

Leica Lino L360, Lino L2P5, Lino L2+, Lino P5, Lino P3 User Manual

Leica Lino
L360, L2P5, L2+
, L2,
P5, P3
1
Start up
Leica Lino 757665g en
de
en
F
I
E
P
NL
DK
S
N
FIN
J
CN
ROK
PL
HR
H
RUS
CZ
GR
LT
LV
EST
SLO
SK
m
TR
User Manual
Version 757665g
English
Congratulations on your purchase of the Leica Lino.
The safety instructions follow the
section on how to operate the
instrument. Before starting up the
instrument for the first time, please
read through the entire User Manual paying special
attention to the section Safety Instructions .
Contents
Start up ................................................................ 1
Operation.............................................................3
Technical data ...................................................12
Safety instructions ........................................... 14
Start up
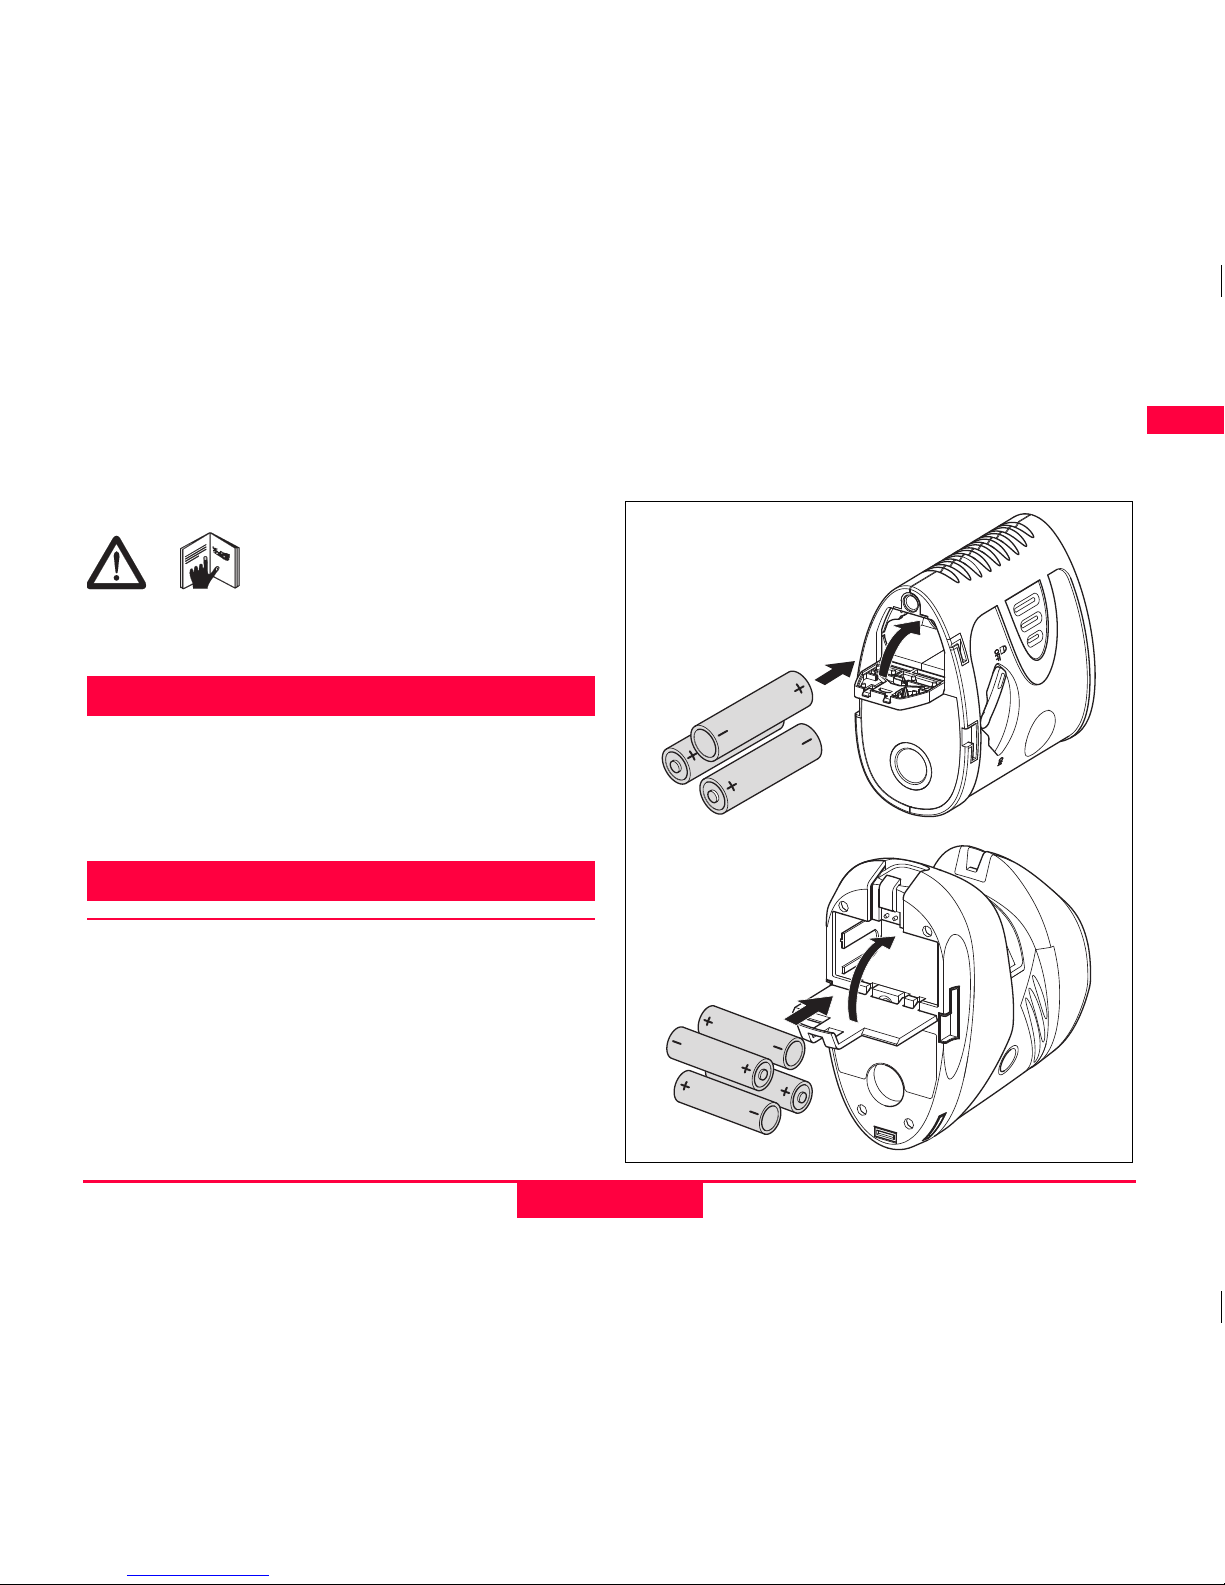
Inserting / replacing batteries
Slide the locking button forwards to unlock the
battery compartment. Open the battery compartment cover and insert the batteries, observing the
correct polarity. Then press the battery compartment
cover back down until it engages.
The battery symbol 9 lights up when the battery
voltage is too low. Replace the batteries as soon as
possible.
• Insert the batteries observing the correct polarity
• Use alkaline batteries or rechargeable batteries only
• Remove the batteries if the instrument is not to
be used for a long period of time (to prevent
corrosion)
L2, P3, P5
L2P5, L2+
2
Start up
Leica Lino 757665g en
de
en
F
I
E
P
NL
DK
S
N
FIN
J
CN
ROK
PL
HR
H
RUS
CZ
GR
LT
LV
EST
SLO
SK
m
TR
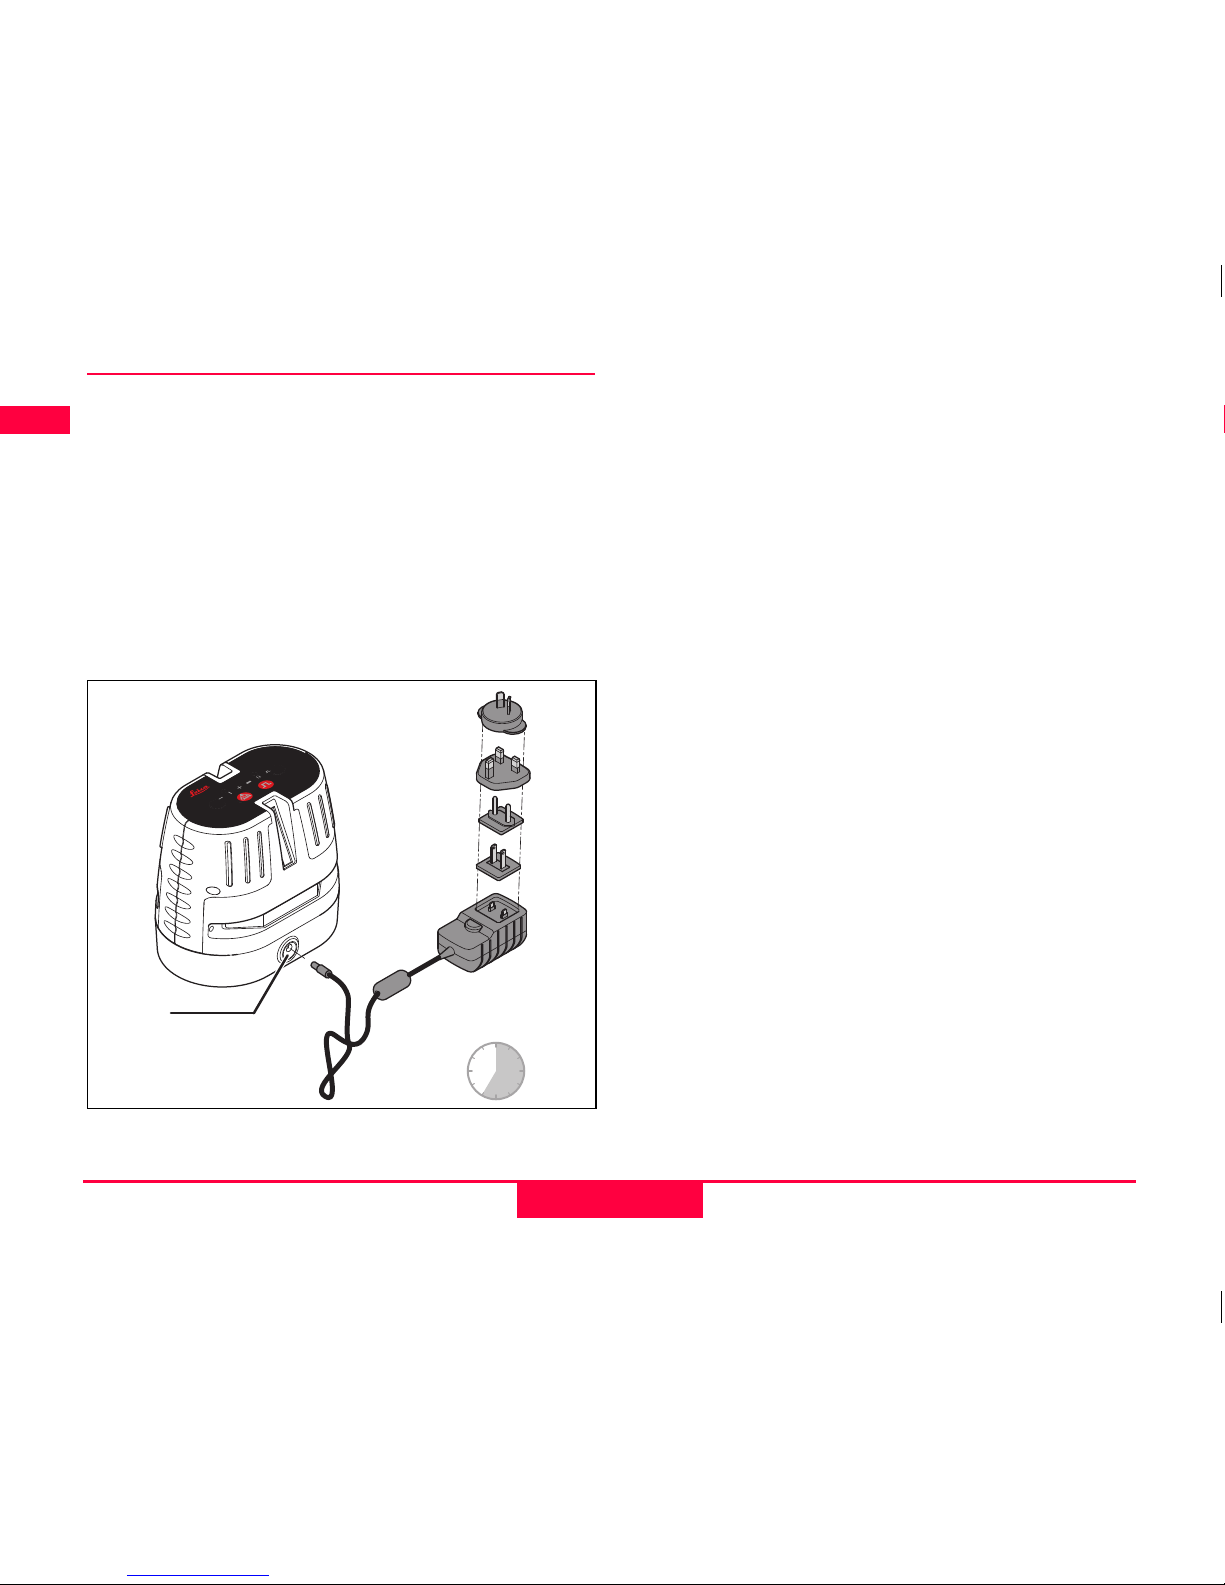
Charging / first-time use
• The battery must be charged prior to first use
because it is delivered with as low an energy
content as possible.
• The permissible temperature range for charging is
between 0°C and +40°C/+32°F and +104°F. For
optimal charging we recommend charging the
batteries at a low ambient temperature of +10°C
to +20°C/+50°F to +68°F if possible.
• It is normal for the battery to become warm
during charging.
1 Jack for battery charger
Lino L360
L360
7 h
1
3
Operation
Leica Lino 757665g en
de
en
F
I
E
P
NL
DK
S
N
FIN
J
CN
ROK
PL
HR
H
RUS
CZ
GR
LT
LV
EST
SLO
SK
m
TR
Operation
Keypad and control elements
1 LASER key
2 PULSE/POWER SAVE MODE key
3 Lock switch
Display
4 Laser crossline
5 Horizontal laser line
6 Vertical laser line
7 Locked
8 Pulse/Power save mode ON
9 Battery voltage too low
AT Plumbing and crossline intersection point
AK Plumbing point
AL Laser switched on
3
Lino L360
7
647
519 82
5
6
1
8
2
9
Lino L2
+
7
5
6
1
8
10
11
2
9
Lino L2P5
1
2
4
5
6
7
8
9
Leica Lino L2
12
9
1
Leica Lino P3
Lino L360

4
Operation
Leica Lino 757665g en
de
en
F
I
E
P
NL
DK
S
N
FIN
J
CN
ROK
PL
HR
H
RUS
CZ
GR
LT
LV
EST
SLO
SK
m
TR
Switching on/off
Lino L360, L2P5, L2+, and L2:
• ON: Briefly press the LASER key 1.
• OFF: Press and hold down the LASER key 1.
Lino P3 and Lino P5:
• ON: Move the Lock switch 3 to the right.
• OFF: Move the Lock switch 3 to the left.
Laser functions
Pressing the LASER key 1 activates the following laser functions:
Action
L360 L360 L2P5 L2P5
L2 L2+ P3 P5
not in Lock
mode
in Lock mode
not in Lock
mode
in Lock mode
1x
horizontal and
vertical
only
horizontal
horizontal and
vertical
only
horizontal
horizontal and
vertical
horizontal and
vertical
all 3 points all 5 points
2x
only
horizontal
only vertical
all lines and
points
only vertical
only
horizontal
only
horizontal
only plumbing
points
only plumbing
points
3x only vertical again as 1x all points again as 1x only vertical only vertical again as 1x
plumbing
point and
right/left
4x again as 1x -
only plumbing
point
- again as 1x again as 1x - again as 1x
5x - - again as 1x - - - - -

5
Operation
Leica Lino 757665g en
de
en
F
I
E
P
NL
DK
S
N
FIN
J
CN
ROK
PL
HR
H
RUS
CZ
GR
LT
LV
EST
SLO
SK
m
TR
Self-levelling and Lock functions
The instrument automatically levels itself within the
specified grade range (Refer to "Technical data") .
Press the Lock switch 3 in order to transport or tilt
the instrument beyond the self-levelling range. When
locked, the pendulum is fixed and the self-levelling
function is deactivated.
Pulse/Power save mode
(only Lino L360, L2P5, L2+, and L2)
The instrument is fitted with a Power save mode. If
particularly good visibility of the laser line is not
necessary and you wish to save energy, you can
switch the Pulse mode on and off by pressing the
PULSE/POWER SAVE MODE key 2.
To be able to detect the laser lines over long
distances (> 15 m) or in unfavourable lighting conditions, a laser detector can be used. The detector is
able to locate the laser beam in Pulse mode, even
over long distances.
(Laser detector refer to accessories)

6
Operation
Leica Lino 757665g en
de
en
F
I
E
P
NL
DK
S
N
FIN
J
CN
ROK
PL
HR
H
RUS
CZ
GR
LT
LV
EST
SLO
SK
m
TR
Applications
 Loading...