

Page 1
User Instructions
3.5W Ultra Slim LED Emergency Bulkhead
c/w Self-test Function
Please read these instructions and retain them for future reference.
Important information:
It is recommended that this fitting is installed by a qualified electrician ensuring the installation
complies with current IEE wiring regulations & local building control.
• This product is designed for connection to a 220-240V mains supply.
• Only mount on level and stable surfaces.
• We cannot accept responsibility for any claims arising from a poor installation.
• Always switch off mains supply before installation.
• The light fitting is Class II and does not require an earth connection.
Technical Specifications:
• Input Voltage: 220-240V/AC
• Power: 3.5W
• Light Output: 170Lm (charging)
130Lm (discharging)
• Maintained & Non-Maintained
• Test method: Self-test
• CCT: 6500K
• IP Rating: IP65
• Protection Class: Class II
• Housing: PC Body & Cover
• Beam Angle: 120
0
• Battery: LiFePO4 3.2V 1500mAh
• Adhesive Legends Included
• Warranty: 3 years (excluding battery)
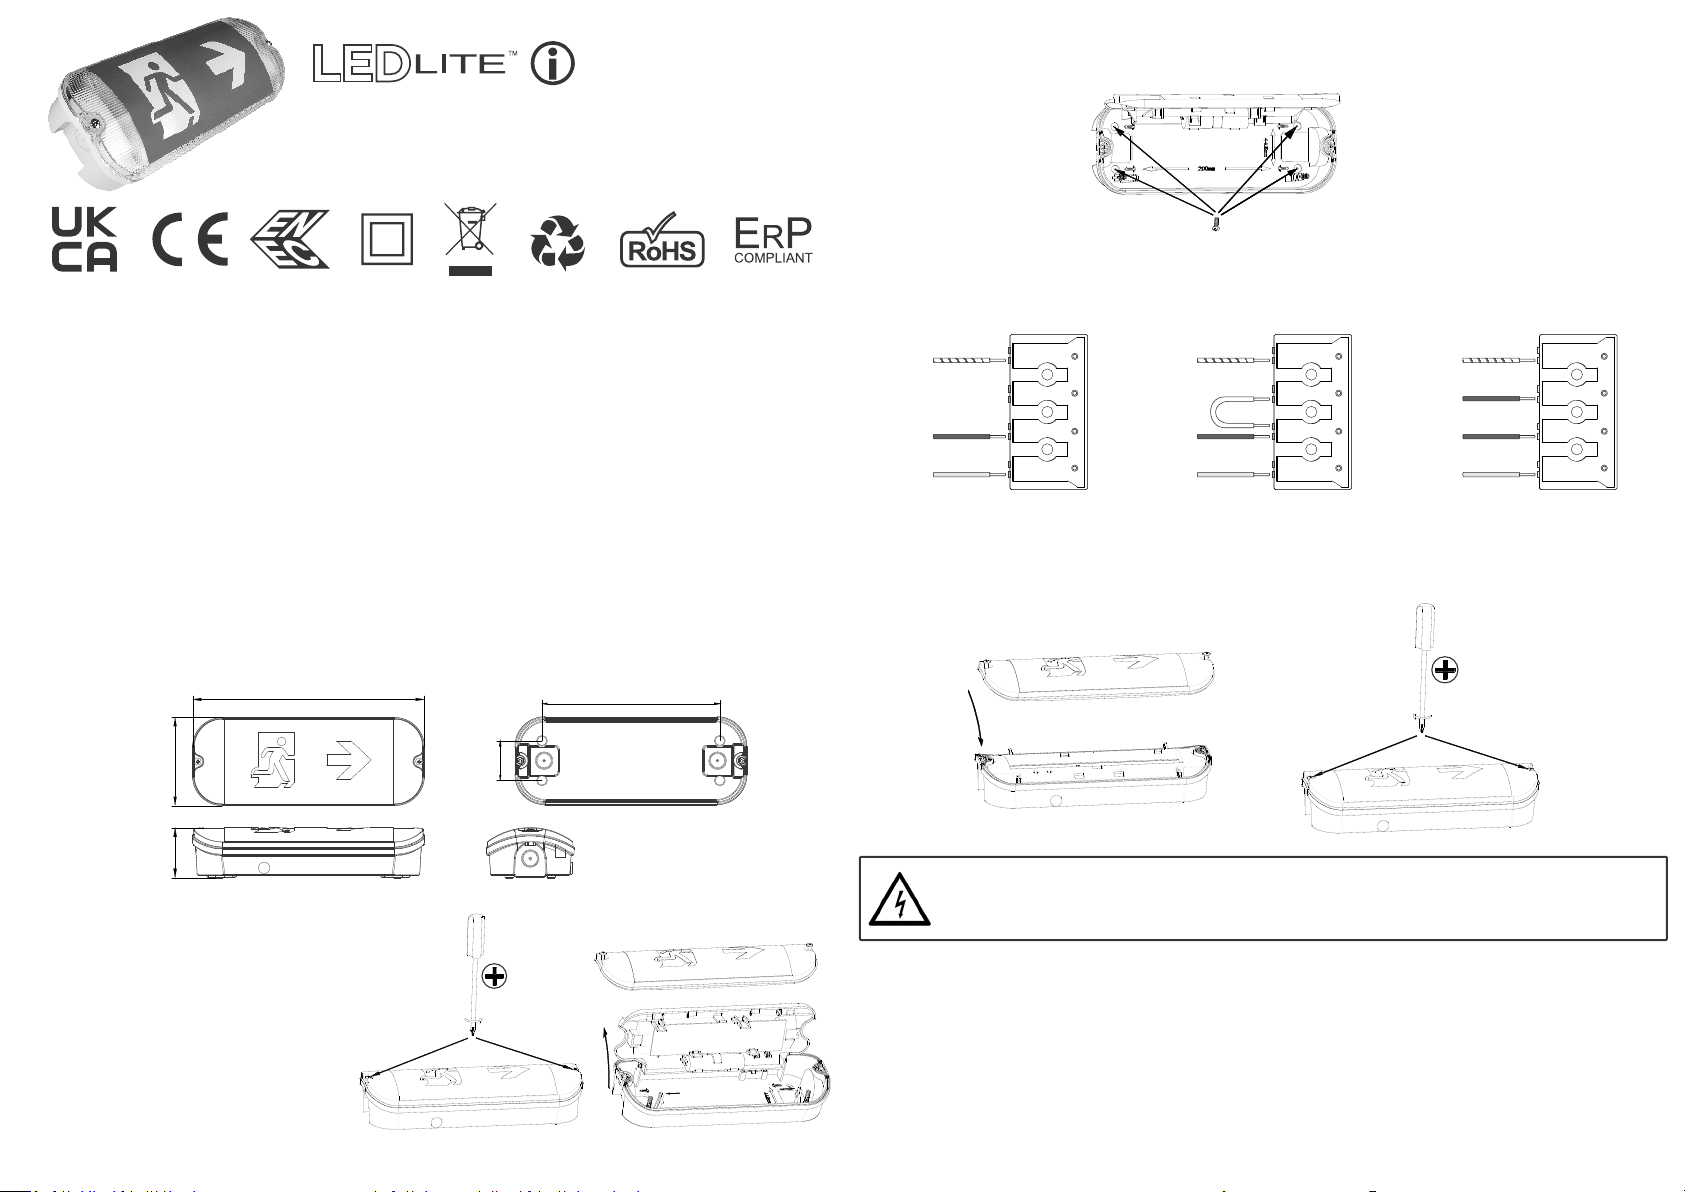
4. The EMSB3ST bulkhead can be mounted on surfaces using the installation holes. First mark the hole
positions using the fitting as a template. Use the screws provided to mount the back plate on the surface.
5. Connect the battery to the PCB and write the installation date on the battery.
6. Feed the cable into the fitting and connect the mains supply to the connection block as per the wiring
diagrams below observing the correct polarity:
Earth
(Green/Yellow)
Live
(Brown)
Neutral
(Blue)
NON-MAINTAINED
OPERATION
E
SL
PL N
Earth
(Green/Yellow)
Live
(Brown)
Neutral
(Blue)
Link
E
SL
PL N
MAINTAINED OPERATION
UNSWITCHED
(Green/Yellow)
Switch Live
(Brown)
Live
(Black)
Neutral
(Blue)
Earth
E
SL
PL N
MAINTAINED OPERATION
SWITCHED
Link Wire PL to SL
7. Fix the geartray back into place and secure the front cover using the 2 cover screws.
Dimensions:
260.8mm
99mm
56mm
Installation and Wiring Instructions:
1. Switch off the mains supply.
2. Open the exit box by unscrewing the cover screws.
To release the gear tray, unclip the tabs on the side.
The gear tray is hinged for convenient fitting and wiring.
3. Choose a suitable cable entry point on
the sides of fitting and drill out the
required knockout.
200mm
44.5mm
WARNING:
This fitting MUST be disconnected before installation and when carrying out insulation resistance
testing at voltages above 250V. Otherwise irreparable damage may occur to internal components.
Emergency Testing and Battery Maintenance:
• Initial battery charge must be for a minimum of 24 hours before testing.
• To achieve best performance the EMSB3ST should be tested fully by switching into emergency mode regularly
in accordance with local testing regulations. Any warranty claim must be accompanied by documentation
which records the dates of this maintenance procedure and signed by maintenance personnel.
• When first connecting to AC power check if the Green LED light is lit confirming that the battery is charging.
• Turn the power off to simulate mains supply failure. The Green LED should go off & the bulkhead will be in
emergency mode.
• The battery must be replaced when the unit no longer meets the rated emergency duration or if there is a
battery fault.
1
2
Page 2
Self Test Function:
• Monthly inspection: The system simulates a power outage every 30 days for 10 seconds. It will return
to the mains power state automatically if there is no fault.
• Annual inspection: The system simulates a power outage every 360 days and for 3 hours or until the
battery power is dissipated. It will return to the mains power state automatically if there is no fault.
Self Test Switch Function:
• Monthly Test: Hold the test button for 3 seconds until you hear 2 beeps. The system simulates a power outage
for 10 seconds. It will return to the mains power state automatically if there is no fault.
• Full test: Hold the test button for 6 seconds until you hear 3 beeps. The system simulates a power outage for
3 hours or until the battery power is dissipated. It will return to the mains power state automatically if
there is no fault.
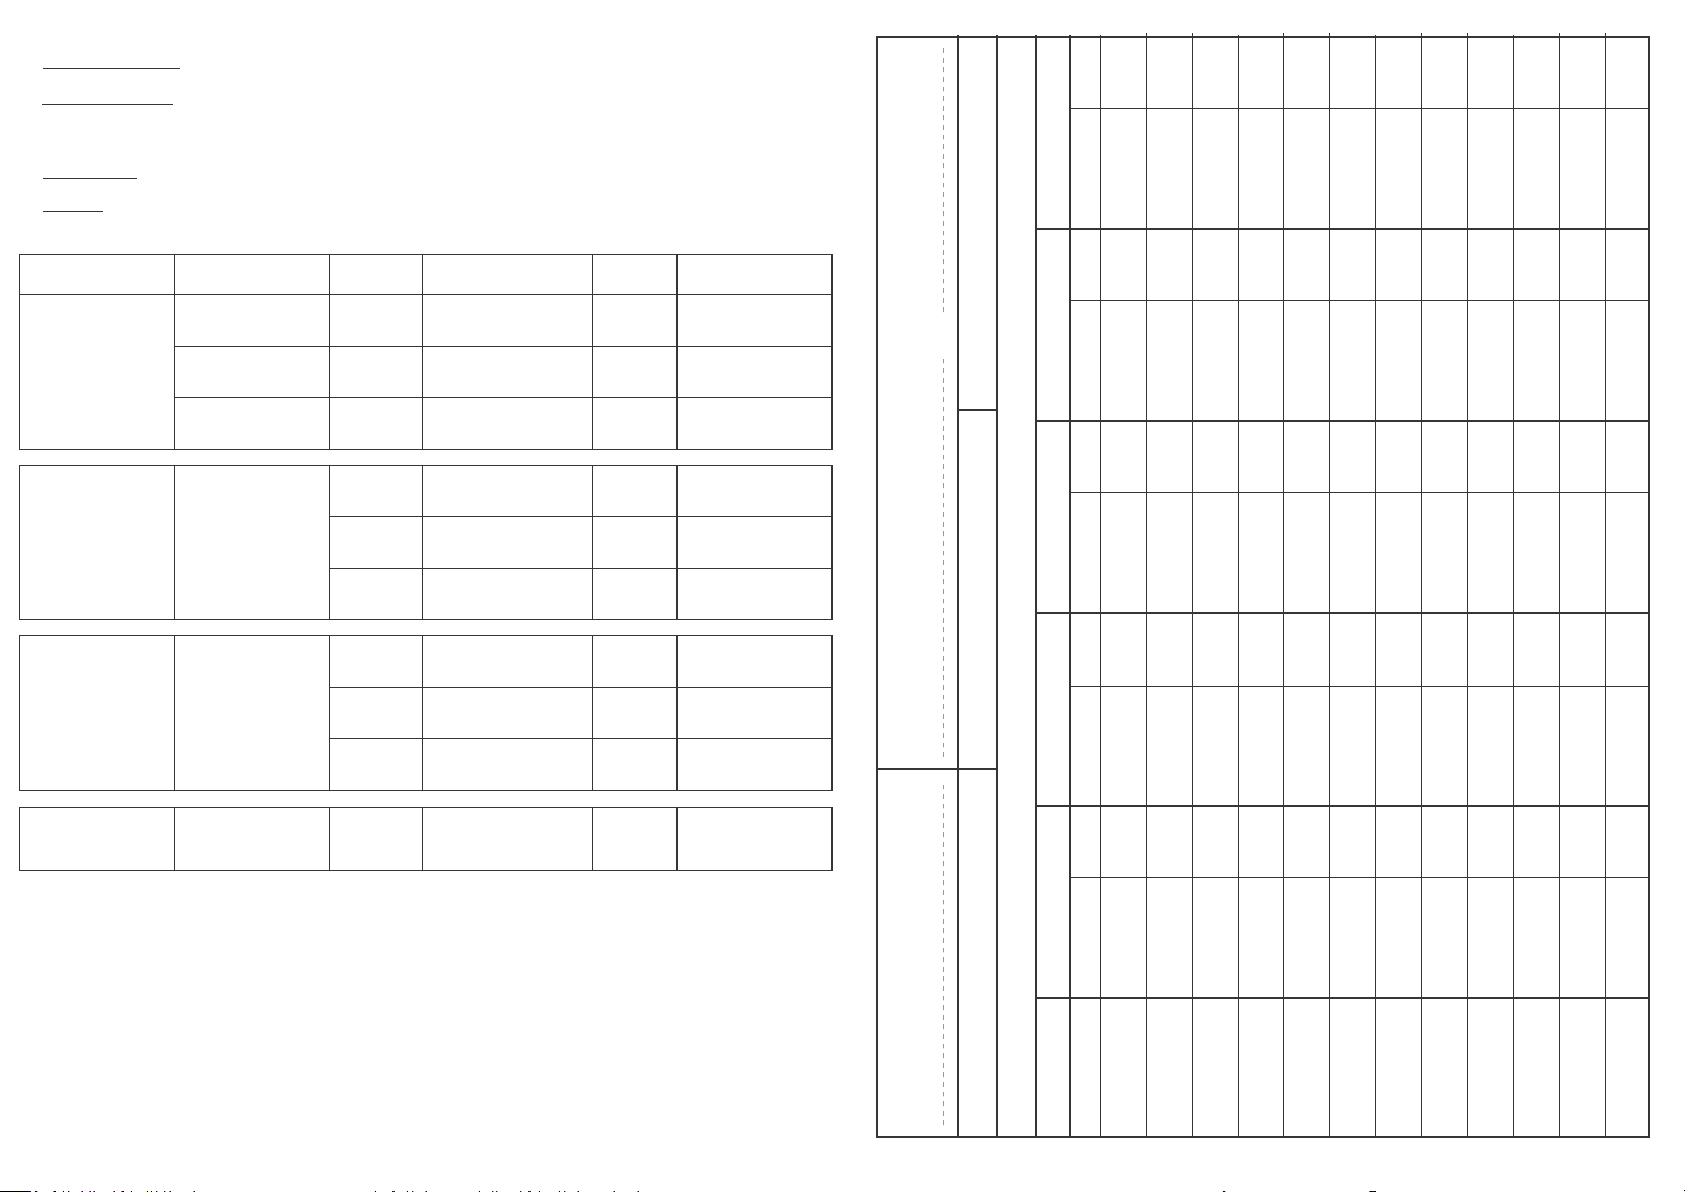
MODE
Mains ON
Monthly self test
battery discharge
(discharge time
10 seconds)
METHOD IF LED INDICATOR STATUS
Automatic Monitoring
Automatic Monitoring
Automatic Monitoring
Monthly test mode:
Hold test button for
3 seconds,
2 beeps
Battery OK
Battery Fault
LED Fault
Battery OK
Battery Fault
LED Fault
(permanently on)
(Flashes every 1 second)
Amber
(Flashes every 1 second)
All indicators OFF
(Flashes every 1 second)
Amber
(Flashes every 1 second)
Green
Red
Red
BEEP
SOUND
OFF
Beep every
45 seconds
Beep every
45 seconds
OFF Green LED
Beep every
45 seconds
Beep every
45 seconds
Green LED
Beep sound
Amber LED
Beep sound
Beep sound
Amber LED
Beep sound
RESULT
Red LED
Red LED
Tel:
Lamp Type - LED
Year 4 Year 5
Date Signed Date Signed Date
OFF Green LED
Beep every
45 seconds
Beep every
45 seconds
Beep sound
Amber LED
Beep sound
Red LED
Yearly self test
battery discharge
(discharge time
3 hours)
Mains Failure
Yearly test mode:
Hold test button for
6 seconds,
3 beeps
No action needed
Exit Box enters 3 hour
emergency mode
Battery OK
Battery Fault
LED Fault
LED Fault
All indicators OFF
Red
(Flashes every 1 second)
Amber
(Flashes every 1 second)
All indicators OFF OFF
Notes:
• To turn off emergency mode (when mains failure occurs) press the test button for 10 seconds
• If the battery and LED board fail simultaneously, the red LED will flash.
• Any beep sound will stop once the fault is fixed.
• After repair connect the bulkhead to mains. Press the test button within 1 second for function confirmation.
• Manual test will not affect the monthly and yearly test schedule.
Troubleshooting:
Most failures experienced are not due to the EMSB3ST itself and are caused by improper installation or
connection of the unit. Please check that:
• Wires are properly clamped into terminals.
• Installation is done according to the wiring diagram.
• Proper polarities are observed.
Keep a record of maintenance and check regularly to ensure its lifespan and usage.
3 4
ROUTINE TEST RECORD
Year 1 Year 2 Year 3
Full Recharge Time 24 Hours Duration 3 Hours
Luminaire Ref/Location In Case of difficulty, contact the Installation Engineer:
Functional
Monthly Test Signed Date Signed Date Signed
Functional
Functional
Functional
Functional
Functional
Functional
Functional
Functional
Functional
Functional
Three Hour
 Loading...