

Page 1
User Instructions
BLM200BAT
200mm LED Magnifying
Swivel Arm Mirror
(AAA Batteries)
Please read these instructions and retain them for future reference.
Important information
• Ensure the product is installed properly and operated as specified in the instructions.
• Before drilling, ensure there are no hidden cables or pipes in the wall.
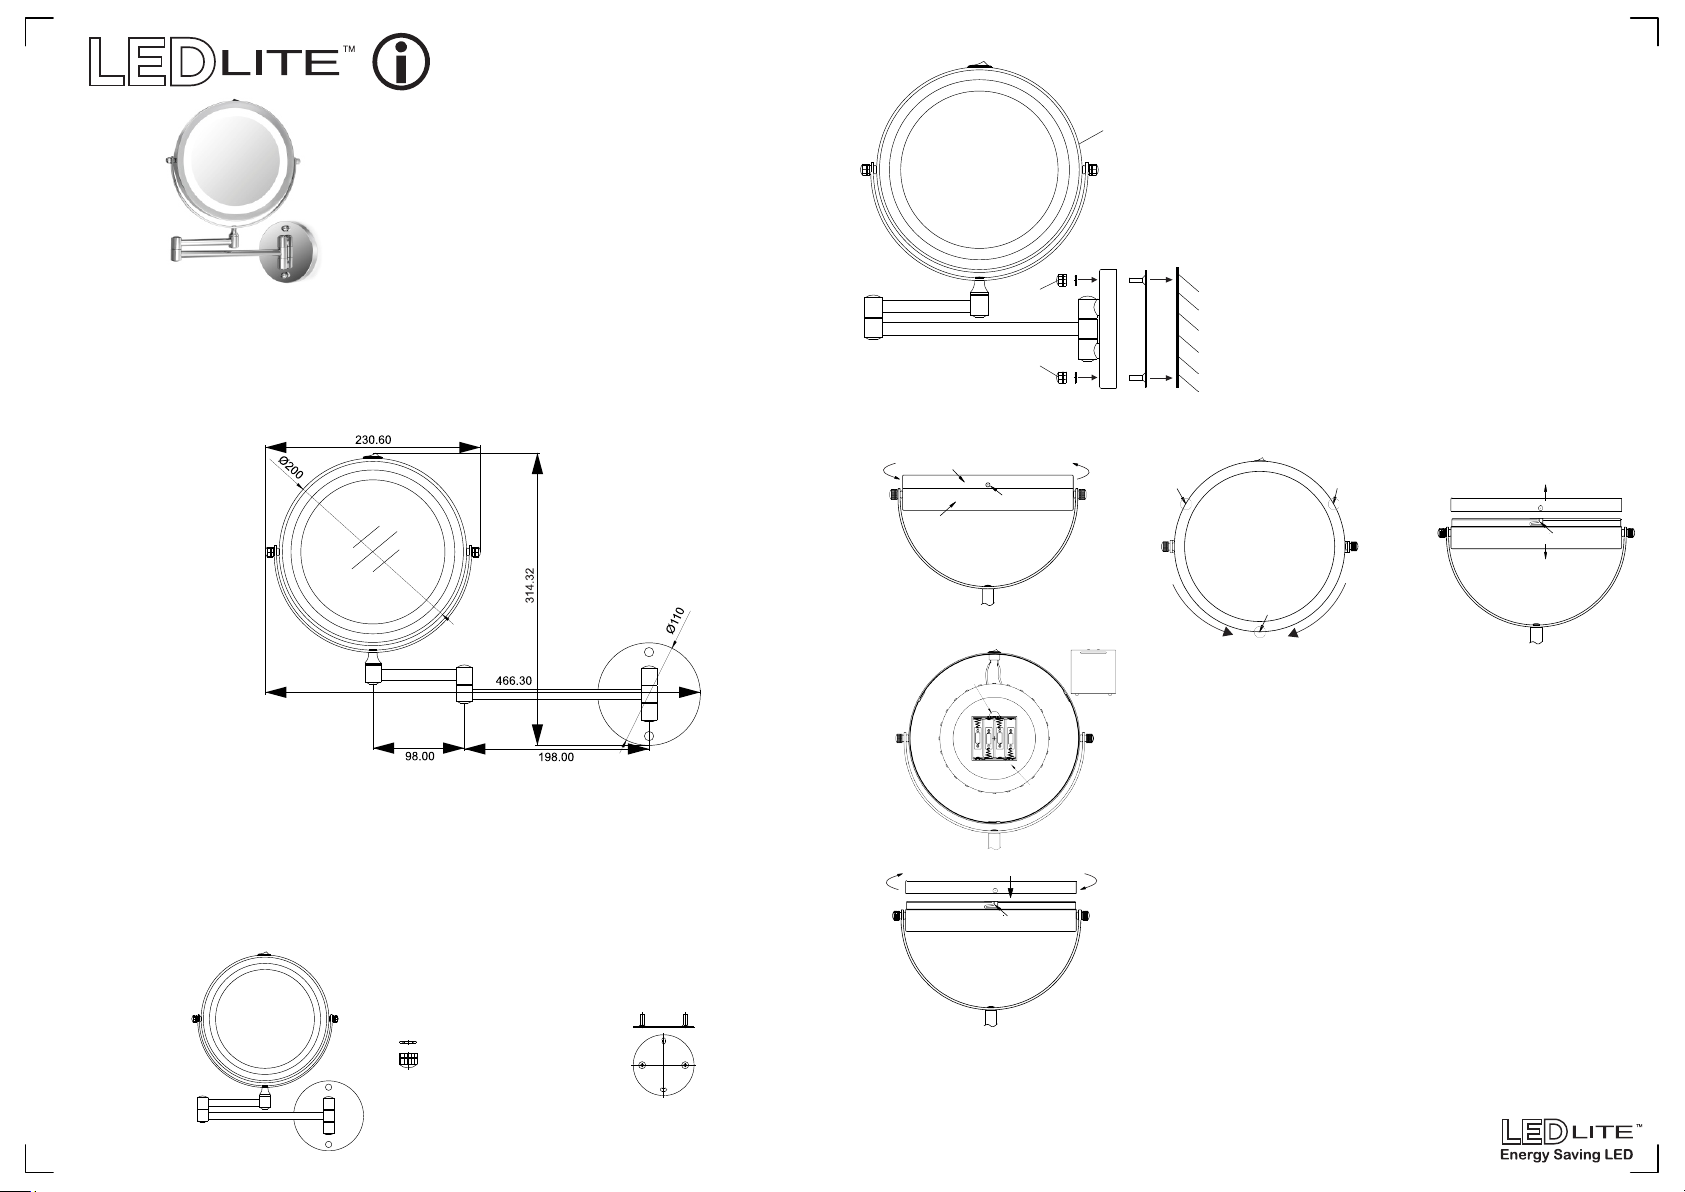
Dimensions(mm):
Installation:
B
B
Battery Installation:
Lamp cover
Bayonet posion
Lamp box
1. Position the magnifying mirror in a suitable location.
Do not position in direct sunlight as the magnifying
A
effect of the mirror may pose a fire hazard.
2. Remove the wall bracket (C) from the mirror via the
fixing(s) on the base of the unit (B).
3. Using the wall bracket (C) as a guide, ensure it is
level and carefully mark the required drilling
locations using a soft pencil.
Wall
C
4. Drill holes in the marked positions to a suitable
depth. If drilling through tile, use a ceramic drill bit.
5. Fasten the wall bracket (C) to the wall.
7. Place the mirror onto the wall bracket and secure
into place using the fixings on the mirror base(B).
Bayonet
Position
Bayonet
Position
Lamp cover
Bayonet posion
Lamp box
Specifications:
Package contains:
Swivel arm Mirror
07-08-2020
• Mount Type: Wall Mounted
• Mirror Type: Makeup / Shaving
• Shape: Round
• Finish: Chrome
• Diameter: 200mm
• Two Sides: ○ Normal
○ Magnifying 5x
A
B
Fixing
Cap Nut & Washers
• Adjustable Arm
• Maximum Arm Length: 30cm
• Built-in Lighting: LED 4000K
• Voltage: 6 V/DC
• On/Off Switch on Mirror frame
• Power Source: 4 x AAA Batteries
(not included)
C
Wall Bracket
Bayonet
Position
CLOSE
Fig. 3Fig. 2 Top View
Fig. 1 Side View
Battery
Box
Battery
Box
Cover
OPEN
1. Open the mirror by rotating the lamp cover 10-12mm
counter-clockwise (Fig. 1 & 2).
2. Open the lamp cover perpendicular to the mirror side to allow
the lamp cover to leave the bayonet position (Fig. 3).
3. Take the battery box cover off and insert 4 x AAA batteries
as indicated (Fig.4). AAA batteries not included.
Fig. 4
Lamp cover
5. Close the battery box after installing the batteries.
4. Place the lamp cover over the box observing the bayonet
positions. Press the lamp cover into the lamp box and rotate
10-12mm clockwise to lock it (Fig. 5).
Lamp box
Bayonet posion
Attention:
Please make sure the direction of rotating is right when locking
or unscrewing the lamp cover and do not over rotate the cover.
Fig. 5
Care Instructions:
We recommend regular cleaning of accessories with a mild, soapy solution and wipe with a dry
cloth. Avoid use of abrasive and corrosive chemicals.
For further information visit www.tlc-direct.co.uk
 Loading...