

Page 1
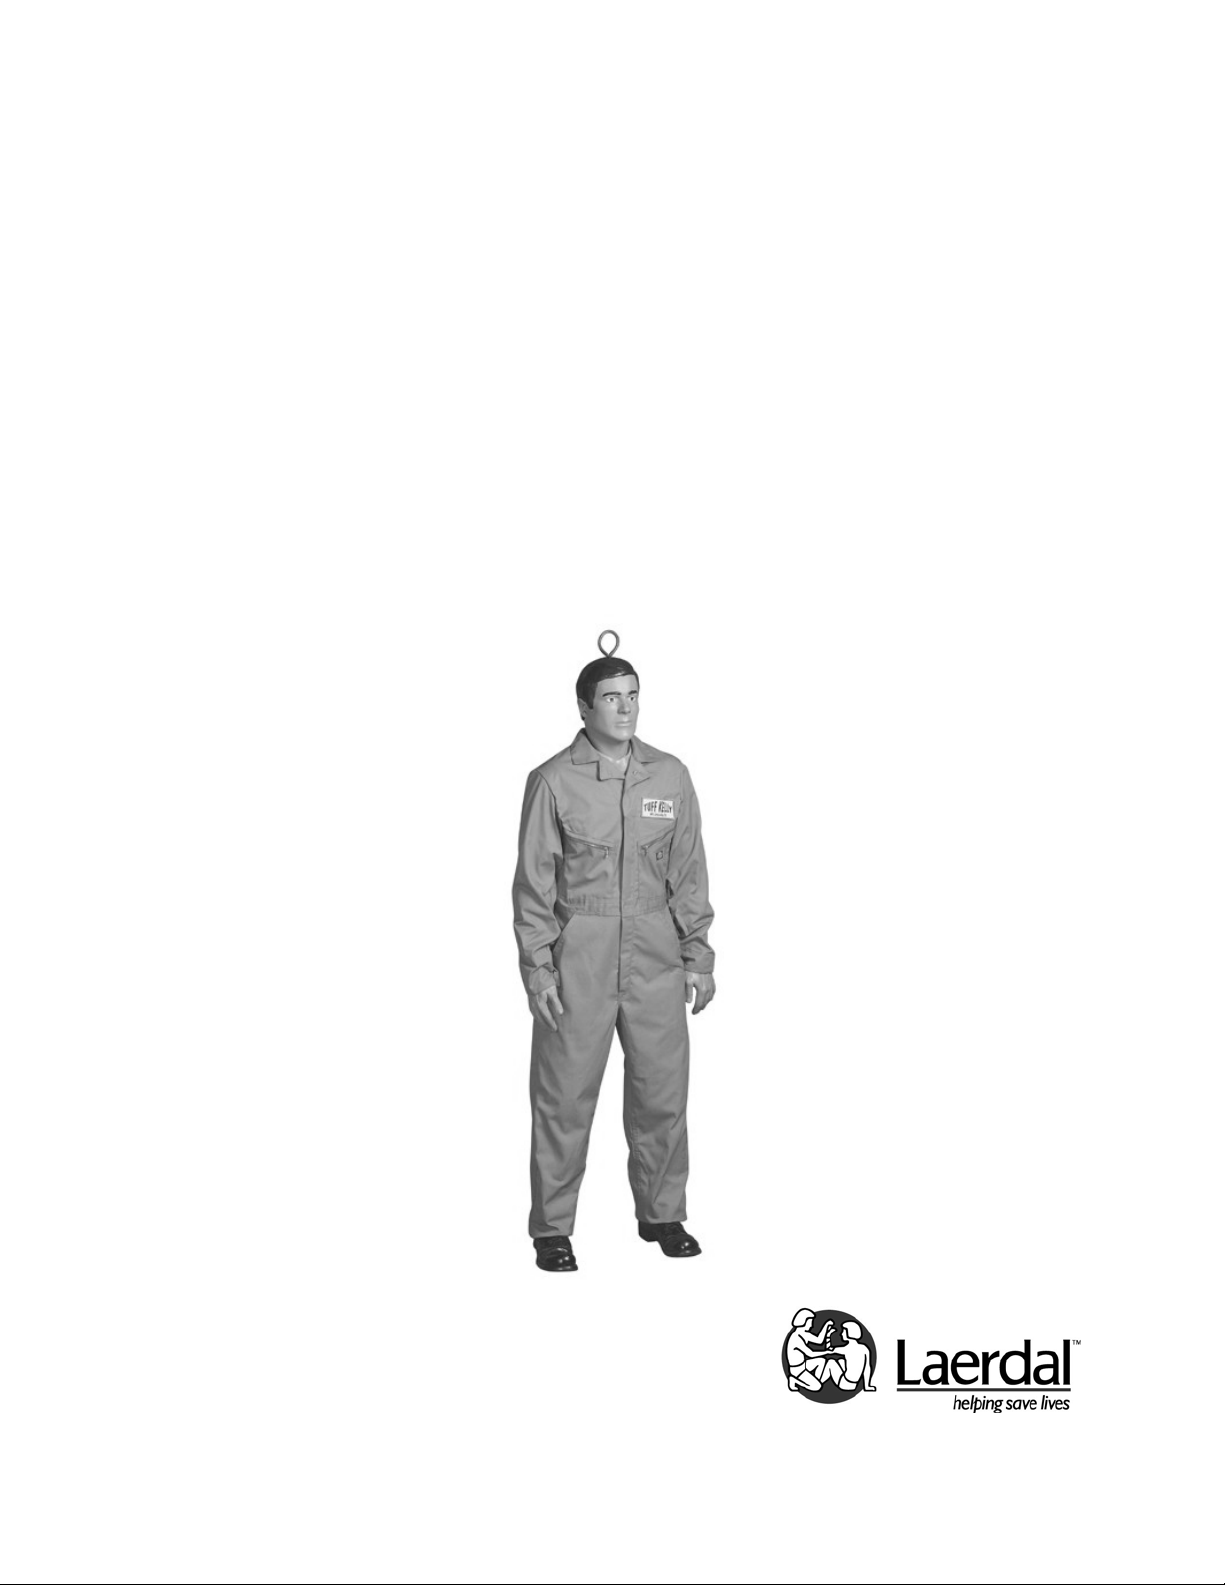
Tuff Kelly
Directions for Use
Page 2

2
Page 3
Cautions and Warnings
Read the Directions for Use and follow all the instructions for Tuff Kelly. Save these
instructions for future reference.
Safety Warning Symbol
Look for this symbol to point out important manikin safety precautions and other
information that should be carefully read and closely followed to promote safety, help
prevent accidents and reduce operating and maintenance problems.
Failure to obey a caution or safety warning, or failure to follow use instructions could
cause immediate damage to the manikin, damage that appears at a later time, accidental
property damage, and could result in serious injury to you or to others.
General Information
Conform to the safety protocols of your country, follow all industry safety standards and
adhere to the safety and health procedures of any organization utilizing tuff Kelly to
provide training and/or competitive events intended to demonstrate or evaluate user
rescue response skills or competency.
3
Page 4

4
Page 5

Contents
Introduction 6
Description 6
Items Included 6
Skills Taught 6
Directions for Use 7
Preparation for Use 8
Inspection for Storage and Next Use 9
Cleaning Instructions 10
Disposal 10
Warranty 11
Illustrations 13, 14, 15
Spare Parts 16
5
Page 6

Introduction
Professionals involved in responding to emergency situations must know how to carry out
rescue and recovery procedures in a safe and effective manner to lessen injuries and
save lives.
Since 1991, the Tuff Kelly manikins have been the most recognized, versatile, practical
and durable extrication and rescue training system.
Description
The rugged and true-to-life Tuff Kelly manikins are full-body (5’5”/1,62 m) and
articulated simulators specifically designed and intended to use for training professionals
to master the skills of a wide variety of rigorous emergency rescues, transportation
protocols and extrication techniques.
Tuff Kelly’s durability, low maintenance requirements and opportunity to replace worn or
broken parts makes it a product of superior value and prolong useful life.
Items included
(1) Tuff Kelly Manikin
(1) Coveralls
(1) Boots
(1) D Ring Waist Belt
(1) Directions for Use
Skills Taught
o
Confined space rescue
Pole-top rescue
o
o Horizontal rescue
o
Vertical rescue
o
Bucket rescue
Transportation protocols
o
o Extrication techniques
6
Page 7

Directions for Use
For all Tuff Kelly models.
Heavy Object!
The Tuff Kelly manikin comes in three (3) weight categories:
o 100 lbs (45,5 kilos) – 101-00001
o 150 lbs (68,2 kilos) – 101-05001
o 175 lbs (79,5 kilos) – 101-07501
Always use safe and approved lifting and handling techniques when positioning
the Tuff Kelly weighted manikins for training use, cleaning or other maintenance.
DO NOT stand under the manikin while it is being elevated and/or
lowered.
DO NOT drop the manikin while tethered.
Note: For safety purposes, use the eyebolt only to move, position,
elevate/hoist and to store Tuff Kelly manikins.
Before You Begin!
Your Tuff Kelly has been carefully inspected before shipment. Unpack and inspect the
manikin; check for damage or missing parts. In the case of a problem, in the U.S.A. call
1-877-LAERDAL (523-7325), fax toll-free 1-800-227-1143, email
customerservice@laerdal.com or contact your local representative for service and/or to
report the problem. In Canada, call Customer Service at 1-888-LAERDAL (523-7325) or
Français 1-800-567-9987, fax to 1-416-298-8016, or email at
savelives@laerdal.ca.
Opportunity! While performing routine cleaning or maintenance, inspect Tuff
Kelly to check for possible worn or broken parts.
DO NOT use the Tuff Kelly if any deterioration, damage or missing
parts are observed. Call 1-877-LAERDAL (523-7325), fax toll-free 1-800-227-1143,
email
immediately.
customerservice@laerdal.com or contact your local representative to report
7
Page 8

Preparation for Use
Use a clean working surface during assembly to prevent product from getting dirty.
o
Tools required (not included):
Wrench (½ inch)
Pliers
Gather the waist attachment hardware:
o Lock Nut (2)
o Washer (2)
o All Thread Rod (1)
See Fig. 3 & Fig. 4 to assemble the legs & pelvis to the manikin’s torso.
To detach reverse the procedure.
Chest Plate
Fits in the Tuff Kelly torso.
To remove:
1. Detach Chest Plate by applying pressure to center of plate.
2. Work your fingers under edge of plate and lift out.
To insert:
1. Replace Chest Plate over torso cavity.
2. Work edges into groov e of torso cavity.
Belly Plate
Fits in the Tuff Kelly pelvis.
To remove:
1. Detach Belly Plate by applying pressure to center of plate.
2. Work your fingers under edge of plate and lift out.
To insert:
1. Replace Belly Plate over pelvis cavity.
2. Work edges into groove of pelvis cavity.
DO NOT perform any unauthorized modification to the Tuff Kelly manikin or
equipment.
8
Page 9

Inspection for Storage and Next Use
Always thoroughly inspect the manikin
Your Tuff Kelly must be inspected before and after each use and/or if the manikin has
been dropped to warrant that it is safe to handle. Verify that the head is securely
fastened to the torso. Routinely check the pelvis bracket and leg attachment, head and
torso connection for hardware wear and tear to ensure that the brackets are not bent or
damaged in any way and all hardware is in its proper place (See Fig. 1 for Pelvis and
Fig. 2 for Torso).
DO NOT use the Tuff Kelly manikin if any deterioration or damage to the
Pelvis Hardware (Fig.1), the Attachment Hardware of the Head and Torso Assembly
(Fig. 2) and/or the overall manikin (Fig. 1) is observed or suspected (ex: bent
pelvis/torso brackets, missing or broken parts, signs of rust, cracks, chips, etc...).
In the U.S.A. call 1-877-LAERDAL (523-7325), fax toll-free 1-800-227-1143, email
customerservice@laerdal.com or contact your local representative for service and/or to
purchase factory approved replacement parts. In Canada, call Customer Service at 1888-LAERDAL (523-7325) or Français 1-800-567-9987, fax to 1-416-298-8016, or email
savelives@laerdal.ca.
at
9
Page 10
Cleaning Instructions
Tuff Kelly’s unique construction consists of a tough, high impact PVC exterior supported
by an internal steel frame of cables and springs for movement and flexibility.
To ensure durability, thoroughly clean and disinfect the Tuff Kelly manikin and
accessories after each use. Wash coveralls according to label instructions.
1. Wipe clean with a soft damp cloth using mild soap and water or disinfecting liquids.
DO NOT use harsh powders or abrasive cleaning pads to clean Tuff Kelly.
2. To prevent mildew and/or rust, always allow the manikin, accessories and clothing to
completely dry before storing.
3. Articulating parts benefit from a light application of talcum powder prior to training
sessions.
4. Avoid felt tipped markers, ink pens, iodine or other staining products and refrain from
placing the Tuff Kelly manikin on newsprint or inked lines of any kind to prevent
discoloration.
5. Store in a dry, clean environment between training sessions.
Disposal
Dispose of Tuff Kelly in accordance with local and/or country regulations.
10
Page 11

Warranty
Thank you for purchasing this Laerdal Tuff Kelly manikin. We hope that you will be
happy with it. In the event that your Tuff Kelly products need warranty service, please
contact Laerdal Medical or the Authorized Dealer from whom they were purchased.
Your warranty
By this limited warranty, Laerdal Medical, warrants to the purchasers the Tuff Kelly
manikin to be free from defects in materials and workmanship for a time period of
one (1) year from the original date of purchase.
If during this designated one (1) period of warranty the product proves defective due
to improver materials and/or workmanship, Laerdal Medical, the Authorized Dealers,
and/or the Authorized Service Centers upon receipt of claim and written notification will
without charge for labor or parts, repair or, at Laerdal Medical discretion, replace the
manikin or its defective parts upon the terms and conditions set out below.
Conditions
1. This warranty does not apply nor cover damage if the original invoice or sales receipt
indicating the original date of purchase, product type and dealer’s name cannot be
presented together with the defective manikin or its produc ts, acce ss ories, spares, etc.
2. This warranty does not apply nor cover damage resulting from adaptations,
modifications, adjustments, or repairs made to the manikin or its products, accessories,
spares, etc, done by non-authorized Service Centers, Dealers, or the customer/product
end user himself.
3. This warranty does not apply to any of the following scenarios:
a. Periodic maintenance and repair or replacement of parts due to normal wear
and tear of the manikin, its products, accessories, spares, etc.
b. Accidents, lightning, water, fire, improper ventilation or any cause beyond the
control of Laerdal Medical.
c. Clothing, staining, discoloration or other cosmetic irregularity which do not
impede or degrade manikin performance.
d. Damage resulting from:
o Misuse including but not limited to failure to use the manikin or its products
and accessories for their intended use in accordance with Laerdal Medical’s
instructions.
o Use of the product in a manner inconsistent with the technical or safety
standards in force in the country and/or organization where it is used.
11
Page 12

Laerdal Medical shall not be liable under this Limited Warranty, or otherwise, for any
incidental or consequential damage or loss of a commercial nature, nor for any damage
constituting injury to property.
Certain states in the U.S.A. do not allow the exclusion or limitation of incidental or
consequential damages, so those limitations or exclusions may not apply to you.
There are no other expressed or implied warranties, whether of merchantability, fitness
of purposes, or otherwise, on the product, its parts and/or accessories.
12
Page 13

13
Page 14

14
Page 15

15
Page 16

Spare Parts
Items listed below are replacement parts for the Tuff Kelly manikin series in light skin
color only. Consult your local representative for availability and part numbers for Tuff
Kelly versions in other skin tone.
Product Number: Description:
101-00150 D Ring Waist Belt (all weight categories)
101-00250 Rescue Belt (all weight categories)
101-00350 Rescue Strap Insert-12 inches (all weight categories)
101-00450 Full Body Harness (all weight categories)
101-00550 Weight Bag (10 lbs each)
101-00650 Complete Right Leg (100 lbs &150 lbs)
101-00750 Complete Left Leg (100 lbs & 150 lbs)
101-00850 Complete Right Leg (175 lbs)
101-00950 Complete Left Leg (175 lbs)
101-01050 Right Thigh (100 lbs & 150 lbs)
101-01150 Left Thigh (100 lbs & 150 lbs)
101-01250 Right Thigh (175 lbs)
101-01350 Left Thigh (175 lbs)
101-01450 Right Calf (100 lbs & 150 lbs)
101-01550 Left Calf (100 lbs & 150 lbs)
101-01650 Right Calf (175 lbs)
101-01750 Left Calf (175 lbs)
101-01850 Right Foot (all weight categories)
101-01950 Left Foot (all weight categories)
101-02050 Right Arm Complete (100 lbs & 150 lbs)
101-02150 Left Arm Complete (100 lbs & 150 lbs)
101-02250 Right Arm Complete (175 lbs)
101-02350 Left Arm Complete (175 lbs)
101-02450 Right Upper Arm (100 & 150 lbs)
101-02550 Left Upper Arm (100 & 150 lbs)
101-02650 Right Upper Arm (175 lbs)
101-02750 Left Upper Arm (175 lbs)
101-02850 Right Forearm (all weight categories)
101-02950 Left Forearm (all weight categories)
101-03050 Right Hand (all weight categories)
101-03150 Left Hand (all weight categories)
101-03250 Head Assembly (all weight categories)
101-03350 Torso Assembly (all weight categories)
101-03450 Chest Plate (all weight categories)
101-03550 Abdominal Plate (all weight categories)
101-03650 Deltoid Pad (all weight categories)
101-03750 Thigh Pad (all weight categories)
101-03850 Bag Retention Strap
101-03950 Legs Hardware Set
16
Page 17

101-04050 Arms Hardware Set
101-04150 Pelvis Hardware Set
101-04250 Coveralls
101-04350 Boots
101-07950 Pelvis Assembly (100 lbs & 150 lbs)
101-08050 Pelvis Assembly (175 lbs)
17
Page 18

© 2010 Laerdal Medical. All rights reserved
Printed in USA - 1005428 Rev D
 Loading...