

La Crosse Technology K86326, TX14 User Manual
Atomic Projection Alarm
Model: K86326
INTRODUCTION:
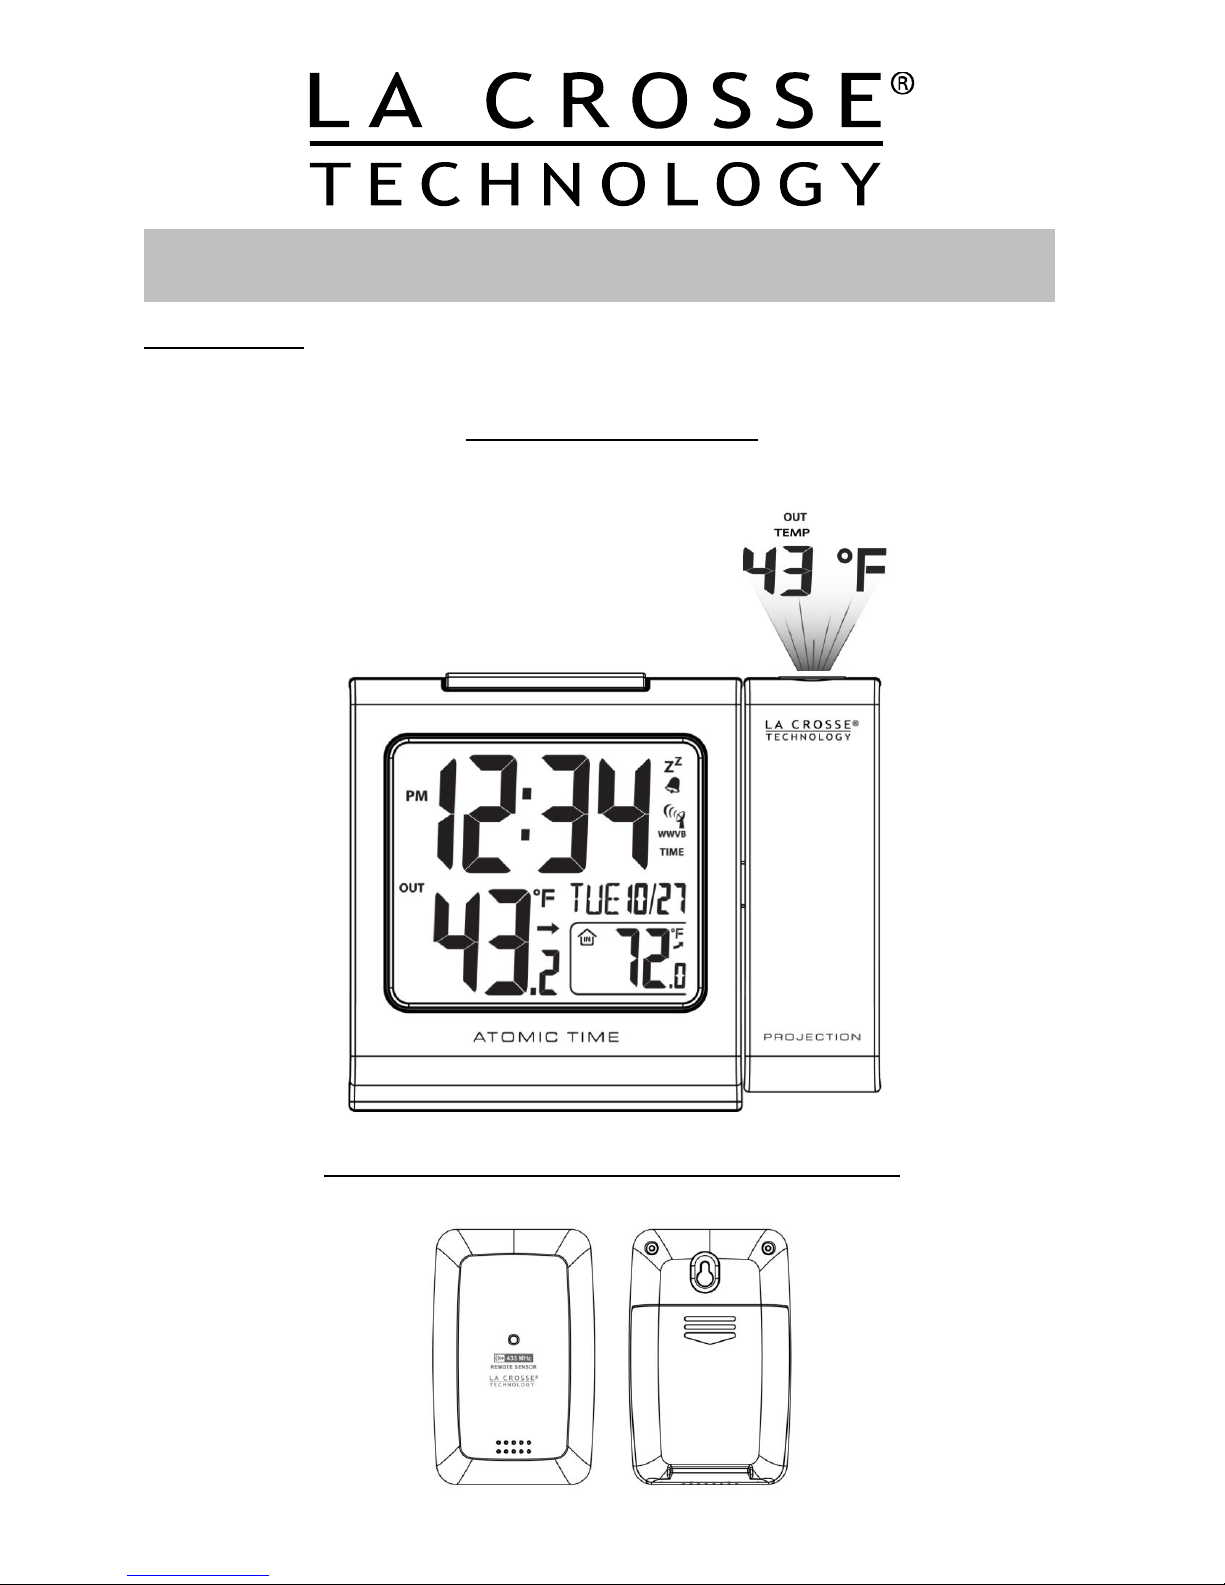
The Atomic Projection Alarm features radio-controlled time, indoor and outdoor temperature on a stylish,
colorful, and easy to read display. Time and/or outdoor temperature can be projected on a wall or ceiling.
ATOMIC PROJECTION ALARM
OUTDOOR TEMPERATURE/HUMIDITY TRANSMITTER: TX14
1

TABLE OF CONTENTS:
INTRODUCTION 1
ATOMIC PROJECTION ALARM 1
OUTDOOR TEMPERATURE TRANSMITTER TX14 1
FEATURES 3
INITIAL SETUP 3
POWER THE PROJECTION ALARM 4
A/C ADAPTER 4
BATTERIES 4
INSTALL BATTERIES IN THE OUTDOOR TRANSMITTER 4
WWVB RADIO CONTROLLED TIME 5
WWVB RECEPTION ICON 5
MANUAL SIGNAL SEARCH 5
FUNCTION BUTTONS 5
PROGRAM MENU 6
WWVB RECEPTION ON/OFF 6
TIME ZONE 6
DAYLIGHT SAVING TIME INDICATOR 7
12 OR 24 HOUR TIME FORMAT 7
SET TIME 7
SET CALENDAR 7
FAHRENHEIT/CELSIUS 7
ALARM SET 8
DEACTIVATE ALARM 8
SNOOZE 8
BACKLIGHT AND PROJECTION INTENSITY 8
PROJECTION: 8
BATTERIES 8
A/C ADAPTER 8
ROTATE PROJECTION 8
CHANGE PROJECTION MODE 8
TEMPERATURE TREND ICONS 9
LOW BATTERY ICON 9
OTHER DISPLAY ICONS 9
POSITION OUTDOOR TRANSMITTER 10
POSITION DISPLAY 10
CARE AND MAINTENANCE 10
SPECIFICATIONS 10
ACCURACY 11
INDOOR TEMPERATURE 11
OUTDOOR TEMPERATURE 11
WARRANTY 11
FCC 12
2

FEATURES:
Projects time and outdoor temperature
o Toggles time and outdoor temperature
o Display time only
o Display outdoor temperature only
o (Default----Toggles time and outdoor temperature)
Projection rotate with 90 degree increments
Atomic Clock: 7 Time-zones:(AST, EST, CST, MST, PST, AKT, HAT)
Calendar (Month/date,2000-2099 Default Year 2010)
Time (hour/minute)
Indoor Temperature
Wireless Outdoor Temperature
Indoor/outdoor temp with trend arrow
C/F selectable
Time alarm with snooze function
Low Battery indicator
Atomic display
High/Low/Off backlight and projection controlled
• Sits on desktop or tabletop
• 2 "AA" Alkaline batteries (not included) OR optional 5.0V AC adapter (included)
INITIAL SET UP:
1. Insert A/C adapter into the wall outlet then into the display or insert 2 AA batteries (not included) into
the display (see Power the Atomic Projection Alarm). The Atomic Projection Alarm will light up and
display time and indoor temperature.
2. Insert 2 fresh AA batteries into the transmitter, observing the correct polarity (see Install Batteries in
the Outdoor Transmitter).
3. Keep the transmitter 5-10 feet from the Atomic Projection Alarm for 15 minutes to establish a good
connection.
4. Within 3 minutes the outdoor temperature should be displayed on the Atomic Projection Alarm. If the
outdoor temperature is not displayed after 3 minutes remove power from the transmitter and the
display for 60 seconds and start again from step 1.
5. For optimum 433 MHz transmission, the outdoor transmitter should be placed a distance of no more
than 200 feet (60 meters, open air) from the Atomic Projection Alarm.
IMPORTANT: When operating on a/c power, the backlight/projection will turn off for 2 to 10 minutes
while the Atomic Projection Alarm searches for the WWVB signal, to avoid interference. The backlight and
projection will resume after the 2-10 minute search.
Do Not Mix Old and New Batteries
Do Not Mix Alkaline, Standard, Lithium or Rechargeable Batteries
3
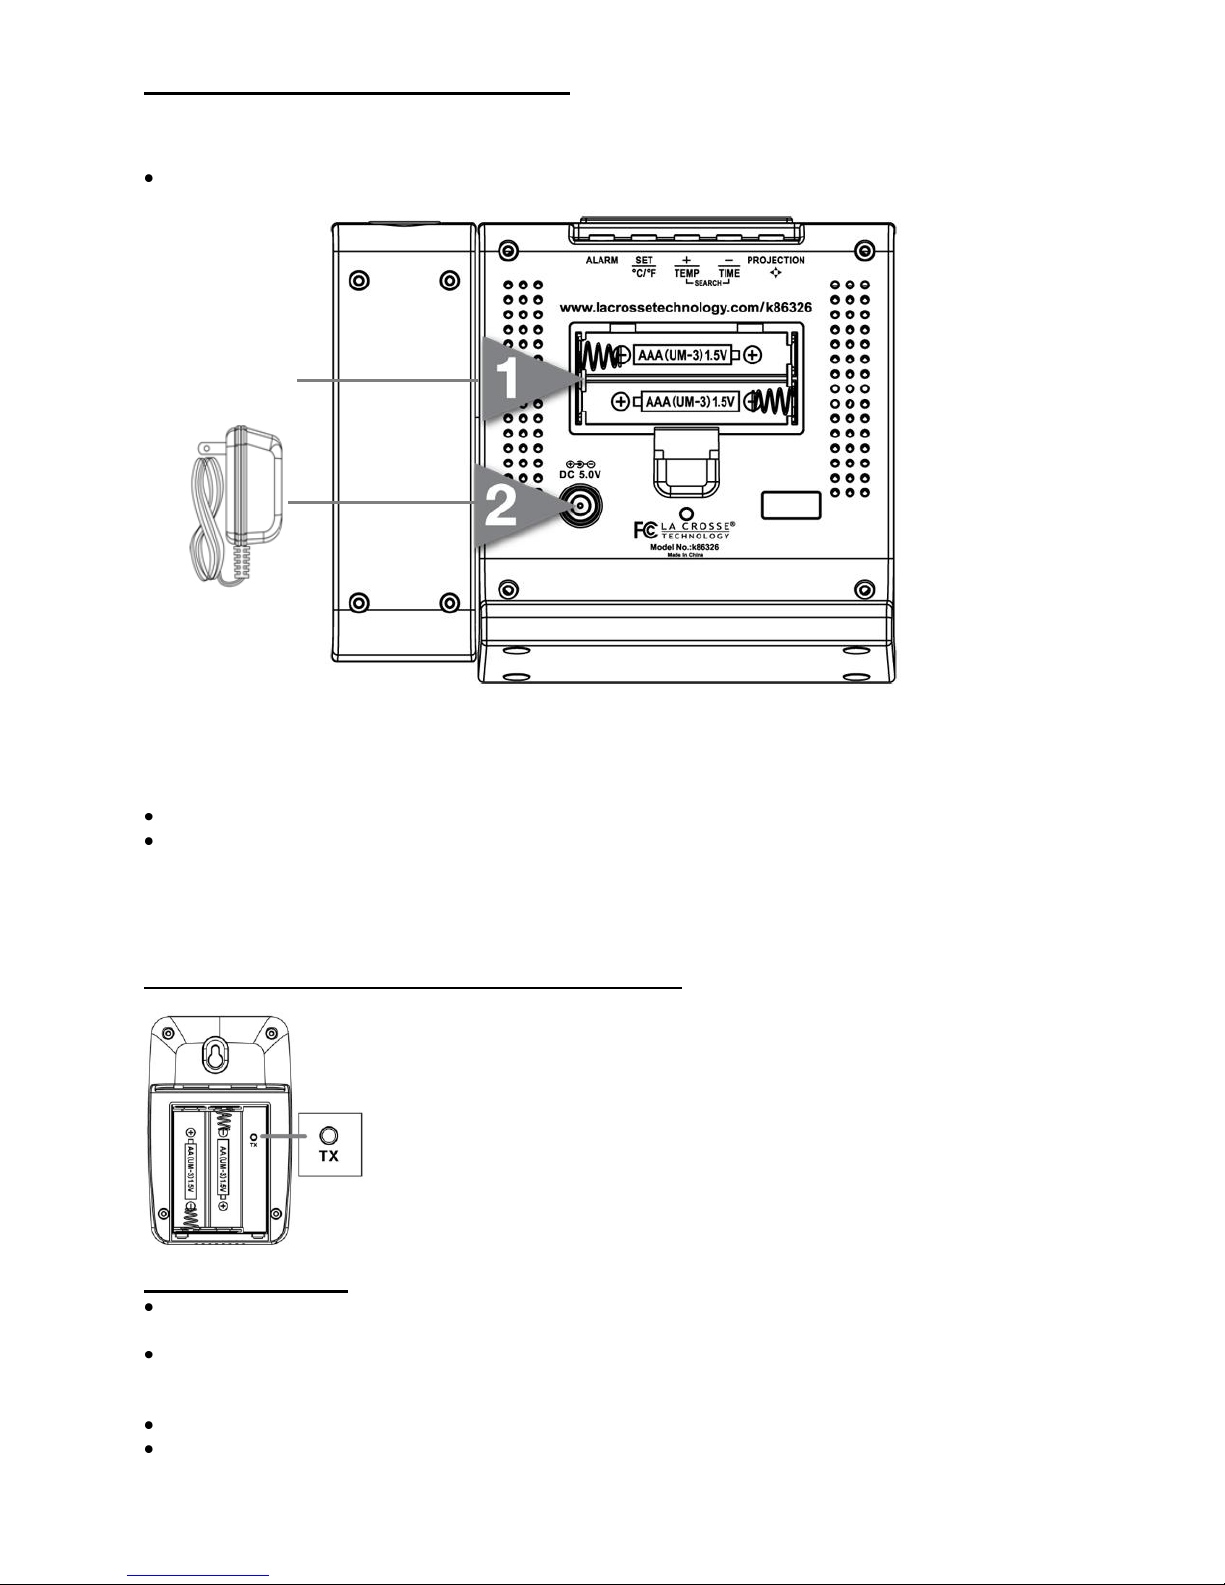
POWER THE ATOMIC PROJECTION ALARM:
Battery
Compartment
5-Volt a/c adapter
The Projection Alarm can be powered by the 5-volt a/c adapter or by 2 AA batteries.
A/C power adapter:
Insert enclosed 5-volt a/c power adapter into a wall outlet, then into the Atomic Projection Alarm.
Batteries:
1. Remove battery cover: Slide tab to the right and pull out to remove battery cover.
2. Install two fresh AA batteries according to the polarity markings.
Do Not Mix Old and New Batteries
Do Not Mix Alkaline, Lithium, Standard, or Rechargeable Batteries
If the Atomic Projection Alarm does not display indoor temperature after 60 seconds, remove adapter and
batteries, and wait for at least 60 seconds before repeating the setup process.
INSTALL BATTERIES IN THE OUTDOOR TRANSMITTER:
1. Slide the battery cover down, then lift off the back of the transmitter.
Note: Be careful not to break the tabs on the battery cover.
2. Insert two fresh AA batteries into the transmitter. Observe the correct
polarity (see marking inside battery compartment).
3. Keep transmitter 5-10 ft. from the Atomic Projection Alarm during setup.
4. After 15 minutes, if the outdoor temperature shows on the display, you can
move the outdoor transmitter outside to a shaded location within range of
the Atomic Projection Alarm.
TROUBLESHOOTING:
If the Projection Alarm does not display the outdoor temperature after 3 minutes, remove the a/c
power adapter and all batteries from both units and start the setup process again.
If the outdoor temperature does not show up after a second attempt, please slide open the battery
cover of the outdoor transmitter to reveal the TX button push down on the TX button for 3 seconds to
send a wireless signal to the Projection Alarm.
Hold the +/TEMP button for 5 seconds so the clock will search for the sensor.
For optimal 433 MHz signal reception, the outdoor transmitter should be placed within 200 feet (60
meters) from the indoor Projection Alarm.
4
 Loading...