

Page 1
User’s Manual Document 1331
User’s Manual for
®
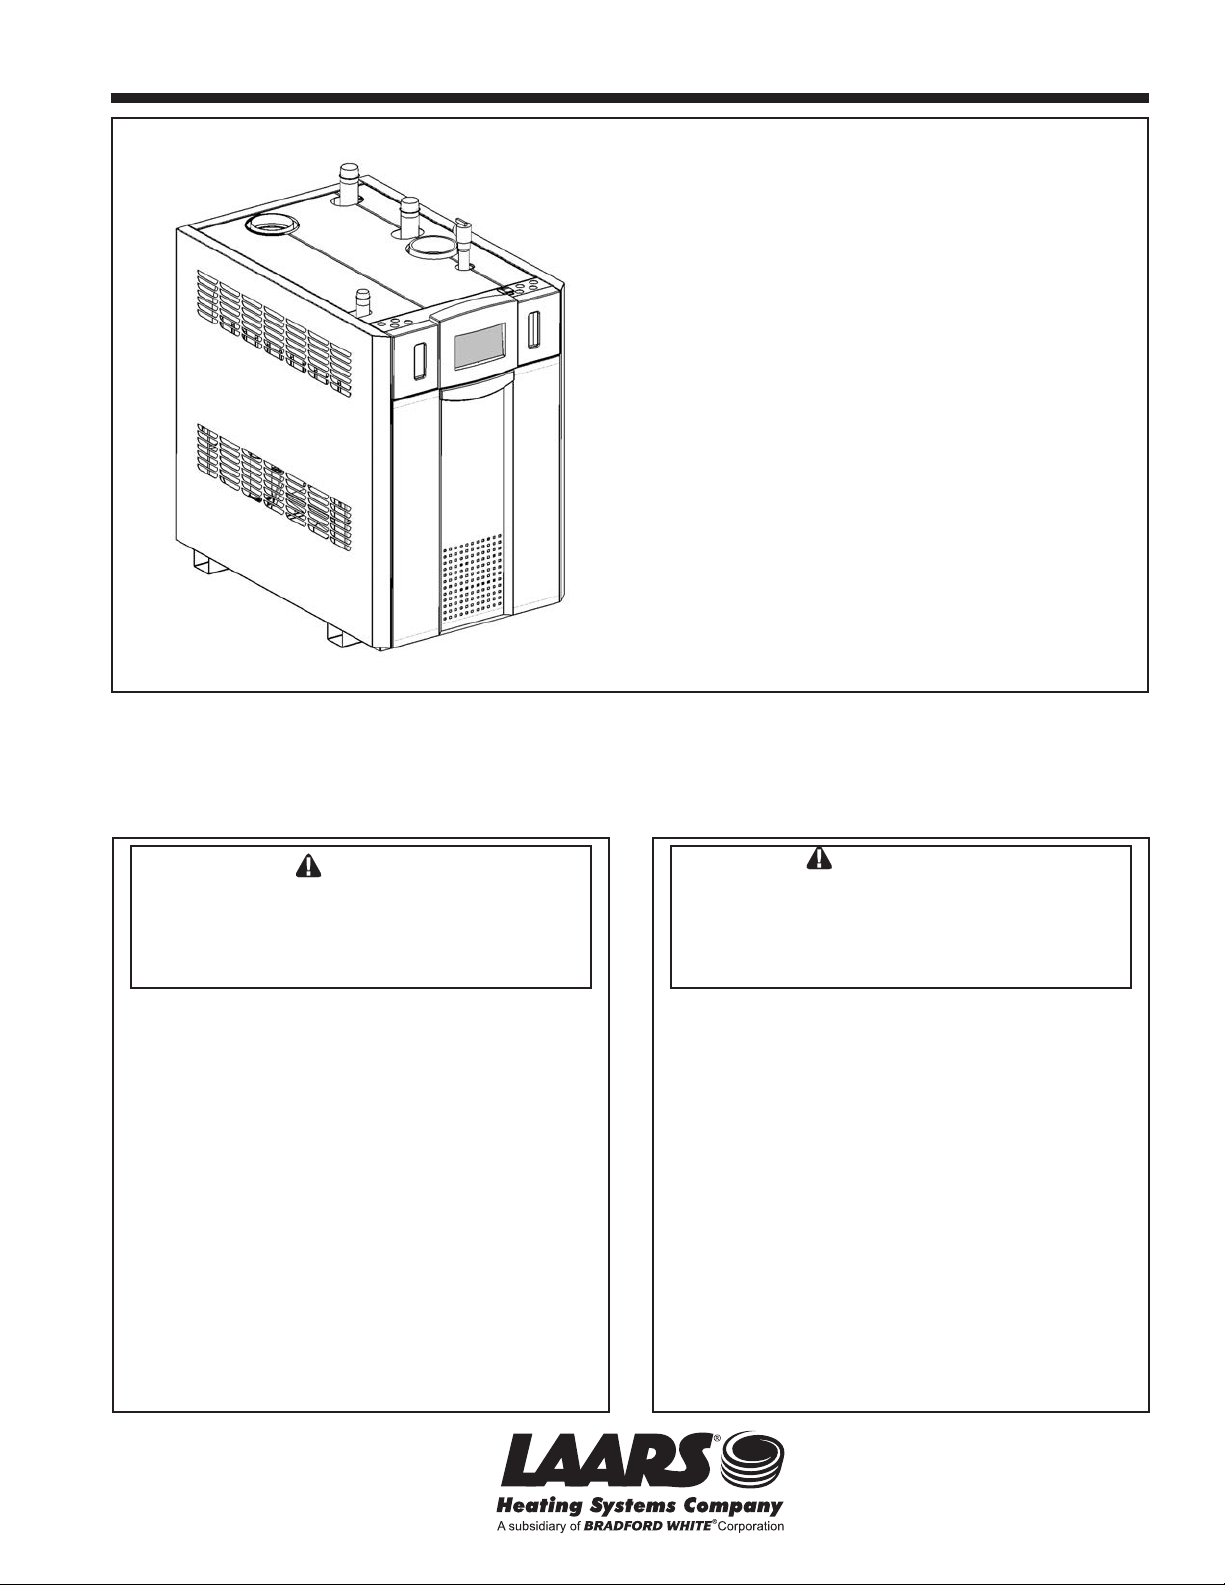
NEOTHERM
with the Touchscreen Display
Modulating Boiler
Model NTH
Sizes 285–850 MBTU/h
Water Heater
Model NTV
Sizes 150-850 MBTU/h
FOR YOUR SAFETY: This product must be installed and serviced by a professional service technician,
qualied in hot water boiler and heater installation and maintenance. Improper installation and/or operation
could create carbon monoxide gas in ue gases which could cause serious injury, property damage, or
death. Improper installation and/or operation will void the warranty.
WARNING
If the information in this manual is not
followed exactly, a re or explosion may
result causing property damage, personal
injury or loss of life.
Do not store or use gasoline or other
ammable vapors and liquids in the vicinity
of this or any other appliance.
WHAT TO DO IF YOU SMELL GAS
• Do not try to light any appliance.
• Do not touch any electrical switch; do not
use any phone in your building.
• Immediately call your gas supplier from a
nearby phone. Follow the gas supplier’s
instructions.
• If you cannot reach your gas supplier, call
the re department.
Installation and service must be performed
by a qualied installer, service agency, or gas
supplier.
Assurez-vous de bien suivres les instructions
données dans cette notice pour réduire au
minimum le risque d’incendie ou d’explosion ou
pour éviter tout dommage matériel, toute blessure
ou la mort.
Ne pas entreposer ni utiliser d’essence ni
d’autres vapeurs ou liquides inammables dans
le voisinage de cet appareil ou de tout autre
appareil.
QUE FAIRE SI VOUS SENTEZ UNE ODEUR DE GAZ:
• Ne pas tenter d’allumer d’appareils.
• Ne touchez à aucun interrupteur. Ne pas vous
servir des téléphones dansle bâtiment où vous
vous trouvez.
• Appelez immédiatement votre fournisseur de
gaz depuis un voisin. Suivez les instructions
du fournisseur.
• Si vous ne pouvez rejoindre le fournisseur de
gaz, appelez le sservice des incendies.
L’installation et l’entretien doivent être assurés par
un installateur ou un service d’entretien qualié ou
par le fournisseur de gaz.
AVERTISSEMENT
H2374200-
Page 2
NeoTherm Boilers and Water Heaters
CONTENTS
Familiarizing yourself to the Laars NeoTherm ...................1
FOR YOUR SAFETY ,
PLEASE READ THIS BEFORE OPERATING .................2
What to Do If You Smell Gas .............................................2
POUR VOTRE SÉCURITÉ,
LISEZ AVANT DE METTRE EN MARCHE ........................2
Que Faire si Vous Sentez une Odeur de Gaz
Lighting the Unit .................................................................3
Turning Off the Gas to the Unit
Instructions de Mise en Marche
..........................................3
..........................................4
Fermeture de l’Alimentation en Gaz ...................................4
Shutting Down the NeoTherm
Restarting the NeoTherm
In the Event of Power Failure
............................................5
....................................................5
.............................................5
THE USER INTERFACE AND ON/OFF SWITCH
About Lockouts, Holds, and Alerts ...................................10
Care, Inspection, and Service
............................................11
......................2
..........6
Page 1
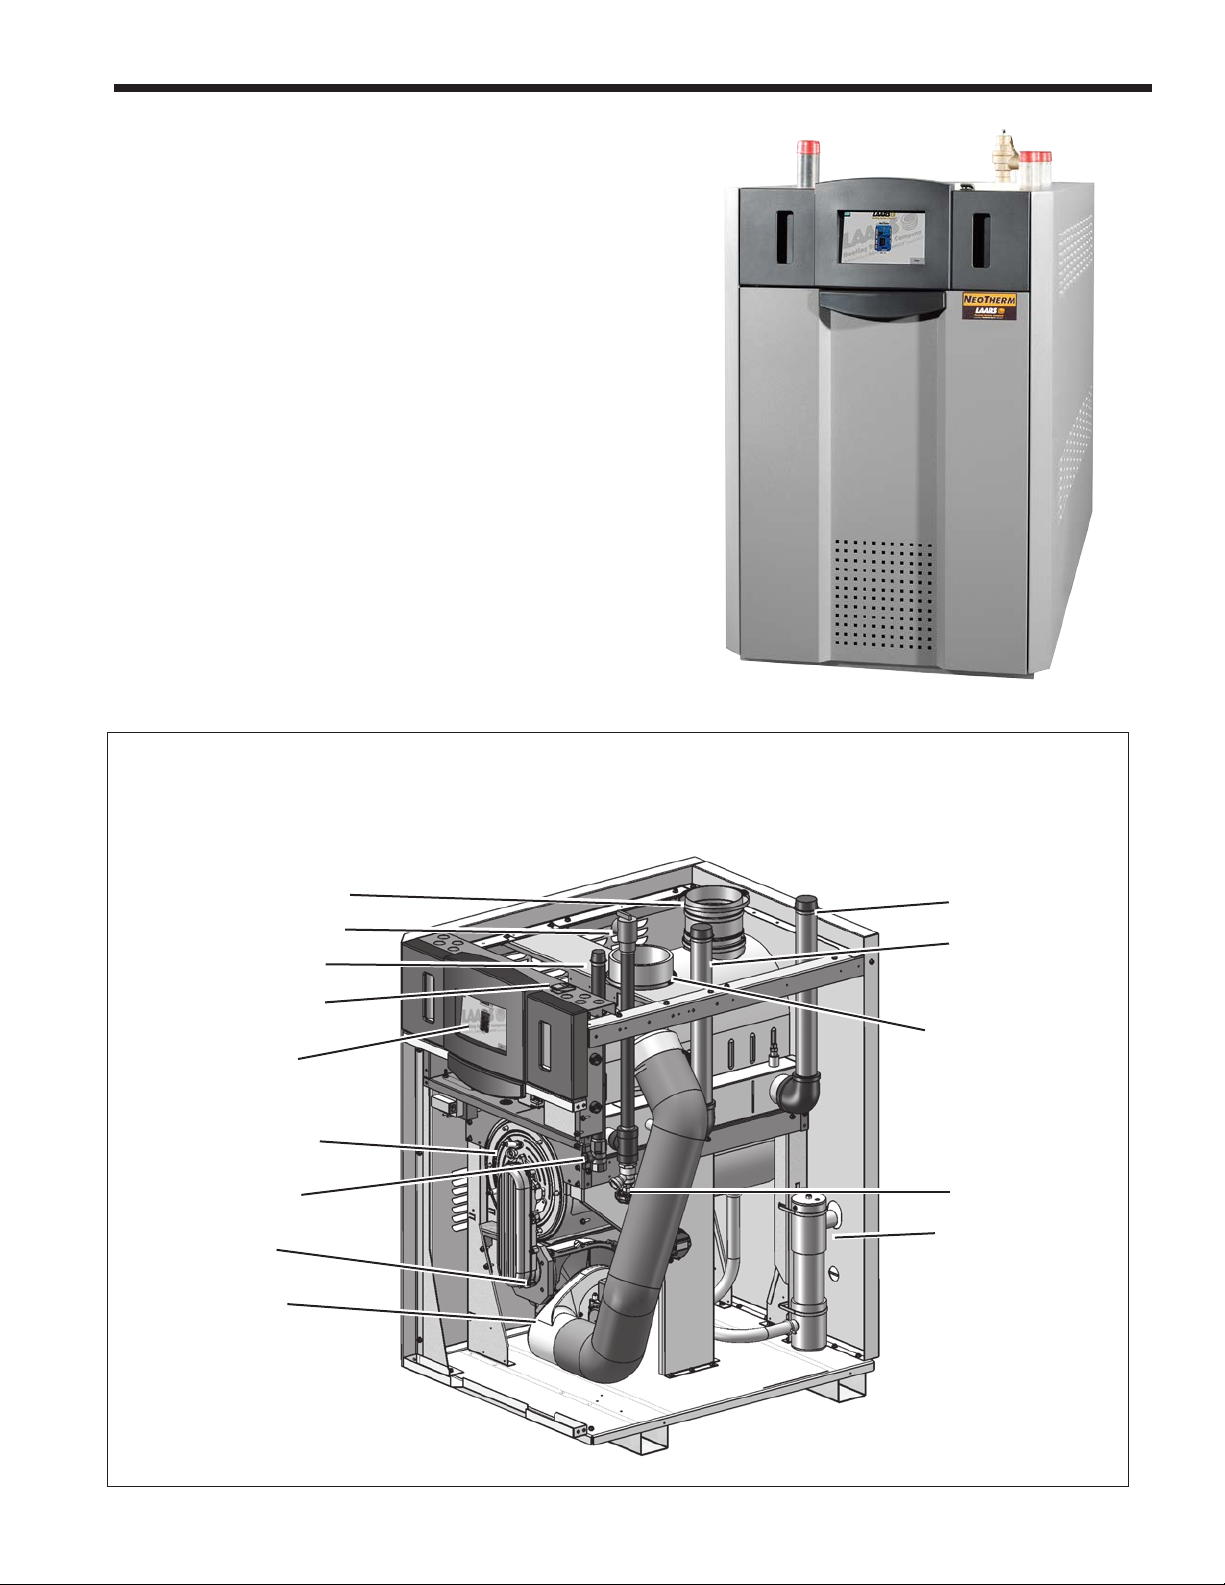
FAMILIARIZING YOURSELF TO THE
EXHAUST VENT CONNECTION
PRESSURE RELIEF VALVE
GAS CONNECTION
ON/OFF SWITCH
Color
Touchscreen
HEAT EXCHANGER
MANUAL SHUTOFF
GAS VALVE
AIR/ GAS
BLOWER
VENTURI
®
NEOTHERM
WATER INLET
WATER OUTLET
AIR INLET CONNECTION
DRAIN VALVE
CONDENSATE TRAP
Sizes available are 199-850 MBTU/h. This illustration is of the 399 MBTU/h
Shown without jacket. Internal components will vary slightly between sizes, but the Touch Screen & On/Off Switch remain the same.
Page 3
Page 2
FOR YOUR SAFETY PLEASE READ THIS BEFORE OPERATING
WARNING
If you do not follow these instructions exactly, a re or explosion may result,
causing property damage, personal injury or loss of life.
A. This unit does not have a pilot. It is equipped with an ignition device which automatically lights the burner. Do
not try to light the burner by hand.
B. Before operating the unit, check for any smell of gas in the area around it. Be sure to smell next to the oor,
because some gas is heavier than air and will settle near the oor.
C. Use only your hand to turn the handle on the gas valve. Never use tools. If the valve handle will not turn by
hand, don’t try to repair it. Call a qualied service technician. If you force the valve or try to repair it, this
may result in a re or explosion.
D. Do not use this unit if any part has been under water. Immediately call a qualied service technician to inspect
the unit. Any part of the control system or any gas control which has been under water must be replaced.
WHAT TO DO IF YOU SMELL GAS
Do not try to light any appliance or device that uses gas.
·
LAARS Heating Systems
· Do not touch any electrical switch. Do not use any phone in your building.
· Immediately call your gas supplier from a neighbor’s phone. Follow the gas supplier’s instructions.
· If you cannot reach your gas supplier, call the re department.
POUR VOTRE SÉCURITÉ,
LISEZ AVANT DE METTRE EN MARCHE
AVERTISSEMENT
Quiconque ne respecte pas à la lettre les instructions dans la présente notice risque un
début d’ incendie ou une explosion entraînant des dommages, des blessures ou la mort.
A. Cet appareil est muni d’un dispositif d’allumage qui allume automatiquement la veilleuse. Ne tentez pas
d’allumer la veilleu manuellement.
B. Avant de faire fonctionner, reniez tout autour de l’appareil pour déceler une odeur de gaz. Reniez près du
plancher, car certains gaz sont plus lourds que l’air et peuvent s’accumuler au niveau du sol.
C. N’utilisez que votre main pour fermer la soupape d’arrêt de gaz. N’utilisez jamais d’outils. Si la poignêe de
la valve ne tourne pas manuellement, ne tentez pas de la réparer. Communiquez avec un technicien de service
qualié. Le fait de forcer ou de tenter de réparer la poignée pourrait causer un incendie ou une explosion.
D. N’utilisez pas cet appareil s’il a été plongé dans I’eau, même partiellement. Faites inspecter I’appareil par un technicien
qualié et remplacez toute partie du système de contrôle et toute commande qui ont été plongées dans I’eau.
QUE FAIRE SI VOUS SENTEZ UNE ODEUR DE GAZ
Ne pas tenter d’allumer d’appareil.
·
· Ne toucher à aucun interrupteur; ne pas vous servir des téléphones se trouvant dans le bâtiment.
· Appelez immédiatement votre fournisseur de gaz depuis un voisin. Suivez les instructions du fournisseur.
· Si vous ne pouvez rejoindre le fournisseur, appelez le service des incendies.
Page 4
NeoTherm Boilers and Water Heaters
LIGHTING THE UNIT
1. STOP! Read the safety information listed above.
2. Set the thermostat to the lowest setting.
3. Turn off all electric power to the unit.
4 This unit is equipped with an ignition device which automatically lights the burner.
Do not try to light the burner by hand.
5. Remove the front access panel.
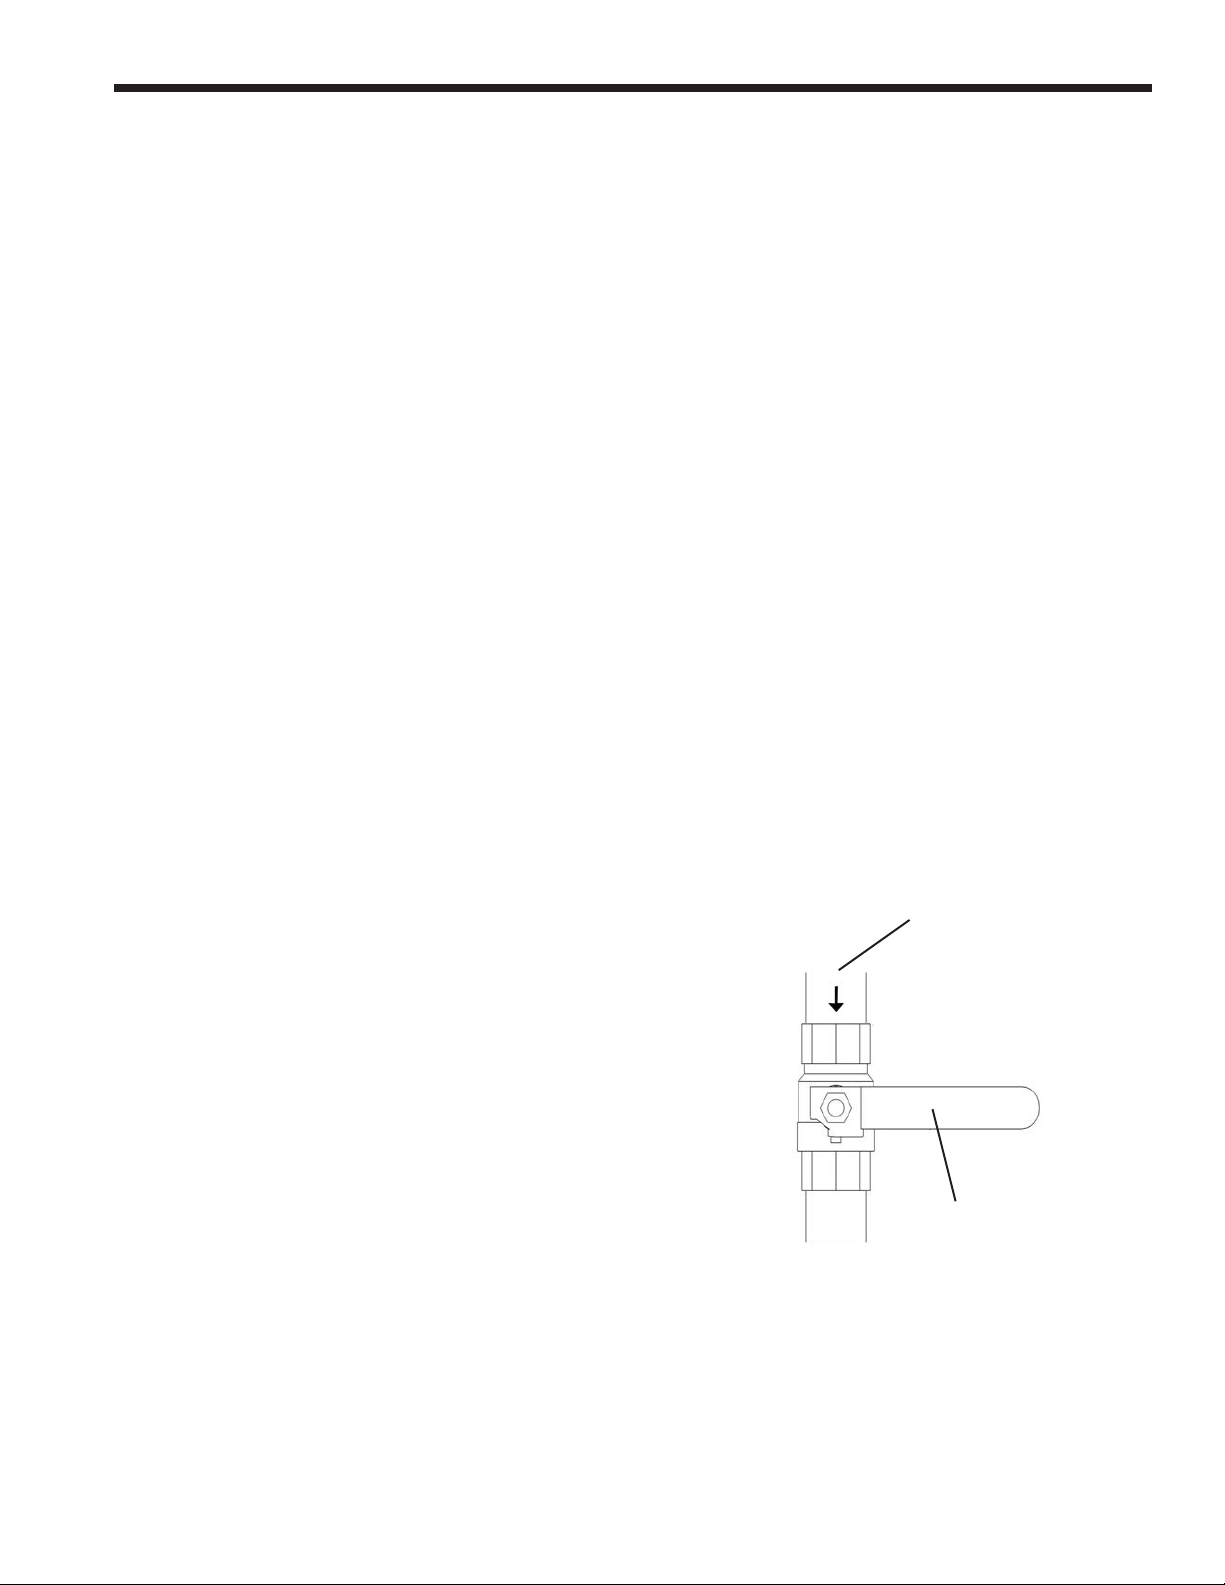
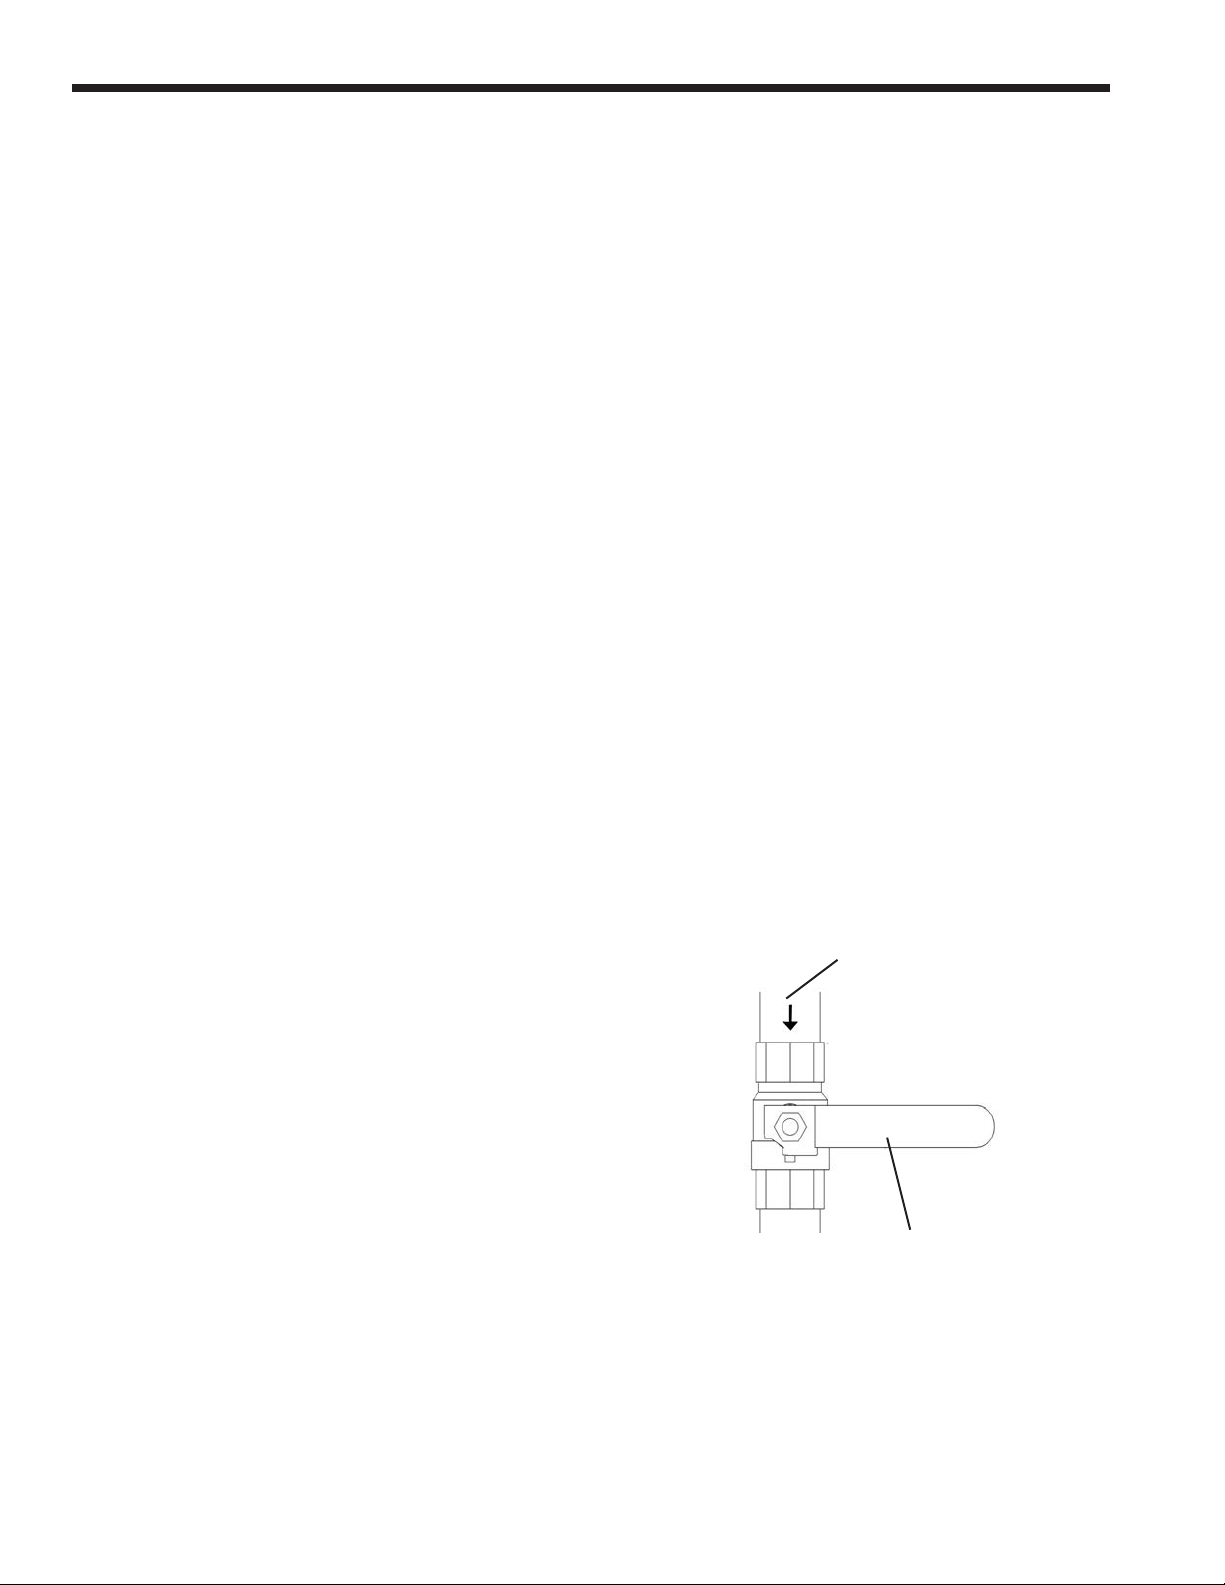
6 Turn off the manual gas valve. The valve is off when the valve handle is at a right
angle to the gas pipe.
7. Wait ve minutes to allow any gas to clear. Smell for gas, including the area near
the oor. If you do smell gas, STOP! Follow Step B in the safety information listed
above. If you don’t smell gas, go to the next step.
8. Slowly turn the manual gas valve to “ON.” The handle on the valve will be parallel
to the gas pipe.
Page 3
9. Replace the front panel.
10. Turn on the electric power to the unit.
11. Set the thermostat to the desired setting.
12. If the unit will not operate, follow the instructions in “Turning Off the Gas to the
Unit” and call your service technician or gas supplier.
TURNING OFF THE GAS TO THE UNIT
1. Before doing any service work, turn off all electric power to
the unit.
2. Set the thermostat to the lowest setting.
3. Remove the front access panel.
4. Turn off the manual gas valve. The valve is off when the
valve handle is at a right angle to the gas pipe.
5. Replace the front panel.
Gas inlet
Manual gas valve
shown in the
Off position
Manual Gas Valve
Page 5
Page 4
INSTRUCTIONS DE MISE EN MARCHE
1. ARRÊTEZ ! Lisez les instructions de sécurité sur la portion supérieure.
2. Réglez le thermostat à la temperature la plus basse.
3. Coupez l’alimentation électrique de l’appareil.
4. Cet appareil est dote d’un dispositif d’allumage qui allumera automatiquement le
brûleur. Ne tentez pas d’allumer le brûleur manuellement.
5. Retirez le couvercle avant.
6. Mettez la soupape d’ arrêt de gaz à „OFF”. La valve est en position „OFF” lorsque la
poignée se trouve à angle droit du tuyau de gaz.
7 Attendez cinq minutes an que le gaz se dissipe. Si vous croyez sentir une odeur de
gaz, ARRÊTEZ ! Reportez-vous aux instructions B ci-dessus, sur cette étiquette. S’il
n’y a pas d’odeur de gaz, passez à la prochaine étape.
8. Remettez lentement la soupape d’arrêt de gaz en position „ON”. La poignée sera
parallèle au tuyau de gaz.
LAARS Heating Systems
9. Replacez le couvercle avant.
10. Rétablissez l’alimentation électrique à l’appareil.
11. Réglez le thermostat à la température désirée.
12. Si l’appareil ne fonctionne pas, suivez les directives relatives à la fermeture de
l’alimentation en gaz et communiquez avec votre technicien de service ou le
fournisseur de gaz.
FERMETURE DE L’ALIMENTATION EN GAZ
1. Coupez toute alimentation électrique à l’appareil si celui-
ci doit faire l’objet d’un entretien.
2. Réglez le thermostat au réglage le plus bas.
3. Retirez le couvercle d’accès au panneau de commande.
4. Mettez la soupape d’arrêt de gaz à „OFF”. La valve est
en position „OFF“ lorsque la poignée se trouve à angle
droit du tuyau de gaz.
5. Replacez le couvercle d’accès au panneau de commande.
Valve de gaz manuel le se
trouvant en position
Entrée
de gaz
„OFF”.
Valve de Gaz Manuel
Page 6

NeoTherm Boilers and Water Heaters
SHUTTING DOWN THE NEOTHERM
It may sometimes be necessary to shut down the NeoTherm. Here are the steps required to
do this:
1. Switch off the main electrical disconnect switch.
2. Open the front cover and close the main manual gas valve.
3. If freezing is anticipated, drain the NeoTherm. (Also be sure to protect the piping in
the building from freezing.)
The steps listed above may require qualied service personnel.
RESTARTING THE NEOTHERM
It may be necessary to restart the NeoTherm – for example, after a power interruption.
Here are the steps required to do this:
1 Reset any errors using the Touchscreen Display. See the section on “About Lockouts,
Holds, and Alerts.”
Page 5
2 Turn up the thermostat to call for heat.
3. In approximately 2 seconds, the blower will operate. Ignition should occur after 35-40
seconds. It may take as long as 2-1/2 minutes.
4. If ignition does not occur, wait 5 minutes and then repeat steps 1 through 3.
5. If, after three attempts, the unit still does not light, shut down the boiler and call your
service technician.
If the unit has been drained, follow these steps:
1. See the “Installation and Operation Manual” for instructions on lling and purging the
unit.
2. Remove the front door. Turn on the gas shutoff valve.
3. Switch on the main electrical disconnect switch. The pump and blower will start, and
the igniter will be energized. After 35 seconds the gas valve will be energized, and
ignition will occur. If ignition does not occur within 2-1/2 minutes switch “off” the
main disconnect switch, wait 5 minutes and switch it “on” again. If after three attempts
ignition does not occur, shut down the unit and call for service.
IN THE EVENT OF POWER FAILURE
The NeoTherm will not operate during an electrical power outage. If there is an extended
power outage with danger of freezing, then the NeoTherm (and all other water systems)
should be completely drained. Before draining the unit, turn off the gas and turn off the
main power switch. When you replace the unit in service, refer to the “Installation and
Operation Manual” for instructions on lling and purging.
Page 7

Page 6
Page 34
LAARS Heating Systems
Section 8
Navigating the Touch Screen
Touch Screen
e home screen shows a picture of the Neo erm
controller. e color of the controller depends on the
status of the Neo erm, as shown below.
Color Status Control
Icon
Blue Normal operation
Red Lockout
Gray Standby mode (Burner
LAARS Heating Systems
switch o )
Figure 32. NeoTherm with Touch Screen
8.1 The Touch Screen
The Touch Screen is located front and center on the
NeoTherm and allows you to navigate into all of the
functionality and control that is available to setup and
customize your heating and/or hotwater system.
8.2 Using the Touch Screen
A screen saver is programmed into the display. Simply
touch the screen to wake it up.
While under normal operation,
the Touch Screen will
automatically present this Home screen. See Menu
1
Gray and
crossed
out
Yel l o w Hold state. is could
Figure 33. Boiler Status Colors
To check the operation of the appliance, press the large
Control Icon on the Home screen. The system will
present a Status Summary screen for the appliance:
Communication
problem
be Anti short cycle, fan
speed transitions, etc.
Menu 1. Home Screen
Menu 2. Status Summary
Page 8

Page 35
NEOTHERM Boilers and Water Heaters
NeoTherm Boilers and Water Heaters
Page 7
Screen Menu Icons
There are several icons at the top of the Touch Screen
Menus (and most of the other screens) that will help
you move around the system:
Home Upper
left-hand
corner
Camera Upper
left-hand
corner
Bell Upper
left-hand
corner
Padlock Upper
right-hand
corner
Back Upper
right-hand
corner
Sometimes a screen is used to present a list, and often
the list is too long to present on a single screen view . To
see the rest of the list, pull down on the bar on the right
side of the screen, or use the up- and down-arrows.
T o make a change, or to get more information about one
of the items on the list, press on the line for that item.
T o change some parameters, a password is required.
The control system includes three levels of password
protection:
Return to Home page
Screen-shot of current
menu as a JPG fi le
System in Lockout,
Reset required
Shows whether a
password has been
entered so parameters
can be changed
Return to previous screen
log
(For some special safety-related functions, besides
entering the correct password, the system will
ask you to go through an additional “verifi cation”
process. For more information, see the section on
“Confi guration.”)
When a password is necessary, the system will
present the keyboard screen. See Menu 3.
Login
1 2 3 4 5 6 7 8 9 0 - =
q w e r t y i o p [ ]u
a s d f g h j k l : *
z x c v b n m , . /
Shift Backspace
OK Clear Cancel
Menu 3. Keyboard Screen
The passwords used by this system are “case
sensitive” – it matters whether a letter in the
password is capitalized or not. Pressing the Shift
key toggles between capital and lower case letters.
“BS” stands for “Back Space,” and also works as a
Delete key.
Anyone can view all of the parameters. However,
to change most of the parameters, you will need a
password.
At the bottom of the screen, the system indicates that
you need to enter a password.
OEM Password Setup and parameter changes
available only to the factory.
Installer Password Setup and parameter changes
made when the system is
installed, and some diagnostic and
troubleshooting functions.
The installer level password is
“lnt” (lower case “LNT.”)
User Level (no password required)
Non-critical adjustments and
functions, including adjusting
the Central Heat and Domestic
Hot Water setpoints, monitoring
the input and output variables,
reading parameters from the
controller, and reading the error
Menu 4. Login Required
The screen used to Login is similar to the Keyboard
screen.
It may be diffi cult for some operators to press the
keys on this screen. In this case, use the back of a
plastic pen, or a stylus, or a pencil eraser. (Do not
use sharp metal tools – these may damage the plastic
Page 9

Page 8
Page 36
LAARS Heating Systems
LAARS Heating Systems
surface of the screen.)
Each time you press a key, the system will respond
with a beep. If you are entering a password, an
asterisk (*) will appear for each character you enter.
The beeps and asterisks will help you enter the correct
number of characters for your password.
When changing a numerical value, the system presents
a numerical entry screen, as shown below.
Menu 5. Numeric Entry Screen
8.3 Verifi cation Process for SafetyRelated Parameters
The verifi cation process allows the user to
confi rm that all the changes made are correct
and that there have not been any inadvertent
changes made.
1. When you start to change a parameter that
is related to safety, the system will present a
warning which looks like this:
Press OK to continue. The system will ask you
to login before you make a change. (For more
information on logging in, see Section 8.2.)
2. If you make a change in any group that could
affect the safe operation of the unit, the control
system will ask you to “verify” the change before
it is accepted.
3. Once all parameters have been changed, return
to the confi gure menu. In the lower right hand
corner of the screen you will see ‘VERIFY’
Press VERIFY, then press BEGIN to start
verifi cation.
Notes –
• Once you change one of these safety-related
parameters, you must fi nish the verifi cation process
for the group that includes the parameter, or the
control system will not let the boiler operate. Y ou
can wait to do the verifi cation until you have changed
parameters in other groups, but before you return the
boiler to service, you must complete the verifi cation
process for all groups that have been changed.
• At the end of the verifi cation process, you must press
the Reset button on the front of the controller. See
Figure 34. You have to do this within 30 seconds, or
the verifi cation will be cancelled. To make it easy to
reach the Reset button, open the door on the front
of the boiler and slide out the control panel before
beginning the verifi cation.
Menu 6. Parameter Safety Warning
WARNING
Changing safety parameters should only be
conducted by experienced, licensed boiler operators
and mechanics. Hazardous burner conditions can
happen with improper operations that may result in
PROPERTY LOSS, PHYSICAL INJURY , or DEATH.
Figure 34. Reset Button on Controller
4. The system will present a listing for each group
of parameters that need verifi cation
See Menu 7.
Page 10

Page 37
NEOTHERM Boilers and Water Heaters
NeoTherm Boilers and Water Heaters
Menu 7. Safety Parameter Confi rmation
5. For each group, check the list carefully. Press
Yes if all of the parameters in the group have
been entered correctly. For each group, you are
given 30 seconds to select Yes/No.
A count-down timer is shown at the bottom of
the screen.
If you made changes in other safety-related
groups, verify the entries in those groups in the
same way. Do this until the following screen
shows
8.4 Checking Individual Parameters
1. From the ‘Home’ screen (Menu 9), press the
icon for the controller.
Menu 9. ‘Home’ screen
2. The Status Summary page for the controller
will appear. This shows the current operating
condition of the controller, and also shows some
of the confi guration settings.
See Menu 10
Page 9
Menu 8. Safety Parameter Reset
6. When the process is complete, the system will
tell you to reset the control system. The Reset
button is located on the front of the controller.
You must press the Reset button within 30
seconds, or the verifi cation will be cancelled. A
count-down timer is shown at the bottom of the
screen.
Menu 10. Status Summary Screen
Notice the four buttons at the bottom of each
Status Summary screen:
• Confi gure – Allows an installer to change
some of the setup parameters used by the
system. A password may be required.
• Operation – Used to adjust the setpoints,
change the fan speed, turn a burner on or off,
or turn the pumps on or off.
• Diagnostics – Allows you to run diagnostic
tests, or check the inputs and outputs used by
the system.
• Details – Allows you to check the status of all
of the setup parameters on the control system.
Page 11

Page 10
Page 38
LAARS Heating Systems
8.5 Confi guring Parameters
In this section, we will give you a quick explanation
of how to change parameters on the controller.
1. From the Home Page screen (Menu 11), press
the icon for the controller.
Menu 11. Home Page Screen
LAARS Heating Systems
2. The Status Summary page for that controller
will appear. See Menu 12
Menu 12. Status Summary Screen
3. Press the Confi gure button to start a
confi guration session for the controller.
Menu 13. Confi guration Screen
This screen lists all of the confi guration groups
that will be outlined in Section 9.
Page 12

Page 39
NEOTHERM Boilers and Water Heaters
NeoTherm Boilers and Water Heaters
8.6 Setting the Date and Time on the
System Display
The display includes an internal clock, which keeps
track of the date and time. This setting is important,
because log entries for Lockouts and Alerts include
time listings. If the Date and Time setting for the
boiler is not correct, the listings in the Lockout and
Alert logs will be incorrect.
To set the clock:
1. Start at the ‘Home’ screen.
Menu 16. Display Setup Screen
4. Press ‘Set Date/Time’ button.
Page 11
Menu 14. ‘Home’ screen
2. Press the Setup button on the lower right
corner of the screen. The system will present
the Setup screen.
Menu 15. Setup Screen
3. Press the Display Setup button at the bottom
of the screen.
Menu 17. Date and Time
5. Use the arrows to change the date and time, and
then press the OK button.
Battery
The display has a removable battery (CR2032) to
store time, date, lockout, and alerts in the event of a
power failure. It has an expected lifetime of 10 years.
The battery can be accessed from the back of the
Touchscreen display.
(Back)
Battery ( CR2032 )
Page 13

Page 12
Page 40
LAARS Heating Systems
8.7 Confi guration Sub-Menus (ALL)
LAARS Heating Systems
Menu 18. Home Screen
To navigate to the Confi guration Menu Screen, fi rst touch
the controller icon on the home screen to access the Status
Summary screen,
8.7.1 thru 8.7.15 are the
Confi guration Sub-Menus.
8.7.1 System Identifi cation & Access
This sub-menu will display information regarding software,
date codes, model numbers and program name, as well as
giving the installer access to re-name the boiler and to change
the modbus addresses for lead lag operation.
8.7.2 CH - Central Heat Confi guration
Menu 19. Status Summary Screen
From the Status Summary Screen, touch the ‘Confi gure’ button
on the bottom left, to access the Confi guration Menu.
When using the NeoTherm for hydronic heating, a call for
heat must be supplied to the “T-T” terminals found on TB7
labeled “T-T or Interlock”. Once a call for heat is established,
the control will start the appropriate (selected) pumps, and
begin the ignition process. From the “Home” screen touch the
Sola icon, then press “Confi gure”. Choose ‘CH-Central Heat
Confi guration to make adjustments to setpoint, and modulation
for a single boiler CH demand.
8.7.3 Outdoor Reset Confi guration
Description of Outdoor Sensor
Menu 20. Confi guration Menu
Page 14

Page 41
NEOTHERM Boilers and Water Heaters
NeoTherm Boilers and Water Heaters
Page 13
8.7.4 DHW - Domestic Hot Water
Confi guration
DHW - Domestic Hot Water is used to confi gure the DHW
temperature parameters for water heaters (NTV) and for
indirect water heaters that are used with boiler (NTH) systems.
8.7.5 Warm Weather Shutdown
Confi guration
8.7.7 Modulation Confi guration
From this sub-menu the installer has the ability to adjust
the range of modulation for the CH, and DHW demands.
NeoTherm is designed with a 5:1 turn down ratio. Any
change to the minimum and maximum modulation rates
will affect the overall ratio of the boiler. The installer level
password will allow changes to these parameters. Consult
the factory if an adjustment is needed to any of these
parameters.
8.7.8 Pump Connections
The controller in the NeoTherm energizes the pump contacts
when it receives a call for heat. Once the call for heat is
satisfi ed, the pump will remain on for the defi ned pump
overrun time.\
From this sub-menu you will be able to enable/disable the
Warm Weather Shutdown feature and adjust the set point.
8.7.6 Demand Priority Confi guration
From the Demand Priority Confi guration, the installer can
adjust the priority of the different demand types.
-Central Heat
-Domestic Hot Water
-Lead Lag
The control uses arrows as indicators to point to the loop with
higher priority.
The Boiler Pump terminals (TB5 - max 7.4 FLA) are fed by
120V (violet wire) internally from the main power feed. The
System and DHW contacts are dry contacts. Appropriate
voltage must be supplied to the System and DHW pumps for
proper operation.
Page 15

Page 14
Page 42
LAARS Heating Systems
8.7.8 Pump Connections (cont)
LAARS Heating Systems
The System pump connections are located on terminal block
5 (TB5) in the control panel. The System pump contacts are
rated for 120Vac, 7.4 Amps. To use the contacts, power must
be supplied on one terminal with the other terminal wired to
the pump or a relay controlling the pump.
The DHW pump connections are located on terminal block
5 (TB5) in the control panel and are rated for 120Vac, 7.4
Amps. To use the contacts, power must be supplied on one
terminal, and the other terminal wired to the pump or a relay
controlling the pump.
Additional 120VAC circuits may be required for the pumps.
8.7.10 High Limits
The outlet High limit can be adjusted using the installer
password. After a change is made, the control will
lockout and require a Safety Verifi cation (see Section 9.3
for more details on Safety Verifi cation).
8.7.11 Stack Limits
8.7.9 Statistics Confi guration
The statistics confi guration sub-menu allows the installer to
view Burner Cycles, Burner Run Time, DHW Pump Cycles,
Boiler Pump Cycles, and System Pump Cycles.
This sub-menu is ‘Read-Only’
8.7.12 Anti-Condensation Confi guration
Anti-condensation (frost protection) is enabled/disabled
on this screen
Page 16

NeoTherm Boilers and Water Heaters
Page 15
Customer Service and Product Support: 800.900.9276 • Fax 800.559.1583
Headquarters: 20 Industrial Way, Rochester, NH 03867 • 603.335.6300 • Fax 603.335.3355
1869 Sismet Road, Mississauga, Ontario, Canada L4W 1W8 • 905.238.0100 • Fax 905.366.0130
www.Laars.com Printed in U.S.A. © Laars Heating Systems 1506 Document 1331
H2374200-
 Loading...