


Get Started

Thanks for choosing Sprint. This booklet introduces you to
the basics of getting started with Sprint and your new
KYOCERA TorqueXT.
ReadyNow – For more help in getting up and running with your
new phone, take advantage of exclusive Ready Now resources
at sprint.com/readynow. You can even schedule a one-on-one
appointment at a Sprint Store near you.
For ongoing support and resources, visit sprint.com/support.
There, you’ll ind guides, tutorials, and more to help you get the
most out of your phone.
Note: Available applications and services are subject to change at any time.
Welcome!

This Get Started guide is designed to help you set up and use your new TorqueXT. It’s divided
into four sections to help you nd the information you need quickly and easily.
Find out what you need to do before you
use your phone the rst time, including
inserting a battery and activating Sprint
service on your phone.
Learn some basics about how to move
around on your phone, use the Home
screen, and enter text. If you’re familiar
with Android
™
phones, you can probably
skip these pages (although a refresher
course never hurt anyone).
Find useful tips for your phone and
discover resources and other helpful Sprint
information. For additional information
including the full User Guide, videos,
tutorials, and community forums, visit
sprint.com/support.
Take advantage of your phone’s features
and Sprint services, from the basics (making
calls) to the more advanced
(using Google
Play™, Wi-Fi®, and more).
Get Ready
Tools & Resources
Use Your Phone
Android Basics
Page 12
Page 5
Page 8
Page 26
Using This Guide
4
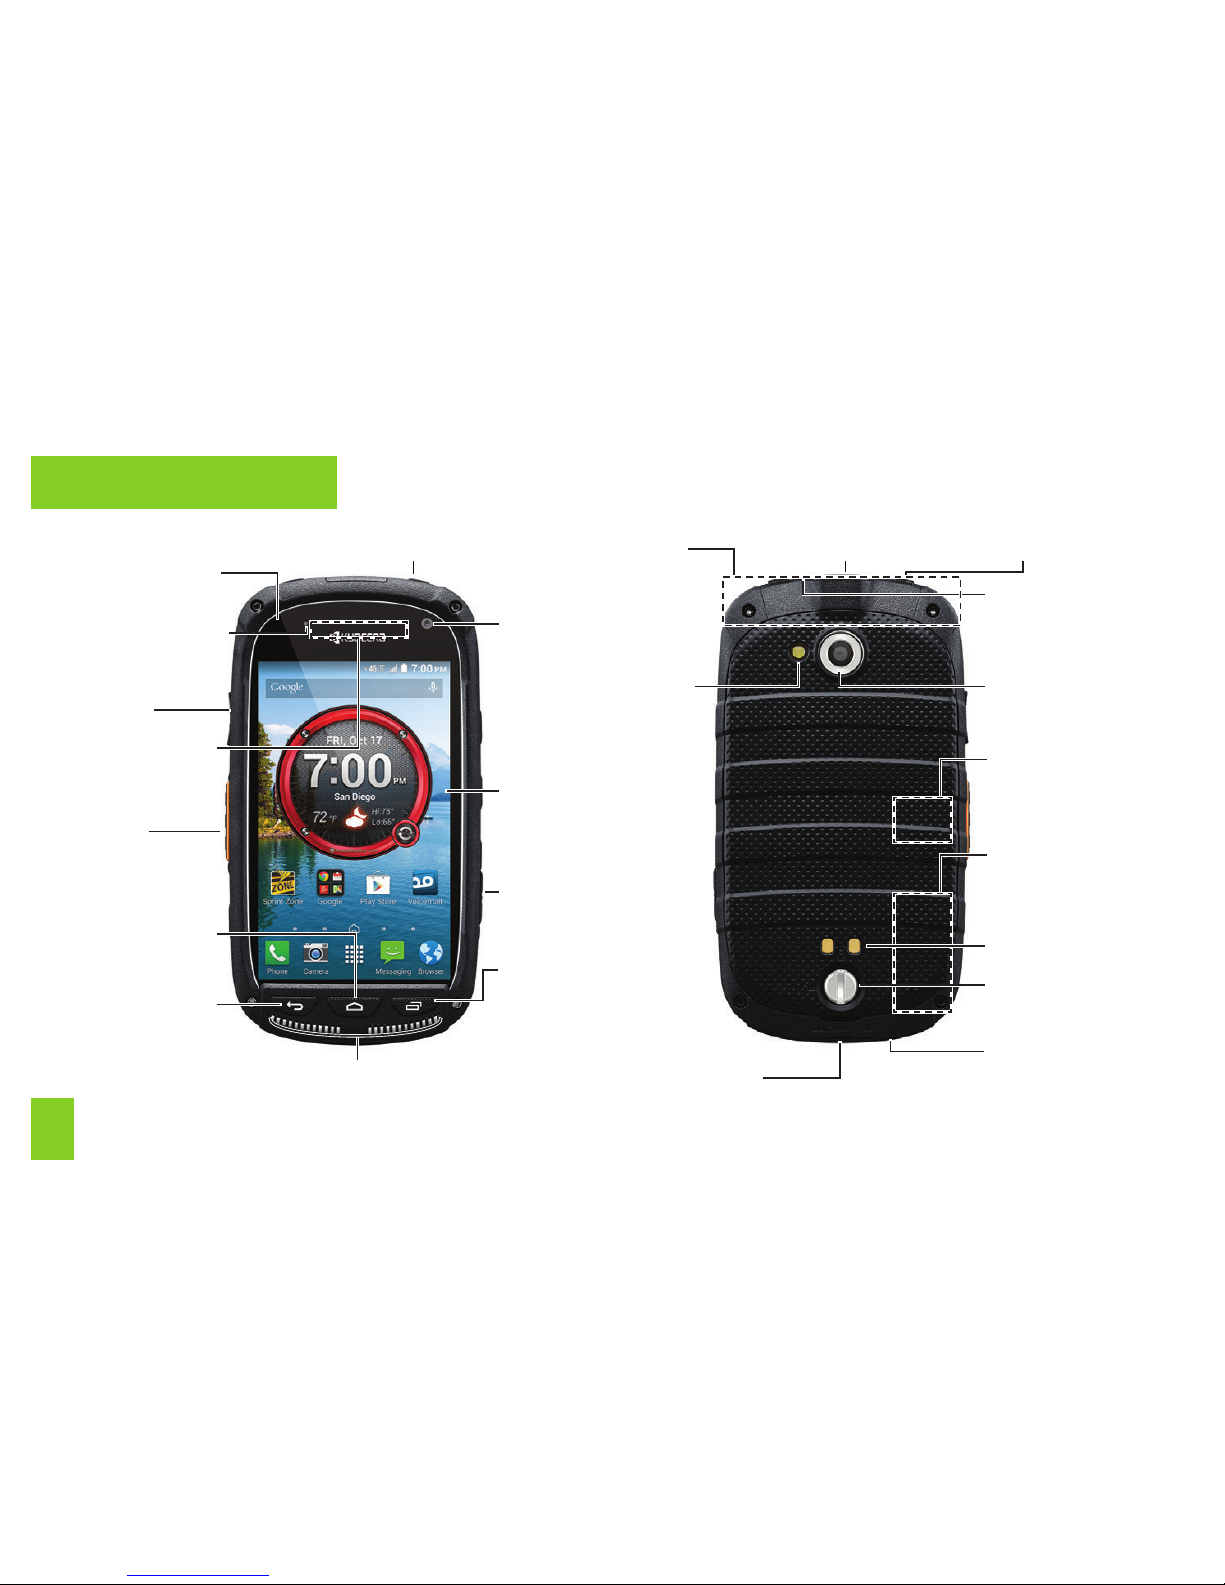
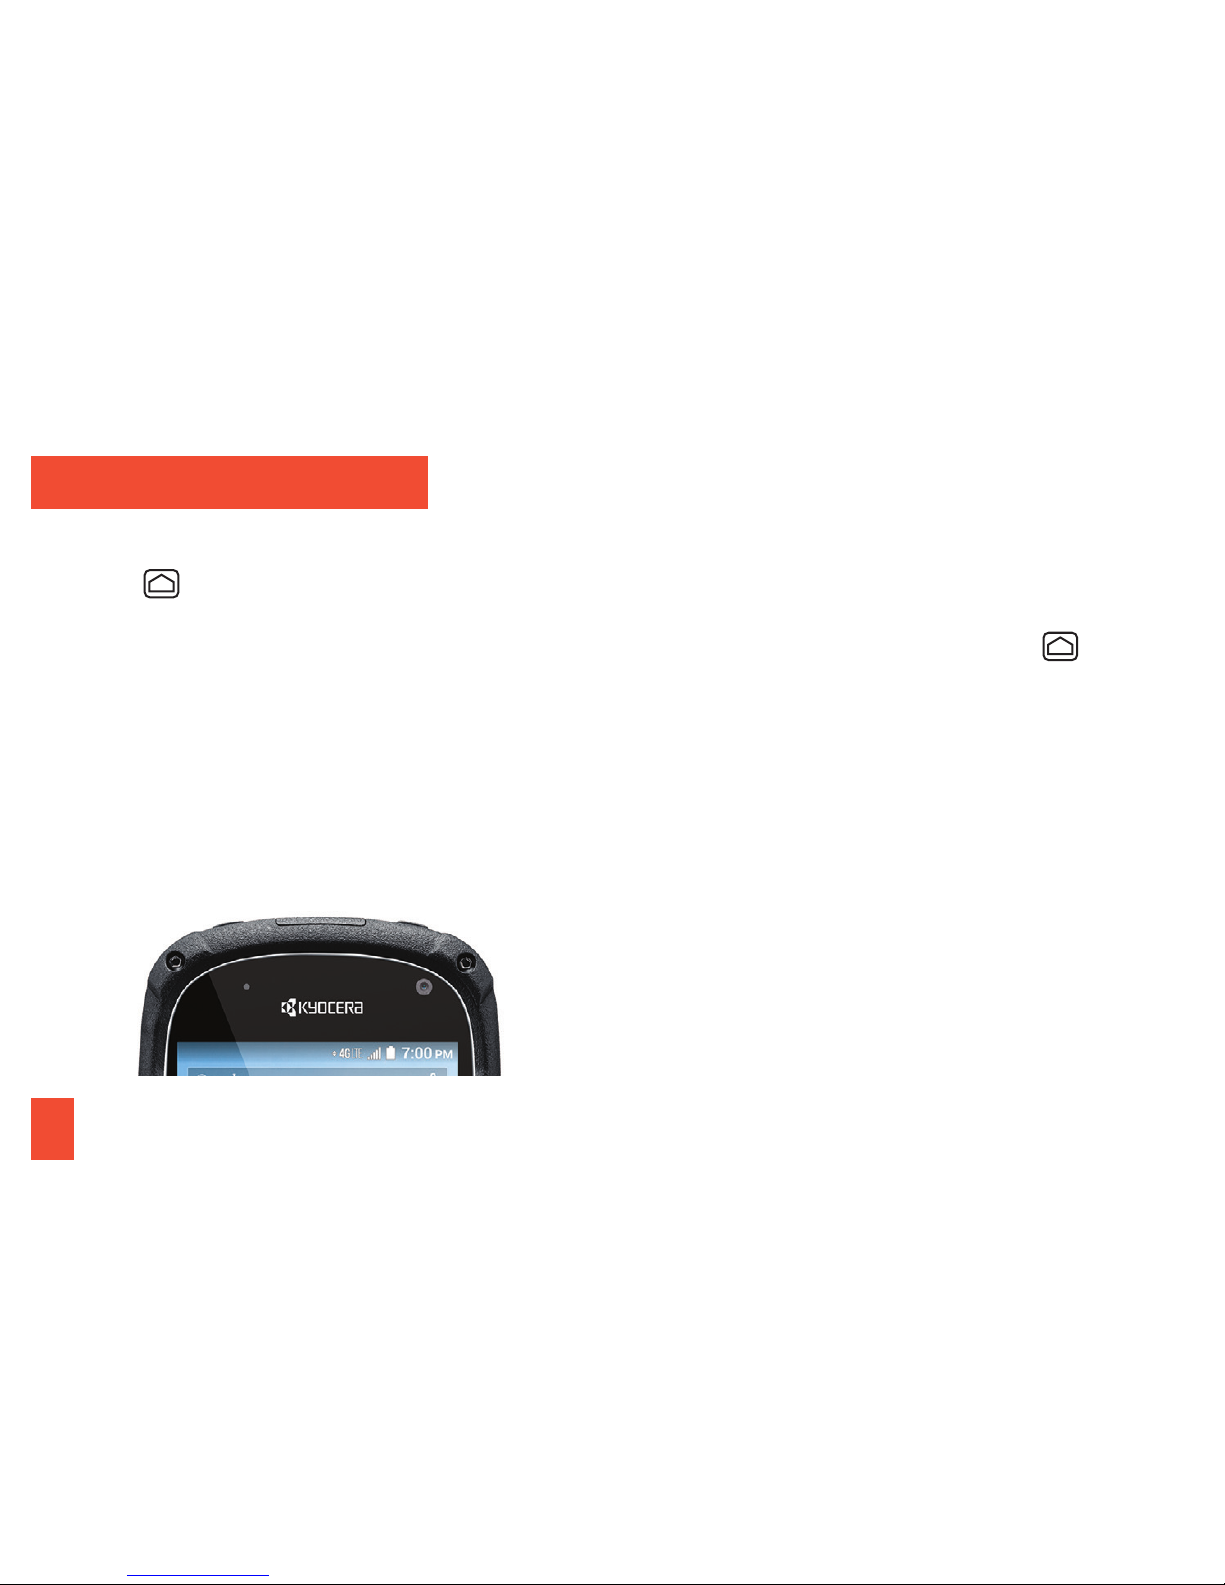
Speakers
Charger/
Accessory Jack
Headset Jack
Volume
Button
Direct
Connect
Button
Back Camera
Lens
Power
Connectors
Battery Cover
Lock
Power Button Speaker ButtonProximity Sensor/
Light Sensor
Smart Sonic
Receiver
(Internal)
Touchscreen
Recent Apps
Button
Back
Button
Self Camera
Lens
Camera
Flash
LED Indicator
Home
Button
Internal
Antenna
Internal
Antenna
SIM Card
Slot (Internal)
Camera
Button
Primary
Microphone
Secondary
Microphone
Your Torque
XT
visit sprint.com/readynow for more information to get your phone up and running
5
Install the Battery
1. Turn the battery cover lock counter-
clockwise to the unlocked position.
2. Insert your thumbnail or ingernail into the
slot and lift the battery cover gently.
3. Insert the battery, contacts end irst, and
gently press the battery into place.
4. Replace the battery cover, making sure all
the tabs are secure and there are no gaps
around the cover.
5. Turn the battery cover lock clockwise to
the locked position.
Charge the Battery
1. Open the cover of the charger/accessory
jack and plug the smaller end of the USB
cable into it.
2. Plug the other end of the USB cable into
the charger, and then plug the charger
into an electrical outlet.
Turn the Phone On
• Press and hold the Power Button to turn
your phone on.
Turn the Screen On and O
• To turn the screen on and o, press the
Power Button.
Unlock the Screen
• Touch and swipe your inger toward .
Turn the Phone O
• Press and hold the Power Button and then
touch Power o > OK to turn the phone o.
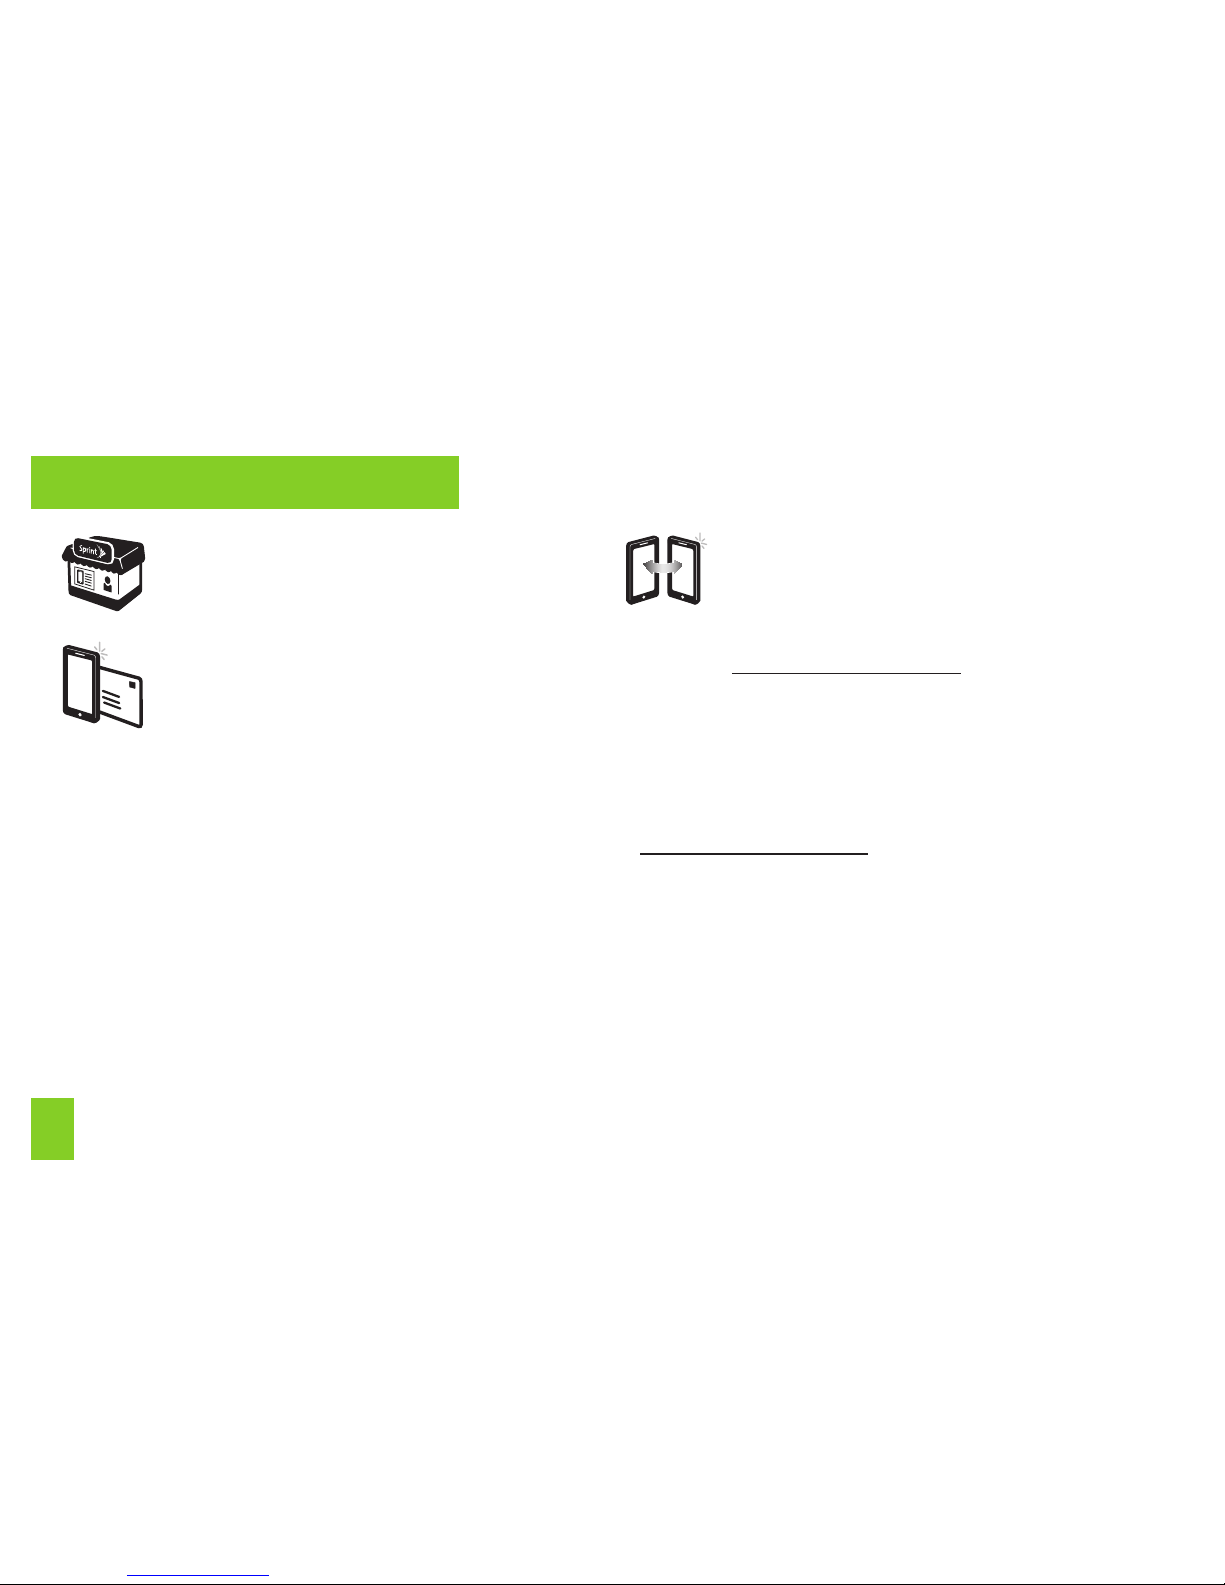
Before you start: Visit sprint.com/readynow
to learn about transferring contacts,
calendars, and more from your old phone.
Get Your Phone Ready
6
If you purchased your phone at a
Sprint Store, it is probably
activated and ready to use.
If you received your phone in the
mail, and it is a new Sprint account
or a new phone number, your
phone is designed to activate
automatically. When you turn the
phone on for the irst time, you
should see a Hands Free Activation
screen, which may be followed by a
PRL Update screen and a Firmware
Update screen. Follow the
onscreen instructions to continue.
If you received your phone in the
mail and it is going to be activated
on an existing number (you’re
swapping phones), go to
sprint.com/activate and follow the
instructions. When you have
inished, make a phone call to
conirm your activation.
If your phone is still not activated, visit
sprint.com/support for assistance. If you
do not have access to the Internet, call
Sprint Customer Service at 1-888-211-4727
from another phone.
Activate Your Phone
visit sprint.com/readynow for more information to get your phone up and running
7
Once activated, you may want to conigure
certain options, including setting up your
Google™ Account.
Connections Optimizer
Following phone activation, you may see a
Connections Optimizer notice. Read the
notice and touch I Agree to allow your
phone to connect automatically to the best
available data network, including Wi-Fi.
Note: You can turn o Connections Optimizer
at any time. Press
> > Settings >
More... > Mobile networks > Connections
Optimizer and then uncheck
Connections Optimizer.
Set Up a Google Account
Setting up a Google Account lets you
access many features of your Android
phone. It also allows you to sync Google
contacts and apps you may previously
have used.
1. Press > > Settings >
Add account > Google.
2. Follow the prompts to set up a new
Google Account or sign in to an existing
Google Account.
Note: You do not need to sign up for a
Google Account to use your phone; however,
to download content from the Google Play™
Store app, you must link your phone to a
Google Account.
Set Up Your Phone
8
Home Screen
• Press to display your Home screen.
Notiications Panel
• When you see a notiication icon on the left
side of the status bar, drag the status bar
down to display the Notiications panel.
• Touch a notiication to open the related
application, such as messaging, call list,
or event.
• To close the panel, drag the bottom bar up.
Viewing Extended Screens
Your phone’s Home screen extends
horizontally up to six additional screens.
• To display the Home screen, press from
any screen.
• To view extended screens, lick the screen
left or right.
Add Items to Your Screens
1. Touch and hold an empty area on a
Home screen.
2. Slide the Apps or Widgets screens to ind
the item you wish to add.
3. Touch and hold an app icon or widget and
drag it to a Home screen thumbnail where
you want to add it.
4. Release your inger.
Your Home Screen
visit sprint.com/support for guides, tutorials and more
9
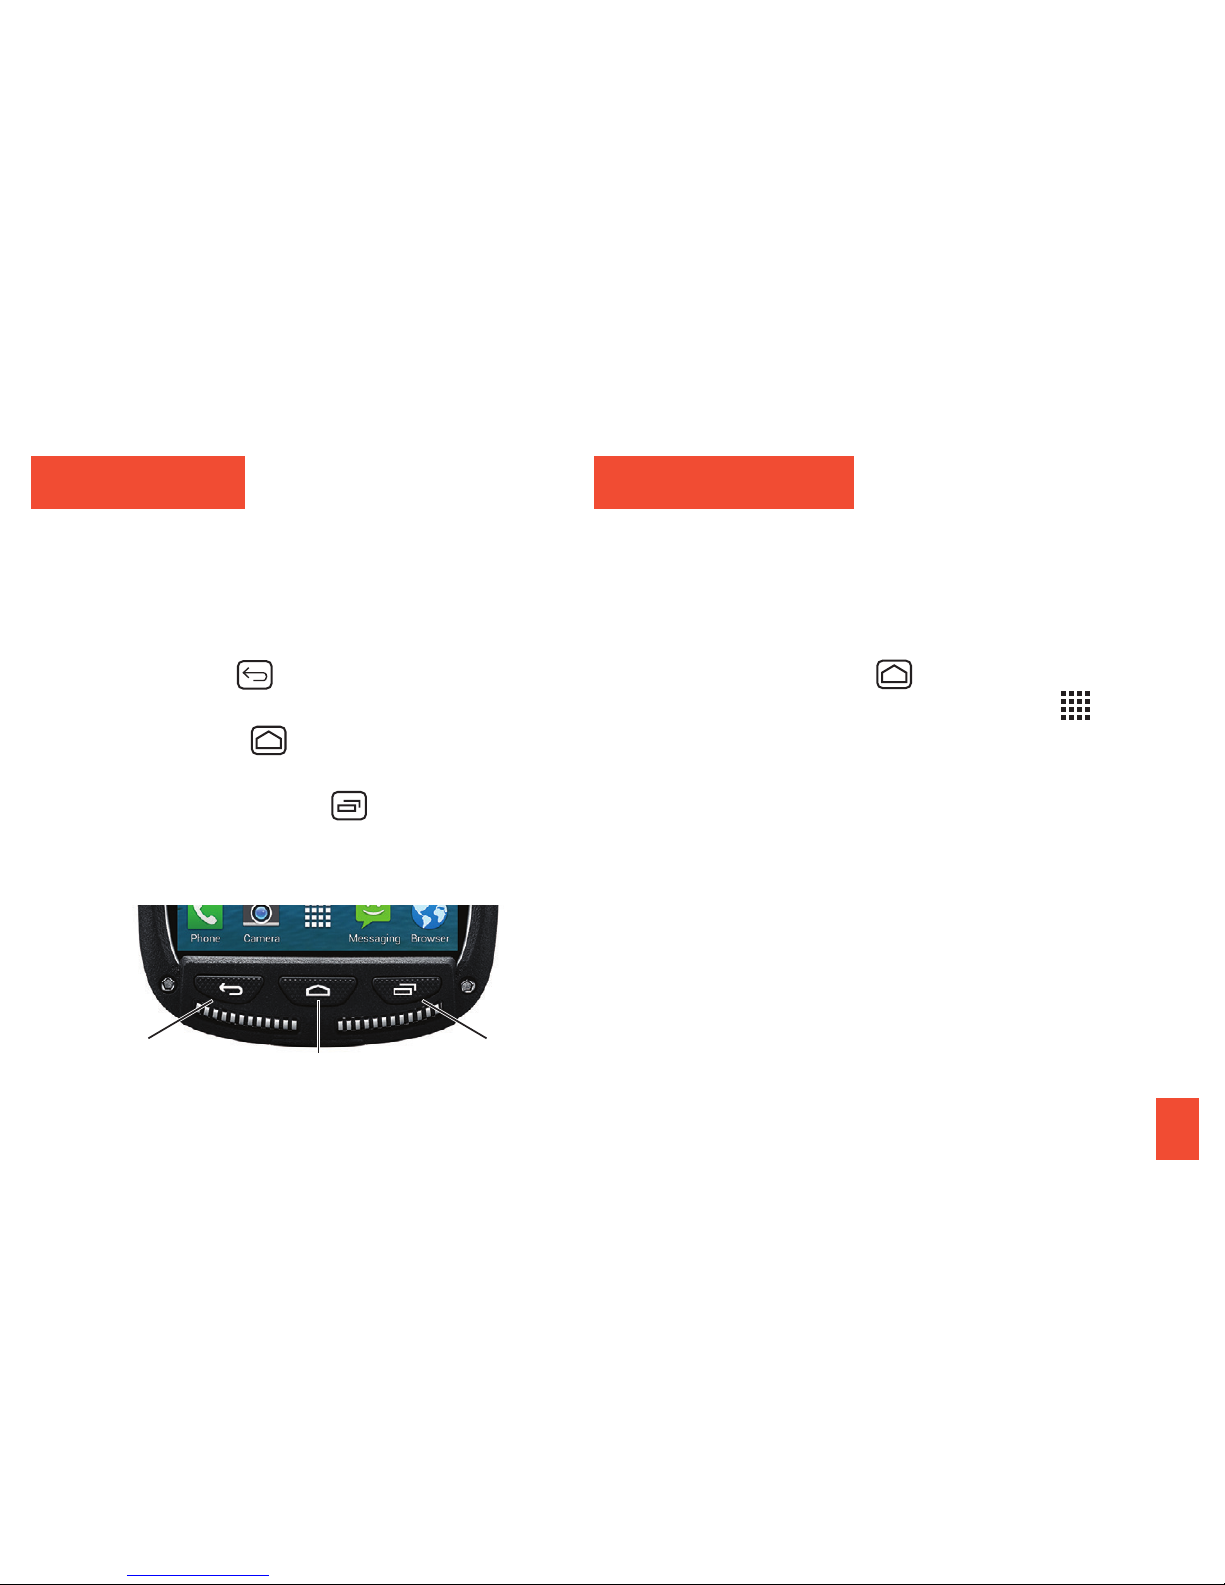
Function Buttons
Just below the touchscreen, you’ll ind a
row of three buttons that let you perform
speciic functions.
• Back Button ( ) – Press to return to the
previous screen view.
• Home Button ( ) – Press to return to the
Home screen.
• Recent Apps Button ( ) – Press to display
recently used apps.
Open Apps
• If an application is on one of your home
screens, just touch it to open it.
• If an application is not available from your
Home screen, press
(if you’re not
already on the Home screen), touch to
display the applications list, and then touch
the application from the alphabetical list.
You may have to scroll to the side to ind
the application you’re looking for.
Recent Apps
Button
Home Button
Back
Button
Buttons Open Apps
10
Touchscreen Keyboards
Your phone lets you choose between two
onscreen keyboards: Google and Swype®.
Language and Keyboard Settings
You can change your text entry options
through the Language & input settings
menu. These may include selecting
touchscreen keyboard options (Google
keyboard or Swype), word prediction, user
dictionary, and locale (language and region).
• Press > > Settings >
Language & input and then touch
an option.
• To change the language for your
keyboard, touch Language.
• To select a keyboard type, touch Default
and select an input method.
• To edit your word suggestion dictionary
for the multi-touch keyboard, touch
Personal dictionary.
• To change keyboard settings, touch
next to Swype or Google Keyboard.
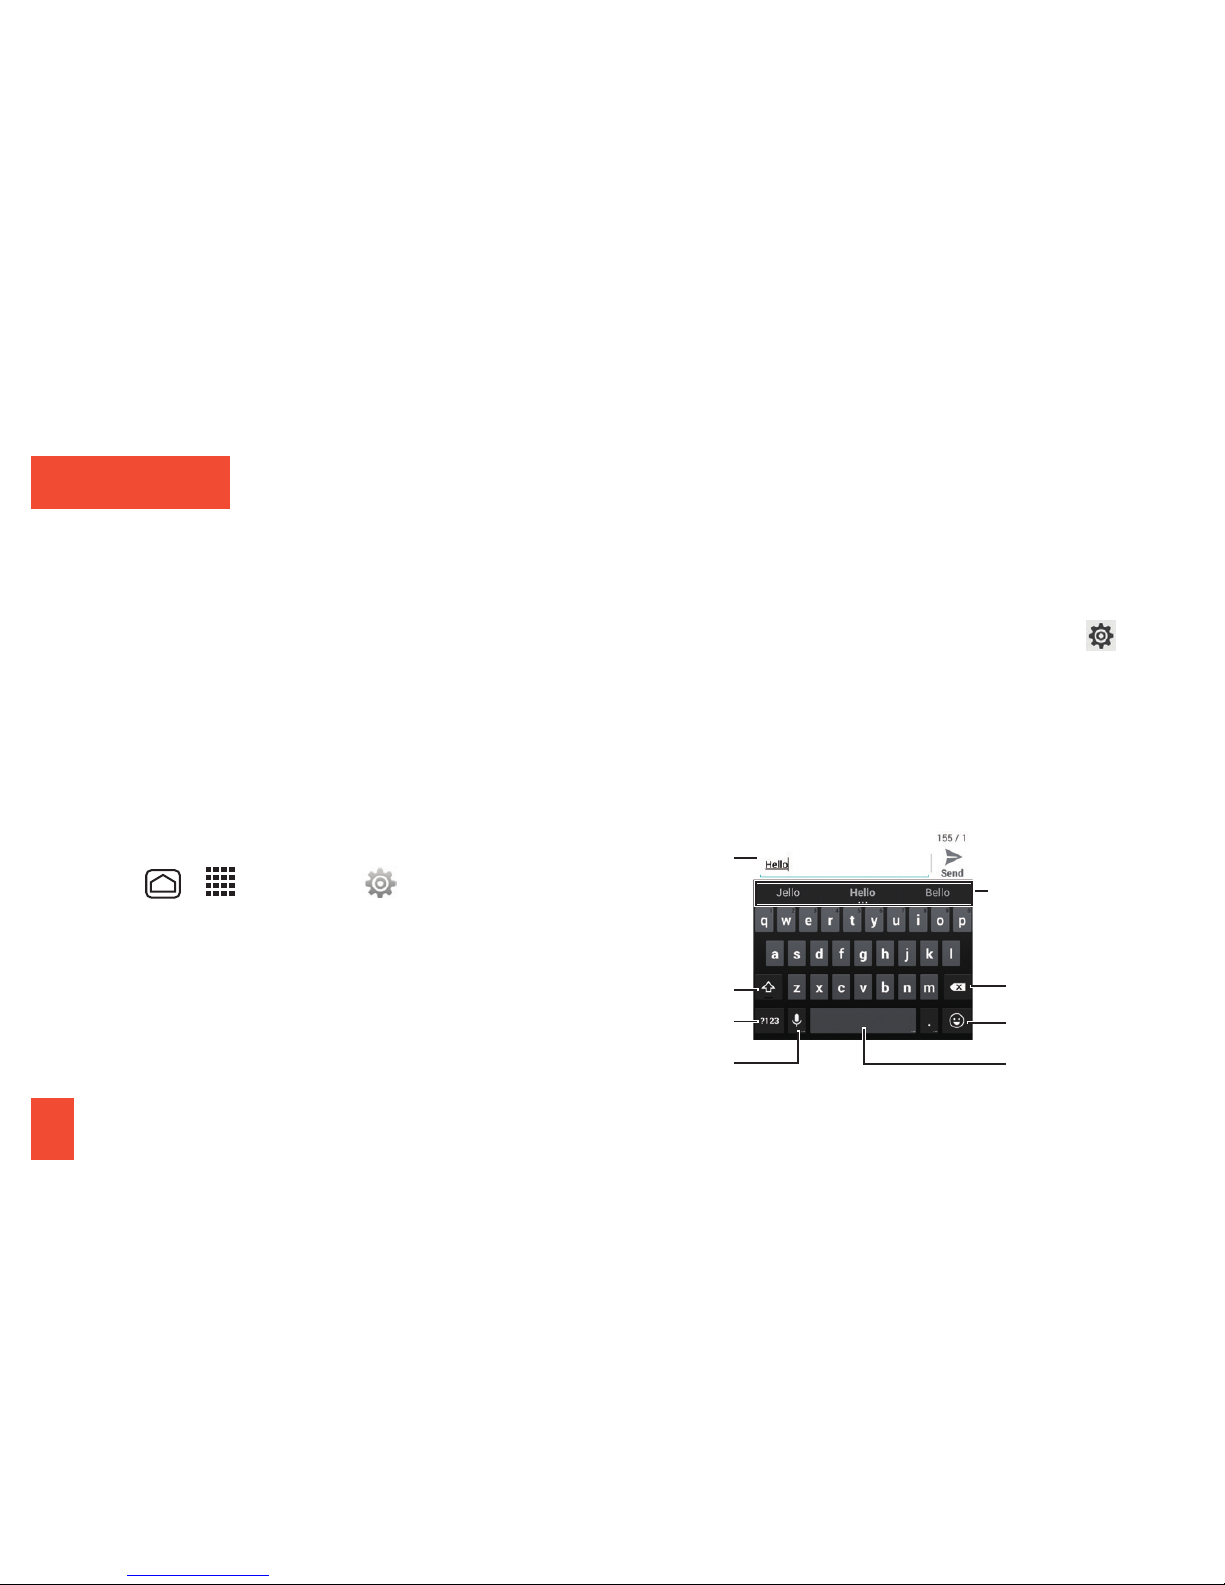
Google Keyboard
Use the Google keyboard to enter text one
letter at a time.
Smiley
Shift
Word Suggestions
(Touch to select.)
Text Mode
Backspace
Space
Voice Input
Text Field
Typing
 Loading...