

Page 1
Owner’s Manual
(
for Thailand
)
R12T
R12T
Phone
R12-PHS_Cover1-4.pm6 7/25/00, 4:25 PM1
Page 2
ii
● This phone uses radio waves. Your call may be cut off if you are in a
location that cannot be reached by radio waves. Even when you are
inside a service area, your call may be still cut off if you are in a place that
cannot be reached by radio waves (close to a building wall, a metal door
or electrical appliances).
● In public places, in crowded or in quiet venues, use your phone with
consideration for the people around you so as not to cause offence.
● Because your phone uses digital signals, it has excellent privacy
characteristics. However, your phone communicates via radio waves and
you need to be aware that it may still be possible for a third party to
intercept your calls.
Before You Use Your Phone
Precautions
● Read these precautions carefully before you use your phone to ensure
that you use the phone safely and correctly.
● The precautions listed here are intended to prevent injury to the phone
user and to others, and to prevent unintended damage to property.
■ The designations below indicate the severity of the injury or damage that
may be incurred if the designated precautions are not followed and the
product is used incorrectly.
DANGER
Indicates that, if this warning is ignored, improper
handling of the product is likely to result in death
or serious injury.
W ARNING
Indicates that, if this warning is ignored, improper
handling of the product could result in death or
serious injury.
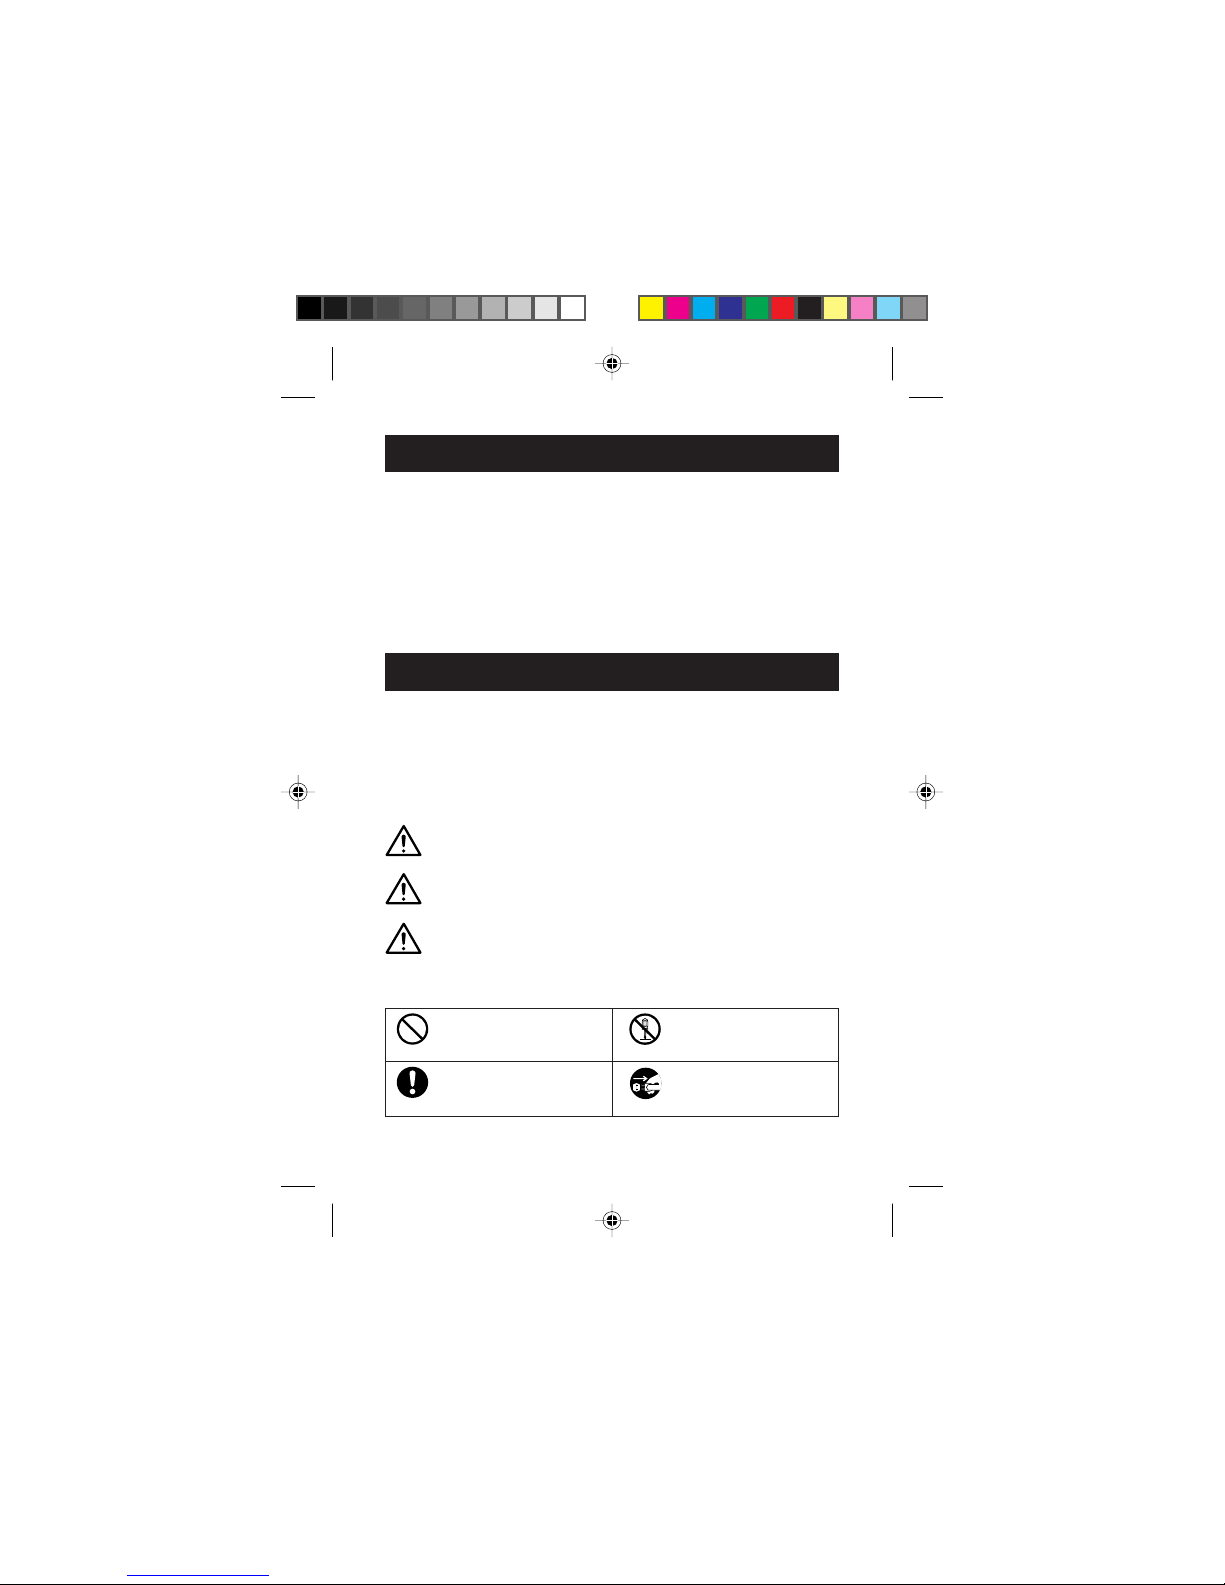
■ The icons shown below are used to indicate instructions that should be
observed.
CAUTION
Indicates that, if this warning is ignored, improper
handling of the product could result in personal
injury or material damage.
Do not
disassemble
Essential
Prohibited
Circular icons with a diagonal
bar notify the user that the
action indicated is prohibited.
Filled circles notify the user
of an action that must be
performed.
This icon indicates that the
device must not be
disassembled.
Unplug
This icon indicates that the
device must be unplugged
from the power socket.
R12-PHS_Caution.p6 7/24/00, 2:15 PM2
Page 3
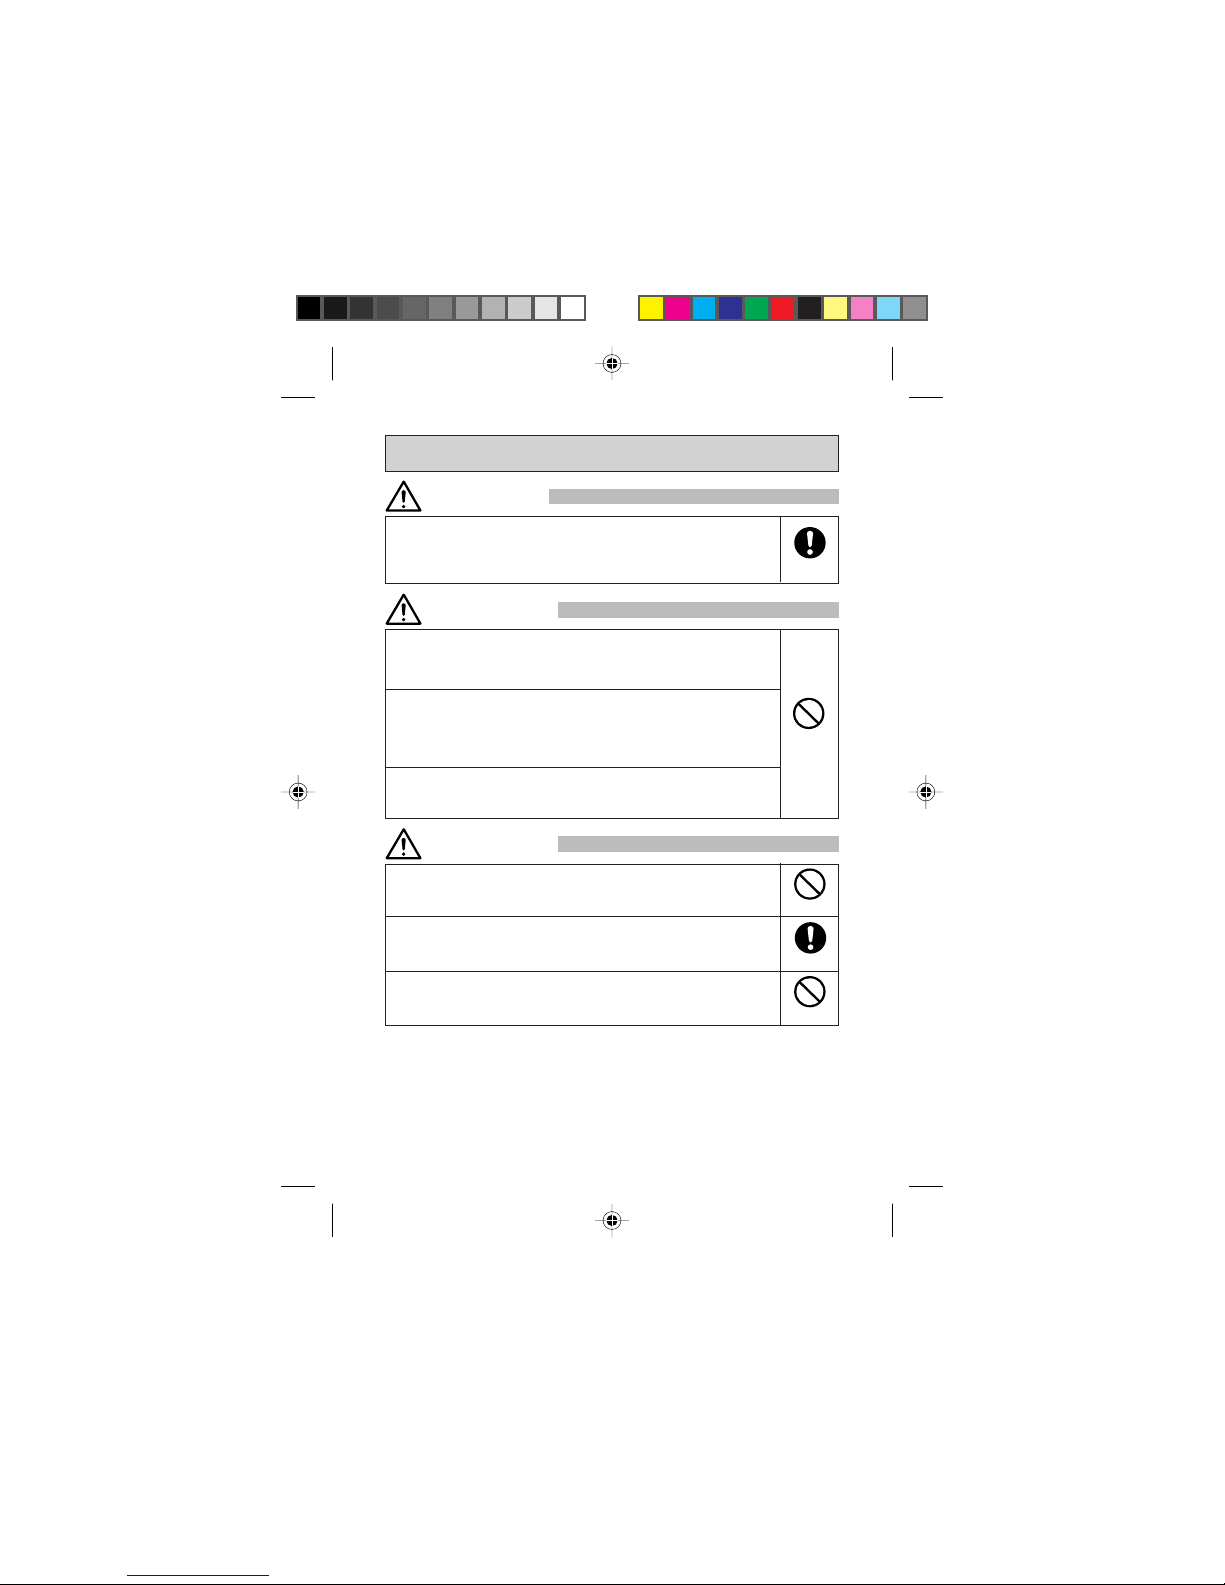
iii
Only use the battery and AC adapter specified by our brand for use
with this phone. The use of a battery or AC adapter other than that
specified could result in the battery leaking fluids, overheating,
bursting or igniting.
Essential
Do not subject this product to strong shocks or vibrations or throw it
around, as this could result in the battery leaking fluids,
overheating, bursting or igniting, and could damage the phone and
cause faults or a fire.
Do not place the battery, the phone itself or the AC adapter in a
microwave oven or pressure cooker, as this could result in the
battery leaking fluids, overheating, bursting or igniting, or could
cause the phone or AC adapter to overheat, emit smoke, or ignite,
or could damage the circuitry inside the device.
Do not use this product in places where there are inflammable
gases, as this could cause the gases to ignite or result in device
damage, faults or a fire.
Prohibited
General Precautions When Using the Phone , Battery and AC adapter
DANGER
WARNING
Do not store this product in a very damp, dusty or hot location, as
this could result in faulty operation.
Store this product out of the reach of small children, as it could
cause injury if used as a toy.
Do not leave this product on an unstable or sloping surface, as it
could fall and be damaged or cause injury.
CAUTION
Prohibited
Essential
Prohibited
R12-PHS_Caution.p6 7/24/00, 2:15 PM3
Page 4
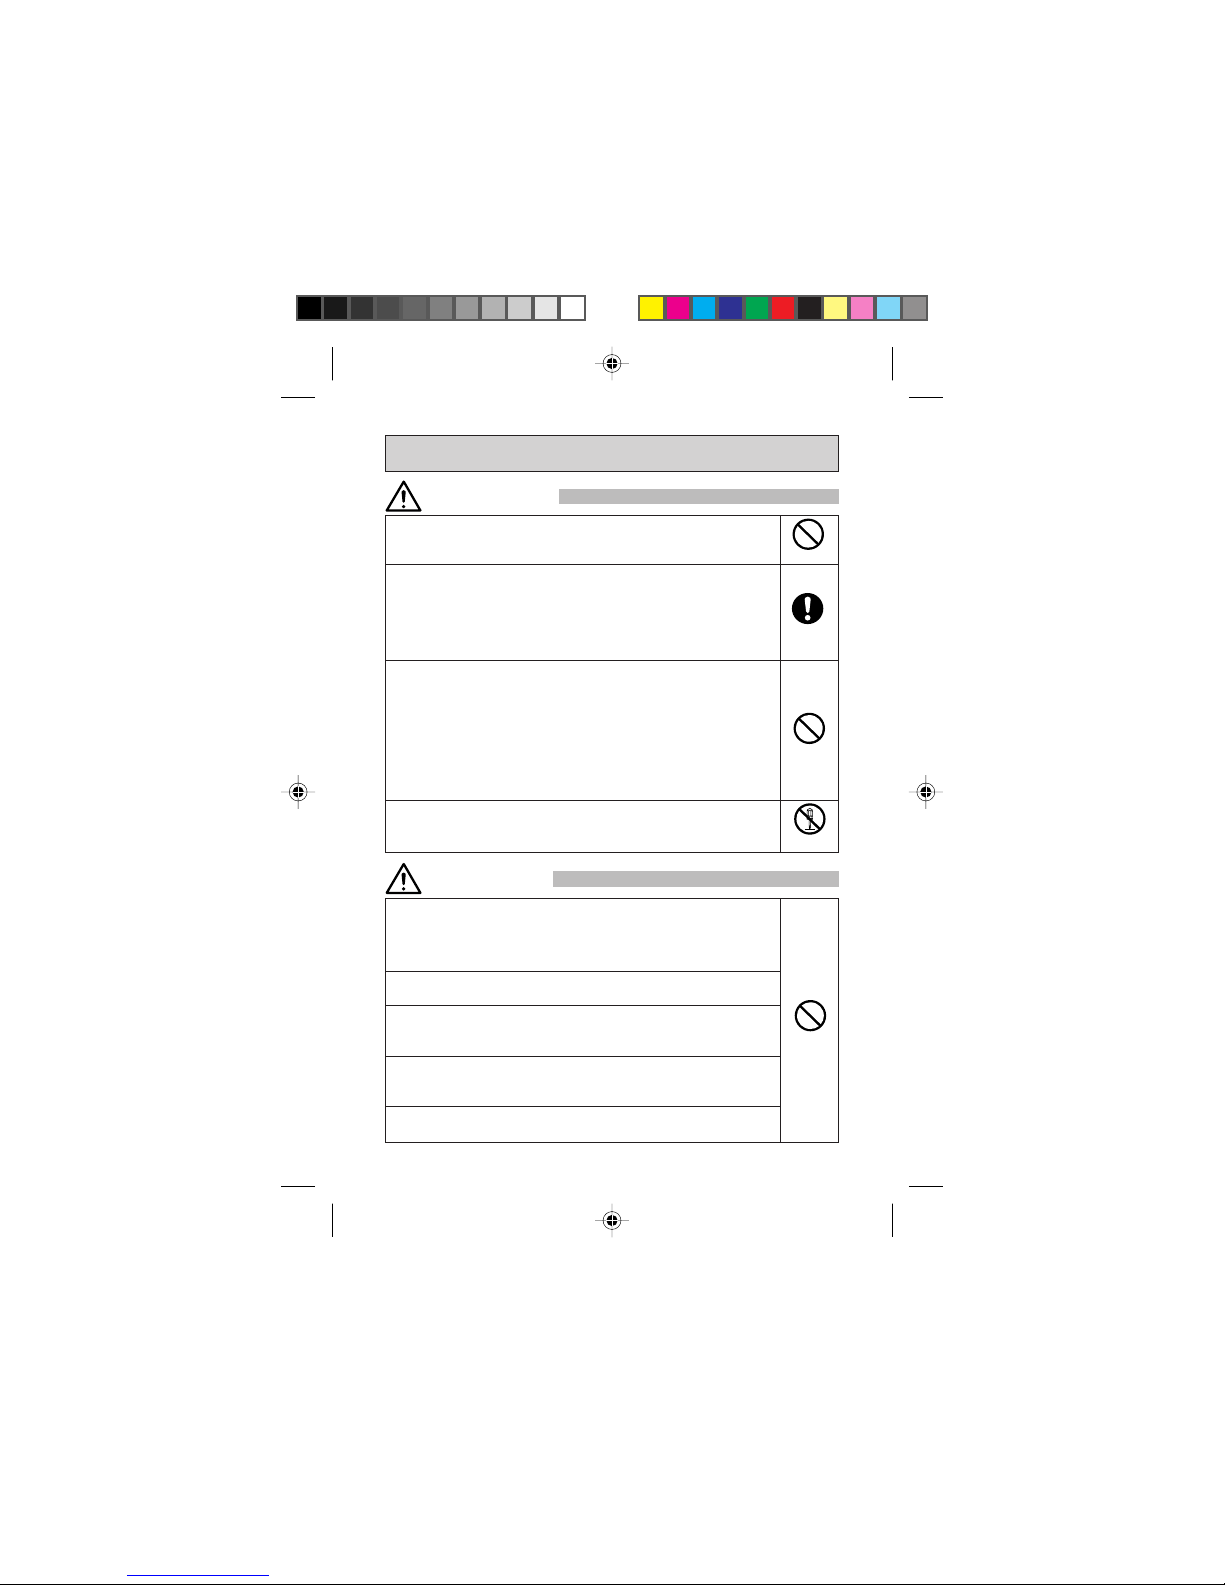
iv
Do not use your mobile phone while driving, as this is dangerous and
could cause a traffic accident. Pull over and park in a safe place
before using the phone.
Switch off the phone when you are in places where the use of mobile
phones is prohibited, such as in an aircraft or hospital. Mobile
phones can adversely affect the operation of electronic
instrumentation and medical equipment. For information on using
your phone in a medical facility, refer to the directives provided by
the facility itself.
Do not use your mobile phone around electronic devices that use very
weak signals or require very precise control. Radio wave interference
can cause malfunctions or other problems in electronic devices.
Examples of affected devices:
Hearing aids, pacemakers and other electronic medical aids, fire
alarms, self-opening doors and other automatic control devices, etc.
For more information on the effects of mobile phones on pacemakers
and other electronic medical aids, check with the device
manufacturer or supplier.
Do not attempt to disassemble or modify your mobile phone as this
could cause injury or electric shock and could damage the phone.
Precautions When Using the Mobile Phone
Prohibited
Prohibited
Essential
Do not
disassemble
WARNING
CAUTION
When the phone is used in some types of car, it could possibly affect
the operation of electronic components in the car. Do not use the
phone if it adversely affects the safe operation of the vehicle in any
way.
Do not use your mobile phone in crowded places as the antenna
could strike someone and cause injury.
Keep your mobile phone away from magnetic cards. Emissions from
the phone can erase the information stored on floppy disks and cash
cards or credit cards.
Keep sharp metal objects such as thumbtacks away from the
earpiece speaker. The dynamic speaker in the earpiece is magnetic
and could attract sharp objects, causing injury.
Keep the mobile phone dry. Water or other fluids entering the phone
could cause overheating, electric shock or damage to the phone.
Prohibited
R12-PHS_Caution.p6 7/24/00, 2:15 PM4
Page 5

v
Do not dispose of the battery by throwing it in a fire, as this could
cause the battery to ignite or burst.
If you are having difficulty connecting the battery to your mobile
phone, do not use force as this could cause the battery to leak
fluids, overheat or ignite.
Do not short-circuit the battery terminals, and do not touch the
terminals with metal objects such as paper clips or needles. Also,
do not carry or store the battery with objects such as metal
necklaces. Any of these could cause the battery to leak fluids,
overheat, burst or ignite.
Do not solder the terminals as this could cause the battery to leak
fluids, overheat, burst or ignite.
Any fluid from inside the battery coming into contact with the eye could
cause loss of vision. If this occurs, flush the affected eye with clean
water (without rubbing) and seek immediate medical treatment.
Do not attempt to disassemble or modify the battery as this could
cause the battery to leak fluids, overheat, burst or ignite.
Do not use or store the battery in hot places such as near a fire or
heating appliance. This could cause the battery to leak fluids,
overheat, burst or ignite.
Essential
Do not
disassemble
Prohibited
If there are any noticeable changes in the battery while being used,
charged or stored (overheating, discoloration, deformation, etc.),
remove the battery from the phone or AC adapter and discard it.
Continued use of the battery in such conditions could cause the
battery to leak fluids, overheat, burst or ignite.
Any battery fluid coming into contact with your skin or clothing could
cause skin damage. Wash the fluid off immediately with clean
water.
If the battery is leaking fluid or producing any odor, move it away
from any naked flame as this could cause the leaking fluid to ignite,
resulting in a fire or in the battery bursting.
Essential
Prohibited
DANGER
WARNING
Prohibited
Precautions When Using the Battery
R12-PHS_Caution.p6 7/24/00, 2:15 PM5
Page 6

vi
Keep the battery dry. Moisture on the battery could cause the
battery to overheat, emit smoke or corrode.
Do not use or leave the battery in direct sunlight or in hot places
such as in a car on a hot day. This could cause the battery to leak
fluids and overheat, and could impair the performance or reduce the
lifetime of the battery.
Prohibited
Always use the AC adapter with a domestic power supply (eg.
220 V AC). The use of other voltages could cause an electric
shock, fire, or damage to the AC adapter.
Never short-circuit the AC adapter plug as this could cause an
electric shock, fire, smoke, or damage to the AC adapter.
Do not use the AC adapter if the power cord is damaged (core wiring
exposed or cut, etc.) as this could cause a fire or electric shock.
Clean off any dust on the power plug as this could cause a fire.
Do not place containers of water (jugs, etc.) near the AC adapter.
Water on the AC adapter could cause overheating, an electric
shock or damage to the devices.
If any water or other liquid gets into the AC adapter, immediately
unplug the power cord. Failure to do so could cause the AC adapter
to overheat or catch fire, or cause an electric shock or damage to
the AC adapter.
Do not attempt to disassemble or modify the AC adapter as this
could cause injury, an electric shock, fire, or damage to the AC
adapter.
Do not use the AC adapter in places with a lot of water vapour,
such as a bathroom, as this could cause an electric shock.
Do not touch the AC adapter, the power cord or the power socket
with wet hands as this could cause an electric shock.
Prohibited
Prohibited
Precautions When Using the AC adapter
Essential
Essential
CAUTION
Prohibited
Do not
disassemble
Unplug
DANGER
R12-PHS_Caution.p6 7/24/00, 2:15 PM6
Page 7

vii
General Notes on Cleaning and Maintenance
Always unplug the AC adapter before performing any cleaning or
maintenance. Failure to do so could cause an electric shock.
Do not place heavy objects on the power cord or attempt to modify
the power cord as this could cause an electric shock or fire.
Always grasp the AC adapter itself when you unplug the AC
adapter. Pulling on the power cord can damage the cord and cause
an electric shock or fire.
Prohibited
Do not splash water on the battery, phone or AC adapter.
The mobile phone, battery and AC adapter are not manufactured to waterproof
specifications. Do not use them in places where there is a lot of water vapour,
such as a bathroom, and take care to protect them from rain.
Use a soft, dry cloth to clean the battery, phone and AC adapter.
Wiping the battery, phone or AC adapter with a wet cloth could cause faults.
Also, solvents such as alcohol, thinners or benzine may remove the printed
lettering on the phone or cause discoloration.
Wipe the AC adapter plug clean occasionally with a dry cloth.
Soiled AC adapter plug result in a poor electrical connection which can cause
power loss. This can also prevent the AC adapter from recharging the battery
correctly.
Essential
Essential
CAUTION
Notes on the Mobile Phone
Do not expose the phone to extremely low or high temperatures.
Use the mobile phone in temperatures between 5°C and 35°C and a humidity
of 35% to 85%.
Use the phone as far away as possible from equipment such as conventional
phones, TVs, radios and electronic office equipment, as the mobile phone can
affect the operation of such equipment.
R12-PHS_Caution.p6 7/24/00, 2:15 PM7
Page 8
viii
Store the battery in a cool, well-ventilated location that is not exposed to direct
sunlight.
The battery has a limited life.
However, the life of any battery is limited, and the amount of time for which a
battery can be used between recharges gradually decreases. If repeated
recharging fails to restore the battery's functionality, the battery life has expired
and should be replaced with a new battery of the specified type.
Do not dispose used batteries with ordinary household garbage.
Apply insulating tape to the battery terminals before you dispose of the battery.
Check with the relevant local authorities for the correct method for disposing of
your battery.
To avoid malfunctions, do not charge the battery in the following places:
• In direct sunlight
• Where the ambient temperature is below 5°C or above 35°C
• In humid or dusty locations or places subject to vibrations (this could cause
malfunctions)
• Near an appliance such as a TV or radio (this could impair picture or sound
quality).
Notes on the Battery
Notes on the AC adapter
R12-PHS_Caution.p6 7/24/00, 2:15 PM8
Page 9
Getting Started
Basic
Operations
Advanced
Dialing
Services
Appendix
Using the phone
as a cordless
phone
Using the
phone as a
transceiver
Using
Advanced
Functions
Table of Contents
ix
Introduction ......................................................................................... 1
Welcome .......................................................................................... 1
What is included in the box .............................................................. 1
Getting Started.................................................................................... 2
Getting to know your phone ............................................................. 2
Phone descriptions ...................................................................... 2
Technical data .............................................................................. 3
Charging the battery......................................................................... 4
Switching the phone ON and OFF ................................................... 5
Switching the phone ON .............................................................. 5
Switching the phone OFF ............................................................ 5
Reception Modes ............................................................................. 6
Switching between reception modes ........................................... 6
Reception mode table .................................................................. 7
Reception times for the various reception modes........................ 7
Basic Operations ............................................................................... 8
Making a call .................................................................................... 8
Inserting a pause into the telephone number .............................. 9
Dialling a Number with a Sub-address Number ............................... 10
Answering a call ............................................................................... 11
Missed calls ................................................................................. 11
Adjusting the earpiece volume ......................................................... 12
Redialing a recent number ............................................................... 12
Deleting numbers from the list ..................................................... 13
Dialing a number in the received calls list ........................................ 13
Deleting a number in the received call list ................................... 14
Advanced Dialing Services................................................................ 15
Storing a number in the phonebook ................................................. 15
Dialing a number in the phonebook.................................................. 16
Using two-touch dialing .................................................................... 17
Changing a phonebook entry....................................................... 18
Deleting a phonebook entry ......................................................... 18
Dial Lock........................................................................................... 19
Registering a Password ............................................................... 19
Setting dial lock ............................................................................ 20
Releasing dial lock ....................................................................... 20
Using key lock .................................................................................. 21
Releasing key lock ....................................................................... 21
MWI (Message Waiting Indicator) .................................................... 21
When a message has been recorded at the MWI service center...21
Using the phone as a cordless phone .............................................. 22
Before using the phone as a cordless phone............................... 22
Making a call .................................................................................... 22
Answering a call ............................................................................... 23
Using the phone as an extension phone .......................................... 24
R12-PHS_TOC.pm6 7/24/00, 2:15 PM1
Page 10

Making an extension call.............................................................. 24
Answering an extension call......................................................... 24
Placing an extension call on hold................................................. 25
Releasing a call that is on hold .................................................... 25
Using the phone as a transceiver ..................................................... 26
Before using the phone as a transceiver...................................... 26
Making a call .................................................................................... 26
Answering a call ............................................................................... 26
Using Advanced Functions ............................................................... 27
Displaying your own number ............................................................ 27
Changing the ring volume ................................................................ 27
Changing the ring pattern................................................................. 28
Changing the key tone ..................................................................... 30
Changing the auto-response time .................................................... 31
Changing the “NO SERVICE AREA” alert ........................................ 32
Changing the “HAND OVER” tone.................................................... 32
About the HAND OVER tone function.......................................... 33
Changing the backlight setting ......................................................... 34
Changing the “SEND OWN NUMBER” setting ................................. 35
Changing the sub-address setting.................................................... 36
Checking the extension number or transceiver number ................... 37
Appendix ............................................................................................ 38
Cleaning the exterior of the phone ................................................... 38
Changing the battery ........................................................................ 38
Changing the battery while waiting for a call................................ 38
Troubleshooting ................................................................................ 40
R12-PHS_TOC.pm6 7/24/00, 2:15 PM2
Page 11
1
Getting Started
Basic
Operations
Advanced
Dialing
Services
Using the phone
as a cordless
phone
Using the
phone as a
transceiver
Using
Advanced
Functions
Appendix
Introduction
Welcome
Thank you for purchasing the phone. Phone is a highly adv anced phone
that is designed to use a variety of advanced features in a simple, easyto-use way.
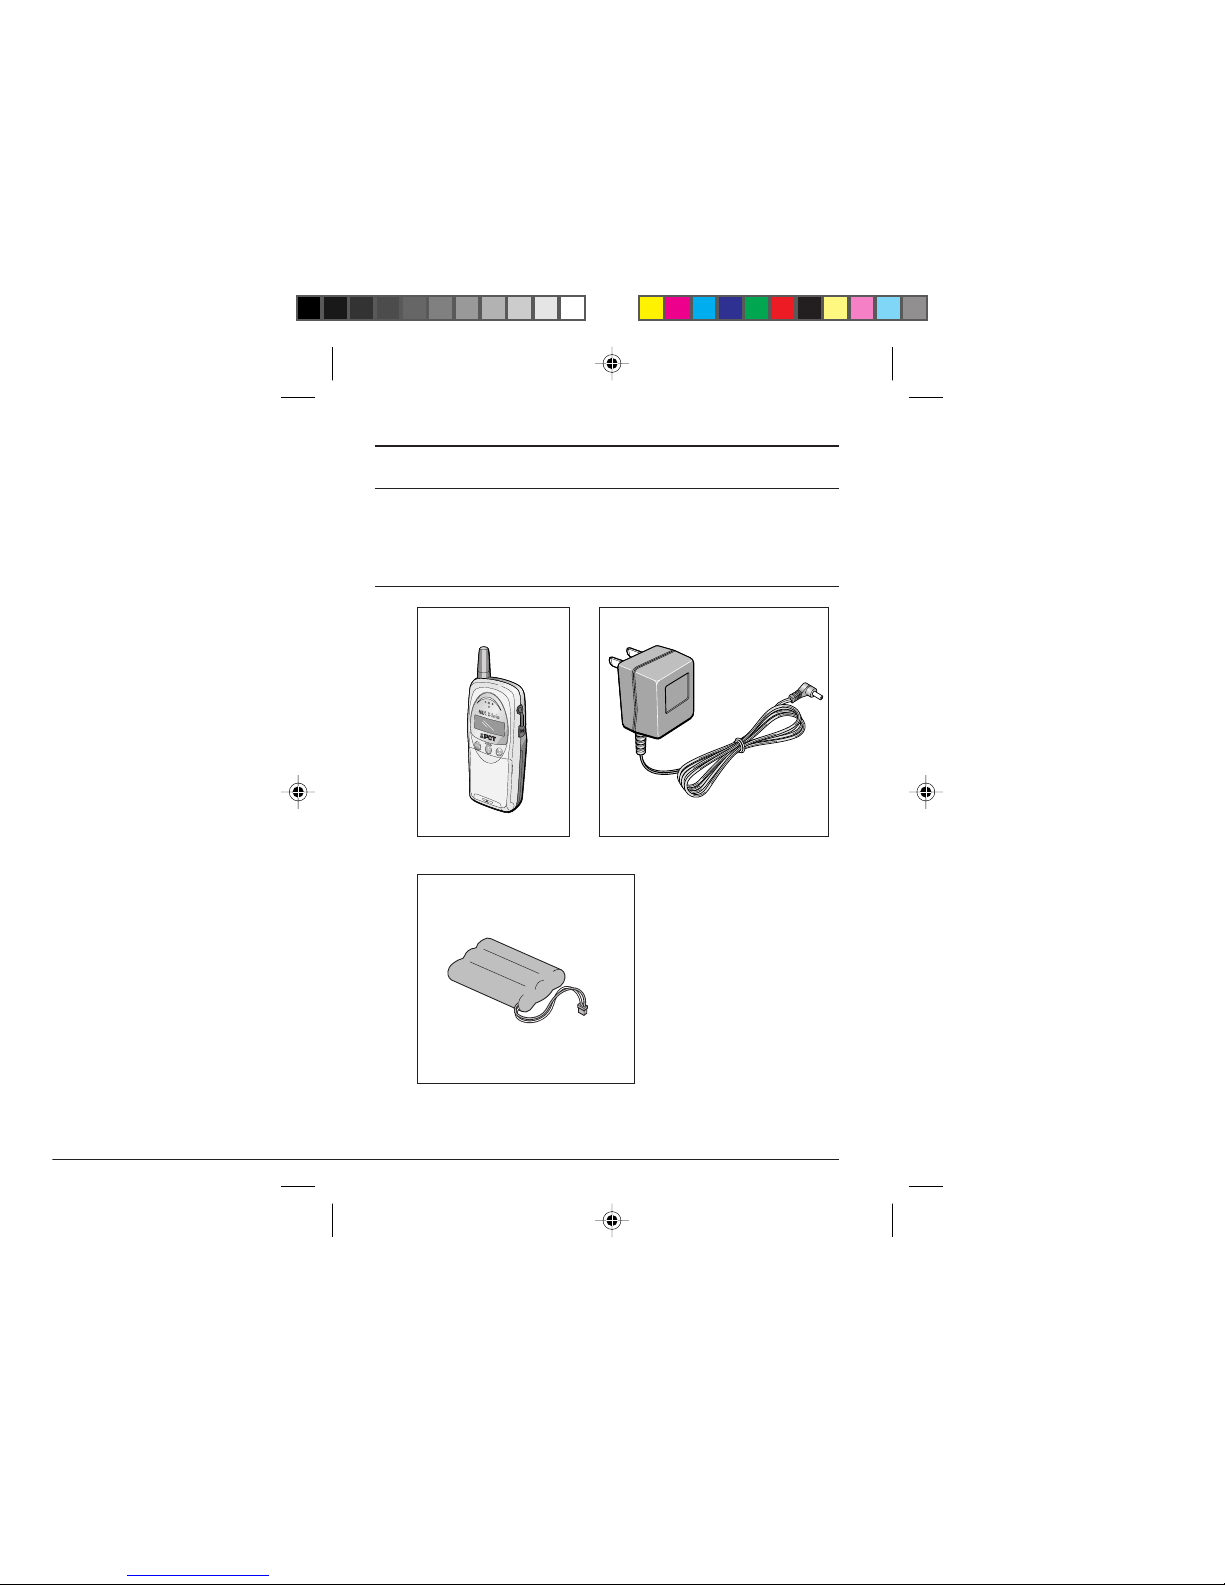
What is included in the box
• R12T phone • AC adapter (ADT-101)
• Battery Pack (Ni-Cd)(NC-12)
• Owner’s Manual
• Warranty
R12-PHS_Body.pm6 7/25/00, 2:33 PM1
Page 12

2
Getting Started
Getting to know your phone
Phone descriptions
Note:
Your phone uses a fixed type antenna that cannot be extended.
Do not try to extend the antenna, otherwise, you may damage it.
1
2
3
4
5
6
7
8
9
10
11
1. Antenna
2. Earpiece speaker
3. Display
4.
Telephone directory/Function key
5. CALL key
6. Number keys
7.
/Incoming call history/
Clear key
8. Microphone
9. Flip cover
10. END/Power ke y
11.
/Redial/Pause key
12.
Earphone microphone jack
13. AC adapter jack
Own phone number display key
Calling volume setting key
Calling sound type setting key
Key operation sound setting key
Auto response time setting key
No Service alert setting key
HAND OVER setting key
Display backlight setting key
Send own number setting key
Reception mode key
Sub-address setting key
Key lock setting and dial lock
setting key
Password setting key
Extension number/Transceiver
number confirmation key
13
12
R12-PHS_Body.pm6 7/25/00, 2:33 PM2
Page 13
3
Getting Started
Basic
Operations
Advanced
Dialing
Services
Using the phone
as a cordless
phone
Using the
phone as a
transceiver
Using
Advanced
Functions
Appendix
Getting Started
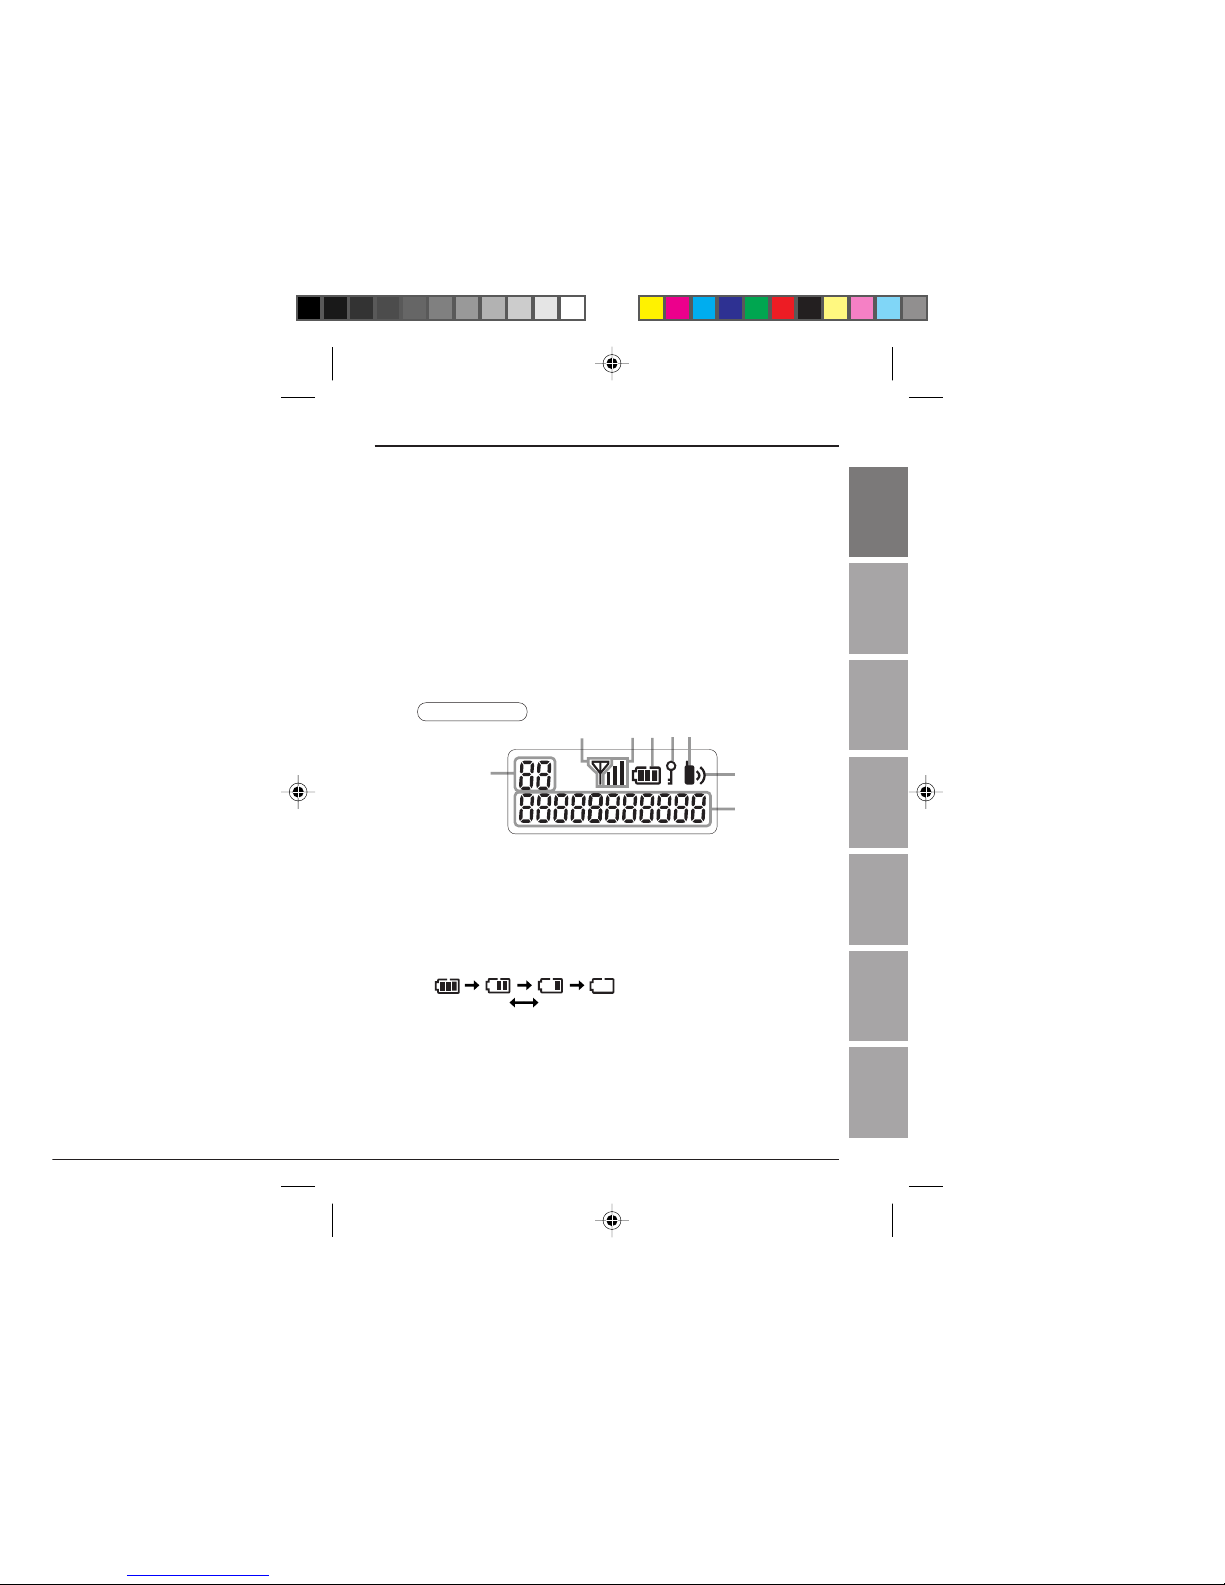
Phone display
1. Information display area
This area includes indicators for reception mode, missed calls, redial
numbers, received call numbers, phonebook numbers, etc.
2. Indicates when you are in a public service area.
3. Indicates the strength of signal reception.
This indicator goes off when using transceiver mode.
4. Battery mark
Indicates the battery level.
Enough to use Requires charging
5. Indicates that dial lock is on.
6. On-hook/Off-hook indicator
This indicator is lit when the phone is off-hook.
7. Indicates the ringer volume.
8. Phone display area
Displays phone numbers and other information.
1
345
6
7
8
2
Technical data
R12T (main unit)
Dimensions.........................................approx. (W)44 × (L)105 × (H)
26.3 mm (Excluding Antenna)
Weight ................................................approx. 93g
Power supply...................................... DC3.6V 350mAh
Continuous stand by time................... approx. 500 hours
Continuous talk time........................... approx. 5 hours
AC adapter (ADT-101)
Input ...................................................AC220V 50/60Hz
Output.................................................DC 9V 100mA
Getting Started
R12-PHS_Body.pm6 7/24/00, 2:16 PM3
Page 14

4
Getting Started
Charging the battery
Before using your phone for the first time, charge the battery for eight
hours.
1. Connect the AC adapter to a power source and insert the AC
adapter plug into the phone.
The battery mark on display will start to blink.
2. When the battery is fully charged, remove the AC adapter plug.
The battery mark on the phone display will blink while the phone is
charging, and then will be stop the blinking when the phone is fully
charged.
When the battery power is low, all of the bars of the battery mark will
disappear and only the frame around the battery mark will be shown. If
you are in a call, an alert tone is emitted to let you know the battery
power is low .
Recharge the battery before using the phone.
Notes:
• If you feel that the battery time is getting shorter, the battery may
be experiencing the memory effect. If this occurs, use the phone
until the battery is fully used all the bars of the battery mark disappear and only the frame around the battery mark is lit. Then charge
the battery for 8 hours. This should restore the battery to its full
capacity again.
• Normally, the battery is very sensitive to the surrounding tem-
perature. Therefore, if you use the phone, or charge the battery, in
conditions where it is subject to extreme heat or cold, you may
not get the best performance from the battery.
R12-PHS_Body.pm6 7/24/00, 2:16 PM4
Page 15

5
Getting Started
Basic
Operations
Advanced
Dialing
Services
Using the phone
as a cordless
phone
Using the
phone as a
transceiver
Using
Advanced
Functions
Appendix
Switching the phone ON and OFF
Switching the phone ON
Press the key until the phone display backlight comes on.
The phone will emit a tone when the power is switched on.
The display backlight will go out after approximately 10 seconds.
Notes:
• Even if you have set the backlight setting to OFF, the
backlight will come on when the phone is switched on.
• When dial lock is on, the
indicator is displayed when you turn
on the phone.
• Dial lock is released when you enter the password you set for dial
lock function.
Switching the phone OFF
Press the key until the phone displa y goes out.
The phone will emit a click sound when the power is switched off.
Note:
If you have turned dial lock on, you can switch off the phone by
pressing the
key.
Getting Started
Getting Started
R12-PHS_Body.pm6 7/24/00, 2:16 PM5
Page 16

6
Reception Modes
You can select one of the following six reception modes to suit your
situation.
PubLIC (Public) Choose this mode when you are outdoors and sim-
ply want to use the phone as a mobile phone.
HouSE (House) Choose this mode when you want to use the phone
as a digital cordless extension phone when you are
at home. (However, you must register the phone in
the home base unit in advance.)
trn (Transceiver) Choose this mode when you want to use the phone
as a transceiver. (However, you must register the
phone in the home base unit advance.)
Pub-HouSE Choose this mode to automatically have the
(Public-House) phone switch between Public and House modes.
(However, you must register the phone in the home
base unit in advance.) If you make a call in this mode ,
the phone uses a public phone line if possible.
HouSE-Pub Choose this mode to automatically have the
(House-Public) phone switch between House and Public modes.
(However, you must register the phone in the home
base unit in advance.) If you make a call in this mode ,
the phone uses the house phone line (via the home
base unit) if possible.
trn-Pub Choose this mode to automatically have the
(Transceiver-Public) phone switch between Transceiver and Public
modes. You can use the phone to make and receiv e
call in Transceiver mode, and also receive calls from
a public phone line. Ho wev er, y ou cannot make calls
to a public phone line. (However, you must register
the phone in the home base unit in advance.)
Switching between reception modes
You can change the reception mode while you waiting in a call.
1
Press and hold down the key.
When “F_” appears in the information area of the display release the ke y.
2
Press the key.
The indicator for the reception mode you are using blinks.
Note:
If they have not been registered on the home base unit, only one will
blink and you will not be able to switch to another reception mode.
Getting Started
R12-PHS_Body.pm6 7/24/00, 2:16 PM6
Page 17

7
Getting Started
Basic
Operations
Advanced
Dialing
Services
Using the phone
as a cordless
phone
Using the
phone as a
transceiver
Using
Advanced
Functions
Appendix
Getting Started
Getting Started
3
Press the and keys to select a reception mode.
1: Public mode (When you are in the Public service area, a “P” is dis-
played in the information area.)
2: House mode (When you are in the House service area, an “H” is
displayed in the information area.)
3: Transceiver mode (A “t” is displayed in the information area.)
4: Public-House mode (When you are in both the Pub lic and House ser-
vice areas, “PH” is displayed in the information area.)
5: House-Public mode (When you are in either the House or Public ser-
vice areas, “HP” is displayed in the information area.)
6: Transceiver-Public mode (When you are in the Public service area,
“tP” is displayed in the information area.)
4
Press the key.
The phone returns to the display the key was pressed.
Reception mode table
Reception times for the various reception modes
Public mode: Approx. 500h
House mode: Approx. 500h
T ransceiv er mode: Approx. 100h
Public-House mode: Approx. 250h
House-Public mode: Approx. 250h
T ransceiv er-Public mode:Approx. 90h
Note:
The reception times above are the average times for the continuous
reception times when the phone is waiting for a call and no calls or
other operations are made using the phone. (The reception times
will be shorter if the phone moves outside the service area or the
reception signal is weak.)
Public mode P Off
House mode H Off
Transceiver mode t
Public-House mode PH
-
HP-Off
House-Public mode HP H
--
P Off
Transceiver-Public mode tP t
-
Out of
Public
Area
Out of
House
Area
Out of Public
and House
Areas
Within
Area
R12-PHS_Body.pm6 7/24/00, 2:16 PM7
Page 18

8
Making a call
Make sure that the reception signal is sufficient and that at least one bar
is shown on the signal indicator.
1
Open the flip cover.
The backlight of the display will come on.
2
Enter the telephone number, including
the full area code.
If you make a mistake entering a number,
press the
key until the incorrect number
is deleted, then enter the correct number. To
re-enter the whole telephone number from the
beginning, press the
key then enter the
correct number.
The telephone number can be a maximum of
32 digits in length. If the number e xceeds 11
digits, the numbers will scroll to the left as
you enter additional numbers.
3
Press the key.
• The telephone number you entered scrolls
to the left and the phone dials the number.
While the number is being dialed, the telephone number on the display blinks.
• After you are connected to the other party,
the amount of time connected is shown on
the display.
The connection time can be displayed for
up to 999 minutes 59 seconds. (The actual connection time may be different.)
• The connection time display on that ap-
pears on display when you are using the
phone is only a guide.
4
When you are finished calling, terminate the connection.
Press the key to terminate the connection.
The connection is terminated and the connection time display stops. Pressing the
key again will clear the connection time display from the panel display.
Basic Operations
Example:
Display after 1 min. 1
sec.
R12-PHS_Body.pm6 7/24/00, 2:16 PM8
Page 19

9
Getting Started
Basic
Operations
Advanced
Dialing
Services
Using the phone
as a cordless
phone
Using the
phone as a
transceiver
Using
Advanced
Functions
Appendix
Basic Operations
5
Close the flip cover.
You can also ter minate the connection by
closing the flip cover.
Five seconds after the flip cover is closed,
the phone will emit a click and the call is disconnected.
For the five seconds after the flip cover is closed,
the connection to the other party is connected
but the sound is muted. If you close the flip cover
by mistake, you can continue the call if you open
the flip cover within the five seconds, provided
the other party has not hung up.
Inserting a pause into the telephone number
You can insert a pause into the telephone number you want to dial.
1
Enter the telephone number.
2
Press the key at the point y ou want
to enter the pause. A “–” is inserted into
the number shown on the display.
Pressing the key a second time
causes “P” to be displayed.
• If you press the key once, a hyphen
“–” is inserted into the number.
3
Enter any other numbers that are needed after the pause.
4
Press the key.
The numbers up to the point you inserted the
pause are dialed.
When the other party answers, press the
key again.
The numbers entered after the pause are dialed.
Notes:
• You cannot insert a pause as the first digit of a number.
• You cannot insert two, or more, pauses in succession into the
number.
• If the reception signal become weak during a call, a warning tone
will be emitted.
Pause
Basic
Operations
Hyphen
R12-PHS_Body.pm6 7/24/00, 2:16 PM9
Page 20

10
Dialling a Number with a Sub-address Number
When the Sub-address setting is on, you can call a phone number that
includes a sub-address number. (The default setting for Sub-address
is ON.)
1
Enter the telephone number.
2
Press the key.
The * separates the phone number from the
sub-address number.
Any numbers after the
*
will be interpreted as
part of the sub-address number.
3
Enter the sub-address.
4
Press the key.
Note:
• If you enter a
*
after entering the first * to separate the phone
number from the sub-address number, the second
*
will be inter-
preted as part of the sub-address number.
• If you enter a
*
first, the * will be interpreted as part of the
phone number.
• A phone number with a sub-address can include up to 32 digits,
including the
*
.
• The sub-address after the
*
, can include up to 19 digits. If you
enter 20 digits or more in the sub-address, the digits after the 19th
digits will be ignored.
• You can dial a phone number with a sub-address when only
calling a number on a public phone line.
Asterisk
Basic Operations
R12-PHS_Body.pm6 7/24/00, 2:16 PM10
Page 21

11
Getting Started
Basic
Operations
Advanced
Dialing
Services
Using the phone
as a cordless
phone
Using the
phone as a
transceiver
Using
Advanced
Functions
Appendix
Answering a call
1
You will hear the ringing.
The backlight of the display lights and you will
see the phone number of the other party, if
they have selected to send their own number.
If the number exceeds 11 digits, 11 digits of
the number will be shown then the display
will scroll to show the remaining numbers.
If the other party has not sent their number,
you will see a “–” on the display.
2
Open the flip cover or press the key.
You can start talking with the other party and
the length of the call is shown on the display.
If the flip cover is already open when you receive a call, press any key other than the
,
, or keys.
Note:
If you have turned key lock on, press the
key or open the flip
cover to answer the phone. You will not be able to use any other
keys to answer the call while the phone is locked.
3
When you have finished the conversation, end the call.
Press the key or close the flip cover.
Missed calls
If you received calls while you were unable to
answer a call, the number of calls missed is
shown in the information display area. This
can display up to 99 missed calls. If there are
no missed calls, nothing is displayed. If you
press the
key, the number of missed calls
on the display is cleared.
Basic Operations
Basic
Operations
Number of missed calls
R12-PHS_Body.pm6 7/24/00, 2:16 PM11
Page 22

12
Adjusting the earpiece volume
You can adjust the volume of the earpiece while you are talking on the
phone. The default setting is “Normal”.
1
Press the or key while you are
talking on the phone.
The earpiece volume is shown on the display .
The current volume is adjusted as shown for
each press of the keys.
Low Normal Loud Extra loud
Note:
If you are using the Earphone microphone, you can also adjust its
volume.
Redialing a recent number
You can easily redial numbers of people you have called before.
The last five phone numbers dialed are remembered with the most recent being first.
• 191 and 199 calls are not remembered.
You cannot call 191 or 199 using the redial function.
1
Press the key.
“L1” is displayed in the information area of
the display and the phone number of the last
number you called is displayed.
2
Press the or key until the number of the person you want to call is displayed.
L1 represents the last number you called. L2,
L3 etc, represents the numbers called before
that.
Basic Operations
Basic
Operations
R12-PHS_Body.pm6 7/24/00, 2:16 PM12
Page 23

13
Getting Started
Basic
Operations
Advanced
Dialing
Services
Using the phone
as a cordless
phone
Using the
phone as a
transceiver
Using
Advanced
Functions
Appendix
3
Press the key.
The phone dials the displayed number.
Deleting numbers from the list
You can perform this operation while waiting for a call.
1
Press the key.
2
Press the or key until the number you want to delete is selected.
3
Press and hold down the key.
When YES-1 NO-3 appears on the display
release the key.
4
Press the key.
A tone will be emitted and the selected number will be deleted.
• If you do not want to delete the selected
number, press the
key.
Dialing a number in the received calls list
You can dial the phone numbers of people who have called you.
The phone numbers of the last five people that called you are remembered with the most recent being first.
1
Press the key.
“C1” is displayed in the information area of
the display and the phone number of the last
person who called you is displayed.
2
Press the or key until the number of the person you want to call is displayed.
C1 represents the number of the last person
that called. C2, C3 etc, represents the numbers of people who called before that.
3
Press the key.
The phone dials the displayed number.
Basic Operations
Basic
Operations
R12-PHS_Body.pm6 7/24/00, 2:16 PM13
Page 24

14
Deleting a number in the received call list
You can perform this operation while waiting for a call.
1
Press the key.
2
Press the or key until the number you want to delete is selected.
3
Press and hold down the key.
When YES-1 NO-3 appears on the display
release the key.
4
Press the key.
A click will be emitted and the selected number will be deleted.
• If you do not want to delete the selected
number, press the
key.
Basic Operations
Basic
Operations
R12-PHS_Body.pm6 7/24/00, 2:16 PM14
Page 25

15
Getting Started
Basic
Operations
Advanced
Dialing
Services
Using the phone
as a cordless
phone
Using the
phone as a
transceiver
Using
Advanced
Functions
Appendix
Advanced Dialing Services
Storing a number in the phonebook
You can store up to 20 telephone numbers in the phonebook.
You can use the phonebook while you are talking the phone.
1
Enter the telephone number.
You can also store telephone numbers that
include a pause. One pause will count as two
digits of the number.
2
Press the key.
The location number 01 in the information
area of the display will blink.
If a telephone number has already been
stored in that location, the number for the lowest available number will be displayed.
To store the telephone number in the displayed location proceed to step 4.
3
Press the or key to select the
number of the location you want to use.
You can also use the number keys on the
keypad instead of the
or keys to
select the location number.
For example:
To select location number 05
Press the
key then the key.
If a telephone number has already been stored in the location, the
existing number and the newly entered number are displayed alternately on the display.
Note:
You can use the number keys of the keypad to store a telephone
number during a call.
4
Press the key.
The location number changes from a blinking display to a steady display and the telephone number is stored in the phonebook.
Advanced
Dialing
Services
R12-PHS_Body.pm6 7/24/00, 2:16 PM15
Page 26

16
Note:
For numbers stored in locations 01 to 09, you use the two-touch
function to dial them quickly.
If you store a telephone number during a call, the tones of the key
used to enter the number will be heard by the other party. In addition, you cannot enter a telephone number that includes a pause
during a call.
After a number has been stored in the phonebook
Once you have stored a number in the phonebook the number is displayed in the information area of the display when you receive a call
from that number.
Dialing a number in the phonebook
1
Press the key.
The first location number and its telephone
number are displayed.
• If you have not stored any telephone numbers in the phonebook, pressing the
key
will have no effect.
2
Select the location number and telephone number for the person you want
to call.
You can select the number in the following ways:
Pressing the or keys.
Pressing the key displays the numbers
from the first location number stored to the
last.
Pressing the
key displays the numbers
from the last location number stored to the
first.
Pressing the key.
With each press of the key the numbers will
be displayed from the first location number
stored to the last.
Advanced Dialing Services
R12-PHS_Body.pm6 7/24/00, 2:16 PM16
Page 27

17
Getting Started
Basic
Operations
Advanced
Dialing
Services
Using the phone
as a cordless
phone
Using the
phone as a
transceiver
Using
Advanced
Functions
Appendix
Advanced Dialing Services
Advanced
Dialing
Services
Pressing the number keys.
The location number and its telephone number is displayed for the number y ou pressed.
For example:
To select location number 05
Press the
key then the key.
If there is no telephone number stored in the location number you
entered, the location number blinks. The display will return to the
previous screen after 2 seconds.
3
Press the key.
The phone dials the displayed number.
Using two-touch dialing
For numbers stored in locations 01 to 09 of the phonebook you use the
two-touch dialing to dial them quickly and easily.
You can use two-touch dialing while waiting for a call.
Example: To dial the telephone number stored in location number 05.
1
Press and hold down the key.
“5” appears on the display then the telephone
number stored in location 05 is displayed.
After the location number and telephone number have been displayed, release the
key.
2
Press the key to dial the number.
Note:
If you press a number key that does not have a stored telephone
number, the two-touch function will not work.
R12-PHS_Body.pm6 7/24/00, 2:16 PM17
Page 28

18
Advanced Dialing Services
Changing a phonebook entry
1
Enter the new telephone number for the
number you want to change.
2
Press the key.
3
Press the or key or the number keys to select the number of the location you want to change.
The existing number and the newly entered
number are displayed alternately on the display .
4
Press the key.
The telephone number you entered is stored
in the selected location.
When YES-1 NO-3 appears on the display
release the key.
5
Press the key.
A tone will be emitted and the selected number will be deleted.
• If you do not want to delete the selected
number, press the
key.
Deleting a phonebook entry
1
Press the key.
2
Press the or key or the keypad number keys to select the number
of the location you want to delete.
3
Press and hold down the key.
When YES-1 NO-3 appears on the display
release the key.
4
Press the key.
A tone will be emitted and the selected number will be deleted.
• If you do not want to delete the selected
number, press the
key.
R12-PHS_Body.pm6 7/24/00, 2:16 PM18
Page 29

19
Getting Started
Basic
Operations
Advanced
Dialing
Services
Using the phone
as a cordless
phone
Using the
phone as a
transceiver
Using
Advanced
Functions
Appendix
Advanced Dialing Services
Advanced
Dialing
Services
Dial Lock
You can lock your phone so that other people can not make calls using
the phone. Set Dial Lock after registering a 4-digit password.
Registering a Password
You can register while you are waiting for a call.
1
Press and hold the key
When “F_” appears in the inf ormation area of
the display release the key.
2
Press the key.
“oLd ____” appears in the information area
of the display.
3
Press the , , , and keys
in order.
The 1, 2, 3, and 4 you enter are displayed as
“
-
” (hyphen) on the displa y.
“
PASS
____”
appears in the information area
of the display.
The default password setting for the phone is
1234.
4
Use the number keys to enter your own
password for the phone.
Example: To set the password to 4567 press
the
, , , and number keys
in order.
The phone returns to the display before the
key was pressed after two seconds and
the password is registered.
Don't forget your password!
Please make a note of the password so that you do not forget it.
• To change your pass word, repeat the pro-
cedure above but enter the password you
have set in step 3. Then enter the new
password you want to use in step 4.
R12-PHS_Body.pm6 7/24/00, 2:16 PM19
Page 30

20
Advanced Dialing Services
Setting dial lock
1
Press and hold down the key.
When “F_” appears in the inf ormation area of
the display release the key.
2
Press the key.
“PASS ____” appears in the information area
of the display.
3
Use the number keys to enter your
password.
The numbers you enter for the passw ord are
displayed as “
-
” (hyphen) on the display.
The
indicator lights in the information area
of the display and dial lock is active.
• While dial lock is active, “P ASS ____” appears in the information area of the display when any of the keys on the phone
are pressed. If you do not enter the correct password, “Error” appears in the information area of the display and you can
not use the phone.
• You can still receive calls normally while
dial lock is active.
• You can still call 191 and 199 while dial
lock is active. Dial 191 or 199 then press
the
key.
Releasing dial lock
1
Use the number keys to enter your
password.
The indicator in the information area of the
display goes out and dial lock is released.
• If you make a mistake entering the password, “Error” appears in the information
area of the display.
Lit
R12-PHS_Body.pm6 7/24/00, 2:16 PM20
Page 31

21
Getting Started
Basic
Operations
Advanced
Dialing
Services
Using the phone
as a cordless
phone
Using the
phone as a
transceiver
Using
Advanced
Functions
Appendix
Advanced Dialing Services
Advanced
Dialing
Services
Using key lock
You can lock the phone so that you do not accidentally press any keys
when carrying the phone while it is switched on.
You can use the key lock function and dial lock together.
Press the key until “CALL-OFF”
appears in the information area of the
display.
While key lock is on, you cannot perf orm any
operation other than those listed below:
• Press the
key to answer an incoming
call.
• Release key lock.
Releasing key lock
Press the key until “CALL-OFF” disappears from the information area of the display .
Key lock is released.
MWI (Message Waiting Indicator)
With this service, calls that come in (when the telephone is switched off,
when you are outside the service area or when you cannot answer the
telephone for some reason) are received by the MWI service, and the
caller can leave a recorded message. You can access to the messages,
left for you at the MWI service using a this phone.
FOR MORE DETAILS, CONTACT TELECOM ASIA
When a message has been recorded at the MWI
service center...
1
When you finish a call in public mode,
the MWI mark appears on the display to
indicate that you have a message waiting.
• If there is no message waiting, the MWI
mark disappears.
Mark
R12-PHS_Body.pm6 7/24/00, 2:16 PM21
Page 32

22
This section describes how to use the phone when it has been registered in the home base unit.
Before using the phone as a cordless phone
Make sure that the reception mode is set to House (H), Public-House
(PH), or House-Public (HP) and that the H letter is lit.
Making a call
Y ou can use the same procedure as described in “Making a call” (p . 8) to
make a call.
When making a call using the phone as a cordless phone, the call is
dialled via the home base unit so you do not need to dial the area code
if you are calling from the same area.
• Even if the reception for the home base unit is poor, you can still
make calls using the public line mode if the service signal for the
public line mode is good. When calling using the public line mode,
please include the area code when dialling the number.
• Your ability to dial numbers that include pauses or phone numbers
that include a sub-address will depend on the type of phone you are
using as the home base unit.
• The actual connection time may be different.
• You can also use the redial function and received call list function to
make calls.
Using the phone as a cordless phone
R12-PHS_Body.pm6 7/24/00, 2:16 PM22
Page 33

23
Getting Started
Basic
Operations
Advanced
Dialing
Services
Using the phone
as a cordless
phone
Using the
phone as a
transceiver
Using
Advanced
Functions
Appendix
Answering a call
You can use the same procedure as described in “Answering a call” (p.
11) to answer a call.
When the reception mode is set to Public or House, you can answer
calls from a public line using the phone as a cordless phone.
When answer in a call as a cordless
phone:
In addition to the ring tone being emitted, “out
LInE” blinks on the display.
Answering a call from a public line area:
See “Answering a call.”
Using the phone
as a cordless
phone
Using the phone as a cordless phone
R12-PHS_Body.pm6 7/24/00, 2:16 PM23
Page 34

24
Using the phone as a cordless phone
Using the phone as an extension phone
Making an extension call
You can make an internal (extension) call to the home base unit or any
cordless phone registered on the home base unit.
1
Open the flip cover then press and hold
down the key.
The reception mode indicator “H” will blink on
the display. Continue to press the key until
the display stops blinking and remains lit.
2
Enter the extension number you want
to call.
When the other party answers your call, begin speaking.
The amount of time you are connected is
shown on the display.
3
When you have finished the call, press
the key.
You can also ter minate the connection by
closing the flip cover. Five seconds after the
flip cover is closed, the connection will be terminated.
Note:
You can not use redial for extension calls.
Answering an extension call
Open the flip cover or press the key.
Y ou can start talking with the other party and the time of the call is shown
on the display.
• When you receive an extension call, in addition to the ring tone being emitted, “Etn
LInE” blinks on the display.
R12-PHS_Body.pm6 7/24/00, 2:16 PM24
Page 35

25
Getting Started
Basic
Operations
Advanced
Dialing
Services
Using the phone
as a cordless
phone
Using the
phone as a
transceiver
Using
Advanced
Functions
Appendix
Using the phone as a cordless phone
Placing an extension call on hold
You can only place a call on hold while you
are using the phone as an extension phone
for an external (outside line) call.
• You cannot place calls on hold while you
are using the phone in public mode, for
external calls, or when using the phone in
transceiver mode.
• The hold function is available via the home
base unit.
While you are in the middle of a call, press
and hold down the
key.
“Hd” appears in the information display area.
Keep the key pressed down until you hear
the “hold” tone.
Changing the “hold” tone volume
If you press the
or key while a call
is on hold, the “hold” tone volume changes to
low. If you press the key while the tone is low
the “hold” tone volume changes to loud.
• The default “hold” tone volume is loud.
Releasing a call that is on hold
While a call is on hold, press the key.
“Hd” disappears from the information display
area. You can resume talking to the other
party.
Note:
You can store/search numbers in the phonebook; check your phone’s
number, or check the extension number and transceiver number while
a call is on hold.
If you check the phone’s own number or the extension number, the
display returns to the on-hold display after 20 seconds.
Using the phone
as a cordless
phone
R12-PHS_Body.pm6 7/24/00, 2:16 PM25
Page 36

26
Using the phone as a transceiver
This section describes how to use the phone when it has been registered in the home base unit.
Before using the phone as a transceiver
• Make sure that the reception mode is set to Transceiver (t) or Transceiver -Public (tP).
• If the reception mode is Tr ansceiver -Public (tP), y ou can receive calls
from a public line but can not make calls to a public line.
• The approximate range for calls is 100 meters. (However, the range
will vary depending on the conditions.)
• Transceiver calls are set to be cut-off after three minutes. After a few
seconds, the phone will automatically try to reconnect to the same
party, so please wait f or the phone to reconnect y ou to contin ue y our
conversation. However, depending on the type of phone the other
party is using, the phone may not be able to automatically reconnect
you. If this happens, enter the number again.
Making a call
1
Open the flip cover and enter the other
party’s transceiver number.
2
Press the key.
When the other party answers your call, begin speaking.
The amount of time you are connected is shown on the display.
3
When you have finished the call, press the key.
You can also terminate the connection by closing the flip cover. Five
seconds after the flip cover is closed, the connection will be terminated.
Answering a call
Open the flip cover or press the key.
Y ou can start talking with the other party and the time of the call is shown
on the display.
• When you receive a transceiver call, in
addition to the ring tone being emitted, “trn
LInE” blinks on the display. If the other
party’s number has been stored in the
phonebook, that number and “trn LInE “
are displayed alternately in the display.
R12-PHS_Body.pm6 7/24/00, 2:16 PM26
Page 37

27
Getting Started
Basic
Operations
Advanced
Dialing
Services
Using the phone
as a cordless
phone
Using the
phone as a
transceiver
Using
Advanced
Functions
Appendix
Displaying your own number
Y ou can displa y your o wn number . You can do this while waiting f or a call
or during a call.
1
Press and hold down the key.
When “F_” appears in the inf ormation area of
the display release the key.
2
Press the key.
Your own number of the phone is displayed.
T o clear the display, press the
key. Even if
you do not press the
key, the display will
be cleared after 20 seconds.
• If the number exceeds 11 digits, the number will be scrolled.
• If you press the
key during a call, the
call will be disconnected.
Changing the ring volume
You can check and adjust the settings for the ring volume of the ring
pattern. The default setting is High.
You can adjust the setting while waiting for a call.
1
Press and hold down the key.
When “F_” appears in the inf ormation area of
the display release the key.
2
Press the key.
The current volume setting is displayed.
3
Press the or key to adjust the
volume.
Y ou can set the volume to High,
Low, or Off.
Pressing the
or key
causes the phone to play the
ring pattern at the selected volume.
Pressing the
key reduces
the volume. If the volume setting is Off, then pressing the
key will have no effect.
Using Advanced Functions
(High)
(Low)
(Off)
Using
Advanced
Functions
Volume setting
R12-PHS_Body.pm6 7/24/00, 2:16 PM27
Page 38

28
Pressing the
key increases
the volume. If the volume setting is High, then pressing the
key will not change the
volume setting.
4
Press the key.
The ring pattern stops and the phone returns
to the display before the
key was pressed.
Even if you do not press the
key, the ring
pattern will stop one ring pattern has finished.
• You can adjust the volume f or the ring pattern when you receive a call by pressing
the
or key while the phone is
playing the ring pattern.
Changing the ring pattern
You can check and adjust the settings for the ring pattern that is used to
inform you of incoming calls. The def ault setting is 01. You can adjust the
setting while waiting for a call.
1
Press and hold down the key.
When “F_” appears in the inf ormation area of
the display release the key.
2
Press the key.
The current ring pattern setting is displayed.
3
Press the or key to change the
ring pattern.
You can set the ring pattern to one of four
tones, or 20 melodies.
Pressing the
or key causes the
phone to play the selected ring pattern.
Pressing the
or key again causes
the phone to switch to the next ring pattern.
01 02 03 04 ~ 21 22 23 24
Using Advanced Functions
Ring pattern
R12-PHS_Body.pm6 7/24/00, 2:16 PM28
Page 39

29
Getting Started
Basic
Operations
Advanced
Dialing
Services
Using the phone
as a cordless
phone
Using the
phone as a
transceiver
Using
Advanced
Functions
Appendix
Using Advanced Functions
No. Ring Patterns and Melody names
1. Electronic Sound
2. Electronic Sound
3. Electronic Sound
4. Electronic Sound
5. William T ell
6. Gavotte
7. Hungarian Rhapsody
8. Humoresque
9. Voices of Spring
10. “Spring” Sonata
11. Turkish March
12. Beautiful Dreamer
13. Minuet
14. Symphony (No.5) in C minor
15. Eine Kline Nachtmusik
16. Tin Soldiers March
17. Song of Joy
18. “Orpheus at Hells” Prelude
19. Pictures at an Exhibition
20. “Pastoral” Symphony
21. Swan Lake
22. The Beautiful Blue Danube
23. Chopin Waltz No.9
24. For Elise
Note:
The ring patterns are played at the volume set by the ring volume
setting. If the ring volume setting is set to Off, you will not hear the
ring patterns.
4
Press the key.
The ring pattern stops and the phone returns
to the display before the
key was pressed.
Even if you do not press the
key, the ring
pattern will stop one ring pattern has finished.
Using
Advanced
Functions
R12-PHS_Body.pm6 7/24/00, 2:16 PM29
Page 40

30
Changing the key tone
Y ou can check and adjust the settings f or the tone mode when you press
any of the keys on the phone. The def ault setting is 2. Y ou can adjust the
setting while waiting for a call.
1
Press and hold down the key.
When “F_” appears in the inf ormation area of
the display release the key.
2
Press the key.
“1 2 3” is displayed and the current setting
blinks.
3
Press the , , or key to
change the key tone setting.
The displayed setting , , are
as follows:
: No tone is emitted when the keys are
pressed.
: A standard key tone is emitted when
the keys are pressed.
: A musical tone is emitted when the
keys are pressed.
4
Press the key.
The phone returns to the display before the
key was pressed.
Even if you do not press the
key, the dis-
play will be cleared after 20 seconds.
Using Advanced Functions
do
re
mi
fa
sol
la
si
do
re
mi
fa
sol
do
re
mi
fa
sol
R12-PHS_Body.pm6 7/24/00, 2:16 PM30
Page 41

31
Getting Started
Basic
Operations
Advanced
Dialing
Services
Using the phone
as a cordless
phone
Using the
phone as a
transceiver
Using
Advanced
Functions
Appendix
Changing the auto-response time
When using the phone with the Earphone microphone, you can check
and adjust the settings for the automatic response time (seconds) from
the time you receive a call. The default setting is 00 (off). You can adjust
the setting while waiting for a call.
1
Press and hold down the key.
When “F_” appears in the inf ormation area of
the display release the key.
2
Press the key.
The current auto-response setting is displayed.
3
Press the number keys (1-9, 0) to enter
the auto-response time in seconds.
Example:
T o set the interval to fiv e
seconds, press the 0 key
then the 5 key.
To set the interval to 18
seconds, press the 1 key
then the 8 key.
T o set the auto-response
time to off, enter 00.
4
Press the key.
The phone returns to the display before the
key was pressed.
Even if you do not press the
key, the dis-
play will be cleared after 20 seconds.
Using Advanced Functions
Using
Advanced
Functions
R12-PHS_Body.pm6 7/24/00, 2:16 PM31
Page 42

32
Changing the “NO SERVICE AREA” alert
You can have the phone alert you when you have moved outside the
service area and that the signal reception has deteriorated. The default
setting is ON-1. You can adjust the setting while waiting for a call.
1
Press and hold down the key.
When “F_” appears in the inf ormation area of
the display release the key.
2
Press the key.
“ON-1 OFF-3” is displayed and the current
setting blinks.
3
Press the or key.
: An alert tone is emitted.
: An alert tone is not emitted.
4
Press the key.
The phone returns to the display before the
key was pressed.
Even if you do not press the
key, the dis-
play will be cleared after 20 seconds.
Changing the “HAND OVER” tone
Your phone has a function, called HAND OVER, that searches for a
stronger reception signal if the current signal becomes weak. You can
check and adjust the settings for the tone that is emitted when this HAND
OVER function operates. The default setting is OFF-3. You can adjust
the setting while waiting for a call.
1
Press and hold down the key.
When “F_” appears in the inf ormation area of
the display release the key.
2
Press the key.
“ON-1 OFF-3” is displayed and the current
setting blinks.
Using Advanced Functions
R12-PHS_Body.pm6 7/24/00, 2:16 PM32
Page 43

33
Getting Started
Basic
Operations
Advanced
Dialing
Services
Using the phone
as a cordless
phone
Using the
phone as a
transceiver
Using
Advanced
Functions
Appendix
3
Press the or key.
: A HAND OVER alert tone is emitted.
: A HAND OVER alert tone is not emit-
ted.
4
Press the key.
The phone returns to the display before the
key was pressed.
Even if you do not press the
key, the dis-
play will be cleared after 20 seconds.
About the HAND OVER tone function
If you hear the HAND OVER tone f or four times consecutively, it means
that the phone is having problems connecting to a service area with
good reception and you may find your call is disconnected. If this occurs,
move to another location with good reception and dial again.
Using Advanced Functions
Using
Advanced
Functions
R12-PHS_Body.pm6 7/24/00, 2:16 PM33
Page 44

34
Changing the backlight setting
You can check and adjust the settings for the backlight of your phone.
The default setting is ON-1, You can adjust the setting while waiting for a
call.
1
Press and hold down the key.
When “F_” appears in the inf ormation area of
the display release the key.
2
Press the key.
“ON-1 OFF-3” is displayed and the current
setting blinks.
3
Press the or key.
: The backlight for the display comes
on when a key on the keypad is pressed.
: The backlight for the displa y does not
come on when a key on the keypad is
pressed.
4
Press the key.
The phone returns to the display before the
key was pressed.
Even if you do not press the
key, the display will be cleared after 20 seconds.
Even if the backlight setting is set to off, the
backlight will come on when you switch the
phone on or you when you receive a call.
Using Advanced Functions
R12-PHS_Body.pm6 7/24/00, 2:17 PM34
Page 45

35
Getting Started
Basic
Operations
Advanced
Dialing
Services
Using the phone
as a cordless
phone
Using the
phone as a
transceiver
Using
Advanced
Functions
Appendix
Using Advanced Functions
Changing the “SEND OWN NUMBER” setting
This function lets you decide whether to send the telephone number of
the phone when you make a call or not. The def ault setting is ON-1 (SEND).
You can adjust the setting while waiting for a call.
1
Press and hold down the key.
When “F_” appears in the information area of
the display release the key.
2
Press the key.
“ON-1 OFF-3” is displayed and the current
setting blinks.
3
Press the or key.
: Sends the telephone number of your
phone to the other party when you
make a call.
: Does not send the telephone number
of the phone when you make a call.
4
Press the key.
The phone returns to the display before the
key was pressed.
Even if you do not press the
key, the dis-
play will be cleared after 20 seconds.
Using
Advanced
Functions
R12-PHS_Body.pm6 7/24/00, 2:17 PM35
Page 46

36
Changing the sub-address setting
This function lets you dial a phone number that includes a sub-address.
The default setting is ON-1.
1
Press and hold down the key.
When “F_” appears in the inf ormation area of
the display release the key.
2
Press the key.
“ON-1 OFF-3” is displayed and the current
setting blinks.
3
Press the or key.
: Recognizes a * entered after a phone
number as the sub-address separator. This allows you to dial numbers
that include a sub-address.
:A * entered after a phone number is
not recognized as the sub-address
separator and is treated as part of the
phone number. This means that you
can NOT dial numbers that include a
sub-address.
4
Press the key.
The phone returns to the display before the
key was pressed.
Even if you do not press the
key, the dis-
play will be cleared after 20 seconds.
Using Advanced Functions
R12-PHS_Body.pm6 7/24/00, 2:17 PM36
Page 47

37
Getting Started
Basic
Operations
Advanced
Dialing
Services
Using the phone
as a cordless
phone
Using the
phone as a
transceiver
Using
Advanced
Functions
Appendix
Checking the extension number or transceiver number
This function lets you check the extension number or the transceiver
number of the phone.
To check the extension number, follow the procedure below when waiting for a call in a reception mode other than Transceiver or TransceiverPublic (“t” or “tP” are not displayed on the information area of the display.)
T o check the transceiv er number , follo w the procedure below when waiting for a call in Transceiver or Transceiver-Public reception mode (“t” or
“tP” are displayed on the information area of the display.)
1
Press and hold down the key.
When “F_” appears in the inf ormation area of
the display release the key.
2
Press and hold down the key.
If the reception mode is a mode other than
T ransceiv er-Public (tP not displa yed), the e xtension number of the phone is displayed.
If the reception mode is Transceiver and
T ransceiver-Pub lic, the transceiver number of
the phone is displayed.
• To clear the display , press the
key . Even
if you do not press the
key, the display
will be cleared after 20 seconds.
Using Advanced Functions
Example: Display
showing the extension
number.
Example: Display
showing the
transceiver number.
Using
Advanced
Functions
R12-PHS_Body.pm6 7/24/00, 2:17 PM37
Page 48

38
Appendix
Cleaning the exterior of the phone
To clean everyday dirt and stains, wipe the phone with a soft, dry cloth.
T o clean stubborn stains, wipe the phone with a soft cloth that has been
moistened with water and a neutral detergent, then wrung tightly so it is
slightly damp.
Note:
Do not use benzene, thinner or other materials as these can cause
damage to the casing, or cause it to change color, or cause the casing to peel.
Changing the battery
The battery is replaceable. Although the battery life will vary, depending
on how you use the phone, we recommend that you replace the battery
every year. When replacing the battery , alwa ys use a Ni-Cd battery pack.
Changing the battery while waiting for a call
1
If the phone is on, press the key to
turn the phone off.
Note:
Always turn off the phone before changing
the battery.
2
Remove the battery cover.
1) Hold the phone with the antenna pointing
towards you.
2) Slide the cover off in the direction of the
arrow, as shown in the illustration.
3
Remove the battery.
Hold the connector by the base and gently
pull it out.
black
red
Appendix
R12-PHS_Body.pm6 7/24/00, 2:17 PM38
Page 49

39
Getting Started
Basic
Operations
Advanced
Dialing
Services
Using the phone
as a cordless
phone
Using the
phone as a
transceiver
Using
Advanced
Functions
Appendix
4
Insert the new battery.
Insert the battery with the marking facing upwards and firmly insert the cables into the
connectors. Make sure y ou insert the colored
cables into the correct connectors.
Store the battery cables between the body of
the phone and the battery.
Note:
When replacing the battery, make sure you align the slots on the
battery with the connector pins on the phone. Do not use force to
pull the battery out or push it in.
5
Attach the battery cover.
Attach the battery cover as shown in the illustration on the right. While taking care not
to trap the cables, make sure the cover is
firmly in place.
6
Insert the AC adapter plug into the
phone and charge the battery for 8
hours.
Notes:
• Always use the AC adapter provided with your phone to charge
the battery.
• The battery level may not be displayed accurately immediately
after you change the battery. If you fully charge the battery, the
battery level will be displayed correctly again.
black
red
Appendix
Appendix
R12-PHS_Body.pm6 7/24/00, 2:17 PM39
Page 50

40
Troubleshooting
If you are experiencing problems with your phone, please check the
chart below before calling for assistance. If you cannot solve the problem after consulting this chart, contact your local dealer.
Problem Cause
The power does not come on. •
Is the battery fully charged? (☞ p. 4)
• Are you pressing the key for long
enough?
You cannot make a call. • Is the phone number correct?
(Have you included the area code
in the number?)
• Have you moved outside the service area?
• Is dial lock turned on?
• Is there a pause in the phone
number?
You can make calls, but hear an • This can occur if you are outside
announcement that you cannot your registered area.
make calls because you are Turn the phone off then on again
outside the service area. and try again.
Calls are cut-off, or noise • Move to a diff erent location and try
interference is heard. again.
You cannot charge the phone. • Is the AC adapter jack correctly in-
serted into the phone? (
☞
p. 2)
• Has the power cord been disconnected from the power supply?
• Is the battery mark blinking?
Appendix
R12-PHS_Body.pm6 7/24/00, 2:17 PM40
Page 51

R12-PHS_Body.pm6 7/24/00, 2:17 PM41
Page 52

R12-PHS_Cover1-4.pm6 7/24/00, 2:13 PM2
 Loading...