

Page 1

Page 2

Page 3

IMPORTANT NOTICES
READ THIS MANUAL CAREFULLY
Your Owner's Manual contains important information on safety, operation, and
maintenance. Any one who operates this ATV should carefully read and
understand the contents of this manual before riding the vehicle.
AGE RECOMMENDATION
KXR 50: The minimum recommended age for this ATV model is 6. Children under
age 6 should never operate this vehicle.
KXR 90: The minimum recommended age for this ATV model is 12. Children under
age 12 should never operate this vehicle.
RIDER TRAINING
Anyone who operates this vehicle should get proper instruction.
FOR ON-ROAD USE ONLY
This machine is designed and manufactured for ON-ROAD use only. It is illegal
and unsafe to operate this machine on any hills and rough or loose terrain.
This machine complies with all applicable ON-ROAD noise level and spark
arrester laws and regulation in effect at the time of manufacture.
Please check your local riding laws and regulations before operating this
machine.
A
Page 4

SPECIAL MESSAGES
KYMCO provides many important safety messages both in this manual and on the
vehicle. For your safety and the safety of others, pay special attention to all
warnings preceded by this alert symbol . Failure to follow the warnings
contained in this manual can result in SERIOUS INJURY or DEATH.
Indicates a strong possibility that serious injury or death may
WARNING
result if instructions are not followed.
CAUTION Indicates a possibility that equipment or property damage
could result if instructions are not followed.
Note: Gives helpful information
The Owner's Manual should be considered a permanent part of your ATV. It should
remain with the vehicle at all times and stay with the ATV if it is sold.
B
Page 5

PREFACE
Congratulations on your purchase of the KYMCO ATV. KYMCO take pride in a
worldwide reputation for quality-in research, design, production and service.
For replacement parts and accessories, we recommend genuine KYMCO
products. They've been specially designed for your vehicle and manufactured to
meet KYMCO's demanding standards.
This manual will provide you with a good basic understanding of the features and
operation of this machine. This manual includes important safety information. It
provides information about special techniques and skills necessary to ride your
machine. It also includes basic maintenance and inspection procedures. If you
have any questions regarding the operation or maintenance of your machine,
please consult a KYMCO dealer.
We wish you many years of safe and enjoyable riding.
While reading this manual, remember:
Indicates a strong possibility that serious injury or death may
WARNING
result if instructions are not followed.
All information in this publication is based on the latest product information
available at the time of approval for printing. KWANG YANG MOTOR CO.,LTD
reserves the right to make changes at any time without notice and without
incurring any obligation.
C
Page 6

CONTENTS
Page Page
LOCATION OF THE WARNING AN D
SPECIFICATION LABELS...........................1
SAFETY INFORM ATION.............................4
DESCRIPTION AND MACHINE
IDENTIFICATION........... .... ....................... .9
Key iden tification number.. ........................9
Frame and engine seri al number...............10
Mod el co de............................................10
Parts location.... ....... ....... ....... ....... ...... 11
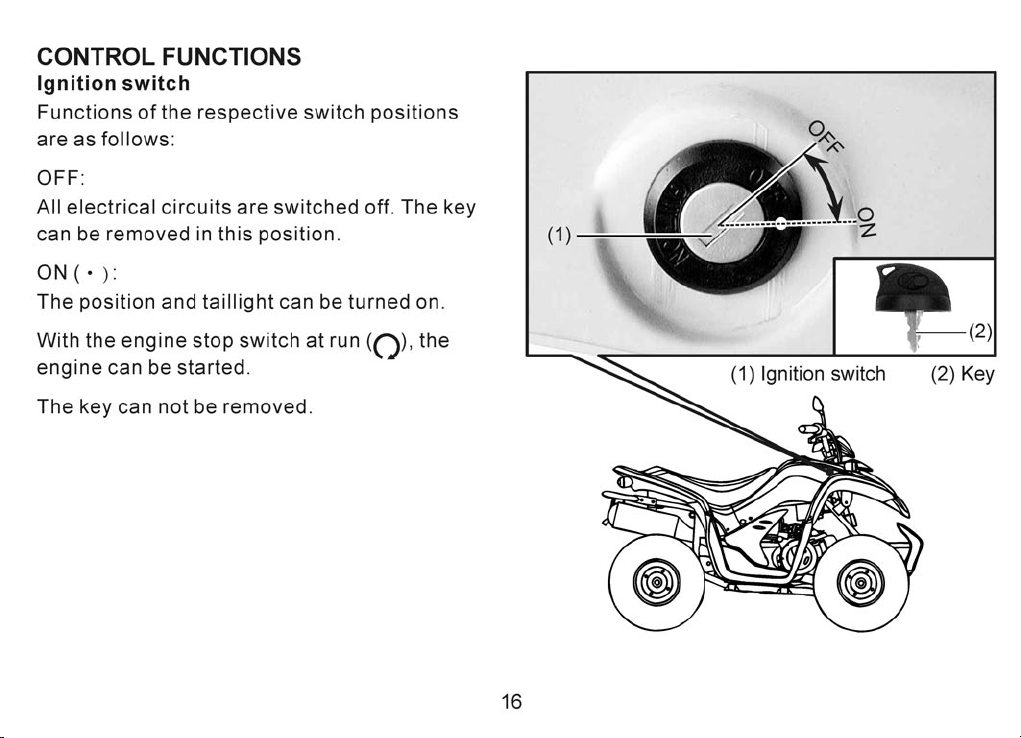
CONTROL FUNCTIONS........... ..... ....... ....16
Ignition switch....................................... .16
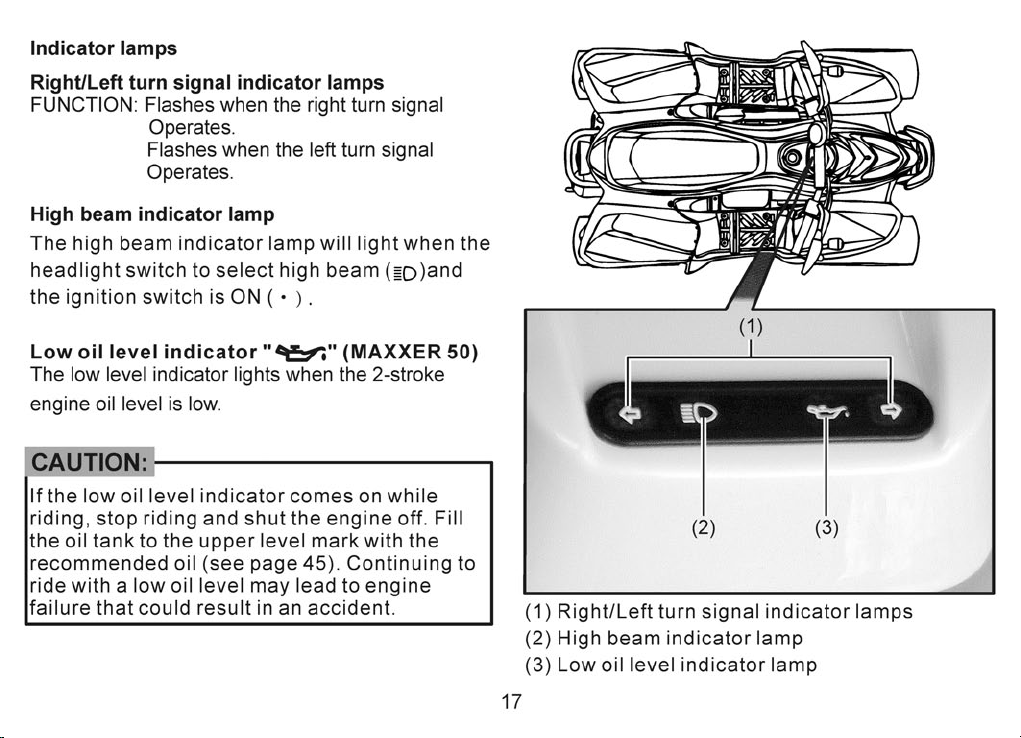
Ind icator lamps ........... ...........................17
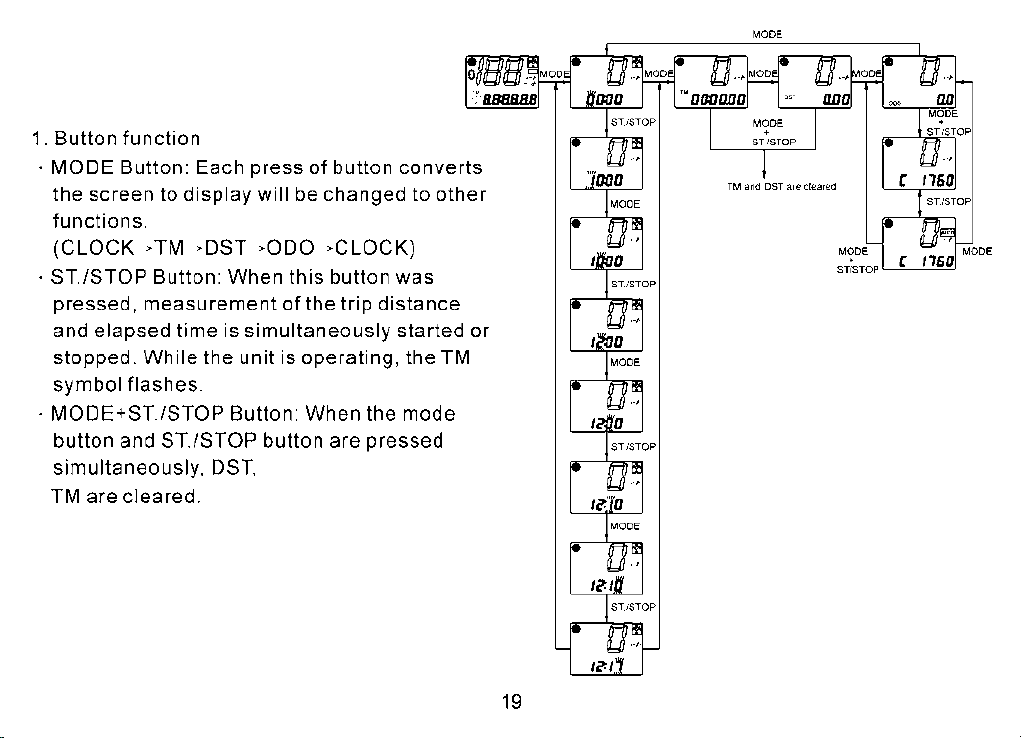
Ins trument ....... .......... ...........................18
Han dlebar switches................................23
Hor n but ton................................. ........23
Turn signal switch ................................23
Hea dlight switc hes ..............................24
Eng ine stop swit ch...............................25
Stater button.. . ....................................26
Kick sta rter.... ....... ... ..............................27
Remote eng ine stop switch.. ....................28
Throttle lever... .....................................29
Speed limi ter.... .....................................30
Front and rear brake.. ....... ....... ....... ....... .31
Brake pedal (MAX XER 90)..... ....... ....... ...31
Parking brake ( 50)....................32
Parking brake (M AXXER 90) ....... ....... .....33
Fuel tank cap .. .......................................3 4
Fuel valve . ... ....... ....... ....... ....... ....... ..... 35
Lock ing steering ( 90)
Starte r (choke) (MAXXER 90)... ....... ....... 37
Seat.. ....... ....... ....... ....... ....... ....... ....... ...38
Fla g pol e bra cket.................................... 39
Storage com partment . ...... ....... ....... ....... 39
MAXXER
MAXXER ..... ....... ..36
(Cont'd)
D
Page 7

Page Page
PRE-OPERATION CHECKS......................40
Front and rear brakes.... ....... ....... ....... ....41
Fuel .... ....... ....... ....... ....... ....... ....... ....... 42
Engine (MAXXER 90) and
transmiss ion oil ....................................44
Engine oil ( 50).......
Chain ...................................................46
Throttle lever.........................................46
Fittings and fasteners.............................46
Ligh ts ...................................................46
Switches ... ....... ....... ....... .. ....................46
Tires ....... ....... ....... ....... . .......................47
How to measure tire pressure .................48
Tire wea r limit .......................................49
OPERATION. .... .... .... ...............................50
Starting a cold engi ne ( 90)........50
Starting e ngine (M AXXER 50 )................53
Eng ine br eak-in.....................................54
Parking .. ..............................................56
Parking on a slope .................................57
Accessorie s ...... ....... ....... ....... ....... ....... .58
MAXXER ..... ....... ......4 5
MAXXER
Riding Your ATV........................................59
GETTING TO KNOW YOUR ATV.. ..... . ......60
RIDE WITH CARE AND
JUDGEMENT.. ........... ........... ........... ......61
Age Recommen dation (MAXXER 50)........62
Age Recommen dation (MAXXER 90)........63
Never ca rry passenger on the carrier........64
Ap parel..... ... ....... ....... ....... ....... ....... .....65
Do not operate after con suming alcoho l or
drugs. ............. .... ............. ............. .... ....66
Pre-operation chec ks..............................67
Loading and accessor ies.... ....... ....... ....... 69
Loading and Opera tional Guidel ines.........69
Accessorie s...... ....... ....... .. ..... ....... ....... .70
No Modifications. ....... ....... ....... ....... ....... 71
Dur ing operation . ..................................72
Exhaust system....................................74
RIDING.... ....... ....... ....... ....... ....... ....... ..75
Remote engine stop switch for new
Ride rs..................................................76
GOOD
(Cont'd)
E
Page 8

Page Page
Speed limiter for new riders.....................77
BRAKING.. ........... ........... ........... ........... 78
TURNING YOUR ATV .............................79
CLIMBING UP SLOPE...........................80
RIDING DOWN SLOPE .........................86
PARKING.............. .... ....................... .... .87
WHAT TO DO IF........ ....... ....... ....... ....... 88
WHAT TO DO.... ....... ....... ....... ....... ....... 88
PERIODIC MAINTENAN CE AND
AD JUSTM ENT.... ..... ..... ..... .............. ..... ...89
Tool kit...................................................89
PERIODIC MAINTENAN CE/
LU BRICATION ( 50). ....... ....... ...91
PERIODIC MAINTENAN CE/
LU BRICATION (MAXXER 90)..................93
Engine oil (MAXXER 90 )..........................95
Transmission oil.....................................99
Spark plug ins pection............................102
Air filter cleaning ....... ....... ....... ....... ......1 03
Valve clear ance adjustme nt
(MAXXER 90).....................................107
Idle speed adjustment.. ..... ....... ....... .....10 8
Throttle lev er adjustm ent ...... ....... ....... .109
MAXXER
Front and rear brake shoes (drum brake)
in spect ion.. ................ ..... ..... ..... ..... ..... 110
Front brake lever free play adjustment.... 111
Rear brake le ver free play adjustment
(D rum brak e)........................................113
Br ake peda l adjustment (MAXXER 90)..115
Brake fluid inspection (Disk brak e)........118
Drive chain slack check.........................120
Drive chain sl ack adju stment.................120
Drive chain cleaning and Lubrication......122
Cable inspection and lubrica tion...........122
Brake lever lubrication... ....... ....... ....... ..123
Knuckle sha ft and rear fork shaft
l ub ri c a t io n . . . . .. . . . . .. .. . . . . .. .. . . . .. .. . . 1 23
Draining th e V-belt compartment
(MAXXER 90)......................................123
Wheel removal.....................................124
Wheel insta llation.................................124
Ba ttery ............. ..... ..... .............. ..... ...12 5
Fuse replacement................................127
Headlight beam adjustment...................130
Trouble s hooting ... ........ ........ . ....... . ...131
Troubl eshoot ing chart ...... ...... ...... ...... 132
(Cont'd)
F
Page 9

Page
CLEANING AND STORAGE.. ....... ....... .....13 3
A. Cle aning .........................................133
B. Storage ...... ....... ....... ....... ....... ....... ..135
SPECIFICATIONS (MAXXE R 50) ....... ....... 137
SPECIFICATIONS (MA XXER 90).............141
NOISE REGU LATION.............................145
MAINTENANCE RECORD.......................146
IN DEX. ............. .... ............. ............. .... ...147
G
Page 10
Page 11
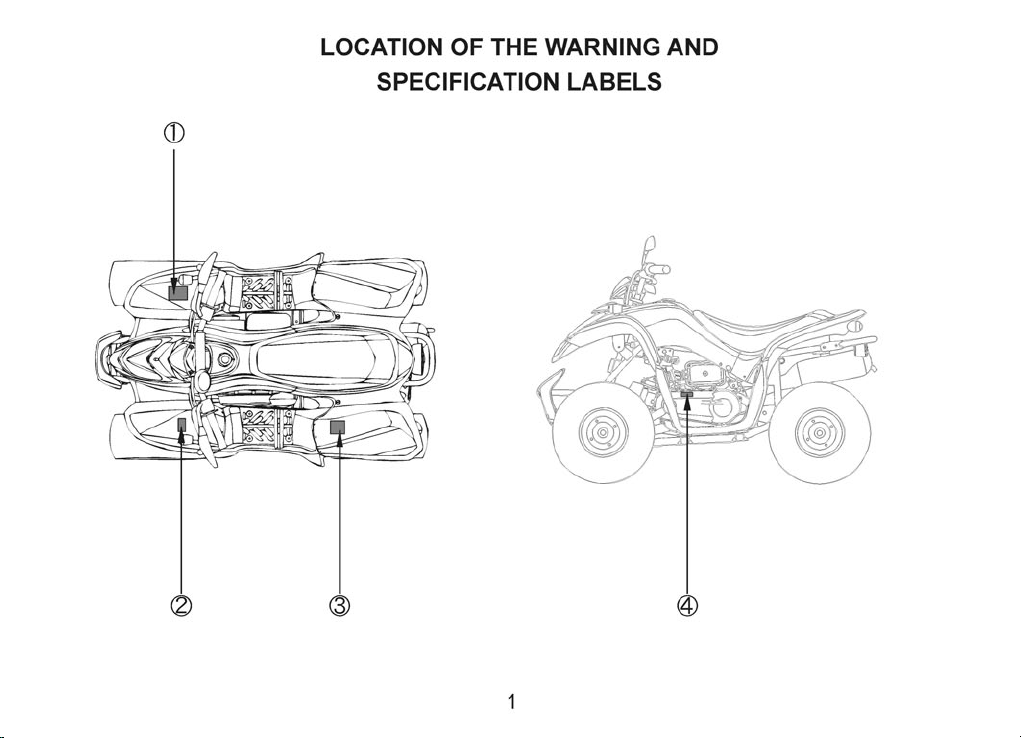
WARNING INFORMATION
Your ATV come s with a hang tag and several
labels containing important safet y information .
Anyone who ri des the vehicle s hould read and
understan d this information befor e riding.
Parents of young riders should make sure their
youngster s read and understand the ha ng tag
and label inf ormation before allowing them to
ride.
The labels should be considered as permanent
parts of the vehicle. If a label comes off or
becomes har d to read, contact your KYMC O
dealer for replacements
WARNING
Improper ATV use can resul t in SEVERE
INJURY or DEATH.
ALWAYS U SE AN
APPROVED HEL ME T AND
PROTECTIVE GEAR
NEVER operate :
‧With out p roper training or in str uct ion.
‧At speeds too fa st fo r you r skills
the conditio ns.
Do not operate t he ve hic le after
consuming ALCOHOL OR DRUGS.
ALWAYS :
‧Use proper rid ing t echniques to avoid
vehicle over tur ns on hills and rough
terrain and in t urn s.
‧For your safet y, wear gear to i ncl ude
helmet glove s and f oot protection.
‧Gasoline is fl amm able shut off engine ,
avoid sparks a nd op en flame when refuel ing .
READ OWNER'S M ANU AL, F OLLOW
ALL IN STRUCTIONS AND WAR NINGS.
NEVER USE WITH
ALCOHOL OR DR UG S
or
2
Page 12
( 50)MAXXER ( 90)MAXXER
WARNING
UNDER
6
Oper ating thi s ATV if y ou are un de r the
age of 6 i ncrea se s your ch an ce of
seve re inju ry o r death .
NEVE R opera te t his ATV if you ar e
unde r age 6.
WARNING
IMPR OPER TIRE P RESSU RE O R OVERL OADING CA N
CAUS E LOSS OF CON TROL.
LOSS O F CONTROL CAN R ESULT IN SEVER E INJURY
OR DEATH.
OPER ATI NG T IRE PRE SSURE : S et w ith tir es c old‧
Reco mmend ed :
FRON T : 22 ~2 8 kpa, (0 .22~0 .2 8 kgf/c m ) , 3.2~4 .0 psi
REAR :
‧Neve r set tire pr essur e over the re comme nd ed.
22~2 8 kpa, (0 .2 2~0.2 8 kg f/cm ) , 3.2~4.0 p si
2
2
Oper ating thi s ATV if y ou are un de r the
age of 1 2 incre as es your c ha nce of
seve re inju ry o r death .
NEVE R opera te t his ATV if you ar e
unde r age 12.
WARNING
UNDER
12
3
Page 13

SAFETY INFORMATION
AN ATV IS NOT A TOY AND CAN BE HAZAR DOUS TO OPERATE. An ATV handles differ ently fro m
other vehicles including motorcycles and cars. A collision can oc cur quickly, ev en during routi ne
maneuvers , if you fail to take proper pre -cautions.
SEVERE INJU RY OR DEATH can result if you do not f ollow these ins tructions:
‧Read this manual and all labels careful ly and follow the o perating proc edures descri bed.
‧Never opera te an ATV with out proper training or ins truction.
Beginners should receive training from a certified i nstructor.
‧Always foll ow the age recommendation:
- A child und er 6 years old should never operate an ATV with engine size greater than 70cc.
- A child und er 12 years old sho uld never opera te an ATV with engine size greater than 90 cc.
‧Never allow a c hild under age 16 t o operate an ATV wit hout adult supervision, and never allow
continued u se of an ATV by a child if he or she does not have the abili ties to operate i t safely.
‧Never opera te an ATV with out wearing an approved motorcycle helm et that fits prop erly. You
should also w ear eye protection (goggles or face shield), gloves, boo ts, long-slee ved shirt or
jacket, and long pants.
4
Page 14

‧Never consu me alcohol or dru gs before or while operating this ATV.
‧Never opera te at speeds too fast for your s kills or the cond itions. Always go at a speed th at is
proper for the terrain, visibility an d operating con ditions, and yo ur experience .
‧Never attempt wheel, jump, or other stu nt.
‧Always insp ect your ATV each ti me you use it to make s ure it is in safe operating co ndition. Alway s
follow the inspection and maintenan ce procedures a nd schedules de scribed in this m anual.
‧Always keep b oth hands on the handlebars and both feet on th e footboards of the ATV during
operation .
‧Always go slo wly and be extra ca reful when operating on unfamiliar terr ain. Always be ale rt to
changing te rrain conditions when operating the ATV.
‧Never opera te on excessive ly rough, slippery or loose terrain.
‧Always foll ow proper proce dures for turning as described in this manu al. Practice tu rning at low
speeds befo re attempting to turn at fas ter speeds. Do not turn at exc essive speed.
‧Never opera te the ATV on hills.
‧Always foll ow proper proce dures for climbing slopes as described in this manual. Che ck the
terrain car efully before you start up a ny slope. Shift your weight forward. Neve r open the thrott le
suddenly. Never go over the to p of a slope at high speed.
5
Page 15

‧Always foll ow proper proce dures for going down slopes and for braking on slopes as described in
this manual. Check the t errain carefu lly before you st art down any slope. Shift yo ur weight
backward. N ever go down a slop e at high speed. Avoid going down sl ope at an angle tha t would
cause the veh icle to lean sharply to one side. Go straight d own the slope whe re possible.
‧Never attempt to turn th e ATV around on any sl ope until you hav e mastered the tu rning technique
described i n this manual on level ground. Avo id crossing the s ide of a steep slope if possible.
‧Always chec k for obstacles before ope rating in a new are a. Never attemp t to operate over large
obstacles , such as large rocks or fallen trees. Always fo llow proper pro cedures when op erating
over obstac les as describe d in this manual.
‧Always be car eful when skidd ing or sliding. Learn to saf ely control ski dding or slidin g by
practicin g at low speeds and on level, smooth terrain. O n extremely sli ppery surfaces, such as
ice, go slowl y and be very cautious in order to reduce the cha nce of skidding o r sliding out of
control.
‧Never opera te an ATV in fas t flowing water or in water de eper than that re commended in th is
manual. Rem ember that wet brakes may ha ve reduced stop ping ability. Test your bra kes after
leaving wat er. If necessary, apply them several times t o let friction dr y out the linings.
‧Always use th e size and type tires specif ied in this manua l. Always maintain proper tire pressure
as describe d in this manual.
‧Never modify an ATV through imp roper installation or use of accessorie s.
‧Never excee d the stated load capacity f or an ATV. Cargo sh ould be properl y distributed a nd
securely at tached. Reduce speed and follow instruc tions in this man ual for carrying cargo. Allow
greater dis tance for braking.
6
Page 16

WARNING
POTENTIAL HAZARD
Improper ha ndling of gasoline.
WHAT CAN HAPP EN
Gasoline ca n catch fire and you could be
burned.
HOW TO AVOID THE HAZARD
Always turn o ff the engine wh en refueling.
Do not refuel right afte r the engine has be en
running and i s still very hot.
Do not spill ga soline on the engine or exhaust
pipe/muffler when refue ling.
Never refuel while smoking, or while in the
vicinity of sparks, open flames, or oth er
sources of ig nition such as the pilot lig hts of
water heaters and clothes dryers.
When transporting th e machine in anot her
vehicle, be s ure it is kept upright and tha t the
fuel cock is in the "OFF" po sition.
Otherwise, fuel may leak out of the carbu retor
or fuel tank.
WHAT CAN HAPP EN
Gasoline is p oisonous and ca n cause injurie s.
HOW TO AVOID THE HAZARD
If you should swallow some gasoline or inhale
a lot of gasoline vapor, or get some gasoline in
your eyes, se e your doctor immediately.
If gasoline spills on your skin, wash wit h soap
and water. If gasoline spills on your clot hing,
change your c lothes.
7
Page 17
Page 18
DESCRIPTION AND MACHINE IDENTIFICATION
Identification number recor ds
Record the ke ys identification numb er, frame
serial numb er, engine seria l number and
model code in formation for assistan ce when
order repla cement parts.
Keys identificatio n number
The keys iden tification number is sta mped on
the hang tag as shown in the f ollowing
illustration.
IGNITION SWITCH KEY NO.
STEERING LOCK KEY NO.
FRAME NO.
ENGINE NO.
MODEL CODE
(1)
(1) Ignition switch key identification number
(2) Steering lock key ( 90)
identification number
9
MAXXER
(2)
Page 19

Page 20
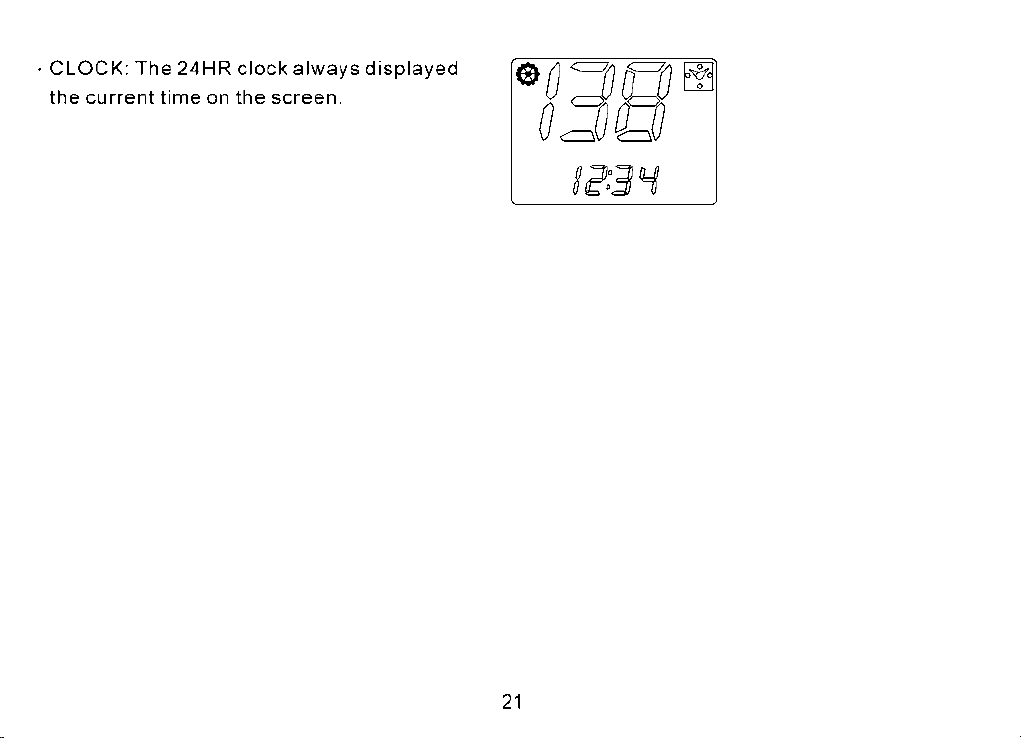
Page 21
Page 22

Page 23

Page 24
Page 25
Page 26
Page 27

Page 28
Page 29
Page 30
Page 31

Page 32

Page 33

(1)
(1) Headlig ht switch
Headlight switch
Turn the sw itch to the " " position to switch on
the low beam.
Turn the sw itch to the " " position to switch on
the high beam .
Turn the sw itch to the " " position to swit ch off
the headlig ht.
NOTE:
The headlig ht can be turned on only when th e
engine is run ning.
24
Page 34

(1) Engine stop switch " "/" "
(1)
Engine stop switch
When the switch is in the RU N ( ) position, the
engine will o perate. When the switch is i n OFF
( ) position, the engine will not operate .
This switch is intende d primarily as a sa fety or
emergency c ontrol, and it should norm ally
remain in the R UN ( ) position.
NOTE:
If you stop your ATV by turning the engine sto p
switch OFF ( ), be sure to tur n the ignition
switch OFF to prevent ba ttery dischar ge.
25
Page 35

(1)
Stater button
To starter the engine, apply brake and press the
starter button, with t he ignition swi tch ON (‧)
and the engin e stop switch at RUN ( )
CAUTION:
See starting instruc tions prior to starting
engine (see page 50 for de tails).
(1) Start button
NOTE:
If the starter switch is p ushed with the ig nition
switch " " and the engin e stop switch " ", the
starter motor will be ac tivated but the e ngine
will not start. To start the engi ne, be sure to
position the engine stop switch at " ".
26
.
Page 36

Page 37

Page 38

Throttle lever
It is operated by the thum b. Pressing the l ever
opens the throttle. Wh en pressure is re leased,
spring tens ion automatically clos es the throttle .
Regulate the speed of the machine by vary ing
the throttle positio n.
(1)
(1) Throttle lever
WARNING
POTENTIAL HAZARD
Malfunction of throttle.
WHAT CAN HAPP EN
The throttle could be hard to opera te,
making it difficult to speed up or sl ow down
when you need to. This could cause an
accident.
HOW TO AVOID THE HAZARD
Check the operation of t he thrott le lever
before you start the eng ine. If it do es not
work smoothly, check f or the cause.
Correct the problem be fore ridi ng the ATV.
Consult a KYMCO dealer i f you can't f ind or
solve the problem yourself.
29
Page 39

Page 40

Front and rear brakes
The front and rear brakes are operated by
squeezing t he front brake lever.
(1)
(1) Front brake lever
Brake pedal (MAXXER 90)
The both front and rear br akes are operat ed at
the same time by depressing the brake pedal.
(1)
(1) Rear brake pedal
31
Page 41

Page 42

Page 43

WARNING
POTENTIAL HAZARD
Improper use of the parking brake .
WHAT CAN HAPP EN
The ATV could start moving unexpect edly
if the pa rking brake is not applied b efore
starting the engine. This could c ause loss
of control or a collision.
The brake could overhe at if you rid e the
ATV without releasin g the parking brake.
You could lose braking performance which
could cause an accident. You could also
wear out the brakes prem aturely.
HOW TO AVOID THE HAZARD
Always set the parking b rake before
starting the engine.
Always be sure you have re leased the
parking brake before y ou begin to r ide.
Fuel tank cap
After refueling, be su re to tighten the fuel tank
cap.
TO refuel re fer to page 42~43.
(1)
(1) Fuel tank cap
34
Page 44

RES
OFF
ON
Fuel valve
The fuel valve supplies fuel from the fue l tank to
the carbure tor.
The fuel valve has three positions.
OFF:
With the lever and " " mark in t his
position fuel will not flow. Always turn th e
lever to this position when the engine is
not running .
ON :
With the lever in this position,
fuel flows to the carbur etor. Normal rid ing
is done with the lever in this position.
RES:
This indica tes reserve. If you run out of
fuel while ri ding, turn the lever
to this position. THEN FILL THE FUEL
TANK AT THE FI RST OPPORTU NITY.
After refueling, ret urn the fuel valv e lever
to the "ON" position.
" " mark
" " mark
(2)
(1)
(1) Fuel lever (2) " " mark
NOTE:
After refueling, do no t operate the ATV wi th the
fuel valve in the RES position. If you run ou t of
fuel, there will be no reserve supply.
35
Page 45

Locking steering
Turn the st eering handle bar left to full an d turn
the key clockwise, the steering handl ebar is
locked.
The key can be taken out.
Turn the ke y countercloc kwise, the stee ring
handlebar i s released automatically.
The key can be taken out.
(MAXXER 90)
LockingLocking
UnlockingUnlocking
WARNING
POTENTIAL HAZARD
Improper use of the locking steer ing.
WHAT CAN HAPP EN
The ATV could cause loss of control or
overturn.
HOW TO AVOID THE HAZARD
Always be sure you have re leased the
locking steering handlebar be fore you
begin to ride.
Never lock the steerin g handlebar, when
the engine is starting.
36
Page 46

Starter (ch oke) ( 90)
Starting a cold engine requires a richer air-fuel
mixture. A separate starter circu it supplies thi s
mixture.
Move in direc tion (A) to turn on the starte r
(choke).
Move in direc tion (B) to turn off the starter
(choke).
Refer to "starting a col d engine" for pro per
operation . (See page 50.)
(A)(A)
(1)(1)
(1) Fully open (2) Half open
(3) Closed (A) Starter (choke)
MAXXER
(3)(3)
(2)(2)
(B)(B)
(B)
CAUTION:
‧Extended us e of the choke may impair piston
and cylinde r wall lubrication and shorten the
life of the engine.
‧Pushing the c hoke knob too hard to the OFF
position may dislodge the choke cable boot. If
this happen s, water and dirt may enter th e
choke cable a nd cause corros ion. If the choke
is hard to actuate, or fee ls like it is sticking,
Check the cable boot
37
Page 47

Seat
To remove the sea t, pull upward the seat lock
lever and pul l up the seat the rear.
(1)
(1)
(1) Seat lock lever
To install the se at, align the tabs on the seat w ith
the grommets on the fram e and press the sea t
down until it locks.
NOTE:
Make sure tha t the seat is securely fitte d.
38
Page 48

Page 49

PRE-OPERATION CHECKS
Before using this machine, check the following points:
ITEM
Brake
Fuel
Engine oil and
Transmission oil
Drive chain
Throttle
Wheels and tires
Fittings and fasteners
Switches
Lights
ROUTINE
‧Check operation, condition,
free play (drum brake) and
brake fluid level (disk brake).
‧Adjust (drum brake) if necessary.
‧Fill with DOT 4 brake fluid (disk brake)
if necessary.
‧Check fuel level.
‧Fill with fuel if necessary.
‧Check oil level.
‧Fill with oil if necessary.
‧Check chain slack and condition.
‧Adjust if necessary.
‧Check for proper throttle cable operation.
‧Check tire pressure, wear and damage.
‧Check all fitting and fasteners.
‧Check for proper function.
‧Check for proper operation.
PAGE
41~42, 110~117
42~43
44~45, 95~101
46, 118~120
46
47~49, 122
46
46
46
40
Page 50

WARNING
POTENTIAL HAZARD
Failure to inspect the ATV before ope rating.
Failure to properly ma intain th e ATV.
WHAT CAN HAPP EN
Increases the possib illty of an a ccident or
equipment damage.
HOW TO AVOID THE HAZARD
Always inspect your ATV ea ch time you use
it to make sure the ATV is in safe operatin g
condition.
Always follow the inspection an d
maintenance proced ures and schedules
described in the Owner's Manual .
Front and rear brakes
1.
Drum brake
Check for correct free play in the brake le vers.
If the free play is incorrect, adjust it. ( See
pages 110~117.)
Check opera tion of the levers. They should
move smooth ly and there should be a firm
feeling whe n the brake is applied. If not , have
the machine i nspected by a KYMCO dealer.
Disk brake
2.
Make sure the re is no brake fluid leakage.
Check opera tion of the levers. They should
move smooth ly and there should be a firm
feeling whe n the brake is applied. If not , have
the machine i nspected by a KYMCO dealer.
Brake opera tion
3.
Test the brakes a t slow speed after startin g
out to make sur e they are working properly. If
the brakes do n ot provide proper braking
performan ce, inspect the brakes for w ear.
(See page 110 .)
41
Page 51

WARNING
POTENTIAL HAZARD
Riding with improperly operat ing brakes.
WHAT CAN HAPP EN
You could lose braking ability, which could
lead to an accident.
HOW TO AVOID THE HAZARD
Always check the brake s at the start of
every ride. Do not ride th e ATV if you find
any problem with the brakes. If a pro blem
cannot be corrected by t he adjustment
procedures provide d in this man ual, have
the ATV inspected by a KYMCO d ealer.
Fuel
Fill the fuel tank when ne cessary and mak e sure
there is sufficient gasoline in the ta nk.
Check for lea ks.
Fuel level sh ould be below the filler neck.
(1)
(1) Filler neck
Recommend ed fuel:
UNLEADED FUEL
Fuel tank capacity:
Total: 5 .5L(1.16 lmp gal, 1.4 US gal )
Reserve: 1.5L(0.32 l mp gal, 0.38 US gal )
42
Page 52

Your KYMCO engine has been designed to use
regular unl eaded gasolin e with a pump octane
number of 86 or h igher, or research octane
number of 91 or h igher. If knocking or pinging
occurs, use a d ifferent bra nd of gasoline or
premium unl eaded fuel. Unleaded fuel will give
you longer sp ark plug life and reduced
maintenan ce cost.
Use unleade d fuel only becau se it produces
fewer engin e and spark plug de posits and
extends the life of the ex haust system. N ever
use stale or contaminated gasoline or a n
oil/gasol ine mixture.
Avoid gett ing dirt, dust or water in the f uel tank.
WARNING
POTENTIAL HAZARD
Improper care when ref ueling.
WHAT CAN HAPP EN
Fuel can spill, which can cause a fir e and
severe injury.
Fuel expands when it heats up. If the f uel
tank is overfilled, fuel could sp ill out due t o
heat from the engine.
HOW TO AVOID THE HAZARD
Do not overfill the fuel tank. Be car eful not
to spill fuel, especially on the engine or
exhaust pipe. Wipe up any spi lled fuel
immediately. Be sure the fuel tank cap is
closed securely.
Do not refuel right afte r the engin e has
been running and is still very hot.
43
Page 53

Engine ( 90)and transmi ssion oil
MAXXER
Make sure the e ngine and transmission oil at the
specified l evel. Add oil as nec essary. (See pa ge
95~101.)
Check for lea ks.
1 0
0
30
0
50
0
70
0
90
0
0
110 F
SAE 5W
SAE 10W-30
CAUTION:
Be sure to use motor oils th at do not
contain anti-frict ion modif iers. Passenger
car motor oils (often la beled "Energy
Conserving") conta in anti-f riction
additives which will cause star ter clutch
slippage, resulting in reduce d compone nt
life and poor engine performanc e.
SAE 10W-40
SAE 20W-40
SAE 20W-50
-1 0
0
0
0
10
0
20
0
30
0
0
40 C
Recommend ed engine/transmission oil
classific ation: API Service SE, SF, SG typ e or
higher
Oil quantity:
Engine oil:
Periodic oil change:
0.7 L (0.62 l mp qt, 0.74 US qt)
Total am ount:
0.8 L (0.70 l mp qt, 0.84 US qt)
Transmission oil:
Periodic oil change:
0.11 L (0.1 0 lmp qt, 0.12 US qt)
Total am ount:
0.12 L (0.11 lmp qt, 0.13 US qt)
44
Page 54

Engine oil ( 50)
Oil level
When the low oil level indicator lights , it means
the oil level i n the oil tank is low; stop the en gine
and fill the oil tank as soo n as possible.
MAXXER
(1)
CAUTION:
.If the low oil level indicator comes on whi le
riding, stop riding and shut the engine off. Fill
the oil tank to the upper le vel mark with the
recommend ed oil. Continuing to ride with a
low oil level m ay lead to engine failure that
could resul t in an accident.
.if the engine h as been run after the low oil
level indic ator has come on, the scoote r must
be taken to an authorized KYMCO dealer fo r
inspectio n and bleeding of the oil system.
Failure to do this will result in serious e ngine
damage.
To fill, lift seat (see page 3 8), remove the ca p
from the oil tank, and fil l with the recomm ended
oil up to the upper level mark.
NOTE:
When filling, do not let d irt or other fore ign
materials e nter the ta nk.
(2)
(3)
(1) Cap (2) Upper level mark (3) Fill duct
Oil recomme ndation :
Use KYMCO 2-S TROKE OIL OR ITS
EQUIVALEN T
CAUTION:
The use of improper oils may cause excess ive
and/or prem ature carbon build-up in the engine
and exhaust s ystem, resulting in loss l f power
and possibl e engine damage . Genuine KYMCO
2-Stroke Oil has been specifically designed
and tested in KYMCO ATV and is a prop er oil.
45
Page 55

Chain
Check the gen eral condition of the chain and
check the cha in slack before every ride.
Lubricate a nd adjust the chain as necessary.
(See pages 118~120 for detai ls.)
Light s
Check the pos ition light and tailligh t/stop light to
make sure the y are in working co ndition. Repair
as necessar y for proper oper ation.
Throttle lever
Check to see that the thro ttle lever oper ates
correctly. It must open smoothly and spring back
to idle position when released. Repair as
necessary f or proper opera tion.
Fittings and fastene rs
Always chec k the tightness of chassis f ittings
and fasteners before a ride. Take the machine to
a KYMCO deale r or refer to t he Service Manu al
for correct tighteni ng torque.
Switches
Check the ope ration of the
switch, engine stop switch, remote en gine stop
switch and an y other switches.
Repair as nec essary for prop er operation.
46
taillight/stop lig ht
Page 56

Tires
WARNING
POTENTIAL HAZARD
Operating this ATV with improper ti res, or
with improper or uneven tire pres sure.
WHAT CAN HAPP EN
Use of improper tires on t his ATV, or
operation of this ATV with improper o r
uneven tire pressure , may cause loss of
control, increasin g your risk o f accident.
HOW TO AVOID THE HAZARD
1.The tires listed bel ow have bee n
approved by Kwang Yang M otor Co., Ltd.
for this model. Other tire combin ations
are not recommended.
2.The tires should be set to the
recommended pressu re:
‧Recommended tire pre ssure
Front: 25 kpa (0.25 kgf/ cm , 3.6 psi)
Rear: 25 kpa (0 .25 kgf/c m , 3.6 psi)
2
2
‧Check and adjust tire pressures when the
tires are cold.
‧Tire press ures must be equal on both
sides.
3.Tire pre ssure below the minimum
specified could cause the tire to d islodge
from the rim under sever e riding
conditions.
The following are minimums:
Front: 22 kpa (0.22 kgf/ cm , 3.2 psi)
Rear: 22 kpa (0 .22 kgf/c m , 3.2 psi)
2
2
Front
Rear
MAXXER 50
16*8-7
16*8-7
Size
MAXXER 90
18*7-8
18*9-8
Type
TUBELESS
TUBELESS
47
Page 57

4.Never set tire press ure over the
recommended
Front: 28 kpa (0.28 kgf/ cm , 40 psi)
Rear: 28 kpa (0 .28 kgf/c m , 40 psi)
2
2
Higher pressures may c ause the tire to
burst. Inflate the tir es very slowly and
carefully. Fast inflation could cause the
tire to burst.
How to measure tire pres sure
Use the low-p ressure tire gauge.
NOTE:
The low-pre ssure tire gauge is included as
standard eq uipment. Make two
measureme nts of the tire pressure and use
the second re ading. Dust or dirt in the gau ge
could cause t he first reading to be incor rect.
Set pressur e tires cold.
Set tire pres sures to the following
Front
Rear
Recommended
pressure
25 kpa
(0.25 kgf/cm ,
3.6 psi)
25 kpa
(0.25 kgf/cm ,
3.6 psi)
2
(0.22 kgf/cm ,
2
(0.22 kgf/cm ,
Minimum
22 kpa
3.2 psi)
22 kpa
3.2 psi)
(1) Low-pressure tire gauge
2
(0.28 kgf/cm ,
2
(0.28 kgf/cm ,
Maximum
28 kpa
4.0 psi)
28 kpa
4.0 psi)
2
2
48
Page 58

Tire wear limit
When the tire groove decreases to 3 mm (0.1 2
in) due to wear, r eplace the tire.
A. 3mm (0.12 in)
49
Page 59

OPERATION
Starting a cold engine ( 90 )MAXXER
WARNINGWARNING
POTENTIAL HAZARD
Operating ATV without being familiar with
all controls.
WHAT CAN HAPP EN
Loss of control, which could cause an
accident or injury.
HOW TO AVOID THE HAZARD
Read the Owner's Manua l carefully. If there
is a control or function you do not
understand, ask your K YMCO dealer.
POTENTIAL HAZARD
Freezing control cables in cold w eather.
WHAT CAN HAPP EN
You could be unable to control the ATV,
which could lead to an accident or collision .
HOW TO AVOID THE HAZARD
When riding in cold weather, alway s make
sure all control cables work smoo thly
before you begin riding.
1. Select a level surface and lock the park ing
brake (see pa ge 32 or 33) before s tarting the
engine.
2. Turn the fuel lock to "ON" .
3. Turn the main s witch to "." and the engine
stop switch to " ".
4. Make sure the tethere d road lead
into the
50
remote engi ne stop switch.
is installe d
Page 60

5. Use the starter (chok e) in reference t o the
figure:
Position :Cold engine start-ambie nt
temperature below 5C (40F).
Position :Cold engine start-ambie nt
temperature at 0C (30F)~30C(90F)
and warming u p position.
Position :Cold engine start-ambie nt
temperature above 25C(80F) and
warm engine s tart position.
1. Fully open
3. Closed
2. Half open
a. Starter (choke)
6.With the throttle cl osed, push the starter
button. Release the st arter button as soon as
the engine starts.
NOTE:
Do not use the electric st arter for more than 5
seconds at a ti me. Release the starter bu tton
for approxi mately 10 seconds before pressing
it again.
7. If the engine is starte d with the starter
(choke) in po sition , the starter (chok e)
should be ret urned to position to warm up
the engine. If the engine is started with t he
starter (choke) in position , keep the st arter
(choke) in th is position to warm up the
engine.
8. Continue warming up the engine until i t idles
smoothly an d return the starter (chok e) to
position before riding.
CAUTION:
See the "engine break- in section prior to
operating engine for the first ti me.
51
Page 61

To start the engi ne without the electric st arter.
1. Follow steps 1 through 5.
2. With the throttle clo sed, operate the kick
starter with a rapid, co ntinuous moti on.
Starting a warm engine ( MAXXER 90)
To start a warm eng ine, refer to the "Startin g a
cold engine " section. The s tarter (choke) should
not be used. The throttle should be opened
slightly.
CAUTION:
.Do not allow the kick star ter to snap back
freely agai nst the pedal stop as engine case
damage coul d result.
.Raise the kic k starter p edal after the ki ck
starter lever is retur ned to the stop.
3. Follow steps 7 through 8.
Warming u p (MAXXER 90)
To get maximum en gine life, always warm up the
engine befo re starting off. Never accelerate
hard with a col d engine! To see whether or not
the engine is w arm, check if it responds to t he
throttle normally with the starter (c hoke) turned
off.
CAUTION:
.Do not operate the throt tle (open and clo se
rapidly) as t he ATV will move for ward
suddenly, causing possib le loss of contro l.
.Do not leave the ATV unattended while the
engine is war ming up
52
Page 62

Starting engine ( 50)MAXXER
WARNING
POTENTIAL HAZARD
Freezing control cables in cold w eather.
WHAT CAN HAPP EN
You could be unable to control the ATV,
which could lead to an accident or collision .
HOW TO AVOID THE HAZARD
When riding in cold weather, alway s make
sure all control cables work smoo thly
before you begin riding.
1. Select a level surface and lock the park ing
brake ( ) before starting the
engine.
2. Turn the fuel lock to "ON" .
3. Turn the main s witch to "." and the engine
stop switch to " ".
4. Make sure the tethere d road lead
into the
see page 32 or 33
is installe d
remote engi ne stop switch.
5.With the throttle cl osed, push the starter
button. Release the st arter button as soon as
the engine starts.
NOTE:
Do not use the electric st arter for more than 5
seconds at a ti me. Release the starter bu tton
for approxi mately 10 seconds before pressing
it again.
6. Be sure to keep the throt tle closed and th e
parking bra ke locked while s tarting and
warming up th e engine.
7. Allow the eng ine warm up before riding.
CAUTION:
.Do not operate the throt tle (open and clo se
rapidly) as t he ATV will move for ward
suddenly, causing possib le loss of contro l.
.Do not leave the ATV unattended while the
engine is war ming up
53
Page 63

To start the engi ne without the electric st arter.
1. Follow steps 1 through 4.
2. With the throttle clo sed, operate the kick
starter with a rapid, co ntinuous moti on.
CAUTION:
.Do not allow the kick star ter to snap back
freely agai nst the pedal stop as engine case
damage coul d result.
.Raise the kic k starter p edal after the ki ck
starter lever is retur ned to the stop.
3. Follow steps 6 through 7.
If you cannot restart a wa rm engine:
1. Follow steps 1 through 4.
2. Open the throttle sli ghtly (1/8-1/4) while
starting the engine . If t he throttle lim iter Is
adjusted as d elivered, open the throt tle fully.
Engine break-in
There is neve r a more important period in t he life
of your machine than the p eriod between z ero
and 20 hours.
For this reason, we ask th at you carefull y read
the following material. Because the e ngine is
brand new, you m ust not put an excessive load
on it for the first 20 hours , the various par ts in
the engine we ar and polish themselves to the
correct ope rating clearances.
During this p eriod, prolonged full th rottle
operation o r any condition which might result in
excessive e ngine heating m ust be avoided.
However, mom entary (2~3 seconds maximum)
full throttle operat ion under load do es not harm
the engine.
Each full throttle acc eleration seq uence should
be followed w ith a substantial rest per iod for the
engine by cru ising at lower r/min so the en gine
can rid itsel f of the temp orary build up of h eat.
If any abnormality is noticed during th is period,
consult a KYM CO dealer.
54
Page 64

1. 0~10 hours :
Avoid cont inuous operat ion above half
throttle. Allow a cooling off period of five to ten
minutes after every hour of operation . Vary
the speed of the machine from time to time.
Do not operate it at full th rottle positi on.
2. 10~20 hour s:
Avoid prol onged operati on above 3/4 thro ttle.
Rev the machi ne freely through the gear s but
do not use full throttle a t any time.
3. After break-in
Avoid prol onged full thro ttle operation. Vary
speeds occa sionally.
55
Page 65

Parking ( 50)
When parkin g, stop the e ngine. Turn the fu el
lock to "OFF" and apply th e parking brake .
MAXXER
Parking ( 90)
When parkin g, stop the e ngine. Turn the fu el
lock to "OFF" and apply th e parking brake .
MAXXER
Make sure the l ock plate into the locked
position.
To set the parkin g brake, see page 3 2.
(1)
(1)Locked position
Make sure the l ock pin into the locked position.
To set the parkin g brake, see page 3 3.
(1)
(1)Locked position
56
Page 66

Parking on a slope
WARNING
POTENTIAL HAZARD
Parking on a slope or other incline .
WHAT CAN HAPP EN
The ATV could roll out of control, increasing
the chance of an acciden t.
HOW TO AVOID THE HAZARD
Avoid par king on slope or other inclines. If
you must park on an incline, place th e
machine transverse ly across the incline,
apply the parking brak e, and bloc k the front
and rear wheels with rocks or other o bjects.
Do not park the ATV at all on slope that are
so steep you could not walk up them eas ily.
1. Bring the machine to a stop by applying th e
brakes.
2. Stop the engine.
3. With the brake applied, apply the park ing
brake.
57
Page 67

Accessories
Accessori es can affect th e handling and co ntrol
of your ATV. Keep the foll owing in mind whe n
consideri ng an accessory o r operating an ATV
which has acc essories.
‧Choose only a ccessories de signed for your
ATV. Your KYMCO deal er has a variety of
genuine KYM CO accessorie s. Other
accessori es may also be avai lable on the
market. However, it is not possible for KY MCO
to test all non-KYMCO ac cessories, no r have
any control over the quality or suitabi lity of
them. Choose a genuine KYMCO accessory,
or one that is equivalent in design and quality.
‧Accessori es should be rigi dly and securel y
mounted. An ac cessory which c an shift
position or come off while yo u are riding coul d
affect you r ability to control the ATV.
‧Do not mount an accessory where it could
interfere with your ability your to con trol the
ATV. Examples in clude (but are not limited t o)
a heavy or bulk y object attached to the
handlebar s which could mak e steering
difficul t, an accessory that limits your ability to
move around o n the seat, or one that limits
your view.
‧Use extra cau tion when riding an ATV with
accessori es. The ATV may han dle differently
58
Page 68

Page 69

WARNING
Indic ates a potentia l hazard that could result
in serious injury or death.
GETTING TO KNOW YOUR ATV
This ATV is for re creation and utility use . This
section, riding your ATV, provides ge neral ATV
riding inst ructions for recreatio nal riding. The
skills and te chniques desc ribed in this section,
however, are a ppropriate for all types of riding.
Riding your ATV requires spec ial skills acqu ired
through pra ctice over a period of time. Take the
time to learn the basic te chniques well b efore
attempting more difficult maneuvers.
Riding your n ew ATV can be a very enj oyable
activity, providing you wi th hours of pleasure.
But it is essential to fam iliarize your self with the
operation o f the ATV to achieve the sk ill
necessary t o enjoy riding safely. Before you
begin to ride , be sure you have read this
Owner's manual.
Manual comp letely and unde rstand the
operation o f the controls. Pay partic ular
attention to the safet y information on pages
4~8. Please a lso read all caution and warning
labels on you r ATV.
60
Page 70

RIDE WITH CARE AND GOOD JUDGEMENT
Get training if you are inexperie nced.
Beginners a nd inexperien ced riders shou ld get
proper inst ruction on how to operate th is ATV.
WARNING
POTENTIAL HAZARD
Operating this ATV without proper
instruction.
HOW TO AVOID THE HAZARD
Become familiar with t his ATV at slow
speeds first, even if yo u are an experienced
operator.
Do not attempt to operat e at maximum
performance until yo u are totally familiar
with the machine's handling and
performance charac teristics.
WHAT CAN HAPP EN
The risk of an accident is greatly in creased
if the op erator does not know how to
operate the ATV properly i n different
situations and on different typ es of terrain.
Riding your machine requires sk ills acquired
through practice ove r a period of t ime.
Take the time to learn the basic techniques w ell
before attempting mo re difficult maneuvers.
61
Page 71

Age Recommendation ( MAXXER 50)
The minimum recommended age for this ATV
model is 6. For safety, never let childre n under 6
years old ope rate this vehicle. Child ren under
16 should be su pervised by an ad ult.
WARNING
POTENTIAL HAZARD
Failure to follow the age recomme ndations
for this ATV.
Failure to supervise c hildren u nder 16 on
ATV models intended fo r their use.
HOW TO AVOID THE HAZARD
A child und er 6 should n ever operate this
ATV.
Never allow a child under 16 to opera te an
ATV without adult supe rvision a nd never
allow continued use of t e ATV by a child If
he or she does not have the abilities t o
operate it safely.
WHAT CAN HAPP EN
If children use ATVs that ar e not
recommended for thei r age, severe injury or
death can result.
Even though a child may be within the age
group for which an ATV is recommended , he
or she may not have the skil ls, abili ties, or
judgm ent needed to operate the ATV sa fely
and may be involved in a serious acci dent.
UNDER
6
62
Page 72

Age Recommendation ( MAXXER 90)
The minimum recommended age for this ATV
model is 12. Fo r safety, never let childr en under
12 years old op erate this vehicle. Chil dren
under 16 shou ld be supervise d by an adult.
WARNING
POTENTIAL HAZARD
Failure to follow the age recomme ndations
for this ATV.
Failure to supervise c hildren u nder 16 on
ATV models intended fo r their use.
HOW TO AVOID THE HAZARD
A child und er 12 shoul d never operate t his
ATV.
Never allow a child under 16 to opera te an
ATV without adult supe rvision a nd never
allow continued use of t e ATV by a child If
he or she does not have the abilities t o
operate it safely.
WHAT CAN HAPP EN
If children use ATVs that ar e not
recommended for thei r age, severe injury or
death can result.
Even though a child may be within the age
group for which an ATV is recommended , he
or she may not have the skil ls, abili ties, or
judgm ent needed to operate the ATV sa fely
and may be involved in a serious acci dent.
UNDER
12
63
Page 73

Page 74

Apparel
WARNING
POTENTIAL HAZARD
Operating this ATV without wearin g an
approved motorcycl e helmet, eye
protection and prote ctive clothing.
WHAT CAN HAPPEN
Operating without an
approved motorcycle
helmet increases your
chances of a severe
head injury or death in
the event of an
accident.
Operating without eye
protection can result in
an accident and
increases your chances
of a severe injury in the
event of an accident.
Operating without protectiv e clothing
increases your chanc es of severe injury in
the event of an accident .
HOW TO AVOID THE HAZARD
Always wear an approve d motorcycle
helmet that fits properly.
You should also wear:
eye protection(goggles or fac e shield)
glove s
boots
long- sleeved shirt or jacket
Long pa nts
65
Page 75

Do not operate after con suming alcohol or
drugs.
Operator's performance capability is reduced by
the influence of alcohol or drugs.
WARNING
POTENTIAL HAZARD
Operating this ATV after c onsumin g
alcohol or drugs.
WHAT CAN HAPP EN
Could seriously affe ct your jud gment.
Could cause you to react m ore slowl y.
Could affect your bala nce and per ception.
Could result in an accident.
HOW TO AVOID THE HAZARD
Never consume alcoho l or drugs be fore or
while d riving this ATV.
66
Page 76

Pre-operation chec ks
Always perf orm the pre-operation checks listed
on page 40 befo re riding for safety and pro per
care of the mac hine.
WARNING
POTENTIAL HAZARD
Failure to inspect the ATV before ope rating.
Failure to properly ma intain th e ATV.
WHAT CAN HAPP EN
Increases the possib ility of an a ccident or
equipment damage.
WARNING
POTENTIAL HAZARD
Operating this ATV with improper ti res, or
with improper or uneven tire pres sure.
WHAT CAN HAPP EN
Use of improper tires on t his ATV, or
operation of this ATV with improper o r
uneven tire pressure , may cause loss of
control, increasin g your risk o f an
accident.
HOW TO AVOID THE HAZARD
Always inspect tour ATV ea ch time you u se
it to make sure the ATV is in safe operatin g
condition.
Always follow the inspection an d
maintenance proced ures and schedules
described in the Owner's Manual .
HOW TO AVOID THE HAZARD
Always use the size and ty pe tires specified
in the Ow ner's Manual for this vehi cle on
pages47~48.
Always maintain prop er tire pressure as
described in the Owner's Manual o n
page47.
67
Page 77

Do not operate at speeds t oo fast your skills
or the conditions.
WARNING
POTENTIAL HAZARD
Operating this ATV at spee ds too fast f or
your skills or the conditions.
WHAT CAN HAPP EN
Increases your chanc es of losing control of
the ATV, which c an result in an accident.
HOW TO AVOID THE HAZARD
Always go at a speed that is proper for t he
terrain, visibility and opera ting conditions,
and your experience.
Speed limit er
For riders inexperienced with this mo del, this
model is equi pped with a speed l imiter in the
throttle lever housing. The speed limiter limits
the power and top speed of the machine.
Turning the screw in decre ases top speed, a nd
turning it out increases top speed.
(2)
(1)
1. Adjuster
68
2. Locknut
Page 78

Loading and accessories
Use extra cau tion when riding the machine with
additiona l loads, such as accessories or cargo.
The machine 's handling may b e adversely
affected . Reduce your speed when adding
additiona l loads.
Loading and Operational Guidelines
Carrying ca rgo will affec t how your ATV handl es
and greatly reduce its ability in accel erating,
braking and m aking turns and o ther maneuvers.
Be sure to obse rve the weight limits and fo llow
these guide lines:
1. Do not tow another vehi cle.
2. Make sure al l cargo is secured before riding.
3. Allow extra r oom for sta rting, stoppi ng and
turning whe never you carry cargo or pull a
trailer.
4. Avoid ridi ng on steep slope s when carrying
cargo or pill ing a trailer.
5. Never cross a slope when toeing a traile r.
69
Page 79

WARNING
POTENTIAL HAZARD
Overloading this ATV or carrying or t owing
cargo improperly.
WHAT CAN HAPP EN
Could cause changes in vehicle ha ndling,
stability and brakin g which cou ld lead to an
accident.
HOW TO AVOID THE HAZARD
Never excee d the stated load capacity f or
this ATV.
Cargo should be properly distri buted and
securely attached.
Reduce speed when carr ying cargo or
pulli ng a trailer. Al low greater distance for
braking.
Always follow the instruction s in your
Owner's Manual for car rying car go or
pulli ng a trailer.
Accessories
Genuine KYM CO accessories have been
specifica lly designed for and teste d on this
vehicle. Be cause KYMCO cannot test al l other
accessori es, you are perso nally responsible for
properly se lecting, installing, a nd using nonKYMCO acces sories. Always follow the loading
instructions above, plus the follow ing:
1. Carefully inspect the accessory to m ake sure
it does not block any lights, reduce grou nd
clearance , or limit suspension trav el, steering
travel, or other contr ols.
2. Make sure the accessory does not inter fere
with your ability to shi ft body positio n on the
seat or operate hand and foot controls.
3. Do not add electrical equipment that w ill
exceed the vehicle's electrical system
capacity. A blown fuse cou ld cause a loss of
lights or engine power.
70
Page 80

Modifications
WARNING
POTENTIAL HAZARD
Operating this ATV with improper
modifications.
WHAT CAN HAPP EN
Improper installat ion of acce ssories or
modification of this vehicle ma y cause
changes in handling which in some
situations could lead to an accid ent.
HOW TO AVOID THE HAZARD
Never modify this ATV thro ugh impro per
installation or use of accessories. All parts
and accessories adde d to this vehicle
should be genuine KYMCO or equiva lent
components designed for use on th is ATV
and should be installed and used ac cording
to instruction. If you have quest ion, consult
an authorized ATV dealer.
No Modifications
Modifying this ATV or removing original
equipment m ay render the vehicle unsafe or
illegal. Sp ark arresters and mufflers ar e
required in m ost areas. Don't modify yo ur
exhaust sys tem or emission control system
component s. Remember, excessive noise
bothers eve ryone and creates a bad image for
ATV.
71
Page 81

Page 82

Page 83

Page 84

RIDING
Select a flat area to become familiar wit h your
ATV. Make sure that this area is free of
obstacles a nd other riders. You should practice
control of the throttl e, brakes, shif ting before
trying more d ifficult ter rain.
Always avoi d riding on rough s urfaces: the ATV
is designed f or on-road use on ly, and handlin g
maneuvers a re more diffic ult to perform on l evel
surfaces.
Set the parki ng brake and follow the instruction
on page 50~54 t o start the engine. Once it ha s
warmed up you a re ready to begin r iding your
ATV. Remember that the engine and exhaust
pipe will be ho t when riding and a fterwards; do
not allow ski n or clothing to come in conta ct with
these compo nents.
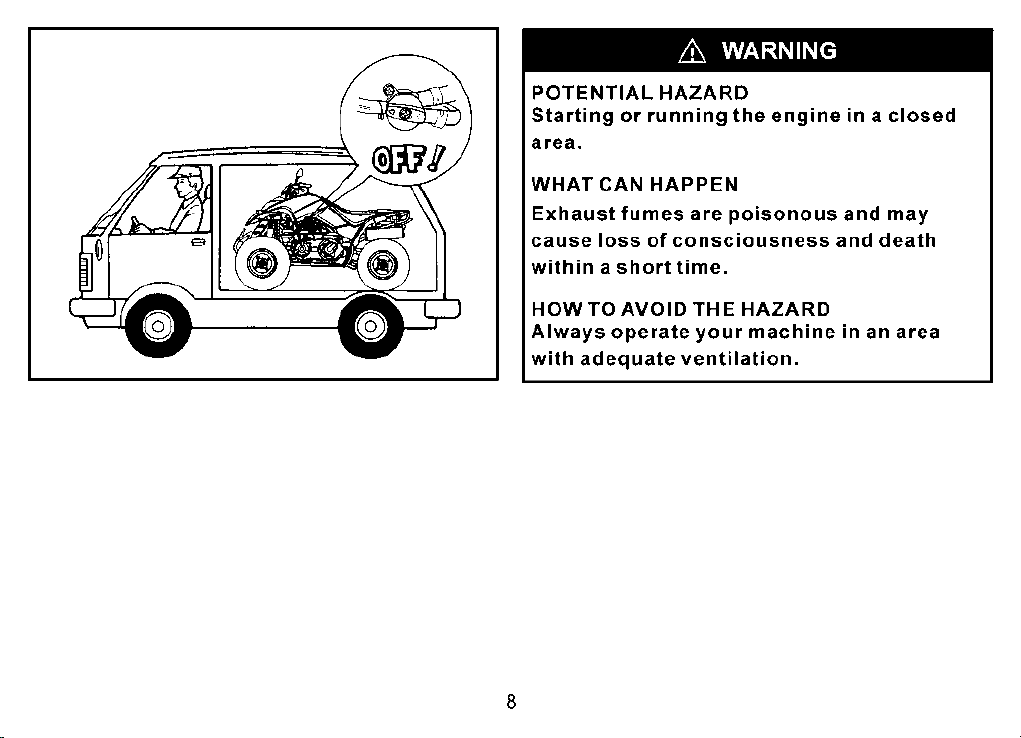
WARNING
POTENTIAL HAZARD
Starting or running the engine in a closed
area.
WHAT CAN HAPP EN
Exhaust fumes are pois onous and m ay
cause loss of consciousness and d eath
within a short time.
HOW TO AVOID THE HAZARD
Always operate your ma chine in an a rea
with adequate ventilation.
Practice wi th the remote engine stop sw itch and
throttle limiter adj usted as delive red until you
are confide nt in braking and making turns.
75
Page 85

Page 86

Speed limiter for new ri ders
Your ATV has an a djustable throttle lim iter.
The screw and l ocknut in the lower thrott le
housing can b e adjusted to limit thrott le lever
movement.
To adjust the thr ottle limiter:
1. Loosen the lock nut.
2. Turn the throttle limi ter screw clock wise to
reduce thro ttle lever movement or
countercl ockwise to increase throttle lever
movement.
3. Hole the screw in place and tighten the lo ck
nut.
1. Adjuster
77
(2)
(1)
2. Locknut
Page 87

BRAKING
Practice starting and stopping at slo w speeds.
Gradually w ork up to faster starts and st ops.
1. Steer straight ahea d. Close the thro ttle
completel y, remove your th umb from the
throttle lever.
2. Gently apply the brakes: pull both han d
levers.
Gradually i ncrease the lever or/and pedal
pressure as y ou feel the brakes slowing y our
speed. The p ressure used de pends on your
speed and the c ondition of the terrain yo u are
riding. Sli ck , slippery or muddy ground requires
gentler bra king.
Pulling one o r both brake leve rs or/and
depressin g brake pedal too h ard may cause the
front and/or rear whee ls to skid or slide o ut of
control. If this happens, release all p ressure on
the lever(s ) immediately. Steer str aight ahead to
regain cont rol. Then gent ly reapply the brakes.
Independe nt use of only the front or rear b rakes
reduces stopping performance. Ext reme braking
may cause the wheels to lock, reducing co ntrol
of the ATV
When possib le, reduce speed or brake before
entering a turn. Closing the throttle o r braking in
mid-turn ma y cause wheel slippage which will
reduce cont rol of your ATV.
78
Page 88

Page 89

CLIMBING UP SLOPE
Use proper ri ding techniques to avoid vehicle
overturns o n slopes. Be sure that you can
maneuver yo ur ATV well on flat gr ound before
attempting any incline and then pract ice riding
first on gentle slopes. Try more difficult climbs
only after you have developed your skil l. In all
cases avoid i nclines with sl ippery or loose
surfaces, or obstacles that might cau se you to
lose contro l.
WARNING
POTENTIAL HAZARD
Operating on excessi vely steep slopes.
WHAT CAN HAPP EN
The vehicle can overtu rn more easily on
extremely s teep slop es than on level
surfaces or small slop es.
HOW TO AVOID THE HAZARD
Never operate the ATV on slo pes too steep
for the ATV or for your abilities.
Practice on smaller sl opes before
attempting large slo pes.
It is important when cli mbing a slope to ma ke
sure that tour weight is transferred fo rward on
the ATV. This can be a ccomplished b y leaning
forward, steeper inclines and stand ing on the
footboards and leaning forward over the
handlebar s.
80
Page 90

Page 91

Page 92

If your ATV has stall ed or stopped and y ou
believe you c an continue up the slope, restart
carefully to make sure you do not lift the fr ont
wheels whic h could cause you t o lose control. If
you are unabl e to continue up the slope,
dismount th e ATV on up slope side . Physically
turn the ATV aro und and then desc end the
slope.
WARNING
POTENTIAL HAZARD
Stalling, rolling backwards o r imprope rly
dismounting while climbing a slope.
WHAT CAN HAPP EN
Could result in ATV overturning.
If you start to roll backw ards, DO NOT use t he
rear brake to s top. The ATV could easily ti p over
backwards . Instead, dismount the ATV
immediate ly on the up of slope side.
HOW TO AVOID THE HAZARD
Maintain steady spee d when clim bing a
slope.
If you lose all forward speed:
Keep weight up slope.
Apply the brakes.
Lock parking brake, af ter you are stopped.
If you begin rolling backwards:
Keep weight up slope.
Never apply the rear bra ke while rolling
backwards.
83
Page 93

Page 94

Page 95

RIDING DOWN SLOPE
When riding y our ATV down s lope, shift your
weight as far to the rear an d up slope side of th e
ATV as possib le. Move back on th e seat and sit
with your arm s straight. Improper bra king may
cause a loss of t raction.
Use caution w hile descendi ng a slope with loose
or slippery surfaces. Braking abili ty and traction
may be advers ely affected b y these surfaces.
Improper br aking may also ca use a loss of
traction. Whenever possible, ride y our ATV
straight down slope. Avoid s harp angles whi ch
could allow t he ATV to tip or roll over. Carefully
choose your p ath and ride no faster than yo u will
be able to reac t to obstacles which may appear.
WARNING
POTENTIAL HAZARD
Going d own a slope i mproperly.
WHAT CAN HAPP EN
Could cause loss of control or caus e the
ATV to overtu rn.
HOW TO AVOID THE HAZARD
Always follow proper procedur es for going
down sl opes as described in this Owner's
Manual. Note: a specia l techniq ue is
required when brakin g as you go dow n a
slope.
Always check the terra in carefully before
you start down any slope.
Shift your weight backward.
Never go down a slope at high speed.
Avoid goi ng down a slo pe at an angl e that
would c ause the vehicle to lean sha rply to
one side. Go straight down the slope where
possible.
86
Page 96

Page 97

WHAT TO DO IF
This section is designed to be a referenc e guide
only. Be sure t o read each secti on on riding
technique s completely.
WHAT TO DO.. ..
If your ATV doesn't turn when you want it to:
Bring the ATV to a s top and practice the turni ng
maneuvers a gain. Be sure you a re putting your
weight on the footboar d to the outside of t he
turn. Position your weight over the fro nt wheels
for better control. (S ee pages 79.)
If your ATV can't mak e it up a slope you are
trying to climb:
Turn the ATV around if you stil l have forward
speed. If not, stop, dis mount on the up slo pe
side of the ATV an d physically tu rn the ATV
around. If the ATV starts to slip backward s DO
NOT USE THE REAR BRAKE - the ATV may tip
over on top of you. Dismount the ATV on the up
slope side. ( See pages 80~85 .)
88
Page 98

PERIODIC MAINTENANCE AND
ADJUSTMENT
Periodic in spection, adjustment and lubricatio n
will keep you r machine in the safest and mo st
efficien t condition pos sible. Safety is an
obligatio n of the machine owner. The most
important points of ma chine inspect ion,
adjustmen t and lubrication are explained on the
following p ages.
WARNING
POTENTIAL HAZARD
Servicing an engine while it is running.
WHAT CAN HAPP EN
Moving parts can catch c lothing o r parts of
the body, causing injury.
Electrical compone nts can cause shocks or
can start fires.
Have KYMCO de aler perform service if yo u
are not familiar with machine ser vice.
Tool kit
A tool kit is prov ide with your ATV.
You are recommen ded to put the tool kit in the
vinyl bag and a lways carry them on the seat
reverse sid e.
(1)
(2)
HOW TO AVOID THE HAZARD
Turn off the engine when performing
maintenance unless o therwis e specified.
(1) Tool kit (2) Rubber band
89
Page 99

The tools in the kit are sufficient to per form
routine mai ntenance and simple repairs. Any
extensive w ork requiring additional tools should
be performe d by your authorized KYMCO
dealer.
WARNING
POTENTIAL HAZARD
Operating this ATV with improper
modifications.
The tool kit includes th e following ite ms:
(1)
Air pressur e gauge
(2)
Spark plug wr ench
(3)
Standard/Phillips screwdriver
(4)
Screwdriv er handle
(5)
10/12 mm wren ch
(6)
Tool bag
(7) Rubber ba nd
(1) (2) (3) (4) (5) (6) (7)
WHAT CAN HAPP EN
Improper installat ion of acce ssories or
modification of this vehicle ma y cause
changes in handling which in some
situation could lead to an accide nt.
HOW TO AVOID THE HAZARD
Never modify this ATV thro ugh impro per
installation or use of accessories. All parts
and accessories adde d to this vehicle
should be genuine KYMCO or equiva lent
components designed for use on th is ATV
and should be installed and used
according to instruc tions. If y ou have
questions, consult an authori zed KYMCO
dealer.
90
Page 100

PERIODIC MAINTENANCE/LUBRICATION ( 50)MAXXER
ITEM
Drive chain
Fuel line*
Transmission oil
V-belt*
Air filter element
Brake*
Battery*
Carburetor*
Wheels*
Spark plug
Exhaust system*
‧Check and adjust slack/alignment/clean/lube.
‧Check fuel hose for cracks or damage.
‧Replace if necessary.
‧Check oil level/oil leakage.
‧Replace every 12 months.
‧Check operation.
‧Replace if damage or excessive wear.
‧Clean.
‧Replace if necessary.
‧Check operation and brake fluid/cable.
‧Replace brake pads/shoes if necessary.
‧Check specific gravity .
‧Check breather hose for proper operation .
‧
‧Check idle speed/starter operation.
‧Adjust if necessary.
‧Check balance/damage/runout.
‧Replace if necessary.
‧Check condition.
‧Adjust gap and clean.
‧Replace if necessary.
‧Check leakage.
‧Retighten if necessary.
‧Replace gasket if necessary.
ROUTINE
if necessary
Correct if necessary.
if necessary
INITIAL
1
month3months6months
Every 20~40 hours
(More often in wet or dusty areas.)
months
EVERY
6
1
year
91
 Loading...