


User Manual
Windows & Macintosh
V1.01

Table of the Contents
About This User’s Manual ......................... |
2 |
Notes for This Manual ............................... |
2 |
Safety Information ..................................... |
3 |
Care and Cleaning ..................................... |
3 |
1. Product Introduction |
.............................. 4 |
Package Contents ................................ |
5 |
Tablet .................................................... |
6 |
Digital Pen ............................................ |
8 |
2. Getting Started ..................................... |
10 |
Installation........................................... |
11 |
Windows ...................................... |
11 |
Mac OS........................................ |
13 |
Configuration ...................................... |
16 |
Windows ...................................... |
16 |
Mac OS........................................ |
27 |
3. Using the Tablet ................................... |
38 |
Holding the Pen .................................. |
39 |
Working Area ...................................... |
40 |
Positioning .......................................... |
41 |
Clicking ............................................... |
42 |
Dragging ............................................. |
43 |
Pressure Control................................. |
44 |
4. |
Using the Bundled Software ............... |
45 |
|
System Requirements ........................ |
46 |
|
Introduction to Tablet Software ........... |
47 |
|
Supporting Operating Systems ........... |
48 |
|
Installing Tablet Software .................... |
49 |
|
Uninstalling Tablet Software................ |
51 |
5. |
Specification Summary ....................... |
52 |
|
Tablet .................................................. |
53 |
|
Digital Pen .......................................... |
54 |
6. |
Troubleshooting................................... |
55 |
|
Testing your device ............................. |
56 |
|
FAQ .................................................... |
58 |
|
Service and Technical Support ........... |
60 |
|
Driver Download ................................. |
61 |
Appendix .................................................. |
62 |
Declarations and Safety Statements... |
63 |
FCC ............................................. |
63 |
CE................................................ |
63 |
Ordering Components and |
|
Accessories ...................................... .. |
64 |
Copyright Information ......................... |
65 |
Limitation of Liability ........................... |
66 |
1

About This User’s Manual
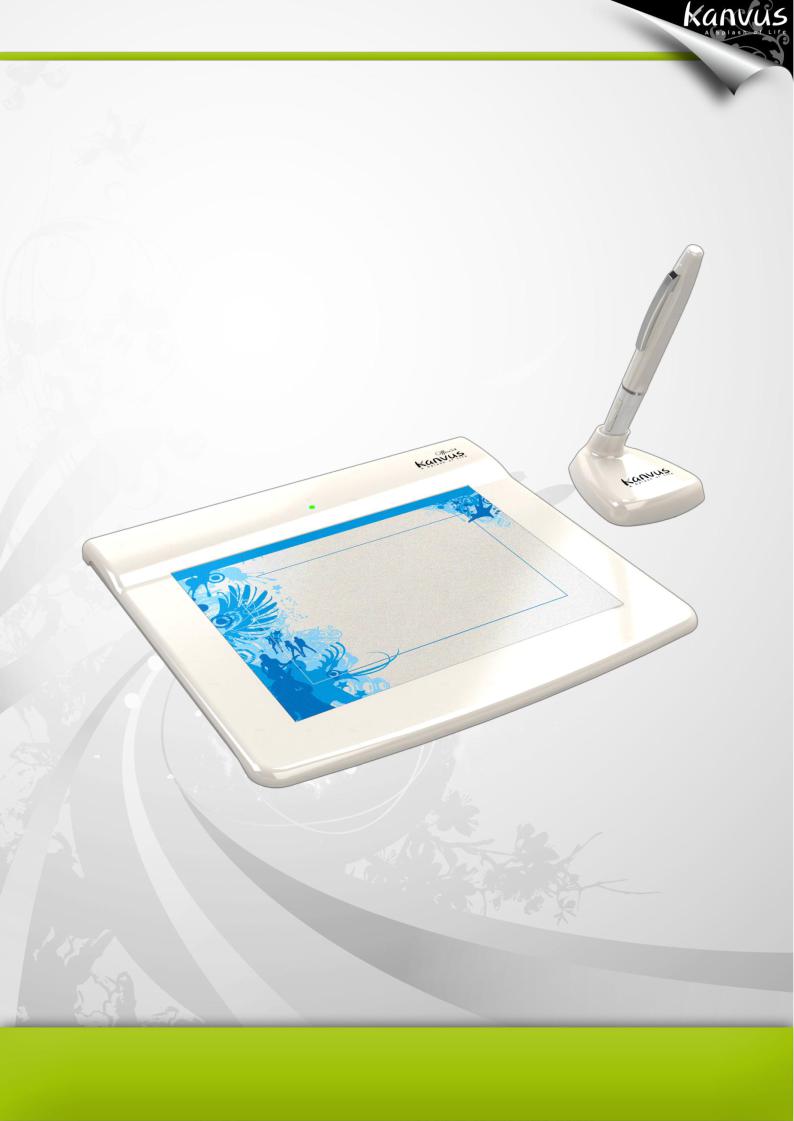
You are reading the Kanvus Office 54 Graphic Tablet User Manual. This Manual provides information regarding the components in the Kanvus Graphic Tablet and how to use them. The following are major sections of this User’s Manual :
1.Product Introduction
Provides information on the Kanvus Graphic Tablet’s components.
2.Getting Started
Provides information on getting started with the Kanvus Graphic Tablet.
3.Using the Tablet
Provides information on using the Kanvus Graphic Tablet.
4.Using the Bundled Software
Provides information on using the Kanvus Graphic Tablet’s utility.
5.Specification Summary
Gives you specifications summary of Kanvus Graphic Tablet.
6.Troubleshooting
Provides information on Kanvus Graphic Tablet, where you can find the answers to most common questions.
Notes for This Manual
A few notes and manuals are used throughout this guide, allowing you to complete certain tasks safely and effectively.
1. |
WARNING |
Important Information that must be followed for safe operation. |
2. |
IMPORTANT |
Vital information that must be followed to prevent damage to data, |
components, or persons. |
||
3. |
TIP |
Tips for completing tasks. |
4. |
NOTE |
Information for special situations. |
|
|
2 |

Safety Information
Adhering to the following safety information will prolong the life of the Tablet.
1.DO NOT try to open the housing of the tablet and the digital pen. It will void your warranty.
2.DO NOT expose to or use near liquids, rain, or moisture.
3.DO NOT place or drop objects on top of the Tablet.
4.DO NOT expose to strong magnetic or electrical fields.
5.DO NOT throw the Tablet in municipal waste. The product has been designed for proper reuse and recycling of parts. The symbol of the crossed-out wheeled bin indicates that the product should not be placed in municipal waste. Check your local regulations for disposal of electronic products.
Care and Cleaning
1.DO NOT expose to dirty or dusty environments to avoid wearing-down the surface of the tablet.
2.Regular cleaning of the tablet surface with a soft cloth will help expand the life span of your tablet. DO NOT use any kind of volatile liquid on the tablet surface, as it will damage the plastic case.
3.Store your tablet and the pen in a clean, dry place and avoid extreme temperatures.
3
1. Product Introduction
-Package Contents -Tablet
-Digital Pen
4
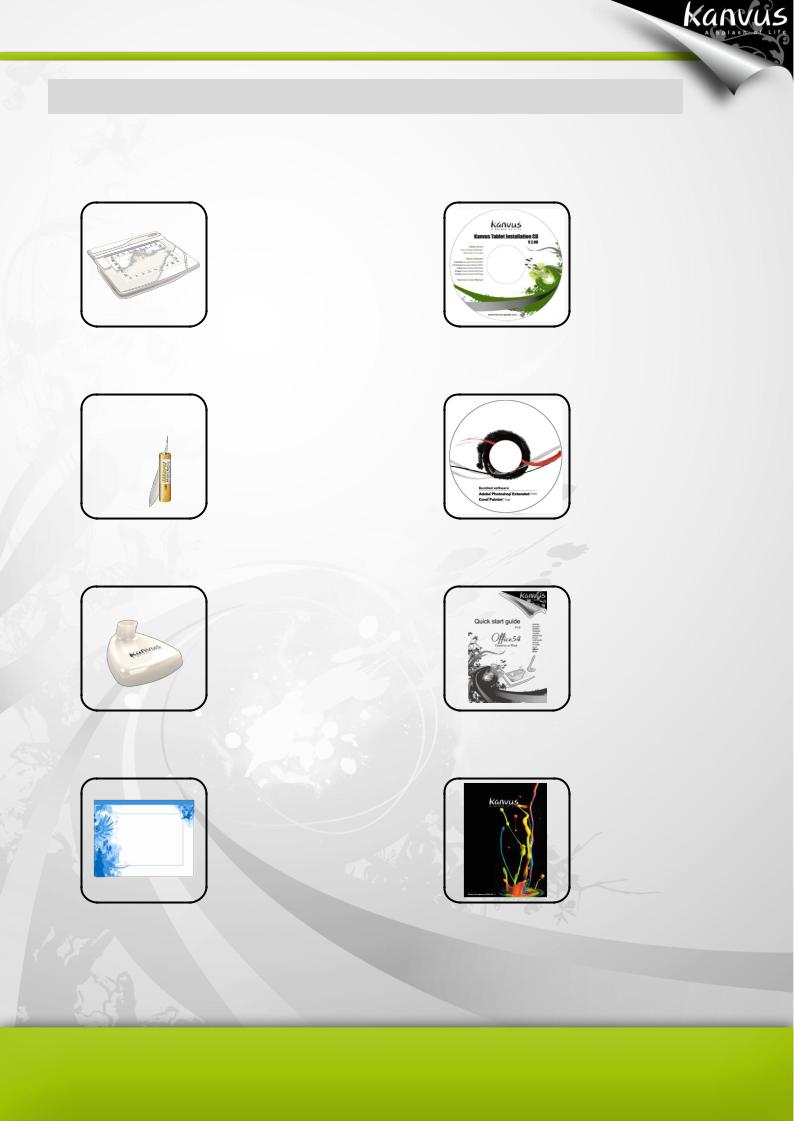
Package Contents
Check your package for the following items.
Kanvus Office 54 Digital Tablet |
Installation CD |
Digital Pen & 1.5V AAA Battery |
Bundled Software(Trial Version) |
|
Installation CD |
Pen Stand |
Quick Guide |
Pad-Cover |
Kanvus DM |
5
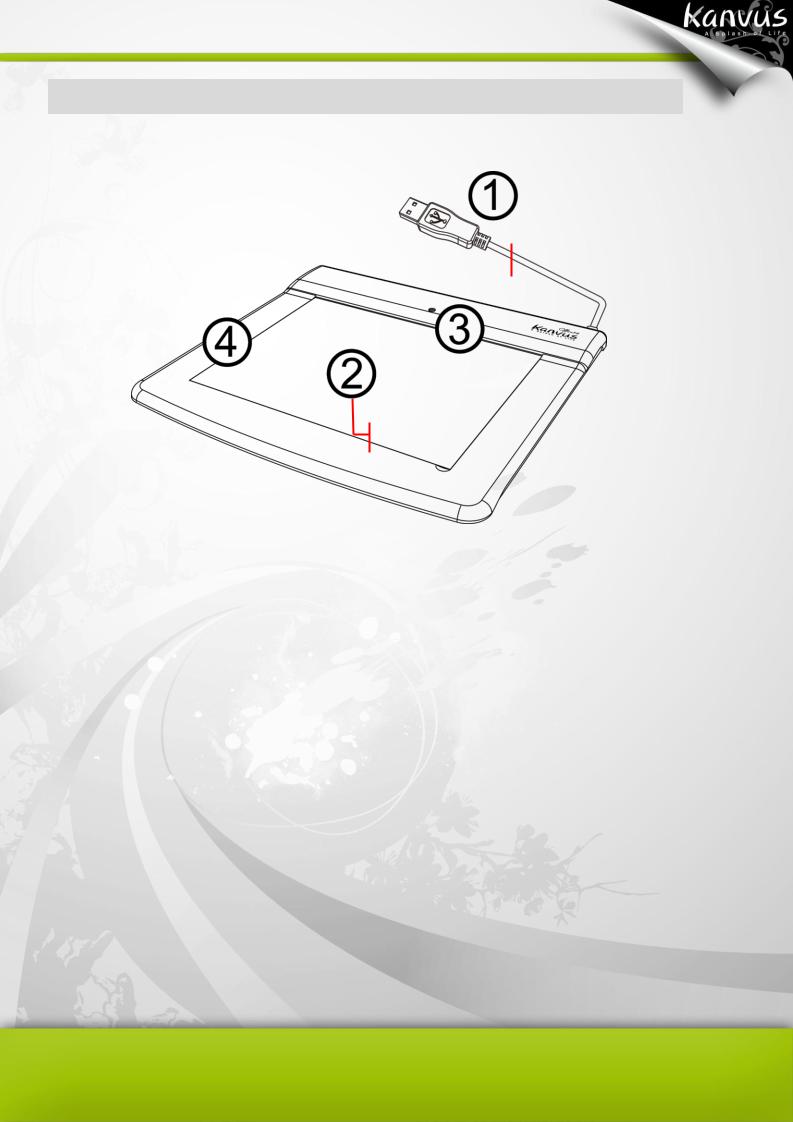
Tablet
Refer to the picture below.
 USB Connector
 Hotspot Area
 LED Indicator
Working Area
Descriptions
○1 — USB Connector : Connect to a USB port on your PC.
○2 — Working Area : Please refer to Working area section for detail descriptions.
○3 — LED Indicator : The green LED light on the tablet is the main indicator for hardware
operation. This LED normally stays off, and will only be turned on/off in response to certain conditions. Pay attention to the states of the LED when you are encountering the following situations :
(a)A built-in power saving function would execute the power saving mode for the pen if it is left unused for a period of time. Tap anywhere on the surface with the tip of the pen to “wake it up” if it has gone into power saving mode.
6

(b)When the pen tablet is re-activated, the LED light will go on for a moment, and will then turn off again.
(c)When the tablet detects the digital pen, the LED will blink slowly. This happens when the pen tip is idling or is being placed within the working area on the tablet.
(d)When you press a button on the pen barrel, the LED light will be turned on.
(e)Moving the pen around the working area will cause the cursor on the screen to move
accordingly.
After the tablet’s device driver has been properly installed, a small tablet icon  will appear in the System Tray, which is normally at the lower right corner of the desktop.
○4 — Hotspot Area : The hotspot area is located at the edge of the working area. A hotspot is
used as a hot key. Press the hotspot to start a default or user-defined application or function.
7
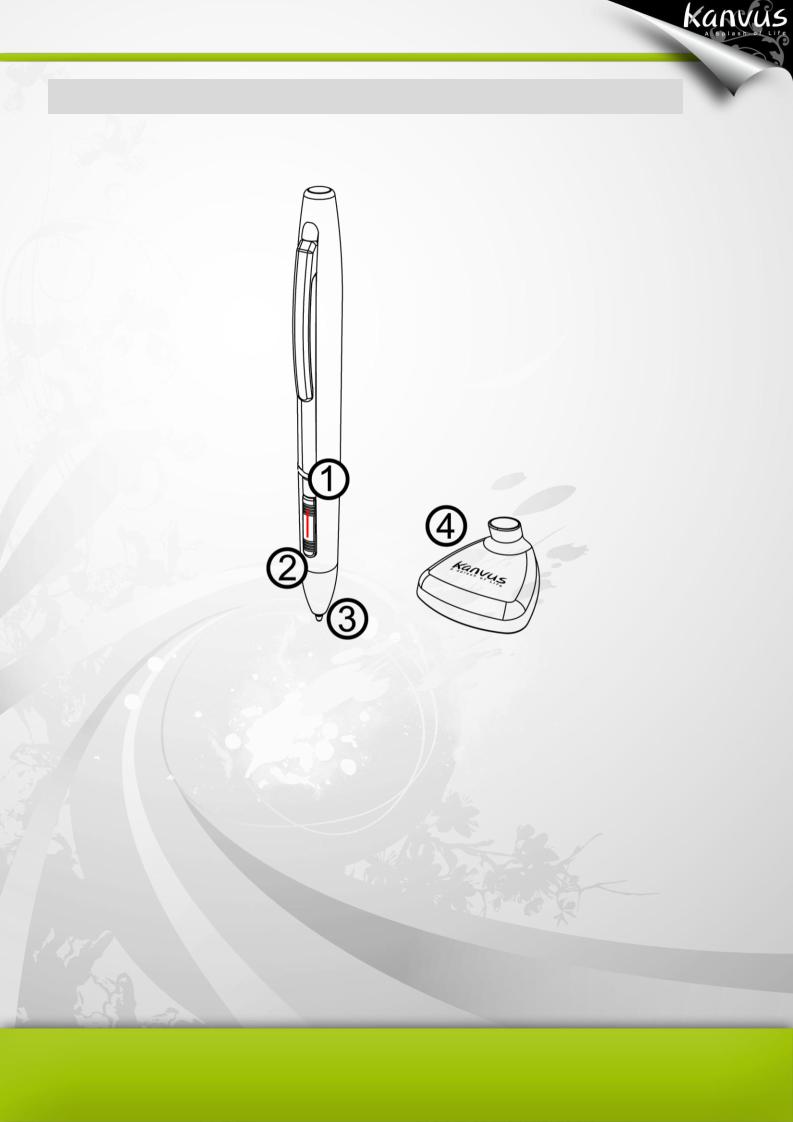
Digital Pen
Refer to the pictures below.
 Button 2
 Pen Stand
 Button 1
 Pen Tip
Descriptions
○1 — Button 2 : This button functions as the Right Click of the mouse (by default).
○2 — Button 1 : Functions like the scroll of the mouse, you can move up/down/left/right (by
default).
○3 — Pen Tip : It is a pressure-sensitive freehand tool for image editing and creating pen strokes
similar to real handwriting. Tap the Pen tip on tablet acts as the Left Click of the mouse (by default).
8
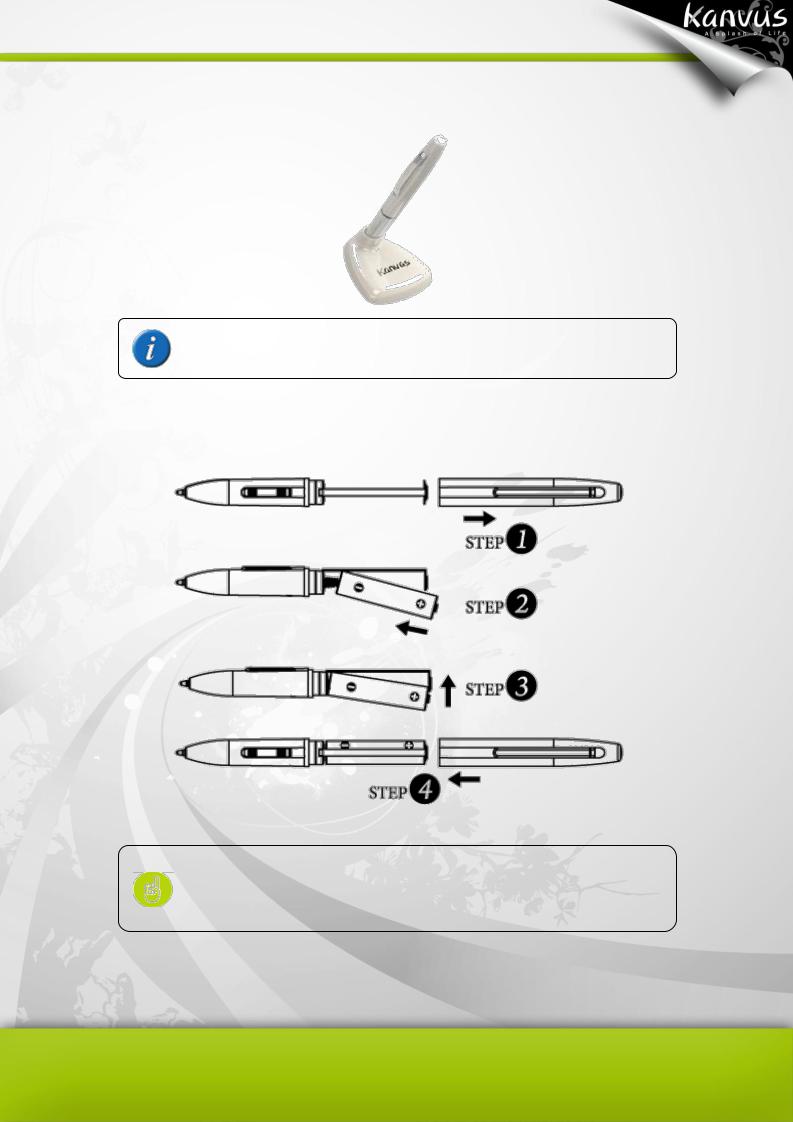
○4 — Pen Stand : Use the Pen stand to store the pen between tasks.
Please refer to Configuration section for more detail settings.
Changing the battery
The power saving mode will be activated if the pen is left unused for about 3 minutes. To wake the pen up, please press the pen tip once anywhere on the surface before you start writing again.
9
2. Getting Started
-Installation -Configuration
10
Installation
Windows
Installing the Driver Software on Windows
Please follow the installation instructions below for Microsoft Windows 2000, XP, Vista and 7
operating systems :
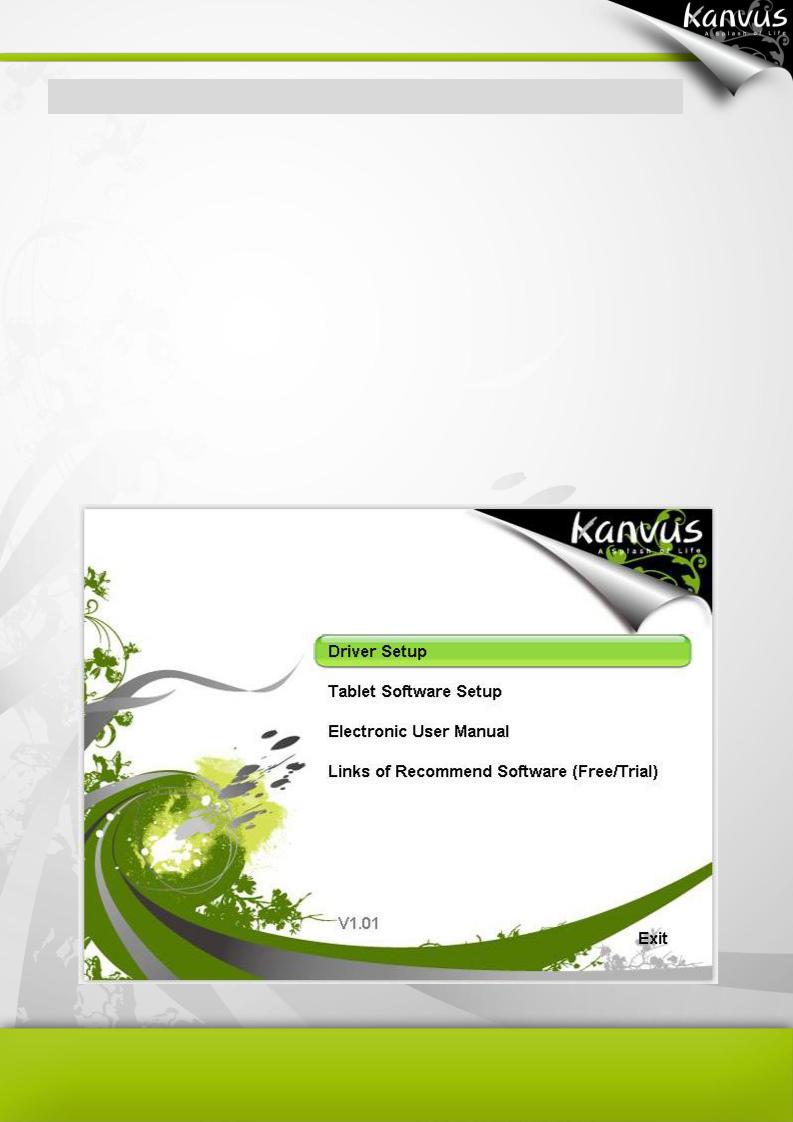
1.Insert the packaged installation CD into CD-ROM drive.
2.The main installation window will appear automatically. If not, please start the installation manually by opening My Computer ► CD/DVD ROM ► then click on the Autorun
program.
11
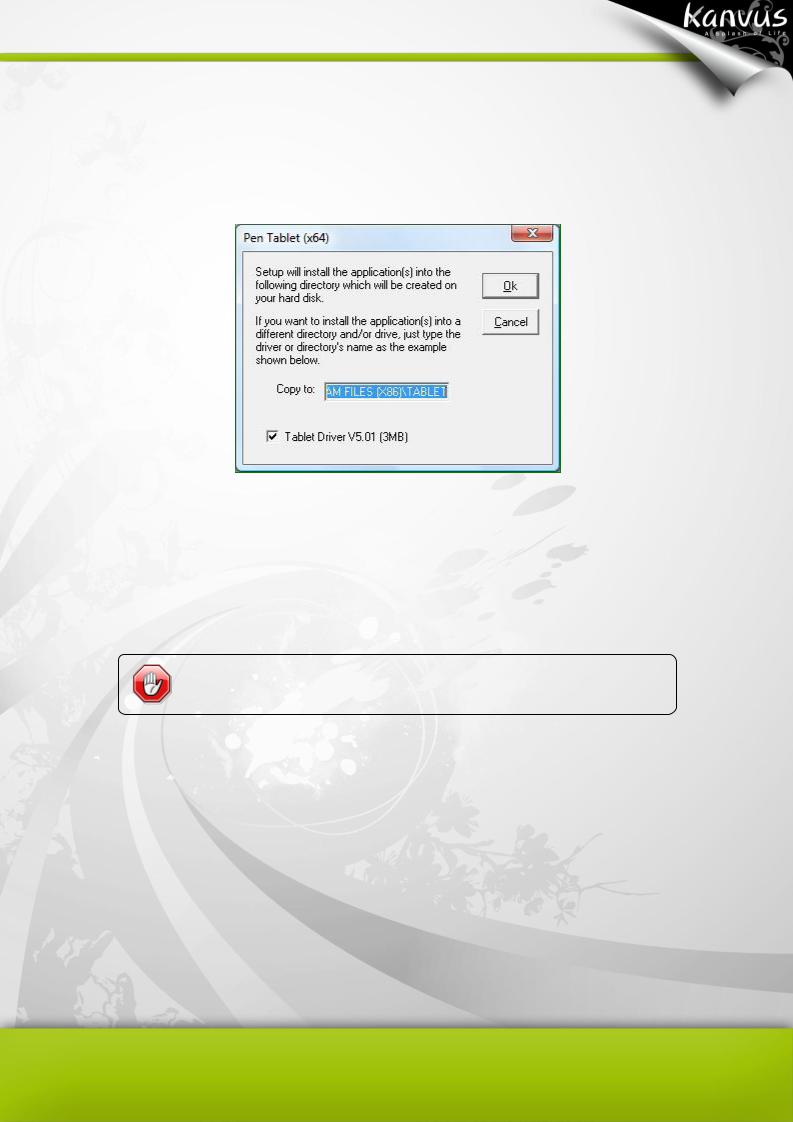
3.When installing the driver, please follow the installation instructions on screen and press the
“Enter” key for each step. After the installation is completed, please reboot the computer
(recommended).
Hardware Installation
Connect the tablet to a PC via an available USB port, after you have installed the driver and rebooted your PC.
Driver must be installed before you connect the device.
12
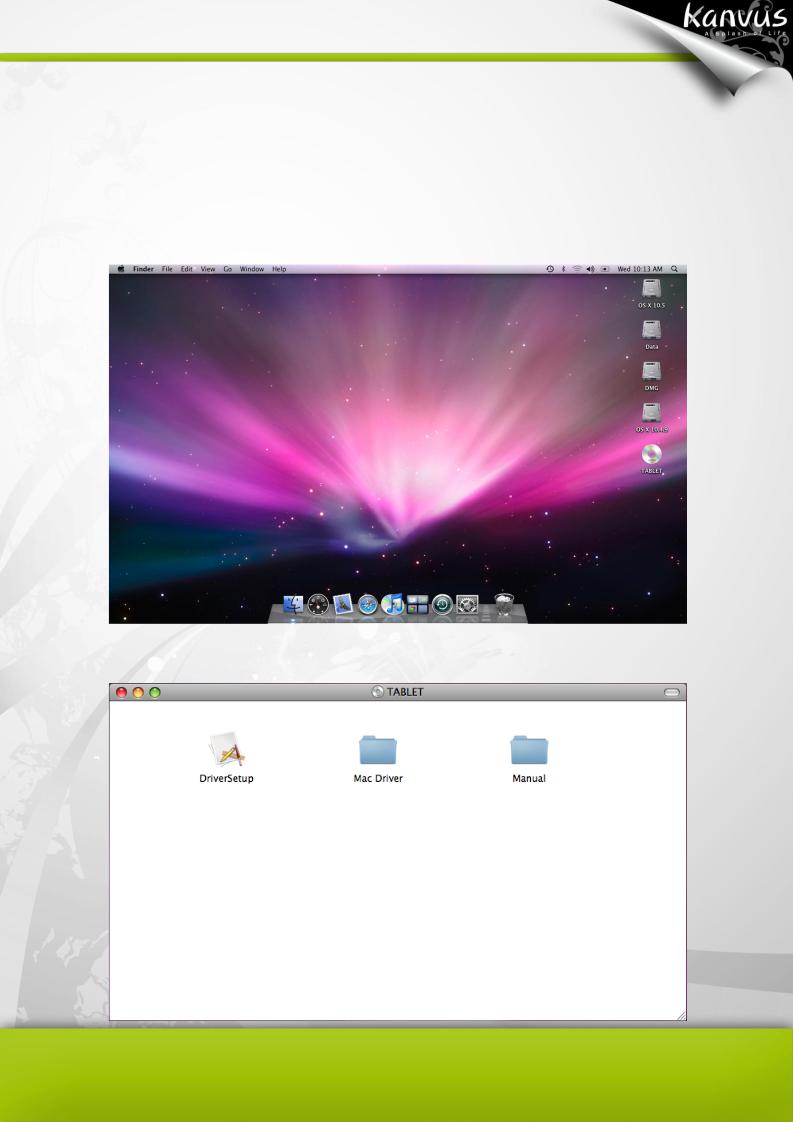
Mac OS
Installing the Driver Software on Mac OS
Please follow the steps below to install the driver : 1. Place Tablet CD into the CD-ROM drive.
2. Click “DriverSetup” on the TABLET window.
13
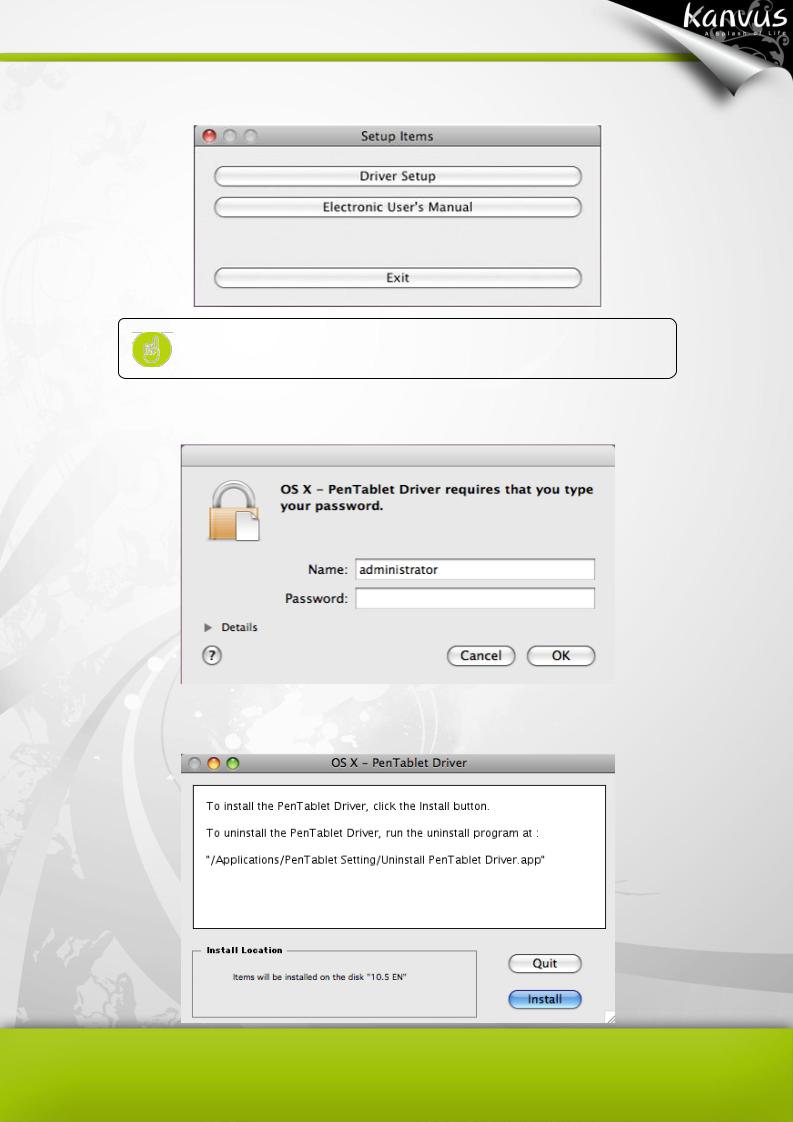
3. Choose “Driver Setup” when the “Setup Items” dialog box appears.
If your Mac OS version is below Mac OS X, please browse your
CD. (Mac Driver / Mac OS 9)
4. Key-in your name and password (Mac computers require username and password).
5. Click “Install” when the “OS X - PenTablet Driver” message appears.
14
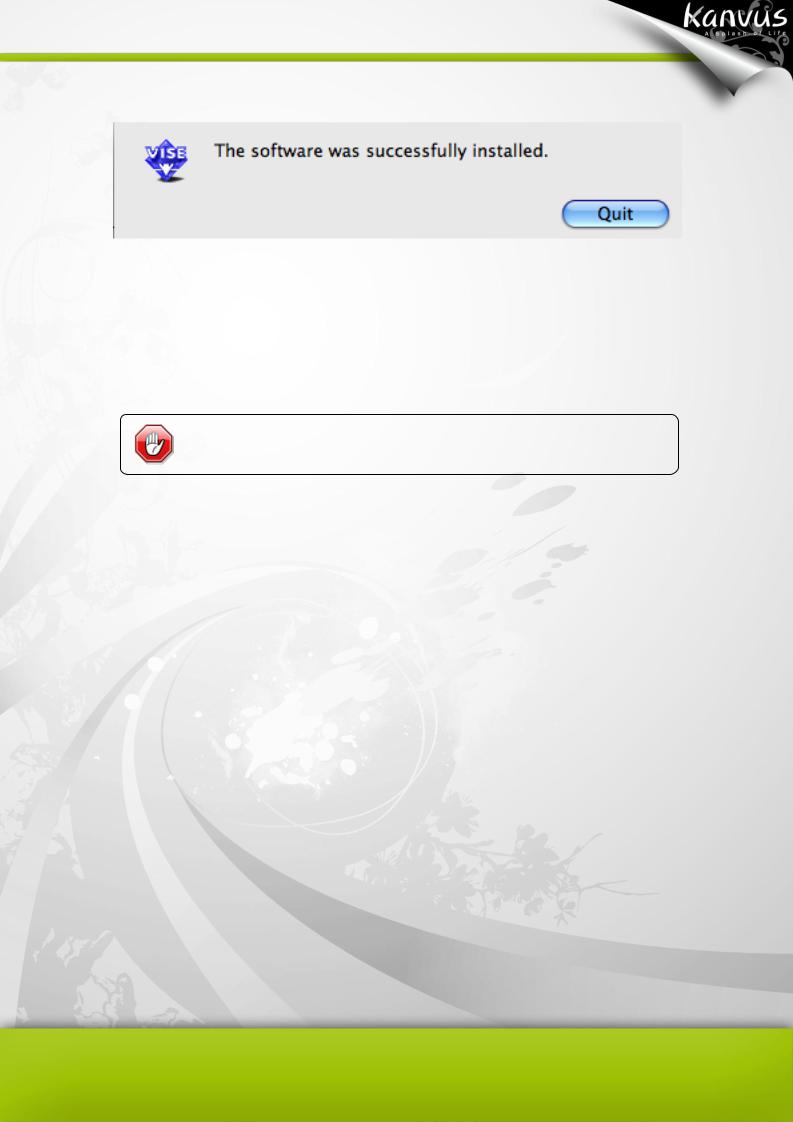
6. Click “Quit” once the system message showed that “The software was successfully installed”.
Hardware Installation
Connect the tablet to a PC via an available USB port, after you have installed the driver and rebooted your PC.
Driver must be installed before you connect the device.
15
Configuration
Windows
To configure your tablet, please press Start ► Settings ► Control Panel , and double-tap
the Tablet Setting  icon.
icon.
Or tap on the tablet icon (  ) in the System Tray (located at the lower right corner of the screen). There are 5 tabs : Info, Button, Scope, Hot Cells, Pressure.
16
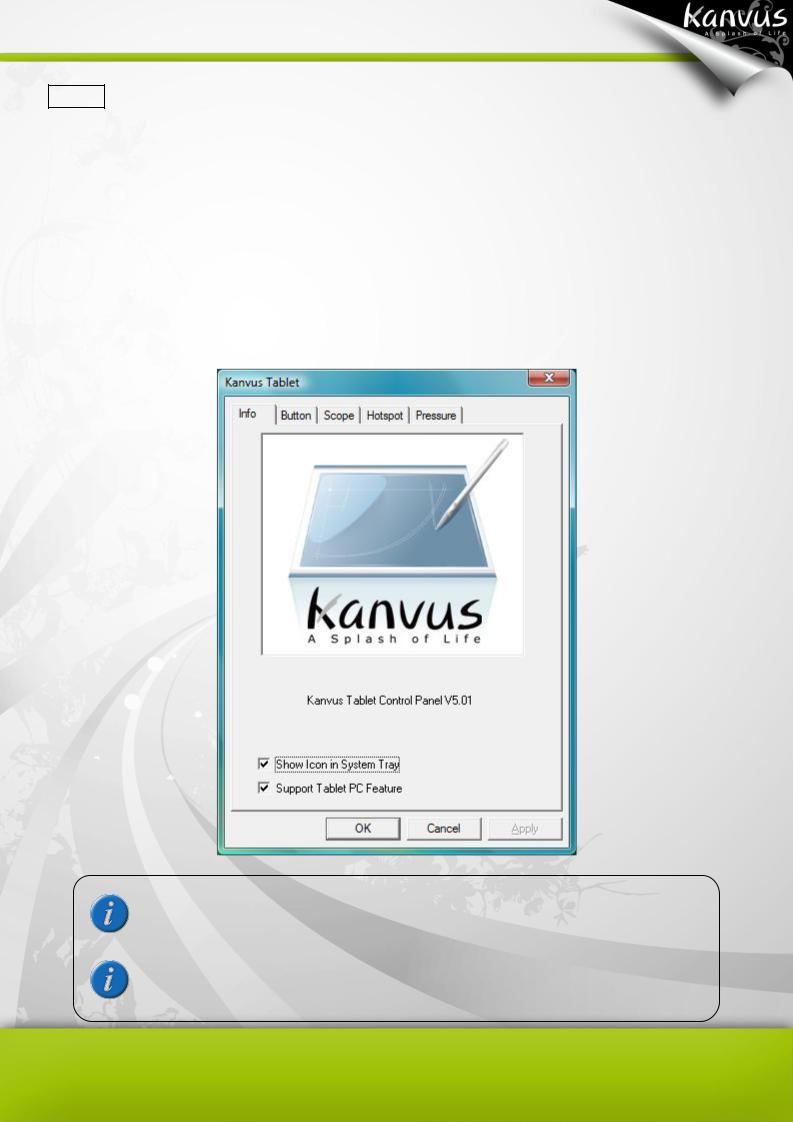
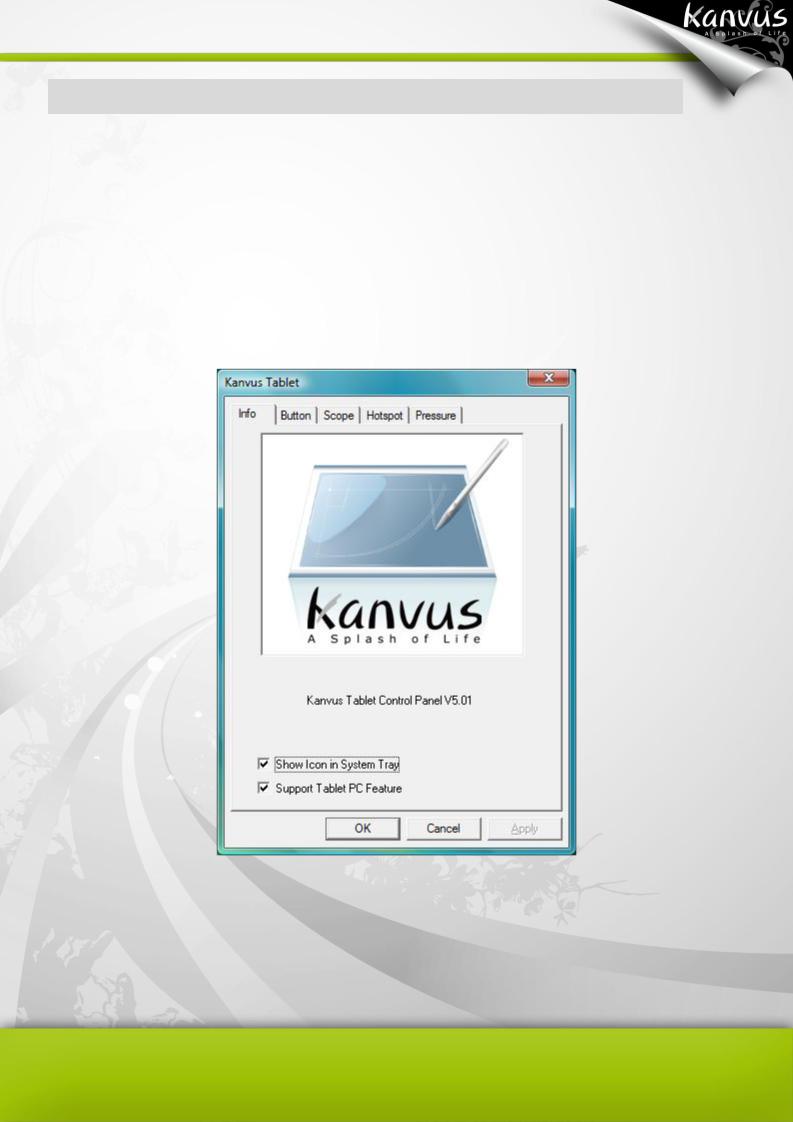
1. Info
The Info tab displays the version number of the driver and Tablet PC function.
(1)Show Icon in System Tray : Tick the box beside it if you want to show the tablet icon (  ) in the system tray.
(2)Support Tablet PC Feature : Tick the box Support Tablet PC Feature to enable the Tablet PC function of pressure sensitivity.
Once the Tablet driver is installed in Windows, the Tablet PC setting will support pressure in MS Journal, OneNote (2003, 2007) etc.
Even when the Tablet PC setting is disabled, the pen pressure for most of the art software packages (Photoshop, Illustrator, Corel Painter) will still be working, but the pen pressure will not function in MS Journal, OneNote (2003,2007) etc.
17
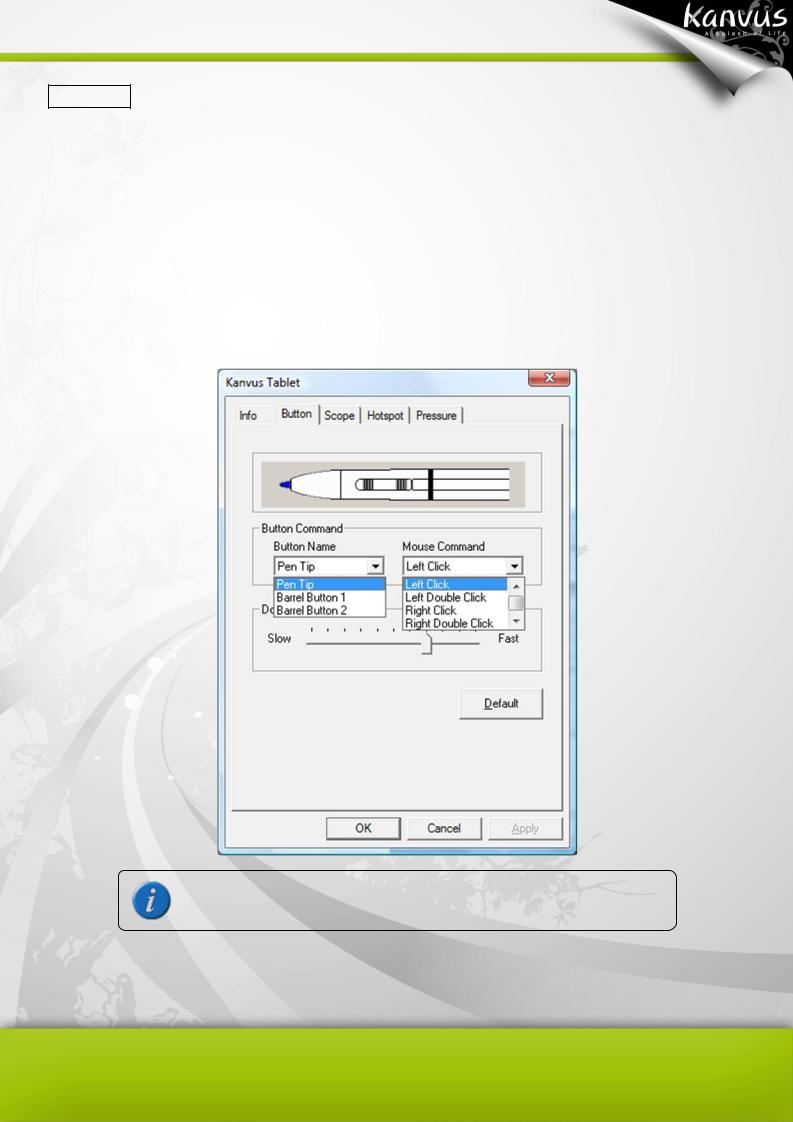
2. Button
(1) Button Name
You may configure the functions of Pen Tip, Barrel Button 1 and Barrel Button 2 by clicking the drop-down menu for Button Name. Assign a command according to the Mouse Command list. You can select No Action, Left Click, Left Double Click, Middle Click, Middle Double Click, Right Click, or Right Double Click.
The Mouse Command is based on the three-button mouse model.
18
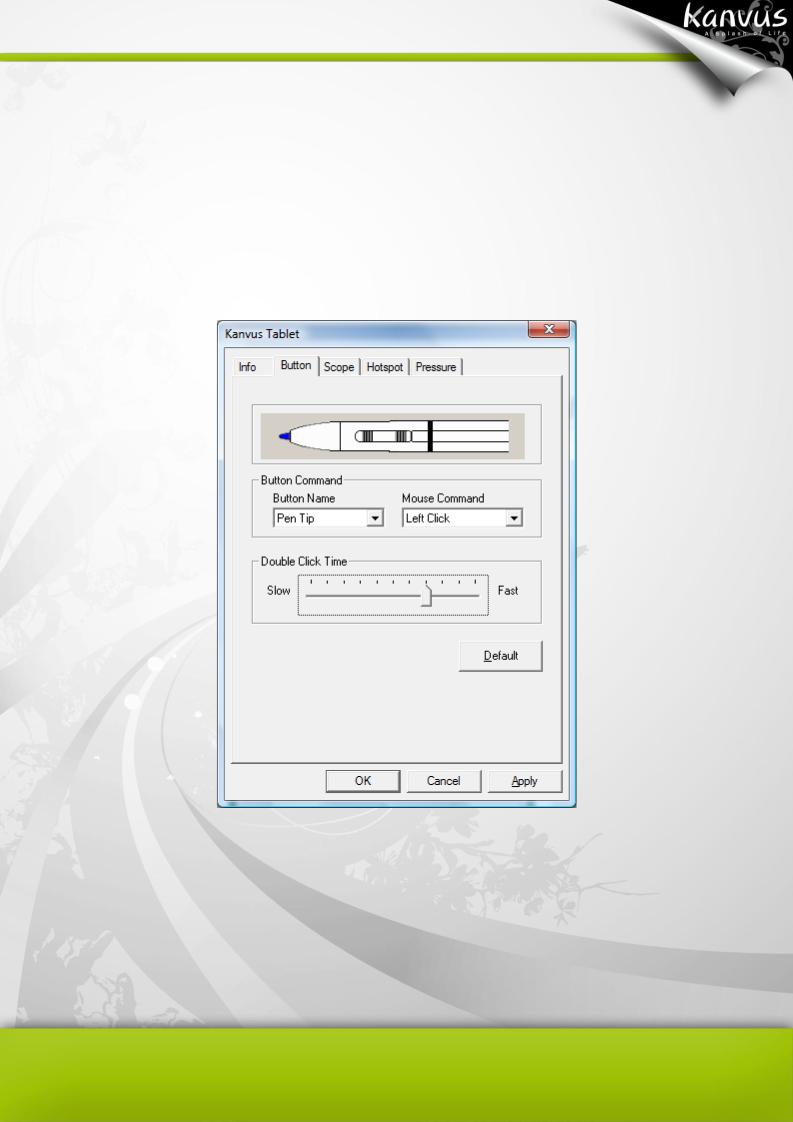
(2) Double Click Time
Move the cursor towards “Slow” if you want a slower double-tapping time with the Pen Tip, or move towards “Fast” if you want it faster. You can achieve the same setting if you go to the Double-click Speed page displayed by selecting Start ► Control Panel ► Mouse ► Buttons , which
allows you to adjust the speed setting.
(3) Default
Tap on the “Default” button to return to the factory default setting.
19

3. Scope
(1) Full Area
Tap on the “Full Area” button to enable the full
working area.
(2) Screen Ratio
Set the tablet screen ratio. The screen ratio you set will then be the screen size of your working area.
20
 Loading...