

Page 1
Page 2

Table of Contents
Thank you for purchasing the Korg nanoKEY Studio.
In order to use this product in a computer music environment, you’ll
Main Features .................................................................. 3
Preparation ...................................................................... 4
Using a Wireless Connection .................................... 4
Using a USB Connection ............................................ 5
Software setup ............................................................. 6
Functions and Operation of Controls .......................... 7
Keyboard ....................................................................... 8
Touchpad ....................................................................... 9
Trigger Pads ................................................................10
Setting the Scale and Key ........................................10
Arpeggiator .................................................................. 11
Other Functions .......................................................... 13
Customizing Controllers ..............................................14
KORG KONTROL Editor Software .......................... 14
Types of Parameters ..................................................14
Scene Parameters ...................................................... 15
Global parameters ......................................................19
need to adjust the MIDI settings of the host application. Please follow the directions in the host application’s owner’s manual to difine
these settings.
Appendix ........................................................................ 23
Restoring the Factory Settings .............................. 23
Troubleshooting.........................................................23
Scale list ...................................................................... 24
Arpeggio rhythm pattern list .................................25
Specifications ...............................................................26
Operating requirements .......................................... 26
- Apple, iPad, iPhone, Mac, iOS and OS X are trademarks of
Apple Inc., registered in the U.S. and other countries.
- Windows is a trademark of Microsoft Corporation in the U.S.
and other countries.
- Bluetooth is a registered trademark of Bluetooth SIG, Inc.
- All product names and company names are the trademarks
or registered trademarks of their respective owners.
2
Page 3

Main Features
25 Backlit Keys with Scale Guide and Easy
Scale for an Error-Free Performance
The nanoKEY Studio is equipped with 25 velocity-sensing keys. Octave Shift buttons (+, –) allow access to every note. Unique Scale
Guide key lighting and Scale Guide features allow anyone—regardless
of keyboard skill—to give a perfect performance, without ever playing an off-key note!
8 Dynamic Pads for Triggering Drums or Playing
Perfect Chords
In addition to the keys, the nanoKEY Studio also provides eight touch-sensitive pads. These pads can be used to play drum sounds and trigger samples. Combined with the Chord Pad feature, each pad can also play a distinct chord in key with the selected scale for fast audio production.
KAOSS-style Two-Axis Touchpad Provide Intui-
8 Assignable Knobs Deliver Real-time Control of
Your Musical Software
Eight real-time performance knobs deliver immediate, hands-on
control of your musical software. Each knob can be assigned to a
specific MIDI Control Change (CC) message so you can tweak the
settings as you play your software synthesizers or while you record
to your DAW.
8 Programmable Scene Memories offer Instant
Access to Your Favorite Settings
Take control of your entire computer music system! The
nanoKEY Studio allows you to create eight entirely different software-specific scenes and instantly switch between them. This one
keyboard can control all of your favorite software synthesizers—and
your DAW system—at the touch of a pad!
tive Fingertip Control
Using the same style of two-axis touchpad as the renowned KORG
Kaossilator, the nanoKEY Studio can intuitively control two parameters in real time using a single fingertip gesture. In addition to controlling Pitch and Modulation, the touchpad can be set to control any
two MIDI parameters. The Touch Scale feature tunes the pad to the
selected scale and key, allowing your free-form pad gestures to
translate into a perfect musical performance.
Convenient USB and wireless compatibility with
both desktop computers and mobile devices
Eliminate cable-clutter and create a wireless connection between
your iPhone, iPad, and/or Mac/Windows computer. The built-in wireless system is easy to use and simple to set up.
3
Page 4
Preparation
nanoKEY Studio
Using a Wireless Connection
Installing Batteries
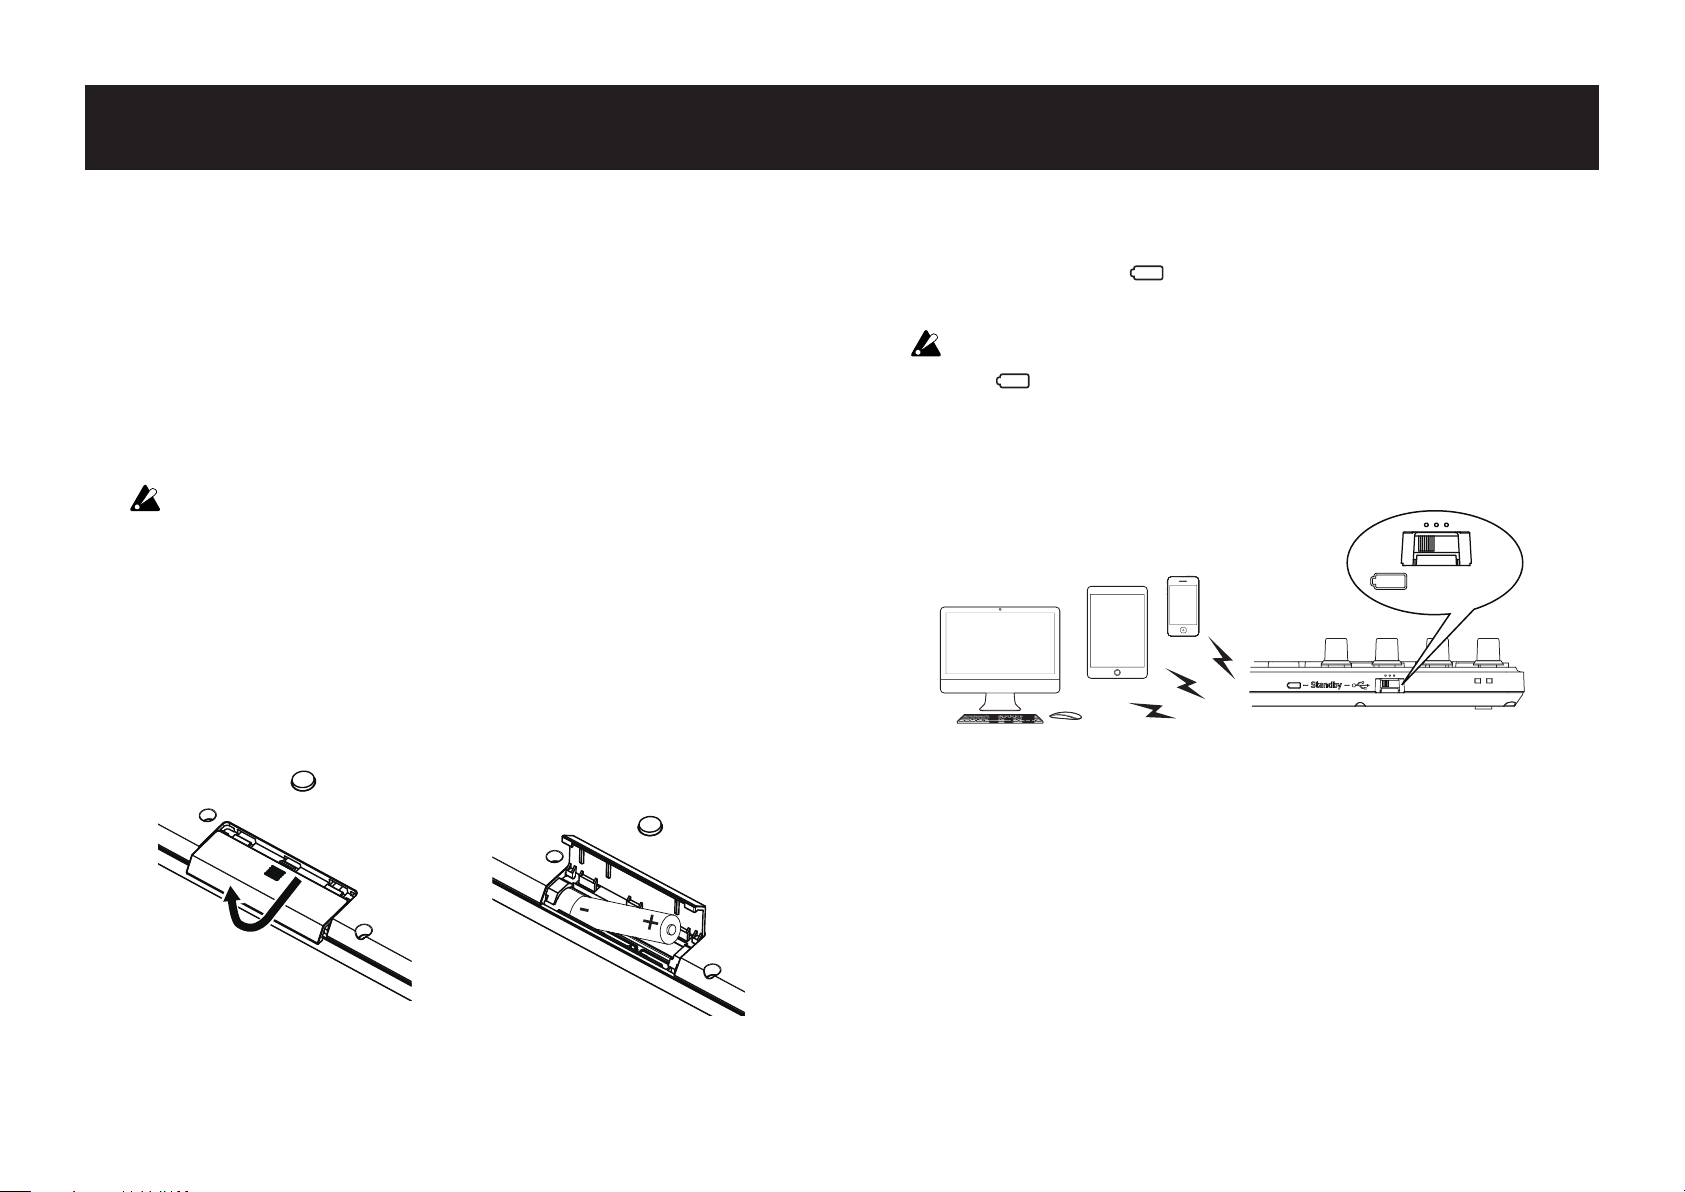
Make sure that the mode switch is set to “Standby”, and then slide
out the battery cover on the rear to open it. Making sure to observe
the correct polarity, insert the batteries, and then close the battery
cover.
If a malfunction occurs that cannot be resolved no matter
how many times the nanoKEY Studio is turned off, then on,
remove the batteries, and then install them again.
TIP Either alkaline or nickel-metal hydride batteries can be
used. In order for the remaining battery level to be detected and indicated correctly, the type of batteries being used
must be specified in the global parameters of the
nanoKEY Studio. (¬ page.19: Battery Type)
Turning On the Power
Set the mode switch to “ ”(Battery). The nanoKEY Studio turns
on (Battery mode).
When using the nanoKEY Studio with the mode switch set
to “ ”(Battery), the batteries will become depleted, even
with a USB connection. In addition, the nanoKEY Studio
cannot be used as a USB-MIDI device, even if it is connected
to a computer using a USB cable.
(Battery)
Turning Off the Power
Set the mode switch to “Standby”. The nanoKEY Studio and the
power LED turn off.
Auto Power-Off Function
In Battery mode, the nanoKEY Studio is automatically turned
off if no operation is performed for an extended period of time.
This function can be disabled in KORG KONTROL Editor.
(¬ page.21: Auto Power Off)
4
Page 5
Wireless Connection Setup
In order to use the nanoKEY Studio wirelessly, a wireless connection
Using a USB Connection
must be established. Refer to “Using a wireless connection” in the
Quick Start Guide to set up the wireless connection.
With an iPhone/iPad or Mac, a wireless connection must be
established each time.
Wireless Operation with USB Power
The wireless function of the nanoKEY Studio can be used in
combination with a USB connection.
While power is supplied from the USB port of the computer, the
wireless function of the nanoKEY Studio can be used to connect
it to an iPhone/iPad, etc.
Turning the Wireless Feature On and Off
While holding down the Shift/Tap button, press Trigger Pad 4
(Wireless) to turn the wireless feature On or Off.
TIP When the mode switch is set to “ ” (Battery), the wireless
function cannot be turned off.
If the nanoKEY Studio is being used in an environment
where radio waves cannot be transmitted, turn off the wire-
Making Connections and Turning On the Power
1. Set the mode switch to “ (USB)”.
2. Use the included USB cable to connect the nanoKEY Studio
to a USB port on your computer. The nanoKEY Studio turns
on, and the power LED lights up.
The included USB cable must be used.
In order to use the nanoKEY Studio functions, settings must
be specified to match your app. Refer to the Owner’s Manual and specify the settings.
TIP When you first connect the nanoKEY Studio to your Win-
dows computer, a driver will be installed automatically.
TIP With the driver pre-installed with Windows, nanoKEY Studio
cannot be used by multiple applications simultaneously. If
you want to use the nanoKEY Studio with multiple applications simultaneously, you must install the KORG USB-MIDI
driver. Download the KORG USB-MIDI driver from the Korg
website. (http://www.korg.com/)
less function.
Turning Off the Power
Set the mode switch to “Standby”. The nanoKEY Studio and the
power LED turn off.
5
Page 6

Software setup
Before using the nanoKEY Studio, it may be necessary to first connect the nanoKEY Studio to your computer and specify the MIDI
port settings, or to load any software synthesizers and to specify
recording settings for individual tracks in your DAW software. For
details, refer to your software’s Owner’s Manual.
6
Page 7
6, 7, 8
15, 16, 17
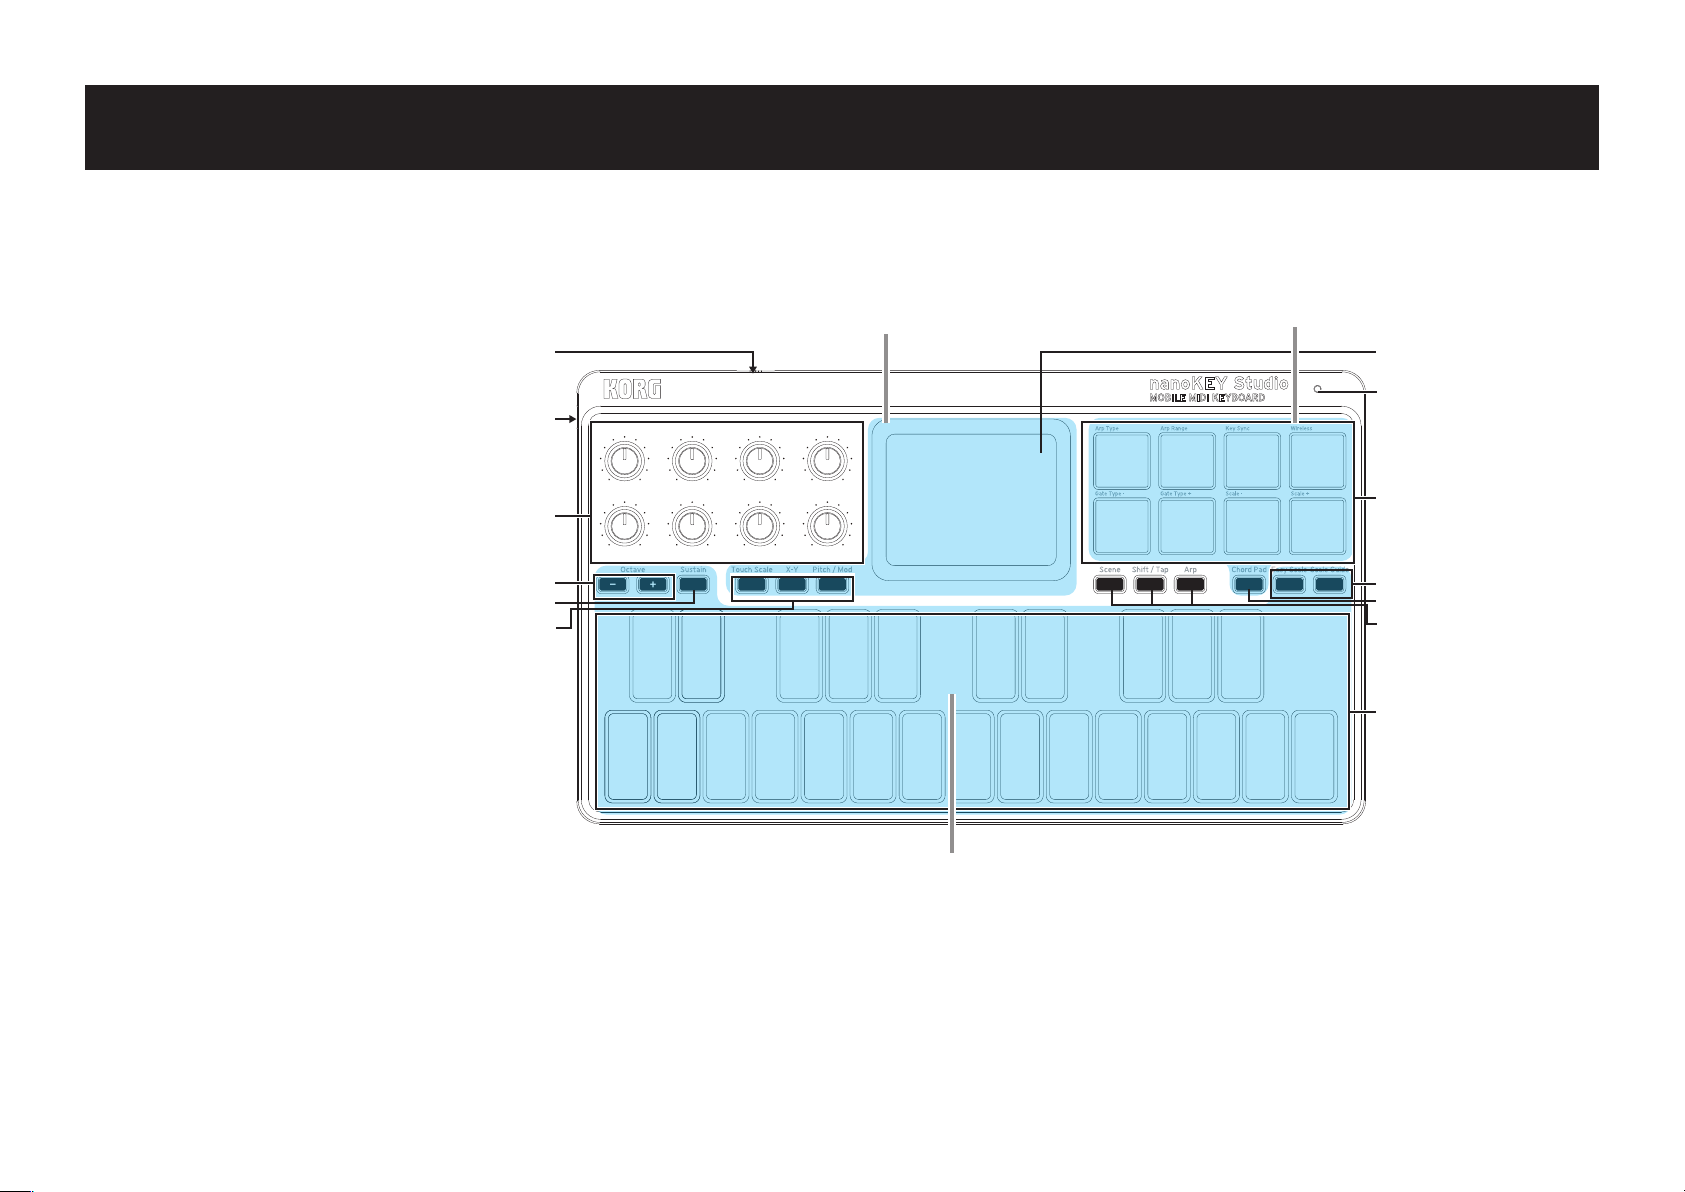
1. Mode switch
Functions and Operation of Controls
2. USB port
3. Knobs
4. Octave buttons
5. Sustain button
6. Touch Scale button
7. X-Y button
8. Pitch/Mod button
9. Touchpad
10. Power LED
11. Trigger Pads
12. Eazy Scale button
13. Scale Guide button
14. Chord Pad button
15. Scene button
16. Shift/Tap button
17. Arp button
Touchpad Trigger pads
1
2
3
4
5
9
10
11
12, 13
14
18
Keyboard
18. Keyboard
7
Page 8
Keyboard
The keyboard features 25 velocity sensitive keys used to transmit
note messages.
Sustain
Pressing this button will send a sustain message.
Note being held when you press the Sustain button—and notes
played while the Sustain button is pressed will be sustain, even after
Octave Shift
The range of the keyboard can be shifted up or down in octave
steps.
Each press of the Octave + or Octave – button shifts the range one
octave higher or lower. The amount of shift is indicated by the lighting in the Octave + and Octave – buttons:
Octave Shift Button lighting
–1 / +1 White
–2 / +2 Pink
–3 / +3 Red
–4 / +4 Blinking red
TIP Simultaneously pressing the Octave + and Octave – buttons
will reset the Octave Shift back to ±0.
Transpose / Key
The pitch of the keyboard can be transposed in semitone steps. By
transposing the keyboard, you can play a song in a new key—or play in
tune with other transposing instruments using familiar fingering. In
you remove your finger(s) from the keyboard.
Easy Scale
The Easy Scale function allows you to easily play melodies or chords
that are in tune with the selected scale and key. Use the Easy Scale
button to turn this function on/off. For details on setting the scale
and key, refer to “Setting the Scale and Key” on page 10.
This function cannot be used together with the scale guide
function.
Scale Guide
The Scale Guide function uses the keyboard backlighting to indicate
the notes of the specified scale and key.
Use the Scale Guide button to turn this function on/off. For details
on setting the scale and key, refer to “Setting the Scale and Key” on
page 10.
This function cannot be used together with the easy scale
function.
addition, this operation can also set the key for the Touch Scale and
Chord Pad features.
While holding down the Shift/Tap button, press the Octave + or
–
button to transpose the pitch of the keyboard in semitone steps. The
range is –12 to +12. The key is indicated by the keyboard backlighting.
Octave
8
Page 9
Touchpad
Toutch/Release
ouchpad
X-axis/Y-axis
X-axis/Y-axis
Touch scale
As you trace your fingertip across the Touchpad, the Touch Scale
mode generates only notes that are in tune with the specified scale
and key. Press the Touch Scale button to switch the Touchpad to
Touch Scale mode.
For details on setting the scale and key, refer to page 10: Setting
the Scale and Key.
TIP While holding down the Touch Scale button, press the Oc-
tave + or Octave – button to adjust the range of the Touchpad between 1 and 4 octaves.
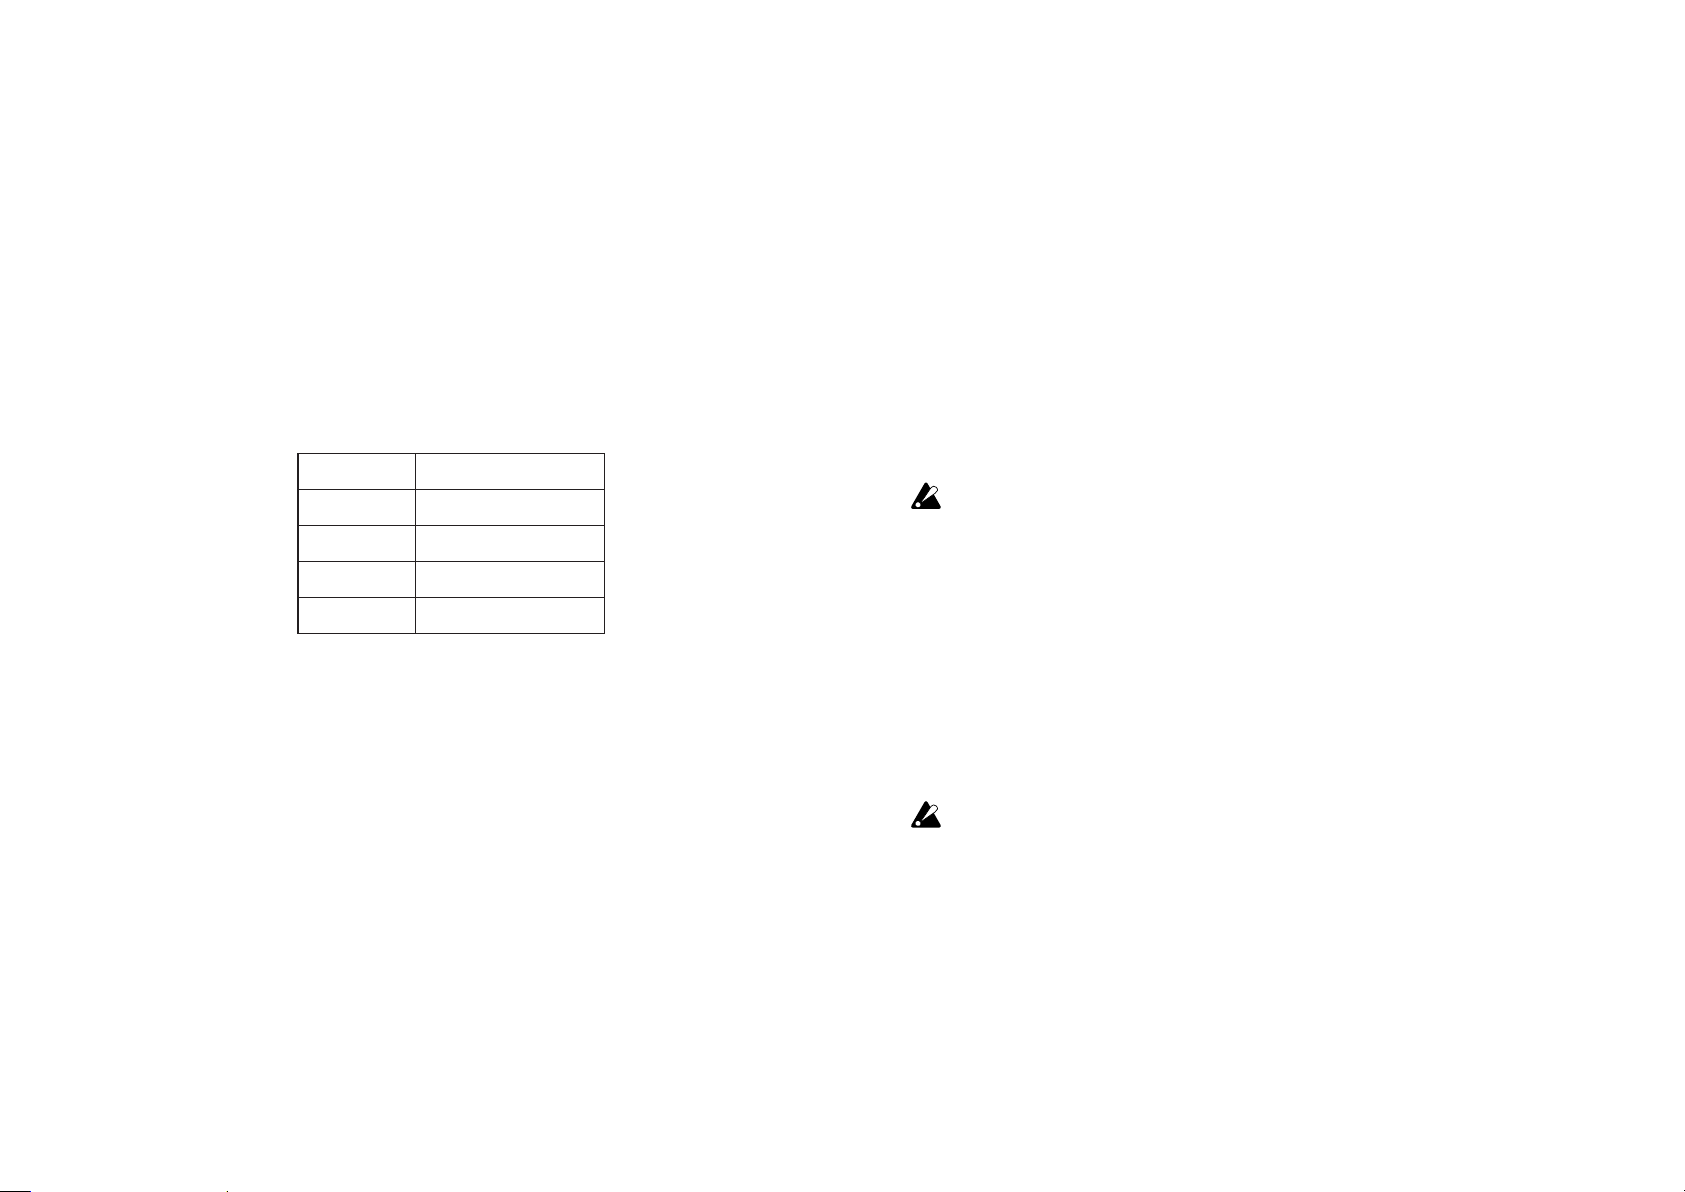
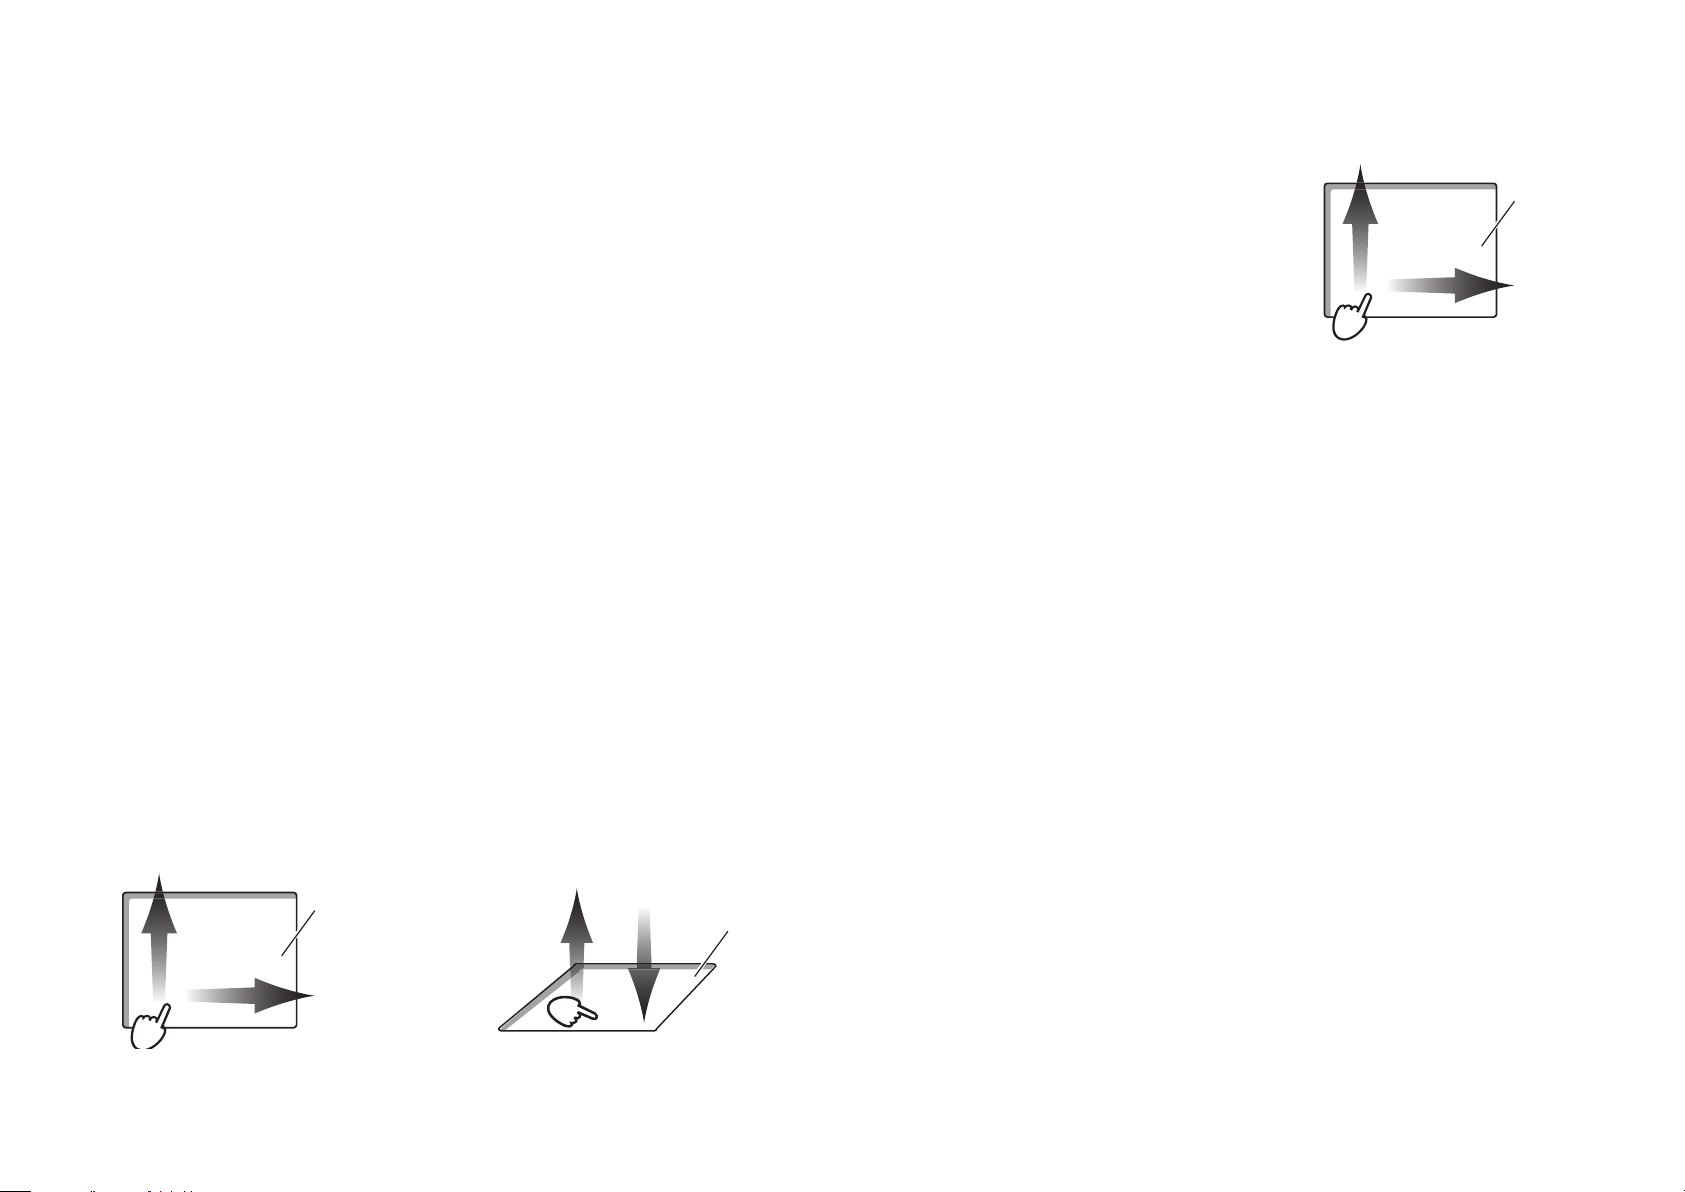
X-Y Control
The X-Y Control mode allows you to assign separate MIDI control
change messages to the X-axis and Y-axis of the Touchpad, allowing
Pitch/Mod
In the Pitch/Mod mode, pitch bend messages and modulation messages are
transmitted with the touchpad.
Based on where you first touched the
touchpad, you can control the pitch
bend along the X-axis and apply modulation such as vibrato along the Y-axis.
Press the Pitch/Mod button to switch the Touchpad to the Pitch/
Mod mode.
Modulation
Touchpad
Pitch Bend
the two parameters to be controlled simultaneously with a single
gesture on the Touchpad. In addition, control change messages can
be transmitted when the Touchpad is touched or released. Press the
X-Y button to switch the Touchpad to X-Y Control mode.
CC
Touchpad
CC
CC
CC
T
9
Page 10

Trigger Pads
Setting the Scale and Key
The eight velocity-sensitive pads are excellent for playing and programming drum parts in real time, as well as triggering samples.
In addition to note messages, control change messages or program
change messages can also be transmitted, Depending on the setting. (¬ page 14: Customizing Controllers)
Do not leave a heavy object on a trigger pad for an extend-
ed period of time.
Chord Pad
The Chord Pad feature allows you to use the Trigger Pads to play
chords. With the Chord Pad feature on, chords are automatically
assigned to the Trigger Pads, based on the current Scale and Key.
(¬ “Setting the Scale and Key”)
The nanoKEY Studio allows you to choose a particular musical scale
and set the key, or root note, of that scale. The Scale and Key you
specify will determine the scale and key used by the Touchpad
Touch Scale feature, the Trigger Pad Chord Pad feature, and the
Keyboard Easy Scale and Scale Guide features.
Setting the Scale
While holding down the Shift/
Tap button, press trigger pad 7
(Scale –) or trigger pad 8 (Scale
+) to specify the Scale. The selected scale is indicated by the
keyboard backlighting.
Setting the Key
While holding down the Shift/Tap button, press the Octave + or Octave – button to specify the Key (as when transposing the keyboard). The selected key is indicated by the keyboard backlighting.
(¬page 8: Transpose / Key)
10
Page 11

Arpeggiator
The Arpeggiator is a function that automatically separates the individual notes being played in a chord, and plays them back in a repeating pattern. Use the Arp button to turn this feature On and Off.
The nanoKEY Studio also contains a variety of rhythm patterns that
can make the Arpeggiator much more interesting—and useful! Using
Alt1: There are two styles of Arpeggios that alternate between
the Up and Down types. This type (Alt1) does not repeat the
highest and lowest notes as it switches between the Up and
Down types.
the Arpeggiator, Keyboard, Trigger Pads and/or the Touchpad allows
you to infuse your performance great rhythmic dexterity.
Arpeggiator Type
While holding down the Shift/Tap button, press Trigger Pad 1 (Arp
Type) to switch between the Arpeggio types Up, Down, Alt 1, Alt 2,
Random, and Trigger.
TIP The arpeggiator is played on the Global MIDI channel.
Up: The Arpeggio is played from the lowest note to the highest
note.
Down: The Arpeggio is played from the highest note to the
lowest note.
Alt2: There are two styles of Arpeggios that alternate between
the Up and Down types. This type (Alt2) repeats the highest and
lowest notes as it switches between the Up and Down types.
Random: The notes are played in a random order by the Arpeggiator.
Trigger: All held notes are played simultaneously, in a rhythmic, pulsing pattern. The “Octave Range” setting has no effect
on the Trigger type.
11
Page 12

Setting the Tempo (Tap Tempo function)
Arp Range
While the Arpeggiator is on, press the Shift/Tap button several
times at a steady interval, along with the beat of the song, to set
the tempo (BPM) of the Arpeggiator.
TIP Pressing the button multiple times improves the accuracy.
Rhythm Pattern
While holding down the Shift/Tap button, press Trigger Pad 5 (Gate
Type –) orTrigger Pad 6 (Gate Type +) to select a new Arpeggiator
rhythm pattern.
For details on the rhythm patterns, refer to page 25: Arpeggio
rhythm pattern list.
Key Sync
This function specifies whether the Arpeggiator will be synchronized with the Keyboard, Trigger Pads, and/or the touchpad when
new notes are played. While holding down the Shift/Tap button,
press Trigger Pad 3 (Key Sync) to turn this function On and Off.
By increasing the Arp Range, the Arpeggio pattern can repeat over
a number of octaves, before re-starting with the original notes
played. While holding down the Shift/Tap button, press Trigger Pad
2 (Arp Range) to adjust the Arpeggio range from 1 to 4 octaves.
Latch
Latching the Arpeggiator allows the pattern to continue playing,
even when you have removed your fingers from the Keyboard, Trigger Pads, or Touchpad. While holding down the Shift/Tap button,
press the Arp button to turn this function On and Off.
Off: The Arpeggiator pattern stops playing once you remove
your fingers from the Keyboard, Trigger Pads, or Touchpad.
On: The Arpeggiator pattern continues to play after you have
removed your fingers from the Keyboard, Trigger Pads, or
Touchpad.
Off: With Key Sync off, the arpeggio pattern will play normally.
On: With Key Sync on, each time you press a key on the Key-
board, tap a Trigger Pad, or place your finger on the Touchpad,
the arpeggio notes will restart at the beginning of the pattern.
You can use this function to manually align the start of the Arpeggio pattern with the start of the measure in real time when
performing with other players.
12
Page 13

Other Functions
Selecting a Scene
The nanoKEY Studio contains eight user-configurable scenes. By
switching scenes, the nanoKEY Studio can access different software
titles, or address a different set of parameters on a DAW system,
etc. While holding down the Scene button, press one of the Trigger
Pads (1–8) to select a new scene.
13
Page 14

Customizing Controllers
KORG KONTROL Editor Software
The KORG KONTROL Editor software is required to customize the
operation of the nanoKEY Studio. Download the software from the
Korg website (http://www.korg.com/), and install the software by
following the instructions in the supplied document.
TIP For details on installing and using the KORG KONTROL Edi-
tor software, refer to the instruction manual for that software.
Types of Parameters
The nanoKEY Studio contains two types of customizable parameters. Scene Parameters address the function of specific controllers
inside of the selected Scene. Global Parameters control the overall
operation of the nanoKEY Studio, regardless of the selected scene.
Scene Parameters
These parameters determine how your software will react when
you operate a controller on the nanoKEY Studio in a specific
Scene. Eight user-configurable scenes can be created and saved
in the nanoKEY Studio. By preparing a separate Scene for each
software title you are using, you can achieve instant control of
them all simply by switching scenes.
Global Parameters
These parameters specify general behavior of the
nanoKEY Studio, such as velocity curves of the keyboard and
14
trigger pads, as well as energy-saving features. The global parameters will be shared among all scenes.
Page 15

Scene Parameters
Keyboard
MIDI Channel ............................................. [1...16, Global]
This parameter specifies which MIDI channel is used to transmit
MIDI messages when you operate the Keyboard (or Touchpad in
the Pitch/Mod mode). When set to “Global”, MIDI messages will
be transmitted on the Global MIDI Channel, specified in the
global parameters. (¬page.19: Global MIDI Channel)
Trigger Pads
Pad Behavior ................................... [Momentary, Toggle]
Select the trigger pad behavior from the following two types.
Momentary When “Assign Type” is set to “Note”, a note-on message is transmitted
when you press a Trigger Pad, and a note-off message is transmitted
when you release the Trigger Pad. When “Assign Type” is set to “Control Change”, a control change message with the value 127 is transmit-ted when you press a Trigger Pad, and a control change message
with the value 0 is transmitted when you release the Trigger Pad.
Toggle When “Assign Type” is set to “Note”, pressing the Trigger Pad will send
a note-on message; pressing the pad again will send the note-off
message. When “Assign Type” is set to “Control Change”, pressing the
Trigger Pad will send a control change message with a value of 127;
pressing the pad again will send a control change message with a
value of 0.
Assign Type .........................................................................
.....[Note, Control Change, Program Change, No Assign]
This parameter specifies the MIDI messages assigned to Trigger Pads.
Note (Note# C-1 to G9) Note messages will be transmitted. Specify the note number
to be transmitted. Up to four note numbers can be assigned.
Control Change
(CC# 0 to 127)
Program Change
(Prog# 0 to 127)
No Assign No MIDI message will be transmitted.
Control change messages will be transmitted. Specify the
control change number to be transmitted.
Program change messages will be transmitted. Specify the
program number to be transmitted.
MIDI Channel ............................................. [1...16, Global]
This parameter specifies which MIDI channel is used to transmit
MIDI messages from the Trigger Pads. When set to “Global”,
MIDI messages will be transmitted on the Global MIDI Channel,
specified in the global parameters.
Chord Pad
MIDI Channel ............................................. [1...16, Global]
This parameter specifies which MIDI channel is used to transmit
MIDI messages.
When set to “Global”, MIDI messages will be transmitted on the
Global MIDI Channel, specified in the global parameters.
Knobs
Knob Enable ........................................... [Enable, Disable]
This parameter specifies whether the Knob operations are enabled or disabled. When set to “Disable”, a MIDI message will
not be transmitted, even if you operate a Knob.
MIDI Channel ............................................. [1...16, Global]
This parameter specifies which MIDI channel is used to transmit
15
Page 16

MIDI messages from the Knobs.
Toutch/Release
X-axis/Y-axis
When set to “Global”, MIDI messages will be transmitted on the
Global MIDI Channel, specified in the global parameters.
Y-axis CC Number .................................................[0...127]
This parameter specifies the value of the control change message that will be transmitted.
CC Number ........................................................... [0...127]
This parameter specifies the CC number of the control change
message that will be transmitted.
Left Value ............................................................. [0...127]
This parameter specifies the value of the control change message that is transmitted when you turn the Knob fully to the
left.
Right Value ............................................................ [0...127]
This parameter specifies the value of the control change message that is transmitted when you turn the Knob fully to the
right.
Touchpad (Touch Scale mode)
MIDI Channel ............................................. [1...16, Global]
This parameter specifies which MIDI channel is used to transmit
Y-axis Lower Value ................................................[0...127]
This parameter specifies the value of the control change message that is transmitted when you touch the bottom edge of the
Touchpad.
Y-axis Upper Value ............................................... [0...127]
This parameter specifies the value of the control change message that is transmitted when you touch the top edge of the
Touchpad.
Touchpad (X-Y Control mode)
CC
Touchpad
CC
CC
CC
Touchpad
MIDI messages when using the Touchpad in the Touch Scale
mode. When set to “Global”, MIDI messages will be transmitted
on the Global MIDI Channel, specified in the global parameters.
Y-axis Enable .......................................... [Enable, Disable]
This parameter specifies whether to enable or disable the transmission of control change messages when you move your finger along the Y-axis in the Touchpad.
MIDI Channel ............................................. [1...16, Global]
This parameter specifies which MIDI channel is used to transmit
MIDI messages when using the Touchpad in the X-Y Control
mode. When set to “Global”, MIDI messages will be transmitted
on the Global MIDI Channel, specified in the global parameters.
16
Page 17

• X-Axis/Y-Axis
CC Number ............................................................ [0...127]
Assign Type ......................... [Control Change, No Assign]
This parameter specifies the MIDI messages assigned to the
X-axis and Y-axis of the touchpad.
Control Change
(CC# 0 to 127)
No Assign No MIDI message will be transmitted.
Control change messages will be transmitted. Specify the control
change number to be transmitted.
CC Number ............................................................ [0...127]
This parameter specifies the CC number that will be transmitted
when “Assign Type” has been set to “Control Change”.
Left Value / Lower Value .......................................[0...127]
This parameter specifies the value of the control change message that is transmitted when you touch the left side or bottom
edge of the touchpad.
Right Value / Upper Value .................................... [0...127]
This parameter specifies the value of the control change mes-
This parameter specifies the CC number of the control change
message that will be transmitted.
O Value ................................................................[0...127]
This parameter specifies the value of the control change message that is transmitted when you lift your finger from the
Touchpad.
On Value ................................................................ [0...127]
This parameter specifies the value of the control change message that is transmitted when you place your finger on the
Touchpad.
sage that is transmitted when you touch the right side or top
edge of the touchpad.
• Touch/Release
In addition to the messages created by moving your finger
across the Touchpad, Control change messages can also be
transmitted when the Touchpad is touched—or released.
Touch Enable .......................................... [Enable, Disable]
This parameter specifies whether to enable or disable touch/
release.
17
Page 18

Touchpad (Pitch/Mod mode)
Sustain Button
When the touchpad is in Pitch/Mod mode, MIDI messages are transmitted on the same MIDI channel assigned to the keyboard.
• Mod
Mod Enable ............................................ [Enable, Disable]
This parameter specifies whether to enable or disable the transmission of control change messages when you move your finger along the Y-axis of the Touchpad.
CC Number ............................................................ [0...127]
This parameter specifies the value of the control change message that will be transmitted.
Lower Value ........................................................... [0...127]
This parameter specifies the value of the control change message that is transmitted when you touch the bottom edge of the
Touchpad.
Upper Value ..........................................................[0...127]
This parameter specifies the value of the control change message that is transmitted when you touch the top edge of the
Touchpad.
Assign Type ............... [Note, Control Change, No Assign]
This parameter specifies the MIDI message assigned to the Sustain button.
Note (Note# C-1 to G9) Note messages will be transmitted. Specify the note
number to be transmitted.
Control Change (CC# 0 to 127) Control change messages will be transmitted. Specify
the control change number to be transmitted.
No Assign No MIDI message will be transmitted.
MIDI Channel ............................................. [1...16, Global]
This parameter specifies which MIDI channel is used to transmit
MIDI messages. When set to “Global”, MIDI messages will be
transmitted on the Global MIDI Channel, specified in the global
parameters.
O Value ................................................................[0...127]
This parameter specifies the value of the message that is transmitted when the Sustain button is switched off.
On Value ................................................................ [0...127]
This parameter specifies the value of the message that is transmitted when the Sustain button is switched on.
When “Assign Type” is set to “Note”, a note-on message is
18
transmitted with the On Value as the velocity. When “On Value”
is set to “0”, a note-on message is transmitted with “1” as the
velocity.
Page 19

Button Behavior ............................. [Momentary, Toggle]
The Sustain button can be set to either of these modes:
Momentary When “Assign Type” is set to “Note”, a note-on message is trans-
mitted when you press the Sustain button, and a note-off message
is transmitted when you release the button. When “Assign Type” is
set to “Control Change”, a control change message with the On Value is transmitted when you press the Sustain button, and a control
change message with the Off Value is transmitted when you release
the button
Toggle When “Assign Type” is set to “Note”, each press of the Sustain
button will alternately send a note-on message or a note-off
message. When “Assign Type” is set to “Control Change”, each
press of the Sustain button will alternately send a control change
message with the On Value or Off Value.
Global parameters
General
Global MIDI Channel ............................................. [1...16]
This parameter specifies the Global MIDI channel that the
nanoKEY Studio is operating on. This can be set to match the
MIDI channel of your software.
Battery Type ........................................... [Alkaline, Ni-MH]
Be sure to use this parameter to specify the type of batteries
you have installed in the nanoKEY Studio. Set this to “Ni-MH”
when using nickel-metal hydride batteries or to “Alkaline” when
using alkaline batteries.
Wireless
Device Name
19
This parameter specifies the device name displayed when a
wireless connection is being used.
Up to 25 alphanumeric characters can be entered.
TIP This setting will be applied the next time that the
nanoKEY Studio is turned on or the next time that the wireless function is turned on (¬ page 5: Wireless Connection Setup).
Page 20

Controllers
ed) velocity
127
Playing strength
Key Velocity Curve ..............................................................
.....[Light, Mid-Light, Normal, Mid-Heavy, Heavy, Const]
This parameter specifies how the volume changes in response to the
force used when you play the Keyboard. Select one of the five velocity curves, or specify a constant value. Select the curve that is most
appropriate for your playing dynamics or for the desired effect.
Light This curve lets you produce loud notes
without having to play very strongly.
Mid-Light |
Normal This is the normal curve.
Mid-Heavy |
Heavy This curve requires strong playing for
loud notes to be produced.
Const This produces a constant (x
value.
1
Soft
Light
Mid-Light
Normal
Mid-Heavy
Const
Heavy
Strong
Trigger Pad Velocity Constant Value ................... [1...127]
This parameter specifies the velocity value that will be transmitted when the Trigger Pad velocity curve has been set to “Const.”
Trigger Pad Sensitivity ............................................. [1...3]
This parameter specifies the sensitivity of the trigger pads. “1”
indicates the most sensitive, and “3” indicates the least sensitive. This parameter can be used to make the trigger pads more
sensitive when inputting drums, so that the pads will respond
even if they are lightly pressed, as well as to make the trigger
pads less sensitive when triggering samples, in order to prevent
the pads from responding accidentally.
If the “Trigger Pad Sensitivity” value is set too low, the Trig-
ger Pads may remain on. If this should happen, set this
parameter to a higher value.
Touchpad Pitch/Mod Return Speed ..................................
Key Velocity Constant Value ................................ [1...127]
This parameter specifies the velocity value that will be transmitted when the Keyboard velocity curve has been set to “Const.”
This setting is useful when playing organ sounds.
Trigger Pad Velocity Curve ................................................
........................................... [Light, Normal, Heavy, Const]
This parameter specifies how the volume changes in response
to the force used when you tap a Trigger Pad. Select one of the
three velocity curves, or specify a constant value.
.......................................[Immediate, Fast, Normal, Slow]
This parameter specifies how quickly the pitch bend and modulation return after you have removed your finger from the
Touchpad. “Immediate” indicates the fastest speed, and “Slow”
indicates the slowest.
Touch Scale Note On Velocity .............................. [1...127]
This parameter specifies the velocity of the note messages that
are transmitted in Touch Scale mode.
Chord Pad Octave Oset .......................................[-2...+2]
This parameter adjusts the pitch range played by the trigger
pads when in Chord Pad mode, in one-octave units.
20
Page 21

Easy Scale Chord Octave Oset ............................ [-2...+2]
This parameter adjusts the pitch range of chords sounded by
the black keys when in Easy Scale mode, in one-octave units.
Energy-Saving Features
Auto Power O ...................................................................
.......................[Disable, 30 min, 1 hour, 2 hours, 4 hours]
MIDI
MIDI Clock Source ............ [Auto, Internal, External-USB]
This parameter can be used to synchronize the nanoKEY Studio
Arpeggiator to your software or DAW system
The MIDI clock is not transmitted or received when a wire-
less connection is being used.
Auto When a MIDI clock is input at the USB port, the arpeggiator
automatically uses the “External” setting. When no MIDI clock
is input, the arpeggiator automatically uses the “Internal”
setting.
Internal The arpeggiator operates at the tempo set with the BPM
parameter. Select this setting when you do not need to
synchronize the BPM with your software.
External-USB The nanoKEY Studio arpeggiator will synchronized with the
MIDI clock of the computer connected to the USB port.
When operating on batteries, the nanoKEY Studio can be set to
automatically turn off after a set period of inactivity to preserve
the battery life. You can choose the amount of time that must
pass with no activity before the power will automatically turn
off—30 minutes, 1 hour, 2 hours, or 4 hours. To prevent the
nanoKEY Studio from turning off automatically, set the Auto
Power Off to “Disable.” To turn the nanoKEY Studio back on
after the Auto Power Off function has turned it off, set the mode
switch to “Standby”, and then return it to
“ ”
(Battery).
Auto LED O .......................................... [Disable, Enable]
By setting this parameter to Enable, you can choose to have the
LEDs automatically decrease in brightness after a set period of inactivity; and then turn off completely after an additional set period of
time where there is no activity. This setting is applied whether the
nanoKEY Studio is operating with a USB connection or on batteries.
LED Brightness ......................................................... [1...3]
21
This parameter specifies the maximum brightness of the LEDs.
“1” indicates the least bright, and “3” indicates the maximum
brightness. This setting is applied whether the nanoKEY Studio
is operating with a USB connection or on batteries.
When the nanoKEY Studio is operating on batteries, the
brighter the LEDs, the shorter the battery life. In order to
extend the battery life, specify a lower setting.
Page 22

LED Illumination ................................... [Disable, Enable]
This parameter can be used to activate the nanoKEY Studio
LED illumination after a set period of time has passed with no
operations being performed. Set this to “Enable” so that the
LEDs will light up or to “Disable” so that they will not light up. If
the Keyboard, Knobs, etc. are operated while the LED Illumination is active, the nanoKEY Studio returns to its previous condition. This setting is applied whether the nanoKEY Studio is operating with a USB connection or on batteries.
LED Eco Mode ........................................ [Disable, Enable]
This parameter specifies whether to use the mode that dims the
LEDs. Set this to “Enable” so that the LEDs will be dimmed or to
“Disable” so that the LEDs will light up as usual. When this parameter is set to “Enable”, the battery consumption will be reduced when the nanoKEY Studio is operating on batteries. This
setting is applied whether the nanoKEY Studio is operating with
a USB connection or on batteries.
22
Page 23

Appendix
Restoring the Factory Settings
While holding down the Scene, Shift/Tap and Chord Pad buttons, set
the Mode switch to “USB” and turn on the nanoKEY Studio. The
Scene button and Trigger Pads 1 through 8 will begin to blink. All
settings of the nanoKEY Studio will be restored to the factory settings when the blinking stops.
Restoring the factory settings takes several seconds after
the nanoKEY Studio is turned on. Never turn off the
nanoKEY Studio while the Scene button is blinking.
The factory settings cannot be restored when the mode
switch is set to “ ” (Battery).
Troubleshooting
Check the Korg website (http://www.korg.com/) for the most recent FAQ.
The nanoKEY Studio won’t turn on.
With a USB connection:
• If the nanoKEY Studio is connected to a computer via a USB hub,
the nanoKEY Studio may not turn on due to insufficient power. In
that case, the nanoKEY Studio should be connected directly to
the USB connector on the computer without using a USB hub.
• There may be a problem with the USB cable currently used. Check if
the nanoKEY Studio can be turned on using the supplied USB cable.
With a wireless connection:
• Make sure that the Mode switch is set to “ ” (Battery).
• Make sure that the batteries have been inserted correctly, and
that they are not depleted. If the batteries are depleted, replace
them with new ones.
A wireless connection cannot be established.
• Verify that your computer or iPhone/iPad is compatible with
Bluetooth 4.0.
• Verify that the operating system for your computer or iPhone/
iPad is compatible with Bluetooth Low Energy MIDI. Compatible
operating systems are OS X Yosemite or later, Windows 8.1 or
later (KORG BLE-MIDI Driver is required), and iOS 8.0 or later.
23
Page 24

The wireless connection cuts out.
• Make sure that your computer or iPhone/iPad is not too far away
from the nanoKEY Studio.
Scale list
Scale Name Scale [Key C]
Major 1 (Ionian) C, D, E, F, G, A, B
There is no response from the software.
• Make sure that the nanoKEY Studio is correctly specified in the
MIDI port setup of your software.
• In order to use the functions of the nanoKEY Studio, your software must be set up. For the setup, refer to “Customizing Controllers” on page 14 and the instruction manual for your software.
• Your software may not support some functions. Check the instruction manual for your software.
• Make sure that the MIDI channel for messages transmitted by the
nanoKEY Studio is set to the same MIDI channel in the software.
Buttons do not operate as indicated by the
nanoKEY Studio.
• Your software may not support some functions or may operate
differently.
Major 2 (Lydian)
minor 1 (Aeolian)
minor 2 (Dorian)
minor 3 (Phrygian)
Major Blues
minor Blues
Major Penta (Major Pentatonic) C, D, E, G, A
minor Penta (minor Pentatonic)
Raga (Raga Bhairav)
Ryukyu C, E, F, G, B
Chinese
Bass Line
Wholetone
5th Interval C, G
C, D, E, F♯, G, A, B
C, D, E♭, F, G, A♭, B
C, D, E♭, F, G, A, B
C, D♭, E♭, F, G, A♭, B
C, D, E♭, E, G, A
C, E♭, F, G♭, G, B
C, E♭, F, G, B
C, D♭, E, F, G, A♭, B
C, E, F♯, G, B
C, G, B
C, D, E, G♭, A♭, B
♭
♭
♭
♭
♭
♭
♭
24
Page 25

Arpeggio rhythm pattern list
01
02
03
04
05
06
07
08
09
10
11
12
13
14
15
25
Page 26

Specications
Wireless method: Bluetooth low energy
Jacks: USB port (micro Type B)
Power supply: USB bus power supply or two AAA batter-
ies (alkaline or nickel-metal hydride batteries)
Battery service life:
Current consumption: 500 mA or less
Dimensions (W x D x H): 278 x 160 x 33 mm/ 10.94” x 6.29” x 1.29”
Weight: 471 g/1.04 lbs (excluding batteries)
Included items: Two AAA alkaline batteries, USB cable,
* For the purpose of improvement, the specifications and
appearance are subject to change without notice.
Approx. 10 hours (when using alkaline
batteries: Battery life will vary depending
on the batteries used and on the conditions of use.)
Quick Start Guide
Operating requirements
Windows (USB connection):
Microsoft Windows 7 SP1 or later (32
bit/64 bit)
Windows (wireless connection):
Computer installed with Microsoft Windows 8.1 or later and compatible with
Bluetooth 4.0 (KORG BLE-MIDI Driver is
required)
Mac (USB connection):
Mac (wireless connection):
iOS (wireless connection): iPhone/iPad installed with iOS 8 or later
nanoKEY Studio operation is not guaranteed with all devic-
es that satisfy these operating requirements.
OS X 10.9 Mavericks or later
Mac installed with OS X 10.10 Yosemite or
later and compatible with Bluetooth 4.0
and compatible with Bluetooth 4.0
26
Page 27

©2016 KORG INC. www.korg.com
 Loading...