

Page 1

ua
C-520
User’s Manual
EFGI 1
Page 2

Page 3

English
User’s Manual
Français
Mode d’emploi
Deutsch
Bedienungseinleitung
Italiano
Manuale di istruzioni
Page 4

Page 5

DIGITAL PIANO
User’s Manual
Page 6
PRECAUTIONS
CE MARK FOR EUROPEAN HARMONIZED STANDARDS
Location
Using the unit in the following locations can result in a malfunction.
• In direct sunlight
• Locations of extreme temperature or humidity
• Excessively dusty or dirty locations
• Locations of excessive vibration
Power supply
Please connect the designated AC adapter to an AC outlet of the correct voltage. Do not connect it to an AC outlet of voltage other than that for which
your unit is intended.
Interference with other electrical devices
This product contains a microcomputer. Radios and televisions placed
nearby may experience reception interference. Operate this unit at a suitable
distance from radios and televisions.
Handling
To avoid breakage, do not apply excessive force to the switches or controls.
Care
If the exterior becomes dirty, wipe it with a clean, dry cloth. Do not use liquid cleaners such as benzene or thinner, or cleaning compounds or flammable polishes.
Keep this manual
After reading this manual, please keep it for later reference.
Keeping foreign matter out of your equipment
• Never set any container with liquid in it near this equipment. if liquid gets
into the equipment, it could cause a breakdown, fire, or electrical shock.
The CE mark that is attached to our company’s products of AC mains operated apparatus until December 31, 1996 means it conforms to the EMC
Directive (89/336/EEC) and to the CE mark Directive (93/68/EEC).
The CE mark that is attached after January 1, 1997 means it conforms to the
EMC Directive (89/336/EEC), to the CE mark Directive (93/68/EEC) and to
the Low Voltage Directive (73/23/EEC).
In addition, the CE mark that is attached to our company’s products of Battery operated apparatus means it conforms to the EMC Directive (89/336/
EEC) and to the CE mark Directive (93/68/EEC).
THE FCC REGULATION WARNING (FOR THE U.S.A.
ONLY)
This equipment has been tested and found to comply with the limits for a
Class B digital device, pursuant to Part 15 of the FCC Rules. These limits are
designed to provide reasonable protection against harmful interference in a
residential installation. This equipment generates, uses, and can radiate
radio frequency energy and, if not installed and used in accordance with the
instructions, may cause harmful interference to radio communications.
However, there is no guarantee that interference will not occur in a particular installation. If this equipment does cause harmful interference to radio or
television reception, which can be determined by turning the equipment off
and on, the user is encouraged to try to correct the interference by one or
more of the following measures:
• Reorient or relocate the receiving antenna.
• Increase the separation between the equipment and receiver.
• Connect the equipment into an outlet on a circuit different from
that to which the receiver is connected.
• Consult the dealer or an experienced radio/TV technician for help.
Unauthorized changes or modification to this system can void the user’s
authority to operate this equipment.
• Be careful not to let metal objects get into the equipment. If something
does slip into the equipment, unplug the AC adapter from the wall outlet.
Then contact your nearest Korg dealer or the store where the equipment was
purchased.
DISCLAIMER
The information contained in this manual has been carefully revised and
checked through. Due to our constant efforts to improve our products, the
specifications might differ to those in the manual. Korg is not responsible for
any eventual differences found between the specifications and the contents
of the instruction manual - the specifications being subject to change without prior notice
WARRANTY
KORG products are manufactured according to the strictest electrical and
mechanical regulations that exist in various countries of the world. These
products are warranted by the KORG distributor only in each country. Any
KORG product that is not sold with the manufacturer’s or distributor’s warranty, or without a serial number, cannot benefit from servicing under the
warranty. This regulation is for the consumer’s own protection.
DATA RESET
When the instrument is turned off, any unsaved parameters or songs are
reset.
UPDATING THE SOFTWARE
The system software of your C-520 can be updated. From time to time, Korg
might release new versions including bug fixes and new features. Please
check our website for more information.
ASSISTANCE AND SERVICE FOR MUSICIANS
For repairs, contact your nearest Authorized KORG Service Center. For more
information on KORG products, and to find software and accessories for
your piano, please contact your local Authorized KORG distributor.
KORG ON THE INTERNET
Korg Inc.: www.korg.co.jp
Korg USA: www.korg.com
Korg UK: www.korg.co.uk
Korg Canada: www.korgcanada.com
Korg Italy: www.korgpa.com
© 2006 Korg Inc. Printed in Japan.
Page 7

Contents
>
Introduction . . . . . . . . . . . . . . . . . . . . . . . . . . . . . . . . . . . . . . . . 6
Main features . . . . . . . . . . . . . . . . . . . . . . . . . . . . . . . . . . . . . . . . . . . . . .6
Control panel . . . . . . . . . . . . . . . . . . . . . . . . . . . . . . . . . . . . . . . 8
Connections . . . . . . . . . . . . . . . . . . . . . . . . . . . . . . . . . . . . . . . 11
Connecting to external audio devices . . . . . . . . . . . . . . . . . . . . . . . . .11
Before you begin . . . . . . . . . . . . . . . . . . . . . . . . . . . . . . . . . . . 12
Open the key cover . . . . . . . . . . . . . . . . . . . . . . . . . . . . . . . . . . . . . . . .12
Turning the instrument on . . . . . . . . . . . . . . . . . . . . . . . . . . . . . . . . . . 12
Using the music stand . . . . . . . . . . . . . . . . . . . . . . . . . . . . . . . . . . . . . .12
Adjusting the volume . . . . . . . . . . . . . . . . . . . . . . . . . . . . . . . . . . . . . .13
Using the headphones . . . . . . . . . . . . . . . . . . . . . . . . . . . . . . . . . . . . . .13
Listening to the Demo . . . . . . . . . . . . . . . . . . . . . . . . . . . . . . . . . . . . . . 13
Basic functions . . . . . . . . . . . . . . . . . . . . . . . . . . . . . . . . . . . . . 15
Playing a single sound (Single mode) . . . . . . . . . . . . . . . . . . . . . . . . .15
Playing two sounds at the same time (Layer mode) . . . . . . . . . . . . . . 16
Playing different sounds with the left and right hand (Split mode) .17
Using the pedals . . . . . . . . . . . . . . . . . . . . . . . . . . . . . . . . . . . . . . . . . . . 18
Transposing . . . . . . . . . . . . . . . . . . . . . . . . . . . . . . . . . . . . . . . . . . . . . . 18
Changing the brilliance . . . . . . . . . . . . . . . . . . . . . . . . . . . . . . . . . . . . .19
Turning the effects on/off . . . . . . . . . . . . . . . . . . . . . . . . . . . . . . . . . . .19
Using performances . . . . . . . . . . . . . . . . . . . . . . . . . . . . . . . . . 20
Choosing performances . . . . . . . . . . . . . . . . . . . . . . . . . . . . . . . . . . . .20
Changing the sounds assigned to a performance . . . . . . . . . . . . . . . .21
Editing a performance . . . . . . . . . . . . . . . . . . . . . . . . . . . . . . . . . . . . . . 21
The metronome . . . . . . . . . . . . . . . . . . . . . . . . . . . . . . . . . . . . 22
Starting and stopping the metronome, adjusting the tempo . . . . . . . 22
Tempo and time signature display . . . . . . . . . . . . . . . . . . . . . . . . . . . . 22
Adjusting the tempo . . . . . . . . . . . . . . . . . . . . . . . . . . . . . . . . . . . . . . .22
Choosing a time signature . . . . . . . . . . . . . . . . . . . . . . . . . . . . . . . . . .23
Drum patterns . . . . . . . . . . . . . . . . . . . . . . . . . . . . . . . . . . . . . . . . . . . . 23
Adjusting the metronome level . . . . . . . . . . . . . . . . . . . . . . . . . . . . . .24
Adjusting the drum pattern’s reverb . . . . . . . . . . . . . . . . . . . . . . . . . . 24
Selecting the accent . . . . . . . . . . . . . . . . . . . . . . . . . . . . . . . . . . . . . . . . 25
Saving the metronome settings . . . . . . . . . . . . . . . . . . . . . . . . . . . . . .25
Playing back a song . . . . . . . . . . . . . . . . . . . . . . . . . . . . . . . . . 26
Accessing the Song Play mode . . . . . . . . . . . . . . . . . . . . . . . . . . . . . . . 26
How to select a song . . . . . . . . . . . . . . . . . . . . . . . . . . . . . . . . . . . . . . .26
How to start playback . . . . . . . . . . . . . . . . . . . . . . . . . . . . . . . . . . . . . . 27
Starting from a different measure . . . . . . . . . . . . . . . . . . . . . . . . . . . .27
Muting/unmuting a recorder’s part . . . . . . . . . . . . . . . . . . . . . . . . . . . 28
Changing the song’s tempo . . . . . . . . . . . . . . . . . . . . . . . . . . . . . . . . .28
Play along with the song . . . . . . . . . . . . . . . . . . . . . . . . . . . . . . . . . . . .28
Cycle Play . . . . . . . . . . . . . . . . . . . . . . . . . . . . . . . . . . . . . . . . . . . . . . . .29
Recording a song . . . . . . . . . . . . . . . . . . . . . . . . . . . . . . . . . . . 30
Quick recording procedure . . . . . . . . . . . . . . . . . . . . . . . . . . . . . . . . . 30
Step 1: Entering the Record mode . . . . . . . . . . . . . . . . . . . . . . . . . . . .30
Step 2: Selecting sounds . . . . . . . . . . . . . . . . . . . . . . . . . . . . . . . . . . . .31
Step 3: Setting the record options . . . . . . . . . . . . . . . . . . . . . . . . . . . .32
Step 4: Setting the time signature and tempo . . . . . . . . . . . . . . . . . . .33
Step 5: Recording . . . . . . . . . . . . . . . . . . . . . . . . . . . . . . . . . . . . . . . . . .33
Step 6: Second-pass recording . . . . . . . . . . . . . . . . . . . . . . . . . . . . . . .34
Changing sounds to a recorded song . . . . . . . . . . . . . . . . . . . . . . . . . . 34
Changing tempo to a recorded song . . . . . . . . . . . . . . . . . . . . . . . . . .35
Pedal Punch recording . . . . . . . . . . . . . . . . . . . . . . . . . . . . . . . . . . . . .35
Auto Punch recording . . . . . . . . . . . . . . . . . . . . . . . . . . . . . . . . . . . . . . 35
Saving the song . . . . . . . . . . . . . . . . . . . . . . . . . . . . . . . . . . . . . . . . . . .36
Editing a song . . . . . . . . . . . . . . . . . . . . . . . . . . . . . . . . . . . . . 37
Setting Cycle Play . . . . . . . . . . . . . . . . . . . . . . . . . . . . . . . . . . . . . . . . . . 37
Erasing a track . . . . . . . . . . . . . . . . . . . . . . . . . . . . . . . . . . . . . . . . . . . . 37
Cutting measures at the end of the song . . . . . . . . . . . . . . . . . . . . . . .38
Quantizing the song . . . . . . . . . . . . . . . . . . . . . . . . . . . . . . . . . . . . . . .38
Transposing the song . . . . . . . . . . . . . . . . . . . . . . . . . . . . . . . . . . . . . .39
Deleting the song . . . . . . . . . . . . . . . . . . . . . . . . . . . . . . . . . . . . . . . . . .39
Saving the song after editing . . . . . . . . . . . . . . . . . . . . . . . . . . . . . . . . . 39
Editing sounds and performances . . . . . . . . . . . . . . . . . . . . . 41
Accessing the Sound edit mode . . . . . . . . . . . . . . . . . . . . . . . . . . . . . 41
Exit from the Sound edit mode . . . . . . . . . . . . . . . . . . . . . . . . . . . . . . 41
Saving a sound . . . . . . . . . . . . . . . . . . . . . . . . . . . . . . . . . . . . . . . . . . . 41
Saving a performance . . . . . . . . . . . . . . . . . . . . . . . . . . . . . . . . . . . . . . 42
Setting the volume . . . . . . . . . . . . . . . . . . . . . . . . . . . . . . . . . . . . . . . . 43
Adjusting the panning . . . . . . . . . . . . . . . . . . . . . . . . . . . . . . . . . . . . . 43
Adjusting the effects . . . . . . . . . . . . . . . . . . . . . . . . . . . . . . . . . . . . . . . 44
Setting the reverb effect . . . . . . . . . . . . . . . . . . . . . . . . . . . . . . . . . . . . 44
Setting the chorus or modulation effect . . . . . . . . . . . . . . . . . . . . . . . 45
Setting the insert effects . . . . . . . . . . . . . . . . . . . . . . . . . . . . . . . . . . . . 45
Setting the octave transposition . . . . . . . . . . . . . . . . . . . . . . . . . . . . . 46
Adjusting the fine tune . . . . . . . . . . . . . . . . . . . . . . . . . . . . . . . . . . . . 47
Programming the pedals . . . . . . . . . . . . . . . . . . . . . . . . . . . . . . . . . . . 47
Selecting a scale . . . . . . . . . . . . . . . . . . . . . . . . . . . . . . . . . . . . . . . . . . . 48
Resetting the current sound and performance . . . . . . . . . . . . . . . . . 49
Global settings . . . . . . . . . . . . . . . . . . . . . . . . . . . . . . . . . . . . . 50
Touch settings . . . . . . . . . . . . . . . . . . . . . . . . . . . . . . . . . . . . . . . . . . . . 50
Turning the internal speakers on or off . . . . . . . . . . . . . . . . . . . . . . . 50
Master tuning . . . . . . . . . . . . . . . . . . . . . . . . . . . . . . . . . . . . . . . . . . . . 51
Brilliance . . . . . . . . . . . . . . . . . . . . . . . . . . . . . . . . . . . . . . . . . . . . . . . . 51
Default split point . . . . . . . . . . . . . . . . . . . . . . . . . . . . . . . . . . . . . . . . 51
Assigning functions to the pedals . . . . . . . . . . . . . . . . . . . . . . . . . . . . 52
Quarter Tone (SubScale realtime programming) . . . . . . . . . . . . . . . 53
Fast Play . . . . . . . . . . . . . . . . . . . . . . . . . . . . . . . . . . . . . . . . . . . . . . . . 53
Mute Level . . . . . . . . . . . . . . . . . . . . . . . . . . . . . . . . . . . . . . . . . . . . . . . 53
Turning the keyboard on or off (Local Control) . . . . . . . . . . . . . . . . 54
MIDI Clock . . . . . . . . . . . . . . . . . . . . . . . . . . . . . . . . . . . . . . . . . . . . . . 54
MIDI IN Channels . . . . . . . . . . . . . . . . . . . . . . . . . . . . . . . . . . . . . . . . 54
MIDI OUT Channels . . . . . . . . . . . . . . . . . . . . . . . . . . . . . . . . . . . . . . 55
MIDI Filters . . . . . . . . . . . . . . . . . . . . . . . . . . . . . . . . . . . . . . . . . . . . . 56
Data transfer via the USB port . . . . . . . . . . . . . . . . . . . . . . . . . . . . . . 56
Erasing songs from the User Song album . . . . . . . . . . . . . . . . . . . . . 57
General Reset . . . . . . . . . . . . . . . . . . . . . . . . . . . . . . . . . . . . . . . . . . . . 58
System version number . . . . . . . . . . . . . . . . . . . . . . . . . . . . . . . . . . . . 58
MIDI . . . . . . . . . . . . . . . . . . . . . . . . . . . . . . . . . . . . . . . . . . . . . 59
What is MIDI? . . . . . . . . . . . . . . . . . . . . . . . . . . . . . . . . . . . . . . . . . . . 59
What is MIDI Over USB? . . . . . . . . . . . . . . . . . . . . . . . . . . . . . . . . . . 59
What can you do with MIDI? . . . . . . . . . . . . . . . . . . . . . . . . . . . . . . . 59
MIDI connections . . . . . . . . . . . . . . . . . . . . . . . . . . . . . . . . . . . . . . . . 59
Standard MIDI settings . . . . . . . . . . . . . . . . . . . . . . . . . . . . . . . . . . . . 60
Using the C-520 as a multitimbral tone generator . . . . . . . . . . . . . . 60
Program Change . . . . . . . . . . . . . . . . . . . . . . . . . . . . . . . . . . . . . . . . . . 60
Control Change . . . . . . . . . . . . . . . . . . . . . . . . . . . . . . . . . . . . . . . . . . 61
Installing the Korg USB MIDI Driver . . . . . . . . . . . . . . . . . . . . 62
Connecting the C-520 to a personal computer . . . . . . . . . . . . . . . . . 62
KORG USB-MIDI Driver system requirements . . . . . . . . . . . . . . . . 62
Please note before use . . . . . . . . . . . . . . . . . . . . . . . . . . . . . . . . . . . . . 62
Windows: Installing the KORG USB-MIDI Driver . . . . . . . . . . . . . 63
Mac OS X: Installing KORG USB-MIDI Driver . . . . . . . . . . . . . . . . 63
Assembling the stand . . . . . . . . . . . . . . . . . . . . . . . . . . . . . . . 64
Cautions for assembly . . . . . . . . . . . . . . . . . . . . . . . . . . . . . . . . . . . . . 64
Assembling procedure . . . . . . . . . . . . . . . . . . . . . . . . . . . . . . . . . . . . . 64
Check after assembly . . . . . . . . . . . . . . . . . . . . . . . . . . . . . . . . . . . . . . 66
Caution . . . . . . . . . . . . . . . . . . . . . . . . . . . . . . . . . . . . . . . . . . . . . . . . . 66
Error messages . . . . . . . . . . . . . . . . . . . . . . . . . . . . . . . . . . . . . 67
Troubleshooting . . . . . . . . . . . . . . . . . . . . . . . . . . . . . . . . . . . 68
Polyphony . . . . . . . . . . . . . . . . . . . . . . . . . . . . . . . . . . . . . . . . . 68
Technical specifications . . . . . . . . . . . . . . . . . . . . . . . . . . . . . . 69
Appendix / Appendice / Anhang / Appendice . . . . . . . . . . . 277
Sounds / Timbres / Klänge / Suoni . . . . . . . . . . . . . . . . . . . . . . . . . . 277
Performances / ‘Performance’-Speicher . . . . . . . . . . . . . . . . . . . . . 283
Effects / Effets / Effekte / Effetti . . . . . . . . . . . . . . . . . . . . . . . . . . . . . 285
Songs / Morceaux / Songs / Brani musicali . . . . . . . . . . . . . . . . . . . 286
MIDI Implementation Chart . . . . . . . . . . . . . . . . . . . . . . . . . 288
English
5
Page 8

Introduction
> Main features
Introduction
Main features
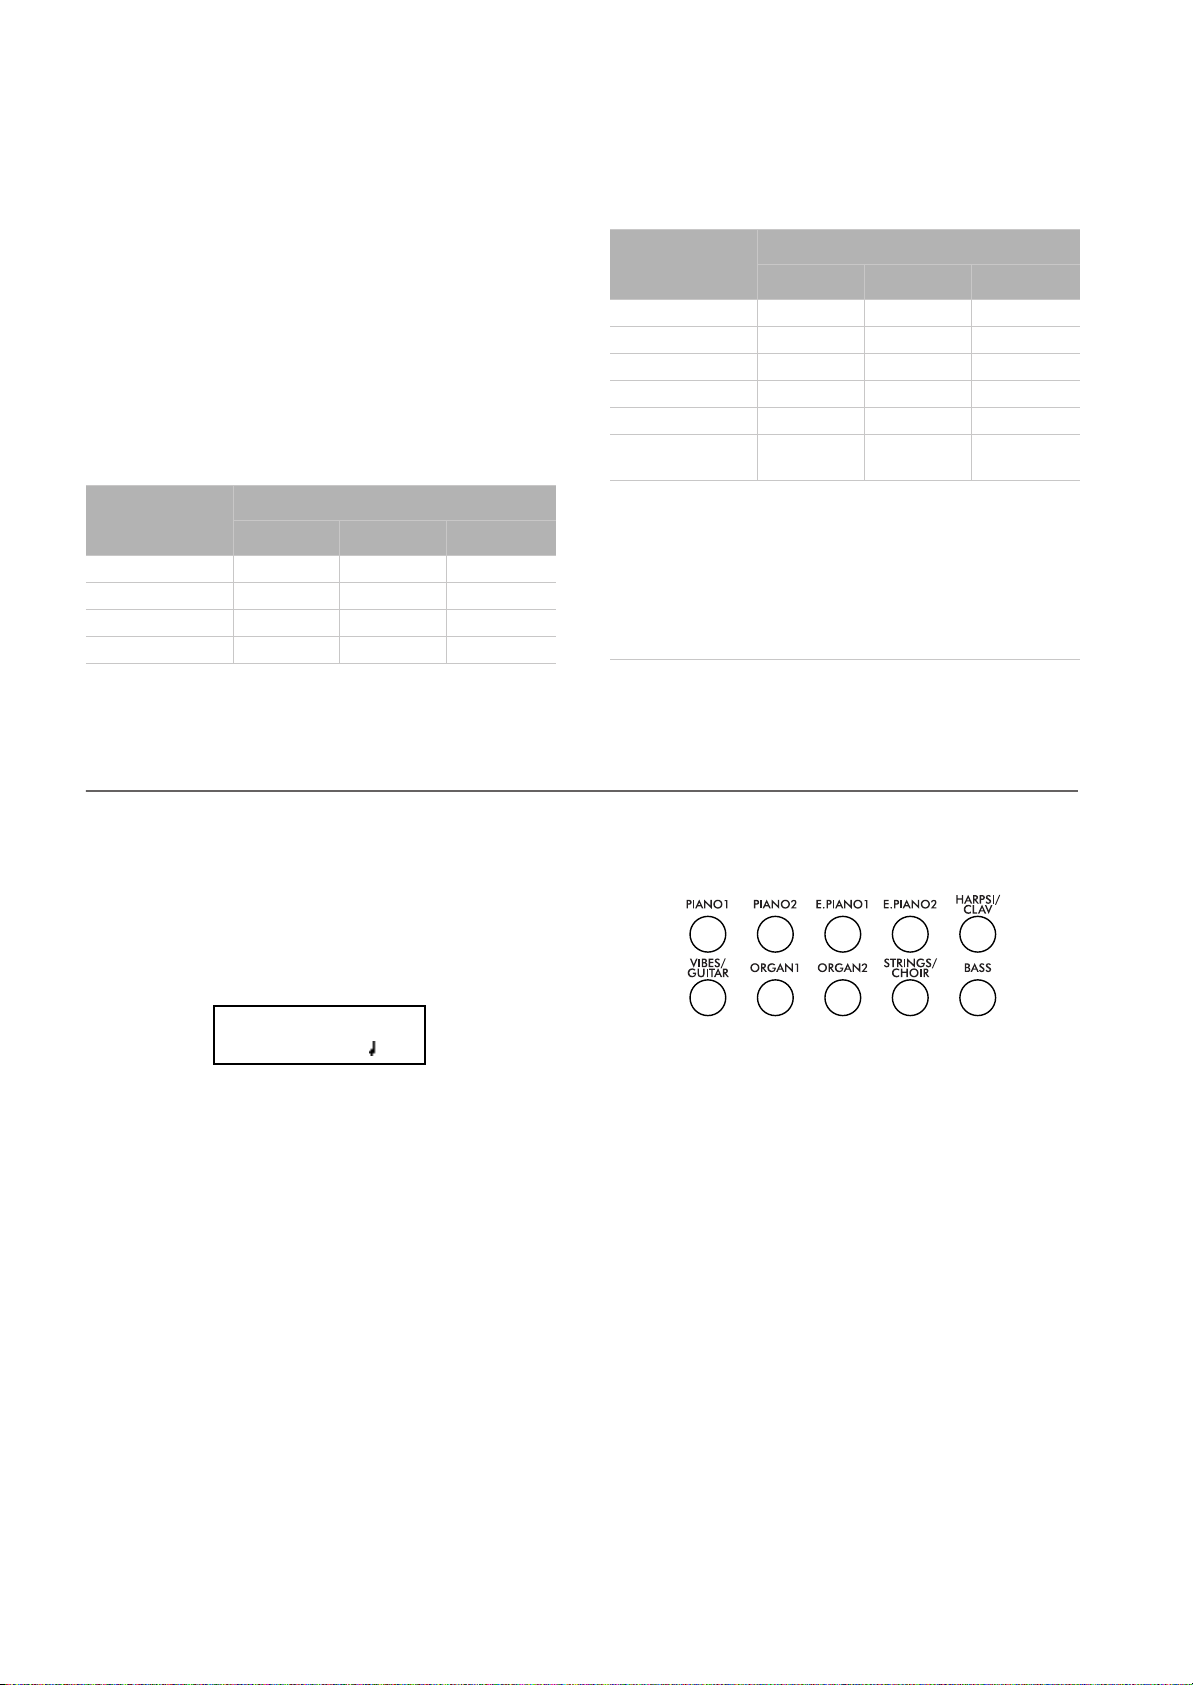
Wide range of sounds
Forty different and expressive high-quality sounds, including
a Stereo Concert Grand Piano. You can use the Layer and Split
functions to simultaneously play a combination of two
sounds. Sounds and sound combinations can be freely modified.
Performances
Sound combination can also be saved into performances, giving you an additional set of 30 timbres (3 banks of 10 performances). Performances also store a custom split point, for
custom combinations of sounds over the keyboard.
Four zones keyboard
The new high-quality, realistic Korg RH3 keyboard features
four zones with different weights. This gives you the same realism and feeling as a grand piano keyboard.
Touch control
You can choose from nine different settings to adjust how the
sound will respond to your keyboard playing dynamics.
Pedal effects
The C-520 provides the same three pedals as a grand piano,
controlling the soft, sostenuto, and damper functions respectively. The damper pedal simulates the natural string resonances and noises of an acoustic piano, by means of the
innovative Korg EPx (Piano eXperience) technology. Both the
damper and soft pedals let you vary the amount of the effect by
how far you press down on them (“half-pedal” function). In
addition, pedals can be freely assigned to other functions, like
starting the recorder or changing the speed of the rotary speaker.
Piano eXperience (or EPx) effects are particularly evident in
sounds like GrandPiano, BriteGrand and MelloPiano.
One-hundred eighty-five songs
The C-520 includes a huge library of songs, based on famous
pieces and lesson books. These songs are perfectly suitable for
piano lessons, being recorded into two separate parts (left
hand on Part 1, right hand on Part 2) that you can easily turn
off and play on the keyboard. In addition, you can change the
metronome’s tempo and let a defined passage play in cycle.
SongBook included
The SongBook album is also included as a printed music book
– a great resource for practicing and playing along with your
preferred tunes.
Onboard recorder
A multi-track, easy-to-use onboard recorder, lets you record
your own songs, or read Standard MIDI Files that you can
transfer via the integrated USB port from an external computer.
Metronome
The built-in metronome allows you to select the time signature, tempo, and volume, and use a bell sound as the accent. It
can even give you a drum accompaniment in a musical style of
your choice (drum patterns).
Data transfer via USB
When connected to a personal computer via the USB port, the
C-520’s internal memory can be seen as a USB disk. This way,
you can backup your data, or transfer files between the C-520
and the personal computer.
Piano eXperience
While existing piano sampling techniques have resembled an
audio snapshot, our new “Piano eXperience” technology is
more of a hologram, accurately reproducing every dimensional detail of the sound. All piano sampling for the C-520 is done
in stereo to preserve the natural imaging of the sound. Different dynamic levels are captured to extend the instrument's expressive vocabulary.
Going even further, the C-520 uses the sound of the key being
released and the hammer returning, as well as the sympathetic
damper resonance of the strings to create all of the subtle shadings that create a superior instrument sound. This attention to
detail defines the sound of the new C-520, providing an instrument that can interpret every nuance of touch into a meaningful musical gesture.
6
MIDI capabilities
The C-520 supports the MIDI protocol, the standard that allows music data to be transferred between musical instruments and computers. MIDI allows two or more devices to
control or be controlled by each other, and also allows you to
use the C-520 as a 16-part multitimbral tone generator.
MIDI over USB
The USB port also carries MIDI data, so that you can connect
the C-520 directly to your personal computer with a single cable and without the need of a dedicated MIDI interface. A dedicated KORG USB MIDI Driver is freely available for full use
of the C-520’s MIDI features.
Page 9

Introduction
> Main features
Temperaments
In addition to the Equal temperament, the C-520 allows you to
select nine alternative temperaments, for historically accurate
performance of classical music, or experimenting. When selecting an acoustic piano sound, the typical Stretched Tuning
is automatically selected.
Adjustable pitch
The Transpose function lets you change the pitch of the piano,
and the Master Tuning function allows you to make fine tune
adjustments.
Effects
The C-520 provides built-in digital effects that can simulate
the natural ambience of a concert hall (reverb) and add rich-
ness to the sound (chorus). In addition, each sound includes
an insert effect (delay, phaser, equalizer, rotary speaker,
etc…), that is specially suited to each particular sound.
Powerful integrated amplification
The C-520 includes a powerful, 2 × 35 Watt amplifier, with
four speakers in bass reflex box. This gives the most authentic
sound reproduction, together with enough volume deliver the
full power of an acoustic piano.
Two sets of headphones
You can connect two stereo headphones, to play with your
teacher or another musician. Connecting a headphone set automatically disconnects the speakers, so there is no risk to disturb others when practicing by night.
English
7
Page 10
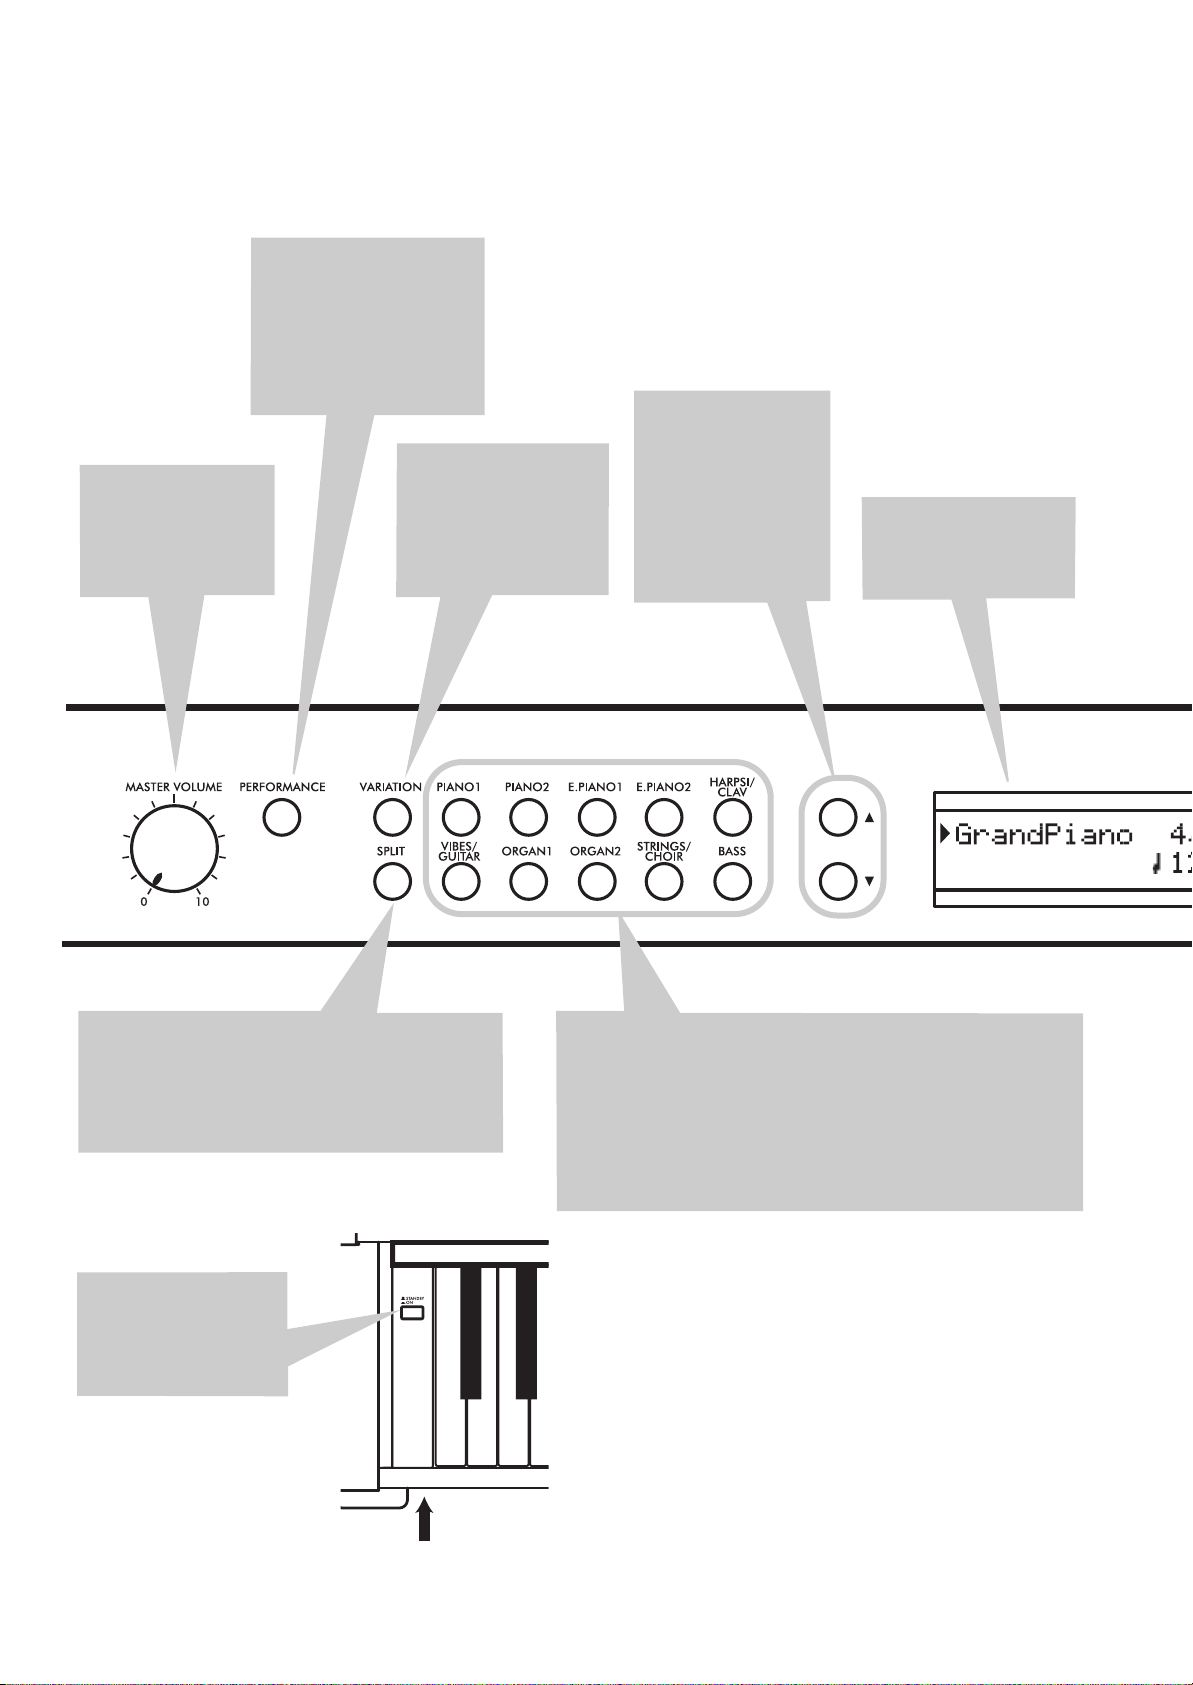
Control panel
>
Control panel
PERFORMANCE button:
Enters/exits Performance
mode. While in this mode,
the sound selection buttons
are used to choose performances instead of single
sounds. See page 20.
MASTER VOLUME
knob:
Adjusts the volume for the speakers,
the Output and the
Phones connectors
VARIATION button:
Selects one of the available variations of the currently selected sound, or
one of the three performance banks.
/
tons: Move the cursor
in the display, from
one parameter to the
following or the previous one. The cursor is
indicated by a point-
ing arrow (
a parameter’s name.
(Scroll) but-
) next to
Display:
Shows the various sound names and
parameters.
SPLIT button:
Split mode, a sound is assigned to your right hand,
and a different one to the left hand. Keep it pressed
and play a note on the keyboard to choose a different split point. See page 17.
POWER switch:
switch. When in the
Standbay position, the
piano is turned off.
Turns Split mode on or off. When in
On/Off
Power LED
8
SOUND SELECTION buttons:
gle mode). You can press two buttons at the same time, to play
two sounds at the same time on the keyboard (Layer mode). Press
SPLIT to play a sound with your right hand, and a different one
with your left hand (Split mode). See page 15.
When the PERFORMANCE indicator is turned on (Performance
mode), these buttons allow for selection of performances. See
page 20.
Press a button to select a sound (Sin-
Page 11
+/YES / -/NO (Value) buttons:
Change the value of
the parameters appearing
in the display. The editable
parameter is shown by the
cursor (
left, or (when editing text)
with the character/cipher in
edit flashing. By keeping
them pressed, the values
start changing automatically, first slowly, then
slightly faster. By pressing
them together, the parameter is reset to its default
value.
While in the Main page,
these buttons can be used
to select a different variation of the current sound.
) placed on its
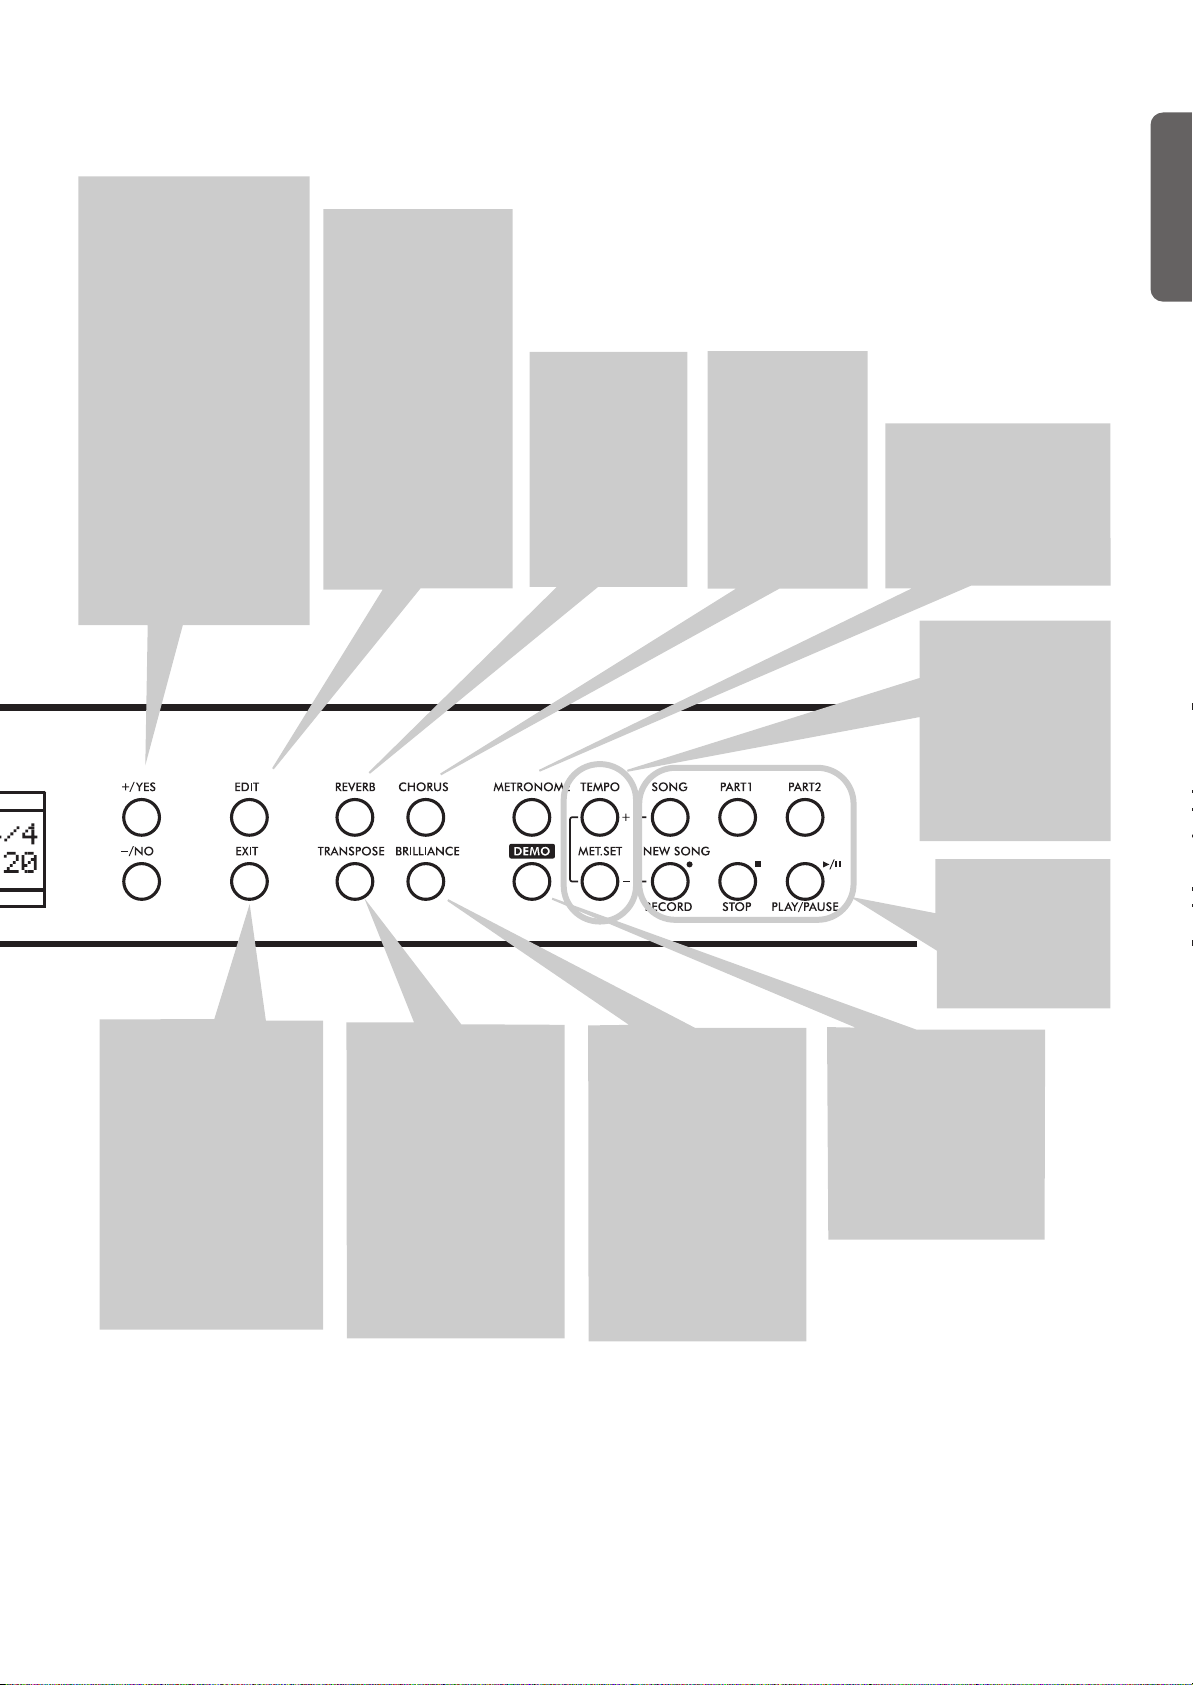
EDIT button:
to access the Edit
mode relevant to the
current type of data
selected in the display. Four Edit modes
are available: Sound
(see page 41), Performance (see page 41),
Song (see page 37)
and Global (see
page 50). Global edit
mode can be
accessed by keeping
the EDIT button
pressed for more
than one second).
Press it
REVERB button:
Turns the reverb
on/off. This adds
ambience to the
sound. Keep it
pressed for more
than one second
to access the
Reverb edit page
(see page 19).
CHORUS button:
Turns the chorus
on/off. This makes
the sound richer.
Keep it pressed
for more than
one second to
access the Chorus
edit page (see
page 19).
Control panel
METRONOME button:
Turns the metronome click
on/off. The tempo and
time signature depend on
the chosen values, or the
selected song (see
page 22).
TEMPO/MET.SET buttons:
Adjust the metronome tempo. The +
button makes it
faster, while the –
button makes it
slower. Pressed
together, they give
access to metronome
editing. See page 22.
>
English
EXIT button:
exit Edit mode, or to
return to the Main page
from other pages. When
exiting from the Edit
mode, the Save procedure will be recalled.
When a drum pattern is
assigned to the Metronome, and it is running,
this button doubles as a
Fill In control (see
page 23, page 33).
Press it to
TRANSPOSE button:
Press this button to
open the Transpose
page and change the
master transpose value.
When the indicator is
turned on, transposition is active. Changes
made after pressing this
button are not saved to
memory, and are reset
when turning the
instrument off. See
page 18.
BRILLIANCE button:
Press this button to
open the Brilliance
page and change the
brilliance value. When
the indicator is turned
on, a brilliance variation is active. Changes
made after pressing this
button are not saved to
memory, and are reset
when turning the
instrument off. See
page 19.
RECORDER buttons:
Control the
playback or recording of the songs.
See page 26,
page 30.
DEMO button:
the Demo mode on/off,
to listen to the demo
songs. Select the songs
with the sound selection buttons (see
page 13). You can play
together with the demo
songs.
Turns
9
Page 12

Control panel
>
OUTPUT (L/MONO, R) connectors:
Audio outputs. Connect
these connectors to an external
amplifying system. (With a hi-fi
system use the LINE, AUX, CD or
TAPE connectors, not the
PHONO connector). To amplify
the C-520 in mono, connect the
single L/MONO connector. Use
the MASTER VOLUME knob to
set the output volume.
Pedals connector:
Connect the
supplied pedals
to this connector.
PHONES connector:
nect one or two pairs of
headphones to these jacks.
The integrated speakers
will turn off.
MIDI (IN, OUT) connectors:
Connectors that are used to
connect other MIDI devices
(sequencer, keyboards, etc.).
OUT: Data output (to be
connected to the MIDI IN
connector of another MIDI
device). IN: Data input (to be
connected to the MIDI OUT
connector of another MIDI
device).
Con-
AC ADAPTER
connector:
Connect the
supplied AC/
DC adapter to
this connector.
10
INPUT (L/MONO, R) connectors:
Line audio inputs. Connect to
these connectors an external
audio source, such as a CD, MP3
or tape player, or another keyboard. To connect a microphone,
you need an external microphone
preamplifier or a mixer.
Warning:
output of a power amplifier to
these inputs!
Avoid connecting the
USB connector:
USB 1.1-compliant, standard
connector. Connects to a personal computer (PC or Mac).
Can be used for data transfer
(see page 56), or USB Over
MIDI use (see page 59).
Type B (slave),
Page 13
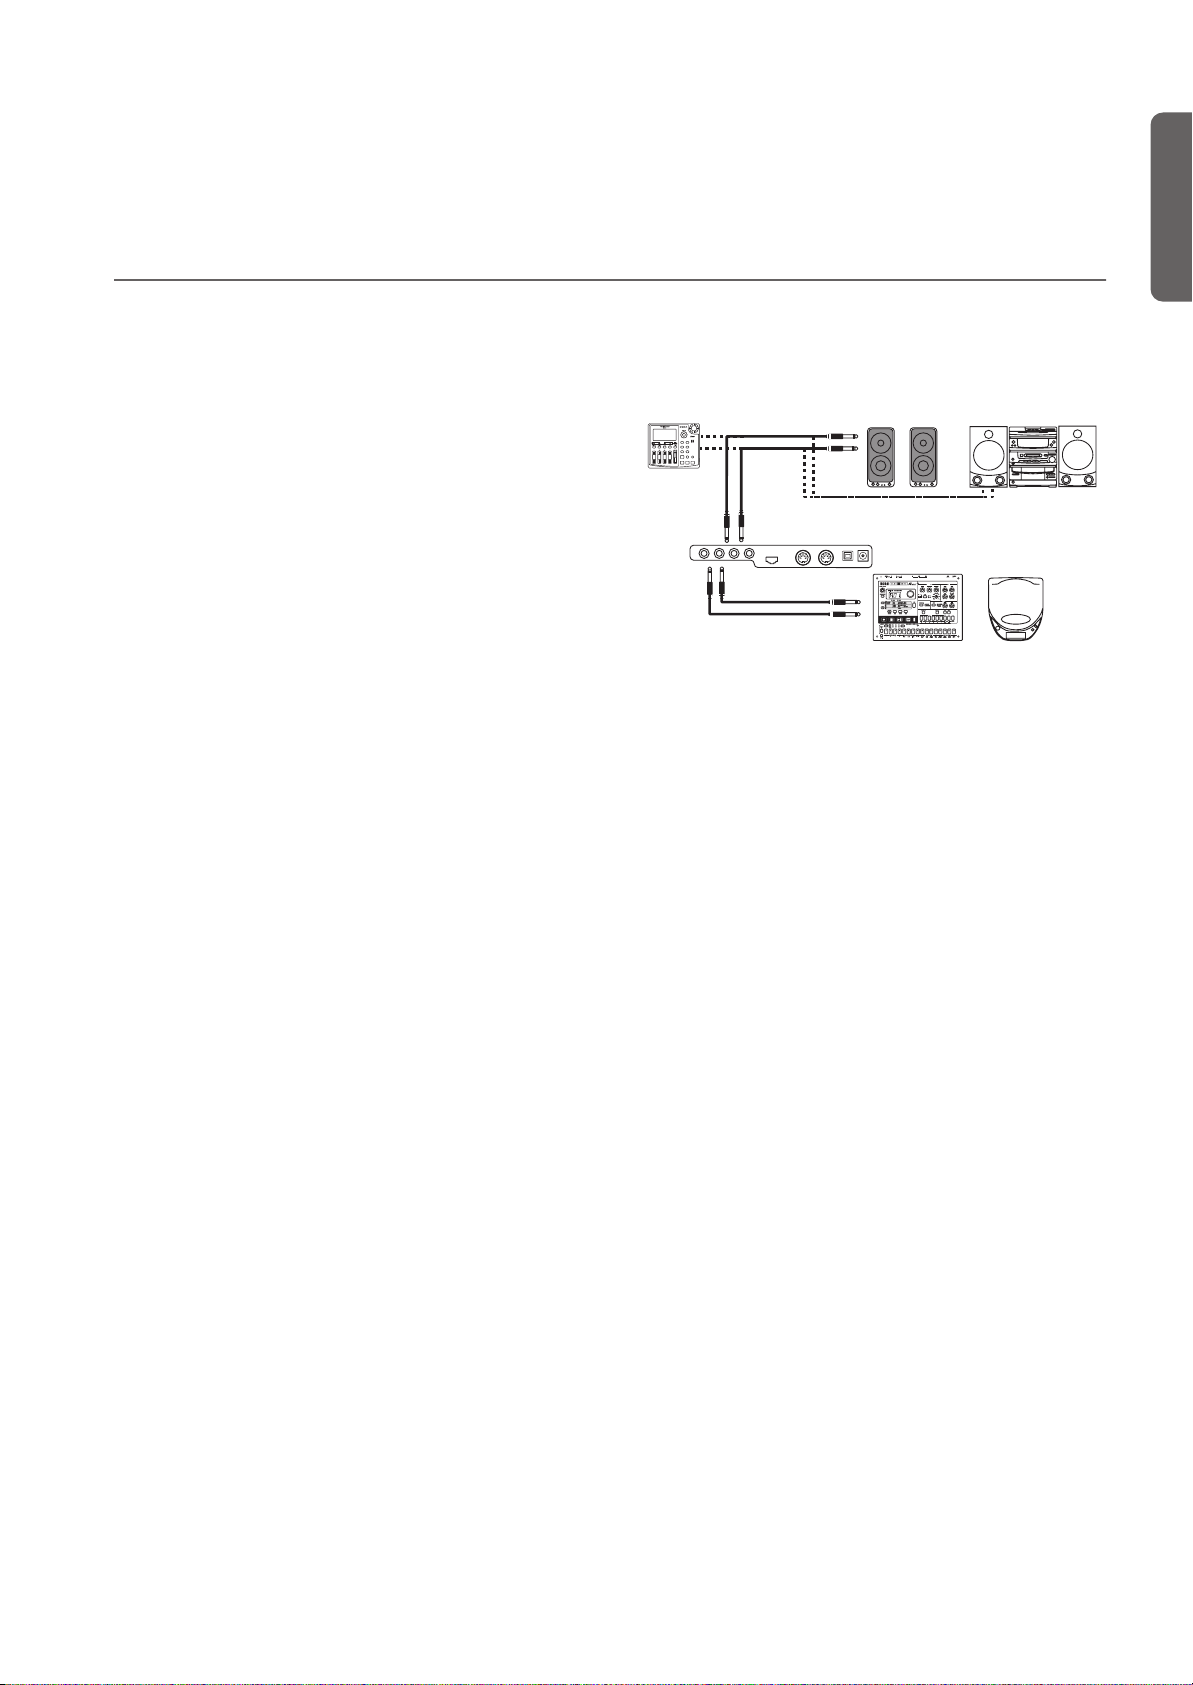
Connections
Connections
> Connecting to external audio devices
Connecting to external audio devices
Connecting to an external amplification system
Use the OUTPUT connectors, if you like to connect your C520 to a high-quality mixer, stereo hi-fi, or a couple of active
monitors. When using a stereo hi-fi, connect the OUTPUTs to
the LINE, AUX, CD or TAPE inputs (never use the PHONO
inputs). For mono amplification, connect only the L/MONO
output.
Connecting other audio devices to the C-520
Use the INPUT connectors, to connect a computer, mixer,
drum machine, synthesizer, MP3 or tape player, to your C520, and hear their sound run through its speakers. For mono
amplification, connect only the L/MONO output.
nect the output of a power amplifier!
English
Do not con-
L/MONO
R
AUX IN
OUTPUT
INPUT
11
Page 14
Before you begin
> Open the key cover
Before you begin
Open the key cover
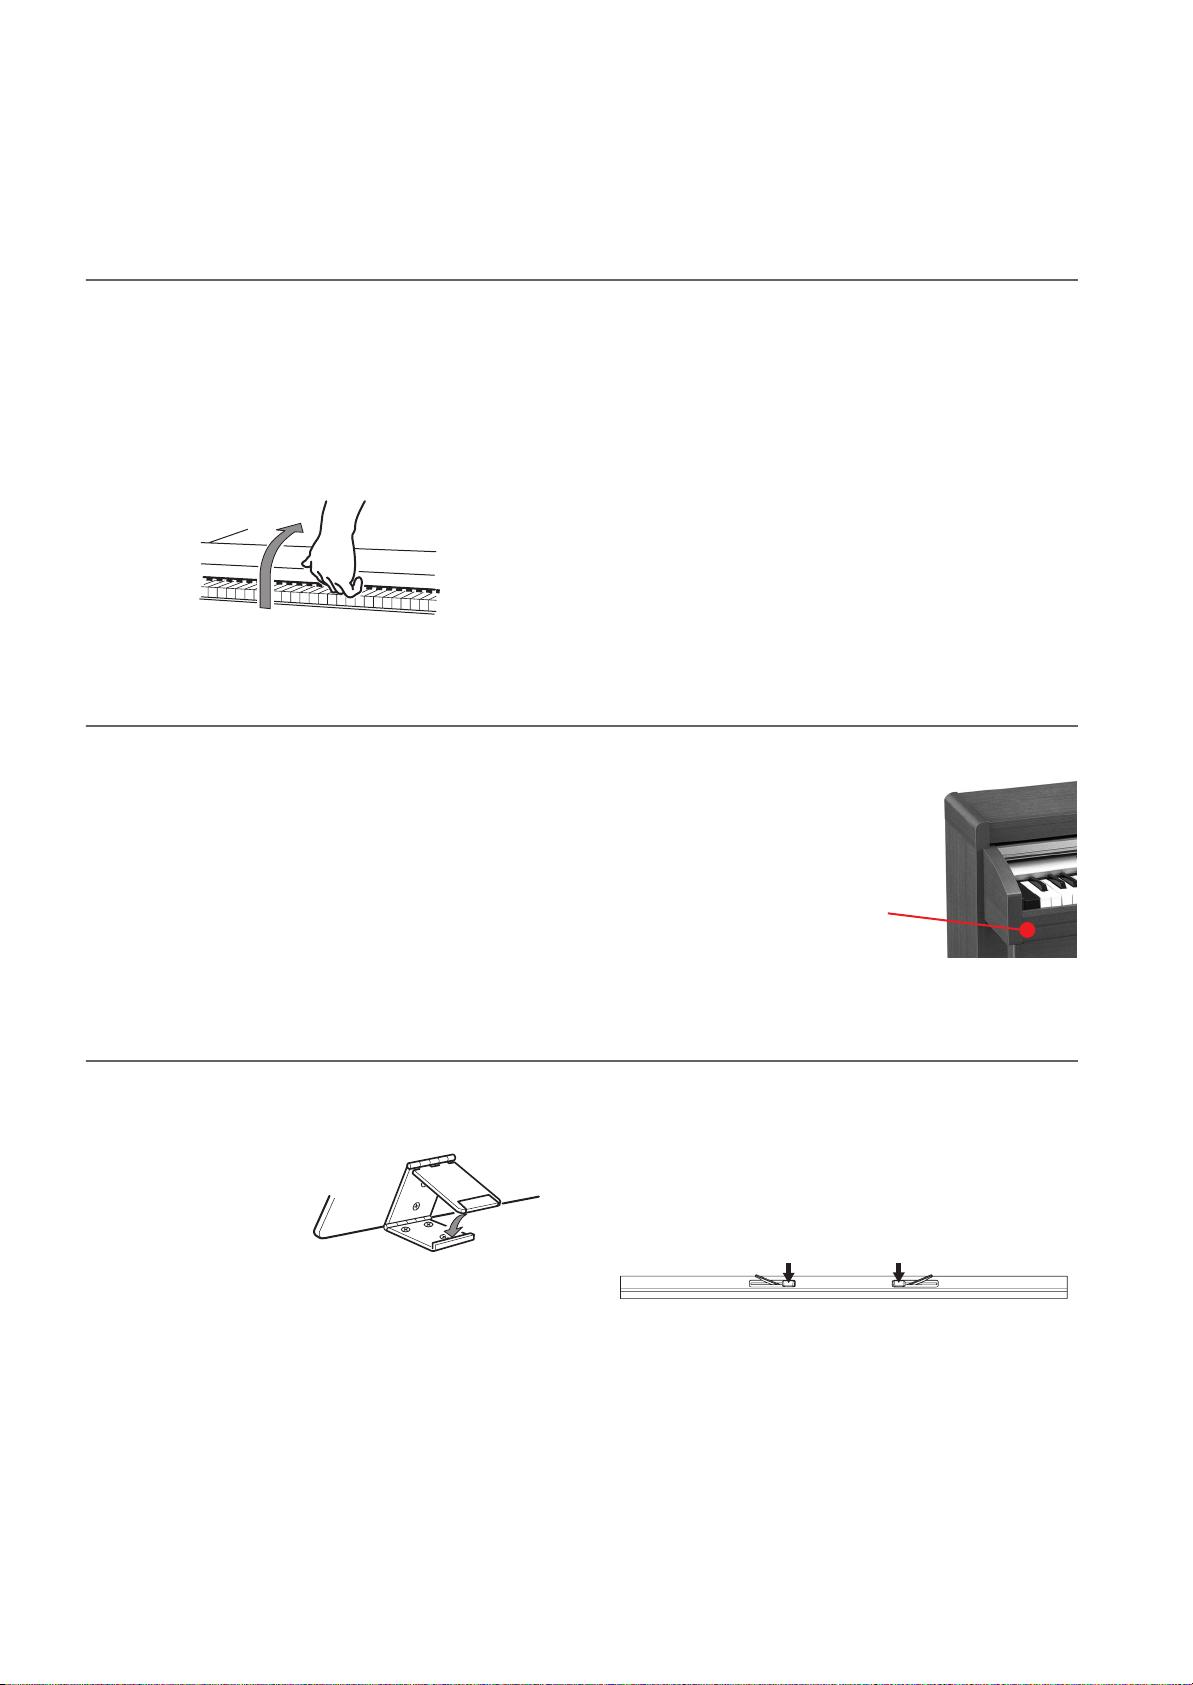
Gently lift the center of the sliding key cover by the indented
portion, and support it while you slide it carefully and fully
into the C-520. Before you open the key cover, make sure that
no foreign objects such as papers or coins are on the top of the
key cover itself, otherwise, these objects may fall into the instrument.
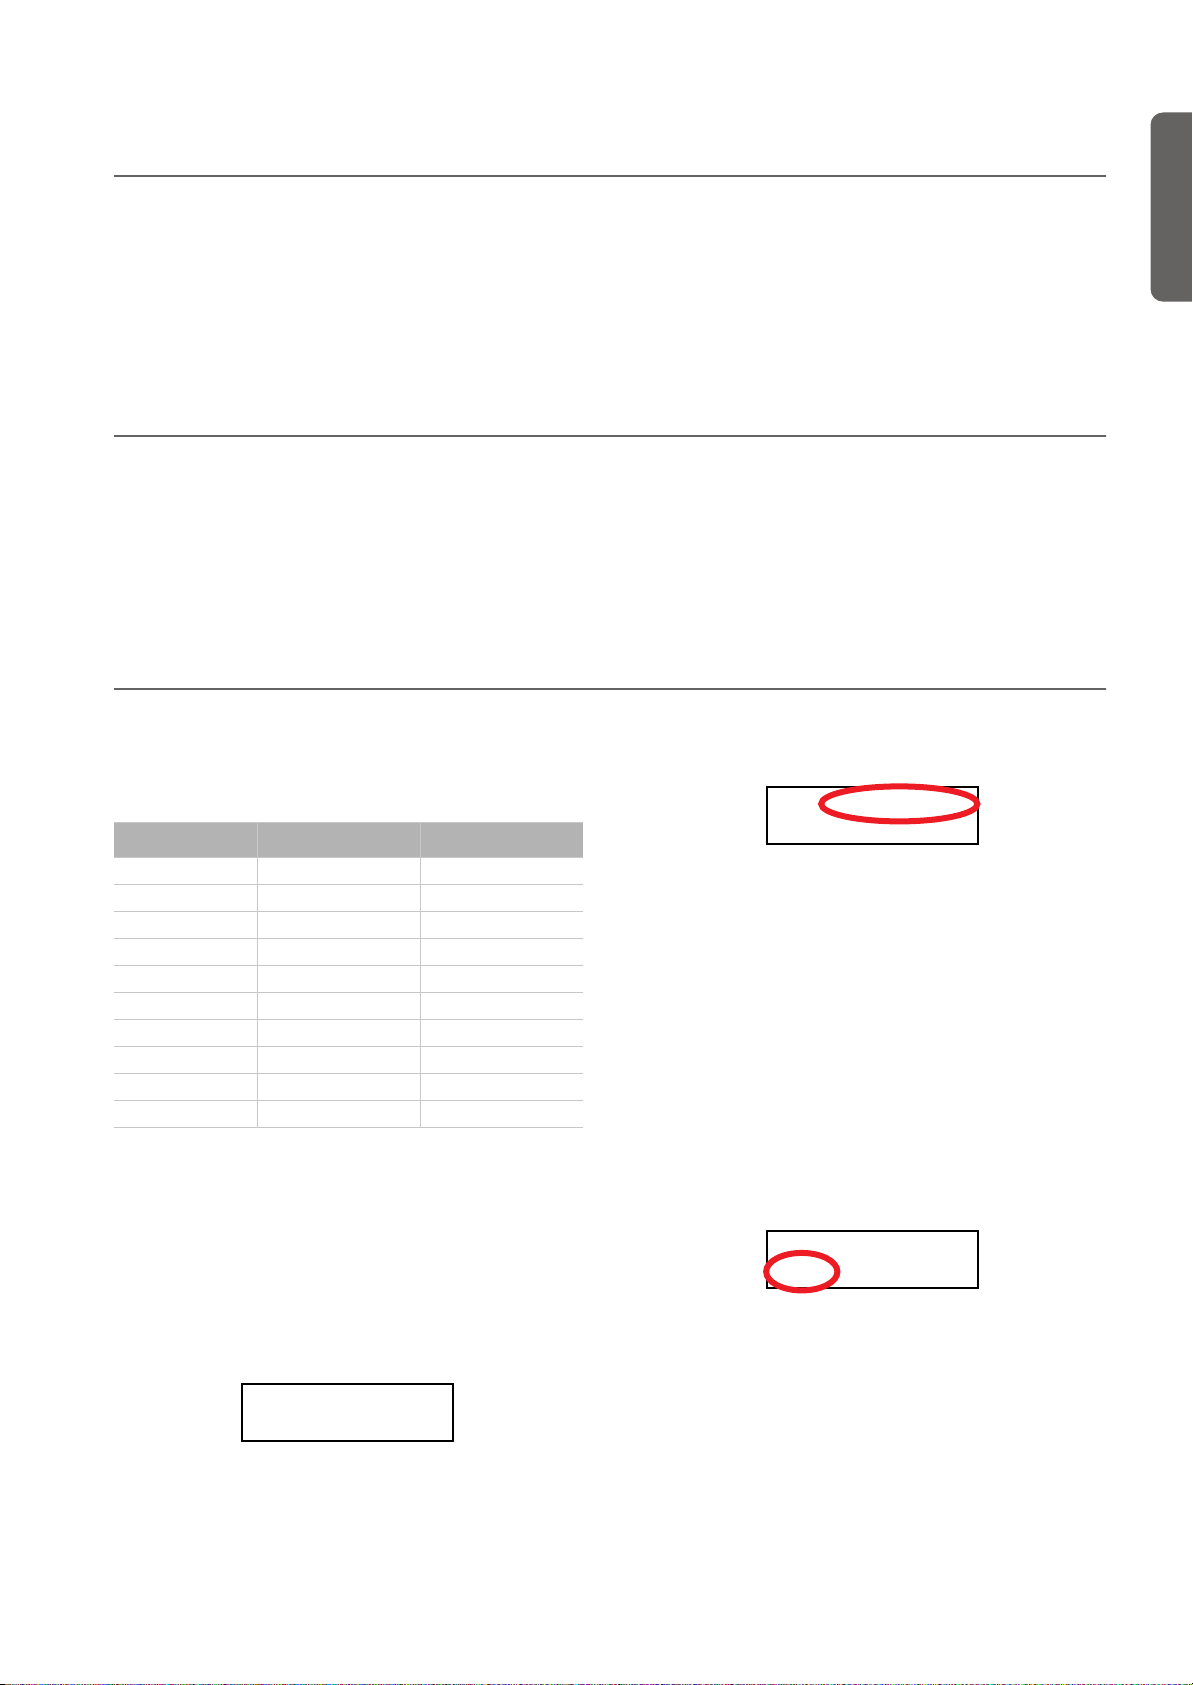
Turning the instrument on
Insert the DC plug of the supplied AC adapter into the DC inlet of the C-520, then connect the AC plug to a wall socket.
After having connected the power cable, press the POWER
switch. When the instrument is turned on, the buttons on the
control panel and the display will light up. Also, an LED on the
front of the instrument, also visible when the key cover is
closed, will light up.
To close the key cover, gently lift the center by the indented
portion, and slide it forward.
Note:
Be careful not to pinch your fingers or hand while open-
ing or closing the key cover.
Note:
The key cover may be damaged if you use excessive force
when opening or closing it.
To turn the instrument off, press the
POWER switch
again.
Power LED
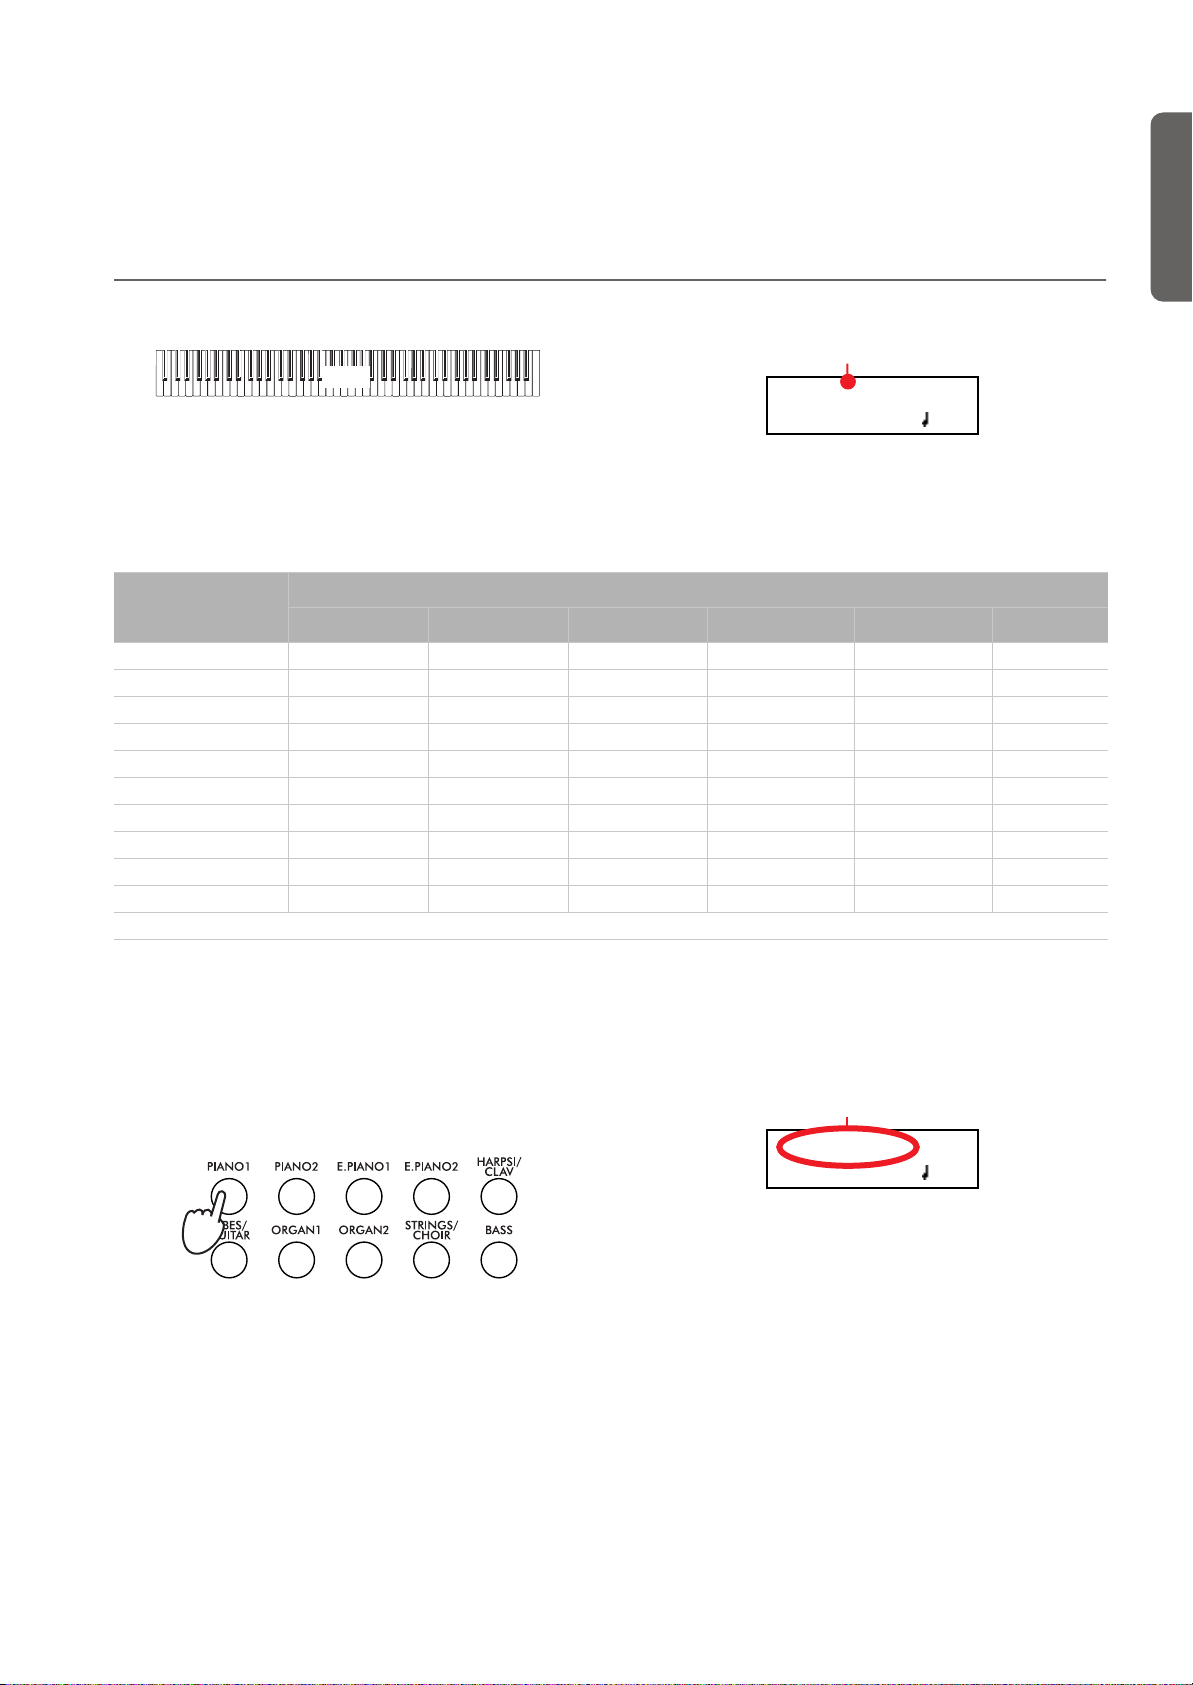
Using the music stand
Opening and closing the music stand
Tilt the music stand upright, and use the two
stoppers located on the
rear to hold the music
stand in place.
To lower the music stand,
release the stoppers and rest the music stand on the flat top.
12
Using the score holders
To keep a music book open, use the two score holders in front
of the music stand. Push on the shorter side to make them slide
up. Push on the longer side to make them slide down.
apply excessive strength or weight to the holders, or you will
risk to break them.
Do not
Page 15
Adjusting the volume
DEMO:GrandPiano1
Bk1 Press Sound
DEMO:-----------
Bk1 Press Sound
Before you begin
> Adjusting the volume
Rotate the MASTER VOLUME knob towards the right to increase the volume; towards the left to decrease the volume. The
maximum value is “10”; the minimum (silence) is “0”. This
control adjusts the output level of the headphones, the internal
speakers and of the OUTPUTs.
Using the headphones
For playing or practicing during night hours, or when you
don’t want to be heard by others in the same room, connect
one or two pairs of high-quality headphones (32
suggested) to the appropriate PHONES connectors. These
connectors are standard 1/4” phone jacks. If your headphones
Ω
impedance
Listening to the Demo
The C-520 contains 20 pre-recorded demo songs. Listen to
them to experience the rich sound and expressive potential of
this instrument. Here is a list of the available demo songs:
It does not control the volume of an audio device connected to
the INPUT connectors. Use the audio device’s own controls to
set its volume.
It is always better to start with a low volume and then increase
gradually.
have a mini-jack adapter, grasp the adapter when plugging in
or out the headphones.
Warning:
avoiding extended listening at high volumes.
When using headphones, protect your hearing by
to the demo song currently in play will turn on. The name
of the song will be shown in the display:
English
Button Bank 1 (1-10) Bank 2 (11-20)
PIANO 1 GrandPiano1 GrandPiano2
PIANO 2 Honky-Tonk Piano Pad
E.PIANO 1 El. Piano 1 El. Piano 2
E.PIANO 2 Digi Piano Vintage EP
HARPSI/CLAV Harpsichord Clav.
VIBES/GUITAR Vibes Ac. Guitar
ORGAN 1 Jazz Organ1 Jazz Organ2
ORGAN 2 Full Pipe Pipe Flute
STRING/CHOIR Strings Choir
BASS Ac. Bass El. Bass
During the demo playback you can’t use any other buttons.
However, you can still play the keyboard to play along with the
demo songs.
Listen to all songs at once
You can listen to all demo songs with a single command.
1. Press the DEMO button. The sound selection indicators
will blink sequentially from left to right. The Demo page
will appear in the display:
DEMO:-----------
Bk1 Press Sound
2. Wait some seconds, without pressing any button. The first
demo song will begin to play. The indicator corresponding
All demo songs will be played back one after the other.
After the last song, the playback will begin again from the
first song.
3. To pause the current song, press the PLAY/PAUSE button.
Press it again to restart playback from the same position.
4. To stop the playback and exit the demo mode, press the
DEMO or the EXIT button.
Listen to a specified song
You can select just one demo song to be played back.
1. First of all, you must select one of the demo song banks.
• To select the first bank (Bk1, songs 1-10), press the DEMO
button once. The indicators will blink sequentially, from
left to right. The Demo page will appear in the display:
• To select the second bank (Bk2, songs 11-20), press the +/
YES button.
• To return to the first bank, press the -/NO button.
2. Press one of the sound selection buttons to select the cor-
responding demo song in the selected bank. The demo is
based on the sound associated with the button. The indicator on the selected demo button will stay on, while the
other indicators will turn off.
13
Page 16

Before you begin > Listening to the Demo
3. After the end of the selected song, all the songs will be
played back in cycle.
4. If you want to select a different song, press one of the
sound selection buttons.
5. To pause the current song, press the PLAY/PAUSE button.
Press it again to restart playback from the same position.
6. To stop the current song without exiting from the Demo
mode, press STOP. Choose a different song and wait for it
to start playing back.
7. To stop the playback and exit the demo mode, press the
DEMO or EXIT button.
14
Page 17
Basic functions
GrandPiano 4/4
120
Main sound
GrandPiano 4/4
120
Sound name
Basic functions > Playing a single sound (Single mode)
Playing a single sound (Single mode)
When you turn the instrument on, it is in Single mode.
Main
The single Grand Piano sound is selected, and plays over the
full keyboard. Its name is shown in the display:
You can replace it with any of the 40 sounds supplied with the
instrument. See the list of sounds in the following table (more
details on each sound are on page 277):
Sound
Button
Var. 1 Var. 2 Var. 3 Var. 4 Var. 5 Var. 6
PIANO 1 GrandPiano* BriteGrand* Rock Piano Piano&Str.
PIANO 2 Honky-Tonk MelloGrand* Piano&Pad Elec.Grand M1 Piano
E.PIANO 1 Tine EP 1 SuitTineEP DynoTineEP Tine EP 2
E.PIANO 2 Dig. EP 1 Dig. EP 2 Reed EP TremReedEP
HARPSI/CLAV Harpsi 8' Harpsi 16' Clav Synth Clav
VIBES/GUITAR Vibes 1 Vibes 2 Nylon Gtr.
ORGAN1 Jazz Organ Perc.Org.1 Perc.Org.2
ORGAN2 Church Org Pipe Flute Pipe Tutti
STRINGS/CHOIR Strings Slow Str. String Pad Choir ScatVoices Vocal Pad
BASS Ac. Bass El. Bass Fretless B Bass&Ride
* Note: The EPx effects are not available when you are in Layer mode.
English
Selecting a sound
You can use the sound selection buttons to select a different
sound.
1. Press one of the sound selection buttons in order to select
a sound type.
12345
678910
The indicator on the button you pressed will light. The
name of the selected sound will appear in the display:
2. Use the VARIATION button to select one of the available
variations of the base sound (see table above). When the
last variation has been selected, press it again to select the
base sound again.
As an alternative, use the +/YES button to scroll the sound
variation list forward; the -/NO button to scroll it backwards.
15
Page 18

Basic functions > Playing two sounds at the same time (Layer mode)
M:90
L:127
Main sound’s volume
Layer sound’s volume
Playing two sounds at the same time (Layer mode)
You can play two sounds at the same time on the keyboard. It
is like having two “overlapping” sounds. This is called the Layer mode.
Main
Layer
Keep in mind that, when in Layer mode, the total number of
voices that you can play at the same time is reduced, depending on the total number of oscillators used by the selected
sounds.
Entering the Layer mode
To access Layer mode from any other mode, press together
two sound selection buttons. The lowest-numbered sound in
the following diagram will be the Main sound, while the highest-numbered sound will be the Layer sound:
12345
678910
The name of the two sounds will appear in the display:
Main sound
GrandPiano 4/4
Strings 120
Layer sound
Exit from the Layer mode
To exit Layer mode, press a single sound selection button, or
the SPLIT button. You will return to the Single mode, with a
single sound playing on the keyboard, or to the Split mode,
with a sound on the left and one on the right of the split point.
Selecting a different pair of sounds
To select different sounds, press a different pair of sound selection buttons. The last selected variation of the sounds corresponding to the new buttons will be selected.
Selecting a variation of the Main sound
You can select a variation of the current Main sound.
1. Be sure the cursor is in the first line of the display. If it isn’t,
use the SCROLL
Cursor
button to move it there:
GrandPiano 4/4
Strings 120
2. Use the VARIATION button to select a different sound
variation. As an alternative, use the +/YES and -/NO buttons to choose a different sound variation.
Selecting a variation of the Layer sound
You can select a variation of the current Layer sound.
1. Use the SCROLL
er sound.
button to move the cursor to the Lay-
GrandPiano 4/4
Strings 120
Scroll
GrandPiano 4/4
Strings 120
2. Use the VARIATION button to select a different sound
variation. As an alternative, use the +/YES and -/NO buttons to choose a different sound variation.
3. If you desire so, use the SCROLL
cursor back to the Main sound.
Balancing layered sounds
You can adjust the sound’s volume balance.
• Keep the Main sound button pressed, to increase its volume and (after the maximum value has been reached)
decrease the volume of the Layer sound. Release the button when done.
• Keep the Layer sound button pressed, to increase its volume and (after the maximum value has been reached)
decrease the volume of the Main sound. Release the button when done.
While the volume is changing, a meter is shown in the display:
buttons to move the
16
Page 19
Basic functions > Playing different sounds with your left and right hand (Split mode)
Playing different sounds with your left and right hand (Split mode)
You can play a sound with your right hand (the Main sound),
and a different one with the left hand (the Left sound). This is
called the Split mode.
Split Point
Selecting a variation of the Main sound
You can select a variation of the Main sound after accessing the
Split mode.
1. Be sure the cursor is in the first line of the display. If it isn’t,
use the SCROLL
button to move it there:
English
Left
Main
Entering the Split mode
To access Split mode from any other mode, press the SPLIT
button. The Main sound of the Single or Layer mode will be assigned to the right half of the keyboard (Main area, shown in
the first line of the display), and a Bass sound will be assigned
to the left half of the keyboard (Left area, shown in the second
line of the display).
Main sound
GrandPiano 4/4
Ac.Bass 120
Left sound
While the Ac.Bass sound will be chosen as the Left sound the
first time you enter Split mode, the last selected sound will be
assigned if you return to Split mode later.
Exit from the Split mode
To exit Split mode, press the SPLIT button again to return to
the Single mode, or press two sound selection buttons together
to enter Layer mode.
Choosing a different split point
If the selected split point is too high or too low, you can choose
a different one. Please note that you can set a default split
point, to have it ready each time you turn the instrument on
(see “Default split point” on page 51).
1. Keep the SPLIT button pressed. The current split point is
shown in the display while you keep the button pressed.
SplitPoint: F#3
2. Play a note to set a different split point.
3. Release the SPLIT button.
Selecting a different Main sound
You can select a different Main sound after accessing the Split
mode. Use the sound selection buttons as you would do to select a sound in Single mode.
Cursor
GrandPiano 4/4
Ac.Bass 120
2. Use the VARIATION button to select a different sound
variation. As an alternative, use the +/YES and -/NO buttons to choose a different sound variation.
Selecting a different Left sound
You can select a different Left sound after accessing the Split
mode.
1. Keep the SPLIT button pressed. The indicator of the Left
sound lights up.
2. Use the sound selection buttons to select a different sound.
3. Release the SPLIT button.
As an alternative, use the display controls:
1. Use the SCROLL
sound.
buttons to move the cursor to the Left
GrandPiano 4/4
Ac.Bass 120
Scroll
GrandPiano 4/4
Ac.Bass 12
2. Use the sound selection buttons as you would do to select
a sound in Single mode.
3. Use the
sound.
buttons to move the cursor back to the Main
Selecting a variation of the Left sound
You can select a variation of the Left sound after accessing the
Split mode.
1. Keep the SPLIT button pressed. The indicator of the Left
sound lights up.
2. Use the VARIATION button to select a different sound
variation.
3. Release the SPLIT button.
17
Page 20
Basic functions > Using the pedals
M:108
L:127
Main sound’s volume
Left sound’s volume
As an alternative, use the display controls:
1. Use the SCROLL
sound.
buttons to move the cursor to the Left
GrandPiano 4/4
Ac.Bass 120
Scroll
GrandPiano 4/4
Ac.Bass 12
2. Use the VARIATION button to select a different sound
variation. As an alternative, use the +/YES and -/NO buttons to choose a different sound variation.
3. If you want, use the SCROLL
sor back to the Main sound.
buttons to move the cur-
Using the pedals
Balancing sounds in Split mode
You can adjust the sound’s volume balance.
• Keep the Main sound button (the one whose indicator is
turned on) pressed, to increase its volume and (after the
maximum value has been reached) decrease the volume of
the Left sound. Release the button when done.
• Keep the SPLIT button pressed, or press the SCROLL
button to move the cursor to the second line of the display. The indicator of the Left sound lights up. Then, keep
the Left sound button pressed, to increase its volume and
(after the maximum value has been reached) decrease the
volume of the Main sound. Release the button when done.
While the volume is changing, a meter is shown in the display:
The C-520 has three assignable pedals, usually acting as damper, sostenuto, and soft. However, you can assign the pedals different functions (see page 47 for sound-level assignment, or
page 52 for global programming).
With the default settings, you can use these pedals to add expression to your playing, as on a traditional piano.
3
2
1
Soft
Sostenuto
Damper
(1) Damper pedal
The damper pedal simulates the natural string resonances of
an acoustic piano. Pressing this pedal will sustain the sound,
Transposing
producing a richly resonant decay. You can control the damper’s depth by how far down you press on the pedal (“half-pedaling”).
Sounds like GrandPiano, BriteGrand and MelloGrand also
trigger EPx effects while in Single and Split mode. However,
these effects are not available when you are in Layer mode.
(2) Sostenuto pedal
Pressing this pedal will apply the damper effect only to the
notes that are already being held down on the keyboard, and
will sustain only those notes. The damper effect will not be applied to any additional notes that you play while holding down
the Sostenuto pedal (apart for the notes already held).
(3) Soft pedal
Pressing this pedal will make the tone softer. You can control
the soft effect depth by how far down you press on the pedal
(“half-pedaling”)
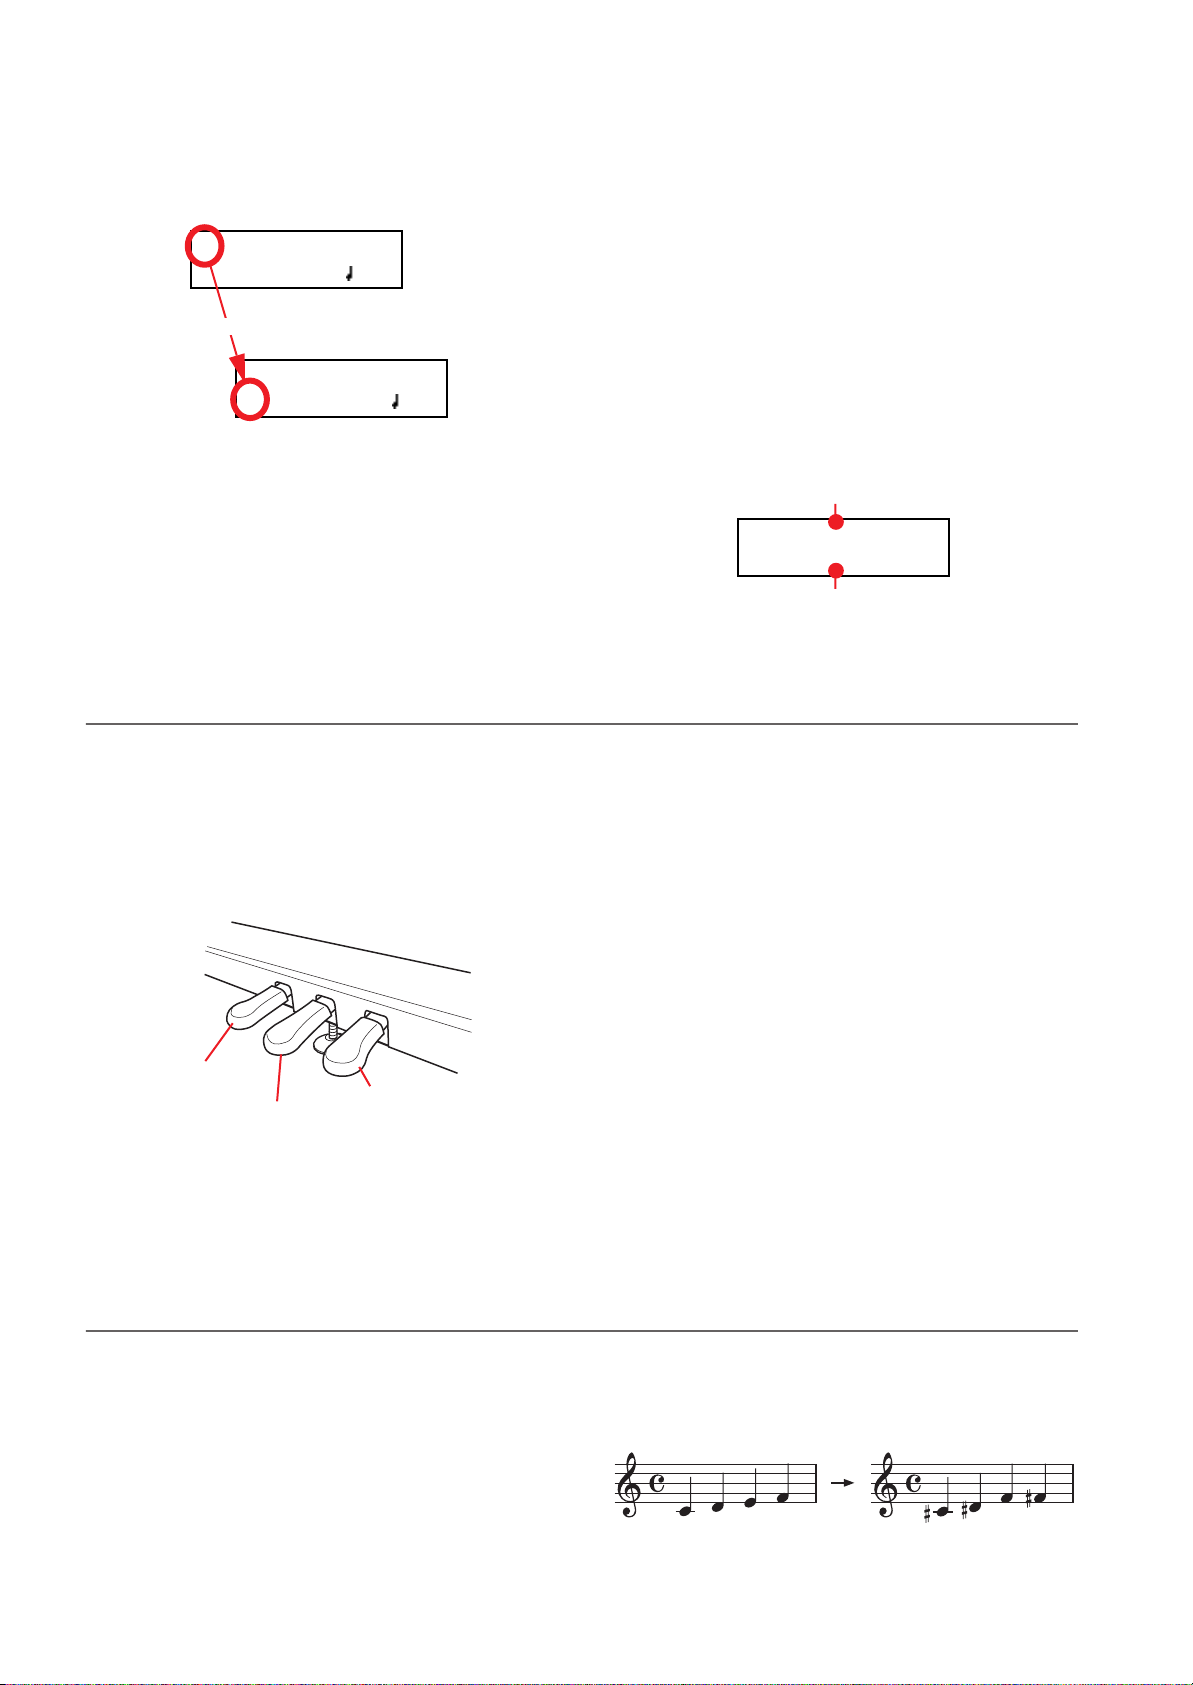
In some cases, a song may be written in a difficult key (e.g.,
many black keys), or you may wish to shift the pitch to match
another instrument or vocalist. In such cases, you can transpose (shift the pitch) so that you can use an easier fingering, or
use the same familiar fingering to play at a different pitch. This
is called the Transpose function.
18
For example if you transpose upward by one semitone, playing
the notes shown at the lower left will produce the pitches
shown at the right.
Page 21
Basic functions > Changing the brilliance
Note: When the instrument is turned on, transposing is reset.
1. Press the TRANSPOSE button to show the Transpose dis-
play:
Transpose
+02 semitones
Transpose value
If you do no changes, just wait some seconds for the page
to automatically disappear. Otherwise, you can exit from
this page by pressing the EXIT button.
Changing the brilliance
Brilliance is the sound’s brightness, that may be affected by the
sound of the room the piano is placed into. For example, a
heavy carpeted room sounds duller than a room containing
less carpeting or furniture. You can set an overall increase or
decrease of brilliance for all sounds.
This is the same parameter you can change in the Brilliance
page of the Global mode (see page 51). However, contrary to
the changes you can make in the Global mode, the changes
made with this button cannot be memorized, and are reset
when turning the instrument off.
Note: When the instrument is turned on, brilliance set in this
page is reset. (Brilliance may have permanently been set in Global mode, see page 51).
1. Press the BRILLIANCE button to show the Brilliance dis-
play:
2. Use the +/YES and -/NO buttons to change the transpose
value in steps of one semitone, within a range of ±11 semitones. When a transposition is active, the indicator turns
on.
3. Press the EXIT button to exit from this page.
4. Press the TRANSPOSE button again to turn transposition
off. The indicator will turn off.
5. Press the TRANSPOSE button if you want to turn transpo-
sition on again, with the last value selected. The indicator
will turn on again. Wait some seconds for the page to disappear, or press the EXIT button to exit immediately.
If you do no changes, just wait some seconds for the page
to automatically disappear. Otherwise, you can exit from
this page by pressing the EXIT button.
2. Use the +/YES and -/NO buttons to change the brilliance
value. When a brilliance change is active, the indicator
turns on.
3. Press the EXIT button to exit from this page.
4. Press the BRILLIANCE button again to turn brilliance
changes off. The indicator will turn off.
5. Press the BRILLIANCE button if you want to turn bril-
liance on again, with the last value selected. The indicator
will turn on again. Wait some seconds for the page to disappear, or press the EXIT button to exit immediately.
English
Brilliance
Bright
Brilliance setting
Turning the effects on/off
The C-520 has two global effects (reverb and chorus), in addition to an insert effect for each sound (see diagram on
page 44). The reverb simulates the sound reverberation in a
room, while the chorus simulates a modulating effect that
makes the sounds richer.
The insert effect is part of the sound itself, and should remain
on to avoid a dramatic change in timbre. On the contrary, you
can turn the reverb and chorus on/off as you like, by using the
REVERB and CHORUS buttons on the control panel.
However, selecting a different sound will reset the status of the
buttons, since it is saved with the sound itself. To permanently
change the effect’s status, edit the sound by keeping one of
these buttons pressed for a couple seconds. See page 44 for
more details.
19
Page 22
Using performances > Choosing performances
Using performances
Performances are registrations of sound combinations. Instead of selecting single sounds, or a combination of sounds,
you simply select a performance. A performance then recalls
one or two sounds, each one with their own settings, plus the
memorized split point (if the sounds are in Split mode).
There are 30 performances (10 groups
× 3 banks each). Each
group corresponds to one of the numbered sound select buttons (1 ~ 10). You can then choose one of the three banks inside the selected group by using the VARIATION button
(more details are on page 283).
Button
Bank 1 Bank 2 Bank 3
1 (PIANO 1) Split&Layr Digital EP* Baroque*
2 (PIANO 2) Grand&Ride PaddedTine* Harpsi-Ch*
3 (E.PIANO 1) Grand&Ebas R&B EPno* Harpsi-Org*
4 (E.PIANO 2) PnoStrings* EP Choir* Church Mix*
Performance
Choosing performances
Button
Performance
Bank 1 Bank 2 Bank 3
5 (HARPSI/CLAV) EGrand Pad* EP&NoFret Guitar Pad*
6 (VIBES/GUITAR) Piano Pad* Scat&Bass GrandPiano
7 (ORGAN1) Pno Choirs* Vibes&Bass BriteGrand
8 (ORGAN2) Pno Guitar* Bass&Guitr MelloGrand
9 (STRINGS/CHOIR) Piano BX3* Org&Bass 1 2 Pianists
10 (BASS) DualManual Org&Bass 2 PnoEXp-
DEMO**
* Note: These performances, with sounds set in Layer mode, do
not use EPx effects.
** Note: Performance 30 (PnoExpDEMO) is designed to demonstrate our “Piano eXperience” technology, by exaggerating the
amount of key-off/hammer return portion of the Grand Piano
sound; it is not intended to be a play-able timbre. Normally,
these additional Piano eXperience sounds are not perceived as
separate elements, but together with the other sample layers,
they are a vital part of the realism and the authentic piano tone.
Here is how to choose a performance.
Note: While in Performance mode, you cannot switch between
Single, Layer and Split modes. However, if you select a performance with two sounds in Split, the SPLIT indicator will turn on.
1. Press the PERFORMANCE button to enter Performance
mode. The indicator turns on, and the latest selected performance is recalled.
Perf.01 4/4
Split&Layr 120
2. Use the sound selection buttons to select a different group
of performance.
12345
678910
3. If needed, use the VARIATION button to select a different
performance inside the same group. There are three performances for each group of performances.
As an alternative, use the +/YES and -/NO buttons to
choose a different performance inside the selected group.
4. Press the PERFORMANCE button again to exit Perfor-
mance mode. The previous sound or combination of
sounds will be recalled. The indicator will turn off.
20
Page 23
Using performances > Changing the sounds assigned to a performance
Changing the sounds assigned to a performance
You can change the sound or sounds assigned to the current
performance, without the need of accessing the Edit mode.
Note: You cannot change performance sounds while in Performance Edit mode.
Note: The EPx effects are not available when you are in Layer
mode.
1. While you are in the Main page of the Performance mode,
press both SCROLL
(or sounds) assigned to the performance are shown in the
display:
/ buttons together. The sound
Main sound
Piano&Str.
Ac. Bass
Layer/Left sound
2. If there are two sounds, use the SCROLL
to move the cursor to the sound you want to change.
3. Use the +/YES and -/NO button to choose a different
sound.
4. Press the EXIT button to exit from the above page. If you
chose a different performance, changes are lost.
5. To save the changes use one of the save procedures ex-
plained in “Saving a performance” on page 42.
/ buttons
Editing a performance
You can edit any performance according to your taste. You can also save any combination of sounds over an existing performance.
See “Editing sounds and performances” on page 41.
English
21
Page 24
The metronome > Starting and stopping the metronome, adjusting the tempo
GrandPiano 4-4
Strings 120
4/4 drum pattern selected
01-Prelude 1
M: 1 4/4 120
Song’s tempo
Song’s time signature
The metronome
The C-520 incorporates a metronome, with which you can beat the tempo during practice or song recording. The metronome can
beat ordinary times, or drum patterns.
Starting and stopping the metronome, adjusting the tempo
Use the METRONOME button to start and stop the metronome.
1. Press the METRONOME button to make the metronome
start (the indicator on the button turns on).
Tempo and time signature display
The metronome’s tempo and time signature are always shown
in the Main page:
Metronome’s time signature
GrandPiano 4/4
Strings 120
Metronome’s tempo
The metronome’s tempo and time signature also appear in
Performance mode:
Metronome’s time signature
Perf 01 4/4
Split&Layr 120
2. Press the METRONOME button again to stop it (the indi-
cator turns off).
hyphen (–) (see page 23 for information o how to select drum
patterns):
When listening to a song, the tempo and time signature are
those of the current song. You can use the TEMPO buttons to
adjust the tempo while the song plays. On the contrary, the
time signature cannot be modified after recording:
When a drum pattern is selected as the time signature, the separator between the fraction’s numerator and denominator is a
Adjusting the tempo
When turning the metronome on for the first time, while in
the Main page, the default tempo of 120 BPM (beats per
minute) is chosen. You can adjust it by using the TEMPO buttons.
22
Metronome’s tempo
(Please remember you can exit from the Song Play page and
return to the Main page by pressing the EXIT button.)
When turning it on from the Song Play (page 26) or Record
page (see page 30), the tempo is that of the current song. You
can adjust it by using the TEMPO buttons.
The last change is preserved, until you don’t choose a different
song and start playing it back.
Page 25
Choosing a time signature
The metronome > Choosing a time signature
When turning the metronome on from the Main page, the default time signature of 4/4 is chosen, but you can adjust it by
accessing the Metronome page (as shown below).
Note: If the PLAY/PAUSE button is flashing, you cannot change
the time signature.
Note: If you enter editing later, you might see a different edit
page instead of the first one. Use the SCROLL button to
reach it.
1. Press the TEMPO + and TEMPO – (or MET.SET) buttons
together. The first Metronome page, Metro TS/Tempo,
will appear, with the Time Signature parameter selected:
Metro TS/Tempo 1
4/4 120
Drum patterns
Instead of an ordinary time signature (4/4, 3/4, etc…), a drum
pattern can be assigned to the metronome. This will give you
the sense you are playing together with a real drum player. You
can also record a drum pattern into a song.
Note: Contrary to ordinary metronome “clicks”, drum pattern
notes can also be recorded by the internal recorder. They can
also be transmitted via MIDI, so you can record them on an external sequencer, or make them play with an external instrument (see “MIDI” on page 59).
Drum patterns are in the second half of the time signature list.
While the list is selected, either scroll to it, or press both the +/
YES and -/NO buttons together, to quick jump to the drum
patterns. Press these buttons together again to quick jump to
the ordinary time signatures (4/4 selected).
Drum patterns
8 Beat 1 Ballroom 2 Bossa 1 Swing 2
8 Beat 2 Ballroom 3 Bossa 2 Swing 3
8 Beat 3 Slow 6/8 Samba Slow Waltz 1
16 Beat 1 Funk 1 Cha Cha Slow Waltz 2
16 Beat 2 Funk 2 Salsa Waltz
2. Use the +/YES and -/NO buttons to select a time signature.
Ordinary times are at the beginning, while drum patterns
are at the end. You can quick jump from the one to the
other by pressing the +/YES and -/NO button together.
Ordinary times
1/2 ~ 16/2 1/4 ~ 16/4 1/8 ~ 16/8
3. Press the EXIT button to return to the Main page.
Drum patterns
16 Beat 3 Rock Mambo Foxtrot
Ballad 1 Rock 6/8 Tango March
Ballad 2 Dance Rhumba
Ballad 3 Beguine Gospel
Ballroom 1 Unplugged
Latin
Swing 1
Here is how to use the drum patterns:
1. While in the Main page, press the METRONOME button
to start the metronome. A Count In is heard, then the
drum pattern begins.
2. While in the Main page (either with a sound or a perfor-
mance selected), or in the Record page, press EXIT (or a
pedal with the Fill In function assigned, see page 52). A Fill
In is played, then a variation of the base drum pattern start
playing.
3. Press EXIT (or the pedal) again. A second Fill In is played,
then the base drum pattern returns playing.
4. Press the METRONOME button to stop the metronome.
English
23
Page 26

The metronome > Adjusting the metronome level
Metro Lev/Rev 2
Lv:100 Rv:64
Metro Lev/Rev 2
Lv:100
Rv:64
Adjusting the metronome level
You can adjust the metronome’s level, in relation to the overall
instrument’s volume.
2. Press the SCROLL
1. Press the TEMPO/MET.SET buttons together. The first
Metronome page should appear.
3. Use the +/YES and -/NO buttons to change the metro-
4. Press the EXIT button to return to the Main page.
Adjusting the drum pattern’s reverb
You can add a reverb effect to the drum patterns.
Note: Reverb does not apply to the metronome click (i.e., when
an ordinary time signatures is chosen).
1. Press the TEMPO/MET.SET buttons together.
2. If you are not there, use the SCROLL
3. Use the +/YES and -/NO buttons to change the metro-
4. Press the EXIT button to return to the Main page.
button to go to the second Metronome page, Metro Lev/Rev. The Lv (Level) parameter will
be selected:
nome’s volume.
/ buttons to se-
lect the Rv (Reverb) parameter:
nome’s reverb.
24
Page 27
Selecting the accent
Metro Settings 4
Save? (Yes/No)
The metronome > Selecting the accent
The accented beat of the ordinary times signatures can be
changed to a marcato or bell sound.
Note: The accent does not apply to drum patterns.
1. Press the TEMPO/MET.SET buttons together.
2. If you are not there, use the SCROLL
to the Metro Accent page:
Metro Accent 3
Bell
/ buttons to go
Saving the metronome settings
Metronome settings can be saved, so that they are not reset to
the default values when turning the instrument off. This procedure saves time signature, volume setting, reverb setting, accent. On the contrary, tempo settings are always reset.
1. Press the TEMPO/MET.SET buttons together. The first
Metronome page appears.
3. Use the +/YES and -/NO buttons to turn the bell on or off,
and choose one of the available accent options.
Option Meaning
Off No accent
Marcato The first beat is played louder
Bell The first beat is played by a bell sound
4. Press the EXIT button to return to the Main page.
2. Press the SCROLL
fourth Metronome page. The Metro Settings Save parameter will be selected:
button four times, to go to the
3. Press +/YES to confirm saving, or -/NO to cancel saving.
You are automatically kept back to the Main page.
English
25
Page 28
Playing back a song > Accessing the Song Play mode
Playing back a song
The C-520 incorporates a multitrack recorder, with which you
can record and play back songs. Since you can turn off a single
part (say, the left hand), and leave another part playing (say,
the right hand), this can be very useful for practicing.
Together with the C-520 come a huge number of classical
songs (185), with which you can play along for practicing or
for enjoying your preferred tunes. Songs are organized in “albums”, that include famous lesson books (Beyer, Burgmüller),
a collection of famous songs, and all the pieces included in the
supplied SongBook.
The recorder can also read 16-track songs in the Standard
MIDI Files (SMF) format, that can be created on a computer
or easily found on the market or in the public domain. Please
note that, while the C-520 complies with General MIDI (GM)
sound mapping, it does not include all GM sounds. For a detailed list of sounds, see page 277.
Accessing the Song Play mode
After you press the SONG button, the Song Play page appears: To return to the Main page, just press one of the sound selec-
Song name
01-Prelude 1
M:--- 4/4 120
Current measure
Tempo
Time signature
tion buttons to select a sound, or press the EXIT button. The
selected song will still be active, but you will no longer see its
name in the display, until you press the SONG button again.
How to select a song
To play a song, you must first select it from an album. Songs
are contained into a permanent memory, and are preserved
when turning the instrument off.
1. If you are in the Main page, press the SONG button twice.
If you are already in Song Play mode, press the SONG button once to access the Song Selection page:
Album:SongBook
01-Prelude 1
2. Use the +/YES and -/NO buttons to select one of the avail-
able songs inside the selected album. If the name is longer
than the display, it will scroll up to the end, then returns to
the beginning.
3. To select a different album, use the SCROLL
move the cursor to the first line of the display:
Album:SongBook
01-Prelude 1
Scroll
Album:SongBook
01-Prelude 1
Album
Song
button to
As an alternative, you can use the first six sound select
buttons to choose an album. See table on the next page.
4. Use the +/YES and -/NO buttons to select one of the avail-
able albums. Various song albums are available (see
page 286 for a detailed list of the included songs):
Album Content
UserSong Songs created using the internal
SongBook All the songs of the supplied
Classics A collection of famous classical
Beyer A The “Preparatory School, Op. 101”
Beyer B (5) HARPSI/
Burgmlr Burgmüller’s “25 Easy and Pro-
recorder, or created with an external sequencer and then transferred to the C-520 via a USB
connection (see page 56)
SongBook
pieces
lesson book by Ferdinand Beyer,
splitted in two separate parts (A
and B)
gressive Studies, Op. 100” lesson
book
Correspondin
g sound
button
(1) PIANO 1
(2) PIANO 2
(3) E.PIANO 1
(4) E.PIANO 2
CLAV
(6) VIBES/
GUITAR
26
Page 29
Playing back a song > How to start playback
01-Prelude 1
M:--- 4/4 120
01-Prelude 1
M:--- 4/4 120
5. After having selected an album, use the SCROLL
ton to move the cursor to the song name again, then
choose a different song:
Album:SongBook
but-
01-Prelude 1
Scroll
Album:SongBook
01-Prelude 1
How to start playback
After having selected a
song, you can play it
back.
Note: During playback,
song parts can be sent out
via MIDI. Song parts are
the following: Part 1, Part 2, and Drum (this latter is active only
if a drum patterns is playing).
6. Press the PLAY/PAUSE button to start playback and re-
turn to the Song Play page, or the EXIT button to just return to the Song Play page, without starting the song.
English
1. Press PLAY/PAUSE to start playing the song. The indica-
tor on the button turns on.
2. Press PLAY/PAUSE again to stop the song at the current
position. The indicator on the button starts flashing.
3. Press PLAY/PAUSE again to resume playback. The indica-
tor on the button stays on steadily.
4. Press STOP to stop the song. The indicator on the PLAY/
PAUSE button turns off. The song returns to the beginning (measure “---”).
Starting from a different measure
You can start playback from a measure different than the first
one.
Note: When releasing the +YES or -/NO button, you may hear
the EPx effects, due to Damper data recorded in the song.
1. While in the Song Play page, the M (Measure) parameter
is selected. Use the +/YES and -/NO buttons to choose a
different measure (+/YES is sometimes called Fast Forward, while -/NO is called Rewind):
2. Press the PLAY/PAUSE button to start playback from the
selected measure.
27
Page 30
Playing back a song > Muting/unmuting a recorder’s part
Muting/unmuting a recorder’s part
During playback, you can mute or unmute a recorder’s part.
Muting is useful to play a part on the keyboard, while letting
the recorder to continue playing the other.
Depending on the settings made in Global mode (see “Mute
Level” on page 53), muting may completely silence the part, or
just attenuate it. Attenuation is very useful for practicing, since
it lets you play over a part that you can still hear at a very soft
level.
Note: The part’s status is automatically restored when you
choose a different song (it is turned on if there are notes, or
turned off if the part is empty).
Changing the song’s tempo
Each song contains its own tempo. You can, however, change
it during playback, for example to make it easier playing along
with the song.
1. Use the TEMPO + button to increase the tempo and make
the song play faster.
1. Press the PART 1 or
PART 2 button, depending on the part
you want to mute
(usually, Part 1 = left
hand, Part 2 = right
hand. This may be different with songs imported via USB).
The muted part’s indicator turns off.
At this point, you can play the muted part on the keyboard.
2. Press the same button again, to unmute the part and let its
indicator turn on again.
2. Use the TEMPO - button to decrease the tempo and make
the song play slower.
3. Press both the +/YES and -/NO buttons at the same time
to recall the original tempo of the song.
Play along with the song
During playback, you can play along with the song. The latest
selected sounds are still active on the keyboard. You can select
different sounds, as seen before. When you press a sound selection button, the Main page appears. Press the SONG button
to return to the Song Play page.
When selecting different sounds, their effects are also recalled.
Be careful, since this can dramatically affect the song’s overall
sound. When selecting a different song, the song’s effects are
selected again.
28
Page 31

Cycle Play
Cycle Play 1
On S:1 E:1
Cycle Play 1
Off
Playing back a song > Cycle Play
When practicing, you can choose a passage to be repeated
again and again. This way, you can try it until it is perfect. This
is called the Cycle Play function.
Note: When the Cycle Play is activated, the Fast Play function no
longer works (see page 53).
Note: If you enter editing later, you might see a different edit
page instead of the first one. Use the SCROLL button to
reach it.
1. While in Song Play mode, press the EDIT button. The first
page of the Song Edit mode, Cycle Play, will appear.
Cycle Play 1
Off
2. Press the +/YES button to turn the Cycle Play mode on.
The S (Start Measure) and E (End Measure) parameters
will appear:
Cycle Play 1
On S:1 E:99
Start Measure
3. Press the SCROLL
sure) parameter, and use the +/YES and -/NO buttons to
choose the measure where the cycle will be starting. Keep
them pressed to scroll faster.
Cycle Play 1
On
End Measure
button to select the S (Start Mea-
S:1 E:1
5. Press the EXIT button to return to the Song Play page.
You’ll notice the Cycle Play icon appearing on the top right
corner of the display, indicating the function has been activated:
01-Prelude 1
M:--- 4/4 120
This icon will stay steadily on when cycle measures are
playing back. It will flash when measures located before or
after the cycle measures are playing (for example, it will
flash if measure 2 or 16 is playing back, when the cycle is
delimited by measures 4 and 12).
Cycle Play icon
6. Press PLAY/PAUSE to start playing. The song will cycle be-
tween the chosen starting and ending points.
During playback, you can press the PLAY/PAUSE button
to pause the song, or restart it from the current point. You
can press the STOP button to stop the song and go back to
the Cycle’s Start Measure.
Note: If the S (Start Measure) parameter has a value other
than 1, the song will be set to pause even if you press STOP.
Turning the Cycle Play off
The Cycle Play will continue until you don’t select a different
song, or turn the instrument off. Otherwise, you can manually
turn it off.
1. While in Song Play mode, press the EDIT button. The first
page of the Song Edit mode should appear.
English
By default, the “S” parameter corresponds to the first measure.
4. Press the SCROLL
sure) parameter, and use the +/YES and -/NO buttons to
choose the measure where the cycle will be ending. Keep
them pressed to scroll faster.
button to select the E (Ending Mea-
Cycle Play 1
On S:1
E:1
2. Press the -/NO button to turn the Cycle Play mode off.
3. Press the EXIT button to return to the Song Play page. The
Cycle Play icon on the top right corner of the display will
be gone.
29
Page 32

Recording a song > Quick recording procedure
Metro TS/Tempo 1
4/4 120
Time Signature
Song Modified
Save? (Yes/No)
Recording a song
You can use the onboard recorder to create a song composed
of up to three parts (left hand, right hand, drum). This song
can then be played back on the C-520, or transferred to a computer (see “Data transfer via the USB port” on page 56) and
played back on any other sequencer (see “MIDI” on page 59).
User-created songs are first contained in a temporary, nonpermanent memory, and are to be saved into a special album
called the User Song album. You must save a song into this album, before turning the instrument off or choosing a different
song.
Quick recording procedure
Recording a song on the C-520 is very easy. Here is a short procedure. More detailed procedures follow, starting from “Step
1: Entering the Record mode”.
1. Select the preferred sound, sound combination or perfor-
mance.
2. Press the SONG and RECORD buttons together to access
Record mode with a new, empty song.
Record:Untitled
M:--- 4/4 120
3. Use the TEMPO buttons to set the tempo.
When you try to select a different song while a new or modified song has not yet been saved, you are asked whether you
want to save it or not (the “Song Modified” message appears).
If you press the +/YES button you are kept to the Save Song
page. See “Saving the song” on page 36 for more information.
Note: A song is recorded into a temporary memory, that is lost
when the instrument is turned off. To preserve a new or modified song, save it into the User Song album before turning the
instrument off. See “Saving the song” on page 36.
4. Press the TEMPO/MET.SET buttons together to open the
Metro TS/Tempo page. Select the time signature, then
press the EXIT button to exit.
5. Either play the keyboard, press the PLAY/PAUSE button,
or (if you chose a drum pattern as the time signature) the
METRONOME button to start recording.
6. Play freely.
7. Press the STOP or RECORD button to stop recording.
Step 1: Entering the Record mode
Entering Record mode with a new, blank song
To enter record with a new, empty song with default settings,
press the SONG and RECORD buttons at the same time (the
recorder must not be playing).
Waltz
M:--- 3/4 120
SONG +
RECORD
Blank song name
Record:Untitled
M:--- 4/4 120
If you try to access Record mode while a new or modified song
has not been saved, you are asked whether you want to save it
or not:
If you press the +/YES button you are kept to the Save Song
page. See “Saving the song” on page 36 for more information.
Entering Record mode with an existing user song
You can enter recording with the current User song (i.e., a
song contained in the UserSong album), to add more notes
(Overdub recording) or add an additional part to. You can
even record an existing part again (Overwrite recording).
30
Page 33

Recording a song > Step 2: Selecting sounds
To record over an existing song, select the song and press the
RECORD button.
Existing song name
Record:Michelle
M:--- 4/4 120
Step 2: Selecting sounds
When you enter Record mode with a new, empty song, the
sounds that were selected for playing on the keyboard are also
selected for recording. If you enter recording on a part already
recorded, the sound previously used to record that part is selected again. If you are not happy with them, you can still select
different sounds now.
Note: Sounds also carry their own effects. By choosing a sound,
you also choose its associated effects.
Use the sound selection buttons to select different sounds for
recording. You can also select a different mode (e.g., switching
from Single to Split) during recording.
When you enter Record on a
new, empty song, both recorder’s parts are ready for
recording (actually, if you
play something on the keyboard, recording begins).
Therefore, everything you
play on the keyboard will be
recorded to the song. Depending on the current
mode (Single, Layer or
Split), one or both parts will
be recorded.
Each sound is recorded into a separate recorder’s part. Normally, the Main sound goes to Part 2, while the Layer or Left
sound go to Part 1 (see diagram).
You can change this, for example if you don’t want to record
the Layer sound, or if you want to record the Main sound into
Part 1 instead of Part 2. To change a part’s status, repeatedly
press the corresponding PART button:
Layer/Left sound Main sound
SINGLE Mode
Main PART 2
LAYER / SPLIT Mode
Main PART 2
Layer/Left PART 1
Please remember that you can only access Record mode on
User songs. Songs contained in albums other than UserSong
cannot be modified.
Exit from the Record mode
To exit from the Record mode, press the RECORD button
again (or the STOP button, to end the Record session). The
RECORD indicator will turn off.
Here is what the indicators’ status mean:
Part 1/2 status Meaning
On The part already contains data. It may happen
when you are recording over an existing song,
or doing second-pass recording. During recording, you will hear this part, but not record over
it.
Off The part does not contain data or is in mute,
and is not enabled for recording.
Flashing The part is enabled for recording. If you are
recording in Overdub mode, new data will be
added to the old data (if any). If you are
recording in Overwrite mode, new data will
replace the old data.
What if I record a Layer or Split on a single part?
When only a single part is enabled for recording, only the
Main sound will be recorded. The Layer or Left sound will be
ignored.
Example 1: Recording a single sound
When you enter recording with a single sound on a new, empty song, both PART indicators will be flashing. You don’t need
to do anything else. Go on with actual recording, and your
sound will be recorded over Part 2. When recording is finished, the PART 1 indicator will turn off, and the PART 2 indicator will stay steadily on.
Example 2: Recording a single sound into Part 1
When you enter recording with a single sound on a new, empty song, both PART indicators will be flashing. Press the PART
2 button to turn its indicator off. At this point, you can go on
with actual recording over Part 1.
English
Example 3: Recording first with a single sound
then both
When you enter recording a single sound on a new, empty
song, both PART indicators will be flashing. This means both
sounds will be recorded. Go on with actual recording in Single
mode, then switch to the Layer or Split mode (by respectively
pressing two sound selection buttons, or pressing the SPLIT
31
Page 34

Recording a song > Step 3: Setting the record options
Tempo Record 3
Auto
button). The Main sound will be recorded over Part 2, while
the Layer or Left sound will go to Part 1.
Example 4: Recording each hand of a piano piece in two separate parts
In this case, enter recording in Single mode, and press the
PART 1 button to turn its indicator off. Only the PART 2 in-
Step 3: Setting the record options
Before starting to record, you can set some options.
Note: The Pedal Punch and Auto Punch functions will not work
on an empty song. At least one track must already be recorded.
1. While the RECORD indicator is lit, press the EDIT button
to access the Record Option pages. The first page is the
Record Mode option page:
Record Mode 1
Overwrite
Use the +/YES and -/NO buttons to choose a recording
mode.
Recording mode Meaning
Overdub Notes are added to a previous recording
Overvwrite Notes replace any older recording (every-
Pedal Punch Lets you use a pedal to enter recording on
Pnc (Auto Punch) Lets you set a start and end measure for
2. Press SCROLL
Quantize value. This is the quantize that happens during
recording:
Use the +/YES and -/NO buttons to change the quantize
value, indicated as a musical figure. “Off” means free
rhythm, with no quantization.
thing is deleted)
the fly (see “Pedal Punch recording” on
page 35)
recording (see “Auto Punch recording” on
page 35)
to go to the second page, and set the
Quantize 2
Off
dicator will continue flashing. Go on recording your right
hand.
When done, start recording your left hand, with the PART 1
indicator flashing, and the PART 2 indicator steadily on. This
way, you will be recording your left hand to Part 1, while Part
2 will be playing back the recorded right hand.
Quantization is a
way of correcting
timing errors; notes
Off
1/16
played too soon or
too late are moved
1/8
to the nearest axis
of a rhythmic
“grid”, set with this parameter, thus playing perfectly in
time. For example, when you select 1/16, all notes are
moved to the nearest 1/16 division. When you select 1/8,
all notes are moved to the nearest 1/8 division.
Beware that choosing too low a value will over-correct,
and make everything sound mechanical.
3. Press SCROLL
to go to the third page, and set the Tem-
po Record mode:
Use the +/YES and -/NO buttons to change the mode.
There are three options:
Tempo Record mode Meaning
Manual The latest manual tempo setting (made
Auto The recorder plays back all recorded
Record All tempo changes made during record-
using the TEMPO buttons) is considered
the current tempo value. No tempo
change events will be recorded. This is
very useful to record the song much
slower than its actual tempo
tempo events. No tempo change events
are recorded
ing will be recorded
Off
1/32 = 1/24 = 3 1/16 = 1/12 = 3 1/8 =
32
Quantize values
4. If done, press the EXIT button to return to the Record
page.
Page 35

Recording a song > Step 4: Setting the time signature and tempo
Step 4: Setting the time signature and tempo
Before starting to record, tempo and time signature are those
you last selected with the TEMPO and MET.SET buttons. You
can however choose a different tempo and time signature.
Note: After having started recording a song, you can no longer
change its time signature. However, you can append a second
section with a different time signature (see “Step 6: Secondpass recording” on page 34, step 6).
Note: You can record a drum pattern only during the first pass.
You will not be able to add or change it later. However, you can
append a second section using a drum pattern (see “Step 6: Second-pass recording” on page 34, step 6).
1. If you wish to set a different time signature at the begin-
ning of the song, press the TEMPO/MET. SET buttons together to access the Metro TS/Tempo page:
Metro TS/Tempo 1
4/4 120
Step 5: Recording
After you have entered the Record mode, chosen the part(s) to
be recorded, and having set the various options, you can start
recording.
A: Recording with no metronome
Here is how to record freely, without using the metronome.
1. Press the PLAY/PAUSE button to start recording. The in-
dicator on the PLAY/PAUSE button will turn on. As an alternative, you can play a note on the keyboard, or press the
pedal assigned as the Play/Pause function.
To start with a pick-up measure (or anacrusis), start with
the PLAY/PAUSE button, then wait until the desired beat
is playing. Assuming the Fast Play option has been left on,
the initial pause will be ignored during playback (see “Fast
Play” on page 53).
2. Press STOP to stop recording. As an alternative, press the
RECORD button, or the pedal assigned as the Stop function. The indicator on the RECORD button turns off. The
song returns to the beginning.
B: Recording with the metronome
Here is how to record, if you chose an ordinary time signature.
1. Press the METRONOME button to hear the click before
starting to record.
2. Press the PLAY/PAUSE button to start recording. The in-
dicator on the PLAY/PAUSE button will turn on. As an alternative, you can play a note on the keyboard, or press the
pedal assigned as the Play/Pause function.
To start with a pick-up measure (or anacrusis), start with
the PLAY/PAUSE button, then wait until the desired beat
is playing. Assuming the Fast Play option has been left on,
Use the +/YES and -/NO buttons to choose a time signature. You can select either an ordinary time signature (4/4,
3/4 and the like), or a drum pattern (8 Beat, Jazz,
Waltz…). In case you choose a drum pattern, it will be
recorded with the song as the Drum part, and sent out via
MIDI.
2. If done, press the EXIT button to return to the Record
page.
3. If you wish to set a different starting tempo, use the TEM-
PO buttons to change the tempo value.
Record:Untitled
M:001 4/4 120
Tempo
the initial pause will be ignored during playback (see “Fast
Play” on page 53).
3. Press STOP to stop recording. As an alternative, press the
RECORD button, or the pedal assigned as the Stop function. The indicator on the RECORD button turns off. The
song returns to the beginning.
C: Recording with a drum pattern
Recording with a drum pattern is a bit different, since you
must decide how to start the drum pattern.
1. Use one of the following ways to start recording:
• If you want to start with a keyboard-only intro, and start
the drum pattern at a measure other than the first one,
press the PLAY/PAUSE button. As an alternative, you can
play a note on the keyboard, or press the pedal assigned as
the Play/Pause function. When it is time to start the drum
pattern, press the METRONOME button, and wait until
the next measure for the drum pattern to actually start (it
will start with a 1-measure intro).
• If you want to immediately start with a drum pattern,
press the METRONOME button to start recording. A 1measure intro will play, then the regular pattern will start
playing.
An Intro will be played back before the main pattern of
the drum pattern begins.
2. During recording, you can press the EXIT button to trigger
a Fill In, break the rhythm, and go to a variation of the basic pattern. Press it again to play a different Fill In, and return to the basic pattern.
English
33
Page 36
Recording a song > Step 6: Second-pass recording
3. Press STOP to stop recording. As an alternative, press the
RECORD button, or the pedal assigned as the Stop func-
Step 6: Second-pass recording
After the first recording, you can start recording again over the
same song, to add parts or notes.
1. Press the RECORD button again. Its indicator will turn on.
The Record page will appear again:
Record:Untitled
M:--- 4/4 120
2. If needed, set the Record options again (see page 32). You
can choose Overdub to add notes, Overwrite to replace
notes (up to the point where you stop recording), or one
of the Punch options to record over a passage.
3. Choose the part to be recorded. When you enter Record
mode again, the indicator of the recorded part will be
turned on, the other off. Press a PART button to make its
indicator start flashing, and record over that part(s).
4. If needed, select a different sound or sound combination.
Please remember that if you record in Layer or Split mode
over a single recorder’s part, only the Main sound will be
recorded.
When you record over an already recorded part, the sound
is the same as the previous recording. However, you can
select a different sound.
5. If needed, change the tempo with the TEMPO buttons. If
the Tempo Record option (see page 32) has been activated,
any tempo change will be recorded.
tion. The indicator on the RECORD button turns off. The
song returns to the beginning.
Note: After 999 measures, the record automatically ends.
6. You cannot change the
time signature (or drum
pattern) chosen during
the first recording pass.
However, if you are starting to record from the end
of the song (you can move there by assigning the highest
possible value to the M, Measure, parameter), you can
choose a different time signature (or a drum pattern) for a
new section to be appended at the end of the current section. This is useful to create a song with different time signatures, or with a drum pattern starting to play at a section
following the first one (see diagram).
First-pass recording
4/4 3/4
Second-pass recording
7. Choose a measure to start recording from. You can start
recording from a measure other than the first one, by
changing the M (Measure) parameter before starting the
recorder.
Record:Untitled
M:001 4/4 120
+/YES
Record:Untitled
M:099 4/4 120
8. Start recording.
9. When done, press the STOP or RECORD button to stop
recording.
Changing sounds to a recorded song
If you are not happy with the sounds used for recording, it is
easy to replace them with different sounds.
Note: When you choose different sounds, effects are also
changed. Each sound, sound combination or performance also
includes its own set of effects.
1. Press the RECORD button to access recording again.
2. Be sure you are at the beginning of the song (measure
shown as “---”):
Record:Untitled
M:--- 4/4 120
34
3. Make the PART 1 and/or PART 2 indicator flash, depend-
4. Choose a different sound (or sounds). If you are editing a
5. Press RECORD to exit song recording.
ing on the part(s) you want to change the sound to.
single part, and you select a Layer or Split sound combination, only the Main sound will be considered.
Page 37
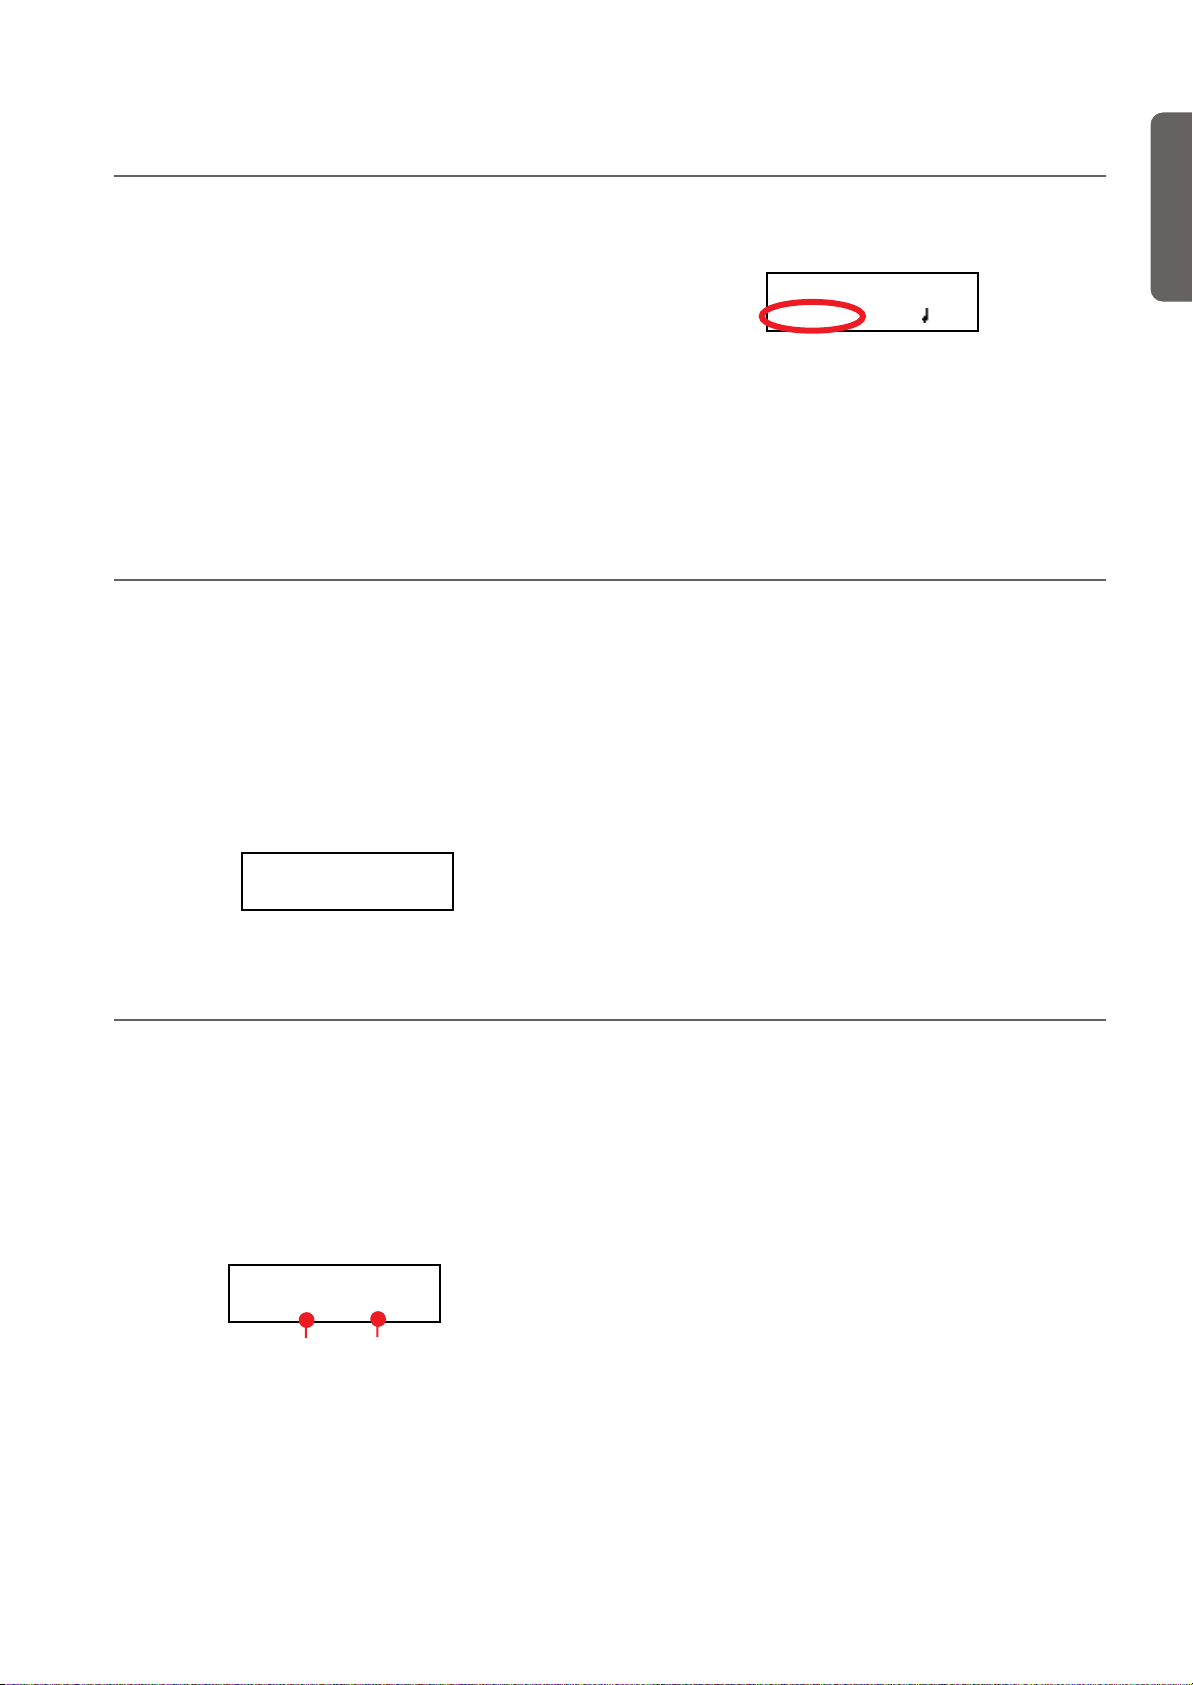
Recording a song > Changing tempo to a recorded song
Record:Untitled
M:001 4/4 120
Changing tempo to a recorded song
If you are not happy with the tempo used for recording (may
you recorded with a slower tempo), it is easy to adjust it after
recording.
Note: After having started recording a song, you can no longer
change its time signature. However, you can append a second
section with a different time signature (see “Step 6: Secondpass recording” on page 34, step 6).
1. Press the RECORD button to access recording again.
Pedal Punch recording
With Pedal Punch recording, you can use a pedal to start and
stop recording.
Note: The Pedal Punch function will not work on an empty
song. At least one track must already have been recorded.
Warning: The Pedal Punch function overwrites existing notes.
1. Be sure a pedal is assigned the Pedal Punch function (see
“Assigning functions to the pedals” on page 52).
2. Be sure to choose the Pedal Punch recording mode (see
“Step 3: Setting the record options” on page 32):
Record Mode 1
Pedal Punch
2. Be sure you are at the beginning of the song (measure
shown as “---”):
3. Be sure neither the PART 1 or PART 2 indicator is flashing.
4. Use the TEMPO buttons to adjust the tempo.
5. Press PLAY/PAUSE to start the song. Just let a few beats
play.
6. Press STOP or RECORD to exit song recording.
3. Press the EXIT button to return to the Record page.
4. Make the PART 1 and/or PART 2 indicator flash, depend-
ing on the part(s) you want to record.
5. Press PLAY/STOP to start the recorder. The song will be
heard.
6. When it is time to start recording, press the pedal set to the
“Pedal Punch” function, and start recording.
7. When finished, press the pedal again to end recording. The
recorder stops.
English
Auto Punch recording
With Auto Punch recording, you can set the start and stop recording points, so that recording automatically begins and
ends at the defined measures.
Note: The Auto Punch function will not work on an empty song.
At least one track must already be recorded.
Warning: The Auto Punch function overwrites existing notes.
1. Be sure to choose the Pnc (Auto Punch) recording mode
(see “Step 3: Setting the record options” on page 32):
Record Mode 1
Pnc S:001 E:001
Start Measure
End Measure
2. Use the SCROLL
S (Start Measure) or E (End Measure) parameters, and use
the +/YES and -/NO buttons to choose the start and end
recording measures.
/ buttons to move the cursor to the
3. Press the EXIT button to return to the Record page.
4. Make the PART 1 and/or PART 2 indicator flash, depend-
ing on the part(s) you want to record.
5. Press PLAY/STOP to start the recorder. Recording will au-
tomatically begin at the “Start” position, and stop at the
“End” position.
6. When finished, press STOP to end recording.
35
Page 38
Recording a song > Saving the song
Song Modified
Save? (Yes/No)
Save Song
Untitled Save?
Saving the song
After recording, the song is stored into a temporary, non-permanent memory. To preserve it from deletion when turning
the instrument off or choosing a different song, you must save
it into the User Song album. There are several ways to do it.
By choosing the Save Song command
You can select the Save Song command at any moment. The
Save Song page also allows you to assign or modify the name
of the song, and save all the changes.
1. After having pressed the EDIT button while in Song Play
mode, use the SCROLL
edit page:
Save Song 7
Untitled Save?
Flashing character
button to go to the Save Song
2. Use the SCROLL buttons to select the character to be edit-
ed (it will start flashing). Use the +/YES and -/NO buttons
to change it. Press the SCROLL
insert a new character, or the +/YES and -/NO buttons together to delete the character at the cursor’s position.
! #$%&‘ ( ) +, - 0123456789; =@
ABCDE F GHI J KL MNOPQR S T UVWXYZ [ ] ^ _ `
abc def ghi j kl mnopqrstuvwxyz{ }
Note: The first character is a blank space. When saving, it will be
automatically removed if added to the beginning or end of the
name.
You can give the song a long name (as explained below). If
it will not fit the display, it will scroll entirely when it is
selected. When saved, the “.MID” extension will be automatically added to the file name.
When you reach the end of the name, a flashing asterisk
(*) appears:
Save Song 7
MyName* Save?
Flashing asterisk
At this point, you can either use the +/YES and -/NO buttons to choose a new character, or press SCROLL
moves the cursor to the Save command:
/ buttons together to
to
3. Press the +/YES button to save the song into the User Song
album, or the -/NO button to return to the Song Play
mode, without saving the song. As an alternative, you can
press EXIT to exit without saving, or to continue recording
the current song.
4. The “Are you sure?” message appears. Press +/YES to con-
firm, -/NO to cancel and exit.
At the end, the Song Play display will appear again, and
you will be able to choose a different song for playing.
By choosing to record a new song
You can press the SONG + RECORD button combination to
start recording a new song. If an unsaved song is still in memory, the Song Modified page will appear (see below).
By choosing a different song
If you try to choose a different song, while the current one has
been recorded or modified and has not yet been saved, you are
prompted to save it.
1. Press the SONG button to select a different song. If the
current song has been recorded or edited, but not yet been
saved, the “Song Modified” message will appear.
2. Press the -/NO button to delete the song or abandon the
changes to a previously saved song. Or press EXIT to return to the current song without saving. Otherwise, press
the +/YES button to make the Save Song page appear:
3. From here on, the save procedure is the same seen above.
How I delete a Song from the UserSong album?
To delete a song from memory after having saved it, use the
procedure described in “Erasing songs from the User Song album” on page 57.
36
Save Song 7
MyName
Save?
Page 39

Editing a song
Editing a song > Setting Cycle Play
After having been recorded, a user-created song can be edited, and then saved again in the User Song album. Please note that songs contained in albums other than UserSong cannot be edited. The only Edit function that can be accessed with these songs is the Cycle Play.
Setting Cycle Play
Cycle Play allows you to repeat a passage during play, to practice with it over and over.
Note: If you enter editing later, you might see a different edit
page instead of the first one. Use the SCROLL button to
reach it.
1. While in Song Play mode, press the EDIT button. The first
page of the Song Edit mode will appear. This is the Cycle
Play mode, whose use has been seen above (see “Cycle
Play” on page 29):
Cycle Play 1
On S:001 E:001
Start Measure
End Measure
2. Press the EXIT button to return to the Main page and start
practicing.
Erasing a track
You can erase a single or all song tracks, to start recording
them again, or just remove them from the song (for example,
the voice track you want to sing live).
1. After having pressed the EDIT button, use the SCROLL
button to go to the Erase Track edit page:
Erase Track 2
All Exec?
2. Use the +/YES and -/NO buttons to select one of the fol-
lowing tracks:
3. Press the SCROLL
Exec command.
4. Press +/YES to start erasing. The “Are you sure?” message
appears. Press +/YES to confirm, -/NO to cancel and keep
the track.
5. Press the EXIT button to return to the Main page and save
the changes (see “Saving the song after editing” on page 39),
or the SCROLL
low).
button to move the cursor to the
button to go to the next edit page (see be-
English
Option Meaning
All All tracks – this results in an empty song
Tr01 (P2), Tr02 (P1) Respectively, Recorder Parts 2 (Track 1)
and 1 (Track 2)
Tr 10 (Dr) Drum part (Track 10)
Tr03 ~ 09, 11 ~ 16 Tracks 3 ~ 9, 11 ~ 16 (Extra tracks)
37
Page 40

Editing a song > Cutting measures at the end of the song
Cutting measures at the end of the song
You can cut measures at the end of the song. For example, you
could have recorded a long section, and then you erased it. After recording a shorter section, you ended up with a series of
empty measures at the end of the song. With this function, you
can cut them away.
1. After having pressed the EDIT button while in Song Play
mode, use the SCROLL
sures edit page:
Cut Measures 3
From: 99 Exec?
button to go to the Cut Mea-
Quantizing the song
Quantize allows you to correct any timing error after recording (see page 32 for more information). With this function, all
parts (including the Drum part) will be quantized.
1. After having pressed the EDIT button while in Song Play
mode, use the SCROLL
edit page:
Quantize 4
Q:1/16 Exec?
2. Choose one of the quantization options (from 1/32 to 1/8).
A “b ~ f” character added after the value means swing-
button to go to the Quantize
2. Choose a measure where you want to start cutting. The
value ranges from 1, to the last measure of the song.
3. Press the SCROLL
Exec command.
button to move the cursor to the
4. Press +/YES to start cutting. The “Are you sure?” message
appears. Press +/YES to confirm, -/NO to cancel and keep
the measures.
5. Press the EXIT button to return to the Main page and save
the changes (see “Saving the song after editing” on page 39),
or the SCROLL
low).
quantization (i.e., correction with a ‘human’ feel). Triplets
are intermediate-values (12, 24).
1/4 =
1/8a = 1/12 = 3 1/16a = 1/24 = 3 1/32 =
3. Press the SCROLL
Exec command.
button to go to the next edit page (see be-
Quantize values
b ~ f = swing
button to move the cursor to the
4. Press +/YES to start quantization. The “Are you sure?”
message appears. Press +/YES to confirm quantization, -/
NO to cancel and keep the original value.
5. Press the EXIT button to return to the Main page and save
the changes (see “Saving the song after editing” on page 39),
or the SCROLL
low).
button to go to the next edit page (see be-
38
Page 41

Transposing the song
Editing a song > Transposing the song
You can transpose the entire song, to make it match a different
key.
1. After having pressed the EDIT button while in Song Play
mode, use the SCROLL
edit page:
Transpose 5
V:+00 Exec?
button to go to the Transpose
2. Choose a transposition value (in semitones).
Value Meaning
-127 127 semitones lower
+00 No transposition
+127 127 semitones higher
Deleting the song
The Delete Song command allows you to delete the whole song
from memory, resulting in an empty song. This is the same as
choosing the New Song command from the control panel (see
page 36).
1. After having pressed the EDIT button while in Song Play
Exec?
button to go to the Delete Song
mode, use the SCROLL
edit page:
Delete Song 6
3. Press the SCROLL
Exec command.
button to move the cursor to the
4. Press +/YES to start transposing. The “Are you sure?” mes-
sage appears. Press +/YES to confirm, -/NO to cancel and
keep the original value.
5. Press the EXIT button to return to the Main page and save
the changes (see “Saving the song after editing” on page 39),
or the SCROLL
low).
button to go to the next edit page (see be-
2. Press +/YES to execute the command, or -/NO to cancel,
and exit from the Song Edit mode.
If you press +/YES, the “Are you sure?” message appears.
Press +/YES to confirm, or -/NO to cancel.
3. Press the EXIT button to return to the Main page and save
the changes (see “Saving the song after editing” on page 39),
or the SCROLL
below).
button to go to the next edit page (see
English
Saving the song after editing
With the Save Song page you can assign or modify the name of
the edited song, and save all changes.
1. After having pressed the EDIT button while in Song Play
mode, use the SCROLL
edit page:
Save Song 7
Untitled Save?
Flashing character
2. Use the SCROLL buttons to select the character to be edit-
ed (it will start flashing). Use the +/YES and -/NO buttons
to change it. Press the SCROLL
button to go to the Save Song
/ buttons together to
insert a new character, or the +/YES and -/NO buttons together to delete the character at the cursor’s position.
! #$%&‘ ( ) +, - 0123456789; =@
ABCDE F GHI J KL MNOPQR S T UVWXYZ [ ] ^ _ `
abcdefghijkl mnopqrstuvwxyz{}
Note: The first character is a blank space. When saving, it will be
automatically removed if added to the beginning or end of the
name.
You can give the song a long name (as explained below). If
it will not fit the display, it will scroll entirely when it is
selected. When saved, the “.MID” extension will be automatically added to the file name.
39
Page 42

Editing a song > Saving the song after editing
When you reach the end of the name, a flashing asterisk
(*) appears:
Save Song 7
MyName* Save?
Flashing asterisk
At this point, you can either use the +/YES and -/NO buttons to choose a new character, or press SCROLL
moves the cursor to the Save command:
to
Save Song 7
MyName
Save?
3. Press the +/YES button to save the song into the User Song
album, or the -/NO button to return to the Song Play
mode, without saving the song. As an alternative, you can
press EXIT to exit without saving, or to continue recording
the current song.
4. The “Are you sure?” message appears. Press +/YES to con-
firm, -/NO to cancel and exit.
At the end, the Song Play display will appear again, and
you will be able to choose a different song for playing.
40
Page 43

Editing sounds and performances > Accessing the Sound edit mode
Editing sounds and performances
The Sound edit mode is where you can edit sounds or performances. Edit parameters are exactly the same in both cases, but
performances also memorize the split point (if the sounds are
in Split mode).
Single sounds and sound
combinations can be programmed in different ways.
For example, when you
press the PIANO button,
the Piano volume can be set
to the maximum. If you
press the PIANO and
STRINGS buttons together,
SOUNDS
40 x Main r.h / both
(n) Main + Layer
40 x Left l.h.
Accessing the Sound edit mode
To access the Sound edit mode, choose a sound, sound combination or performance, then press EDIT.
During editing, the Layer/Left parameters can only be accessed
when you are in Layer or Split mode. If you are in Sound
to turn the Layer mode on, the Piano volume could be lowered, to mix it with the Strings sound. It is like having a different sound when the Piano is playing alone, and when it is
playing in layer with a String sound.
Left sounds are exactly the same as Main sounds. When you
are in Split mode, it is like having two different Main sounds
assigned to each of your hand.
There are 40 Main sounds, 40 Left sounds, plus a variable
number of Layer combinations. There is space for any kind of
sound combination you wish to add to your sonic palette.
mode, you can switch mode at any time during editing. If you
are in Performance mode, you cannot switch mode. However,
if you select a performance with two sounds in Split, the SPLIT
indicator will light.
English
Exit from the Sound edit mode
After having edited some parameter, press EXIT to exit the
Sound edit mode. If nothing was modified, you immediately
exit. If something was modified, the Sound Modified message
will appear:
Sound Modified
Save? (Yes/No)
Saving a sound
If you make some changes during editing, when you press
EXIT to exit the Sound edit mode, you are prompted to save
your sound. See above.
Press +/YES to save, -/NO (or EXIT) to cancel. If you choose
to cancel, all changes will be deleted when choosing a different
sound. If you choose to save, the edited sound replaces the older sound.
41
Page 44

Editing sounds and performances > Saving a performance
Are you sure?
Saving a performance
There are three ways to save a performance. Please find them
below.
After editing a sound
1. If you entered Sound edit mode with the PERFORMANCE
indicator turned off (Sound mode), after modifying something and pressing EXIT, the Sound Modified page (seen
above) will appear:
Sound Modified
Save? (Yes/No)
While in this page, the PERFORMANCE indicator will
start flashing.
PERFORMANCE button and LED indicator
2. Press the PERFORMANCE button to save the current
sound or sound combination into a performance. After
you press the button, the Performance Name page appears:
6. Use the sound selection buttons (including the VARIA-
TION button) to select the location where you want to
save your performance.
12345
678910
Here is the table of the Performance’s locations:
Performance #
Button
Bank 1 Bank 2 Bank 3
1 (PIANO 1) 01 11 21
2 (PIANO 2) 02 12 22
3 (E.PIANO 1) 03 13 23
4 (E.PIANO 2) 04 14 24
5 (HARPSI/CLAV) 05 15 25
6 (VIBES/GUITAR) 06 16 26
7 (ORGAN1) 07 17 27
8 (ORGAN2) 08 18 28
9 (STRINGS/CHOIR) 09 19 29
10 (BASS) 10 20 30
Performance Name
JazzCombo To
Flashing character
3. If you want, edit the performance name. A performance’s
name can be up to 10 characters long.
Use the SCROLL buttons to select the character to be
edited (it is flashing). Use the +/YES and -/NO buttons to
change it. Press the SCROLL
/ buttons together to
insert a new character, or the +/YES and -/NO buttons
together to delete the character at the cursor’s position.
4. When you reach the end of the name, pressing SCROLL
moves the cursor to the To command:
Performance Name
JazzCombo
To
5. Press the +/YES button to go to the Save To Performance
page:
Save To: Perf 01
JazzCombo
Save?
7. The location number appears in the top right corner of the
display, while the name of the performance already stored
at that location appears in the lower left corner:
Target location number
Save To: Perf.01
Split&Lay
Name of the performance at the
target location
Save?
8. Press the +/YES button to save the performance into the
selected location, or the EXIT button to return to the Main
page without saving, with the last performance still selected. If you press +/YES, the “Are you sure?” message appears.
Press +/YES to confirm, -/NO to cancel.
42
Page 45

Editing sounds and performances > Setting the volume
Volume 1
M:127
L:120
Pan 2
M:R07
L:L07
After editing a performance
1. If you entered Sound edit mode with the PERFORMANCE
indicator turned on (Performance mode), after modifying
something and pressing EXIT, the Perf Modified page will
appear:
Perf.Modified
Save? (Yes/No)
2. While this page is shown, press the +/YES button to save
the changes into a performance. After you press the but-
Setting the volume
Use this page to set each sound’s volume.
Note: If you return to editing later, you might see a different
edit page instead of the first one. Use the SCROLL
reach it.
1. After having pressed the EDIT button, the Volume page
will appear:
Volume 1
M:127 L:120
2. While the Main (M) part is selected, use the +/YES and -/
NO buttons to select a different value.
Value Meaning
0 Minimum – no sound
127 Maximum – very loud
button to
ton, the Save To Performance page (seen above) will appear. You will be able to save the current sound or sound
combination into a performance. (See procedure above.)
By pressing the Performance button
While in the Main page, keep the PERFORMANCE button
pressed. The Performance Name page (seen above) will appear. You will be able to save the current sound or sound combination into a performance. (See procedure above.)
3. If you are in Layer or Split mode, press the SCROLL
button to select the L (Layer/Left) parameter (only available in Layer or Split mode):
4. While the Layer/Left (L) part is selected, use the +/YES and
-/NO buttons to select a different value.
5. Press the EXIT button to return to the Main page and save
the changes (see “Exit from the Sound edit mode” on
page 41), or the SCROLL
page (see below).
button to go to the next edit
English
Adjusting the panning
Panning is the position of each part in the stereo front (or
“panorama”).
1. After having pressed the EDIT button, use the SCROLL
button to go to the Pan edit page, with the M (Main) parameter selected:
Pan 2
M:R07 L:L07
While the Main (M) part is selected, use the +/YES and -/
NO buttons to select a different value.
Value Meaning
L64 Hard Left
C00 Center
R63 Hard Right
2. If you are in Layer or Split mode, press SCROLL
to go to select the L (Layer/Left) parameter (only available
in Layer or Split mode):
again
3. While the Layer/Left (L) part is selected, use the +/YES and
-/NO buttons to select a different value.
4. Press the EXIT button to return to the Main page and save
the changes (see “Exit from the Sound edit mode” on
page 41), or the SCROLL
page (see below).
button to go to the next edit
43
Page 46

Editing sounds and performances > Adjusting the effects
'U\
Reverb Send 4
M:127 L:100
Reverb Send 4
M:127
L:100
Adjusting the effects
The C-520 is equipped with three types of effects: The following diagram shows the effect’s routing:
Effect Meaning
IFX (Insert Effect) The sound pass entirely through this effect.
This is used for effects being part of the
sound itself, like the phaser of the rotary
speaker. There is a separate IFX for each of
the sounds.
Rev (Reverb) This effect adds ambience to the sounds. In
Layer or Split mode, there is a single reverb
for all selected sounds.
Ch (Chorus) This effect adds modulation to the sounds.
In Layer or Split mode, there is a single chorus for all selected sounds.
0DLQ6RXQG
/D\HU/HIW6RXQG
5HYHUE6HQG
Use the following parameters to select the reverb, chorus and
insert effects, and adjust how much of the sound must be processed.
,);
,);
&KRUXV6HQG
:HW'U\
:HW
&KRUXV6HQG
5HYHUE6HQG
&KRUXV
5HYHUE
Setting the reverb effect
Reverb adds ambience to the sound. Either you are in Single,
Layer or Split mode, a single reverb effect is available for both
sounds (see diagram). A different amount of reverb can be applied to each sound, thanks to the Reverb Send parameter (see
below).
1. After having pressed the EDIT button, use the SCROLL
button to go to the Reverb Type edit page, with the reverb
type selected:
Reverb Type 3
Hall 1 On
Use the +/YES and -/NO buttons to select a different reverb.
See below the list of available reverb effects (a more detailed
list is on page 285).
Reverb
Hall 1 Hall 2 Hall 3
Wet Plate Dry Plate
Room 1 Room 2 Bright Room
2. Press SCROLL
again to select the Reverb On/Off pa-
rameter:
Reverb Type 3
Hall 1
On
Use the +/YES and -/NO buttons to turn reverb on or off.
This corresponds to the status of the REVERB indicator.
3. Press SCROLL
to go to the Reverb Send edit page, with
the M (Main) parameter selected:
Use the +/YES and -/NO buttons to set the amount of
reverb applied to the Main sound (0 ~ 127).
4. If you are in Layer or Split mode, press SCROLL
again
to select the L (Layer/Left) parameter:
Use the +/YES and -/NO buttons to set the amount of
reverb applied to the Layer/Left sound (0 ~ 127).
5. Press the EXIT button to return to the Main page and save
the changes (see “Exit from the Sound edit mode” on
page 41), or the SCROLL
page (see below).
button to go to the next edit
44
Page 47

Editing sounds and performances > Setting the chorus or modulation effect
Chorus Send 6
M:127 L:Off
Chorus Send 6
M:127
L:Off
IFX M/L Type 7
LoGain
Phaser
Setting the chorus or modulation effect
The chorus or modulation effect adds depth to the sound. Either you are in Single, Layer or Split mode, a single chorus effect is available for both sounds (see diagram above). A
different amount of chorus can be applied to each sound,
thanks to the Chorus Send parameter (see below).
1. After having pressed the EDIT button, use the SCROLL
button to go to the Chorus Type edit page, with the chorus
type selected:
Chorus Type 5
Chorus Off
Use the +/YES and -/NO buttons to select a different chorus effect. See below the list of available chorus-type
effects (a more detailed list is on page 285).
Chorus
Chorus Harm. Chorus Chorus Delay
Ensemble Flanger Tremolo
2. Press SCROLL
rameter:
again to select the Chorus On/Off pa-
Chorus Type 5
Chorus
Off
Use the +/YES and -/NO buttons to turn the chorus on or
off. This corresponds to the status of the CHORUS indicator.
3. Press SCROLL
the M (Main) parameter selected:
Use the +/YES and -/NO buttons to set the amount of
chorus applied to the Main sound (0 ~ 127).
4. If you are in Layer or Split mode, press SCROLL
to select the L (Layer/Left) parameter:
Use the +/YES and -/NO buttons to set the amount of
chorus applied to the Layer/Left sound (0 ~ 127).
to go to the Chorus Send edit page, with
again
5. Press the EXIT button to return to the Main page and save
the changes (see “Exit from the Sound edit mode” on
page 41), or the SCROLL
page (see below).
button to go to the next edit
English
Setting the insert effects
In addition to the reverb and chorus effects, common to both
sounds in Layer and Split mode, an insert effect (IFX) is available for each sound (see diagram above). The insert effect
strongly modifies the sound, and is to be considered as part of
the sound itself.
1. After having pressed the EDIT button, use the SCROLL
button to go to the IFX Type edit page, with the IFX assigned to the Main sound selected:
IFX M/L Type 7
EQ1 Phaser
Use the +/YES and -/NO buttons to select a different
effect. “Off ” means no effect. See below the list of available
IFX effects (a more detailed list is on page 285).
IFX
LoGain HiGain HLGain MdGain
Echo1 Echo2 Echo3
Dly4th Dly3/4 Dly8th
Pan Trem. Phaser Rotary
AmpSim Comp. Limit. Excit.
Wah PhaTrm AmpTrm CmpAmp
OD-Wah WahAmp
2. If you are in Layer or Split mode, press SCROLL
to select the IFX assigned to the Layer/Left sound:
Use the +/YES and -/NO buttons to select a different
effect.
again
45
Page 48

Editing sounds and performances > Setting the octave transposition
IFX Wet/Dry 8
M:W099
L:D020
Octave 9
M:+02
L:+00
Press the SCROLL button to go to the IFX Wet/Dry
edit page, with the M (Main) parameter selected:
IFX Wet/Dry 8
M:W099 L:D020
Use the +/YES and -/NO buttons to set the amount of IFX
applied to the Main sound.
Value Meaning
–Wet Wet, i.e., maximum effect applied. Negative
W-99 ~ W-51 Mostly wet, with negative value.
D-50 ~ D-01 Mostly dry, i.e., minimum effect applied. Nega-
Dry Dry, i.e., with no effect at all.
D001 ~ D050 Mostly dry, i.e., minimum effect applied.
W051 ~ W099 Mostly wet.
Wet Wet, i.e., maximum effect applied.
(inverted) phase.
tive (inverted) phase.
This is the diagram of the mix betweeen Wet and Dry settings:
100%
100%
Dry
0%
Dry
3. If you are in Layer or Split mode, press SCROLL
100%
Wet
Wet
again
to select the L (Layer/Left) parameter:
Use the +/YES and -/NO buttons to set the amount of IFX
applied to the Layer/Left sound.
4. Press the EXIT button to return to the Main page and save
the changes (see “Exit from the Sound edit mode” on
page 41), or the SCROLL
page (see below).
button to go to the next edit
Setting the octave transposition
Here you can set the individual octave transposition for the
Main and the Layer/Left sounds.
1. After having pressed the EDIT button, use the SCROLL
button to go to the Octave edit page, with the M (Main)
parameter selected:
Octave 9
M:+02 L:+00
Use the +/YES and -/NO buttons to change the octave
transposition, within a range of ±4 octaves.
Value Meaning
-04 ~ -01 Four to one octave lower
+00 No transposition
+01 ~ +04 One to four octave higher
2. If you are in Layer or Split mode, press SCROLL
again
to select the L (Layer/Left) parameter:
Use the +/YES and -/NO buttons to change the octave
transposition.
3. Press the EXIT button to return to the Main page and save
the changes (see “Exit from the Sound edit mode” on
page 41), or the SCROLL
page (see below).
button to go to the next edit
46
Page 49
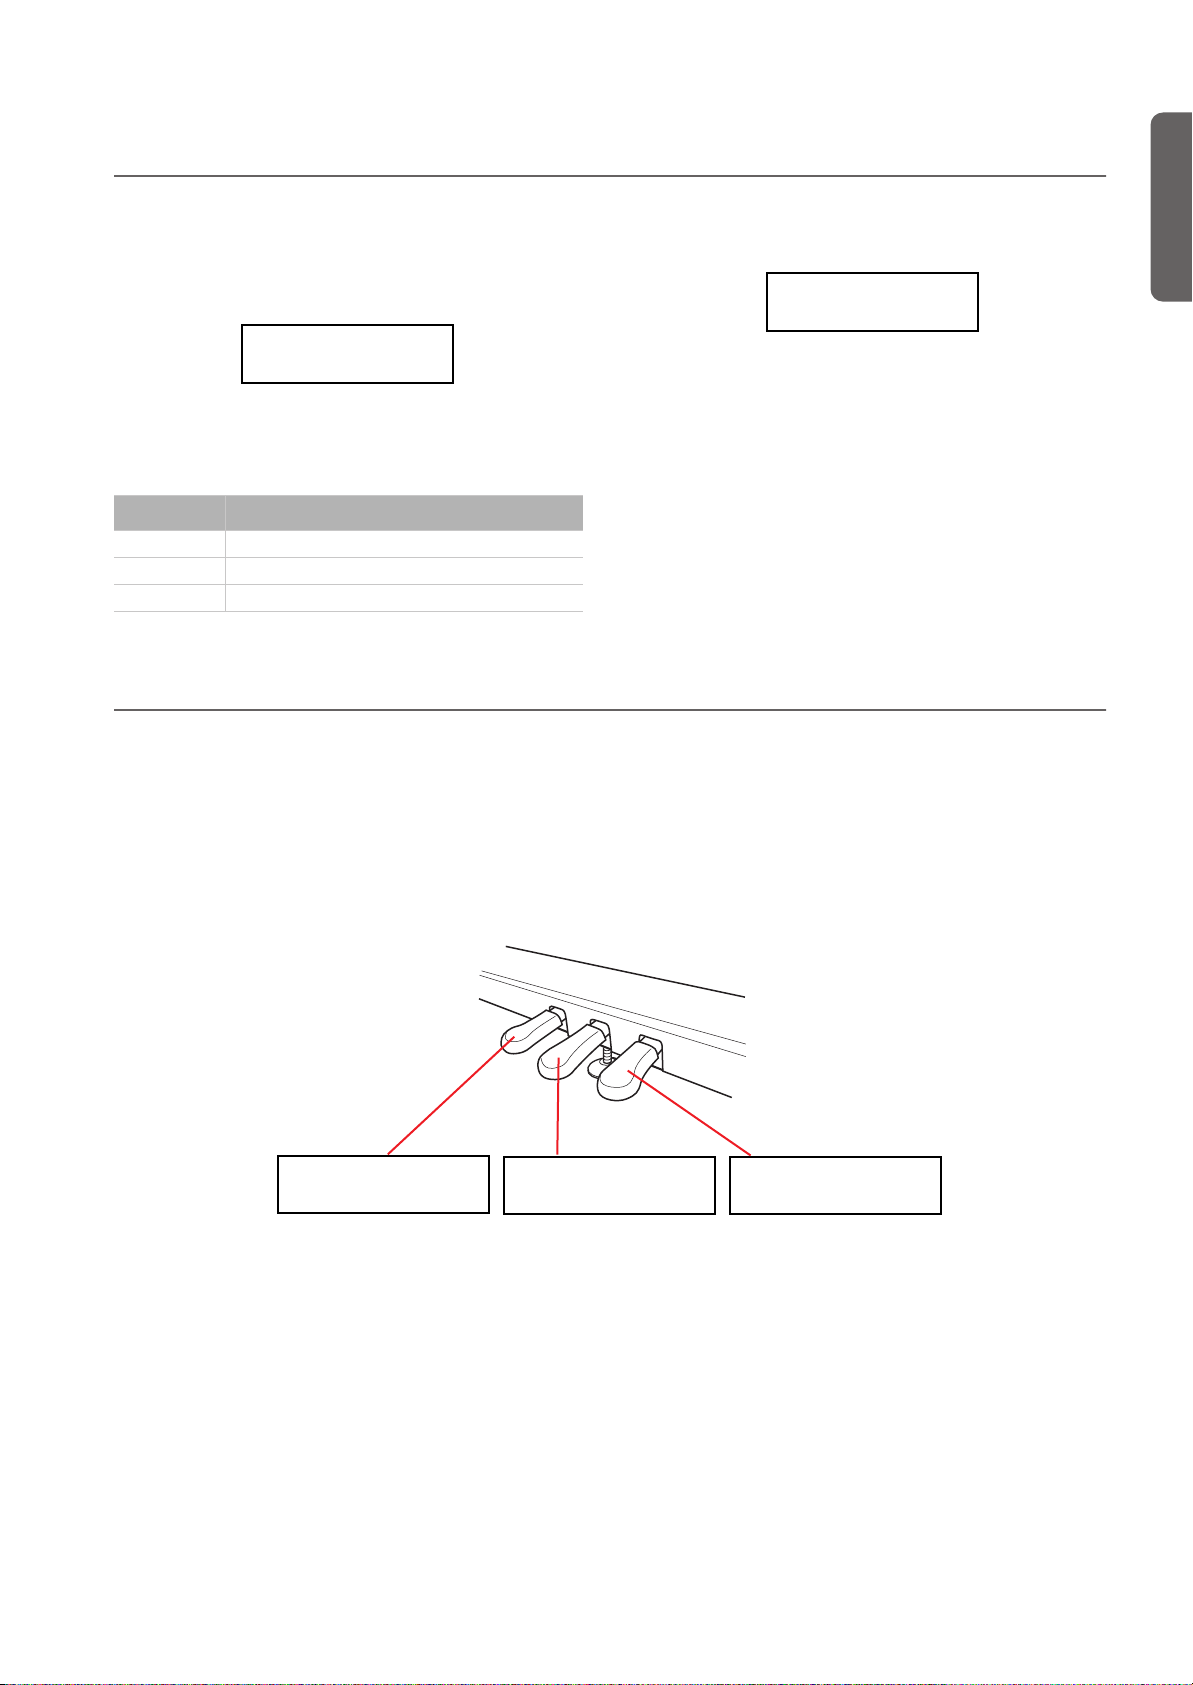
Adjusting the fine tune
Fine Tune 10
M:+00
L:+00
Editing sounds and performances > Adjusting the fine tune
You can fine tune the Main and the Layer sounds (in Layer
mode), so that there is some “beating” between them.
1. After having pressed the EDIT button, use the SCROLL
button to go to the Fine Tune edit page:
Fine Tune 10
M:+00 L:+00
Use the +/YES and -/NO buttons to adjust fine tune for
the Main sound, within a range of ±99 cents (1 cent = 1/
100 of a semitone).
Value Meaning
-99 ~ -01 Ninety-nine to one cent lower
+00 No transposition
+01 ~ +99 One to 99 cents higher
Programming the pedals
By default, the three pedals act (from right to left) as damper,
sostenuto and soft. You can freely reassign them according to
your need or preference. You can either assign them to the
sounds by these pages, or globally (see page 52). Global programming override these settings.
Hint: Use sound programming to assign sound effects, like
damper, rotary speaker speed and glide; use global program-
2. If you are in Layer or Split mode, press SCROLL
to select the L (Layer/Left) parameter:
Use the +/YES and -/NO buttons to change the fine tune
of the Layer/Left sound.
again
3. Press the EXIT button to return to the Main page and save
the changes (see “Exit from the Sound edit mode” on
page 41), or the SCROLL
page (see below).
ming to assign global controls, like drum pattern, recorder and
quarter tone control.
Note: When a function other than Sound is assigned to a pedal
in Global edit, therefore overriding sound programming, a (G)
abbreviation appears in the following pedal assignment pages.
1. After having pressed the EDIT button, use the SCROLL
button to show the Pedal assignment page for the pedal
you wish to reprogram:
button to go to the next edit
English
3
Pedal 3 (G) 13
M:Soft L:Off
2. Use the SCROLL buttons to move the cursor to the M
(Main) or L (Layer/Left) parameter. Use the +/YES and -/
NO buttons to choose the required function.
You can assign different functions to the Main and Layer/
Left sounds, depending on the type of sound. This allows
for a great flexibility in pedal assignment. Some examples:
• A Grand Piano is the Main sound, and a String Ensemble
is the Layer sound. Pedal 1 triggers the Damper effect for
the Piano sound only (it is Off for the Layer sound),
Pedal 2 (G) 12
M:Sost L:Off
2
1
Pedal 1 (G) 11
M:Damper L:Off
allowing for long, held Piano notes. At the same time,
Pedal 3 triggers the Soft effect for both sounds.
• A Grand Piano is the Main sound, and an Acoustic Bass is
the Left sound. The Damper effect is assigned to the Main
sound on Pedal 1 (it is Off for the Left sound), while the
Glide effect is assigned to the Left sound on Pedal 3 (it is
Off for the Main sound). When you want Piano notes to
be held, press the rightmost pedal (#1) as in a traditional
piano; when you want the Bass to glide, press the leftmost
pedal (#3). You can use both pedals at the same time.
47
Page 50

Editing sounds and performances > Selecting a scale
SubScale Sw. 15
M:On L:Off
SubScale Sw. 15
M:On
L:Off
Here are the effects that can be assigned to the pedals in
Sound edit mode:
Setting Function
Off The pedal does not affect the sound
Damper Damper pedal
Sost. (Sostenuto) Sostenuto pedal
Soft Soft pedal
Glide Glide function. When the pedal is
Rotary Rotary Speaker control, typical of electro-
depressed, the sound “glides” slightly
toward the lower pitch. Try it on the
Ac.Guitar sound (left pedal).
mechanical organs. Try it on the Percussion
Organ 1 & 2 sounds (left pedal).
Selecting a scale
There are numerous classical compositions that were composed using scales (or “temperaments”) that differ from the
“equal temperament” commonly used today. In order to reproduce the original sound of such compositions, the C-520
provides other classical scales, in addition to the equal temperament. In addition, scales to play ethnic and experimental music are given.
You can assign the alternative temperament, or “sub scale”, to
both sounds, or just one of them. The other sound will continue playing using the equal temperament (or, in some cases, the
stretch one).
1. Press SCROLL
2. Use the +/YES and -/NO buttons to select one of the avail-
able scales, chosen among the following ones:
Scale Meaning
Equal Temp. Nearly all keyboard instruments today use
Pure Major Major chords in the selected key are perfectly
Pure Minor Minor chords in the selected key are perfected
Arabic An arabic scale, with the E and B notes tuned a
Pythagorean Pythagorean scale, based on the music theo-
Werckmeister This is the Werckmeister III scale invented by
to go to the SubScale Type edit page:
SubScale Type 14
Kirnberger
equal temperament. This temperament spaces
all semitones at equal distances, and allows
identical scales to be played in any key.
tuned.
tuned.
quarter tone lower.
ries of the great Greek philosopher and matematician. It is most suitable for melodies.
Andreas Werckmeister, the German organist
and music theoretician. This scale was created
in the later Baroque period to allow relatively
free transposition.
3. Press the EXIT button to return to the Main page and save
the changes (see “Exit from the Sound edit mode” on
page 41), or the SCROLL
button to go to the next edit
page (see below).
Scale Meaning
Kirnberger This is the Kirnberger III scale invented by
Slendro Scale of the Indonesian Gamelan. The octave is
Pelog Scale of the Indonesian Gamelan. The octave is
Stretched Simulates the “stretched” tuning of an acous-
3. Press SCROLL
Johann Phillip Kirnberger in the early 18th
century, and is used mainly for tuning harpsichords.
divided in 5 notes (C, D, F, G, A). The remaining
notes are tuned as in the Equal tuning.
divided in 7 notes (all white keys). The black
keys are tuned as in the Equal tuning.
tic piano. Basically an equal tuning, the lowest
notes are slightly lower, while the highest
notes are slightly higher than the standard.
This scale is automatically recalled when selecting the GrandPiano, BriteGrand and MelloPiano sounds.
to go to the SubScale Switch edit page,
with the M (Main) parameter selected:
4. Use the +/YES and -/NO button to turn the sub scale on or
off for the Main sound. If it is off, the sound will continue
playing using the equal temperament.
5. Press SCROLL
to select the L (Layer/Left) parameter:
6. Use the +/YES and -/NO button to turn the sub scale on or
off or the Layer/Left sound. If it is off, the sound will continue playing using the equal temperament.
7. Press the EXIT button to return to the Main page and save
the changes (see “Exit from the Sound edit mode” on
page 41), or the SCROLL
page (see below).
button to go to the next edit
48
Page 51

Editing sounds and performances > Resetting the current sound and performance
Resetting the current sound and performance
Any custom programming of the current sound, sound combination or performance, can be reset to the original values.
Hint: To reset all data, use the dedicated function in Global
mode (see “General Reset” on page 58).
1. After having pressed the EDIT button, use the SCROLL
button to show the Reset Sound/Performance page:
Reset Snd/Prf 16
Exec?
2. Press +/YES to start resetting. The “Are you sure?” message
appears. Press +/YES to confirm resetting, -/NO to cancel
and leave your custom data untouched.
If you choose to reset, the current performance, sound or
sound combination is reset to the factory values.
English
49
Page 52

Global settings > Touch settings
Global Modified
Save? (Yes/No)
Speaker 2
On
Global settings
Global edit is where you can edit some general parameters, not
tied to the single sounds or songs.
Accessing Global edit
Keep the EDIT button pressed for more than one second, to
access the Global edit mode.
Touch settings
The keyboard sensitivity, or touch, can be programmed.
1. After having kept the EDIT button pressed, use the
SCROLL
2. Use the +/YES and -/NO button to change sensitivity. The
following table lists the available touch settings.
Setting Touch sensitivity
Fixed Fixed dynamic = 100.
Soft 1~3 Loud notes can be produced even by playing
Medium 1~2 Normal piano touch.
Hard 1~3 Loud notes can be produced only by playing
button to show the Touch Sensitivity page:
Touch Sens. 1
Medium 2
lightly.
very hard.
Exit from the Global edit mode
After having edited some parameter, press EXIT to exit the
Global mode. If nothing was modified, you exit immediately.
If something was modified, the Save page will appear:
Press +/YES to save, -/NO to cancel.
This is the diagram of the touch curves:
Strong
( )
Note
loudness
Soft
Medium
Soft
Hard
Playing strength
Strong
Soft
()
3. Press the EXIT button to return to the Main or Song Play
page and save the changes (see “Exit from the Global edit
mode” on page 50), or the SCROLL
next edit page (see below).
button to go to the
Turning the internal speakers on or off
Whether you prefer listening to the internal speakers or to an
external amplification system, you can turn the internal speakers on or off.
Note: The speakers are automatically turned on when the instrument is turned on again.
Hint: You can also turn the speaker off, by inserting a jack in
the headphone connectors.
50
1. After having kept the EDIT button pressed, use the
SCROLL
button to show the Speaker page:
2. Use the +/YES and -/NO button to turn the internal speak-
ers on or off.
3. Press the EXIT button to return to the Main or Song Play
page, or the SCROLL
(see below).
button to go to the next edit page
Page 53
Master tuning
Split Point 5
F#3
Global settings > Master tuning
In order to adapt the C-520 pitch to that of another instrument, you can adjust the pitch. Standard tuning is A4 = 440
Hz.
Note: If you enter editing later, you might see a different edit
page instead of the first one. Use the SCROLL button to
reach it.
1. After having kept the EDIT button pressed, the Master
Tune page will appear:
Master Tune 3
440.0 Hz
Brilliance
Brilliance is the sound’s brightness. You can set an overall increase or decrease of brilliance.
This is the same parameter you can change with the BRILLIANCE button (see page 19). However, contrary to the button, these changes can be memorized, and are preserved even
when turning the instrument off.
Note: Brilliance changes can be recorded into a song. If you later change them again, values recorded in the song are left unchanged.
1. After having kept the EDIT button pressed, use the
SCROLL
ternative, press the BRILLIANCE button to immediately
access the Brilliance page:
button to show the Brilliance page. As an al-
Brilliance 4
Normal
2. Use the +/YES and -/NO button to select a different tun-
ing.
Setting Tuning
415 ~ -439.5 Lower tuning. The lowest value corresponds to
440 Standard tuning
440.5 ~ 465 Higher tuning. The highest value corresponds to
about -100 cents (one semitone) from the standard tuning.
about +100 cents (one semitone) over the standard tuning.
3. Press the EXIT button to return to the Main or Song Play
page and save the changes (see “Exit from the Global edit
mode” on page 50), or the SCROLL
next edit page (see below).
After having chosen a brilliance value different than Normal, the BRILLIANCE indicator will turn on.
button to go to the
2. Use the +/YES and -/NO button to change the brilliance.
The following table lists the available settings.
Setting Brilliance
Very Mellow, Mellow The sound becomes darker.
Normal Normal tone.
Bright, Very Bright The sound becomes brighter.
3. Press the EXIT button to return to the Main or Song Play
page and save the changes (see “Exit from the Global edit
mode” on page 50), or the SCROLL
next edit page (see below).
button to go to the
English
Default split point
You can set a default split point, that will be automatically recalled each time you press the SPLIT button when playing
sounds.
Note: The split point may be different from the default split
point, if you change it after turning the instrument on. Also, it
may vary when choosing a performance with two sounds in
Split mode. The last selected split point remains selected, until
you turn the instrument off.
1. After having kept the EDIT button pressed, use the
SCROLL
button to show the Split Point page:
2. Use the +/YES and -/NO button to change the split point.
When you change this value, if you are in Split mode the
current split point is also changed.
3. Press the EXIT button to return to the Main or Song Play
page and save the changes (see “Exit from the Global edit
51
Page 54

Global settings > Assigning functions to the pedals
mode” on page 50), or the SCROLL button to go to the
next edit page (see below).
Assigning functions to the pedals
By default, the three pedals act as (from right to left) damper,
sostenuto and soft. You can freely reassign them according to
your need or preference. You can either assign them to the
sounds (see page 47), or globally by these pages. Global programming override sound settings.
Hint: Use sound programming to assign sound effects, like
damper, rotary speaker velocity and glide; use global program-
3
Pedal 3 Glob. 8
Sound
2. Use the +/YES and -/NO button to choose the assigned
function.
Setting Function
Sound The pedal is programmed by the selected
Fill In The pedal triggers as the Fill In command
Quarter Tone The pedal activates the Quarter Tone func-
Transpose Up Each time the pedal is pressed, the master
sound, sound combination or performance
(see “Programming the pedals” on
page 47).
for the drum pattern (see “Drum patterns”
on page 23).
tion. When this function is turned on, you
can detune some notes in realtime, to make
custom scales. See “Quarter Tone (SubScale
realtime programming)” below.
transpose is raised by one semitone.
Pedal 2 Glob. 7
Sound
ming to assign global controls, like drum pattern, recorder and
quarter tone control.
Note: When a function other than Sound is assigned to a pedal,
therefore overriding sound programming, a (G) abbreviation
appears in the pedal assignment pages in Sound Edit mode.
1. After having kept the EDIT button pressed, use the
SCROLL
the pedal you wish to reprogram:
2
1
Setting Function
Transpose Down Each time the pedal is pressed, the master
Play/Pause The pedal duplicates the PLAY/PAUSE but-
Stop The pedal duplicates the STOP button’s
Pedal Punch This is used for Pedal Punch recording. This
button to show the Pedal assignment page for
Pedal 1 Glob. 6
Sound
transpose is lowered by one semitone.
ton’s function.
function.
function is detailed on page 35.
3. Press the EXIT button to return to the Main or Song Play
page and save the changes (see “Exit from the Global edit
mode” on page 50), or the SCROLL
next edit page (see below).
button to go to the
52
Page 55

Global settings > Quarter Tone (SubScale realtime programming)
Fast Play 9
On
Quarter Tone (SubScale realtime programming)
The Quarter Tone function allows you to program a custom
scale in realtime, for example those sudden scale change typical of Arabic music. Changes are not saved anywhere (they are
only used in realtime), so the scale is easily “wiped-out” when
selecting a different sound or performance, or when pressing
the Quarter Tone pedal again.
Note: Quarter Tone can only be used if the SubScale has been
activated for the Main and/or Layer/Left sounds in Sound edit
mode (see “SubScale Switch” on page 48).
You can assign the “Quarter Tone” function to any of the pedals.
1. Assign the Quarter Tone function to one of the pedals, as
seen above.
Fast Play
When you record a song with the onboard recorder, or read a
Standard MIDI File from an external sequencer, one or more
empty beats can exist at the beginning of the song. However,
when the Fast Play function is activated, all empty beats are
skipped, making the song playback immediately begin from
the first note. If setup data are contained inside these empty
beats, they are read faster.
2. Keep the Quarter Tone pedal pressed. The keyboard will
not play at this time. Press the notes you want to lower a
quarter tone.
3. Release the Quarter Tone pedal.
4. Play with your new scale. Notes you pressed on step 2 are
now lowered of a quartertone.
5. To reset the original scale, press and release the Quarter
Tone pedal again, without playing any note. All pitches
will be reset, and the scale selected by the sound or performance will be recalled (see “Selecting a scale” on page 48).
As an alterative, you can reset the Quarter Tone settings by
choosing a different sound or performance.
1. After having kept the EDIT button pressed, use the
SCROLL
button to show the Fast Play page:
2. Use the +/YES and -/NO button to turn the Fast Play func-
tion on or off.
3. Press the EXIT button to return to the Main or Song Play
page and save the changes (see “Exit from the Global edit
mode” on page 50), or the SCROLL
next edit page (see below).
button to go to the
English
Mute Level
Muting is useful with piano lessons, when you may want to
play one or both song parts to play them on the keyboard. You
mute a part by pressing the corresponding PART button while
in Song Play mode.
In this page, you can choose either the mute completely silences a part, or just attenuates it.
1. After having kept the EDIT button pressed, use the
SCROLL
button to show the Mute Level page:
Mute Level 10
Volume: 0
2. Use the +/YES and -/NO button to choose the mute level.
Setting Perceived level
0 Silence
1 ~ 30 Soft
31 ~ 60 Medium
61 ~ 90 Loud
3. Press the EXIT button to return to the Main or Song Play
page and save the changes (see “Exit from the Global edit
mode” on page 50), or the SCROLL
next edit page (see below).
button to go to the
53
Page 56

Global settings > Turning the keyboard on or off (Local Control)
Local Control 11
On
MIDI IN Ch. 13
Ch:1 Track 1
MIDI IN Ch. 13
Ch:1
Track1
Turning the keyboard on or off (Local Control)
Local is the parameter that allows you to establish whether the
keyboard has to play the internal sounds and transmit MIDI
data at the same time (Local On), or whether it just has to
transmit MIDI data and not play the internal sound (Local
Off).
Local Off should be chosen when you wish to use the C-520 as
a mute keyboard, to play another instrument via the MIDI
OUT port. It should also be chosen when C-520 is connected
to an external sequencer via its MIDI IN and MIDI OUT connectors. This will avoid the notes to be played twice, by the
keyboard and by the sequencer, producing an annoying
“echo” effect.
Normally, you will choose Local On (automatically selected
when turning the C-520 on), so that playing the keyboard will
produce sound.
MIDI Clock
MIDI Clock allows for synchronization of two MIDI devices,
for example the internal recorder of the C-520, and an external
sequencer.
Note: When the power is turned on, the MIDI Clock will be automatically set to Internal.
1. After having kept the EDIT button pressed, use the
SCROLL
button to show the MIDI Clock page:
MIDI Clock 12
External MIDI
Note: When the power is turned on, the Local will be automatically set to On.
1. After having kept the EDIT button pressed, use the
SCROLL
button to show the Local Control page:
2. Use the +/YES and -/NO button to turn the function on or
off.
3. Press the EXIT button to return to the Main or Song Play
page, or the SCROLL
(see below).
button to go to the next edit page
2. Use the +/YES and -/NO button to choose the source of
the clock message.
Setting MIDI Clock
Internal The MIDI Clock is generated by the C-520 itself.
External MIDI The MIDI Clock is received from an external
External USB The MIDI Clock is received from an external
The message is also sent to the MIDI OUT and
USB ports.
MIDI device connected to the C-520’s MIDI IN
port.
device connected to the C-520’s USB port.
MIDI IN Channels
When C-520 is controlled from an external MIDI device, it can
work as a 16-part multitimbral tone generator. You can select
a different sound on each of the 16 MIDI channels. These
channels are not accessible from the control panel, and are
separate from the Main, Layer/Left, Recorder Part 1 and Part
2, and Drum tracks. Therefore, you can continue playing with
the piano while MIDI data are received from an external MIDI
device.
Note: MIDI data is received both from the MIDI IN port, and the
USB port at the same time. For more information about MIDI
Over USB, see “What is MIDI Over USB?” on page 59.
54
3. Press the EXIT button to return to the Main or Song Play
page, or the SCROLL
(see below).
button to go to the next edit page
1. After having kept the EDIT button pressed, use the
SCROLL
button to show the MIDI IN Channels page:
2. Use the +/YES and -/NO button to choose one of the 16
available channels (Ch) to be programmed.
3. Press the SCROLL
signed track.
button to move the cursor to the as-
Page 57
Global settings > MIDI OUT Channels
MIDI IN Ch. 13
Ch:01 Tr01
MIDI OUT Ch. 14
Ch:1 Main
4. Use the +/YES and -/NO buttons to choose a different
track. Here is a list of the available tracks for each of the
MIDI IN channels:
Tracks Meaning
Off No data received on the selected channel. This is
Track 1~16 One of the 16 tracks of the C-520.
Global Global track. All notes and pedal controls
useful when an external sequencer is sending
data to two (or more) different devices. Turn off
all channels you want to reserve to the other
device(s).
(damper, sostenuto, soft) received via the MIDI IN
are considered as if they came from the integrated keyboard and pedals. The split point (if
any) is considered.
MIDI OUT Channels
The standard MIDI has 16 separate channels available for
transmission and reception of data. C-520 can transmit on six
channels at the same time. To transmit data from the C-520,
you need to choose which of the 16 MIDI channels you wish
to transmit data on, and which track they are assigned to.
Note: MIDI data is sent both to the MIDI OUT port, and the USB
port at the same time. For more information about MIDI Over
USB, see “What is MIDI Over USB?” on page 59.
1. After having kept the EDIT button pressed, use the
SCROLL
page:
2. Use the +/YES and -/NO button to choose one of the 16
available channels (Ch) to be programmed.
3. Press the SCROLL
signed track.
button to show the MIDI OUT Channels
MIDI OUT Ch. 14
Ch:1 Main
button to move the cursor to the as-
5. Press the SCROLL
button to move the cursor to the
channel again.
6. Use the +/YES and -/NO button to choose another chan-
nel to be programmed, and repeat the above procedure.
7. Press the EXIT button to return to the Main or Song Play
page and save the changes (see “Exit from the Global edit
mode” on page 50), or the SCROLL
button to go to the
next edit page (see below).
4. Use the +/YES and -/NO buttons to choose a track trans-
mitting on the selected channel. Here is a list of the available tracks for each of the MIDI OUT channels:
Tracks Meaning
Off No data sent on the selected channel. This is useful
Main Main sound
Layer Layer sound (when in Layer mode)
Left Left Sound (when in Split mode)
Part 1, 2 Recorder part 1 or 2
Drum Drum (when a drum pattern is selected)
5. Press the SCROLL
channel again.
when you want to play notes on the piano alone,
without sending them to another MIDI device connected to the C-520’s MIDI OUT port.
button to move the cursor to the
English
MIDI OUT Ch. 14
Ch:1
Main
6. Use the +/YES and -/NO button to choose another chan-
nel to be programmed, and repeat the above procedure.
7. Press the EXIT button to return to the Main or Song Play
page and save the changes (see “Exit from the Global edit
mode” on page 50), or the SCROLL
button to go to the
next edit page (see below).
55
Page 58

Global settings > MIDI Filters
MIDI Filters 15
Flt:CC
Off
USB Connect 16
Enable?
USB Connect 16
Disable?
MIDI Filters
When you choose a sound, operate the damper pedal, adjust
the level balance in Layer mode, or make other adjustments on
the control panel, a MIDI message is sent to a connected external MIDI (and/or USB) device. At the same time, C-520 can
receive a MIDI message from an external MIDI (and/or USB)
device connected to its MIDI IN (or USB port), to control the
sounds, damper pedal, volume adjustment, and other data.
You can choose to deactivate (i.e., “filter”) these data selectively, to avoid unwanted changes or mixing data generated by external devices and internal controls. Also, you could want to
avoid sending MIDI data to an external MIDI device, for example Program Change message selecting unwanted sounds
on a different musical instrument.
1. After having kept the EDIT button pressed, use the
SCROLL
button to show the MIDI Filters page:
MIDI Filters 15
Flt:CC Off
2. Use the +/YES and -/NO buttons to choose one of the fil-
ters to be programmed. Here is a list of the available filters:
Filter Meaning
CC Control Changes messages, e.g., pedal, modulation,
PC Program Change messages, i.e., the messages sent to
PB Pitch Bend
SysEx System Exclusive, e.g., the messages used to program
3. Press the SCROLL
volume, pan, etc.
select a sound.
effect parameters.
button to move the cursor to the sta-
tus of the selected filter:
4. Use the +/YES and -/NO buttons to change the filter’s sta-
tus. On means that the corresponding data is filtered (not
sent or received), Off means that it is not filtered (it is sent
and received).
5. Press the EXIT button to return to the Main or Song Play
page and save the changes (see “Exit from the Global edit
mode” on page 50), or the SCROLL
next edit page (see below).
button to go to the
Data transfer via the USB port
The USB is a high-speed data port installed on most modern
computers. You can use it to transfer data from the internal
memory of the C-520, to a computer and vice-versa. Before
you do this, you must enable USB connection for data transfer.
Note: While data transfer is active, no MIDI over USB communication is allowed.
Windows ME, 2000, XP, and Mac OS 9.0.4 to OS X, are supported with no need for special drivers. To use the C-520 with
Windows 98SE you need the dedicated KORG Driver, a special
software that you can freely download from our website.
Warning: Since activating the USB port for data transfer automatically deactivates MIDI over USB, exit from any MIDI
software on your personal computer before turning the USB
Connect function on. Failing to do so could damage the C520’s internal memory data.
Warning: When you turn the USB connection off, the C-520
will be reinitialized and all unsaved data in the instrument’s
memory will be deleted. Save any unsaved sound, performance, song, or global setting, before activating the USB
connection.
1. First of all, connect the C-520 to a personal computer via a
standard USB cable. Make sure that the connector is oriented correctly, and insert it all the way into the jack.
MIDI IN
2. Then, turn USB Data Connect on on the C-520, to let the
computer see its internal memory as a USB disk.
After having kept the EDIT button pressed, use the
SCROLL
button to show the USB Connect page:
3. Press the +/YES button to activate data connection. The
Disable command will appear in the display.
Warning: Do not press the -/NO button while transferring
data, or you could damage the C-520’s memory content,
and cause malfunctioning on your personal computer
56
Page 59

Global settings > Erasing songs from the User Song album
USB Connect 16
Enable?
At this point, the C-520 should appear on your computer’s desktop or disk window as an external USB drive,
with the name KORG SSD (i.e., KORG Solid State Disk,
the technical name of the internal permanent memory).
Windows
Mac OS X
4. Move files to or from the C-520 and the personal comput-
er as you would with any other USB drive. When moving
files, consider the following:
Warning: Do not turn the C-520 off before disconnecting it
from the personal computer. Doing so, could damage the C520’s memory content, and cause malfunctioning on your
personal computer.
Data inside the C-520’s memory are organized in four
folders (also called ‘sub-directories’). Each folder contains
a different type of data created by yourself. The different
data is explained in the following table.
Folder Content
Global Global settings, Metronome settings
Perform Performances
Preset Modified sounds and sound combinations
UserSong Your personal songs, i.e., songs you created with
the internal recorder, or created with an external
sequencer. You can copy from the computer to this
folder songs in Standard MIDI File format (files
with the “.MID” extension). To select the correct
sounds on the C-520, imported songs must comply
with the General MIDI (GM) standard. Not all GM
sounds can be played, since C-520 includes only a
subset of the GM standard.
This is the diagram of the data::
5. After data transfer is completed, remove the KORG SSD
icon from the computer desktop. Please refer to your computer’s documentation for any care on ejecting/removing
USB storage devices. However, here is what you should
commonly do:
• On a Windows PC: Right-click the KORG SSD icon displayed in the right side of your computer’s taskbar. In the
menu that appears, left-click “Stop USB disk driver (drive
name).” Make sure that a message indicating that the
“USB disk may be disconnected safely” is displayed. At
this point, the C-520 should have been automatically disconnected from your personal computer, and the Enable
command should appear again in the C-520’s display,
meaning connection has been deactivated.
• On a Mac: Drag the KORG SSD icon over the Eject icon
on the Dock (Mac OS 9: drag it to the trashcan on the
desktop), and wait until the icon disappears. When it is no
longer shown, go to the C-520 and press the -/NO button
to deactivate data connection. The C-520 will be reinitialized, and the Enable command will appear in the display
again, meaning connection has been deactivated.
6. When the Enable command appears in the display again,
the USB connection has been safely turned off.
7. Press the EXIT button to return to the Main or Song Play
page, or the SCROLL
(see below).
button to go to the next edit page
English
Erasing songs from the User Song album
You can erase a song from the User Song album. On the contrary, songs of the other albums cannot be erased.
Note: You can erase a song from the User Song album also via
an external computer, by means of the USB data connection
(see above).
1. After having kept the EDIT button pressed, use the
SCROLL
button to show the Erase Song page:
Erase Song 17
Prelude Exec?
2. Use the +/YES and -/NO buttons to choose the song of the
User Song album you wish to delete. If the name is longer
than the display, it will scroll up to the end, then return to
the beginning.
3. Press the SCROLL
button to move the cursor to the
Exec command.
4. Press +/YES to start deletion. The “Are you sure?” message
appears. Press +/YES to confirm deletion, -/NO to cancel
and keep the song.
5. Press the EXIT button to return to the Main or Song Play
page, or the SCROLL
(see below).
button to go to the next edit page
57
Page 60

Global settings > General Reset
General Reset
You can reset all memory data to the original factory settings.
This includes sounds, sound combinations, performances,
global data.
Warning: The general reset will delete all your user data, like
custom performances, Layer sound balancing and global data!
Backup this data to a personal computer before doing a general reset. User Songs will not be deleted.
1. After having kept the EDIT button pressed, use the
SCROLL
button to show the General Reset page:
General Reset 18
Exec? (Yes/No)
System version number
You can see the operating system’s version number while in
Global mode. Press both the SCROLL
and +/YES buttons
2. Press +/YES to start the reset procedure (or -/NO or EXIT
to cancel and exit). The “Are you sure?” message appears.
Press +/YES again to confirm reset, -/NO to cancel and
leave your custom data untouched.
If you choose to reset, the instrument is reset, and all data
are restored to the original values. Please do not turn the
instrument off during reset.
together. The version number will appear in the display. Press
EXIT to close the message.
58
Page 61

MIDI
MIDI > What is MIDI?
What is MIDI?
MIDI, is the abbreviation of Musical Instrument Digital Interface. It is an international standard that was created to connect and
transfer data between electronic musical instruments, computers and other devices.
What is MIDI Over USB?
You can let the C-520 communicate MIDI data with a computer using the USB port instead of the MIDI ports. This way,
you can connect your C-520 to a personal computer without
the need of a dedicated MIDI interface.
Most C-520 MIDI features can be used on a Windows XP or
Mac OS X computer with no need of special software. Howev-
er, for full and easy use of all MIDI features, we suggest you to
install the “KORG USB MIDI Driver”, a special software that
you can find in the CD that comes with your C-520. Relevant
instructions come with the software itself. See “Installing the
Korg USB MIDI Driver” on page 62.
What can you do with MIDI?
Thanks to MIDI, you can use the C-520 to control other instruments, use other instruments to control the C-520, and
use a sequencer to create complex musical pieces.
When you use the C-520 keyboard or pedal, or select a sound,
the notes, pedal activation and change in sound are transmitted to another instrument, or are recorded by an external sequencer.
English
MIDI connections
Always connect the MIDI OUT connector of the instrument to
the MIDI IN connector of another instrument. Never connect
two connectors of the same instrument to each other.
Connect the MIDI OUT connector of the transmitting (master) device to the MIDI IN connector of the receiving (slave)
device.
MIDI IN
MIDI sound module
To connect the C-520 to a computer using the MIDI ports, you
need a MIDI interface for the computer, sequencing or musical notation software, and two standard MIDI cables. Connect
the C-520 MIDI OUT connector to the MIDI IN connector of
C-520 bottom
MIDI OUT
MIDI keyboard
the computer. Connect the C-520 MIDI IN connector to the
MIDI OUT connector of the computer.
MIDI
OUT
MIDI IN
MIDI
IN
MIDI OUT
59
Page 62

MIDI > Standard MIDI settings
Standard MIDI settings
When turning the instrument on, the default MIDI factory
settings of the C-520 are programmed as follows:
Parameter Setting
Transmission channels (see “MIDI OUT
Channels” on page 55)
01 = Main sound
02 = Layer sound
03 = Left sound
04 = Recorder Part 1
05 = Recorder Part 2
10 = Drum
Parameter Setting
Reception channel(s) (see “MIDI IN
Channels” on page 54)
Local (see “Turning the keyboard on or
off (Local Control)” on page 54)
Using the C-520 as a multitimbral tone generator
When C-520 is controlled from an external MIDI device, it can
work as a 16-part multitimbral tone generator. You can select
a different sound on each of the 16 MIDI channels.
Note: Sounds on the C-520 are set as in the General MIDI (GM)
standard. However, not all sounds of the standard are available.
1. Use a MIDI cable to connect the C-520’s MIDI IN to the
MIDI OUT of a sequencer etc. As an alternative, connect
the C-520 to a personal computer through the USB port
(see “Installing the Korg USB MIDI Driver” on page 62).
2. Transmit MIDI data from the connected sequencer (or
other device). See “Program Change” on page 60 for instructions on how to select a sound using the MIDI Program Change message. Program Change reception must
be activated on the C-520 (it is by default).
Read the other devices user’s manual for details on sending Program Change messages.
All 16 tracks (1-16)
On
Program Change
The sounds of the C-520 can be selected via MIDI, by sending
a Program Change message on the channel where you wish to
assign the sound. The “Sounds / Timbres / Klänge / Suoni” table on page 277 lists the Program Change numbers corresponding to each C-520 sound.
Transmitting Program Change messages
You can send a MIDI Program Change message to a MIDI device connected to the C-520 MIDI OUT (or USB port), to
change its sound. When selecting one of the internal sounds of
the C-520 by using the sound selection buttons, a MIDI Program Change number will be transmitted on the sound’s
MIDI channel. Program Change numbers are shown in the table on page 277.
Receiving Program Change messages
When a Program Change message is received from an external
device on a MIDI channel, the corresponding internal sound
will be selected on the C-520 for that MIDI channel. Program
Change numbers are shown in the table on page 277.
Program Change enable/disable
The C-520 usually receives Program Change data. If you don’t
want to receive (or transmit) them, use the Filter function.
Please remember that to enable full remote program switching, both the PC and CC filters must be turned off, to allow
transmission of Program Change and Bank Select messages.
See “MIDI Filters” on page 56.
60
Page 63

Control Change
MIDI > Control Change
When you operate the damper pedal, adjust the balance in
Layer mode, or make other adjustments on the control panel,
a Control Change message is sent to a connected external
MIDI device. At the same time, C-520 can receive a Control
Change message from an external MIDI device connected to
its MIDI IN, to control the damper pedal, volume adjustment,
and other data.
Control Change enable/disable
The C-520 usually receives Control Change data. If you don’t
want to receive (or transmit) them, use the Filter function. See
“MIDI Filters” on page 56.
English
61
Page 64

Installing the Korg USB MIDI Driver > Connecting the C-520 to a personal computer
Installing the Korg USB MIDI Driver
The USB port can be used to transfer MIDI data between the
C-520 and a personal computer (this is called the MIDI Over
USB function). This is useful when your computer is not fitted
with a MIDI interface.
USB can be used in parallel with the MIDI ports. For example,
you can connect your C-520 to a sequencer running on your
computer, and at the same time control another MIDI instrument connected to the MIDI ports of the piano.
Connecting the C-520 this ways makes it, at the same time, a
MIDI input device, a controller, and a sound generator.
Connecting the C-520 to a personal computer
Please install the KORG USB-MIDI Driver, before connecting
the C-520 to a personal computer. Be sure your personal com-
puter meets the requirement shown on “KORG USB-MIDI
Driver system requirements” below.
KORG USB-MIDI Driver system requirements
Windows
Computer: A computer with an USB port, that satisfies the requirements of Microsoft Windows XP.
Operating system: Microsoft Windows XP Home Edition /
Professional / x64 Edition (a driver for the x64 Edition is in
beta release.)
Macintosh
Computer: An Apple Macintosh with an USB port that satisfies the requirements of Mac OS X.
Operating system: Mac OS X version 10.3 or later.
Please note before use
Copyright to all software included in this product is the property of Korg Inc.
The license agreement for this software is provided separately.
You must read this license agreement before you install this
software. Your installation of this software will be taken to indicate your acceptance of this agreement.
62
Page 65

Installing the Korg USB MIDI Driver > Windows: Installing the KORG USB-MIDI Driver
Windows: Installing the KORG USB-MIDI Driver
Please connect the C-520 to the computer via an USB cable
only after having installed the KORG USB-MIDI Driver Tools.
Warning: C-520 cannot use the KORG MIDI Data Filer at the
same time.
Note: You must install a separate driver for each USB port you
will use.
1. Insert the included CD-ROM into your CD-ROM drive.
Normally, the “Digital Piano Application Installer” will
start up automatically.
If your computer is set so that the installer does not run
automatically, double-click “KorgSetup.exe” on the CDROM.
2. Please follow the installation instructions appearing on-
screen.
3. Restart the computer, and turn on the C-520. Connect the
C-520 to the computer via an USB cable.
4. Select the following command from the task bar to open
the installation instructions:
Start > all programs > KORG > KORG USB-MIDI Driver
Tools > Installation manual
5. Select the following command from the task bar to open
the installation program:
Start > all programs > KORG > KORG USB-MIDI Driver
Tools > Install KORG USB-MIDI Device
6. Please follow the installation instructions appearing on-
screen to install the KORG USB-MIDI Driver.
Driver’s ports
After installation, the following ports will be shown in you
MIDI application (e.g., sequencer) among the other MIDI devices:
C520 KEYBOARD: This allows for reception of MIDI messages from the C-520 (keyboard and controller’s data) to the
MIDI application running on the computer.
C520 SOUND: This allows for transmission of MIDI messages
from the MIDI application running on the computer, to the
internal tone generator of the C-520.
Mac OS X: Installing KORG USB-MIDI Driver
English
1. Insert the included CD-ROM into your CD-ROM drive.
2. Please double click on the “KORG USB-MIDI Driver.pkg”
in the “KORG USB-MIDI Driver” folder inside the CDROM, to run the installer. Install it according to the instructions appearing on-screen.
Driver’s ports
After installation, the following ports will be shown in you
MIDI application (e.g., sequencer) among the other MIDI devices:
C520 KEYBOARD: This allows for reception of MIDI messages from the C-520 (keyboard and controller’s data) to the
MIDI application running on the Mac.
C520 SOUND: This allows for transmission of MIDI messages
from the MIDI application running on the Mac, to the internal
tone generator of the C-520.
63
Page 66

Assembling the stand > Cautions for assembly
Assembling the stand
Cautions for assembly
• When placing the piano on the stand, be careful not to
pinch your hands.
• Be sure that the correct parts are assembled in the correct
orientation and position, and follow the steps in order.
Assembling procedure
1. Open the packing carton and take out the contents. Check
that all of the following items are available.
Back panel
Sideboard A
(Left side)
Assembly Accessories
Screws (a)
(M6 x 20)...4pcs.
Pedal Box
Screws (b)
(M4 x 14)...6pcs.
Sideboard B
(Right side)
Caps...4pcs.
• Do not apply weight to the front edge of the piano before
tightening the screws, otherwise the piano may fall down.
els to the pedal box. Make sure that there is no gap between
the side panels and the pedal box.
Screws (a)
Pull out the
pedal cable
Align precisely, so that there is
no gap between the side panel
This is used to adjust the height
after you’ve finished assembling
the stand; don’t tighten it completely.
and pedal box.
3. With the finished surface (woodgrain) facing forward,
curve (bow) the back panel slightly and fit it into the
grooves of the side panel.
Cable holder
...2 pcs.
Piano Fasteners
...2 pcs.
Adjuster...1pc.
NB: You will need a cross-point (Phillips #2) screwdriver
for assembly.
2. Screw the adjuster into the pedal box as far as it will go, and
attach the pedal cable.Use screws (a) to fasten the side pan-
Slightly curve the back panel,
and fit it into the grooves
Finished
surface
Grooves in side panels
4. Use screws (b) to fasten the side panels.
Start by fastening the bottom edge of the back panel (four
places). In two places, pass the screw through a cable
holder to attach it to the stand. Attach the power cable
holder at either the right side or the left side depending on
the position of the AC outlet you’ll be using. Tighten these
screws.
Then fasten the top edge of the back panel (two places).
Don’t tighten these screws completely yet, since you’ll be
64
Page 67

Assembling the stand > Assembling procedure
If you notice an uneven gap,
loosen screws (a) to make adjustments.
Avoid
uneven gaps
adjusting this area after you attach the instrument to the
stand.
Leave untightened
Attach together with
a cable holder
(for the pedal cable)
Fasten the cable holders
at the left or right side
(for the power cable)
5. Make sure that the stand is not tilted and that there are no
gaps in it, and then firmly tighten all of the screws, except
for the two screws you left untightened.
6. Attach the instrument.
Note: The side panels are easily scratched; please use cau-
tion.
Lift the instrument with both hands, being careful to
keep them not closer than 70mm from both ends of the
piano to avoid pinching. Position the screw heads pro-
truding from the inside of the left and right sides of the
stand, so that they are aligned with the grooves of the
metal fitting at the left and right ends of the instrument.
and gently lower the instrument onto the stand. If the
instrument is aligned correctly, the screws on the inside of
the side panels will fit firmly into the grooves of the metal
fittings.
Warning: Carefully lower the left and right ends of the
instrument evenly, keeping the instrument level, and
being careful not to pinch your hand or drop the instrument. Lifting only one side is very dangerous and may
also damage the metal fixtures of the instrument itself.
You must raise or lower both left and right ends of the
instrument simultaneously, keeping the instrument
level.
You can perform this step more easily if you use your body
to apply pressure to the side panel of the stand while sliding the instrument onto the stand.
7. While pressing the upper edge of the stand, tighten the two
back panel screws that you had left untightened.
Press against the
side of the instrument
Firmly tighten the two screws while pressing
the left and right side panels from the outside.
Press against the
side of the instrument
8. Make sure that there are no uneven gaps between the top
surface of the instrument and the top of the side panels.
If you notice any unsightly gap, make adjustments by
loosening the screws (a) that fasten the side panel to the
pedal box.
If there is a very noticeable gap between the instrument
and the side panels of the stand, or if the gap is uneven, it
may be that the instrument was not placed correctly on
the stand. If so, lift up the entire instrument and place it
correctly on the stand.
9. Fasten the instrument fastening bolts from below the in-
strument.
Then loosen the adjuster, and adjust it so that it is in firm
contact with the floor.
Note: Unless the adjuster is in firm contact with the floor,
the pedal will wobble, possibly causing malfunctions.
Screw into holes on the
back of the instrument
English
Groove
Screw head
Instrument fastening bolts
Loosen adjuster to the correct position
Verify that all screws are firmly tightened. Finally, place
caps on the heads of pedal box screws (a).
10.Connect the included power cable to the AC adaptor.
AC adaptor
DC plug
Included power cable
65
Page 68

Assembling the stand > Check after assembly
11.Connect the pedal cable and the DC plug of the AC adap-
tor to the bottom of the instrument, and use the cable retainers to fasten the cables.
Note: Pay attention to the orientation of the connector
when connecting the pedal cable.
Check after assembly
[•] Are any parts left over?
If any parts are left over, check the diagrams to see where
they should be used.
Caution
Note: When placing your digital piano, be careful that the
stand is not resting on the AC adaptor cable.
Fasten using the cable holders
[•] Make sure that all screws are tight.
Caution when transporting the instrument
Remove the piano from its stand, and transport them separately. After transportation, refer to these instructions and reassemble the piano and stand.
Screw loosening
After assembly, the various screws and bolts of the stand may
loosen as time goes by, causing the stand to wobble. If this occurs, re-tighten the screws.
Disassembly
If you need to packup the piano, reverse the assembly order by
which the piano was attached to the stand and the stand was
assembled. After disassembly, save the screws and other parts
so that no parts are lost.
66
Page 69

Error messages
Error messages > Caution
Write Protect
While saving a song, you are trying to write over a write-protected file. The song has been previously copied from a PC,
and it had the write-protect attribute turned on while on the
computer’s disk. Change name to the song before repeating
the save operation.
Out of Memoy
The song is too long, and the memory has been filled out.
When the maximum memory capability has been reached, recording is automatically stopped. Press EXIT to close this message.
Maximum song length reached
A song can’t exceed 999 measures in length. When you reach
that limit, the recorder is automatically stopped. Please note
that recording can end earlier, if there is not enough memory
for all 999 measures to be recorded.
Loading Song Error
The song could not be loaded, for problems in file integrity,
excessive file size , or other errors.
Record Mode Not Allowed
You are trying to access recording on a protected song (i.e., all
the songs contained in albums different than UserSong). This
is not possible.
Song Modified
Save?
A new or modified song exists in memory, and has not yet
been saved. Press +/YES to save it, or -NO to cancel and abandon all changes. In this latter case, the song in memory will be
lost.
Sound Modified
Save?
The current sound or sound combination has been modified.
Press +/YES to save it, or -NO to cancel and abandon all
changes.
Perf. Modified
Save?
The current performance has been modified. Press +/YES to
save it, or -NO to cancel and abandon all changes.
English
USB Working Wait please
Disconnecting the C-520 from the computer cannot be done
yet, since the computer is still working on the files. This may
happen when you press Enable, and then immediately after
Disable. Wait a little for the USB operation to complete.
Memory Full
The internal storage memory (the one preserved when turning
the instrument off, and seen when connecting the C-520 via
USB) is full, so you cannot save the song. To free some space,
you can either delete some songs by connecting the C-520 via
USB, or using the dedicated internal function (see “Erasing
songs from the User Song album” on page 57).
Invalid Name
Your song’s name is still blank (i.e., no characters were inserted, or all characters were deleted). Assign a name to the song,
and try saving again.
Song Exists Execute
The song already exists in the internal storage memory. If you
press +/YES the older version is deleted and replaced by the
new one. If you press -/NO or EXIT saving is canceled, and the
older version is preserved.
Globals Modified
Save?
Global settings have been modified. Press +/YES to save it, or
-NO to cancel and abandon all changes.
Save Global Failure
There was an error during save. Global settings have not been
saved.
Save Preset Failure
There was an error during save. The sound or sound combination has not been saved (a preset is the common technical
name for sounds and sound combinations).
Save Midi Failure
There was an error during save. Midi settings have not been
saved.
General Reset Wait Please
You are resetting the internal data.
General Reset / nn%
This message shown the percentage of data being reset. Warning: Do not turn the instrument off while this message is in the
display.
67
Page 70

Troubleshooting > Caution
Troubleshooting
If during use any of the following problems should occur,
carefully examine the instrument to see if you can find out
what the problem is, and try resolving it by following the suggestions below. If the instrument will still not function properly refer to your dealer or to an Authorized Korg Service
Center.
Problem Possible remedy Page
The instrument
will not turn on.
No sound. (1) Make sure that the volume is not
Check that the AC adapter is correctly
connected to the piano and the outlet.
set on 0. If it is, bring it up to an adequate level.
(2) Make sure there is not a jack
plugged into one of the PHONES connectors. This would turn the internal
speakers off. if so, unplug the jack.
(3) Make sure that the MIDI Local
function is not set on OFF. If it is, set it
to ON (or turn the instrument off and
then on again).
10
12
13
54
Polyphony
The C-520 contains sampled sounds, which have been recorded, analyzed and processed from the actual sounds of the original musical instruments. These sounds usually consist of one
or more different samples reproduced by pressing a key. Each
sample is played back by a single oscillator. Sounds using just
one oscillator have a full polyphony of max. 62 voices, while
sounds using two oscillators have a limited polyphony of max.
31 notes. Sounds using more oscillators have a more limited
polyphony. When the number of notes exceeds the limit of the
sound, some notes will be stopped, so that the new ones can be
heard.
Furthermore, when playing in Layer mode with more than two
notes, the max. polyphony depends on how many oscillators
are used in total.
Please refer to the table on page 277 for more information
about the number of oscillators used by each sound.
68
Page 71

Technical specifications
Technical specifications > Caution
Specifications C-520
Keyboard 88 key, Graded Hammer Action (RH3)
Touch selection Eight velocity curves, plus fixed
Key cover Wooden sliding key cover
Tuning Transpose, Fine tuning, 10 Temperaments + Quarter Tone
Sound generation Piano eXperience stereo sampling
Polyphony 62 notes (max). The use of 2- (or more) oscillator sounds and the Layer mode reduces the maximum number of
simultaneous notes.
Modes Single, Layer, Split, Performance (30)
Sounds 40 types; (7 Acoustic Pianos, Honky-Tonk, Electric Grand, 8 Electric Pianos, 2 Harpsichords, 2 Clavs, 2 Vibra-
phones, Acoustic Guitar, 3 Jazz Organs, 3 Church Organs, 3 Strings, 3 Choirs, 4 Basses.)
Effects 8 Reverb types ,6 Chorus types
24 Insert types including Tremolo, Delay, Rotary Speaker, Equalizer, etc.
Brilliance (5 settings)
Demo 205 songs; 20 demo songs
185 classical songs with separate R.H. and L.H. parts
Metronome Tempo, Time Signature, Accent (Standard, Bell), Volume controls, Drum patterns
Recorder 2 parts, 45,000 notes per song
Controls: Record, Play/Pause, Stop, Part 1 On/Off, Part 2 On/Off.
Functions: Cycle, Erase Track, Quantize, Transpose, Delete Song,
Rename Song.
Pedals Damper (support half-pedaling), Soft (support half-pedaling), Sostenuto
All freely assignable
Connections Audio output (OUTPUT L/MONO, R), Audio input (INPUT L/MONO, R), 2 × Headphones, MIDI (IN, OUT), Pedals,
USB (supports Ms Windows XP, Apple Mac OS X 10.2 or later)
Controls Power switch, Master Volume, Performance, Variation, Split, Sound selectors, Scroll, Value (Yes/No), Edit, Exit,
Reverb, Chorus, Transpose, Brilliance, Demo, Metronome, Tempo, Recorder
Display 2 line × 16 character backlit LCD
Amplification 2 × 35 Watt amplifier, 2 × 13cm woofer in bass-reflex boxes, 2 × tweeter
Power supply DC24V, External switching adapter
Dimensions (W x D x H) 54.96" × 18.19" × 34.21" inch (1396 × 462 × 869 mm), including stand; with music stand folded down
Weight 116.84 lbs. (53 kg), including stand
Music stand With score holder
Included accessories AC adapter; Song Book, CD-ROM with KORG USB-MIDI Driver for Windows XP and Mac OS X
English
Sounds processed with INFINITY™.
Korg reserves the right to change the specifications without notice.
69
Page 72

Technical specifications > Caution
70
Page 73
DIGITAL PIANO
Mode d’emploi
Page 74

PRECAUTIONS
Position de l’instrument
L’instrument ne doit jamais être installé :
• Aux rayons directs du soleil
• Dans des milieux extrêmement froids ou humides
• Dans des milieux particulièrement sales ou poussiéreux
• Dans des milieux soumis à de fortes vibrations
MARQUE CE POUR L’HARMONISATION DES STANDARDS EUROPEENS
La marque CE est apposée depuis le 31 décembre 1996 sur nos produits qui
utilisent la tension AC, conformément à la Directive EMC (89/336/CEE) et à
la Directive sur la marque CE (93/68/CEE).
er
La marque CE apposée depuis le 1
Directives EMC (89/336/CEE), sur la marque CE (93/68/CEE) et à la Directive concernant la Basse Tension (73/23/EEC).
De même, la marque CE apposée sur nos appareils faisant appel à l’alimentation sur piles indique la conformité à la Directive EMC (89/336/CEE) et à la
Directive sur la marque CE (93/68/EEC).
janvier 1997 indique la conformité aux
Alimentation
Brancher l’adaptateur AC fourni à une prise secteur ayant un voltage adapté. Ne
jamais brancher l’instrument à une prise secteur dont le voltage est différent de
celui pour lequel l’appareil est prédisposé.
Interférences avec d’autres dispositifs électriques
Cet instrument est doté d’un micro-ordinateur. Des appareils tels que radios
ou postes de télévision peuvent interférer sur son fonctionnement. Il faut
donc l’installer à une distance appropriée de tels appareils.
Manipulation
Ne jamais appliquer une force excessive aux interrupteurs ou aux contrôles
car ceci peut les endommager.
Nettoyage
Si le boîtier de l’appareil est sale, le nettoyer à l’aide d’un chiffon sec. Ne
jamais utiliser des détergents liquides tels que mazout ou alcool, ou abrasifs
ou détergents inflammables.
Conserver ce mode d’emploi
Après l’avoir lu, conserver le mode d’emploi pour de futures références.
Ne jamais introduire dans l’appareil des objets ou des choses
En aucun cas l’instrument ne doit être en contact avec des liquides.
Si un liquide pénètre dans l’instrument, il y a danger de panne de
courant, de feu, voire d’électrocution.
• Ne jamais introduire des objets métalliques dans l’instrument. Si de
tels objets pénètrent dans l’instrument, déconnecter l’adaptateur AC
de la prise secteur et contacter le revendeur Korg ou le magasin le
plus proche.
RECLAMATIONS
Les informations contenues dans cette publication ont été soigneusement
préparées et vérifiées. Vu notre continuel engagement à l’amélioration de
nos produits, il se peut que des spécifications soient différentes de celles
détaillées dans le mode d’emploi. Korg décline toute responsabilité envers les
éventuelles différences qui peuvent se présenter entre les spécifications et la
description détaillée dans le mode d’emploi - les spécifications sont sujettes à
modifications sans préavis.
THE FCC REGULATION WARNING (FOR THE U.S.A.
ONLY)
This equipment has been tested and found to comply with the limits for a
Class B digital device, pursuant to Part 15 of the FCC Rules. These limits are
designed to provide reasonable protection against harmful interference in a
residential installation. This equipment generates, uses, and can radiate
radio frequency energy and, if not installed and used in accordance with the
instructions, may cause harmful interference to radio communications.
However, there is no guarantee that interference will not occur in a particular installation. If this equipment does cause harmful interference to radio or
television reception, which can be determined by turning the equipment off
and on, the user is encouraged to try to correct the interference by one or
more of the following measures:
• Reorient or relocate the receiving antenna.
• Increase the separation between the equipment and receiver.
• Connect the equipment into an outlet on a circuit different from
that to which the receiver is connected.
• Consult the dealer or an experienced radio/TV technician for help.
Unauthorized changes or modification to this system can void the user’s
authority to operate this equipment.
SERVICE ET ASSISTANCE AU MUSICIEN
Contactez le Service d’Assistance Agréé KORG le plus proche. Le revendeur
Agréé KORG est à votre disposition pour toute ultérieure information concernant les produits, les logiciels et les accessoires pour piano.
KORG SUR INTERNET
Accueil Korg Inc. : www.korg.co.jp
Accueil Korg France : www.korgfr.net
Accueil Korg Canada : www.korgcanada.com
Accueil Korg USA : www.korg.com
RETABLISSEMENT DES DONNEES
Lors de la mise hors tension de l’instrument, tous les paramètres non sauvegardés se rétablissent à leur valeur d’usine.
GARANTIE
Les produits KORG sont fabriqués conformément aux plus rigoureuses
spécifications en vigueur dans chaque pays. Ces produits sont garantis par le
distributeur KORG dans le pays où ils ont été vendus. Le fabricant/distributeur décline toute responsabilité ou garantie envers tout produit KORG
vendu démuni de garantie ou de numéro de série. Ceci afin de mieux garantir la protection et la sécurité de l’acheteur.
© 2006 Korg Italy Spa. Imprimé en Japon
Page 75

Sommaire
>
Introduction . . . . . . . . . . . . . . . . . . . . . . . . . . . . . . . . . . . . . . . 74
Caractéristiques principales . . . . . . . . . . . . . . . . . . . . . . . . . . . . . . . . .74
Tableau de commande . . . . . . . . . . . . . . . . . . . . . . . . . . . . . . 76
Connexions . . . . . . . . . . . . . . . . . . . . . . . . . . . . . . . . . . . . . . . . 79
Connexion à des dispositifs audio externes . . . . . . . . . . . . . . . . . . . . .79
A lire en premier . . . . . . . . . . . . . . . . . . . . . . . . . . . . . . . . . . . 80
Ouvrir le piano . . . . . . . . . . . . . . . . . . . . . . . . . . . . . . . . . . . . . . . . . . . . 80
Mettre l’instrument sous tension . . . . . . . . . . . . . . . . . . . . . . . . . . . . .80
Utiliser le pupitre . . . . . . . . . . . . . . . . . . . . . . . . . . . . . . . . . . . . . . . . . .80
Régler le volume . . . . . . . . . . . . . . . . . . . . . . . . . . . . . . . . . . . . . . . . . .81
Utiliser les casques . . . . . . . . . . . . . . . . . . . . . . . . . . . . . . . . . . . . . . . . .81
Reproduire les Morceaux de Démonstration . . . . . . . . . . . . . . . . . . . 81
Fonctions de base . . . . . . . . . . . . . . . . . . . . . . . . . . . . . . . . . . 83
Jouer un timbre (mode Single) . . . . . . . . . . . . . . . . . . . . . . . . . . . . . .83
Jouer deux timbres à la fois (mode Layer) . . . . . . . . . . . . . . . . . . . . .84
Jouer des timbres différents à la main gauche et droite (mode Split) . 85
Utiliser les pédales . . . . . . . . . . . . . . . . . . . . . . . . . . . . . . . . . . . . . . . . .87
Transposition . . . . . . . . . . . . . . . . . . . . . . . . . . . . . . . . . . . . . . . . . . . . .87
Modifier la Brilliance . . . . . . . . . . . . . . . . . . . . . . . . . . . . . . . . . . . . . . . 88
Activer/couper les effets . . . . . . . . . . . . . . . . . . . . . . . . . . . . . . . . . . . .88
Utiliser les performances . . . . . . . . . . . . . . . . . . . . . . . . . . . . . 89
Sélectionner les performances . . . . . . . . . . . . . . . . . . . . . . . . . . . . . . .89
Modifier les timbres affectés à une performance . . . . . . . . . . . . . . . .89
Editer une performance . . . . . . . . . . . . . . . . . . . . . . . . . . . . . . . . . . . .90
Le métronome . . . . . . . . . . . . . . . . . . . . . . . . . . . . . . . . . . . . . 91
Lancer et arrêter le métronome, régler le tempo . . . . . . . . . . . . . . . .91
Afficher le tempo et la vitesse . . . . . . . . . . . . . . . . . . . . . . . . . . . . . . . .91
Régler le tempo . . . . . . . . . . . . . . . . . . . . . . . . . . . . . . . . . . . . . . . . . . .91
Sélectionner la vitesse (ou time signature) . . . . . . . . . . . . . . . . . . . . .92
Phrasés rythmiques répétitifs (ou Drum patterns) . . . . . . . . . . . . . . . 92
Régler le volume du métronome . . . . . . . . . . . . . . . . . . . . . . . . . . . . . 93
Régler la réverbération du métronome . . . . . . . . . . . . . . . . . . . . . . . . 93
Sélectionner l’accent . . . . . . . . . . . . . . . . . . . . . . . . . . . . . . . . . . . . . . .93
Sauvegarder les réglages du métronome . . . . . . . . . . . . . . . . . . . . . . . 94
Reproduire un morceau . . . . . . . . . . . . . . . . . . . . . . . . . . . . . 95
Entrer en mode Song Play . . . . . . . . . . . . . . . . . . . . . . . . . . . . . . . . . . .95
Comment sélectionner un morceau . . . . . . . . . . . . . . . . . . . . . . . . . .95
Comment lancer la reproduction . . . . . . . . . . . . . . . . . . . . . . . . . . . . . 96
Lancer la reproduction sur une mesure différente . . . . . . . . . . . . . . .96
Couper/activer une partie enregistrée . . . . . . . . . . . . . . . . . . . . . . . . . 97
Modifier le tempo du morceau . . . . . . . . . . . . . . . . . . . . . . . . . . . . . .97
Jouer avec le morceau en reproduction . . . . . . . . . . . . . . . . . . . . . . . . 97
Cycle Play . . . . . . . . . . . . . . . . . . . . . . . . . . . . . . . . . . . . . . . . . . . . . . . .98
Enregistrer un morceau . . . . . . . . . . . . . . . . . . . . . . . . . . . . . . 99
Procédure rapide d’enregistrement . . . . . . . . . . . . . . . . . . . . . . . . . . . 99
Poste 1 : Entrer en mode Record) . . . . . . . . . . . . . . . . . . . . . . . . . . . .99
Poste 2 : Sélectionner les timbres . . . . . . . . . . . . . . . . . . . . . . . . . . . .100
Poste 3 : Régler les options d’enregistrement . . . . . . . . . . . . . . . . . . 101
Poste 4 : Régler la vitesse et le tempo . . . . . . . . . . . . . . . . . . . . . . . . .102
Poste 5 : Enregistrer . . . . . . . . . . . . . . . . . . . . . . . . . . . . . . . . . . . . . . . 103
Poste 6 : Deuxième passage d’enregistrement . . . . . . . . . . . . . . . . . . 104
Modifier les timbres d’un morceau enregistré . . . . . . . . . . . . . . . . .104
Modifier le tempo d’un morceau enregistré . . . . . . . . . . . . . . . . . . .105
Enregistrer avec la fonction Pedal Punch . . . . . . . . . . . . . . . . . . . . .105
Enregistrer avec la fonction Auto Punch . . . . . . . . . . . . . . . . . . . . . . 106
Sauvegarder le morceau . . . . . . . . . . . . . . . . . . . . . . . . . . . . . . . . . . .106
Editer un morceau . . . . . . . . . . . . . . . . . . . . . . . . . . . . . . . . . 108
Réglage de Cycle Play . . . . . . . . . . . . . . . . . . . . . . . . . . . . . . . . . . . . .108
Effacer une piste . . . . . . . . . . . . . . . . . . . . . . . . . . . . . . . . . . . . . . . . . . 108
Couper des mesures à la fin du morceau . . . . . . . . . . . . . . . . . . . . . . 109
Quantification du morceau . . . . . . . . . . . . . . . . . . . . . . . . . . . . . . . .109
Transposition du morceau . . . . . . . . . . . . . . . . . . . . . . . . . . . . . . . . .109
Supprimer un morceau . . . . . . . . . . . . . . . . . . . . . . . . . . . . . . . . . . . .110
Sauvegarder le morceau après l’avoir modifié . . . . . . . . . . . . . . . . .110
Editer les timbres et les performances . . . . . . . . . . . . . . . . . 111
Entrer en mode d’édition Sound . . . . . . . . . . . . . . . . . . . . . . . . . . . 111
Quitter le mode d’édition Sound . . . . . . . . . . . . . . . . . . . . . . . . . . . 111
Sauvegarder un timbre . . . . . . . . . . . . . . . . . . . . . . . . . . . . . . . . . . . . 111
Sauvegarder une performance . . . . . . . . . . . . . . . . . . . . . . . . . . . . . 112
Régler le volume . . . . . . . . . . . . . . . . . . . . . . . . . . . . . . . . . . . . . . . . . 113
Régler le panning . . . . . . . . . . . . . . . . . . . . . . . . . . . . . . . . . . . . . . . . 113
Régler les effets . . . . . . . . . . . . . . . . . . . . . . . . . . . . . . . . . . . . . . . . . . 114
Régler l’effet de réverbération . . . . . . . . . . . . . . . . . . . . . . . . . . . . . . 114
Régler le chorus ou effet de modulation . . . . . . . . . . . . . . . . . . . . . 115
Régler les effets intégrés . . . . . . . . . . . . . . . . . . . . . . . . . . . . . . . . . . . 115
Régler la transposition d’octave . . . . . . . . . . . . . . . . . . . . . . . . . . . . 116
Régler l’accordage fin . . . . . . . . . . . . . . . . . . . . . . . . . . . . . . . . . . . . . 117
Programmer les pédales . . . . . . . . . . . . . . . . . . . . . . . . . . . . . . . . . . . 117
Sélectionner une gamme . . . . . . . . . . . . . . . . . . . . . . . . . . . . . . . . . . 118
Rétablir les timbres et les performances à leurs valeurs originales 119
Réglages du mode Global . . . . . . . . . . . . . . . . . . . . . . . . . . . 120
Régler la dynamique du toucher . . . . . . . . . . . . . . . . . . . . . . . . . . . . 120
Activer/couper les haut-parleurs intégrés . . . . . . . . . . . . . . . . . . . . 120
Accordage fin (ou Master tuning) . . . . . . . . . . . . . . . . . . . . . . . . . . 121
Brilliance . . . . . . . . . . . . . . . . . . . . . . . . . . . . . . . . . . . . . . . . . . . . . . . 121
Point de partage du clavier . . . . . . . . . . . . . . . . . . . . . . . . . . . . . . . . 121
Affecter des fonctions aux pédales . . . . . . . . . . . . . . . . . . . . . . . . . . 122
Quarter Tone (programmation en temps réel des “SubScales”) . . 123
Fast Play . . . . . . . . . . . . . . . . . . . . . . . . . . . . . . . . . . . . . . . . . . . . . . . 123
Couper le volume . . . . . . . . . . . . . . . . . . . . . . . . . . . . . . . . . . . . . . . . 123
Activer/couper le clavier (ou Local Control) . . . . . . . . . . . . . . . . . . 124
MIDI Clock . . . . . . . . . . . . . . . . . . . . . . . . . . . . . . . . . . . . . . . . . . . . . 124
Canaux MIDI IN . . . . . . . . . . . . . . . . . . . . . . . . . . . . . . . . . . . . . . . . 125
Canaux MIDI OUT . . . . . . . . . . . . . . . . . . . . . . . . . . . . . . . . . . . . . . 125
Filtres MIDI . . . . . . . . . . . . . . . . . . . . . . . . . . . . . . . . . . . . . . . . . . . . 126
Données transférées via le port USB . . . . . . . . . . . . . . . . . . . . . . . . . 127
Supprimer des morceaux contenus dans l’album User Song . . . . . 128
Page General Reset . . . . . . . . . . . . . . . . . . . . . . . . . . . . . . . . . . . . . . . 128
Numéro de la version du système . . . . . . . . . . . . . . . . . . . . . . . . . . . 128
MIDI . . . . . . . . . . . . . . . . . . . . . . . . . . . . . . . . . . . . . . . . . . . . 129
Le MIDI, qu’est-ce que c’est ? . . . . . . . . . . . . . . . . . . . . . . . . . . . . . . 129
Le MIDI via USB, qu’est-ce que c’est ? . . . . . . . . . . . . . . . . . . . . . . . 129
Que pouvez-vous faire avec le MIDI? . . . . . . . . . . . . . . . . . . . . . . . . 129
Connexions MIDI . . . . . . . . . . . . . . . . . . . . . . . . . . . . . . . . . . . . . . . 129
Réglages Standard MIDI . . . . . . . . . . . . . . . . . . . . . . . . . . . . . . . . . . 130
Utiliser le C-520 en tant que générateur de sons multitimbre . . . . 130
Program Change . . . . . . . . . . . . . . . . . . . . . . . . . . . . . . . . . . . . . . . . . 130
Control Change . . . . . . . . . . . . . . . . . . . . . . . . . . . . . . . . . . . . . . . . . 131
Installer le Korg USB MIDI Driver . . . . . . . . . . . . . . . . . . . . . 132
Connecter le C-520 à un ordinateur . . . . . . . . . . . . . . . . . . . . . . . . . 132
Caractéristiques de système du KORG USB-MIDI Driver . . . . . . . 132
A lire avant usage . . . . . . . . . . . . . . . . . . . . . . . . . . . . . . . . . . . . . . . . 132
Windows : Installer le KORG USB-MIDI Driver . . . . . . . . . . . . . . 133
Mac OS X : Installer le KORG USB-MIDI Driver . . . . . . . . . . . . . . 133
Assembler le stand . . . . . . . . . . . . . . . . . . . . . . . . . . . . . . . . . 134
Précautions à adopter pendant les opérations d’assemblage . . . . . 134
Instructions . . . . . . . . . . . . . . . . . . . . . . . . . . . . . . . . . . . . . . . . . . . . . 134
Tests à effectuer après l’assemblage . . . . . . . . . . . . . . . . . . . . . . . . . 136
Précautions . . . . . . . . . . . . . . . . . . . . . . . . . . . . . . . . . . . . . . . . . . . . . 136
Messages d’erreur . . . . . . . . . . . . . . . . . . . . . . . . . . . . . . . . . 137
Problèmes et solutions . . . . . . . . . . . . . . . . . . . . . . . . . . . . . 138
Polyphonie . . . . . . . . . . . . . . . . . . . . . . . . . . . . . . . . . . . . . . . 138
Spécifications techniques . . . . . . . . . . . . . . . . . . . . . . . . . . . 139
Appendix / Appendice / Anhang / Appendice . . . . . . . . . . . 277
Sounds / Timbres / Klänge / Suoni . . . . . . . . . . . . . . . . . . . . . . . . . . 277
Performances / ‘Performance’-Speicher . . . . . . . . . . . . . . . . . . . . . 283
Effects / Effets / Effekte / Effetti . . . . . . . . . . . . . . . . . . . . . . . . . . . . . 285
Songs / Morceaux / Songs / Brani musicali . . . . . . . . . . . . . . . . . . . 286
MIDI Implementation Chart . . . . . . . . . . . . . . . . . . . . . . . . . 288
Francçais
73
Page 76

Introduction > Caractéristiques principales
Introduction
Caractéristiques principales
Vaste gamme de timbres
Cinquante timbres différents avec une excellente qualité d’expression, y inclut un timbre Stereo Concert Grand Piano. Avec
les fonctions Layer et Split, vous pouvez jouer une combinaison de deux timbres ensemble. Vous pouvez librement modifier les timbres et les combinaisons de timbres.
Performances
Les combinaisons de timbres peuvent être sauvegardées dans
des performances ; ainsi vous disposez d’un set de 30 timbres
supplémentaires (3 banques de 10 performances chaque).
Dans les performances, vous pouvez également sauvegarder
votre partage personnel de clavier et donc des combinaisons
personnelles de timbres sur toute l’étendue du clavier.
Quatre zones de clavier
Le nouveau piano Korg RH3 présente quatre zones de clavier
différemment lestées pour vous offir une excellente et réelle reproduction des timbres. C’est comme jouer sur un grand piano à queue, le même réalisme et les mêmes sensations.
Contrôle du toucher
Neuf différents réglages de dynamique sont disponibles pour
la réponse du clavier au toucher.
Pédale des effets
Tel un piano à queue, le C-520 reproduit trois pédales qui contrôlent respectivement les fonctions de pédale douce, sostenuto et de résonance. La pédale de résonance ou “Forte”
reproduit grâce à l’innovative technologie Korg EPx (Piano
eXperience) le soulèvement des étouffoirs qui limitent la vibration des cordes du piano acoustique . En appuyant soit sur
la pédale de résonance, soit sur la pédale douce, vous variez la
quantité d’effet appliquée en fonction de la pression que vous
exercez sur la pédale (fonction “mi-pédale”). Les pédales peuvent également être affectées à d’autres fonctions telles que le
lancement du magnétophone ou le changement de vitesse de
l’effet du rotary speaker.
En détail, le C-520 exploite le relâchement de la touche et le
soulèvement du marteau, ainsi que la résonance des étouffoirs
pour recréer tous les tonalités d’un grand instrument de qualité. C’est cette attention pour les détails qui distingue le nouveau C-520 qui devient ainsi un instrument en mesure
d’interpréter toutes les nuances d’une partition musicale pointue.
Les effets de Piano eXperience (ou EPx) sont particulièrement
évidents lorsque vous jouez les timbres GrandPiano, BriteGrand et MelloPiano.
Cent quatre-vingt-cinq morceaux
Le C-520 est doté d’une énorme bibliothèque de morceaux,
basés soit sur des partitions fameuses, soit sur des leçons. Ces
morceaux s’adaptent parfaitement pour des leçons de piano
car ils sont enregistrés en deux parties différentes (la main gauche correspond à la Partie 1, la main droite à la Partie 2) que
vous coupez ou vous jouez sur le clavier. Vous pouvez de
même modifier le tempo du métronome et reproduire cycliquement un passage déterminé.
SongBook inclus
Le livre des morceaux (ou SongBook) est inclus, tel un livre de
musique - une grande ressource qui vous permet de vous exercer accompagné de vos timbres préférés.
Magnétophone intégré
Avec le magnétophone intégré multipiste vous pouvez facilement enregistrer vos morceaux ou lire des Fichiers Standard
MIDI que vous transfèrerz depuis un ordinateur externe via le
port USB intégré.
Métronome
Le Métronome interne permet de sélectionner la vitesse du
tempo, le tempo, le volume et d’utiliser une clochette pour
mettre l’accent. Avec le mètronome vous pouvez également
ajouter un accompagnement de batterie (soit un phrasé rythmique répétitif) à un style musical de votre choix.
Piano eXperience
Les techniques d’échantillonnage des timbres de piano actuellement disponibles sur le marché n’offrent qu’un court “résumé” audio, tandis que notre nouvelle technologie “Piano
eXperience” est bien plus qu’un simple hologramme car elle
reproduit ponctuellement tous les détails dimensionnels du
timbre. Tous les échantillonnages du C-520 ont été réalisés en
stéréo afin de préserver la sonorité naturelle du timbre. De même, plusieurs niveaux différents de dynamique ont été “capturés” afin d’agrandir le vocabulaire expressif de l’instrument.
74
Données transférées via USB
La mémoire interne du C-520 peut être comparée à un disque
USB lorsque vous connectez votre instrument à un ordinateur
personnel via le port USB. C’est ainsi que vous pouvez sauvegarder vos données ou transférez des fichiers entre le C-520 et
l’ordinateur personnel.
Caractéristiques MIDI
Le C-520 est compatible avec le protocole MIDI, c’est à dire le
protocole standard qui permet d’échanger des données musicales entre instruments musicaux et ordinateurs. Le protocole
Page 77

Introduction > Caractéristiques principales
MIDI permet à deux (ou plus) dispositifs de piloter ou d’être
pilotés l’un l’autre ; le C-520 peut ainsi fonctionner comme un
générateur de sons mutitimbre à 16 parties.
MIDI via USB
Les données MIDI peuvent également être adressées via le port
USB ; il suffit de connecter directement votre C-520 à votre ordinateur personnel à l’aide d’un seul câble. Nul besoin d’interface MIDI dédiée ! Un Driver KORG USB MIDI est disponible
gratuitement pour exploiter à fond toutes les caractéristiques
MIDI du C-520.
Tempéraments
Le C-520 joue le tempérament Egal (Equal) ; il permet également de sélectionner neuf autres tempéraments pour une attentive reproduction historique de la musique classique ou
expérimentale. En sélectionnant un timbre de piano acoustique, le typique Stretched Tuning (cordes pincées) correspondant est automatiquement choisi.
Réglage de la hauteur
La focntion Transpose permet de modifier la hauteur du timbre par pas de demi-tons, tandis que la fonction Master Tuning permet d’effectuer un accordage fin.
Effets
Le C-520 est doté d’effets numériques propres qui simulent
une salle de concert (reverb) et étoffent le timbre (chorus). En
plus, chaque timbre inclut un effet intégré (delay, phaser,
equalizer, rotary speaker, etc.), qui s’adapte particulièrement
bien à ce timbre spécifique.
Amplification de puissance intégrée
Le C-520 est intégré d’un amplificateur de puissance de 2 × 35
Watts et de deux haut-parleurs en boîte Bass Reflex. Vous retrouvez ainsi toute la puissance d’un piano acoustique grâce à
l’authentique reproduction du timbre combinée à un volume
suffisant.
Deux paires de casques
Vous pouvez brancher deux casques stéréo de manière à jouer
avec votre professeur ou un autre musicien. Lorsque vous insérez un casque, les haut-parleurs sont automatiquement déconnectés ; ainsi, vous ne risquez pas de déranger le voisinage
lorsque vous jouez la nuit.
Francçais
75
Page 78

Tableau de commande >
Tableau de commande
Bouton PERFORMANCE :
Active/coupe le mode Performance. Lorsque ce mode
est sélectionné, les boutons
de sélection des timbre
sélectionnent des performances au lieu de timbres
individuels. Voir page 89.
Bouton VARIATION :
Molette MASTER
VOLUME : Règle le
volume des hautparleurs, des bornes
Output et Phones
Sélectionne l’une des
variations disponibles
dans le timbre courrament sélectionné ou
l’une des trois banques
de performances.
/
Boutons de
défilement (Scroll) : A
l’écran, ces boutons
déplacent le curseur
sur le paramètre suivant ou précédent. Le
curseur est représenté sous la forme
d’une flèche pointée
) à côté du nom du
(
paramètre.
Ecran : Affiche les noms
des différents timbres et
paramètres.
Bouton SPLIT : Active/coupe le mode Split. En mode
Split, un timbre est affecté à la main droite et un
autre timbre à la main gauche. Appuyez et gardez
enfoncé ce bouton pour modifier le point de partage du clavier. Voir page 85.
Interrupteur POWER :
Interrupteur de mise
sous/hors tension de
l’instrument. En position
Standbay, le piano est
hors tension.
Témoin Power
76
Boutons de sélection des timbres (ou SOUND SELECTION) :
Appuyez sur l’un des boutons pour jouer le timbre indiqué (mode
Single). Appuyez en même temps sur deux boutons pour jouer
deux timbres simultanément (mode Layer). Appuyez sur SPLIT pour
jouer un timbre avec la main droite et un timbre différent avec la
main gauche (mode Split). Voir page 83.
Lorsque le témoin de PERFORMANCE est allumé (mode Performance), avec ces boutons vous sélectionnez les performances. Voir
page 89.
Page 79

+/YES / -/NO Boutons
(Value): Ces boutons modi-
fient la valeur des paramètres affichés à l’écran. Le
paramètre éditable est
indiqué par le curseur (
positionné sur la gauche ou
(lorsque vous éditez un
texte) avec le caractère/
numéro en édition qui clignote. En les gardant
enfoncés, les valeurs se
modifient automatiquement, d’abord lentement
et ensuite de plus en plus
vite. En appuyant sur les
deux simultanément, le
paramètre se rétablit à sa
valeur de défaut.
Dans la page principale
(Main), utilisez ces boutons
pour sélectionner une
variation différente dans le
timbre en cours de session.
Bouton EDIT :
Appuyez sur ce bouton pour accéder au
)
mode Edit relatif aux
type de données
sélectionnées à
l’écran. Il y a quatre
modes Edit disponibles : Sound (voir
page 111), Performance (voir
page 111), Song (voir
page 108) et Global
(voir page 120). Vous
accédez directement
au mode Global en
gardant enfoncé le
bouton EDIT pendant
quelques secondes).
Bouton REVERB :
Active/coupe
l’effet de réverbération. Le son
en est plus
étoffé. Gardez-le
enfoncé pendant
plus d’une
seconde pour
accéder à la
page d’édition
Reverb (voir
page 88).
Bouton CHORUS :
Active/coupe le
son de chorus. Le
son en est plus
enrichi. Gardez-le
enfoncé pendant
plus d’une
seconde pour
accéder à la page
d’édition Chorus
(voir page 88).
Tableau de commande >
Bouton METRONOME :
Active/coupe le clic du
métronome. Le tempo et
la vitesse dépendent des
valeurs choisies ou du
morceau sélectionné (voir
page 91).
Bouton TEMPO/
MET.SET : Règlent le
tempo du métronome.
Appuyez sur le bouton
+ pour le rendre plus
rapide, sur – pour le
ralentir. En appuyant
simultanément sur les
deux, vous accédez à
l’édition du métronome. Voir page 91.
Francçais
Bouton EXIT : Appuyez
sur ce bouton pour quitter le mode Edit ou pour
retourner à la page principale (Main) lorsque
vous êtes dans une page
différente. Lorsque vous
quittez le mode Edit,
l’écran affiche la procédure de sauvegarde (ou
Save). Lorsqu’un phrasé
rythmique de batterie est
affecté au Métronome,
et qu’il est en train de
jouer, ce bouton fonctionne comme un contrôle de Fill In (voir
page 92, page 103).
Bouton TRANSPOSE :
Appuyez sur ce bouton
pour ouvrir la page
Transpose et modifier la
valeur principale de la
transposition. Lorsque
ce témoin est allumé, la
transposition est activée. Les modifications
effectuées après avoir
appuyé sur ce bouton
ne sont pas sauvegardées dans la mémoire et
sont perdues lors de la
mise hors tension de
l’instrument. Voir
page 87.
Bouton BRILLIANCE :
Appuyez sur ce bouton
pour ouvrir la page
Brilliance et modifier la
valeur du brillant du
timbre. Lorsque ce
témoin est allumé, une
variation du brillant est
activée. Les modifications effectuées après
avoir appuyé sur ce
bouton ne sont pas sauvegardées dans la
mémoire et sont perdues lors de la mise hors
tension de l’instrument. Voir page 88.
Boutons
RECORDER : Ces
boutons pilotent la
reproduction ou
l’enregistrement des
morceaux. Voir
page 95, page 99.
Bouton DEMO : Active/
coupe le mode Demo
pour reproduire les
morceaux de démonstration. Sélectionnez les
morceaux à l’aide des
boutons de sélection
des timbres (voir
page 81). Vous pouvez
jouer avec l’accompagnement du morceau
en reproduction.
77
Page 80
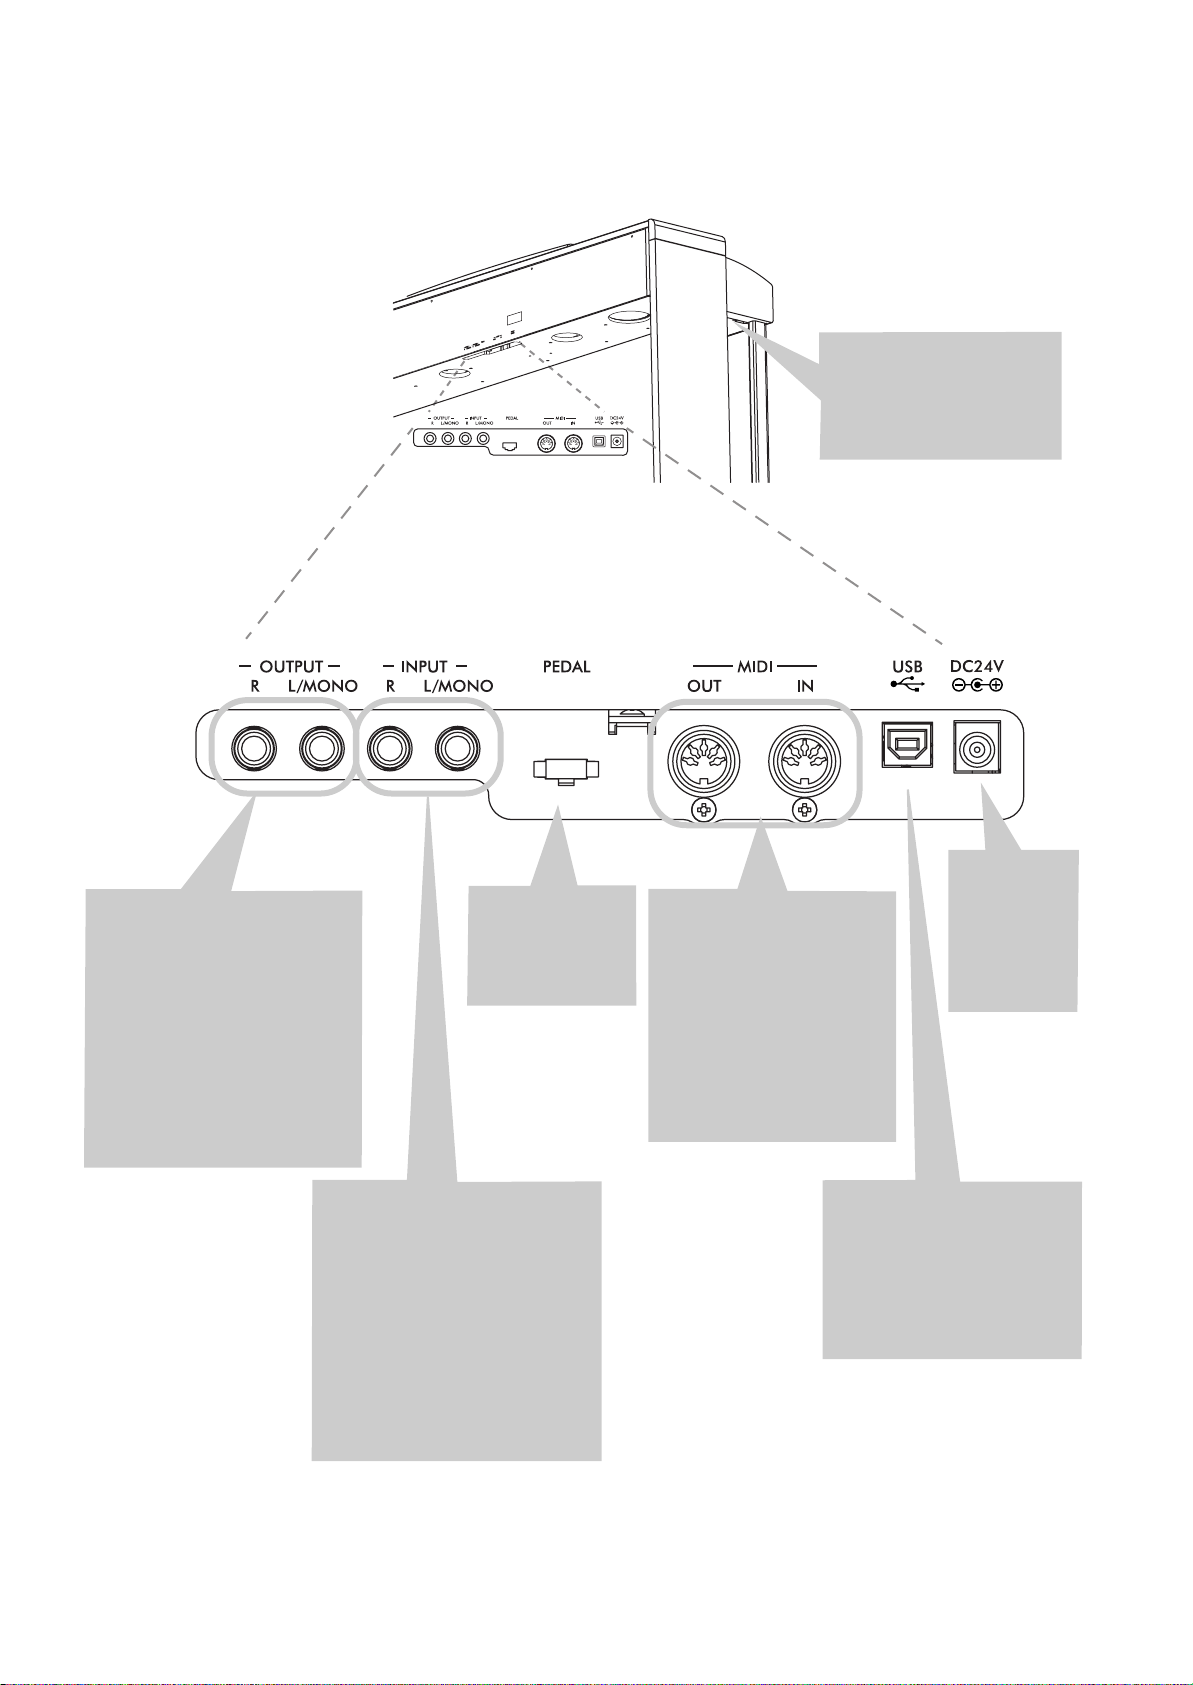
Tableau de commande >
Bornes PHONES : Permet-
tent de connecter un ou
deux casques. Les hautparleurs se désactivent lorsque vous insérez le casque.
Bornes OUTPUT (L/MONO, R) :
Sorties Audio. Un système
d’amplification externe peut
être branché à ces bornes. (Avec
un système hi-fi, utilisez les bornes LINE, AUX, CD ou TAPE et
non pas la borne PHONO). Pour
amplifier votre C-520 en mono,
branchez-vous à la borne individuelle L/MONO. Pour régler le
volume de sortie, utilisez la
molette MASTER VOLUME.
Borne Pedals :
Branchez le groupe
de pédales fourni à
cette borne.
Bornes INPUT (L/MONO, R) :
Entrées audio de ligne. Via ces
bornes, vous pouvez connecter
une source audio externe telle un
reproducteur CD, MP3, une table
de mixage ou un autre clavier.
Pour brancher un microphone,
vous nécessitez d’un préamplificateur externe pour microphone ou
d’une table de mixage.
Attention : Il ne faut jamais brancher à ces bornes un amplificateur
de puissance !
Bornes MIDI (IN, OUT) : Bornes utilisées pour connecter
des dispositifs MIDI tels que
séquenceurs, claviers, etc.
OUT : Sortie des données (à
connecter à la borne MIDI IN
d’un autre dispositif MIDI).
IN : Entrée de données (à
connecter à la borne MIDI
OUT d’un autre dispositif
MIDI).
Borne USB : Type B (esclave),
compatible USB 1.1, borne
standard. A connecter à un
ordinateur (PC ou Mac). Peut
être utilisée pour transférer
des données (voir page 127)
ou pour utilisations MIDI via
USB (voir page 129).
Borne AC
ADAPTER :
Branchez
l’adaptateur
AC/DC fourni
à cette borne.
78
Page 81

Connexions > Connexion à des dispositifs audio externes
Connexions
Connexion à des dispositifs audio externes
Connexion à un système d’amplification externe
Utilisez les bornes OUTPUT si votre C-520 doit être branché
à une table de mixage de qualité élevée, à un système hi-fi stéréo ou à une paire de moniteurs actifs. Avec un système hi-fi
stéréo, branchez les bornes OUTPUT aux entrées AUX ou
TAPE (ne jamais utiliser les bornes PHONO). Pour amplifier
en mono, branchez uniquement la sortie L/MONO.
Brancher d’autres dispositifs audio au C-520
Utilisez les bornes INPUT pour brancher un ordinateur, une
table de mixage, une drum machine, un synthétiseur, un MP3
ou un magnétophone à votre C-520 et écoutez leurs sons diffusés par les haut-parleurs. Pour amplifier en mono, branchez
uniquement la sortie L/MONO. Ne jamais connecter la sortie
à un amplificateur de puissance !
L/MONO
R
AUX IN
OUTPUT
INPUT
Francçais
79
Page 82
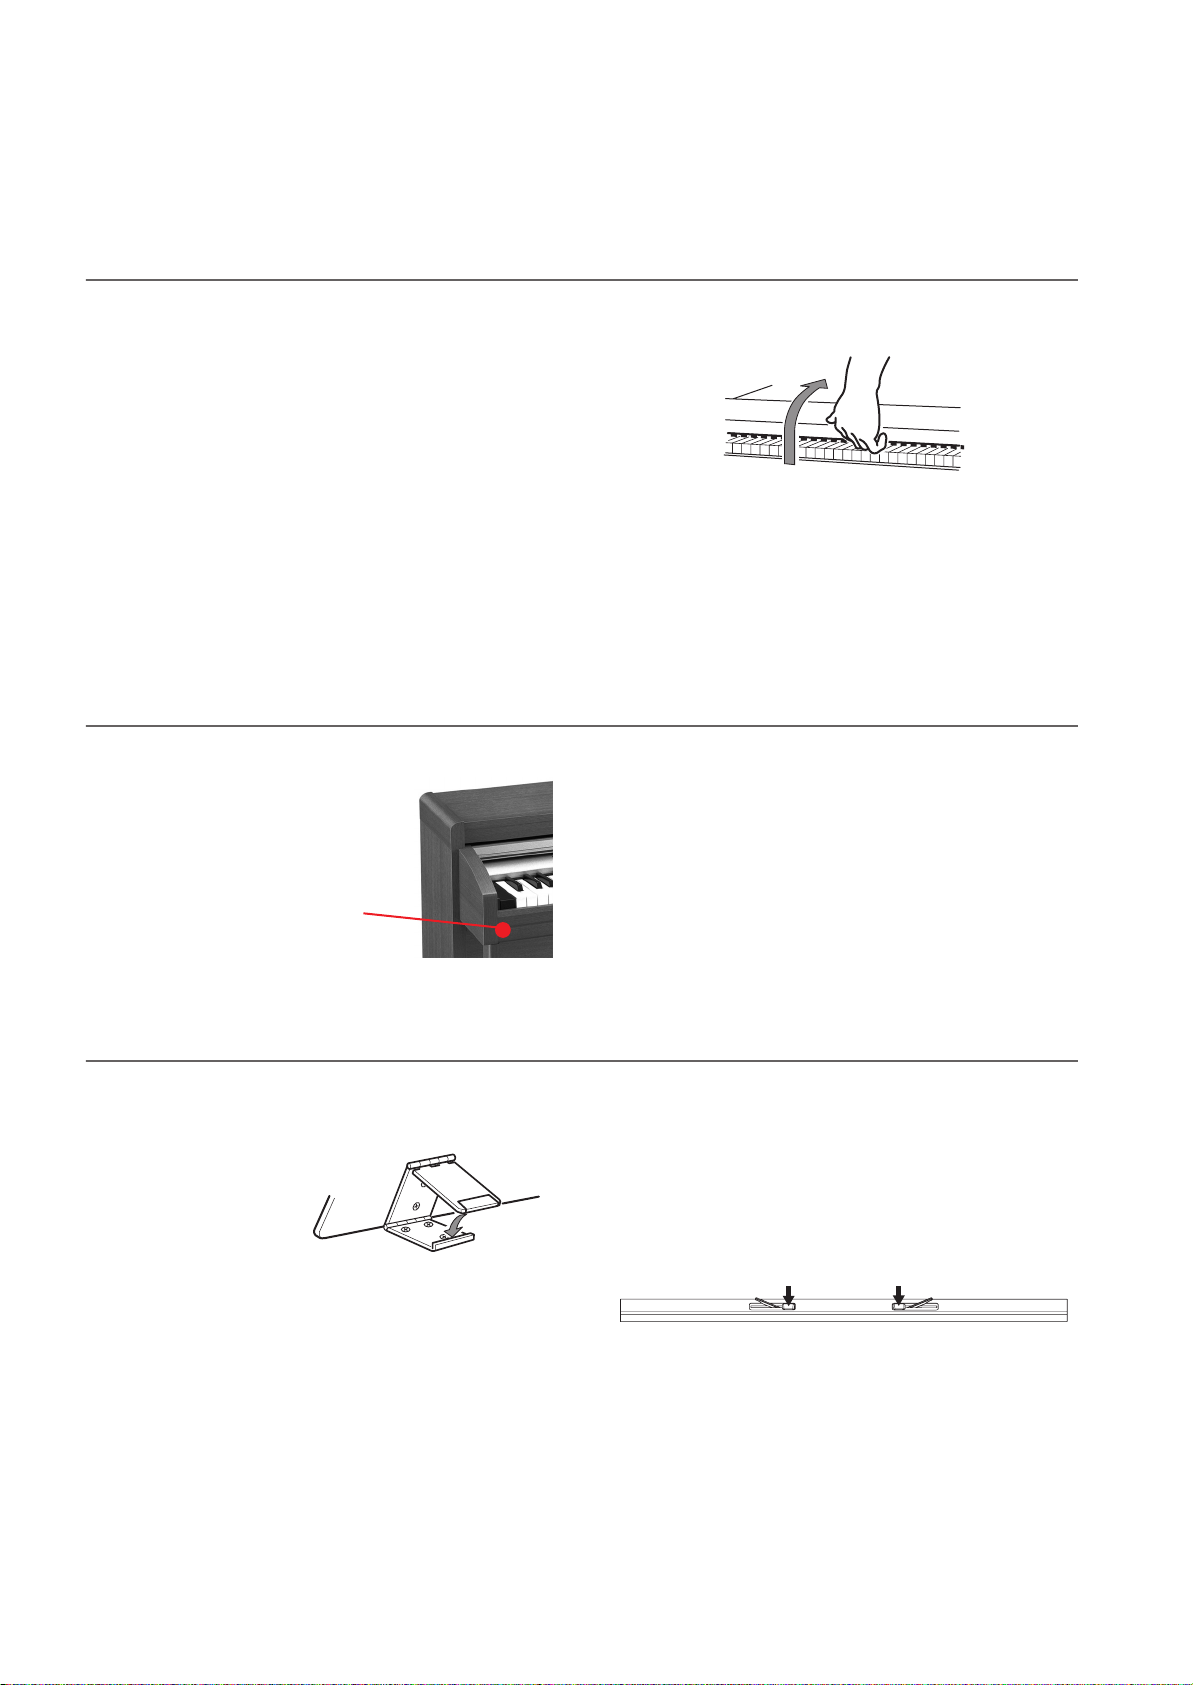
A lire en premier > Ouvrir le piano
A lire en premier
Ouvrir le piano
Positionnez la main à mi-clavier sur l’encoche et soulevez le
couvercle avec précaution ; accompagnez son mouvement
tout au long de sa course, jusqu’à ce qu’il s’escamote entièrement dans le C-520. Avant d’ouvrir le couvercle, vérifiez
qu’aucun objet tel du papier ou des monnaies ne soit posé sur
le couvercle même, sinon ces objets pourraient tomber dans
l’instrument.
Pour le fermer, posez la main à mi-couvercle, sur l’encoche et,
avec précaution, tirez-le en avant.
Note : Attention à ne pas vous coincer les doigts ou les mains
lorsque vous soulevez le couvercle.
Note : N’exercez pas une force excessive pour ouvrir ou fermer
le couvercle car cela peut l’endommager.
Mettre l’instrument sous tension
Introduire la fiche
DC de l’adaptateur AC fourni
dans la borne DC
du C-520 et ensuite brancher la
fiche AC à la prise
secteur.
Témoin Power
Utiliser le pupitre
Ouvrir et fermer le pupitre
Soulevez le pupitre et utilisez les deux arrêts prévus
en face arrière, de façon à
ce qu’il ne tombe pas.
Pour refermer le pupitre,
desserrez les arrêts et disposez le pupitre à plat.
Lorsque le câble de puissance est branché, appuyez sur l’interrupteur POWER. Lorsque l’instrument est sous tension, les témoins du tableau de bord s’allument. De même, un témoin
positionné en face avant de l’instrument, visible aussi lorsque
le couvercle est fermé, s’allume. Pour mettre l’instrument hors
tension, appuyez de nouveau sur l’interrupteur POWER.
Utiliser les tiges à curseur
Pour que votre livre reste ouvert, utilisez les deux tiges à curseur disponibles sur la face avant du pupitre. Appuyez sur la
tige la plus courte pour faire remonter les curseurs. Appuyez
sur la tige la plus longue pour les faire glisser vers le bas.
N’exercez pas une force excessive sur les tiges, ni y poser des
objets trop lourds, car vous risquez de les casser.
80
Page 83

Régler le volume
DEMO:-----------
Bk1 Press Sound
DEMO:GrandPiano1
Bk1 Press Sound
A lire en premier > Régler le volume
Tournez la molette MASTER VOLUME vers la droite pour
augmenter le volume ; vers la gauche pour le diminuer. La valeur maximum est “10” ; celle minimum (silence) est “0”. Ce
contrôle règle le niveau de sortie des casques, des hautparleurs internes et des bornes OUTPUT.
Cette molette ne règle pas le volume d’un dispositif audio
branché aux bornes INPUT. Réglez le volume du dispositif
branché en utilisant ses contrôles du volume.
On conseille de toujours commencer à jouer à faible volume et
d’augmenter progressivement.
Utiliser les casques
Pour jouer ou s’exercer la nuit, ou pour ne pas déranger
d’autres personnes présentes dans la même pièce, vous pouvez
utiliser un ou deux casques de qualité (on conseille une impédance de 32Ω) en les branchant aux bornes prévues PHONES.
Le standard de ces bornes est de 1/4”. Si la prise de votre casque
est dotée d’un adaptateur mini, ne tirez pas sur le casque : prenez en main l’adaptateur et tirez-le.
Attention : Pour protéger l’ouïe, on déconseille une écoute
prolongée à volume élevé avec le casque.
Reproduire les Morceaux de Démonstration
20 morceaux de démonstration sont stockés dans le C-520. Reproduisez-les pour écouter les riches timbres et le potentiel
d’expression sonore de votre instrument. Ci-dessous la liste
des morceaux de démonstration disponibles:
Bouton Banque 1 (1-10) Banque 2 (11-20)
PIANO 1 GrandPiano1 GrandPiano2
PIANO 2 Honky-Tonk Piano Pad
E.PIANO 1 El. Piano 1 El. Piano 2
E.PIANO 2 Digi Piano Vintage EP
HARPSI/CLAV Harpsichord Clav.
VIBES/GUITAR
ORGAN 1 Jazz Organ1 Jazz Organ2
ORGAN 2 Full Pipe Pipe Flute
STRING/
CHOIR
BASS Ac. Bass El. Bass
Pendant la reproduction des morceaux de démonstration,
vous ne pouvez utiliser aucun autre bouton. Toutefois, vous
pouvez jouer sur le clavier avec l’accompagnement du morceau de démonstration.
Vibes Ac. Guitar
Strings Choir
Reproduire tous les morceaux
Il suffit d’une seule commande pour reproduire tous les morceaux.
1. Appuyez sur le bouton DEMO. Les témoins des boutons
de sélection des timbres clignotent en séquence de gauche
à droite. L’écran affiche la page Demo:
2. Attendez quelques secondes ; n’appuyez sur aucun autre
bouton. La reproduction du premier morceau de démonstration commence. Le témoin du morceau en reproduction s’allume. L’écran affiche le nom du morceau:
Tous les morceaux de démonstration sont reproduits. A la
fin du dernier morceau, la reproduction recommence
depuis le premier.
3. Pour arrêter la reproduction du morceau, appuyez sur le
bouton PLAY/PAUSE. Appuyez de nouveau sur ce bouton
pour relancer la reproduction qui recommence exactement sur la position sur laquelle le morceau avait été arrêté.
4. Appuyez sur les boutons DEMO ou EXIT pour arrêter la
reproduction et quitter le mode de démonstration.
Francçais
81
Page 84

A lire en premier > Reproduire les Morceaux de Démonstration
Reproduire un morceau individuel
Vous pouvez sélectionner un morceau spécifique et le reproduire.
1. D’abord, vous devez sélectionner l’une des banques dispo-
nibles.
• Pour sélectionner la première banque (Bk1, morceaux 1-
10), appuyez une fois sur le bouton DEMO. Les témoins
clignotent l’un après l’autre, de gauche à droite. L’écran
affiche la page Demo:
DEMO:-----------
Bk1 Press Sound
• Pour sélectionner la deuxième banque (Bk2, morceaux
11-20), appuyez sur le bouton +/YES.
• Pour retourner à la première banque, appuyez sur le bouton -/NO.
2. Appuyez sur le bouton de sélection des timbres correspon-
dant à la banque sélectionnée. La démonstration est basée
sur le timbre associé au bouton. Le témoin du bouton de
démonstration sélectionné reste allumé, tandis que les
autres s’éteignent.
3. A la fin de la reproduction du morceau sélectionné, tous
les morceaux de la banque sélectionnée seront reproduits
en cycle.
4. Pour sélectionner un morceau différent, appuyez sur l’un
des boutons de sélection des timbres.
5. Pour arrêter la reproduction du morceau, appuyez sur le
bouton PLAY/PAUSE. Appuyez de nouveau sur ce bouton
pour relancer la reproduction qui recommence exactement sur la position sur laquelle le morceau avait été arrêté.
6. Pour arrêter la reproduction du morceau sans quitter le
mode Demo, appuyez sur STOP. Sélectionnez un morceau
différent et attendez que la reproduction ne démarre.
7. Appuyez sur les boutons DEMO ou EXIT pour arrêter la
reproduction et quitter le mode de démonstration.
82
Page 85
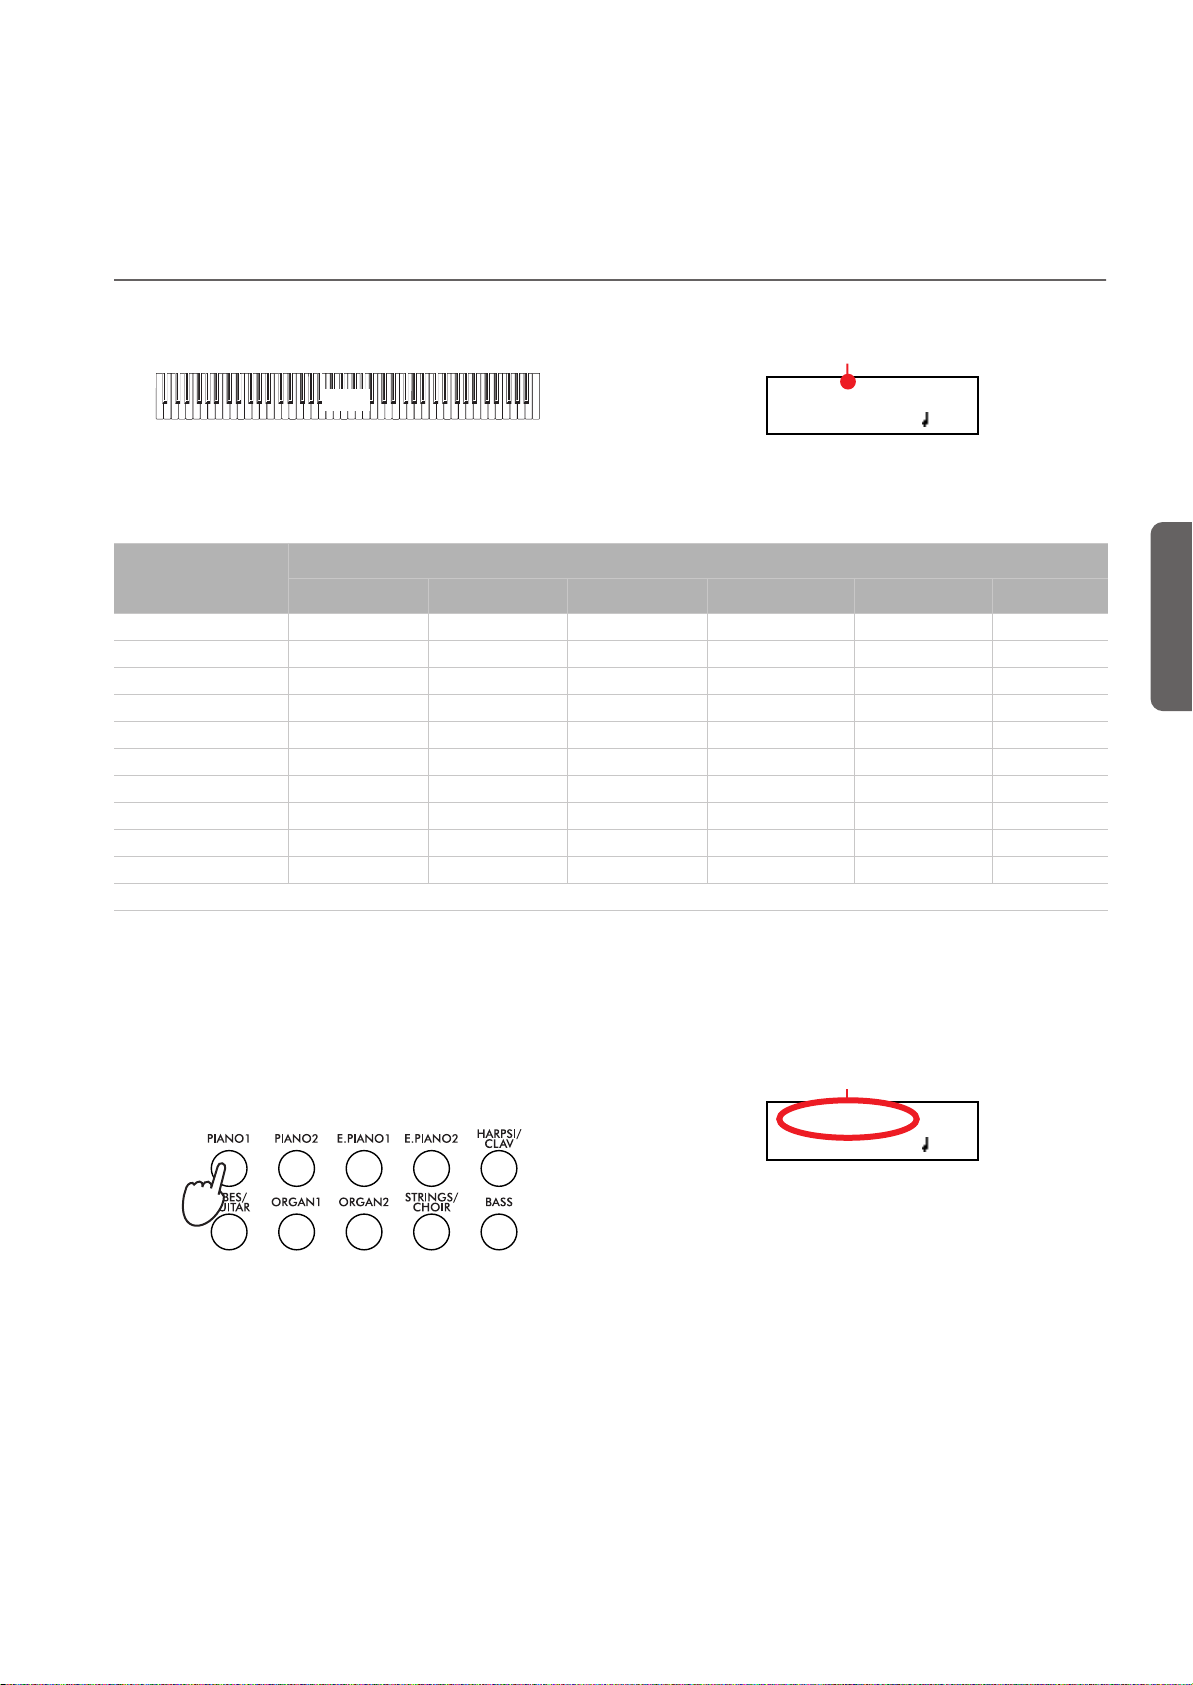
Fonctions de base
GrandPiano 4/4
120
Timbre principal Main
GrandPiano 4/4
120
Nom du timbre
Jouer un timbre (mode Single)
Lorsque vous mettez sous tension votre instrument, il est prédisposé en mode Single.
Main
Fonctions de base > Jouer un timbre (mode Single)
C’est le timbre Grand Piano qui est sélectionné et qui joue sur
toute l’étendue du clavier. Son nom est affiché à l’écran:
Vous pouvez le remplacer par l’un des 40 timbres dont votre
instrument est doté. Voir la liste des timbres dans le tableau
suivant (plus de détails de chaque timbre à page 277):
Bouton
Var. 1 Var. 2 Var. 3 Var. 4 Var. 5 Var. 6
PIANO 1 GrandPiano* BriteGrand* Rock Piano Piano&Str.
PIANO 2 Honky-Tonk MelloGrand* Piano&Pad Elec.Grand M1 Piano
E.PIANO 1 Tine EP 1 SuitTineEP DynoTineEP Tine EP 2
E.PIANO 2 Dig. EP 1 Dig. EP 2 Reed EP TremReedEP
HARPSI/CLAV Harpsi 8' Harpsi 16' Clav Synth Clav
VIBES/GUITAR Vibes 1 Vibes 2 Nylon Gtr.
ORGAN1 Jazz Organ Perc.Org.1 Perc.Org.2
ORGAN2 Church Org Pipe Flute Pipe Tutti
STRINGS/CHOIR Strings Slow Str. String Pad Choir ScatVoices Vocal Pad
BASS Ac. Bass El. Bass Fretless B Bass&Ride
* Note : Les effets EPx ne sont pas disponibles en mode Layer.
Timbre
Sélectionner un timbre
Pour sélectionner un timbre différent, appuyez sur l’un des
boutons de sélection des timbres.
Le témoin du bouton que vous avez appuyé s’allume. Le
nom du timbre sélectionné est affiché à l’écran :
1. Appuyez sur l’un des boutons de sélection des timbres
pour sélectionner un type de timbre.
Francçais
12345
678910
2. Utilisez le bouton VARIATION pour sélectionner l’une
des variations disponibles pour le timbre de base (voir le
tableau plus haut). Après avoir choisi la dernière variation,
appuyez de nouveau sur le bouton pour sélectionner de
nouveau le timbre de base.
En alternative, appuyez sur le bouton +/YES pour défiler
en avant la liste des variations du timbre ou sur le bouton
-/NO pour la défiler en arrière.
83
Page 86

Fonctions de base > Jouer deux timbres à la fois (mode Layer)
Jouer deux timbres à la fois (mode Layer)
Vous pouvez jouer deux timbres ensemble sur le clavier. C’est
comme avoir à disposition deux timbres qui se “superposent”.
C’est le mode Layer.
Main
Layer
Rappelez-vous que lorsque le mode Layer est sélectionné, le
nombre total de voix pouvant jouer simultanément est réduit,
en fonction du nombre total d’oscillateurs exploités par les
timbres sélectionnés.
Entrer en mode Layer
Pour accéder au mode Layer, à partir de n’importe quel autre
mode, appuyez en même temps sur deux boutons de sélection
des timbres. Le diagramme suivant liste les timbres disponibles
; le timbre dont le numéro est inférieur correspond au timbre
principal Main, tandis que celui dont le numéro est supérieur
correspond au deuxième timbre, c’est à dire celui Layer :
12345
678910
1. Vérifiez que le curseur est positionné sur la première ligne
de l’écran:
Curseur
GrandPiano 4/4
Strings 120
2. A l’aide du bouton VARIATION, sélectionnez une varia-
tion différente du timbre. En alternative, appuyez sur les
boutons +/YES et -/NO pour choisir une variation différente.
Sélectionner une variation du timbre Layer
Vous pouvez sélectionner une variation du timbre Layer en
cours de session.
1. Appuyez sur le bouton
timbre Layer.
GrandPiano 4/4
Strings 120
Défilement
pour déplacer le curseur sur le
GrandPiano 4/4
Strings 120
Le nom des deux timbres est affiché à l’écran:
Timbre principal Main
GrandPiano 4/4
Strings 120
Timbre Layer
Quitter le mode Layer
Pour quitter le mode Layer, appuyez sur un seul bouton de sélection des timbres ou sur le bouton SPLIT. L’instrument se
rétablit en mode Single, avec un seul timbre qui joue sur toute
l’étendue du clavier, ou en mode Split, avec un timbre qui joue
à gauche et un autre à droite du point de partage.
Sélectionner une paire différente de timbres
Pour sélectionner des timbres différents, appuyez sur une paire différente de boutons de sélection des timbres. C’est la dernière variation sélectionnée dans les timbres correspondants
aux nouveaux boutons choisis qui joue.
Sélectionner une variation du timbre principal Main
Vous pouvez sélectionner une variation du timbre principal
Main.
2. Appuyez sur le bouton VARIATION pour sélectionner
une variation différente du timbre. En alternative, appuyez
sur les boutons +/YES et -/NO pour choisir une variation
différente.
3. Vous pouvez également appuyer sur les boutons
déplacer le curseur en arrière et retourner au timbre principal Main.
Egalisation des timbres en mode Layer
Vous pouvez régler le volume des timbres en mode Layer.
• Gardez enfoncé le bouton du timbre principal Main pour
augmenter son volume et (lorsque la valeur maximum a
été atteinte) pour diminuer le volume du timbre Layer.
Lorsque l’égalisation a été ainsi réglée, relâchez le bouton.
• Gardez enfoncé le bouton du timbre Layer pour augmenter son volume et (lorsque la valeur maximum a été
atteinte) pour diminuer le volume du timbre principal
Main. Lorsque l’égalisation a été ainsi réglée, relâchez le
bouton.
Un mètre est affiché à l’écran lorsque le volume est en cours de
modification:
Volume du timbre principal Main
M:90
L:127
Volume du timbre Layer
pour
84
Page 87
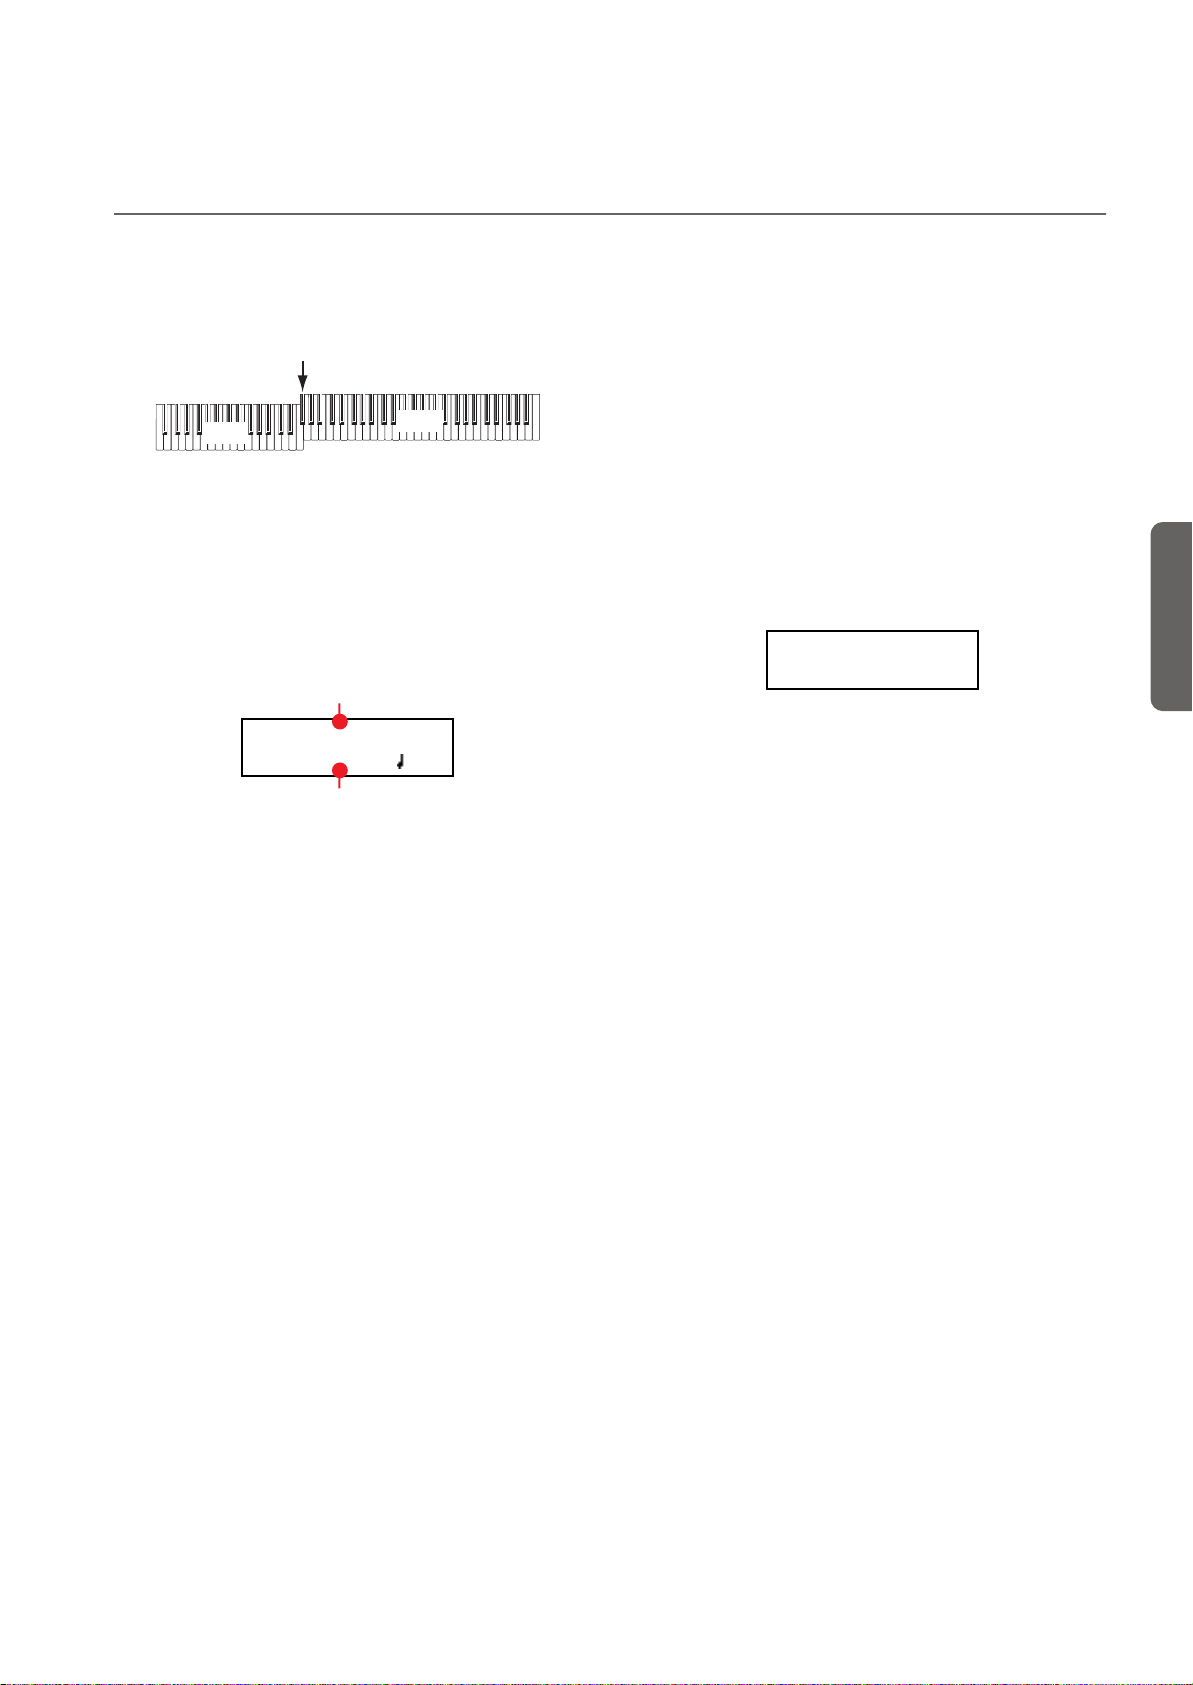
Fonctions de base > Jouer des timbres différents à la main gauche et à la main droite (mode Split)
SplitPoint: F#3
Jouer des timbres différents à la main gauche et à la main droite (mode Split)
Vous pouvez jouer un timbre à la main droite (timbre de la
mélodie) et un timbre différent à la main gauche (timbre d’accompagnement). C’est le mode Split.
Split Point
Left
Main
Entrer en mode Split
Pour accéder au mode Split, à partir de n’importe quel autre
mode, appuyez sur le bouton SPLIT. Le son principal Main du
mode Single, ou Layer, sera affecté à la moitié droite du clavier
(zone principale de la mélodie affichée sur la première ligne de
l’écran), tandis que le son de la basse sera affecté à la moitié
gauche du clavier (zone gauche d’accompagnement affichée
sur la deuxième ligne de l’écran).
Timbre principal
GrandPiano 4/4
Ac.Bass 120
Timbre de basse
Lorsque vous accédez pour la première fois au mode Split,
c’est le timbre Ac.Bass qui est sélectionné. Successivement,
c’est le dernier timbre choisi lorsque vous avez quitté le mode
Split qui sera sélectionné lorsque vous accéderez de nouveau à
cette fonction.
Quitter le mode Split
Pour quitter le mode Split, appuyez de nouveau sur le bouton
SPLIT pour rétablir le mode Single ou appuyez simultanément
sur deux boutons de sélection des timbres pour entrer en
mode Layer.
Choisir un point de partage différent
Si le point de partage sélectionné est trop aigu ou trop bas,
vous pouvez en choisir un différent. Remarque : vous pouvez
également régler un point de partage de défaut qui sera disponible chaque fois que vous mettrez l’instrument sous tension
(voir “Point de partage du clavier” à la page 121).
1. Gardez enfoncé le bouton SPLIT. L’écran affiche le point
de partage couramment sélectionné tant que vous gardez
le bouton enfoncé.
Francçais
2. Jouez la note qui doit fonctionner en tant que nouveau
point de partage.
3. Relâchez le bouton SPLIT.
Sélectionner un timbre principal Main différent
Avec le mode Split sélectionné, vous pouvez choisir un timbre
principal Main différent. Appuyez sur les boutons de sélection
des timbres comme lorsque vous choisissez un timbre en
mode Single.
85
Page 88

Fonctions de base > Jouer des timbres différents à la main gauche et à la main droite (mode Split)
M:108
L:127
Volume du timbre principal
Volume du timbre de gauche
Sélectionner une variation du timbre principal
Avec le mode Split sélectionné. vous pouvez choisir une variation du timbre principal Main.
1. Vérifiez que le curseur est bien positionné sur la première
ligne de l’écran. Si nécessaire, déplacez-le en appuyant sur
les boutons SCROLL
Curseur
:
GrandPiano 4/4
Ac.Bass 120
2. Choisissez une variation différente à l’aide du bouton VA-
RIATION. En alternative, appuyez sur les boutons +/YES
ou -/NO pour choisir une variation différente.
Sélectionner un timbre d’accompagnement différent
Avec le mode Split sélectionné, vous pouvez choisir un timbre
différent pour la zone gauche du clavier.
1. Gardez enfoncé le bouton SPLIT. Le témoin du timbre de
gauche s’allume.
2. Choisissez un timbre différent en appuyant sur les boutons
de sélection des timbres.
3. Relâchez le bouton SPLIT.
En alternative, vous pouvez utiliser les contrôles disponibles à
l’écran:
1. Appuyez sur les boutons SCROLL
seur sur le timbre d’accompagnement.
GrandPiano 4/4
pour déplacer le cur-
Ac.Bass 120
Bouton
GrandPiano 4/4
Ac.Bass 12
2. Appuyez sur les boutons de sélection des timbres comme
lorsque vous choisissez un timbre en mode Single.
3. Appuyez sur les boutons
rière et retourner au timbre principal Main.
pour déplacer le curseur en ar-
2. Appuyez sur le bouton VARIATION pour choisir une va-
riation différente.
3. Relâchez le bouton SPLIT.
En alternative, vous pouvez utiliser les contrôles disponibles à
l’écran:
1. Appuyez sur les boutons SCROLL
seur sur le timbre d’accompagnement.
GrandPiano 4/4
pour déplacer le cur-
Ac.Bass 120
Bouton
GrandPiano 4/4
Ac.Bass 12
2. Appuyez sur le bouton VARIATION pour sélectionner
une variation différente. En alternative, appuyez sur les
boutons +/YES et -/NO pour choisir une variation différente.
3. Si vous le souhaitez, vous pouvez appuyer sur les boutons
pour déplacer le curseur en arrière et retourner au tim-
bre principal Main.
Egalisation des timbres en mode Split
Vous pouvez régler le volume des timbres.
• Gardez enfoncé le bouton du timbre principal Main (c’est
à dire celui dont le témoin est allumé), pour augmenter
son volume et (lorsque la valeur maximum a été atteinte)
pour diminuer le volume du deuxième timbre. Lorsque
l’égalisation a été ainsi réglée, relâchez le bouton.
• Gardez enfoncé le bouton SPLIT, ou appuyez sur le bouton SCROLL
ligne de l’écran. Le témoin du deuxième timbre s’allume.
Gardez enfoncé le bouton de ce timbre pour augmenter
son volume et (lorsque la valeur maximum a été atteinte)
pour diminuer le volume du timbre principal Main. Lorsque l’égalisation a été ainsi réglée, relâchez le bouton.
Un mètre est affiché à l’écran lorsque le volume est en cours de
modification:
pour déplacer le curseur sur la deuxième
Sélectionner une variation du timbre d’accompagnement
Avec le mode Split sélectionné, vous pouvez choisir une variation du timbre de gauche.
1. Gardez enfoncé le bouton SPLIT. Le témoin du timbre
d’accompagnement s’allume.
86
Page 89

Utiliser les pédales
Fonctions de base > Utiliser les pédales
Le C-520 est doté de trois pédales assignables qui généralement fonctionnent en tant que pédale de résonance, de soutien
et douce. Néanmoins vous pouvez affecter à ces pédales des
fonctions différentes (voir page 117 l’affectation de la hauteur
du timbre ou page 122 la programmation globale).
Avec les réglages de défaut, vous utilisez ces pédales pour ajouter de l’expression lorsque vous jouez, exactement comme sur
un piano traditionnel.
3
2
1
Douce
De soutien
De résonance
(1) Pédale de résonance (ou Damper)
La pédale de résonance simule la résonance naturelle des cordes pincées d’un piano acoustique. En appuyant sur la pédale,
les notes jouées sont maintenues et leur chute résonne riche-
ment. Vous contrôlez l’ampleur de la résonance en exerçant
une pression plus ou moins forte sur la pédale (fonction “mipédale”).
Les timbres tels que GrandPiano, BriteGrand et MelloGrand
sont également dotés d’effets EPx tant en mode Single, qu’en
mode Split. Toutefois, ces effets ne sont pas disponibles lorsque le clavier est prédisposé en mode Layer.
(2) La pédale de soutien (ou Sostenuto)
En appuyant sur cette pédale, l’effet “damper” s’applique uniquement aux notes effectivement jouées sur le clavier lorsque
vous appuyez sur la pédale ; c’est ainsi que ces notes continuent à résonner tant que vous appuyez sur la pédale. L’effet
“damper” ne s’applique à aucune nouvelle note jouée après
avoir appuyé sur la pédale de soutien (celles qui l’étaient auparavant continuent de l’être).
(3) Pédale douce (ou Soft)
Lorsque vous appuyez sur cette pédale, le son sera plus doux et
mélodieux. La pression exercée sur la pédale règle l’application
de l’effet “soft” du son (effet mi-pédale).
Francçais
Transposition
Parfois, la clé d’écriture d’un morceau est particulièrement
difficile (par ex. beaucoup de bémols) ou vous désirez modifier la hauteur pour insérer un autre instrument ou voix. Dans
ce cas, vous pouvez transposer (décaler, modifier la hauteur)
de manière à faciliter le jeu ou jouer avec une hauteur différente. C’est la fonction “Transpose”.
Par exemple, si vous transposez les notes d’un demi-ton vers
l’aiguë, lorsque vous jouerez les notes illustrées à gauche, elles
seront reproduites à la hauteur représentée à droite.
Note : La transposition est perdue lors de la mise hors tension
de l’instrument.
1. Appuyez sur le bouton TRANSPOSE pour visualiser l’affi-
chage Transpose :
Transpose
+02 semitones
Valeur de transposition
Si vous n’apportez aucune modification, attendez quelques secondes et la page disparaît automatiquement. Sinon, vous
quittez cette page en appuyant sur le bouton EXIT.
2. Appuyez sur les boutons +/YES et -/NO pour modifier la
valeur de transposition par pas de demi-tons, dans une
plage de ±11 demi-tons. Lorsqu’une transposition est activée, le témoin s’allume.
3. Appuyez sur le bouton EXIT pour quitter cette page.
4. Appuyez de nouveau sur le bouton TRANSPOSE pour dé-
sactiver la transposition. Le témoin s’éteint.
5. Appuyez sur le bouton TRANSPOSE si vous souhaitez ré-
tablir la transposition avec la dernière valeur sélectionnée.
Le témoin s’allume de nouveau. Attendez quelques secondes et la page disparaît automatiquement ou appuyez sur
le bouton EXIT pour quitter immédiatement.
87
Page 90

Fonctions de base > Modifier la Brilliance
Modifier la Brilliance
Le paramètre Brilliance règle le brillant du timbre ; selon où
votre piano est positionné (dans une pièce ou dans une salle de
concert), le brillant du timbre peut en être affecté. Par exemple, si la pièce où vous jouez est pleine de tapis ou de meubles,
le son en sera étouffé. Vous pouvez programmer un réglage général pour augmenter ou diminuer le brillant de tous les timbres.
C’est le même paramètre que vous pouvez modifier dans la
page Brilliance du mode Global (voir page 121). Toutefois,
contrairement aux modifications apportées en mode Global,
les modifications effectuées en appuyant sur ce bouton ne sont
pas mémorisées et sont donc perdues lors de la mise hors tension de l’instrument.
Note : Lors de la mise sous tension de l’instrument, le brillant du
timbre tel que réglé dans cette page ne fonctionne pas. (Le
brillant doit être programmé de manière permanente en mode
Global, voir page 121).
1. Appuyez sur le bouton BRILLIANCE pour visualiser l’affi-
chage Brilliance:
Brilliance
Bright
Réglages du brillant du timbre
Si vous n’apportez aucune modification, attendez quelques secondes et la page disparaît automatiquement.
Sinon, vous quittez cette page en appuyant sur le bouton
EXIT.
2. Appuyez sur les boutons +/YES et -/NO pour modifier la
valeur de ce paramètre. Lorsque vous activez une modification du brillant du timbre, le témoin s’allume.
3. Appuyez sur le bouton EXIT pour quitter cette page.
4. Appuyez de nouveau sur le bouton BRILLIANCE pour ef-
facer les modifications apportées à ce paramètre. Le témoin s’éteint.
5. Appuyez sur le bouton BRILLIANCE si vous souhaitez ré-
tablir ce paramètre avec la dernière valeur sélectionnée. Le
témoin s’allume de nouveau. Attendez quelques secondes
et la page disparaît automatiquement ou appuyez sur le
bouton EXIT pour quitter immédiatement.
Activer/couper les effets
Le C-520 est doté de deux effets principaux (réverbération et
chorus) qui s’ajoutent à l’effet intégré dans chaque timbre
(voir diagramme de page 114). La réverbération simule la réflexion du son dans une salle, tandis que le chorus simule un
effet modulant qui étoffe le son.
L’effet intégré dans le timbre fait partie du timbre même et
c’est ainsi qu’il doit rester afin de ne pas provoquer une forte
modification du timbre. Tandis qu’en ce qui concerne les effets de réverbération et de chorus, vous pouvez soit les activer,
soit les couper à l’aide des boutons REVERB et CHORUS disponibles sur le tableau de bord.
Néanmoins, rappelez-vous que si vous sélectionnez un timbre
différent, ces boutons se désactivent car leurs fonctions ne
s’appliquent qu’au timbre correspondant. Pour modifier de
manière permanente l’état des effets, éditez le timbre en gardant enfoncé l’un de ces deux boutons pendant environ deux
secondes. Voir les informations détaillées à page 114.
88
Page 91

Utiliser les performances
Utiliser les performances > Sélectionner les performances
Les Performances sont des enregistrements de combinaisons
de timbres. Au lieu de sélectionner des timbres individuels, ou
une combinaison de timbres, vous sélectionnez simplement
une performance. Une performance peut rappeler un ou deux
timbres, chacun contenant ses propres réglages, le point de
partage mémorisé (si les timbres sont en mode Split).
Il y a 30 performances (10 groupes
× 3 banques chaque). Cha-
que groupe correspond à l’un des boutons numérotés de sélection des timbres (1 ~ 10). Vous pouvez choisir l’une des trois
banques dans le groupe sélectionné en utilisant le bouton VARIATION (voir les informations détaillées à page 283).
Bouton
Banque 1 Banque 2 Banque 3
1 (PIANO 1) Split&Layr Digital EP* Baroque*
2 (PIANO 2) Grand&Ride PaddedTine* Harpsi-Ch*
3 (E.PIANO 1) Grand&Ebas R&B EPno* Harpsi-Org*
4 (E.PIANO 2) PnoStrings* EP Choir* Church Mix*
Performance
Sélectionner les performances
Bouton
Performance
Banque 1 Banque 2 Banque 3
5 (HARPSI/CLAV) EGrand Pad* EP&NoFret Guitar Pad*
6 (VIBES/GUITAR) Piano Pad* Scat&Bass GrandPiano
7 (ORGAN1) Pno Choirs* Vibes&Bass BriteGrand
8 (ORGAN2) Pno Guitar* Bass&Guitr MelloGrand
9 (STRINGS/CHOIR) Piano BX3* Org&Bass 1 2 Pianists
10 (BASS) DualManual Org&Bass 2 PnoEXp-
DEMO**
* Note : Ces performances, dont les timbres sont en mode Layer,
n’utilisent pas les effets EPx.
** Note :Nous avons choisi la Performance 30 (PnoExpDEMO)
pour vous donner la démonstration de notre technologie “Piano
eXperience” en exagérant, ou non, la quantité d’activation des
marteaux et des étouffoirs sur le timbre Grand Piano ; ce n’est
donc pas un timbre que l’on peut utiliser pour jouer. Normalement, ces timbres Piano eXperience supplémentaires ne sont pas
perçus en tant qu’éléments séparés, mais bien en combinaison
avec d’autres échantillonnages car ils sont la partie vitale du réalisme et de l’authenticité de la tonalité du piano.
Francçais
Voilà comment sélectionner une performance.
Note : Lorsque le mode Performance est sélectionné, vous ne
pouvez pas passer au mode Single, Layer et Split. Toutefois,
vous pouvez sélectionner une performance ayant deux timbres
en Split, le témoin de SPLIT s’allume.
2. Pour sélectionner un groupe différent de performances,
utilisez les boutons de sélection des timbres.
12345
1. Appuyez sur le bouton PERFORMANCE pour accéder au
mode Performance. Le témoin s’allume et c’est la dernière
performance sélectionnée qui est rappelée.
Perf.01 4/4
Split&Layr 120
3. Si nécessaire, utilisez le bouton VARIATION pour sélec-
tionner une performance différente dans le même groupe.
Il y a trois performances pour chaque groupe de performances.
En alternative, appuyez sur les boutons +/YES et -/NO
pour sélectionner une performance différente à l’intérieur
du groupe sélectionné.
678910
4. Appuyez de nouveau sur le bouton PERFORMANCE pour
quitter le mode Performance. Le timbre ou la combinaison
de timbres précédents seront rappelés. Le témoin s’éteint.
Modifier les timbres affectés à une performance
Vous pouvez modifier le timbre, ou les timbres, affecté à la
performance couramment sélectionnée sans devoir accéder au
mode Edit.
Note : Vous ne pouvez pas modifier les timbres d’une performance lorsque vous êtes en mode Performance Edit.
Note : Les effets EPx ne sont pas disponibles lorsque vous êtes
en mode Layer.
89
Page 92

Utiliser les performances > Editer une performance
1. Lorsque vous êtes dans la page principale du mode Perfor-
mance, appuyez simultanément sur les deux boutons
SCROLL
performance est affiché à l’écran :
/ . Le timbre (ou les timbres) affecté à la
Timbre principal Main
Piano&Str.
Ac. Bass
Deuxième timbre /Layer
Editer une performance
Vous pouvez éditer (c’est à dire modifier) une performance
comme vous le souhaitez. Vous pouvez également sauvegarder
n’importe quelle combinaison de timbres dans une perfor-
2. S’il y a deux timbres, appuyez sur les boutons SCROLL
/ pour déplacer le curseur sur le timbre que vous souhaitez modifier.
3. Utilisez les boutons +/YES et -/NO pour choisir un timbre
différent.
4. Appuyez sur le bouton EXIT pour quitter cette page. Si
vous choisissez une performance différente, les modifications sont perdues.
5. Pour sauvegarder les modifications apportées, appliquez
l’une des procédures de sauvegarde détaillées dans le paragraphe “Sauvegarder une performance” à la page 112.
mance existante. Voir “Editer les timbres et les performances”
à la page 111.
90
Page 93

Le métronome > Lancer et arrêter le métronome, régler le tempo
01-Prelude 1
M: 1 4/4 120
Tempo du morceau
Vitesse du morceau
Le métronome
Le C-520 intègre un métronome qui vous permet de régler le tempo lorsque vous vous exercez ou lorsque vous enregistrez un morceau.
Lancer et arrêter le métronome, régler le tempo
Appuyez sur le bouton METRONOME pour lancer et arrêter
le métronome.
1. Appuyez sur le bouton METRONOME pour lancer le mé-
tronome (le témoin du bouton s’allume).
Afficher le tempo et la vitesse
Le tempo et la vitesse (ou time signature) du métronome sont
toujours affichés dans la page principale Main :
Vitesse du métronome
GrandPiano 4/4
Strings 120
Tempo du métronome
Le tempo et la vitesse du métronome sont également affichés
en mode Performance :
Vitesse du métronome
Perf 01 4/4
Split&Layr 120
2. Appuyez de nouveau sur le bouton METRONOME pour
l’arrêter (le témoin du bouton s’éteint).
tions détaillées de comment sélectionner les modèles de batterie à page 92):
Mouvement 4/4 de phrasé rythmi-
que de batterie sélectionné
GrandPiano 4-4
Strings 120
Lorsque vous reproduisez un morceau, le tempo et la vitesse
correspondent à ceux du morceau en cours de reproduction.
Appuyez sur les boutons TEMPO pour régler le tempo pendant la reproduction du morceau. Au contraire, vous ne pouvez pas modifier la vitesse après l’enregistrement :
Francçais
Si un phrasé rythmique de batterie est sélectionné en tant que
vitesse, le séparateur entre le numérateur et le dénominateur
de la fraction est représenté par un tiret (–) (voir les informa-
Régler le tempo
Lorsque vous lancez pour la première fois le métronome, dans
la page principale, le tempo programmé par défaut correspond
à 120 BPM (battements par minute) et il est automatiquement
sélectionné. Vous pouvez le régler à l’aide des boutons TEMPO.
Tempo du métronome
(Rappelez-vous : pour quitter la page Song Play et rétablir la
page principale Main , il suffit d’appuyer sur le bouton EXIT.)
Si vous lancez le Tempo à partir de la page Song Play (page 95)
ou de la page Record (voir page 99), le tempo correspond à celui du morceau couramment sélectionné. Vous pouvez le régler à l’aide des boutons TEMPO.
La dernière modification est préservée tant que vous ne choisissez pas un morceau différent et que vous le reproduisez.
91
Page 94

Le métronome > Sélectionner la vitesse (ou time signature)
Sélectionner la vitesse (ou time signature)
Lorsque vous lancer le métronome dans la page principale, la
vitesse programmée par défaut est de 4/4 ; vous pouvez la modifier dans la page Metronome (telle que représentée plus bas).
Note : Si le bouton PLAY/PAUSE clignote, vous ne pouvez pas
modifier la vitesse.
Note : Si vous saisissez des modifications par la suite, il se peut
qu’une page de modification différente de la première soit affichée. Appuyez sur les boutons SCROLL pour l’afficher de
nouveau.
1. Appuyez simultanément sur les deux boutons TEMPO +
2. Appuyez sur les boutons +/YES et -/NO pour choisir la vi-
tesse souhaitée. Les mouvements traditionnels sont positionnés au début, tandis que ceux des phrasés rythmiques
répétitifs de batterie sont à la fin. Vous passer rapidement
d’une position à l’autre en appuyant sur les deux boutons
+/YES et -/NO simultanément.
Mouvements traditionnels
1/2 ~ 16/2 1/4 ~ 16/4 1/8 ~ 16/8
et TEMPO – (ou sur MET.SET). La première page Metronome, c’est à dire Metro TS, est affichée à l’écran avec le
paramètre Time Signature sélectionné :
3. Appuyez sur le bouton EXIT pour rétablir la page princi-
pale.
Metro TS/Tempo 1
4/4 120
Phrasés rythmiques répétitifs (ou Drum patterns)
Au lieu d’une vitesse traditionnelle (4/4, 3/4, etc…), vous pouvez affecter un phrasé rythmique répétitif au métronome. Ceci
vous donnera l’impression de jouer avec un vrai “pro” de batterie. Vous pouvez également enregistrer un tel phrasé dans un
morceau.
Note : Contrairement au “clics” traditionnels du métronome,
les notes des phrasés rythmiques répétitifs peuvent également
être enregistrées par le magnétophone intégré. Elles peuvent
également être transmises via MIDI, afin de pouvoir les enregistrer sur un séquenceur externe, ou les reproduire à l’aide d’un
instrument externe (voir “MIDI” à la page 129).
Les Drum patterns sont positionnés dans la seconde partie de
la liste des vitesses disponibles. Avec la liste sélectionnée, soit
vous les défilez, soit vous appuyez simultanément sur les deux
boutons +/YES et -/NO, pour passer rapidement aux drum
patterns. Appuyez de nouveau simultanément sur ces deux
boutons pour passer rapidement aux vitesses traditionnelles
(mouvement de 4/4 sélectionné).
Drum patterns
8 Beat 1 Ballroom 2 Bossa 1 Swing 2
8 Beat 2 Ballroom 3 Bossa 2 Swing 3
8 Beat 3 Slow 6/8 Samba Slow Waltz 1
16 Beat 1 Funk 1 Cha Cha Slow Waltz 2
16 Beat 2 Funk 2 Salsa Waltz
16 Beat 3 Rock Mambo Foxtrot
Drum patterns
Ballad 1 Rock 6/8 Tango March
Ballad 2 Dance Rhumba
Ballad 3 Beguine Gospel
Ballroom 1 Unplugged
Latin
Voilà comment utiliser les phrasés rythmiques répétitifs :
1. Dans la page principale, appuyez sur le bouton METRO-
NOME pour lancer le métronome. Vous entendez un
compte à rebours (ou Count In), ensuite le phrasé rythmique répétitif commence.
2. Dans la page principale (indépendamment du fait que soit
sélectionné un timbre ou une performance) ou dans la
page Record, appuyez sur EXIT (ou sur une pédale à laquelle vous avez affecté la fonction Fill In, voir à page 122).
L’instrument joue un remplissage (ou Fill In) et ensuite
c’est la variation du phrasé rythmique répétitif de base qui
commence à jouer.
3. Appuyez de nouveau sur EXIT (ou sur la pédale). L’instru-
ment joue un deuxième Fill In et ensuite c’est le phrasé
rythmique répétitif de base qui recommence à jouer.
4. Appuyez sur le bouton METRONOME pour arrêter le mé-
tronome.
Swing 1
92
Page 95

Régler le volume du métronome
Metro Lev/Rev 2
Lv:100
Rv:64
Le métronome > Régler le volume du métronome
Vous pouvez régler le volume du métronome afin de l’adapter
au volume général de l’instrument.
1. Appuyez simultanément sur les deux boutons TEMPO/
MET.SET. L’écran affiche la première page Metronome.
2. Appuyez sur le bouton SCROLL
de page Metronome, c’est à dire la page Metro Lev/Rev. Le
paramètre Lv (Level) est sélectionné :
pour afficher la secon-
3. Appuyez sur les boutons +/YES et -/NO pour modifier le
volume du métronome.
4. Appuyez sur le bouton EXIT pour rétablir la page princi-
pale.
Metro Lev/Rev 2
Lv:100 Rv:64
Régler la réverbération du métronome
Vous pouvez ajouter un effet de réverbération aux phrasés
rythmiques répétitifs.
Note : La réverbération ne s’applique pas au clic du métronome
(par exemple lorsqu’une vitesse traditionnelle est sélectionnée).
1. Appuyez simultanément sur les deux boutons TEMPO/
MET.SET.
2. Si l’affichage de votre écran ne correspond pas à celui re-
présenté plus bas, appuyez sur les boutons SCROLL
3. Appuyez sur les boutons +/YES et -/NO pour modifier la
réverbération du métronome.
4. Appuyez sur le bouton EXIT pour rétablir la page princi-
pale.
pour sélectionner le paramètre Rv (Reverb) :
/
Francçais
Sélectionner l’accent
Le battement accentué des vitesses traditionnelles peut être
modifié en “marcato” ou en clochette.
Note : L’accent ne s’applique pas aux phrasés rythmiques répétitifs.
1. Appuyez simultanément sur les deux boutons TEMPO/
MET.SET.
2. Si la page affichée ne correspond pas à celle représentée
plus bas, appuyez sur les boutons SCROLL
afficher la page Metro Accent :
Metro Accent 3
Bell
/ pour
3. Appuyez sur les boutons +/YES et -/NO pour activer ou
couper le son d’une clochette et choisissez l’une des options disponibles pour l’accent .
Option Signification
Off Aucun accent
Marcato C’est le premier battement qui est acentué
Bell Le son d’une clochette est reproduit sur le premier
battement
4. Appuyez sur le bouton EXIT pour rétablir la page princi-
pale.
93
Page 96

Le métronome > Sauvegarder les réglages du métronome
Metro Settings 4
Save? (Yes/No)
Sauvegarder les réglages du métronome
Vous pouvez sauvegarder vos réglages personnels de manière
à ce que l’instrument ne se rétablisse pas à ses valeurs de défaut
lors de la mise hors tension. Cette procédure sauvegarde la vitesse, le réglage du volume, le réglage de la réverbération et
l’accent, tandis que les réglages de tempo sont toujours perdus
lors de la mise hors tension de l’instrument.
1. Appuyez simultanément sur les deux boutons TEMPO/
MET.SET. L’écran affiche la première page Metronome.
2. Appuyez quatre fois sur les boutons SCROLL
ficher la quatrième page Metronome. Le paramètre Metro
Settings Save est sélectionné :
pour af-
3. Appuyez sur +/YES pour confirmer l’opération de sauve-
garde ou sur -/NO pour l’annuler. La page principale Main
est automatiquement rétablie.
94
Page 97
Reproduire un morceau
Reproduire un morceau > Entrer en mode Song Play
Le C-520 intègre un magnétophone multipiste qui vous permet d’enregistrer et de reproduire des morceaux. Il vous permet également de couper une partie individuelle (dénommée
: la main gauche), tandis que l’autre partie (dénommée : la
main droite) continue à jouer, ce qui est vraiment très pratique
pour s’exercer.
Votre C-520 est fourni d’une grande quantité de morceaux
classiques (185) avec lesquels vous pouvez vous exercer ou
simplement reproduire pour écouter vos morceaux préférés.
Les morceaux sont organisés en “albums” qui recueillent des
Entrer en mode Song Play
Lorsque vous appuyez sur le bouton SONG, l’écran affiche la
page Song Play :
Nom du morceau
01-Prelude 1
M:--- 4/4 120
Mesure courrante
Vitesse
Tempo
livres de leçons très réputés (Beyer A et B, Burgmüller), une
collection de morceaux fameux, ainsi que tous les morceaux
inclus dans le SongBook fourni.
Le magnétophone est également en mesure de lire les morceaux à 16 pistes des Fichiers format Standard MIDI (ou SMF)
; ces fichiers peuvent être créés à l’ordinateur et de toutes façons ils sont disponibles sur le marché. Toutefois, rappelezvous que bien que le C-520 est compatible avec la disposition
des sons du General MIDI (GM), il n’inclut pas tous les sons
GM. Voir les informations détaillées à page 277.
Pour retourner à la page principale Main, il suffit d’appuyer
sur l’un des boutons de sélection des timbres pour sélectionner
un timbre ou d’appuyer sur le bouton EXIT. Le morceau sélectionné n’est pas désactivé, mais son nom n’est plus affiché à
l’écran ; pour l’afficher à nouveau, appuyez de nouveau sur le
bouton SONG.
Francçais
Comment sélectionner un morceau
Pour reproduire un morceau, vous devez préalablement le sélectionner dans un album. Les morceaux sont stockés dans une
mémoire permanente et ils ne sont pas perdus lors de la mise
hors tension de l’instrument.
1. Si vous êtes dans la page principale, appuyez deux fois sur
le bouton SONG. Si vous êtes en mode Song Play, appuyez
une seule fois sur le bouton SONG pour afficher la page
Song Selection :
Album:SongBook
01-Prelude 1
2. Appuyez sur l’un des boutons +/YES et -/NO pour sélec-
tionner l’un des morceaux disponibles dans l’album sélectionné. Si le nom est plus long que l’écran, il défilera et ira
à la ligne.
Album
Morceau
3. Pour sélectionner un album différent, appuyez sur les bou-
tons SCROLL
ligne de l’écran :
En alternative, vous pouvez utiliser les six premiers boutons de sélection des timbres pour choisir un album. Voir
le tableau de la page suivante.
pour déplacer le curseur sur la première
Album:SongBook
01-Prelude 1
Bouton
Album:SongBook
01-Prelude 1
95
Page 98

Reproduire un morceau > Comment lancer la reproduction
01-Prelude 1
M:--- 4/4 120
01-Prelude 1
M:--- 4/4 120
4. Appuyez sur les boutons +/YES et -/NO pour sélectionner
l’un des albums disponibles. Il y a plusieurs albums (voir la
liste détaillée des morceaux à page page 286) :
Album Contenu
UserSong Ce sont des morceaux créés à l’aide
SongBook Ce sont tous les morceaux contenus
Classics C’est une collection de morceaux
Beyer A C’est le livre de leçons “Preparatory
Beyer B HARPSI/
Burgmlr C’est le livre de leçons “25 Easy and
du magnétophone intégré ou créés
à l’aide d’un séquenceur externe et
ensuite transférés au C-520 via le
port USB (voir page 127)
dans le SongBook fourni
classiques très fameux
School, Op. 101” de Ferdinand Beyer,
partagé en deux parties (A et B)
Progressive Studies, Op. 100” de
Burgmüller
Bouton
sélection
timbres
PIANO 1
PIANO 2
E.PIANO 1
E.PIANO 2
CLAV
VIBES/GUITAR
Comment lancer la reproduction
5. Après avoir sélectionné un album, appuyez sur les boutons
SCROLL
nom du morceau, ensuite choisissez un morceau différent :
pour déplacer le curseur de nouveau sur le
Album:SongBook
01-Prelude 1
Bouton
Album:SongBook
01-Prelude 1
6. Appuyez sur le bouton PLAY/PAUSE pour lancer la repro-
duction et retourner à la page Song Play ou sur le bouton
EXIT pour retourner à la page Song Play sans lancer la reproduction du morceau .
Après avoir sélectionné
un morceau, vous pouvez le reproduire.
Note : Pendant la reproduction, vous pouvez
adresser les parties du
morceau via MIDI. Les parties du morceau sont les suivantes :
Part 1, Part 2 et Drum (qui est activée uniquement si des phrasés
rythmiques répétitifs jouent).
2. Appuyez de nouveau sur le bouton PLAY/PAUSE pour ar-
rêter le morceau sur la position en cours de session. Le témoin du bouton commence à clignoter.
3. Appuyez de nouveau sur PLAY/PAUSE pour relancer la
reproduction. Le témoin du bouton arrête de clignoter.
4. Appuyez sur STOP pour arrêter le morceau. Le témoin du
bouton s’éteint. Le morceau se rétablit sur la première mesure (measure “---”).
1. Appuyez sur PLAY/PAUSE pour lancer la reproduction du
morceau. Le témoin du bouton s’allume.
Lancer la reproduction sur une mesure différente
Vous pouvez lancer la reproduction sur une mesure différente
de la première.
Note : Lorsque vous relâchez le bouton +YES ou -/NO, parfois
vous entendrez les effets EPx à cause des données de Damper
enregistrées dans le morceau.
1. Dans la page Song Play, le paramètre M (Measure) est sé-
lectionné. Appuyez sur les boutons +/YES et -/NO pour
choisir une mesure différente (parfois le bouton +/YES est
également dénommé Avancement rapide ou Fast Forward,
tandis que -/NO est dénommé Retour en arrière ou
Rewind :
2. Appuyez sur le bouton PLAY/PAUSE pour lancer la repro-
duction sur la mesure sélectionnée.
96
Page 99

Reproduire un morceau > Couper/activer une partie enregistrée
Couper/activer une partie enregistrée
Pendant la reproduction, vous pouvez couper ou activer une
partie enregistrée. C’est très pratique de pouvoir couper une
partie pour la jouer sur le clavier pendant que le magnétophone continue à reproduire l’autre.
En fonction des réglages effectués dans le mode Global (voir
“Couper le volume” à la page 123), l’action de couper peut soit
complètement mettre sous silence une partie, soit juste l’atténuer. L’atténuation est elle aussi très pratique pour s’exercer
parce qu’elle vous donne la possibilité de jouer la partie et de
l’écouter en même temps à faible volume.
Note : L’état de la partie est automatiquement restauré lorsque
vous choisissez un morceau différent (il est activé si des notes
sont présentes ou désactivé si la partie est vide).
Modifier le tempo du morceau
Chaque morceau contient son propre tempo. Toutefois, vous
pouvez le modifier en cours de reproduction, par exemple
pour faciliter votre jeu lorsque vous jouez avec le morceau.
1. Appuyez sur le bouton TEMPO + pour augmenter le tem-
po : le morceau jouera plus vite.
1. Appuyez sur le bou-
ton PART 1 ou sur
PART, selon la partie
que vous souhaitez
couper (généralement, Part 1 = main
gauche, Part 2 = main droite. Cette disposition peut être
différente dans les morceaux importés via USB). Le témoin
de la partie coupée s’éteint.
Maintenant, vous pouvez jouer la partie ainsi coupée sur le
clavier.
2. Appuyez de nouveau sur le même bouton pour activer la
partie : son témoin s’allume de nouveau.
2. Appuyez sur le bouton TEMPO - pour diminuer le tempo
: le morceau jouera plus lentement.
3. Appuyez simultanément sur les deux boutons +/YES et -/
NO pour rétablir le tempo original du morceau.
Francçais
Jouer avec le morceau en reproduction
Pendant la reproduction, vous pouvez jouer avec le morceau.
Les derniers timbres sélectionnés sont encore activés sur le clavier. Si vous le voulez, vous pouvez sélectionner des timbres
différents, tel que déjà vu précédemment. Lorsque vous appuyez sur l’un des boutons de sélection des timbres, l’écran affiche la page principale Main. Appuyez sur le bouton SONG
pour rétablir la page Song Play.
Lorsque vous sélectionnez des timbres différents, vous rappelez également leurs effets. Faites attention car cela peut dramatiquement affecter tous les timbres du morceau. Lorsque vous
sélectionnez un morceau différent, les effets du morceau sont
de nouveau sélectionnés.
97
Page 100

Reproduire un morceau > Cycle Play
Cycle Play 1
On S:1 E:1
Cycle Play 1
Off
Cycle Play
Lorsque vous vous exercez, vous pouvez choisir un passage
pour le répéter plusieurs fois. Ainsi vous pouvez l’essayer jusqu’à ce que votre jeu vous satisfait. Cette fonction est dénommée Cycle Play.
Note : Lorsque Cycle Play est activé, la fonction Fast Play ne
fonctionne pas (voir page 123).
Note : Si successivement vous apportez des modifications, il se
peut qu’une page d’édition différente soit affichée à la place
de la première. Appuyez sur les boutons SCROLL pour la rechercher.
1. En mode Song Play, appuyez sur le bouton EDIT. L’écran
affiche la première page du mode Song Edit, c’est à dire
Cycle Play.
Cycle Play 1
Off
2. Appuyez sur le bouton +/YES pour activer le mode Cycle
Play. L’écran affiche les paramètres S (mesure du début ou
Start Measure) et E (fin de la mesure ou End Measure) :
Cycle Play 1
On S:1 E:99
Mesure du début
3. Appuyez sur le bouton SCROLL
paramètre S (Start Measure) et appuyez sur les boutons +/
YES et -/NO pour choisir la mesure sur laquelle le cycle
doit commencer. Appuyez-les simultanément pour défiler
rapidement les valeurs à l’écran.
Cycle Play 1
On
Par défaut, le paramètre Start correspond à la première
mesure.
4. Appuyez sur le bouton SCROLL
paramètre E (Ending Measure) et appuyez sur les boutons
+/YES et -/NO pour choisir la mesure sur laquelle le cycle
doit terminer. Appuyez-les simultanément pour défiler rapidement les valeurs à l’écran.
Cycle Play 1
On S:1
Mesure de la fin
S:1 E:1
pour sélectionner le
pour sélectionner le
E:1
chée en haut à droite de l’écran pour indiquer que la fonction est activée :
01-Prelude 1
M:--- 4/4 120
L’icône reste affichée à l’écran pendant que les mesures
cycliques sont reproduites. Elle commence à clignoter
lorsque des mesures précédentes ou suivantes celles cycliques sont reproduites (par exemple : elle clignotera si la
mesure 2 ou la mesure 16 jouent alors que le cycle est délimité par les mesures 4 et 12).
Icône de Cycle
Play
6. Appuyez sur PLAY/PAUSE pour commencer à jouer. Le
morceau jouera en boucle entre le point de départ et le
point final choisis.
Pendant la reproduction, vous pouvez appuyer sur le bouton PLAY/PAUSE pour mettre en pause le morceau ou le
relancer exactement sur cette position. Vous pouvez
appuyer sur le bouton STOP pour arrêter le morceau et
retourner à la mesure de départ du cycle.
Note : Si la valeur du paramètre S (Start Measure) est différente de 1, le morceau se prédisposera en pause même si
vous appuyez sur STOP.
Désactiver la fonction Cycle Play
Cycle Play continue tant que vous ne choisissez un morceau
différent ou que vous mettez l’instrument hors tension. Sinon,
vous pouvez désactiver manuellement cette fonction.
Note : Si successivement vous apportez des modifications, il se
peut qu’une page d’édition différente soit affichée à la place
de la première. Appuyez sur les boutons SCROLL pour la rechercher.
1. En mode Song Play, appuyez sur le bouton EDIT. L’écran
affiche la première page du mode Song Edit.
2. Appuyez sur le bouton -/NO pour désactiver le mode Cy-
cle Play.
5. Appuyez sur le bouton EXIT pour retourner à la page Song
Play. Vous remarquerez que l’icône de Cycle Play est affi-
98
3. Appuyez sur le bouton EXIT pour retourner à la page Song
Play. L’Icône de Cycle Play affichée en haut à droite de
l’écran disparaît.
 Loading...