

Page 1
y
t
Eas
Star
¾
¾ 16 of the most coveted
¾ 30 effects divided into 3 FX
¾ 80 Programs: 40 presets
¾ A total of 6 simultaneous
¾ Intuitive interface for quick
¾ Delay and Reverb Effects
¾ Program select foot
¾ Battery or AC-powered
¾ External expression pedal
¾ Auto-chromatic tuner
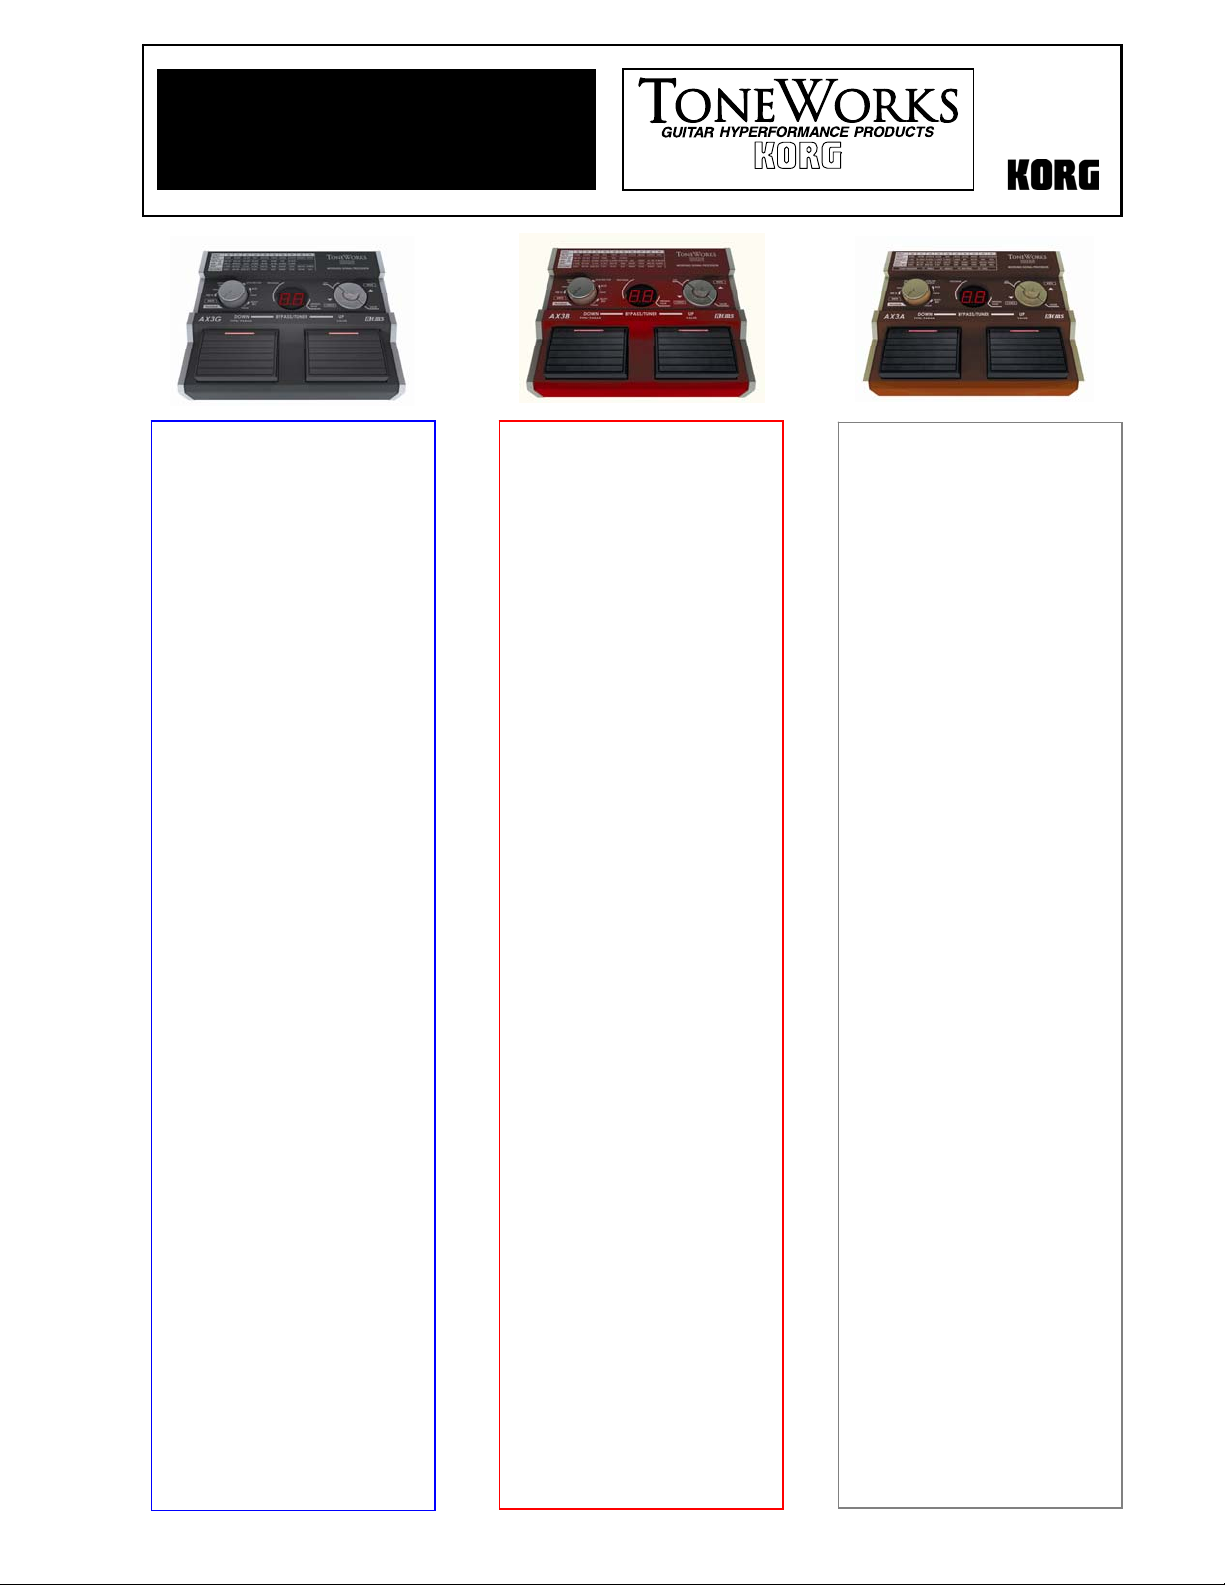
AAXX33GG
A great collection of
accurately-crafted Guitar
Amp/Cabinet modeling and
Effects using Korg’s awardwinning “REMS” modeling
technology.
Drive/Amp models; mix
and match with 10 killer
cabinets.
blocks w/ an adjustable
professional noise reduction
effect. 10 Pre FX: Comp,
Wah, Acoustic, Drone, P/U
and more. 10 Modulation,
Filter and Pitch effects. 10
Delay/Reverb effects.
and 40 user
FX (3 effects blocks, Noise
Reduction, Drive/Amp and
Cabinet modeling).
and easy operation.
carry over when changing
between programs with the
same settings.
switches with large LED
indicators for excellent
visibility.
jack; volume/wah
w/mute function
AAXX33BB
¾
For the Electric Bass:
Superbly crafted Amp,
Cabinet and Effects using
Korg’s REMS modeling
technology.
¾ 16 of the most coveted
Drive/Amp models, mix and
match with 10 killer
cabinets.
¾ 30 effects including 10 Pre-
FX: Comp, Wah, Fretless
and Synth. 10 Modulation,
Filter and Pitch effects. 10
Delay/Reverb effects plus a
professional noise reduction
effect.
¾ 80 Programs: 40 presets
and 40 user
¾ A total of 6 simultaneous
FX (3 effects blocks, Noise
Reduction, Drive/Amp and
Cabinet modeling).
¾ Intuitive interface for quick
and easy operation.
¾ Function and Value knobs
allow easy access to effect
parameters and other
features.
¾ Program select foot
switches with large LED
indicators for visibility.
¾ External expression pedal
jack; volume/wah
¾ Battery or AC-powered
¾ Auto-chromatic tuner
w/mute function
¾ Output jack also powers
headphones
AAXX33AA
Multi-effect processor for
¾
Electric Acoustic Guitar
providing essential high
quality effects.
¾ Korg’s “REMS” modeling
technology accurately
reproduces the rich, subtle
sound of other acoustic
guitars; Nylon, Reso, M
Small, G Large, T Large &
more.
¾ Choose from 9 acoustic
body models or a Mic effect
that emulates the timbre of
your guitar being run
through a condenser
microphone.
¾ 33 effects including 10 Pre
FX such as Compressor,
Limiter, Exciter and Drone.
A Tone network with Mid
Frequency adjustment, a
Notch Filter, 10 Modulation ,
Filter and Pitch effects. 10
Delay/Reverb types and a
Noise Reduction effect.
¾ 43 total effect types, 7 FX
can be used simultaneously
¾ 80 Programs: 40 presets
and 40 user
¾ Auto-chromatic tuner
w/mute function
¾ Intuitive interface for quick
and easy operation
¾ External expression pedal
jack; volume/wah
¾ Built in auto-chromatic
tuner w/mute function
¾ Battery or AC-powered
Page 2

AX3-Series EasyStart
Note: The following procedures work for all 3 of the AX3-Series effect units!
Audio Connections and Tuning
1. With four AA batteries installed, or the optional adaptor connected to the Power Supply Input, connect your guitar/bass to the INPUT
jack on the rear panel.
2. Set the Function Selector knob to “PROGRAM” and lower the MASTER output level of the AX3 using the Value Knob.
3. Connect your headphones, mixer, or amplifier to the OUTPUT jack on the rear panel; then use the Value Knob to raise the MASTER
level, increasing the volume.
4. Tune up! Step on the Program Up and Down Switches simultaneously to activate Bypass mode; the auto-chromatic tuner will be active
(if both switches are held for approx. 1 second, Mute mode will be activated). Pluck a string; the Program/Value Display will indicate
the note name, and the Program Switch LEDs will indicate whether the note is sharp or flat. When both lights are lit simultaneously ,
the string is in tune.
5. Return to the previous mode by stepping on either of the Program switches.
Restoring the Factory Preset Programs
1. While holding down both Program UP and DOWN Switches and the CANCEL Button, connect the power adaptor (or if using batteries,
power up by plugging a cable into the input jack). The Program/Value Display will indicate “rL” and the Program Switch LEDs will
blink. Release the button and switches.
2. Press the WRITE Button once (“Ld” will display). The factory programs will be loaded into the user area (01~40). When loading is
completed, the Program/Value Display will indicate “CP” briefly, and program number 01 will be recalled.
Note: If you reload the preset programs, all previously stored custom programs will be overwritten!
Note: Never turn off the power while this operation is in progress!
Selecting and listening to the AX3’s Programs
The AX3 pedals provide 80 program locations; 8 banks with 10 programs in each (8x10=80). Programs 01 - 40
are User locations that can be customized and saved. Programs 41 - 80 are factory preset, and can be modified
but cannot
1. Set the Function Selector knob to “PROGRAM”.
2. Using the program UP and DOWN Switches, you can now scroll through and audition all 80 programs.
be overwritten.
Tip: To jump from bank to bank (as opposed to scro lling t hrough each individual program), use the
Cancel and Write buttons.
Tweak the AX3’s Programs
Each of the AX3’s 80 programs can be modified to your liking. This includes chaning effects types as well as
effect parameters.
1. Set the Function Selector knob to the effect type you wish to edit (i.e. PRE FX, DRIVE/AMP, MOD, DELAY/REV, etc.)
2. Use the Write (“UP”) & Cancel (“DOWN”) Buttons to scroll through the various effect choices. (Press UP & DOWN buttons
simultaneously to turn FX type off).
Note: The effect chart printed on the face of your AX3 will be indispensable in locating and identifying the
various available effect choices. There is also a more detailed chart in the back of the included
manual.
3. Use the Value Knob to adjust the FX’s main parameter.
4. To fine tune the sub-parameters (not applicable to LEVEL, NR, CAB, MIC & BODY, TONE, and NOTCH), set the Function Knob to the
corresponding effect type “PARAM” position (the next position moving clockwise on the knob). Choose the desired parameter with the
Write (“UP”) & Cancel (“DOWN”) Buttons and use the Value Knob to adjust the parameter value.
2
Page 3

AX3-Series EasyStart
Note: A list of effect parameters can be found in the aforementioned effect chart in the rear of the
Tip: The Original Value Indicator (small dot in th e lower right corner of the Program/Value Display
EExxaammppllee ((aallll AAXX33 mmooddeellss))
manual. This will be very helpful in determining which parameter is being adjusted.
)
can be used to indicate the saved effect/ parameter settings of the currently selected program.
Simply put, when the Original Value Indicator is lit, the previously saved effect/parameter setting
has been selected.
1. Select MOD with the Function Knob.
2. Use the Write (“UP”) & Cancel (“DOWN”) Buttons to select “F2” (CL Flange). Then use the Value Knob to adjust the CL Flange
effect’s Main parameter (SPEED).
3. Turn the Function Knob clockwise one position to PARAM. Use the Write (“UP”) & Cancel (“DOWN”) Buttons to select “P2”
(DEPTH). Use the Value Knob to adjust the level of the DEPTH parameter.
Note: In this mode, if you press the Program Up (Value) switch , the current parameter value will be
displayed. If you press the Program Down (Type/Param) switch, it will display to the currently
selected FX type/parameter.
Saving a Program
You’ve tweaked and turned some knobs, and you like the changes that you’ve made – now to save your program:
1. Set the Function Knob to the “WRITE” position, and press WRITE (“UP”) Button. A User program number will blink in the
Program/Value Display.
2. Use the Program Up and Down Switches or Value Knob to select the destination program number (1 - 40)
3. Press the WRITE (“UP”) Button once again, and your program will be stored in the specified location (“CP” will display briefly indicating
the process is complete).
Amp/Line Setting (AX3G only)
The AX3G’s output may be optimized to suit specific monitoring sources via the Amp/Line setting. Amp/Line settings can be
made under the P5 parameter of the Drive/Amp (Note; the amp line setting is only applicable to Amp models {i.e. A0, A1,
A2, A3, etc.} and will not be found on Drive models {i.e. D0, D1, D2, D3, etc.}). Select “A1” if you connect the AX3’s output
to the input of a clean-sounding open back c ombo. Select “A2” if you connect the AX3’s output to the input of an open back
combo with stronger mid-range content. Select “A3” if you connect the AX3’s output into a sealed back cabinet such as an
amp stack. Select “Ln” if you connect the AX 3’s output into a line input such as a mixer, recorder, headphones or any other
full range monitoring source.
3
 Loading...