

Page 1

MS6000 MK
II
/ MS7000 MK
II
User’s Guide Scanner Driver Software
Ver.3.00
Scanner Driver (32bit) Ver.2.26
Scanner Driver (64bit) Ver.3.16
Page 2

Page 3

Contents
1 Getting Ready ············································································· 1-1
1-1 Overview ······································································································· 1-1
1-2 System Requirements·················································································· 1-2
2 The Driver Software Installation (32bit driver) ························· 2-1
2-1 Installing Scanner Driver ············································································· 2-2
Installing the Driver Software.................................................................... 2-2
Connecting to a PC................................................................................... 2-5
2-2 Uninstall Scanner Driver············································································ 2-12
2-3 Update Scanner Driver··············································································· 2-17
3 The Driver Software Installation (64bit driver) ························· 3-1
3-1 Installing Scanner Driver ············································································· 3-2
Installing the Driver Software.................................................................... 3-2
Connecting to a PC................................................................................... 3-5
3-2 Uninstall Scanner Driver············································································ 3-10
3-3 Update Scanner Driver··············································································· 3-14
4 The MS6000 MKII TWAIN Driver User’s Guide························· 4-2
4-1 The MS6000 MKII Scanner User Interface Setup······································· 4-2
4-2 Scan Setting·································································································· 4-3
Template ................................................................................................... 4-3
Scan Size.................................................................................................. 4-3
Scan Mode................................................................................................ 4-3
Resolution................................................................................................. 4-3
Metric Size (United States) ....................................................................... 4-4
Inch Size (Other Countries) ...................................................................... 4-4
Preview ..................................................................................................... 4-4
4-3 The Preview Window···················································································· 4-4
Custom Size Name................................................................................... 4-5
MS6000 MKII /MS7000 MKII i
Page 4

Rulers ........................................................................................................ 4-5
The Window ..............................................................................................4-5
The Action Buttons .................................................................................... 4-5
4-4 Film Type ·······································································································4-5
4-5 Image Adjustment························································································· 4-6
Output........................................................................................................ 4-6
Masking ..................................................................................................... 4-6
Auto Frame Elimination .............................................................................4-6
Centering................................................................................................... 4-7
Automatic Deskew..................................................................................... 4-7
4-6 Lamp ··············································································································4-7
Auto Lamp OFF......................................................................................... 4-7
4-7 Brightness and Contrast ··············································································4-7
Exposure Mode ......................................................................................... 4-7
Brightness .................................................................................................4-8
Contrast..................................................................................................... 4-8
4-8 Batch Scan Mode ··························································································4-8
4-9 The Action Buttons ······················································································· 4-9
Scan .......................................................................................................... 4-9
Close ......................................................................................................... 4-9
5 The MS7000 MKII TWAIN Driver User’s Guide ·························5-2
5-1 The MS7000 MKII Scanner User Interface Setup ·······································5-2
5-2 Scan Setting ·································································································· 5-3
Template.................................................................................................... 5-3
Scan Size .................................................................................................. 5-3
Scan Position ............................................................................................5-3
Scan Mode ................................................................................................ 5-4
Resolution .................................................................................................5-6
Metric Size (United States)........................................................................ 5-6
Inch Size (Other Countries)....................................................................... 5-6
Preview...................................................................................................... 5-6
5-3 The Preview Window ···················································································· 5-7
Custom Size Name ...................................................................................5-7
Rulers ........................................................................................................ 5-7
ii MS6000 MKII/MS7000 MKII
Page 5

The Window.............................................................................................. 5-7
The Action Buttons.................................................................................... 5-8
5-4 Film Type······································································································· 5-8
5-5 Image Adjustment ························································································ 5-8
Output ....................................................................................................... 5-8
Masking .................................................................................................... 5-9
Auto Frame Elimination ............................................................................ 5-9
Centering .................................................................................................. 5-9
Automatic Deskew .................................................................................. 5-10
5-6 Lamp············································································································ 5-10
Auto Lamp OFF ...................................................................................... 5-10
5-7 Brightness and Contrast ··········································································· 5-10
Exposure Mode....................................................................................... 5-10
Brightness............................................................................................... 5-10
Contrast .................................................................................................. 5-10
5-8 Batch Scan Mode ························································································5-11
5-9 The Action Buttons ·····················································································5-11
Scan.........................................................................................................5-11
Focus .......................................................................................................5-11
Close....................................................................................................... 5-12
6 Special Function········································································· 6-1
6-1 Activating the special functions ································································· 6-1
6-2 Disabling the special functions ·································································· 6-4
6-3 Image Adjustment ························································································ 6-6
Engineering Enhancement ....................................................................... 6-6
6-4 Overlay ·········································································································· 6-6
Select Overlay .......................................................................................... 6-6
Enable Overlay ......................................................................................... 6-6
6-5 Overlay Window ··························································································· 6-7
6-6 The Action Buttons ······················································································ 6-8
MARS Controller....................................................................................... 6-8
ACF Controller (When ACF-7 is connected)............................................. 6-8
6-7 MARS Controller··························································································· 6-8
MS6000 MKII /MS7000 MKII iii
Page 6

Move.......................................................................................................... 6-9
Adjust Stop Position .................................................................................. 6-9
Auto Scan.................................................................................................. 6-9
6-8 ACF Controller (When ACF-7 is connected)············································· 6-10
Auto Feed / Scan..................................................................................... 6-10
Auto Feed................................................................................................ 6-10
iv MS6000 MKII/MS7000 MKII
Page 7

Getting Ready 1
1 Getting Ready
1-1 Overview
Thank you for purchasing a TWAIN-supported Microform Scanner. This version of the
Scanner Driver supports the following scanners:
¾ MS6000 MKII Microform Scanner
¾ MS7000 MKII Microform Scanner
MS6000 MKII/MS7000 MKII 1-1
Page 8

1 Getting Ready
1-2 System Requirements
The following operating environment is required in order to use the Scanner driver.
Computer Compatible with IBM PC/AT
Operating System
(32bit driver)
Operating System
(64bit driver)
Required
CPU/memory
Interface Hi-Speed USB
CD-ROM drive
Application
software
Note The optional interface kit is required to connect MS6000 MKII/MS7000 MKII
to the computer.
Windows 7 (32bit)
Windows Vista (32bit) SP2 or later
Windows XP Professional / Home Edition SP3 or later
Windows 2000 Professional SP4 or later
Windows 7 (64bit)
Windows Vista (64bit) SP2 or later
Windows XP Professional x64 Edition SP2 or later
Required CPU: Pentium III 500MHz or higher
Required memory: 256MB or more
Application software compatible with TWAIN32
(32-bit application compatible with Windows 7/Vista/XP/2000)
The MS6000 MKII/MS7000 MKII firmware must be version 25G102-00 or
higher. (32bit driver)
The MS6000 MKII/MS7000 MKII firmware must be version 25G110-00 or
higher. (Both 32bit driver and 64bit driver can be used.)
In addition, the Scanner Driver must be Ver.2.26 (32bit), Ver.3.16 (64bit) or
later.
If a USB hub is connected, the system may not operate correctly. Use the
USB cable included with the interface kit to connect the scanner directly to
the USB port of the computer.
1-2 MS6000 MKII/MS7000 MKII
Page 9

The Driver Software Installation (32bit driver) 2
2 The Driver Software Installation (32bit driver)
This chapter details the procedures for installing the driver software and for connecting
the scanner to the computer.
Important! Do not connect the scanner to a computer before installing the driver
software.
If you connect the scanner and the Found New Hardware Wizard
appears, unplug the USB cable from the computer, and then click
Cancel to close the screen.
Note The Driver Version 2.26 will automatically uninstall the incompatible
previous USB Driver software, such as Ver.6.0.1.7 or before, during the
installation process. Or you may need to uninstall the incompatible driver
software manually prior to installing the version 2.26 driver software.
Before installing the new Version 2.26 driver, delete the SCSI driver
software.
The MS6000MKII/MS7000MKII firmware must be version 25G102 or higher.
MS6000 MKII/MS7000 MKII 2-1
Page 10
2 The Driver Software Installation (32bit driver)
2-1 Installing Scanner Driver
Installing the Driver Software
The following procedure shows the 32bit driver installation.
Administrative rights are needed for the driver installation.
Note Screens may differ slightly depending on the Windows version.
1. Insert “USB Driver Software CD” in the CD-ROM drive.
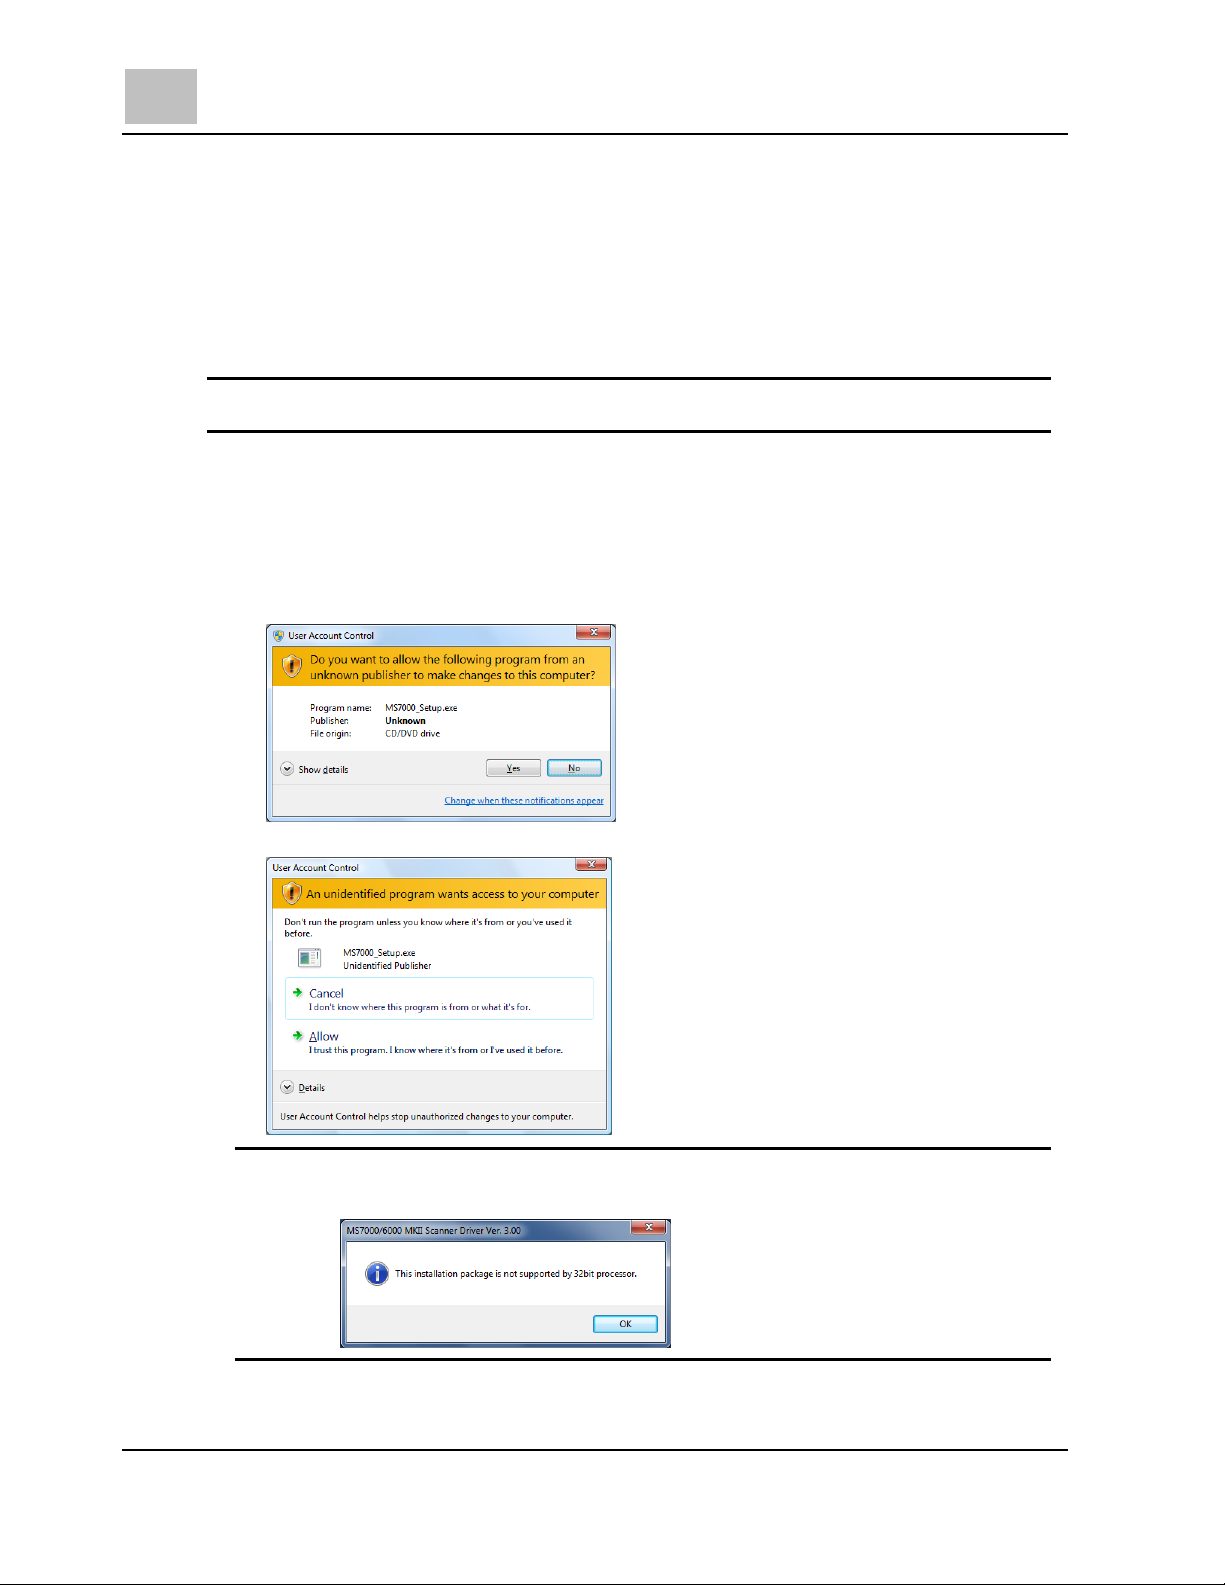
2. Double click "MS7000_Setup.exe" in the “32bit” folder of the "USB Driver
Software”.
¾ Windows 7: If the User Account Control dialog box appears, click Yes.
¾ Windows Vista: If the User Account Control dialog box appears, click Allow.
Note If the following message appears, you have tried to install the 64bit driver
to the 32 bit OS. Please click OK and install the 32bit driver.
2-2 MS6000 MKII/MS7000 MKII
Page 11
The Driver Software Installation (32bit driver) 2
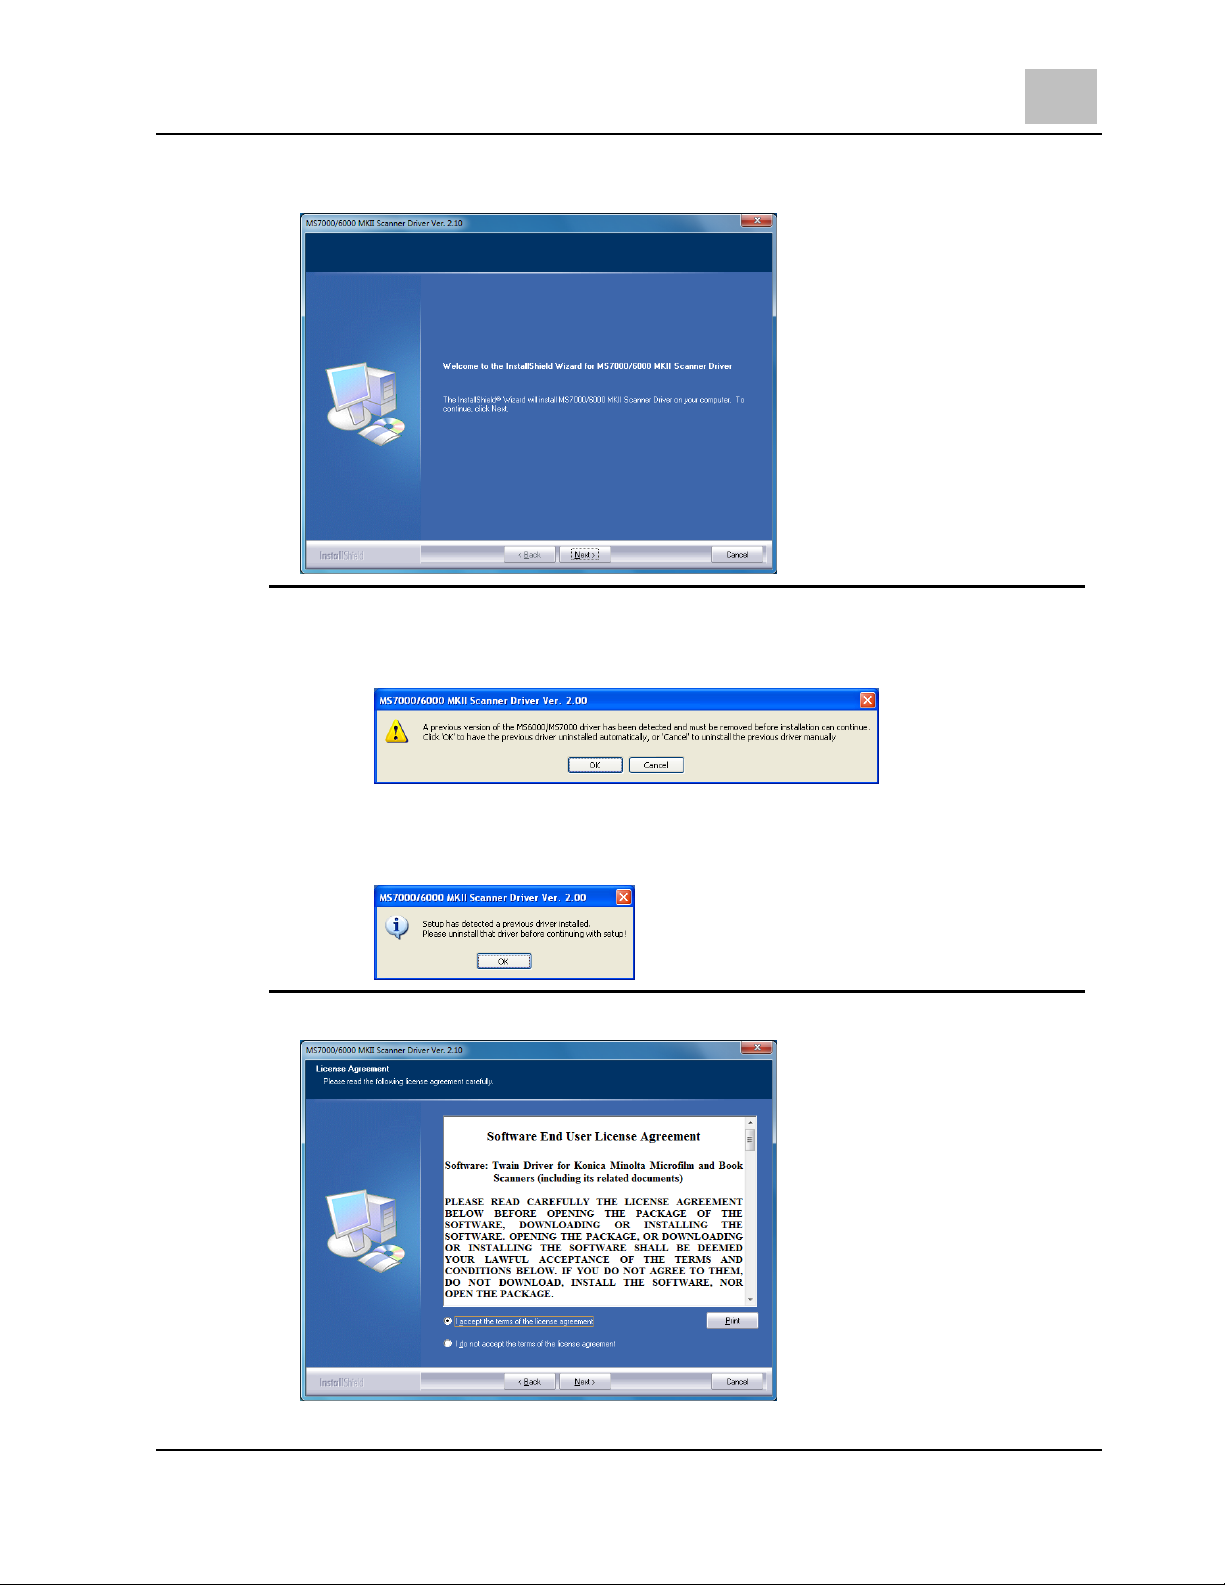
3. When the installation screen appears click Next.
Note If the following message appears, the previous USB driver software is
installed. Please click OK and uninstall the previous driver version. When
uninstallation is completed, the installation is restarted.
If the following message appears, the SCSI driver software is installed.
Please execute the installation again after uninstalling the SCSI driver
software.
4. Select I accept the terms of the license agreement, and click Next.
MS6000 MKII/MS7000 MKII 2-3
Page 12
2 The Driver Software Installation (32bit driver)
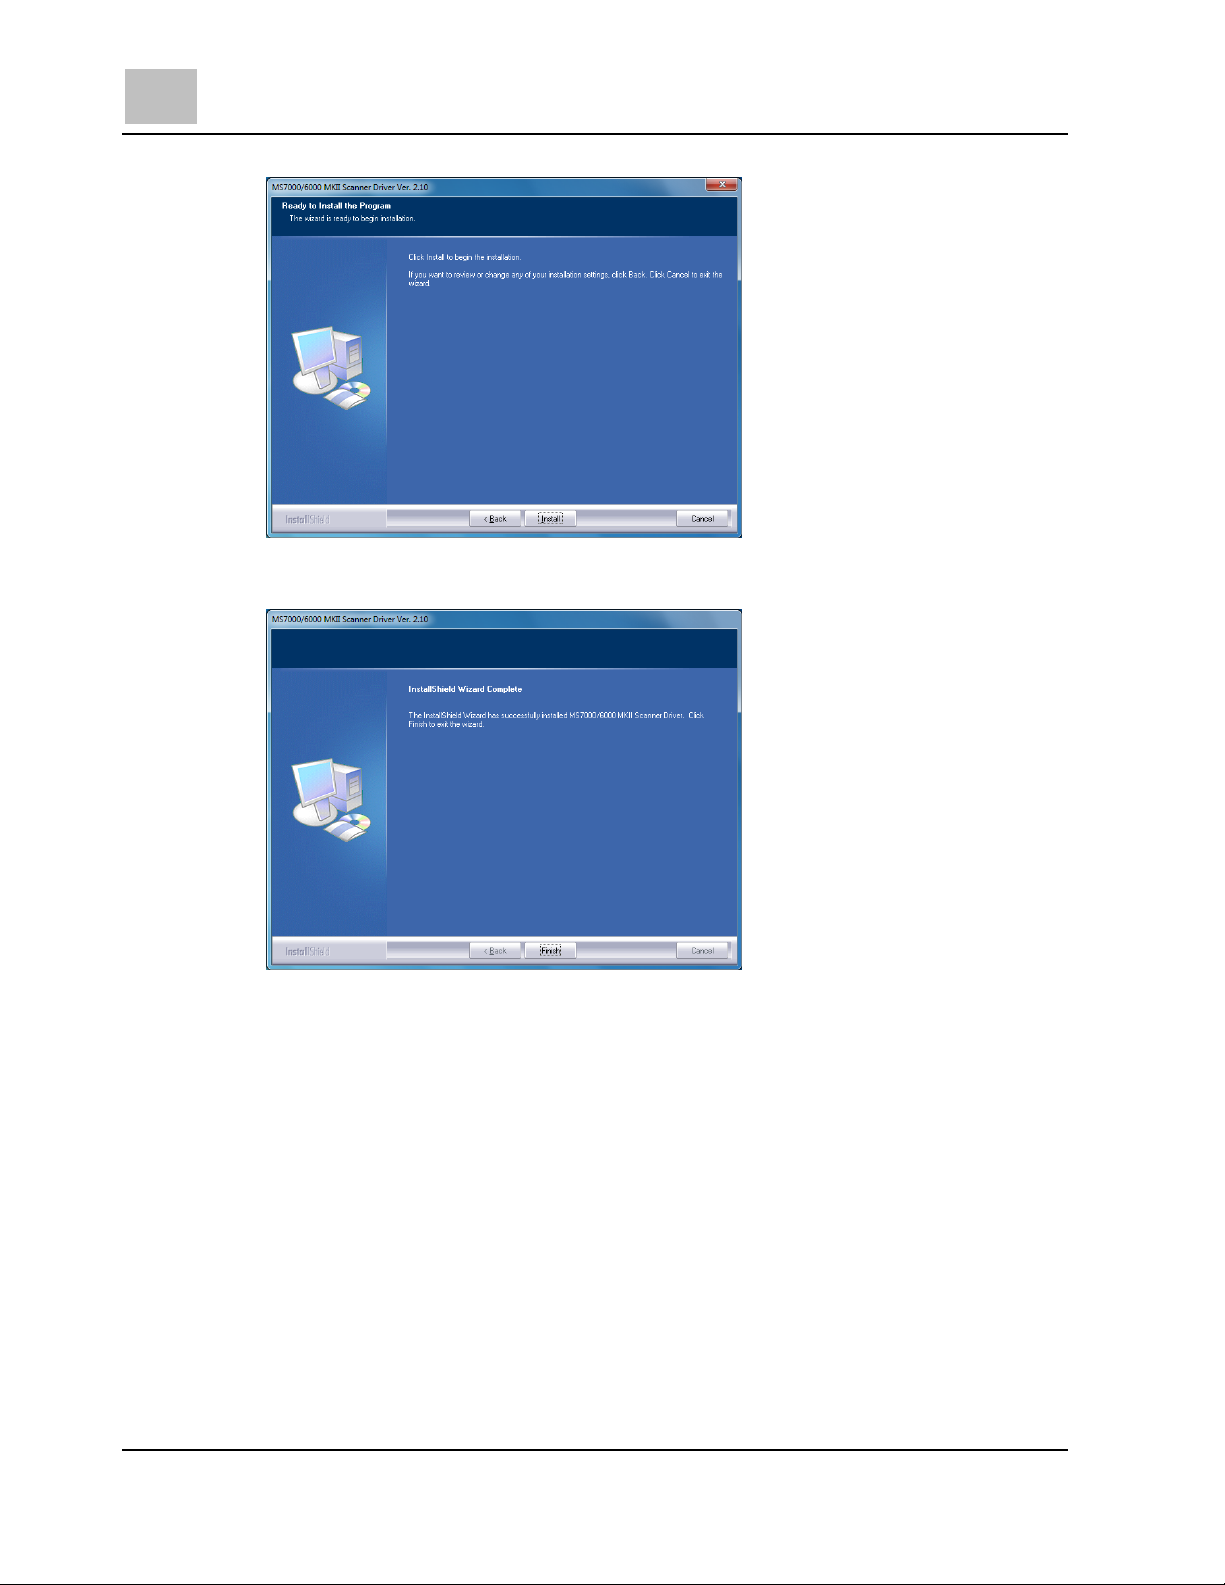
5. Click Install.
6. When the InstallShield Wizard Complete screen appears, click Finish, and
remove the CD-ROM from the computer.
2-4 MS6000 MKII/MS7000 MKII
Page 13
The Driver Software Installation (32bit driver) 2
Connecting to a PC
Note When connecting the scanner to the computer, use the USB cable included
with the interface kit.
Windows 7 (32bit)
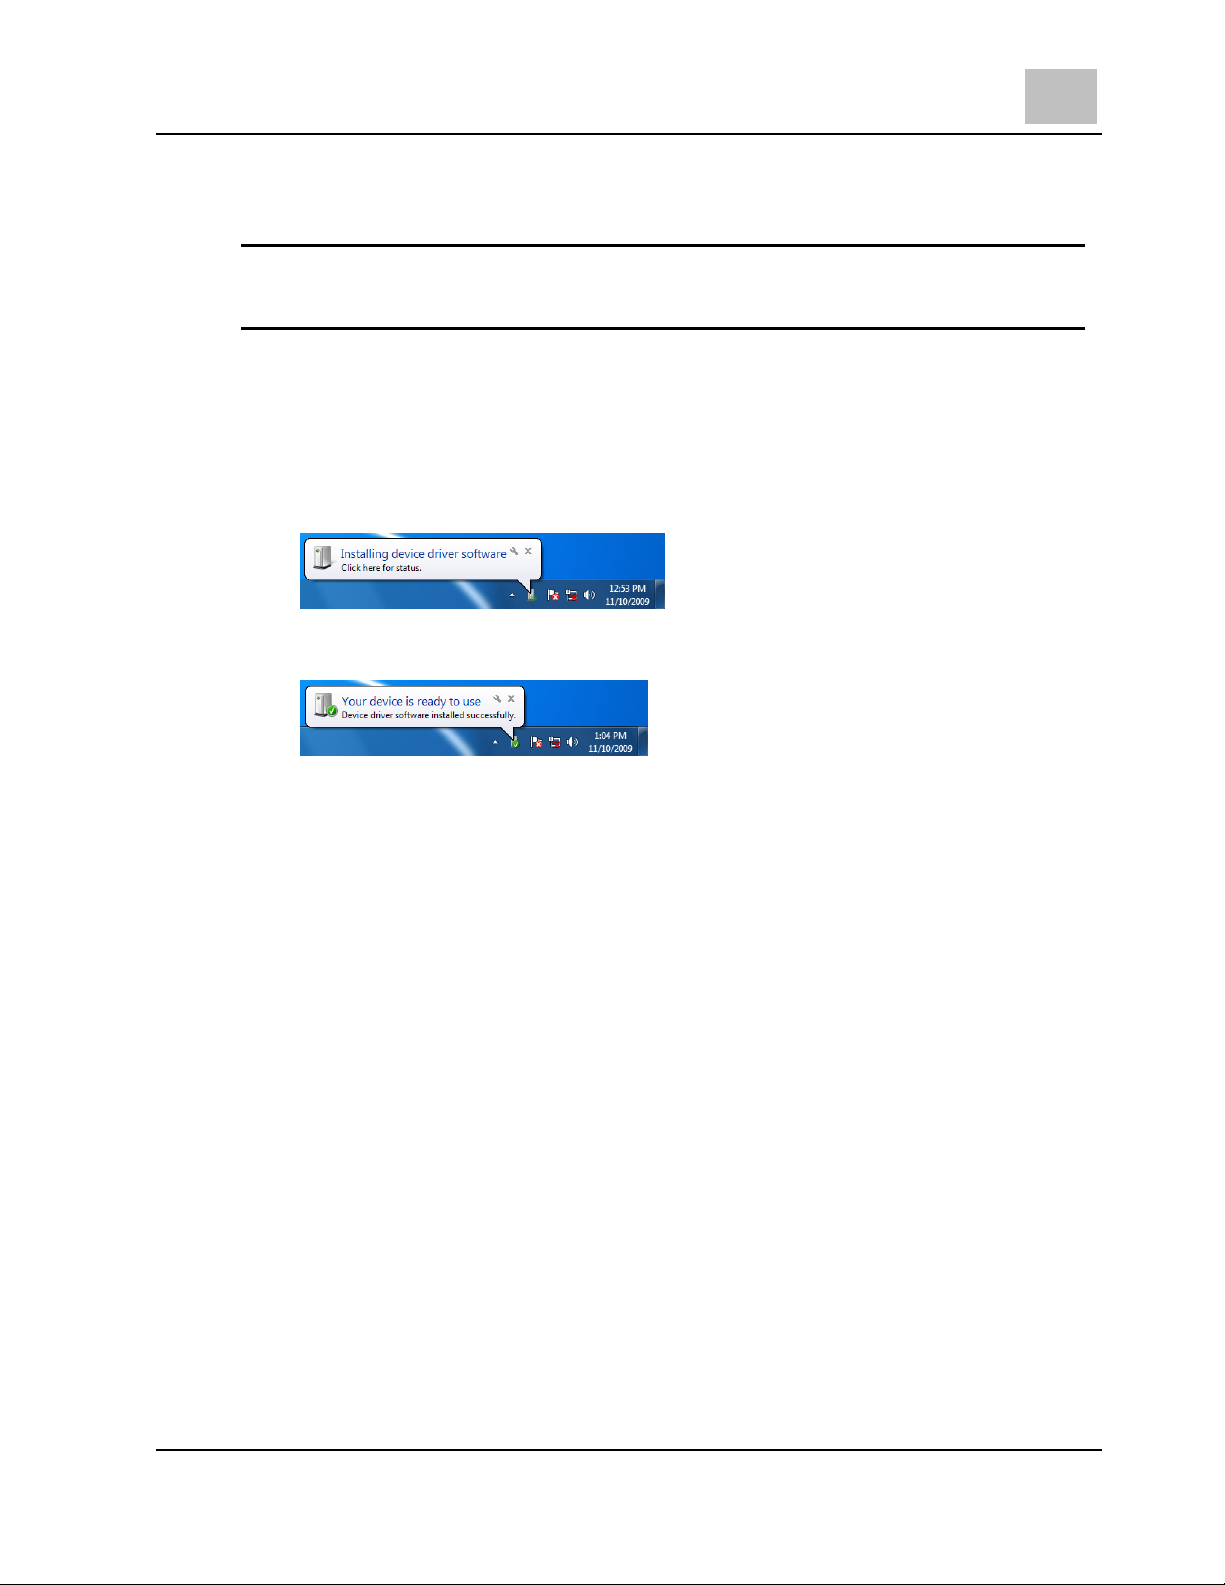
1. Turn on the scanner.
2. Use the USB cable to connect the scanner to the computer.
3. Installing device driver software appears.
4. When Your devices are ready to use is displayed, the driver was installed
successfully.
MS6000 MKII/MS7000 MKII 2-5
Page 14
2 The Driver Software Installation (32bit driver)
Windows Vista (32bit)
1. Turn on the scanner.
2. Use the USB cable to connect the scanner to the computer.
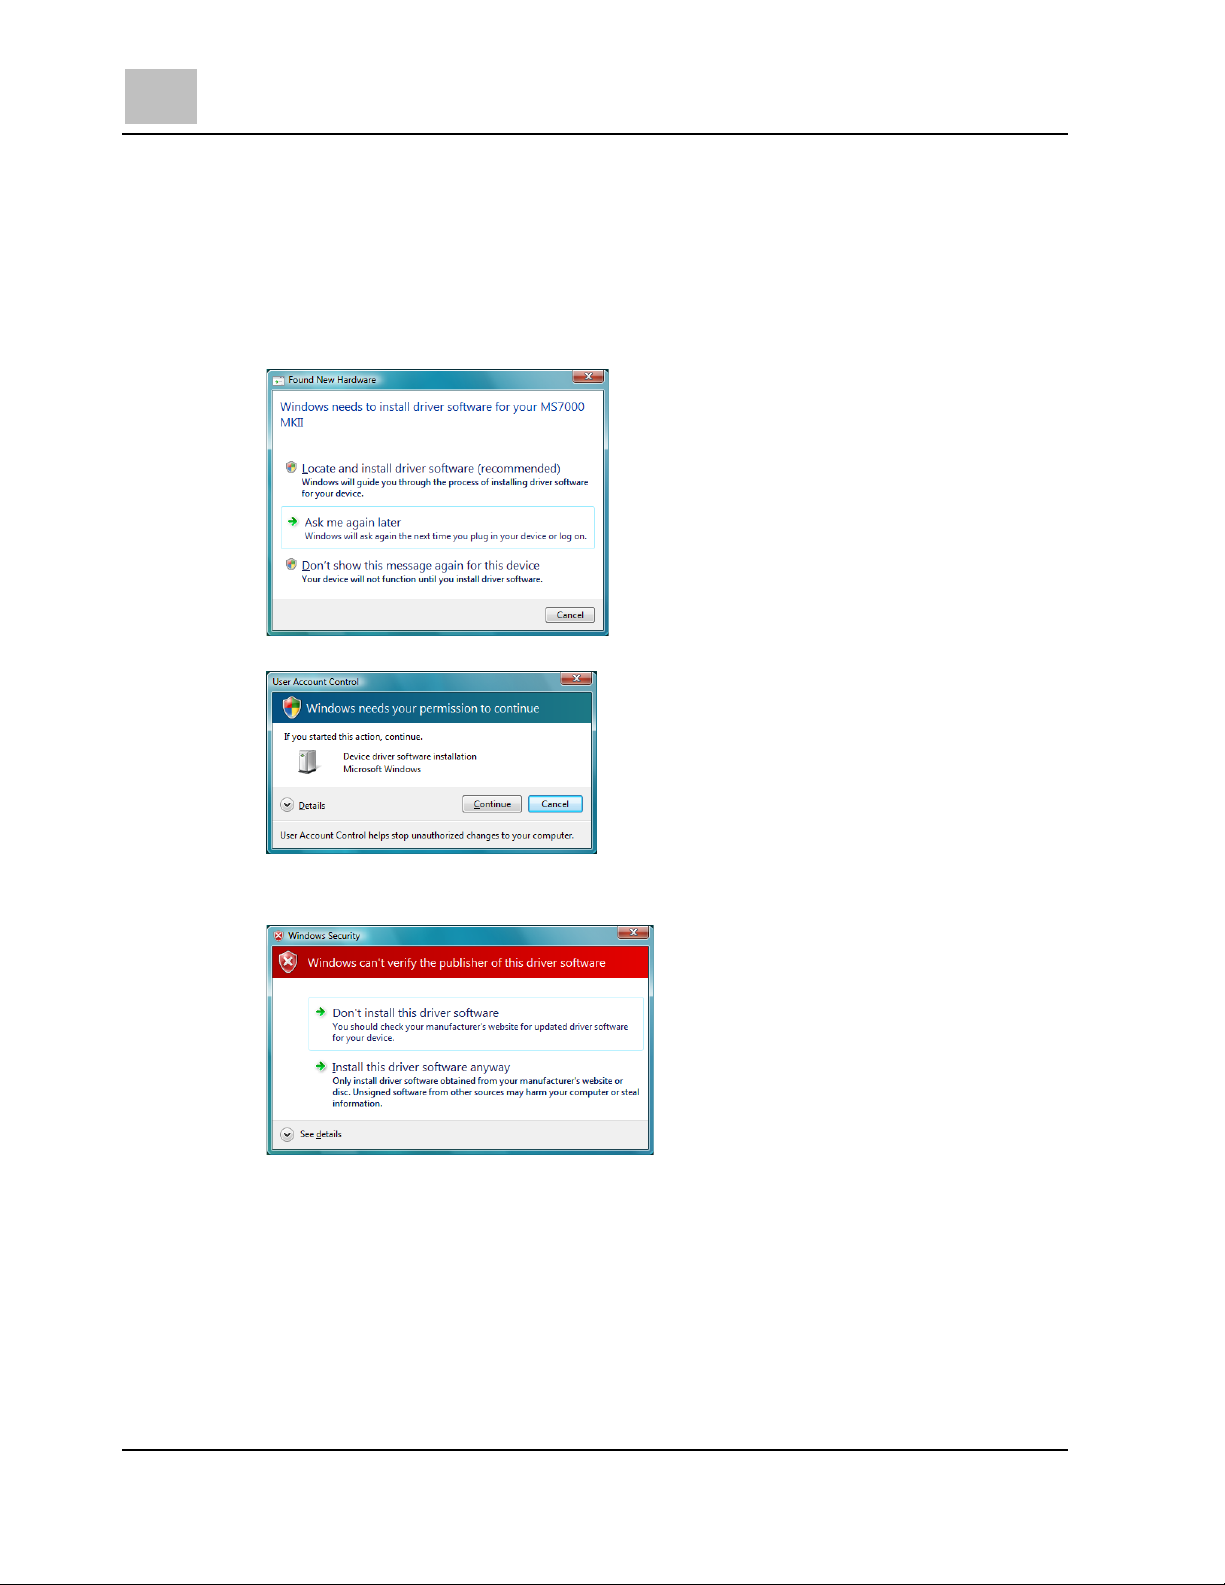
3. When the Found New Hardware Wizard appears, click Locate and install driver
software (recommended).
If the User Account Control dialog box appears, click Continue.
4. When the Windows Security dialog box appears, click Install this driver
software anyway.
2-6 MS6000 MKII/MS7000 MKII
Page 15
The Driver Software Installation (32bit driver) 2
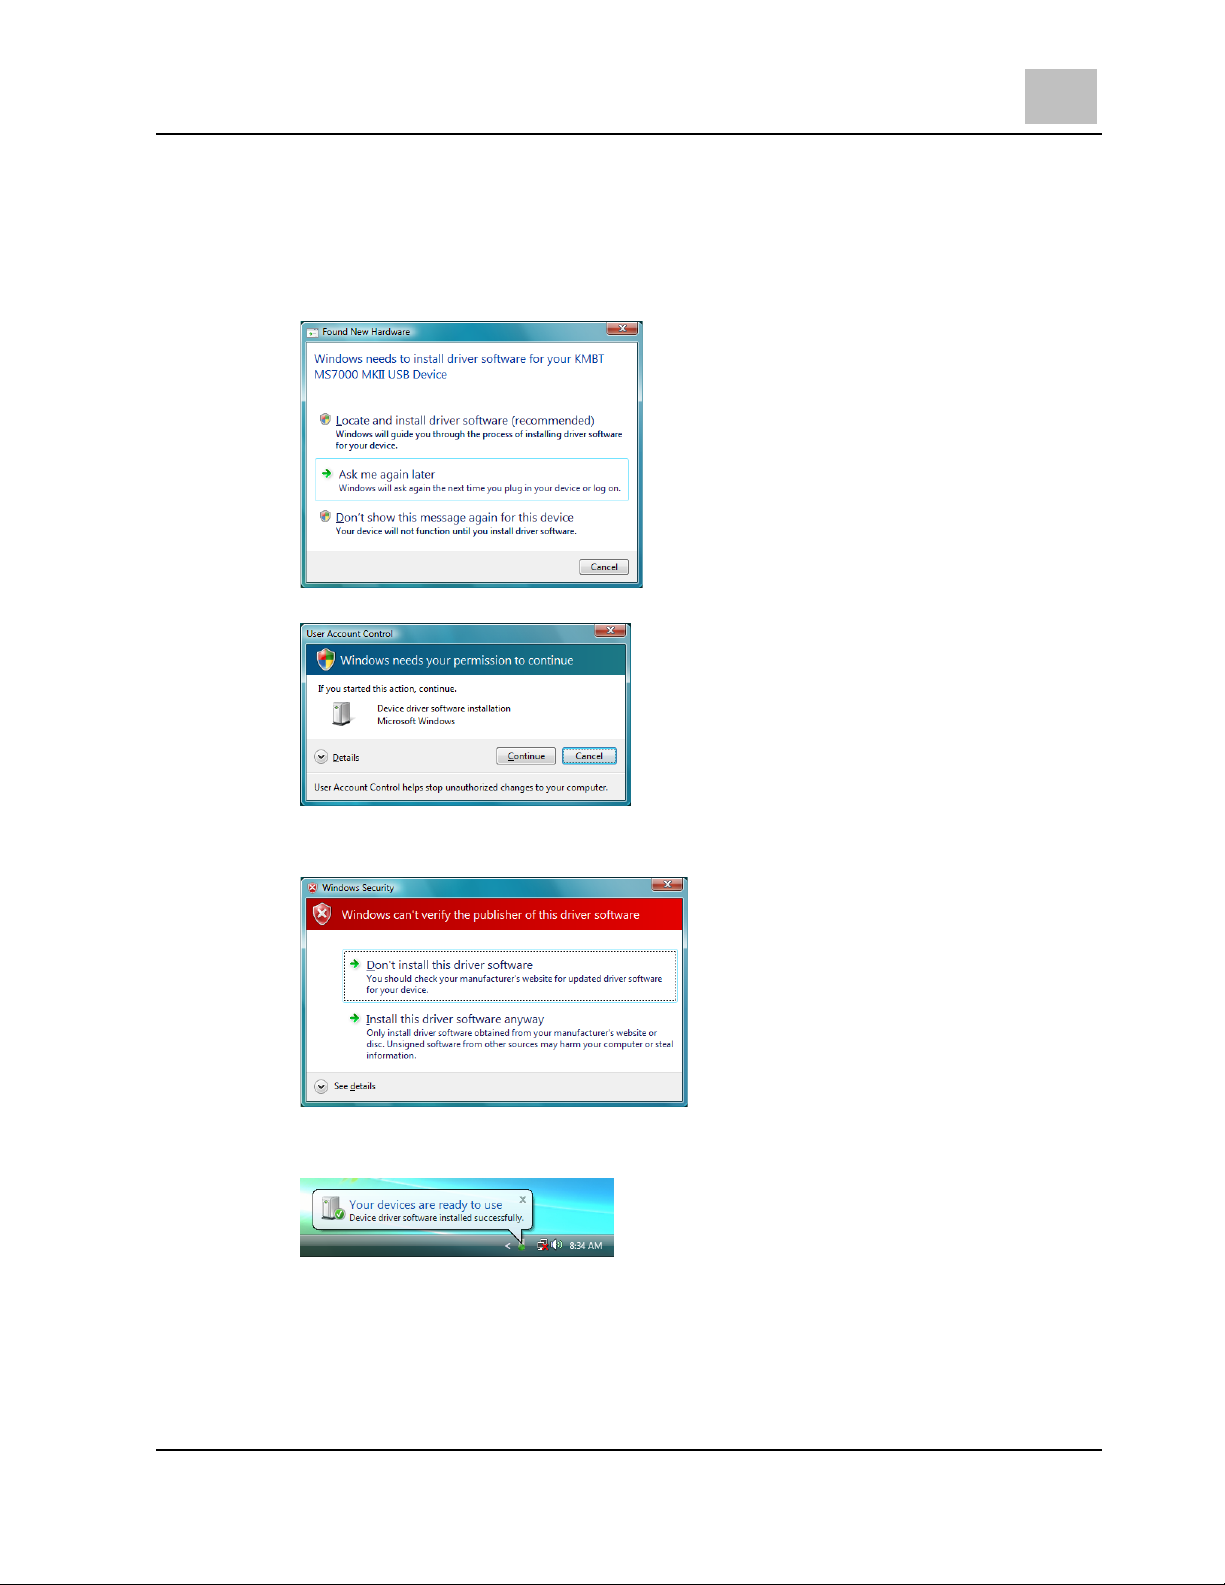
5. When the installation of the driver is completed, determine the driver in
accordance with the instructions in the search wizard.
When the Found New Hardware Wizard appears, click Locate and install driver
software (recommended).
If the User Account Control dialog box appears, click Continue.
6. When the Windows Security dialog box appears, click Install this driver
software anyway.
7. When Your devices are ready to use is displayed, the driver was installed
successfully.
MS6000 MKII/MS7000 MKII 2-7
Page 16
2 The Driver Software Installation (32bit driver)
Windows XP Professional / Home Edition (32bit)
1. Turn on the scanner.
2. Use the USB cable to connect the scanner to the computer.
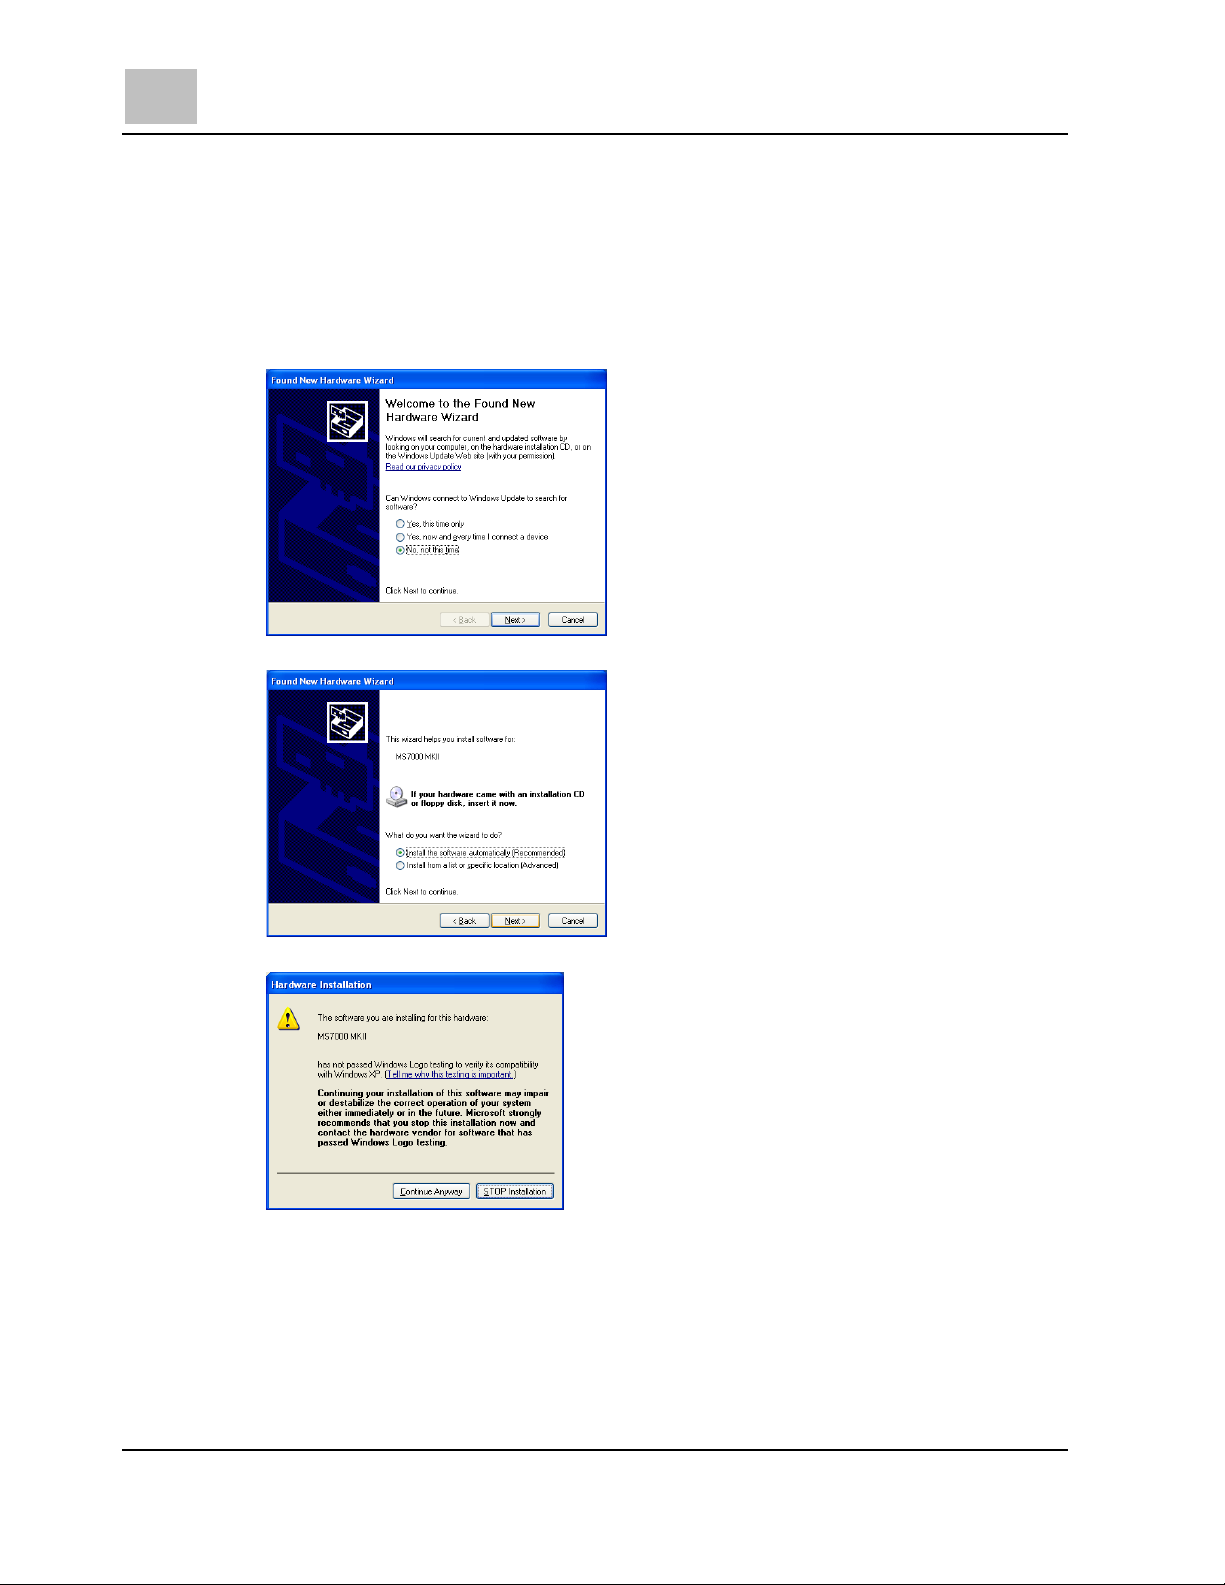
3. When the Found New Hardware Wizard appears, select No, not this time, and
click Next.
4. Select Install the software automatically (Recommended), and click Next.
5. When the Hardware Installation dialog box appears, click Continue Anyway.
2-8 MS6000 MKII/MS7000 MKII
Page 17

The Driver Software Installation (32bit driver) 2
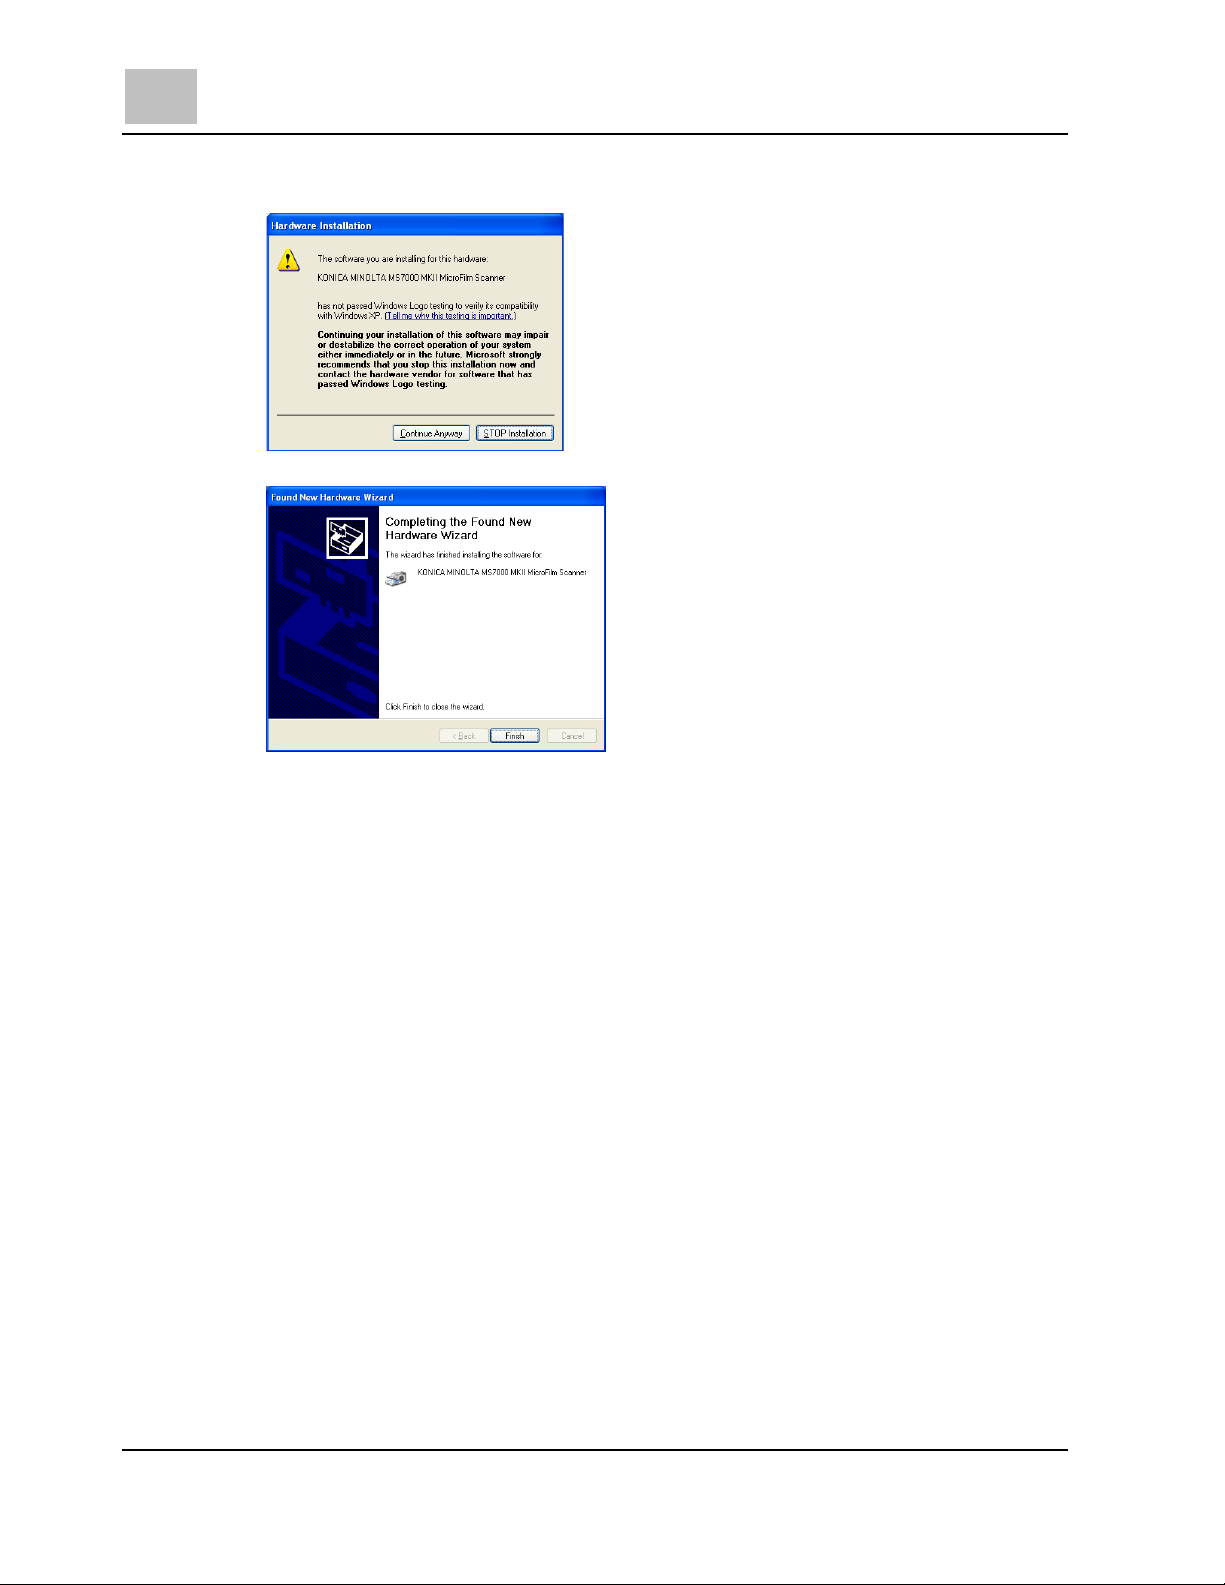
6. Confirming the completion of the search wizard, click Finish.
7. When the installation of the driver is completed, determine the driver in
accordance with the instructions in the search wizard.
When the Found New Hardware Wizard appears, select No, not this time and
then click Next.
8. Select Install the software automatically (Recommended), and click Next.
MS6000 MKII/MS7000 MKII 2-9
Page 18
2 The Driver Software Installation (32bit driver)
9. When the Hardware Installation dialog box appears, click Continue Anyway.
10. Confirming the completion of the search wizard, click Finish.
11. The installation of the Driver is completed.
2-10 MS6000 MKII/MS7000 MKII
Page 19
The Driver Software Installation (32bit driver) 2
Windows 2000 Professional
1. Turn on the scanner.
2. Use the USB cable to connect the scanner to the computer.
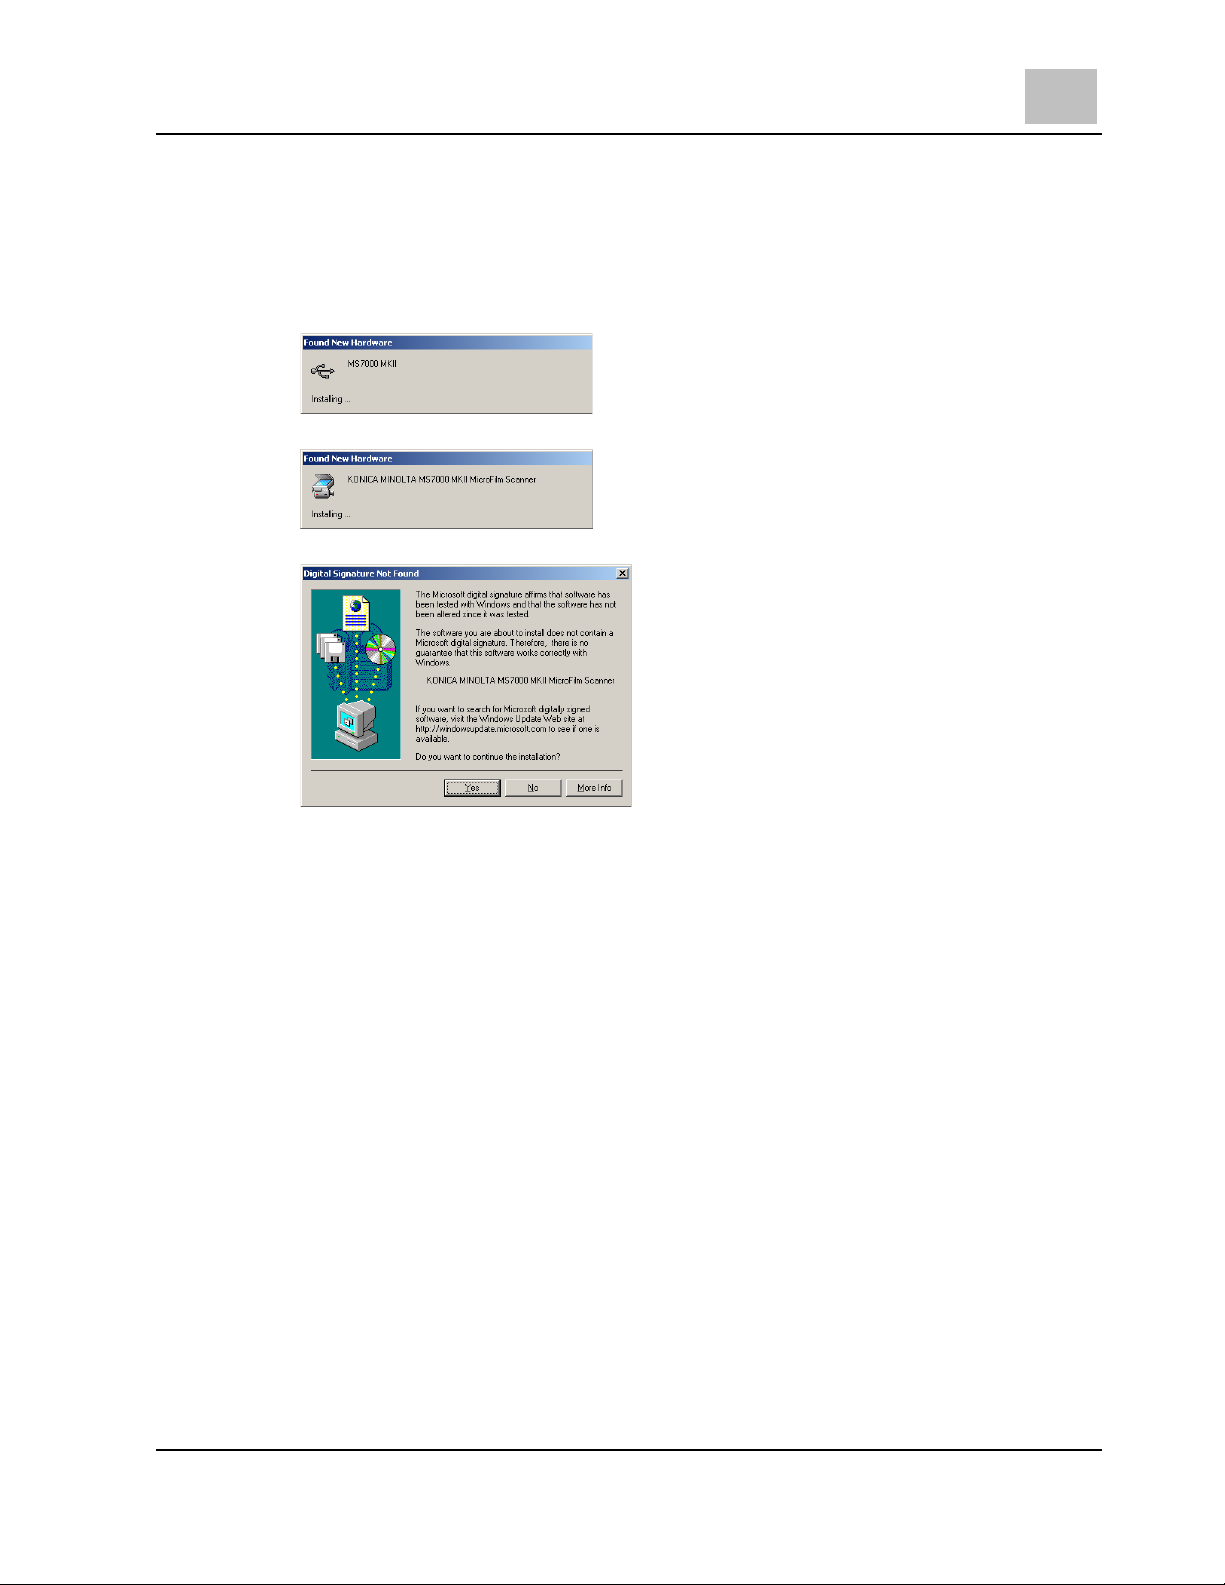
3. After Found New Hardware appears, the driver is automatically installed.
4. After Found New Hardware appears, the driver is automatically installed.
5. When the Digital Signature Not Found dialog box appears, click Yes.
6. The installation of the Driver is completed.
MS6000 MKII/MS7000 MKII 2-11
Page 20
2 The Driver Software Installation (32bit driver)
2-2 Uninstall Scanner Driver
When the Driver installed on the computer is no longer needed, use the following
procedure to perform the deletion.
1. Confirm that the computer is connected with the scanner.
2. Turn ON the computer and the scanner.
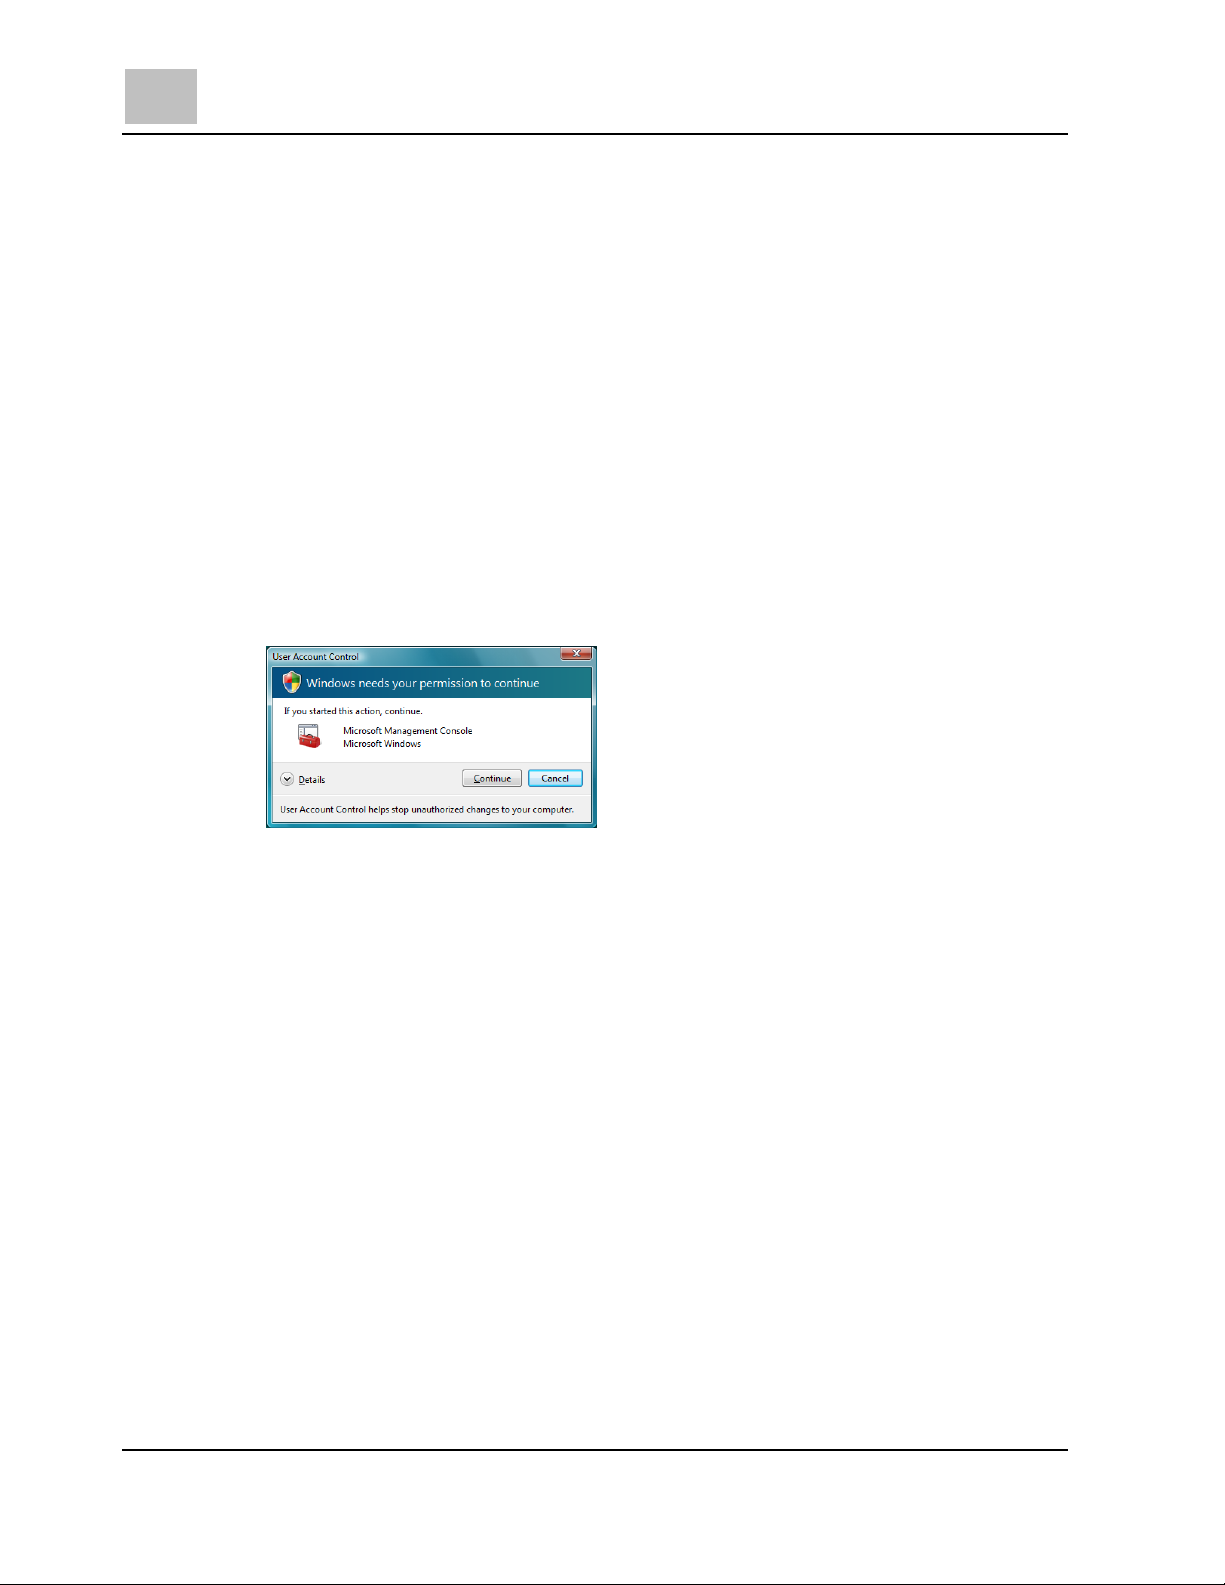
3. Select Device Manager
¾ Windows 7: From start menu, choose Control Panel. Click System and
Security. Click Device Manager.
¾ Windows Vista: From start menu, choose Control Panel. Click System and
Maintenance. Click Device Manager.
If the User Account Control dialog box appears, click Continue.
¾ Windows XP: From start menu, choose Control Panel. Click Performance and
Maintenance. Click System. Click the Hardware tab, and then click Device
Manager.
¾ Windows 2000: From start menu, choose Settings and then Control Panel.
Double-click System. Click the Hardware tab, and then click Device Manager.
2-12 MS6000 MKII/MS7000 MKII
Page 21
The Driver Software Installation (32bit driver) 2
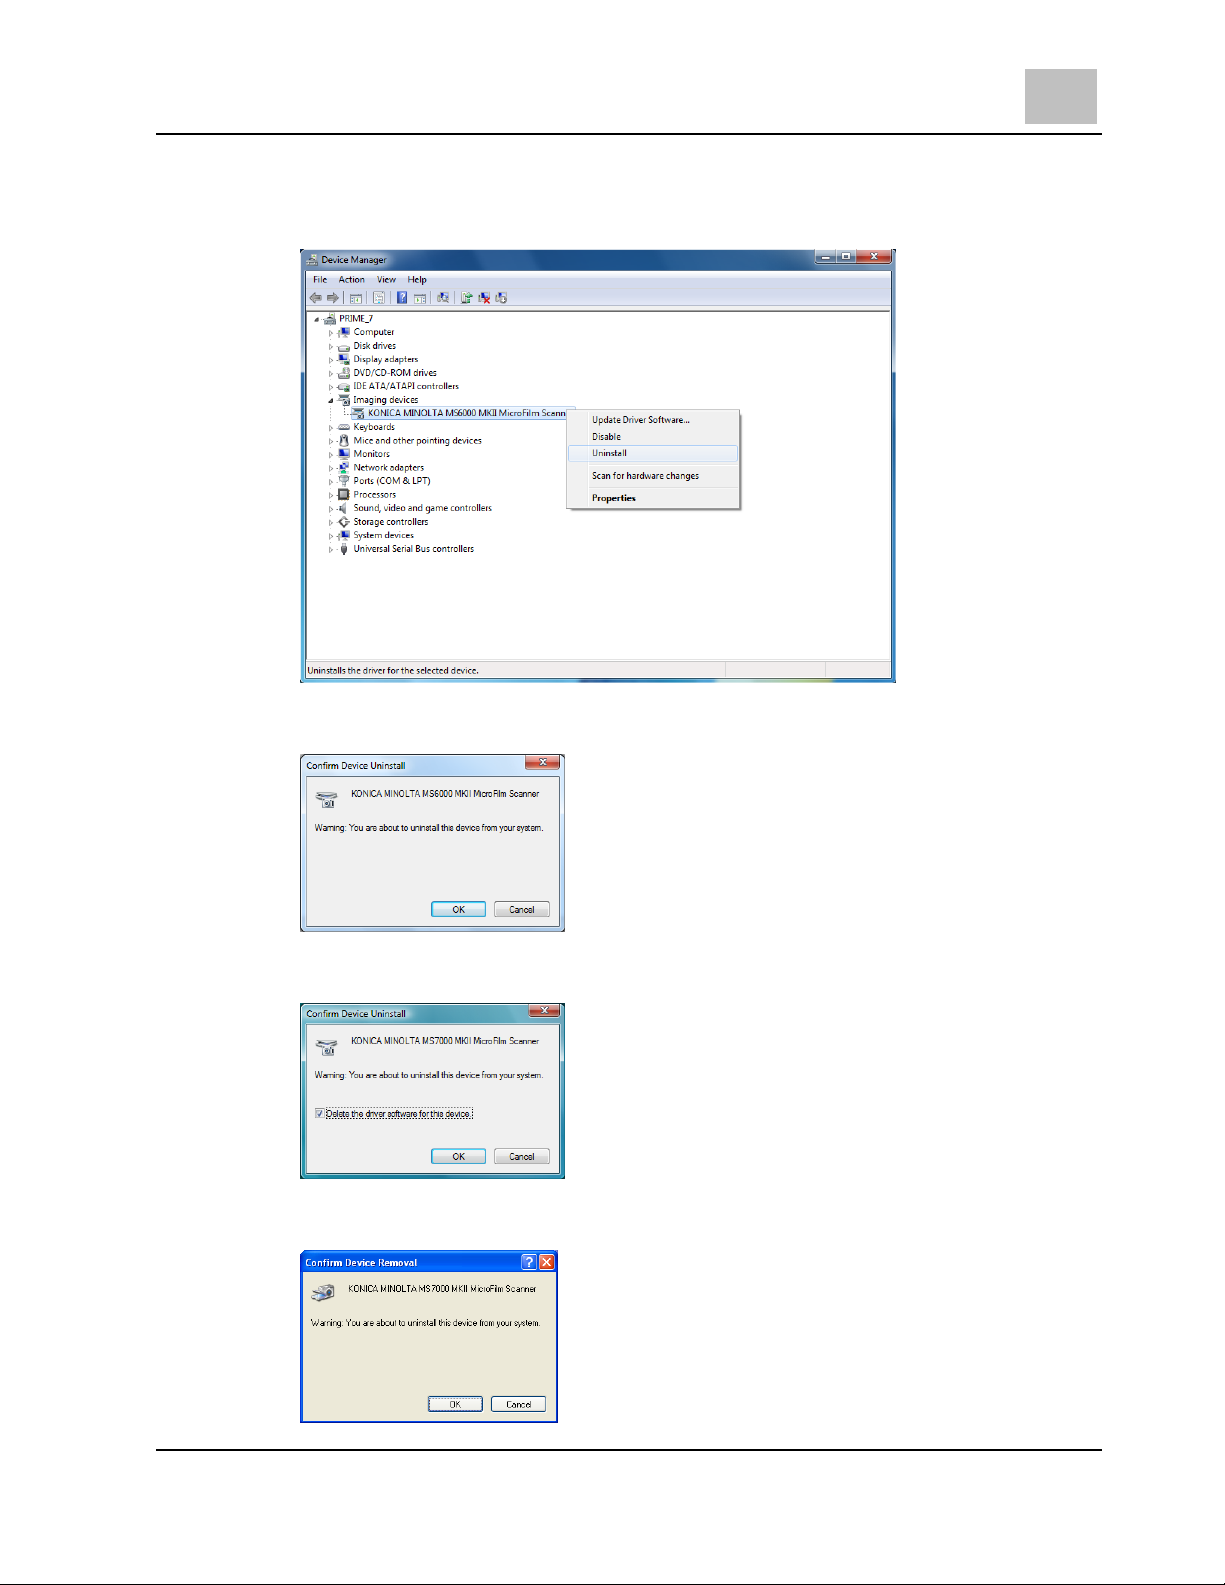
4. Uninstall the Imaging Devices - KONICA MINOLTA MS7000MKII MicroFilm
Scanner or Imaging Devices - KONICA MINOLTA MS6000MKII MicroFilm
Scanner.
¾ Windows 7: When the Confirming Device Uninstall dialog box appears, click
OK.
¾ Windows Vista: When the Confirming Device Uninstall dialog box appears,
check Delete the driver software for this device, and click OK.
¾ Windows XP, Windows 2000: When the Confirm Device Removal dialog box
appears, click OK.
MS6000 MKII/MS7000 MKII 2-13
Page 22
2 The Driver Software Installation (32bit driver)
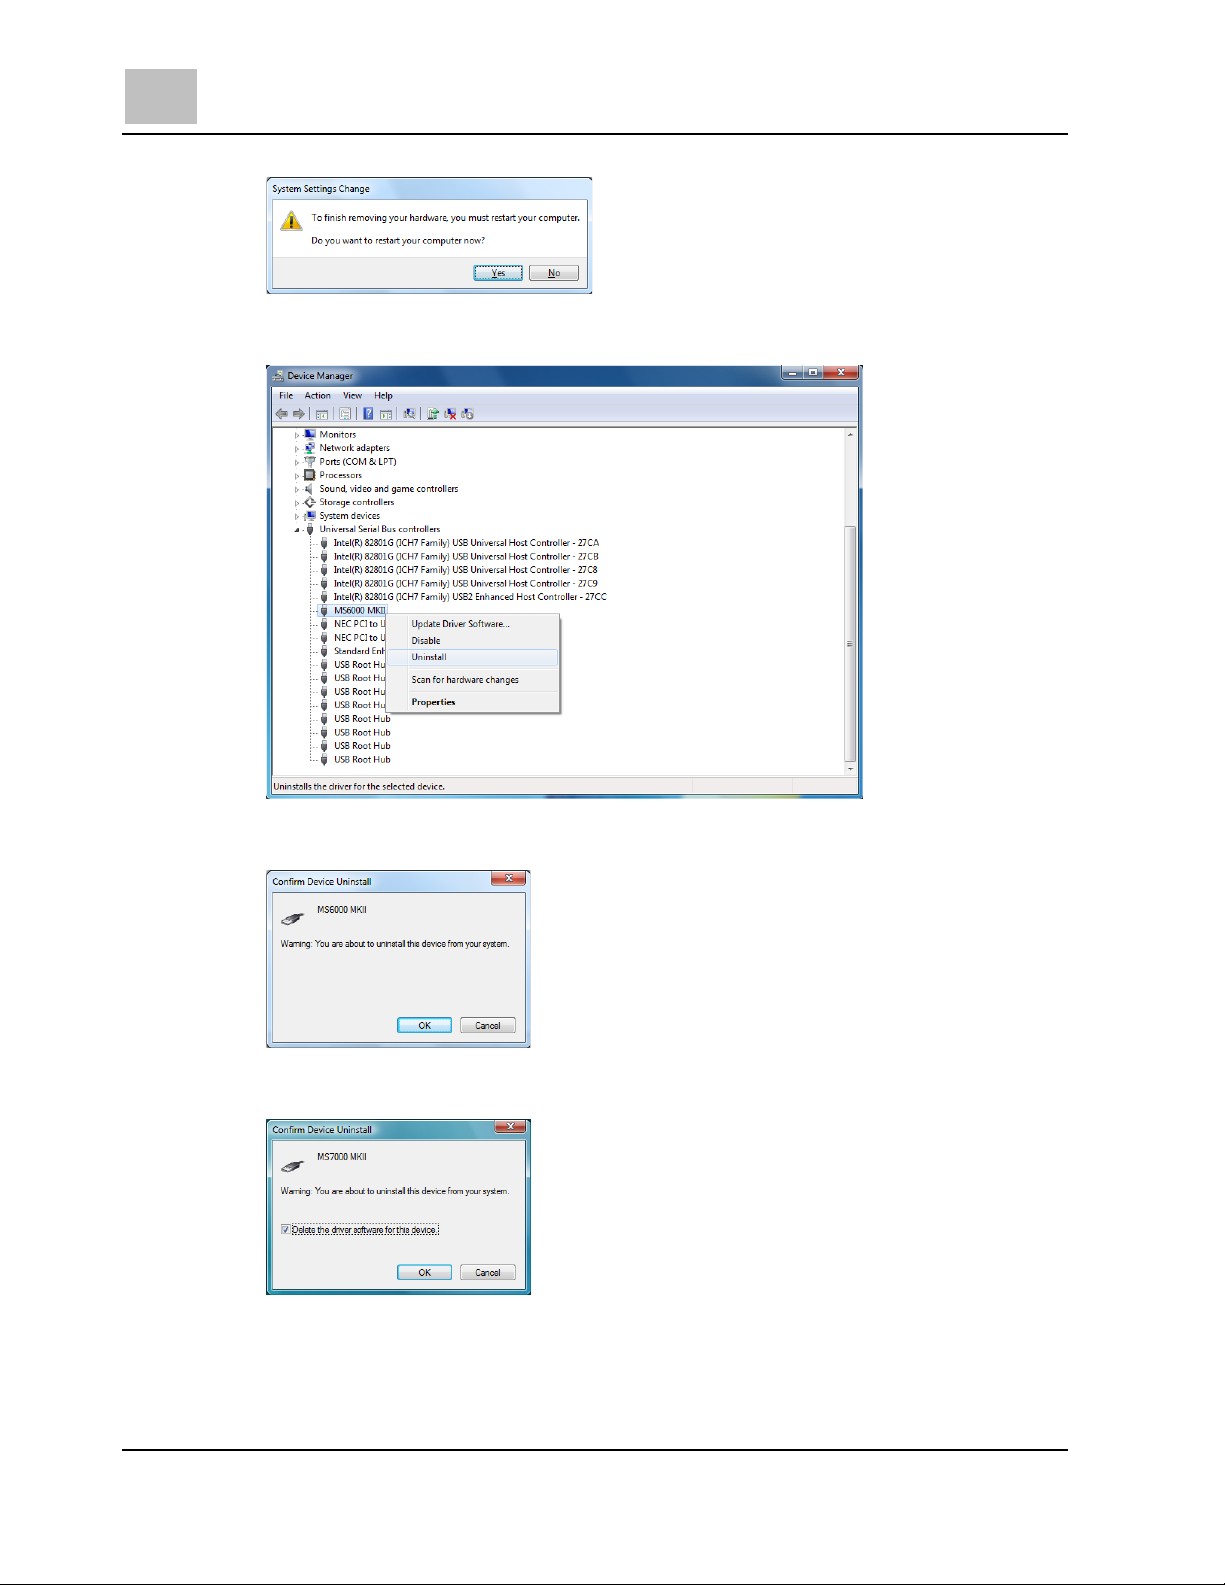
5. If the System Settings Change dialog box appears, click No.
6. Uninstall the Universal Serial Bus controllers - MS7000MKII or Universal Serial
Bus controllers - MS6000MKII.
¾ Windows 7: When the Confirming Device Uninstall dialog box appears, click
OK.
¾ Windows Vista: When the Confirming Device Uninstall dialog box appears,
check Delete the driver software for this device, and click OK.
2-14 MS6000 MKII/MS7000 MKII
Page 23

The Driver Software Installation (32bit driver) 2
¾ Windows XP, Windows 2000: When the Confirm Device Removal dialog box
appears, click OK.
7. When uninstallation is completed, turn OFF the scanner.
8. Uninstall Program
¾ Windows 7: From start menu, choose Control Panel. Click Uninstall a Program.
Select MS7000/6000 MKII Scanner Driver, and click Uninstall.
¾ Windows Vista: From start menu, choose Control Panel. Click Uninstall a
Program. Select MS7000/6000 MKII Scanner Driver, and click Uninstall.
If the User Account Control dialog box appears, click Continue.
¾ Windows XP: From start menu, choose Control Panel. Click Add or Remove
Program. Select MS7000/6000 MKII Scanner Driver, and click Remove.
¾ Windows 2000: From start menu, choose Settings and then Control panel.
Double-click Add/Remove Program. Select MS7000/6000 MKII Scanner Driver,
and click Change/Remove.
9. When the following message appears, click Yes.
MS6000 MKII/MS7000 MKII 2-15
Page 24

2 The Driver Software Installation (32bit driver)
10. When the Uninstall Complete appears, click Finish.
11. The driver was uninstalled successfully.
2-16 MS6000 MKII/MS7000 MKII
Page 25

The Driver Software Installation (32bit driver) 2
2-3 Update Scanner Driver
The following procedure shows the driver update
Administrative rights are needed for the driver update.
Note When updating the scanner driver, the uninstallation of the driver of the
previous version is unnecessary.
Screens may differ slightly depending on the Windows version.
12. Turn on the computer without turning on the scanner.
13. Insert “USB Driver Software CD” in the CD-ROM drive.
14. Double click "MS7000_Setup.exe" in the “32bit” folder of the "USB Driver
Software”.
¾ Windows 7: If the User Account Control dialog box appears, click Yes.
¾ Windows Vista: If the User Account Control dialog box appears, click Allow.
MS6000 MKII/MS7000 MKII 2-17
Page 26

2 The Driver Software Installation (32bit driver)
15. When the Update screen appears, click Next.
16. When the Update Complete screen appears, click Finish, and remove the
CD-ROM from the computer.
2-18 MS6000 MKII/MS7000 MKII
Page 27

The Driver Software Installation (64bit driver) 3
3 The Driver Software Installation (64bit driver)
This chapter details the procedures for installing the driver software and for connecting
the scanner to the computer.
Important! Do not connect the scanner to a computer before installing the driver
software.
If you connect the scanner and the Found New Hardware Wizard
appears, unplug the USB cable from the computer, and then click
Cancel to close the screen.
The MS6000MKII/MS7000MKII firmware must be version 25G110-00
or higher.
MS6000 MKII/MS7000 MKII 3-1
Page 28

3 The Driver Software Installation (64bit driver)
3-1 Installing Scanner Driver
Installing the Driver Software
The following procedure shows the 64bit driver installation.
Administrative rights are needed for the driver installation.
Note Screens may differ slightly depending on the Windows version.
1. Insert “USB Driver Software CD” in the CD-ROM drive.
2. Double click "MS7000_64_Setup.exe" in the “64bit” folder of the "USB Driver
Software”.
¾ Windows 7: If the User Account Control dialog box appears, click Yes.
¾ Windows Vista: If the User Account Control dialog box appears, click Allow.
Note If the following message appears, you have tried to install the 32bit
driver to the 64bit OS. Click OK and install the 64bit driver.
3-2 MS6000 MKII/MS7000 MKII
Page 29

The Driver Software Installation (64bit driver) 3
3. When the installation screen appears click Next.
4. Select I accept the terms of the license agreement, and click Next.
5. Click Install.
MS6000 MKII/MS7000 MKII 3-3
Page 30

3 The Driver Software Installation (64bit driver)
6. When the InstallShield Wizard Complete screen appears, click Finish, and
remove the CD-ROM from the computer.
3-4 MS6000 MKII/MS7000 MKII
Page 31

The Driver Software Installation (64bit driver) 3
Connecting to a PC
Note When connecting the scanner to the computer, use the USB cable included
with the interface kit.
Windows 7 (64bit)
1. Turn on the scanner.
2. Use the USB cable to connect the scanner to the computer.
3. Installing device driver software appears.
4. When KONICA MINOLTA MS6000 MKII Microfilm Scanner or KONICA
MINOLTA MS7000 MKII Microfilm Scanner is displayed, the driver was installed
successfully.
MS6000 MKII/MS7000 MKII 3-5
Page 32

3 The Driver Software Installation (64bit driver)
Windows Vista (64bit)
Important! For the Windows Vista 64bit, be sure to reboot the computer when
you connect the scanner to the computer and perform the installation
of the driver at the beginning.
If you don’t reboot the computer, the driver can’t be booted because it
can’t recognize the scanner.
1. Turn on the scanner.
2. Use the USB cable to connect the scanner to the computer.
3. When the Found New Hardware Wizard appears, click Locate and install driver
software (recommended).
If the User Account Control dialog box appears, click Continue.
4. When the Windows Security dialog box appears, click Install this driver
software anyway.
3-6 MS6000 MKII/MS7000 MKII
Page 33

The Driver Software Installation (64bit driver) 3
5. When KONICA MINOLTA MS6000 MKII Microfilm Scanner or KONICA
MINOLTA MS7000 MKII Microfilm Scanner is displayed, be sure to power off the
scanner and reboot the computer.
Note If you click the above balloon, following screen appears.
The update of Windows will be performed during the rebooting of the
computer, so be sure not to power off the computer during the update of
Windows.
6. Reboot the computer, then power on the scanner again.
7. Then Installing device driver software appears again.
8. When KONICA MINOLTA MS6000 MKII Microfilm Scanner or KONICA
MINOLTA MS7000 MKII Microfilm Scanner is displayed, the driver was installed
successfully.
MS6000 MKII/MS7000 MKII 3-7
Page 34

3 The Driver Software Installation (64bit driver)
Windows XP Professional x64 Edition (64bit)
1. Turn on the scanner.
2. Use the USB cable to connect the scanner to the computer.
3. When the Found New Hardware Wizard appears, select No, not this time, and
click Next.
4. Select Install the software automatically (Recommended), and click Next.
5. When the Hardware Installation dialog box appears, click Continue Anyway.
3-8 MS6000 MKII/MS7000 MKII
Page 35

The Driver Software Installation (64bit driver) 3
6. Confirming the completion of the search wizard, click Finish.
7. The installation of the Driver is completed.
MS6000 MKII/MS7000 MKII 3-9
Page 36

3 The Driver Software Installation (64bit driver)
3-2 Uninstall Scanner Driver
When the Driver installed on the computer is no longer needed, use the following
procedure to perform the deletion.
1. Confirm that the computer is connected with the scanner.
2. Turn ON the computer and the scanner.
3. Select Device Manager
¾ Windows 7: From start menu, choose Control Panel. Click System and
Security. Click Device Manager.
¾ Windows Vista: From start menu, choose Control Panel. Click System and
Maintenance. Click Device Manager.
If the User Account Control dialog box appears, click Continue.
¾ Windows XP: From start menu, choose Control Panel. Click Performance and
Maintenance. Click System. Click the Hardware tab, and then click Device
Manager.
3-10 MS6000 MKII/MS7000 MKII
Page 37

The Driver Software Installation (64bit driver) 3
4. Uninstall the Universal Serial Bus controllers - KONICA MINOLTA
MS7000MKII MicroFilm Scanner or Universal Serial Bus controllers - KONICA
MINOLTA MS6000MKII MicroFilm Scanner.
¾ Windows 7: When the Confirming Device Uninstall dialog box appears, click
OK.
¾ Windows Vista: When the Confirming Device Uninstall dialog box appears,
check Delete the driver software for this device, and click OK.
¾ Windows XP: When the Confirm Device Removal dialog box appears, click OK.
MS6000 MKII/MS7000 MKII 3-11
Page 38

3 The Driver Software Installation (64bit driver)
5. If the System Settings Change dialog box appears, click No.
6. When uninstallation is completed, turn OFF the scanner.
7. Uninstall Program
¾ Windows 7: From start menu, choose Control Panel. Click Uninstall a Program.
Select MS7000/6000 MKII Scanner Driver, and click Uninstall.
¾ Windows Vista: From start menu, choose Control Panel. Click Uninstall a
Program. Select MS7000/6000 MKII Scanner Driver, and click Uninstall.
If the User Account Control dialog box appears, click Continue.
¾ Windows XP: From start menu, choose Control Panel. Click Add or Remove
Program. Select MS7000/6000 MKII Scanner Driver, and click Remove.
8. When the following message appears, click Yes.
3-12 MS6000 MKII/MS7000 MKII
Page 39

The Driver Software Installation (64bit driver) 3
9. When the Uninstall Complete appears, click Finish.
10. The driver was uninstalled successfully.
MS6000 MKII/MS7000 MKII 3-13
Page 40

3 The Driver Software Installation (64bit driver)
3-3 Update Scanner Driver
The following procedure shows the driver update
Administrative rights are needed for the driver update.
Note When updating the scanner driver, the uninstallation of the driver of the
previous version is unnecessary.
Screens may differ slightly depending on the Windows version.
1. Turn on the computer without turning on the scanner.
2. Insert “USB Driver Software CD” in the CD-ROM drive.
3. Double click "MS7000_64_Setup.exe" in the “64bit” folder of the "USB Driver
Software”.
¾ Windows 7: If the User Account Control dialog box appears, click Yes.
¾ Windows Vista: If the User Account Control dialog box appears, click Allow.
3-14 MS6000 MKII/MS7000 MKII
Page 41

The Driver Software Installation (64bit driver) 3
4. When the Update screen appears, click Next.
5. When the Update Complete screen appears, click Finish, and remove the
CD-ROM from the computer.
MS6000 MKII/MS7000 MKII 3-15
Page 42

4 The MS6000 MKII TWAIN Driver User’s Guide
4 The MS6000 MKII TWAIN Driver User’s Guide
4-1 The MS6000 MKII Scanner User Interface Setup
By installing a TWAIN compatible application on a personal computer, the Scanner can
be operated by starting the TWAIN driver.
When selecting the TWAIN driver, the following basic screen appears. Check and select
the Scan Setting according to your configurations.
4-2 MS6000 MKII/MS7000 MKII
Page 43

The MS6000 MKII TWAIN Driver User’s Guide 4
4-2 Scan Setting
Template
When registering preset contents, input the registration name on the Registration Name
column as below.
¾ Save - Save the registration name.
The scanner driver's configurations that are selected by the user are saved as a
template.
¾ Delete - Delete the registered name.
Select the registration name to be deleted. Clicking the Delete button, the selected
registration name and the template are deleted.
¾ Return - Return to the registered name.
Note The template file is preserved in the following folder.
Windows 7:
C:\Users\[user name]\AppData\Roaming\MicroDS
Windows Vista:
C:\Users\[user name]\AppData\Roaming\MicroDS
Windows XP:
C:\Documents and Settings\[user name]\Application Data\MicroDS
Windows 2000:
C:\Documents and Settings\[user name]\Application Data\MicroDS
Scan Size
Select the scanning size.
Scan Mode
Select the scanning mode. (Only “Single” can be selected on MS6000MKII.)
Resolution
Select the resolution of the image.
MS6000 MKII/MS7000 MKII 4-3
Page 44

4 The MS6000 MKII TWAIN Driver User’s Guide
Note 800dpi is effective only when 8.5”x11” (P) and A4 (P) are selected.
Metric Size (United States)
The scanner can be set to metric size in Scan Size.
Inch Size (Other Countries)
The scanner can be set to inch size in Scan Size.
Preview
Click the Preview Window (see below).
4-3 The Preview Window
4-4 MS6000 MKII/MS7000 MKII
Page 45

The MS6000 MKII TWAIN Driver User’s Guide 4
Custom Size Name
When registering a preset specified scanning size, input the name on the Custom Size
Name column.
¾ Save - Save the name and configuration which is specified on range of the Preview
Window.
¾ Delete - Delete the saved name and data which is selected on the Custom Size
Name column.
Rulers
¾ Unit - When specifying the scanning size area in a preview window an inch or
millimeter measure can be chosen from the Unit column.
The Window
The specified scanning size (reading area of the scanner for the screen) is displayed on
the preview window as a dashed line.
The scanning size of the dashed line can be specified by using a mouse.
The Action Buttons
¾ Preview - The full screen is scanned with low resolution, and the result is displayed
on the preview window.
¾ Close - Closes the Preview Window.
4-4 Film Type
Select the polarity of the read Film Type.
¾ Automatic - Select when using automatic film type detection.
¾ Negative - Select when using the negative film.
¾ Positive - Select when using the positive film.
MS6000 MKII/MS7000 MKII 4-5
Page 46

4 The MS6000 MKII TWAIN Driver User’s Guide
4-5 Image Adjustment
Output
Select the processing mode of the output image.
¾ Black And White (Text) - For use with text images.
¾ Black And White (Photo) - For use with photo images.
¾ Black And White (Fine mode1), Black And White (Fine mode2) - For use with
lower grades of film.
¾ Grayscale (Text), Grayscale (Photo), Grayscale (Fine mode1), Grayscale (Fine
mode2) - Suitable mode for use with gradation images, because the image data is
converted to grayscale data, and the image size becomes large.
Note Optional Grayscale Memory Board is needed for Grayscale mode.
Masking
When a scanning size that is bigger than the image has been selected, an outside
portion of the image is deleted in the Masking mode.
OFF ON
ABCD
EFGH
IJKL
ABCD
EFGH
IJKL
Auto Frame Elimination
When a scanning size that is bigger than the image has been selected, a surplus frame
around the image is cut out in the Auto Frame Elimination mode.
OFF ON
ABCD
EFGH
IJKL
ABCD
EFGH
IJKL
4-6 MS6000 MKII/MS7000 MKII
Page 47

The MS6000 MKII TWAIN Driver User’s Guide 4
Centering
When selecting the Centering mode, the outside of the image is masked out, and the
remaining image is centered.
OFF ON
Automatic Deskew
The skewed image will be corrected.
4-6 Lamp
Auto Lamp OFF
When the Auto Lamp OFF mode is selected, the lamp turns off automatically. The initial
default setting is “Disabled”.
ABCD
EFGH
IJKL
ABCD
EFGH
IJKL
4-7 Brightness and Contrast
Exposure Mode
Select “Auto” or “Manual” as the exposure control
¾ Auto - The density is controlled automatically in corresponding with the original.
¾ Manual - The density can be manually controlled.
MS6000 MKII/MS7000 MKII 4-7
Page 48

4 The MS6000 MKII TWAIN Driver User’s Guide
Brightness
The Brightness can be adjusted by the scroll bar. It is available in 37 steps for Manual,
and 19 steps for Auto.
Contrast
The Contrast can be adjusted by the scroll bar. It is available in 15 steps.
4-8 Batch Scan Mode
When utilized this application can continue to initiate scans upon completion of the initial
scan.
When selected the Batch Scan Mode will cause the driver to remain open and will place
a Done button in the Status Window. While the Status Window is displayed you can
continue to initiate scans and make setting changes from the front panel of the scanner.
When the Done button is pressed, the Status Window and Driver UI will close and all
image data will be displayed in the scanning application.
Note If Batch Scan Mode is used, the 2nd and all subsequent scans are executed
with the scanner.
4-8 MS6000 MKII/MS7000 MKII
Page 49

The MS6000 MKII TWAIN Driver User’s Guide 4
4-9 The Action Buttons
Scan
The scanning begins. It becomes Scan Stop button while scanning.
Note While scanning, do not change the panel settings of the scanner or the
driver settings.
Close
When the Close button is clicked, the Status Window and Driver UI is closed.
MS6000 MKII/MS7000 MKII 4-9
Page 50

5 The MS7000 MKII TWAIN Driver User’s Guide
5 The MS7000 MKII TWAIN Driver User’s Guide
5-1 The MS7000 MKII Scanner User Interface Setup
By installing a TWAIN compatible application on a personal computer, the Scanner can
be operated by starting the TWAIN driver.
When selecting the TWAIN driver, the following basic screen appears. Check and select
the Scan Setting according to your configurations.
5-2 MS6000 MKII/MS7000 MKII
Page 51

The MS7000 MKII TWAIN Driver User’s Guide 5
5-2 Scan Setting
Template
When registering preset contents, input the registration name on the Registration Name
column as below.
¾ Save - Save the input registration name.
The scanner driver's configurations that are selected by the user are saved as a
template.
¾ Delete - Delete the registered name.
Select the registration name to be deleted. Clicking the Delete button, the selected
registration name and the template are deleted.
¾ Return - Return to the registered name.
Note The template file is preserved in the following folder.
Windows 7:
C:\Users\[user name]\AppData\Roaming\MicroDS
Windows Vista:
C:\Users\[user name]\AppData\Roaming\MicroDS
Windows XP:
C:\Documents and Settings\[user name]\Application Data\MicroDS
Windows 2000:
C:\Documents and Settings\[user name]\Application Data\MicroDS
Scan Size
Select the scanning size.
Scan Position
Select the scanning position.
¾ Center - It scans based on the center position of the screen.
¾ Left - It scans based on the left end position of the screen.
MS6000 MKII/MS7000 MKII 5-3
Page 52

5 The MS7000 MKII TWAIN Driver User’s Guide
Scan Mode
Select the scanning mode.
The Screen of the Scanner
¾ Single - Delivers one image as defined by the screen of the scanner.
¾ Single (Check) - Delivers one image as defined by combined images (left and right)
on the screen of the scanner.
When selecting Masking with narrow pitched frame images, two separate images will
be detected.
Single [Masking OFF] Single (Check) [Masking OFF]
Single [Masking ON] Single (Check) [Masking ON]
Note When selecting the Single (check), Auto Frame Elimination and
LEFT RIGHT
LEFT RIGHT
LEFT RIGHT
Automatic Deskew can not be enabled.
LEFT RIGHT
LEFT RIGHT
¾ Dual (Check) - Delivers two images as defined by separated images (left and right)
on the screen of the scanner.
When selecting Masking with narrow pitched frame images, two separate images will
be detected.
Note When selecting the Dual (check), Auto Frame Elimination can not be
enabled.
5-4 MS6000 MKII/MS7000 MKII
Page 53

The MS7000 MKII TWAIN Driver User’s Guide 5
¾ Dual - Delivers two images as defined by separated images (left and right) on the
screen of the scanner (for viewing two standard size images side by side).
Dual
¾ Stack L/R Letter, Stack R/L Letter - Changes position of images from left/right
positions, to a stacked top/bottom position in Letter size.
Stack L/R Letter Stack R/L Letter
Note Grayscale can not be enabled in the Stack Letter modes.
¾ Stack L/R Actual, Stack R/L Actual - Changes position of images from left/right
positions, to a stacked top/bottom position.
LEFT RIGHT
LEFT
RIGHT
When selecting the Stack Letter modes, Auto Frame Elimination can not
be enabled.
RIGHT
LEFT
Stack L/R Actual Stack R/L Actual
Note Grayscale can not be enabled in the Stack Actual modes.
Note When selecting Auto 11x17”-8.5x11” or Auto A3-A4, only Single can be
LEFT
RIGHT
When selecting the Stack Letter modes, Auto Frame Elimination can not
be enabled.
enabled.
RIGHT
LEFT
MS6000 MKII/MS7000 MKII 5-5
Page 54

5 The MS7000 MKII TWAIN Driver User’s Guide
Resolution
Select the resolution of the image.
Note 800dpi is effective only when 11”x8.5” (L), 8.5”x14” (L), 3 2/3”x17” (L), Check
(L), and A4 (L) are selected.
Metric Size (United States)
The scanner can be set to metric size in Scan Size.
Inch Size (Other Countries)
The scanner can be set to inch size in Scan Size.
Preview
Click the Preview Window (see below).
5-6 MS6000 MKII/MS7000 MKII
Page 55

The MS7000 MKII TWAIN Driver User’s Guide 5
5-3 The Preview Window
Custom Size Name
When registering the preset specified scanning size, input the name on the Custom Size
Name column.
¾ Save - Save the name and data which is specified on range of the Preview Window.
¾ Delete - Delete the saved name and data which is selected on the Custom Size
Name column.
Rulers
¾ Unit - When specifying the scanning size area on a preview window an inch or
millimeter measure can be chosen on the Unit column.
The Window
The specified scanning size (reading area of the scanner for the screen) is displayed on
the preview window as a dashed line.
The scanning size of a dashed line can be specified by using a mouse.
MS6000 MKII/MS7000 MKII 5-7
Page 56

5 The MS7000 MKII TWAIN Driver User’s Guide
The Action Buttons
¾ Preview - The full screen is scanned with low resolution, and the result is displayed
on the preview window.
¾ Close - Close the Preview Window.
5-4 Film Type
Select the polarity of the read Film Type.
¾ Automatic - Select when using automatic film type detection.
¾ Negative - Select when using the negative film.
¾ Positive - Select when using the positive film.
5-5 Image Adjustment
Output
Select the processing mode of the output image.
¾ Black And White (Text) - For use with text images.
¾ Black And White (Photo) - For use with photo images.
¾ Black And White (Fine mode1), Black And White (Fine mode2) - For use with
lower grades of film.
¾ Grayscale (Text), Grayscale (Photo), Grayscale (Fine mode1), Grayscale (Fine
mode2) - Suitable mode for use with gradation images, because the image data is
converted to grayscale data, and the image size becomes large.
Note Optional Grayscale Memory Board is needed for Grayscale mode.
5-8 MS6000 MKII/MS7000 MKII
Page 57

The MS7000 MKII TWAIN Driver User’s Guide 5
Masking
When a scanning size that is bigger than the image has been selected, an outside
portion of the image is deleted in the Masking mode.
OFF ON
ABCD
EFGH
IJKL
ABCD
EFGH
IJKL
Auto Frame Elimination
When a scanning size that is bigger than the image has been selected, a surplus frame
around the image is cut out in the Auto Frame Elimination mode.
OFF ON
Note When Scan Mode is Single or Dual, the Auto Frame Elimination can be
used.
ABCD
EFGH
IJKL
ABCD
EFGH
IJKL
Centering
When selecting the Centering mode, the outside of the image is masked out, and the
remaining image is centered.
OFF ON
ABCD
EFGH
IJKL
ABCD
EFGH
IJKL
MS6000 MKII/MS7000 MKII 5-9
Page 58

5 The MS7000 MKII TWAIN Driver User’s Guide
Automatic Deskew
The skewed image will be corrected.
5-6 Lamp
Auto Lamp OFF
When the Auto Lamp OFF mode is selected, the lamp turns off automatically. The initial
default setting is “Disabled”.
5-7 Brightness and Contrast
Exposure Mode
Select “Auto” or “Manual” as the exposure control
¾ Auto - The density is controlled automatically in corresponding with the original.
¾ Manual - The density can be manually controlled.
Brightness
The Brightness can be adjusted by the scroll bar. It is available in 37 steps for Manual,
and in 19 steps for Auto.
Contrast
The Contrast can be adjusted by the scroll bar. It is available in15 steps.
5-10 MS6000 MKII/MS7000 MKII
Page 59

The MS7000 MKII TWAIN Driver User’s Guide 5
5-8 Batch Scan Mode
When utilized the application can continue to initiate scans upon completion of the initial
scan.
When selected the Batch Scan Mode will cause the driver to remain open and will place
a Done button in the Status Window. While the Status Window is displayed you can
continue to initiate scans and make setting changes from the front panel of the scanner.
When the Done button is pressed, the Status Window and Driver UI will close and all
image data will be displayed in the scanning application.
Note If Batch Scan Mode is used, the 2nd and all subsequent scans are executed
with the scanner.
5-9 The Action Buttons
Scan
The scanning begins. It becomes Scan Stop button while scanning.
Note While scanning, do not change the panel settings of the scanner or the
driver settings.
Focus
The focus is adjusted automatically.
Note Do not perform any other operation while using focus.
MS6000 MKII/MS7000 MKII 5-11
Page 60

5 The MS7000 MKII TWAIN Driver User’s Guide
Close
When the Close button is clicked, the Status Window and Driver UI is closed.
5-12 MS6000 MKII/MS7000 MKII
Page 61

Special Function 6
6 Special Function
6-1 Activating the special functions
After the driver is installed, the special functions are disabled. To make the special
functions active, please follow the procedure below.
MS6000 MKII/MS7000 MKII 6-1
Page 62

6 Special Function
1. Double-click the “MS7000_6000AdminTool.exe”, the tool for the administrator
which is installed in the “C:\Windows\twain_32” folder.
¾ Windows 7: If the User Account Control dialog box appears, click Yes.
¾ Windows Vista: If the User Account Control dialog box appears, click Allow.
2. When the A special function was effective dialog box appears, click OK.
6-2 MS6000 MKII/MS7000 MKII
Page 63

Special Function 6
3. When the above procedure is completed, the following special functions are
effective.
¾ Engineering Enhancement
¾ Overlay
¾ MARS Controller / ACF Controller (When ACF-7 is connected)
MS6000 MKII/MS7000 MKII 6-3
Page 64

6 Special Function
6-2 Disabling the special functions
Please follow the procedure below to de-activate the special functions.
1. Double-click the “MS7000_6000AdminTool.exe”, which is installed in the
“C:\Windows\twain_32” folder.
¾ Windows 7: If the User Account Control dialog box appears, click Yes.
¾ Windows Vista: If the User Account Control dialog box appears, click Allow.
2. When the A special function was invalidated dialog box appears, click OK.
6-4 MS6000 MKII/MS7000 MKII
Page 65

Special Function 6
3. When the above procedure is completed, the following special functions are
de-activated.
¾ Engineering Enhancement
¾ Overlay
¾ MARS Controller / ACF Controller (When ACF-7 is connected)
MS6000 MKII/MS7000 MKII 6-5
Page 66

6 Special Function
6-3 Image Adjustment
Engineering Enhancement
Corrects the image distorted to the barrel type.
MS7000 MKII: The image distorted to the barrel type as follows is corrected.
MS6000 MKII: The image distorted to the barrel type as follows is corrected.
Note The above-mentioned illustrations are exaggerated and drawn rather than
actually produced distortion.
6-4 Overlay
When outputting directly from the scanner to the printer, the specified character can be
printed.
Select Overlay
When the “Select Overlay” window is selected, the character overlay dialog is started.
Enable Overlay
When printing directly from the scanner to the printer, the Font that is specified in the
“Character Selection” is printed out.
6-6 MS6000 MKII/MS7000 MKII
Page 67

Special Function 6
Note It takes about 30 seconds to one minute to communicate with the scanner.
6-5 Overlay Window
¾ Setting of character - Selects the character area, font, font-size and others, and
input the prints.
¾ Overlay Position - Select the overlay position. There are eight places in total: four
corners of the paper and the center of four sides.
¾ Open File - Open the file which specified the contents of overlay.
¾ Save As File - Save the specified contents as files.
¾ OK - Determine the contents of the overlay.
¾ Cancel - Cancels the determined contents.
Note Please set the value from 5 to 190mm when prompted on the screen.
Please do not perform other operations while setting the value.
MS6000 MKII/MS7000 MKII 6-7
Page 68

6 Special Function
6-6 The Action Buttons
MARS Controller
When the MARS controller is connected, the MARS Controller screen is displayed under
the Scan Setting screen.
ACF Controller (When ACF-7 is connected)
When the ACF-7 is connected, the ACF Controller screen is displayed under the Scan
Setting screen.
6-7 MARS Controller
It is a function of the PC to control the Mars controller. This function cannot be utilized
when not connected with the Mars controller.
.
Note The MARS CONTROLLER 4 firmware must be version 4.5 or 5.5 or higher.
The MARS MINI CONTROLLER 2 firmware must be version 1.6 or
26G100-00 or higher.
¾ Single Level Retrieval, Dual Level Retrieval - Select the type of film retrieval with
Single Level Retrieval or Dual Level Retrieval.
Note The MARS mode selection should be matched to the type of film being
used.
6-8 MS6000 MKII/MS7000 MKII
Page 69

Special Function 6
¾ Chapter Frame Number Box - Displays the current frame number “Chapter” as
reported by the MARS Controller.
¾ Page Frame Number Box - Displays the current frame number “Page” as reported
by the MARS controller.
Note Chapter can be input only at Dual Level Retrieval.
¾ Search Frame - Search the specified frame number.
¾ Set Frame Number - Change the present frame number to the specified frame
number.
¾ Rewind - Rewind the film. When the film is not set, it becomes "Film Set" button.
Move
¾ One Chapter, One Page - Select the unit of the frame movement by the chapter unit
and the page unit.
¾ <<, >> - The frame is sent back and forth by the page unit or the chapter unit.
Adjust Stop Position
¾ <<, >> - The film stop position is fine-tuned back and forth.
Auto Scan
¾ Start Chapter Number Box - Sets the desired beginning Chapter number to start
with when using “Dual Level Retrieval”.
¾ Start Page Number Box / End Page Number Box - Sets the desired beginning
frame number “Page” and the end frame number “Page”.
¾ 1st Page Only - When dual level is retrieved, only the first frame chapter is scanned.
¾ Interval Scan - It scans continuously while skipping the frame at the specified
interval.
¾ Auto Scan - Starts the continuous scan. While continuously scanning, it becomes
“Scan Stop” button.
MS6000 MKII/MS7000 MKII 6-9
Page 70

6 Special Function
6-8 ACF Controller (When ACF-7 is connected)
It is a function of the PC to control the ACF-7. This function cannot be performed when
not connected with ACF-7.
Note The ACF-7 firmware must be version 50G107-00 or higher.
Auto Feed / Scan
¾ Number of Cards, All Cards - Specify the number of cards to be used continuously
scanned.
¾ Auto Feed / Scan - Starts the continuous scanning. While in continuous scanning, it
becomes “Scan Stop” button. When the button is pressed, continuous scanning is
stopped.
Auto Feed
¾ Number of Cards, All Cards - Specify the number of cards which performs
continuous card feeding.
¾ Auto Feed - Start the continuous card feeding. While in continuously card feeding, it
becomes “Feed Stop” button. When the button is pressed, continuous card feeding is
stopped.
¾ Feed Interval - Specify the interval of the card feeding.
6-10 MS6000 MKII/MS7000 MKII
Page 71

Page 72

Copyright
2010 KYOKKO SEIKO CO., LTD.
The information contained in this
manual is subject to change without
notice to incorporate improvements
made on the product or products the
manual covers.
Manufactured For Konica-Minolta by Kyokko Seiko
100 Williams Drive Ramsey, NJ 07446
2010. 10
 Loading...