

Page 1

®
magicolor 5430 DL
Reference Guide
4138-7744-01A
1800761-001A
Page 2

Copyright Notice
The digitally encoded software and publication included with your printer are
Copyrighted © 2004 by KONICA MINOLTA BUSINESS TECHNOLOGIES, INC.,
Marunouchi Center Building, 1-6-1 Marunouchi, Chiyoda-ku, Tokyo, 100-0005,
Japan. All Rights Reserved.
This software may not be reproduced, modified, displayed, transferred, or copied in
any form or in any manner or on any media, in whole or in part, without the express
written permission of KONICA MINOLTA PRINTING SOLUTIONS U.S.A., INC.
No part of this publication may be reproduced, stored in a retrieval system, or transmitted in any form or by any means, electronic, mechanical, photocopying, recording, or otherwise, without the prior written permission of KONICA MINOLTA. The
information contained in this guide is intended for use with the KONICA MINOLTA
magicolor 5430 DL printers only.
Trademarks
KONICA MINOLTA and the KONICA MINOLTA logo are trademarks or registered
trademarks of KONICA MINOLTA HOLDINGS, INC.
magicolor is a trademark or registered trademark of KONICA MINOLTA PRINTING
SOLUTIONS U.S.A., INC.
Notice
KONICA MINOLTA BUSINESS TECHNOLOGIES, INC. reserves the right to make
changes to this guide and to the equipment described herein without notice. Considerable effort has been made to ensure that this manual is free of inaccuracies and
omissions. However, KONICA MINOLTA BUSINESS TECHNOLOGIES, INC. makes
no warranty of any kind including, but not limited to, any implied warranties of merchantability and fitness for a particular purpose with regard to this manual.
KONICA MINOLTA BUSINESS TECHNOLOGIES, INC. assumes no responsibility
for, or liability for, errors contained in this manual or for incidental, special, or consequential damages arising out of the furnishing of this manual, or the use of this manual in operating the equipment, or in connection with the performance of the
equipment when so operated.
Page 3

Contents
1 Operation on Mac OS X ....................................................................................1
System Requirements for the Printer Driver 2
Installing the Printer Driver 3
Installing Ghostscript 3
Installing the magicolor 5430 DL Printer Driver 7
Print Center Settings 12
When using a USB connection 12
When using a network connection 15
Rendezvous Setting 15
IP Printing Setting 17
Specifying Port 9100 19
Selecting Print Options 22
Uninstalling the Printer Driver 24
Specifying Page Setup Settings 26
Page Attributes Options 27
Custom Paper Size Options 28
Summary 29
Specifying Print Settings 30
Print Dialog Box 31
Common buttons 32
Contents
i
Page 4

Copies & Pages 32
Layout 33
Duplex 34
Output Options 35
Paper Feed 36
Printer Features 37
Basic Features 38
Color Matching Options 39
Watermark Orientation 40
Watermark Selection 41
Watermark Setting 42
Summary 43
Checking Print Jobs 44
Deleting a Print Job 44
Troubleshooting 45
2 Understanding the Network Configuration Menus .......................................47
Network Menu 48
Location within the Configuration Menu 48
Accessing the Network Menu 49
Using the Network Menu Options 49
DHCP/BOOTP 49
IP Address 50
Subnet Mask 50
Gateway 50
Mac Address 51
HTTP 51
SNMP 51
3 Network Printing in a Windows Environment ...............................................53
Network Connection 54
Theory 54
Supported Environments 54
Making the Connection 55
Ethernet Interface 55
Using DHCP 55
Setting the Address Manually 56
Network Printing 59
BOOTP 59
DHCP 59
HTTP 59
IPP 60
LPD/LPR 60
SLP 60
SNMP 61
TCP/IP 61
Contentsii
Page 5

Printing via IPP (Internet Printing Protocol) – Windows Server 2003/XP/
2000 62
Adding an IPP Port 62
Printing via IPP (Internet Printing Protocol) – Windows Me/98SE 65
Adding an IPP port 65
Printing via IPP if the Printer Driver is Already Installed 68
4 Using PageScope Web Connection .............................................................. 69
About PageScope Web Connection 70
Display Language 70
Requirements 70
Setting Up the Printer Web Page 71
Determining the Printer Name 71
Setting Up Your Browser Software 71
Internet Explorer (version 6.0 for Windows) 72
Netscape Navigator (version 7.1) 72
Safari (version 1.1) 73
Understanding the PageScope Web Connection Window 74
Navigation 74
Current Status 75
User Mode 75
Administrator Mode 75
Viewing Printer Status 76
System Page 76
Summary (shown above) 77
Details 78
Counter 82
Online Assistance 83
Job Page 84
Active Job (shown above) 84
Print Page 86
Test Print (shown above) 86
Configuring the Printer 87
System Page 87
User Choice (shown above) 87
Password 89
Preference 91
Online Assistance 93
Network 95
Configuration (shown above) 95
Contents
iii
Page 6

Page 7

Operation on
Mac OS X
1
Page 8
System Requirements for the Printer Driver
Before installing the printer driver, make sure that your system meets the following system requirements.
Computer Apple Macintosh computer with a PowerPC
G3 or later processor (PowerPC G4 or later is
recommended)
Connecting the computer
and printer
Operating system Mac OS X v10.2 or later
RAM More than OS recommendation
Available disk space 256 MB or more (for storing images)
USB connection, Network connection
(10Base-T/100Base-TX)
System Requirements for the Printer Driver2
Page 9

Installing the Printer Driver
" You must have administrator privileges in order to install the printer
driver.
" Before proceeding with the installation, be sure to exit all running
applications.
Installing Ghostscript
You need to install Ghostscript before installing the printer driver. The following procedure is not required with Mac OS X 10.3 or later.
1 The latest version of Ghostscript can be downloaded from <http://
www.cups.org/ghostscript.php>.
" Here we explain how to install the software from the
espgs-7.05.5-0.ppc.dmg disk image file.
2 Double click the espgs-7.05.5-0.ppc.dmg file.
The disk image Install ESP Ghostscript 7.05.5 appears on the desktop.
3 Double click the ESP Ghostscript.mpkg package file in the disk image.
4 Enter the administrator user name and password in the Authenticate dia-
log box, and then click OK.
Installing the Printer Driver
3
Page 10
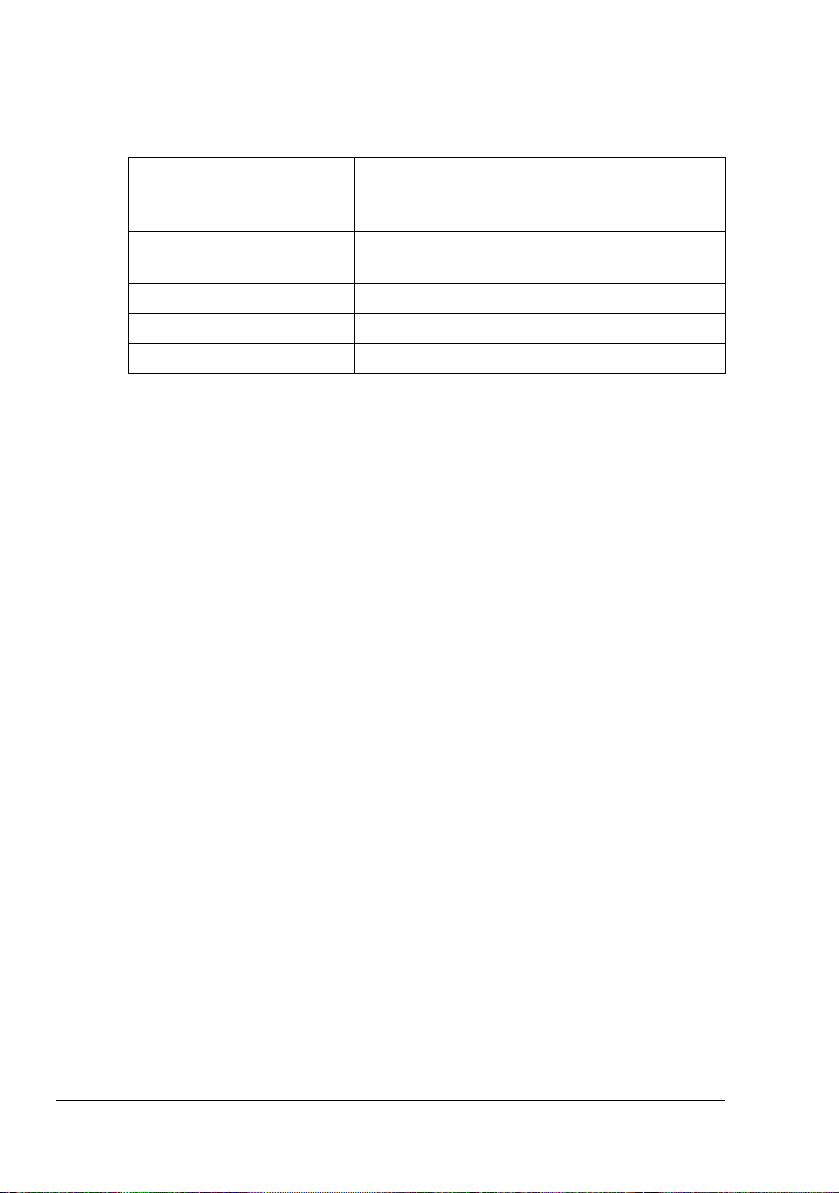
5 Click Continue.
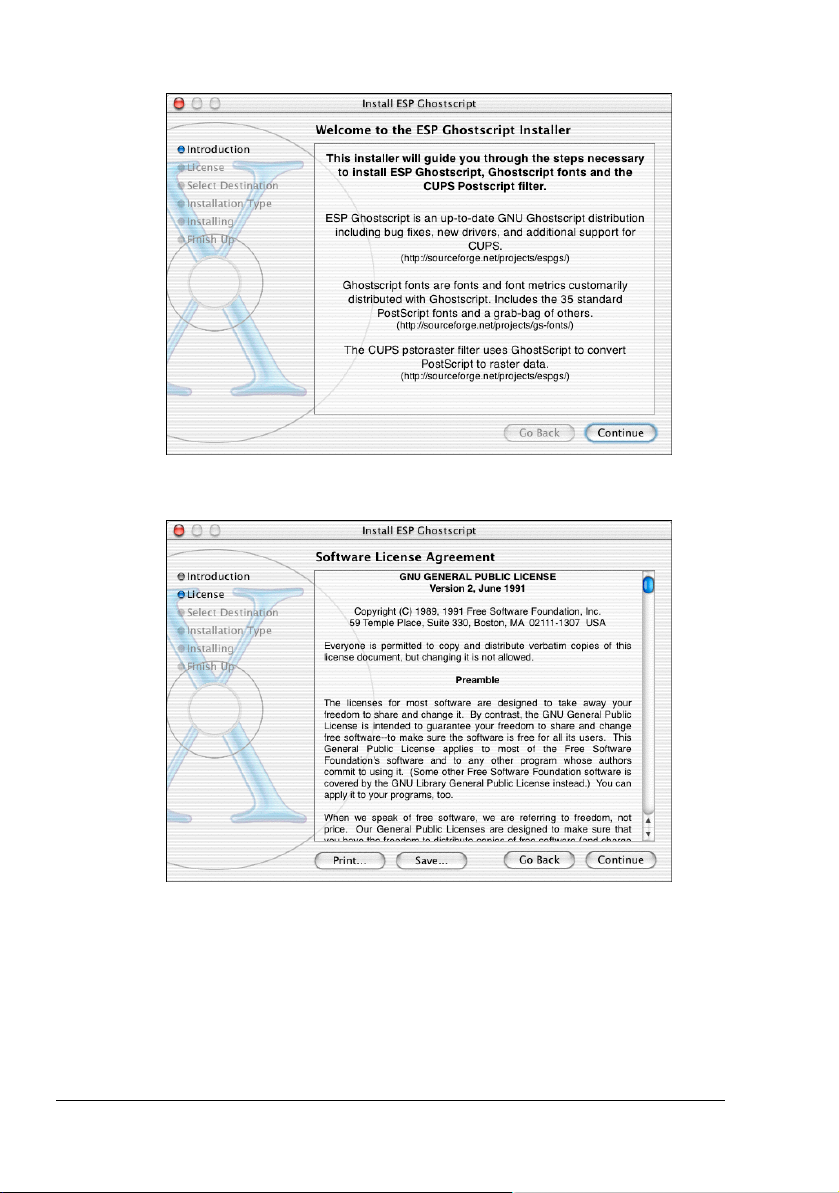
6 Check the details of the license agreement and click Continue.
Installing the Printer Driver4
Page 11
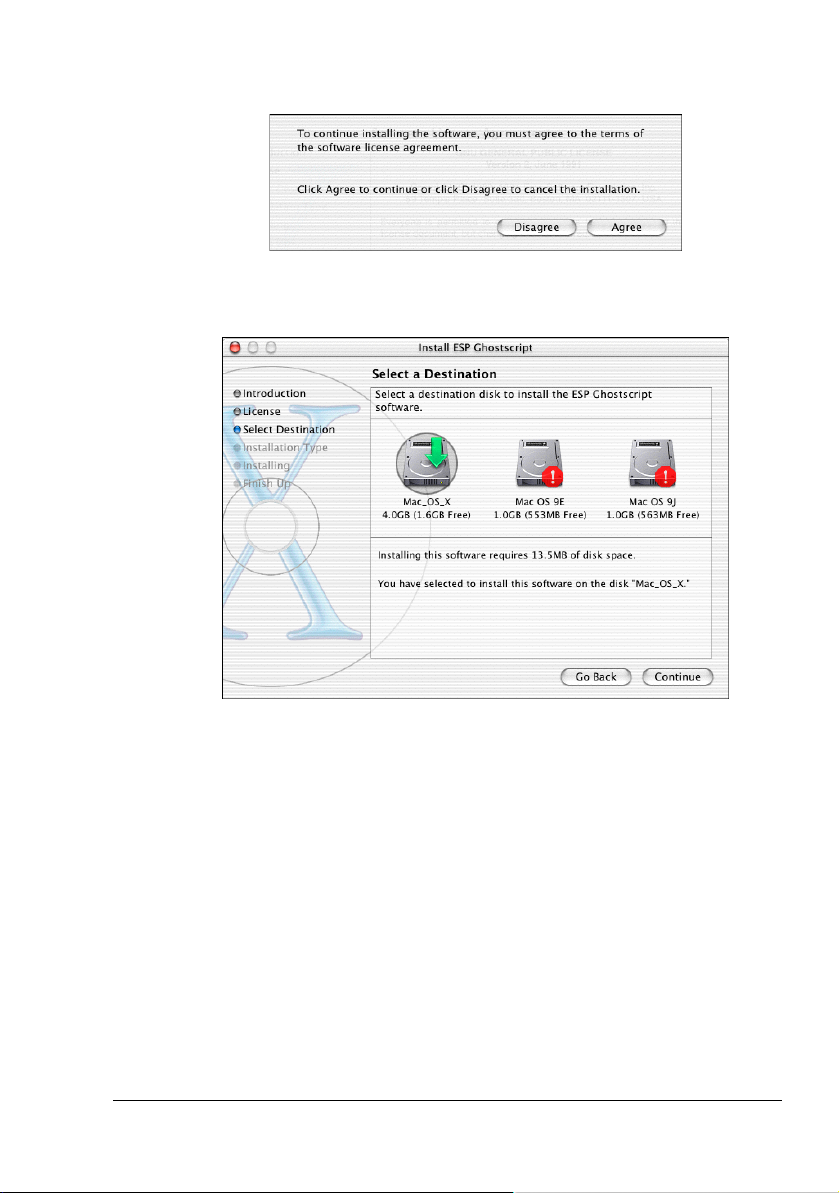
7 Click Agree in the confirmation dialog box, if you agree to the terms of the
license.
8 In the Select a Destination page, select the disk in which you wish to
install the software, and then click Continue.
Installing the Printer Driver
5
Page 12
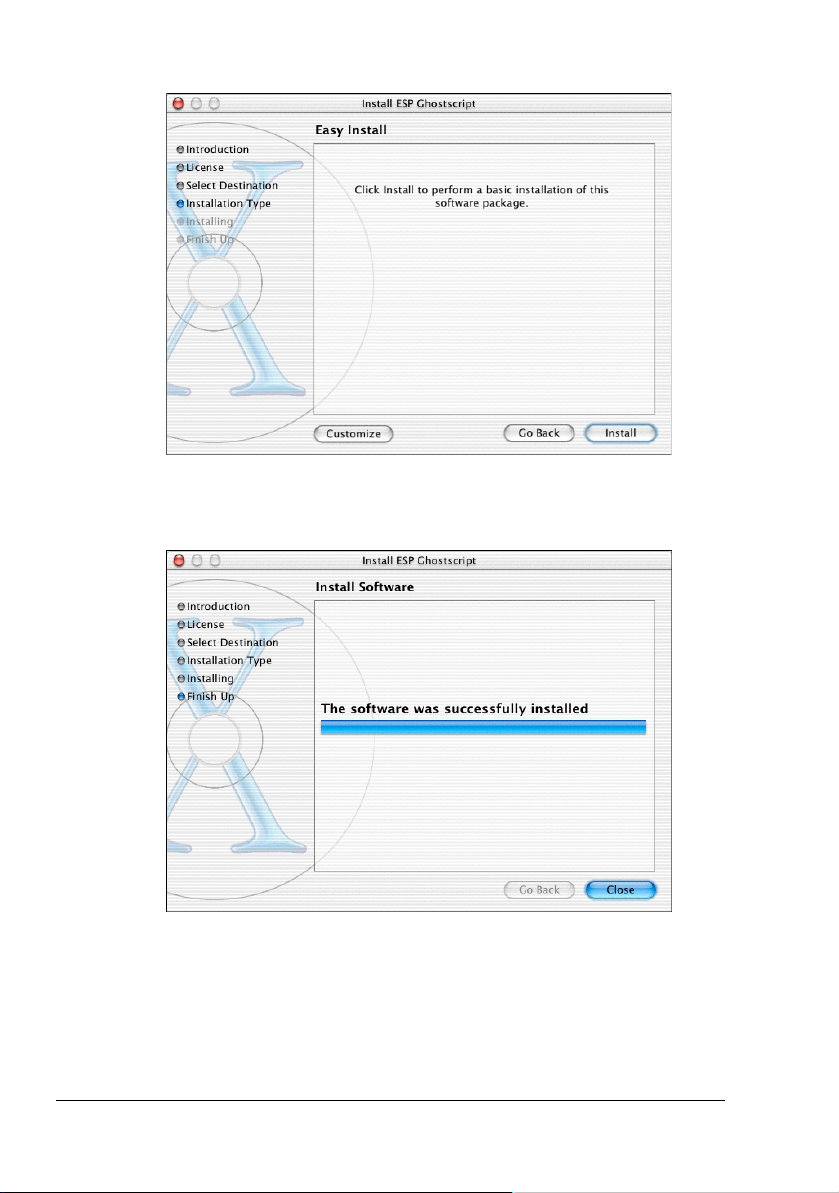
9 Click Install in the Easy Install page.
Installation starts.
10 After the installation has been completed, click Close.
This completes the installation of Ghostscript.
Installing the Printer Driver6
Page 13
Installing the magicolor 5430 DL Printer Driver
" The procedure for installing the printer driver on Mac OS 10.2.x is
described below. The following procedure or some steps may be different depending on the version of the operating system being used.
Complete the installation according to the instructions in the dialog
boxes that appear.
1 Insert the magicolor 5430 DL Utilities & Documentation CD-ROM in the
CD-R/DVD drive of your Macintosh.
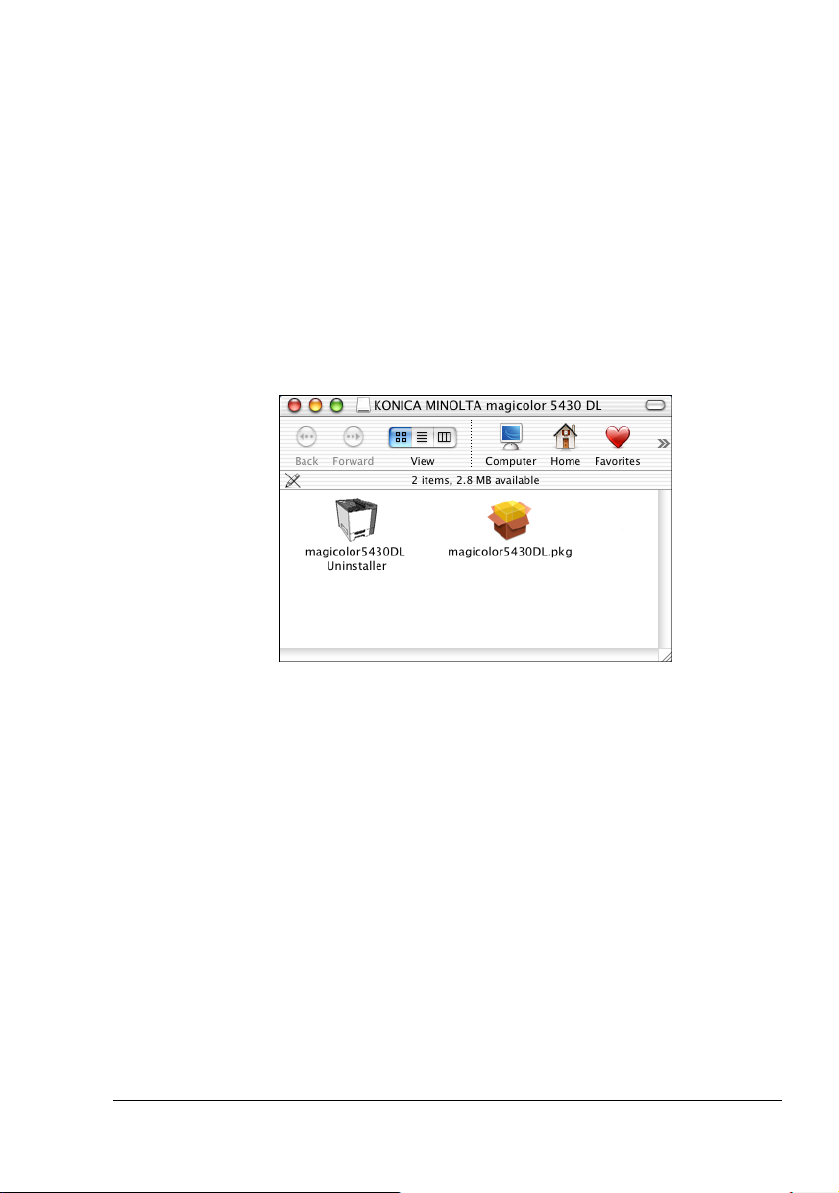
2 Double click the magicolor5430DL-x.x.x-ppc.dmg disk image file.
The disk image KONICA MINOLTA magicolor 5430 DL appears on the
desktop.
3 Double-click the magicolor5430DL.pkg package file in the disk image.
The installer for the printer driver starts up.
Installing the Printer Driver
7
Page 14
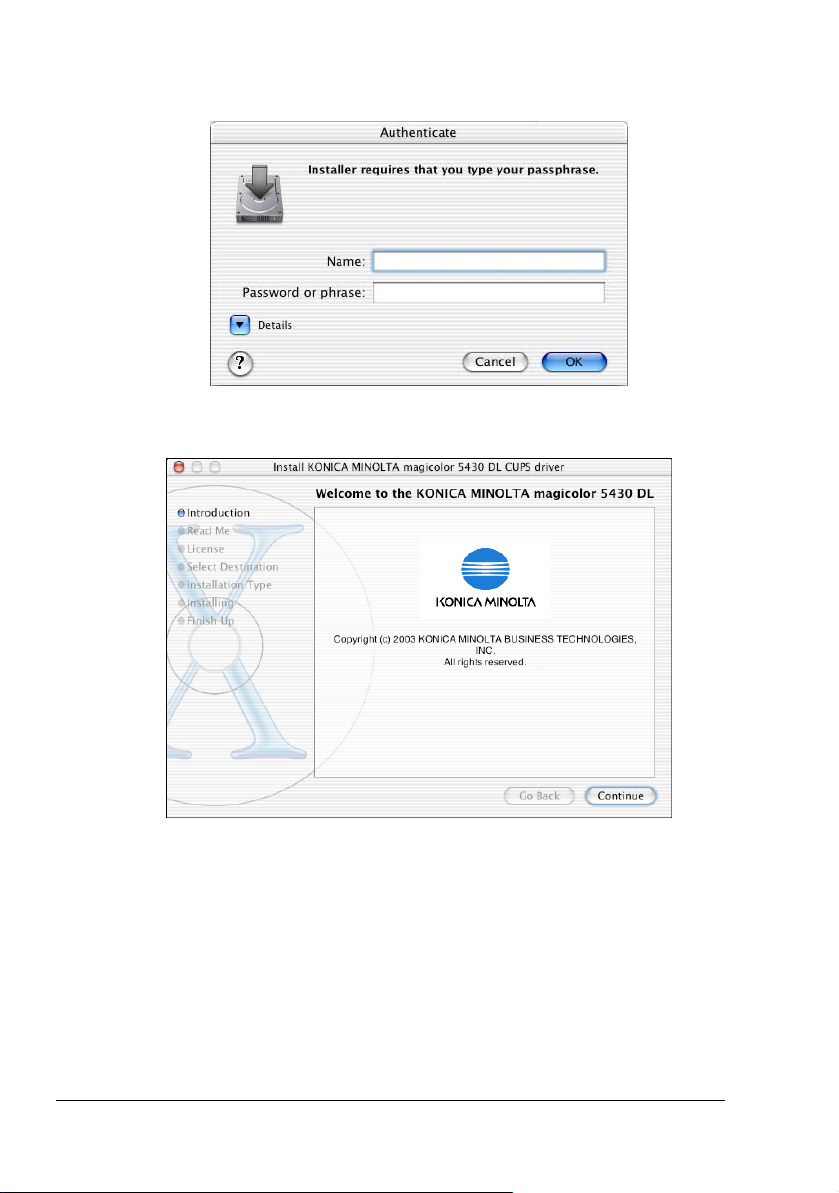
4 Enter the administrator user name and password in the Authenticate dia-
log box, and then click OK.
5 Click Continue.
Installing the Printer Driver8
Page 15
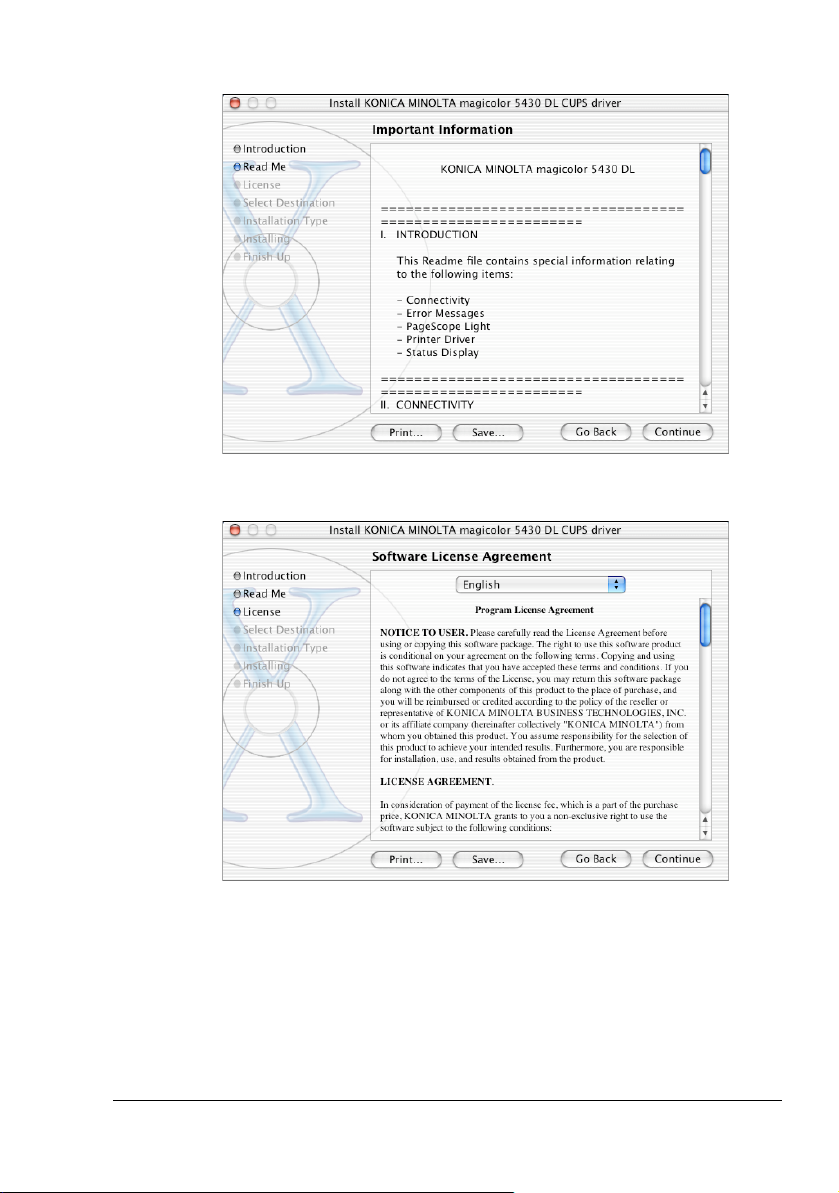
6 Check the information in the Read Me, and then click Continue.
7 Check the details of the license agreement, and then click Continue.
Installing the Printer Driver
9
Page 16
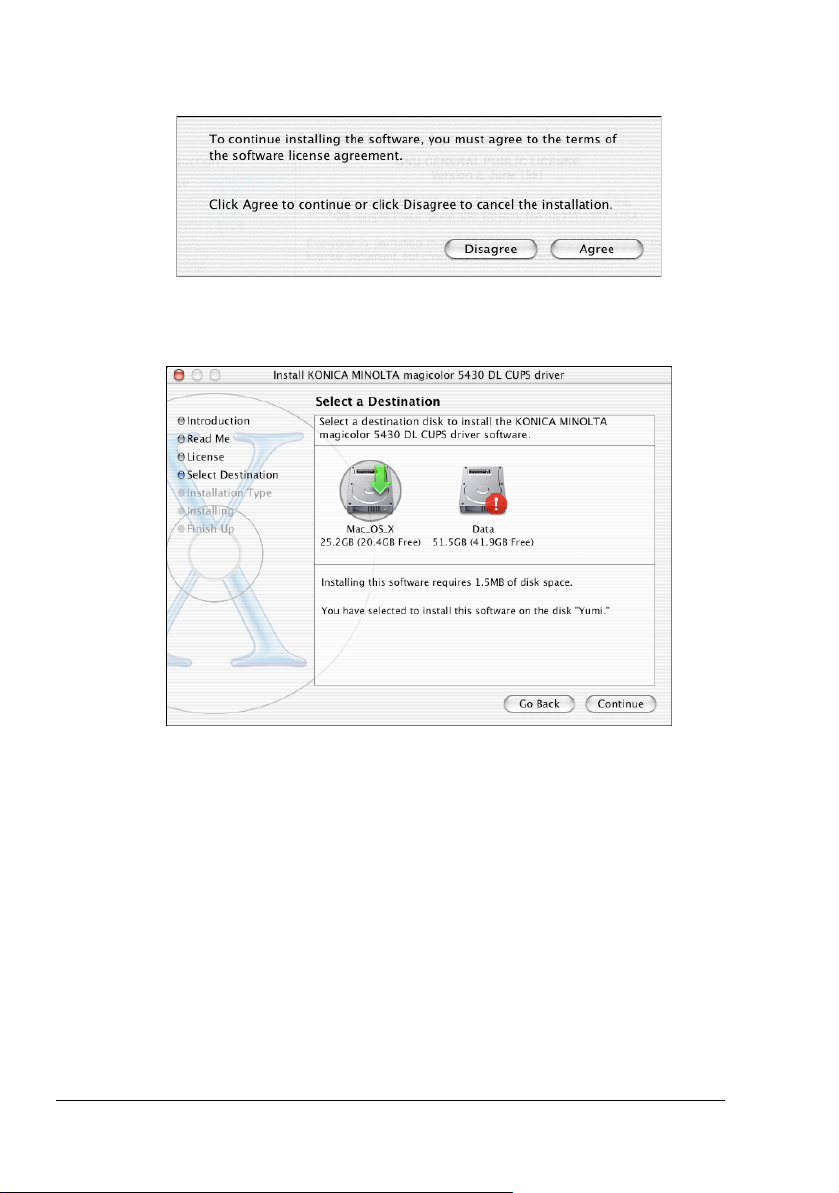
8 Click Agree in the confirmation dialog box if you agree to the terms of the
license.
9 In the Select a Destination page, select the disk in which you wish to
install the software, and then click Continue.
Installing the Printer Driver10
Page 17
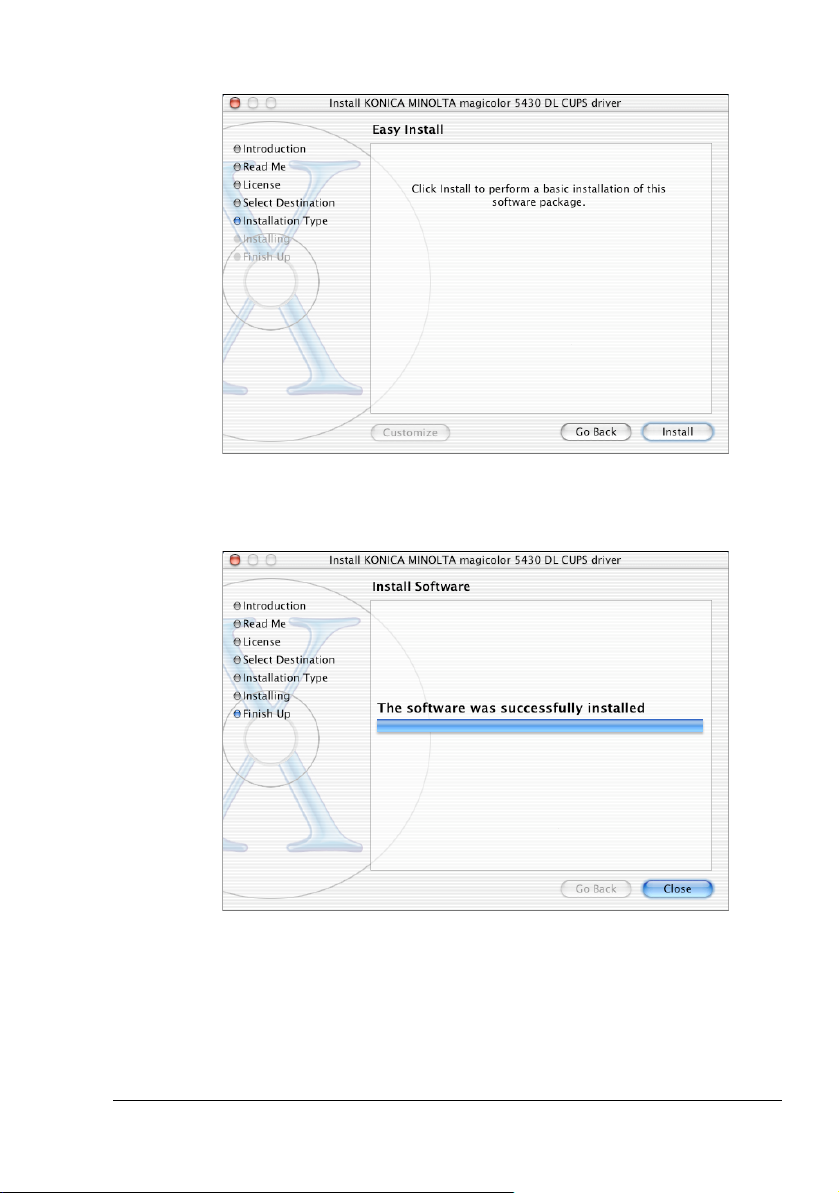
10 Click Install in the Easy Install page.
Installation starts.
11 After the installation has been completed, click Close.
This completes the installation of the magicolor 5430 DL printer driver.
Installing the Printer Driver
11
Page 18

Print Center Settings
When using a USB connection
1 Use the USB cable to connect the printer to your computer.
2 Check that the printer is turned on, and then restart the computer.
3 Open Print Center, which can be accessed by clicking Macintosh HD,
then Applications, then Utilities.
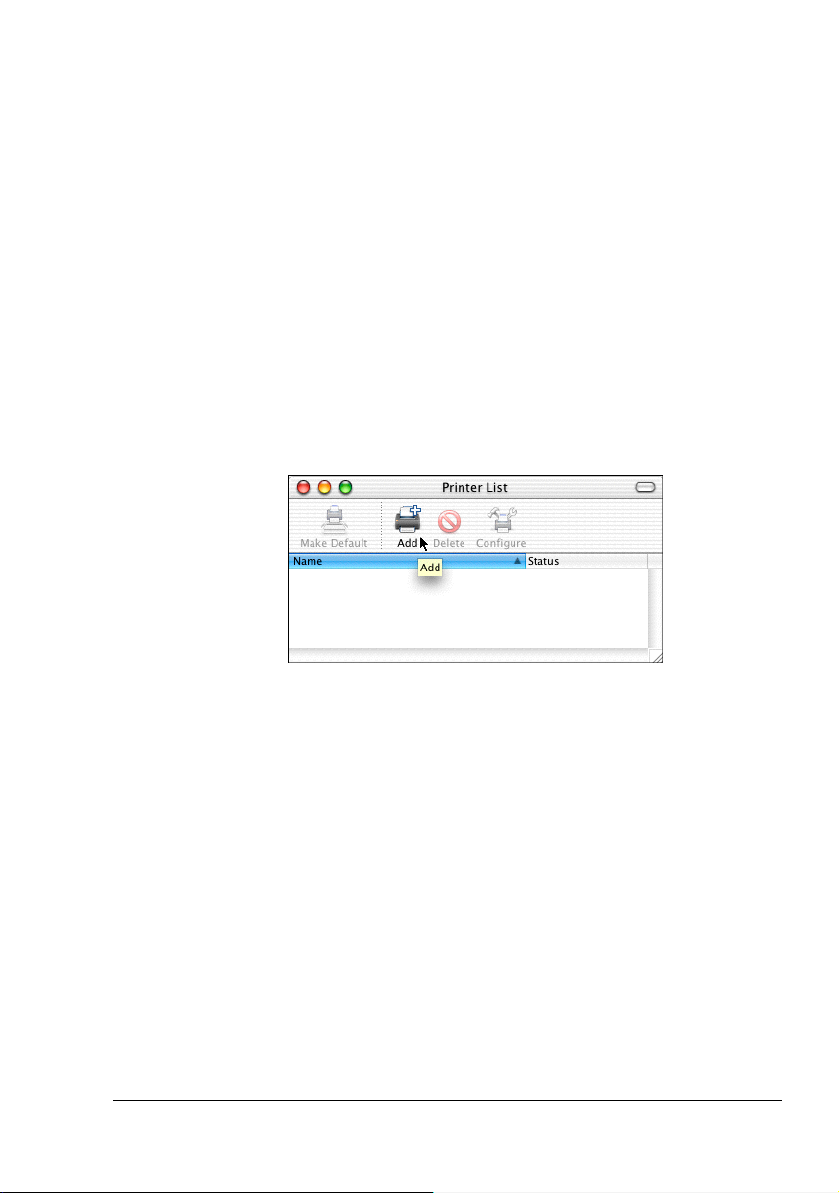
4 In the Printer List, click Add while pressing the Option key in the key-
board.
5 Select Advanced from the pop-up menu.
Print Center Settings12
Page 19
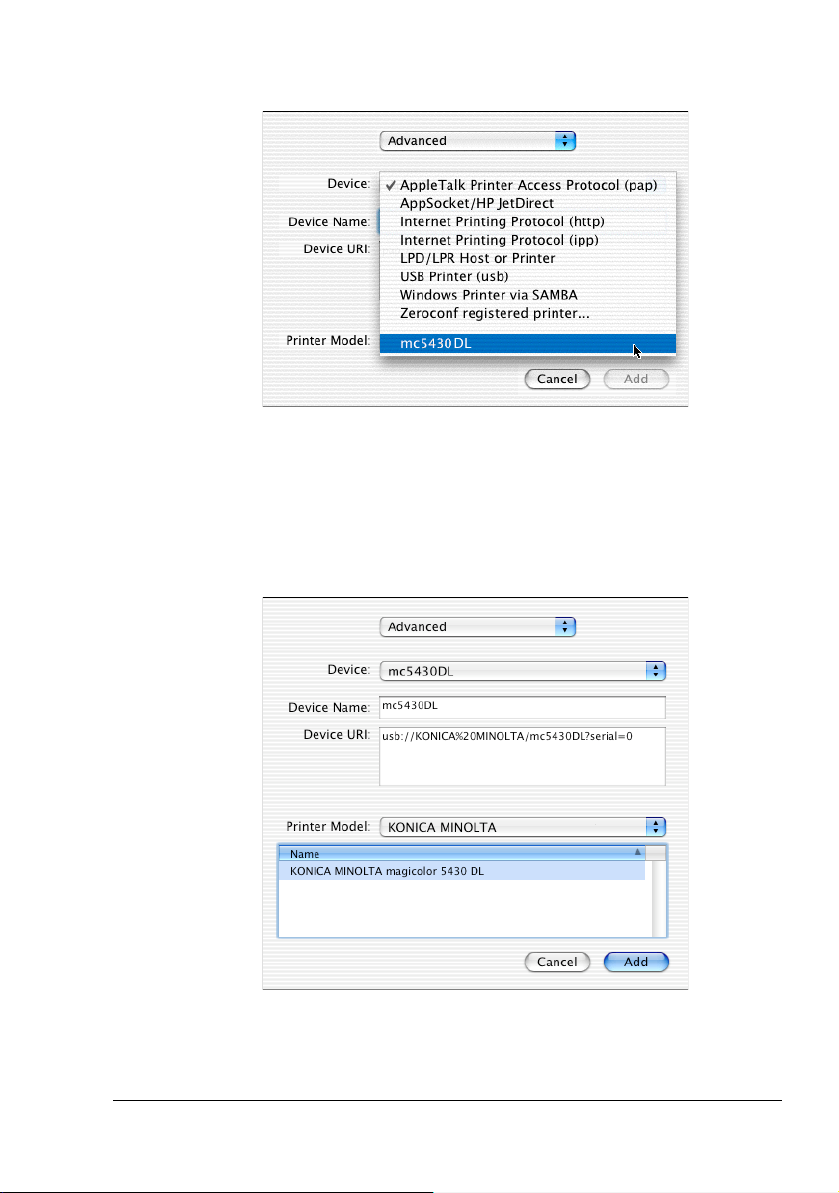
6 Select mc5430DL from the Device pop-up menu.
" If mc5430DL does not appear, check that the printer is turned on and
the USB cable is connected, and then restart the computer.
7 Select KONICA MINOLTA from the Printer Model pop-up menu.
8 Select KONICA MINOLTA magicolor 5430 DL in the Name list.
Print Center Settings
13
Page 20
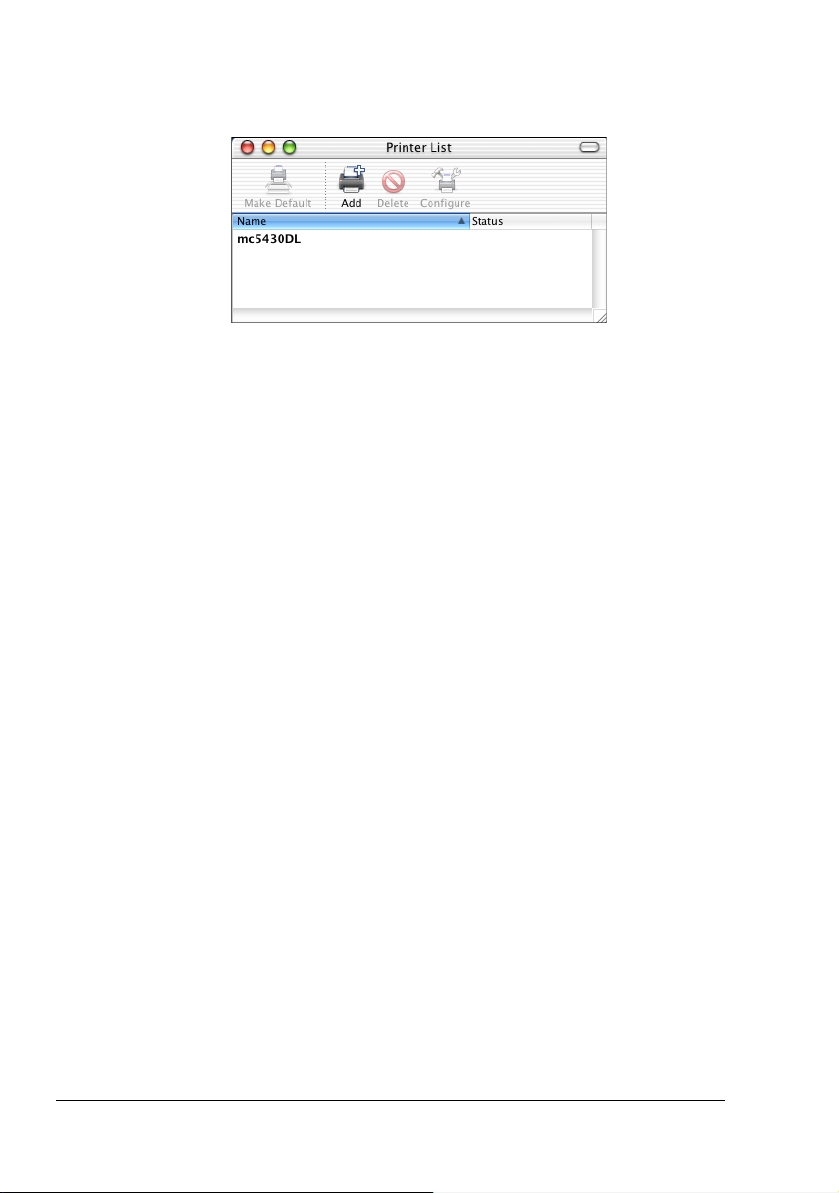
9 Click Add.
The new printer appears in the Printer List screen.
Print Center Settings14
Page 21
When using a network connection
The network connection settings can be specified in one of three ways:
Rendezvous setting, IP Printing setting, and Specifying Port 9100. We recommend using the Rendezvous setting.
Rendezvous Setting
" In order to use the Rendezvous setting, Rendezvous must first be
enabled from the Rendezvous Configuration window of PageScope Web Connection. Refer to chapter 4, “Using PageScope
Web Connection.” for a description of
PageScope Web Connection.
1 Connect the printer to an Ethernet network.
2 Open Print Center, which can be accessed by clicking Macintosh HD,
then Applications, then Utilities.
3 Click Add in the Printer List.
4 Select Rendezvous from the pop-up menu.
Print Center Settings
15
Page 22
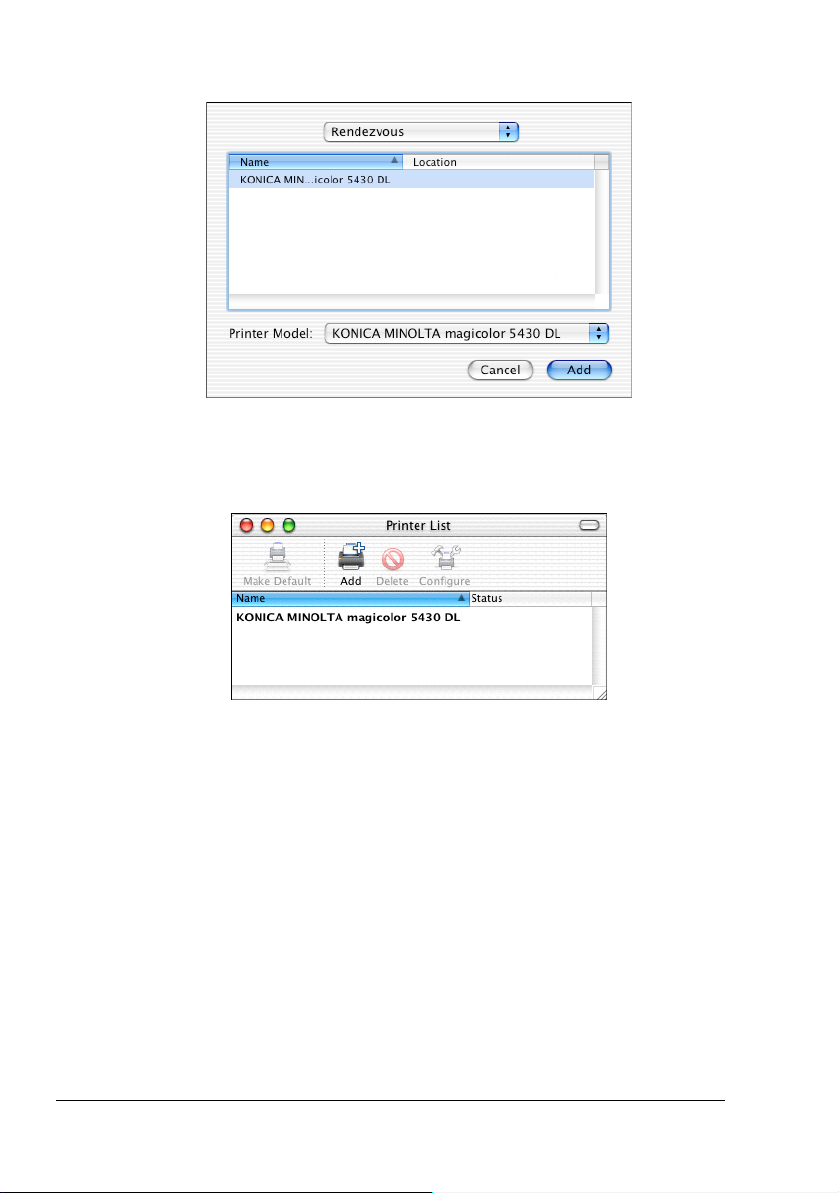
5 Select KONICA MINOLTA magicolor 5430 DL in the Name list.
6 Click Add.
The new printer appears in the Printer List screen.
Print Center Settings16
Page 23
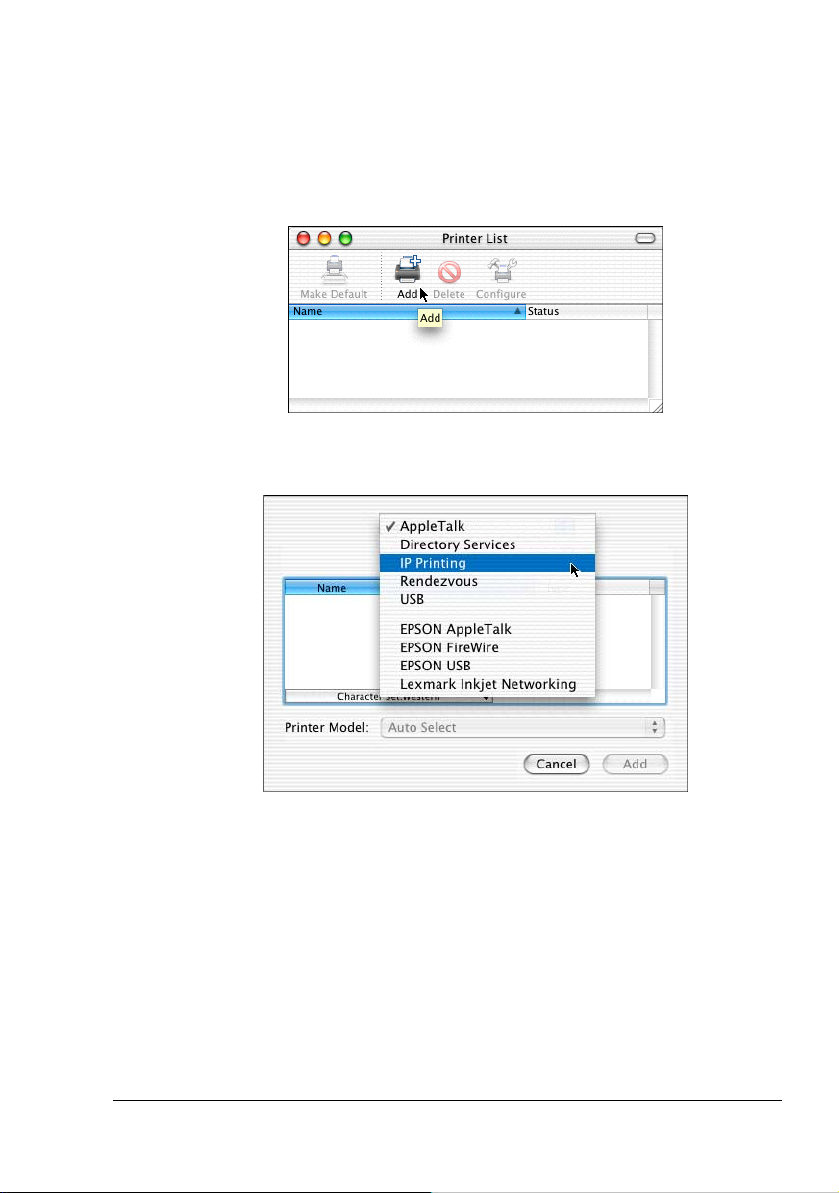
IP Printing Setting
1 Connect the printer to an Ethernet network.
2 Open Print Center, which can be accessed by clicking Macintosh HD,
then Applications, then Utilities.
3 Click Add in the Printer List.
4 Select IP Printing from the pop-up menu.
Print Center Settings
17
Page 24
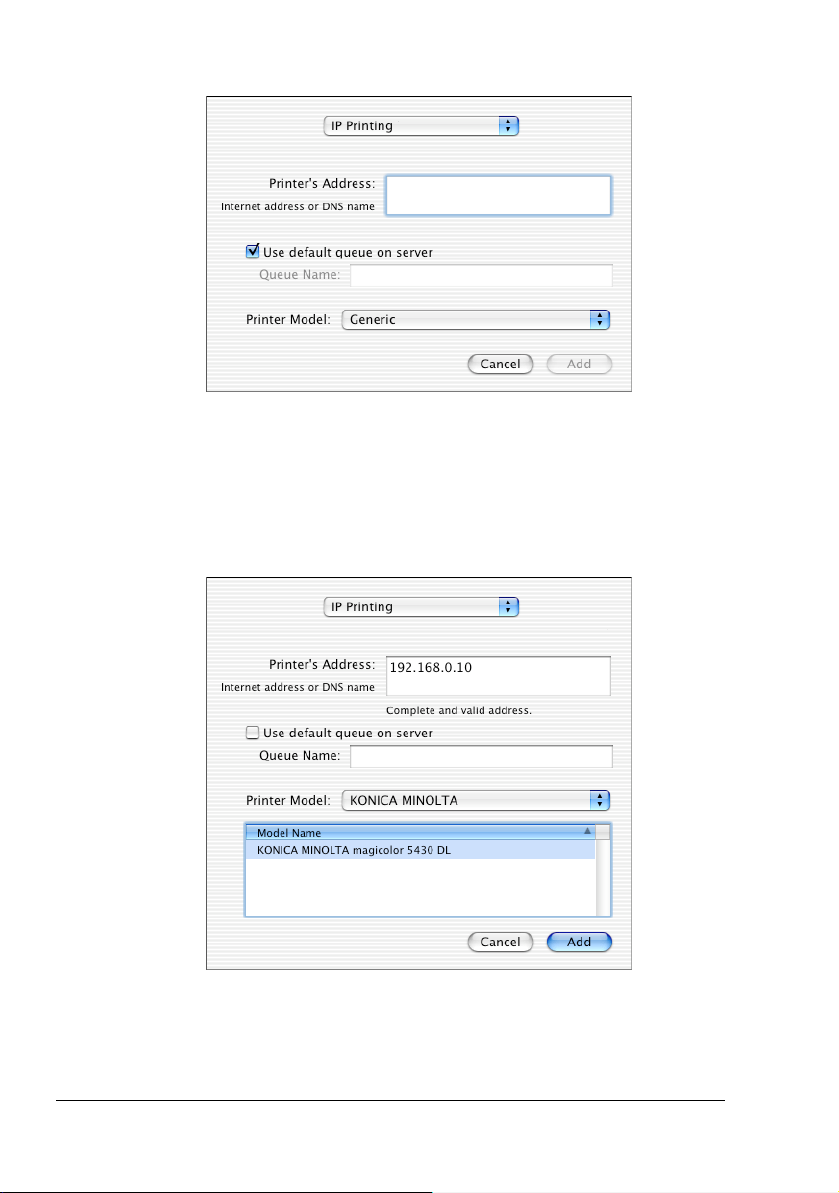
The IP Printing screen appears.
5 Enter the IP address for the printer in the Printer’s Address text box.
Clear the Use default queue on server check box.
Enter “lp” in the Queue Name text box.
6 Select KONICA MINOLTA from the Printer Model pop-up menu.
7 Select KONICA MINOLTA magicolor 5430 DL in the Model Name list.
Print Center Settings18
Page 25

8 Click Add.
The new printer appears in the Printer List screen.
Specifying Port 9100
1 Connect the printer to an Ethernet network.
2 Open Print Center, which can be accessed by clicking Macintosh HD,
then Applications, then Utilities.
3 In the Printer List, click Add while pressing the Option key.
Print Center Settings
19
Page 26
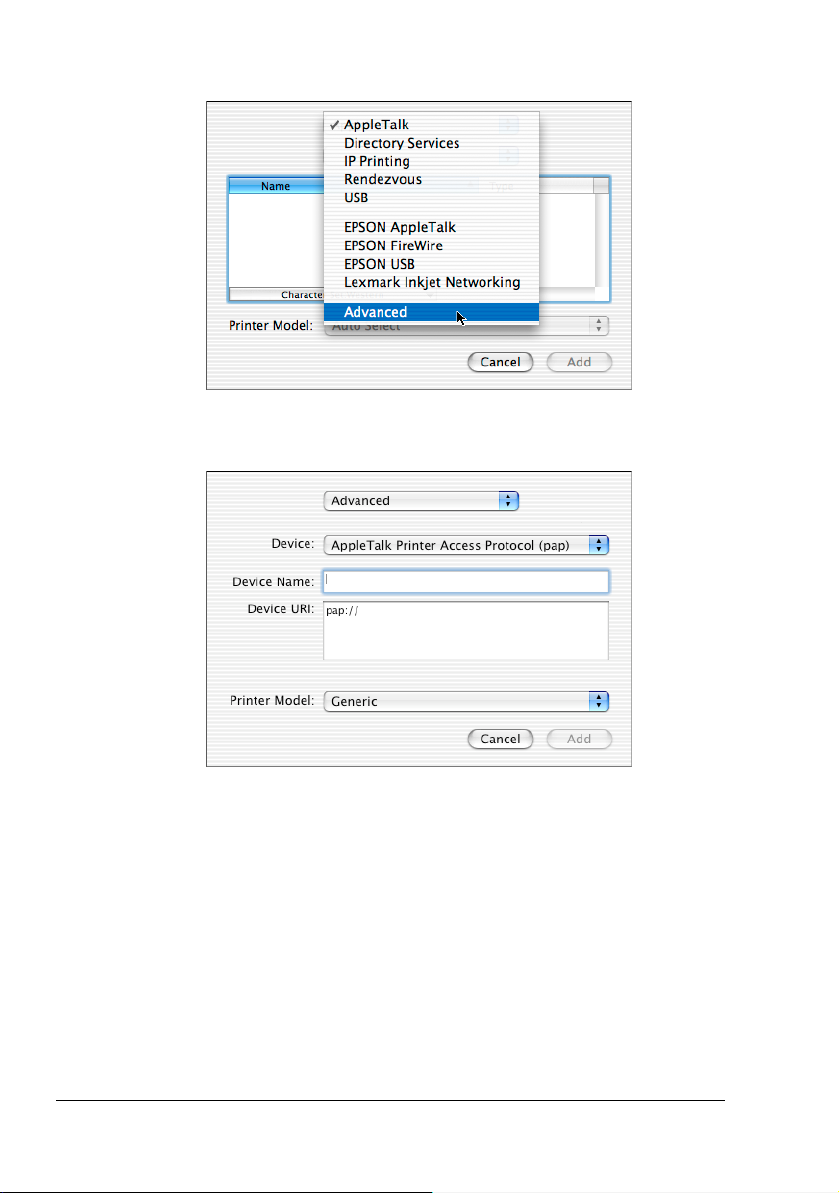
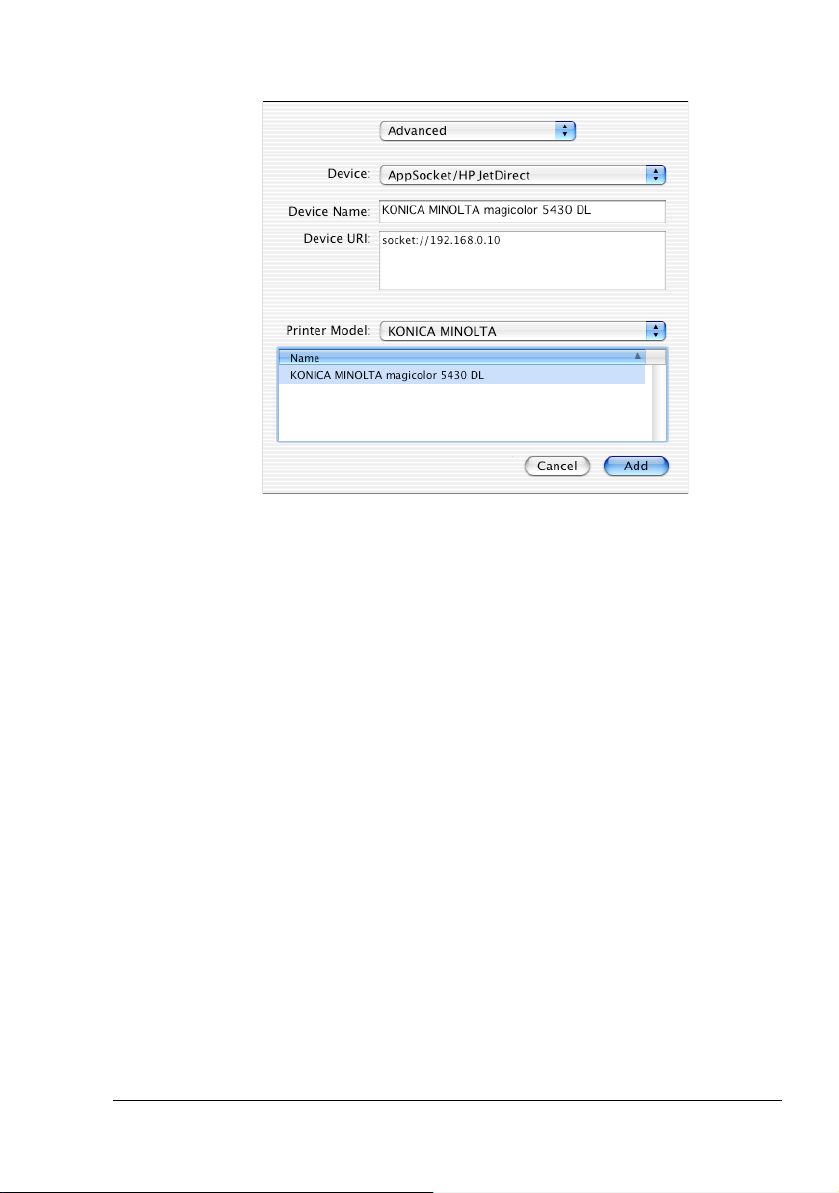
4 Select Advanced from the pop-up menu.
The Advanced screen appears.
5 Select AppSocket/HP JetDirect from the Device pop-up menu.
6 Enter the name for the printer in the Device Name text box.
7 In the Device URI text box, enter “socket://” followed by the IP address for
the printer.
8 Select KONICA MINOLTA from the Printer Model pop-up menu.
Print Center Settings20
Page 27
9 Select KONICA MINOLTA magicolor 5430 DL in the Name list.
10 Click Add.
The new printer appears in the Printer List screen.
Print Center Settings
21
Page 28
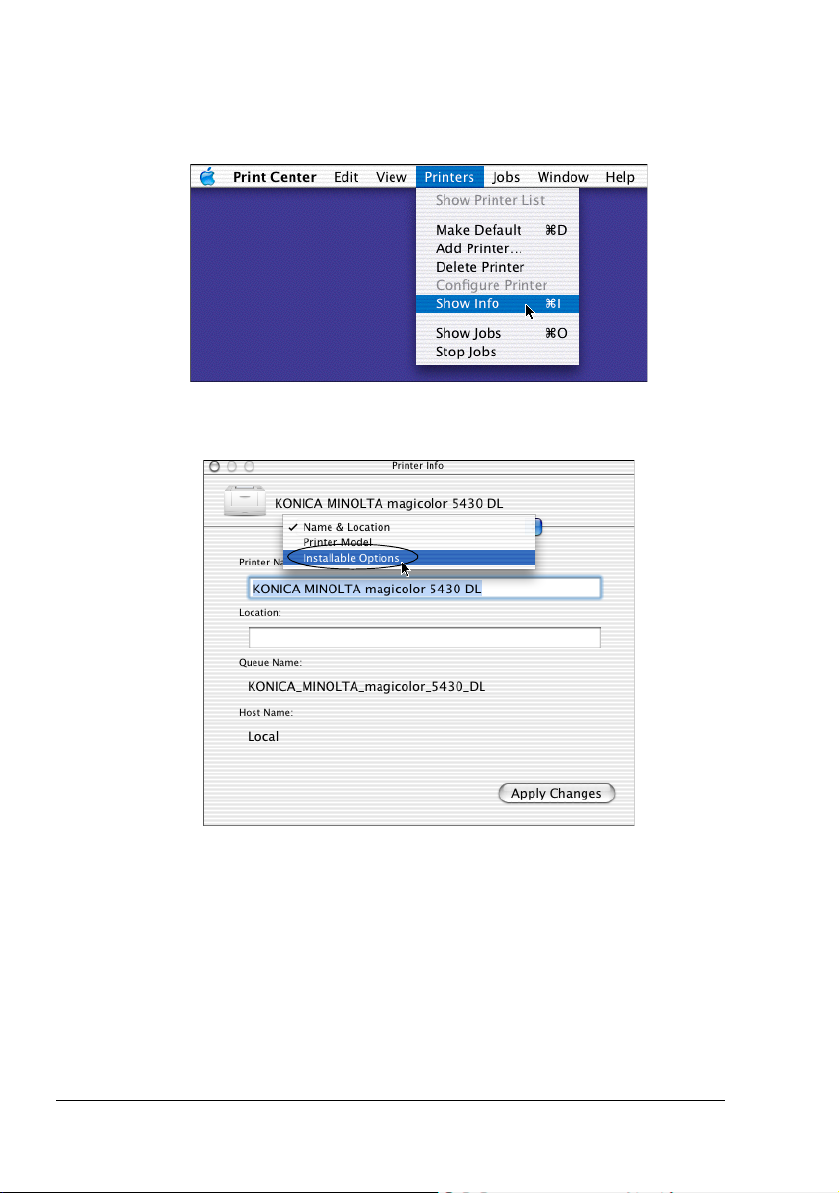
Selecting Print Options
1
Select this printer in the Printer List, and then select Show Info from the
Printers menu.
2 Select Installable Options from the pop-up menu.
Selecting Print Options22
Page 29
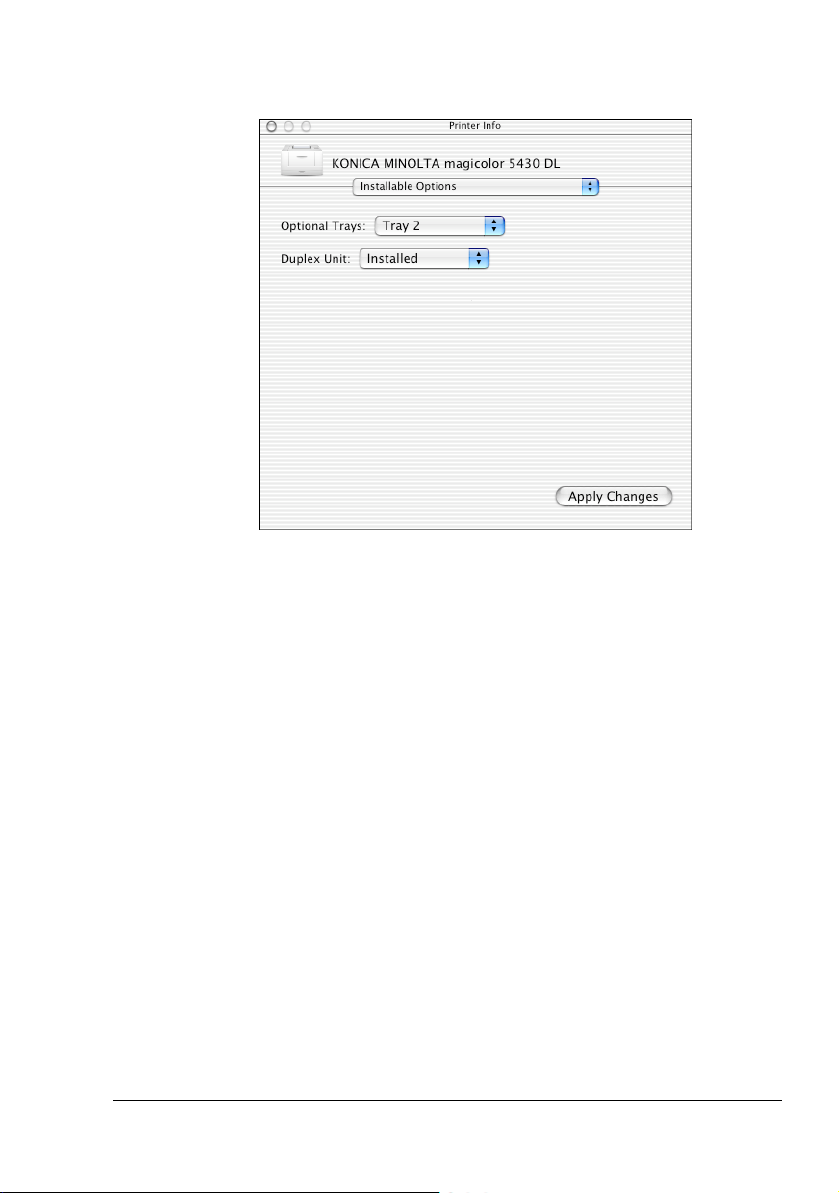
3 Select the Optional Trays and Duplex Unit pop-up menu to match your
printer setup, and then click Apply Changes.
4 Close the Printer Info dialog box.
Selecting Print Options
23
Page 30
Uninstalling the Printer Driver
1
Insert the magicolor 5430 DL Utilities & Documentation CD-ROM in the
CD-R/DVD drive of your Macintosh.
2 Double-click the magicolor5430DL-x.x.x-ppc.dmg disk image file.
The disk image KONICA MINOLTA magicolor 5430 DL appears on the
desktop.
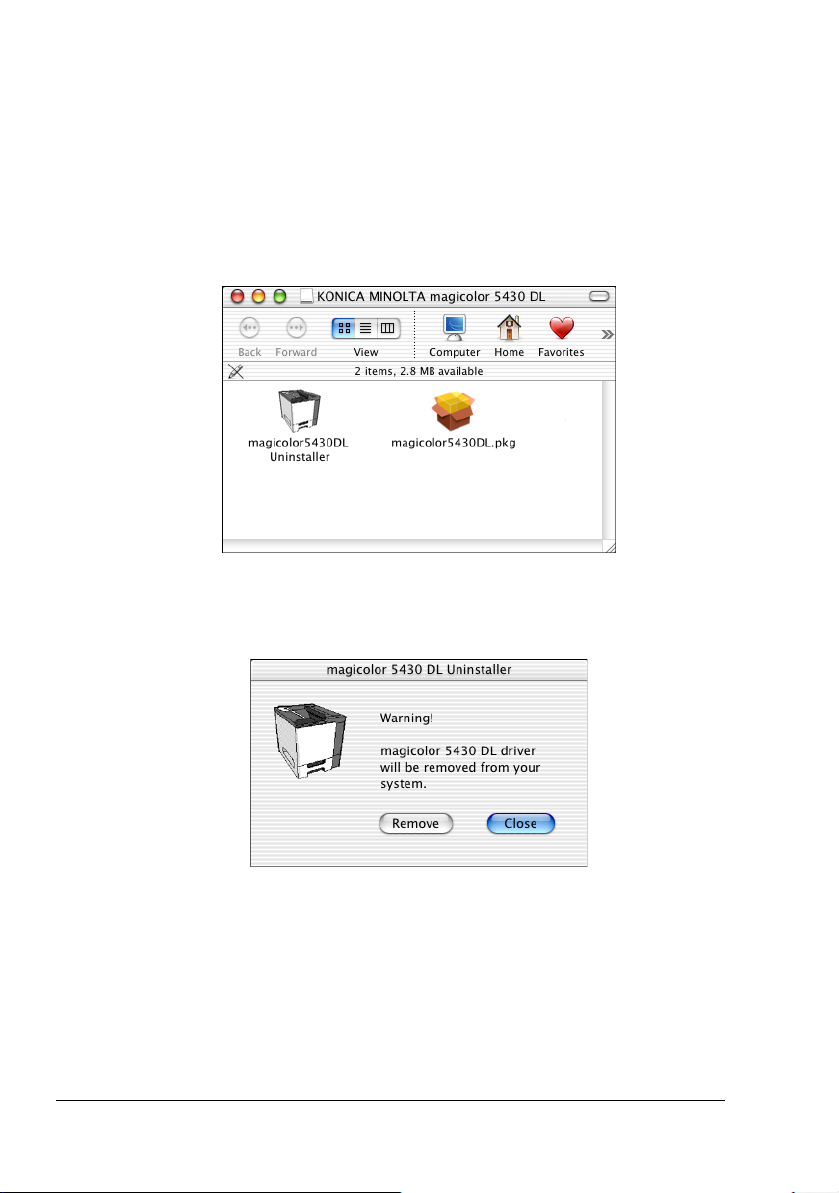
3 Double-click the magicolor5430DL Uninstaller file in the disk image.
The uninstaller for the printer driver starts up and the following message
appears.
4 Click Remove.
Uninstalling the Printer Driver24
Page 31

5 Enter the administrator user name and password in the Authenticate dia-
log box, and then click OK.
6 After the uninstallation has been completed, click Close.
7 Open Print Center, which can be accessed by clicking Macintosh HD,
then Applications, then Utilities.
8 Select this printer in the Printer List, and then select Delete Printer from
the Printers menu.
This completes the uninstallation of the magicolor 5430 DL printer driver.
Uninstalling the Printer Driver
25
Page 32

Specifying Page Setup Settings
The following dialog box appears when Page Setup... is selected from the
File menu in the application being used.
1 Select Page Setup... from the File menu.
The Page Setup dialog box appears.
2 Select this printer in the Format for pop-up menu.
You can select the following sections from the Settings pop-up menu.
Section Description
Page Attributes This is used to specify the settings for the
paper size, scaling, and print orientation.
Custom Paper Size This is used to specify a custom paper size.
Summary This is used to check the current settings.
Specifying Page Setup Settings26
Page 33

Page Attributes Options
The Page Attributes section is used to specify the settings for the paper
size, scaling, and print orientation.
Paper Size
Select the desired paper size from the Paper Size pop-up menu.
Orientation
Select either a vertical or horizontal page orientation for printouts.
Scale
If you want to enlarge or reduce the size of the printout, enter the scale
ratio here (1-400%)
" Regardless of which paper size is selected, the printer does not print
within 0.157" (4 mm) of the edge of the paper.
Specifying Page Setup Settings
27
Page 34

Custom Paper Size Options
The Custom Paper Size section is used to specify the dimensions for a custom paper size.
New
Click this button to create a new custom paper size.
Duplicate
Click this button to duplicate (copy) the settings of an existing custom
paper size and create a new custom paper size based on those settings.
Delete
Click this button to delete a custom paper size.
Save
Click this button to save the settings for the selected custom paper size.
Paper Size
Enter the dimensions of the paper height and width for the custom paper
size.
Height: 5.19 - 14" (148 - 297 mm)
Width: 3.57 - 8.5" (92 - 216 mm)
Printer Margins
Enter the dimensions for the top, left, right, and bottom margins.
Specifying Page Setup Settings28
Page 35

Summary
The Summary is used to check the currently selected Page Attributes settings.
Specifying Page Setup Settings
29
Page 36

Specifying Print Settings
The following dialog box appears when Print... is selected from the File
menu in the application being used.
1 Select Print... from the File menu.
The Print dialog box appears.
2 Select this printer in the Printer pop-up menu.
The Print dialog box is used to specify the following print options.
Specifying Print Settings30
Page 37

Print Dialog Box
Section Description
Copies & Pages This section contains options for the number
of copies to be printed and the range of
pages to print.
Layout This section contains options for the number
of pages per sheet of paper and other layout
options when printing.
Duplex This section contains options for printing on
both sides of the paper and for the binding
location.
Output Options This section contains options for saving the
print image as a file and for the format of
saved data.
Error Handling This section contains options for handling
print errors. (Do not use with the magicolor
5430DL printer.)
Paper Feed This section contains paper feed options.
Printer Features This section contains options for color print-
ing and watermark settings.
Summary This is used to check the current settings.
" No warning message will be displayed if options cannot be used
together are selected.
Specifying Print Settings
31
Page 38

Common buttons
? (Help button)
This displays help information about the Print dialog box.
Preview
Click this button to view a preview image of the printout, to check that the
print options are set correctly.
Save As PDF...
Click this button to save the print output as a PDF file.
Cancel
Click this button to close the Print dialog box without applying any of the
settings.
Print
Click this button to print using the selected print options.
Copies & Pages
The Copies & Pages section is used to specify the number of copies to print
and the range of pages to print.
Copies
This specifies the number of copies to be printed. If the Collated checkbox is selected, all pages in the documents are printed as sets of printouts.
For example, if 5 is entered for Copies and Collated is selected, the doc-
ument is printed five times from the first page to the last page.
Pages
All: Prints all pages in the document.
From, to: Specifies the range of pages to be printed.
Specifying Print Settings32
Page 39

Layout
The Layout section is used to specify the number of pages per sheet of
paper and other layout options when printing.
Pages per Sheet
Specifies the number of pages to be printed on one sheet of paper. For
example, if 2 is selected, two pages are printed on one sheet of paper.
Layout Direction
If you are printing more than one page per sheet, this specifies the direction and order the pages should be arranged on each sheet of paper.
Border
This prints a border around the image for each of the pages printed on
one sheet of paper when more than one page is printed on one sheet of
paper.
Specifying Print Settings
33
Page 40

Duplex
The Duplex section is used to specify the options for printing on both sides of
the paper when the Duplex Unit is installed in the printer.
Print on Both Sides
Select this option to print on both sides of the paper.
Binding
This is used to specify if the binding edge should be along the long edge
or the short edge of the paper.
" To print on both sides of the paper, Duplex Unit must be selected
under Installable Options (p. 22).
The Print on Both Sides check box can be selected even when the
Duplex Unit is not installed. However, in this case, the print job will be
cancelled.
Specifying Print Settings34
Page 41

Output Options
The Output Options section is used to specify whether or not to save the
print output as a file, and the data format to use when saving the data.
Save as File
Select this option to save the print output as a file.
Format
Select the data format to be used when saving the print output as a file.
Specifying Print Settings
35
Page 42

Paper Feed
The Paper Feed section is used to specify the paper feed setting.
All pages from
All pages in the document are printed using the paper in the specified
paper tray.
First page from
The first page of the document is printed on paper from a paper tray different from the tray used to print the rest of the document.
Remaining from
The rest of the document is printed from the specified paper tray when the
first page is to be printed on paper from a different tray.
" If the optional trays is installed, select Tray 2 & Tray 3 under Install-
able Options (p. 22). If Tray 2 & Tray 3 is not selected, Tray 2 and
Tray 3 appears in gray and cannot be selected.
Specifying Print Settings36
Page 43

Printer Features
The Printer Features section is used to specify the resolution, paper type,
color options, watermark options etc., for the Basic Features, Color Match-
ing Options, Watermark Orientation, Watermark Selection, and Watermark Setting feature sets.
Specifying Print Settings
37
Page 44

Basic Features
Resolution
This option specifies the resolution to be used when printing a document.
Media Type
This option specifies the type of paper on which the print image will be
printed.
Color Mode
This option specifies whether the document should be printed in color or
grayscale.
Specifying Print Settings38
Page 45

Color Matching Options
Color Matching
This option specifies the color matching settings.
Perceptual: Performs suitable color matching for photographic images.
Saturation: Performs suitable color matching for business graphics.
Specifying Print Settings
39
Page 46

Watermark Orientation
Watermark Orientation
This option specifies the direction of the text in a watermark.
Specifying Print Settings40
Page 47

Watermark Selection
Watermark
This specifies whether to use a watermark print.
Specifying Print Settings
41
Page 48

Watermark Setting
Watermark Text
This specifies the text in the watermark.
Watermark Font
This specifies the font to be used for the text in the watermark.
Watermark Size
This specifies the font size to be used for the text in the watermark.
Watermark Color
This specifies the color of the text in the watermark.
Watermark Intensity
This specifies the density of text in the watermark.
Specifying Print Settings42
Page 49

Summary
The Summary is used to check the currently selected print settings.
Specifying Print Settings
43
Page 50

Checking Print Jobs
You can check the status of print jobs in Print Center.
1 Open Print Center, which can be accessed by clicking Macintosh HD,
then Applications, then Utilities.
2 Double-click this printer in the Printer List.
Any unfinished print jobs are displayed.
Deleting a Print Job
1 Display the print jobs using the procedure above.
2 Select the print job you wish to delete.
3 Click Delete.
Or, you can also select Delete Job from the Job menu to delete the job.
Checking Print Jobs44
Page 51

Troubleshooting
Symptom Solution
The setting in the saved
presets are not applied.
Media type error appears. If a media type, such as “Transparency”, is
The printer stops responding.
The printer is not detected
using Rendezvous.
Checking the version number of the printer driver.
The dialog box may appear
unusual when selecting
other manufacturer printer
and back to magicolor.
The custom paper size is
different from the size that
was set.
When printing 2 pages on a
single sheet of paper, the
pages are not centered on
the paper.
Depending on the functions selected for the
printer, some preset settings are not saved.
specified for Tray 2/3, a media type error
appears and the printer stops. Be sure to
specify a media type supported by Tray 2/3.
Depending on the operating system, some
paper size and paper type combinations are
not permitted. If the job was sent with an
incorrect combination of settings, the printer
stops responding. Be sure to print with the
correct combination of paper size and paper
type settings.
Using Administrator mode in PageScope
Web Connection, select the Enable Rendez-
vous Service Discovery check box on the
Rendezvous Configuration page.
Click the magicolor5430DL.pkg icon in the
Receipts folder (within Library), and then
select Get Info from the File menu.
Close the Print dialog box, and then open it
again.
Depending on the operating system, the custom paper size settings may change slightly
(for example, 5.80" may change to 5.79").
Depending on the operating system, the
pages are not centered on the paper when
printing two pages on a single sheet of paper
with the following paper sizes.
Troubleshooting
Legal, Letter Plus, Foolscap, Government
Legal, Statement, Folio
45
Page 52

Symptom Solution
When printing multiple copies of multiple pages on a
single sheet of paper with
Collated selected, the
pages are printed continuously.
While printing from Acrobat
Reader, the pages are not
correctly collated or the
print job is cancelled.
When printing multiple copies of multiple
pages on a single sheet of paper, Collated
cannot be selected.
If a printing error occurs with Acrobat Reader,
print using the preview feature provided by
the operating system.
Troubleshooting46
Page 53

Understanding
the Network
Configuration
Menus
2
Page 54

Network Menu
Location within the Configuration Menu
READY
MENU
SPECIAL PAGES
MENU
LANGUAGE
MENU
ENGINE
MENU
NETWORK
DHCP:xx
BOOTP:xx
IP ADDRESS
xxx.xxx.xxx.xxx
SUBNET MASK
xxx.xxx.xxx.xxx
GATEWAY
xxx.xxx.xxx.xxx
MAC ADDRESS
00206Bxxxxxx
HTTP:xx
SNMP:xx
MENU
CONSUMABLE USAGE
Network Menu48
Page 55

Accessing the Network Menu
Use the following series of keystrokes at the printer to access the Network
menu options on your printer. This menu provides access to all of the configurable network items.
Press this
key...
MENU
(until) the message window reads . . .
READY
SPECIAL PAGES
NETWORK
Using the Network Menu Options
If the printer is connected to a network, the following settings should be specified. For details about each setting, contact your network administrator.
" When manually setting the IP address, Subnet Mask, and Gateway
turn off DHCP and BOOTP first.
DHCP/BOOTP
Purpose If there is a DHCP or BOOTP server on the network, speci-
fies whether the IP address is automatically assigned by
the DHCP or BOOTP server and other network information
is loaded.
Options DHCP SET: ON
BOOTP SET: OFF
DHCP SET: OFF
BOOTP SET: ON
Default DHCP SET: ON, BOOTP SET: OFF
Network Menu
DHCP SET: OFF
BOOTP SET: OFF
49
Page 56

IP Address
Purpose Sets the IP address of this printer on the network.
Range 0–255 for each xxx triplet
Use the Up and Down keys to increase or decrease each
number; use the Left and Right keys to move between triplets.
Default 192.168.1.2
Notes Leading zeros of each triplet are automatically suppressed;
for example, “001” displays as “1”
Subnet Mask
Purpose Sets the subnet mask value of the network. The subnet
mask allows you to limit access to your printer (for example, according to departmental divisions).
Range 0–255 for each xxx triplet
Use the Up and Down keys to increase or decrease each
number; use the Left and Right keys to move between triplets.
Default 255.255.255.0
Notes Leading zeros of each triplet are automatically suppressed;
for example, “000” displays as “0”
Gateway
Purpose Sets the address of the router/gateway if a router/gateway
is used on your network and you allow users outside your
network environment to print on your printer.
Range 0–255 for each xxx triplet
Use the Up and Down keys to increase or decrease each
number; use the Left and Right keys to move between triplets.
Default 192.168.1.1
Notes Leading zeros of each triplet are automatically suppressed;
for example, “001” displays as “1”
Network Menu50
Page 57

Mac Address
Purpose Displays the Ethernet hardware address for this printer. It
cannot be changed.
Options None
Default Printer dependent
HTTP
Purpose Enables or disables the printer’s internal web page (see
chapter 4, “Using PageScope Web Connection.” )
Options HTTP SET: OFF, HTTP SET: ON
Default HTTP SET: ON
Notes In order for these settings to be applied, the printer must be
turned off, then on again after the setting is specified.
SNMP
Purpose Enables or disables SNMP (Simple Network Management
Protocol), a scalable, distributed management suite for
managing small to large size networks.
Options SNMP SET: OFF, SNMP SET: ON
Default SNMP SET: ON
Notes In order for these settings to be applied, the printer must be
turned off, then on again after the setting is specified.
Network Menu
51
Page 58

Page 59

Network Printing
in a Windows
Environment
3
Page 60

Network Connection
Theory
To connect your printer in a
TCP/IP network environment, you
must make sure that the internal
network addresses in the printer
have been set.
" In many cases, you have
to enter only a unique IP
address. However, you
may also have to enter a
subnet mask and/or a
gateway (router) address,
depending on your
network configuration
requirements.
Supported Environments
Windows Server 2003/XP/2000/NT4.0/Me/98SE
Network Connection54
Page 61

Making the Connection
Ethernet Interface
The standard Ethernet interface is an RJ45 type of connector, capable of
transmission speeds from 10 to 100 megabits per second (Mbit/s).
When connecting your printer to an Ethernet network, the tasks you perform
depend on how you plan to set the printer’s IP (Internet Protocol) address.
Printers are shipped with a preset IP address, subnet mask, and gateway.
IP Address—A unique identifier for each device on a TCP/IP network.
Subnet Mask—A filter used to determine what subnet an IP address
belongs to.
Gateway—A node on a network that serves as an entrance to another
network.
Since the IP address for each PC and printer on your network must be
unique, you usually need to modify this preset address so it doesn’t conflict
with any other IP address or your network or any attached network. You can
do this in one of two ways. Each is explained in detail in the following sections.
Using DHCP
Setting the address manually
Using DHCP
If your network supports DHCP (Dynamic Host Configuration Protocol), the
printer’s IP address will be automatically assigned by the DHCP server when
you turn on the printer. (Refer to “Network Printing” on page 59 for a description of DHCP.)
" If your printer is not automatically assigned an IP address, verify that
DHCP is enabled on the printer (
FIG PAGE
DHCP/BOOTP
). If it is not enabled, you can enable it in the NETWORK
menu.
1 Connect your printer to the network.
Attach your printer to the network by plugging the network RJ45 connector into the RJ45 receptacle on the interface panel of your printer.
2 Turn on your PC and printer.
3 When the printer’s message window displays READY, install the printer
driver and utilities.
Network Connection
SPECIAL PAGES/PRINT CON-
55
Page 62

Setting the Address Manually
You may also manually change the printer’s IP address, subnet mask, and
gateway by using the following instructions. (See chapter 2, “Understanding
the Network Configuration Menus,” for more information.)
" When manually setting the IP address, turn off DHCP and BOOTP
first.
CAUTION
You should always notify your network’s administrator before changing
the printer’s IP address.
1 Turn on your PC and printer.
2 When the printer’s message window displays READY, set the IP address.
Press this
key . . .
Use the and keys to move to each of the four number triplets.
(Leading zeros of each triplet are automatically suppressed; for example,
“.001.” displays as “.1.”)
Use the and keys to increase or decrease each number.
(until) the message window displays . . .
READY
MENU
SPECIAL PAGES
MENU
NETWORK
DHCP:OFF
BOOTP:OFF
IP ADDRESS
192.168.1.2
IP ADDRESS
92.168.1.2
1
IP ADDRESS
xxx.xxx.xxx.xxx
Network Connection56
Page 63

3 If you don’t want to set the subnet mask or gateway, go to step 5.
If you don’t want to set the subnet mask, but you do want to set the gateway, go to step 4.
If you want to set the subnet mask, follow these steps.
Press this
key . . .
(until) the message window displays . . .
SUBNET MASK
255.255.255.0
SUBNET MASK
55.255.255.0
2
Use the and keys to move to each of the four number triplets.
(Leading zeros of each triplet are automatically suppressed; for example,
“.001.” displays as “.1.”)
Use the and keys to increase or decrease each number.
SUBNET MASK
x
xx.xxx.xxx.xxx
4 If you don’t want to set the gateway, go to step 5.
If you want to set the gateway, follow these steps.
Press this
key . . .
(until) the message window displays . . .
GATEWAY
192.168.1.1
GATEWAY
1
92.168.1.1
Use the and keys to move to each of the four number triplets.
(Leading zeros of each triplet are automatically suppressed; for example,
“.001.” displays as “.1.”)
Use the and keys to increase or decrease each number.
Network Connection
GATEWAY
xxx.xxx.xxx.xxx
57
Page 64

5 Save your configuration changes and make the printer ready for printing
again.
Press this
key . . .
(until) the message window displays . . .
Press the Up key twice to return to
READY
6 Print a configuration page to verify that the correct IP address, subnet
mask, and gateway have been set.
Press this
key . . .
(until) the message window displays . . .
READY
MENU
SPECIAL PAGES
PRINT
CONFIG PAGE
7 When the printer’s message window displays READY, install the printer
driver and utilities.
Network Connection58
Page 65

Network Printing
The magicolor 5430 DL supports the following network protocols:
BOOTP
DHCP
HTTP
IPP
LPD/LPR
SLP
SNMP
TCP/IP
This chapter defines each of these protocols and then explains how to print
via IPP.
BOOTP
BOOTP (Bootstrap Protocol), an Internet protocol that enables a diskless
workstation to discover its own IP address, the IP address of a BOOTP server
on the network, and a file to be loaded into memory to boot the machine. This
enables the workstation to boot without requiring a hard or floppy disk drive.
DHCP
DHCP (Dynamic Host Configuration Protocol) is a protocol for assigning
dynamic IP addresses to devices on a network. With dynamic addressing, a
device can have a different IP address every time it connects to the network.
In some systems, the device's IP address can even change while it is still
connected. DHCP also supports a mix of static and dynamic IP addresses.
Dynamic addressing simplifies network administration because the software
keeps track of IP addresses rather than requiring an administrator to manage
the task. This means that a new computer can be added to a network without
the hassle of manually assigning it a unique IP address.
HTTP
HTTP (HyperText Transfer Protocol) is the underlying protocol used by the
World Wide Web. It defines how messages are formatted and transmitted,
and what actions web servers and browsers should take in response to various commands. For example, when you enter a URL in your browser, this
actually sends an HTTP command to the Web server directing it to fetch and
transmit the requested web page.
Network Printing
59
Page 66

IPP
IPP (Internet Printing Protocol) is a protocol for end users’ most common
printing situations over the Internet. It allows users to find out about a printer’s
capabilities, submit print jobs to a printer, find out the status of the printer or
print job, and cancel a previously submitted print job.
For more information on using IPP, See “Printing via IPP (Internet Printing
Protocol) – Windows Server 2003/XP/2000” on page 62.
LPD/LPR
LPD/LPR (Line Printer Daemon/Line Printer Request) is a platformindependent printing protocol that runs over TCP/IP. Originally implemented
for BSD UNIX, its use has spread into the desktop world and is now an
industry standard.
SLP
SLP (Service Location Protocol) simplifies the discovery and use of network
resources such as printers by automating a number of network services.
Traditionally, in order to locate services on the network, users had to supply
the host name or network address of the machine providing the desired service. This has created many administrative problems.
However, SLP (Service Location Protocol) simplifies the discovery and use of
network resources such as printers by automating a number of network services. It provides a framework that allows networking applications to discover
the existence, location, and configuration of networked services.
With SLP users no longer need to know the names of network hosts. Instead,
they need to know only the description of the service they are interested in.
Based on this description, SLP is able to return the URL of the desired
service.
Unicast, Multicast, and Broadcast
SLP is a unicast and a multicast protocol. This means that messages can be
sent to one agent at a time (unicast) or to all agents (that are listening) at the
same time (multicast). However, a multicast is not a broadcast. In theory,
broadcast messages are “heard” by every node on the network. Multicast
differs from broadcast because multicast messages are only “heard” by the
nodes on the network that have “joined the multicast group.”
For obvious reasons network routers filter almost all broadcast traffic. This
means that broadcasts that are generated on one subnet will not be “routed”
or forwarded to any of the other subnets connected to the router (from the
router’s perspective, a subnet is all machines connected to one of its ports).
Network Printing60
Page 67

Multicasts, on the other hand, are forwarded by routers. Multicast traffic from
a given group is forwarded by routers to all subnets that have at least one
machine that is interested in receiving the multicast for that group.
SNMP
SNMP (Simple Network Management Protocol) is actually a set of protocols
for managing complex networks. SNMP works by sending messages to different parts of a network. SNMP-compliant devices, called agents, store data
about themselves in Management Information Bases (MIBs) and return this
data to the SNMP requesters.
TCP/IP
Most networks combine TCP (Transmission Control Protocol) with the
lower-level protocol IP (Internet Protocol). TCP establishes a virtual connection between two host systems and guarantees the delivery of data between
them while IP specifies the format and addressing of this data sent between
these two host systems.
Network Printing
61
Page 68

Printing via IPP (Internet Printing Protocol) – Windows
Server 2003/XP/2000
Adding an IPP Port
There are two ways to add an IPP port under Windows Server 2003/XP/2000:
Using setup.exe or using the Add Printer wizard.
Using setup.exe
Double-click setup.exe in the drivers\english\W2k-xp folder on the Utilities
and Documentation CD-ROM. (Unless otherwise noted, all dialog boxes
pictured here are taken from a Windows XP operating system.)
1 In the second dialog box select the Net-
work Printer radio button and then
choose OK.
2 In the Printer text box of the next dialog box
enter the printer’s network pathname in one
of the following formats and then choose
OK:
http://ipaddress:80/ipp
http://ipaddress:631/ipp
ipp://ipaddress:80/ipp
ipp://ipaddress:631/ipp
If you enter an invalid pathname, the following error message displays
(depending on your Windows operating system). Choose OK to return to
the previous dialog box and then type a valid pathname.
Windows Server 2003/XP—“Windows cannot connect to the printer.
Either the printer name was typed incorrectly, or the specified printer
has lost its connection to the server. For more information, click Help.”
Windows 2000—“Could not connect to the printer. You either entered
a printer name that was incorrect or the specified printer is no longer
connected to the server. Click Help for more information.”
Network Printing62
Page 69

3 Windows Server 2003/XP—Go to step 4.
Windows 2000—If you entered a valid path in the previous step, the following message displays: “The server on which the KONICA MINOLTA
magicolor 5430 DL printer resides does not have the correct printer driver
installed. If you want to install the driver on your local computer, click OK.”
The reason for this is that you do not yet have a printer driver installed.
Choose OK.
4 Choose Have Disk, locate the directory
on the CD-ROM where the printer driver
files are located (for example, drivers\english\W2k-xp), and then choose
OK.
5 Finish installing the printer driver.
Using the Add Printer Wizard
For Windows Server 2003/XP: Click Start, select Printers and Faxes,
and then click Add Printer.
For Windows 2000: Click Start, point to Settings, click Printers, and then
click Add Printer.
1 In the second dialog box select the Network Printer radio button and
then choose Next.
Windows Server 2003/XP
Network Printing
Windows 2000
63
Page 70

2 In the URL field in the next dialog box enter the printer’s network path-
name in one of the following formats and then choose Next:
http://ipaddress:80/ipp
http://ipaddress:631/ipp
ipp://ipaddress:80/ipp
ipp://ipaddress:631/ipp
Windows Server 2003/XP
Windows Server 2003/XP—“Windows cannot connect to the printer.
Either the printer name was typed incorrectly, or the specified printer
has lost its connection to the server. For more information, click Help.”
Windows 2000—“Could not connect to the printer. You either entered
a printer name that was incorrect or the specified printer is no longer
connected to the server. Click Help for more information.”
Windows 2000
3 Windows Server 2003/XP—Go to step 4.
Windows 2000—If you entered a valid path in the previous step, the following message displays: “The server on which the KONICA MINOLTA
magicolor 5430 DL printer resides does not have the correct printer driver
installed. If you want to install the driver on your local computer, click OK.”
The reason for this is that you do not yet have a printer driver installed.
Choose OK.
4 Choose Have Disk, locate the directory
on the CD-ROM where the printer driver
files are located (for example, drivers\english\W2k-xp), and then choose
OK.
5 Finish installing the printer driver.
Network Printing64
Page 71

Printing via IPP (Internet Printing Protocol) – Windows
Me/98SE
To print via IPP under Windows Me/98SE, you must first do the following:
1 Go to http://www.microsoft.com/Windows98/downloads/contents/WUPre-
views/IPP/Default.asp and follow the instructions to download WPNPINS.EXE, the Internet Print Services update file for Windows 98SE.
2 Install the WPNPINS.EXE file by locating it in Windows Explorer and then
double-clicking the WPNPINS.EXE.
Adding an IPP port
There are three ways to add an IPP port under Windows Me/98SE: Using
setup.exe, using the Add Printer Wizard (without a printer driver already
installed), and using the Add Port (with a printer driver already installed).
Using setup.exe
Double-click setup.exe in the drivers\english\Win9x folder on the Utilities and
Documentation CD-ROM. (Unless otherwise noted, all dialog boxes pictured
here are taken from a Windows Me operating system.)
1 In the second dialog box select the
Network Printer radio button and then
choose OK.
2 In the Network Path text box in the
next dialog box enter the printer’s network pathname in one of the following
formats and then choose OK:
http://ipaddress:80/ipp
http://ipaddress:631/ipp
ipp://ipaddress:80/ipp
ipp://ipaddress:631/ipp
If you enter an invalid pathname, the following error message displays:
“This network printer is currently offline or unavailable. You can install the
printer now, but you will not be able to print to it until it comes back online
or is made available.” Choose Cancel to return to the previous dialog box
and then type a valid pathname.
Network Printing
65
Page 72

3 If you entered a valid path in the previous step, the following message dis-
plays: “The server on which the printer resides does not have a suitable
printer driver installed. Click OK if you wish to install the driver on your
local machine.” The reason for this is that you do not yet have a printer
driver installed. Choose OK.
4 Ensure that the port entered above is
selected by default by checking the
“Set as default printer?” check box and
then choose OK.
5 Enter the printer name in the next dia-
log box and choose OK.
6 Choose OK to finish installing the printer driver. The IPP port will be the
default port.
Using the Add Printer Wizard
Choose Start>Settings>Printers to access the Add Printer wizard. (Unless
otherwise noted, all dialog boxes pictured here are taken from a Windows Me
operating system.)
1 In the second dialog box, select the
Network Printer radio button and
then choose Next.
Network Printing66
Page 73

2 In the URL field in the next dialog box
enter the printer’s network pathname
in one of the following formats and
then choose Next:
http://ipaddress:80/ipp
http://ipaddress:631/ipp
ipp://ipaddress:80/ipp
ipp://ipaddress:631/ipp
If you enter an invalid pathname, the following error message displays:
“This network printer is currently offline or unavailable. You can install the
printer now, but you will not be able to print to it until it comes back online
or is made available.” Choose Cancel to return to the previous dialog box
and then type a valid pathname.
3 Choose Have Disk, locate the direc-
tory on the CD-ROM where the printer
driver files are located (for example,
drivers\english\Win9x), and then
choose Next.
4 Finish installing the printer. The IPP port will be the default printer port.
Network Printing
67
Page 74

Printing via IPP if the Printer Driver is Already Installed
Choose Start>Settings>Printers. (Unless otherwise noted, all dialog boxes
pictured here are taken from a Windows Me operating system.)
1 Right-click the printer icon and then
choose Properties from the pop-up
menu.
2 On the Details tab, choose Add Port.
3 In the next dialog box, select the Net-
work radio button, enter the printer’s
network pathname in one of the following formats, and then choose OK to
add the path:
http://ipaddress:80/ipp
http://ipaddress:631/ipp
ipp://ipaddress:80/ipp
ipp://ipaddress:631/ipp
4 In the Properties dialog box choose OK to enable the IPP port.
Network Printing68
Page 75

Using PageScope
Web Connection
4
Page 76

About PageScope Web Connection
This chapter provides information on
PageScope Web Connection, an
HTTP (HyperText Transfer Protocol)-based web page that resides in
your printer and that you can access
using your Web browser.
This page gives you instant access
to printer status and the most frequently used printer configuration
options. Anyone on your network
can access the printer using their
web browser software. In addition,
with the proper password, you can
change the configuration of the printer without leaving your PC.
" Users who are not given passwords by the administrator can still view
the configuration settings and options but are not able to save or apply
changes.
Display Language
The language used in the PageScope Web Connection screens is specified
from the printer’s control panel. For details on specifying the display language, refer to the User’s Guide (CD-ROM) provided with the printer.
Requirements
To use PageScope Web Connection, the following is required:
Windows Server 2003/XP/2000/Me/98SE/NT4.0, MacOS X
Microsoft Internet Explorer version 5.5 or later
Netscape Navigator version 7.1 or later
Safari version 1.0 or later
" You do not need an Internet connection.
TCP/IP communication software (used by PageScope Web Connection)
installed on your PC
A network, to which both your PC and the printer are connected
" You cannot access PageScope Web Connection using a local
(USB) connection. If your PC and printer are connected via a USB
cable, use the Status Display.
About PageScope Web Connection70
Page 77

Setting Up the Printer Web Page
Setting up the printer web page to run on your network involves two basic
steps:
Determining the name or address of your printer
Setting up the “no proxy” preferences in your browser software
Determining the Printer Name
The printer web page can be accessed in two ways:
Through the assigned name of the printer—This name comes from the IP
host table (the filename is hosts) on the computer system and is usually
assigned by the system administrator (for example, magicolor 5430 DL). It
may be more convenient for you to use the printer name than the IP
address.
Location of the Host Table on the PC
z Windows Server 2003/XP \windows\system32\drivers\etc\hosts
z Windows Me/98SE \windows\hosts
z Windows 2000/NT4.0 \winnt\system32\drivers\etc\hosts
Through the printer’s IP address—The IP address of your printer is a
unique number and, therefore, may be the preferred identification to enter,
especially if you have more printers active in your network. The printer’s
IP address is listed on the configuration page.
Location of the Configuration Page in the Printer’s Configuration
Menu
SPECIAL PAGES/PRINT CONFIG PAGE menu
z
Setting Up Your Browser Software
Since your printer resides on your intranet and is not accessible beyond the
firewall of your network, you must set up the proper “preferences” in your
browser software. Your printer name or IP address must be added to the “no
proxy” list in the preferences dialog box of the browser.
" You need to do this procedure only once.
The sample screens below may be different from yours depending on software versions and operating systems in use.
" Our examples represent the IP address of the printer with:
xxx.xxx.xxx.xxx. Always enter your printer's IP address without leading zeros. For example, 192.168.001.002 should be entered as
192.168.1.2.
Setting Up the Printer Web Page
71
Page 78

Internet Explorer (version 6.0 for Windows)
1 Start Internet Explorer.
2 From the Tools menu
choose Internet Options.
3 Select the Connections tab
on the dialog box.
4 Choose the LAN Settings
button to display the Local
Area Network (LAN) Settings dialog box.
5 Select Advanced in Proxy
server to open the Proxy Settings dialog box.
6 In the Exceptions text box,
type a comma after the last
entry and then type the
printer name or the IP
address of your printer.
7 Choose OK three times to return to the main browser window.
8 Enter the printer’s IP address in the URL Address box to access the
printer home page.
Netscape Navigator (version 7.1)
1 Start Netscape Navigator.
2 From the Edit menu choose
Preferences.
3 Select the
Advanced/Proxies
directory from the left pane
of the dialog box.
4 Select the Manual Proxy
Configuration radio
button.
5 In the No Proxy for: text
box, type a comma after the
last entry, and then type the printer name or the IP address of your printer.
6 Choose OK to return to the main browser window.
Setting Up the Printer Web Page72
Page 79

7 Enter the printer name or IP address in the URL Location box to access
the printer home page.
Safari (version 1.1)
http://192.168.1.2/
1 From the Apple menu, choose Location, and then click Network prefer-
ences.
2 Click the Proxies tab in the Network preferences dialog box.
3 In the Bypass proxy settings for these Hosts & Domains list, type in
the name or IP address of the printer.
4 Click Apply Now.
5 In the URL address bar, type in the name or IP address of the printer to
access the printer’s Web page.
Setting Up the Printer Web Page
73
Page 80

Understanding the PageScope Web Connection Window
The illustration below identifies the navigation and configuration areas of the
windows that you see in PageScope Web Connection windows.
Link to
KONICA MINOLTA
web site
Version information
Access to
Administrator Mode
Links to subtopics
Current status
topics
Configuration area
Printer nameLinks to main
Navigation
Selecting the main topic and subtopic displays the configuration area for the
printer options (parameters) associated with your selections.
To change a current setting, click on the current setting and then select from
the available choices or enter the new value.
" In order to apply or save any changes made to the configuration set-
tings, PageScope Web Connection must be logged in from Administrator Mode. (For details, refer to “Administrator Mode” on page 75.)
Understanding the PageScope Web Connection74
Page 81

Current Status
The current status of the printer is displayed at the top of all PageScope Web
Connection windows. The icon displays the type of status being displayed.
Icon Status Description Examples
Ready The printer is online
and either ready to
print or printing.
READY
WARMING UP
PRINTING
Attention The printer needs
attention, but
printing continues.
Fixable
Error
Fatal Error The printer must be
The printer needs
attention before
printing can resume.
rebooted. If that
doesn’t fix the error,
service is required.
TRAY 1 EMPTY
C TONER LOW
PUT MEDIA:TRAY 1
TONER EMPTY CYAN
MEDIA JAM TRAY 2
ERROR AIDC SENSOR
User Mode
You automatically enter User Mode whenever you enter PageScope Web
Connection. In User Mode you can view configuration settings but not change
them.
Administrator Mode
In order to change any configuration settings through PageScope Web Connection, you must first enter Administrator Mode:
1 Choose the Login button.
2 Type the password in the Admin Password text box.
" The default password is “administrator”. However, once you are in
Administrator Mode, you can change this in the System/Password window.
3 Choose the Login button.
If you type an incorrect password, the following message displays:
“Invalid Password. Please log in again with a correct password.” Retype
the password.
Understanding the PageScope Web Connection
75
Page 82

Viewing Printer Status
System Page
The System page is the starting point for all access to the printer's internal
web pages. On this page you find printer status and current configuration settings, printer identification, and links to all other web pages.
" All of the information displayed on the System page is read only.
Viewing Printer Status76
Page 83

Summary (shown above)
The System/Summary window provides the following information.
Item Description
Printer name/status Shows the name assigned to your printer, and dis-
plays the current status of the printer—just as it’s
displayed on the printer’s control panel message
window.
" The status display allows you to remotely
identify possible printer problems, such as out
of paper and out of toner.
Device Status (Product
image)
Printer Memory Displays the amount of memory installed in the
DIMM If an optional DIMM is installed in the printer, dis-
Network Lists the installed printer interface (Ethernet 10/
Tray 2 Identifies whether an optional lower feeder unit
Tray 3 Identifies whether an optional lower feeder unit
Duplex Unit Identifies whether the duplex unit is “Installed” or
Identifies the type of printer that you are browsing.
The printer is pictured in the illustration with all
installed options.
printer.
plays the size of the DIMM.
If no optional DIMM is installed in the printer, displays 0 MBytes.
100Base TX).
(Tray 2) is “Installed” or “Not Installed.”
(Tray 3) is “Installed” or “Not Installed”.
“Not Installed.”
Viewing Printer Status
77
Page 84

Details
Input Tray
The System/Details/Input Tray window provides the following information.
Item Description
Tray Identifies the paper feed units (Tray 1/2/3) installed on
the printer.
Paper Size Indicates the size of paper loaded in a specific tray.
Media Type Indicates the type of paper loaded in a specific tray.
Paper Indicates the paper status (“Ready” or “Empty”) for
each tray.
Viewing Printer Status78
Page 85

Network
The System/Details/Network window provides the following information.
Item Description
Type Identifies the type of network interface installed on the
printer (Ethernet 10Base T/100Base TX).
IP Address Identifies the IP (Internet Protocol) address of the
Ethernet interface.
The address can also be viewed on the operation control
panel.
Subnet Mask Identifies the subnet mask address of the Ethernet
interface.
The address can also be viewed on the operation control
panel.
Gateway Address Identifies the gateway address of the Ethernet interface.
The address can also be viewed on the operation control
panel.
MAC Address Identifies the Media Access Control (MAC) address of
the Ethernet interface.
The address can also be viewed on the operation control
panel.
NetBIOS Name Identifies the NetBIOS name for the printer.
Viewing Printer Status
79
Page 86

Item Description
Domain/
Workgroup
Rendezvous
Printer Name
Rendezvous Host
Name
Identifies the domain and the workgroup name for the
printer.
Identifies the printer name (“KONICA MINOLTA magicolor 5430DL”).
Identifies the host name for the printer.
Viewing Printer Status80
Page 87

Consumables
The System/Details/Consumables window provides the following informa-
tion:
Item Description
Consumables Identifies the type of consumable that is being
monitored.
Status Indicates the remaining life of the consumables
Toner Cartridge: Percentage
Transfer Roller, Transfer Belt Unit: Ready, Near
Life End, or Life End
Max. Life Identifies the maximum life expectancy of the toner
Viewing Printer Status
Waste Toner Bottle: Ready, Near Full, or Full
cartridge in sheets of media.
81
Page 88

Counter
The System/Counter window provides the following information:
Item Description
Total Face Counter Indicates the number of single-sided prints (in color,
in black and white, and the total amount).
Duplex Counter Indicates the number of double-sided prints (in
color, in black and white, and the total amount).
Viewing Printer Status82
Page 89

Online Assistance
The System/Online Assistance window provides the following information:
Item Description
Contact Name Identifies the organization that provides assistance
with the printer.
Contact Information Identifies the web address for assistance.
Product Help URL Identifies the web address for assistance.
Corporate URL Identifies the KONICA MINOLTA web address.
Supplies and
Accessories
Online Help URL Identifies the Web address for on-line assistance.
Identifies the web address where you can order
printer supplies and accessories.
Viewing Printer Status
83
Page 90

Job Page
This page allows you to view the status of current print jobs.
Active Job (shown above)
The Job/Active Job window provides the following information for up to ten
print jobs:
Item Description
Job ID Displays the print job identification number. Each
print job that the printer receives is assigned a
unique identification number.
Job Owner If known, displays the owner of the print job.
Status Displays the current status of the print job (Printing,
Receiving, Waiting, Completed, or Cancelled).
Job Type Displays the type of print job (Normal Print or IPP
Print). For more information on IPP (Internet Printing
Protocol), see chapter 3, “Network Printing in a
Windows Environment.”
Job Name Displays the name of the print job.
Number of Pages Displays the number of pages in the print job.
Number of Copies Displays the number of copies of the print job
requested.
Viewing Printer Status84
Page 91

Item Description
Next > button If more than five print jobs are queued to print,
moves you from the first to the second Active Jobs
window.
< Previous button If more than five print jobs are queued to print,
moves you from the second to the first Active Jobs
window.
Delete Selected Job
button
Deletes the print job(s) whose check boxes in
column 1 are checked.
Viewing Printer Status
85
Page 92

Print Page
This page allows you to print pages that provide various information about the
printer.
Test Print (shown above)
The Print/Test Print window provides the following information:
Item Description
Configuration Page Allows you to print a printer configuration page,
which lists the printer’s configuration settings, by
choosing “Yes”, and then clicking Print button.
Test Pages Allows you to print a printer test page by choosing
“Yes”, and then clicking Print button.
Menu Map Allows you to print a printer menu map, which
displays the printer’s configuration menus, by
choosing “Yes”, and then clicking Print button.
Print button Sends the page to the printer.
Viewing Printer Status86
Page 93

Configuring the Printer
In order to make any configuration changes through PageScope Web Connection, you must first enter Administrator Mode. See “Administrator Mode”
on page 75 for instructions on logging into Administrator Mode.
System Page
This page allows you to configure several user- and printer-specific items.
User Choice (shown above)
The System/User Choice window allows you to configure the following
items:
Item Description
AutoContinue Specifies whether the printer should continue printing if
the correct media size is not loaded in the specified tray.
Choices: Off, On
Default: On
Configuration Menu Equivalent:
ENGINE/AUTO CONTINUE
Configuring the Printer
87
Page 94

Item Description
Tray Chaining Specifies whether the printer should switch to a different
tray (containing media of the same size and type of
media) and then continue printing if the specified tray runs
out of media.
Choices: Off, On
Default: On
Configuration Menu Equivalent:
ENGINE/TRAY CHAINING
" This option is available only if the optional lower
feeder unit (Tray 2/3) is installed.
Energy Saver Sets the amount of time (in minutes) the printer waits
between print jobs before activating the Energy Saver
feature.
Choices: 15, 30, 60, 120
Default: 30
Configuration Menu Equivalent:
ENGINE/ENERGY SAVER
" When the Energy Saver setting in the Preference is
off, the drop-down list box is disabled and gray out.
Restore User
Default button
Apply button Applies the configuration settings for this window.
Clear button Resets all configuration settings for this window to their
Logout button Logs out of Administrator Mode and returns to User
Resets all Administrator Mode configuration settings to
their factory defaults.
Configuration Menu Equivalent:
ENGINE/ENGINE SERVICE/RESTORE
USER DEFAULT
user defaults.
Mode.
Configuring the Printer88
Page 95

Password
The System/Password window allows you to configure the following items:
Item Description
New Password Sets a new password to enter Administrator Mode.
" Passwords can be set to any string of numbers and
Retype
Password
Verifies the new password typed in the New Password
text box.
" If the password typed in both text boxes doesn’t
Apply button Applies the configuration settings for this window.
Clear button Resets all configuration settings for this window to their
user defaults.
Logout button Logs out of Administrator Mode and returns to User
Mode.
Configuring the Printer
letters (uppercase and lowercase) between 6 and
16 characters in length.
match, the following message displays when you
choose the Apply button: “Please retype the
correct password.” Click OK button, and then
retype the passwords in both text boxes.
89
Page 96

" If you forget the new password you’ve assigned, use the printer’s
ENGINE/ENGINE SERVISE/RESTORE USER DEFAULT
menu to reset the password (and all other configuration choices) to
administrator.
Configuring the Printer90
Page 97

Preference
The System/Preference window allows you to configure the following items:
Item Description
Refresh Rate Sets the time interval (in seconds) that passes before the
screen automatically updates. During a screen refresh,
the printer is polled for any new information or status, and
all of the fields in the PageScope Web Connection
windows are updated.
Range: 30–7200 (0.5–12 minutes)
Default: 30
If less than 30 seconds is specified, the setting
changes to 30 seconds.
If more than 7200 seconds is specified, the setting
Energy Saver Sets whether or not to use the Energy Saver feature
specified in the System/User Choice window.
Choices: On, Off
Default: On
Configuration Menu Equivalent:
Apply button Applies the configuration settings for this window.
Configuring the Printer
changes to 7200 seconds.
ENGINE/ENGINE SERVICE/ENERGY SAVER
91
Page 98

Item Description
Clear button Resets all configuration settings for this window to their
user defaults.
Logout button Logs out of Administrator Mode and returns to User
Mode.
Configuring the Printer92
Page 99

Online Assistance
The System/Online Assistance window allows you to configure the follow-
ing items:
Item Description
Contact Name Sets the name of the person or organization responsible
for providing assistance with the printer.
Range: Up to 63 characters
Default: KONICA MINOLTA Customer Support
Contact
Information
Product Help
URL
Corporate URL Sets the KONICA MINOLTA corporate web site address.
Sets the telephone number for printer assistance.
Range: Up to 127 characters
Default: http://printer.konicaminolta.com/
Sets the help web site address for printer assistance.
Range: Up to 127 characters
Default: http://printer.konicaminolta.com/
Range: Up to 127 characters
Default: http://printer.konicaminolta.com/
Configuring the Printer
93
Page 100

Item Description
Supplies and
Accessories
Online Help URL Sets the Web address for on-line assistance.
Apply button Applies the configuration settings for this window.
Clear button Resets all configuration settings for this window to their
Logout button Logs out of Administrator Mode and returns to User
Sets the web address where you can purchase printer
supplies and accessories.
Range: Up to 127 characters
Default: http://www.q-shop.com
Range: Up to 127 characters
Default: http://pagescope.com
user defaults.
Mode.
Configuring the Printer94
 Loading...