

Konica Minolta DIMAGE CAPTUR User Manual

INSTRUCTION MANUALE
9222-7301-11 SY-A307/ME-0308

2 BEFORE YOU BEGIN / SYSTEM REQUIREMENTS
BEFORE YOU BEGIN
Before installing DiMAGE Capture software, read the data-transfer section in the camera manual.
This section details how to connect the camera to a computer using the USB cable. The examples in
this manual assume the camera is connected to the computer with a USB cable as described in the
camera manual.
This instruction manual does not provide instruction in the basic operation of personal computers, or
the basic operation of Windows operating systems; refer to the manuals supplied with the computer.
Every precaution has been taken to ensure the accuracy of this material. Contact Minolta if you have
any questions. Minolta is not responsible for any loss or damage caused by the use of this software.
This instruction manual may not be copied either in part or in its entirety without the prior permission
of Minolta.
TABLE OF CONTENTS
System requirements .............................................................................................................................3
DiMAGE Capture system requirements ....................................................................................3
About DiMAGE Viewer...............................................................................................................3
Installation ......................................................................................................................................4
Uninstallation .............................................................................................................................6
Starting up the software .........................................................................................................................7
Ferrite core ................................................................................................................................7
Starting up the software ............................................................................................................7
Quitting / Disconnection.............................................................................................................9
Settings ....................................................................................................................................10
Main window............................................................................................................................10
Focus modes ...........................................................................................................................11
Basic tab..................................................................................................................................12
Exposure tab ...........................................................................................................................15
Color tab ..................................................................................................................................17
Display focus / white balance area..........................................................................................19
Focusing screen ......................................................................................................................19
Taking pictures ....................................................................................................................................20
Preferences ....................................................................................................................................21
Preferences window ................................................................................................................21
File destination ........................................................................................................................22

3
Minolta, The essentials of imaging, and DiMAGE are trademarks or registered trademarks of Minolta
Co., Ltd. Microsoft and Windows are registered trademarks in the United States and other countries
of Microsoft Corporation. The official name of Windows is Microsoft Windows Operating System.
Pentium is a registered trademark of Intel Corporation. All other brand and product names are trademarks or registered trademarks of their respective owners.
DIMAGE CAPTURE SYSTEM REQUIREMENTS
IBM PC/AT compatible computers
Windows XP (Home/Professional),
Windows Me, Windows 2000 Professional
64MB RAM or the memory required by the operating system, whichever is
greater.
100MB or more of available hard-disk space
after installation
A True Color (24 bit) or greater monitor
with a minimum resolution of 800 X 600.
1024 X 768 (XGA) or higher is recommended.
CD-ROM drive
300MHz Intel Pentium processor II or higher and must meet the the require-
ments of the operating system
For the camera to be connected directly to the computer and used as a mass-storage device, the
computer must be equipped with a USB port as a standard interface. The computer and the operating system must be guaranteed by their manufacturers to support USB interface.
ABOUT DIMAGE VIEWER
The use of DiMAGE Viewer software ver. 2.2.0 or later is recommended. The DiMAGE Viewer is
linked with DiMAGE Capture and can be installed from the DiMAGE Viewer CD-ROM, included with
the camera. Many functions such as editing or correction will be available. To display RAW-image file
taken with DiMAGE Capture, the DiMAGE Viewer must be installed. See the DiMAGE Viewer’s manual for the details.
SYSTEM REQUIREMENTS
4 INSTALLATION
RAM-stationed programs such as anti-virus or installation-monitoring software may cause the installer
to fail. Remove or disable these programs before installing DiMAGE Capture. Reinstall or enable the
software when the installation is complete.
In the example below, the hard disk drive is drive E. The letters designating the drives will vary
between computers. With Windows 2000 or XP, the software should be installed with the Administrator
privilege.
INSTALLATION
Tu rn on the computer to start Windows.
Insert the DiMAGE Capture CD-ROM into the CD-ROM
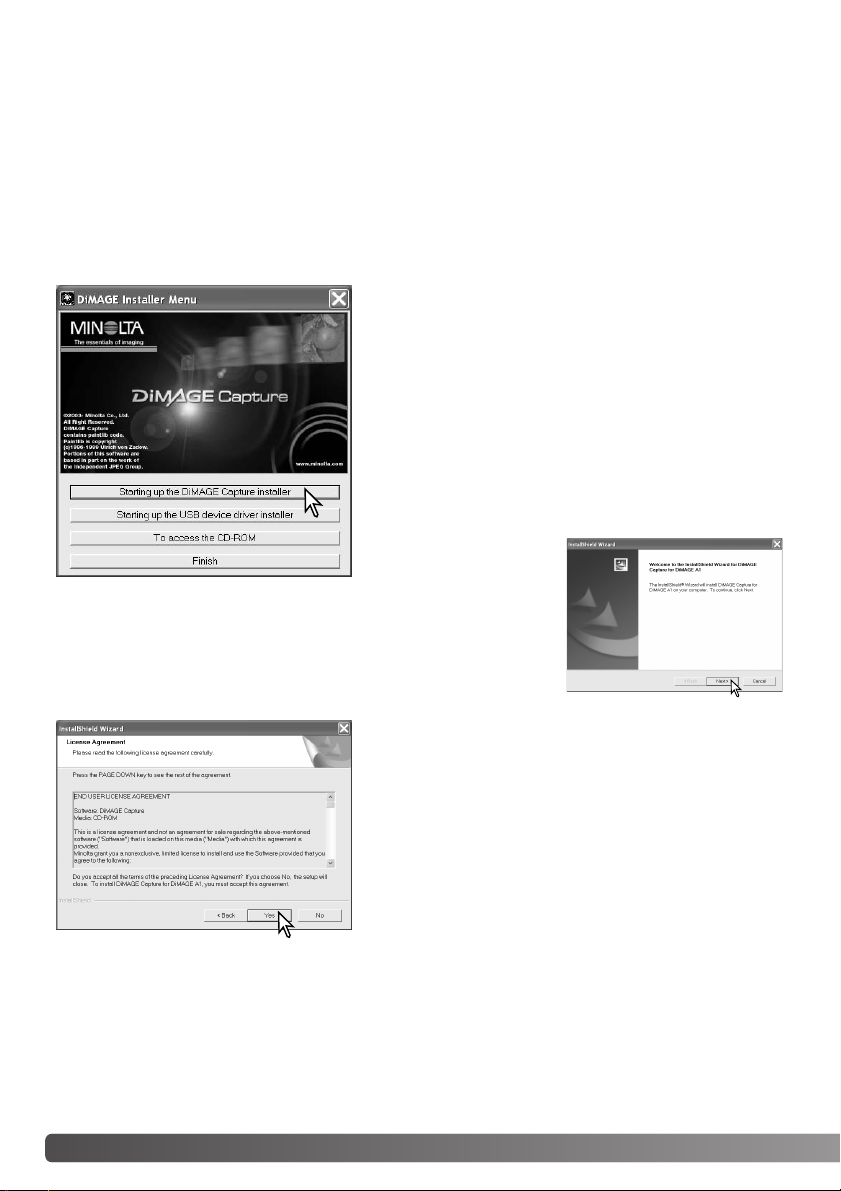
drive. The DiMAGE Installer Menu window will open automatically.
If this display doesn’t appear, double-click the CD-ROM
icon and then “MLTInstApp.exe”.
Click the “Starting up the DiMAGE Capture installer” button to begin installation.
The welcome window
will open. Click “Next>”
to continue.
The license agreement appears. If you accept the agreement, click “Yes” to continue the installation routine.
Read the entire license agreement carefully before continuing. If you do not agree to the terms, click “No” to exit
the installation program.
5
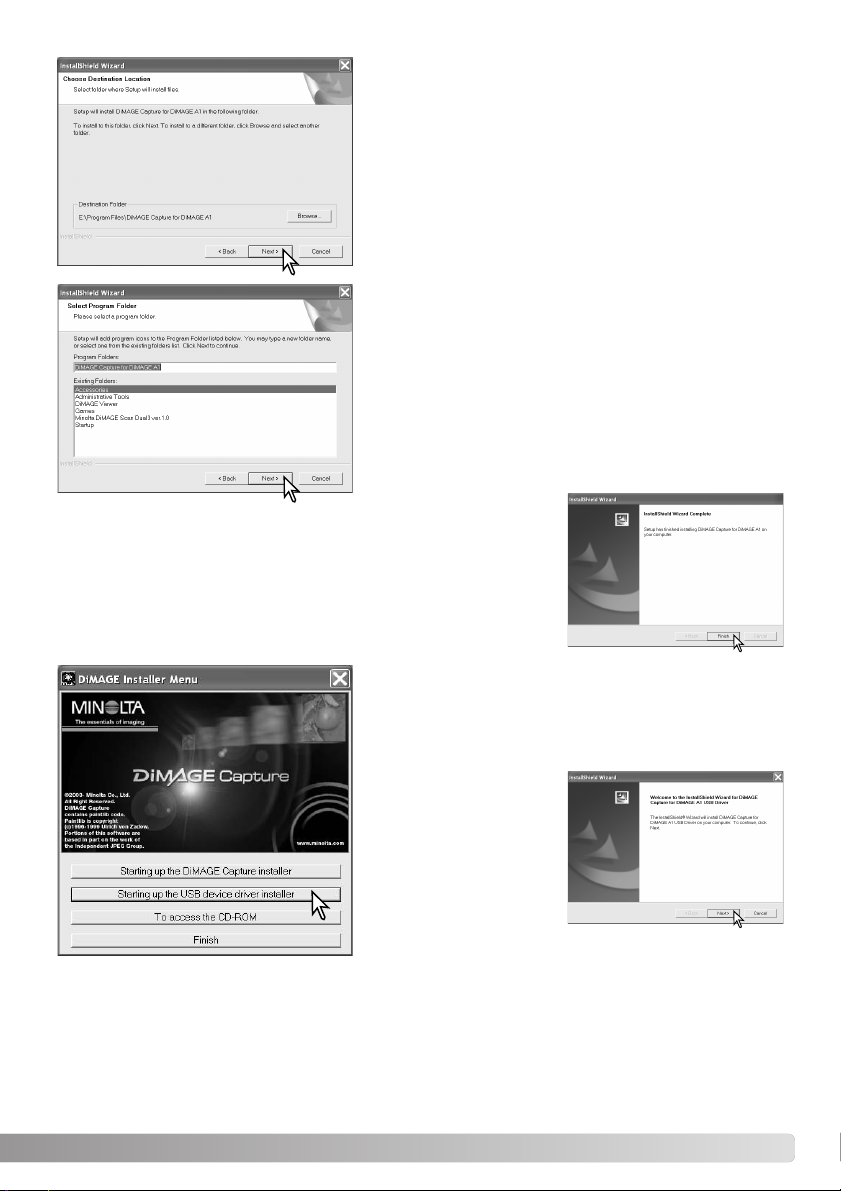
To install the software in the default location - E:\Program
Files\DiMAGE Capture for DiMAGE A1, click “Next >.” To
install the software in a different location, click browse
button to display the folder selection window. Specify the
directory in which to install the software.
The name of the default program folder is displayed. To
install the software icons in this folder, click “Next>.”
Installation will begin.
To install the software icons in another folder, select one
of the folders listed in the existing-folders box below. Click
“Next>” to begin installation.
When the software
installation has been
completed, a message
will be displayed. Click
“Finish.”
Click the “Starting up the USB device driver installer” button to begin installation.
The welcome window
will open. Click “Next>”
to continue.
6 INSTALLATION / STARTING UP
UNINSTALLATION
Windows XP:
1. Quit the software.
2. Select Start > Control Panel > Add or Remove Programs.
3. Select DiMAGE Capture for DiMAGE A1.
4. Click Change/Remove.
Windows Me and 2000:
1. Quit the software.
2. Select Start > Settings > Control Panel > Add/Remove Programs.
3. Select DiMAGE Capture for DiMAGE A1.
4. Click Remove.
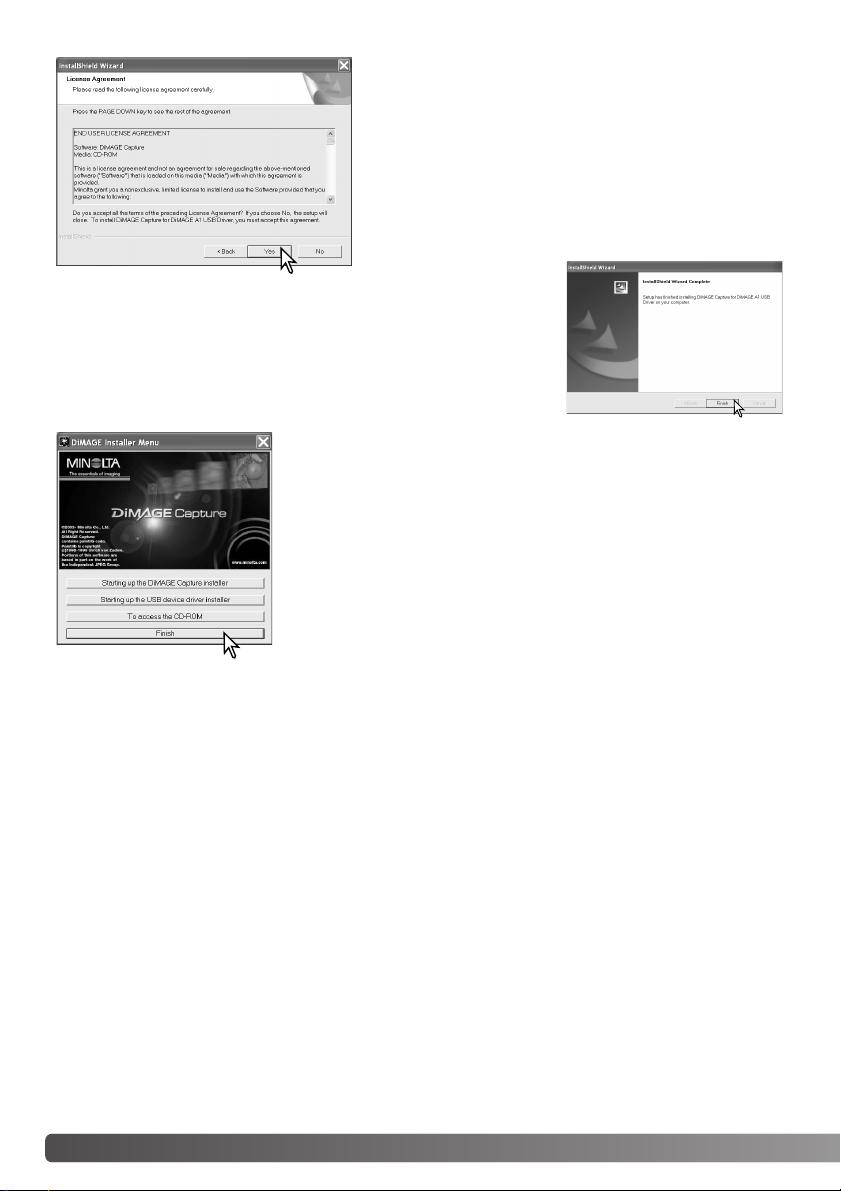
The DiMAGE Viewer installer window will be displayed. Click “Finish”
to close the window.
When using Windows Me, re-start the computer to complete the
installation.
The license agreement appears. If you accept the agreement, click “Yes” to continue the installation routine.
Read the entire license agreement carefully before continuing. If you do not agree to the terms, click “No” to exit
the installation program.
When the software
installation has been
completed, a message
will be displayed. Click
“Finish.”
7
STARTING UP THE SOFTWARE
FERRITE CORE
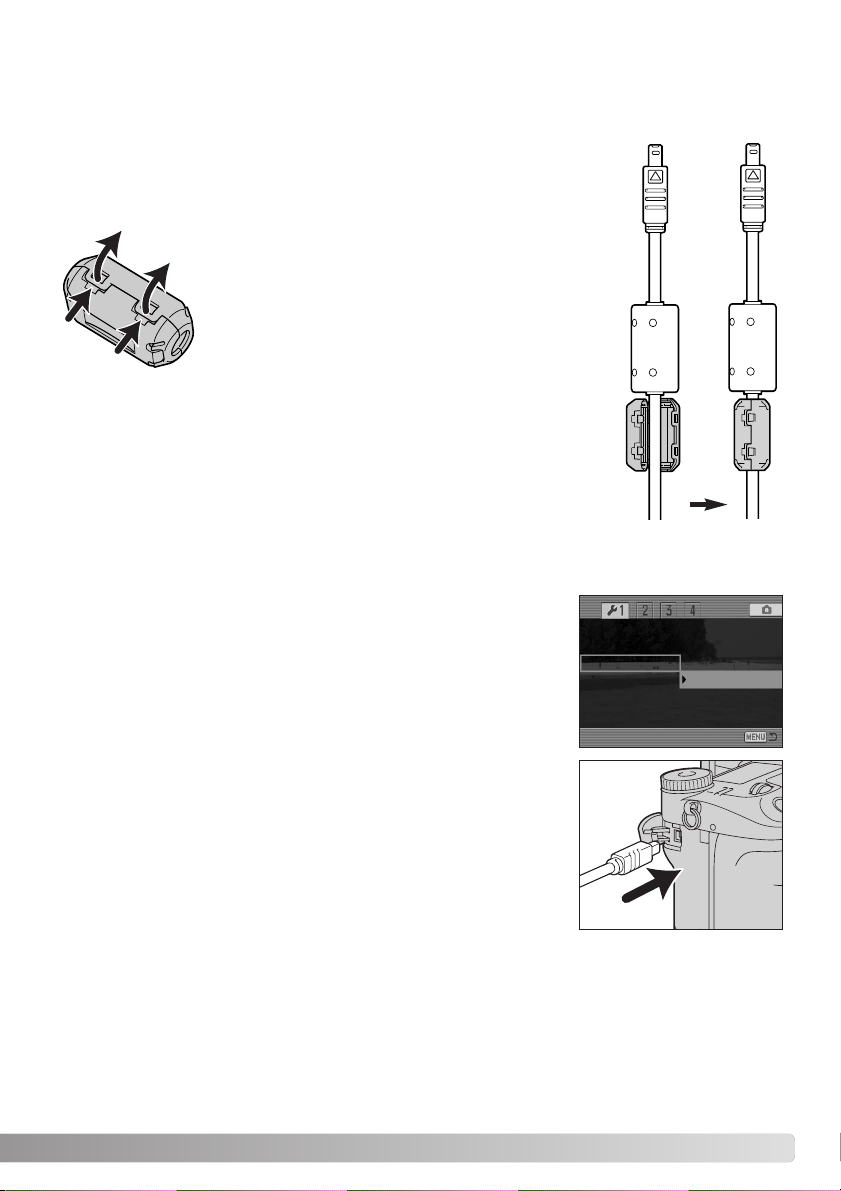
Attach the Ferrite core FRC-100 supplied with the camera to the USB cable
before use. The ferrite core reduces harmful interference.
Slide a thin blunt object under the two latches on the core to open it.
The core must be placed on the end of the cable
that is connected to the camera as shown on the
right.
Place the core around the cable and close.
Confirm the latches on the core have caught.
STARTING UP THE SOFTWARE
1. Start up the computer. The computer must be on before connecting
the camera.
2. Turn the camera on and select “Comp. control” in the Transfer mode
in section 1 of the setup menu. See camera’s manual for the detail.
3. Open the AV out / USB port cover on the camera. Attach the small-
er plug of the USB cable to the camera. The plug should be firmly
attached.
4. Attach the other end of the USB cable to the computer’s USB port.
The plug should be firmly attached. Only one camera can be connected to the computer. The camera should be connected directly
to the computer’s USB port. Attaching the camera to a USB hub
may prevent proper operation. A memory card is not necessary.
LCDbrightness
Shortcut help
Tr ansfer mode Data storage
EVF auto swtch Comp. control
Video output
Language
When using the Windows XP or 2000, Windows-logo-testing message or Digital-signature-notfound message may appear when the camera is connected for the first time. Continue anyway.
8STARTING UP
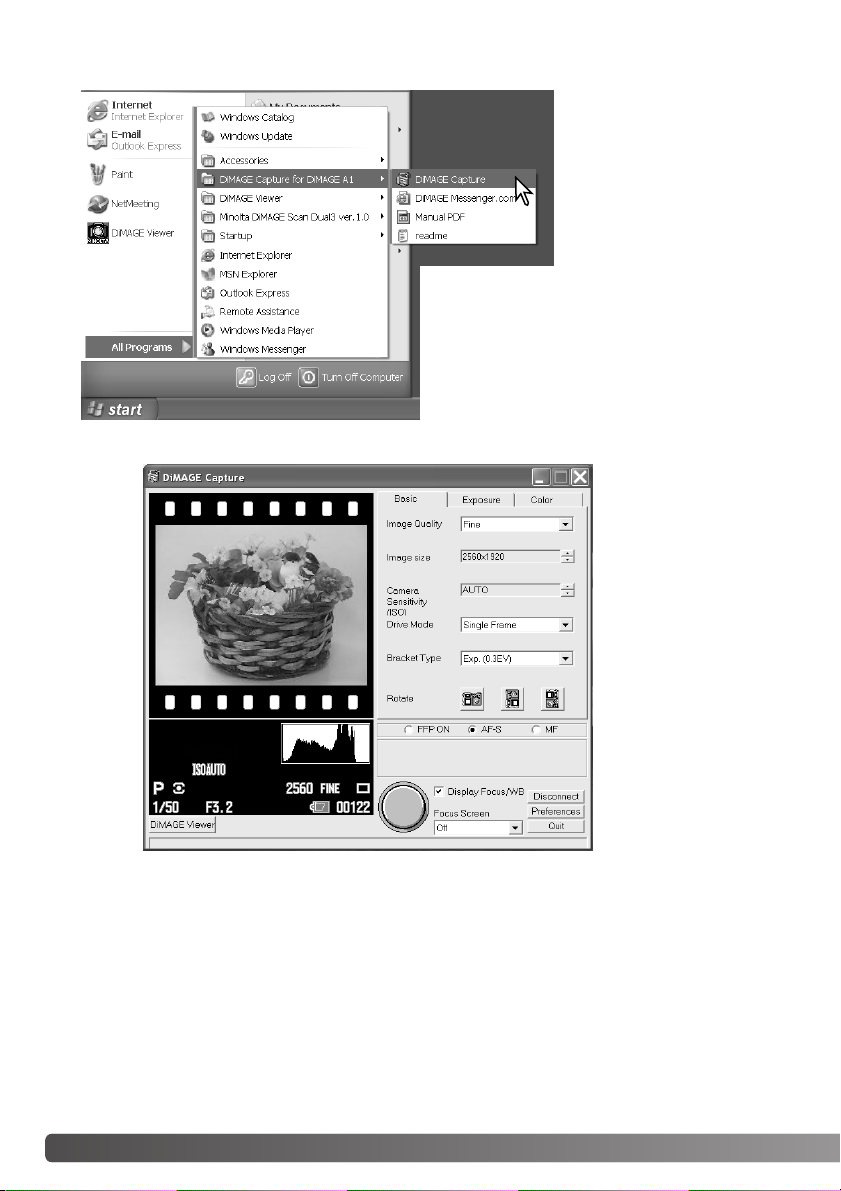
5. Select and start the DiMAGE Capture.
Windows XP:
Choose Start > All Programs > DiMAGE Capture
for DiMAGE A1 > DiMAGE Capture.
Windows Me and 2000:
Choose Start > Programs > DiMAGE Capture for
DiMAGE A1 > DiMAGE Capture.
 Loading...