

Konica BIZHUB 750, BIZHUB 600 User Manual

User Manual
750/600


x
Introduction


Introduction
Thank you for choosing this machine.
This manual contains details on the operation of the various functions of the
machine, precautions on its use, and basic troubleshooting procedures. In
order to ensure that this machine is used correctly and efficiently, carefully
read this manual before using the machine. After reading the manual, store
it in the designated holder so that it can easily be referred to when questions
or problems arise during operation.
The illustrations used in this manual may appear slightly different from views
of the actual equipment.
Energy Star®
As an ENERGY STAR® Partner, we have determined that this machine meets
the ENERGY STAR® Guidelines for energy efficiency.
What is an ENERGY STAR® product?
®
An ENERGY STAR
ically switch to a “low-power mode” after a period of inactivity. An ENERGY
®
product uses energy more efficiently, saves you money on utility bills
STAR
and helps protect the environment.
bizhub 750/600 x-3
product has a special feature that allows it to automat-

Trademarks and Registered Trademarks
KONICA MINOLTA, KONICA MINOLTA Logo, and The essentials of imaging
are registered trademarks or trademarks of KONICA MINOLTA HOLDINGS,
INC.
PageScope and bizhub are registered trademarks or trademarks of KONICA
MINOLTA BUSINESS TECHNOLOGIES, INC.
Netscape Communications, the Netscape Communications logo, Netscape
Navigator, Netscape Communicator, and Netscape are trademarks of Netscape Communications Corporation.
THIS SOFTWARE IS PROVIDED BY ERIC YOUNG “AS IS” AND ANY EXPRESS OR IMPLIED WARRANTIES, INCLUDING, BUT NOT LIMITED TO,
THE IMPLIED WARRANTIES OF MERCHANTABILITY AND FITNESS FOR A
PARTICULAR PURPOSE ARE DISCLAIMED. IN NO EVENT SHALL THE AUTHOR OR CONTRIBUTORS BE LIABLE FOR ANY DIRECT, INDIRECT, INCIDENTAL, SPECIAL, EXEMPLARY, OR CONSEQUENTIAL DAMAGES
(INCLUDING, BUT NOT LIMITED TO, PROCUREMENT OF SUBSTITUTE
GOODS OR SERVICES; LOSS OF USE, DATA, OR PROFITS; OR BUSINESS
INTERRUPTION) HOWEVER CAUSED AND ON ANY THEORY OF LIABILITY, WHETHER IN CONTRACT, STRICT LIABILITY, OR TORT (INCLUDING
NEGLIGENCE OR OTHERWISE) ARISING IN ANY WAY OUT OF THE USE
OF THIS SOFTWARE, EVEN IF ADVISED OF THE POSSIBILITY OF SUCH
DAMAGE.
The licence and distribution terms for any publically available version or derivative of this code cannot be changed. i.e. this code cannot simply be copied and put under another distribution licence [including the GNU Public
Licence.]
All other product names mentioned are trademarks or registered trademarks
of their respective companies
x-4 bizhub 750/600

Contents
Introduction
Energy Star® ..................................................................................... x-3
What is an ENERGY STAR® product? ...........................................x-3
Trademarks and Registered Trademarks ...................................... x-4
Contents ............................................................................................ x-5
Available Features .......................................................................... x-17
Automatically selecting the paper .................................................x-17
Adjusting copies to the size of the paper .....................................x-17
Scanning the original in separate batches ....................................x-17
Copying an original containing various page sizes .......................x-17
Specifying separate horizontal and vertical zoom ratios ..............x-18
Adjusting copies according to the image quality of the original ...x-18
Copying multiple original pages onto a single page .....................x-18
Sorting copies ...............................................................................x-19
Stapling copies .............................................................................x-19
Punching holes in copies ..............................................................x-20
Center folding/binding ..................................................................x-20
Zigzag folding and folding in three ................................................x-20
Inserting paper between copies of overhead
projector transparencies ...............................................................x-21
Inserting copies of a different original at a specified location .......x-21
Adding a cover page/insertion ......................................................x-22
Copying with chapter title pages on the front side .......................x-22
Copying with reversed colors .......................................................x-23
Separately copying a page spread ...............................................x-23
Repeating copy images ................................................................x-23
Splitting an original page into two copies .....................................x-24
Making copies for filing .................................................................x-24
Adjusting the image to fit the paper size ......................................x-24
Copying with a layout for center binding ......................................x-25
Erasing sections of copies ............................................................x-25
Printing distribution text on copies ...............................................x-25
Managing jobs ...............................................................................x-26
Programming copy settings ..........................................................x-26
Checking the copy settings ..........................................................x-26
Enlarging the size of text in touch panel screens .........................x-26
Displaying explanations of functions and settings ........................x-26
Interrupting a copy job ..................................................................x-26
Printing a sample copy .................................................................x-26
bizhub 750/600 x-5

Explanation of manual conventions ...............................................x-27
Safety advices ...............................................................................x-27
Sequence of action .......................................................................x-27
Tips ...............................................................................................x-28
Special text markings ...................................................................x-28
Descriptions and symbols for original and paper ........................x-29
“Width” and “Length” ...................................................................x-29
Paper orientation ..........................................................................x-29
User manuals ..................................................................................x-30
User manual [Copy Operations] <this manual> ............................x-30
User manual [Network Scanner Operations] ................................x-30
User manual [Box Operations] ......................................................x-30
User manual [Enlarge Display Operations] ...................................x-30
Legal restrictions on copying .........................................................x-31
1 Installation and operation precautions
1.1 Safety information .............................................................................1-3
Warning and precaution symbols ...................................................1-3
Meaning of symbols ........................................................................1-4
Disassemble and modification ........................................................1-4
Power cord .....................................................................................1-5
Power source ..................................................................................1-6
Power plug ......................................................................................1-7
Grounding .......................................................................................1-7
Installation .......................................................................................1-8
Ventilation .......................................................................................1-9
Actions in response to troubles ......................................................1-9
Consumables ................................................................................1-10
When moving the machine ...........................................................1-11
Before successive holidays ..........................................................1-11
1.2 Regulation notices ...........................................................................1-12
CE marking (Declaration of Conformity) for users of the
European Union (EU) ....................................................................1-12
USER INSTRUCTIONS FCC PART 15 -
RADIO FREQUENCY DEVICES (for U.S.A. users) ........................1-12
INTERFERENCE-CAUSING EQUIPMENT STANDARD
(ICES-003 ISSUE 4) (for Canada users) ........................................1-12
For users in countries not subject to class B regulations .............1-13
x-6 bizhub 750/600

1.3 Laser safety ..................................................................................... 1-14
For Denmark users ....................................................................... 1-14
For Norway users ......................................................................... 1-14
For Finland, Sweden users .......................................................... 1-15
Ozone release .............................................................................. 1-17
Acoustic noise (For European users only) .................................... 1-17
1.4 Caution notations and labels ......................................................... 1-18
1.5 Space requirements ....................................................................... 1-19
1.6 Operation precautions ................................................................... 1-21
Power source ............................................................................... 1-21
Operating environment ................................................................ 1-21
Storage of copies ......................................................................... 1-21
2 Before making copies
2.1 Part names and their functions ....................................................... 2-3
Outside of machine ........................................................................ 2-3
Inside of machine ........................................................................... 2-6
Options ........................................................................................... 2-7
Large Capacity Tray LU-401/LU-402 ............................................. 2-9
Finisher FS-504/FS-602 (+ Punch Kit PK-504/PK-505) ............... 2-10
Cover Sheet Feeder PI-501 ......................................................... 2-13
Z-Folding unit ZU-601/ZU-602 .................................................... 2-14
Shift Tray SF-601 ......................................................................... 2-15
Control panel ................................................................................ 2-16
Basic settings screen (Basic screen) ........................................... 2-19
Icons that appear in the touch panel ........................................... 2-21
2.2 Adjusting the angle of the control panel ...................................... 2-22
To adjust the angle of the control panel ...................................... 2-22
2.3 Turning on the main power and the sub power ........................... 2-24
To turn on the machine ................................................................ 2-24
To scan during warm-up .............................................................. 2-26
To turn off the machine ................................................................ 2-28
Automatically canceling the settings
(Automatic Panel Reset) ............................................................... 2-30
Automatically canceling the mode screen
(Automatic System Reset) ............................................................ 2-30
Automatically conserving energy (Low Power Mode) .................. 2-31
Automatically conserving energy (Sleep Mode) ........................... 2-32
Manually conserving energy ........................................................ 2-33
Limiting machine usage according to a schedule
(Weekly Timer) .............................................................................. 2-34
Controlling the use of this machine with user authentication ...... 2-36
Using the machine with account track ......................................... 2-40
bizhub 750/600 x-7

2.4 Loading paper into the tray 1 or 2 ..................................................2-43
To load paper (tray 1 or 2) ............................................................2-43
2.5 Loading paper into the tray 3 or 4 ..................................................2-45
To load paper (tray 3 or 4) ............................................................2-45
2.6 Loading paper into the bypass tray ...............................................2-47
To load paper (bypass tray) ..........................................................2-47
2.7 Loading paper into the LCT (LU-401/LU-402) ...............................2-51
To load paper (LCT) ......................................................................2-51
2.8 Loading paper of a different size into paper trays .......................2-54
Changing the size of paper that is loaded ....................................2-54
When thick paper is loaded into a paper tray ...............................2-56
To set the conveyance lever .........................................................2-56
3 Basic copy operations
3.1 General copy operation ....................................................................3-3
To make a copy ..............................................................................3-3
3.2 Operations that cannot be combined ..............................................3-6
Operations where the setting specified last is given priority ..........3-6
Operations where the setting specified first is given priority ..........3-8
3.3 Positioning the original .....................................................................3-9
To position the original into the ADF ..............................................3-9
To position the original on the original glass ................................3-11
Scanning the original in separate batches
(“Separate Scan” setting) ..............................................................3-13
Scanning a multi-page original from the original glass .................3-15
3.4 Specifying original settings ............................................................3-18
Copying original of mixed sizes (“Mixed Original” setting) ...........3-18
Positioning folded (Z-folded) original ............................................3-20
Positioning tabbed original ...........................................................3-22
Selecting the original orientation (Original Direction settings) ......3-24
To specify an original direction setting .........................................3-26
Selecting the position of the binding margin (Margin settings) ....3-28
To specify a margin setting ...........................................................3-30
3.5 Selecting a paper setting ................................................................3-32
Automatically selecting the paper size
(“Auto Paper Select” setting) ........................................................3-33
Manually selecting the desired paper size ....................................3-34
3.6 Specifying a zoom setting ..............................................................3-35
Automatically selecting the zoom ratio (“Auto Zoom” setting) .....3-35
Specifying the same zoom ratio as the original (“×1.0” setting) ...3-37
x-8 bizhub 750/600

Slightly reducing the copy (“Minimal” setting) ............................. 3-38
Selecting a preset zoom ratio (Enlarge and Reduce settings) ..... 3-39
Typing In the zoom ratio (Zoom with Constant X
and Y Ratio setting) ...................................................................... 3-40
Typing in separate X and Y zoom ratios
(Independent Zoom settings) ....................................................... 3-42
Selecting a stored zoom ratio ...................................................... 3-45
Storing the desired zoom ratio ..................................................... 3-47
3.7 Selecting a simplex/duplex setting (1-side/2-sides settings) ..... 3-49
To select single-sided copies ...................................................... 3-51
To select double-sided copies ..................................................... 3-53
3.8 Selecting the quality of the original .............................................. 3-55
Positioning original with small print or photos
(Orig. Image Type settings) .......................................................... 3-55
To specify an orig. image type setting ......................................... 3-56
3.9 Specifying the density settings ..................................................... 3-58
Adjusting the print density (Density settings) ............................... 3-59
Adjusting the background density
(Adjust Background settings) ....................................................... 3-60
3.10 Selecting a combine originals setting .......................................... 3-61
Copying multiple original pages onto a single page
(Combine Originals) ...................................................................... 3-63
3.11 Selecting finishing settings ............................................................ 3-65
Separating copies by sets (“Sort” setting) ................................... 3-68
Separating copies by pages (“Group” setting) ............................ 3-70
Feeding out copies face up (“Face Up” setting) .......................... 3-72
Stapling copies (Staple settings) .................................................. 3-73
To bind copies with staples ......................................................... 3-76
Punching holes in copies (Punch settings) .................................. 3-78
To punch holes in copies ............................................................. 3-79
3.12 Specifying folding settings ............................................................ 3-81
To fold copies at the center (“Half Fold”) ..................................... 3-83
To bind copies at the center (“Fold & Staple”) ............................. 3-84
To fold copies fanned (“Z-Fold”) .................................................. 3-86
To fold copies in three (“Tri-Fold”) ............................................... 3-88
3.13 Scanning the next original to be copied while a copy
job is being printed (Next Job Reservation) ................................. 3-90
To reserve a copy job .................................................................. 3-90
3.14 Stopping scanning/printing ........................................................... 3-92
To stop scanning/printing ............................................................ 3-92
3.15 Deleting a stopped job ................................................................... 3-93
To delete a stopped job ............................................................... 3-93
bizhub 750/600 x-9

4 Additional copy operations
4.1 Checking the copy settings (Mode Check) .....................................4-3
To check the settings ......................................................................4-3
To change the settings ...................................................................4-6
4.2 Printing a proof copy to be checked (Proof Copy) .........................4-7
To make test prints .........................................................................4-7
4.3 Interrupting a copy job (Interrupt Mode) .......................................4-11
To interrupt a copy job ..................................................................4-11
4.4 Registering copy programs (Mode Memory) ................................4-13
To store/change a copy program .................................................4-13
To delete a copy program .............................................................4-16
4.5 Copying with programmed copy settings (Mode Memory) .........4-17
To recall a stored job ....................................................................4-17
4.6 Displaying function descriptions (Help) ........................................4-20
Overview of help screens ..............................................................4-20
To display the main help menu screen .........................................4-24
To display the help screen while specifying a setting ..................4-26
4.7 Specifying control panel settings (Accessibility Mode) ...............4-27
Displaying the accessibility setting screen ...................................4-27
To set the “Key Repeat Start/Interval Time” function ...................4-27
To set the “Enlarge Display Timer Setting” function .....................4-30
To set the “Message Display Time” function ................................4-32
To set the “Accept Sound Setting” function .................................4-34
To set the “Touch Panel Volume Adjust” function ........................4-37
To set the “Touch Panel Adj.” function .........................................4-40
5 Troubleshooting
5.1 When the message “Malfunction detected.” appears
(Call Technical Representative) .......................................................5-3
Display in Enlarge Display Mode ....................................................5-3
To call the technical representative ................................................5-5
5.2 When the message “Misfeed detected.” appears ..........................5-7
To clear a paper misfeed ................................................................5-8
5.3 When the message “Replenish paper.” appears ..........................5-10
To replenish paper ........................................................................5-10
5.4 When the message “... Not enough remaining memory.”
appears .............................................................................................5-11
Memory becomes full while scanning ...........................................5-11
Memory becomes full while queuing a job ...................................5-12
x-10 bizhub 750/600

5.5 Simple troubleshooting .................................................................. 5-13
Main body .................................................................................... 5-13
ADF .............................................................................................. 5-15
Finisher ......................................................................................... 5-16
5.6 Main messages and their remedies .............................................. 5-17
6 Specifications
6.1 Specifications ................................................................................... 6-3
bizhub 750/600 .............................................................................. 6-3
ADF ................................................................................................ 6-5
Option specifications ..................................................................... 6-6
Large Capacity Tray LU-401 .......................................................... 6-6
Large Capacity Tray LU-402 .......................................................... 6-6
Finisher FS-504 .............................................................................. 6-7
Finisher FS-602 .............................................................................. 6-8
Punch Kit PK-504/PK-505 ............................................................. 6-9
Z-Folding Unit ZU-601/ZU-602 ...................................................... 6-9
Cover Sheet Feeder PI-501 ........................................................... 6-9
Shift Tray SF-601 ......................................................................... 6-10
Accessories .................................................................................. 6-10
7 Copy paper/original
7.1 Copy paper ........................................................................................ 7-3
Possible paper sizes ...................................................................... 7-3
Paper types and paper capacities ................................................. 7-4
Special paper ................................................................................. 7-5
Precautions for paper .................................................................... 7-7
Paper storage ................................................................................. 7-7
Automatic tray switching feature ................................................... 7-8
Order for selecting the paper trays ................................................ 7-8
7.2 Specifying the paper setting for the bypass tray ........................... 7-9
To automatically detect the paper size
(“Auto Paper Select” setting) ......................................................... 7-9
To specify a paper size (Standard Size settings) ......................... 7-11
To specify a non-standard paper size
(Custom Size settings) ................................................................. 7-13
To store a non-standard paper size
(Custom Size settings store) ........................................................ 7-16
To select a setting for oversized paper
(Oversized Paper settings) ........................................................... 7-19
To specify a setting for special paper .......................................... 7-22
bizhub 750/600 x-11

7.3 Specifying paper settings for paper trays .....................................7-24
To display the paper tray setting screen ......................................7-24
To specify a standard paper size (Standard Size 1 settings) ........7-27
To specify a setting for standard special-sized paper
(Standard Size 2 settings) .............................................................7-29
To specify a non-standard paper size (Custom Size settings) .....7-31
To select a setting for oversized paper
(Oversized Paper settings) ............................................................7-33
To specify a paper type ................................................................7-35
7.4 Originals ...........................................................................................7-37
Original that can be positioned into the ADF ................................7-37
Precautions for positioning original into the ADF .........................7-39
Original that can be placed on the original glass ..........................7-40
Precautions for positioning original on the original glass .............7-41
8 Application functions
8.1 Inserting paper between overhead projector transparencies
(“OHP Interleave” function) ..............................................................8-2
To copy using the “OHP Interleave” function .................................8-2
8.2 Inserting copies of a different original at a specified location
(“Insert Image” function) ...................................................................8-6
To copy using the “Insert Image” function .....................................8-7
8.3 Adding cover pages (“Cover Mode” function) ..............................8-11
To copy using the “Cover Mode” function ...................................8-12
8.4 Inserting cover pages (“Insert Sheet” function) ...........................8-16
To copy using the “Insert Sheet” function ....................................8-18
8.5 Specifying pages to be printed on the front side
(“Chapters” function) ......................................................................8-23
To copy using the “Chapters” function ........................................8-25
8.6 Copying with image colors inversed
(“Neg-/Pos. Reverse” function) ......................................................8-30
To copy using the “Neg-/Pos. Reverse” function .........................8-30
8.7 Producing separate copies of each page in a page spread
(“Book Copy” function) ...................................................................8-32
To copy using the “Book Copy” function .....................................8-35
8.8 Repeating the copy image on a sheet of paper
(“Image Repeat” function) ..............................................................8-41
To automatically detect the scanning area
(“Auto Original Size Detect”) .........................................................8-43
To repeat the specified area (“Set Range”) ..................................8-46
To repeat the image the specified number of times (“Repeat”) ....8-50
x-12 bizhub 750/600

8.9 Copying an original on two pages
(“Booklet Pagination function) ...................................................... 8-54
To copy using the booklet pagination function ............................ 8-55
8.10 Adding filing margins to copies (“Page Margin”
function) ........................................................................................... 8-57
To copy using the “Page Margin” function .................................. 8-58
To adjust the position of the binding margin
(“Edit Margin” setting) .................................................................. 8-61
8.11 Adjusting the image to fit the paper
(Image Adjustment settings) .......................................................... 8-65
To copy using the image adjustment settings ............................. 8-67
8.12 Copying booklet original (“Booklet” function) ............................. 8-71
To copy using the “Booklet” function .......................................... 8-72
8.13 Erasing specified areas of copies (“Erase” functions) ................ 8-74
To erase specified areas of copies (“Erase” function) ................. 8-75
To erase the center of copies (“Center Erase” function) .............. 8-78
To erase specified areas of copies
(“Non-Image Area Erase” function) .............................................. 8-81
8.14 Printing the date/time, page number or distribution
number on copies (Stamp/Overlay functions) ............................. 8-83
To display the stamp/overlay screen ........................................... 8-85
Printing the date/time (“Date/Time” function) .............................. 8-87
To copy using the “Date/Time” function ...................................... 8-87
Printing the page number (“Page #” function) ............................. 8-90
To copy using the “Page #” function ........................................... 8-90
Printing the distribution number (“Set Numbering” function) ...... 8-94
To copy using the “Set Numbering” function .............................. 8-94
Printing the built-in stamp (“Built-In Stamp” function) ................. 8-96
To copy using the “Built-in stamp” function ................................ 8-96
Printing the preset text at the center of the copy image
(“Watermark” function) ................................................................. 8-99
To copy using the “Watermark” function ..................................... 8-99
9 Replacing toner cartridges and staples and
emptying dust boxes
9.1 Replacing the toner cartridge ......................................................... 9-2
Display in Enlarge Display Mode ................................................... 9-4
To replace the toner cartridge ........................................................ 9-5
9.2 Replacing the Staples ...................................................................... 9-7
Display in Enlarge Display Mode ................................................... 9-8
To replace the staple cartridge for finisher FS-504 ....................... 9-9
To replace the staple cartridge for finisher FS-602 ..................... 9-10
bizhub 750/600 x-13

9.3 Emptying the dust boxes ................................................................9-14
To empty the dust box of the punch kit ........................................9-14
To empty the dust box of the Z-folding unit .................................9-17
10 Care of the machine
10.1 Cleaning ...........................................................................................10-2
Main body .....................................................................................10-2
Original glass ................................................................................10-2
Left partition glass ........................................................................10-3
Control panel ................................................................................10-3
ADF platen guide cover ................................................................10-4
Paper take-up roller ......................................................................10-4
10.2 Viewing counters (Meter Count) ....................................................10-5
To view the counters .....................................................................10-5
10.3 When the message “Preventive maintenance time.” appears ....10-7
11 Managing jobs (Job List)
11.1 Overview of the Job List screen .....................................................11-2
Jobs ..............................................................................................11-2
Multi-job feature ............................................................................11-2
Job List screens ............................................................................11-3
11.2 Performing operations on jobs ......................................................11-6
To delete a job ..............................................................................11-6
To check the job settings ..............................................................11-8
Displayed Information ...................................................................11-9
To check the job details ..............................................................11-10
To display current jobs (Held Jobs and Active Jobs lists) ..........11-12
To display job history ..................................................................11-13
To print a sample copy of a stored job .......................................11-14
To print a stored job ...................................................................11-16
To increase priority for printing ...................................................11-19
12 Utility
12.1 Overview of Utility Mode .................................................................12-2
List of registration information ......................................................12-2
12.2 Selecting a destination register ...................................................12-16
One-Touch registration ...............................................................12-16
User box .....................................................................................12-16
Displaying the Destination Register screen ................................12-17
x-14 bizhub 750/600

12.3 Specifying user settings ............................................................... 12-19
System setting ........................................................................... 12-19
Display setting ............................................................................ 12-25
Initial setting ............................................................................... 12-26
Copier setting ............................................................................. 12-27
Scanner setting .......................................................................... 12-29
Printer setting ............................................................................. 12-29
Displaying the User Setting screen ............................................ 12-30
12.4 Specifying administrator settings ............................................... 12-32
System setting ........................................................................... 12-32
Administrator/Machine setting ................................................... 12-39
One-Touch registration .............................................................. 12-39
User authentication/Account track ............................................ 12-39
Network setting .......................................................................... 12-41
Copier setting ............................................................................. 12-42
Printer setting ............................................................................. 12-43
System connection .................................................................... 12-44
Security setting .......................................................................... 12-44
Displaying the administrator setting screen ............................... 12-46
12.5 Adjusting the printer ..................................................................... 12-48
Adjusting the starting print position at the leading
edge position ............................................................................. 12-48
Adjusting the starting print position at the left edge .................. 12-50
12.6 Adjusting the finisher ................................................................... 12-52
Adjusting the center stapling position ........................................ 12-52
Adjusting the half-fold position .................................................. 12-55
Adjusting the hole-punching positions
(Punch Vertical Position) ............................................................ 12-58
Adjusting the hole-punching positions
(Punch Horizontal Position) ........................................................ 12-61
Adjusting the hole-punching positions
(Punch Unit Vert. Position) ......................................................... 12-64
Adjusting the hole-punching positions
(Punch Unit Hor. Position) .......................................................... 12-67
Adjusting the hole-punching positions
(Punch Resist Loop Size) ........................................................... 12-70
Adjusting the Z-fold positions .................................................... 12-73
Adjusting the tri-fold positions ................................................... 12-77
Adjusting the pitch of the two staples ....................................... 12-79
Cover sheet tray size .................................................................. 12-81
bizhub 750/600 x-15

12.7 Authentication method .................................................................12-82
User authentication and account track .......................................12-82
When user authentication and account track
are synchronized .........................................................................12-83
When user authentication and account track
are used separately .....................................................................12-84
To select an authentication method ...........................................12-85
12.8 User authentication setting ..........................................................12-89
Administrative setting .................................................................12-89
User name list .............................................................................12-89
Default function permission ........................................................12-89
To specify the administrative setting ..........................................12-90
User registration .........................................................................12-92
User counter ...............................................................................12-96
To check the counter ..................................................................12-97
12.9 Account track setting ....................................................................12-99
Account track registration ...........................................................12-99
Account track counter ..............................................................12-103
To check the counter ................................................................12-104
12.10 Password rules ............................................................................12-106
Conditions of the password rules .............................................12-106
13 Appendix
13.1 Entering text .....................................................................................13-2
To type text ...................................................................................13-4
List of available characters ...........................................................13-4
13.2 Function combination table ............................................................13-5
14 Index
x-16 bizhub 750/600
Available Features
Automatically selecting the paper
The most appropriate paper size can automatically be selected based on the
size of the loaded original and the specified zoom ratio.
For details, refer to “Automatically selecting the paper size (“Auto Paper Select” setting)” on page 3-33.
Adjusting copies to the size of the paper
The most appropriate zoom ratio can automatically be selected based on the
size of the loaded original and the specified paper size.
For details, refer to “Automatically selecting the zoom ratio (“Auto Zoom”
setting)” on page 3-35.
Scanning the original in separate batches
A document with a large number of pages can be divided and scanned in
separate batches. Double-sided copies can be produced by using the original glass or the original pages can be alternately loaded onto the original
glass or into the automatic document feeder, and then all pages can be printed together as a single job.
For details, refer to “Scanning a multi-page original from the original glass”
on page 3-15 and “Scanning the original in separate batches (“Separate
Scan” setting)” on page 3-13.
Copying an original containing various page sizes
An original with various page sizes can be scanned and copied together.
For details, refer to “Copying original of mixed sizes (“Mixed Original” setting)” on page 3-18.
bizhub 750/600 x-17

Specifying separate horizontal and vertical zoom ratios
By specifying separate horizontal and vertical zoom ratios, copies of the original can be resized as desired.
For details, refer to “Typing in separate X and Y zoom ratios (Independent
Zoom settings)” on page 3-42.
Adjusting copies according to the image quality of the original
The copies can be adjusted according to the image quality of the original.
For details, refer to “Positioning original with small print or photos (Orig. Image Type settings)” on page 3-55 or “Adjusting the print density (Density settings)” on page 3-59.
Copying multiple original pages onto a single page
Multiple pages of the original can be printed together on a single page.
For details, refer to “Copying multiple original pages onto a single page
(Combine Originals)” on page 3-63.
x-18 bizhub 750/600

Sorting copies
The sorting method for outputting copies can be selected.
For details, refer to “Separating copies by sets (“Sort” setting)” on
page 3-68, “Separating copies by pages (“Group” setting)” on page 3-70.
Stapling copies
Copies can be stapled together before they are fed out.
For details, refer to “Stapling copies (Staple settings)” on page 3-73.
bizhub 750/600 x-19

Punching holes in copies
Holes for filing can be punched in the copies.
For details, refer to “Punching holes in copies (Punch settings)” on
page 3-78.
Center folding/binding
Copies can be folded in half or bound with staples, then folded in half. For
details, refer to “To fold copies at the center (“Half Fold”)” on page 3-83 and
“To bind copies at the center (“Fold & Staple”)” on page 3-84.
Zigzag folding and folding in three
Copies can be folded fanned or in three. For details, refer to “To fold copies
fanned (“Z-Fold”)” on page 3-86 and “To fold copies in three (“Tri-Fold”)” on
page 3-88.
x-20 bizhub 750/600

Inserting paper between copies of overhead projector transparencies
After each overhead projector transparency copy is printed, a page can be
added to the stack as an interleaf.
For details, refer to “Inserting paper between overhead projector transparencies (“OHP Interleave” function)” on page 8-2.
Inserting copies of a different original at a specified location
An original page scanned from the original glass can be inserted between
original pages scanned with the automatic document feeder, and
all copies can be fed out together.
For details, refer to “Inserting copies of a different original at a specified location (“Insert Image” function)” on page 8-6.
bizhub 750/600 x-21

Adding a cover page/insertion
Cover pages or insertions can be added to copies. Copies can be produced
using different paper (for example, colored paper) for the cover pages and
insertions.
For details, refer to “Adding cover pages (“Cover Mode” function)” on
page 8-11 and “Inserting cover pages (“Insert Sheet” function)” on
page 8-16.
Copying with chapter title pages on the front side
Double-sided copies can be made so that the chapter title pages are printed
on the front sides of pages.
For details, refer to “Specifying pages to be printed on the front side (“Chapters” function)” on page 8-23.
x-22 bizhub 750/600

Copying with reversed colors
An original can be copied with the light- and dark-colored areas of images
inversed.
For details, refer to “Copying with image colors inversed (“Neg-/Pos. Reverse” function)” on page 8-30.
Separately copying a page spread
A page spread, such as in an open book or catalog, can be copied onto separate pages.
For details, refer to “Producing separate copies of each page in a page
spread (“Book Copy” function)” on page 8-32.
Repeating copy images
An original image can be repeatedly printed on a single sheet of paper.
For details, refer to “Repeating the copy image on a sheet of paper (“Image
Repeat” function)” on page 8-41.
bizhub 750/600 x-23

Splitting an original page into two copies
A single original page can be divided in two and each half can be printed on
separate copies. For details, refer to “Copying an original on two pages
(“Booklet Pagination function)” on page 8-54.
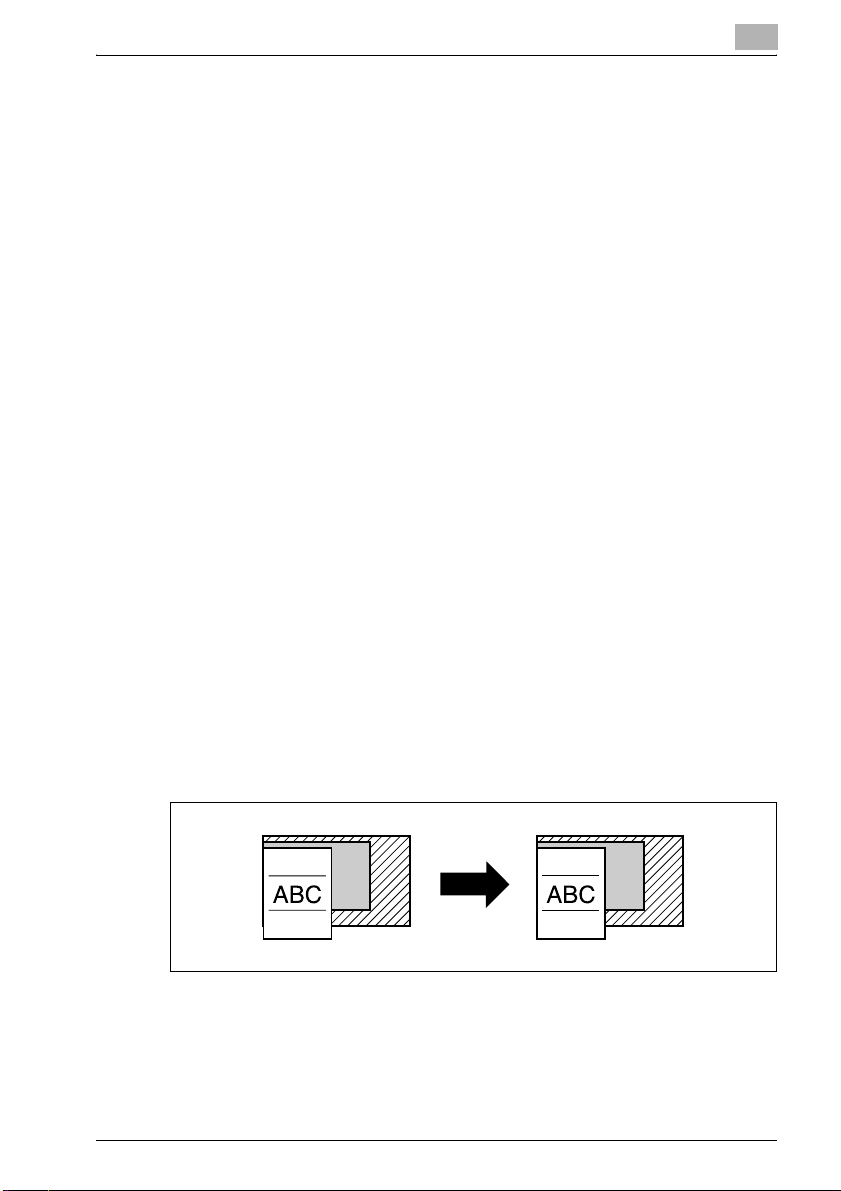
Making copies for filing
Copies can be printed with a filing margin so they can easily be stored in filing
binders.
For details, refer to “Adding filing margins to copies (“Page Margin” function)” on page 8-57.
Adjusting the image to fit the paper size
Copies can be produced after specifying the position of the original image
on the paper. For details, refer to “Adjusting the image to fit the paper (Image
Adjustment settings)” on page 8-65.
x-24 bizhub 750/600

Copying with a layout for center binding
Copies can be made with the pages arranged in the layout of a magazine.
For details, refer to “Copying booklet original (“Booklet” function)” on
page 8-71.
Erasing sections of copies
The transmission information in received faxes and the shadows from
punched holes and from the bindings and edges of books can be erased in
copies.
For details, refer to “Erasing specified areas of copies (“Erase” functions)” on
page 8-74.
Printing distribution text on copies
Each copy set can be printed with distributions numbers, page numbers, or
the date.
For details, refer to “Printing the date/time, page number or distribution
number on copies (Stamp/Overlay functions)” on page 8-83.
bizhub 750/600 x-25

Managing jobs
The print status of copy jobs can be checked and the jobs can be managed.
For details, refer to “Managing jobs (Job List)” on page 11-2.
Programming copy settings
Frequently used copy settings can be programmed and recalled to be used
with other copy jobs.
For details, refer to “Registering copy programs (Mode Memory)” on
page 4-13.
Checking the copy settings
Screens showing the current copy settings can be displayed. From these
screens, the copy settings can also be changed.
For details, refer to “Checking the copy settings (Mode Check)” on page 4-3.
Enlarging the size of text in touch panel screens
The text and buttons in the touch panel can be displayed in a larger size that
is easier to read, allowing basic copy operations to be easily performed.
For details, refer to the Enlarge Display Operations of the bizhub 750/600
user manual.
Displaying explanations of functions and settings
The name and function of parts and details of functions and settings appears
in the Help screens.
For details, refer to “Displaying function descriptions (Help)” on page 4-20.
Interrupting a copy job
The copy job being printed can be interrupted in order for a different copy
job to be printed.
For details, refer to “Interrupting a copy job (Interrupt Mode)” on page 4-11.
Printing a sample copy
Before printing a large number of copies, a single proof copy can be printed
so that it can be checked.
For details, refer to “Printing a proof copy to be checked (Proof Copy)” on
page 4-7.
x-26 bizhub 750/600

Explanation of manual conventions
The marks and text formats used in this manual are described below.
Safety advices
6 DANGER
Failure to observe instructions highlighted in this manner may result in
fatal or critical injuries in fact of electrical power.
% Observe all dangers in order to prevent injuries.
7 WARNING
Failure to observe instructions highlighted in this manner may result in
serious injuries or property damage.
% Observe all warnings in order to prevent injuries and to ensure safe use
of the machine.
7 CAUTION
Failure to observe instructions highlighted in this manner may result in
slight injuries or property damage.
% Observe all cautions in order to prevent injuries and to ensure safe use
of the machine.
Sequence of action
1 The number 1 as formatted here indi-
cates the first step of a sequence of
actions.
An illustration inserted
2 Subsequent numbers as formatted
here indicate subsequent steps of a
sequence of actions.
Text formatted in this style pro-
?
vides additional assistance.
% Text formatted in this style describes the action that will ensure the
desired results are achieved.
bizhub 750/600 x-27
here shows what operations
must be performed.

Tips
2
Note
Text highlighted in this manner contains useful information and tips to ensure safe use of the machine.
2
Reminder
Text highlighted in this manner contains information that should be reminded.
!
Detail
Text highlighted in this manner contains references for more detailed information.
Special text markings
[Stop] key
The names of keys on the control panel are written as shown above.
MACHINE SETTING
Display texts are written as shown above.
x-28 bizhub 750/600
 Loading...