

Page 1

1
ADJUSTMENT
1 ADJUSTMENT
2 ISW
3 SERVICE
4 DIAGRAMS
Page 2

ADJUSTMENT
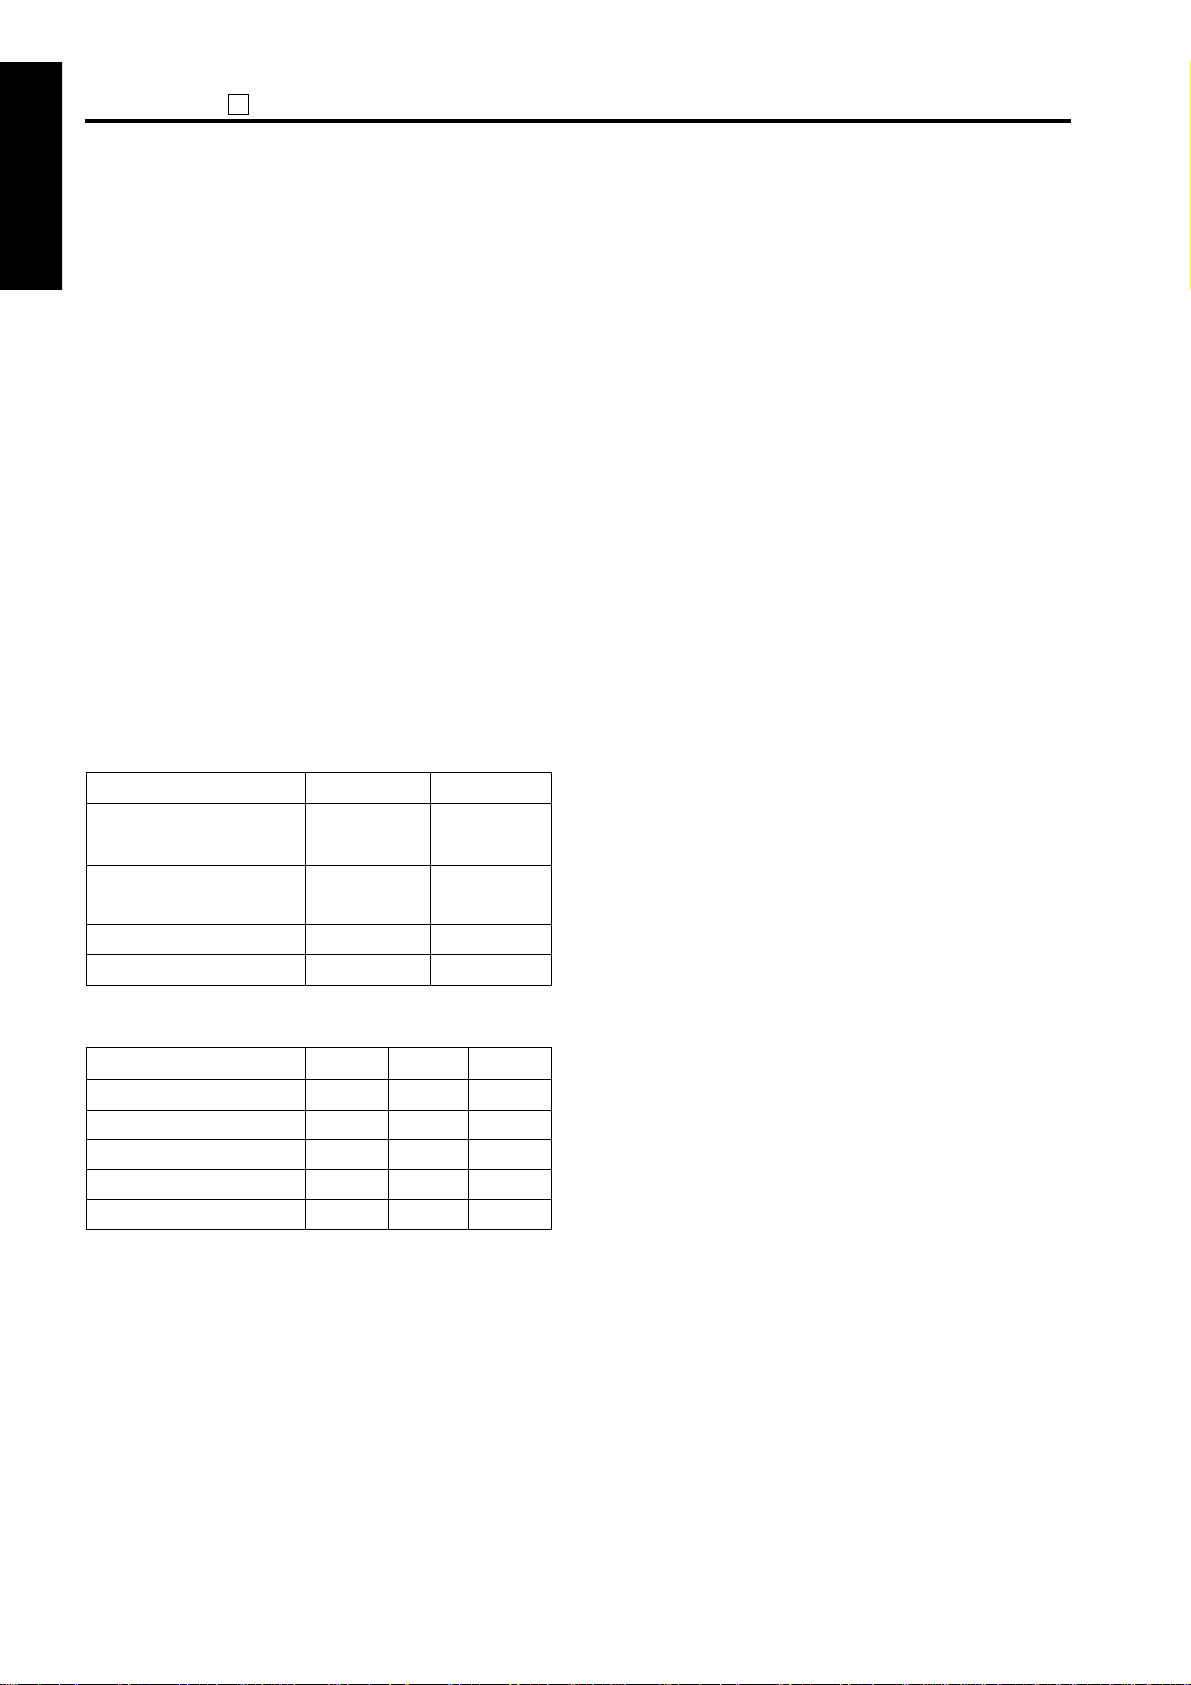
HOW TO USE THE ADJUSTMENT SECTION
[1] Construction
This section details adjusting items and procedures. Use
this section for making adjustments and as a checklist
before implementing corrective measures in the field.
1. Does the power supply meet the requirements?
2. Is the power supply properly grounded?
3. Is the machine sharing its power source with another
high current consumption machine that draws large
currents intermittently? (e.g. an elevator, air conditioner, or other source of electrical consumption)
4. Is the installation environment suitable?
a. The machine must be installed in a well-
ventilated place free from high temperature, high
humidity and direct sunlight.
b. The machine must be installed on a level floor.
5. Does the cause of a defective image lie in the original
itself?
6. Is the density adjusting control at the proper position?
7. Are the original glass and RADF platen guide clean?
8. Is the correct paper being used for the copy?
9. Are the copying materials and parts replaced when
they reach the end of their usable life? (developer,
drum, cleaning blade, etc.)
10. Is there toner in the toner cartridge?
The following items should also be observed when
repairing the machine.
1. Only one side of the AC power line is disconnected
when the main power of this machine is turned off.
Always unplug the machine before beginning work. If
absolutely necessary to work with the power on,
exercise care to avoid being caught in the scanning
rear of the exposure unit.
2. Special care should be taken when handling the
fixing unit since it operates at extremely high
temperatures.
3. The developing unit is surrounded by a strong
magnetic field. Keep watches and metering
equipment away from it.
4. Avoid scarring the drum with tools or similar objects.
5. Do not touch IC pins with your bare hands.
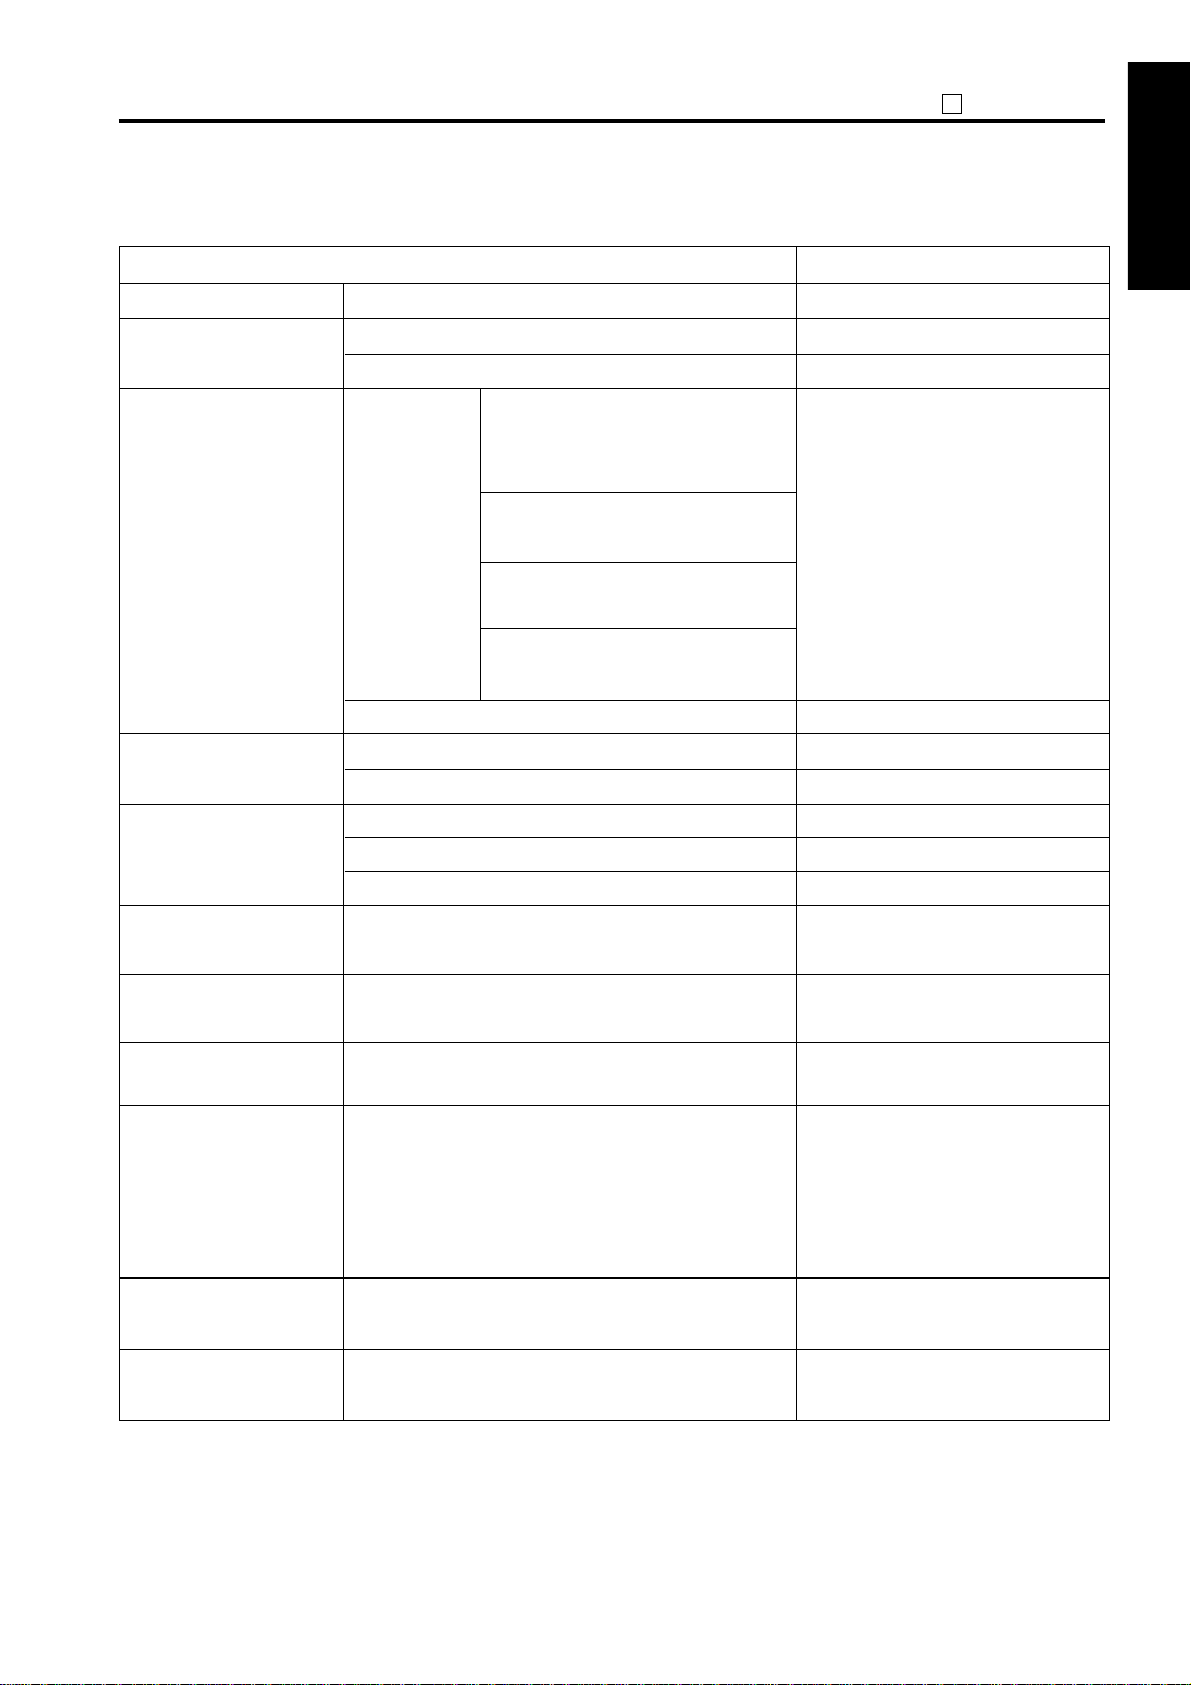
ADJUSTMENTS WHEN REPLACING PARTS
Adjustments (including checks) and settings are not only
required when a defective copy image occurs, but also
after replacing or reinstalling certain parts.
[How to use the tables]
The following items are used in the tables throughout this
section.
1. Mode
Indicates the adjustment mode.
[“25”] : 25 mode
[“36”] : 36 mode
[“47”] : 47 mode
2. Codes
Indicates the applicable code and/or Copy Quantity
Setting button for each mode.
3. Conditions
New: Indicates adjustment (including check) is
required when replacing a new part.
Reset: Indicates adjustment (including check) is
required when a part has been re-installed.
4. Symbols used in the tables
.................
1 2
(Empty circle) : Indicates adjustments (including
: Indicates there is a priority
sequence for adjustments
(including checks) and settings.
checks) and settings that can be
carried out independently.
1 ADJUSTMENT
2 ISW
3 SERVICE
4 DIAGRAMS
1-1
Page 3

ADJUSTMENT
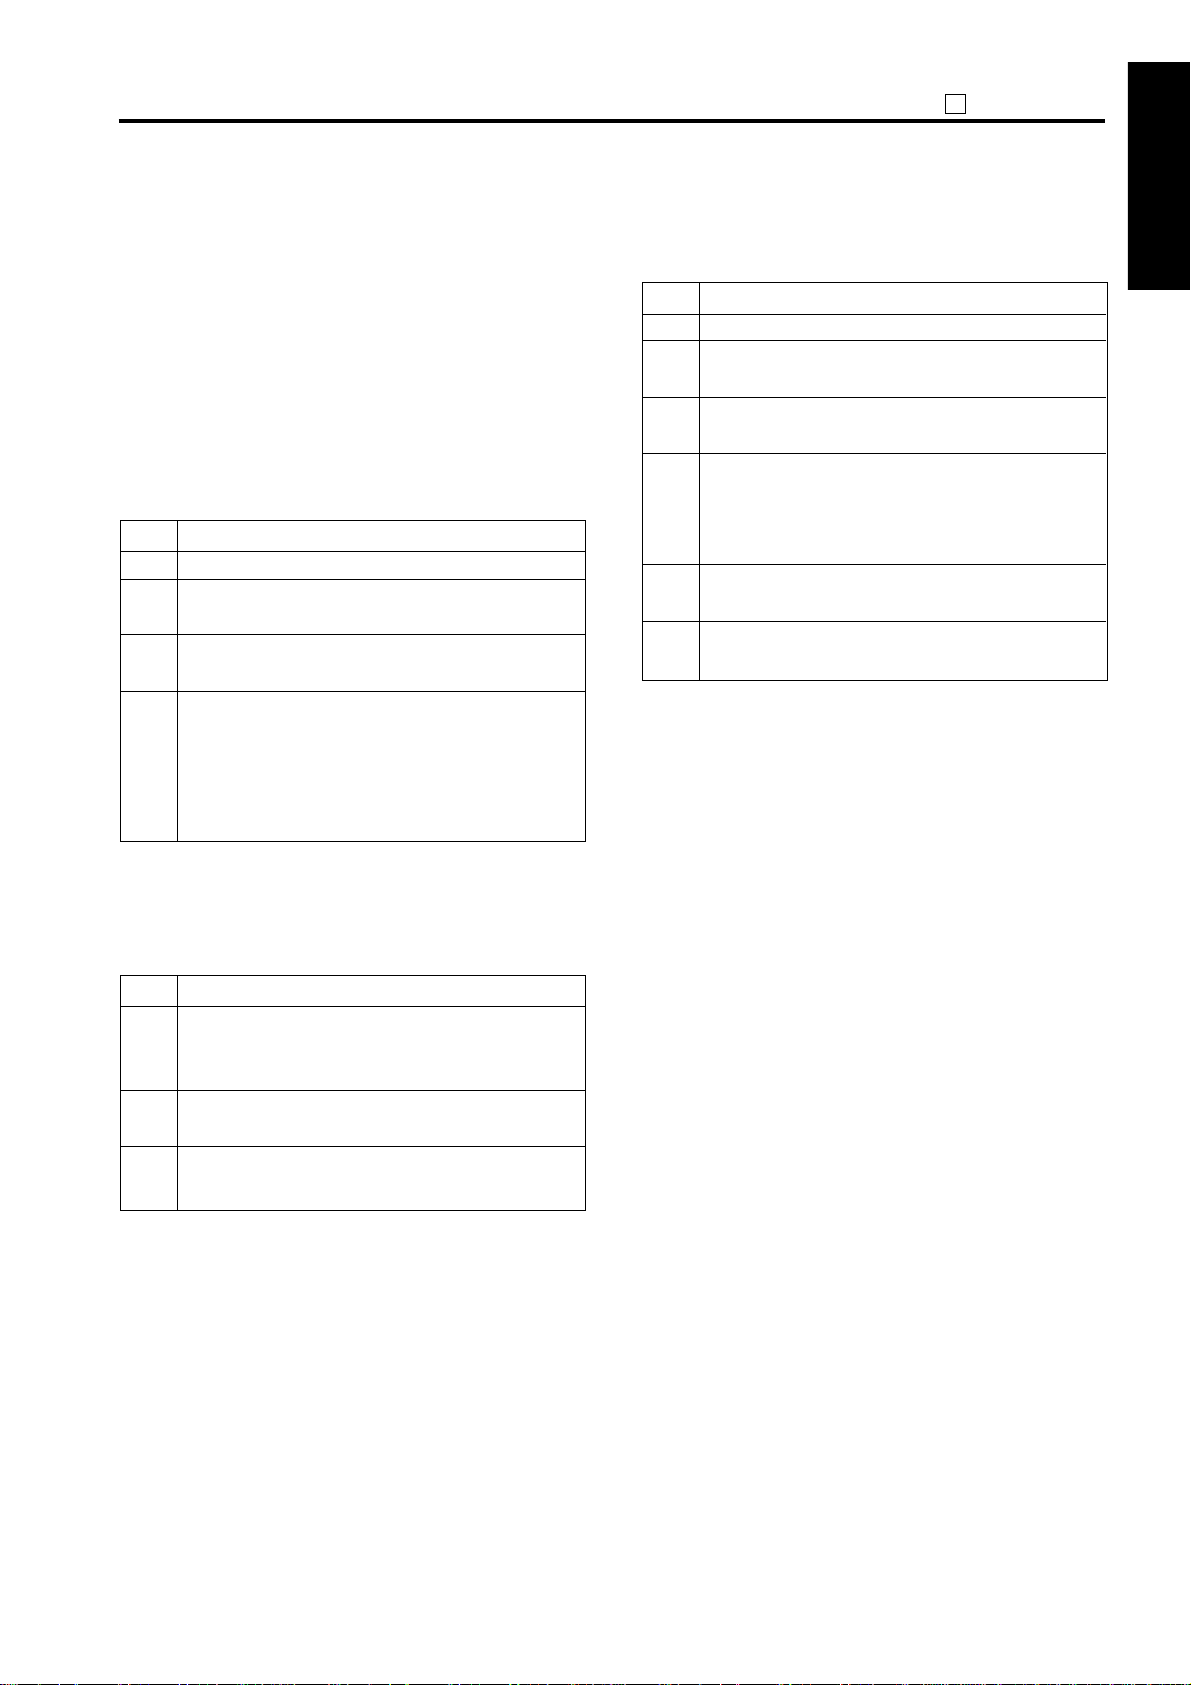
LIST OF ADJUSTMENT ITEMS
<List of adjustment items for 7020>
1 ADJUSTMENT
2 ISW
Adjustment setting items
PM counter reset
PM cycle set
L detection adjustment
Part name
3 SERVICE4 DIAGRAM
Drum
Developer
Fixing unit-related parts
Writing unit
Parameter memory substrate
Paper feeding-related rubber rollers
RADF
RADF slit glass
Electronic RDH
Mode
Code
New
New
New
New/Re
New
New
New/Re
New
New/Re
25
2-1252-2361
2
*
1
*
Vertical magnification adjustment (printer, platen)
Vertical magnification adjustment (RADF)
Horizontal magnification adjustment (platen)
Restart timing adjustment (copier system)
Restart timing adjustment (RADF)
Paper feed loop amount adjustment
Leading edge original erasure adjustment
Centering adjustment
Image read point adjustment
36
2-1362-1362-1362-2
1
2
334
1
2
1
2
1
2
4
3
36
36
2-3362-4362-5362-6366-2368-1368-247198
2-2
5
5
3
6
7
7
6
4
8 9
5
6
RADF scanning density adjustment
Sensor-related counter clearing
Fixing-related counter clearing
Electrical RDH memory check
7
• "New" means replace with a new part and "Re" means to reinstall the part.
• The circles will appear above a number when there is an adjustment priority.
*1: When the parameter memory board is replaced, remember to replaced the developer before conducting the L
deection adjustment.
*2: After replacing the developer, be sure that you do not make any copies until you have first carried out L detection
adjustment.
1-2
Page 4

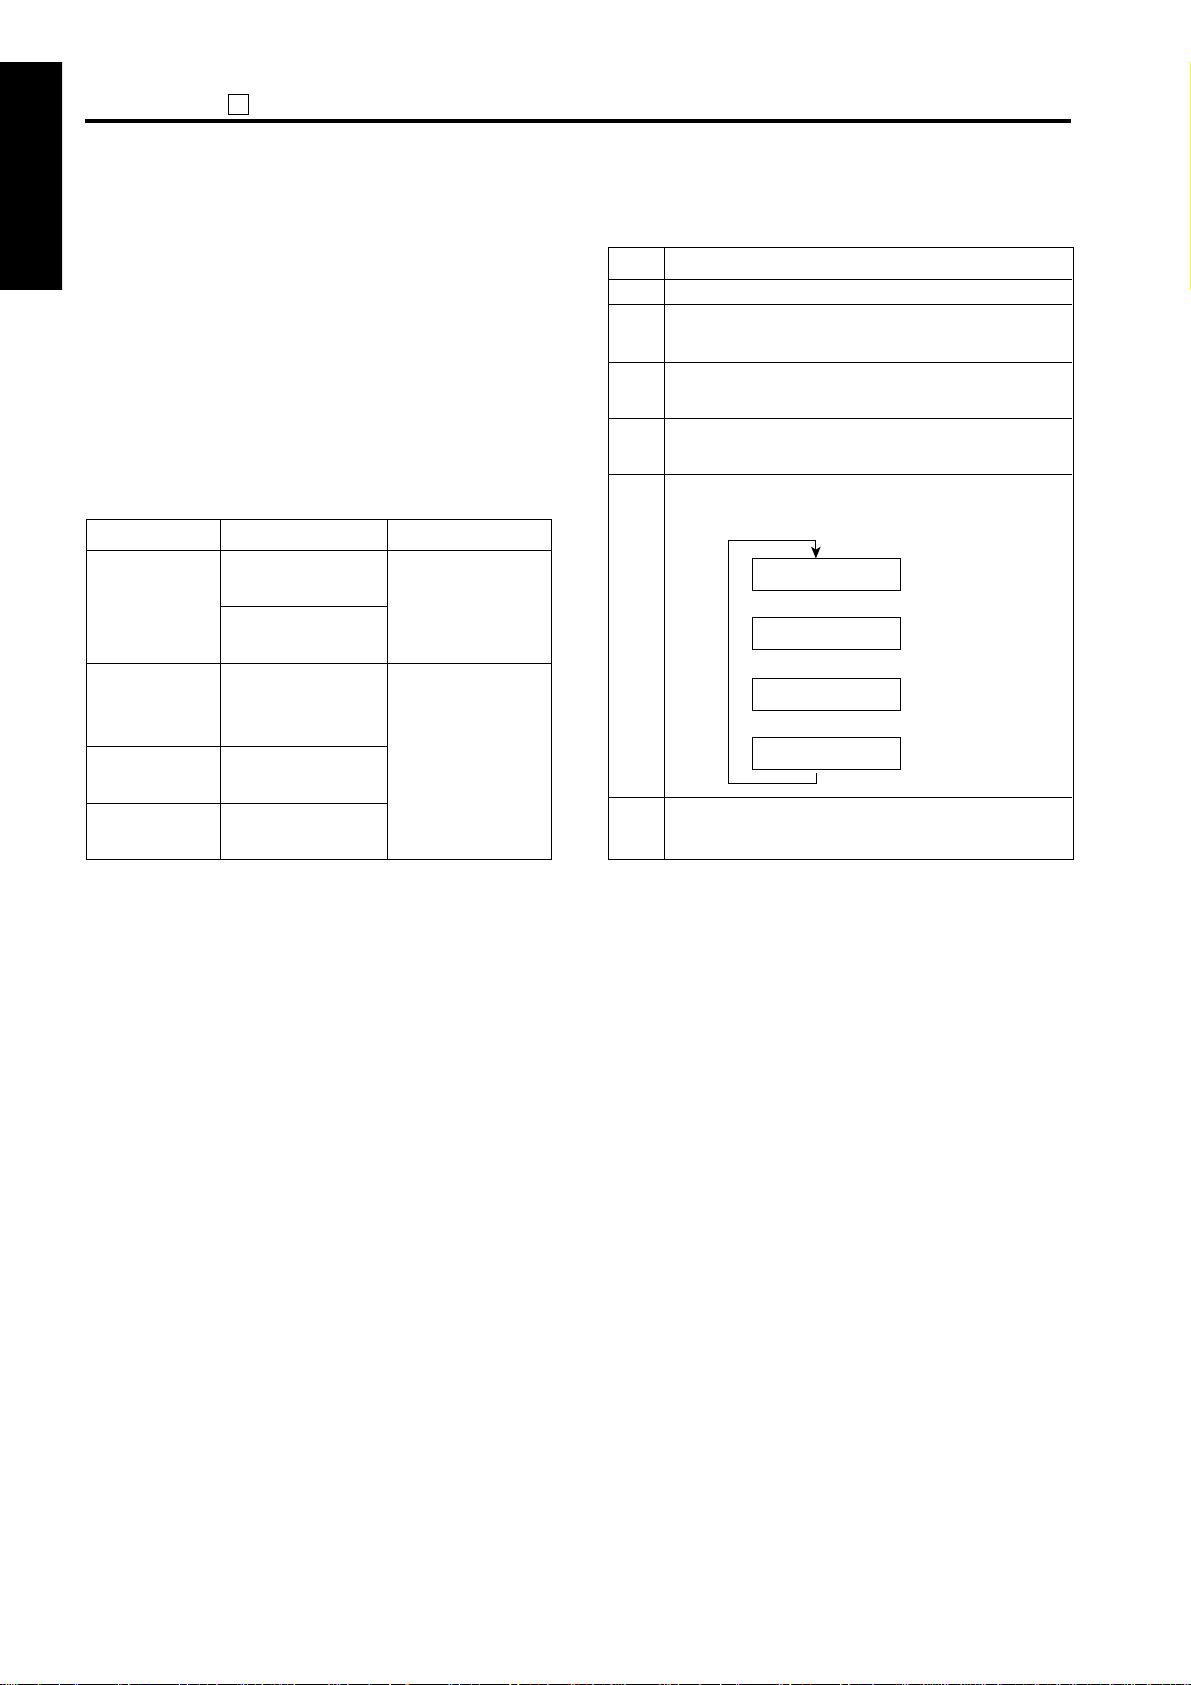
MODE CHANGE MENU
Each adjustment mode is selected by conducting special
operations:
[1] Setting method
The following modes can be selected on the screen
without turning OFF/ON the power supply:
1. Normal mode
2. Adjustment mode (36 mode)
3. Memory setting mode (25 mode)
4. Key ope mode (Key operator mode)
5. I/O check mode (47 mode)
6. Exit
ADJUSTMENT
1 ADJUSTMENT
2 ISW
Step
1
2
3
4
5
Operation procedure
Turn on the main and sub power switches.
Keep pressing the
“Please enter service password.” appears.
Input 9272 as the password and press the
[Start] key. (The password is fixed and cannot
be changed.)
[Mode Select Menu Screen]
Press the key of the mode to be selected on the
screen. To return to the Mode Change Menu
Screen, keep pressing the
screen appears.
When the adjustment ends, press
[1. Normal Mode] key and the basic screen will
appear.
button until the message
*
button until the
*
3 SERVICE
4 DIAGRAMS
1-3
Page 5

P ADJUSTMENT
ADJUSTMENT
CHECK OF COUNT VALUE WITH P FUNCTION
The P function enables to display of the following
parameters by using the
1 ADJUSTMENT
Total count
Total count start date
PM count/PM count limit
PM count start date
Fax send paper count*
Fax receive paper count*
2 ISW
Printer count*
Scanner count*
Drum count
Developing count
Fixing unit count
*: These values are displayed when the option is
mounted.
button:
*
3 SERVICE4 DIAGRAM
[1] How to use P function
1. Turn on the SW1 (main power) and SW2(sub
power) to display the basic screen.
2. Press the
3. The P mode Screen will appear and each count
value is displayed.
4. To display the count values on the next screen,
press the [ ↓ ] key on the screen. To return to the
previous screen, press the [ ↑ ] key.
5. To output the count value list, press the [PRINT]
key.
6. Press the [OK] key or the stop/clear button to return
to the basic screen.
button.
*
1-4
Page 6
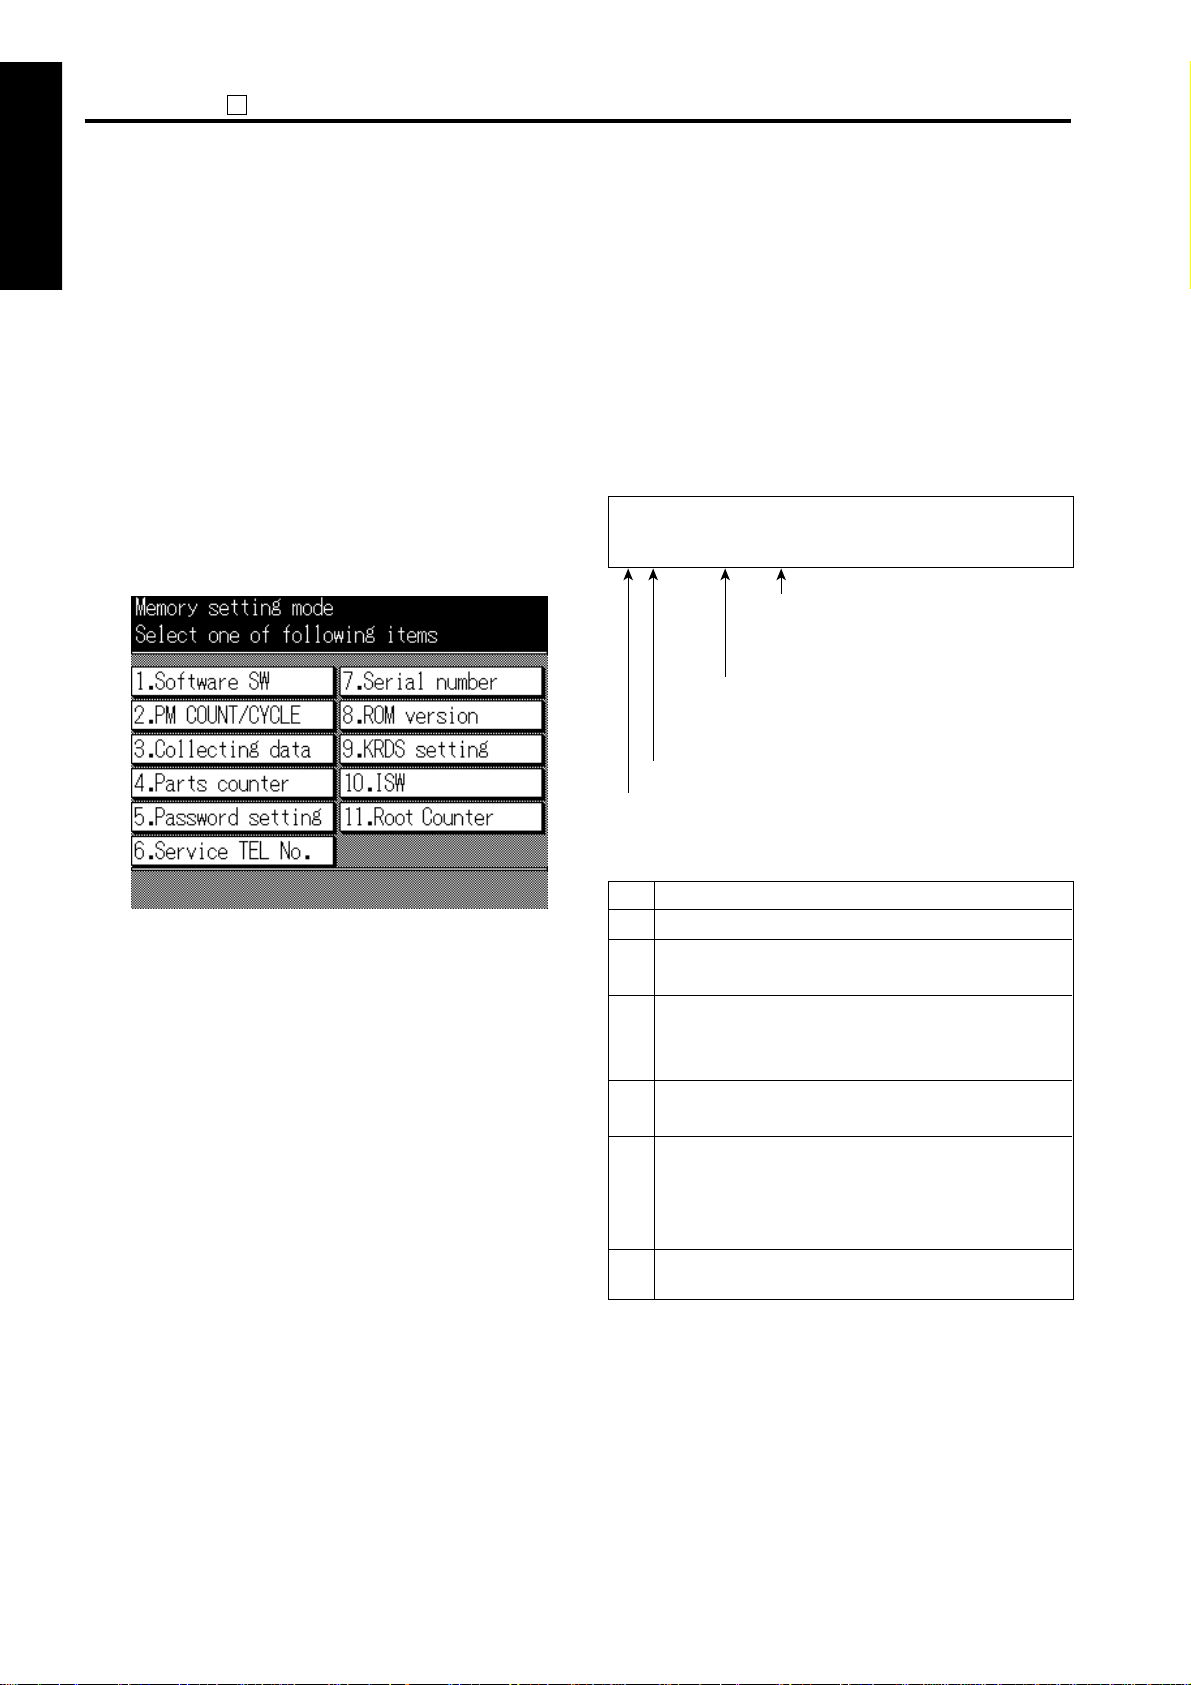
25 MODE
<List of adjustment items for 25 mode>
25
ADJUSTMENT
Software SW
1.
2. PM COUNT/CYCLE
3. Collecting data
4. Parts counter
5. Password setting
Service TEL No.
6.
Adjustment item menu
1. PM COUNT reset
2. PM CYCLE set
1. Count data
2. Date count data
1. Count of parts (Fixed)
2. Count of parts (Named)
1. Key operator password set
2. E.K.C. master key code set
3. Weekly timer master key set
Data Collection 1
(by each size)
(RADF paper passage count)
Data Collection 2
JAM occurrence count by each point)
(
Data Collection 3
(copy count by each mode)
Data Collection 4
(SC occurrence count : F code)
Remarks
Refer to “List of software DIP SW”.
39 items
30 items
4 digits
8 digits
4 digits
Telephone & Fax. No. of service
1 ADJUSTMENT
2 ISW
3 SERVICE
7.
Serial number
8.
ROM version
9. KRDS setting
10. ISW
11. Root counter
1. Calling time set
2. Host password set
3. KRDS TEL No. Setting
4. KRDS software SW set
5. KRDS Setup calling
center setting.
Indicates serial No. of main and each
optional unit.
Indicates each ROM version.
Refer to the chapter “ISW“.
Displays the root counter (total
counter).
4 DIAGRAMS
1-5
Page 7
ADJUSTMENT
25
[1] Setting method
1 ADJUSTMENT
A special operating mode called “25 Mode” has been
provided with this machine. This mode enables rewriting
of the non-volatile storage and specify other various
settings.
1. Turn OFF the SW2 (sub power) when the SW1
(main power) remains ON.
2. Turn the SW2 (sub power) ON while pressing 2 and
5 of the copy quantity setting buttons. The 25 mode
2 ISW
menu screen will appear.
In the 25 mode normal copy operation becomes
unavailable.
[25 MODE MENU SCREEN]
3 SERVICE4 DIAGRAM
[2] Setting software DIP SW
1. Setting method
This setting specifies the software DIP switch on the
software SW setting screen. (*1)
Caution 1: The bit of the DIP switch is written in
the non-volatile RAM every time it is
changed.
Caution 2: The numbers shown in the message
area are defined as follows:
Software SW
04-7 : 1 A8
8-bit switch values in indicated in
hexadecimals from 00 to FF.
Bit data
1 : ON
0 : OFF
Bit number (0 to 7)
3. Press the desired item key on the LCD screen.
Each setting screen will appear.
4. Enter data in each selected screen.
5. Press the [Return] key to check the data that has
been entered.
6. Turn the SW2 (sub power) off to cancel the 25
mode.
7. New data will be effective after restarting.
Switch number
2. Setting procedures
Step
Operation procedure
1
Enter the 25 Mode.
2
[25 mode menu screen]
Press the [1. Software SW] key.
3
[Software SW setting screen]
Select DIP switch number.
Use the left [ ▲ ] , [ ▼ ] key.
4
Select bit number of the DIP switch.
Use the center [ ▲ ] , [ ▼ ] key.
5
Select ON (=1) or OFF (=0) of the DIP switch.
Use [ON] or [OFF] key.
[ON] : Set bit.
[OFF] : Clear bit.
6
Press the [Return] key to return to the 25 mode
menu screen.
For each switch function, refer to “List of Software DIP
switches”.
1-6
Page 8

<List of software DIP switches>
25
ADJUSTMENT
DIP SW
No.
DIP-SW1
DIP-SW2
DIP-SW3
DIP-SW4
DIP-SW5
DIP-SW6
BIT Functions
0
Operation when key counter is removed
(when using as a copier)
1
A3 (11 x 17) counting method
2
3
Selection of maximum number of copies that
4
can be stapled by FS-107.
5
6
7
FS107 limit on number of stapled sets
0
Toner replenish stop timing
1
2
3
4
5
1-shot message display at automatic staple mode clearing
6
7
Prohibition of non-image area erases, repeat (auto)
and original position correction
0
Use of Latin specification F4
1
F34/F35/F36 latch
2
Toner replenish stop timing 2
3
Return to EKC screen after copying reservation
4
5
By-pass feed non-standard size selection
6
7
0
Toner level detection (”Supply toner” indication)
1
2
Number of copies allowed before machine stops
3
after “Supply Toner” indication.
4
Non-display of advance/delete buttons for job list
5
Job stop or nonstop at no toner
6
Impossibility of coping reservation to coin vender
7
0
Destination switchover
1
2
3
4
Detecting method of 8.5 x 11 size on RADF
5
6
7
0
Prevention of faulty image at high temperature
and high humidity. (When the machine is not
turned on for a long period.)
K size selection switch for Taiwan destination
1
2
3
Polygon motor low-speed rotation timing
4
5
Polygon motor pre-rotation selection
6
7
*3
*4
Ignore
Count as 1
*1
None
Decide with DIP SW 3-2
Yes
No
No
*5
No
*3
When copying ends
No
*6
*7
Size detection effective
*3
*3
0 : Display
*8
0 : Does not stop
*3
0 : Can reserve copying
*9
The size is detects as 8.5 x 11 even
if the original reaches to RADF’s
PS307 (original detect PS 2).
Yes
AB series sizes
*10
*11
10
Instantaneous stop Jam
Count as 2
Temporary stop after 25 sets of copy
Stop after paper exdit
No
Yes
Yes
Yes
Interval between copy set
Yes
Non-standard handling
1 : Do not display
1 : Stops
1 : Cannot reverse copying
If original reaches to RADF’s PS307
(original detect PS 2), the size is
detected as 8.5 x 14.
No
K size
Japan
*2
Default values
U.S.A.
0
0
0
0
0
0
0
0
0
0
1
1
0
0
0
0
0
0
0
0
0
0
0
0
0
0
1
1
0
1
0
0
0
0
0
0
0
0
0
0
0
0
0
0
0
0
0
0
1 ADJUSTMENT
Europe
1
1
0
0
0
0
0
0
0
0
0
0
0
0
0
0
0
0
0
0
1
1
1
1
0
0
0
0
0
0
0
0
0
0
0
0
0
0
0
0
0
0
0
0
0
0
0
0
0
0
0
0
1
1
1
1
0
0
1
1
0
0
0
0
1
0
0
1
0
0
0
0
0
0
0
0
0
0
0
0
0
0
0
0
0
0
0
0
0
0
0
0
0
0
0
0
2 ISW
3 SERVICE
4 DIAGRAMS
1-7
Page 9
ADJUSTMENT
25
DIP SW
1 ADJUSTMENT
No.
DIP-SW7
2 ISW
DIP-SW8
3 SERVICE4 DIAGRAM
DIP-SW9
DIP-SW10
DIP-SW11
DIP-SW12
BIT
0
1
2
3
4
5
6
7
0
1
2
3
4
5
6
7
0
1
2
3
4
5
6
7
0
1
2
3
4
5
6
7
0
1
2
3
4
5
6
7
0
1
2
3
4
5
6
7
Functions
Transfer paper priority in image area
Automatic restart after feeding paper
8.5x11APS (Japan, Europe), A4APS (U.S.A.)
Nonstandard-size notification for platen APS B6
(Japan) / A5 (Europe) / 5.5 x 8.5 (U.S.A.) *15
Nonstandard-size notification for platen APS A4
(Japan, Europe) / 8.5x11 (U.S.A.)
Password request for 25/36/47 mode
Selection of A series size (European version)
Selection of automatic erasure outside manuscript
Changing of key operator fixed magnification setting
Disabling copying when PM count reached
Adjusting of LCD contrast to help screen
Priority tray when APS is released
Data collection (25 Mode)
Selection of copy quantity limit
Summer time setting for weekly timer
Selection of magnification mode when APS
function is cancelled.
Selection of setting screen message.
Displaying of icon to line 3
Displaying of JAM code
Tray icon display
Setting of PM count at which copying is
inhibited
KRDS connection recognition
F/E screen switchover (except for F34, F35 and F36)
*12
Area erasure outside manuscript
Does not restart
*13
Yes
*14
No
No
*15
No
*16
No
Rectangular erasure
Permit
*17
Permit
No
*18
*19
No
*20
Set time = Set value x 10 minutes
*21
Automatic
Guide display
No
No
No
*17
Not recognize
No
*22
10
Images on whole page in the
platen mode only
Restarts
No
Yes
Yes
Yes
Yes
For aslant manuscript
Prohibit
Prohibit
Yes
Yes
Life size
Display of machine state
Yes
Yes
Yes
Recognize
Yes
Default values
Japan
1
0
0
0
0
0
0
1
1
1
0
0
0
0
0
0
0
0
0
0
0
0
0
0
0
1
1
0
0
0
1
0
1
1
1
1
0
1
1
0
0
0
0
0
0
0
0
0
U.S.A.
1
0
0
0
0
0
0
0
0
0
0
0
0
0
0
0
0
0
0
0
0
0
0
0
0
1
1
0
0
0
0
0
0
0
0
0
0
0
0
0
0
0
0
0
0
0
0
0
Europe
1
0
0
0
0
0
0
0
0
0
0
0
0
0
0
0
0
0
0
0
0
0
0
0
0
1
1
0
0
0
0
0
0
0
0
0
0
0
0
0
0
0
0
0
0
0
0
0
1-8
Page 10
25
ADJUSTMENT
DIP SW
No.
DIP-SW13
DIP-SW14
DIP-SW15
DIP-SW16
DIP-SW17
DIP-SW18
BIT Functions
0
1
2
3
4
5
6
Automatic erasure threshold outside original
7
0
Operation when stapling is not possible
1
Other than B6R, A5R, 5.5×8.5 nonstandard
2
3
4
Operation when 2 position stapling is not
5
available
6
Operation when one position stapling is not
7
available
0
1
2
3
4
5
6
Full stack stop when FNS not installed
7
0
Fixing temperature at low power mode
1
2
Operation of PTC
3
Indication to prepare toner bottle
4
5
Countermeasure for internal overheat
6
MPC correction control
7
0
F4 size setting
1
2
3
4
5
6
7
0
Unit isolation (1)
1
2
3
4
5
6
7
*24
*25
*26
*27
*28
No
*29
Always ON
No
Stop job
*30
*31
Tray 1 (upper part of main
*32
body) can be used
Tray 2 (lower part of main
body) can be used
Tray 3 (DB upper) can be used
Tray 4 (DB lower) can be used
DB can be used
10
Yes
PTC OFF if OFF mode, if SW2 (sub
power) is OFF, or if system is OFF
due to WT or auto shutoff.
Yes
Stop job, and turn fixing heater OFF
Tray 1 (upper part of main
body) is isolated
Tray 2 (lower part of main
body) is isolated
Tray 3 (DB upper) is isolated
Tray 4 (DB lower) is isolated
DB is isolated
Japan
Default values
U.S.A.
0
0
0
0
0
0
0
0
0
0
0
0
0
0
0
0
0
0
0
0
0
0
0
0
0
1
0
0
0
0
0
0
0
0
0
0
1
0
1
0
0
0
0
0
0
0
0
0
Europe
0
0
0
0
0
0
0
0
0
0
0
0
0
0
0
0
1
0
1
0
1
0
1
0
0
0
0
0
0
0
0
0
0
0
0
0
0
0
0
0
0
0
0
0
0
0
0
0
0
0
1
1
0
0
0
0
1
1
0
0
0
0
0
0
0
0
0
0
0
0
0
0
1
1
0
0
1
1
0
0
0
0
0
0
0
0
0
0
0
0
0
0
0
0
0
0
1 ADJUSTMENT
2 ISW
3 SERVICE
4 DIAGRAMS
1-9
Page 11
ADJUSTMENT
25
DIP SW
1 ADJUSTMENT
No.
DIP-SW19
2 ISW
DIP-SW20
3 SERVICE4 DIAGRAM
DIP-SW21
DIP-SW22
BIT
0
1
2
3
4
5
6
7
0
1
2
3
4
5
6
7
0
1
2
3
4
5
6
7
0
1
2
3
4
5
6
7
Functions
Unit isolation (2)
Unit isolation (3)
Platen size recognition selector switch 1 for
Latin America (U.S.A. only)
Platen size recognition selector switch 2 for
Latin America (U.S.A. only)
Platen size recognition selector switch 3 for
Latin America (U.S.A. only)
Notice of nonstandard small platen size
Job suspension/end at pulling out key
counter
Notice of small size of platen mode
(8.5x11/A4 or smaller)
Total-counter/key-counter increment
operation
Sub power supply is turned ON when main
power is ON
Nonstandard size becomes effective at
automatic platen start
*31
*31
*15
*15
*32
Printer board can be used
Fax board can be used
Scanner can be used
RADF can be used
FNS can be used
8.5 x 11
8.5 x 11R
8.5 x 14
Notice of noticed size
If DIP SW1-0:0: Stop paper
feed and terminate
If DIP SW1-0:1 Immediatestop jam
Notice size detected by APS.
Normal operation
No
No
10
Printer board is isolated
Fax board is isolated
Scanner is isolated
RADF is isolated
FNS offset mode cannot be used
A4
A4R
F4
Notice as nonstandard size
If DIP SW1-0:0: Stop paper
feed and terminate
If DIP SW1-0:1 Immediatestop jam
Notice size as A4 (Japan, Europe)
or 8.5x11 (U.S.A.)
For copying: Increment both the
total counter and the key counter.
For printer/fax device: Increment
the total counter only.
Yes (WUT increase)
Yes (only by-pass tray)
Default values
Japan
0
0
0
0
0
0
0
0
0
0
0
0
0
0
0
0
0
0
0
0
0
0
0
0
0
0
0
0
0
0
0
0
U.S.A.
0
0
0
0
0
0
0
0
0
0
0
0
0
0
0
0
0
0
0
0
0
0
0
0
0
0
0
0
0
0
0
0
Europe
0
0
0
0
0
0
0
0
0
0
0
0
0
0
0
0
0
0
0
0
0
0
0
0
0
0
0
0
0
0
0
0
1-10
Page 12
25
ADJUSTMENT
DIP SW
No.
DIP-SW23
DIP-SW24
BIT
0
Automatic tray changeover when FNS tray
is full
1
2
3
4
100 sheets are discharged when FNS is
not stable, and tray is detected full
5
100 sheets are discharged when FNS is
stable, and tray is detected full
6
7
Fixing web count-over stop
0
1
2
3
4
5
6
7
Job start and changeover without print
process stop
Functions
No automatic changeover to
Tray 1
No automatic changeover
to optional Tray 1
No automatic changeover
to optional Tray 2
No automatic changeover to
Tray 2
No
No
Not stop
Process stop
10
Automatic changeover to
Tray 1
Automatic changeover to
optional Tray 1
Automatic changeover to
optional Tray 2
Automatic changeover to
Tray 2
Yes
Yes
Stops
Without process stop
Default values
Japan
1
1
1
1
0
1
0
0
0
0
0
0
0
0
0
0
U.S.A.
1
1
1
1
0
1
0
0
0
0
0
0
0
0
0
0
Europe
1
1
1
1
0
1
0
0
0
0
0
0
0
0
0
0
1 ADJUSTMENT
2 ISW
3 SERVICE
1-11
4 DIAGRAMS
Page 13

ADJUSTMENT
25
*1 : FS107 stapling upper limit
1 ADJUSTMENT
2 ISW
*2 : FS107 limit on number of stapled sets
*3 : Toner-replenish stop timing
3 SERVICE4 DIAGRAM
After 0 effective copies
After 100 effective copies
After 200 effective copies
After 500 effective copies
Mode 1-3 1-4
50 sheets
45 sheets
40 sheets
35 sheets
The following dipswitch settings are related:
• DIPSW 2 – 5
1-shot message display at automatic staple mode
clearing.
If this bit is set to "1", then if the user specifies more
than 25 stapled sets the copier automatically stops
after reaching the 25th set, and displays a message
instructing the user to remove the paper and press
the START button.
When the TLD (toner level detector) detects that the
toner-out condition has persisted for a fixed length of
time, the copier waits an additional number of copies
(as specified by DIPSW4 – 0, 4 – 1) and then displays
a message instructing the user to load new toner.
•
Toner-level detect (message requesting new toner)
Mode 4-0 4-1
Following the message display, the copier allows
printing of an additional number of copies as set by
DIPSW4 – 2, 4 – 3, and will then disable copying.
• Number of copies to copy-disable (following
message for new toner)
• The toner-low/toner-out condition is cleared by
insertion of a new toner bottle (toner-bottle detect
0
0
1
1
0
0
1
1
0
1
0
1
0
1
0
1
*4 : 1-shot message display at automatic staple mode
*5 : F34/F35/F36 latch
*6 : Return to EKC screen after copying reservation
*7 : By-pass feed nonstandard size selection
sensor OFF/ON).
• The toner-out stop conditions vary according to
the settings of DIPSW3 – 2 and DIPSW2 – 0.
clearing
If 1-shot display is enabled: If the copy limit is exceed
during staple-mode operation, a message indicating
this appears on the display, and copying continues in
sort mode.
Note that this setting is related to the “1-SHOT
DISPLAY TIME” setting available under key-operator
mode. For information about memory switches, refer
to the Instruction Manual.
In the event of a fixing-related error, the setting
changes to "1" so that power OFF/ON will not clear
the error condition. After correcting (repairing) the
problem, reset this to "0" to re-enable copying.
If EKC setup is enabled, then if this bit is set to "1"
(return to screen) the copier will immediately display
the EKC password-request screen following exit of
the final sheet for the reserved jobs. If copying is not
reserved, the copier will wait 1 minute following job
completion before displaying the EKC passwordrequest screen.
This setting determines whether the system detects
the size of the paper in the by-pass tray. If the setting
is "1" (handle as nonstandard), the size is not
detected and copying is based on the maximum
paper size.
Mode 4-2 4-3
After almost 100 copies
After almost 400 copies
After almost 700 copies
After almost 1000 copies
However, that the copier will stop only if DIPSW4 – 5
("Job stop or nonstop at no toner ") is set to "1".
0
0
1
1
0
1
0
1
*8 : Non-display of advance/delete buttons for job list
Under default conditions, the job list screen allows for
deletion or priority changing of jobs that have been
stoved in ERDH memory.
If this bit is set to "1"(non-display), however, the
advance and delete buttons will not appear on the
display so that it will not be possible to delete or
reorder the reserved jobs.
1-12
Page 14
25
ADJUSTMENT
*9 : Destination switch
Mode 5-0 5-1
Japan
U.S.A.
Europe
Taiwan
0
1
0
1
*10 : Polygon motor low-speed rotation timing
Use these bits to change the start timing of prerotation following copy completion.
Mode 6-4 6-5
15 seconds
30 seconds
60 seconds
120 seconds
0
0
1
1
*11 : Polygon motor pre-rotation selection
Use these bits to set the speed of polygon-motor
rotation during idling state.
Mode 6-6 6-7
No pre-rotation (33,070 rpm)
Pre-rotation (16,000 rpm)
Stopped
0
0
1
*12 : Copy-sheet size priority in image area
This setting determines how the copier handles
platen copying when the original size differs from the
copy-sheet size when the AMS setting is cleared. If
this bit is set to "1" (whole-page image in platen mode
only), then the copier will not erase the area outside
of the original (so that area outside of the APSdetected size is also copied).
If this bit is set to "0", then the copier does erase the
area outside of the original.
Note that in RADF copying, the copier will always
erase the area outside of the original regardless of
this setting.
Related settings are DIPSW8 – 0 (Selection of
automatic erasure outside original), key-operatormode and memory switch 4. For information about
memory switches, refer to the Instruction Manual.
*13 : Automatic restart after paper feed
This setting determines how copying is restarted if
0
0
1
1
0
1
0
1
0
1
0
the tray becomes empty while copying is in progress.
Under the default setting, the user (after adding
paper and setting the tray back in place) must press
the START button to resume copying. If this bit is set
to "1", however, copying restarts automatically when
the tray is set back in place.
*14 :
8.5x11 APS (Japan, Europe), A4 APS (U.S.A.)
If this bit is to "1" (No), the copier will forcibly copy as
A4 in Japan/Europe if it detects an original size of
8.5x11, and will forcibly copy as 8.5x11 in U.S.A. if it
detects an original size of A4). Under the default
setting, APS operates for both A4 and 8.5x11.
*15 : Settings related to nonstandard original sizes
• DIPSW21 – 5 "Notify of small size of platen mode"
This setting determines how the copier operates if
it detects that size of the original is smaller than A4
(Japan/Europe) or 8.5x11 (U.S.A.). If this bit is set
to "0", then according to the setting of DIPSW21 –
3 "Notify of nonstandard small size of platen
mode" the copier will either execute copy as
nonstandard size or will notify of the APS detected
size. If this bit is set to "1", then all originals are
reported as size A4/8.5x11.
• DIPSW21 – 3 "Notify of nonstandard small size of
platen mode"
This setting is effective only if DIPSW21 – 5 is set
to '0'. If this bit is set to "1", the copier will notify
that size is nonstandard if an original smaller than
A4 (Japan/Europe) or 8.5x11 (U.S.A.) is set on the
original glass.
• DIPSW7 – 4 "Nonstandard-size notification for
platen APS B6 (Japan) / A5 (Europe) / 5.5x8.5
(U.S.A.)"
This setting is effective only if DIPSW21 – 5,
DIPSW21 – 3, and DIPSW7 – 3 are all set to "0".
This setting determines how the copier notice the
original size when the platen APS detects that the
size is B6 (Japan), A5 (Europe), or 5.5x8.5
(U.S.A.). If this bit is set to "1", the copier notice the
minimum size.
If the bit is set to "0", the copier reports that the
size is nonstandard.
• DIPSW7 – 3 "Nonstandard-size notification for
platen APS A4 (Japan, Europe) / 8.5x11 (U.S.A.)"
This setting is effective only if DIPSW21 – 5,
DIPSW21 – 3, and DIPSW7 – 4 are all set to "0".
1 ADJUSTMENT
2 ISW
3 SERVICE
4 DIAGRAMS
1-13
Page 15
ADJUSTMENT
25
This setting determines how the copier notice the
1 ADJUSTMENT
*16 : DIPSW8 – 0 "Selection of automatic erasure outside
2 ISW
original size for a platen copy when the size is
detected as being nonstandard. If this bit is set to
"1", the copier notice the size as A4 (Japan,
Europe) or 8.5x11 (U.S.A.). If the bit is set to "0",
the copier notice that the size is nonstandard.
• If DIPSW7 – 4 and 7 – 3 are both "1", operation is
according to 7 – 3 (A4/8.5x11).
original"
If this bit is set to "1" "Handling of slanted originals",
the copier will automatically erase area outside of the
original that have been placed a skew on the platen.
If this bit is set to "0" "Rectangular erasure", erasure
will always be in alignment with the copy paper.
(Example)
3 SERVICE4 DIAGRAM
BIT:0 BIT:1
*17 : Request password for 25, 36, 47 mode
If this bit is set to "1" ("Yes"), the copier will display a
password-request screen before entering service
mode. The password is "9272".
*18 : Disable of copying when PM count is reached
DIPSW12 – 3, 12 – 4, and 12 – 5 (Setting of PM count
at which copying is disabled) sets the number of
copies at which copying is disabled. Note that
copying will be disabled only if DIPSW8 – 2 (Disable
copying when PM count is reached) is set to "1".
Mode 12-3 12-5
1000 copies
2000 copies
3000 copies
4000 copies
5000 copies
0
0
0
0
1
12-4
0
0
1
1
0
*19 : Priority tray when APS is released
• This setting sets the tray selection used when APS
is set OFF from key-operator mode.
Priority tray when APS is released
Mode 8-4 8-6
No priority
Main-body upper tray
Main-body lower tray
DB upper tray
DB lower tray
0
0
0
0
1
8-5
0
0
1
1
0
0
1
0
1
0
*20 : Data collection (Mode 25)
If this bit is set to "1" (Yes), then all 25-mode collected
data 1 to 4 can be checked. If the setting is "0", then
only collected data 1 is available for checking.
*21 : Copy quantity limit
Mode 9-0 9-2
No limit
1 sheet
3 sheets
5 sheets
9 sheets
10 sheets
20 sheets
30 sheets
50 sheets
99 sheets
9-1
0
0
0
0
0
0
0
0
1
1
0
0
0
0
1
1
1
1
0
0
9-3
0
0
1
1
0
0
1
1
0
0
0
1
0
1
0
1
0
1
0
1
*22 : Summer time setting for WT (weekly timer)
Mode 10-0 10-2
0 minute
30 minutes
60 minutes
0
1
0
1
0
90 minutes
120 minutes
150 minutes
10-1
0
1
0
1
0
1
0
1
1
0
0
1
10-3
0
0
1
0
1
1
0
0
0
1
1
1
1-14
Page 16

25
ADJUSTMENT
*23 : F/E screen switch (except for F34, F35, F36)
If "1" (No), the display will show error codes for fixing
errors, but in all other cases will simply show a
message instructing the user to turn power OFF/ON.
If set to "0", all errors will be indicated by error codes.
*24 : Threshold for automatic erasure of area outside
original
Accurate detection of the outer boundary of the
original may become difficult if the original is light in
density or if extraneous light (sunlight, room
fluorescent light, etc.) has penetrated the copier.
Setting the threshold to lower values facilitates
detection for light-density originals but increases the
risk of incorrect detection due to extraneous light.
Mode 13-6 13-7
Threshold thr 80h
Threshold thr 60h
Threshold thr 50h
Threshold thr 50h
*25 :
Operation if stapling is not possible
Sizes other than B6R, A5R, 5.5x8.5R, nonstandard
Mode 14-0 14-1
Auto cancel
Auto switching to 1-position
stapling
Inhibit
Forced 2-position stapling
mode operation
0
0
1
1
0
1
0
1
0
1
0
1
0
0
1
1
*27 : Operation when 2 position stapling is not
available
Mode 14-6 14-7
Auto cancel
Auto cancel
Inhibit
Forced 2-position stapling
mode operation
0
1
0
1
0
0
1
1
*28 :Full stack stop when FNS not installed
If "1", then a copier will automatically stop copy
operation a predetermined number of copies after
PS20 (exit limit detect PS) turns ON, and will display
a message requesting the user to remove paper.
After removing the paper, the user can restart
copying by pressing the START button.
*29 :Fixing temperature at low power
Mode 16-0 16-1
160˚C
110˚C
85˚C
85˚C
0
1
0
1
0
0
1
1
1 ADJUSTMENT
2 ISW
3 SERVICE
4 DIAGRAMS
*26 : Operation when one position stapling is not
available
Mode 14-4 14-5
Auto cancel
Auto cancel
inhibit
Forced 1-position stapling
mode operation
0
1
0
1
0
0
1
1
1-15
Page 17
ADJUSTMENT
25
*30 : MPC correction control
1 ADJUSTMENT
2 ISW
These switches determine whether MPC correction is
carried out when sub power turns on.
MPC (laser maximum power correction) is designed
to optimize copy density (mainly to prevent excess
density), and is generally carried out every 20 copies.
In the copier is left off for a protracted period of time,
toner may begin to lose its charge, resulting in excess
density when copying restarts. To prevent this
problem, the default setting causes the copier to
automatically execute MPC when power turns ON
(from OFF mode or from main power OFF) if the
following two conditions hold: (1) the copier has been
off for a prolonged period (at least 8 hours), and (2)
the ambient humidity is 60% or higher.
If you set the switches to "01", then the copier will
execute MPC at power ON if either of the above two
conditions hold. If the switches are set to "10", then
MPC will always be carried out at power ON.
If "1", "1" is set to DIPSW16 – 6 and DIPSW16 – 7,
then MPC will never be carried out at power ON.
3 SERVICE4 DIAGRAM
Mode 16-6 16-7
Humidity over 60% and
First in the morning
Humidity over 60% or
First in the morning
Always
No control
*33 : SW2 (sub switch) turns ON with SW1
(main switch)
Setting this bit to "1" will increase the warm-up time.
Reason:
The CB (overall control board) houses both an
engine-control CPU and a system-control CPU.
Switching ON of the main power does not start the
engine CPU, but does start the power supply to the
system CPU. The system CPU is initialized, and then
the OS is initialized, and then memory and other
hardware checks are performed. This initialization
sequence takes about 6 seconds (until the fax,
printer/scanner, and copy LEDs have gone ON/OFF).
Normaly, pressing the SW2 during this time will not
cause the engine to start.
0
1
0
1
0
0
1
1
*31 : F4 size setting
Mode 12-3 12-5
8.5 x 13
8.25 x 13
8.125 x 13
8 x 13
8.5 x 13.5
0
1
0
1
0
12-4
0
0
1
1
0
*32 : Unit isolation
If a unit is malfunctioning and causing a problem, set
the corresponding bit to isolate the unit from the
system (software isolation). Copier operation can
then continue without problem until the unit can be
repaired, etc.
0
0
0
0
1
1-16
Page 18
25
ADJUSTMENT
[3] PM count setting
This function resets the PM count and sets the PM cycle.
Care should be taken to reset the PM count properly.
PM count / cycle menu
1. PM count resetting
2. PM cycle setting
1. PM count reset
Select whether to reset the count in the PM count
reset screen.
Step
Operation procedure
1
Enter the 25 Mode.
2
[25 mode menu screen]
Press the [2. PM COUNT/CYCLE] key.
3
[PM Count/Cycle Menu Screen]
Press the [1. PM count reset] key.
4
[PM Count Reset Screen]
Press the [YES] key to reset the PM count.
Press the [NO] or [RETURN] key, then the PM
count is not reset and returns to the PM count/
cycle setting menu screen.
3. Setting of PM cycle
Set PM Cycle as follows:
Step
Operation procedure
1
Enter the 25 mode.
2
[25 mode menu screen]
Press the [2. PM COUNT/CYCLE] key.
3
[PM Count/Cycle menu screen]
Press the [2. PM CYCLE Set] key.
4
[PM Cycle set screen]
Enter PM cycle from the numeric keys.
Enter upper 3-digit (hundred thousand, ten
thousand, thousand) only.
5
Press the [SET] key to enter a PM cycle that has
been entered.
6
Press the [RETURN] key to return to the PM
count/cycle setting menu screen.
1 ADJUSTMENT
2 ISW
3 SERVICE
2. Entering PM count start date
When resetting the PM count, it is necessary to input the start
date, and the screen below will appear automatically.
Step
Operation procedure
1
[PM Count Starting Date Input Screen]
Enter a PM count start date from the numeric
keys.
2
Press the [SET] key to enter the data that has
been entered.
3
Press the [RETURN] key to return to the PM
count/cycle menu screen.
Note: When pressing the [RETURN] key without
pressing the [SET] key, the PM count start
date is not changed. It is necessary to
reset the count again for inputting the
count.
4 DIAGRAMS
1-17
Page 19
ADJUSTMENT
25
[4] Data collection
1 ADJUSTMENT
This function enables viewing of the various data recorded
in the machine.
Also, it is possible for the collected data to be checked by
KRDS and management listing.
Data collection menu
1. Count data collection
2. Area data collection start
2 ISW
Data collection list
Classification
Data collection
1
Data collection
2
3 SERVICE4 DIAGRAM
Data collection
3
Data collection
4
Contents
Count number of
copies by each size
Count RADF original
feed quantities
Count number of JAM
occurrence by each
point
Count number of
copies by each mode
Count number of SC
occurrence
Pre-peration
– (Note 1)
Enter the 25 mode
•
•
Select [1. Software
SW]
•
Set the address to
8-7:1 (
↓
↓
Note
1. Procedures for checking collected data
Step
Operation procedure
1
Enter the 25 mode.
2
[25 mode menu screen]
Press the [3. Collecting data] key.
3
[Data collection menu screen]
Press the [1. Count data] key.
4
[Data collection screen]
Change the data number with the [▲] or [▼] key.
5
Pressing [NEXT] or [FRONT] key enables display
of next data collection screen. (Note 3)
Data collection 1
↓
Data collection 2
↓
Data collection 3
↓
Data collection 4
Press the [RETURN] key to return to the data
2)
6
collection menu screen.
Note 1: Only data collection 1 can be checked in
default.
Note 2 : For the setting method, see "[2] Setting
software DIP SW" in 25 mode.
(1) The data is displayed at the line 2 in the message
display area as “Data number (No.): Count value
(000000)”.
(2) The data number can be changed by pressing the
[ ▲ ] or [ ▼ ] key.
(3) Press and hold the [ ▲ ] or [ ▼ ] key to display the
next items continuously.
Note 3 : In order to confirm collected data 2 to 4,
set DIP SW 8-7 to “1” beforehand.
1-18
Page 20

25
ADJUSTMENT
2. Data collection details
(1) Data collection 1
a. Count number of copies by each size
Type
Count
number of
copies
by each size
Size
No.
1 A4 + A4R A4 + A4R 8.5 x 11
2 B5 + B5R B5 + B5R 5.5 x 8.5
3 A5 + A5R A5 + A5R 4 8.5 x 11
5 AB series AB series Inch series
6 A3R A3R 11 x 17R
7 A4R A4R 8.5 x 14R
8 A5R A5R 8.5 x 11R
9 B4R B4R 5.5 x 8.5R
10 B5R B5R 11 B6R F4R 12 Postcard --
13 - - 14 8.5 x 11R - 15 - - -
Paper size for destination
Japan Europe
+8.5 x 11R
+5.5 x 8.5R
+8.5 x 11R
Special Special Special
Maximum count number : 99,999,999
b. Count RADF original feed quantities
Type
Count RADF
original feed
quantities
Size
No.
16 ADF mode original feed counter
17 RADF mode original feed counter
18 ADF mixed original mode original
feed counter
19 RADF mixed original mode original
feed counter
Maximum count number : 99,999,999
Feed mode
U.S.A.
--
(2) Data collection 2
<Jam occurrence count by factor>
No. Jam Point
1 10-0 By-pass
2 11-0 Upper tray (main body)
3 12-0 Lower tray (main body)
4 13-0 DB upper tray
5 14-0 DB lower tray
6 16-0 Paper feed jam
7- 8- -
9- 10 30-0 Conveyance jam
11 31-0 Conveyance jam
12 - 13 - 14 32-0 Conveyance jam
15 32-2 Conveyance jam
16 33-0 Conveyance jam
17 - 18 - 19 - 20 97-1 ADU conveyance jam
21 97-2 ADU conveyance jam
22 92-0 ADU conveyance jam
23 - 24 - 25 61-0 DF-314
26 61-1 DF-314
27 62-0 DF-314
28 62-1 DF-314
29 62-2 DF-314
30 62-3 DF-314
31 62-4 DF-314
32 62-5 DF-314
33 63-0 DF-314
34 63-1 DF-314
35 63-2 DF-314
36 63-3 DF-314
37 63-4 DF-314
1 ADJUSTMENT
2 ISW
3 SERVICE
4 DIAGRAMS
1-19
Page 21
ADJUSTMENT
25
No. Jam Classification
1 ADJUSTMENT
2 ISW
38 63-5 DF-314
39 63-6 DF-314
40 63-7 DF-314
41 - 42 - -
43 72-16 FS-107
44 72-17 FS-107
45 72-19 FS-107
46 72-21 FS-107
47 72-23 FS-107
48 - 49 - -
3 SERVICE4 DIAGRAM
Maximum count number : 999,999
(3) Data collection
<Count number of copies by each mode>
No. Contents
1 Platen single side → single side
2-
3 RADF double side → single side
4 RADF double side → double side
5 RADF single side → single side
6 RADF single side → double side
7 Finisher (Staple mode)
8 Finisher (Sort mode)
9 Finisher (Group mode)
10 Finisher (No. of stapling)
11 Life size mode
12 Fixed ratio (E3: 1.41/2.00)
13 Fixed ratio (E2: 1.22/1.55)
14 Fixed ratio (E1: 1.15/1.29)
15 Fixed ratio (R1: 0.86/0.77)
16 Fixed ratio (R2: 0.82/0.65)
17 Fixed ratio (R3: 0.71/0.50)
18 Arbitrary magnification
19 Zoom
20 2.00 magnification
21 0.45 magnification
22 AMS mode
23 APS mode
24 AE mode
25 Interrupt mode
26 By-pass feed mode
27 Book copy mode
28 Frame erase mode
29 Fold erase mode
30 Life size image shift mode
31 Reduction image shift mode
32 33 34
35 36 No. of paper feed quantities at OHP mode
37
38 Access number of the JOB memory call mode
No. of paper feed quantities at inter sheet mode
No. of paper feed quantities at mixed original mode
(Number of pressing the
button)
*
1-20
Page 22
25
ADJUSTMENT
No. Contents
39 Preheat mode
40 Copy quantity is set to 1.
41 Copy quantity is set between 2 and 5.
42 Copy quantity is set between 6 and 10.
43 Copy quantity is set to 11 or above.
44 Intersheet
45 -
46 Photo mode
47 48 Verti./Horiz. zoom mode
49 Book memory mode
50 Single step mode
51 Text/Photo mode
52 Text mode
53 Arbitrary density mode
54 No. of paper feed quantities at OHP mode 2
55 56 57 Image insert mode
58 Chapter management mode
59 Combination mode
60 Repeat mode
61 Reverse image mode
62 Non-image area erase mode
63 Increase contrast mode
64 Auto layout copy
65 66 67 Copy quantity of paper feed from tray 1
68 Copy quantity of paper feed from tray 2
69 Copy quantity of paper feed from tray 3
70 Copy quantity of paper feed from tray 4
71 72 73 Finisher, Number of stapling (front)
74 Finisher, Number of stapling (rear)
75 Booklet mode copying count
76
77 Z-fold mode copying count
78 Mixed mode copying count
79 Stamp mode copying count
80 Top/bottom correction mode copying count
OHP mode (without doubled sheet) copying count
Maximum count : 99,999,999
(4) Data collection 4
Count number of SC occurrence (F Code)
Error code (decimal number)
No. Classification
Main code Sub code
1 10-1 Communication
2 10-2 abnormality
3 10-9
4 18-1 Paper feed
5 18-2 lifting abnormality
6 18-3
7 18-4
8 26-1 High-voltage power
9 28-1 source abnormality
10 28-2
11 28-3
12 34-1 Fixing high-temperature
13 34-2 abnormality
14 35-1 Fixing low-temperature
15 35-2 abnormality
16 35-3
17 35-4
18 35-5
19 35-6
20 35-7
21 35-8
22 35-9
23 35-10
24 36-1 Broken fixing sensor
25 36-2
26 36-3
27 37-1
28 40-1 Scanning system
29 40-9 abnormality
30 41-1
31 46-1 Image processing
32 46-8 system
33 46-10
34 46-11
35 49-2
36 49-4
37 49-6
38 51-4 Motor speed
39 51-5 abnormality
Fixing web abnormality
1 ADJUSTMENT
2 ISW
3 SERVICE
4 DIAGRAMS
1-21
Page 23

ADJUSTMENT
25
Error code (decimal number)
No. Classification
1 ADJUSTMENT
2 ISW
3 SERVICE4 DIAGRAM
Main code Sub code
40 51-6
41 52-1 Fan lock abnormality
42 52-2
43 56-1 Image control
44 56-2 communication
45 56-3 abnormality
46 56-4
47 56-5
48 56-6 Operation control
49 56-7 section system error
50 56-8
51 56-9
52 56-10
53 56-11
54 60-1 RADF abnormality
55 60-9
56 60-11
57 67-3
58 70-1 Finisher abnormality
59 70-9
60 70-11
61 77-2
62 77-3
63 77-5
64 77-6
65 77-11
66 77-16
67 80-1 Non-volatile memory
68 80-2 abnormality
69 80-3
70 80-4
71 80-5
72 81-1 Flash ROM abnormality
73 81-2
74 81-3
75 88-1
76 89-1
77 89-2
78 89-3
79 89-4
80 89-5
Motor speed abnormality
Main body identification error
Image processing system
Overrall control board
communication error
Error code (decimal number)
No. Classification
Main code Sub code
81 89-6
82 87-00 Print controller error
83 52-5 Fan lock error
84 86-02 Fax board error
85 86-03
86 86-04
87 86-06 Fax error
88 86-88
89 86-89
90 86-90
91 86-91
92 86-10 Fax error
93 86-20 (Fax board side)
94 22-1
95 23-1 Drum periphery
96 26-2 High voltage
97 26-3 power supply
98 28-4
99 43-1 Scanning system error
100 52-3 Fan lock error
Overrall control board
communication error
(overrall control board side)
Machine internal temperature
Maximum count : 9,999
1-22
Page 24

25
ADJUSTMENT
3. Starting periodic date collection
Reset the periodic data from the setting periodic
collection start date. Make a date that this operation
is performed as a new periodic collection start date.
The periodic data can be checked with the KRDS and
management list.
Operation procedure
Step
Enter the 25 mode.
1
[25 mode menu screen]
2
Press the [3. Collecting data] key.
[Data collection menu screen]
3
Press the [2. Date count data] key.
[Starting periodic data collection screen]
4
Press the [YES] key to start the periodic data
collection.
Press the [NO] or [RETURN] key, then data
collection start date is not reset and returns to
the data colleciton menu screen.
[5] Copy count for each part to be
replaced
Perform the copy count display, count clear, limit value
setting and arbitrarily parts to be replaced setting to the
data of the parts to be replaced (fixed/arbitrarily).
Each count value can be check with the management list
of 36 Mode and the KRDS.
Parts counter menu
1. Copy Count for each fixed replacement part
2. Copy Count for each arbitrarily replacement part
1. Copy count display and count reset by
parts to be replaced (fixed)
Set the parts name of the fixed parts to be replaced
(fixed), parts No. and copy count display, and count
reset.
Step
Operation procedure
1
Enter the 25 mode.
2
[25 mode menu screen]
Press the [4. Parts counter] key.
3
[Parts counter menu screen]
Press the [1. Count of parts (Fixed)] key.
4
[Copy count screen by parts to be replaced (fixed)]
Press [▲] , [▼] keys to select the data.
5
Press the [Count reset] key.
6
[Count reset screen by parts to be replaced (fixed)]
Press the [YES] key to clear the copy count.
Press the [NO] or [RETURN] key, then the copy
count is not reset and returns to the copy count
screen by parts to be replaced.
1 ADJUSTMENT
2 ISW
3 SERVICE
4 DIAGRAMS
1-23
Page 25
ADJUSTMENT
25
<List of parts to be replaced (fixed)>
1 ADJUSTMENT
1
2
3
4
5
6
2 ISW
7
8
9
10
11
12
13
14
3 SERVICE4 DIAGRAM
15
16
17
18
19
20
21
22
23
24
25
26
27
28
29
30
31
32
33
34
35
36
37
38
39
UnitNo. Parts name
Drum unit
(including charging
corona unit)
Transfer separation
corona unit
Developing unit
Main body
Main body paper
feed unit
DB (LCT or tray 3)
paper feed unit
DB Tray 4 paper
feed unit
By-pass feed unit
Fixing unit
DF-314
FS-107
Drum
Cleaning blade assembly
Drum unit
Transfer separation corona unit
Developer
Developing unit
Ozone filter
(Tray: 1) Feed rubber
(Tray: 1) Double feed prevention
rubber/Upper
(Tray: 1) Double feed prevention
rubber/Lower
(Tray: 2) Feed rubber
(Tray: 2) Double feed prevention
rubber/Upper
(Tray: 2) Double feed prevention
rubber/Lower
(Tray: 3 or LCT) Feed rubber
(Tray: 3 or LCT) Double feed
prevention rubber/Upper
(Tray: 3 or LCT) Double feed
prevention rubber/Lower
(Tray: 4) Feed rubber
(Tray: 4) Double feed prevention
rubber/Upper
(Tray: 4) Double feed prevention
rubber/Lower
By-pass feed reverse roller
By-pass feed pick up roller
By-pass feed conveyance roller
Fixing heat roller
Fixing pressure roller
Fixing web
Heat insulating sleeve/A
Heat insulating sleeve/B
Fixing cleaning roller
Cleaner assembly
Fixing claw
Fixing roller holder/Upper
Fixing roller holder/Lower
Fixing sensor
Fuse mounting plate assembly
Fixing heater lamp 1
Fixing heater lamp 2
Paper feed roller (A)
Double feed prevention roller (A assembly)
Paper exit roller (A)
2. Copy count display and count reset by
parts to be replaced (Named; arbitrarily)
Set the limit value for the parts to be replaced, parts
No., parts name setting, copy count display and
count reset.
Step
Operation procedure
1
Enter the 25 Mode.
2
[25 mode menu screen]
Press the [4. Parts counter ] key.
3
[Parts counter menu screen]
Press the [2. Count of parts (Named)] key.
[Copy count screen by parts to be replaced (named)]
4
Press the [▲] or [▼] key to select the data to be
set or changed.
The following items can be set below:
5
[COUNT RESET] : To clear the copy count.
[LIMIT SET] : To enter the limit value (6-digit).
[P/N SET] : To enter the parts number (9-digit).
[Parts name] : To enter the parts name.
6
Press the [RETURN] key, then return to copy
count screen by parts to be replaced.
1-24
Page 26

25
ADJUSTMENT
<List of parts to be replaced (arbitrarily)>
Count timingNo.
1
When copy count (at the paper exit is completed)
2
When copy count (at the paper exit is completed)
3
When copy count (at the paper exit is completed)
4
When copy count (at the paper exit is completed)
5
When copy count (at the paper exit is completed)
6
When copy count (at the paper exit is completed)
7
When copy count (at the paper exit is completed)
8
When copy count (at the paper exit is completed)
9
When copy count (at the paper exit is completed)
10
When copy count (at the paper exit is completed)
11
When copy count (at the paper exit is completed)
12
When copy count (at the paper exit is completed)
13
When copy count (at the paper exit is completed)
14
When copy count (at the paper exit is completed)
15
When copy count (at the paper exit is completed)
16
When copy count (at the paper exit is completed)
17
When copy count (at the paper exit is completed)
18
When copy count (at the paper exit is completed)
19
When copy count (at the paper exit is completed)
20
When copy count (at the paper exit is completed)
21
When paper is fed from by-pass tray
22
When paper is fed from tray 1
23
When paper is fed from tray 2
24
When paper is fed from tray 3
25
When paper is fed from tray 4
26
When paper is fed from ADU
27
When paper is exited from main body
28
When original is fed into RADF
29
When original is fed into RADF
30
When original is fed into RADF
(1) Count resetting method
Step
Operation procedure
1
Enter the 25 mode.
2
[25 mode menu screen]
Press the [4. Parts counter ] key.
3
[Parts counter menu screen]
Press the [2. Count of parts (Named)] key.
4
[Copy count screen by parts to be replaced (named)]
Press the [▲] or [▼] to select the data.
5
Press the [COUNT RESET] key.
6
[Count reset screen by parts to be replaced (named)]
Press the [YES] key to clear the copy count that
has been selected.
Press the [NO] or [RETURN] key, then the copy
count is not reset and returns to the copy count
screen by parts to be replaced (named).
1 ADJUSTMENT
2 ISW
3 SERVICE
4 DIAGRAMS
1-25
Page 27
ADJUSTMENT
25
(2) Count limit setting method
1 ADJUSTMENT
2 ISW
3 SERVICE4 DIAGRAM
Enter the new limit value from the numeric keys on
the screen.
Step
Operation procedure
1
Enter the 25 mode.
2
[25 mode menu screen]
Press the [4. Parts counter ] key.
3
[Parts counter menu screen]
Press the [2. Count of parts (Named)] key.
4
[Copy count screen by parts to be replaced (named)]
Press the [▲] or [▼] to select the data to be set
or changed.
5
Press the [LIMIT SET] key.
6
[Copy count limit setting screen by parts to
be replaced (named)]
Enter new value using the numeric keys.
7
Press the [SET] key to enter the limit value that
has been entered.
8
Press the [RETURN] key to return to the copy
count screen by parts to be replaced (named).
(3) Parts No. setting
Enter the new parts No. (8-digit) from the numeric
keys and alphabet keys on the screen.
Step
Operation procedure
1
Enter the 25 mode.
2
[25 mode menu screen]
Press the [4. Parts counter ] key.
3
[Parts counter menu screen]
Press the [2. Count of parts (Named)] key.
4
[Copy count screen by parts to be replaced (named)]
Press the [▲] or [▼] to select the data to be set
or changed.
5
Press the [P/N SET] key.
6
[Part No. setting screen by parts to be replaced (named)]
Enter new parts No. using the numeric and
alphabet keys.
7
Press the [SET] key to enter the parts No. that
has been entered.
8
Press the [RETURN] key to return to the copy
count screen by parts to be replaced (Named).
Note: When pressing the [RETURN] key without
pressing the [SET] key, the setting is
complete without changing a new limit
value and returns to the copy count screen
by parts to be replaced (Named).
Reference: The right side of the limit value will be
marked as
its limit value.
if the copy count exceeds
*
Note: When pressing the [RETURN] key without
pressing the [SET] key, the setting is
complete without changing a new parts
No. and returns to the copy count screen
by parts to be replaced (Named).
1-26
Page 28

25
ADJUSTMENT
(4) Parts name setting
Enter the new parts name from the keys on the
screen.
There are three screen in the input screen and are
changed with the [ ▼ ] or [ ▲ ] key:
• Alphabet (a capital letter), numeric number
• Alphabet (a small letter), numeric number
• Symbol, numeric number
Step
Operation procedure
1
Enter the 25 mode.
2
[25 mode menu screen]
Press the [4. Parts counter ] key.
[Parts counter menu screen]
3
Press the [2. Count of parts (Named)] key.
4
[Copy count screen by parts to be replaced (named)]
Press the [▲] or [▼] to select the data to be
set or changed.
5
Press the [P/N SET] key.
[Parts name setting screen by parts to be
6
replaced (named)]
Enter new parts name using the keys on the screen.
7
Press the [OK] key to enter the parts name that has
been entered.
8
Press the [CANCEL] key to return to the copy
count screen by parts to be replaced (Named).
Note: When pressing the [CANCEL] key without
pressing the [OK] key, the setting is
completed without setting a parts name
and returns to the copy count screen by
parts to be replaced (Named).
[6] Password setting
This function sets the password to enter each mode.
In the 25 mode menu screen, select the [6. Password
setting], then the password setting menu screen will
appear.
Select the password to be adjusted/entered in this screen.
Password setting menu
1. Key operator password set
2. E.K.C. master key code set
3. Weekly timer master key set
1. Setting key operator password
This function sets the password to enter the key
operator mode.
Step
Operation procedure
1
Enter the 25 mode.
2
[25 mode menu screen]
Press the [5. Password setting] key.
3
[Password setting menu screen]
Press the [1. Key operator password det] key.
4
[Key Operator Password Setting Screen]
Enter 4-digit new password from the numeric
keys.
5
Press the [SET] key to set the password that has
been entered.
6
Press the [RETURN] key to return to the
password setting menu screen.
Note: When pressing the [RETURN] key without
pressing the [SET] key, the setting is
complete. However the new password will
not be entered and the password setting
menu screen will return.
1 ADJUSTMENT
2 ISW
3 SERVICE
4 DIAGRAMS
1-27
Reference: When setting a password to “0000”,
the key operator mode can be used
without a password.
Page 29

ADJUSTMENT
25
2. Setting of EKC master key code
1 ADJUSTMENT
2 ISW
3 SERVICE4 DIAGRAM
This function sets the EKC master key code.
Operation procedure
Step
Enter the 25 mode.
1
[25 mode menu screen]
2
Press the [5. Password setting] key.
[Password setting menu screen]
3
Press the [2. E.K.C. master key code set] key.
[EKC master key code setting screen]
4
Enter 8-digit new EKC master key code using
the numeric keys.
Press the [SET] key to enter the EKC master
5
key code that has been entered.
Press the [RETURN] key to return to the
6
password setting menu screen.
Note: When pressing the [RETURN] key without
pressing the [SET] key, the setting is
complete without changing a new EKC
master key code and returns to the
password setting menu screen.
Reference: When “00000000” is set as the pass-
word, the EKC setting menu screen will
be displayed instead of the password
entry screen.
3. Setting the weekly timer master key
This function sets the weekly timer master key
required for entering the various weekly timer set
mode.
Step
Operation procedure
1
Enter the 25 mode.
2
[25 mode menu screen]
Press the [5. Password setting] key.
3
[Password setting menu screen]
Press the [3. Weekly timer master key set] key.
[Weekly timer master key setting screen]
4
Enter 4-digit new weekly timer master key
using the numeric keys.
Press the [SET] key to enter the weekly timer
5
master key that has been entered.
6
Press the [RETURN] key to return to the
password setting menu screen.
Note: When pressing the [RETURN] key without
pressing the [SET] key, the setting is
complete without changing a new weekly
timer master key and returns to the
password setting screen.
Reference: When setting the master key to “0000”,
the weekly timer mode can be used
without a password.
1-28
Page 30

25
ADJUSTMENT
[7] Setting phone number of the
service center
This function displays the phone and fax numbers of the
service center which is indicated on the screen if a service
call is required.
This function is not related to KRDS functions. It is
designed only for indicating the data on the screen.
1. Setting phone and fax number of the
service center
Select [6. Service TEL No.] in the 25 mode screen.
Service center number setting screen will appear.
Step
Operation procedure
1
Enter the 25 mode.
2
[25 mode menu screen]
Press the [6. Service TEL No.] key.
3
[Service center number setting screen]
Press the [TEL] key to set the phone number
and the [FAX] key to set the [FAX] number, and
input the number (Max. 16 digits) using the
numeric keys on the screen.
4
When input has been mistaken, rewrite it after
moving the cursor with [<<] or [>>] key, or delete
all with the Stop/clear button to input again.
5
Press the [SET] key to enter the number that has
been entered.
6
Press the [RETURN] key to return to the 25
mode menu screen.
Note: When pressing the [RETURN] key without
pressing the [SET] key, the setting is
complete. However the new phone
number will not be entered and the 25
mode menu screen will return.
[8] Setting the serial number
This function is used to display, set and change the serial
number of the main body and optional units.
The serial numbers can be read from KRDS.
1. Serial number display procedure
Select [7. Serial number] in the 25 mode screen. The
serial number setting screen will appear.
The item name and serial number are displayed on
the serial number setting menu screen. Each serial
number is displayed at the right side of each unit.
Press the [DESTINATION] key to select the machine
destination.
Press the [RETURN] key to end setting and return to
the 25 mode menu screen.
2. Setting and changing serial number
On the serial number setting screen, select the
desired item, then each serial number setting screen
will appear.
Step
Operation procedure
1
Enter the 25 mode.
2
[25 mode menu screen]
Press the [7. Serial number] key.
3
[Serial number setting menu screen]
Press the key corresponding to the desired item
on the screen.
4
[Serial number setting screen]
Enter the 9-digit serial number from the alphabet
and numeric keys on the screen and then press
the [SET] key to enter the number that has been
entered.
5
Press the [RETURN] key to return to the serial
number setting menu screen.
6
When changing the serial number of other item,
repeat steps 3 to 5.
7
Press the [RETURN] key to return to the 25
mode menu screen.
1 ADJUSTMENT
2 ISW
3 SERVICE
4 DIAGRAMS
1-29
Note: When pressing the [RETURN] key without
pressing the [SET] key, the setting is
complete. However the new serial number
will not be entered and the serial number
setting menu screen will return.
Page 31

ADJUSTMENT
25
3. Changing the destination setting for FAX
1 ADJUSTMENT
2 ISW
To change the destination setting, press the
"Destination" key on the serial-number setup menu.
The procedure is as follows.
Step
Operation procedure
1
Enter the 25 mode.
2
[25 mode menu screen]
Press the [7. Serial No.] key.
3
[Serial number setting screen]
Press the [Destination] key.
4
[Destination setting screen]
Use the [▲] or [▼] key to select the destination.
5
Press the [OK] key to register the setting and to
return to the serial number setting screen.
Note: If you press [CANCEL] key without first
pressing [OK] key, the copier will retain the
previous destination setting and return you
to the serial number setting screen.
<Destination codes>
3 SERVICE4 DIAGRAM
Code Destination Code Destination
JP Japan FI Finland
CA Canada SE Sweden
US U.S.A NO Norway
CN China AT Austria
SA Saudi Arabia BE Belgium
TW Taiwan NL Netherlands
ZA South Africa CH Switzerland
PL Poland FR France
PT Portugal GB Great Britain
ES Spain DE German
IT Italy NZ New Zealand
DK Denmark AU Australia
IE Ireland EU Europe
[9] Displaying the ROM version
Display ROM version mounted to the machine.
1. ROM version viewing method
In the 25 mode menu screen, select [8. ROM
version], then the ROM version display screen will
appear.
The item name and ROM version are displayed on
the ROM version display screen. Each serial number
is displayed at the right side of each item.
When there is no option not installed, the applicable
position is a blank.
ROM version display
1. System control
2. Image control
3. Panel
4. Optical control
5. RADF
6. Finisher
When the optional fax and printer are installed, their
ROM versions will also be displayed.
Press the [RETURN] key to end this screen and
return to the 25 mode screen.
1-30
Page 32

25
ADJUSTMENT
[10] Outline
If a FAX board is installed in this machine, it is not
necessary to connect a modem for KRDS. If a FAX board
is not installed, please connect a data modem for KRDS.
[11] Specifications
1. Type: Overall control board built-in type.
2. KRDS (Overall control board) Interface between
modem
: RS-232C Compatible
: Baud Rate: Max : 115.2 kbps
Default : 38.4 kbps
3. Basic Functions
Auto trouble notification
Operation count auto acquisition
Remote control (machine adjustment data,
rewriting of the counter limit, etc.)
Notification of frequent JAM occurrence
Replenish toner notification
Repair and other call buttons
4. FAX-KRDS*
Communications Speed : Max. 14.4 kbps (V.17)
Modulation Method : (V.17, V.29, V.27ter,
V.27 fallback mode,
V.34)
* This specification is valid for KRDS host
application version 5.0 or higher versions.
[12] KRDS setting
This function selects whether to use KRDS.
KRDS allows the copy machine to call up the host
computer periodically and also when there is an
abnormality. Also data in the copier can be changed from
the host computer.
KRDS can execute the above functions for the following
data:
a. Data on the copier's status such as total and PM
count.
b. Data on the frequency of the partial copier such as
RADF paper feed count.
c. Data on the copier's error status such as SC (F) /JAM
occurrence point and count.
d. Data on the various adjustments
To use KRDS, set up as follows:
1. Initialize KRDS memory.
2. Set the type of modem and line.
(If FAX-KRDS is used, this setting is unnecessary.)
3. Enter host password.
4. Set phone number.
KRDS setting menu
1. Calling time set
2. Host password set
3. KRDS TEL No. setting
4. KRDS software SW set
1 ADJUSTMENT2 ISW
3 SERVICE
1-31
5. KRDS setup calling
4 DIAGRAMS
Page 33

ADJUSTMENT
25
[13] KRDS set up
1 ADJUSTMENT
1. KRDS set up item
KRDS set up procedure
Step
2 ISW
3 SERVICE4 DIAGRAM
Operation procedure
In case of a modem using, turn off the modem and
1
connect to the copier using a modem cable (RS-232C,
25P-25P straight cable) and wall jack using a modular
cable to the modem.
If the FAX KRDS is used, connect the FAX board
to the wall jack using the modular cable.
Setting the KRDS connection recognition
2
(25 mode → [1. Software SW])
Set copier software DIPSW 12-6 (KRDS
connection recognition) to “1”.
Initialize KRDS memory. (47 mode → [1] [5] [P]
3
[9] [8] [P] → Start button ON)
Set KRDS software SW.
4
(25 mode → [9. KRDS setting] → [4. KRDS software
SW set] (Select type of modem and dial mode))
Select the type of modem from the bit pattern 0
to 6 of the KRDS software SW No.1 and dial
mode from the bit pattern 7.
Host password setting.
5
(25 mode → [9. KRDS setting] → [2. Host password
set]) (Refer to *1 and *2)
KRDS phone number setting.
6
(25 mode → [9. KRDS setting] → [3. KRDS TEL
No. setting]) (Refer to *3)
Turn off the SW1 (main power) and SW2 (sub
7
power) of the copier.
Turn on the power switch of the modem.
8
Turn on the SW1 (main power) of the copier.
9
Check the set up flag setting condition.
10
(25 mode → [9. KRDS setting] → [4. KRDS software
SW set] → check that the data on the switch No.33
and bit No.0 indicates “0” (not yet).)
Check the KRDS communication mode.
11
(25 mode → [9] KRDS Setting → [4] KRDS
software SW setting → Check the data in bit
No. 2 of switch No. 38.)
It should be set on “1” if communications are via FAXKRDS, and on “0” if communications are via a modem.
If the setting is different, change the setting.
Preform KRDS set up calling.
12
(25 mode → [9. KRDS setting] → [5. KRDS Setup calling])
Press the [START] key to start set up.
13
Check the finishing of set up.
14
(25 mode → [9. KRDS setting] → [4. KRDS software
SW set] → Completes if the data on the switch No.33
and bit No.0 indicates “1” (finished).)
Turn off the SW1 (main power) and SW2 (sub
15
power) of the copier.
*1: Host password must be 5-digit.
*2: Host password 1 must be specified.
*3: For both the copier and the host side, copier phone
number and host phone number 1 must be
specified.
*4: Refer to the manual of the modem about
specifications for connecting with the modular
cable.
LINETEL
Modem
Wall jack
Modular cable
Note: In the case of FAX KRDS, connect to the
LINE terminal on the FAX board.
1-32
Page 34

25
ADJUSTMENT
2. Setting the KRDS connection recognition
(1) Plug the power cord of the copier to the outlet.
(When the SW1 (main power) and SW2 (sub
power) of the copier remain off.)
(2) Turn on the SW1 (main power) when the SW2 (sub
power) remains off.
(3) Turn on the SW2 (sub power) while pressing [2]
and [5] of the copy quantity setting buttons
simultaneously.
(4) Select the [1. Software SW] key on the 25 mode
menu screen.
(5) Select the bit No.6 of the switch No.12, and then
press the [ON] key.
ON: KRDS recognize
OFF: KRDS not recognized
Note: If the copier software DIPSW 12-6 (KRDS
recognition) is not selected to “1”, the
menu of the KRDS can not be selected.
3. Initializing KRDS memory
(1) Turn off the SW2 (sub power) when the SW1 (main
power) remains on.
(2) Turn on the SW2 (sub power) while holding down
[4] and [7] of the copy quantity setting buttons
simultaneously.
(3) Press the start print button after pressing the copy
quantity setting button [1], [5] and [P] button, then
[9], [8], finally [P] button again.
4. Setting KRDS software SW
This function allows adjustment of the KRDS software
switches.
Note: Adjust the software switch while checking
the switch and bit number since the
memory is rewritten every time the bit data
(1 or 0) is changed.
Any bit data that has been incorrectly
changed must be returned to the original
data.
Step
Operation procedure
1
Enter the 25 mode.
2
[25 mode menu screen]
Press the [9. KRDS setting ] key.
3
[KRDS setting menu screen]
Press the [4. KRDS software SW set] key.
4
[KRDS software SW set screen]
Use the [▲] or [▼] keys to set the switch number.
(Refer to *1)
5
Use the [▲] or [▼] keys to set the bit number.
(Refer to *1)
6
Press the [ON] of [OFF] key to set the bit data.
7
Press the [RETURN] key to end the setting.
1 ADJUSTMENT2 ISW
3 SERVICE
I/O check mode
< 15 - 98 > IN: – – OUT: NOW
(4) “NOW” indication will be changed to “FIN” on the
message display.
(5) Turn off the SW2 (sub power).
4 DIAGRAMS
1-33
Page 35

ADJUSTMENT
25
*1:
1 ADJUSTMENT
• The bit of the switch is written in the non-volatile
RAM every time it is changed.
• The numbers shown in the message area are
defined as follows:
2 ISW
3 SERVICE4 DIAGRAM
For each switch function, refer to “List of KRDS
Software DIP SW”.
5. Setting type of modem and line
(1) Using the switch No. 01, enter the modem and line
data into the bits 0 to 7, referring to the following
table.
<If telephone line type is “Pulse”>
Bit No.
Modem
intialization command
AT&FE0Q0V1X0S0=1&S0
AT&FE0Q0V1X0S0=1&S0&D2&C1
AT&FE0Q0V1X0S0=1&S0%E0
AT&FE0Q0V1X0S0=1&S0&D2
AT&FE0Q0V1X0S0=1&S0&M5
AT&FE0Q0V1X0S0=1
AT&FE0Q0V1X0S0=1&S0\N5
<If telephone line type is “Tone”>
Bit No.
Modem
intialization command
AT&FE0Q0V1X0S0=1&S0
AT&FE0Q0V1X0S0=1&S0&D2&C1
AT&FE0Q0V1X0S0=1&S0%E0
AT&FE0Q0V1X0S0=1&S0&D2
AT&FE0Q0V1X0S0=1&S0&M5
AT&FE0Q0V1X0S0=1
AT&FE0Q0V1X0S0=1&S0\N5
7
0
0
0
0
0
0
0
7
1
1
1
1
1
1
1
4
5
6
0
0
0
0
0
0
0
0
0
0
0
0
0
0
0
0
0
0
0
0
0
4
5
6
0
0
0
0
0
0
0
0
0
0
0
0
0
0
0
0
0
0
0
0
0
1
2
3
0
0
0
1
0
0
1
0
0
0
1
0
0
1
0
1
1
0
1
1
0
1
2
3
0
0
0
1
0
0
1
0
0
0
1
0
0
1
0
1
1
0
1
1
0
0
*
1
01
0
02
1
03
0
04
1
05
0
06
1
07
0
*
1
81
0
82
1
83
0
84
1
85
0
86
1
87
Example:
If the initialization command for the modem you are
using is AT&FE0Q0V1X0S0=1&S0 and you have a
pulse-dial telephone line, enter the data for bits 7 to 0
as 00000001:
In hexadecimal <
Be sure to verify with the above charts whether or not
the hexadecimal <
model being used.
Reference:
This machine has a telephone (modem) line type
automatic recognition setting function.
KRDS Software DIP SW:
Switch No.38 and bit No.0
Data 0: off (manual setting)
1:
on (line type automatic recognition) (default)
As a result, if this switch is at “1”, Bit No. 7 of Switch No. 1 can
be either “0” or “1”.
>, the value is expressed as 01.
*
> output corresponds with the
*
1-34
Page 36

25
ADJUSTMENT
(2) List of KRDS Software DIP SW : Default value
byte
1
2
3
No.
bit
0-6
7
0
1-2
3
4-7
0
1
2
3
4-5
Function Description
Select modem
Dial mode
Data character length
Parity and stop bit
Reserve
Baud rate
Local echo
Result code
Result code form
(displayed result)
Set DCD signal operation
(carrier detect)
Set DSR signal operation
6
0
0
0
0
0
0
0
0
1
0
1
1
1
1
0
0
0
Function
5
4
0
0
0
0
0
0
0
0
0
0
0
0
0
0
0
0
1
1
1
1
0
0
0
1
1
0
1
1
0
0
0
1
1
0
0
0
0
1
1
0
1
1
3
0
0
0
0
0
0
0
0
1
Don’t
care
0
1
0
1
2
0
0
0
1
0
0
0
1
0
1
1
0
0
0
0
1
0
0
0
1
1
1
1
1
1
1
1
1
0
0
1
0
1
0
1
MSB LSB
7
0
1
0
0
0
0
0
1
1
1
Default value
(Hexadecimal)
No setting (No data is sent to modem.)
AT&FE0Q0V1X0S0=1&S0
AT&FE0Q0V1X0S0=1&S0&D2&C1
AT&FE0Q0V1X0S0=1&S0%E0
AT&FE0Q0V1X0S0=1&S0&D2
AT&FE0Q0V1X0S0=1&S0&M5
AT&FE0Q0V1X0S0=1
AT&FE0Q0V1X0S0=1&S0\N5
Manual setting (3 to 24 byte data is sent to modem.)
Pulse dial
Tone dial
8 bit (fixed)
No parity, stop bit 1 (fixed)
Even number of parity, stop bit 1
Odd number of parity, stop bit 1
No parity, stop bit 2
1200 bps
2400 bps
4800 bps
9600 bps
19200 bps
38400 bps
57600 bps
115200 bps
No setting
E0: Exist
No setting
Q0: Exist
No setting
V1: Word
No setting
&C1: ON only when the carrier is detected.
No setting
&S0: Keep ON
&S1: ON during online
&S2
81
(*)
81
(*)
57
(*)
1 ADJUSTMENT2 ISW
3 SERVICE
4 DIAGRAMS
Note: In FAX-KRDS, items with the * mark are disregarded (invalid).
1-35
Page 37

ADJUSTMENT
25
No.
byte bit
1 ADJUSTMENT
6
3
4
Check DSR signal
7
Check DCD signal
0-1
Set DTR signal operation
2 ISW
Speaker control
2-3
Display speed when
4-6
connection is completed
and dial/busy tone is
detected.
3 SERVICE4 DIAGRAM
Reset modem (This is set
7
prior to shipping.)
Arbitrary command regist-
0-7
5
ration area 1 (ASCII data)
0-7
6
0-7
7
Arbitrary command regist-
0-7
8
ration area 2 (ASCII data)
0-7
9
0-7
10
Arbitrary command regist-
0-7
11
12
13
14
15
16
17
ration area 3 (ASCII data)
0-7
0-7
Arbitrary command regist-
0-7
ration area 4
0-7
Command free setting
0-7
Set S register (bit 0 - 7)
0
S0:
S6:
1
to dial start
S7: Off hook limit timer
2
6
0
1
0
0
0
0
1
1
1
1
Function
5
4
0
0
0
1
1
0
1
1
0
0
0
1
1
0
1
1
3
2
0
0
0
1
1
0
1
1
0
1
0
1
off
on
off (fixed)
on
0
0
0
1
1
0
1
No setting
1
&D0
0
&D1
1
&D2
No setting
M0: Keep off
M1: ON until communication starts
M2
No setting
No indication of communication speed
X0:
X1: Indication of communication speed
Indication of communication speed; Detect dial tone
X2:
X3:
Indication of communication speed; Detect busy tone
X4:
Indication of communication speed; Detect dial and busy tone
non
non
No setting
&F: This is set prior to shipping.
Send ASCII data specified in this area to modem
0
No setting
1
S0=: Effective data
No setting
S6=: Effective data
No setting
S7=: Effective data
Function Description
Automatic receive ring count
Wait time from off hook
MSB LSB
7
0
1
0
1
Default value
(Hexadecimal)
57
(*)
10
(*)
00
(*)
01
(*)
1-36
Page 38

25
ADJUSTMENT
No.
byte bit
17
18
19
20
21
22
23
24
25
26
27
28
29
30
31
Function Description
S8: Dial stop time (sec.)
3
Carrier recognize time
S9:
4
S10: Allowable carrier
5
stop time
S11
6
Reserve
7
S0 data (No. of times data
was received automatically)
S6 data (Wait time until
dialing starts.)
S7 data (Wait time until
carrier detect)
S8 data (Pause time)
S9 data (Carrier detection
time)
S10 data (Carrier disconnection detection time)
S11 data
Timer 1 (Ring reception→
Connect reception)
Timer 2 (Dial call end
→ Connect reception)
Timer 3
Timer 4 (Line Connect → Send
Start-up message request)
Timer 5 (Opposite Party
Signal answer wait time)
Retry data; Timer 6
(Initialization OK →Dial call)
Call when SC error occurs
0
Call specify date
1
Call parts replace date
2
Call drum replace date
3
Call regular service date
4
5
6
0
1
Function
5
0
1
Don’t
care
4
3
0
1
0
1
00 - FFH
00 - FFH
00 - FFH
00 - FFH
00 - FFH
00 - FFH
00 - FFH
00 - FFH
00 - FFH
00 - FFH
00 - FFH
00 - FFH
00 - FFH
0
1
0
1
2
0
1
0
1
0
1
0
1
MSB LSB
7
Don’t
care
No setting
S8=: Effective data
No setting
S9=: Effective data
No setting
S10=: Effective data
No setting
S11=: Effective data
01H (1)
03H (3)
1EH (30)
03H (3)
06H (6)
0EH (14)
5FH(95)
20H (32) x 1sec
40H (64) x 1sec
0AH (10) x 100ms
20H (32) x 100ms
1EH (30) x 1sec
FFH (255) x 5ms
disable
enable
disable
enable
disable
enable
disable
enable
disable
enable
Default value
(Hexadecimal)
01
(*)
01 (*)
03 (*)
1E (*)
03 (*)
06 (*)
0E (*)
5F (*)
20 (*)
40 (*)
0A (*)
20 (*)
1E (*)
FF (*)
99
1 ADJUSTMENT2 ISW
3 SERVICE
4 DIAGRAMS
1-37
Page 39

ADJUSTMENT
25
No.
byte bit
1 ADJUSTMENT
31
32
2 ISW
33
Call regular transmit date
6
Select regular transmit
7
(Time and count)
Call when optional configu-
0
ration is changed
Report of toner
1
replenishment
Report of JAM occur
2
frequently
3-7
Reserve
0
Set up flag
1-2
Radial interval
3 SERVICE4 DIAGRAM
3-4
Radial count
5-6
Reserve
7
Line feed control
(when initializing modem)
34
35
36
37
Call JAM date (main body)
0-1
Valid copy quantity
Call ADF JAM date
2-3
Valid original feed quantity
Call JAM date
4-5
MCBJ setting
Call JAM date
6-7
MOBJ setting
Reserve
Reserve
Reserve
0
1
0
1
0
1
Function
Don’t care
Don’t care
0
0
1
1
0
0
0
1
1
0
1
1
disable
enable
time
counter
0
disable
1
enable
0
1
0
1
0
0
0
1
1
0
1
1
0
1
0
1
0
0
1
1
0
0
0
1
1
0
1
1
disable
enable
disable
enable
0
not yet
1
finished
1 min.
3 min.
5 min.
7 min.
0
5
10
No limit
CR/LF: LF exist
CR: No LF
0
Copy quantity: level 1
1
Copy quantity: level 2
0
Copy quantity: level 3
1
Copy quantity: level 4
Original feed quantity: level 1
Original feed quantity: level 2
Original feed quantity: level 3
Original feed quantity: level 4
MCBJ: level 1
MCBJ: level 2
MCBJ: level 3
MCBJ: level 4
MOBJ: level 1
MOBJ: level 2
MOBJ: level 3
MOBJ: level 4
Function Description
MSB LSB
76543210
0
1
Don’t care
0
1
0
0
1
1
Default value
(Hexadecimal)
99
00
0A
(*)
(*)
(*)
55
00
1-38
Page 40

25
ADJUSTMENT
6
5
Don’t care
0
1
0
1
Don’t care
0
1
Bit pattern
43
0
1
Don’t
care
Default value
1
2
0
1
0
1
0
0
off
1
on
0
1
Don’t care
0
1
when the KRDS memory initialization operation is performed.
not connect
connect
DATA (Using a modem)
FAX
Upper 2-digit fixed (for host)
All 6-digit (for host)
Call back communication
No call back communication
copy enable
copy disable
copy enable
copy disable
disable
enable
0
disable
1
enable
disable
enable
Prohibition
Permission
(Hexadecimal)
No.
byte bit
38
0
1
2
3-5
6
7
39
0-1
2
3
4
5
6-7
40
0
1
2-5
6
7
Note 1: KRDS Communications Mode (38 Byte, 2 bit) : This bit is set on “1” when the FAX board is connected and
Function Description
Line type automatic
recognition
MSAD connection
KRDS communication
mode (Note
Reserve
PM limit data length
Regular transmit communication
Sequence control
Reserve
RS-232 line error
K01_XX (Note 2)
Modem AT command error
K02_XX (Note 2)
Reserve
Force copy stop
(at host side) (Note 3)
Reserve
Force copy stop (Note 3)
(at terminal equipment side)
Jam history data clear
Reserve
User data access setting
(local) (Note 4)
Resarve
1)
MSB LSB
7
0
1
Don’t care
0
1 ADJUSTMENT2 ISW
88
(*)
00
3 SERVICE
00
4 DIAGRAMS
Note 2: For details of errors, refer to [19] Error code table.
Note 3: Copy Forced Stop: If DIP SWs 39-5 and 40-0 are both set to 1, then it becomes impossible to copy.
Note 4: There are three types of user data, speed dial data, programmed dial data and group dial data. Normally, due
to maintenance of the confidentiality of user data, access to these data by service personnel is, as a rule,
prohibited. If for any reason, access is necessary using KRDS, this switch can be changed to ‘1’, then access
will be enabled. In this case, change the settings after obtaining the agreement of the customer.
1-39
Page 41

ADJUSTMENT
25
6. Setting host password
This function sets the host password.
1 ADJUSTMENT
(1) Screen selection
Select the [9. KRDS setting] key in the 25 mode menu
screen to display the KRDS setting menu screen as
an initial screen.
Then select the [2. Host password set] key to display
the host password setting screen.
2 ISW
(2) Setting method
a. Three patterns can be used to set KRDS host
password. The entry screen, screen contents and
setting method for each pattern are all the same.
Each message, however, is different.
(There are only 2 patterns for a usable password.)
b. Press the [NEXT] or [BACK] key to 2change the
screen.
c. Enter the host password, 5-digit number or
alphabet, with the numeric keys on the screen and
3 SERVICE4 DIAGRAM
press the [SET] key.
d. The firstly entered number or alphabet will be
shifted to the left end.
e. After inputting the password, it the [NEXT], [BACK]
or [RETURN] key is pressed before pressing the
key, the data that has been entered is canceled.
f. Press the [SET] key, and then press the
[RETURN] key to set the entered password. The
screen will return to the KRDS setting menu
screen.
* As the host password is set to “00000” in factory
setting, ensure to change it to the password which
was set by the KRDS host application for
communication.
Confirm the password of host side with KRDS host
application administrator.
* Note that the host password setting (Host 1) must
be performed.
* See the [14] Calling time set menu mode
(Arbitrary) concerning “Host 2” settings.
* Do not care “Host 3.”
Step
Operation procedure
1
Enter the 25 mode.
2
[25 mode menu screen]
Press the [9. KRDS setting ] key.
3
[KRDS setting menu screen]
Press the [2. Host password set] key.
4
[Host password setting screen]
Enter password consisting of number and
alphabet.
5
Press the [NEXT] or [BACK] key to change the
screen, then enter password (up to 2 patterns).
6
Press the [SET] key.
7
Press the [RETURN] key to end the setting.
1-40
Page 42

25
ADJUSTMENT
7. Setting the KRDS telephone number
This function sets copier for KRDS and host telephone
number.
(1) Screen selection
Select the [9. KRDS setting] key in the 25 mode menu
screen to display the KRDS setting menu screen as
an initial screen.
Then select the [3. KRDS TEL No. Setting] key to
display the KRDS TEL NO setting screen.
(2) Setting method
a. Three patterns can be used to set KRDS phone
number. The entry screen, screen contents and
setting method for each pattern are all the same.
Each screen, however, is different.
b. Press the [NEXT] or [BACK] key to change the
screen.
c. Enter the telephone number, 15-digit or less
number, with the numeric keys on the screen and
press the [SET] key.
d. The entered number is displayed in the cursor
section displayed in the line 2 of the message
display area. The cursor shifts from left to right
according to the entered.
If more than 15 digit is entered, the number of the
15 digit is rewritten.
e. To reenter the telephone number, press the Stop/
clear button to clear the data then enter the correct
number.
f. If you wish to change the number of an arbitrary
position, press the [<<] or [>>] key to move the
cursor to the desired position and reenter.
g. No data has been set for the second row of the
message area prior to shipping.
h. The keys except the numeric keys are defined as
follows:
[,] Pause:
Wait temporarily for self-dial feed. (2-3 sec.)
[W] Wait:
Wait for dial tone such as asynchronous,
etc. (excluding sound guidance).
[T] Tone Dial:
Indicate tone dial after this symbol
[P] Pulse Dial:
Indicate pulse dial after this symbol
[ -] Symbol to divide numbers:
(This symbol is ignored when dialing.)
[.], [#], [
i. After inputting the password, it the [NEXT], [BACK]
or [RETURN] key is pressed before pressing the
[SET] key, the data that has been entered is
canceled.
j. Press the [SET] key, and then press the [BACK]
key to set the entered number. The screen will
return to the KRDS setting menu screen.
* • Note that the telephone number setting (copier)
• Refer to [14] Calling time set menu mode
• Do not care "Host 3."
Operation procedure
Step
Enter the 25 mode.
1
[25 mode menu screen]
2
Press the [9. KRDS setting ] key.
[KRDS setting menu screen]
3
Press the [3. KRDS TEL No. setting] key.
[KRDS TEL No. setting screen]
4
Enter telephone number (15-digit or less) consisting
of number and alphabet with numeric keys.
5
Press the [NEXT] or [BACK] key to change the
screen, then telephone number (up to 3 patterns).
6
Press the [SET] key.
7
Press the [RETURN] key to end the setting.
]:
*
Use these keys as required such extension
number.
and telephone number setting (Host1) must be
performed.
(Arbitrary) for the (Host 2).
1 ADJUSTMENT2 ISW
3 SERVICE
4 DIAGRAMS
1-41
Page 43

ADJUSTMENT
25
8. Calling KRDS set up
<Auto set up>
1 ADJUSTMENT
In the host call setting, call the designated host computer
in the set date and time, and transmit each data of the
copier. Refer to the separate KRDS Host Application
Manual for details of the data being handled.
(1) Screen selection
Select the [9. KRDS setting] in the 25 mode menu
2 ISW
3 SERVICE4 DIAGRAM
screen to display the KRDS setting menu screen.
Then select the [4. KRDS software SW set] to display
the KRDS software SW set screen.
Check that the software DIP SW 33-0 is set to “0”.
After checking, press the [RETURN] key to return to
the KRDS setting menu screen.
On the KRDS setting menu screen, select the [5.
KRDS Setup calling] to display the calling host for
setup screen.
Note: If the KRDS software DIPSW 33-0 (Set up
flag) is not selected to “0” (not yet). The
KRDS setup calling screen can not be
selected.
c. Turn off the power to end the operation.
Step
Operation procedure
1
Enter the 25 mode.
2
[25 mode menu screen]
Press the [9. KRDS setting ] key.
3
[KRDS setting menu screen]
Press the [4. KRDS software SW set] key.
4
[KRDS software SW set screen]
Use the [▲] , [▼] key to select the switch number
to “33” and bit number “0”.
5
Check that bit data indicates “0”. If not, set to “0”
to press the [OFF] key.
6
Press the [RETURN] key to return to the KRDS
setting menu screen.
7
[KRDS setting menu screen]
Press the [5. KRDS Setup calling] key.
8
[Calling the host for setup screen]
Press the [Start] key.
Check the message on the screen.
9
Turn off the power to end the operation.
• How to confirm the completion of setup
(2) Setting method
a. Press the [Start] key in the screen.
(a) Communication message
Calling the host for setup
Communicating
Note: Do not turn OFF the power during
communication.
(b) Completion message
Calling the host for setup
Communication completed
b. Turn off the power if no completion message is
displayed in ten minutes.
Check that the host computer starting up correct,
host phone number, cable connection, etc. then
open to calling the host for setup screen again to
press the [Start] key.
Confirm the data at bit No. 0 of address 33 in
reference to "4. Setting KRDS software DIP SW."
If "0", setup is not completed.
If "1", setup is completed.
<Manual set up>
This copier machine can be set up manually, other
than the automatical setup as explained above. (The
setup is effective when both the copier and the host
have completed the setup action.)
• Operation for the copier machine
1. Switch on the power of modem.
2. Set the address No. 33 as referring to "4. Setting
KRDS software DIP SW."
3. Change the data of bit No. 0 from 0 to 1.
0: Set up not completed
1: Set up completed
4. Establish the changed data by pressing the copy
button.
5. Switch off the power of main body.
• Operation for the host computer
1-42
For the operation of the host compouter, refer to the
KRDS Host Application Administrator's Manual.
Page 44

25
ADJUSTMENT
[14]
Calling time set menu mode (Arbitrary)
Select the [9. KRDS setting] key in the 25 mode menu
screen to display the KRDS setting menu screen as an
initial screen.
Then select the [1. Calling time set] key to display the
calling time set menu screen.
Calling time set menu
1. Calling mode-1
2. Calling mode-2
3. Calling mode-3
Press the [RETURN] key to exit the calling time set menu
screen and return to the KRDS setting screen.
This host calling setting calls everything to the “Host
*
2”.
Therefore, it is necessary first to set the “Host 2”
telephone No. and host password.
1. Setting calling time setting mode
This function sets designated date calling.
(1) Screen selection
Select the [1. Calling mode-1] (Setting designated
date calling setting) in the calling time set menu
screen to display the calling mode-1 (designated date
calling) setting screen.
Press the [RETURN] key to exit the calling mode-1
(designed date calling) setting screen and return to
the calling time set menu screen.
(2) Entering method
a. Enter year, month, day and time using the numeric
keys.
b. The cursor that indicates entering position will be
appeared in the message indication area at line 2.
c. Using the [<<], [>>] key and move the cursor to
desired position.
d. If reenter the entered data, press the Stop/clear
button to clear the entered data then enter the data
again.
e. Enter year, month, day and time using the numeric
keys, then press the [SET] key.
f. Enter year, month, day and time as follows.
• The year is entered by inputting 4-digit in the
Christian era.
• The month and day are entered by inputting 2-digit
number. (Example: 1 is entered as 01.)
• The time is entered using 24 hour clock.
(Example: 1:00p.m. is entered as 13.)
• The minute is entered by inputting 2-digit number.
(Example: 1 is entered as 01.)
• Example:
at 1:00 p.m. of January 15, 1998 →
1998/01/15 13:00
g. Press the [SET] key every time data for one item is
entered and check the entered data.
h. The screen will return to the calling time setting
menu screen if the [RETURN] key is pressed
without pressing the [SET] key. In this case, no
entered data will be changed.
1 ADJUSTMENT2 ISW
3 SERVICE
4 DIAGRAMS
1-43
Page 45

ADJUSTMENT
25
i. Press the [SET] key, and then the [RETURN] key
1 ADJUSTMENT
2 ISW
3 SERVICE4 DIAGRAM
to end setting. The screen will return to the calling
time set menu screen.
Step
Operation procedure
1
Enter the 25 mode.
2
[25 mode menu screen]
Press the [9. KRDS setting ] key.
3
[KRDS setting menu screen]
Press the [1. Calling time set] key.
4
[Calling time set menu screen]
Use the [1. Calling mode-1] (Setting designated
date calling setting).
5
[Calling mode-1 (Designed date calling)
setting screen]
Enter year, month and day using the numeric
key on the screen, then press the [<<], [>>] key
to move the cursor to entering position of time.
6
Enter time and minute using the numeric keys on
the screen, then press the [SET] key.
7
Press the [RETURN] to end the setting.
2. Setting regular date & time calling
The copier will call the host at the regular time
specified.
(1) Screen selection
Select the [2. Calling mode-2] (regular data & time
calling setting) in the calling time set menu screen to
display the calling mode-2 (regular data & time
calling) setting screen.
Press the [RETURN] key to exit the calling mode-2
(regular data & time calling) setting screen and return
to the calling time set menu screen.
(2) Mode selecting method
a. Select and press the desired mode in the
[monthly], [weekly], [dayly] keys.
There are three mode type (month, week, day)
that can be set.
b. The current selected mode is high lighted
according to the mode key.
At this time, the setting contents will be appeared
in the message indication area at line 2.
1-44
Page 46

25
ADJUSTMENT
(3) Mode setting method
Perform the operation in each mode as follows:
a. Monthly mode
(a) Using the numeric keys, enter the day, hour
and minute.
(b) Press the [SET] key to enter the input data.
b. If you wish to change the number of an arbitrary
position, press the [<<] or [>>] key to move the
cursor to the desired position and reenter.
c. If reenter the entered data, press the Stop/clear
button to clear the entered data then enter the data
again.
d. Weekly mode
(a) Using the numeric keys, enter the day of the
week, hour and minute.
(b) The day of the week is entered using the
numeric keys according to the following
definitions.
1: Monday 2: Tuesday 3: Wednesday
4: Thursday 5: Friday 6: Saturday
7: Sunday
(c) Press the [SET] key to enter the input data.
e. Daily mode
(a) Using the numeric keys, enter the hour and
minute.
(b) Press the [SET] key to enter the input data.
f. Common operation
(a) The screen will return to the calling time set
menu screen if the [RETURN] key is pressed
without pressing the [SET] key. In this case, no
entered data will be changed.
(b) Press the [SET] key, and then the [RETURN]
key to end setting. The screen will return to
calling time set menu screen.
(c) Enter the number with the numeric keys as
follows:
• The month and day are entered by inputting 2-digit
number. (Example: 1 is entered as 01.)
• The time is entered using 24 hour clock.
(Example: 1:00p.m. is entered as 13.)
• The time is entered using 24 hour clock. (Example:
1:00p.m. is entered as 13.)
• Example:
Monthly mode: 10 17:10
Weekly mode: day 17:10
Daily mode: 17:10
Step
Operation procedure
1
Enter the 25 mode.
2
[25 mode menu screen]
Press the [9. KRDS setting ] key.
3
[KRDS setting menu screen]
Press the [1. Calling time set] key.
4
[Calling time set menu screen]
Use the [2. Calling mode-2] (regular time calling
setting).
5
[Calling mode-2 (regular time calling) setting
screen]
Press the any key in [monthly], [weekly], [dayly]
keys.
6
Using the numeric keys on the screen, enter the
day, hour and minute.
(Item that can be input differs from depend on
the mode.)
7
Press the [SET] key.
8
Press the [RETURN] to end the setting.
1 ADJUSTMENT2 ISW
3 SERVICE
4 DIAGRAMS
1-45
Page 47

ADJUSTMENT
25
3. Setting regular count calling
1 ADJUSTMENT
The copier will call the host at the regular count
specified.
(1) Screen selection
Select the [3. Calling mode-3] (regular count) in the
calling time set menu screen to display the Calling
mode-3 (regular count call) setting screen.
Press the [RETURN] key to exit the Calling mode-3
2 ISW
(Regular count call) setting screen and return to the
calling time set menu screen.
(2) Setting method
a. Using the numeric keys on the screen, enter 6-
digit number, regular count value, then press the
[SET] key.
b. To reenter the entered data, press the Stop/clear
button to clear the entered data then enter the data
again.
c. The entered numerical value is entered from the
3 SERVICE4 DIAGRAM
number of 4 digit. The number is displayed while
shifting from right to left.
d. The screen will return to the calling time set menu
screen if the [RETURN] key is pressed without
pressing the [SET] key. In this case, no entered
data will be changed.
e. Press the [SET] key then the [RETURN] key to
end the setting. The screen will return to the calling
time set menu screen.
[15] KRDS host call
If the machine is connected to a KRDS, it can call the host
at the service center.
a. Select the [JAM history] (JAM-related trouble call),
[SC history] (SC-related trouble call), [No TONER],
[No PAPER], [COPY QUALITY] (Copy qualityrelated trouble call) or [OTHER REASON] (Other
call), depending upon the particular circumstances.
KRDS host menu
1. JAM history
2. SC history
3. NO TONER
4. NO PAPER
5. COPY QUALITY
6. OTHER REASON
b. When the [Start] key is pressed, the machine starts
calling the host.
Caution: Do not turn OFF the power during
communication.
Step
Operation procedure
1
Enter the 25 mode.
2
[25 mode menu screen]
Press the [9. KRDS setting ] key.
3
[KRDS setting menu screen]
Press the [1. Calling time set] key.
4
[Calling time set menu screen]
Use the [3. Calling mode-3] (regular count).
5
[Calling mode-3 (regular count call) setting
screen]
Using the numeric keys on the screen, enter
number, regular count value, then press the
[SET] key.
6
Press the [RETURN] to end the setting.
1-46
Page 48

25
ADJUSTMENT
[16] FAX KRDS auto on function
If the FAX board is installed, the FAX-KRDS mode
automatically becomes effective when the main power is
turned ON.
(Mode 25 → Software DIP SW12–6:1 (continuous)
KRDS software DIP SW 38-2: Set on 1 (FAX).)
Even if the FAX board is installed, if the FAX KRDS
function is not used, (if a modem is used), the above FAX
KRDS auto on function is deactivated by changing the
settings below.
However, in [8] “Setting the Serial number” in 25 Mode, if
the “Destination” setting is DE: German, FAX KRDS mode
does not become valid even if the FAX board is installed.
Step
Operation procedure
1
Enter the key operator mode.
2
[Key operator mode menu screen]
Press the FAX setting key and display the FAX
setting menu.
3
[FAX setting menu screen]
Press the special setting key and display the
password input screen.
4
Input the password [9] [2] [7] [2], then press the
[OK] key.
5
[FAX setting menu screen]
Press the nonvolatile parameters key.
6
[Nonvolatile parameter setting screen]
Press the function parameters setting key.
7
Turn address 0E0138: bit 0 (Auto On/Off function
for FAX KRDS) OFF.
Refer to FK-101 service Handbook for more detail.
[17] A point to notice for operation
Be sure to turn ON the main power of the 7020 main body
if the modem power is turned OFF and ON with the main
power OFF.
Reason: To initialize the modem.
(When the KRDS circuit is powered, it automatically
initialized the modem following the modem power ON and
OFF operations.
When the main power of the 7020 main body is OFF,
however, the KRDS circuit is not powered and does not
initialize the modem after the modem power ON and OFF
operations.
Some types of modem cannot start communication with
KRDS unless they are initialized by the KRDS.)
1 ADJUSTMENT2 ISW
3 SERVICE
4 DIAGRAMS
1-47
Page 49

ADJUSTMENT
25
[18] ASCII code table
1 AJUSTMENT
ASCII is 1 byte code specified by ANSI.
It enables indication of control code, alphabet and number.
character
SH
2 ISW
3 SERVICE4 DIAGRAM
SX
EX
ET
EQ
AK
BL
BS
HT
LF
HM
CL
CR
S0
S1
DE
D1
D2
D3
D4
NK
SN
EB
CN
EM
SB
EC
→
←
↑
↓
binary
0000 0000
0000 0001
0000 0010
0000 0011
0000 0100
0000 0101
0000 0110
0000 0111
0000 1000
0000 1001
0000 1010
0000 1011
0000 1100
0000 1101
0000 1110
0000 1111
0001 0000
0001 0001
0001 0010
0001 0011
0001 0100
0001 0101
0001 0110
0001 0111
0001 1000
0001 1001
0001 1010
0001 1011
0001 1100
0001 1101
0001 1110
0001 1111
hexa-
decimal
0
1
2
3
4
5
6
7
8
9
A
B
C
D
E
F
10
11
12
13
14
15
16
17
18
19
1A
1B
1C
1D
1E
1F
character
!
"
#
$
%
&
'
(
)
*
+
,
.
/
0
1
2
3
4
5
6
7
8
9
:
;
<
=
>
?
binary
0010 0000
0010 0001
0010 0010
0010 0011
0010 0100
0010 0101
0010 0110
0010 0111
0010 1000
0010 1001
0010 1010
0010 1011
0010 1100
0010 1101
0010 1110
0010 1111
0011 0000
0011 0001
0011 0010
0011 0011
0011 0100
0011 0101
0011 0110
0011 0111
0011 1000
0011 1001
0011 1010
0011 1011
0011 1100
0011 1101
0011 1110
0011 1111
hexa-
decimal
20
21
22
23
24
25
26
27
28
29
2A
2B
2C
2D
2E
2F
30
31
32
33
34
35
36
37
38
39
3A
3B
3C
3D
3E
3F
character
@
A
B
C
D
E
F
G
H
I
J
K
L
M
N
O
O
Q
R
S
T
U
V
W
X
Y
Z
[
¥
]
^
_
binary
0100 0000
0100 0001
0100 0010
0100 0011
0100 0100
0100 0101
0100 0110
0100 0111
0100 1000
0100 1001
0100 1010
0100 1011
0100 1100
0100 1101
0100 1110
0100 1111
0101 0000
0101 0001
0101 0010
0101 0011
0101 0100
0101 0101
0101 0110
0101 0111
0101 1000
0101 1001
0101 1010
0101 1011
0101 1100
0101 1101
0101 1110
0101 1111
hexa-
decimal
40
41
42
43
44
45
46
47
48
49
4A
4B
4C
4D
4E
4F
50
51
52
53
54
55
56
57
58
59
5A
5B
5C
5D
5E
5F
character
‘
a
b
c
d
e
f
g
h
i
j
k
l
m
n
o
p
q
r
s
t
u
v
w
x
y
z
{
}
~
binary
0110 0000
0110 0001
0110 0010
0110 0011
0110 0100
0110 0101
0110 0110
0110 0111
0110 1000
0110 1001
0110 1010
0110 1011
0110 1100
0110 1101
0110 1110
0110 1111
0111 0000
0111 0001
0111 0010
0111 0011
0111 0100
0111 0101
0111 0110
0111 0111
0111 1000
0111 1001
0111 1010
0111 1011
0111 1100
0111 1101
0111 1110
0111 1111
hexa-
decimal
60
61
62
63
64
65
66
67
68
69
6A
6B
6C
6D
6E
6F
70
71
72
73
74
75
76
77
78
79
7A
7B
7C
7D
7E
7F
1-48
Page 50

[19] Error code table
25
ADJUSTMENT
Error code CountermeasureContents
K00_00
K00_01
K00_02
K00_03
K00_04
K00_05
K00_06
K00_07
K00_08
K00_09
K00_10
K00_11
K00_12
K00_13
K01_00
K01_01
K01_02
K01_03
K02_00
K02_01
Connection NG.
No response from other party.
(No detection of start text from host after establishing connection.)
Because copying is taking place, it is impossible to write to the
non-volatile RAM and the line is cut.
Password does not match.
Serial number does not match.
Syntactical error.
Write-in indication on an item for which write-in is impossible.
Unread item error.
Signal reception time-out after detection other party response.
Serial number registration completed.
Communications error due to generation of carrier OFF.
Dial tone is not detected within 5 seconds after setting of
x2 and x4 commands.
Busy signal detected.
No tone detected for 5 seconds after input of @ command.
DTR went to OFF or in OFF state.
Cannot open RS-232C.
Cannot close RS-232C.
Response time-out from RS-232C task.
AT command error.
Initializing NG (MODEM).
Example: Modem initializing command no good.
Redial, repeat reception standby.
Redial, repeat reception standby.
Temporarily stop copying.
Check password.
Check serial number.
Redial, repeat reception standby.
Re-operation on host side.
Re-operation on host side.
Redial, repeat reception standby.
Check serial number.
Redial, repeat reception standby.
Check connection of telephone
line.
Redial.
Redial, repeat reception standby.
Check modem power source.
Check RS-232C cable connection.
Turn power on copier OFF and ON.
Turn power on copier OFF and ON.
Check modem power source.
Check RS-232C cable connection.
Turn power on copier OFF and ON.
Possibility of modem malfunction
or software bug.
Check modem power source.
Check RS-232C cable connection.
1 ADJUSTMENT
2 ISW
3 SERVICE
[20] ISW setting
Refer to the chapter “ISW.”
[21] Root counter display
The total counter can be checked in 25 mode on the root
counter display.
Step
Operation procedure
1
Enter the 25 mode.
2
[25 mode menu screen]
Press the [11. Root counter].
3
[Root counter display screen]
Values of the root counter (total counter) are
displayed.
4
Press the [RETURN] key to return to the
25 mode screen.
1-49
4 DIAGRAMS
Page 51

ADJUSTMENT
36
36 MODE
<List of adjustment items for 36 mode>
1 ADJUSTMENT
No.
Menu
1
High voltage adjustment
2 ISW
2
Timing adjustment
3 SERVICE4 DIAGRAM
No.
Sub menu
None
1
Vertical/Horizontal
magnification
adjustment
2
Restart timing
adjustment
Circular menu
Charging voltage adjustment
Transfer current adjustment
Separation (AC) voltage adjustment
Separation (DC) current adjustment
Charging grid voltage adjustment
Developing bias adjustment
L detection adjustment
Automatic toner supply
Printer vertical magnification (drum clock)
adjustment
Platen vertical magnification (drum clock)
adjustment
Platen horizontal magnification (drum clock)
adjustment
RADF (50% single side) vertical
magnification (drum clock) adjustment
RADF (100%
(drum clock) adjustment
RADF (200%
(drum clock) adjustment
RADF (400%
(drum clock) adjustment
RADF (50% double side) vertical magnification
(drum clock) adjustment
RADF (100% double side) vertical magnification
(drum clock) adjustment
RADF (200% double side) vertical magnification
(drum clock) adjustment
RADF (400%
magnification (drum clock) adjustment
Restart timing adjustment (All)
Restart timing adjustment (Main body upper tray)
Restart timing adjustment (Main body lower tray)
Restart timing adjustment (DB upper tray)
Restart timing adjustment (DB lower tray)
Restart timing adjustment (By-pass)
Restart timing adjustment (ADU)
single
side) vertical magnification
single
side) vertical magnification
single
side) vertical magnification
double side
) vertical
Summary of operation
Adjustment in the field is inhibited.
Make an L detection adjustment for toner supply and
register the result in the nonvolatile memory. Display
the L detection adjustment value as the result when
it is completed. Reset the developing counter.
Adjustment in the field is inhibited.
After making an adjustment, print the SGU
pattern (No.16).
After making an adjustment, make a copy.
The same as 36 mode 9 RADF Adjustment.
After making an adjustment, print the SGU
pattern (No.16).
1-50
Page 52

36
ADJUSTMENT
No.2Menu
Timing adjustment
No.
Sub menu
2
Restart timing
adjustment
3
Paper feed loop
adjustment
4
Leading edge original
erasure adjustment
5
Centering
adjustment
Circular menu
Restart timing adjustment (RADF single side)
Restart timing adjustment (RADF double side (first side))
Restart timing adjustment (RADF double side (second side))
Paper feed loop amount adjustment (All)
Paper feed loop amount adjustment
(Main body upper tray)
Paper feed loop amount adjustment
(Main body lower tray, small size)
Paper feed loop amount adjustment
(Main body lower tray, large size)
Paper feed loop amount adjustment
(DB upper tray, small size)
Paper feed loop amount adjustment
(DB upper tray, large size)
Paper feed loop amount adjustment
(DB lower tray, small size)
Paper feed loop amount adjustment
(DB lower tray, large size)
Paper feed loop amount adjustment
(By-pass, plain paper)
Paper feed loop amount adjustment
(By-pass, thick paper)
Paper feed loop amount adjustment
(By-pass, post card)
Paper feed loop amount adjustment (ADU)
Paper feed loop amount adjustment
(RADF single side)
None
Centering adjustment (All )
Centering adjustment (Main body upper tray, common)
Centering adjustment
(Main body upper tray, small size)
Centering adjustment
(Main body upper tray, large size)
Centering adjustment (Main body lower tray, common)
Centering adjustment
(Main body lower tray, small size)
Centering adjustment
(Main body lower tray, large size)
Centering adjustment (DB upper tray, common)
Centering adjustment (DB upper tray, small size)
Centering adjustment (DB upper tray, large size)
Centering adjustment (DB lower tray, common)
Centering adjustment (DB lower tray, small size)
Centering adjustment ( DB lower tray, large size)
Summary of operation
The same as 36 mode 9 RADF Adjustment.
After making an adjustment, print the SGU
pattern (No.16).
The same as 36 mode 9 RADF Adjustment.
After making an adjustment, make a copy.
After making an adjustment , print the SGU
pattern (No.16).
1 ADJUSTMENT
2 ISW
3 SERVICE
4 DIAGRAMS
1-51
Page 53

ADJUSTMENT
No.
Menu
2
1 ADJUSTMENT
Timing adjustment
2 ISW
3
3 SERVICE4 DIAGRAM
Running mode
36
No.
Sub menu
5
Centering
adjustment
6
Image read point
adjustment
7
Restoring standard
data
1
Intermittent copy
mode
2
No paper intermittent
copy mode
3
No paper mode
4
No paper endless
mode
5
Running mode
Circular menu
Centering adjustment (ADU, common)
Centering adjustment (ADU, small size)
Centering adjustment (ADU, large size)
Centering adjustment (By-pass, common)
Centering adjustment (By-pass, small size)
Centering adjustment (By-pass, large size)
Centering adjustment (Platen)
Centering adjustment (RADF single side)
Centering adjustment (RADF double side (first side))
Centering adjustment (RADF double side (second side))
Origin adjustment
Vertical/Horizontal magnification adjustment
Restart timing adjustment
Paper feed loop amount adjustment
Leading edge original erasure adjustment
Centering adjustment
Image read point adjustment
None
Summary of operation
Print the SGU patters (No.16) after making
an adjustment.
The same as 36 mode 9 RADF Adjustment.
After making an adjustment, make a copy.
Reset the adjustment data in the same
condition as they were when the machine
left the factory.
After making a selection, carry out operation.
4
Test pattern print
5
Density adjustment
6
Copy quality adjustment
None
Test pattern density
adjustment
1
RADF scanner
density adjustment
None
None
None
Print the SGU pattern according to the
specification No.
After making an adjustment, print
the specified SGU pattern.
Make a density adjustment by letting the
machine read white chart.
1-52
Page 54

No.
7
8
9
10
Menu
List print
Counter clear
RADF adjustment
FNS adjustment
No.
Sub menu
1
Test pattern
2
Font pattern
3
Memory dump list
4
Machine
management list
5
Adjustment list
1
Drum unit
related counter
2
Fixing unit related
counter
1
Vertica/Horizontal
magnification
adjustment
2
Restart timing
adjustment
3
Paper loop adjustment
4
Centering adjustment
5
RADF scanner
density adjustment
Circular menu
None
None
None
None
None
None
None
Vertical magnification adjustment drum
clock of RADF (50% single side)
Vertical magnification adjustment drum
clock of RADF (100% single side)
Vertical magnification adjustment drum
clock of RADF (200% single side)
Vertical magnification adjustment drum
clock of RADF (400% single side)
Vertical magnification adjustment drum
clock of RADF (50% double side)
Vertical magnification adjustment drum
clock of RADF (100% double side)
Vertical magnification adjustment drum
clock of RADF (200% double side)
Vertical magnification adjustment drum
clock of RADF (400% double side)
RADF (single side)
RADF (double side (first side))
RADF (double side (second side))
None
RADF (single side)
RADF (double side (first side))
RADF (double side (second side))
None
FNS alignment plate adjustment (back)
FNS alignment plate adjustment (front)
36
ADJUSTMENT
Summary of operation
Grid pattern with 2 dots in width of line and
500 dots at intervals of lines.
Built-in font pattern (Those for Japan include
kanji characters.)
Print dump of data stored from the specified
address in Hex and ASCII formats.
Print the condition of the machine, counter
data information, and jam history.
Print only 25/36 mode adjustment value
from the machine management list.
Clear drum counter.
Clear fixing web counter
After making an adjustment, make a copy.
After making an adjustment, make a copy.
After making an adjustment, make a copy.
After making an adjustment, make a copy.
Make an adjustment of density by letting
the machine read white chart.
After making an adjustment, make a copy.
1 ADJUSTMENT
2 ISW
3 SERVICE
4 DIAGRAMS
1-53
Page 55

ADJUSTMENT
36
[1] Setting method
1 ADJUSTMENT
A special operating mode called “36 Mode” has been
provided with this machine. This mode enables
adjustment of the various parts.
1. Turn the SW2 (sub power) OFF when the SW1
(main power) remains ON.
2. Turn the SW2 (sub power) ON while pressing 3 and
6 of the copy quantity setting buttons.
2 ISW
36 mode menu screen will appear on the LCD. At
this time, normal copy operation is not possible.
[36 mode menu screen]
3 SERVICE4 DIAGRAM
3. Press the desired item key on the LCD screen.
Each setting screen will appear.
4. Enter data in each setting screen.
5. Press the [RETURN] key to check the data that
have been entered.
6. Turn the SW2 (sub power) OFF to cancel the 36
mode.
7. New data will be effective after re-starting.
Note: If RADF and FNS are not installed, the [9.
RADF adj.] and [10. FNS adj.] keys are
netted and neither key can be selected.
[2] High voltage adjustment
1. Charging voltage value adjustment
Charging voltage value adjustment is inhibited in the
field.
2. Transfer current adjustment
Transfer current adjustment is inhibited in the field.
3. Separation (AC) voltage adjustment
Separation (AC) voltage adjustment is inhibited in the
field.
4. Separation (DC) voltage value adjustment
Separation (DC) voltage value adjustment is inhibited
in the field.
5. Charging grid voltage adjustment
Charging grid voltage adjustment is inhibited in the
field.
6. Developing bias adjustment
Developing bias adjustment is inhibited in the field.
7. L detection adjustment
This adjustment be made immediately after
replacement of the developer (before any copies are
made with the new developer). Developing counter is
automatically reset.
1-54
Page 56

36
ADJUSTMENT
Step
Operation procedure
1
Enter the 36 mode.
2
[36 mode menu screen]
Press the [1. HV adjustment] key.
[High voltage adjustment screen]
3
Press the [NEXT] key until the “L detection
adj.” appears in the message display area.
[High voltage adjustment --- L detection
4
adjustment screen]
Press the [START] key, then confirm that [OK]
is displayed at [RESULT] and the L detection
data value.
5
To make another adjustment, press the [NEXT]
or [BACK] to select the desired
adjustment.
6
Press the [RETURN] to return to
the 36 mode menu screen.
9. Toner automatic supply
Normally, this adjustment takes place automatically
in the machine. Because of this, adjustment is
inhibited in the field.
[3] Timing adjustment
This function adjusts each timing.
When timing adjustment is performed, use A3 or 11 x 17
size paper.
Timing adjustment menu
1. Vertical/horizontal magnification adjustment
2. Restart timing adjustment
3. Paper feed loop amount adjustment
4. Leading edge original erasure amount adjustment
5. Centering adjustment
6. Image read point adjustment
7. Restoring standard data
(1) Select [2. Timing adj.] in the 36 mode menu screen.
The timing adjustment menu screen will appear.
(2) Press the item key to be adjusted. The selected
setting screen will appear.
1 ADJUSTMENT
2 ISW
3 SERVICE
1-55
4 DIAGRAMS
Page 57

ADJUSTMENT
1.
Vertical/Horizontal magnification adjustment
1 ADJUSTMENT
2 ISW
3 SERVICE4 DIAGRAM
Adjust the vertical/horizontal magnification at the
zoom mode.
(1) Select the [2. Timing adj.] in the 36 mode menu
screen, then the timing adjustment menu screen will
appear. Select the [1. Drum clock adj.] on this
screen, then the Drum clock adjustment (vertical/
horizontal magnification adjustment) screen will
appear.
This adjustment has the following items. These can
be selected by pressing the [NEXT] or [BACK] key:
• Vertical magnification drum clock adjustment --Printer
• Vertical magnification drum clock adjustment --Platen
• Horizontal magnification drum clock adjustment --Platen
• Vertical magnification drum clock adjustment --RADF (50% single side)
• Vertical magnification adjustment --- RADF (100%
single side)
• Vertical magnification adjustment --- RADF (200%
single side)
• Vertical magnification adjustment --- RADF (400%
single side)
• Vertical magnification adjustment --- RADF (50%
double side)
• Vertical magnification adjustment --- RADF (100%
double side)
• Vertical magnification adjustment --- RADF (200%
double side)
• Vertical magnification adjustment --- RADF (400%
double side)
If the RADF is not installed, the RADF adjustment
item will not appear.
(2) Enter data from the numeric keys on the screen, then
press the [SET] key to enter the data that have been
entered.
(3) Press the [COPY] key to return to the basic screen,
then make a test copy.
(4) Press the # button while pressing the
return to the Vertical/Horizontal magnification
adjustment screen.
(5) If the output (test copy image) is different from the
standard value, enter setting value using the numeric
keys and make a test copy.
If the output (test copy image) is within the standard
value, adjust the next adjustment item.
36
*
button to
a. Printer system vertical magnification
adjustment
Step
Operation procedure
1
Enter the 36 mode.
2
[36 mode menu screen]
Press the [2. Timing adj.] key.
3
[Timing adjustment menu screen]
Press the [1. Drum clock adj.] key.
4
[Magnification adjustment screen]
Press the [NEXT] key until “Printer”
appears in the message display area.
5
Press the [COPY] key.
6
[Basic screen]
Select A3 or 11 x 17 size paper, then press the
Start print button to print the SGU pattern.
Measure the vertical magnification of the output paper.
7
Standard value: 0.5 % max (life size)
Within ±1 mm with respect to 206 mm
Press the # button while pressing the
8
return to the vertical/horizontal magnification
(drum clock) adjustment screen.
[Vertical/horizontal magnification (drum clock)
9
adjustment screen]
If the vertical magnification is different from the
standard value, enter a value from the numeric
keys, then press the [SET] key to store the
adjustment value.
nput range: -50 (reduction) ~ +50 (enlargement)
I
1 step = 0.1 %
Repeat steps 5 to 9 until the vertical magnification
10
becomes the standard value.
To adjust another adjustment item, press the
11
[NEXT] or [BACK] key to select the desired
adjustment.
Press the [RETURN] key to return to the timing
12
adjustment menu screen.
Standard value:0.5 % max. (life size)
Within ±1.0 mm with respect to 206 mm
*
button to
1-56
206
Page 58

36
ADJUSTMENT
b. Platen vertical magnification adjustment
Operation procedure
Step
Enter the 36 mode.
1
[36 mode menu screen]
2
Press the [2. Timing adj.] key.
[Timing adjustment menu screen]
3
Press the [1. Drum clock adj.] key.
[Vertical/Horizontal magnification (drum clock)
4
adjustment screen]
Press the [NEXT] key until “Drum clock adj.
(platen)” appears in the message display area.
Press the [COPY] key.
5
[Basic screen]
6
Set the new pyramid chart on the original glass
and select A3 or 11 x 17 size paper. Then press
the Start print button to make a copy.
Measure the vertical magnification of the output paper.
7
Standard value: 0.5 % max (life size)
Within ±1 mm with respect to 200 mm
Press the # button while pressing the
8
the vertical/horizontal magnification adjustment screen.
[Vertical/Horizontal magnification (drum clock)
9
adjustment screen]
If the vertical magnification is different from the
standard value, enter a value from the numeric keys,
then press the [SET] key to store the adjustment value.
Input range: -20 (reduction) ~ +20 (enlargement)
1 step = 0.05 %
Repeat steps 5 to 9 until the vertical magnification
10
becomes the standard value.
To adjust another adjustment item, press the
11
[NEXT] or [BACK] key to select the desired
adjustment.
Press the [RETURN] key to return
12
to the timing adjustment menu screen.
button to return to
*
c. Platen horizontal magnification adjustment
Step
Operation procedure
1
Enter the 36 mode.
2
[36 mode menu screen]
Press the [2. Timing adj.] key.
3
[Timing adjustment menu screen]
Press the [1. Drum clock adj.] key.
4
[Vertical/Horizontal magnification (drum clock)
adjustment screen]
Press the [NEXT] key until “Horizontal adj. (platen)”
appears in the message display area.
5
Press the [COPY] key.
6
[Basic screen]
Set the new pyramid chart on the original glass
and select A3 or 11 x 17 size paper. Then press
the Start print button to make a copy.
7
Measure the vertical magnification of the output paper.
Standard value: 0.5 % max (life size)
Within ± 1 mm with respect to 200 mm
8
Press the # button while pressing the
return to the vertical/horizontal magnification
(drum clock) adjustment screen.
9
[Vertical/Horizontal magnification (drum clock)
adjustment screen]
If the vertical magnification is different from the standard
value, enter a value from the numeric keys, then press
the [SET] key to store the adjustment value.
Input range: -10 (reduction) ~ +10 (enlargement)
1 step = 0.1 %
10
Repeat steps 5 to 9 until the horizontal
magnification becomes the standard value.
11
To adjust another adjustment item, press the [NEXT]
or [BACK] key to select the desired adjustment.
12
Press the [RETURN] key to return
to the timing adjustment menu screen.
button to
*
1 ADJUSTMENT
2 ISW
3 SERVICE
4 DIAGRAMS
Standard value:0.5 % max. (life size)
Within ±1.0 mm with respect to 200 mm
200
Vertical
magnification
Standard value:0.5 % max. (life size)
Within ±1.0 mm with respect to 200 mm
200
Caution: The result of the platen horizontal
magnification will be reflected all the
images read by scanner (RADF, platen).
1-57
Page 59

ADJUSTMENT
36
d. RADF vertical magnification adjustment
1 ADJUSTMENT
Step
Operation procedure
1
Enter the 36 mode.
2
[36 mode menu screen]
Press the [2. Timing adj.] key.
3
[Timing adjustment menu screen]
Press the [1. Drum clock adj.] key.
4
[Vertical/Horizontal magnification (drum clock)
2 ISW
3 SERVICE4 DIAGRAM
adjustment screen]
Press the [NEXT] key until “RADF/100%” appears
in the message display area.
5
Press the [COPY] key.
6
[Basic screen]
Set the ADF adjustment chart on the RADF and
select A3 or 11 x 17 size paper. Then press the
Start print button to make a copy.
7
Measure the vertical magnification of the output paper.
Standard value: 0.5 % max (life size)
Within ± 1.0 mm with respect to 200 mm
8
Press the # button while pressing the
vertical/horizontal magnification (drum clock) adjustment screen.
9
[Vertical/Horizontal magnification (drum clock)
adjustment screen]
If the vertical magnification is different from the standard
value, enter a value from the numeric keys, then press
the [SET] key to store the adjustment value.
Input range: -20 (reduction) ~ +20 (enlargement)
1 step = 0.1 %
10
Repeat steps 5 to 9 until the vertical magnification
becomes the standard value.
11
To adjust another adjustment item, press the [NEXT]
or [BACK] key to select the desired adjustment.
12
Press the [RETURN] key to return to the timing
adjustment menu screen.
button to return to the
*
1. Restart timing adjustment
To adjust the restart timing.
Select the [2. Timing adj.] in the 36 mode menu
screen, then the timing adjustment menu screen will
appear.
Select the [2. Restart timing] on this screen, then the
restart timing adjustment screen will appear.
This adjustment has the following kinds of items.
These can be selected by pressing the [NEXT] or
[BACK] key:
• Restart timing adjustment --- All
• Restart timing adjustment --- Main body upper tray
• Restart timing adjustment --- Main body lower tray
• Restart timing adjustment --- DB upper tray
• Restart timing adjustment --- DB lower tray
• Restart timing adjustment --- By-pass
• Restart timing adjustment --- ADU
• Restart timing adjustment --- RADF (single side)
• Restart timing adjustment --- RADF (double side
(first side))
• Restart timing adjustment --- RADF (double side
(second side))
Standard value:0.5 % max. (life size)
Within ±1 mm with respect to 200 mm
Vertical
magnification
190
1-58
Page 60

36
ADJUSTMENT
a. Engine restart timing adjustment
Operation procedure
Step
Enter the 36 mode.
1
[36 mode menu screen]
2
Press the [2. Timing adj.] key.
[Timing adjustment menu screen]
3
Press the [2. Restart timing] key.
[Restart timing adjustment screen]
4
Press the [NEXT] key until the desired
adjustment item appears in the message
display area.
Press the [COPY] key.
5
[Basic screen]
6
Select A3 or 11 x 17 size paper and press the
Start print button to print the SGU pattern.
Check the restart (leading edge) timing of the
7
output paper.
Standard value: Within ± 2.0 mm
Press the # button while pressing the
8
to return to the restart timing adjustment screen.
[Restart timing adjustment screen]
9
If the restart timing is different from the standard
value, enter a value from the numeric keys,
then press the [SET] key to store the adjustment
value.
Input range: -127 (slower) ~ +127 (faster)
1 step = 0.1mm
Repeat steps 5 to 9 until the restart timing
10
becomes the standard value.
To adjust another adjustment item, press the
11
[NEXT] or [BACK] key to select the desired
adjustment.
Press the [RETURN] key to return to the timing
12
adjustment menu screen.
button
*
b. RADF restart timing adjustment
Step
Operation procedure
1
Enter the 36 mode.
2
[36 mode menu screen]
Press the [2. Timing adj.] key.
3
[Timing adjustment menu screen]
Press the [2. Restart timing] key.
4
[Restart timing adjustment screen]
Press the [NEXT] key until the desired
RADF adjustment item appears in the message
display area.
5
Press the [COPY] key.
6
[Basic screen]
Set the ADF adjustment chart on the RADF and
select A3 or 11 x 17 size paper. Then press the
Start print button to make a copy.
Adjustment the “RADF double side (second side)”,
*
then make a test copy in double side - single side
mode and check the restart timing of 2nd output paper.
Check the restart (leading edge) timing of the
7
output paper.
Standard value: Within ± 3.0 mm (life size)
Press the # button while pressing the
8
to return to the restart timing adjustment screen.
[Restart timing adjustment screen]
9
If the restart timing is different from the standard
value, enter a value from the numeric keys,
then press the [SET] key to store the adjustment
value.
Input range: -50 (slow) ~ +50 (fast)
1 step = 0.1mm
Repeat steps 5 to 9 until the restart timing
10
becomes the standard value.
To adjust another adjustment item, press the
11
[NEXT] or [BACK] key to select the desired
adjustment.
Press the [RETURN] key to return to the timing
12
adjustment menu screen.
button
*
1 ADJUSTMENT
2 ISW
3 SERVICE
4 DIAGRAMS
1-59
Page 61

ADJUSTMENT
36
3. Paper feed loop amount adjustment
1 ADJUSTMENT
2 ISW
3 SERVICE4 DIAGRAM
Adjust the loop amount for each tray.
Select the [2. Timing adj.] in the 36 mode menu
screen, then the timing adjustment menu screen will
appear.
Select the [3. Paper loop adj.] on this screen, then the
paper feed loop amount adjustment screen will
appear.
This adjustment has the following kinds of items.
These can be selected by pressing the [NEXT] or
[BACK] key.
• Paper feed loop adjustment (All)
• Paper feed loop adjustment (Main body upper
tray)
• Paper feed loop adjustment (Main body lower tray
(small size) ) (Note 1)
• Paper feed loop adjustment (Main body lower tray
(large size) ) (Note 2)
• Paper feed loop adjustment (DB upper tray (small
size) ) (Note 1)
• Paper feed loop adjustment (DB upper tray (large
size) ) (Note 2)
• Paper feed loop adjustment (DB lower tray (small
size) ) (Note 1)
• Paper feed loop adjustment (DB lower tray (large
size) ) (Note 2)
•
Paper feed loop adjustment (Bypass (plain paper) )
•
Paper feed loop adjustment (Bypass (thick paper) )
• Paper feed loop adjustment (Bypass (post card) )
• Paper feed loop adjustment (ADU)
• Paper feed loop adjustment (RADF) (single side)
Note 1: Except for F4R, A3, B4, 8.5 x 14, 11 x 17
a. Paper feed loop adjustment for engine
Operation procedure
Step
Enter the 36 mode.
1
2
[36 mode menu screen]
Press the [2. Timing adj.] key.
3
[Timing adjustment menu screen]
Press the [3. Paper loop adj.] key.
4
[Paper feed loop amount adjustment screen]
Press the [NEXT] key until the desired adjustment
item appears in the message display area.
5
Press the [COPY] key.
6
[Basic screen]
Select A3 or 11 x 17 size paper, then press the
Start print button to print the SGU pattern.
7
Check the paper feed loop amount.
Press the # button while pressing the
8
to return to the paper feed loop amount
adjustment screen.
9
[Paper feed loop amount adjustment screen]
If the paper feed loop amount is not correct,
enter a value from the numeric keys, then press
the [SET] key to store the adjustment value.
Input range: –127 (small) ~ 00 (standard) ~
+127 (large)
1 step = 0.14mm
10
Repeat steps 5 to 9 until the paper feed loop
amount becomes appropriate.
11
To adjust another adjustment item, press the
[NEXT] or [BACK] key to select the desired
adjustment.
12
Press the [RETURN] key to return to the timing
adjustment menu screen.
button
*
Note 2: F4R, A3, B4, 8.5 x 14, 11 x 17
1-60
Page 62

36
ADJUSTMENT
b. Paper feed loop adjustment for RADF
Step
Operation procedure
1
Enter the 36 mode.
2
[36 mode menu screen]
Press the [2. Timing adj.] key.
[Timing adjustment menu screen]
3
Press the [3. Paper loop adj.] key.
[Paper feed loop amount adjustment screen]
4
Press the [NEXT] key until RADF appears in the
message display area.
5
Press the [COPY] key.
6
[Basic screen]
Set the ADF adjustment chart on the RADF and
select A3 or 11 x 17 size paper, then press the
Start print button to make a test copy.
7
Check the paper feed loop amount.
8
Press the # button while pressing the
to return to the paper feed loop amount
adjustment screen.
9
[Paper feed loop amount adjustment screen]
If the paper feed loop amount is not correct,
enter a value from the numeric keys, then press
the [SET] key to store the adjustment value.
Input range: -10 (small) ~ 00 (standard) ~
+10 (large)
1 step = 0.5mm
10
Repeat steps 5 to 9 until the paper feed loop
amount is appropriate.
11
To adjust another adjustment item, press the
[NEXT] or [BACK] key to select the desired
adjustment.
12
Press the [RETURN] key to return to the timing
adjustment menu screen.
button
*
4. Leading edge original erasure adjustment
Adjust the leading edge original erasure (leading
edge blank cut) amount.
Select the [2. Timing adj.] in the 36 mode menu
screen, then the timing adjustment menu screen will
appear.
Select the [4. Lead edge timing] on this screen, then
the leading edge original erasure amount adjustment
screen will appear.
Step
Operation procedure
1
Enter the 36 mode.
2
[36 mode menu screen]
Press the [2. Timing adj.] key.
3
[Timing adjustment menu screen]
P
ress the [4. Leading edge timing] key.
[Leading edge original erasure adjustment screen]
4
Press the [COPY] key.
[Basic screen]
5
Set the new pyramid chart on the original glass
and select A3 or 11 x 17 size paper, then press
the Start print button to make a test copy.
Measure the leading edge original erasure
6
amount of the output paper.
Standard value: Within 3.0 mm
7
Press the # button while pressing the
return to the leading edge original erasure
amount adjustment screen.
[Leading edge original erasure adjustment screen]
8
If the leading edge original erasure amount is
not correct, enter a value from the numeric keys,
then press the [SET] key to store the adjustment
value.
Input range: -20 (small) ~ +20 (large)
1 step = 0.1mm
Repeat steps 4 to 8 until the leading edge
9
original erasure amount becomes the standard
value.
Press the [RETURN] key to return
10
to the timing adjustment menu screen.
button to
*
1 ADJUSTMENT
2 ISW
3 SERVICE
4 DIAGRAMS
1-61
Page 63

ADJUSTMENT
36
5. Centering adjustment
1 ADJUSTMENT
2 ISW
3 SERVICE4 DIAGRAM
Adjust the miscentering for paper feed direction.
Select the [2. Timing adj.] in the 36 mode menu
screen, then the timing adjustment menu screen will
appear.
Select the [5. Centering adj.] on this screen, then the
centering adjustment screen will appear.
This adjustment has the following kinds of items.
These can be selected by pressing the [NEXT] or
[BACK] key.
• Centering adjustment (All )
• Centering adjustment (Main body upper tray,
common)
•
Centering adjustment (Main body upper tray, small size)
•
Centering adjustment (Main body upper tray, large size)
• Centering adjustment (Main body lower tray,
common)
•
Centering adjustment (Main body lower tray, small size)
•
Centering adjustment (Main body lower tray, large size)
• Centering adjustment (DB upper tray, common)
• Centering adjustment (DB upper tray, small size)
• Centering adjustment (DB upper tray, large size)
• Centering adjustment (DB lower tray, common)
• Centering adjustment (DB lower tray, small size)
• Centering adjustment ( DB lower tray, large size)
• Centering adjustment (ADU, common)
• Centering adjustment (ADU, small size)
• Centering adjustment (ADU, large size)
• Centering adjustment (By-pass, common)
• Centering adjustment (By-pass, small size)
• Centering adjustment (By-pass, large size)
• Centering adjustment (Platen)
• Centering adjustment (RADF single side)
•
Centering adjustment (RADF double side (first side))
•
Centering adjustment (RADF double side (second side))
Note 1: ADU centering adjustment can be taking
place for each paper size.
Large size: A3, B4, 8.5 x 14, 11 x 17
a. Each tray centering adjustment
Step
Operation procedure
1
Enter the 36 mode.
2
[36 mode menu screen]
Press the [2. Timing adj.] key.
3
[Timing adjustment menu screen]
Press the [
4
[Centering adjustment screen]
Press the [NEXT] key until the desired tray
appears in the message display area.
5
Press the [COPY] key.
6
[Basic screen]
Set A3 or 11 x 17 size paper in the tray to be
adjusted and select this tray. Then press the
[START] button to print the SGU pattern .
7
Fold the output (SGU pattern) at the center in
the paper feed direction, and check that the left
and right lines overlap completely.
Standard value: Within ±2 mm
8
Press the # button while pressing the
to return to the centering adjustment screen.
9
[Centering adjustment screen]
If the miscentering is more than standard value,
enter a value from the numeric keys, then press
the [SET] key to store the adjustment value.
Input range:
1 step = 0.09mm
10
Repeat steps 5 to 9 until the miscentering is
within standard value. (Note 1)
11
To adjust another adjustment item, press the
[NEXT] or [BACK] key to select the desired
adjustment.
12
Press the [RETURN] key to return to the timing
adjustment menu screen.
Note 1: If the adjustment by data does not correct
5. Centering adj.
] key.
*
-53 (inward direction of the center line)
~ +53 (rear direction of the center line)
the miscentering to fall into the specified
range, adjust the tray as follows:
button
Small size: A4R, B5R, 8 x 11R
Note 2: ADU centering adjustment for each paper
is the offset adjustment from the ADU
(common).
1-62
Page 64

36
ADJUSTMENT
b. ADU centering adjustment
Step
Operation procedure
1
Enter the 36 mode.
2
[36 mode menu screen]
Press the [2. Timing adj.] key.
3
[Timing adjustment menu screen]
Press the [5. Centering adj.] key.
4
[Centering adjustment screen]
Press the [NEXT] key until "ADU" appears in the
message display area.
5
Press the [COPY] key.
6
[Basic screen]
Select copy mode to single side - double side mode, then
press the Start print button to print the SGU pattern.
Fold the output (SGU pattern) at the center in
7
the paper feed direction, and check that the left
and right lines overlap completely.
Standard value: First side: Within ±3 mm
Second side: Within ±3 mm
Press the # button while pressing the
8
to return to the centering adjustment screen.
[Centering adjustment screen]
9
If the miscentering is more than standard value,
enter a value from the numeric keys, then press
the [SET] key to store the adjustment value.
Input range:
1 step = 0.09mm
Repeat steps 5 to 9 until the miscentering is
10
within standard value for each paper size.
(Note 1)
To adjust another adjustment item, press the
11
[NEXT] or [BACK] key to select the desired
adjustment.
Press the [RETURN] key to return to the timing
12
adjustment menu screen.
-53 (inward direction of the center line)
~ +53 (rear direction of the center line)
button
*
c. Platen centering adjustment
Step
Operation procedure
1
Enter the 36 mode.
2
[36 mode menu screen]
Press the [2. Timing adj.] key.
3
[Timing adjustment menu screen]
Press the [5. Centering adj.] key.
4
[Centering adjustment screen]
Press the [NEXT] key until "Platen" appears in
the message display area.
5
Press the [COPY] key.
6
[Basic screen]
Set the new pyramid chart on the original glass
and select A3 or 11 x 17 size paper, then press
the Start print button to make a test copy.
7
Check the miscentering by comparing the
original with the copy.
Standard value: Within ±2 mm
8
Press the # button while pressing the
to return to the centering adjustment screen.
[Centering adjustment screen]
9
If the miscentering is more than standard value,
enter a value from the numeric keys, then press
the [SET] key to store the adjustment value.
Input range:
1 step = 0.06mm
Repeat steps 5 to 9 until the miscentering is
10
within standard value. (Note 1)
To adjust another adjustment item, press the
11
[NEXT] or [BACK] key to select the desired
adjustment.
Press the [RETURN] key to return to the timing
12
adjustment menu screen.
-74 (inward direction of the center line)
~ +74 (rear direction of the center line)
button
*
1 ADJUSTMENT
2 ISW
3 SERVICE
4 DIAGRAMS
Standard value: Within 3.0 mm (life size)
Miscentering
amount between
Lengthwise
direction
first side and
second side
1-63
Page 65

ADJUSTMENT
36
d. RADF centering adjustment
1 ADJUSTMENT
2 ISW
3 SERVICE4 DIAGRAM
Operation procedure
Step
Enter the 36 mode.
1
[36 mode menu screen]
2
Press the [2. Timing adj.] key.
[Timing adjustment menu screen]
3
Press the [5. Centering adj.] key.
[Centering adjustment screen]
4
Press the [NEXT] key until "RADF" appears in
the message display area.
Press the [COPY] key.
5
[Basic screen]
6
Set the ADF adjustment chart on the RADF and
select A3 or 11 x 17 size paper, then press the
Start print button to make a copy.
Adjust the "RADF (double side (second side)) ", then
*
make a test copy in double side - single side mode
and check the loop amount of 2nd outputted paper.
7
Check the miscentering by comparing the
original with the copy.
Standard value: Within ±3 mm
8
Press the # button while pressing the
to return to the centering adjustment screen.
9
[Centering adjustment screen]
If the miscentering is more than
standard value, enter a value from the numeric
keys, then press the [SET] key to store the
adjustment value.
Input range:
1 step = 0.04mm
10
Repeat steps 5 to 9 until the miscentering is
within standard value for each adjustment.
11
To adjust another adjustment item, press the
[NEXT] or [BACK] key to select the desired
adjustment.
12
Press the [RETURN] key to return to the timing
adjustment menu screen.
-74 (inward direction of the center line)
to +74 (rear direction of the center line)
button
*
6. Image read point adjustment
Adjust the image read point.
Select the [2. Timing adj.] in the 36 mode menu
screen, then the timing adjustment screen will
appear.
Select the [6. Read point adj.] on this screen, then the
centering adjustment screen will appear.
Step
Operation procedure
1
Enter the 36 mode.
2
[36 mode menu screen]
Press the [2. Timing adj.] key.
3
[Timing adjustment menu screen]
Press the [
[Image read point adjustment screen]
4
Press the [COPY] key.
5
[Basic screen]
Set the new pyramid chart on the original glass
and select A3 or 11 x 17 size paper, then press
the Start print button to make a test copy.
Make a comparison between original image and test
6
copy image. Then check the image read point.
Standard value: 1.0 mm
Press the # button while pressing the
7
return to the image read point adjustment screen.
8
[Image read point adjustment screen]
If the image read point is different from the
standard value, enter a value from the numeric
keys, then press the [SET] key to store the
adjustment value.
Input range: -20 (small) to +20 (large)
1 step = 0.1mm
9
Repeat steps 5 to 9 until the image read point
is within standard value.
10
Press the [RETURN] key to return to the timing
adjustment menu screen.
6. Read point adj.
] key.
button to
*
1-64
Page 66

36
ADJUSTMENT
7. Resetting standard data
Reset the adjusted set values of timing adjustment to
the standard values (factory set data).
Select the [2. Timing adj.] in the 36 mode menu
screen, then the timing adjustment menu screen will
appear.
Select the [7. Factory default] on this screen, then the
resetting standard data screen will appear.
This adjustment can reset the following item adjusted
set values to the standard values (factory default
data). These can be selected by pressing the [NEXT]
or [BACK] key.
• Factory default --- magnification drum clock
adjustment
• Factory default --- Restart timing adjustment
• Factory default --- Paper feed loop amount
adjustment
• Factory default --- Leading edge original erasure
adjustment
• Factory default --- Centering adjustment
• Factory default --- Original read point adjustment
Step
Operation procedure
1
Enter the 36 mode.
2
[36 mode menu screen]
Press the [2. Timing adj.] key.
3
[Timing adjustment menu screen]
Press the [7. Factory default] key.
4
[Resetting standard data screen]
Press the [NEXT] key until the desired item
appears in the message display area.
5
Press the [YES] key to reset the set values
to the standard values that have been selected.
Press the [NO] or [RETURN] key, then the set
values are not reset and return to timing
adjustment menu screen.
6
To reset another adjustment item, repeat
steps 4 to 5.
7
Press the [RETURN] key to return to the timing
adjustment menu screen.
[4] Running test mode
Select the [3. Running mode] in the 36 mode menu
screen, then the running test mode menu sreen will
appear.
The following items can be selected:
1. Running mode 1 (Intermittent copy mode)
Running mode 1 is an intermittent copy mode. In this
mode, after the set number of copy operations has
been completed, the machine goes into the copy
ready status, waits 0.5 sec., then starts the same
operation again.
2. Running mode 2 (Paperless intermittent
copy mode)
Running mode 2 is a paperless intermittent copy
mode. It makes copies at roughly the same timing as
for a normal copy, without performing paper detection
or jam detection. Also, like running mode 1, after the
set number of copy operations has been completed,
the machine goes into the copy ready status, waits
0.5 sec., then starts the same operation again.
3. Running mode 3 (Paperless mode)
Running mode 3 is a paperless mode. It makes
copies at roughly the same timing as for a normal
copy, without performing paper detection or jam
dection.
4. Running mode 4 (Paperless/endless mode)
Running mode 4 is a paperless/endless mode. It
automatically sets the copy quantity to infinity. Also,
like running mode 3, it makes copies at roughly the
same timing as for a normal copy, without performing
paper detection or jam detection.
5. Running mode 5
Running mode 5 is process running mode. It consists
of running mode 4 plus an operation consisting of an
optics each-time scan and an automatic paper feed
tray change.
1 ADJUSTMENT
2 ISW
3 SERVICE
4 DIAGRAMS
1-65
Page 67

ADJUSTMENT
36
Step
Operation procedure
1
1 ADJUSTMENT
2 ISW
Enter the 36 mode.
2
[36 mode menu screen]
Press the [3. Running mode] key.
3
[Running test mode menu screen]
Press the key according to the desired running
mode. (Mode 1 to Mode 5)
4
[Basic screen]
Press the Start print button.
5
After checking the copy operation, press the
Stop/Clear button to stop copy operation.
6
Press the # button while pressing the
return to the running mode menu screen.
7
To perform another running test mode, repeat
steps 3 to 6.
8
Press the [RETURN] key to return to 36 mode
menu screen.
3 SERVICE4 DIAGRAM
button to
*
[5] Test pattern output
Carry out the test at the time of continuous copy
operation.
Select the [4. Test pattern] in the 36 mode menu
screen, then the test pattern output screen will
appear.
Note: Do not operate pattern numbers that are
not particularly specified.
No.1
No.2
No.49
No.11
No.16
Step
1
2
3
4
5
6
7
8
Overall halftone
Gray scale pattern
Writing system check
Linearity evaluation pattern
Operation procedure
Enter the 36 mode.
[36 mode menu screen]
Press the [4. Test pattern] key.
[Test pattern output screen]
Enter a pattern number to be output from
numeric key.
Press the [SET] key.
Press the [COPY] key.
[Basic screen]
Press the Start print button to output a test
pattern.
Press the # button while pressing the
return to the test pattern output screen.
To output a different test pattern, repeat steps
3 to 6.
Press the [RETURN] key to return to the timing
adjustment menu screen.
*
button to
1-66
Page 68

36
ADJUSTMENT
No. 1 Overall halftone
[Check Items]
• When the density is set to 70 (halftone)
If white stripes, black stripes, or uneven density can be seen, locate abnormality in either scanner system or
printer system.
• When the density is set to 0 (white)
If the test pattern is fogged, locate abnormality in either scanner system or printer system.
• When the density is set to 255 (black)
If the density is light, locate abnormality in either scanner system or printer system.
* For information about setting the density, refer to “[6] Test pattern density adjustment” below.
Test Pattern
1 ADJUSTMENT
2 ISW
3 SERVICE
1-67
4 DIAGRAMS
Page 69

ADJUSTMENT
No. 11 Beam misalignment check
1 ADJUSTMENT
[Check Items]
Check the writing system abnormality (condition of resolution, reproducibility of independence point and so on).
2 ISW
36
Test Pattern
3 SERVICE4 DIAGRAM
1-68
Page 70

36
ADJUSTMENT
No. 16 Linearity evaluation pattern
[Check Items]
Judge from this test pattern which of the scanner system and the printer system is abnormal. Items that can be
checked include horizontal magnification, vartical magnification, tilt image, and leading edge timing of the printer
system. If the copy image is defective despite no abnormality being visible on the test pattern, the scanner
system is defective.
Test Pattern
Edge of pager
20mm
Edge of pager
31mm
237mm
1 ADJUSTMENT
2 ISW
3 SERVICE
206mm
280mm
280mm
190mm190mm
4 DIAGRAMS
1-69
Page 71

ADJUSTMENT
ADJUSTMENT
36
[6] Test pattern density adjustment
1 ADJUSTMENT
Density of respective patterns is adjusted in the following
procedure.
Select the [5. Density Adj.] in the 36 mode menu screen,
then the print density adjustment menu screen will appear.
Density adjustment menu
1. Test pattern density adjustment
2 ISW
1. Test pattern density adjustment
Adjustment of the density of the test pattern.
Select the [5. Density Adj.] in the 36 mode menu
screen, then the print density adjustment menu
screen will appear.
Select the [1. Print density adj. (1)] in the print density
adjustment menu screen, then the print density
adjustment screen will appear.
Step
Operation procedure
1
3 SERVICE4 DIAGRAM
Enter the 36 mode.
2
[36 mode menu screen]
Press the [5. Density adj.] key.
3
[Print density adjustment menu screen]
Press the [1. Print density adj. (1)]
Key.
4
[Print density adjustment screen]
Press the key according to the desired test pattern
to be adjusted. (No.01, No.06, No.12 and No.17)
Enter a desired density by a numeric value from
5
the numeric keys, then press the [SET] key.
Input range : 000 (light) to +255 (dark).
Press the [COPY] key.
6
[Basic screen]
7
Press the start print button to output a test pattern.
Check the density of the output test pattern.
8
Press the # button while pressing the
9
to return to the print density adjustment
screen.
To adjust another test pattern, repeat steps 4 to 9.
10
Press the [RETURN] key to return
11
to point density adjustment menu screen.
button
*
[7] Image quality adjustment
This function adjusts the image quality adjustment.
(1) Select the [6. Image quality adj.] in the 36 mode menu
screen, then the image quality adjustment screen will
appear.
Image quality adjustment menu
1. RADF scan density adj.
(2) Press the key according to the item to be adjusted.
The selected adjustment screen will appear.
(3) Press the [START] key on each screen.
(4) To end the adjustment, press the [RETURN] key to
the Image quality adjustment menu screen.
1-70
Page 72

36
ADJUSTMENT
ADJUSTMENT
1. RADF Scanning density adjustment
When the slit glass is replaced, adjust the density
when reading the original with the RADF.
Note 1: The mechanical adjustment, optical
adjustment and electrical adjustment of
the scanner are completed.
Note 2: Make sure that the slit glass is cleaned.
Note 3: Make sure that the white chart is not dirty
or folded.
Step
Operation procedure
1
Enter the 36 mode.
2
[36 mode menu screen]
Press the [6. Image quality adj.] key.
3
[Print density adjustment menu screen]
Press the [2. RADF Scan density adj.] key.
4
[RADF Scanning density adjustment screen]
Set the white chart on the RADF (Note 1).
5
Press the [START] key.
6
Check that "Completed" appears in the message
display area.
7
If "ERROR" appears in the message display area,
then repeat steps 4 and 5 (Note 2).
8
Press the [RETURN] key to return to the Print
density adjustment menu screen.
Note 1: Be sure to set the white chart orientation to
the orientation of A4. It will not be adjusted
correctly in the orientation of A4R.
Note 2: If “ERROR” is displayed repeatedly, there
is a possibility of a defect in the adjustment
of the scanner machine, optics, or electricrelated parts.
[8] List print
Select the [7. List Print] from the 36 Mode Menu Screen to
display the List Print Menu Screen.
You can select following menu options from this screen.
1. Test pattern.
2. Font pattern.
3. Memory dump list.
4. Management list.
5. Adjustment list.
Note:
Don't try to touch a mode not mentioned.
1. Test pattern
This option is used to output a grid pattern consisted
of line width of 2 dots and line-to-line space of 500
dots. From this pattern, you can check the write
system for normal performance.
2. Font pattern
This option outputs the font list built in the engine.
3. Memory dump list
This option is used to dump out data (in hex and
ASCII format) after the address specified in ERDH
memory (this list is referenced for troubleshooting).
4. Management list
This option outputs the machine status, counter
information and history of jam.
5. Adjustment list
This option outputs a list of current adjusting values in
the 25/36 mode.
1 ADJUSTMENT
2 ISW
3 SERVICE
4 DIAGRAMS
1-71
Page 73

ADJUSTMENT
ADJUSTMENT
36
Step
Operation procedure
1
1 ADJUSTMENT
2 ISW
3 SERVICE4 DIAGRAM
Enter the 36 mode.
2
[36 mode menu screen]
Press the [7. List print] key.
3
[List print menu screen]
Press the key corresponding to the desired
menu option.
4
[List print screen]
When outputting the memory dump list, specify
the start and end addresses (Note 1).
5
Press the [Copy] key.
6
[Basic screen]
Press the [START] button to output the list.
7
Press the # button while depressing the
to return to the List Print Screen.
8
When outputting another list, repeat above
steps 3 to 7.
9
Press the [RETURN] key to return to the 36
Mode Menu Screen.
Note 1: The memory dump list is dump output in
both the hex and ASCII format.
button
*
[9] Counter clear
The counter must be cleared whenever the drum or fixing
unit is replaced.
Select the "8. Counter Clear" from the 36 Mode Menu
Screen to display the Counter Clear Screen.
Following menu options are available from this screen.
1. Drum relevant counter (drum counter).
2. Fixing counter (fixing web counter).
Step
Operation procedure
1
Enter the 36 mode.
2
[36 mode menu screen]
Press the [8. Counter clear] key.
3
[Counter clear screen]
Press the key corresponding to the item to be
cleared.
4
Message in the message display area will
confirm if you really want to clear the item.
Press the [YES] key. When the item is cleared,
the Counter Clear Screen will be restored.
5
When clearing another counter, repeat above
steps 3 and 4.
6
Press the [RETURN] key to return to the 36
Mode Menu Screen.
1-72
Page 74

36
ADJUSTMENT
ADJUSTMENT
[10] Adjustment of RADF
Adjustments of RADF are performed in the following
procedures. For the adjustment, A3 or 11 x 17 copy paper
should be used.
(1) Select the [9. RADF adj.] from the 36 Mode Menu
Screen to display the RADF adjustment menu.
RADF adjustment menu
1. Vertical/horizontal magnification (Drum clock)
adjustment.
2. Restart timing adjustment.
3. Paper feed loop amount adjustment.
4. Centering adjustment.
5. RADF scanning density adjustment.
(2) Press the key corresponding to the desired item. The
screen corresponding to the selected item will
appear.
(3) Using the [Next] and [BACK] keys, select the item to
be adjusted. The selected item will be indicated in
the message display area on the screen.
(4) Enter a desired value from the numeric keys on the
screen, then press the [SET] key to validate your
entry.
(5) Turn on the Basic Screen by pressing the [COPY]
key, then make a test copy from the Basic Screen.
(6) Press the # button while depressing the
return to the desired adjustment screen.
(7) If the output does not conform to the standard, enter
a desired value again from the numeric keys, then
make a test copy. When the output satisfies the
standard, proceed to adjustment of the next item.
(8) When the adjustment is complete, press the
[RETURN] key to return to the Timing Adjustment
Screen.
button to
*
1. Adjustment of horizontal/vertical
magnification (Drum clock)
(1) Select the [9. RADF adj.] from the 36 Mode Menu
Screen to display the RADF Adjustment Menu.
Select [1. Drum clock adj.] from this screen and the
Magnification Screen will appear.
Using the [NEXT] and [BACK] will allow you to select
the following items.
• RADF horizontal/vertical magnification adjustment
(50%, single side).
• RADF horizontal/vertical magnification adjustment
(100%, single side).
• RADF horizontal/vertical magnification adjustment
(200%, single side).
• RADF horizontal/vertical magnification adjustment
(400%, single side).
• RADF horizontal/vertical magnification adjustment
(50%, double side).
• RADF horizontal/vertical magnification adjustment
(100%, double side).
• RADF horizontal/vertical magnification adjustment
(200%, double side).
• RADF horizontal/vertical magnification adjustment
(400%, double side).
(2) Enter a desired value from the numeric keys on the
screen, then press the [SET] key to validate your
entry.
(3) Turn on the Basic Screen by pressing the [COPY]
key, then make a test copy from the Basic Screen.
(4) Press the # button while depressing the
return to the Magnification Adjustment Screen.
(5) If the output does not conform to the standard, enter
a desired value again from the numeric keys, then
make a test copy.
When the output satisfies the standard, proceed to
adjustment of the next item.
button to
*
1 ADJUSTMENT
2 ISW
3 SERVICE
4 DIAGRAMS
1-73
Page 75

ADJUSTMENT
ADJUSTMENT
36
Step
Operation procedure
1
1 ADJUSTMENT
2 ISW
3 SERVICE4 DIAGRAM
Enter the 36 mode.
2
[36 mode menu screen]
Press the [9. RADF adj.] key.
3
[RADF adjustment menu screen]
Press the [1. Drum clock adj.] key.
[Magnification adjustment screen]
4
Press the [NEXT] key until the desired
adjustment item appears.
5
Press the [COPY] key.
6
[Basic screen]
Set the ADF adjustment chart on RADF, then
select an A3 or 11 x 17 copy paper. Then press
the start button to make a copy.
7
Measure vertical magnification of the output.
Standard value: ±0.5% maximum (with 1.0
magnification).
±1.0 mm maximum per 200 mm.
8
Press the # button while depressing the
to return to the Magnification Adjustment Screen.
9
[Magnification adjustment screen]
If the vertical magnification does not comply with
the standard value, enter the value from the
numeric keys, then press the [SET] key to
validate your entry.
Input range: –20 (reduce the magnification) to
+20 (increase the magnification)
1 step = 0.1
10
Repeat above steps 5 to 9 until the vertical
magnification meets the standard value.
11
You can proceed to adjustment of another item
using the [NEXT] and [BACK] keys.
12
Press the [RETURN] key to return to the RADF
Adjustment Menu Screen.
button
*
2. Adjustment of restart timing
Use the following procedure to adjust the RADF
restart timing.
At the 36 mode menu screen, select [9. RADF adj.] to
open the RADF adjustment menu. At the RADF
adjustment menu, select [2. Restart timing]. This
moves you to the screen you use to adjust the restart
timing.
You can use the [NEXT] and [BACK] buttons to select
the following adjustments.
• RADF (single side)
• RADF (double side (first side))
• RADF (double side (second side))
Standard value:±0.5% maximum (in 1.0 magnification)
±1 mm maximum per 200 mm
Vertical
magnification
190
1-74
Page 76

36
ADJUSTMENT
ADJUSTMENT
Step
Operation procedure
1
Enter the 36 mode.
2
[36 mode menu screen]
Press the [9. RADF adj.] key.
3
[RADF adjustment menu screen]
Press the [2. Restart Timing] key.
[
Re-start timing adjustment screen
4
Press the [NEXT] key until the desired
adjustment item appears.
Press the [COPY] key.
5
[Basic screen]
6
Set the ADF adjustment chart on RADF, then
select an A3 or 11 x 17 copy paper. Then press
the start button to make a copy.
When RADF (double side (second side)) is selected,
*
make copies from double side - single side mode, and
use the second copy for the adjustment.
Check the output for the restart timing.
7
Standard value: ±3.0 mm maximum (Life size).
Press the # button while depressing the
8
to return to the Restart Timing Adjustment Screen.
[
Restart timing adjustment screen
9
When the restart timing does not comply with
the standard value, enter the value from the
numeric keys, then press the [SET] key
to validate it.
Input range: –50 (delays the timing) to
+50 (advances the timing)
1 step = 0.1 mm
Repeat above steps 5 to 9 until the re-start
10
timing meets the standard value.
You can select another item for the adjustment
11
from the [NEXT] and [BACK] keys.
Press the [RETURN] key to return to
12
the RADF Adjustment Menu Screen.
]
]
button
*
3. Paper feed loop adjustment
Adjustment of the RADF loop volume is done in the
following procedures.
Select the [9. RADF adj.] from the 36 Mode Menu
Screen to display the RADF Adjustment Menu
Screen. Select the [3. Paper loop adj.] from this
screen to display the Paper Feed Loop Adjustment
Screen.
Using the [NEXT] and [BACK] keys, you can select
the following item from this screen.
• RADF (single side)
Step
Operation procedure
1
Enter the 36 mode.
2
[36 mode menu screen]
Press the [9. RADF adj.] key.
3
[RADF adjustment menu screen]
Press the [3. Paper Loop adj.] key.
4
[Paper feed loop adjustment screen]
Press the [NEXT] key until the desired item
appears in the message display area.
5
Press the [COPY] key.
6
[Basic screen]
Set the ADF adjustment chart on RADF, then
select an A3 or 11 x 17 copy paper. Then press
the start button to make a copy.
7
Check paper feed loop volume of the output.
8
Press the # button while depressing the
to return to the Paper Feed Loop Volume
Adjustment Screen.
[Paper feed loop volume adjustment screen]
9
If the paper feed loop volume is inappropriate,
enter a desired value from the numeric keys,
then press the [SET] key to validate it.
Input range:
up to +10 (increase)
1 step = 0.5 mm
Repeat above steps 5 to 9 until an appropriate
10
paper feed loop volume is obtained.
You can proceed to adjustment of another item
11
from the [NEXT] and [BACK] keys.
12
Press the [RETURN] key to return to the RADF
Adjustment Menu Screen.
–10 (decrease) through 00 (standard)
button
*
1 ADJUSTMENT
2 ISW
3 SERVICE
4 DIAGRAMS
1-75
Page 77

ADJUSTMENT
ADJUSTMENT
36
4. Centering adjustment
1 ADJUSTMENT
2 ISW
Adjustment of skew of images on RADF in feed
direction is done in the following procedures.
Select the [9. RADF adj.] from the 36 Mode Menu
Screen to display the Timing Adjustment Menu
Screen. Select the [5. Centering adj.] from this
screen to display the Centering Adjustment Screen.
You can select the following adjustment from the
[NEXT] and [BACK] keys.
• RADF Centering adjustment (single side).
• RADF Centering adjustment (double side (first
side)).
• RADF Centering adjustment (double side (second
side)).
3 SERVICE4 DIAGRAM
Operation procedure
Step
Enter the 36 mode.
1
[36 mode menu screen]
2
Press the [9. RADF adj.] key.
[RADF adjustment menu screen]
3
Press the [5. Centering adj.] key.
4
[
Centering adjustment screen
Press the [NEXT] key until the desired item
appears in the message display area.
5
Press the [COPY] key.
6
[Basic screen]
Set the ADF adjustment chart on RADF, then
select A3 or 11 x 17 for the copy paper. Then,
press the start button to make copies.
When the RADF (double side (second side)) is
*
selected, make copies from double side - single side
mode, and use the second for the adjustment.
7
Compare skew of the copy against that of the original
Standard value: ±3 mm maximum.
8
Press the # button while depressing the
to return to the Centering Adjustment Screen.
9
[
Centering adjustment screen
If the skew volume does not conform to the standard
value, enter a desired value from the numeric keys,
then press the [SET] key to validate it.
Input range: –74 (in the front side direction of the
center line) through 00 (in the back
side direction of the center line) up
to +74 (increase)
1 step = 0.04 mm
10
Repeat above steps 5 to 9 until the skew meets
the standard value.
11
You can proceed to adjustment of another item
from the [NEXT] and [BACK] keys.
12
Press the [RETURN] key to return to
the RADF Adjustment Menu Screen.
]
]
button
*
.
1-76
Page 78

36
ADJUSTMENT
ADJUSTMENT
5. RADF scanning density adjustment
Whenever the slit glass on RADF is replaced, its
density in reading an original must be adjusted in the
following manner.
Note 1: Before starting this operation, every
adjustment must be completed for the
scanner's mechanical, optical and electric
system.
Note 2: Make sure that the slit glass must be
cleaned.
Note 3: Make sure that the white chart is not
stained or folded.
Step
Operation procedure
1
Enter the 36 mode.
2
[36 mode menu screen]
Press the [9. RADF adj.] key.
3
[RADF adjustment menu screen]
Press the [2. RADF Scan density adj.]
key.
4
[RADF scanner density adjustment screen]
Set the white chart on RADF (Note 1).
5
Press the [START] key.
6
Make sure that the message “Completed” is
indicated in the message display area.
7
If the message “Error” appears in the message
display area, repeat above steps 4 and 5
(Note 2).
8
Press the [RETURN] key to return to
the RADF Adjustment Menu Screen.
Note 1: Be sure to set the white chart in A4
direction. If it is set in A4R direction,
appropriate adjustment is not available.
[11] FNS adjustment
Positional adjustment of the finisher alignment plate is
done in the following procedures. This adjustment is
required when papers discharged from the finisher are
irregular in size.
1. FNS alignment plate adjustment (back side)
2. FNS alignment plate adjustment (front side)
Adjustment is done for each of the following paper
sizes.
• 11 x 17 (8.5 x 11)
• A3 (A4)
• B4 (B5)
• 8.5 x 14 (8.5 x 11R, 5.5 x 8.5R)
• A4R (A5)
• B5R
• 5.5 x 8.5R
• A5R
•F4
•8K
• 16K
• 16KR
1 ADJUSTMENT
2 ISW
3 SERVICE
4 DIAGRAMS
Note 2: If the message "Error" recurs, you may
suspect inappropriate adjustment done in
the scanner's mechanical, optical or
electric system, or failure on parts used in
these systems.
1-77
Page 79

ADJUSTMENT
ADJUSTMENT
Operation procedure
Step
Enter the 36 mode.
1 ADJUSTMENT
2 ISW
3 SERVICE4 DIAGRAM
1
[36 mode menu screen]
2
Press the [10. FNS adj.] key.
[FNS adjustment menu screen]
3
Press the key corresponding to the matching
plate to be adjusted.
[FNS matching plate position adjustment screen]
4
Press the [SET] key until the target paper size
of the adjustment is displayed at top of the
numeric keys.
Enter desired value from the numeric keys
5
on the screen, then press the [SET] key to
validate your entry.
P
ress the [COPY] key to display the Basic
6
Screen, then make test copies from this screen.
Press the # button while depressing the
7
to return to the FNS Adjustment Screen.
[FNS adjustment screen]
8
When the output does not conform to the
standard value, enter an adjusting value from
the numeric keys, then press the [SET] key to
validate your entry.
Input range: –10 to +10
1 step = 0.2 mm
When proceeding to adjustment of another paper
9
size, select it from the [NEXT] and [BACK] keys,
then implement necessary adjustment repeating
above steps 4 to 7.
When the adjustment is complete, press the
[RETURN] key to return to the FNS Adjustment
10
Menu Screen.
36
button
*
1-78
Page 80

36
ADJUSTMENTADJUSTMENT
Management list P.1
[Description Items]
• Serial number setup.
• ROM version indication.
Version of flash ROMs.
• Copy count (data collection 1).
Total count and count during the specified period by mode.
• Counter check.
• Copy count by paper size (data collection 2).
Total count and count during the specified period by paper size.
Management list
Periodic date data
collection start date
Number of page
Output date, main body
serial number, and total
copy count
1 ADJUSTMENT
2 ISW
3 SERVICE
Serial number display
ROM version display
Scan count
Copy count
Counter check
Copy count of each
paper size
4 DIAGRAMS
1-79
Page 81

ADJUSTMENTADJUSTMENT
36
1 ADJUSTMENT
2 ISW
Management list P.2
[Description Items]
• F code count (data collection 4).
Total count and count during the specified periods.
• JAM code count (data collection 2).
Total count and count during the specified period.
Management list
3 SERVICE4 DIAGRAM
F code count
Number of page
Output date, main body
serial number, and total
copy count
JAM code count
1-80
Page 82

36
ADJUSTMENTADJUSTMENT
Management list P.3
[Description Items]
• Latest SC (F/E code) history.
List information about the last 50 service calls (F/E codes). For each call, indicates the following: date and
time of occurrence, error code, total copy count, and ROM version.
Management list
Number of page
Output date, main body
Latest SC history
serial number, and total
copy count
1 ADJUSTMENT
2 ISW
3 SERVICE
1-81
4 DIAGRAMS
Page 83

ADJUSTMENTADJUSTMENT
36
1 ADJUSTMENT
Management list P.4
[Description Items]
• Latest JAM history.
The list 100 jams are listed with the information on the date occurred, respective JAM codes, total copy count,
and tray and paper sizes.
2 ISW
Management list
3 SERVICE4 DIAGRAM
Latest JAM history
Number of page
Output date, main body
serial number, and total
copy count
1-82
Page 84

36
ADJUSTMENTADJUSTMENT
Management list P.5
[Description Items]
• Copy count by arbitrarily replacement parts.
Part name, part number, copy count and limit count of each parts.
Management list
Number of page
Output date, main body
serial number, and total
Copy count of each
parts (parts to be
replaced (named
arbitrarily) )
copy count
1 ADJUSTMENT
2 ISW
3 SERVICE
1-83
4 DIAGRAMS
Page 85

ADJUSTMENTADJUSTMENT
36
1 ADJUSTMENT
Management list P.6
[Description Items]
• Copy count by fixed replacement part.
Part name, part number, copy count and limit count of each unit.
2 ISW
Management list
3 SERVICE4 DIAGRAM
Copy count by fixed
replacement part
Number of page
Output date, main body
serial number, and total
copy count
1-84
Page 86

36
ADJUSTMENTADJUSTMENT
Management list P.7
[Description Items]
• Count by the copy mode (data collection 3).
Management list
Count by the copy
mode
Number of page
Output date, main body
serial number, and total
copy count
1 ADJUSTMENT
2 ISW
3 SERVICE
1-85
4 DIAGRAMS
Page 87

ADJUSTMENTADJUSTMENT
36
1 ADJUSTMENT
Management list P.8
[Description Items]
• Adjusting values (36 mode).
Default values and setting values of the High voltage adjustment, vertical/horizontal magnification
adjustment, restart adjustment, paper feed loop amount adjustment, leading edge original erasure
adjustment, centering adjustment and image read point adjustment.
2 ISW
* Adjustment list Page1
Management list
3 SERVICE4 DIAGRAM
High voltage
adjustment
Number of page
Output date, main body
serial number, and total
copy count
Horizontal/vertical
magnification
adjustment
Restart timing
adjustment
Paper feed loop
amount adjustment
Leading edge original
erasure adjustment
Centering adjustment
Image read point
adjustment
1-86
Page 88

36
ADJUSTMENTADJUSTMENT
Management list P.9
[Description Items]
• FNS alignment plate adjustment (back side)
• FNS alignment plate adjustment (front side)
* Adjustment list page 2.
Management list
Number of page
Output date, main body
FNS alignment
plate adjustment
(back side)
serial number, and total
copy count
1 ADJUSTMENT
2 ISW
3 SERVICE
FNS alignment
plate adjustment
(front side)
4 DIAGRAMS
1-87
Page 89

ADJUSTMENTADJUSTMENT
36
1 ADJUSTMENT
2 ISW
Management list P.10
[Description Items]
• Adjusting values. (25 mode)
Values to be selected for respective adjustment items.
• 25 mode software DIP SW setting.
Default values and current setting value of each DIP SW.
* Adjustment list page 3.
Management list
3 SERVICE4 DIAGRAM
Adjusting values
(25 mode)
Number of page
Output date, main body
serial number, and total
copy count
Software DIP
SW settings
1-88
Page 90

36
ADJUSTMENTADJUSTMENT
Management list P.11
[Description Items]
• KRDS software DIP SW setting.
Default values and current setting value of each DIP SW.
* Adjustment list page 4.
Management list
KRDS software
DIP SW setting
Number of page
Output date, main body
serial number, and total
copy count
1 ADJUSTMENT
2 ISW
3 SERVICE
1-89
4 DIAGRAMS
Page 91

ADJUSTMENTADJUSTMENT
47
47 MODE
[1] 47 mode setting method
1 ADJUSTMENT
1. 47 Mode
This mode provides self-diagnostic functions (input/
output check function) to check and adjustment the
various signals and loads.
Also, 47 mode has a multi mode — it is possible to
check the multiple input/output using one input/
output check code.
2 ISW
2. Operation method (to start 47 mode)
(1) 47 Mode startup
a. Turn the SW2 (sub power) OFF when the SW1
(main power) remain ON.
b. Turn the SW2 (sub power) ON while holding down
4 and 7 of the numeric keys. The 47 Mode Menu
Screen will appear.
This is the 47 mode in which the normal copy
operation becomes disabled.
3 SERVICE4 DIAGRAM
[47 mode menu screen]
(2) Input check method
a. Using the numeric keys, enter the code input for
the desired signal (sensor, etc.) to check.
b. When using the multi mode, press the
and enter the multi code according to the desired
input check item (signal) with the numeric keys.
Step
Operation procedure
1
Enter the 47 mode.
2
[47 mode menu screen]
Using the numeric keys, enter the input check
code (Note 1).
3
When using the multi mode, press the
Using the numeric keys, enter the multi code
4
(Note 1).
Input check result will appear in the input check
5
result display area.
To check other signal input check, repeat steps
6
2 to 5.
Note 1: Refer to “[5] Input check list”.
button
*
button.
*
[47 mode message display area]
I/O check mode
< 000 - 00 > IN : 000 OUT : ----
Input check
Multi code
Input/Output check code
Output check
1-90
Page 92

47
ADJUSTMENTADJUSTMENT
(3) Output check method
a. Using the numeric keys, enter the output check
code for the desired output load to check.
b. When using the multi mode, press the
and enter the multi code according to the desired
output check item (load).
c. Press the [START] button to perform the output
check.
d. To end the output check, press the [STOP/
CLEAR] button.
Step
Operation procedure
1
Enter the 47 mode.
2
[47 mode menu screen]
Using the numeric keys, enter the output check
code (Note 2).
3
When using the multi mode, press the
(Note 2).
4
Using the numeric keys, enter the multi code
(Note 2).
5
Press the [START] button to perform the output
check.
6
To end the output check, press the [STOP/
CLEAR] button.
7
To make another output check, repeat steps
2 to 6.
*
button
*
button
[2] Initial setting in the field
Each adjustment data is totally returned to the data
value when the machine is dilivered from the factory.
Step
Operation procedure
1
Enter the 47 mode.
2
[47 mode menu screen]
Press "93" by means of the numeric keys.
Check that "093-00" appears in the message
display area.
3
Press the [START] button.
Settings (adjustment) data is returned to the
data value when the machine is delivered
from the factory.
4
To end the setting, press the [STOP/CLEAR]
button.
5
To end the 47 mode, turn the SW2 (sub power)
OFF.
1 ADJUSTMENT
2 ISW
3 SERVICE
Note 2: Refer to “[6] Output check list”.
(4) Exiting the 47 mode
The end the 47 mode, turn the SW2 (sub power)
OFF.
4 DIAGRAMS
1-91
Page 93

ADJUSTMENTADJUSTMENT
47
[3] RADF original size detection
1 ADJUSTMENT
2 ISW
3 SERVICE4 DIAGRAM
adjustment
This adjustment is done when RADF fails to correctly
detect size of an original.
Step
Operation procedure
1
Enter the 47 mode.
2
[47 mode menu screen]
Press [69] by means of the numeric keys.
Check that "069-00" appears in the message
display area.
3
Set an original of A5R on RADF, then press the
[START] button.
4
Press the [STOP/CLEAR] button to end the
operation.
5
Press the
6
Enter [1] from the the numeric keys.
Make sure that "069-01" is indicated in the
message display area.
7
Set an A3 size original on RADF, then press the
[START] button.
8
T
o end the adjustment, press the [STOP/CLEAR]
button.
9
To end the 47 mode, turn the SW2 (sub power) OFF.
button.
*
[4] Electronic RDH memory check
Perform this adjustment when memory is expanded.
Step
Operation procedure
1
Enter the 47 mode.
2
[47 mode screen]
Press [197] by means of the numeric keys.
Check that "197-00" appears in the message
display area.
3
Press the [START] button.
4
The "OUT:" entry in the message display area
indicates the total size of the electronic-RDH
memory (inclusive of the 32MB provided as
standard).
• 32MB (standard) : 0032
• 32MB + 64MB : 0096
• 32MB + 64MB + 64MB : 0160
• 32MB + 128MB : 0160
• 32MB + 128MB + 128MB : 0288
5
Press the [STOP/CLEAR] button.
6
[47 mode screen]
Enter a value of [198] using the numeric keys
Be sure that "198-00" appears in the message
display area.
Press the [START] button.
7
The system begins executing a memory check.
The "OUT:" entry in the message area displays
8
"NOW": while checking is in progress, then
displays "OK" if all memory is operating correctly.
To end the check, press the [STOP/CLEAR]
9
button.
To end the 47 mode, turn the SW2 (sub power) OFF.
10
.
1-92
Page 94

[5] Input check list
Display
1
1
2, 3, 4
234567890
B5R
A5R
B4
A4
A5R
A4R
A4
A3
A4R
F4
F4
5.5 x 8.5
5.5 x 8.5
8.5 x 11
8.5 x 11
8.5 x 11R
8.5 x 11R
8.5 x 14
8.5 x 14
11 x 17
Tray
For U.S.A.
Display
1
1
2, 3, 4
234567890
B5
B5
B4
B4
A5R
A5R
A4
A4
A4R
A4R
F4
A3
5.5 x 8.5F48.5 x 11
8.5 x 11
8.5 x 11R
8.5 x 11R
8.5 x 14
11 x 17
Tray
For Europe
Display
1
LCT (3)
234567890
A4 A4R 8.5 x 11 8.5 x 11R B5R B5 A4 A4R 8.5 x 11 8.5 x 11R
Tray
Common
47
ADJUSTMENTADJUSTMENT
Classifi-
cation
Analog
signal
Paper
feed
Note 1:
Name Code Multi code Symbol
Drum temperature signal
Toner control data 0
Toner control data 1
Fixing temperature sensor 0
Fixing temperature sensor 1
L detection signal
Humidity sensor signal
No paper detection signal
Tray upper limit detection signal
Tray detection
Paper size signal
00
01
02
03
04
05
06
1: Main body upper tray
10
2: Main body lower tray
3: DB upper tray
4: DB lower tray
5: By-pass
1: Main body upper tray
12
2: Main body lower tray
3: DB upper tray
4: DB lower tray
1: Main body upper tray
13
2: Main body lower tray
3: DB upper tray
4: DB lower tray
1: Main body upper tray
16
2: Main body lower tray
3: DB upper tray
4: DB lower tray
TH1
TH2
TDS
HUM1
PS8
PS11
PS103
PS108
PS13
PS7
PS10
PS102
PS107
PS12
PS9
PS101
PS106
PFDB (upper)
PFDB (lower)
SDB1
SDB2
OFF ON
0 to 255
0 to 255
0 to 255
0 to 255
0 to 255
0 to 255
0 to 255
No paper
Upper limit
not reached
Tray is not
provided
0 to 9
(Note 1)
Display
1 ADJUSTMENT
2 ISW
Paper
Upper limit
3 SERVICE
Tray is
provided
4 DIAGRAMS
1-93
Page 95
ADJUSTMENTADJUSTMENT
47
Classifi-
cation
1 ADJUSTMENT
Paper feed sensor signal
Paper
feed/conveyance
2 ISW
Optics
Intrinsic
functions
3 SERVICE4 DIAGRAM
RADF
FNS
ADU
Paper exit sensor signal
Interlock
Optics sensor signal
Check of serial communications
Toner supply periphery
RADF input
FNS input
ADU PS
Name Code Multi code Symbol
20
1: Registration sensor
3: Jam detect sensor (DB upper tray)
4: Jam detect sensor (DB lower tray)
22
1: Fixing exit sensor
2: Paper exit sensor
23
1: Right side door
40
1: Optics home position PS
2: APS timing PS
3: APS sensor 1
4: APS sensor 2
50
1: RADF control board
2: Finisher control board
3: Scanner drive board
4: Printer drive board
57
1: Toner level detector signal
2: Toner bottle sensor signal
60
00: No original detect PS
01: RADF open/close detect PS
02: Cover open/close detect PS
03: Original resistration PS
04: Original feed PS
05: Original exit PS
06: Original detect PS 1
07: Original detect PS 2
09: Size detect VR
70
1: Pressure sensor (level)
2: Paper exit detect PS
3: Paper pressure sensor (H.P.)
4: Tray full stack detect PS
6: Paper entrance detect PS
7: Stapler HP detect PS
8: No staple detect PS
9: Stapler ready detect PS
10: Shutter PS
11: Tray upper limit detect PS
12: Tray lower limit detect PS
13: No paper detect PS
14: Stapler unit HP detect PS
15:
Alignment plate
16:
Alignment plate
80
detect PS (rear)
detect PS (front)
PS1
PS104
PS105
PS2
PS3
SW3
PS14
PS15
PS17
PS18
DFCB
FSCB
SCDB
PRDB
TLD
PS5
PS301
PS304
PS305
PS311
PS312
PS303
PS306
PS307
VR301
PS703
PS701
PS704
PS702
PS712
PS713
PS714
PS705
PS711
PS706
PS707
PS708
PS709
PS710
PS4
Display
OFF ON
No paper
No paper
No paper
No paper
No paper
Close
In home position
Close
No original
No original
No toner
No bottle
No paper
Closed
Closed
No paper
No paper
No paper
No paper
No paper
0 to 255
Paper is provided
Pressure applied
Full
Paper is provided
H.P.
Staples are provided
Ready
Open
Upper limit
Lower limit
Paper is provided
H.P.
H.P.
H.P.
No paper
Paper
Paper
Paper
Paper
Paper
Open
Not in home position
Open
Original is provided
Original is provided
Toner is provided
Bottle is provided
Paper is provided
Open
Open
Paper is provided
Paper is provided
Paper is provided
Paper is provided
Paper is provided
No paper
No pressure
Normal
No paper
Not in H.P.
No staples
Not ready
Close
Not at upper limit
Not at lower limit
No paper
Not in H.P.
Not in H.P.
Not in H.P.
Paper is provided
1-94
Page 96

[6] Output check list
47
ADJUSTMENTADJUSTMENT
Classifi-
cation
Analog
signal
Counter
clear
Paper
feed
Name Code Multi code Symbol Remarks
Exposure lamp
Toner supply motor,
developing sleeve,
main motor, botl SD
Charging
Transfer
Separation (AC)
Transfer + Separation (AC + DC)
Separation (DC)
Grid
Dmax/γ LED
Guide plate
Bias
Service counter clear
Dmax level adjustment
1st paper feed SD
Paper feed motor
Tray lift up motor
Registration clutch
Loop clutch
Tray select (paper size signal)
By-pass size adjustment
Separation claw SD
00
01
02
03
04
05
06
07
08
10
11
15
1: Service counter clear
(Clears service related counter values.)
Reuse counter clear (for development)
2:
10: EKC data block clear
11: Job memory data block clear
Arbitrary replacement parts data block clear
12:
13:
Coded dialing data block clear (for fax)
14: One touch data block clear (for fax)
15: Group data block clear (for fax)
98: Initialize KRDS non volatile area
18
20
1: Main body upper tray
2: Main body lower tray
3: By-pass
4: DB upper tray
5: DB lower tray
21
1: Paper feed motor
2: DB drive motor
23
1: Main body upper tray
2: Main body lower tray
3: DB upper tray
4: DB lower tray
25
26
27
1: Main body upper tray
2: Main body lower tray
3: DB upper tray
4: DB lower tray
28
29
M1, M3
M4, SD5
SD1
SD2
SD3
SD101
SD102
M9
M100
M7
M8
M101
M102
MC1
MC2
VR1
SD7
L1
HV
HV
HV
HV
HV
HV
HV
HV
HV
1 ADJUSTMENT
2 ISW
3 SERVICE
4 DIAGRAMS
1-95
Page 97

ADJUSTMENTADJUSTMENT
47
Classifi-
cation
1 ADJUSTMENT
Optics
system
2 ISW
Main
body
Operation
3 SERVICE4 DIAGRAM
panel
Optical motor
Polygon motor
Shading correction operation
Laser PWM
Conpel to laser ON
Platen still APS operation
Main motor
Fan motor
Total counter
Fixing heater
All LED ON
Operation panel check
Developing motor
PCL
TSL
Cleaning web solenoid
Name Code Multi code Symbol
31
32
1: 600dpi
2: Prerotation
34
36
0 to 255
37
39
41
42
1: Optical unit fixing cooling fan
2: Suction fan
4: DCPS cooling fan
6: Fixing cooling fan motor
43
45
1: Main heater lamp 1
2: Sub heater lamp 2
48
49
50
51
52
53
M2
M5
M2, L1
LD
LD, M5
L1
M1
FM3
FM4
FM1
FM2
T(C)
L2
L3
OB
OB, LCD
M3
PCL
TSL
SD4
Remarks
After HP search, execute A3 size
scanning at life size.
1 count
Check LCD, keys, and buzzer
Intrinsic
functions
RADF
Toner auto supply
Toner supply motor
Toner bottle SD
Toner level power
Toner bottle rotation
24V power source remote
Load output
Others
54
55
56
57
58
1: For scanner
59
2: For printer
0: Original feed motor CW
60
1: Original feed motor CCW
2: Original reversal motor CW
3: Original reversal motor CCW
4:
Original conveyance motor CCW 50%
5:
Original conveyance motor CCW 100%
6:
Original conveyance motor CCW 400%
7: Rollar pressure SD
8: Exit SD
0: Original size adjustment (small size)
69
1: Original size adjustment (large size)
M4, M1
M4
SD6
TLD
SD6, M4
M301
M301
M303
M303
M302
M302
M302
SD302
SD303
VR301
VR301
Toner supply M and bottle SD both ON
to rotate bottle half turn; then stop.
1-96
Page 98

47
ADJUSTMENTADJUSTMENT
Classifi-
cation
FNS
ADU
Name Code Multi code Symbol Remarks
Each load on FNS
ADU motor
ADU gate SD
01: Paper conveyance motor
70
03: Alignment motor shift position move
(A4 position, close)
05: Tray up/down motor up
06: Tray up/ down motor down
07: Tray up/down motor fewer
quantity up move in the staple mode
08: Alignment plate H.P search
11: Motor pressure operation
12: Motor release operation
14: Stapler unit in stapling operation
17: Stapler shift motor H.P search
18: Stapler motor at rearside A4
1-position stapling position
Alignment motor at open A4 position
33:
34:
Alignment motor at close A4 position
35:
Alignment motor in oscillation operation
42:
Exit motor in exit direction rotation
46: Tray up/down motor in tray
scan operation
47: Tray up/down motor changeover
to tray 1
48: Tray up/down motor changeover
to optional tray 1
49: Tray up/down motor changeover
to optional tray 2
50: Tray up/down motor changeover
to tray 2
51: Stapler shift motor H.P search
52: Stapler move motor at front side
A4 1-position stapling position
53: Exit motor in rewind direction
rotation
54: Cooling fan motor rotation
99: Running mode
1: 140 mm/sec forward rotation
80
2: 350 mm/sec forward rotation
3: 210 mm/sec reverse rotation
4: 350 mm/sec reverse rotation
83
M701
M704, 703
M706
M706
M706
M704, 703
M707
M707
M708
M705
M705
M704, 703
M704, 703
M704, 703
M702
M706
M706
M706
M706
M706
M705
M705
M702
M709
M6
SD5
1 ADJUSTMENT
2 ISW
3 SERVICE
4 DIAGRAMS
1-97
Page 99

ADJUSTMENTADJUSTMENT
47
Classifi-
cation
1 ADJUSTMENT
PM counter clear
Process counter clear/
Drum counter clear
Initial settings
(Restore factory defaults)
2 ISW
Display 36 mode adjustment values
and factory data
Others
Automatic adjustment of L detection
reference value
Process delivery completing
setting
3 SERVICE4 DIAGRAM
Light distribution check
Messages display
Name Code Multi code Symbol Remarks
90
91
0: Process counter clear
1: Drum counter clear
93
94
95
96
97
101
1. Initialize file for default settings
(values saved by 47-096).
2. Set initial vertical magnification
adjustment (for RADF).
3. Set initial restart timing adjustment
(for RADF).
4. Set initial original feed loop
adjustment (for RADF).
Initialize developing counter.
1. Read current date.
• Set shipping date
• Set periodic collection start date
2. Enable incrementing of
mechanical counter (In 25 mode,
reset DIPSW21 – 6 to "0".)
Set to suppress display of jam codes.
3.
(In 25 mode, reset DIPSW10 – 7 to "0".)
4. Return test pattern density to initial
value (255).
5. Return solid pattern density to
initial value (255).
Save settings into factory settings file.
6.
7. Initialize fax-related nonvolatile
memory (121).
For message checking.
1-98
Page 100

47
ADJUSTMENTADJUSTMENT
Classifi-
cation
Others
Name Code Multi code Symbol Remarks
Initialize fax-related nonvolatile
memory 1
Initialize fax-related nonvolatile
memory 2
Display total ERDH memory size
ERDH memory check
Check of overall control board
(For assembly line)
121
oo: 1. Initialize data
• Fax job-function settings
• System image-processing data
Fax communication function settings
•
Fax communication ability settings
•
• Fax communication HP settings
• Fax list/report settings
• Initialize the Abbr data
• Group/one-touch data
• Communication journal
• File system
• F-code, relay data
2. Save backup data
• Fax job-function settings
• System image-processing data
Fax communication function settings
•
Fax communication ability settings
•
• Fax communication HP settings
• Fax list/report settings
Register Abbr entries 01 to 30 as
3.
destination numbers for programs 01 to 30.
05:
1.
Initialize fax-related nonvolatile memory
(121).
2. Register 200 Abbr entries.
197
198
999
1 ADJUSTMENT
2 ISW
3 SERVICE
4 DIAGRAMS
1-99
 Loading...