

Page 1

848A2B93A1 (411)
SHORT REACH TRIMMER
TAILLE HAIE DE COURTE PORTÉE
KURZWELLENTRIMMER
POTATORE DI CORTA PORTATA
PODADERA DE CORTO ALCANCE
Thank you for purchasing a KOMATSU
ZENOAH product.
Before using our trimmer, please read this
manual carefully to understand the proper
use of your unit.
Nous vous remercions d'avoir porté votre
choix sur un appareil KOMATSU ZENOAH.
Avant d'utiliser ce taille-haies, lire
attentivement ce mode d'emploi afin de
bien comprendre le fonctionnement de
l'appareil.
Vielen Dank für den Kauf des KOMATSU
ZENOAH Kurzwellentrimmers.
Bitte lesen Sie diese Anleitung vor der
Inbetriebnahme, um den korrekten Einsatz
des Geräts zu verstehen.
Grazie per aver acquistato questo
apparecchio della KOMATSU ZENOAH.
Prima di usare il potatore, leggere questo
manuale attentamente per saper usare il
potatore correttamente.
Le agradecemos el haber adquirido un
producto KOMATSU ZENOAH.
Antes de proceder a la utilización de
nuestra podadera, le rogamos que lea
este manual atentamente para así
comprender el correcto uso de la unidad.
OPERATOR’S MANUAL
MODE D’EMPLOI
BEDIENUNGSANLEITUNG
MANUALE D’INSTRUZIONI
MANUAL DE INSTRUCCIONES
GB
GB
F
F
D
D
I
I
E
E
SRTZ2600
Page 2
English
Page 3
Français Deutsch
Italiano
Español
Page 4
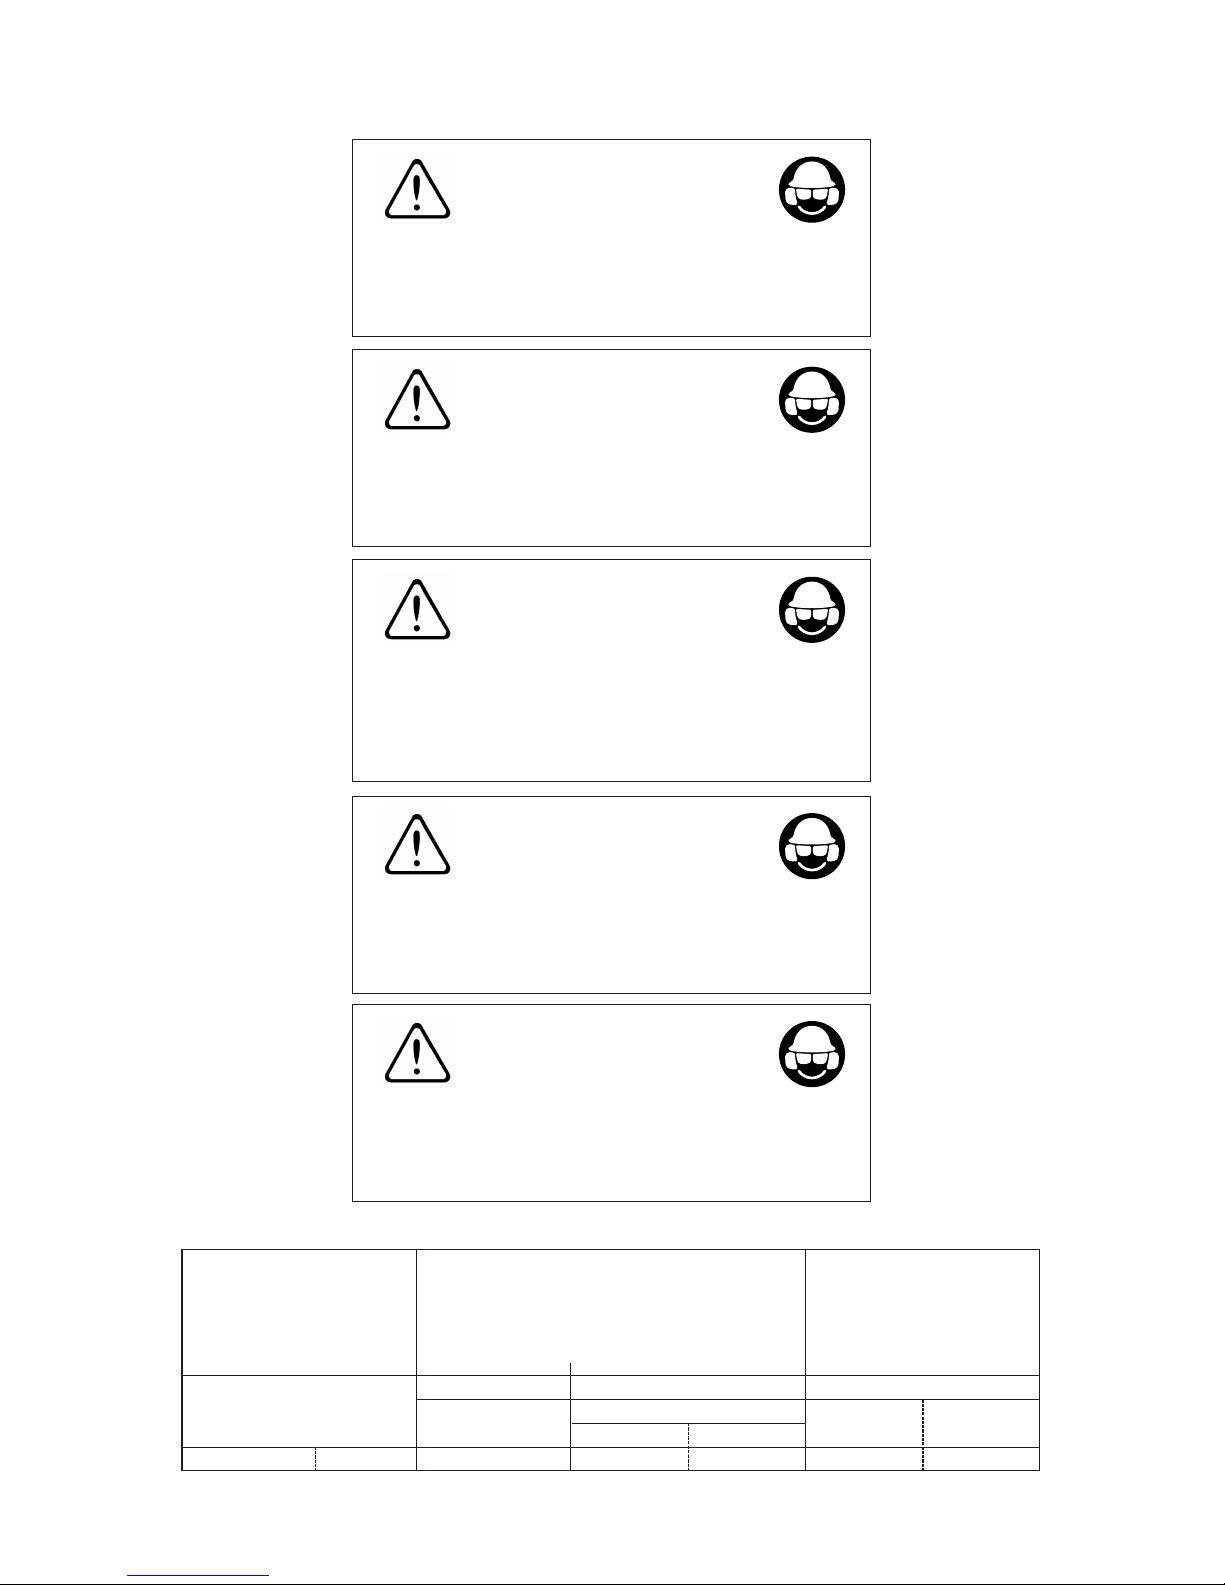
ATENCION!!!
RIESGO DE DAÑO AUDITIVO
EN NORMALES CONDICIONES DE UTILIZACIÓN, ESTA MAQUINA PUEDE
TOLERAR, PARA EL OPERADOR ENCARGADO, UN NIVEL DE EXPOSICÍON
DIARIO A RUIDO EQUIVALENTE O SUPERIOR A
86 dB(A)
WARNING!!!
RISK OF DAMAGING HEARING
IN NORMAL CONDITIONS OF USE, THIS MACHINE
MAY INVOLVE A DAILY LEVEL OF PERSONAL EXPOSURE TO NOISE
FOR THE OPERATOR EQUAL TO OR GREATER THAN
86 dB(A)
ATTENTION!!!
DANGER D'ATTEINTE A L'OUIE
L'OPERATEUR UTILISANT NORMALEMENT CETTE MACHINE
PEUTS S'EXPOSER QUOTIDIENNEMENT
A UN BRUIT EGAL OU DEPASSANT
86 dB(A)
ACHTUNG!!!
HÖRSCHADEN - RISIKO
UNTER NORMALEN ANWENDUNGSBEDIGUNGEN
KANN DIESES GERÄT DIE BEDIENUNGSPERSON
EINEM TÄGLICHEN GERÄUSCHPEGEL VON
86 dB(A)
ODER MEHR AUSSETZEN
ATTENZIONE!!!
RISCHIO DI DANNO UDITIVO
NELLE NORMALI CONDIZIONI DI UTILIZZO, QUESTA MACCHINA PUÒ
COMPORTARE PER L'OPERATORE ADDETTO, UN LIVELLO DI ESPOSIZIONE
PERSONALE E GIORNALIERO A RUMORE PARI O SUPERIORE A
86 dB(A)
MODEL SOUND LEVEL VIBRATION LEVEL
MODELE NIVEAU SONORE NIVEAU DE VIBRATION
MODELLE KLANGPEGEL VIBRATIONSPEGEL
MODELLO LIVELLO DEL SUONO LIVELLO DI VIBRAZIONE
MODELO NIVEL DE SONIDO NIVEL DE VIBRACION
EN27917 ISO 11094 ISO 7916
LwA
mesured guaranteed
SRTZ2600 25.4 cm
3
86dB(A) 107dB(A) 109dB(A) 5.9m/s
2
7.0m/s
2
LpA idling
racing
Page 5

APPROVAL NUMBER OF CE EXHAUST EMISSION REGULATION
DIRECTIVE 97/68/EC AMENDED 2002/88/EC
e13*97/68SH2G3*2002/88*0094*00
NUMERO D’APPROBATION DES REGLEMENTATIONS SUR LES EMISSIONS
DES GAZ D’ECHAPPEMENT DE LA CE
DIRECTIVE 97/68/EC AMENDEMENT 2002/88/EC
e13*97/68SH2G3*2002/88*0094*00
NÚMERO DE APROBACIÓN DEL REGLAMENTO CE SOBRE
EMISIONES DE GASES DE ESCAPE
DIRECTIVA 97/68/EC 2002/88/CE MODIFICADA
e13*97/68SH2G3*2002/88*0094*00
APPROVAZIONE REGOLAMENTO CEE SULLE EMISSIONI DI GAS
DIRETTIVA 97/68/EC EMENDAMENTO 2002/88/CEE
e13*97/68SH2G3*2002/88*0094*00
ZULASSUNGSNUMMER FÜR CE-ABGASBESTIMMUNGEN
RICHTLINIE 97/68/EC GEÄNDERT 2002/88/EG
e13*97/68SH2G3*2002/88*0094*00
Page 6
English Français
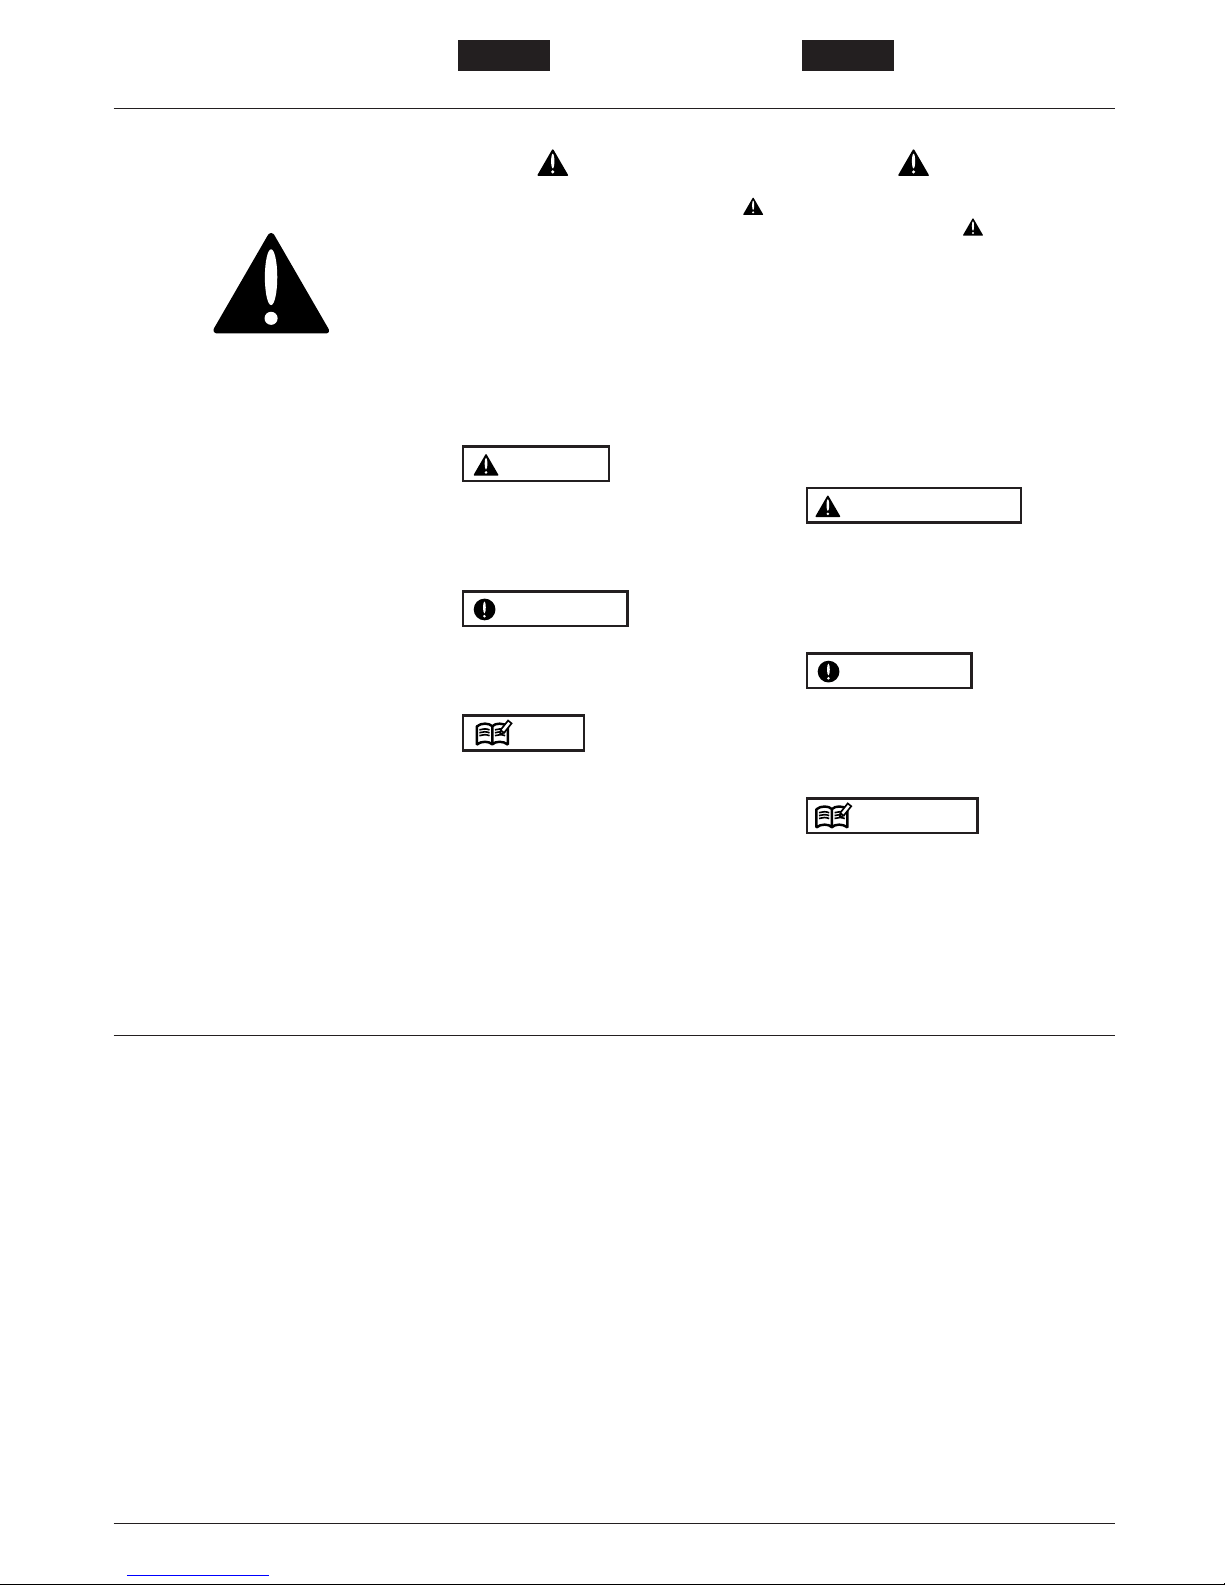
SAFETY FIRST
Instructions contained in warnings
within this manual marked with a
symbol concern critical points which
must be taken into consideration to
prevent possible serious bodily injury,
and for this reason you are requested
to read all such instructions carefully
and follow them without fail.
■ WARNINGS IN THE MANUAL
This mark indicates instructions which
must be followed in order to prevent
accidents which could lead to serious
bodily injury or death.
This mark indicates instructions which
must be followed, or it leads to mechanical
failure, breakdown, or damage.
This mark indicates hints or directions
useful in the use of the product.
NOTE
IMPORTANT
WARNING
SECURITE
Les instructions contenues dans les
mises en garde de ce mode d’emploi
portant le symbole concernent les
points critiques qui doivent être pris en
considération pour éviter les blessures
corporelles graves, c’est pourquoi ces
précautions doivent être
rigoureusement suivies.
■ DIFFERENTS TYPES
D’AVERTISSEMENT DE CE MODE
D’EMPLOI
Les instructions repérées par ce symbole
doivent être rigoureusement suivies afin
d’éviter tout accident pouvant entraîner
des blessures corporelles graves ou la
mort.
Les instructions repérées par ce symbole
doivent être suivies afin d’éviter tout
incident mécanique, panne ou
endommagement de la débroussailleuse.
Remarques utilisées dans des instructions
ou conseils supplémentaires pour
l’utilisation de cette débroussailleuse.
REMARQUE
IMPORTANT
AVERTISSEMENT
Contents Tables des matieres
6
1. Information .......................................8
2. Specifications.................................10
3. Warning labels on the machine......12
4. Symbols on the machine................14
5. For safe operation..........................16
6. Set up.............................................28
7. Fuel ................................................30
8. Operation........................................36
9. Maintenance...................................42
10. Storage...........................................52
11. Troubleshooting guide....................54
1. Information .......................................8
2. Caracteristiques .............................10
3.
Etiquettes d’avertissement placées sur la
machine
............................................12
4. Symboles utilises sur la machine...14
5. Consignes de securite....................16
6. Assemblage....................................28
7. Carburant .......................................30
8. Fonctionnement..............................36
9. Entretien.........................................42
10. Rangement.....................................52
11.
Guide de localisation des pannes
........54
Page 7
EspañolDeutsch Italiano
SICHERHEIT HAT VORRANG
Die Hinweise in den Warnungen dieser
Anleitung bzw. auf den mit einem Symbol gekennzeichneten
Warnplaketten sind von größter
Bedeutung für die Betriebssicherheit.
Deshalb sollten Sie diese Warnungen
sorgfältig durchlesen und strikt
beachten, um das Risiko von schweren
Verletzungen zu vermeiden.
■ WARNHINWEISE IN DER
ANLEITUNG
Dieses Symbol bedeutet, daß diese
Instruktionen befolgt werden müssen,
damit Unfälle mit folgenschweren
Verletzungen, die u.a. zum Tode führen
können, vermieden werden.
Dieses Symbol bedeutet, daß diese
Instruktionen befolgt werden müssen oder
es kommt zu mechanischen Defekten,
Versagen des Gerätes oder Schäden.
Dieses Symbol zeigt Tips oder Ratschläge
für den Gerätebetrieb an.
HINWEIS
WICHTIG
WARNUNG
LA SICUREZZA INNANZI TUTTO
Le istruzioni contenute nelle sezioni di
avvertimento precedute dal simbolo
riguardano dei punti critici che
devono essere osservate per prevenire
potenziali lesioni personali gravi. Per
questo motivo, dovete leggere tutte
queste istruzioni attentamente ed
osservarne il contenuto in ogni
momento.
■ SEGNALAZIONI USATE NEL
MANUALE
Questo marchio rappresenta delle
istruzioni che devono essere osservate
per prevenire eventuali incidenti che
possono causare lesioni gravi o addirittura
mortali.
Questo marchio indica delle istruzioni che
devono essere seguite per evitare
malfunzionamenti meccanici, guasti o
danni.
Questo marchio indica dei suggerimenti o
indicazioni utili per l’utilizzo del prodotto.
NOTA
IMPORTANTE
AVVERTIMENTO
LA SEGURIDAD PRIMERO
Las instrucciones que aparecen en
este manual bajo las advertencias
marcadas con el símbolo hacen
referencia a puntos críticos que deben
tomarse en consideración para evitar
posibles lesiones físicas; por esta
razón, le solicitamos que lea
detenidamente todas estas
instrucciones y que las siga
estrictamente.
■ ADVERTENCIAS CONTENIDAS EN
EL MANUAL
Bajo este símbolo aparecen instrucciones
que se deben seguir a fin de evitar
accidentes que pueden causar serias
lesiones físicas o la muerte.
Bajo este símbolo aparecen instrucciones
importantes que se deben seguir; ignorar
estas instrucciones puede ocasionar fallos
mecánicos, desperfectos o daños.
Este símbolo hace referencia a consejos o
indicaciones que son de utilidad para el
uso del producto.
NOTA
IMPORTANTE
ADVERTENCIA
Inhalt ContenidoIndice
7
1. Informazione.....................................8
2. Specifiche.......................................10
3. Etichetta di avvertimento
sull’apparecchio..............................12
4. Simboli sulla macchina...................14
5. Per un funzionamento sicuro..........16
6. Impostazione..................................28
7. Carburante .....................................30
8. Funzionamento...............................36
9. Manutenzione.................................42
10. Immagazzinaggio...........................52
11. Localizzazione dei guasti ...............54
1. Información.......................................8
2. Especificaciones.............................10
3. Etiqueta de advertencias en la
máquina..........................................12
4.
Símbolos presentes en la máquina
.....14
5. Instrucciones de seguridad ............16
6. Montaje...........................................28
7. Combustible ...................................30
8. Uso.................................................36
9. Mantenimiento................................42
10. Almacenamiento.............................52
11. Guía de localización y solución de
problemas.......................................54
1. Information .......................................8
2. Technische daten...........................10
3. Warnaufkleber auf der Maschine ...12
4. Symbole auf der maschine.............14
5. Sicherer betrieb..............................16
6. Zusammenbau ...............................28
7. Kraftstoff.........................................30
8. Betrieb............................................36
9. Wartung..........................................42
10. Lagerung........................................52
11. Fehlersuche....................................54
Page 8
English Français
1. Information 1. Information
8
Cet appareil est équipé d'un
mécanisme d'arrêt automatique en de
surcharge.
Lorsque les lames se coincent dans
du fil de fer ou des branches trop
difficiles à couper, ce mécanisme
joue un rôle d'amortisseur,
protégeant les lames et les
engrenages contre tout contrecoup
qui pourrait les endommager.
Si les lames se coincent trop souvent
dans des branches, pensez à
contrôler les points suivants:
1. Taille des branches ➞ N'essayez
jamais de couper des branches de
plus de 5 mm d'épaisseur.
2. Etat du bord d'attaque des lames
➞ Remplacez les lames usées.
Nous vous remercions d'avoir choisi notre
produit.
This machine is equipped with an
Overload Cancellation Mechanism.
When the cutting blades have got into
metal wires or twigs difficult to cut,
the mechanism works as a shock
absorber, and protects the gears and
the blades from severe reaction
which could give damage to those
parts.
When the blades are frequently
caught by twigs, please check the
following points:
1. Size of the twigs ➞ Never try to
cut twigs thicker than 5 mm.
2. Condition of the blade edges
➞
Replace the worn-out blades.
Thank you for choosing our product.
Page 9
EspañolDeutsch Italiano
1. Information 1. Informazione 1. Información
9
Esta máquina está equipada con un
Mecanismo de Cancelación de
Sobrecarga.
Cuando las cuchillas de corte se
hayan metido en alambres o ramitas
dificiles de cortar, el mecanismo
funciona como un amortiguador y
protege los engranajes y las cuchillas
de la reacción que les produzca daño
a aquellas partes.
Si las cuchillas se meten
frecuentemente en ramitas,
compruebe los puntos siguientes:
1. Grosor de las ramitas ➞ No
intente nunca cortar ramas más
gruesas que 5 mm.
2. Condición de las puntas de cuchillas
➞ Cambie las cuchillas
desgastadas.
Le agradecemos el haber adquirido
nuestro producto.
Questa macchina e equipaggiata con
Meccanismo Preventive per
Sovraccarico.
Quando la lama penetra in fili
metallici o in rami difficili da potare,
questo meccanismo serve
all'assorbimento d'impulso, e
protegge l'ingranaggio e.
la lama dalla reazione severa che si
danneggia quelle parti.
Quando la lama penetra in rami
spesso, controllare i punti seguenti:
1. Misura di rami ➞ Non potare i
rami piu' di 5 mm.
2. Condizione di punta di lama
➞
Scambiare la lama consumata.
Grazie per aver scelto nostro apparecchio.
Diese Maschine ist mit einem
Überbelastungsabsagemechanismus
ausgerüstet.
Wenn die Schneidmesser in den
Metalldraht oder in die schwer zu
schneidenden Zweige eingreifen,
funktioniert der Mechanismus als
Stoßdämpfer und schützt die
Winkelgetriebe sowie die
Schneidmesser vor schwerer
Reaktion, die diese Maschinenteile
beschädigen könnte.
Wenn die Schneidmesser häufig von
Zweigen gefangen werden, prüfen Sie
bitte die folgenden Punkte:
1. die Größe des Zweigs ➞
Versuchen Sie niemals, Zweige zu
schneiden, die dicker sind als 5 mm.
2. die Schärfe der Schneidmesser
➞
Tauschen Sie bitte die übermäßig
abgenutzten Schneidmesser aus.
Vielen Dank für Ihren Kauf unseres
Produkts.
Page 10

English
2. Specifications
10
Français
2. Fiche technique
MODEL SRTZ2600
Overall size ( L x W x H ) 1725 x 400 x 365 mm
Dry Weight w/o shoulder strap
6.3 kgs
Engine Type Air cooled 2-stroke gasoline engine
Model ZENOAH GZ25N
Displacement 25.4cm
3
Max. output 0.9 kW (1.2 Hp)
Fuel Mixture (Gasoline 25 : Oil 1)
Carburetor Walbro Diaphragm type
Spark Plug NGK CMR7A
Transmission
Centrifugal clutch, spiral bevel gear, cam crank
Reduction ratio 4.0
Cutting head Type Reciprocating Double blade
Tooth 42 teeth
Pitch 30 mm
Effective cut width 615 mm
Angle adjust range
90° (±45° from cutting head position aligned shaft)
Standard Accessories Shoulder strap 1 pc
Tool Kit 1 pc
Blade Cover 1 pc
Specifications are subject to change without notice.
MODELE SRTZ2600
Dimensions hors tout (L x L x H) 1725 x 400 x 365 mm
Poids à sec sans sangle 6,3 kgs
Moteur Type Moteur à essence, 2 temps, refroidissement à air
Modèlel ZENOAH GZ25N
Cylindrée 25,4 cm
3
Puissance maxi.t 0,9 kW (1,2 Hp)
Carburant Mélange (essence 25 : huile 1)
Carburateur Walbro type à diaphragme
Bougie NGK CMR7A
Transmission
Embrayage centrifuge, engrenage conique à spirale, manivelle à came
Rapport de démultiplication 4,0
Tête de coupe Type Reciprocating Double blade
Dents 42 dents
Pas 30 mm
Largeur de coupe effective
615 mm
Plage de réglage d'angle
90° (±45° de l'axe aligné à la position de la tête de coupe)
Accessoires standard Sangle 1
Trousse à outils 1
Protège-lame 1
Ces spécifications peuvent être modifiées sans préavis.
Page 11

Deutsch
11
2. Technische Daten
Italiano
2. Dati tecnici
Español
2. Especificaciohes
MODELL SRTZ2600
Gesamtgröße (L x B x H) 1725 x 400 x 365 mm
Leergewicht ohne Schultergurt 6,3 kgs
Motor Typ Luftgekühlet Zweitaktmotor
Modell ZENOAH GZ25N
Hubraum 25,4 cm
3
Max. Leistung 0,9 kW (1,2 Hp)
Kraftstoff Gemisch (Benzin 25, Öl 1 Anteil)
Vergaser Walbro-Membrantyp
Zündkerze NGK CMR7A
Kraftübertragung Zentrifugalkupplung, Schneckengetriebe, Exzenterkurbel
Übersetzungsverhältnis 4,0
Schneidkopf Typ Zwei gegenläufige Messer
Schneidmesser 42 Zähne
Abstand 30 mm
Effektive Schnittlänge 615 mm
Schnittwinkelbereich 90° (±45° von Mittelstellung an Welle)
Standardzubehör Schultergurt 1
Werkzeugsatz 1
Schneidmesserabdeckung 1
Technischen Daten können ohne Vorankündigung geändert werden.
MODELLO SRTZ2600
Dimensioni generali (P x L x H) 1725 x 400 x 365 mm
Peso netto senza tracolla 6,3 kgs
Motore Tipo
Motore a benzina a due tempi con raffreddamento ad aria
Modello ZENOAH GZ25N
Cilindrata 25,4 cm
3
Uscita massima 0,9 kW (1,2 Hp)
Carburante Miscela (benzina 25/ olio 1)
Carburatore Walbro a diaframma
Candela NGK CMR7A
Trasmissione I
nnesto centrifugale, ingranaggi conici spiroidali, manovella delle camme
Rapporto di riduzione 4,0
Testa delle lame Tipo Doppia lama alternativa
Denti 42 denti
Passo 30 mm
Larghezza taglio effettiva
615 mm
Schnittwinkelbereich
90° (±45° dall’albero di allineamento con la posizione della testa delle lame)
Accessori standard Tracolla 1 pz
Kit di utensili 1 pz
Coprilama 1 pz
Le specifiche sono soggette a modifiche senza preavviso.
MODELO SRTZ2600
Tamaño global (Lar x Anch x Alt) 1725 x 400 x 365 mm
Peso en seco sin correa para el hombro 6,3 kgs
Motor Tipo Motor de 2 tiempos de gasolina refrigerado por aire
Modelo ZENOAH GZ25N
Desplazamiento 25,4 cm
3
Salida máxima 0,9 kW (1,2 Hp)
Combustible Mezcla (Gasolina 25: Aceite 1)
Carburador Tipo Walbro Diafragma
Bujía NGK CMR7A
Transmisión Embrague centrífugo, engranaje cónico espiral
Relación de reducción 4,0
Cabezal de corte Tipo Cuchilla alternativa doble
Dientes 42 dientes
Paso 30 mm
Ancho de corte efectivo
615 mm
Gama de ajuste de ángulo 90° (45± desde el eje alineado en la posición de cabezal de corte)
Accesorios estándar Correa para el hombro 1 pieza
Kit de herramientas 1 pieza
Tapa de cuchillas 1 pieza
Especificaciones sujetas a cambios sin previo aviso.
Page 12
English Français
3. Warning labels on the
machine
3. Etiquettes d’avertissement
sur la machine
12
(a)
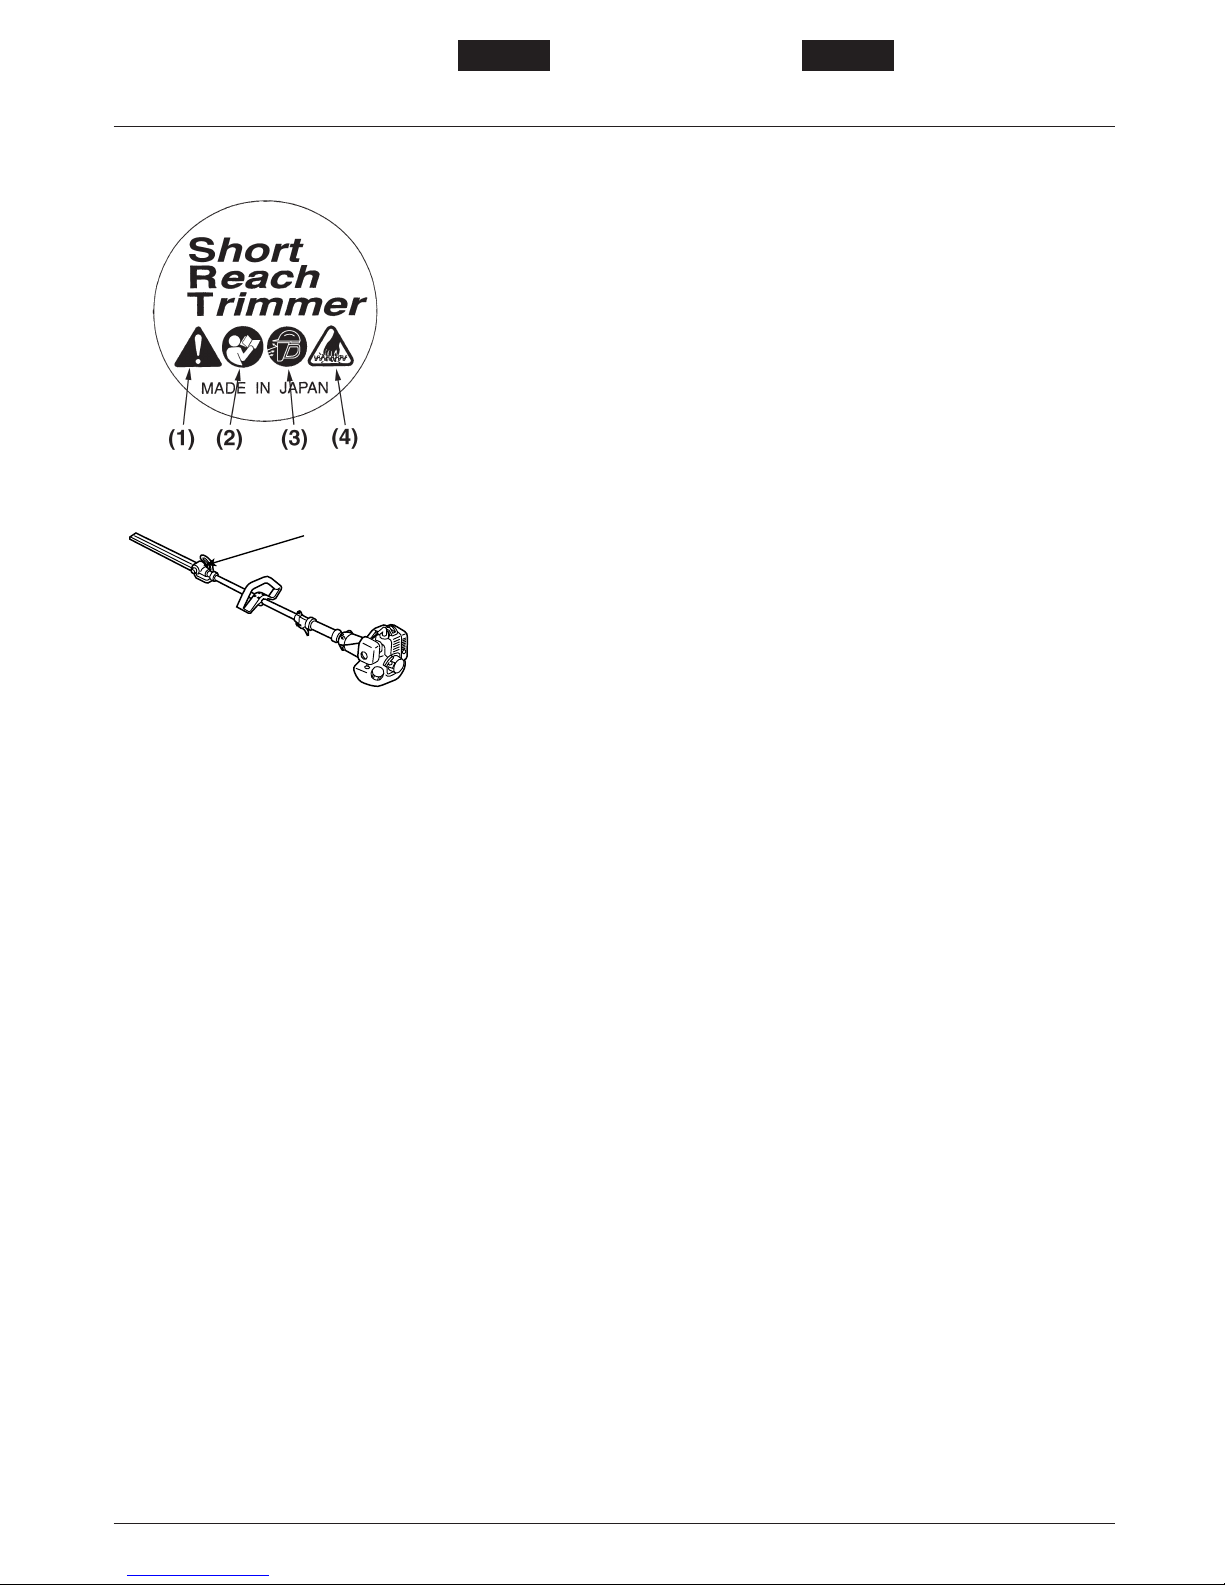
■ HANDLING OF WARNING LABELS
(PART NUMBER : T3080-13250)
(1)Handling this machine improperly
could result in accidents causing
serious injury or death. Read this
manual carefully and practice using
the trimmer until you are fully
acquainted with all operations and
have learned to use it correctly.
(2)Carefully read owner’s manual
(3)Always be careful to wear a face
protector and helmet when using
your trimmer.
(4)Keep hands away from cutting
blades
(a)Where to apply
■ TAKING CARE OF WARNING
LABELS
1. Always keep warning labels clean and
free of scratches which might make
them illegible or difficult to read.
2. If the warning labels provided with your
trimmer become soiled, peel off, or
otherwise become illegible or difficult to
read, order new labels from the
KOMATSU ZENOAH authorized
servicing dealer where you purchased
your trimmer and replace the damaged
labels with new labels.
3. When applying new labels, be sure to
first wipe away any dirt and dry the
surface before applying the new label in
the same place as the original label.
■ MANIPULATION DES ÉTIQUETTES
DE MISE EN GARDE (NUMÉRO DE
PIÈCE: T3080-13250)
(1)Lorsque cet l'appareil est utilisé
incorrectement, des accidents
peuvent entraîner des blessures
graves ou mortelles. Lire
attentivement ce mode d'emploi et
s'entraîner avec le taille-haies pour
se familiariser avec toutes les
fonctions afin de l'utiliser
correctement.
(2)Lire attentivement le mode d'emploi
(3)Toujours porter un masque et un
casque lors de l'utilisation de votre
taille-haies
(4)Eloigner les mains des lames de
coupe
(a)Point d'application
■ ENTRETIEN DES ÉTIQUETTES
1. Toujours maintenir les étiquettes
d'avertissement propres et exemptes
de rayures afin de ne pas les rendre
illisibles ou difficiles à lire.
2 Si les étiquettes d'avertissement
fournies avec votre taille-haies
deviennent sales, les décoller, ou si
elles sont illisibles ou difficiles à lire,
commander des étiquettes neuves
auprès du revendeur agréé KOMATSU
ZENOAH auprès duquel la taille-haies a
été achetée et remplacer les étiquettes
endommagées par des étiquettes
neuves.
3. Lors de l'application d'étiquettes
neuves, essuyer d'abord toute trace de
saleté et sécher la surface avant de
coller l'étiquette neuve au même endroit
que l'étiquette d'origine.
Page 13

EspañolDeutsch Italiano
3. Warnaufkleber auf der
Maschine
3. Etichetta di avvertimento
sull’apparecchio
3. Etiqueta de advertencia en
la máquina
13
■ HANDHABUNG VON
WARNPLAKETTEN (TEILENR:
T3080-13250)
(1)Bei unsachgemäßer Handhabung
dieses Geräts drohen Unfälle mit
schweren Verletzungen und
Lebensgefahr. Daher diese
Anleitung sorgfältig durchlesen und
die Bedienung üben, bis sie sicher
beherrscht wird.
(2)Die Betriebsanleitung lesen
(3)Stets Gesichtsschutz und Helm
tragen
(4)Hände von Schneidmessern
fernhalten
(a)Anbringungsort
■ PFLEGE DER WARNPLAKETTEN
1. Warnplaketten sauberhalten und vor
Kratzern schützen, damit sie lesbar
bleiben.
2. Sollten sich die Warnplaketten vom
Trimmer lösen oder unleserlich werden,
vom KOMATSU ZENOAH
Vertragshändler neue Plaketten
bestellen und die beschädigten
Plaketten ersetzen.
3. Vor dem Aufkleben von neuen
Plaketten zunächst die
Anbringungsstelle von Schmutz und
Fremdkörpern befreien, dann die neue
anstelle der alten Plakette anbringen.
■ MANEGGIO DELLE ETICHETTE DI
AVVERTIMENTO (NUMERO
COMPONENTE: T3080-13250)
(1)L’uso errato del potatore può dar
luogo a pericolosi situazioni in cui si
possono verificare lesioni gravi o
addirittura letali. Leggere questo
manuale attentamente e usare il
potatore solo dopo aver
familiarizzato completamente con
tutte le funzioni e dopo aver
imparato l’uso corretto del potatore.
(2)Leggere il manuale delle istruzioni
attentamente.
(3)Fare attenzione ad indossare
sempre una visiera di protezione per
il viso ed un casco durante l’uso del
potatore.
(4)Tenere le mani lontane dalle lame.
(a)Applicazione
■ OSSERVARE LE ETICHETTE DI
AVVERTIMENTO
1. Tenere sempre le etichette di
avvertimento pulite e prive di graffi,
altrimenti non saranno chiaramente
leggibili.
2. Nel caso in cui le etichette di
avvertimento in dotazione con il
potatore si dovessero sporcare,
staccare o diventare illeggibili, ordinare
nuove etichette dal rivenditore
autorizzato dalla KOMATSU ZENOAH
dove si ha acquistato il potatore, poi
sostituire le etichette danneggiate con
quelle nuove.
3. Prima di attaccare le nuove etichette,
assicurarsi di rimuovere ogni traccia di
sporcizia, poi asciugare la superficie
prima di fissare la nuova etichetta nello
stesso luogo di quella originale.
■ MANIPULACIÓN DE LAS ETIQUETAS
DE ADVERTENCIA (NÚMERO DE
PIEZA: T3080-12350)
(1)La manipulación incorrecta de esta
máquina podría resultar en
accidentes que ocasionen graves
lesiones o incluso la muerte. Lea
este manual atentamente y
practique el uso de la podadera
hasta que esté completamente
familiarizado con todas las
operaciones y haya aprendido a
utilizarla correctamente.
(2)Lea atentamente el manual del
operario
(3)Tenga cuidado de llevar puesto
siempre un protector para la cara y
un casco cuando utilice la
podadera.
(4)Mantenga las manos alejadas de las
cuchillas de corte
(a)Donde colocarlas
■ CUIDADOS DE LAS ETIQUETAS DE
ADVERTENCIA
1. Mantenga siempre las etiquetas de
advertencia limpias y libre de rayones
que podrían dejarla ilegible o hacer que
su lectura resultara difícil.
2. Si alguna etiqueta de advertencia
suministrada con la podadera se
ensuciara, despegara, o de alguna otra
manera quedara ilegible o difícil de leer,
solicite etiquetas nuevas al distribuidor
de servicio autorizado KOMATSU
ZENOAH donde compró la podadera y
cambie las etiquetas dañadas por otras
nuevas.
3. Al colocar las etiquetas nuevas,
asegúrese primero de limpiar toda
suciedad y de secar la superficie antes
de colocar la etiqueta nueva en el
mismo sitio donde estaba la etiqueta
original.
Page 14

4. Symbols on the machine
4. Symboles utilises sur la
machine
For safe operation and maintenance,
symbols are carved in relief on the
machine. According to these indications,
please be careful not to take a mistake.
(a)The port to refuel the "MIX GASOLINE"
Position:
FUEL TANK CAP
(b)The direction to close the choke
Position:
AIR CLEANER COVER
(c) The direction to open the choke
Position:
AIR CLEANER COVER
Des symboles en relief ont été placés sur
la machine pour assurer la sécurité à
l’usage et faciliter l’entretien. Prendre soin
d’observer les indications suivantes afin
d’éviter les erreurs.
(a)Emplacement de remplissage du
“MELANGE”
Emplacement:
BOUCHON DU RESERVOIR DE
CARBURANT
(b)Position fermée du starter
Emplacement:
CAPOT DU FILTRE A AIR
(c) Position ouverte du starter
Emplacement:
CAPOT DU FILTRE A AIR
English Français
14
Page 15

4. Symbole auf der Maschine 4. Simboli sulla macchina
4. Símbolos presentes en la
máquina
Für einen sicheren Betrieb und eine
sichere Wartung sind Symbole als
Hilfestellung auf die Maschine eingeprägt.
Gehen Sie gemäß diesen Anzeigen
vorsichtig vor und machen Sie keinen
Fehler.
(a)Die Öffnung zum Nachfüllen des
“BENZINGEMISCHS”
Position:
KRAFTSTOFFTANKDECKEL
(b)Die Richtung zum Schließen der
Drossel
Position:
LUFTFILTERABDECKUNG
(c) Die Richtung zum Öffnen der Drossel
Position:
LUFTFILTERABDECKUNG
Per un funzionamento e una
manutenzione sicura, i simboli sono stati
incisi in rilievo sull’apparecchio. Seguite
queste indicazioni per evitare eventuali
errori.
(a)Porta per riempire la miscela “MIX
GASOLINE”,
Posizione:
COPERCHIO DEL SERBATOIO DEL
CARBURANTE.
(b)Direzione di chiusura dell’aria
Posizione:
COPERCHIO DEL FILTRO DELL’ARIA
(c) Direzione di apertura dell’aria
Posizione:
COPERCHIO DEL FILTRO DELL’ARIA
Para el uso y mantenimiento seguro del
producto, los símbolos han sido
estampados en relieve en la máquina.
Siga siempre estas indicaciones, y tenga
cuidado de no cometer un error.
(a)Orificio de llenado de “MEZCLA DE
GASOLINA”
Posición:
TAPÓN DEL TANQUE DE
COMBUSTIBLE
(b)Dirección de cierre del estrangulador
Posición:
CUBIERTA DEL FILTRO DE AIRE
(c) Dirección de apertura del
estrangulador
Posición:
CUBIERTA DEL FILTRO DE AIRE
EspañolDeutsch Italiano
15
Page 16
English Français
5. For safe operation
16
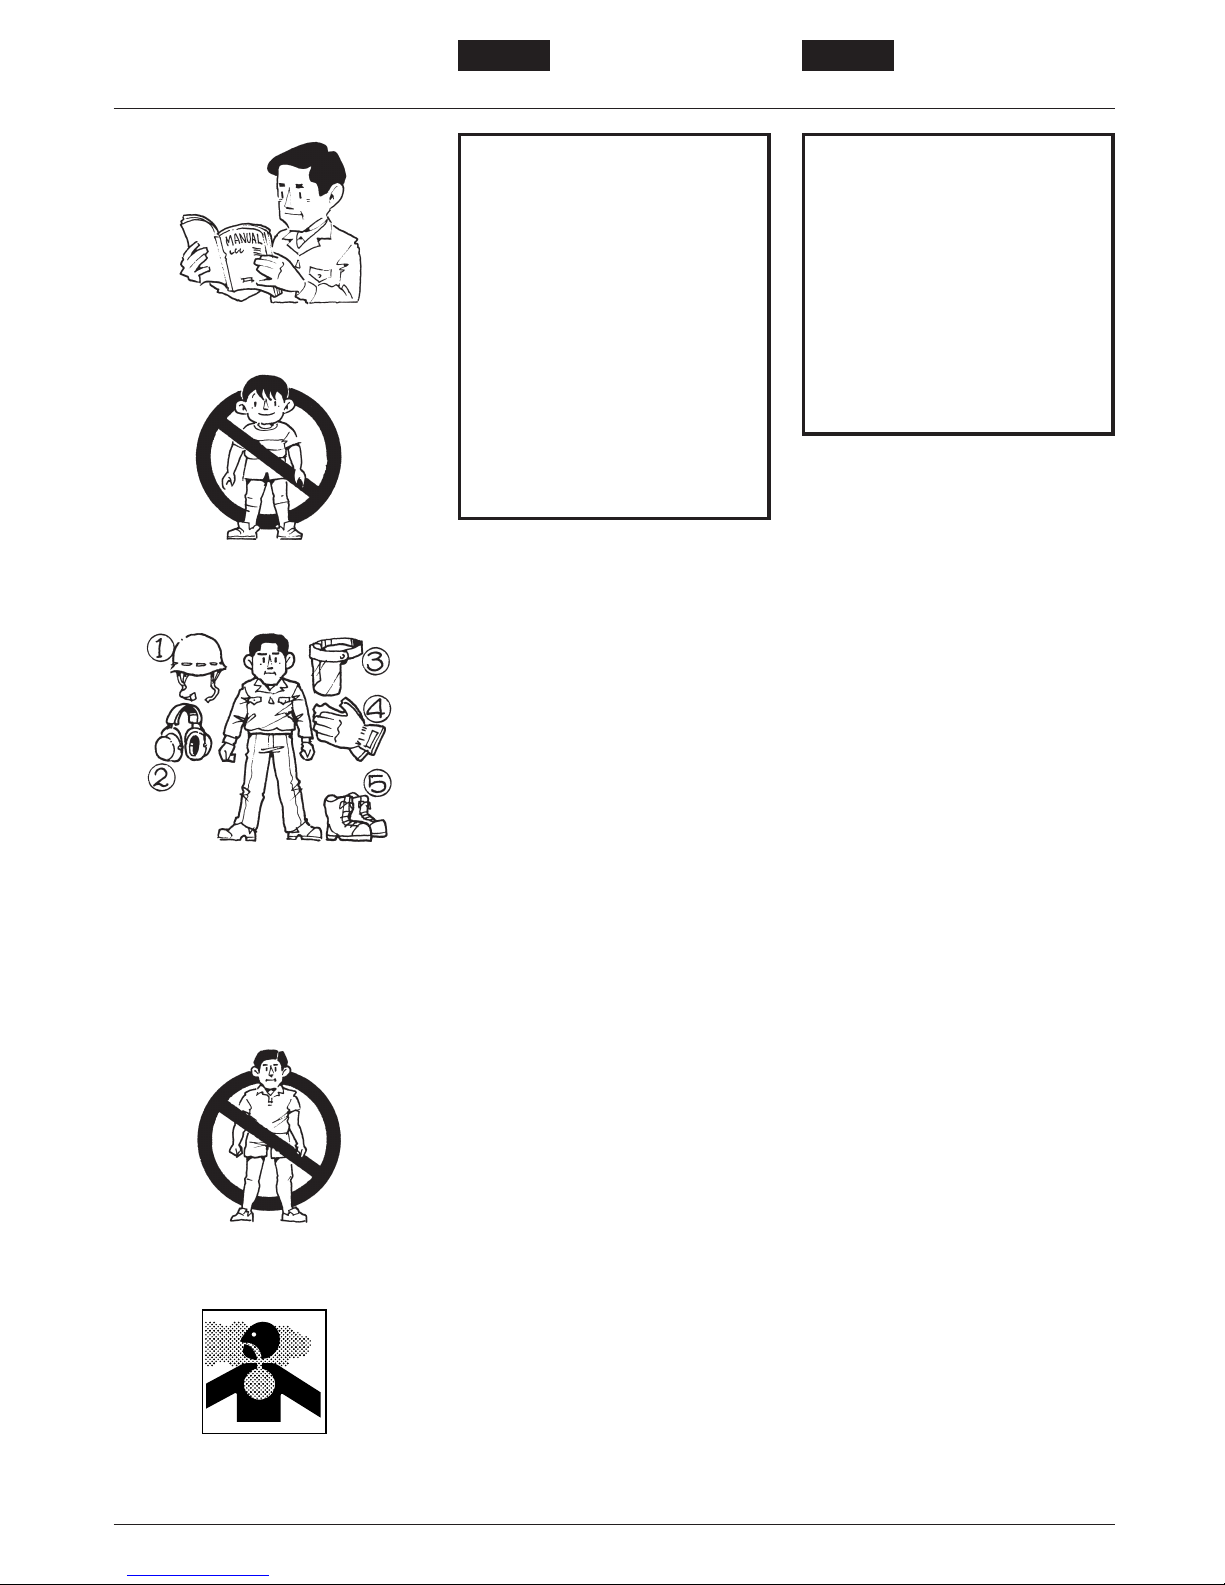
1. Read this manual carefully until you
completely understand and follow all
safety and operating instructions.
2. Keep this manual handy so that you
may refer to it later whenever any
questions arise. Also note, if you have
any questions which cannot be
answered herein, contact the dealer
from whom you purchased the
product.
3. Always be sure to include this manual
when selling, lending, or otherwise
transferring the ownership of this
product.
4. Never allow children or anyone
unable to fully understand the
directions given in the manual to use
the machine.
■ WORKING CONDITION
1. When using the product, you should
wear proper clothing and protective
equipment.
(1)Helmet
(2)Ear protectors
(3)Protection goggles or face protector
(4)Thick work gloves
(5)Non-slip-sole work boots
2. And you should carry with you.
(1)Attached tools and files
(2)Properly reserved fuel
(3)Spare blade
(4)Things to notify your working area
(rope, warning signs)
(5)Whistle (for collaboration or
emergency)
(6)Hatchet or saw (for removal of
obstacles)
3. Do not wear loose clothing, jewelry,
short trousers, sandals, or go barefoot.
Do not wear anything which might be
caught by a moving part of the unit.
Secure hair so it is above shoulder
length.
■ WORKING CIRCUMSTANCE
1. Never start the engine inside a closed
room or building. Exhaust gases
contain dangerous carbon monoxide.
2. Never use the product:
a. when the ground is slippery or when
you can’t maintain a steady posture.
b. At night, at times of heavy fog, or at
any other times when your field of
vision might be limited and it would
1. Lire ce manuel attentivement jusqu’à
une compréhension totale et suivre
toutes les instructions de sécurité et
d’utilisation.
2. Conserver ce mode d’emploi à portée
de la main pour le consulter au
moindre doute. Si une question reste
sans réponse, contacter le revendeur.
3. Ne pas oublier de donner le manuel
avec la machine en cas de revente ou
de prêt.
4. Ne pas laisser des enfants ou toute
personne incapable de comprendre
les instructions, utiliser cette machine.
■ CONDITIONS DE TRAVAIL
1. Lors de l’utilisation de cette machine, il
est nécessaire de porter des vêtements
appropriés et des équipements de
sécurité.
(1)Casque
(2)Casque antibruit
(3)Lunettes ou masque de protection
(4)Gants de travail épais
(5)Chaussures de sécurité à semelle
antidérapante
2. Les objets suivants doivent être
emportés sur le lieu de travail :
(1)Les outils fournis avec la machine et
des limes
(2)Une réserve de carburant
(3)Une lame de rechange
(4)Matériel pour délimiter la zone de
travail
(5)Un sifflet (pour collaborateur ou en
cas d’urgence)
(6)Une hache ou une scie (pour
enlever les obstacles)
3. Ne pas porter des vêtements lâches, de
short, de bijou, de sandales ou travailler
pieds nus. Ne pas porter quoi que ce
soit pouvant être happé par les pièces
en mouvement de la machine. Porter
les cheveux longs noués au-dessus des
épaules.
■ CONDITIONS DE TRAVAIL
1. Ne jamais mettre la machine en marche
à l’intérieur d’une pièce ou d’un
bâtiment. Les gaz d’échappement
contiennent du monoxide de carbone
dangereux.
2. Ne jamais utiliser la machine dans les
conditions suivantes:
a. Lorsque le sol est glissant ou lorsqu’il
est impossible de se maintenir dans
5. Consignes de securite
Page 17

EspañolDeutsch Italiano
17
1. Lesen Sie sich diese Anleitung
sorgfältig durch, bis Sie alle
Sicherheits- und Bedienungshinweise
verstehen und befolgen.
2. Diese Anleitung greifbereit haben, um
sie im Zweifelsfall schnell zur Hand zu
haben. Bei Fragen zum Gerät, die
nicht in dieser Anleitung behandelt
werden, bitte an den Händler wenden,
der Ihnen das Produkt verkauft hat.
3. Bei Verkauf, Verleih oder Weitergabe
stets diese Anleitung zusammen mit
dem Gerät übergeben.
4. Niemals Kinder oder Personen, die
die Anweisungen in dieser Anleitung
nicht vollständig verstehen, die
Maschine betreiben lassen.
■ ARBEITSBEDINGUNG
1. Wenn das Produkt benutzt wird, sollten
Sie stets richtige Kleidung und
Schutzausrüstung tragen.
(1)Helm
(2)Ohrenschutz
(3)Schutzbrille oder Schutzmaske
(4)Dicke Schutzhandschuhe
(5)Rutschfeste Arbeitsschuhe
2. Und Sie sollten folgende Dinge bei sich
tragen.
(1)Mitgelieferte Werkzeuge und Feilen
(2)Reservekraftstoff
(3)Ersatzschneidblatt
(4)Gegenstände, die Ihren
Arbeitsbereich kennzeichnen (Seil,
Warnzeichen)
(5)Pfeife (für Zusammenarbeit oder
Notfall)
(6) Beil oder Säge (zum Entfernen von
Hindernissen)
3. Keine lockere Kleidung, Schmuck,
kurze Hosen oder Sandalen tragen und
nicht barfuß gehen. Nichts tragen, daß
von den beweglichen Teilen des
Gerätes erfaßt werden kann. Haare
über Schulterhöhe zusammenbinden.
■ ARBEITSUMSTAND
1. Den Motor niemals in geschlossenen
Räumen oder Gebäuden starten.
Abgase enthalten gefährliches
Kohlenmonoxid.
2. Niemals das Produkt benutzen:
a. wenn der Untergrund glitschig ist
oder ein stabiler Stand beeinträchtigt
ist.
b. Nachts, bei dichtem Nebel oder
1. Leggete questo manuale
attentamente per capire
completamente ed osservare tutte le
norme di sicurezza ed istruzioni per
l’uso.
2. Tenete questo manuale in un luogo
accessibile per poter fare riferimento
all stesso in un momento successivo,
in caso di dubbi. Inoltre, se avete
delle domande alle quali non trovate
la risposta nel manuale, rivolgetevi al
vostro rivenditore da cui avete
acquistato questo prodotto.
3. Assicuratevi di allegare questo
manuale se vendete o prestate l’unità
oppure se la stessa cambia
proprietario in altri modi.
4. Non lasciate mai che bambini o
persone non consapevoli delle
istruzioni fornite nel manuale
d’istruzioni utilizzino l’apparecchio.
■ CONDIZIONI LAVORATIVE
1. Quando usate il prodotto, dovete
indossare i vestiti e le protezioni
appropriate.
(1)Casco
(2)Cuffie di protezione
(3)Occhiali di protezione o visiera
(4)Spessi guanti di lavoro
(5)Scarponi di lavoro con la suola
antiscivolo
2. Inoltre, portate i seguenti oggetti con
voi:
(1)Gli utensili e le lime in dotazione
(2)Il carburante custodito in modo
appropriato
(3)Una lama di riserva
(4)Oggetti per delimitare l’area di
lavoro (una corda, delle insegne di
avvertimento)
(5)Un fischietto (per collaborazione o
per situazioni di emergenza)
(6)Accetta o sega (per rimuovere degli
ostacoli)
3. Non indossate dei vestiti lenti, gioielli,
pantaloncini, sandali, né camminate
scalzo. Non indossate nessun oggetto
che possa rimanere inceppato nelle
parti mobili dell’unità. Legate i capelli in
modo tale che sia al di sopra
dell’altezza delle spalle.
■ CIRCOSTANZE LAVORATIVE
1. Non accendete mai il motore all’interno
di una stanza chiusa o in un edificio. I
gasi di scarico contengono il monossido
di carbonio che è molto pericoloso.
2. Non usate mai il prodotto nelle seguenti
situazioni:
a. Quando il terreno è scivoloso o
quando non potete mantenere una
posizione stabile.
1. Lea detenidamente este manual
hasta comprender cabalmente todas
las instrucciones de seguridad y uso.
2. Mantenga este manual a mano para
que pueda consultarlo cuando tenga
alguna duda. Si tiene cualquier duda
que no esté cubierta en este manual,
consulte en la tienda donde adquirió
el producto.
3. Asegúrese de incluir siempre este
manual al vender, prestar o transferir
la propiedad de este producto.
4. Nunca permita que niños u otras
personas que no sean capaces de
comprender cabalmente las
instrucciones que se dan en el
manual utilicen la máquina.
■ CONDICIONES DE TRABAJO
1. Al utilizar el producto, asegúrese de
usar la vestimenta y el equipo de
protección adecuados.
(1)Casco
(2)Protectores para los oídos
(3)Gafas protectoras o protector facial
(4) Guantes de trabajo gruesos
(5)Botas de trabajo con suela
antideslizante
2Asegúrese de llevar con usted los
siguientes elementos:
(1)Herramientas y limas incluidas
(2)Combustible de reserva
(3)Hoja de repuesto
(4)Elementos para marcar su área de
trabajo (cuerdas, letreros de
advertencia)
(5)Silbato (para colaboración o
situaciones de emergencia)
(6)Hacha pequeña o sierra (para quitar
obstáculos)
3. No use ropa suelta, joyas, pantalones
cortos ni sandalias, y no trabaje
descalzo. No use nada que pueda ser
atrapado por las piezas móviles de la
unidad. Recójase el pelo,
asegurándose de que quede por
encima de sus hombros.
■ PRECAUCIONES
1. Nunca arranque el motor dentro de una
habitación cerrada o edificio. Los gases
de escape contienen monóxido de
carbono peligroso.
2. Nunca use el producto en los siguientes
casos:
a. Cuando el suelo sea resbaloso o
cuando usted no pueda mantener
una posición estable.
5. Sicherer Betrieb
5. Per un funzionamento sicuro
5. Instrucciones de seguridad
Page 18
English Français
18
be difficult to gain a clear view of the
working area.
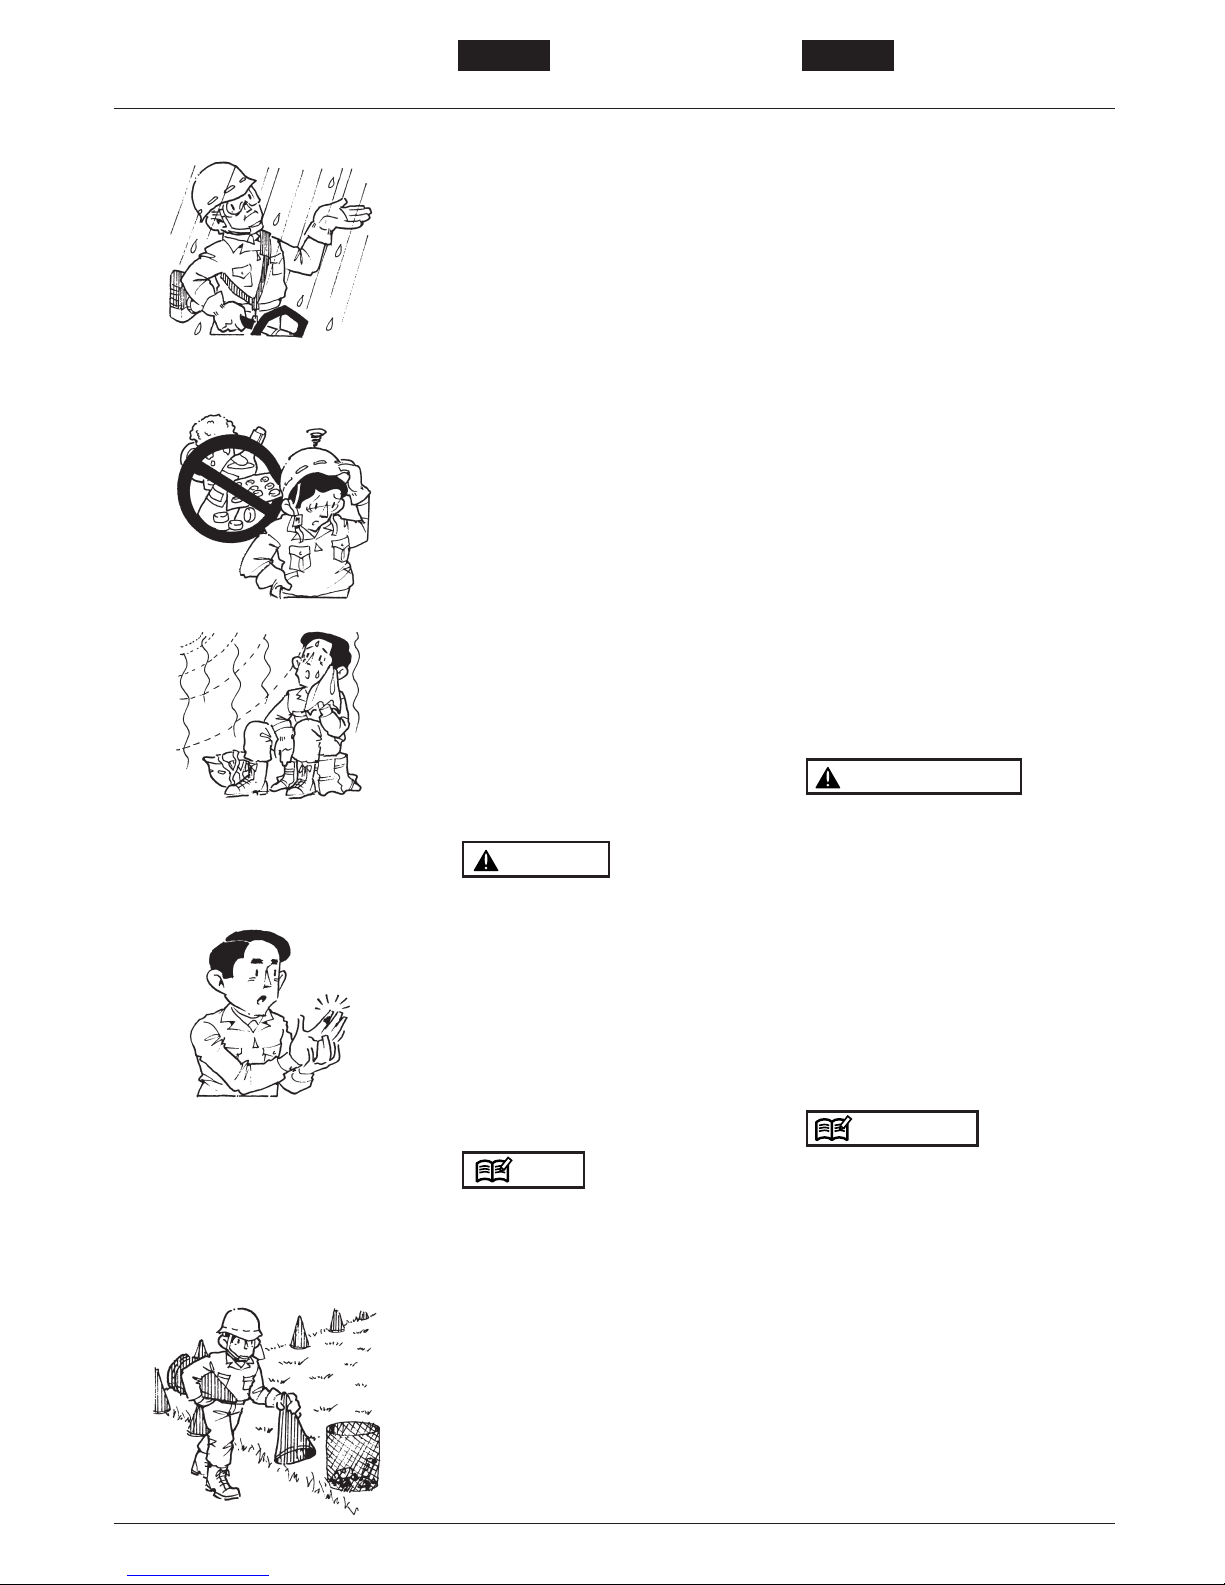
c. During rain storms, during lightning
storms, at times of strong or galeforce winds, or at any other times
when weather conditions might make
it unsafe to use the product.
■ WORKING PLAN
1. You should never use the product when
under the influence of alcohol, when
suffering from exhaustion or lack of
sleep, when suffering from drowsiness
as a result of having taken cold
medicine or at any other time when a
possibility exists that your judgment
might be impaired or that you might not
be able to operate the product properly
and in a safe manner.
2. When planning your work schedule,
allow plenty of time to rest. Limit the
amount of time over which the product
is to be used continuously to
somewhere around 30–40 minutes per
session, and take 10–20 minutes of rest
between work sessions. Also try to
keep the total amount of work
performed in a single day under 2 hours
or less.
1. If you don’t observe the working
time, or working manner (See
■USING THE PRODUCT), Repetitive
Stress Injury(RSI) could occur.
If you feel discomfort, redness and
swelling of your fingers or any other
part of your body, see a doctor
before getting worse.
2. To avoid noise complaints, in
general, operate product between
8a.m. and 5p.m. on weekdays and
9a.m. to 5p.m. weekends.
Check and follow the local regulations as
to sound level and hours of operations for
the product.
■ BEFORE STARTING THE ENGINE
1. The area within a perimeter of 15 m of
the person using the product should be
considered a hazardous area into which
no one should enter. If necessary
yellow warning rope, warning signs
should be placed around the perimeter
of the area. When work is to be
NOTE
WARNING
une position correcte.
b. La nuit, par temps de brouillard ou
lorsque la visibilité ou le champ de
vision empêche de voir clairement la
zone de travail.
c. Pendant les averses, les orages
avec éclairs, par grands vents ou
toute autre condition climatique
rendant l’utilisation de la machine
dangereuse.
■ PLAN DE TRAVAIL
1. Ne jamais utiliser la machine sous
l’influence de l’alcool ou en état de
faiblesse due à la fatigue, au manque
de sommeil, à la prise de médicament
ou à tout autre moment où l’on n’est
pas réellement capable de l’utiliser
correctement et en toute sécurité.
2. Lors de l’élaboration du plan de travail,
prévoir suffisamment de temps de
repos. Limiter la durée des périodes
pendant lesquelles la machine est
utilisée sans interruption entre 30 et 40
minutes. Se reposer de 10 à 20 minutes
entre ces périodes. Autant que
possible, essayer de limiter ce genre de
travail à 2 heures par jour.
1. Si ce plan de travail et cette méthode
de travail ne sont pas respectés, un
accident dû au stress répétitif peut
se produire (voir
■UTILISATION DE
LA MACHINE).
Si l’on ressent un malaise ou si les
doigts ou tout autre membre
rougissent et enflent, consulter un
docteur avant que cela ne s’aggrave.
2. Pour éviter les problèmes de bruit
avec le voisinage, utiliser
généralement la machine entre 8 et
17 heures pendant la semaine et de 9
à 17 heures les fins de semaine.
Vérifier et suivre la réglementation locale
sur le niveau de bruit et les horaires
d’utilisation de ce type de machine.
■ AVANT DE METTRE LE MOTEUR EN
MARCHE
1. La zone dans un rayon de 15 mètres
autour de l’opérateur est considérée
comme dangereuse et personne ne doit
s’y trouver. Si nécessaire, délimiter le
périmètre de la zone de travail avec du
ruban de marquage (rouge fluorescent
REMARQUE
AVERTISSEMENT
5. For safe operation 5. Consignes de securite
Page 19

EspañolDeutsch Italiano
19
anderen Bedingungen, die die Sicht
im Arbeits- und Sicherheitsbereich
einschränken und einen sicheren
Betrieb verhindern.
c. Bei starkem Niederschlag, Gewitter,
stürmischem Wind oder anderen
Wetterbedingungen, die einen
sicheren Einsatz dieses Produktes
unmöglich machen.
■ ARBEITSPLAN
1. Sie sollten das Produkt keinesfalls unter
Einfluß von Alkohol, bei Erschöpfung
oder Übermüdung, bei Schläfrigkeit
aufgrund der Einnahme von
Erkältungsmitteln oder dann benutzen,
wenn die Möglichkeit besteht, daß Ihr
Urteilsvermögen beeinträchtigt ist oder
Sie nicht imstande sind, das Produkt
einwandfrei und sicher zu bedienen.
2. Beim Planen der Arbeitseinsätze,
genügend Ruhephasen
berücksichtigen. Begrenzen Sie die
Zeitdauer, die die vorgesehenen 30 –
40 Minuten pro Arbeitseinsatz bei
kontinuierlichem Betrieb überschreitet
und zwischen den Einsätzen jeweils
Pausen von 10 – 20 Minuten einlegen.
Die gesamte Arbeitszeit sollte täglich
unter 2 Stunden oder weniger liegen.
1. Wenn Sie die Arbeitszeit oder die
Arbeitsweise nicht beachten (Siehe
■ANWENDUNG DES PRODUKTS),
könnten Verletzungen aufgrund sich
wiederholenden Stresses (RSI)
verursacht werden.
Wenn Sie sich nicht wohl fühlen,
wenn Ihre Finger oder ein anderes
Körperteil rot und angeschwollen ist,
suchen Sie einen Arzt auf, bevor es
schlimmer wird.
2. Um Lärmbelästigung zu verhindern
sollte das Gerät im allgemeinen
werktags zwischen 8.00 und 17.00
und am Wochenende zwischen 9.00
und 17.00 Uhr verwendet werden.
Prüfen und befolgen Sie die örtlichen
Bestimmungen für dieses Produkt und die
Betriebsstunden.
■ VOR DEM START DES MOTORS
1. Der Gefahrenbereich während des
Betriebs, aus dem Dritte unbedingt
fernzuhalten sind, erstreckt sich in
einem Umkreis von 15 Metern, um
dieses Produkt. Falls erforderlich, den
Arbeitsbereich mit einem gelben
Warnband, mit Warnzeichen absperren.
HINWEIS
WARNUNG
b. Di notte, quando c’è molta nebbia o
in altre occasioni quando il campo
visivo è limitato ed è difficile avere
una visione nitida dell’area di lavoro.
c. Durante la pioggia, durante una
tempesta, quando tira un vento molto
forte o in altre occasioni in cui le
condizioni meteorologiche rendono
poco sicuro l’utilizzo del prodotto.
■ PIANO DI LAVORO
1. Non usate mai il prodotto sotto
l’influenza dell’alcool, se siete stanchi o
assonnati; se siete in uno stato di
sonnolenza per via dell’assunzione di
farmaci o in altre occasioni in cui vostro
giudizio può essere ridotto,
impedendovi così di usare il prodotto in
modo corretto e sicuro.
2. Quando pianificate il lavoro, non
dimenticate di fornire del tempo per
riposare. Limitate il tempo di utilizzo del
prodotto a 30 — 40 minuti per sessione
e riposatevi da 10 a 20 minuti tra le
sessioni di lavoro. Inoltre, cercate di
mantenere la quantità totale del lavoro
effettuato durante la giornata a 2 ore o
meno.
1. Se non osservate il tempo di lavoro o
il modo di lavoro. (Fate riferimento
alla sezione
■UTILIZZO DEL
PRODOTTO), si possono verificare
delle lesioni per via di sforzi continui
(RSI). Se sentite del disagio, oppure
se le dita od altre parti del corpo si
arrossiscono o si gonfiano,
consultate un medico prima che la
situazione peggiora.
2. Per evitare dei problemi dovuti alla
generazione di rumore, usate il
prodotto tra le ore 8 antimeridiane e
le ore 5 pomeridiane nei giorni feriali
e dalle ore 9 antimeridiane e le 5
pomeridiane nei giorni festivi.
Controllate ed osservate le norme locali
sul livello sonoro e sulle ore operative del
prodotto.
■ PRIMA DI ACCENDERE IL MOTORE
1. L’area all’interno di un perimetro di 15
m dalla persona usando il prodotto va
considerata una zona pericolosa in cui
nessuno deve entrare. Se necessario,
posizionare una corda di avvertimento
di colore giallo oppure delle insegna di
avvertimento intorno all’area. Quando il
NOTA
AVVERTIMENTO
b. Durante la noche, cuando haya
niebla densa, o en cualquier otra
situación en que su campo de visión
esté limitado y sea difícil lograr una
adecuada visión del área de trabajo.
c. Durante tormentas de lluvia,
tormentas eléctricas, tormentas de
viento, o en cualquier otra
circunstancia en que las condiciones
climáticas puedan hacer inseguro el
uso del producto.
■ PLAN DE TRABAJO
1. Nunca utilice el producto cuando se
encuentre bajo la influencia del alcohol,
cuando sufra de fatiga o falta de sueño,
cuando sienta somnolencia debido a
que ha tomado una medicina para el
resfrío, o en cualquier otra situación
que pueda afectar su juicio y usted no
sea capaz de utilizar el producto
correctamente y de manera segura.
2. Al planificar su trabajo, deje un tiempo
suficiente para descansar. Limite el
tiempo de uso continuo del producto a
30–40 minutos por sesión, y tome
descansos de 10–20 minutos entre las
sesiones de trabajo. Asimismo, trate de
que la cantidad total de trabajo diario
sea inferior a 2 horas.
1. Si no sigue las recomendaciones en
cuanto a la duración del trabajo o a
la forma de trabajar (consulte
■USO
DEL PRODUCTO), usted podrá sufrir
una lesión por esfuerzo repetido
(RSI).
Si siente algún malestar, si sus
dedos o cualquier otra parte de su
cuerpo enrojecen o se hinchan,
consulte oportunamente a un
médico.
2. Para evitar problemas de ruido, en
general utilice el producto entre las 8
a.m. y las 5 p.m. los días laborables,
y de 9 a.m. a 5 p.m. durante el fin de
semana.
Compruebe y respete las disposiciones
locales respecto de los niveles de ruido y
horas de uso del producto.
■ ANTES DE ARRANCAR EL MOTOR
1. El área dentro de un perímetro de 15 m
de la persona que está usando el
producto debe considerarse como un
área de peligro en la que nadie debe
ingresar. Si fuera necesario, marque el
perímetro del área de trabajo con una
cuerda de color amarillo y letreros de
NOTA
ADVERTENCIA
5. Sicherer Betrieb
5. Per un funzionamento sicuro
5. Instrucciones de seguridad
Page 20

English Français
20
performed simultaneously by two or
more persons, care should also be
taken to constantly look around or
otherwise check for the presence and
locations of other people working so as
to maintain a distance between each
person sufficient to ensure safety.
2. Check the condition of working area to
avoid any accident by hitting hidden
obstacles such as stumps, stones,
cans, or broken grass.
Remove any obstacle before beginning
work.
3. Inspect the entire unit for loose
fasteners and fuel leakage. Make sure
that the cutting attachment is properly
installed and securely fastened.
4. Always use the shoulder strap. Adjust
the strap for comfort before starting the
engine. The strap should be adjusted to
fit your body according as your working.
■ STARTING THE ENGINE
1. Keep bystanders and animals at least
15 m away from the operating point. If
you are approached, immediately stop
the engine.
2. The product is equipped with a
centrifugal clutch mechanism, so the
cutting attachment begins to rotate as
soon as the engine is started by putting
the throttle into the start position. When
starting the engine, place the product
onto the ground in a flat clear area and
hold it firmly in place so as to ensure
that neither the cutting part nor the
throttle come into contact with any
obstacle when the engine starts.
Never place the throttle into the high
speed position when starting the
engine.
3. After starting the engine, check to make
sure that the cutting attachment stops
rotating when the throttle is moved fully
back to its original position. If it
continues to rotate even after the
throttle has been moved fully back, turn
off the engine and take the unit to your
authorized Komatsu Zenoah servicing
WARNING
IMPORTANT
et blanc par exemple) et poser des
panneaux d’avertissement. Lorsque
deux ou plusieurs personnes travaillent
ensemble ou à proximité, chacune doit
constamment faire attention et garder
ses distances par rapport aux autres
pour assurer une sécurité satisfaisante.
2. Vérifier constamment l’état de la zone
de travail pour éviter tout accident dû
aux impacts avec des obstacles tels
que les souches, les pierres, les boîtes
de conserves ou débris de verre.
Retirer tout obstacle avant de commencer
le travail.
3. Vérifier que la machine ne comporte
aucun élément desserré ou de fuite de
carburant. S’assurer que l’outil de
coupe est monté correctement et bien
serré.
4. Utiliser toujours la machine avec son
harnais. Le régler pour un confort
maximal avant de mettre le moteur en
marche. La sangle en bandoulière doit
être réglée à votre taille et suivant votre
posture de travail.
■ DEMARRAGE DU MOTEUR
1. Empêcher toute personne ou animal de
s’approcher à moins de 15 mètres. Si
quelqu’un s’approche trop près, arrêter
aussitôt le moteur.
2. La machine est équipée d’un
embrayage centrifuge et l’outil de coupe
se met à tourner dès que le moteur est
mis en route en plaçant l’accélérateur
en position de démarrage. Pour mettre
le moteur en route, poser et maintenir
fermement la machine à plat sur le sol
dans un endroit dégagé où aucun
obstacle ne peut entrer en contact avec
l’outil de coupe ou la manette
d’accélérateur une fois que le moteur
sera en marche.
Ne jamais mettre la manette de
l’accélérateur à fond lors de la mise en
marche.
3. Une fois le moteur en marche, vérifier
que l’outil de coupe s’arrête de tourner
lorsque l’accélérateur est remis à zéro.
Si l’outil de coupe continue à tourner,
arrêter le moteur et rapporter la
machine chez le revendeur agréé pour
la faire réparer.
AVERTISSEMENT
IMPORTANT
5. For safe operation 5. Consignes de securite
Page 21

EspañolDeutsch Italiano
21
Sollten mehrere Personen gleichzeitig
in demselben Bereich arbeiten, stets
auf ausreichenden Abstand achten, um
die Sicherheit aller Mitarbeiter zu
gewährleisten.
2. Den Zustand des Arbeitsbereiches
prüfen, um einen Unfall aufgrund
versteckter Hindernisse wie Stümpfe,
Steine oder zerbrochenes Glas
vermieden werden.
Hindernisse vor Arbeitsbeginn
wegräumen.
3. Prüfen Sie das gesamte Gerät auf
lockere Befestigungen und
Kraftstofflecks. Sicherstellen, daß das
Schneidblatt richtig installiert und fest
fixiert ist.
4. Immer den Schultergurt verwenden.
Den Gurt vor dem Starten des Motors
so einstellen, Der Riemen sollte so
eingestellt werden, dass er der
Arbeitshaltung entspricht und sicher am
Körper sitzt.
■ DEN MOTOR STARTEN
1. Zuschauer und Tiere mindestens 15
Meter vom Arbeitsbereich fernhalten.
Wenn sich Ihnen jemand nähert, sofort
den Motor stoppen.
2. Das Produkt verfügt über einen
Zentrifugalkupplungsmechanismus.
Dadurch beginnt sich das Schneidblatt
zu drehen, sobald der Drosselhebel in
die Startposition gebracht wird. Beim
Starten des Motors, das Produkt auf
einen ebenen Boden stellen und
festhalten, so daß das Schneidteil und
die Drossel bei Start des Motors nicht in
Kontakt mit Fremdkörpern kommen.
Niemals die Drossel in die
Schnellaufposition bewegen, wenn der
Motor gestartet wird.
3. Nach dem Starten des Motors
sicherstellen, daß das Blatt stoppt,
wenn die Drossel zurück in die
Ausgangsposition bewegt wird. Sollte
sich das Blatt weiterhin bewegen, den
Motor sofort abstellen und das Gerät
zur Reparatur einem autorisierten
Komatsu Zenoah-Vertragshändler
übergeben.
WARNUNG
WICHTIG
lavoro deve essere eseguito
contemporaneamente da due o più
persone, controllate continuamente la
posizione delle altre persone che
lavorano per mantenere una distanza di
sicurezza tra ciascuna persona,
garantendo così l’incolumità di tutti.
2. Controllate la condizione dell’area di
lavoro per evitare eventuali incidenti
dovuto al contatto con degli ostacoli
nascosti, ad esempio ceppi d’albero,
sassi, bidoni o pezzi di vetro rotto.
Rimovete eventuali ostacoli prima di
cominciare il lavoro.
3. Ispezionate l’intera unità per scoprire
eventuali dispositivi di fissaggi lenti o
eventuali perdite di carburante.
Assicuratevi che la testa tagliente sia
stata installata e fissata in modo ben
saldo.
4. Usate sempre la tracolla. Regolate la
tracolla prima di accendere il motore.
La cinghia deve essere regolata al
vostro corpo in base al vostro lavoro.
■ ACCENSIONE DEL MOTORE
1. Assicuratevi che le persone e gli
animali si trovino ad una distanza di
almeno 15 metri dal punto di lavoro. Se
vi si avvicinano, spegnete il motore
immediatamente.
2. Il prodotto è stato dotato di un
meccanismo ad innesto centrifugale, in
modo tale che la testa tagliante inizia a
girare appena si accende il motore
posizionando la leva del gas nella
posizione di avviamento. Prima di
accendere il motore, posizionate il
prodotto sul terreno in un luogo piano e
privo di ostacoli e tenetelo fermo nella
posizione per assicurarvi che né la
parte tagliente né la leva del gas venga
in contatto con eventuali ostacoli
quando si accende il motore.
Non posizionate mai la leva del gas
nella posizione ad alta velocità per
accendere il motore.
3. Dopo aver acceso il motore, controllate
che la testa tagliente smetta di ruotare
appena si rimette la leva del gas nella
posizione originale. Se dovesse
continuare a girare anche dopo aver
AVVERTIMENTO
IMPORTANTE
advertencia. Cuando el trabajo vaya a
ser realizado simultáneamente por dos
o más personas, también se deberá
tener la precaución de mirar
constantemente alrededor y verificar la
presencia y posición de las demás
personas que están trabajando, a fin de
mantener una distancia prudente entre
cada persona que garantice su
seguridad.
2. Compruebe las condiciones del área de
trabajo a fin de evitar accidentes que
pueden ocurrir al golpear obstáculos
ocultos tales como tocones, piedras,
latas o vidrios rotos.
Quite todos los obstáculos antes de iniciar
el trabajo.
3. Inspeccione la unidad completa para
determinar si tiene sujetadores sueltos
o fugas de combustible. Asegúrese de
que el accesorio de corte esté
debidamente instalado y asegurado.
4. Utilice siempre la correa de hombro.
Ajuste la correa a su comodidad antes
de arrancar el motor. La correa debería
estar ajustada para adaptarse a su
cuerpo según la forma de trabajar.
■ ARRANQUE DEL MOTOR
1. Mantenga a espectadores y animales a
una distancia de al menos 15 metros
del lugar de uso de la máquina. Si
alguien se aproxima, detenga
inmediatamente el motor.
2. El producto está equipado con un
mecanismo de embrague magnético,
por lo que el accesorio de corte
comienza a girar inmediatamente
cuando se arranca el motor poniendo el
acelerador en posición de arranque. Al
arrancar el motor, ponga el producto en
el suelo, en un lugar plano y despejado,
y sujételo firmemente para asegurarse
de que la pieza de corte y el acelerador
no puedan entrar en contacto con
ningún obstáculo cuando el motor
arranque.
Nunca ponga el acelerador en la
posición de alta velocidad al arrancar
el motor.
3. Después de arrancar el motor,
compruebe que el accesorio de corte
deja de girar cuando usted devuelve
completamente el acelerador a su
posición original. Si el accesorio de
ADVERTENCIA
IMPORTANTE
5. Sicherer Betrieb
5. Per un funzionamento sicuro
5. Instrucciones de seguridad
Page 22

English Français
22
dealer for repair.
■ USING THE PRODUCT
Cut only materials recommended by
the manufacturer. And use only for
tasks explained in the manual.
1. Grip the handles firmly with both hands
using your whole hand. Place your feet
slightly apart (slightly further apart than
the width of your shoulders) so that
your weight is distributed evenly across
both legs, and always be sure to
maintain a steady, even posture while
working.
2. Keep cutting attachment below waist
level.
3. Maintain the speed of the engine at the
level required to perform cutting work,
and never raise the speed of the engine
above the level necessary.
4. If the unit start to shake or vibrate, turn
off the engine and check the whole unit.
Do not use it until the trouble has been
properly corrected.
5. Keep all parts of your body away from
rotating cutting attachment and hot
surfaces.
6. Never touch the muffler, spark plug, or
other metallic parts of the engine while
the engine is in operation or
immediately after shutting down the
engine. Doing so could result in serious
burns or electrical shock.
• IF SOMEONE COMES
1. Guard against hazardous situations at
all times. Warn adults to keep pets and
children away from the area. Be careful
if you are approached. Injury may result
from flying debris.
2. If someone calls out or otherwise
interrupts you while working, always be
sure to turn off the engine before
turning around.
■ MAINTENANCE
1. In order to maintain your product in
proper working order, perform the
maintenance and checking operations
described in the manual at regular
IMPORTANT
■ UTILISATION DE LA MACHINE
Ne couper avec la machine que les
matériaux recommandés par le
fabricant.
1. Tenir les poignées de la machine
fermement des deux mains. Ecarter
légèrement les jambes (pour que les
pieds reposent sur une largeur un peu
plus importante que celle des épaules)
et avoir une posture de travail stable et
répartir le poids du corps également sur
chaque jambe.
2. Maintenir l’outil de coupe toujours plus
bas que le niveau de la taille.
3. Faire tourner le moteur à la vitesse
appropriée à la coupe sans jamais
accélérer inutilement au dessus du
niveau nécessaire.
4. Si la machine se met à vibrer ou à créer
des secousses, arrêter le moteur et
procéder à une vérification totale de la
machine.
5. Se tenir à distance de l’outil de coupe
ou des parties chaudes de la machine.
6. Ne jamais toucher le silencieux, la
bougie ou toute autre partie métallique
du moteur pendant le fonctionnement
ou aussitôt après son arrêt. Dans ces
circonstances, les risques de brûlures
ou d’électrocution sont importants.
• SI QUELQU’UN S’APPROCHE
1. Il faut se préserver des situations
dangereuses à tout moment. Avertir les
adultes de maintenir les enfants et les
animaux à distances car le risque de
recevoir des projections d’objet est
important.
2. Si quelqu’un appelle ou interrompt le
travail d’une manière ou d’une autre,
arrêter le moteur avant de se tourner
vers la personne.
■ ENTRETIEN
1. De manière à conserver la machine en
parfait état de marche, effectuer à
intervalles réguliers les opérations et
les vérifications d’entretien décrites
IMPORTANT
5. For safe operation 5. Consignes de securite
Page 23

EspañolDeutsch Italiano
23
■ BENUTZUNG DES PRODUKTES
Nur Materialien abschneiden, die durch
den Hersteller empfohlen werden. Und
nur für die in der Anleitung
beschriebenen Aufgaben verwenden.
1. Die Griffe fest mit beiden Händen
fassen. Die Beine etwas spreizen
(weiter als die Schulter), damit das
Gewicht gut verteilt ist. Auf stabilen
Stand und gleichmäßige Bewegungen
achten.
2. Das Blatt unter Hüfthöhe halten.
3. Die Drehzahl des Motors auf die
auszuführende Aufgabe einstellen.
Niemals die Drehzahl über den
notwendigen Wert anheben.
4. Wenn das Gerät beginnt zu vibrieren,
den Motor ausschalten und das
gesamte Gerät prüfen. Das Gerät so
lange nicht verwenden, bis der Fehler
gefunden und beseitigt ist.
5. Alle Körperteile von dem sich
drehenden Blatt und heißen
Oberflächen fernhalten.
6. Niemals während des Betriebs oder
nach dem Abschalten bei noch warmen
Motor den Dämpfer, die Zündkerze
oder Metallteile berühren. Es können
ernste Verbrennungen oder ein
elektrischer Schlag verursacht werden.
• FALLS SICH JEMAND NÄHERT
1. Schutz gegen gefährliche Situationen
jederzeit. Erwachsene müssen gewarnt
werden, Kinder sowie Haustiere aus
dem Arbeitsbereich fern zu halten.
Gehen Sie vorsichtig vor, wenn sich
Ihnen jemand nähert. Es besteht
Verletzungsgefahr durch
herumfliegendes Schnittgut.
2. Wenn Sie jemand ruft oder Sie bei Ihrer
Arbeit unterbricht, immer zuerst den
Motor abstellen, bevor Sie sich
umdrehen.
■ WARTUNG
1. Die in dieser Anleitung beschriebenen
Wartungsarbeiten und Inspektionen in
regelmäßigen Abständen durchführen,
um stets einen einwandfreien Zustand
WICHTIG
riposto la leva del gas nella posizione
originale, spegnete il motore e portate
l’unità al più vicino centro di assistenza
tecnica autorizzata dalla Komatsu
Zenoah per i lavori di assistenza
tecnica.
■ UTILIZZO DEL PRODOTTO
Tagliate solo i materiali raccomandati
dal fabbricante. Usate il prodotto solo
nel modo spiegato nel presente
manuale.
1. Afferrate le impugnature fermamente
con ambedue le mani, usando l’intera
mano per afferrare l’impugnatura.
Mettetevi con le gambe leggermente
divaricate (poco più
divaricate della larghezza delle vostre
spalle), in modo tale che il vostro peso
sia distribuito regolarmente su
ambedue le gambe ed assicuratevi di
mantenere una posizione stabile e
regolare del corpo durante il lavoro.
2. Tenete la testa tagliente al di sotto del
livello della vita.
3. Mantenete la velocità del motore al
livello richiesto per effettuare il lavoro
del taglio e non aumentate mai la
velocità del motore più del necessario.
4. Se l’unità inizia a tremare o vibrare,
spegnete il motore e controllate l’intera
unità. Non usate l’unità fino a quando il
problema non è stato corretto.
5. Tenete ogni parte del vostro corpo
lontano dalle parti taglienti che girano e
dalle superfici calde.
6. Non toccate mai la marmitta, la candela
o altri parti di metallo del motore mentre
quest’ultimo è in funzione o
immediatamente dopo aver spento il
motore. Altrimenti potete subire gravi
scottature o scosse elettriche.
• SE VIENE QUALCUNO
1. Proteggetevi sempre contro situazioni
pericolose. Avvertite gli adulti di tenere
gli animali domestici ed i bambini
lontani dall’area. Fate attenzione se vi
si avvicinano. I detriti che volano
possono causare delle lesioni agli
esseri viventi.
2. Se qualcuno vi chiama o vi interrompe
in altri modi durante il lavoro,
assicuratevi di spegnere il motore prima
di girarvi.
■ MANUTENZIONE
1. Per mantenere il prodotto in perfette
condizioni lavorative, effettuate il lavoro
di manutenzione ed i controlli descritti
nel manuale, agli intervalli stabiliti.
IMPORTANTE
corte sigue girando una vez que el
acelerador ha sido movido
completamente hacia atrás, apague el
motor y lleve la unidad a un centro de
servicio Komatsu Zenoah autorizado
para que sea reparada.
■ USO DEL PRODUCTO
Corte sólo los materiales indicados por
el fabricante y use la máquina sólo
para las tareas descritas en este
manual.
1. Coja los mangos firmemente con
ambas manos. Separe los pies
ligeramente (un poco más que el ancho
de sus hombros) de manera que su
peso quede distribuido uniformemente
en ambas piernas, y asegúrese de
mantener siempre una postura firme
mientras trabaja.
2. Mantenga el accesorio de corte por
debajo del nivel de su cintura.
3. Mantenga la velocidad del motor al
nivel necesario para realizar el trabajo
de corte, y nunca aumente la velocidad
del motor por encima del nivel
requerido.
4. Si la unidad comienza a dar sacudidas
o a vibrar, apague el motor y
compruebe la unidad completa. No use
la unidad hasta haber corregido
debidamente el problema.
5. Mantenga todas las partes de su
cuerpo alejadas del accesorio de corte
que gira y de las superficies calientes.
6. Nunca toque el silenciador, la bujía u
otras piezas metálicas del motor
mientras éste se encuentra en
funcionamiento o inmediatamente
después de apagarlo. De lo contrario,
usted podrá sufrir serias quemaduras o
descargas eléctricas.
• SI ALGUIEN SE APROXIMA
1. Evite las situaciones peligrosas en todo
momento. Advierta a los adultos que
mantengan a sus niños y mascotas
lejos del área de trabajo. Tenga
cuidado cuando alguien se le acerque.
Los desechos que salen despedidos
pueden causar lesiones.
2. Si alguien le llama o le interrumpe de
alguna otra forma mientras trabaja,
asegúrese de apagar siempre el motor
antes de voltear.
■ MANTENIMIENTO
1. A fin de mantener el producto en
buenas condiciones de funcionamiento,
realice las operaciones de
mantenimiento y comprobación que se
IMPORTANTE
5. Sicherer Betrieb
5. Per un funzionamento sicuro
5. Instrucciones de seguridad
Page 24

English Français
24
intervals.
2. Always be sure to turn off the engine
before performing any maintenance or
checking procedures.
(1)Check ok !
The metallic parts reach high
temperatures immediately after
stopping the engine.
3. When replacing the cutting attachment
or any part, or when replacing the oil or
any lubricant, always be sure to use
only KOMATSU ZENOAH products or
products which have been certified
by KOMATSU ZENOAH for use with
the KOMATSU ZENOAH product.
4. In the event that any part must be
replaced or any maintenance or repair
work not described in this manual must
be performed, please contact a
representative from the store nearest
KOMATSU ZENOAH authorized
servicing dealer for assistance.
5. Do not use any accessory or
attachment other than those bearing the
KOMATSU ZENOAH mark and
recommended for the unit.
6. Under no circumstances should you
ever take apart the product or alter it in
any way. Doing so might result in the
product becoming damaged during
operation or the product becoming
unable to operate properly.
■ HANDLING FUEL
1. The engine of the KOMATSU ZENOAH
product is designed to run on a mixed
fuel which contains highly flammable
gasoline. Never store cans of fuel or
refill the tank of the unit in any place
where there is a boiler, stove, wood fire,
electrical sparks, welding sparks, or any
other source of heat or fire which might
ignite the fuel.
2. Never smoke while operating the unit or
refilling its fuel tank.
3. When refilling the tank, always turn off
the engine and allow it to cool down.
Take a careful look around to make
sure that there are no sparks or open
flames anywhere nearby before
refueling.
(1)Refill after cooling the engine.
4. Wipe spilled fuel completely using a dry
rag if any fuel spillage occurs during
refueling.
5. After refueling, screw the fuel cap back
tightly onto the fuel tank and then carry
the unit to a spot 10 feet or more away
WARNING
5. For safe operation 5. Consignes de securite
dans le mode d’emploi.
2. Toujours arrêter le moteur avant
d’effectuer les vérifications ou
opérations d’entretien.
(1)Tout est en ordre de marche !
Les pièces métalliques atteignent leur
plus haute température aussitôt après
l’arrêt de la machine.
3. Lors du remplacement de pièce de
rechange, de l’huile ou du graissage,
veiller à n’utiliser que des pièces ou
des produits KOMATSU ZENOAH
.
4. Pour toute pièce devant être
remplacée, opération d’entretien ou de
réparation, contacter le centre de SAV
agréé par KOMATSU ZENOAH le plus
proche pour demander assistance.
5. Ne pas utiliser d’accessoires ou d’outils
de marque autres que KOMATSU
ZENOAH ou non agréés.
6. Ne jamais démonter ou modifier la
machine, quelles que soient les
circonstances. Dans le cas contraire, la
machine risque d’être endommagée en
cours d’utilisation ou de ne pas
fonctionner correctement.
■ MANIPULATION DU CARBURANT
1. Le moteur de la débroussailleuse
KOMATSU ZENOAH est conçu pour
fonctionner avec du mélange contenant
de l’essence hautement inflammable.
Ne jamais entreposer de bidon de
carburant ou refaire le plein de la
machine dans un local où se trouve une
chaudière, un feu ouvert, un poste à
souder électrique ou toute autre source
de chaleur ou d’étincelles pouvant
enflammer le carburant.
2. Ne jamais fumer pendant l’utilisant de la
machine ou son remplissage en
carburant.
3. Avant de refaire le plein de carburant,
laisser refroidir la machine. Vérifier
aussi l’absence de flammes ou
d’étincelles à proximité.
(1)Refaire le plein après avoir laissé
refroidir la débroussailleuse
4. Essuyer avec un chiffon toute trace de
carburant renversé lors du remplissage.
5. Une fois le plein effectué, bien resserrer
le bouchon du réservoir et éloigner la
AVERTISSEMENT
Page 25

EspañolDeutsch Italiano
25
5. Sicherer Betrieb
5. Per un funzionamento sicuro
5. Instrucciones de seguridad
2. Assicuratevi sempre di spegnere il
motore prima di effettuare i lavori di
manutenzione o le procedure di
controllo.
(1)Controllo OK!
Le parti di metallo raggiungono alte
temperature immediatamente dopo
l’arresto del motore.
3. Quando sostituite un componente
oppure quando sostituite l’olio o il
lubrificante, assicuratevi di usare
esclusivamente i prodotti della
KOMATSU ZENOAH o i prodotti
garantiti dalla KOMATSU ZENOAH
per l’uso in questo prodotto.
4. Qualora bisogna sostituire un
componente oppure effettuare del
lavoro di manutenzione o riparazione
non descritto in questo manuale,
rivolgetevi al più vicino centro di
assistenza tecnica autorizzata dalla
KOMATSU ZENOAH.
5. Non usate degli accessori o attrezzi
diversi da quelli recanti il marchio
KOMATSU ZENOAH raccomandati per
l’unità.
6. In nessuna circostanza dovete
smontare il prodotto o modificarlo.
Altrimenti il prodotto si potrà
danneggiare durante l’utilizzo oppure
può non funzionare correttamente.
■ MANEGGIO DEL CARBURANTE
1. Il motore della Komatsu Zenoah è stato
disegnato per un funzionamento
usando una miscela di carburante
contenente della benzina altamente
infiammabile. Non custodite mai i
canistri di carburante o riempite il
serbatoio dell’unità in un luogo dove c’è
una caldaia, una stufa, un camino, delle
scintille elettriche, delle scintille di
saldatura o altri sorgenti di calore o
fuoco che possono causare
l’accensione del carburante.
2. Non fumate mai mentre usate l’unità o
riempite il serbatoio del carburante della
stesa.
3. Quando riempite il serbatoio, spegnete
il motore ed aspettate che si raffreddi.
Guardatevi bene intorno per assicurarvi
che non ci siano delle scintille o fiamme
nella vicinanza, prima di riempire il
serbatoio con il carburante.
(1)Riempite il serbatoio quando il
motore si è raffreddato
4. Rimovete il carburante eventualmente
AVVERTIMENTO
describen en el manual a intervalos
regulares.
2. Asegúrese de apagar siempre el motor
antes de realizar cualquier labor de
mantenimiento o comprobación.
(1)Comprobación correcta!
Las partes metálicas alcanzan altas
temperaturas y se mantienen calientes
cuando se apaga el motor.
3. Al reemplazar el cualquier pieza, o al
cambiar el aceite o cualquier lubricante,
asegúrese
de usar solamente
productos KOMATSU ZENOAH o
productos que hayan sido
certificados por KOMATSU ZENOAH
para ser usados con esta máquina
.
4.En caso de que sea necesario sustituir
alguna pieza o realizar algún trabajo de
mantenimiento o reparación no descrito
en este manual, tome contacto con un
representante del centro de servicio
KOMATSU ZENOAH autorizado más
cercano.
5. Utilice solamente piezas y accesorios
marcados KOMATSU ZENOAH y
recomendados para la unidad.
6. No se debe, bajo ninguna
circunstancia, desarmar el producto ni
modificarlo de ninguna forma. De lo
contrario, el producto podrá dañarse
durante su uso o podrá funcionar
incorrectamente.
■ MANIPULACIÓN DEL COMBUSTIBLE
1. El motor de este producto KOMATSU
ZENOAH ha sido diseñado para
funcionar con una mezcla de
combustible que contiene gasolina
altamente inflamable. No almacene los
bidones de combustible ni llene el
tanque de la unidad cerca de calderas,
estufas, fogatas, chispas eléctricas,
chispas de soldadura o cualquier otra
fuente de calor o fuego que pueda
inflamar el combustible.
2. Nunca fume mientras utiliza la unidad o
llena el tanque de combustible.
3. Antes de llenar el tanque de
combustible, apague primero el motor y
permita que se enfríe. Asimismo,
inspeccione cuidadosamente el lugar
para asegurarse de que no haya
chispas o llamas en las cercanías.
(1)Llenar una vez que el motor se haya
enfriado
4. Si derrama combustible mientras llena
el tanque, limpie completamente el
combustible derramado con un trapo.
ADVERTENCIA
sicherzustellen.
2. Unbedingt den Motor vor Wartung oder
Inspektion abschalten.
(1)Prüfung in Ordnung!
Die Metallteile erreichen sofort nach
Abstellen des Motors hohe
Temperaturen.
3. Wenn das ein Teil ersetzt wird, Öl oder
andere Schmierstoffe ausgewechselt
werden, sicherstellen, daß nur
KOMATSU ZENOAH-Produkte oder
von KOMATSU ZENOAH
zugelassene Produkte durch
KOMATSU ZENOAH-Produkte ersetzt
werden
.
4. Wenn ein Bauteil ersetzt werden muß
oder Wartungs- oder Reparaturarbeiten
müssen durchgeführt werden, die nicht
in dieser Anleitung beschrieben sind,
wenden Sie sich bitte an Ihren nächsten
KOMATSU ZENOAH-autorisierten
Vertragshändler.
5. Verwenden Sie kein Zubehör oder
Ausstattungen, die nicht mit dem
KOMATSU ZENOAH-Symbol versehen
und die nicht für dieses Gerät
empfohlen sind.
6. Unter keinen Umständen sollte das
Gerät auseinandergebaut oder in
irgendeiner Weise verändert werden.
Anderenfalls kann das Produkt während
des Betriebs beschädigt oder nicht
einwandfrei betrieben werden.
■ HANDHABUNG DES KRAFTSTOFFS
1. Der Motor des KOMATSU ZENOAHProduktes wurde für die Verwendung
eines Kraftstoffgemischs entwickelt, das
hoch-entzündbares Benzin enthält.
Niemals Tankkanister dort
aufbewahren, wo sich Boiler, Öfen,
Holzfeuer, elektrische Funken,
Lötfunken oder andere Hitzquellen oder
Feuer befinden, die den Kraftstoff
entzünden können, sowie niemals dort
Kraftstoff nachfüllen.
2. Niemals während des Betriebs rauchen
oder Kraftstoff nachfüllen.
3. Für das Auffüllen des Tanks, den Motor
immer ausschalten und ihn abkühlen
lassen. Sehen Sie sich vor dem
Nachfüllen sorgfältig um, um
sicherzustellen, daß sich keine Funken
oder offene Flammen in der Nähe
befinden.
(1)Nachfüllen nachdem der Motor
abgekühlt ist
4. Wischen Sie verschütteten Kraftstoff mit
einem trockenen Tuch vollständig weg,
WARNUNG
Page 26

English Français
5. For safe operation 5. Consignes de securite
26
from where it was refueled before
turning on the engine.
■ TRANSPORTATION
1. When you finish trimming in one
location and wish to continue work in
another spot, turn off the engine, lift up
the unit and carry it paying attention to
the blade.
2. Never forget to place the protective
cover over the blades.
3. When transporting the unit over long
distances, detach the blade and fix the
unit by ropes.
4. Never transport the product over rough
roads over long distances by vehicle
without removing all fuel from the fuel
tank. If doing so, fuel might leak from
the tank during transport.
machine à plus de 3 mètres de l’endroit
où le plein a été fait avant de la
remettre en marche.
■ TRANSPORT
1. Lorsque la coupe d’une zone est
terminée et que l’on souhaite continuer
dans un autre endroit, arrêter le moteur,
soulever la machine et la transporter en
faisant attention à la lame de coupe.
2. Ne pas oublier de remettre en place le
protège lame.
3. Lorsque l’on transporte la machine sur
une grande distance, retirer la lame et
l’arrimer avec des cordes.
4. Ne jamais transporter la machine sur
mauvaise route et grande distance sans
vider complètement le réservoir de
carburant.
Page 27

EspañolDeutsch Italiano
5. Sicherer Betrieb
5. Per un funzionamento sicuro
5. Instrucciones de seguridad
27
wenn während des Nachfüllens
Kraftstoff verschüttet wird.
5. Nach dem Nachfüllen, den Tankdeckel
wieder auf den Kraftstofftank
schrauben, das Gerät vor dem Starten
des Motors zu einem Ort bringen, der 3
Meter oder mehr von dem Ort entfernt
ist, an dem nachgefüllt wurde.
■ TRANSPORT
1. Wenn Sie das Schneiden an einer
Stelle stoppen und Sie an einer
anderen weiterarbeiten möchten, den
Motor ausschalten und das Gerät
anheben. Achten Sie beim
Transportieren mit äußerster Vorsicht
auf das Blatt.
2. Niemals vergessen, die
Schutzabdeckung über das Blatt zu
platzieren.
3. Wenn das Gerät über eine lange
Distanz transportiert wird, das Blatt
abnehmen und das Gerät mit Seilen
fixieren.
4. Niemals das Produkt über eine lange
Distanz auf schlechten Straßen in
einem Fahrzeug transportieren, ohne
das vorher der Tank geleert wurde.
Anderenfalls kann während des
Transports Kraftstoff auslaufen.
fuoriuscito durante il riempimento del
serbatoio usando un strofinaccio
asciutto.
5. Dopo aver riempito il serbatoio, avvitate
il coperchio del carburante in modo ben
saldo sul serbatoio del carburante e poi
portate l’unità ad un punto che dista
almeno 10 piedi dal luogo di
riempimento del carburante, prima di
accendere il motore.
■ TRASPORTO
1. Quando avete finito di tagliare in un
posto e desiderate continuare il lavoro
in un altro luogo, spegnete i motore e
sollevate l’unità e poi portatelo nel
luogo desiderato facendo attenzione
alla lama.
2. Non dimenticate di posizionare il
coperchio di protezione sulle lame.
3. Quando trasportate l’unità per lunghe
distanze, staccate la lama e fissate
l’unità con una corda.
4. Non trasportate mai il prodotto per
lunghe distanze con un veicolo che
cammina su strade sconnesse, senza
aver svuotato tutto il carburante dal
serbatoio del carburante. Altrimenti, il
carburante può fuoriuscire dal serbatoio
durante il trasporto.
5. Después de llenar el tanque de
combustible, atornille firmemente el
tapón de llenado al tanque de
combustible, y traslade la unidad a un
lugar a 10 pies de distancia de donde
fue llenada antes de encender el motor.
■ TRANSPORTE
1. Cuando haya terminado de cortar en un
sitio y desee continuar trabajando en
otro, apague el motor, levante la unidad
y transpórtela teniendo cuidado con la
cuchilla.
2. No olvide colocar las cubiertas
protectoras sobre las hojas.
3. Cuando tenga que transportar la unidad
por grandes distancias, desmonte la
hoja y asegure la unidad con cuerdas.
4. Nunca transporte la unidad en vehículo
por grandes distancias a través de
caminos en mal estado, sin antes
vaciar todo el combustible del tanque.
De lo contrario, el combustible podrá
derramarse del tanque durante el
transporte.
Page 28

English Français
28
6. Set up 6. Assemblage
■ MOUNTING ENGINE (SE1)
1. Push the driveshaft housing toward the
clutch housing and rotate it by hand to
check that the driveshaft is engaged
with the gears.
2. Insert the driveshaft housing into the
clutch housing until it bottoms, and align
the positioning holes on the both
housings and install the screw.
3. Fasten the clamp securely with 2
screws.
■ CONNECTING THROTTLE WIRE
1. Remove the air cleaner cover.
2. Connect the end of the throttle wire to
the joint on the top of the carburetor.
(SE2)
■ CONNECTING SWITCH WIRES
• Connect the switch wires between the
engine and the main unit. Pair the wires
of the same color.
■ INSTALLING HANDLE
• Mount the handle to the shaft tube and
clamp it at a location that is comfortable
to you. (SE3)
(1)About 48cm
■ ATTACHING THE TRIMMING
MECHANISM (SE4)
1. Remove the cap on the end of the main
pipe.
2. Remove the screw screwed into the
end of the trimming mechanism.
3. Insert the end of the trimming
mechanism into the main pipe.
4. Line up the hole on the end of the
trimming mechanism into which the
screw is to be inserted with the hole on
the main pipe, and screw the screw
firmly in.
5. Using a 10-mm wrench, screw in the
hexagonal bolt provided to fix the
trimming mechanism into place.
(1)Main pipe
(2)Trimming mechanishm
(3)Screw hole
(4)Screw
(5)Fastening bolt
■ BALANCE UNIT
1. Put on strap and attach unit to strap.
2. Depending on the working posture,
slide clamp up or down until unit
balances and the strap fits your body.
■ MONTAGE DU MOTEUR (SE1)
1. Engager le tube de protection de l’arbre
de transmission dans le carter
d’embrayage et le tourner à la main
pour vérifier que les cannelures de
l’arbre sont bien engagées dans leur
logement.
2. Insérer à fond l'arbre de transmission
dans le boîtier de l'appareil et aligner
les trous de positionnement des deux
parties pour installer les vis de fixation.
3. Bien serrer la bride à l’aide des deux
vis.
■ RACCORDEMENT DU CABLE
D’ACCELERATEUR
1. Enlever le capot du filtre à air.
2. Raccorder l’extrémité du câble
d’accélérateur dans sa fixation sur le
dessus du carburateur. (SE2)
■ RACCORDEMENT DES FILS
ELECTRIQUES
• Relier les fils électriques entre le
moteur et la machine en faisant
correspondre les couleurs de fils.
■ MISE EN PLACE DE LA POIGNEE
• Monter la poignée sur le bras de
l'appareil et la positionner pour avoir
une prise confortable et sûre (SE3).
(1)Environ 48cm
■ FIXATION DU MECANISME DE
COUPE (SE4)
1. Enlever le capuchon au bout du tube
principal.
2. Retirer la vis vissée dans le bout du
mécanisme de coupe.
3. Insérez le bout du mécanisme de coupe
dans le tuyau principal.
4. Alignez le trou d'un bout du mécanisme
de coupe dans lequel la vis doit être
insérée avec le trou du tuyau principal,
et visser la vis fermement.
5. A l'aide d'une clé de 10 mm, visser le
boulon à six pans pour fixer le
mécanisme de coupe en place.
(1)Tuyau principal
(2)Mécanisme de coupe
(3)Trou de la vis
(4)Vis
(5)Boulon de fixation
■ EQUILIBRAGE DE LA MACHINE
1. Mettre le harnais sur l’épaule et y
accrocher la débroussailleuse.
2. Suivant votre posture de travail, faites
glisser le collier de haut en bas sur la
machine jusqu’à ce que celle-ci soit en
équilibre et que la sangle soit adaptée à
votre taille.
SE1
SE2
(1)
SE3
SE4
Page 29

EspañolDeutsch Italiano
29
6. Zusammenbau 6. Impostazione 6. Montaje
■ ANBRINGEN DES MOTORS (SE1)
1. Das Antriebswellen-Gehäuse zum
Kupplungsgehäuse schieben und sie
per Hand drehen, um zu prüfen, ob die
Antriebswelle in die Zahnräder eingreift.
2. Passen Sie das Antriebswellengehäuse
in das Kupplungsgehäuse bis zum
Anschlag ein, richten Sie die
Positionierlöcher auf beiden Gehäusen
aus und installieren Sie die Schraube.
3. Dann die Schelle mit zwei Schrauben
festschrauben.
■ EINHÄNGEN DES DROSSELZUGS
1. Den Luftfilterdeckel abnehmen.
2. Das Ende des Drosselzugs in das
Gestänge oben am Vergaser
einhängen. (SE2)
■ ANSCHLUSS DER
SCHALTERKABEL
• Das Schalterkabel zwischen dem Motor
und dem Hauptgerät anschließen.
Kabelpaar mit gleicher Farbe.
■ ANBRINGEN DES HALTEGRIFFS
• Befestigen Sie den Griff am Wellenrohr
und klemmen Sie ihn an der Stelle fest,
an der es für Sie komfortabel ist. (SE3)
(1) Etwa 48cm
■ ANBRINGEN DES SCHNEIDKOPFES
(SE4)
1. Die Kappe vom Ende des Wellenrohrs
abnehmen.
2. Die Schraube aus der Spannhülse am
Schneidkopf herausdrehen.
3. Das Wellenrohr in die Spannhülse am
Schneidkopf einführen.
4. Die Bohrungen von Wellenrohr und
Spannhülse fluchten und die Schraube
fest hineindrehen.
5. Dann den Schneidkopf durch Anziehen
der Klemmschraube mit einem 10-mmSechskantschlüssel fixieren.
(1)Wellenrohr
(2)Schneidkopf
(3)Schraubenbohrung
(4)Schraube
(5)Klemmschraube
■ GERÄT AUSBALANCIEREN
1. Den Gurt anlegen und Gerät am Gurt
befestigen.
2. Der Halter sollte entsprechend der
Arbeitshaltung nach oben oder unter
geschoben werden, bis das Gerät
ausgeglichen ist und der Riemen sicher
am Körper sitzt.
■ MONTAGGIO DEL MOTORE (SE1)
1. Premete l’albero motore verso
l’alloggiamento dell’innesto e giratelo
manualmente per controllare che
l’albero motore venga azionato dagli
ingranaggi.
2. Inserite l’alloggiamento dell’albero di
trasmissione fino in fondo, allineate i
fori di posizionamento su entrambi gli
alloggiamenti ed iserite la vite.
3. Fissate il morsetto in modo ben saldo
con due viti.
■ COLLEGAMENTO DEL FILO DEL
GAS
1. Rimovete il coperchio del filtro dell’aria.
2. Collegate l’estremità del filo del gas al
giunto in alto sul carburatore. (SE2)
■ COLLEGAMENTO DEI FILI DI
COMMUTAZIONE
• Collegate i fili di commutazione tra il
motore e l’unità principale. Accoppiate i
fili dello stesso colore.
■ INSTALLAZIONE DELLA MANIGLIA
• Montate l’impugnatura sul tubo
dell’albero e bloccatela nella posizione
più comoda per voi. (SE3)
(1)48cm circa
■ INSTALLAZIONE DEL MECCANISMO
DI POTATURA (SE4)
1. Rimuovere il coperchio dall’estremità
del tubo principale.
2. Rimuovere la vite avvitata all’estremità
del meccanismo di potatura.
3. Inserire l’estremità del meccanismo di
potatura nel tubo principale.
4. Allineare il foro all’estremità del
meccanismo di potatura nel quale la
vite va inserita, con il foro del tubo
principale, poi avvitare la vite in modo
ben saldo.
5. Usare una chiave da 10 mm per
avvitare il bullone esagonale in
dotazione per fissare il meccanismo di
potatura.
(1)Tubo principale
(2)Meccanismo di potatura
(3)Foro per la vite
(4)Vite
(5)Bullone di fissaggio
■ UNITÀ DI EQUILIBRIO
1. Installate la tracolla e fissate l’unità
sulla stessa.
2. A seconda della vostra posizione di
lavoro, fate scivolare la cinghia verso
l’alto e verso il basso fino a mettere
l’unità in equilibrio e adattare la cinghia
al vostro corpo.
■ MONTAJE DEL MOTOR (SE1)
1. Empujar el bastidor del eje de
transmisión hacia el bastidor del
embrague y hacerlo girar a mano para
comprobar que el eje de transmisión
está enganchado a las marchas.
2. Inserte el bastidor del eje de
transmisión en el bastidor del
embrague hasta que llegue al fondo,
aliene los orificios de ambos bastidores
y coloque el tornillo.
3. Fije la abrazadera firmemente con dos
tornillos.
■ CONEXIÓN DEL ALAMBRE DEL
ACELERADOR
1. Retire la cubierta del filtro de aire.
2. Conecte el extremo del alambre del
acelerador a la junta situada en la parte
superior del carburador. (SE2)
■ CONEXIÓN DE LOS ALAMBRES DEL
INTERRUPTOR
• Conecte los alambres del interruptor
entre el motor y la unidad principal.
Paree los alambres del mismo color.
■ INSTALACIÓN DEL MANGO
• Instale el mango en el tubo del eje y
asegúrelo en la posición que le sea
más cómoda. (SE3)
(1)Aproximadamente 48cm
■ FIJACIÓN DEL MECANISMO DE
PODA (SE4)
1. Quite la tapa del extremo del tubo
principal.
2. Quite los tornillos atornillados en el
extremo del mecanismo de poda.
3. Introduzca el extremo del mecanismo
de poda en el tubo principal.
4. Alinee el orificio del extremo del
mecanismo de poda en el que se va a
introducir el tornillo con el orificio del
tubo principal, y atornille el tornillo
firmemente.
5. Mediante una llave de 10 mm, atornille
el tornillo hexagonal provisto para fijar
el mecanismo de poda en su posición.
(1)Tubo principal
(2)Mecanismo de poda
(3)Orificio del tornillo
(4)Tornillo
(5)Tornillo de sujeción
■ CÓMO EQUILIBRAR LA UNIDAD
1. Colóquese la correa y asegure la
unidad a la correa.
2. Dependiendo de la postura de trabajo,
deslice la abrazadera hacia arriba o
hacia abajo hasta que la unidad se
equilibre y la correa se adapte a su
cuerpo.
Page 30

English Français
7. Fuel 7. Carburant
30
■ FUEL
• Gasoline is very flammable. Avoid
smoking or bringing any flame or
sparks near fuel. Make sure to stop
the engine and allow it cool before
refueling the unit. Select outdoor
bare ground for fueling and move at
least 3m (10ft) away from the fueling
point before starting the engine.
• The Komatsu Zenoah engines are
lubricated by oil specially formulated for
air-cooled 2-cycle gasoline engine use.
If Komatsu Zenoah oil is not available,
use an anti-oxidant added quality oil
expressly labeled for air-cooled 2-cycle
engine use. (JASO FC GRADE OIL or
ISO EGC GRADE)
• Do not use BIA or TCW (2-stroke watercooling type) mixed oil.
RECOMMENDED MIXING RATIO
GASOLINE 50:OIL 1
• Exhaust emission are controlled by
the fundamental engine parameters
and components (eq., carburation,
ignition timing and port timing)
without addition of any major
hardware or the introduction of an
inert material during combustion.
• These engines are certified to operate
on unleaded gasoline.
• Make sure to use gasoline with a
minimum octane number of 89 RON
(USA/Canada: 87AL)
• If you use a gasoline of a lower octane
value than prescribed, there is a danger
that the engine temperature may rise
and an engine problem such as piston
seizing may consequently occur.
• Unleaded gasoline is recommended to
reduce the contamination of the air for
the sake of your health and the
environment.
• Poor quality gasolines or oils may
damage sealing rings, fuel lines or fuel
tank of the engine.
WARNING
■ CARBURANT
• L’essence est un produit hautement
inflammable. S’abstenir de fumer et
ne tolérer aucun flamme ou source
d’étincelles à proximité de l’endroit
où est entreposée l’essence. Arrêter
le moteur puis le laisser refroidir un
peu avant de remplir le réservoir.
Remplir le réservoir à l’extérieur sur
une surface nue et éloigner le bidon
d’essence d’au moins 3 mètres avant
de mettre le moteur de la
tronçonneuse en marche.
• Les moteurs Komatsu Zenoah sont
lubrifiés à l’aide d’une huile
spécialement conçue pour les moteurs
2 temps à refroidissement par air. S’il
n’est pas possible d’obtenir de l’huile
Komatsu Zenoah, utilisez une huile
antioxydante de haute qualité
spécialement destinée aux moteurs 2
temps à refroidissement par air (HUILE
DE TYPE JASO FC ou DE TYPE ISO
EGC).
• Ne jamais utiliser des huiles mélangées
BIA ou TCW (pour les moteurs 2 temps
à refroidissement par eau).
RAPPORT DE MELANGE RECOMMANDE
ESSENCE 50 : HUILE 1
• La composition des gaz
d’échappement est contrôlée par les
principaux paramètres et
composants du moteur (comme par
ex., la carburation, le calage de
l’allumage et le calage du port) sans
avoir besoin d’effectuer des
changements de matériel ou à
introduire un matériel inerte durant
la combustion.
• Ces moteurs sont certifiés pour
fonctionner avec de l’essence sans
plomb.
• Utiliser toujours une essence à indice
d’octane minimal de 89RON
(USA/Canada : 87AL).
• Si une essence à indice d’octane
inférieur est utilisée, il y a un risque
important d’augmentation dangereuse
de la température du moteur, entraînant
des problèmes de moteur au niveau
des cylindres par exemple.
• Il est préférable d’utiliser de l’essence
sans plomb afin de réduire la pollution
de l’atmosphère et de participer ainsi à
la protection de l’environnement et de
votre santé.
• De l’essence ou de l’huile de basse
qualité risque d’endommager les joints,
les conduites d’essence ou le réservoir
d’essence du moteur.
AVERTISSEMENT
Page 31

EspañolDeutsch Italiano
7. Kraftstoff 7. Carburante 7. Combustible
31
■ CARBURANTE
• La benzina è estremamente
infiammabile. Evitate di fumare o
avvicinare fiamme libere o scintille al
carburante. Spegnete il motore e
lasciatelo raffreddare prima di effettuare il rifornimento. Il rifornimento
deve avvenire all’aperto su un
terreno incolto e prima di avviare il
motore occorre spostarsi ad almeno
3 m dal punto di rifornimento.
•I motori Komatsu Zenoah sono
lubrificati con olio formulato
appositamente per motori a benzina a 2
tempi raffreddati ad aria. Qualora non
disponiate dell’olio Komatsu Zenoah,
utilizzate un olio antiossidante di alta
qualità omologato per motori a 2 tempi
raffreddati ad aria (OLIO JASO FC
GRADE oppure ISO EGC GRADE).
• Non utilizzate olio miscelato BIA o TCW
(per motori a 2 tempi raffreddati ad
acqua).
RAPPORTO DI MISCELAZIONE
RACCOMANDATO
50 BENZINA : 1 OLIO
• Le emissioni di scarico sono
controllate da parametri e
componenti fondamentali del motore
(ad es. carburazione, fasatura di
accensione e fasatura delle luci)
senza l’aggiunta di altri componenti
o l’introduzione di un materiale
inerte durante la combustione.
• Questi motori sono omologati per
funzionare con benzina senza piombo.
• Accertatevi di utilizzare una benzina
con un numero minimo di ottani di
89RON (USA/Canada: 87AL).
• L’uso di una benzina con numero di
ottani inferiore a quello indicato può
provocare il surriscaldamento del
motore e problemi come il grippaggio
dei pistoni.
• Si raccomanda l’uso di benzina senza
piombo per motivi di riduzione
dell’inquinamento atmosferico, per la
vostra salute e per l’ambiente.
• Benzine oppure oli di scarsa qualità
possono danneggiare i segmenti, i tubi
del carburante oppure il serbatoio del
carburante del motore.
AVVERTIMENTO
■ COMBUSTIBLE
• La gasolina es muy inflamable. Evite
fumar o producir cualquier llama o
chispa cerca del combustible.
Asegúrese de detener el motor y
dejar que se enfríe antes de repostar
la unidad. Seleccione un terreno al
aire libre para el reabastecimiento y
aleje la unidad una distancia de por
lo menos 3 metros (10 pies) del
punto de abastecimiento antes de
poner en marcha el motor.
• Los motores de Komatsu Zenoah están
lubricados con un aceite especialmente
formulado para uso en motores de
gasolina de 2-tiempos refrigerados por
aire. Si no estuviere disponible el aceite
de Komatsu Zenoah, utilice un aceite
de calidad con antioxidante agregado
que sea expresamente para uso en
motores refrigerados por aire de 2ciclos (ACEITE JASO FC GRADE o
ISO EGC GRADE).
• No utilice BIA o TCW (tipo 2-tiempos
refrigerados por agua) mezclado con
aceite.
PROPORCIÓN DE LA MEZCLA
RECOMENDADA
GASOLINA 50 : ACEITE 1
• Las emisiones del escape son
controladas por los parámetros y
componentes fundamentales del
motor (por ejemplo, carburación,
ajuste de encendido y de puerto) sin
agregar ningún software mayor o
introducir un material inerte durante
la combustión.
• Estos motores están certificados para
funcionar con gasolina sin plomo.
• Asegúrese de utilizar gasolina con un
octanaje mínimo de 89RON
(EE.UU./Canadá: 87AL).
• Si utiliza gasolina con un valor de
octanaje menor que el prescrito, existe
el peligro de que la temperatura del
motor se eleve y ocurra como
consecuencia un problema en este,
como por ejemplo un atascamiento del
pistón.
• Se recomienda la gasolina sin plomo
para reducir la contaminación del aire
por el bien de su salud y del
medioambiente.
• Gasolinas o aceites de mala calidad
puede dañar los anillos de sellado, las
líneas o el tanque de combustible del
motor.
ADVERTENCIA
■ KRAFTSTOFF
• Benzin ist sehr leicht entzündlich.
Rauchen oder das Handhaben
offener Flammen oder Funken in der
Nähe des Kraftstoffs ist zu
vermeiden. Zudem ist
sicherzustellen, dass der Motor
gestoppt und abgekühlt ist, bevor
Kraftstoff nachgefüllt wird. Dafür ist
ein leerer Boden im Freien zu
wählen; anschließend sollte der
Motor wenigstens 3 m entfernt vom
Ort des Auftankens gestartet
werden.
• Die Motoren von Komatsu Zenoah sind
mit Öl geschmiert, das über eine
besondere Formel für die Verwendung
mit luftgekühlten 2-Takt-Benzinmotoren
verfügt. Falls kein Öl von Komatsu
Zenoah verfügbar ist, bitte ein Öl mit
Antioxidations-Zusatz verwenden, das
ausdrücklich für die Verwendung mit
luftgekühlten 2-Takt-Benzinmotoren
vorgesehen ist (JASO FC GRADE OIL
oder ISO EGC GRADE).
• Kein gemischtes BIA- oder TCW-Öl (2Takt-Wasserkühlung) verwenden.
EMPFOHLENES MISCHUNGSVERHÄLTNIS
KRAFTSTOFF 50 : ÖL 1
• Die Abgasemission wird durch die
grundlegenden Motor-Parameter und
-Komponenten gesteuert (d. h. durch
die Gemischaufbereitung, die
Zündungszeit und die Steuerzeit),
ohne dass maßgebliche
Zusatzgeräte oder die Zuführung
irgend eines inerten Materials
während der Verbrennung
erforderlich wäre.
• Diese Motoren sind für den Betrieb mit
unverbleitem Benzin zertifiziert.
• Es ist sicherzustellen, dass Benzin mit
einer Mindestoktanzahl von 89RON
(USA/Kanada: 87AL) verwendet wird.
• Wenn Benzin mit einem niedrigeren
Oktanwert als angegeben verwendet
wird, besteht die Gefahr eines
Ansteigens der Motortemperatur, was
Motorprobleme wie beispielsweise ein
Kolbenanfressen zur Folge haben kann.
• Unverbleites Benzin wird empfohlen,
um die Luftverschmutzung zugunsten
Ihrer Gesundheit und zugunsten der
Umwelt zu reduzieren.
• Benzin oder Öl schlechter Qualität kann
zu einer Beschädigung der
Dichtungsringe, der Kraftstoffleitungen
oder des Kraftstofftanks des Motors
führen.
WARNUNG
Page 32

English Français
32
7. Fuel 7. Carburant
■ HOW TO MIX FUEL
Pay attention to agitation.
1. Measure out the quantities of gasoline
and oil to be mixed.
2. Put some of the gasoline into a clean,
approved fuel container.
3. Pour in all of the oil and agitate well.
4. Pour In the rest of gasoline and agitate
again for at least one minute. As some
oils may be difficult to agitate
depending on oil ingredients, sufficient
agitation is necessary for the engine to
last long. Be careful that, if the agitation
is insufficient, there is an increased
danger of early piston seizing due to
abnormally lean mixture.
5. Put a clear indication on the outside of
the container to avoid mixing up with
gasoline or other containers.
6. Indicate the contents on outside of
container for easy identification.
■ FUELING THE UNIT
1. Untwist and remove the fuel cap. Rest
the cap on a dustless place.
2. Put fuel into the fuel tank to 80% of the
full capacity.
3. Fasten the fuel cap securely and wipe
up any fuel spillage around the unit.
1. Select bare ground for fueling.
2. Move at least 10feet (3meters) away
from the fueling point before starting
the engine.
3. Stop the engine before refueling the
unit. At that time, be sure to
sufficiently agitate the mixed
gasoline in the container.
FOR YOUR ENGINE LIFE, AVOID;
1. FUEL WITH NO OIL(RAW GASOLINE)
– It will cause severe damage to the
internal engine parts very quickly.
2. GASOHOL – It can cause deterioration
of rubber and/or plastic parts and
disruption of engine lubrication.
3. OIL FOR 4-CYCLE ENGINE USE – It
can cause spark plug fouling, exhaust
WARNING
IMPORTANT
■ COMMENT OBTENIR UN BON
MELANGE
• Faire attention à ne pas trop remuer
le carburant.
1. Mesurez les volumes d’essence et
d’huile à mélanger.
2. Verser un peu d’essence dans un
récipient à carburant propre.
3. Verser ensuite toute l’huile, puis bien
remuer le tout.
4. Verser enfin le reste de l’essence, puis
bien mélanger l’ensemble pendant une
minute environ. Etant donné que
certains types d’huiles sont plus fluides
que d’autres en fonction de leur
composition, un brassage énergique est
nécessaire afin de garantir une bonne
marche du moteur pendant longtemps.
En effet, en cas de mélange insuffisant,
un risque majeur de problèmes au
niveau des cylindres peut apparaître
en raison d’un mélange hétérogène.
5. Placer une étiquette assez grande sur
le récipient afin d’éviter de le confondre
avec de l’essence ou avec d’autres
récipients.
6. Indiquer les composants sur cette
étiquette afin d’en faciliter
l’identification.
■ REMPLISSAGE DU RESERVOIR
1. Dévisser puis retirer le bouchon de
carburant. Déposer ce bouchon sur une
surface non poussiéreuse.
2. Remplir le réservoir de carburant à 80%
de sa capacité totale.
3. Visser fermement le bouchon du
réservoir et essuyer toute éventuelle
éclaboussure d’essence sur l’appareil.
1. Effectuer le remplissage sur une
surface nue.
2. S’éloigner d’au moins 3 mètres du
point de remplissage avant de
démarrer le moteur.
3. Arrêter le moteur avant de démarrer
l’appareil. Bien remuer à cet instant
le mélange d’essence dans le
réservoir.
A EVITER POUR PROLONGER LA
DUREE DE VIE DU MOTEUR;
1. ESSENCE SANS HUILE (ESSENCE
PURE) – L’essence pure est capable
d’endommager très rapidement les
pièces du moteur.
2. ESSENCE-ALCOOL – Ce mélange
risque de très rapidement détruire les
pièces en caoutchouc et/ou en
AVERTISSEMENT
IMPORTANT
Page 33

EspañolDeutsch Italiano
33
7. Kraftstoff 7. Carburante 7. Combustible
■ MISCHUNG DES KRAFTSTOFFES
• Es ist auf ein gutes Durchmischen zu
achten.
1. Die zu mischende Benzin- und
Ölmenge abmessen.
2. Etwas Benzin in einen sauberen, dafür
geeigneten Kraftstoffbehälter schütten.
3. Das gesamte Öl dazu schütten und das
Gemisch gut durchmischen.
4. Den Rest des Benzins dazu schütten
und das Gemisch erneut für mindestens
eine Minute durchmischen. Da je nach
Ölzusatz einige Ölsorten recht schwer
durchzumischen sein könnten, ist ein
ausreichendes Durchmischen
erforderlich, damit der Motor lange
betriebsbereit ist. Es ist darauf zu
achten, dass bei nicht ausreichendem
Durchmischen aufgrund einer
ungewöhnlich mageren Mischung ein
erhöhtes Risiko eines verfrühten
Kolbenanfressens besteht.
5. Auf die Außenseite des Behälters ist
eine klare Kennzeichnung anzubringen,
damit verhindert wird, dass der Behälter
mit anderen Benzin- oder sonstigen
Behältern verwechselt wird.
6. Der Inhalt ist für eine leichte
Identifizierung auf der Außenseite zu
kennzeichnen.
■ BETANKEN DES GERÄTES
1. Den Kraftstoff-Tankverschluss
losdrehen und entfernen. Den
Verschluss an einem staubfreien Ort
ablegen.
2. Den Kraftstofftank bis zu 80 % seines
vollen Fassungsvermögens mit
Kraftstoff befüllen.
3. Den Kraftstoff-Tankverschluss sicher
fest drehen und eventuelle KraftstoffFlecken um das Gerät herum
aufwischen.
1. Für das Betanken einen leeren
Boden wählen.
2. Das Gerät vor dem Starten des
Motors mindestens 3 Meter vom Ort
des Auftankens entfernen.
3. Den Motor vor dem Auftanken
stoppen. Zu diesem Zeitpunkt
sicherstellen, dass das gemischte
Benzin im Behälter ausreichend
durchgemischt wird.
ZUGUNSTEN EINER LANGEN
BETRIEBSDAUER IHRES MOTORS IST
FOLGENDES ZU VERMEIDEN;
1. DIE VERWENDUNG VON
KRAFTSTOFF OHNE ÖL (PURER
KRAFTSTOFF) – Die Verwendung
dessen führt schnell zu ernsthaften
Schäden der inneren Motor-Bauteile.
2. DIE VERWENDUNG VON GASÖL –
WARNUNG
WICHTIG
■ MISCELAZIONE DEL CARBURANTE
• Prestate attenzione durante
l’agitazione.
1. Misurate le quantità di olio e benzina da
miscelare.
2. Versate parte della benzina in un
contenitore per carburante adeguato e
pulito.
3. Versate tutto l’olio ed agitate bene.
4. Versate il resto della benzina ed agitate
nuovamente per almeno un minuto.
Poichè alcuni olii possono essere
difficili da miscelare, per garantire la
massima durata del motore è
necessario agitare bene. In caso di
miscelazione insufficiente, aumenta il
rischio di grippaggio prematuro del
pistone a causa della miscela
eccessivamente povera.
5. Marcate chiaramente il contenitore per
evitare di confondere il contenuto con
quello di altri contenitori.
6. Annotate il contenuto all’esterno del
contenitore per identificarlo facilmente.
■ RIFORNIMENTO DELL’UNITA’
1. Svitate e togliete il tappo del
carburante. Appoggiatelo su una
superficie priva di polvere.
2. Versate il carburante nel serbatoio fino
all’80% della sua capacità.
3. Fissate saldamente il tappo del
carburante e rimuovete l’eventuale
carburante fuoriuscito intorno all’unità.
1. Il rifornimento deve avvenire
all’aperto su un terreno incolto.
2. Prima di avviare il motore, spostatevi
ad almeno 3 metri dal punto di
rifornimento.
3. Spegnete il motore prima di iniziare il
rifornimento. Accertatevi di aver
agitato sufficientemente la miscela
nel contenitore.
PER LA MASSIMA DURATA DEL
MOTORE, EVITATE;
1. CARBURANTE SENZA OLIO
(BENZINA GREZZA) – Provocherà
velocemente gravi danni ai componenti
interni del motore.
2. GASOLIO – Può deteriorare le parti in
gomma e/o plastica e compromettere la
lubrificazione del motore.
AVVERTIMENTO
IMPORTANTE
■ COMO MEZCLAR EL COMBUSTIBLE
• Preste atención en la agitación.
1. Mida las cantidades de gasolina y
aceite que va a mezclar.
2. Coloque un poco de gasolina dentro de
un depósito de combustible aprobado y
limpio.
3. Vierta en este todo el aceite y agítelo
bien.
4. Vierta el resto de la gasolina y agite la
mezcla nuevamente durante por lo
menos un minuto. La mezcla de
algunos aceites puede resultar difícil,
dependiendo de los ingredientes del
aceite, es necesaria una agitación
suficiente para beneficio de la duración
del motor. Tenga cuidado, si la
agitación es insuficiente, existe un
aumento en el peligro de atascamiento
del pistón anticipado debido a una
mezcla anormalmente pobre.
5. Coloque una indicación o etiqueta clara
en la parte exterior del depósito para
evitar que este se pueda confundir con
depósitos de gasolinas u otras
sustancias.
6. Indique los contenidos en la parte
exterior del deposito para una fácil
identificación.
■ ABASTECIMIENTO DE LA UNIDAD
1. Desenrosque y retire la tapa del
combustible. Coloque la tapa sobre un
lugar sin polvo.
2. Coloque el combustible dentro del
tanque a un 80% de la capacidad total.
3. Fije en forma segura la tapa del
combustible y limpie cualquier
derramamiento de combustible que se
encuentre al rededor de la unidad.
1. Seleccione un terreno al descubierto
para el reabastecimiento.
2. Aleje la unidad una distancia de por
lo menos 3 metros (10 pies) del
punto de abastecimiento antes de
poner en marcha el motor.
3. Detenga el motor antes de
reabastecer la unidad. En ese
momento, asegúrese de agitar en
forma suficiente la gasolina
mezclada en el depósito.
PARA CONTRIBUIR A LA VIDA ÚTIL
DEL MOTOR, EVITE;
1. COMBUSTIBLE SIN ACEITE
(GASOLINA CRUDA) – Esto
ocasionará rápidamente daños graves
a las partes internas del motor.
2. GASOHOL – Este puede causar el
deterioro de las piezas de caucho y/o
plásticas y una alteración en la
ADVERTENCIA
IMPORTANTE
Page 34

34
English Français
7. Fuel 7. Carburant
port blocking, or piston ring sticking.
4. Mixed fuels which have been left
unused for a period of one month or
more may clog the carburetor and
result in the engine failing to operate
properly.
5. In the case of storing the product for a
long period of time, clean the fuel tank
after rendering it empty. Next, activate
the engine and empty the carburetor of
the composite fuel.
6. In the case of scrapping the used mixed
oil container, scrap it only at an
authorized repository site.
As lot details of quality assurance, read
the description in the section Limited
Warranty carefully. Moreover, normal
wear and change in product with no
functional influence are not covered by the
warranty. Also, be careful that, if the
usage in the instruction manual is not
observed as to the mixed gasoline, etc.
described therein, it may not be covered
by the warranty.
NOTE
plastique et d’empêcher la lubrification
du moteur.
3. HUILE POUR MOTEURS 4 TEMPS –
Elles risquent d’encrasser les bougies,
de bloquer l’échappement ou
d’endommager les segments des
pistons.
4. Les mélanges d’huile et de
carburants laissés au repos pendant
une période d’un mois ou plus
risquent sérieusement d’encrasser le
carburateur et d’entraîner par
conséquent une défaillance du moteur.
5. Dans l’éventualité d’une longue période
d’inactivité, nettoyer le réservoir de
carburant après l’avoir vidangé. Allumer
ensuite le moteur et vider le mélange
d’essence du carburateur.
6. En cas de mise au rebut du récipient
contenant le mélange d’huile, en
disposer toujours dans une décharge
autorisée.
Pour plus de détails sur la garantie de
qualité, lire attentivement la section à
propos de la Garantie Limitée. Il est
également important de rappeler que
l’usure et les dégradations normales de
l’appareil ne sont en aucun cas couvertes
par cette garantie. De plus, le non-respect
des instructions relatives aux proportions
des mélanges d’essence, etc. décrites
dans ce mode d’emploi risque d’entraîner
un refus de couverture par la garantie.
REMARQUE
Page 35

35
EspañolDeutsch Italiano
7. Kraftstoff 7. Carburante 7. Combustible
lubricación del motor.
3. ACEITE PARA USO EN MOTORES DE
4-TIEMPOS – Esto puede ocasionar
incrustaciones de la bujía de
encendido, bloqueo del orificio de
escape o del anillo de pistón.
4. Los combustibles mezclados que se
hayan dejado sin utilizar durante un
período de un mes o más pueden
obstruir el carburador y provocar una
falla haciendo que el motor no funcione
correctamente.
5. En el caso de almacenamiento del
producto durante un período de tiempo
prolongado, limpie el tanque de
combustible después de haberlo
desocupado. Luego, active el motor y
vacíe del carburador el combustible
compuesto.
6.En el caso de tener que desechar el
depósito de aceite mezclado, hágalo
solo en un sitio repositorio autorizado.
Para detalles sobre la garantía de calidad,
lea cuidadosamente la descripción que
está en la sección de garantía limitada.
Por otra parte, el desgaste y cambio
normal en el producto sin influencia
funcional no está cubierto por la garantía.
También tenga cuidado si en el manual de
instrucciones en la parte sobre el uso, no
están contemplados detalles como la
mezcla de gasolina, etc. es posible que
esto no sea cubierto por la garantía.
NOTA
3. OLIO PER MOTORI A 4 TEMPI – Può
imbrattare la candela, intasare la porta
di scarico o grippare le guarnizioni dei
pistoni.
4. Miscele rimaste inutilizzate per più di
un mese possono intasare il
carburatore compromettendo il corretto
funzionamento del motore.
5. In caso di inutilizzo prolungato del
motore, svuotate il serbatoio del
carburante e pulitelo. Successivamente,
accendete il motore e svuotate il
carburante dalla miscela.
6. Per l’eventuale smaltimento, i
contenitori con la miscela di olio
esausto devono essere consegnati ad
un centro di raccolta autorizzato.
Per maggiori dettagli sulla garanzia di
qualità, leggete attentamente la
descrizione nella sezione Garanzia
limitata. La garanzia non copre la normale
usura e le eventuali modifiche al prodotto
che non ne influenzano la funzionalità. La
garanzia viene invalidata anche nel caso
di mancato rispetto delle istruzioni di
miscelazione del carburante ecc.
contenute in questo manuale.
NOTA
Die Verwendung dessen kann zu einer
Beeinträchtigung der Gummi- und/oder
Plastikteile und zu einer Spaltung der
Motorschmierung führen.
3. DIE VERWENDUGNG VON ÖL FÜR
DIE VERWENDUNG MIT 4-TAKTMOTOREN – Die Verwendung dessen
kann zu einer
Zündkerzenverschmutzung, zu einer
Blockierung der Auspufföffnung oder zu
einem Feststecken des Kolbenrings
führen.
4. Die Verwendung gemischten
Kraftstoffs, der über den Zeitraum
eines Monats oder länger nicht
verwendet wurde, kann zu einer
Verstopfung des Vergasers führen, was
zur Folge hätte, dass der Motor nicht
mehr ordnungsgemäß arbeitet.
5. Falls das Gerät über einen längeren
Zeitraum hinweg gelagert werden soll,
ist der Kraftstofftank nach seiner
vollständigen Entleerung zu reinigen.
Anschließend ist der Motor zu starten
und der Vergaser von Verbundkraftstoff
zu befreien.
6. Für den Fall eines erforderlichen
Entsorgens des bereits verwendeten
Behälters mit gemischtem Kraftstoff ist
dieser ausschließlich an den dafür
vorgesehenen AbfallstoffSammelstellen zu entsorgen.
Hinsichtlich der Einzelheiten über die
Qualitätssicherung bitte die Beschreibung
im Abschnitt „Eingeschränkte
Garantiebestimmungen“ sorgfältig
durchlesen. Darüber hinaus werden
normaler Verschleiß und Änderungen des
Gerätes ohne funktionelle Auswirkungen
nicht durch die Garantie abgedeckt.
Zudem ist darauf zu achten, dass die
Folgen einer Nichtbeachtung der in der
Bedienungsanleitung beschriebenen
Hinweise insbesondere hinsichtlich der
Verwendung des gemischten Kraftstoffs o.
Ä. unter Umständen nicht durch die
Garantie abgedeckt sind.
HINWEIS
Page 36

English Français
8. Operation 8. Fonctionnement
36
■ STARTING ENGINE
The cutting head will start rotating
upon the engine starts.
1. Rest the unit on a flat, firm place. Keep
the cutting head off the ground and
clear of surrounding objects as it will
start rotating upon starting of the
engine.
2. Push the primer pump several times
until overflown fuel flows out in the clear
tube. (OP1)
3. Move the choke lever to the closed
position. (OP2)
(1)choke lever
(2)close
(3)open
4. Set the ignition switch to the “RUN(A)”
position. While pulling the throttle
lever(OP3,1,2), push the throttle set
button(OP3,3), and release the
throttle(OP3,2), then the throttle lever is
in to the “start position”. (OP3)
(A) run
(B) stop
(C) ignition switch
5. While holding the unit firmly, pull out the
starter rope quickly until engine fires.
(OP4)
• Avoid pulling the rope to its end or
returning it by releasing the knob. Such
actions can cause starter failures.
6. Move the choke lever downward to
open the choke. And restart the engine.
(OP2)
7. Allow the engine to warm up for a
several minutes before starting
operation.
1. When restarting the engine immediately
after stopping it, leave the choke open.
2. Overchoking can make the engine hard
to start due to excess fuel. When the
engine failed to start after several
attempts, open the choke and repeat
pulling the rope, or remove the spark
plug and dry it.
NOTE
IMPORTANT
WARNING
OP1
(1)
(2)
(3)
OP2
OP3
OP4
■ MISE EN MARCHE DU MOTEUR
Faire attention que la lame de coupe se
mette à tourner dès que le moteur
démarre.
1. Poser la machine dans un endroit plat
et ferme. Ne pas poser la tête de coupe
sur le sol et dégager tout objet pouvant
être projeté par la lame qui se met à
tourner dès que le moteur démarre.
2. Appuyer plusieurs fois sur la pompe
d’amorçage jusqu’à ce que de
l’essence s’écoule par le tuyau de tropplein (OP1).
3. Placer le starter en position fermée
(OP2).
(1)levier du starter
(2)fermé
(3)ouvert
4. Placer l’interrupteur de contact sur la
position de démarrage “Marche(A)”.
Tout en tirant sur la manette
d’accélérateur(OP3,1,2), appuyer sur le
bouton(OP3,3) de verrouillage pour
libérer l’accélérateur(OP3,2), le placer
alors sur la position de démarrage
“Start”. (OP3)
(A) Marche
(B) Arrêt
(C) Interrupteur de démarrage.
5. Tout en maintenant fermement la
machine, tirer la poignée de démarrage
(OP4).
• Eviter de tirer à fond sur la corde de
démarrage ou de relâcher brutalement
la poignée. Ces opérations risquent
d’endommager le système de
démarrage.
6. Ramener le levier du starter vers le bas
pour le remettre en position ouverte. Et
redémarrer le moteur (OP2).
7. Laisser le moteur chauffer pendant
plusieurs minutes avant de commencer
à travailler.
1. Pour redémarrer le moteur aussitôt
après l’avoir arrêté, laisser le starter en
position ouverte.
2. Trop tirer sur le starter risque de rendre
le moteur difficile à démarrer à cause
de l’excès de carburant. Si le moteur
refuse de démarrer après plusieurs
tentatives infructueuses, placer le
starter en position ouverte et tirer à
nouveau plusieurs fois la corde de
REMARQUE
IMPORTANT
AVERTISSEMENT
Page 37

EspañolDeutsch Italiano
8. Betrieb 8. Funzionamento 8. Uso
37
■ STARTEN DES MOTORS
Beachten Sie, daß der Schneidekopf
beim Start des Motors sich auch dreht.
1. Das Gerät auf einen flachen stabilen
Untergrund platzieren. Den
Schneidekopf vom Boden fernhalten.
Da sich das Schneidblatt beim
Anlassen zu bewegen beginnt,
sämtliche Hindernisse aus dem Bereich
entfernen.
2. Die Vorpumpe mehrmals betätigen, bis
übergelaufener Kraftstoff durch den
durchsichtigen Schlauch fließt. (OP1)
3. Den Chokehebel auf die geschlossene
Position bewegen. (OP2)
(1)Chokehebel
(2)schließen
(3)öffnen
4. Den Zündschalter auf die Position
“Betrieb(A)” stellen. Während der
Drosselhebel (OP3,1,2) gezogen wird,
den Blockierungsknopf
schieben(OP3,3) und die Drossel
loslassen(OP3,2). Dann wird der
Drosselhebel an der “Startposition”
fixiert. (OP3)
(A) Betrieb
(B) Stopp
(C) Zündschalter
5. Während das Gerät festgehalten wird,
das Startseil schnell herausziehen, bis
der Motor zündet. (OP4)
• Das Seil nicht bis zum Anschlag
herausziehen und nicht durch
Loslassen des Griffs aufwickeln lassen,
da dies zum Versagen des Anlassers
führt.
6. Bewegen Sie den Chokehebel nach
unten, um den Choke zu öffnen. Starten
Sie den Motor erneut. (OP2)
7. Den Motor mehrere Minuten
warmlaufen lassen, bevor mit der Arbeit
begonnen wird.
1. Für den Neustart des Motors, den
Choke offen lassen.
2. Wird der Choke zu sehr geschlossen,
kann es aufgrund von übermäßiger
Kraftstoffzufuhr zu Startschwierigkeiten
kommen. Sollte der Motor trotz
mehrerer Versuche nicht anspringen,
den Choke öffnen und wiederholt das
Anlasserseil betätigen oder aber die
Zündkerze herausschrauben und
HINWEIS
WICHTIG
WARNUNG
■ AVVIAMENTO DEL MOTORE
Non dimenticate che la testa tagliente
inizia a girare appena si accende il
motore.
1. Appoggiate l’unità su una superficie
piana e stabile. Tenete la testa tagliente
alzata dal terreno, lontana dagli oggetti
circostanti, poiché inizierà a girare
appena si accende il motore.
2. Premete la pompa dell’accensione a
freddo alcune volte fino a quando il
carburante in eccesso fuoriesce nel
tubo trasparente. (OP1)
3. Spostate la leva dell’aria nella posizione
chiusa. (OP2)
(1)Leva dell’aria
(2)Chiusa
(3)Aperta
4. Collocate l’interruttore di accensione
nella posizione “in funzione(A)”. Tirante
la leva del gas(OP3,1,2), premete il
taso di bloccaggio(OP3,3) e sbloccate
la valvola a farfalla(OP3,2), affinché la
leva del gas sia fissa nella posizione
“Start position”. (OP3)
(A) in funzione
(B) arresto
(C) interruttore di accensione
5. Afferrando in modo ben saldo
l’apparecchio, tirate la corda di avvio
finché l’apparecchio non si mette in
funzione. (OP4)
• Evitate di tirare la corda fino alla fine o
di farla ritornare sbloccando la
manopola. Altrimenti il motorino di
avviamento può non funzionare
correttamente.
6. Per aprire lo starter, muovete la levetta
verso il basso. Poi riavviate il motore.
(OP2)
7. Lasciate che il motore si riscaldi per
alcuni minuti prima di iniziare
l’operazione.
1. Lasciate l’aria aperta per riaccendere il
motore immediatamente dopo averlo
fermato.
2. Un’eccessiva chiusura dell’aria può
rendere difficile l’accensione del motore
per via dell’eccesso di carburante. Se il
motore non si accende dopo alcuni
tentativi, aprite l’aria e tirate la corda più
volte oppure rimovete la candela ed
asciugatela.
NOTA
IMPORTANTE
AVVERTIMENTO
■ ARRANQUE DEL MOTOR
Tenga presente que el cabezal cortador
comenzará a girar cuando el motor sea
arrancado.
1. Coloque la unidad sobre una superficie
plana y firme. Asegúrese de que el
cabezal cortador no esté en contacto
con el suelo y manténgalo alejado de
los objetos circundantes, ya que
comenzará a girar cuando el motor
arranque.
2. Pulse el cebador varias veces hasta
que el combustible fluya por el tubo
transparente. (OP1)
3. Mueva la palanca del estrangulador a la
posición de cierre. (OP2)
(1)Palanca del estrangulador
(2)cerrar
(3)abrir
4. Ajuste el interruptor de ignición a la
posición “iniciar(A)”. Mientras tira de la
palanca de aceleración(OP3,1,2), pulse
el botón de bloqueo(OP3,3) y libere el
acelerador(OP3,2), a continuación el
acelerador quedará fijado en la
“Posición de arranque”. (OP3)
(A) iniciar
(B) parar
(C) interruptor de encendido
5. Mientras sujeta la unidad firmemente,
tire rápidamente de la cuerda del
arrancador hacia fuera hasta que el
motor arranque. (OP4)
• Evite tirar de la cuerda hasta el final, y
no la suelte para devolverla a su
posición inicial. Estas acciones pueden
causar fallos en el arrancador.
6. Mueva la palanca del estrangulador
hacia abajo para abrir el estrangulador.
Y vuelva a arrancar el motor. (OP2)
7. Permita que el motor se caliente
durante varios minutos antes de
comenzar a usar la máquina.
1. Al volver a arrancar el motor
inmediatamente después de detenerlo,
deje el estrangulador abierto.
2. El uso excesivo del estrangulador
puede dificultar el arranque del motor
debido al exceso de combustible. Si el
motor no arranca después de varios
intentos, abra el estrangulador y vuelva
a tirar de la cuerda del arrancador, o
retire la bujía y séquela.
NOTA
IMPORTANTE
ADVERTENCIA
Page 38

English Français
8. Operation 8. Fonctionnement
38
■ STOPPING ENGINE (OP3)
1. Release the throttle lever and run the
engine for a half minute.
2. Shift the ignition switch to the “B”
position. (OP3)
• Except for an emergency, avoid
stopping the engine while pulling the
throttle lever.
■ ADJUSTING THROTTLE CABLE
• The normal play is 1 or 2mm when
measured at the carburetor side end.
Readjust with the cable adjuster as
required. (OP5)
(1)Cable adjuster
■ ADJUSTING IDLING SPEED (OP6)
1. When the engine tends stop frequently
at idling mode, turn the adjusting screw
clockwise.
2. When the cutting head keeps rotating
after releasing the trigger, turn the
adjusting screw counter-clockwise.
(1)Idle adjusting screw
• Warm up the engine before adjusting
the idling speed.
■ ADJUSTING THE MAXIMUM SPEED
• The screw at the throttle lever is for
adjusting the maximum rpm. (OP7)
• Turning the screw crock-wise, the rpm
becomes down, the otherwise, the rpm
becomes up. (STANDARD
OPERATION SPEED: 8000 ~ 9500
rpm)
Running engine with faster engine
speed than 9500 rpm may damage the
engine, slower engine speed than 8000
rpm may cause of the poor cutting
ability.
(1)Adjust screw
(2)Down
(3)Up
NOTE
IMPORTANT
(1)
OP6
.04 in
(1~2mm)
(1)
OP5
démarrage ou enlever et sécher la
bougie.
■ ARRET DU MOTEUR (OP3)
1. Relâcher la manette d’accélérateur et
laisser tourner le moteur pendant
encore 30 secondes.
2. Placer le bouton de contact sur
“Arrêt(B)” (arrêt). (OP3)
• Sauf en cas d’urgence, ne jamais
couper le contact lorsqu’on accélére.
■ REGLAGE CÂBLE
D’ACCÉLÉRATEUR
• le jeu normal est de 1 à 2 mm mesuré
au niveau du carburateur. Si
nécessaire, effectuer ce réglage à l’aide
du régleur. (OP5)
(1)Ajusteur de câble
■ REGLAGE DU RALENTI (OP6)
1. Lorsque le moteur a tendance à
s’arrêter souvent au ralenti, tourner la
vis dans le sens horaire.
2. Si la tête de coupe continue de tourner
au ralenti après avoir relâché la
manette d’accélérateur, tourner la vis
dans le sens contraire des aiguilles
d’une montre.
(1)Vis de réglage du ralenti
• Laisser chauffer le moteur avant
d’effectuer le réglage du ralenti.
■
REGLAGE DE LA VITESSE MAXIMALE
• La vis située à côté du levier
d’accélérateur sert à régler la vitesse de
rotation maximale (OP7).
• La vitesse de rotation diminue en la
tournant dans le sens des aiguilles
d’une monter et augmente dans le sens
contraire (Vitesse de fonctionnement
normale : entre 8.000 et 9.500 t/mn).
Faire tourner le moteur à des vitesses
supérieures à 9.500 t/mn risque de
l’endommager et en dessous de 8.000
t/mn, la coupe risque de perdre en
efficacité.
(1)Réglez les vis
(2)Diminution
(3)Augmentation
REMARQUE
IMPORTANT
OP7
Page 39

EspañolDeutsch Italiano
8. Betrieb 8. Funzionamento 8. Uso
39
■ ARRESTO DEL MOTORE (OP3)
1. Sbloccate la leva del gas e lasciate il
motore girare per mezzo minuto.
2. Collocate l’interruttore di accensione
nella posizione “arresto(B)”. (OP3)
• Evitate di fermare il motore tirando la
leva del gas, tranne in situazioni di
emergenza.
■ REGOLAZIONE CAVO DEL GAS
• Il gioco normale è di 1 o 2 mm,
misurato al lato del carburatore.
Effettuate la regolazione del gioco se
necessario, servendovi del regolatore
del cavo (OP5).
(1)Regolatore del cavo
■ REGOLAZIONE DELLA VELOCITÀ
NEL FUNZIONAMENTO AL MINIMO
(OP6)
1. Se il motore tende a fermarsi spesso
nel modo di funzionamento al minimo,
girate la vite di regolazione in senso
orario.
2. Girate la vite di regolazione in senso
orario mentre la testa tagliente continua
a girare dopo aver sbloccato il grilletto.
(1)Vite di regolazione della velocità del
minimo
• Riscaldate il motore prima di regolare la
velocità del minimo.
■ REGOLAZIONE DELLA VELOCITA’
MASSIMA
• La vite sulla leva di riduzione della
velocità serve per regolare il massimo
dei giri del motore (OP7)
• Girando la vite in senso orario, il
numero di giri diminuisce, girando in
senso contrario, aumenta (VELOCITA’
STANDARD DI FUNZIONAMETO:
8000 ~ 9500 giri/min.)
Se si fa girare il motore ad un numero
di giri più alto di 9500 si può
danneggiare il motore. Une velocità
inferiore a 8000 giri/min. può invece
causare una scarsa efficacia nel
tagliare.
(1)Regolazione della vite
(2)Giù
(3)Su
NOTA
IMPORTANTE
trocknen.
■ STOPPEN DES MOTORS (OP3)
1. Den Drosselhebel freigeben und den
Motor eine halbe Minute laufen lassen.
2. Dann den Zündschalter auf “Stopp(B)”
stellen. (OP3)
• Außer bei Notfällen den Motor nicht bei
gedrücktem Drosselhebel ausschalten.
■ EINSTELLEN DROSSELKABEL
• Normalerweise liegt das Spiel bei 1
oder 2 mm, wenn von der Ende der
Vergaserseite gemessen wird. Mit dem
Kabeleinsteller, falls erforderlich, neu
einstellen. (OP5)
(1)Kabeleinsteller
■ EINSTELLEN DES LEERLAUFS
(OP6)
1. Sollte der Motor im Leerlauf häufig
absterben, die Einstellschraube im
Uhrzeigersinn drehen.
2. Wenn der Schneidekopf nach
Loslassen des Auslösers sich immer
noch dreht, die Einstellschrauben
gegen den Uhrzeigersinn drehen.
(1) Leerlauf-Einstellschraube
• Den Leerlauf nur bei warmen Motor
einstellen.
■ EINSTELLUNG DER MAXIMALEN
GESCHWINDIGKEIT
• Mit der Schraube am Drosselhebel wird
die maximale Umdrehung eingestellt.
(OP7)
• Wird die Schraube im Uhrzeigersinn
gedreht, verringern sich die
Umdrehungen, wird sie gegen den
Uhrzeigersinn gedreht, werden sie
erhöht.
(STANDARDBETRIEBSGESCHWINDIGK
EIT: 8000 ~ 9500 U/min)
Wird der Motor mit einer
Geschwindigkeit von mehr als 9500
U/min. betrieben, kann der Motor
beschädigt werden, bei einer
langsameren Geschwindigkeit von
weniger als 8000 U/min. kann dies die
Schneideleistung verschlechtern.
(1)Schraube einstellen
(2)Nach unten
(3)Nach oben
HINWEIS
WICHTIG
■ CÓMO PARAR EL MOTOR (OP3)
1. Libere la palanca del acelerador y
mantenga el motor en marcha durante
medio minuto.
2. Mueva el interruptor de encendido a la
posición “parar(B)”. (OP3)
• Excepto en casos de emergencia, evite
detener el motor mientras tira de la
palanca del acelerador.
■ AJUSTE CABLE DEL ACELERADOR
• La holgura normal es de 1 – 2 mm
medida en el extremo del carburador.
Ajuste la holgura con el ajustador de
cable según sea necesario. (OP5)
(1)Ajustador de cable
■ AJUSTE DE LA VELOCIDAD DE
MARCHA EN VACÍO (OP6)
1. Cuando el motor tienda a detenerse
frecuentemente en régimen de marcha
en vacío, gire el tornillo de ajuste en el
sentido de las agujas del reloj.
2. Si el cabezal cortador sigue girando
una vez que se ha liberado el gatillo,
gire el tornillo de ajuste en el sentido
contrario a las agujas del reloj.
(1)Tornillo de ajuste de marcha mínima
• Caliente el motor antes de ajustar la
velocidad de marcha en vacío.
■ AJUSTE DE LA VELOCIDAD MÁXIMA
• El tornillo de la palanca del obturador
es para ajustar las rpm máximas.(OP7)
• Girando el tornillo en la dirección de las
agujas del reloj, las rpm bajan, y en la
otra dirección suben. (VELOCIDAD
ESTÁNDAR DE FUNCIONAMIENTO):
8000 ~ 9500 rpm)
El motor se podría estropear si se
mantiene a una velocidad de motor
superior a 9500 rem, la velocidad de
motor inferior a 8000 rpm podría causar
poca habilidad de corte.
(1)Ajustar tornillo
(2)Hacia arriba
(3)Hacia abajo
NOTA
IMPORTANTE
Page 40

English Français
40
8. Operation 8. Fonctionnement
OP8
• This product is equipped with
extremely sharp blades, and when
used improperly these blades can be
extremely dangerous, and improper
handling can cause accidents which
may in turn lead to serious injury or
death. For this reason, you should
always be careful to follow the
following instructions when using
your trimmer.
• Never hold the trimmer in a way in
which the blades are pointed towards
someone else.
• Never allow the blades to come into
proximity with your body while the
engine of the trimmer is in operation.
• Always be sure to turn off the engine
before changing the angle of the
blades, removing branches which have
become stuck in the blades, or at any
other time when coming into close
proximity with the blades.
• Always wear work gloves made of
leather or some other sturdy material
when using the trimmer.
• Always place the blade cover provided
with the trimmer over the blades when
not in use.
• Falling branches may fall onto the
face or into the eyes, resulting in
injuries, scratches, and cuts, and for
this reason you should always be
sure to wear a helmet and face
protector when using your trimmer.
• The thickness of branches which may
be cut using this trimmer is limited to up
to approximately 4.8mm. Never try to
cut branches thicker than this, as doing
so may result in damage to the trimmer.
■ ADJUSTING THE ANGLE OF THE
CUTTING BLADES (OP8)
1. Stop the trimmer engine.
2. Turn the bolt located on the top of the
trimming mechanism counter-clockwise
to loosen it.
3. Adjust the angle of the blades to the
desired angle, and then fix the bolt
firmly back into place.
(1)Clamp bolt
(2)Trimming mechanism
(3)Tighten
(4)Loosen
NOTE
WARNING
• Ce taille-haies est équipé de lames
très tranchantes, et lorsqu'il n'est
pas utilisé correctement, il peut
présenter un danger, et une
manipulation incorrecte peut
provoquer des accidents et entraîner
des blessures graves ou mortelles.
Pour cette raison, les consignes de
sécurité doivent toujours être suivies
lors de l'utilisation de votre taillehaies.
• Ne jamais toucher le taille-haies avec
les lames pointées vers une personne.
• Ne jamais laisser les lames à proximité
de votre corps pendant le
fonctionnement du moteur et du taillehaies.
• Toujours couper le moteur avant de
modifier l'angle des lames pour enlever
des rameaux coincés dans les lames,
ou chaque fois qu'on s'approche des
lames.
• Toujours porter des gants en cuir ou en
matériau solide lors de l'utilisation du
taille-haies.
• Toujours placer le couvercle de
protection de la lame fourni avec le
taille-haies sur les lames lorsque le
taille-haies n'est pas utilisé.
• Des rameaux tombants risquent de
tomber sur le visage ou les yeux et
de provoquer des blessures, des
égratignures et des coupures, c'est
pourquoi, il faut toujours porter un
casque et une protection du visage
lors de l'utilisation du taille-haies.
• L'épaisseur des rameaux qui doivent
être coupés avec ce taille-haies est
limitée à environ 4,8mm. Ne jamais
essayer de couper des rameaux plus
épais, car le taille-haies risque d'être
endommagé.
■ RÉGLAGE DE L'ANGLE DES LAMES
TRANCHANTES (OP8)
1. Arrêter le moteur du taille-haies.
2. Tourner le boulon situé sur le dessus
du mécanisme de coupe vers la gauche
pour le desserrer.
3. Régler les lames à l'angle désiré, et
fixer ensuite le boulon fermement en
place.
(1)Boulon de serrage
(2)Mécanisme de coupe
(3)Serrer
(4)Desserrer
REMARQUE
AVERTISSEMENT
Page 41

EspañolDeutsch Italiano
41
8. Betrieb 8. Funzionamento 8. Uso
•Dieses Gerät weist äußerst scharfe
Schneidmesser auf, die bei
unsachgemäßem Einsatz und
falscher Handhabung schwere
Unfälle mit Leibes- und
Lebensgefahr verursachen können.
Aus diesem Grund beim Einsatz des
Trimmers stets die folgenden
Hinweise beachten.
• Niemals die Schneidmesser auf andere
Personen richten oder in deren Nähe
bringen.
• Bei laufendem Motor die
Schneidmesser vom Körper fernhalten.
• Den Motor unbedingt abschalten, bevor
der Schnittwinkel eingestellt oder
Fremdkörper aus den Messern entfernt
werden soll bzw. etwas in der Nähe des
Schneidkopfes zu tun ist.
• Zum Verwenden des Trimmers stets
dicke Handschuhe aus Leder oder
anderem festen Material anlegen.
• Nach Verwendung des Trimmers immer
die beiliegende Schutzabdeckung an
den Schneidmessern anbringen.
• Fallende Zweige und Äste können
Gesicht oder Augen treffen und
Verletzungen wie Kratzer oder
Schnitte verursachen. Daher einen
Schutzhelm und einen
Gesichtsschutz zum Arbeiten mit
dem Trimmer tragen.
• Die maximale Dicke der Äste, die mit
diesem Trimmer geschnitten werden
können, beträgt ungefähr 4,8mm.
Niemals versuchen dickere Äste zu
schneiden, da dies Schäden am
Trimmer verursachen kann.
■ EINSTELLEN DES
SCHNITTWINKELS (OP8)
1. Den Motor ausschalten.
2. Die Schraube oben am Schneidkopf
gegen den Uhrzeigersinn drehen, um
sie zu lockern.
3. Den Schneidkopf auf den gewünschten
Winkel einstellen und dann mit der
Schraube wieder fixieren.
(1)Klemmschraube
(2)Schneidkopf
(3)Festziehen
(4)Lockern
HINWEIS
WARNUNG
• Questo potatore è stato dotato di
lame estremamente affilate e se
vengono usate in modo errato, le
lame possono essere molto
pericolose. L’uso errato può causare
lesioni personali gravi o addirittura
letali. Per questo motivo, fare
attenzione a seguire le seguenti
istruzioni prima di usare il potatore.
• Non tenere mai il potatore in modo tale
che le lame siano puntate verso una
persona.
• Assicurarsi che le lame non siano vicine
al vostro corpo mentre è acceso il
motore del potatore.
• Assicurarsi di spegnere il motore prima
di cambiare l’angolo delle lame, prima
di rimuovere eventuali rami incastrati
nelle lame o in altre occasioni in cui ci si
deve avvicinare alle lame.
• Indossare sempre dei guanti di lavoro
fatti di cuoio, o un altro materiale
resistente, durante l’uso del potatore.
• Installare il coprilama in dotazione con il
potatore quando non sono usate le
lame.
•I rami tagliati possono cadere sul
viso o finire negli occhi dell’utente,
causando così lesioni, graffi e tagli.
Per questo motivo indossare sempre
un casco e una visiera per il viso per
usare questo potatore.
• Lo spessore dei brani che si possono
tagliare con questo potatore è limitato a
circa 4,8mm. Non cercare mai di
tagliare rami più spessi, altrimenti il
potatore si potrà danneggiare.
■ REGOLAZIONE DELL’ANGOLO
DELLE LAME (OP8)
1. Fermare il motore del potatore.
2. Girare il bullone posto in alto sul
meccanismo di potatura nel senso
antiorario per allentare lo stesso.
3. Regolare l’angolo delle lame come si
desidera, poi fissare il bullone in modo
ben saldo.
(1)Bullone di fissaggio
(2)Meccanismo di potatura
(3)Serrare
(4)Allentare
NOTA
AVVERTIMENTO
• Este producto está equipado con
cuchillas extremadamente afiladas, y
cuando se utilizan incorrectamente
estas cuchillas pueden ser
extremadamente peligrosas, y la
manipulación incorrecta puede
ocasionar accidentes que a su vez
conducen a lesiones graves o la
muerte. Por esta razón, siempre
debe tener cuidado de seguir las
instrucciones que figuran a
continuación al utilizar la podadera.
• No sostenga nunca la podadera de una
manera tal que las cuchillas apunten
hacia alguna persona.
• No permita nunca que las cuchillas se
aproximen a su cuerpo mientras el
motor de la podadera está funcionando.
• Asegúrese siempre de apagar el motor
antes de cambiar el ángulo de las
cuchillas, de quitar las ramas que se
han quedado atascadas en las
cuchillas, o en cualquier otro momento
en el que se acerque demasiado a las
cuchillas.
• Trabaje siempre con guantes de cuero
o de otro material fuerte al utilizar la
podadera.
• Coloque siempre la tapa de las
cuchillas suministradas con la podadera
en las cuchillas cuando no se utilice.
• Las ramas cortadas pueden caerle
en la cara o en los ojos, ocasionado
lesiones, arañazos, y cortes, y por
esta razón debe asegurarse siempre
de llevar puesto un casco y un
protector para la cara al utilizar la
podadera.
• El grosor de las ramas que se pueden
cortar con la podadera está limitado a
aproximadamente 4,8mm. No intente
nunca cortar ramas más gruesas que
esta medida, ya que hacerlo así puede
provocar daños en la podadera.
■ AJUSTE DEL ÁNGULO DE LAS
CUCHILLAS DE CORTE. (OP8)
1. Pare el motor de la podadera.
2. Gire el tornillo situado en la parte
superior del mecanismo de poda en
sentido contrario a las agujas del reloj
para aflojarlo.
3. Ajuste el ángulo de las cuchillas al
ángulo deseado, y luego ajuste el
tornillo firmemente en su posición.
(1)Perno de sujeción
(2)Mecanismo de poda
(3)Ajustar
(4)Aflojar
NOTA
ADVERTENCIA
Page 42

42
Every Every Every
25 50 100
System/compornent Procedure Before hours hours hours note
use after after after
fuel leaks, fuel spillage wipe out ✔
fuel tank, air filter, fuel filter inspect/clean ✔✔ replace, if necessary
see ■ADJUSTING replace carburetor
idle adjusting screw ✔
IDLING SPEED (p.36) if necessary
clean and readjust GAP: .025in(0.6 – 0.7 mm)
spark plug ✔
electrode gap replace, if necessary
cylinder fins, intake air cooling vent clean ✔
muffler, spark arrester, cylinder exhaust port
clean, remove piled up carbon ✔
throttle lever, ignition switch check operation ✔
replace if something's
cutting parts ✔
wrong
gear case grease ✔
screws/nuts/bolts tighten/replace ✔✔not adjusting screws
ENGINE
SHAFT
MAINTENANCE CHART
English
9. Maintenace
Français
9. Entretien
Toutes les Toutes les Toutes les
25 50 100
Système/Composant Procédure Avant heures heures heures Remarque
utilisation suivantes suivantes suivantes
fuites ou éclaboussures de carburant essuyer ✔
réservoir de carburant, filtre à air, filtre à carburant
vérifier, nettoyer ✔✔ remplacer si nécessaire
voir ■ REGLAGE remplacer le carburateur
vis de réglage du ralenti ✔
DU RALENTI (p 36) si nécessaire
nettoyer et régler le JEU : de 0,6 à 0,7 mm
bougie d’allumage ✔
jeu des électrodes remplacer si nécessaire
ailettes de cylindre, ouïe de refroidissement nettoyer ✔
Silencieux, pare-étincelles,
nettoyer,Enlever les dépôts
✔
Embout du tuyau d'échappement de calamine accumulée
levier d ‘accélérateur, bouton de contact vérifier le fonctionnement ✔
remplacer en cas de
parties coupantes ✔
défaut
carter du renvoi d’angle graisser ✔
vis/écrous/boulons serrer/remplacer ✔✔sauf vis de réglage
MOTEURMACHINE
TABLEAU D’ENTRETIEN
Page 43

43
Deutsch
9. Wartung
Italiano
9. Manutenzione
Español
9. Mantenimiento
Alle Alle Alle
25 50 100
System/Komponente Vorgehensweise Vor Stunden Stunden Stunden Hinweis
Gebrauch nach nach nach
Kraftstofflecks, Kraftstoffverschüttung Wegwischen ✔
Kraftstofftank, Luftfilter, Kraftstoffilter Prüfen/reinigen ✔✔ Austauschen, falls erforderlich
Siehe Vergaser austauschen,
Leerlaufeinstellschraube ■
LEERLAUFGESCHWINDIGKEIT
✔ falls erforderlich
EINSTELLEN
(S. 36)
Reinigen und ABSTAND: 0,6 – 0,7 mm
Zündkerze ✔
Elektrodenabstand neu einstellen austauschen, falls erforderlich
Zylinderrippen, Einlaßluftkühlventil Reinigen ✔
Dämpfer, Funkenfänger Reinigen, angesammelte ✔
Zylinderauslaßöffnung Kohle entfernen
Drosselhebel, Zündschalter Betrieb prüfen ✔
Austauschen, wenn
Scheideteile ✔
etwas nicht korrekt ist
Winkelgetriebe Schmieren ✔
Schrauben/Muttern/Bolzen Anziehen/austauschen ✔✔Keine Einstellschraube
Ogni Ogni Ogni
25 50 100
Sistema/componente Procedura Prima ore ore ore Nota
dell’uso d’utilizzo d’utilizzo d’utilizzo
perdite di carburante, carburante in eccesso strofinate ✔
serbatoio del carburante, filtro dell’aria, ispezionate/pulite ✔✔ sostituite, se necessario
filtro del carburante
vedi ■
REGOLAZIONE DELLA
sostituite il carburatore se
vite di regolazione del minimo
VELOCITÀ DELFUNZIONAMENTO
✔ necessario
AL MINIMO
(p. 36)
Pulite e regolate la fessura ✔ FESSURA: 0,6 – 0,7 mm
candela
dell’elettrodo sostituite la candela se necessario
alette del cilindro, ventola di raffreddamento pulite ✔
dell’aria di aspirazione
marmitta, parascintille, porta di pulite, rimuovere il carbone ✔
scarico del cilindro accumulato
leva del gas, interruttore di accensione controllate il funzionamento ✔
parti taglienti sostituite le parti guaste ✔
scatola degli ingranaggi lubrificate ✔
viti/dadi/bulloni serrate/sostituite ✔✔non le viti di regolazione
cada Ogni Ogni
25 100 100
sistema/componente procedimiento antes horas horas horas nota
de usar de uso de uso de uso
fugas de combustible, combustible derramado limpiar ✔
tanque de combustible, filtro de aire, inspeccionar/limpiar ✔✔ reemplazar si es necesario
filtro de combustible
tornillo de ajuste de velocidad ver ■AJUSTE DE LA reemplazar el carburador si
de marcha mínima VELOCIDAD DE MARCHA ✔ es necesario
MÍNIMA” (pág. 36)
limpiar y ajustar la distancia
DISTANCIA INTERELECTRÓDICA:
bujía ✔
interelectródica
0,6 –0,7 mm reemplazar si es necesario
aletas del cilindro, toma de aire de refrigeración
limpiar ✔
silenciador, parachispas, lumbrera de escape
limpiar, rimuovere il carbone accumulato
✔
palanca del acelerador, interruptor de encendido
comprobar funcionamiento ✔
reemplazar si hay algún
partes cortantes ✔
desperfecto
caja de engranajes engrasar ✔
tornillos/tuercas/pernos apretar/reemplazar ✔✔no aplicable a los tornillos de ajuste
WARTUNGSTABELLE
DIAGRAMMA DI
TABLA DE MANTENIMIENTO
MOTOR
WELLE
MOTORE
ALBERO
MOTOREJE
Page 44

English Français
9. Maintenace 9. Entretien
44
■ BLADES (MA1)
• When refilling the tank or resting, it is
often a good idea to use the time to oil
the cutting blades.
• If a gap exists between the upper and
lower blades, follow the procedure
below to adjust them so that they fit
more closely together.
• Loosen lock nut (A) as shown in the
diagram.
2. Tighten screw (B) fully, and then turn
one-third to one-half of a rotation
backward.
3. While holding onto the screw to keep it
in position, tighten the lock nut.
4 .Check to make sure that the flat
washer (C) is loose enough so that it
may be turned by pressing on it with a
finger.
(1)Upper blade
(2)Lower blade
• Screwing in the screw too tightly may
make it impossible for the blades to
move. Conversely, not screwing in the
screw tightly enough may make the
blades of the trimmer feel dull and
cause leaves and branches to become
caught in the blades of the trimmer.
QUICK TIP
If the blades become so worn down that it
is no longer possible to eliminate the gap
between them, you should contact the
authorized KOMATSU ZENAH servicing
dealer from which you purchased your
KOMATSU ZENAH trimmer to have the
blades resharpened or replaced.
■ GEAR CASE
The inside of the gear case should be
lubricant using ZENOAH-approved
lubricant after every 25 hours of use.
When adding lubricant, use a grease gun
to insert lubricant into the three grease
nipples located on the gear case. (MA2)
TYPE OF LUBRICANT TO BE USED
Always be sure to use #2 lithium
heat-resistant lubricant.
(1)Grease fitting
NOTE
■ LAMES (MA1)
• Pendant le remplissage du réservoir ou
le reposant, il serait judicieux de
s'occuper à lubrifier les lames de
coupe.
• S'il y a un écartement entre les lames
supérieure et inférieure, suivre la
procédure ci-dessous pour les ajuster
de façon à ce qu'elles soient plus
serrées.
• Desserrer le contre-écrou (A) comme
représenté sur le schéma.
2. Visser la vis (B) à fond, et ensuite
tourner d'un tiers ou d'un demi tour en
arrière.
3. Tout en tenant une vis en position,
serrer le contre-écrou.
4. Vérifier que la rondelle plate (C) est
assez desserrée de façon qu'elle
puisse être tournée en la pressant avec
un doigt.
(1)Lame supérieure
(2)Lame inférieure
• Si la vis est trop serrée, les lames ne
peuvent pas bouger.
Vice versa, si la vis n'est pas assez
serrée, les lames du taille-haies ne sont
pas tranchantes et peuvent coincer les
feuilles et les branches dans les lames
de la taille-haies.
CONSEIL RAPIDE
Si les lames sont usées de sorte qu'il n'est
plus possible de réduire l'écartement entre
elles, prendre contact avec votre
revendeur agréé KOMATSU ZENOAH
auprès duquel le taille-haies a été acheté
pour faire affûter ou remplacer les lames.
■ BOITE D'ENGRENAGE
L'intérieur de la boîte d'engrenage doit
être lubrifié avec un lubrifiant agréé
ZENOAH toutes les 25 heures de
fonctionnement.
Lors de l'addition du lubrifiant, utiliser un
pistolet à graisse pour faire pénétrer le
lubrifiant dans les trois raccords de
graissage situés sur la boîte d'engrenage.
(MA2)
TYPE DE LUBRIFIANT A UTILISER
Toujours utiliser le lubrifiant résistant à la
chaleur #2 contenant du lithium.
(1)Raccord de graissage
REMARQUE
MA1
MA2
Page 45

EspañolDeutsch Italiano
9. Wartung 9. Manutenzione 9. Mantenimiento
45
■ SCHNEIDMESSER (MA1)
• Während des Tankens oder Pausen
empfiehlt es sich, die Schneidmesser
zu schmieren.
• Bei einem Spalt zwischen dem oberen
und unteren Messer entsprechend der
Beschreibung unten den Abstand
korrigieren.
1. Die gezeigte Sicherungsmutter (A)
lockern.
2. Schraube (B) ganz festziehen und dann
um eine halbe oder Drittelumdrehung
lösen.
3. Die Schraube gegenhalten und die
Sicherungsmutter festziehen.
4. Sicherstellen, daß die Beilegscheibe
(C) so locker ist, daß sie mit dem Finger
gedreht werden kann.
(1)Oberes Messer
(2)Unteres Messer
• Wird die Schraube zu fest angezogen,
wird die Messerbewegung behindert.
Bei ungenügendem Anziehen der
Schraube sitzen die Messer zu locker,
wodurch sich leicht Blätter oder Äste
zwischen ihnen verfangen.
TIP
Falls der Messerabstand aufgrund von
Verschleiß nicht mehr korrigiert werden
kann, die Schneidmesser von einem
KOMATSU ZENOAH-Vertragshändler
schleifen oder austauschen lassen.
■ WINKELGETRIEBE
Das Winkelgetriebe alle 25
Betriebsstunden mit dem von ZENOAH
zugelassenen Fett schmieren.
Zum Schmieren eine Schmierfettpresse
an den 3 Nippeln des Getriebes ansetzen.
(MA2)
ART DES SCHMIERFETTS
Stets hitzefestes Lithiumfett Nr. 2
verwenden.
(1)Schmiernippel
HINWEIS
■ LAME (MA1)
• Quando si riempie il serbatoio o si
pausa durante il lavoro, è una buona
idea usare il tempo per lubrificare le
lame.
• Se ci fosse una fessura tra le lame
superiore ed inferiore, seguire la
procedura qui sotto per regolare le lame
onde evitare fessure.
1. Allentare il dado di blocco (A) come
nell’illustrazione.
2. Serrare la vite (B) completamente, poi
girare la vite da un terzo a mezzo giro
all’indietro.
3. Mentre si tiene la vite con la mano per
fermare la stessa nella posizione,
serrare il dado di blocco.
4. Assicurarsi che la rondella piana © sia
abbastanza lenta per poter girare la
stessa premendola con il dito.
(1)Lama superiore
(2)Lama inferiore
• Se la vite viene avvitata troppo forte, le
lame non gireranno. Viceversa, una vite
lenta può causare un’operazione poco
efficiente delle lame oppure
l’intrappolamento di foglie e rami nelle
lame del potatore.
SUGGERIMENTO
Se le lame sono diventate consumate in
modo tale che non è più possibile liminare
la fessura tra le stesse, rivolgersi al
rivenditore autorizzato della KOMATSU
ZENOAH dal quale si ha acquistato il
potatore per far affilare o sostituire le
lame.
■ SCATOLA DEGLI INGRANAGGI
Ogni 25 ore di utilizzo, la parte interna
della scatola degli ingranaggi deve essere
lubrificata usando un lubrificante
approvato dalla ZENOAH.
Quando si aggiunge il lubrificante, usare
una pompa per ingrassaggio a pressione
per applicare il lubrificante nei tre
ingrassatori posti sulla scatola degli
ingranaggi. (MA2)
TIPO DI LUBRIFICANTE DA USARE
Assicurarsi di usare un lubrificante #2 al
litio resistente al calore.
(1) Ingrassatore
NOTA
■ CUCHILLAS (MA1)
• Al proceder al rellenado del tanque o
durante el descanso es siempre una
buena idea utilizar el tiempo para
lubricar las cuchillas de corte.
• Si hay holgura entre las hojas superior
e inferior, siga el procedimiento que
figura a continuación para ajustarlas
para que encajen de manera más junta
una con otra.
1. Afloje la tuerca de bloqueo (A) tal como
se muestra en el diagrama.
2. Ajuste el tornillo (B) totalmente, y luego
haga de un tercio a un medio de giro
hacia atrás.
3. Compruebe y asegúrese de que la
arandela plana (C) está lo
suficientemente floja como para que se
pueda girar presionándola con un dedo.
(1)Hoja superior
(2)Hoja inferior
• Colocar el tornillo demasiado ajustado
puede hacer que sea imposible que las
cuchillas se muevan. Por el contrario, si
el tornillo no se ajusta lo suficiente
puede ocurrir que las cuchillas de la
podadera se sientan sin filo y las hojas
y ramas queden atrapadas en las
cuchillas de la podadera.
CONSEJO RÁPIDO
Si las cuchillas se desgastan tanto que ya
no es posible eliminar la holgura entre
ellas, debe ponerse en contacto con el
distribuidor de servicio autorizado
KOMATSU ZENOAH al que le haya
comprado la podadera KOMATSU
ZENOAH para que le afilen o cambien las
cuchillas.
■ CAJA DE ENGRANAJES
El interior de la caja de engranajes debe
ser lubricado con lubricante aprobado por
ZENOAH después de cada 25 horas de
uso.
Al añadir lubricante, utilice una pistola de
engrase para introducir el lubricante en
las tres boquillas de engrase situadas en
la parte trasera de la caja.(MA2)
TIPO DE LUBRICANTE QUE SE DEBE
UTILIZAR
Asegúrese siempre de utilizar lubricante
de litio termo-resistente No.2
(1)Accesorio de engrase
NOTA
Page 46

English Français
9. Maintenace 9. Entretien
46
■ AIR FILTER
• The air filter, if clogged, will reduce the
engine performance. Check and clean
the filter element in warm, soapy water
as required. Dry completely before
installing. If the element is broken or
shrunk, replace with a new one. (MA3)
(1)Air filter
■ FUEL FILTER
• When the engine runs short of fuel
supply, check the fuel cap and the fuel
filter for blockage. (MA4)
(1)Fuel filter
■ SPARK PLUG
• Starting failure and mis-firing are often
caused by a fouled spark plug. Clean
the spark plug and check that the plug
gap is in the correct range. For a
replacement plug, use the correct type
specified by KOMATSU ZENOAH.
(MA5)
• REPLACEMENT PLUG IS A NGK
CMR7A.
• Note that using any spark plug other
than those designated may result in the
engine failing to operate properly or in
the engine becoming overheated and
damaged.
• To install the spark plug, first turn the
plug until it is finger tight, then tighten it
a quarter turn more with a socket
wrench.
TIGHTENING TORQUE:
87–104 (in-lbs)
(9.8–11.8 N.m.)
■ MUFFLER
• Inspect periodically, the muffler for
loose fasteners, any damage or
corrosion. If any sign of exhaust
leakage is found, stop using the
machine and have it repaired
immediately.
• Note that failing to do so may result
in the engine catching on fire.
WARNING
IMPORTANT
■ FILTRE A AIR
• Si le filtre à air est colmaté, la
performance du moteur en sera réduite.
Vérifier et nettoyer l’élément de filtre
avec de l’eau savonneuse tiède. Le
sécher complètement avant de le
réinstaller. Si l’élément de filtre est
cassé ou rétréci, le remplacer par un
neuf (MA3).
(1)Filtre à air
■ FILTRE A CARBURANT
• Si l’essence n’arrive plus au
carburateur, vérifier que l’évent du
bouchon de réservoir et le filtre à
carburant ne sont pas bouchés. (MA4)
(1)Filtre à carburant
■ BOUGIE D’ALLUMAGE
• Les démarrages sans succès et les
ratés d’allumage du moteur sont
souvent causés par une bougie
encrassée. Vérifier l’état de la bougie et
le jeu de ses électrodes. Comme
bougie de rechange, n’utiliser que le
type approprié spécifié par KOMATSU
ZENOAH. (MA5)
• LE TYPE DE BOUGIE DE
REMPLACEMENT EST UNE NGK
CMR7A.
• Prendre note que l’utilisation d’un type
de bougie différent peut causer des
pannes, la surchauffe du moteur et
même des dégâts internes.
• Lors de la mise en place d’une nouvelle
bougie, la serrer complètement à la
main et terminer en serrant un quart de
tour à la clé.
COUPLE DE SERRAGE:
de 87 à 104 in-lbs
(de 9.8 à 11.8 N.m.)
■ SILENCIEUX
• Vérifier régulièrement l’état du
silencieux : dommages, corrosion et
fixation. Si le silencieux fuit, arrêter
d’utiliser la machine et la faire réparer
immédiatement.
• Si l’on continue d’utiliser la machine
dans cette condition, le moteur
risque de prendre feu.
AVERTISSEMENT
IMPORTANT
(1)
MA3
(1)
MA4
0.6– 0.7mm
MA5
Page 47

EspañolDeutsch Italiano
9. Wartung 9. Manutenzione 9. Mantenimiento
47
■ LUFTFILTER
• Wenn der Luftfilter verstopft ist,
reduziert er die Motorleistung. Das
Filterelement mit warmen Seifenwasser
reinigen. Vor der Installation muß er
vollständig getrocknet werden. Wenn
das Element zerbrochen oder
geschwunden ist, ersetzen Sie es durch
ein neues. (MA3)
(1)Luftfilter
■ KRAFTSTOFFILTER
• Wenn der Motor aufgrund von
Kraftstoffmangel nicht einwandfrei läuft,
den Kraftstoffdeckel und den
Kraftstoffilter auf Verstopfung prüfen.
(MA4)
(1)Kraftstoffilter
■ ZÜNDKERZE
• Startschwierigkeiten und
Fehlzündungen werden oft von
schmutzigen Zündkerzen verursacht.
Die Zündkerze reinigen und prüfen, ob
der Zündkerzenabstand im richtigen
Bereich liegt. Für den Austausch nur
von KOMATSU ZENOAH zugelassene
Zündkerzen verwenden. (MA5)
• ERSATZZÜNDKERZE IST EINE NGK
CMR7A.
• Wenn andere Zündkerzen verwendet
werden, als die speziell entwickelten,
kann es zu Motorstörungen kommen
oder der Motor wird überhitzt und
beschädigt.
• Um eine Zündkerze einzusetzen, die
Zündkerze zuerst mit den Fingern
eindrehen, dann noch mal um eine
Vierteldrehung mit einem
Steckschlüssel nachziehen.
ANZUGSMOMENT:
87–104 (in-lbs)
(9.8–11.8 N.m.)
■ DÄMPFER
• Den Dämpfer regelmäßig auf lose
Befestigungen, Beschädigungen oder
Korrosion prüfen. Wenn ein Zeichen
eines Auslaßlecks auftritt, das Gerät
nicht länger verwenden und sofort
reparieren lassen.
• Anderenfalls kann der Motor Feuer
fangen.
WARNUNG
WICHTIG
■ FILTRO DELL’ARIA
• Se il filtro dell’aria è otturato, le
prestazioni del motori saranno ridotte.
Controllate e pulite l’elemento del filtro
in una soluzione calda di acqua e
sapone, se necessario. Asciugate il
filtro completamente prima di
reinserirlo. Se l’elemento è guasto o
deformato, sostituitelo con uno nuovo
(MA3).
(1)Filtro dell’aria
■ FILTRO DEL CARBURANTE
• Quando l’alimentazione del carburante
è scarsa nel motore, controllate se è
otturato il coperchio del carburante o il
filtro del carburante. (MA4)
(1)Filtro del carburante
■ CANDELA
• Errori di avviamento e accensioni
irregolari sono spesso dovuti da una
candela difettosa. Pulite la candela e
controllate che la fessura sia nel campo
corretto. Per sostituire la candela, usate
una candela del tipo specificato dalla
KOMATSU ZENOAH. (MA5)
• LA CANDELA DI SOSTITUZIONE DA
USARE È QUELLA NGK CMR7A.
• Osservate che l’uso di candele diverse
da quelle specificate può causare errori
operativi, surriscaldamento e danni al
motore.
• Per installare la candela, girate la
candela con le dita fino a quando non è
serrata, poi giratela un altro quarto di un
giro usando una chiave a tubo.
TORSIONE DI SERRAGGIO:
87–104 (pollici-libbre)
(9.8–11.8 N.m.)
■ MARMITTA
• Ispezionate regolarmente la marmitta
per scoprire eventuali dispositivi di
fissaggio lenti, danni o corrosione. Se
scoprite dei segni di perdite di gas di
scarico, smettete di usare la macchina
e farla riparare immediatamente.
• Se non fate riparare la macchina, il
motore potrà andare a fuoco.
AVVERTIMENTO
IMPORTANTE
■ FILTRO DE AIRE
• Un filtro de aire obstruido reducirá la
eficiencia del motor. Compruebe y
limpie el elemento de filtro en caliente,
usando agua jabonosa en caso de ser
necesario. Seque completamente el
elemento antes de instalarlo. Si el
elemento está roto o se ha encogido,
reemplácelo por uno nuevo. (MA3)
(1)Filtro de aire
■ FILTRO DE COMBUSTIBLE
• Cuando el suministro de combustible al
motor se interrumpa, compruebe si el
tapón de combustible y el filtro de
combustible están obstruidos. (MA4)
(1)Filtro de combustible
■ BUJÍA
• Los fallos de arranque son causados a
menudo por bujías en mal estado.
Limpie la bujía y compruebe que la
distancia de la misma se encuentra
dentro del margen correcto. Para
cambiar la bujía, utilice el tipo correcto
especificado por KOMATSU ZENOAH.
(MA5)
• LA BUJÍA DE RECAMBIO DEBE SER
UNA BUJÍA NGK CMR7A.
• Tenga presente que la utilización de
cualquier bujía distinta del tipo
especificado puede ocasionar que el
motor no funcione correctamente o que
el motor se recaliente y resulte dañado.
• Para instalar la bujía, primero gire la
bujía manualmente hasta sentirla
apretada, y luego apriétela un cuarto de
vuelta más con una llave de tubo.
PAR DE TORSIÓN:
87–104 (pulg.-lbs)
(9.8–11.8 N.m.)
■ SILENCIADOR
• Inspeccione periódicamente el
silenciador por sujetadores sueltos,
daños o corrosión. Si encuentra
cualquier señal de fuga de gas de
escape, deje de usar lamáquina y
hágala reparar inmediatamente.
• Tenga presente que si no lo hace, el
motor podría incendiarse.
ADVERTENCIA
IMPORTANTE
Page 48

English Français
9. Maintenace 9. Entretien
48
■ SPARK ARRESTER (MA6)
• The muffler is equipped with a spark
arrester to prevent red hot carbon from
flying out of the exhaust outlet.
Periodically inspect and clean as
necessary with a wire brush.
(1)Spark arrester
■ INTAKE AIR COOLING VENT
• Never touch the cylinder, muffler, or
spark plugs with your bare hands
immediately after stopping the
engine. The engine can become very
hot when in operation, and doing so
could result in severe burns.
• When checking the machine to make
sure that it is okay before using it,
check the area around the muffler
and remove any wood chips or
leaves which have attached
themselves to the machine. Failing
to do so could cause the muffler to
become overheated, and that this in
turn could cause the engine to catch
on fire. Always make sure that the
muffler is clean and free of wood
chips, leaves, and other waste before
use.
• Check the intake air cooling vent and
the area around the cylinder cooling fins
after every 25 hours of use for
blockage, and remove any waste which
has attached itself to the machine. Note
that it is necessary to remove the
engine cover shown in (MA7) in order to
be able to view the upper part of the
cylinder.
• If waste gets stuck and causes
blockage around the intake air cooling
vent or between the cylinder fins, it may
cause the engine to overheat, and that
in turn may cause mechanical failure on
the part of the machine. (MA7)
(1)cylinder
(2)intake air cooling vent (back)
IMPORTANT
WARNING
■ PARE-ETINCELLES (MA6)
• Le silencieux est équipé d’un pareétincelles pour empêcher les particules
de calamine portées au rouge de
s’échapper. Le vérifier périodiquement
et le nettoyer si nécessaire avec une
brosse métallique.
(1)Pare-etincelles
■ OUÏE DU REFROIDISSEMENT PAR
AIR
• Ne jamais toucher le cylindre, le
silencieux ou la bougie à mains nues
aussitôt après l’arrêt de la machine.
Le moteur peut devenir très chaud
en cours d’utilisation et le risque de
brûlure grave à son contact est
important.
• Lors de la vérification de la machine,
s’assurer de son bon état de
fonctionnement avant de l’utiliser,
vérifier autour du silencieux et retirer
les copeaux de bois ou les feuilles
pouvant y être retenues. Si cette
opération n’est pas faite, le
silencieux peut surchauffer et le
moteur peut prendre feu. Toujours
vérifier que le silencieux est propre
et débarrassé des copeaux, feuilles
mortes et autres débris avant
d’utiliser la machine.
• Vérifier l’ouïe d’entrée d’air de
refroidissement et la zone des ailettes
autour du cylindre toutes les 25 heures
de fonctionnement et retirer tout
bourrage de détritus. Prendre note qu’il
est nécessaire de démonter le capot
moteur (MA7) pour accéder à la partie
supérieure du cylindre.
• Si des détritus se coincent et bouchent
la zone aux alentours de l’ouïe d’entrée
d’air de refroidissement, le moteur
risque de chauffer et provoquer une
grave panne mécanique. (MA7)
(1)cylindre
(2)Ouïe d’entrée d’air de
refroidissement (arrière)
IMPORTANT
AVERTISSEMENT
(1)
MA6
(1)
(2)
MA7
Page 49

EspañolDeutsch Italiano
9. Wartung 9. Manutenzione 9. Mantenimiento
49
■ FUNKENFÄNGER (MA6)
• Dieser Dämpfer verfügt über einen
Funkenfänger, um den Austritt von
Kohlenstoffunken aus dem Auslaß zu
verhindern. Den Funkenfänger
regelmäßig inspizieren und bei Bedarf
mit einer Drahtbürste reinigen.
(1)FunkenfÄnger
■ ANSAUGLUFT-KÜHLSCHLITZE
• Zylinder, Dämpfer oder Zündkerze
niemals direkt nach dem Abschalten
des Motors berühren. Der Motor
erhitzt sich beim Betrieb stark und
kann deshalb Verbrennungen
verursachen.
• Bei der Überprüfung des Gerätes vor
dem Einsatz den Bereich um den
Dämpfer von anhaftenden
Holzspänen oder Blätter befreien.
Anderenfalls droht eine Überhitzung
des Dämpfers und Brandgefahr des
Motors. Vor dem Gebrauch stets
sicherstellen, daß der Dämpfer
sauber und frei von Blättern,
Holzspänen und anderen
Fremdkörpern ist.
• Die Ansaugluft-Kühlschlitze sowie die
Zylinderrippen alle 25 Betriebsstunden
kontrollieren und anhaftenden Schmutz,
Fremdkörper usw. entfernen.
Um den oberen Zylinderbereich
inspizieren zu können, muß die in Abb.
(MA7) gezeigte Motorabdeckung
entfernt werden.
• Sammelt sich Schmutz oder Schnittgut
am Ansaugluft-Kühlgrill bzw. an den
Zylinderrippen an, kann Überhitzung
des Motors resultieren und einen
Schaden verursachen. (MA7)
(1)Zylinder
(2)Ansaugluft-Kühlschlitze (hinten)
WICHTIG
WARNUNG
■ PARASCINTILLE (MA6)
• La marmitta è stata dotata del
parascintille per prevenire la fuoriuscita
di carbone rosso e caldo dalla marmitta.
Ispezionate e pulite il parascintille
regolarmente, servendovi di una
spazzola per fili.
(1)Parascintille
■ SFIATO DI RAFFREDDAMENTO
DELL’ARIA DI ASPIRAZIONE
• Non toccate mai i cilindri, la marmitta
o le candele con le mani
immediatamente dopo aver fermato il
motore. Il motore può diventare
molto caldo durante l’utilizzo e
toccando i suddetti componenti, vi
potete bruciare le mani gravemente.
• Quando controllate la macchina per
verificare che sia pronta per l’uso,
controllate l’area intorno alla
marmitta e rimovete eventuali
frammenti di legno o foglie inceppate
nella stessa, altrimenti la marmitta si
può surriscaldare e questo può far sì
che il motore vada a fuoco.
Assicuratevi sempre che la marmitta
sia pulita e priva di frammenti di
legno, foglie ed altri oggetti estranei
prima di usare la macchina.
• Controllate lo sfiato di raffreddamento
dell’aria di aspirazione e l’area intorno
alle alette di raffreddamento del cilindro
ogni 25 ore di utilizzo per scoprire
eventuali bloccaggi e per rimuovere
ogni oggetto estraneo dalla macchina.
Osservate che bisogna rimuovere il
coperchio del motore per potere vedere
la parte superiore del cilindro. (MA7)
• Se degli oggetti estranei si inceppano
ed otturano lo sfiato di raffreddamento
dell’aria di aspirazione o tra le alette del
cilindro, il motore si può surriscaldare e
causare un guasto meccanico. (MA7)
(1)Cilindro
(2)Sfiato di raffreddamento dell’aria di
aspirazione (retro)
IMPORTANTE
AVVERTIMENTO
■ PARACHISPAS (MA6)
* El silenciador está equipado con un
parachispas para impedir que salga
carbón caliente al rojo por el tubo de
escape. Inspecciónelo periódicamente
y, en caso de ser necesario, límpielo
con un cepillo de alambre.
(1)Parachispas
■ TOMA DE AIRE DE REFRIGERACIÓN
• Nunca toque el cilindro, el
silenciador o las bujías con las
manos descubiertas inmediatamente
después de parar el motor. El motor
puede alcanzar altas temperaturas
mientras funciona, por lo que tal
acción podría causarle graves
quemaduras.
• Al comprobar la máquina para
asegurarse de que está bien antes
de usarla, compruebe la zona
alrededor del silenciador y quite
todas las astillas de madera o las
hojas que se hayan adherido al
desbrozador. Si no lo hace, el
silenciador podrá recalentarse, lo
que a su vez podrá hacer que el
motor se incendie. Asegúrese
siempre de que el silenciador esté
limpio y libre de astillas de madera,
hojas y otros desechos antes de
usar la máquina.
• Compruebe la toma de aire de
refrigeración y la zona alrededor de las
aletas de refrigeración del cilindro cada
25 horas de uso para determinar si
están bloqueadas, y retire todos los
desechos que se hayan adherido al
máquina. Tenga presente que es
necesario desmontarla cubierta del
motor que aparece en MA7 para poder
ver la parte superior del cilindro.
• Si se acumulan desechos y producen
un bloqueo alrededor de la toma de aire
de refrigeración o entre las aletas del
cilindro, el motor podrá recalentarse, lo
que a su vez podrá causar fallos
mecánicos. (MA7)
(1)Cilindro
(2)Toma de aire de refrigeración
(posterior)
IMPORTANTE
ADVERTENCIA
Page 50

English Français
9. Maintenace 9. Entretien
50
■ PROCEDURES TO BE PERFORMED
AFTER EVERY 100 HOURS OF USE
1. Remove the muffler, insert a
screwdriver into the vent, and wipe
away any carbon buildup. Wipe away
any carbon buildup on the muffler
exhaust vent and cylinder exhaust port
at the same time.
2. Tighten all screws, bolts, and fittings.
3. Check to see if any oil or grease has
worked its way in between the clutch
lining and drum, and if it has wipe it
away using oil-free, lead-free gasoline.
■ PROCEDURE A EFFECTUER
TOUTES LES 100 HEURES
D’UTILISATION
1. Démonter le silencieux et insérer un
tournevis dans la fente pour retirer tous
les dépôts éventuels de calamine.
Retirer également tous les autres
dépôts sur le silencieux.
2. Serrer les vis, boulons et fixations.
3. Vérifier si de l’huile ou de la graisse
s’est introduite entre les mâchoires et le
tambour d’embrayage ; si s’est le cas,
les nettoyer à l’essence sans plomb.
MA8
Page 51

EspañolDeutsch Italiano
9. Wartung 9. Manutenzione 9. Mantenimiento
51
■ ALLE 100 BETRIEBSSTUNDEN
AUSZUFÜHRENDE
WARTUNGSARBEITEN
1. Entfernen Sie den Dämpfer, passen Sie
einen Schraubendreher in die
Ventilationsöffnungen ein und wischen
Sie angesammelte Kohle weg. Wischen
Sie die auf der Dämpfer- und der
Zylinderauslaßöffnung angesammelte
Kohle gleichzeitig weg.
2. Alle Schrauben und Verbindungen
nachziehen.
3. Prüfen, ob Öl oder Fett zwischen
Kupplungsbelag und -trommel
eingedrungen ist. Falls ja, mit fettfreiem,
unverbleiten Benzin abwischen.
■ PROCEDURE DA EFFETTUARE
OGNI 100 ORE DI UTILIZZO
1. Togliete il silenziatore, inserite un
cacciavite nella ventola, e rimuovete
ogni eventuale accumulo di carbone.
Rimuovete anche ogni accumulo di
carbone dalla ventola di scarico del
silenziatore e dalla porta di scarico del
cilindro.
2. Serrate tutte le viti, i bulloni e gli
accessori.
3. Controllate se tracce di olio o grasso si
sono introdotte tra il rivestimento
dell’innesto e il tamburo. Se sì, rimovete
le tracce di olio o grasso usando della
benzina senza piombo e senza olio.
■ PROCEDIMIENTOS A REALIZAR
CADA 100 HORAS DE USO
1. Desmonte el silenciador, introduzca un
destornillador en el orificio de
ventilación, y limpie cualquier
acumulación de carbón. Limpie también
cualquier acumulación de carbón en el
orificio de escape de la ventilación del
silenciador y lumbrera de escape.
2. Apriete todos los tornillos, pernos y
accesorios.
3. Compruebe si se ha introducido aceite
o grasa entre el forro del embrague y el
tambor; de ser así, quite el aceite o
grasa usando gasolina sin plomo libre
de aceite.
Page 52

English Français
10. Storage 10. Rangement
52
• Aged fuel is one of major causes of
engine starting failure. Before storing
the unit, empty the fuel tank and run the
engine until it uses all the fuel left in the
fuel line and the carburetor. Store the
unit indoor taking necessary measures
for rust prevention.
• Le carburant âgé est une des causes
principales des impossibilités de
démarrage. Avant de ranger la
machine, vider le réservoir et faire
tourner le moteur jusqu’à ce qu’il n’y ait
plus du tout de carburant dans la Durit
et le carburateur. Ranger la machine à
l’intérieur après l’avoir protégée contre
la corrosion.
Page 53

EspañolDeutsch Italiano
10. Lagerung 10. Immagazzinaggio 10. Almacenamiento
53
• Alter Kraftstoff ist die Hauptursache für
Motorstörungen. Bevor das Gerät
gelagert wird, den Kraftstofftank leeren
und den Motor so lange laufen lassen,
bis der gesamte Kraftstoff in der
Kraftstoffleitung und im Vergaser
verbraucht ist. Das Gerät innen lagern
und Vorsichtsmaßnahmen gegen Rost
vornehmen.
• Carburante vecchio è una delle cause
principali delle accensioni mancate del
motore. Prima di immagazzinare l’unità,
svuotate il serbatoio e lasciate il motore
girare fino a quando è stato consumato
tutto il carburante nel tubo del
carburante e nel carburatore.
Immagazzinate l’unità dentro casa
prendendo le misure necessarie per
prevenire la formazione di ruggine.
• El combustible envejecido es una de
las causa principales de que no
arranque el motor. Antes de almacenar
la unidad, vacíe el tanque de
combustible y haga funcionar el motor
hasta que consuma todo el combustible
que queda en la tubería de combustible
y en el carburador. Almacene la unidad
bajo techo, tomando las medidas
necesarias para evitar la corrosión.
Page 54

54
Case 1. Starting failure
CHECK PROBABLE CAUSES ACTION
fuel tank ➞ incorrect fuel ➞ drain it and with correct fuel
fuel filter ➞ fuel filter is clogged ➞ clean
carburetor adjustment screw ➞ out of normal range ➞ adjust to normal range
sparking (no spark) ➞ spark plug is fouled/wet ➞ clean/dry
➞ plug gap is incorrect ➞ correct (GAP: 0.6 – 0.7 mm)
spark plug ➞ disconnected ➞ retighten
Case 2. Engine starts but does not keep running/Hard re-starting.
CHECK PROBABLE CAUSES ACTION
fuel tank ➞ incorrect fuel or staled fuel ➞ drain it and with correct fuel
carburetor adjustment screw ➞ out of normal range ➞ adjust to normal range
muffler,cylinder (exhaust port) ➞ carbon is built-up ➞ wipe away
air cleaner ➞ clogged with dust ➞ wash
cylinder fin, fan cover ➞ clogged with dust ➞ clean
When your unit seems to need further service, please consult with our service shop in your area.
English
11. Troubleshooting guide
Français
11. Guide de localisation des pannes
1er cas : Défaut de démarrage
VERIFICATION CAUSES PROBABLES ACTION
réservoir de carburant ➞ carburant incorrect ➞ vidanger et remplacer le carburant
filtre à carburant ➞ filtre à carburant colmaté ➞ nettoyer
vis de réglage de carburateur ➞ déréglé ➞ refaire le réglage
allumage ➞ bougie sale ou noyée ➞ nettoyer ou sécher
➞ Jeu d’électrodes incorrect ➞ régler le jeu (de 0,6 à 0,7 mm)
Bougie d’allumage ➞ débrancher ➞ resserrer
2ème cas : Le moteur démarre mais ne reste pas en marche ou est difficile à redémarrer
VERIFICATION CAUSES PROBABLES ACTION
réservoir de carburant ➞ carburant incorrect ➞ vidanger et remplacer le carburant
vis de réglage de carburateur ➞ déréglé ➞ refaire le réglage
silencieux, cylindre ➞ dépôt de calamine ➞ retirer
filtre à air ➞ colmaté de poussière ➞ nettoyer
ailette de cylindre/flasque de ventilateur ➞ colmaté de poussière ➞ nettoyer
Si la machine nécessite des opérations d’entretien plus élaborées, contacter le centre de service après-vente le plus proche.
Page 55

55
Deutsch
11. Fehlersuche
Italiano
11. Localizzazione dei guasti
Español
11. Guía de localización y solución de problemas
Fall 1. Startschwierigkeiten
PRÜFUNG MÖGLICHE URSACHEN MASSNAHME
Kraftstofftank ➞ falscher Kraftstoff ➞ ablassen und korrekten Kraftstoff einfüllen
Kraftstoffilter ➞ Kraftstoffilter verstopft ➞ reinigen
Vergasereinstellschraube ➞ nicht innerhalb des normalen Bereichs ➞ auf den normalen Bereich einstellen
Zündung (keine Funken) ➞ Zündkerze ist verschmutz/naß ➞ reinigen/trocknen
➞ Zündkerzenabstand ist falsch ➞ korrekt (ABSTAND: 0,6 – 0,7 mm)
Zündkerze ➞ nicht angeschlossen ➞ wieder befestigen
Fall 2. Motor startet nicht oder läuft ständig/ Es ist schwierig neu zu starten
PRÜFUNG MÖGLICHE URSACHEN MASSNAHME
Kraftstofftank ➞ Falscher Kraftstoff oder abgestandener Kraftstoff ➞
ablassen und korrekten Kraftstoff einfüllen
Vergasereinstellschraube ➞ nicht innerhalb des normalen Bereichs ➞ auf den normalen Bereich einstellen
Dämpfer, Zylinder (Auspufföffnung) ➞ Kohlenstoffablagerungen ➞ wegwischen
Luftfilter ➞ verstopft durch Staub ➞ waschen
Zylinderrippen, Gebläseabdeckung ➞ verstopft durch Staub ➞ reinigen
Wenn Ihr Gerät weitere Wartungsarbeiten benötigt, wenden Sie sich an unseren Kundendienst in Ihrer Nähe.
Caso 1. Mancata accensione
CONTROLLATE CAUSA PROBABILE RIMEDIO
Il serbatoio del carburante ➞ Carburante errato ➞ Sostituitelo con del carburante giusto.
Il filtro del carburante ➞ Il filtro del carburante è otturato ➞ Pulite il filtro
Vite di regolazione del carburatore ➞ Fuori dal campo normale. ➞ Regolate la vite
Scintillamento (niente scintille) ➞ La candela è guasta/bagnata. ➞ Pulite o asciugate la candela
➞ La fessura della candela è errata. ➞ Correggete la fessura (FESSURA: 0,6 – 0,7 mm)
Candela ➞ Allentata ➞ Stringete la candela
Caso 2. Il motore si accende ma non continua a girare oppure è difficile da riaccendere.
CONTROLLATE CAUSA PROBABILE RIMEDIO
Serbatoio del carburante ➞ Carburante errato o vecchio ➞
Svuotate il serbatoio e riempitelo con del carburante giusto.
Vite di regolazione del carburatore ➞ Fuori dal campo normale ➞ Regolate la vite
Marmitta, cilindro (porta di scarico) ➞ Accumulo di carbone ➞ Strofinate le parti per rimuovere il carbone
Filtro dell’aria ➞ Otturato di polvere ➞ Lavate il filtro
Aletta del cilindro, coperchio del ventilatore ➞ Otturato di polvere ➞ Pulite queste parti.
Quando l’unità sembra richiedere ulteriori lavori di assistenza tecnica, rivolgetevi al vostro rivenditore di zona.
Caso 1. El motor no arranca
COMPROBAR POSIBLES CAUSAS ACCIÓN
Tanque de combustible ➞ Combustible incorrecto ➞ Vaciar y llenar con el combustible correcto
Filtro de combustible ➞ El filtro de combustible está obstruido. ➞ Limpiar
Tornillo de ajuste del carburador ➞ Fuera del margen normal ➞ Ajustar al margen normal
Explosión (no hay chispa) ➞ La bujía está sucia/mojada. ➞ Limpiar/secar
➞ La distancia interelectródica es incorrecta ➞
Corregir (DISTANCIA INTERELECTRÓDICA: 0,6
–
0,7 mm)
Bujía ➞ Desconectada ➞ Reajustarlo
Caso 2. El motor arranca pero no se mantiene en marcha./Dificultad para volver a arrancar el motor.
COMPROBAR POSIBLES CAUSAS ACCIÓN
Tanque de combustible ➞ Combustible incorrecto ➞ Vaciar y llenar con el combustible correcto
.
Tornillo de ajuste del carburador ➞ Fuera del margen normal. ➞ Ajustar al margen normal.
Silenciador, cilindro (lumbrera de escape) ➞ Acumulación de carbón ➞ Quitar
Filtro de aire ➞ Obstruido con polvo ➞ Lavar
Aletas del cilindro, cubierta de ventilador ➞ Obstruidas con polvo ➞ Limpiar
Si le parece que la unidad necesita otros servicios, consulte nuestro centro de servicio en su área.
Page 56

English Français
Should any failure occur on the product
under normal operating conditions within
the applicable warranty period, the failed
part will be replaced or repaired free of
charge by a KOMATSU ZENOAH
authorized dealer.
WARRANTY PERIOD: 1 year (6 months if
used professionally, and 30 days if used
for rental purpose) from the date of initial
purchase.
THE PURCHASER SHALL BEAR COSTS
OF TRANSPORTING THE UNIT TO AND
FROM THE KOMATSU ZENOAH
DEALER.
THE PURCHASER SHALL NOT BE
CHARGED FOR DIAGNOSTIC LABOR
WHICH LEADS TO THE
DETERMINATION THAT A WARRANTED
PART IS DEFECTIVE, IF THE
DIAGNOSTIC WORK IS PERFORMED
AT THE KOMATSU ZENOAH DEALER.
THE PURCHASER OR OWNER IS
RESPONSIBLE FOR THE
PERFORMANCE OF THE REQUIRED
MAINTENANCE AS DEFINED BY THE
MANUFACTURER IN THE
OWNER/OPERATOR MANUAL.
ANY WARRANTED PART WHICH IS
NOT SCHEDULED FOR REPLACEMENT
AS REQUIRED MAINTENANCE, OR
WHICH IS SCHEDULED ONLY FOR
REGULAR INSPECTION TO THE
EFFECT OF REPAIR OR “REPLACE AS
NECESSARY” SHALL BE WARRANTED
FOR THE WARRANTY PERIOD. ANY
WARRANTED PART WHICH IS
SCHEDULED FOR REPLACEMENT AS
REQUIRED MAINTENANCE SHALL BE
WARRANTED FOR THE PERIOD OF
TIME UP TO THE FIRST SCHEDULED
REPLACEMNET POINT FOR THE PART.
ANY REPLACEMENT PART THAT IS
EQUIVALENT IN PERFORMANCE AND
DULABILITY MAY BE USED IN NONWARRANTY MAINTENANCE OR
REPAIRS, AND SHALL NOT REDUCE
THE WARRANTY OBLIGATION OF THE
COMPANY.
THE COMPANY IS LIABLE FOR
DAMAGES TO OTHER ENGINE
COMPONENTS CAUSED BY THE
FAIRURE OF A WARRANTED PARTS
STILL UNDER WARRANTY.
THE WARRANTY DOES NOT APPLY
TO THOSE UNITS WHICH HAVE BEEN
DAMAGED BY NEGLIGENCE OF
INSTRUCTION LISTED IN THE
OWNER/OPERATOR MANUAL FOR
PROPER USE AND MAINTENANCE OF
THE UNITS ACCIDENT MISHANDLING,
ALTERATION, ABUSE, IMPROPER
LUBULICATION, USE OF ANY PARTS
En case de panne ou de défaut constaté
sur le produit au cours de la période de
garantie, les pièces défectueuses seront
réparées ou remplacées gratuitement par
le concessionnaire KOMATSU ZENOAH.
PERIODE DE GARANTIE : 1 an (6 mois
pour un usage professionnel ou 30 jours
pour les machines de location) à compter
de la date d’achat.
LE CLIENT PREND EN CHARGE TOUS
LES COUTS DE TRANSPORT DE
L’APPAREIL DEPUIS ET JUSQU’AUX
LOCAUX DU CONCESSIONNAIRE
KOMATSU ZENOAH.
LE CLIENT NE SERA PAS TENU POUR
RESPONSABLE DES CHARGES
RELATIVES A LA DETECTION D’UNE
DEFAILLANCE D’UNE PIECE SOUS
GARANTIE UNIQUEMENT LORSQUE
CES TRAVAUX DE DIAGNOSTIC
AURONT ETE EFFECTUES DANS LES
LOCAUX DU CONCESSIONNAIRE
KOMATSU ZENOAH.
LE CLIENT OU LE CAS ECHEANT, LE
PROPRIETAIRE DEVRA
IMPERATIVEMENT S’ACQUITTER DES
TACHES D’ENTRETIEN DECRITES PAR
LE FABRICANT DANS LE MODE
D’EMPLOI DU CLIENT/UTILISATEUR.
TOUTE PIECE SOUS GARANTIE DONT
LE REMPLACEMENT N’EST PAS
PREVU DANS LE CADRE DE
L’ENTRETIEN REQUIS, OU DESTINEE A
ETRE CONTROLEE REGULIEREMENT
ET REPAREE OU “REMPLACEE SI
NECESSAIRE” SERA SOUS GARANTIE
POUR TOUTE LA PERIODE
APPLICABLE. TOUTE PIECE SOUS
GARANTIE DESTINEE A ETRE
REMPLACEE A LA SUITE D’UN
CONTROLE SERA SOUS GARANTIE
POUR TOUTE LA PERIODE ALLANT
JUSQU’A SON PREMIER
REMPLACEMENT PREVU.
TOUTE PIECE DE RECHANGE DE
QUALITE ET DE VALEUR
EQUIVALENTES POURRA ETRE
UTILISEE POUR DES REPARATIONS
OU DES OPERATIONS DE
MAINTENANCE NON COUVERTES PAR
LA GARANTIE, SANS REDUCTION DES
OBLIGATIONS DE GARANTIE DE LA
SOCIETE.
LA SOCIETE SERA TENUE POUR
RESPONSABLE DE TOUS LES
DOMMAGES CAUSES AUX PIECES DU
MOTEUR PAR UNE DEFAILLANCE DE
PIECES QUELCONQUES SE
TROUVANT ENCORE SOUS GARANTIE.
LA GARANTIE NE S’APPLIQUE EN
AUCUN CAS AUX APPAREILS AYANT
ETE ENDOMMAGES SUITE AU NON-
Limited warranty Garantie limitée
56
Page 57

EspañolDeutsch Italiano
Wenn an diesem Gerät unter normalen
Betriebsbedingungen während der
entsprechenden Garantiezeit ein Defekt
auftritt, wird das schadhafte Teil kostenlos
von einem autorisierten KOMATSU
ZENOAH-Händler repariert oder ersetzt.
GARANTIEZEIT: 1 Jahr (bei gewerblicher
Verwendung: 6 Monate, und 30 Tage bei
Leihgeräten), gerechnet ab
Verkaufsdatum.
DER KÄUFER TRÄGT DIE KOSTEN
EINES TRANSPORTS DES GERÄTES
ZU UND VOM KOMATSU ZENOAHHÄNDLER.
DER KÄUFER MUSS NICHT FÜR DIE
KOSTEN DIAGNOSTISCHER ARBEITEN
AUFKOMMEN, DIE ZU DER
FESTSTELLUNG FÜHREN, DASS EIN
DURCH DIE GARANTIE ABGEDECKTES
BAUTEIL DEFEKT IST, FALLS DIESE
DIAGNOSTISCHE ARBEIT BEI EINEM
KOMATSU ZENOAH-HÄNDLER
DURCHGEFÜHRT WIRD.
DER KÄUFER ODER BESITZER IST
FÜR DIE DURCHFÜHRUNG DER
ERFORDERLICHEN
WARTUNGSARBEITEN
VERANTWORTLICH, WIE SIE IM
BESITZER-/BEDIENER-HANDBUCH
BESCHRIEBEN WERDEN.
JEDES DURCH DIE GARANTIE
ABGEDECKTE BAUTEIL, FÜR DAS KEIN
AUSTAUSCH ALS ERFORDERLICHE
WARTUNG VORGESEHEN IST, ODER
DAS NUR REGELMÄSSIG INSPIZIERT
WERDEN MUSS, DAMIT ES
REPARIERT ODER „JE NACH
ERFORDERNIS AUSGETAUSCHT“
WERDEN KANN, WIRD NACH DEN
GARANTIEBESTIMMUNGEN IM
GARANTIEZEITRAUM ERSETZT. JEDES
DURCH DIE GARANTIE ABGEDECKTE
BAUTEIL, FÜR DAS EIN AUSTAUSCH
ALS ERFORDERLICHE WARTUNG
VORGESEHEN IST, WIRD NACH DEN
GARANTIEBESTIMMUNGEN BIS ZUM
ZEITPUNKT DES ERSTEN
VORGESEHENEN AUSTAUSCHS DES
BAUTEILS ERSETZT.
JEDES BELIEBIGE ERSATZTEIL, DAS
IN SEINER LEISTUNG UND
LEBENSDAUER DEM
AUSZUTAUSCHENDEN BAUTEIL
ENTSPRICHT, DARF BEI NICHT DURCH
DIE GARANTIE ABGEDECKTEN
WARTUNGEN ODER REPARATUREN
VERWENDET WERDEN UND FÜHRT ZU
KEINEM ERLÖSCHEN DER
GARANTIEVERPFLICHTUNGEN DES
UNTERNEHMENS.
DAS UNTERNEHMEN KANN
INNERHALB DES
GARANTIEZEITRAUMS FÜR SCHÄDEN
Se un guasto dovesse verificarsi
all’interno del periodo di garanzia ed in
circostanze normali di uso, la parte guasta
verrà riparata o sostituita gratuitamente da
un rivenditore autorizzato KOMATSU
ZENOAH.
PERIODO DI GARANZIA: 1 anno (6 mesi
se usata professional-mente e 30 giorni se
data in affitto) dalla data di acquisto.
I COSTI DI TRASPORTO VERSO E DAL
RIVENDITORE KOMATSU ZENOAH
SONO A CARICO DELL’ACQUIRENTE.
ALL’ACQUIRENTE NON VERRA
ADDEBITATO ALCUN COSTO PER LA
DIAGNOSI CHE HA PORTATO ALLA
DETERMINAZIONE DEL DIFETTO DEL
COMPONENTE IN GARANZIA, A
CONDIZIONE CHE TALE DIAGNOSI SIA
EFFETTUATA DAL RIVENDITORE
KOMATSU ZENOAH.
L’ACQUIRENTE O PROPRIETARIO E’
RESPONSABILE DELLO
SVOLGIMENTO DELLA
MANUTENZIONE RICHIESTA, COME
INDICATO NEL MANUALE
D’ISTRUZIONI DEL PRODUTTORE.
GLI EVENTUALI PARTICOLARI IN
GARANZIA DI CUI NON E’RICHIESTA
LA SOSTITUZIONE O MANUTENZIONE,
OPPURE E’RICHIESTA SOLAMENTE
UN’ISPEZIONE PERIODICA AI SENSI
DELLA RIPARAZIONE OPPURE DELLA
„SOSTITUZIONE A DISCREZIONE“
SARANNO COPERTI PER IL PERIODO
DI GARANZIA. GLI EVENTUALI
PARTICOLARI IN GARANZIA DI CUI
E’RICHIESTA LA SOSTITUZIONE O
MANUTENZIONE SARANNO COPERTI
DALLA GARANZIA FINO AL PRIMO
INTERVALLO DI SOSTITUZIONE
INDICATO.
PER LA MANUTENZIONE O LE
RIPARAZIONI NON IN GARANZIA
POSSONO ESSERE UTILIZZATI
RICAMBI DI PRESTAZIONI E
AFFIDABILITA’ EQUIVALENTI, ED ESSI
NON RIDUCONO GLI OBBLIGHI DI
GARANZIA DA PARTE DEL
PRODUTTORE.
IL PRODUTTORE RISPONDE DI
EVENTUALI DANNI AD ALTRI
COMPONENTI DEL MOTORE
PROVOCATI DAL GUASTO DI UN
PARTICOLARE ANCORA IN GARANZIA.
LA GARANZIA NON SI APPLICA ALLE
UNITA’ DANNEGGIATE PER MANCATO
RISPETTO DELLE ISTRUZIONI PER
L’USO E LA MANUTENZIONE
CONTENUTE NEL MANUALE
D’ISTRUZIONI, USO IMPROPRIO,
MODIFICHE NON AUTORIZZATE,
ABUSI, LUBRIFICAZIONE ERRATA,
En caso de que este producto presente
cualquier falla bajo condiciones de
operación normales durante el periodo de
garantía, la pieza dañada será cambiada
o reparada por un distribuidor autorizado
KOMATSU ZENOAH sin cargo.
PERÍODO DE GARANTÍA: un año (6
meses en caso de uso profesional y 30
días en caso de uso para alquiler) a partir
de la fecha de compra.
EL COMPRADOR DEBE ASUMIR LOS
COSTOS DE TRANSPORTE DE LA
UNIDAD HACIA Y DESDE EL SITIO DE
DISTRIBUCIÓN DE KOMATSU ZENOAH.
NO SE LE DEBEN COBRAR AL
COMPRADOR LOS TRABAJOS DE
DIAGNÓSTICO QUE CONLLEVAN A
DETERMINAR QUE UNA PIEZA
GARANTIZADA ESTÁ DEFECTUOSA, SI
EL TRABAJO DE DIAGNÓSTICO SE
LLEVA A CABO EN EL SITIO DE
DISTRIBUCIÓN DE KOMATSU ZENOAH.
EL COMPRADOR O PROPIETARIO ES
RESPONSABLE DE LA EJECUCIÓN
DEL MANTENIMIENTO REQUERIDO
COMO HA SIDO ESPECIFICADO POR
EL FABRICANTE EN EL MANUAL DEL
PROPIETARIO/OPERADOR.
CUALQUIER PIEZA GARANTIZADA QUE
NO ESTÉ PLANIFICADA PARA
REEMPLAZO EN CALIDAD DE
MANTENIMIENTO REQUERIDO, O QUE
ESTÉ PLANIFICADA SOLO PARA
INSPECCIÓN REGULAR PARA
EFECTOS DE REPARACIÓN O
“REEMPLAZO SI ES NECESARIO”
DEBEN SER CUBIERTAS DURANTE EL
PERÍODO DE GARANTÍA. CUALQUIER
PIEZA GARANTIZADA QUE HAYA SIDO
PLANIFICADA PARA REEMPLAZO EN
CALIDAD DE MANTENIMIENTO
REQUERIDO, DEBE SER
GARANTIZADA PARA EL PERÍODO DE
TIEMPO HASTA EL PRIMER PUNTO DE
REEMPLAZO PLANIFICADO PARA LA
PIEZA.
CUALQUIER PIEZA DE REEMPLAZO
QUE SEA EQUIVALENTE EN
DESEMPEÑO Y DURABILIDAD PUEDE
SER UTILIZADA EN UN TRABAJO DE
MANTENIMIENTO SIN-GARANTÍA O EN
UNA LABOR DE REPARACIÓN, Y NO
REDUCIRÁ LA OBLIGACIÓN DE
GARANTÍA DE LA EMPRESA.
LA EMPRESA ES RESPONSABLE POR
DAÑOS A OTROS COMPONENTES DEL
MOTOR CAUSADOS POR FALLAS DE
PIEZAS GARANTIZADAS QUE ESTÉN
TODAVÍA BAJO LA GARANTÍA.
LA GARANTÍA NO SE APLICA A
AQUELLAS UNIDADES QUE HAN SIDO
DAÑADAS POR NEGLIGENCIA EN LAS
Garantiebestimmungen Garanzia limitata Garantía limitada
57
Page 58

OR ACCESSARIES OTHER THAN
THOSE SPECIFIED BY THE COMPANY,
OR OTHER CAUSES BEYOND THE
CONPANY'S CONTROL.
THIS WARRANTY DOES NOT COVER
THOSE PARTS REPLACED BY
NORMAL WEAR OR HARMLESS
CHANGES IN THEIR APPEARANCE.
THERE ARE NO OTHER EXPRESS
WARRANTIES.
IMPLIED WARRANTIES INCLUDING
THOSE OF MERCHANTABILITY AND
FITNESS FOR A PARTICULAR
PURPOSE ARE LIMITED TO TWO (2)
YEARS OF HOME USE [ONE (1) YEAR
FOR ANY OTHER USE] FROM THE
ORIGINAL DELIVERY DATE.
LIABILITIES FOR INCIDENTAL OR
CONSEQUENTIAL DAMAGE UNDER
ANY AND ALL WARRANTIES ARE
EXCLUDED.
IF YOU NEED TO OBTAIN MORE
INFORMATION, PLEASE CALL YOUR
NEAREST SERVICE CENTER, OR
CHECK PLEASE KOMATSU ZENOAH
WEB SITE http://www.zenoah.net
RESPECT DES INSTRUCTIONS
D’UTILISATION ET D’ENTRETIEN
DECRITES DANS LE MODE D’EMPLOI
DU CLIENT/UTILISATEUR, PAR UNE
MAUVAISE MANIPULATION, PAR DES
MODIFICATIONS, DES MISES A
L’EPREUVE SEVERES, UNE MAUVAISE
LUBRIFICATION, L’UTILISATION DE
PIECES OU D’ACCESSOIRES AUTRES
QUE CEUX RECOMMANDES PAR
NOTRE SOCIETE, OU ENFIN EN
RAISON D’AUTRES CAUSES NE
DEPENDANT PAS DE LA SOCIETE.
CETTE GARANTIE NE COUVRE EN
AUCUN CAS LE REMPLACEMENT DE
PIECES EN RAISON DE LEUR USURE
NORMALE OU DE LEGERES
MODIFICATIONS D’APPARENCE.
AUCUNE AUTRE GARANTIE
FORMELLE N’EST FOURNIE.
LES GARANTIES TACITES, IET
NOTAMMENT CELLES RELATIVES A LA
QUALITE MARCHANDE OU A LA
POSSIBILITE D’ACCOMPLIR UNE
TACHE PARTICULIERE SONT
LIMITEES A DEUX (2) ANS POUR UNE
UTILISATION A DOMICILE [ET A UN (1)
AN POUR TOUT AUTRE TYPE
D’UTILISATION] DEPUIS LA DATE
D’ACHAT D’ORIGINE.
NOUS NE SAURIONS EN AUCUN CAS
ETRE TENUS RESPONSABLES DE
TOUT DOMMAGE ACCIDENTEL OU
CONSEQUENT A L’UTILISATION DE
CET APPAREIL.
POUR PLUS D’INFORMATIONS A CE
SUJET, VEUILLEZ APPELER VOTRE
CENTRE DE SERVICE LE PLUS
PROCHE OU CONSULTEZ LE SITE
INTERNET DE KOMATSU ZENOAH
http://www.zenoah.net
58
Page 59

AN ANDEREN MOTORTEILEN
HAFTBAR GEMACHT WERDEN, DIE
DURCH EINE FEHLFUNKTION VON
DURCH DIE GARANTIE ABGEDECKTE
BAUTEILE INNERHALB DES
GARANTIEZEITRAUMES ENTSTEHEN.
DIE GARANTIE BEZIEHT SICH NICHT
AUF BAUTEILE, DIE DURCH DIE
NICHTBEACHTUNG DER IM BESITZER/BEDIENER-HANDBUCH
BESCHRIEBENEN ANLEITUNGEN ZUR
ORDNUNGSGEMÄSSEN
VERWENDUNG UND WARTUNG
ENTSTANDEN SIND.
AUSGESCHLOSSEN VON DEN
GARANTIELEISTUNGEN SIND ZUDEM
SCHÄDEN DURCH UNFÄLLE, FALSCHE
HANDHABUNG, VERÄNDERUNG,
MISSBRAUCH, FALSCHE
SCHMIERUNG ODER VERWENDUNG
VON BAUTEILEN ODER ZUBEHÖR, DIE
BZW. DAS NICHT DURCH DAS
UNTERNEHMEN VORGESEHEN
WURDE, SOWIE DURCH ANDERE,
AUSSERHALB DES EINFLUSSES DES
UNTERNEHMENS LIEGENDE
URSACHEN.
DIESE GARANTIE BEZIEHT SICH
NICHT AUF BAUTEILE, DIE NACH
EINEM NORMALEN VERSCHLEISS
AUSGETAUSCHT WERDEN MÜSSEN,
ODER AUF NICHT BEDEUTENDE
VERÄNDERUNGEN DER ÄUSSEREN
ERSCHEINUNG DIESER BAUTEILE.
DARÜBER HINAUS BESTEHEN
KEINERLEI WEITEREN
GARANTIEANSPRÜCHE.
DIE IMPLIZIERTEN
GARANTIELEISTUNGEN ÜBER DIE
ERHÄLTLICHKEIT UND DIE EIGNUNG
VON BAUTEILEN FÜR EINEN
BESTIMMTEN ZWECK SIND AB
URSPRÜNGLICHEM KAUFDATUM BZW.
AUSLIEFERUNGSDATUM AUF ZWEI (2)
JAHRE FÜR EINE VERWENDUNG IM
RAHMEN DES HAUSGEBRAUCHS [EIN
(1) JAHR FÜR JEDE ANDERE
VERWENDUNG] BESCHRÄNKT.
HAFTUNGEN FÜR VERSEHENTLICHE
ODER FOLGESCHÄDEN UNTER
ALLEN GARANTIEN SIND
AUSGESCHLOSSEN.
WENN WEITERE INFORMATIONEN
BENÖTIGT WERDEN, BITTE DAS
NÄCHSTGELEGENE SERVICECENTER
ANRUFEN ODER DIE KOMATSU
ZENOAH-WEBSITE BESUCHEN UNTER:
http://www.zenoah.net
USO DI PARTICOLARI O ACCESSORI
DIVERSO DA QUELLO SPECIFICATO
DAL PRODUTTORE, OPPURE ALTRE
CAUSE NON SOTTO IL CONTROLLO
DEL PRODUTTORE.
LA PRESENTE GARANZIA NON
COPRE I PARTICOLARI SOSTITUITI
PER NORMALE USURA O MODIFICHE
NON AUTORIZZATE AL PRODOTTO.
NON ESISTONO ALTRE GARANZIE
ESPRESSE.
LE GARANZIA IMPLICITE, INCLUSE
QUELLE DI COMMERCIABILITA’ E
IDONEITA’ PER UN PARTICOLARE
SCOPO, SONO LIMITATE A DUE (2)
ANNI PER USO DOMESTICO [UN (1)
ANNO PER QUALSIASI ALTRO USO]
DALLA DATA DI ACQUISTO
ORIGINALE.
IL PRODUTTORE NON RISPONDE DI
EVENTUALI DANNI ACCIDENTALI O
CONSEQUENZIALI.
PER MAGGIORI INFORMAZIONI,
RIVOLGETEVI AL VOSTRO CENTRO DI
ASSISTENZA PIU’ VICINO OPPURE
VISITATE IL SITO WEB KOMATSU
ZENOAH, http://www.zenoah.net
INSTRUCCIONES DESCRITAS EN EL
MANUAL DEL
PROPIETARIO/OPERADOR PARA UN
USO Y MANTENIMIENTO ADECUADO
DE LAS UNIDADES, EL MAL MANEJO
ACCIDENTAL, ALTERACIÓN, ABUSO,
LUBRICACIÓN INCORRECTA, USO DE
ACCESORIOS DIFERENTES A LOS
ESPECIFICADOS POR LA EMPRESA, U
OTRAS CAUSAS QUE ESTÁN FUERA
DEL CONTROL DE LA EMPRESA.
ESTA GARANTÍA NO CUBRE
AQUELLAS PIEZAS REMPLAZADAS
POR DESGASTE NORMAL O CAMBIOS
INOFENSIVOS EN SU APARIENCIA.
NO EXISTEN OTRAS GARANTÍAS
EXPLÍCITAS.
GARANTÍAS IMPLÍCITAS INCLUYENDO
AQUELLAS GARANTÍAS DE
COMERCIALIZACIÓN Y
ADAPTABILIDAD PARA UN PROPÓSITO
EN PARTICULAR, ESTÁN LIMITADAS A
DOS (2) AÑOS DE USO DOMÉSTICO
[UN (1) AÑO PARA CUALQUIER OTRO
USO] DESDE LA FECHA DE ENVÍO
ORIGINAL.
RESPONSABILIDADES POR DAÑOS
ACCIDENTALES O CRÍTICOS ESTÁN
EXCLUIDAS DE CUALQUIER
GARANTÍA.
SI NECESITA INFORMACIÓN
ADICIONAL, LLAME POR FAVOR A SU
CENTRO DE SERVICIO MÁS
CERCANO, O CONSULTE LA PÁGINA
WEB DE KOMATSU ZENOAH
http://www.zenoah.net
59
Page 60

 Loading...