

Kohler K9698SN Installation Manual

Installation Guide
Whirlpool Trim Kit
K-9694 K-9695
K-9696 K-9697
K-9698
Français, page “Français-1”
Español, página“Español-1”
1025430-2-B
Thank You For Choosing Kohler Company
We appreciate your commitment to Kohler quality. Please take a few
minutes to review this manual before you start installation. If you
encounter any installation or performance problems please don’t
hesitate to contact us. Our phone numbers and web site are listed on
the back cover. Thanks again for choosing Kohler Company.
Tools and Materials
Plus:
• Silicone Lubricant
(Supplied)
• Jet Removal Tool
(Supplied)
Screwdriver
Before You Begin
WARNING: Risk of personal injury or death. Never operate the
whirlpool bath without the suction cover in place. Doing so may
result in serious injury or death. If your whirlpool does not have
the suction cover installed, install the necessary parts prior to
using your whirlpool.
1025430-2-B 2 Kohler Co.
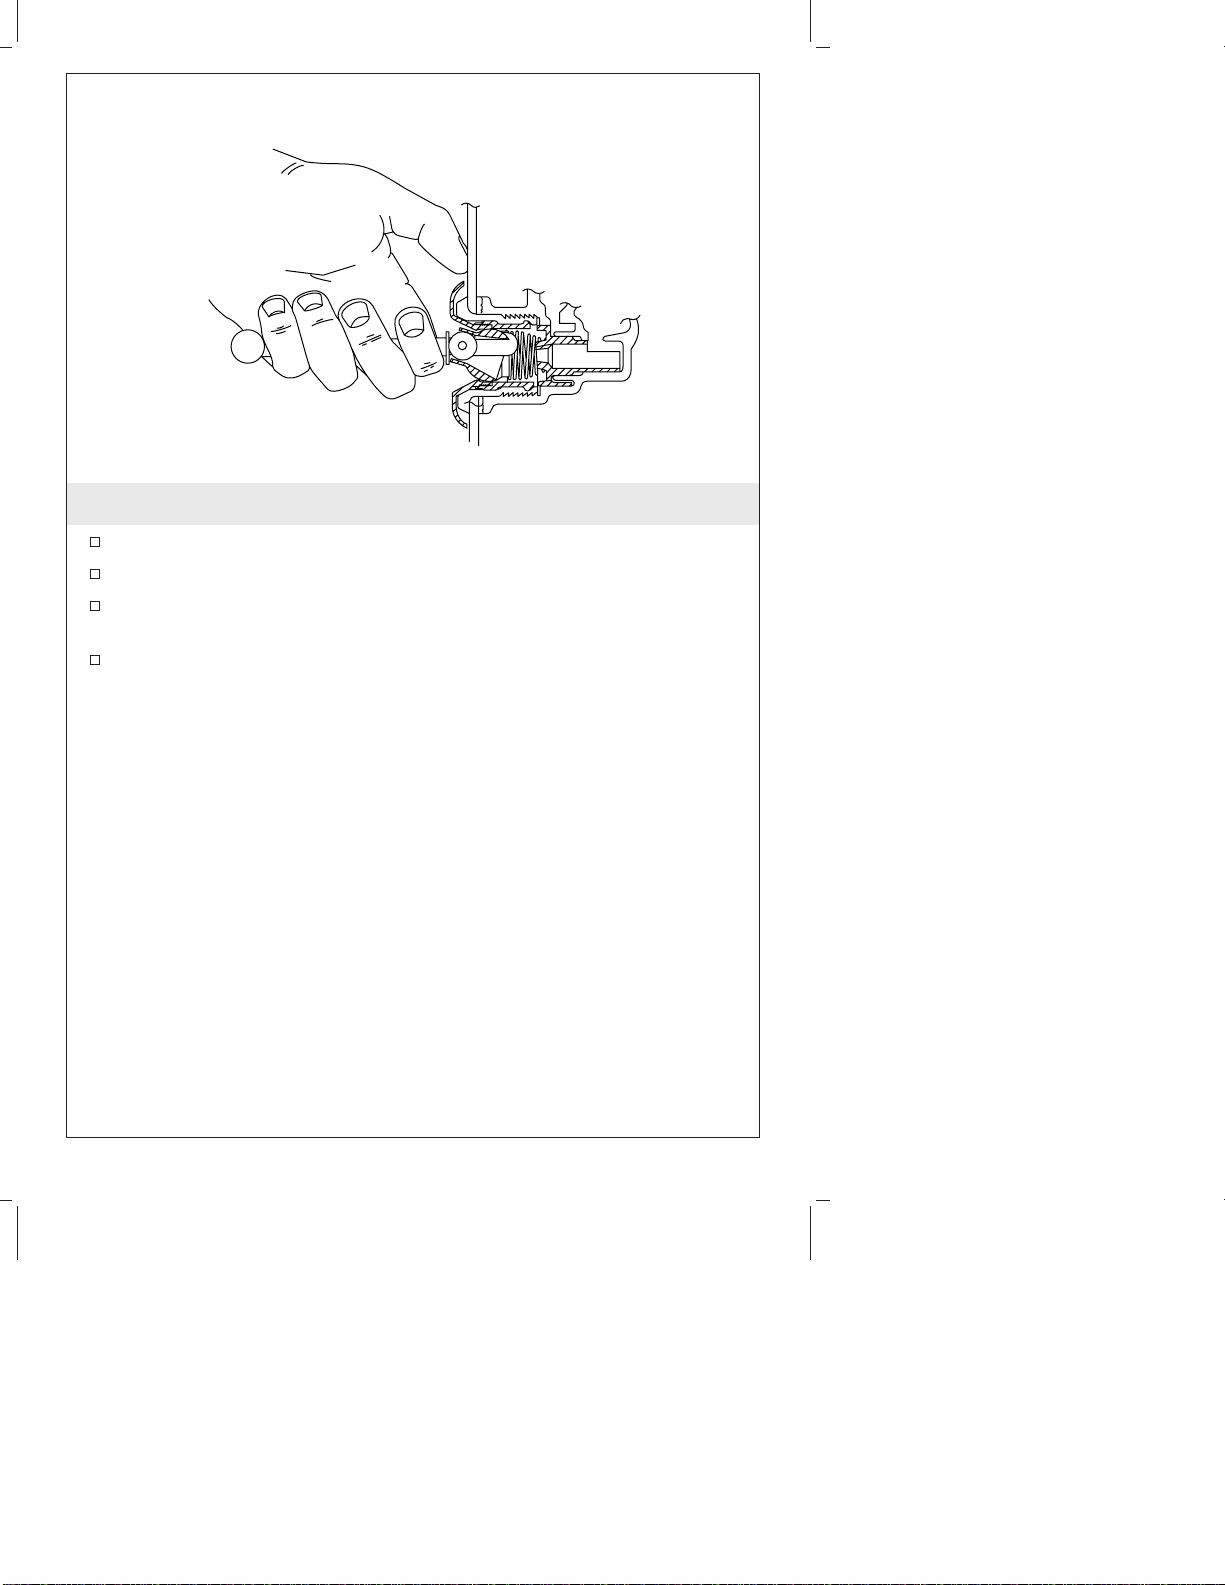
1. Remove the Flexjet Assembly (If Needed)
Grip the jet removal tool tightly in your hand.
Turn the jet ball nozzle completely upward.
Insert the tool with the hook end up and catch the inside top of
the ball as shown.
Press your thumb against the bath wall and firmly pull out the jet
assembly.
Kohler Co. 3 1025430-2-B
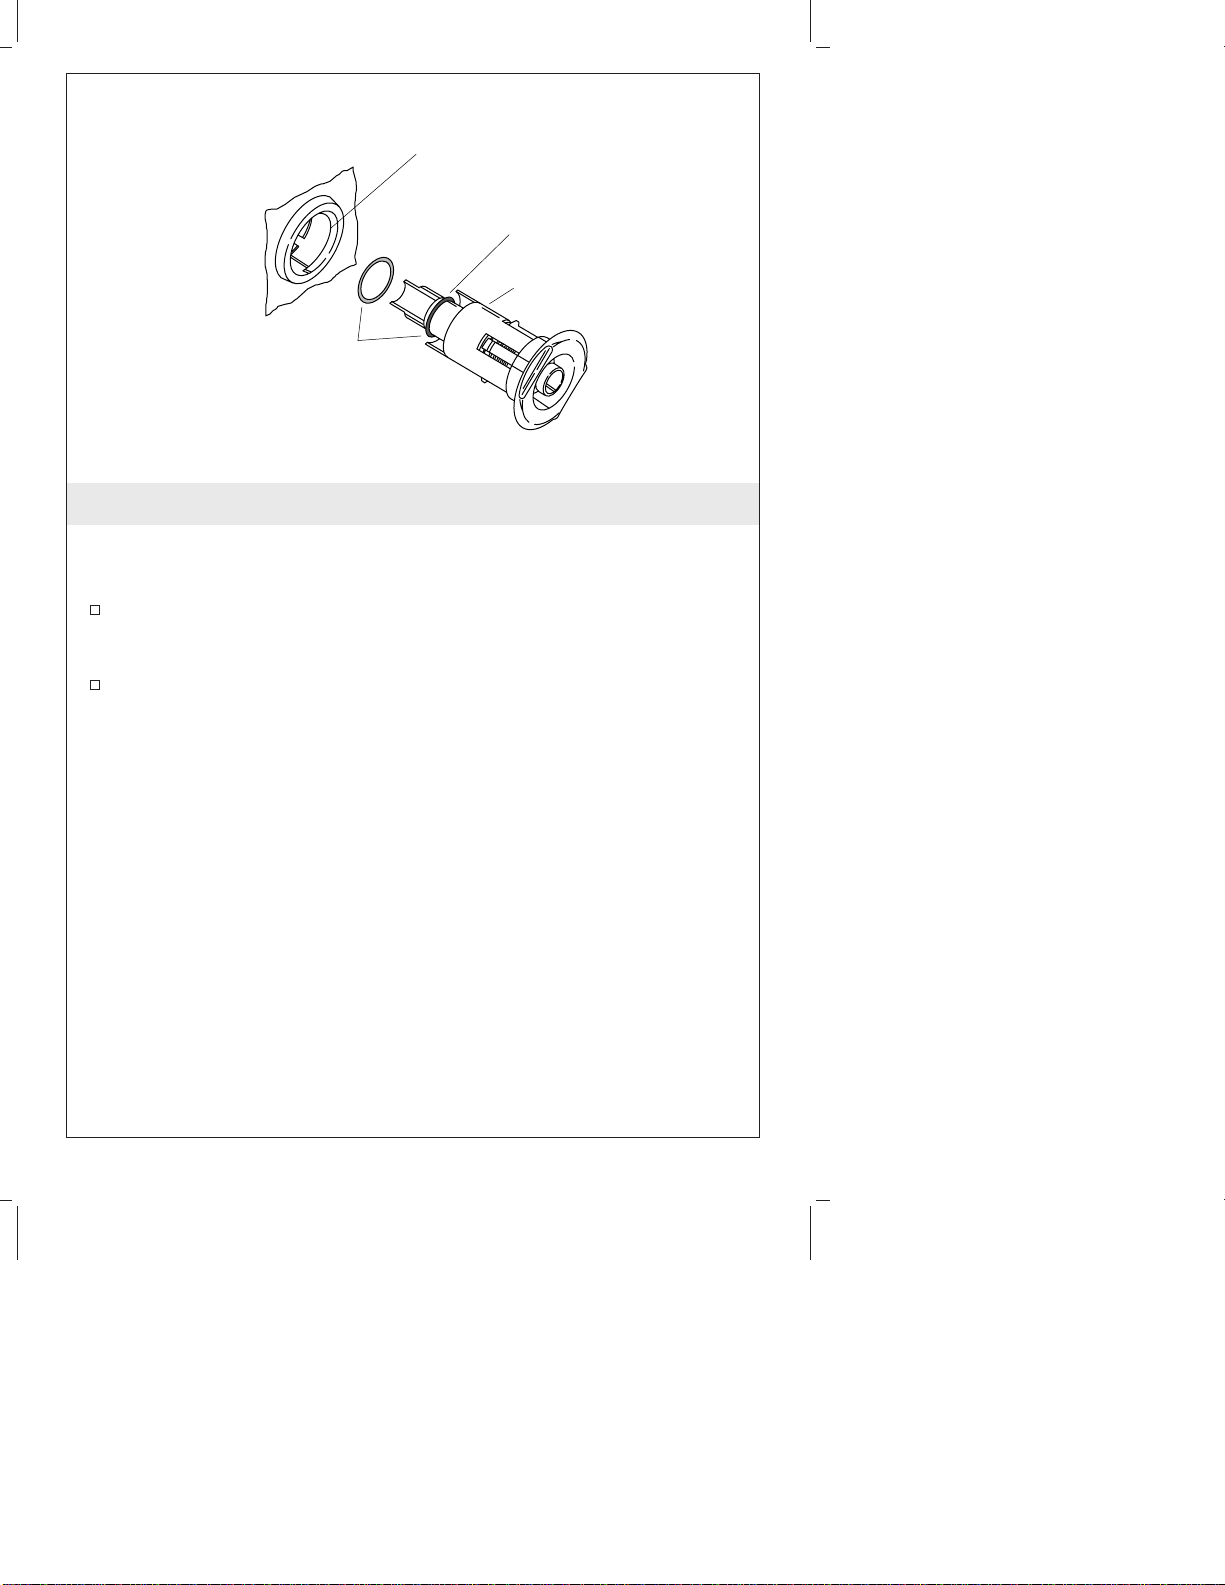
FlexJet Housing
First Shoulder
FlexJet
Apply silicone
lubricant to o-ring.
2. Install the FlexJet Assembly
NOTE: The FlexJet O-ring must be correctly positioned, must be
lubricated, and must be in good condition to permit easy rotation
and proper orientation of the jet.
Lubricate the O-ring with silicone lubricant (supplied) to prevent
noisy operation of the jet. Install the O-ring onto the first
shoulder of the FlexJet.
Carefully insert the jet into the housing, and lightly push and
rotate the jet until it snaps into position. Do not force the jet.
NOTE: When installed correctly, the jet should turn smoothly in
both directions.
1025430-2-B 4 Kohler Co.
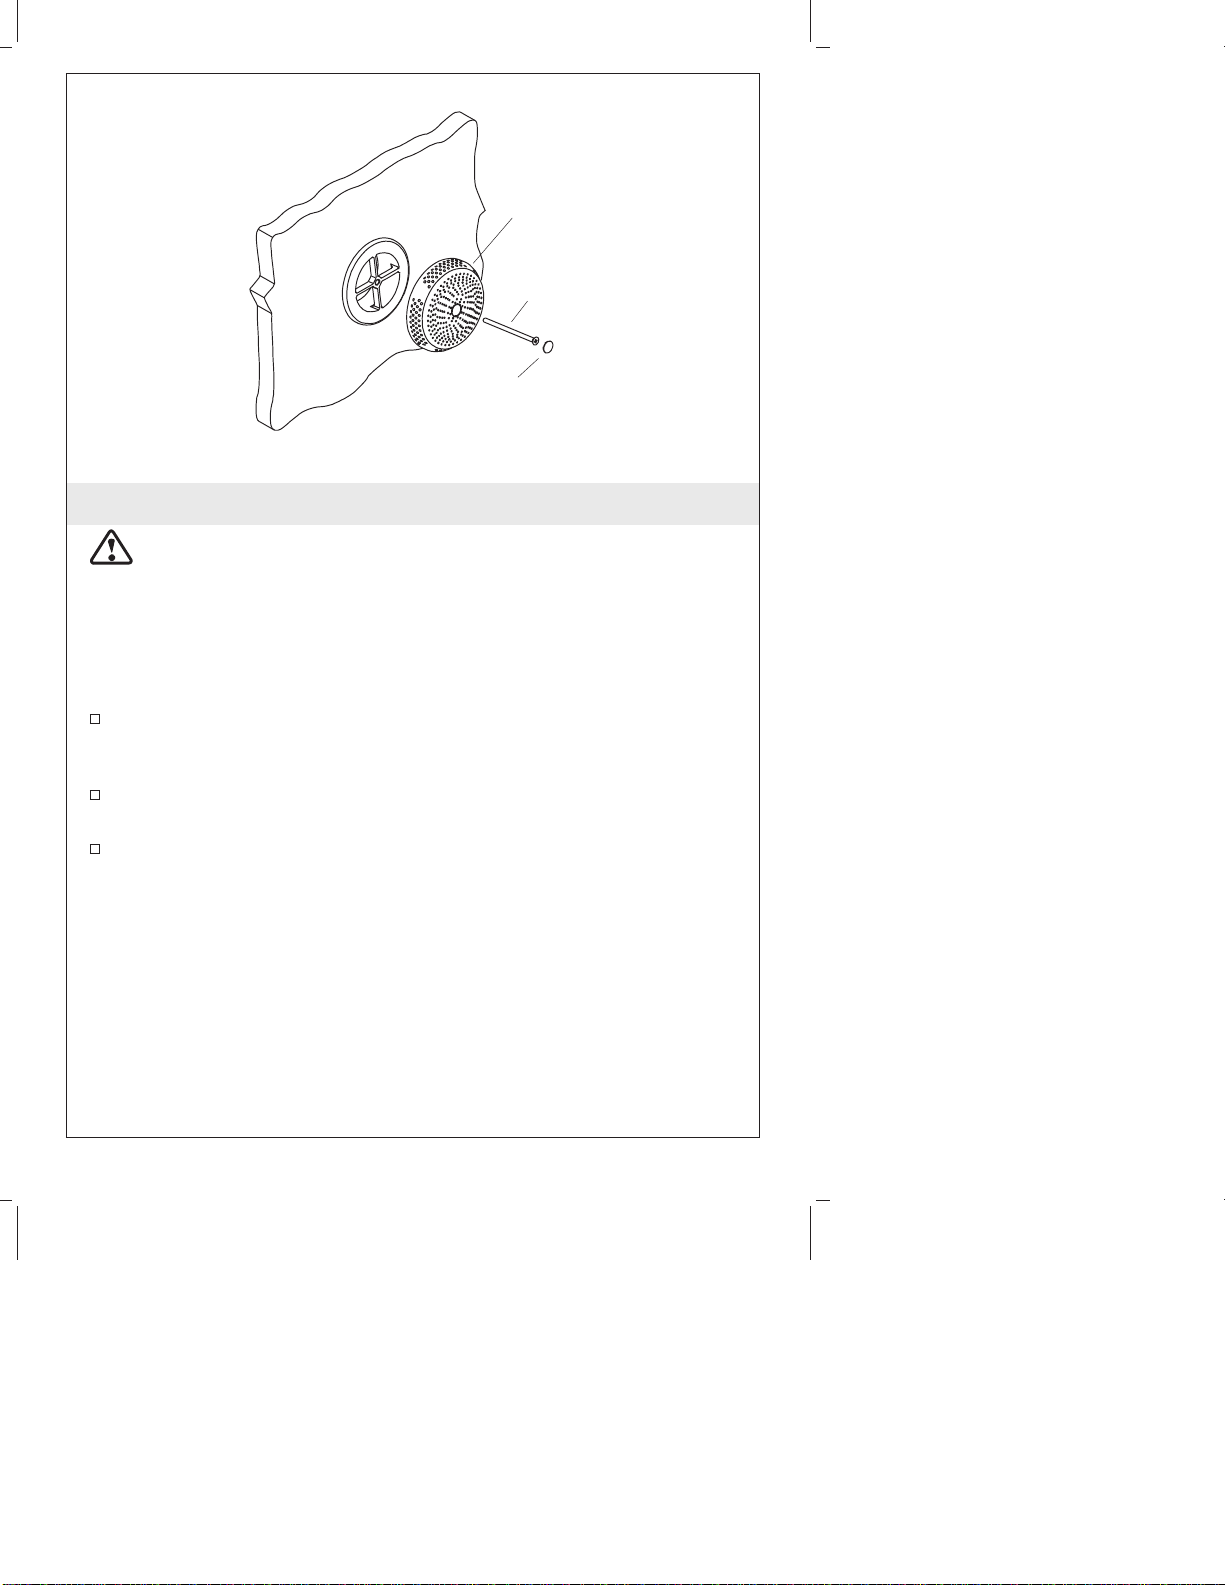
Suction Cover
Screw
Plug (Plastic
Trim Only)
3. Install the Suction Cover
WARNING: Risk of personal injury or death. Never operate the
whirlpool bath without the suction cover in place. Doing so may
result in serious injury or death. If your whirlpool does not have
the suction cover installed, install the necessary parts prior to
using your whirlpool.
NOTE: The suction cover may already be installed on your
whirlpool.
Insert the screw through the suction cover and into the threaded
center hole of the suction fitting on your whirlpool. Position the
suction cover with the Kohler logo facing upward.
Tighten the screw until the sides of the cover are snug against the
wall of the whirlpool. Do not overtighten.
Press the plug (if supplied) into the recessed hole on the cover.
Kohler Co. 5 1025430-2-B
 Loading...