

Kohler K-9530 Installation And Care Manual

Installation and Care Guide
Two-Way Diverter
K-9530
M product numbers are for Mexico (i.e. K-12345M)
Los números de productos seguidos de
M corresponden a México (Ej.
K-12345M)
Français, page “Français-1”
Español, página “Español-1”
1229813-2-A
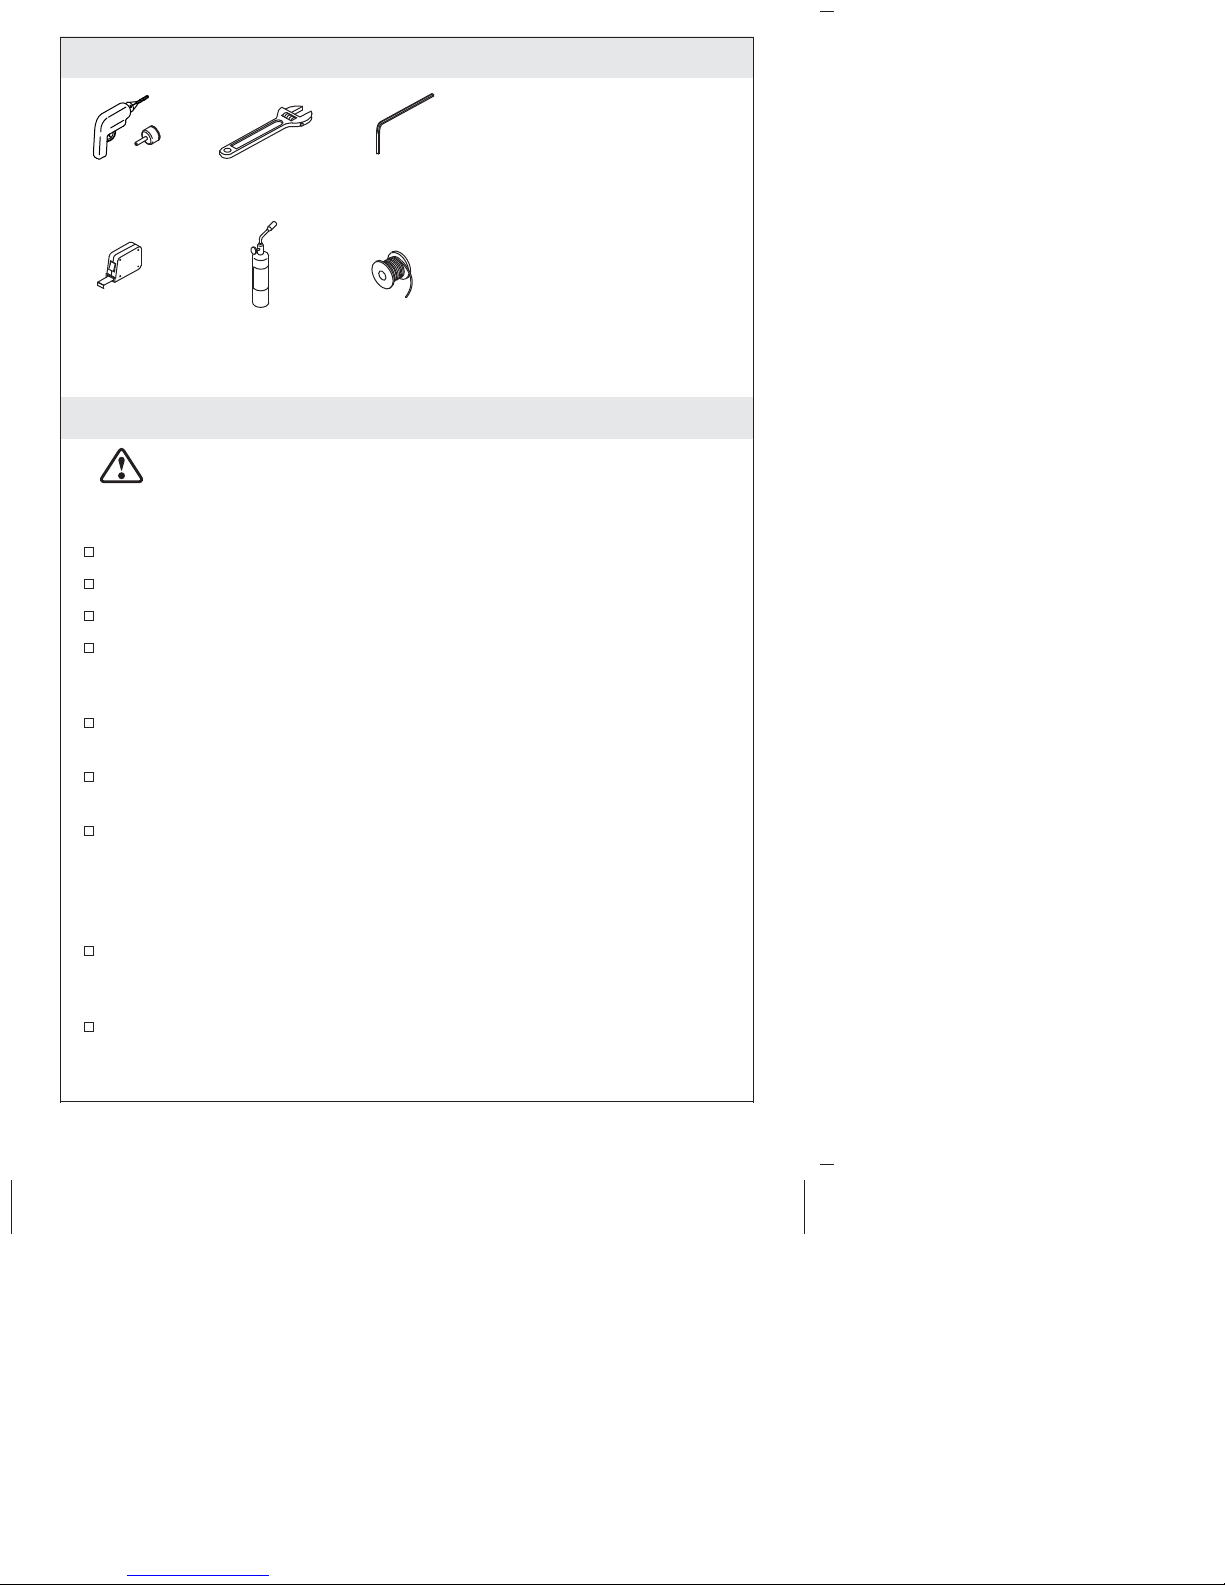
Tools and Materials
Drill and
Hole Bit
Adjustable
Wrench
Plus:
• Supply piping,
connectors, and caps
3/32" Hex
Wrench
Tape
Measure
Propane
Torch
Solder
Before You Begin
WARNING: Risk of personal injury. This product is a
diverter valve only and should never be used as a shut-off
valve. Doing so would allow cross flow between the hot and
cold water supplies and create a serious scalding hazard.
Observe all local plumbing and building codes.
Shut off the main water supply.
Provide an access panel for all installations.
Carefully read this entire instruction manual before beginning the
installation; the illustrations do not show all possible
configurations.
This diverter can be installed to decks with a maximum thickness
of 1-1/4″ (32 mm).
Carefully inspect waste and supply tubing for any sign of
damage. Replace if needed.
You can extend the distance between the water source and the
braided hose connection with 1/2″ copper piping below the rim
of the bath/whirlpool, but it may not be safe or practical. A long
run of piping will mean a long run of room-temperature standing
water when the handshower is first activated for use.
This diverter can be used in either a deck-mount or wall-mount
installation. Refer to the ″Diverter Configurations″ section for any
special considerations.
Do not install spouts with flow restrictors or handheld shower
units on the large (5/8″ OD) bath outlet.
1229813-2-A 2 Kohler Co.

Before You Begin (cont.)
The KOHLER two-way diverter is designed for use with
KOHLER non-diverting bath spouts.
Remove all internal components of the diverter valve before
soldering. Kohler Co. recommends soldering supply and optional
outlet connections to avoid potential leakage.
Kohler Co. 3 1229813-2-A

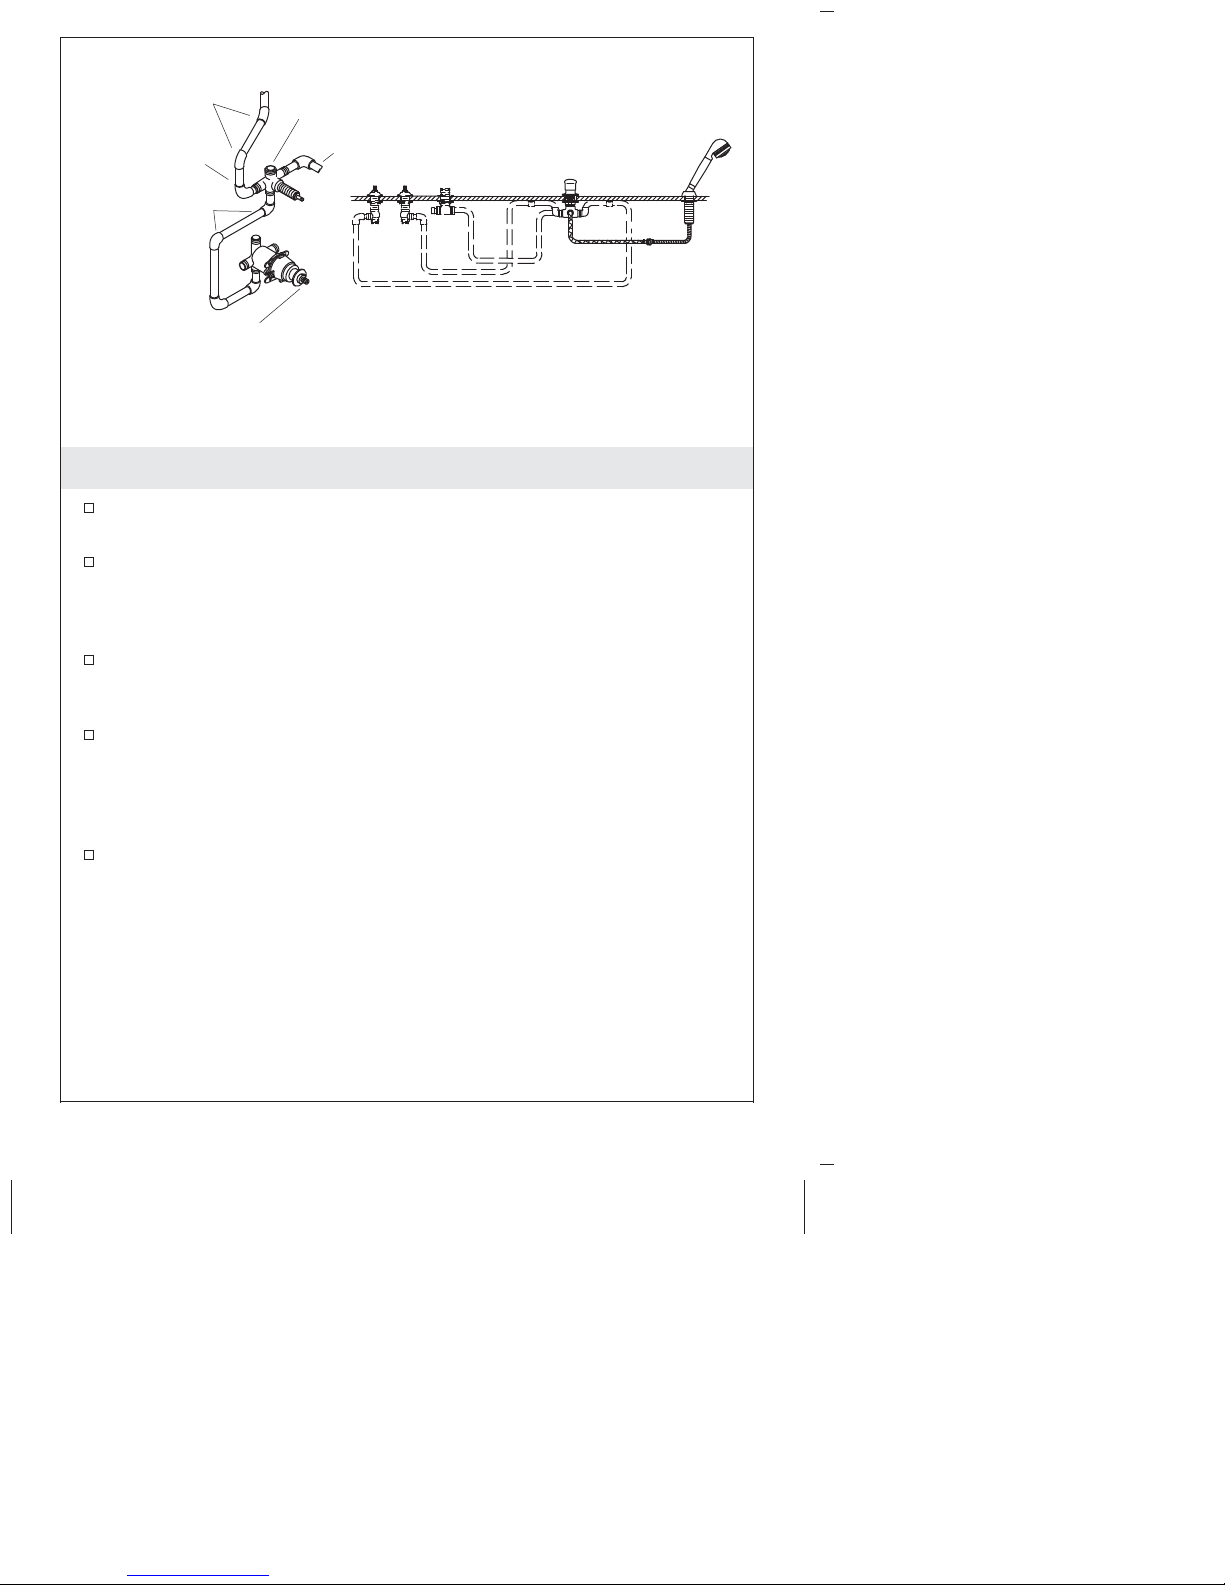
Spout 1/2" Nominal
(5/8" OD)
1/2" Nominal (5/8" OD)
3/4"-14 NPSM Thread
3/4"-14
NPSM
Thread
Hot or
Cold 1/2"
Nominal
(5/8" OD)
Handshower 3/8"
Nominal (1/2" OD)
Hot or
Cold 1/2"
Nominal
(5/8" OD)
Cartridge
1/2"-14 NPSM
Thread
3/8" Nominal (1/2" OD)
1/2"-14 NPSM Thread
Showerhead
or Bath Spout
From Mixer
From Mixer
Cartridge
Handshower or
Showerhead
Review instructions for
specific configurations.
Deck-Mount
Wall-Mount
1. Diverter Configurations
Configurations for Deck-Mount Installations
The small port is for the handshower (or showerhead).
The port directly across from the small port is for the bath spout.
Default flow is through this port.
The remaining two ports are for the hot and cold water inlet
supplies. They are interchangeable. If only one of these ports is
needed, cap the other port.
Configurations for Wall-Mount Installations
When diverting between the bath spout and handshower (or
showerhead):
The small port is for the handshower (or showerhead).
The port directly across from the small port is for the bath spout.
Default flow is through this port.
1229813-2-A 4 Kohler Co.

Diverter Configurations (cont.)
The remaining two ports are for the hot and cold water inlet
supplies. They are interchangeable. If only one of these ports is
needed, cap the other port.
When diverting between the showerhead and handshower:
The small port is for the handshower.
The port directly across from the small port is for the
showerhead. Default flow is through this port.
The remaining two ports are for the inlet supply. They are
interchangeable. If only one of these ports is needed, cap the
other port.
Kohler Co. 5 1229813-2-A
Jog in Piping
Diverter
To Shower
To Handshower
Jog in Piping
Mixer Valve
Wall-Mount Deck-Mount
2. Piping Configurations
Verify the location of the components and the orientation of all
ports.
Decide in advance on the location and orientation of the diverter.
The locations of the shower and the handshower as well as the
direction in which the inlets/outlets point will affect the piping
and connectors needed.
Allow clearance for the valve outlets, handles, and handshower
hoses. For use with an optional spout, also allow clearance for the
spout connection.
You can extend the distance between the diverter and the braided
hose connection with 1/2″ copper piping below the rim of the
bath/whirlpool, but it may not be safe or practical. A long run of
piping will mean a long run of room-temperature standing water
when the handshower is first activated for use.
Secure long runs of piping to the underside of the deck or rim. If
the piping cannot be secured at a point near the diverter, secure
the piping from underneath with lumber or other suitable
support.
1229813-2-A 6 Kohler Co.

Adapter
(Supplied
with Spout)
1/2"
Nominal
Copper
1/2"
Nominal
Copper Cap
Spout
Supply
Te e
3. Preparation
Provide an access panel for all installations.
Allow for access to the connection between the shower
high-pressure hose and the shower interlock hose.
NOTE: For easiest installation, do not install the bath unit until all
soldering (except supplies) is complete. Then install the bath and
connect the supplies.
If used, install the bath spout shank at this time according to the
spout installation instructions. If possible, do not install the
finished trim until all other installations and construction are
completed.
For spouts with a supply tee: Add an adapter and a 1/2″ copper
tube. Secure with solder. Cap to close the extra port.
Install the valve bodies according to the valve body installation
instructions.
Loosely secure the valve bodies.
Follow the handle installation instructions to temporarily
assemble the handles to adjust the valves to the proper height.
Adjust the valve height before connecting the lines to the diverter
or supply.
NOTE: The cartridge assembly is easier to remove before the
diverter is installed. You can remove the assembly now or after the
diverter installation.
Kohler Co. 7 1229813-2-A

Preparation (cont.)
Use a wrench to loosen the cartridge assembly from the diverter
body. Continue to unthread the assembly to remove.
Set the assembly aside. Protect the seals and O-rings from
becoming dirty, damaged, or misaligned.
1229813-2-A 8 Kohler Co.

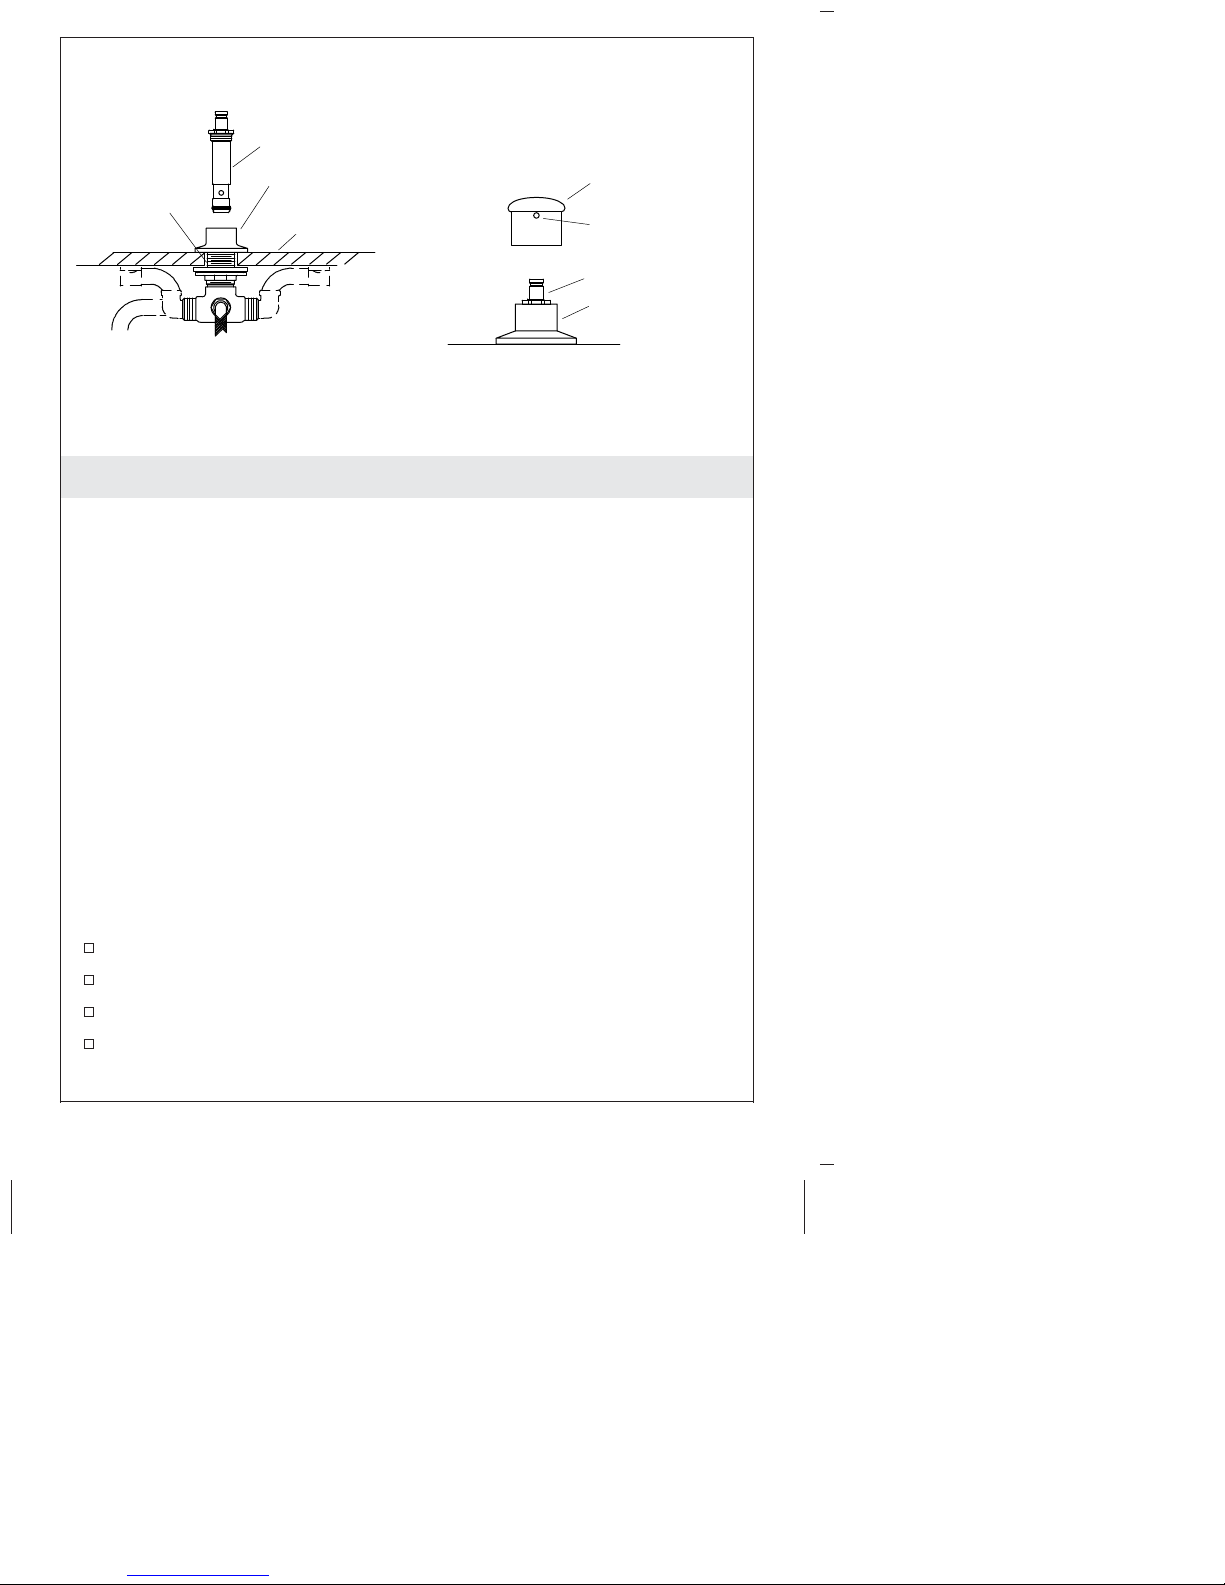
Escutcheon
Deck/Rim
Washer
Brass
Mounting
Nut
Rubber
Washer
Friction
Washer
4. Install the Diverter
For Finished Deck Installations
At the diverter install location, drill a 1-1/2″ (38 mm) hole.
For All Installations
NOTE: You may need assistance to align and secure the diverter.
Thread the mounting nut all the way down onto the diverter
body.
Slide the friction washer followed by the rubber washer over the
diverter body and down to the mounting nut.
Insert the diverter body through the deck/rim/wall.
Slide the washer onto the diverter body.
Thread the escutcheon onto the diverter body until the
escutcheon bottoms out on the diverter body. This will allow
ample clearance for proper handle function.
Align the inlets and outlets.
Hand tighten the mounting nut.
Kohler Co. 9 1229813-2-A
Diverter
Cartridge
Diverter
Escutcheon
Diverter Handle
Valve Body
Deck/Rim
Setscrew
Stem
Escutcheon
Note: Provide Diverter Support
5. Complete the Diverter Installation
CAUTION: Risk of product damage. Verify that the diverter body
is secure before removing the cartridge. If not secured, the process
of removing the cartridge may damage the pipe and connections.
CAUTION: Risk of product damage. Excessive heat will damage
the internal plastic components. Do not apply excessive heat while
soldering. Direct the torch flame away from the brass body. Only
apply direct heat to the connectors and extensions.
IMPORTANT! If there is limited access to the solder connections, or
if any other risk of excessive heat being applied to the brass body
exists, remove the cartridge prior to soldering. If you remove the
cartridge, protect the seals and O-rings from becoming dirty,
damaged, or misaligned.
IMPORTANT! Do not apply excessive heat while soldering. Direct
the torch flame away from the brass body.
IMPORTANT! Only apply direct heat to the connectors and
extensions.
If not already removed, remove the diverter cartridge assembly.
Dry fit all piping and connectors.
Solder piping for the optional spout or wall shower.
Connect the hot and cold lines from the valves to the diverter.
1229813-2-A 10 Kohler Co.

Complete the Diverter Installation (cont.)
While supporting from below, carefully install and wrench tighten
the cartridge assembly into the diverter body.
Install the diverter handle. Use a hex wrench to tighten the
setscrew.
Assemble the adapter to the cartridge; tighten the setscrew to
secure.
Press the handle onto the adapter.
6. Installation Checkout
Complete the installation of the valve, valve trim and any other
components according to the instructions packed with the
product.
Ensure all connections are tight.
Open the drain.
Turn on the main water supply and check for leaks. Repair as
needed.
Open both hot and cold valves and run water through the spout
(if installed) to remove debris. Check for leaks.
Confirm proper diverter operation.
Turn the valves to the closed position.
Care and Cleaning
For best results, keep the following in mind when caring for your
KOHLER product:
•
Use a mild detergent such as liquid dishwashing soap and warm
water for cleaning. Do not use abrasive cleaners that may scratch
or dull the surface.
•
Carefully read the cleaner product label to ensure the cleaner is
safe for use on the material.
•
Always test your cleaning solution on an inconspicuous area
before applying to the entire surface.
•
Do not allow cleaners to sit or soak on the surface.
Kohler Co. 11 1229813-2-A

Care and Cleaning (cont.)
•
Wipe surfaces clean and rinse completely with water immediately
after cleaner application. Rinse and dry any overspray that lands
on nearby surfaces.
•
Use a soft, dampened sponge or cloth. Never use an abrasive
material such as a brush or scouring pad to clean surfaces.
For detailed cleaning information and products to consider, visit
www.kohler.com/clean. To order Care & Cleaning information, call
1-800-456-4537.
Warranty
KOHLER®Faucet Lifetime Limited Warranty
Kohler Co. warrants its Faucets* manufactured after January 1, 1997, to
be leak and drip free during normal residential use for as long as the
original consumer purchaser owns his or her home. If the Faucet
should leak or drip during normal use, Kohler Co. will, free of charge,
mail to the purchaser the cartridge necessary to put the Faucet in good
working condition. This warranty applies only to Kohler Faucets
installed in the United States of America, Canada or Mexico (″North
America″).
Kohler Co. also warrants all other aspects of the faucet or accessories
(″Faucet″)*, (except gold, non-Vibrant
of defects in material and workmanship during normal residential use
for as long as the original consumer purchaser owns his or her home.
This warranty applies only to Kohler Faucets installed in North
America. If a defect is found in normal residential use, Kohler Co. will,
at its election, repair, provide a replacement part or product, or make
appropriate adjustment. Damage to a product caused by accident,
misuse, or abuse is not covered by this warranty. Improper care and
cleaning will void the warranty**. Proof of purchase (original sales
receipt) must be provided to Kohler Co. with all warranty claims.
Kohler Co. is not responsible for labor charges, installation, or other
incidental or consequential costs. In no event shall the liability of
Kohler Co. exceed the purchase price of the Faucet.
If the Faucet is used commercially or is installed outside of North
America, or if the finish is gold, non-Vibrant or a painted or powder
coated color finish, Kohler Co. warrants the Faucet to be free from
defects in material and workmanship for one (1) year from the date the
product is installed, under Kohler Co.’s standard one-year limited
warranty.
If you believe that you have a warranty claim, contact Kohler Co.,
either through your Dealer, Plumbing Contractor, Home Center or
, non-chrome finishes) to be free
®
1229813-2-A 12 Kohler Co.
 Loading...