

Kohler K-2829 Installation Manual

Installation Guide
Self-Rimming/Above-the-Counter Lavatory
K-2829
M product numbers are for Mexico (i.e. K-12345M)
Los números de productos seguidos de
M corresponden a México (Ej.
K-12345M)
Français, page “Français-1”
Español, página “Español-1”
1061941-2-B
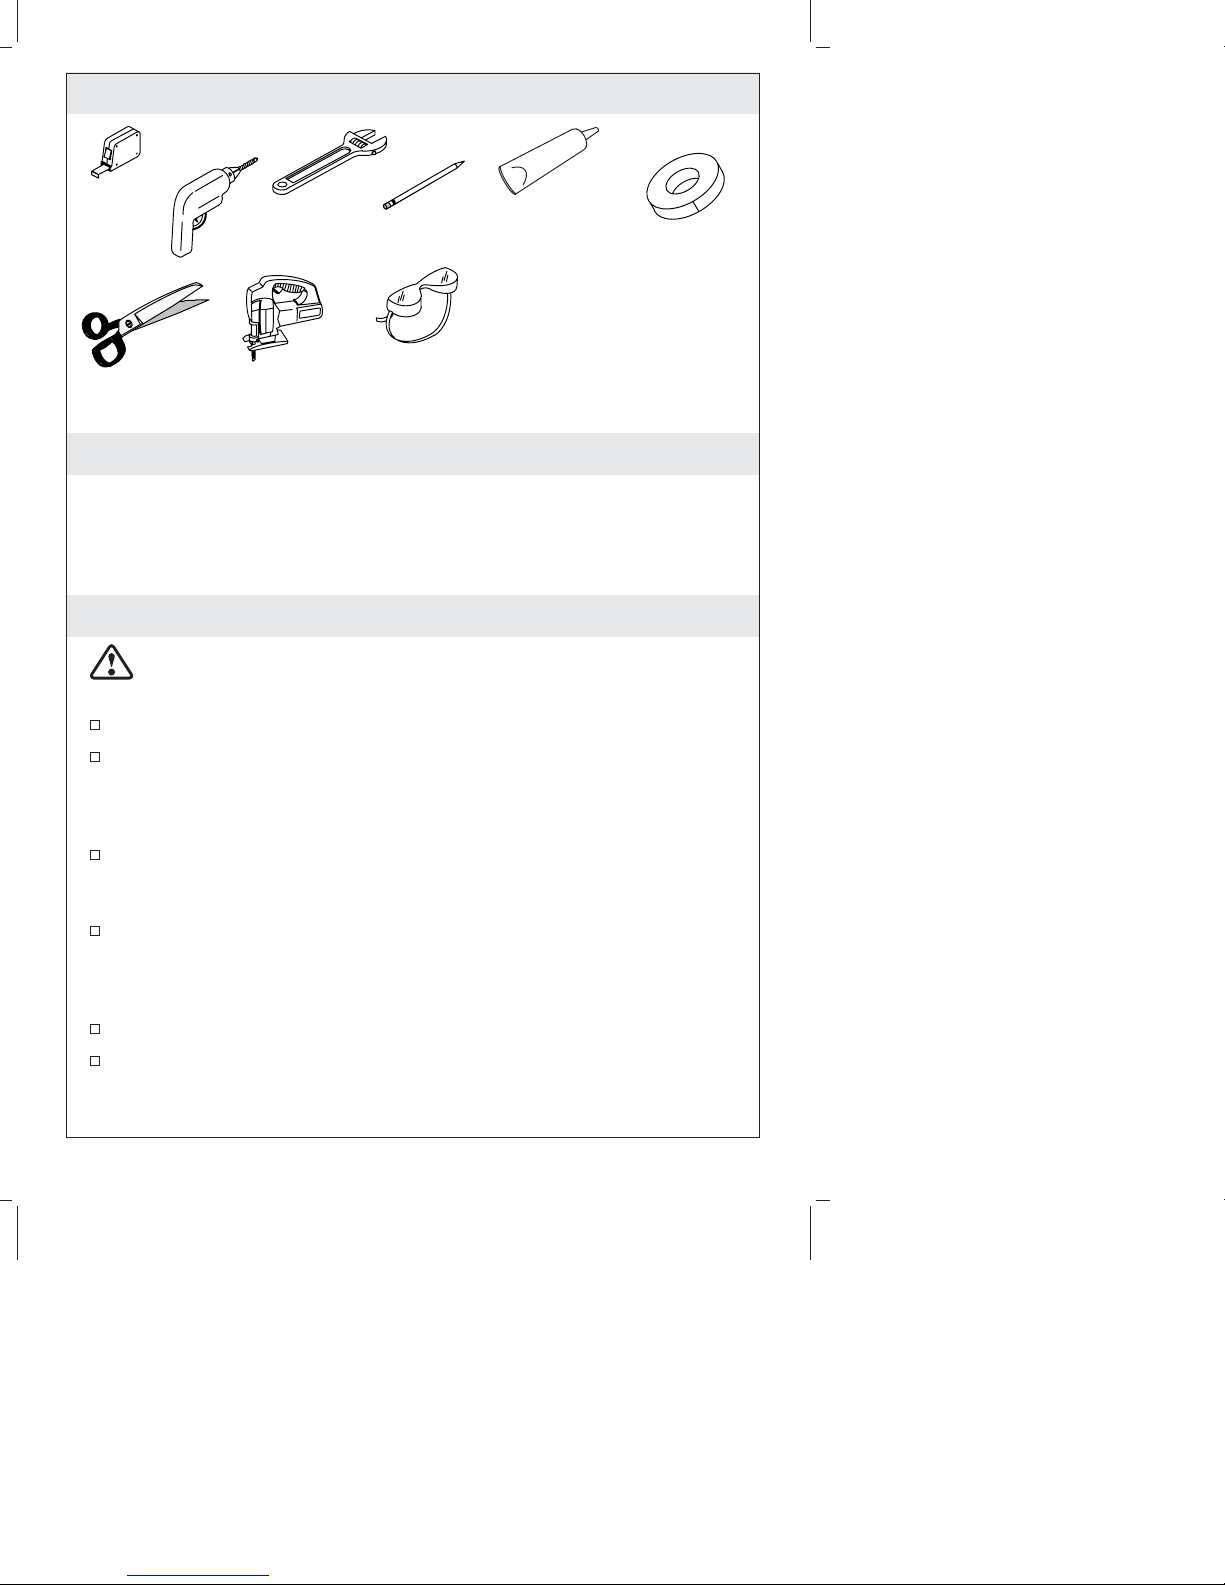
Tools and Materials
Tape
Measure
Scissors
Drill
Adjustable
Wrench
Jigsaw
Pencil
Safety
Glasses
Silicone
Sealant
Plus:
• Template (supplied)
• Rags or Paper Toweling
• Assorted Drill Bits
• Marker
Masking Tape
Thank You For Choosing Kohler Company
We appreciate your commitment to Kohler quality. Please take a few
minutes to review this manual before you start installation. If you
encounter any installation or performance problems, please don’t
hesitate to contact us. Our phone numbers and website are listed on
the back cover. Thanks again for choosing Kohler Company.
Before You Begin
CAUTION: Risk of personal injury or product damage. Cast
iron lavatories are very heavy. Get help lifting the lavatory into
place.
Observe all local plumbing and building codes.
If you are replacing an existing lavatory, turn off the water supply
to the faucet. Open the faucet valves to relieve pressure, then
disconnect the supply lines. Disconnect the drain assembly,
remove the trap, then remove the lavatory.
For new installations, ensure the water supply lines, drain piping,
vanity, and/or countertop is in place before proceeding with the
lavatory installation.
When selecting a faucet for the lavatory, ensure the spout will
reach a minimum of 4″ (10.2 cm) over the rim of the lavatory and
the stream of water is directed toward the center of the lavatory
basin. A wall-mount faucet is recommended.
Never rest or store the lavatory on the drain surface.
Prior to installation, unpack the new lavatory and inspect it for
damage. Return the lavatory to its protective carton until you are
ready to install it.
1061941-2-B 2 Kohler Co.

Before You Begin (cont.)
This instruction guide contains both self-rimming and
above-counter installation techniques. Follow the instructions that
apply to your installation.
For replacement installations, make sure the existing cutout is the
same size or smaller than needed for the new lavatory.
If installing multiple components (such as a cabinet, countertop,
or lavatory), read all product installation instructions before
beginning the lavatory installation. Some components should be
installed before others. Refer to Homeowners Guide for sample
configurations.
Kohler Co. reserves the right to make revisions in the design of
products without notice, as specified in the Price Book.
Kohler Co. 3 1061941-2-B
12-15/16" (32.8 cm)
25-13/16" (65.6 cm)
1-1/4" OD
3/8" Hot
12-7/8"
(32.7 cm)
4"
(10.2 cm)
14"
(35.6 cm)
1-9/16"
(4 cm)
3/8" Cold
9-5/8" (24.5 cm)
19-5/16"
(49 cm)
5/8" (1.5 cm)
4" (10.2 cm)
1-1/4" (3.2 cm)
5-9/16"
(14.1 cm)
34" (86.4 cm)
8"
(20.3 cm)
Min
27"
(68.6 cm)
Min
24" (61 cm)
9"
(22.9 cm)
Min
11"
(27.9 cm)
Standard Installation
Recommended ADA Installation
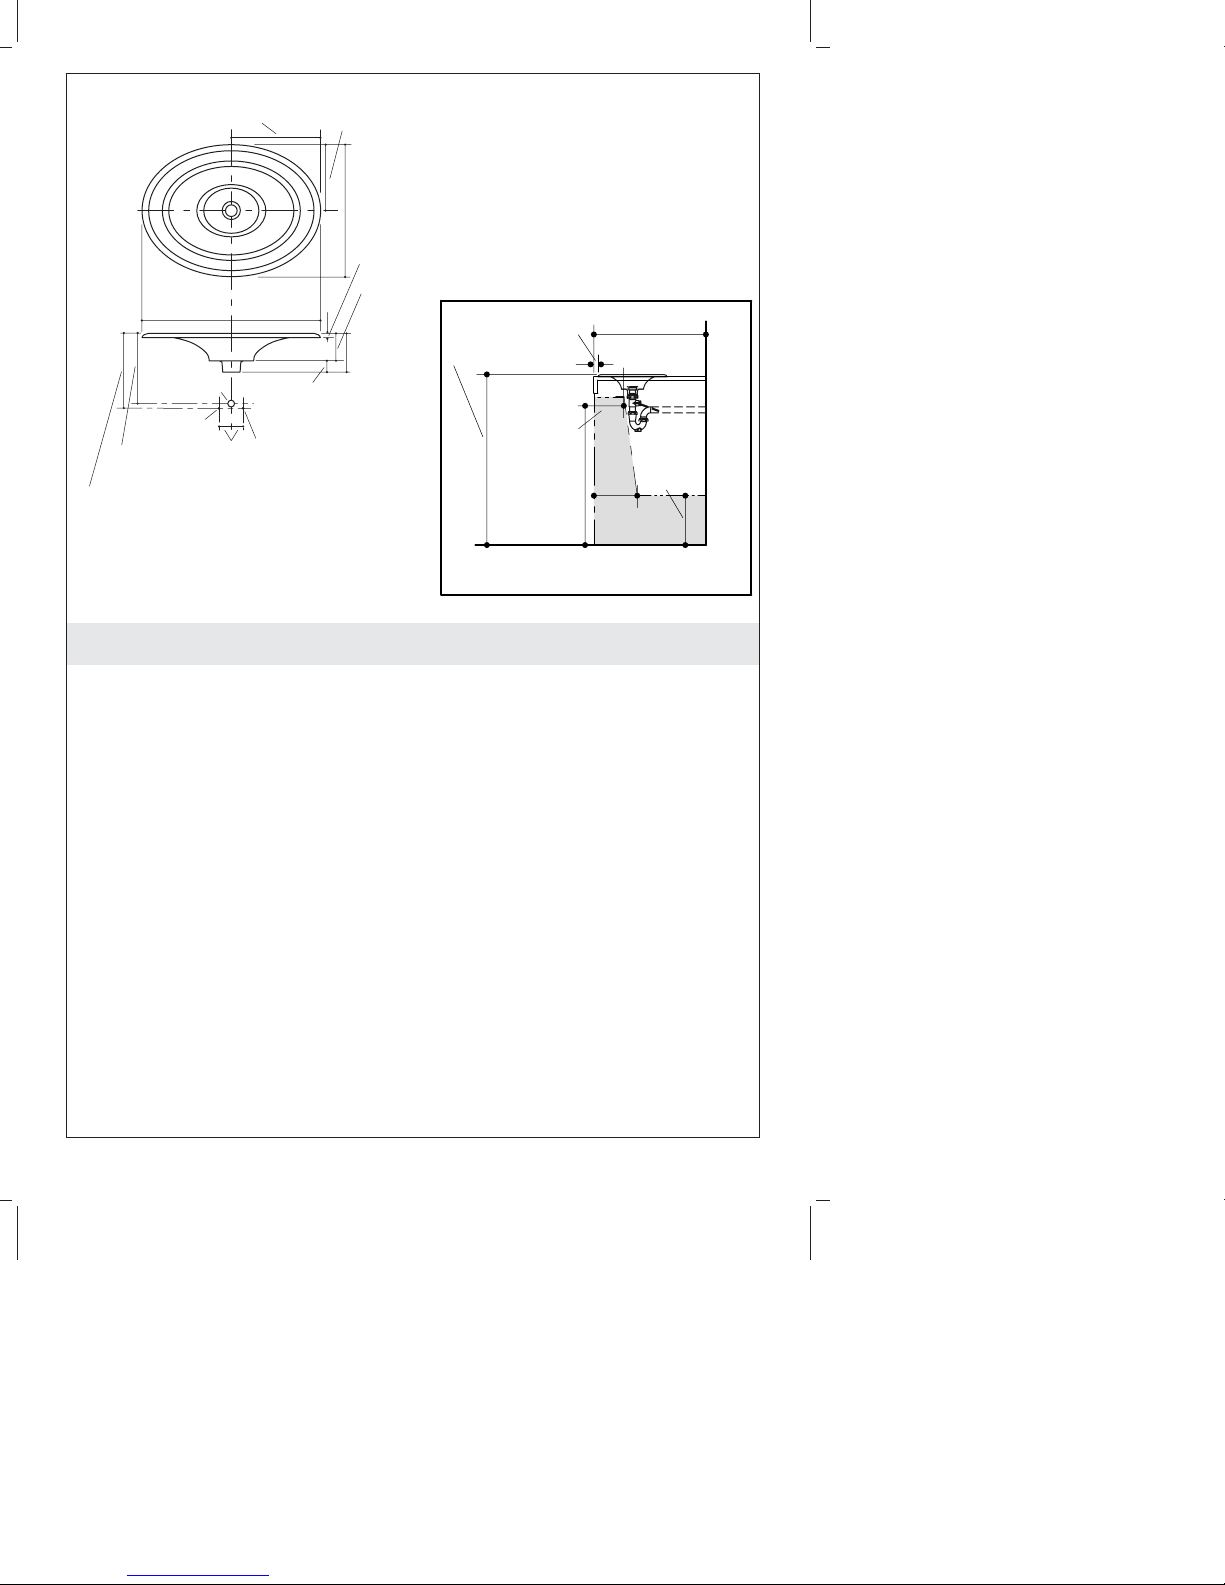
Roughing-In
NOTE: To determine the faucet and lavatory placement, consider the
faucet and handle escutcheon diameters, the length of the spout,
and the clearance between the spout and the lavatory rim. Ensure:
•
the faucet spout will reach a minimum of 4″ (10.2 cm) over the
rim of the lavatory.
•
adequate clearance for hand washing.
•
the stream of water is directed toward the center of the lavatory
basin.
1061941-2-B 4 Kohler Co.
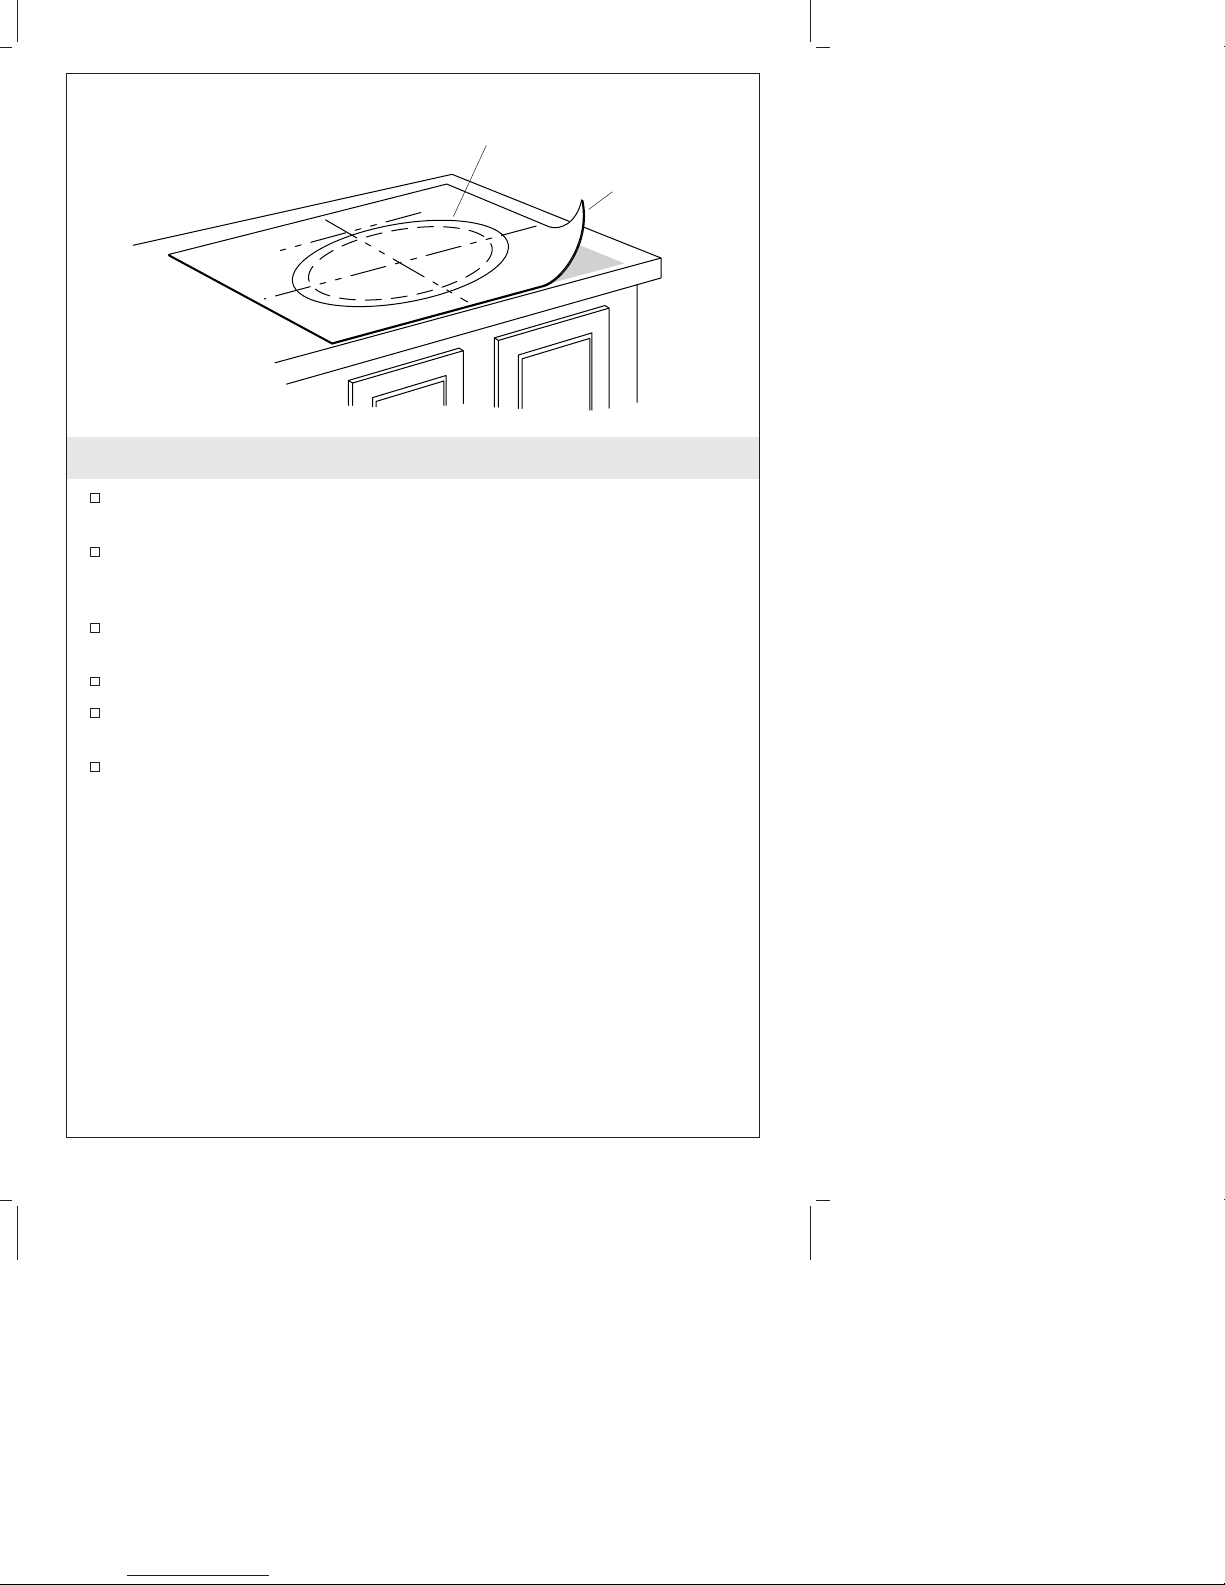
Self-Rimming
Cut-Out Line
Cut-Out
Template
1. Self-Rimming – Prepare the Site
Cut along the self-rimming cut-out line on the cut-out template
with a scissors.
Using the centerlines as a guide, squarely position the cut-out
template on the countertop. Ensure there is adequate clearance
between the lavatory, backsplash, and faucet.
Use a pencil to trace around the self-rimming cut-out line on the
countertop.
Remove the cut-out template from the countertop.
Recheck the clearance between the lavatory, backsplash, and
faucet. Adjust the traced cut-out line, if necessary.
Cut along the inside of the marked pencil line for the lavatory
with jigsaw.
Kohler Co. 5 1061941-2-B
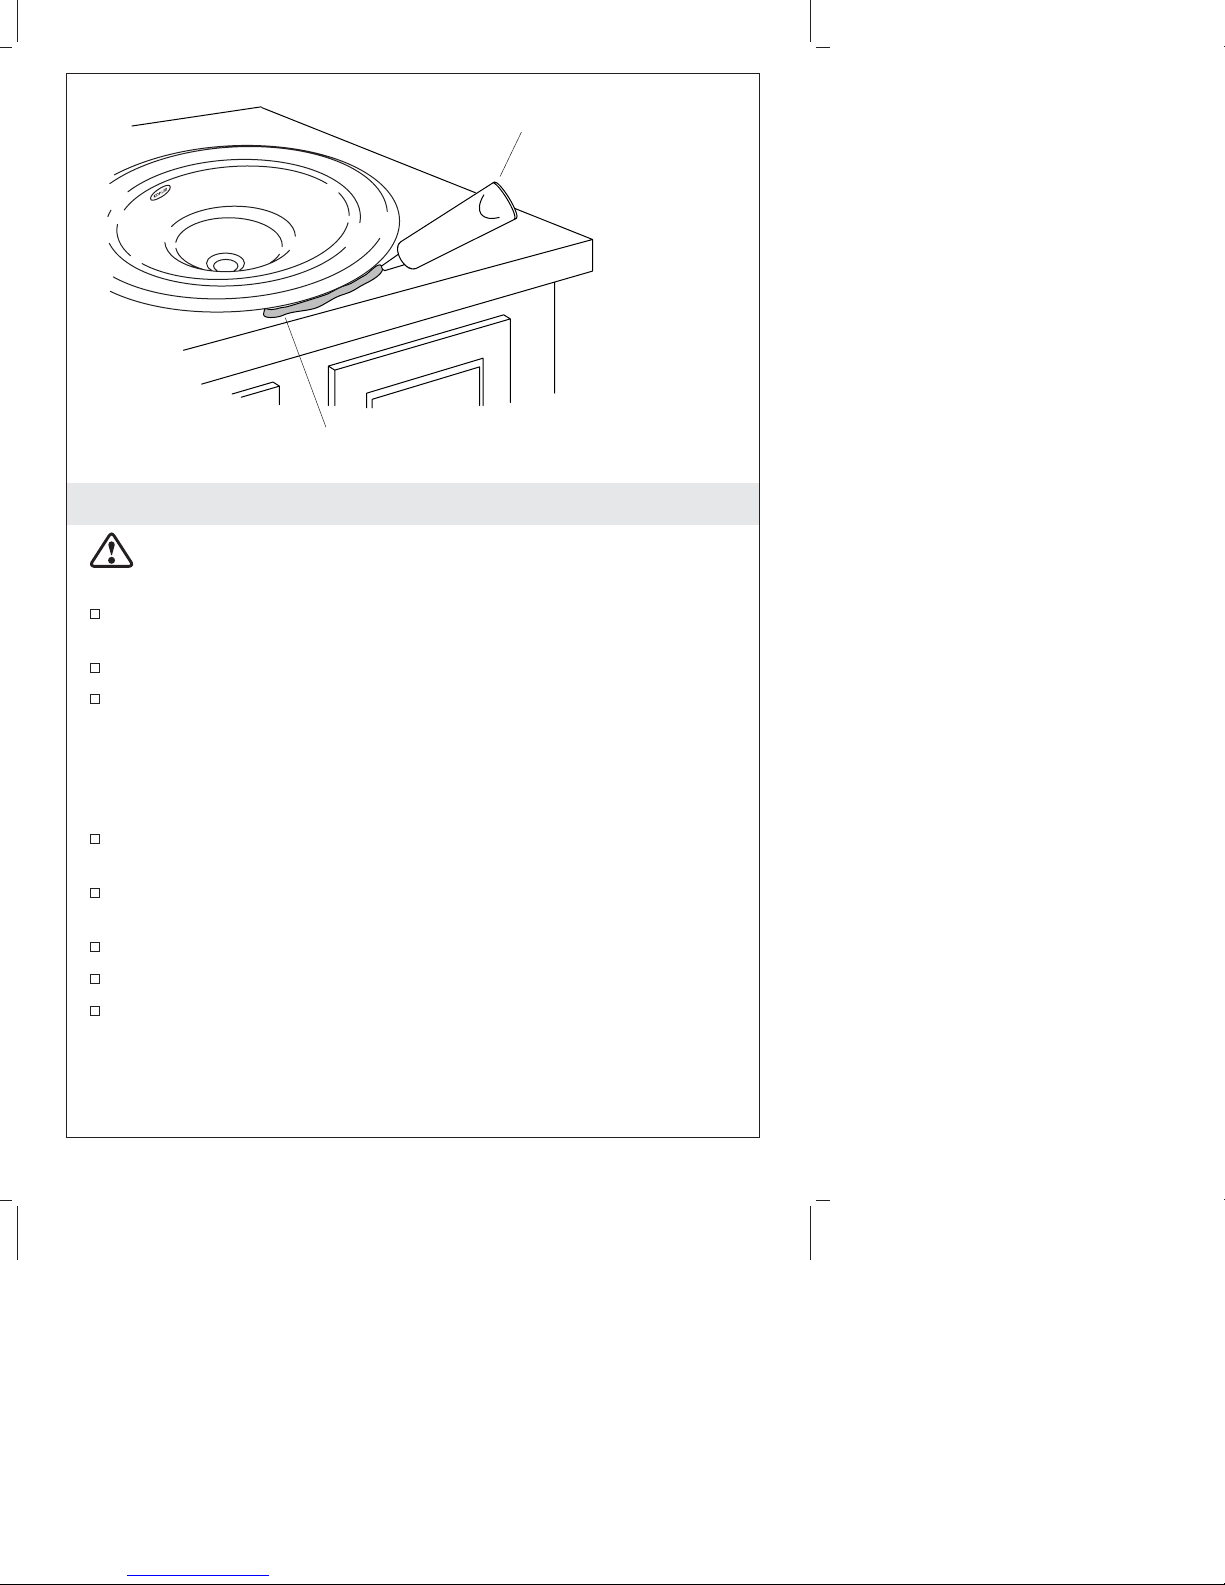
Sealant
Seal along the edge of lavatory.
2. Self-Rimming Installation – Install the Lavatory
CAUTION: Risk of personal injury or product damage. Cast
iron lavatories are very heavy. Get help lifting the lavatory into
place.
Temporarily position the lavatory in the countertop cutout so the
″Kohler″ logo is to the back. Verify proper fit and clearance.
Remove the lavatory from the countertop.
Install the faucet and drain according to the manufacturer’s
instructions.
NOTE: For installations using tile, wood, or other porous materials,
apply waterproof sealer around the cutout area of the countertop
surface. Allow the sealer to dry before proceeding.
Carefully position the lavatory in the countertop cutout so the
″Kohler″ logo is to the back. Verify proper fit and clearance.
Apply a thin, continuous bead of sealant around the lavatory
edges. Immediately wipe away any excess sealant.
Fill any voids between the lavatory and the cutout with sealant.
Verify that the lavatory had not moved out of position.
Allow the sealant to cure for at least 30 minutes before
proceeding.
1061941-2-B 6 Kohler Co.
Backsplash
Above-the-Counter
Cut-Out Line
Outside Edge
of Lavatory
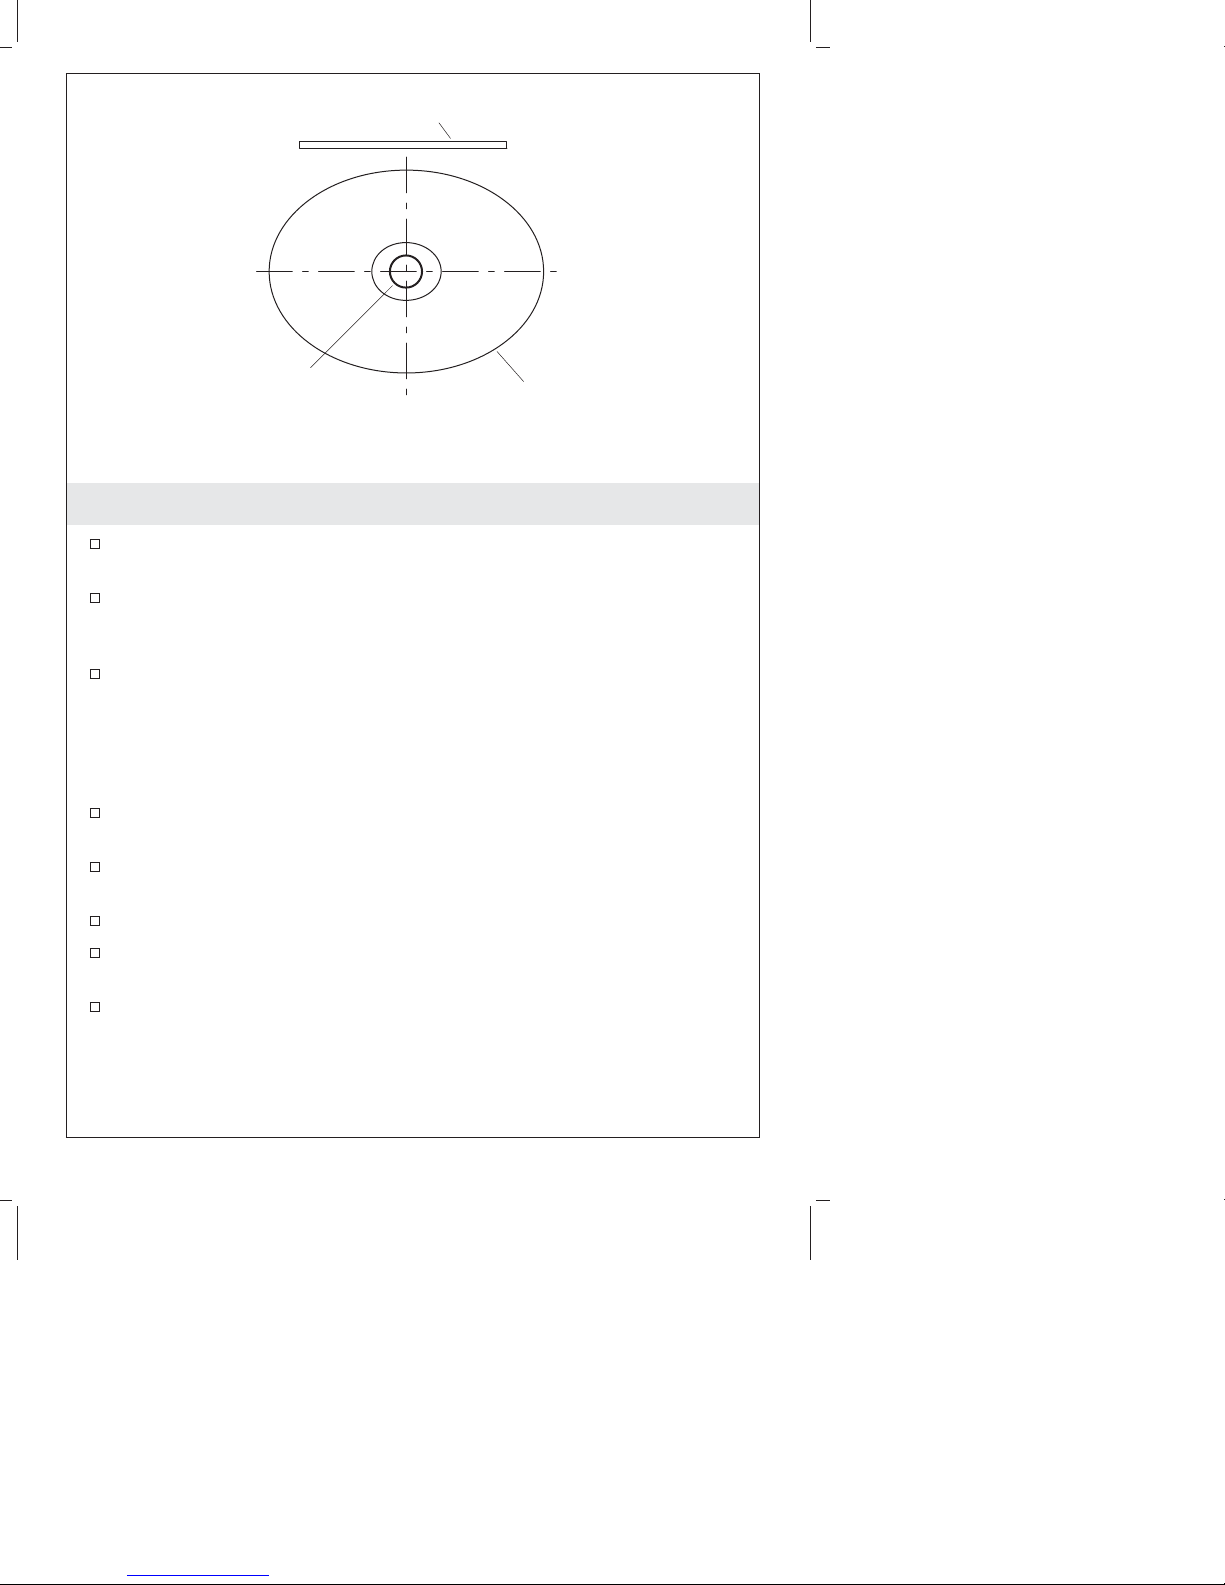
3. Above-the-Counter – Prepare the Site
Cut along the above-the-counter cut-out line on the cut-out
template with a scissors.
Using the centerlines as a guide, squarely position the cut-out
template on the countertop. Ensure there is adequate clearance
between the lavatory, faucet, and backsplash.
Use a pencil to trace around the above-the-counter cut-out line
on the countertop.
NOTE: Ensure the faucet spout will reach a minimum of 4″ (10.2
cm) over the rim of the lavatory and the stream of water is directed
toward the center of the lavatory basin.
Recheck the clearance between the lavatory, faucet, and
backsplash. Adjust the traced cut-out line, if necessary.
Use a pencil to mark the exact centers of the four mounting hole
locations on the countertop.
Remove the cut-out template.
Cut along the inside of the marked pencil line for the lavatory
with a jigsaw.
Drill the four 3/8″ (1 cm) mounting holes at the marked centers.
Kohler Co. 7 1061941-2-B
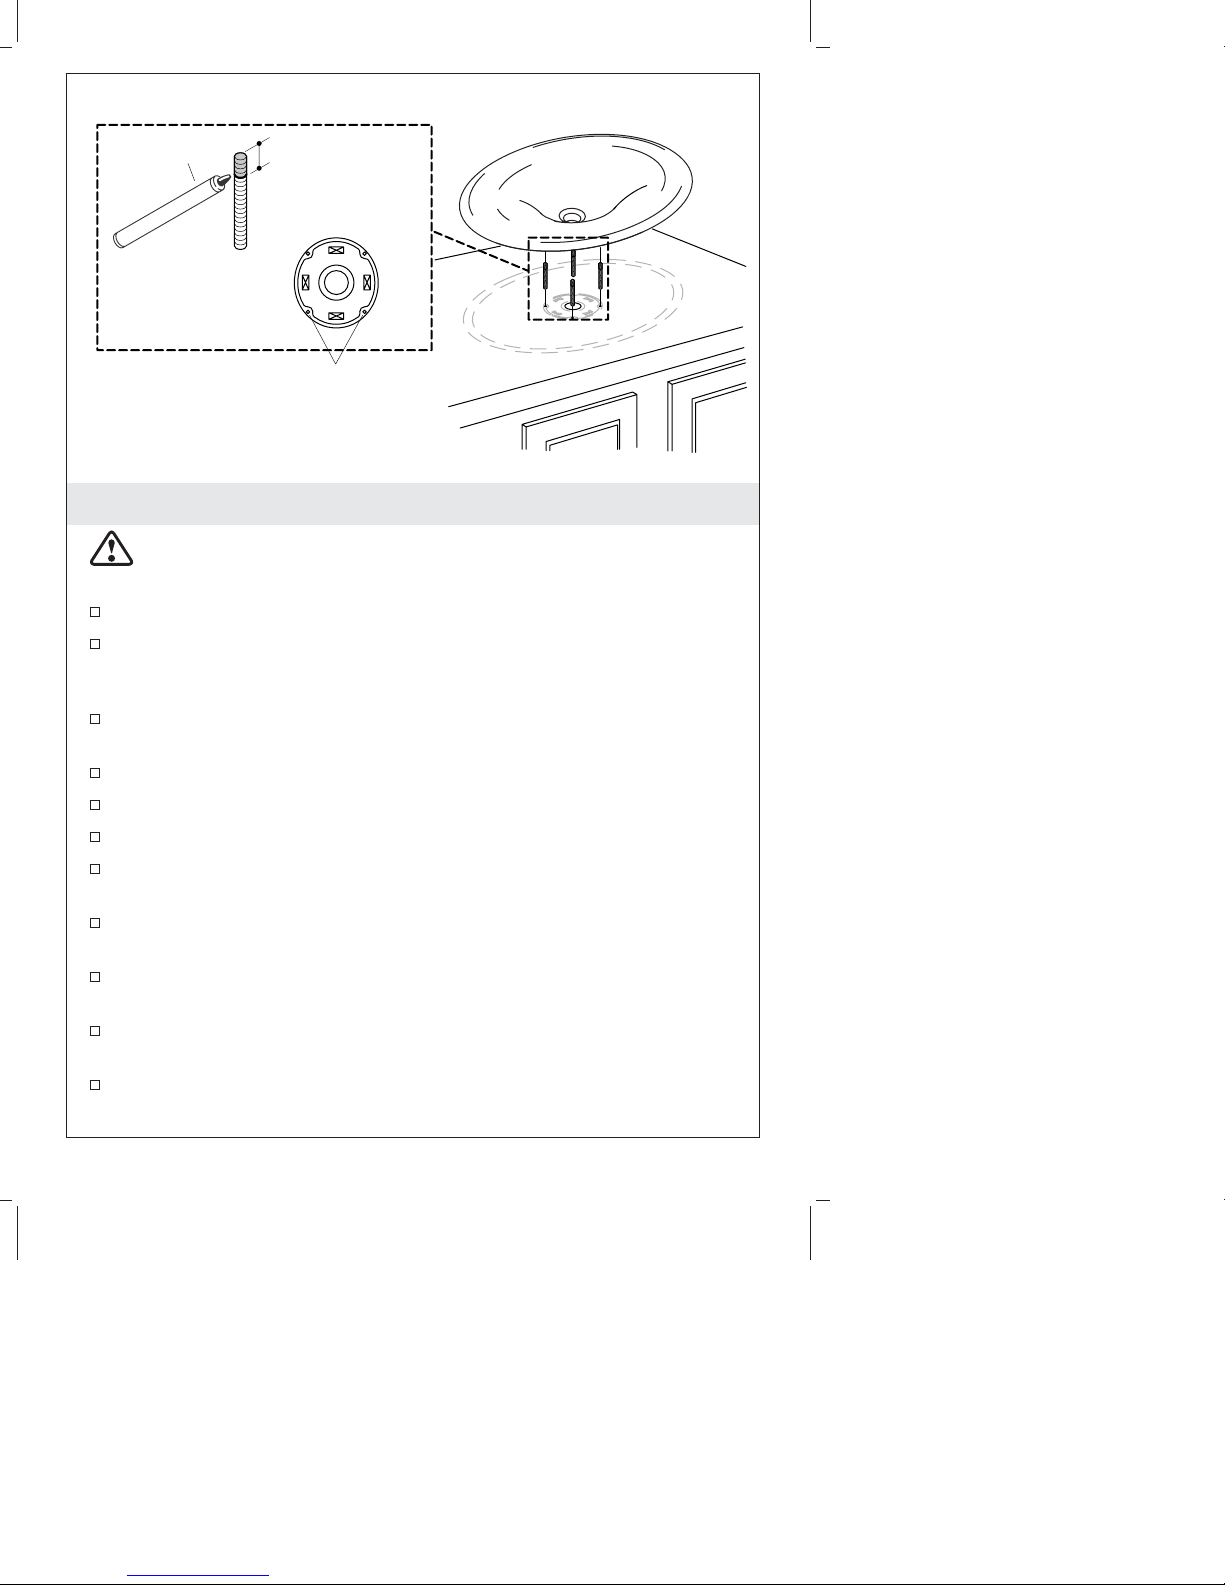
Marker
5/16" (8 mm)
Bottom View
of Lavatory
Mounting Stud Holes
4. Above-the-Counter – Install the Lavatory
CAUTION: Risk of personal injury or product damage. Cast
iron lavatories are very heavy. Get help lifting the lavatory into
place.
Mark a spot 5/16″ (8 mm) in on each threaded stud, as shown.
Handtighten the threaded studs into each of the four drilled
mounting holes of the countertop. Do not tighten past the marked
points on the threaded studs.
Temporarily position the lavatory in the countertop cutout so the
″Kohler″ logo is to the back.
Inspect for proper fit.
Remove the lavatory, then place it upside down on a soft cloth.
Install the faucet according to the manufacturer’s instructions.
Install the drain to the lavatory according to the drain installation
instructions.
Apply a thin continuous bead of silicone sealant around the flat
outside edge of the bottom surface of the lavatory.
Carefully position the lavatory in the countertop cutout so the
″Kohler″ logo is to the back.
Thread a washer and nut onto each of the threaded studs from
underneath the countertop.
Tighten the nuts 1/2 turn past hand-tight with an adjustable
wrench.
1061941-2-B 8 Kohler Co.

Above-the-Counter – Install the Lavatory (cont.)
Wipe away any excess sealant with a clean cloth. Fill any voids as
needed.
Allow the sealant to cure for at least 30 minutes before
proceeding.
5. All Installations – Installation Checkout
Connect and tighten the trap to the drain, and complete the water
supply connections to the faucet according to the instructions
packed with the faucet.
Run water into the lavatory and check for leaks.
Clean up with a non-abrasive cleaner.
Kohler Co. 9 1061941-2-B
 Loading...