

Page 1

Exprtr_cvr Page 1 Monday, April 1, 1996 2:55 PM
User’s Guide Part No. 4B0979
KODAK XLS 8600 Printer and
XLS 8600 PS Printer
Export Module for ADOBE PHOTOSHOP Software
and MACINTOSH Computers
Export Module for ADOBE PHOTOSHOP Software
and MICROSOFT WINDOWS 3.1
Page 2

Page 3

Contents
Introduction .........................................................................1
Section I .............................................................................I-1
Contents
Job Scheduling............................................................................2
Communication Channels............................................................2
Increasing Image Sharpness.......................................................2
Kodak XLS 8600 Printer and XLS 8600 PS Printer
Export Module for ADOBE PHOTOSHOP Software
and MICROSOFT WINDOWS 3.1............................... I-1
Installation..................................................................................I-1
Hardware Requirements...............................................I-1
Requirements for SCSI–connected
Installations......................................................I-2
Software Requirements................................................I-2
Requirements for SCSI–connected
Installations......................................................I-2
Installing the Software ..................................................I-2
Dialog Boxes and Print Options.................................................I-5
XLS 8600 Printer Setup Dialog Box..............................I-6
Opening the XLS 8600 Printer Setup
Dialog Box .......................................................I-6
Media...............................................................I-7
Copies..............................................................I-8
Printer..............................................................I-9
Printed Size .....................................................I-9
Layout............................................................I-11
Image Processing..........................................I-12
Print ...............................................................I-12
Cancel............................................................I-13
April 1996 i
Page 4

Contents
Help ...............................................................I-13
Select a Printer Dialog Box.........................................I-13
OK...............................................................................I-14
Cancel............................................................I-14
SCSI Host Adapter ........................................I-14
Update...........................................................I-14
Printer Status Dialog Box............................................I-14
Printer Information.........................................I-15
Job Information..............................................I-16
Refresh..........................................................I-16
OK..................................................................I-16
Selecting a Port for the Printer....................................I-17
Printing........................................................................I-19
Error Messages ..........................................................I-20
General Error Messages................................I-20
Media Mismatch Messages........................................I-21
Other Error Messages ................................................I-21
Section II ...........................................................................II-1
Kodak XLS 8600 Printer and XLS 8600 PS Printer
Export Module for ADOBE PHOTOSHOP Software
and MACINTOSH Computers................................... II-1
Installation....................................................................II-1
Hardware Requirements.................................II-1
Software Requirements...............................................II-1
Installing the Software .................................................II-2
Installing Printer Tables...............................................II-5
Changing the Printer’s Network Name ........................II-7
Dialog Boxes and Print Options..............................................II-10
Kodak XLS 8600 Printer Dialog Box..........................II-10
ii April 1996
Page 5

Contents
Media............................................................II-11
Copies...........................................................II-13
Printer...........................................................II-13
Printed Size ..................................................II-14
Layout...........................................................II-15
Image Processing.........................................II-16
Print ..............................................................II-17
Cancels.........................................................II-17
Select a Kodak Printer Dialog Box.............................II-18
Update..........................................................II-18
Network.........................................................II-19
Cancel...........................................................II-20
OK.................................................................II-20
Printer Status Dialog Box...........................................II-21
Printer Information........................................II-21
Job Information.............................................II-21
Update..........................................................II-21
OK.................................................................II-22
Printing....................................................................................II-22
Error Messages ......................................................................II-23
General Error Messages............................................II-23
AppleTalk is not turned on............................II-24
The printer cannot be found!.........................II-24
The printer is not receiving! ..........................II-24
The printer is not responding!.......................II-24
Media Mismatch Messages.......................................II-24
Other Error Messages ...............................................II-24
April 1996 iii
Page 6

Contents
Appendix A: About Printer Tables................................A-1
Additive and Subtractive Color ................................................ A-1
Standard Tables”..................................................................... A-2
Custom Windows Tables......................................................... A-2
Custom Macintosh Tables....................................................... A-3
Creating New Printer Tables.................................................... A-4
Appendix B: Getting Additional Help...........................B-1
Asia/Pacific Region helpline numbers ........................ B-2
European helpline numbers........................................B-2
Appendix C: About SCSI connection...........................C-1
Windows systems....................................................................C-1
Macintosh Systems.....................................................C-2
Index.......................................................................... Index-1
iv April 1996
Page 7

Introduction
Introduction
This manual describes how to use the Kodak XLS 8600
and XLS 8600 PS Printer Export Module for ADOBE
PHOTOSHOP software and MACINTOSH computers,
and the Kodak XLS 8600 and XLS 8600 PS Printer
Export Module for ADOBE PHOTOSHOP software and
MICROSOFT WINDOWS 3.1. Each of these packages
will be referred to as the Export Module. The Export
Modules allow you to print from within Photoshop using
the XLS 8600/XLS 8600 PS Printer running in raster
mode. Since the Export Modules actually run from within
Photoshop, you can use all Photoshop image processing
functions before you print.
The Export Modules allow you to:
•
Scale an image
•
Reprint the last image sent to the printer
•
Print in landscape or portrait mode
•
Apply print sharpening
•
Specify printer tables to perform custom color–
rendering
•
Select a variety of sizes and types of paper and
transparency material
•
Specify XtraLife ribbon to protect prints
•
Center an image on the page
•
Create a mirror image
April 1996 1
Page 8

Introduction
Job Scheduling
The number of jobs that can be queued to the printer at
one time is dependent on the available memory in the
printer. If large image files are sent, fewer jobs can be
processed. Installing optional memory in the printer
increases the number of jobs that can be processed, and
is described in the KODAK XLS 8600 Printer and XLS
8600 PS Printer, User’s Guide.
The other factor that impacts job scheduling is the
network configuration impact on job scheduling in which
the printer is installed. When the printer is connected
through more than one port, the printer polls the ports in
a round robin method. This means that once a job is
received by the printer, it stops polling the ports until the
job has finished printing. The printer then looks to the
next port in the list. The position of the ports in the list will
impact the order in which jobs are processed. Simple
timing of when jobs are sent is not the only determinant
of when jobs will be processed and printed.
Communication Channels
Your computer can print to the XLS 8600/XLS 8600 PS
Printer through SCSI connection or parallel connection,
or through Ethernet connection if the optional Network
Interface Card is installed on the printer. Refer to the
KODAK XLS 8600 Printer and XLS 8600 PS Printer,
User’s Guide for more information about network
connectivity.
Increasing Image Sharpness
•
To gain more control over image sharpness, turn
sharpening off in the Export Module and use one of
Photoshop’s sharpening filters instead.
2 April 1996
Page 9

Section I
Kodak XLS 8600 Printer and XLS 8600 PS Printer
Export Module for ADOBE PHOTOSHOP Software and
MICROSOFT WINDO WS 3.1
Section I
This section explains how to install and use the Export
Module on your PC. It assumes that you are familiar with
the Microsoft Windows environment.
Installation
Hardware Requirements
The following hardw are is recommended to load and use
the Export Module.
•
A 386 or 486 computer that is Microsoft Windows
compatible.
•
Hard drive
•
3.5 inch floppy disk drive
•
Enough RAM to run Microsoft Windows 3.1 and
Photoshop (at least 8MB)
•
Minimum of 4 MB of hard disk space
•
An available LPT port, SCSI host adapter, or network
connection
NOTE: SCSI communications will be enabled only if a
SCSI host adapter board is installed in your PC.
April 1996 I-1
Page 10

Section I
Requirements for SCSI–connected Installations
•
An ADAPTEC SCSI host adapter board.
•
A SCSI cable. Refer to the section Connecting the
printer for more information
•
A SCSI terminator
Refer to Appendix C, About SCSI–connected
Installations, for more information.
Software Requirements
Your PC must be installed with:
•
MS-DOS version 5.0 or later, or any compatible
operating system that will run Microsoft Windows
•
Microsoft Windows 3.1
•
Adobe Photoshop, Version 2.5
Requirements for SCSI–connected Installations
•
ADAPTEC EZ–SCSI Software. This software is
commonly provided with ADAPTEC SCSI host
adapter boards when they are purchased. The
supplier of your board should be able to provide the
software if you do not have it, or you can purchase it
through Adaptec directly.
Installing the Software
This section describes how to install the software on your
PC.
1. Turn on the PC and start Windows.
2. Insert the XLS 8600/XLS 8600 PS Printer Export
Module disk in the disk drive.
I-2 April 1996
Page 11
Section I
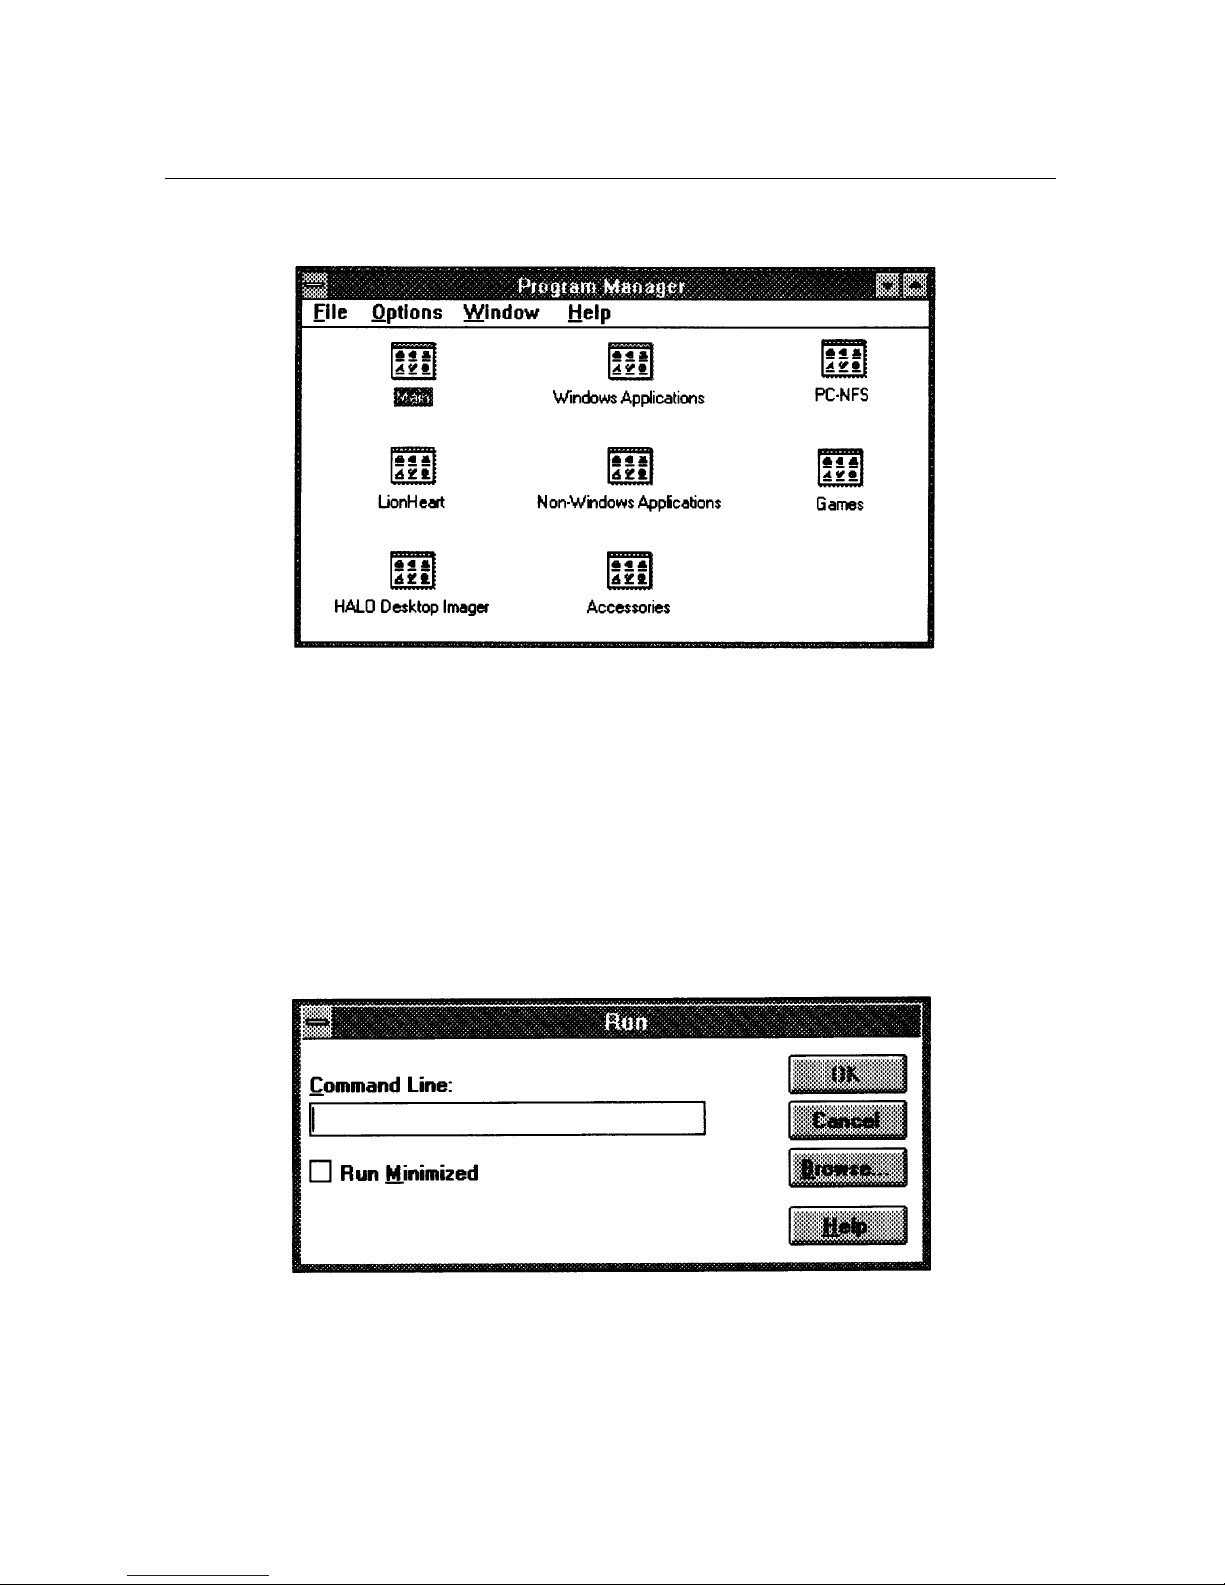
3. Open the Program Manager window.
NOTE: The defaults for your system may be set
differently, so your screen may not look like the
one illustrated above. For example, one or more
of the icons (i.e., Accessories, Main, Games) may
be open and in window form.
4. Pull down the File menu and select Run.
The Run dialog box will appear.
5. Type a:setup <enter>.
April 1996 I-3
Page 12
Section I
NOTE: Another floppy drive can be used to install the
Export Module. Simply replace a: with the
appropriate drive letter. For example, type b: if
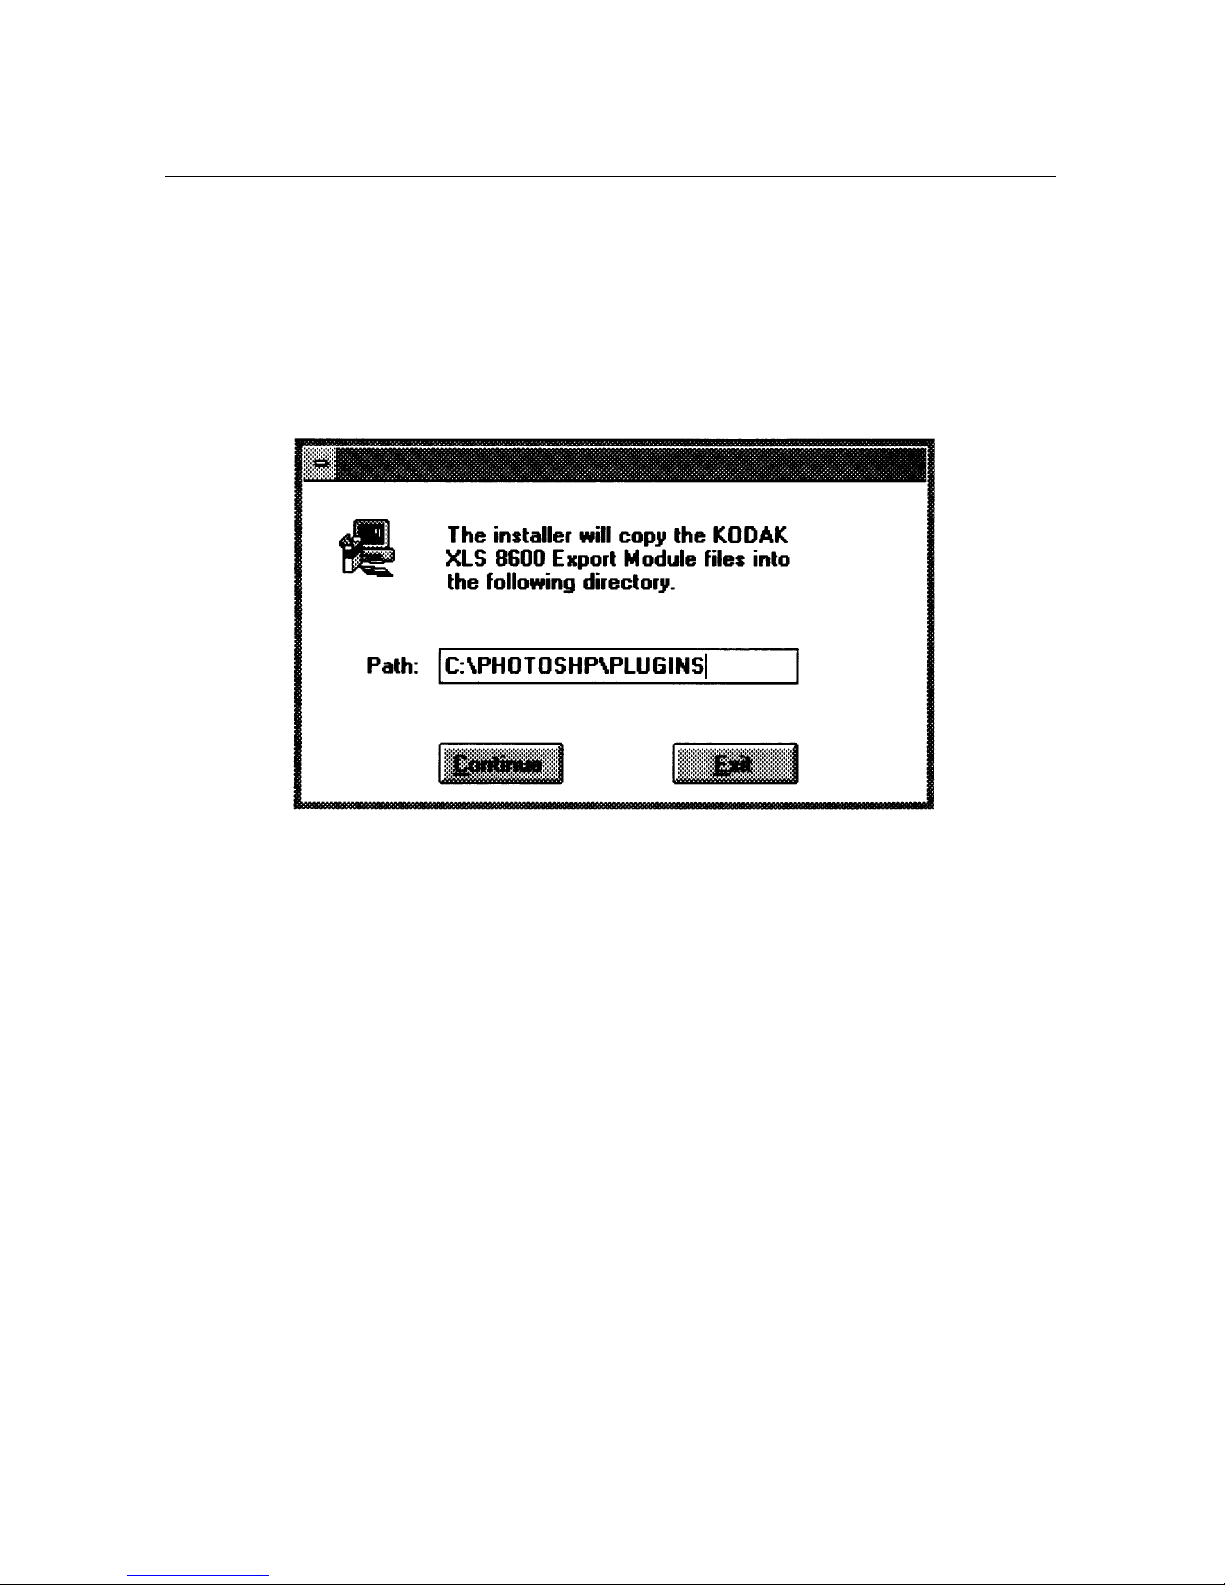
you are using drive B.A dialog box will appear,
telling you that the installer program is being
initialized. When initialization is complete, the
following dialog box will appear.
NOTE: The installer copies the Export Module files to the
default Photoshop Plugins directory
(C:\PHOTOSHOP\PLUGINS). If Photoshop was
not installed in the default directory, you must
change the Path text entry box to indicate the
correct path for the PLUGINS directory.
6. Select Continue.
The installation will begin, and a window like the
following will display its progress.
I-4 April 1996
Page 13
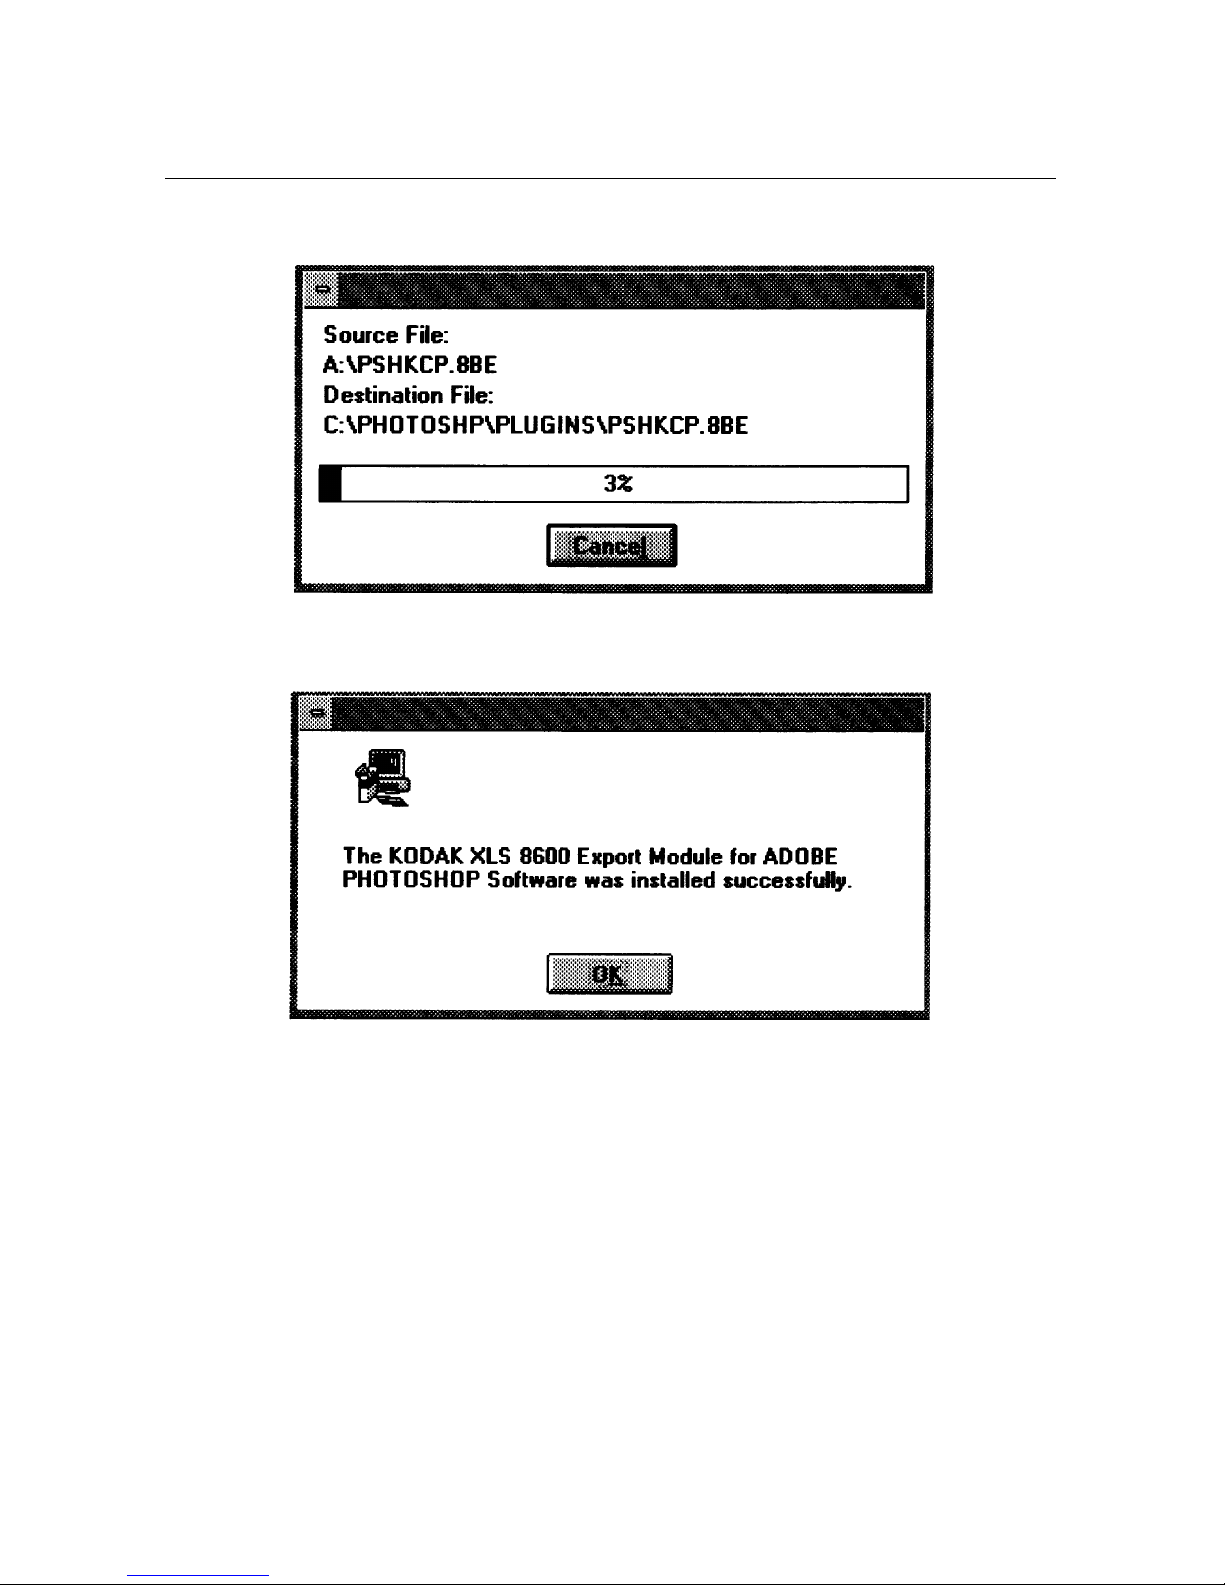
When installation is complete the following
confirmation box will appear.
Section I
April 1996 I-5
7. Select OK.
8. Remove the diskette from the drive.
Dialog Boxes and Print Options
This section describes the Export Module dialog boxes
which allow you to specify print options to be used when
printing to the XLS 8600/XLS 8600 PS Printer.
Page 14
Section I
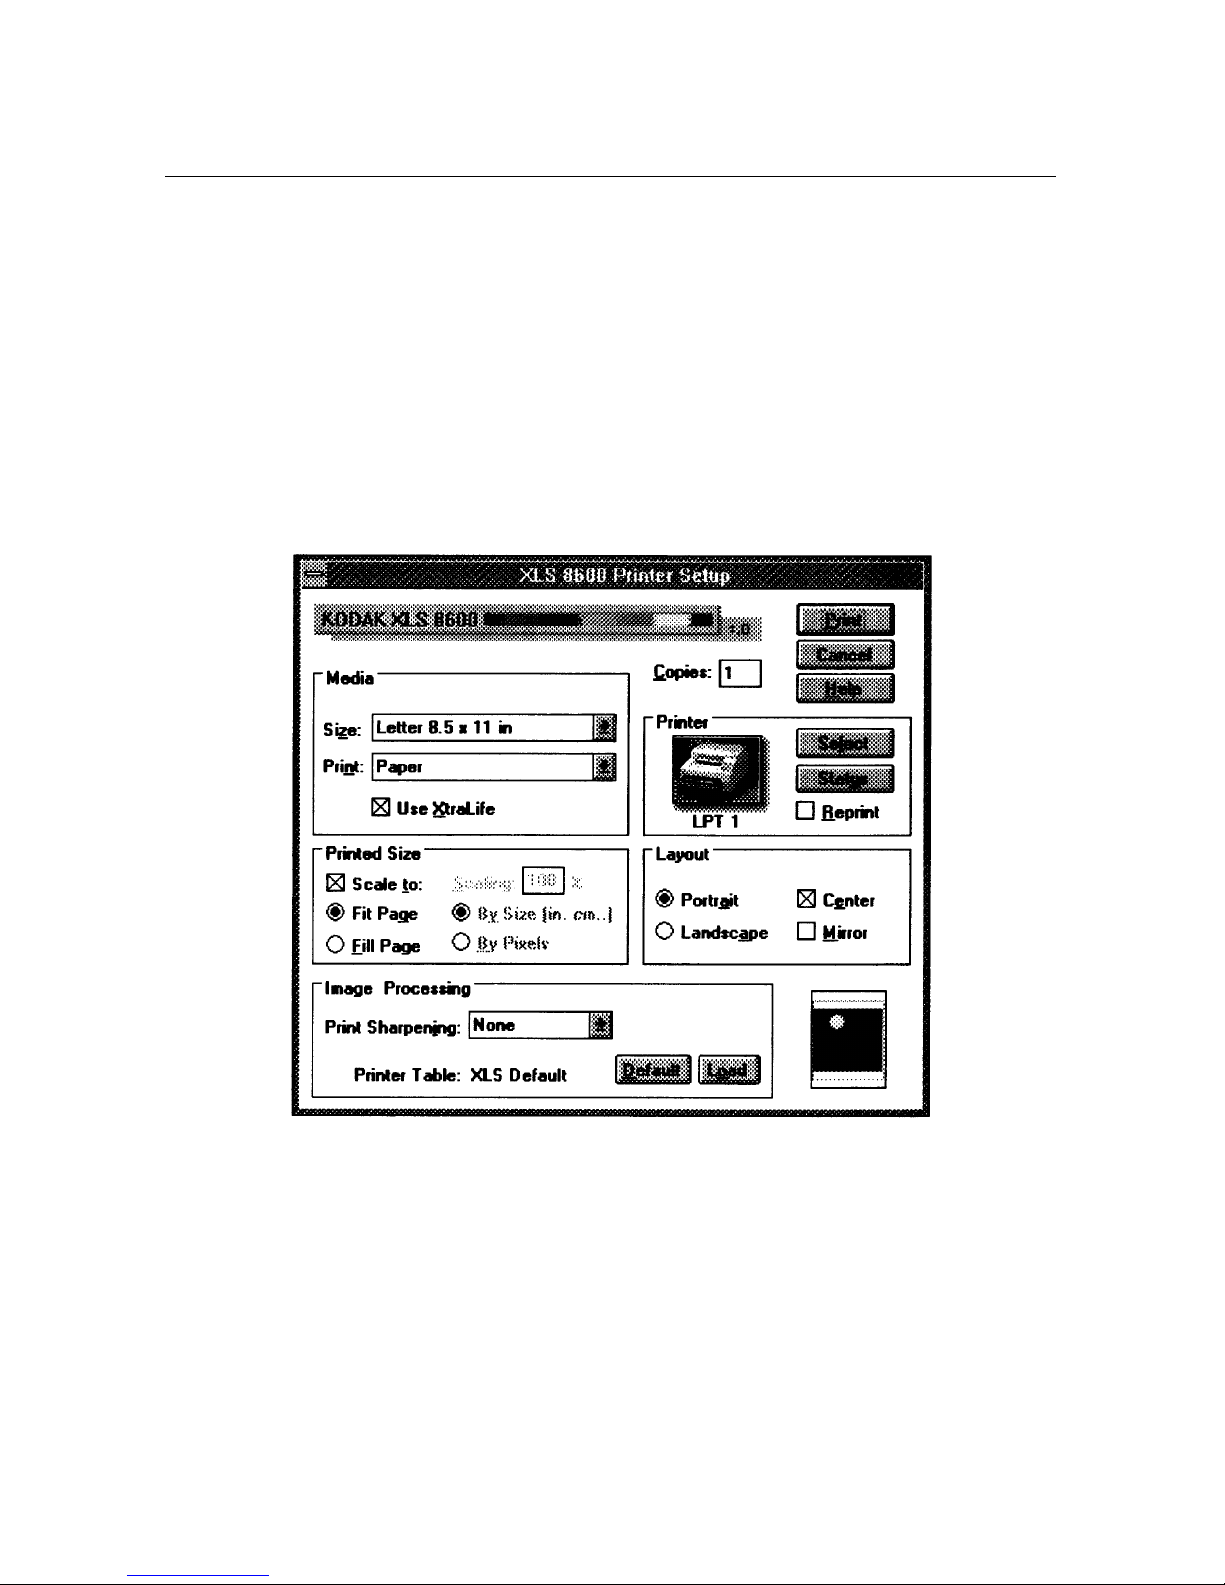
XLS 8600 Printer Setup Dialog Box
The XLS 8600 Printer Setup dialog box allows you to
control printer features by choosing available options.
Opening the XLS 8600 Printer Setup Dialog Box
1. Run Photoshop and open an image file.
2. Pull down the File menu, select Export and slide
over the Print to XLS 8600 Printer option.
The XLS 8600 Printer Setup dialog box will appear.
I-6 April 1996
Following are descriptions of the options in the XLS 8600
Printer Setup dialog box.
Page 15
Section I
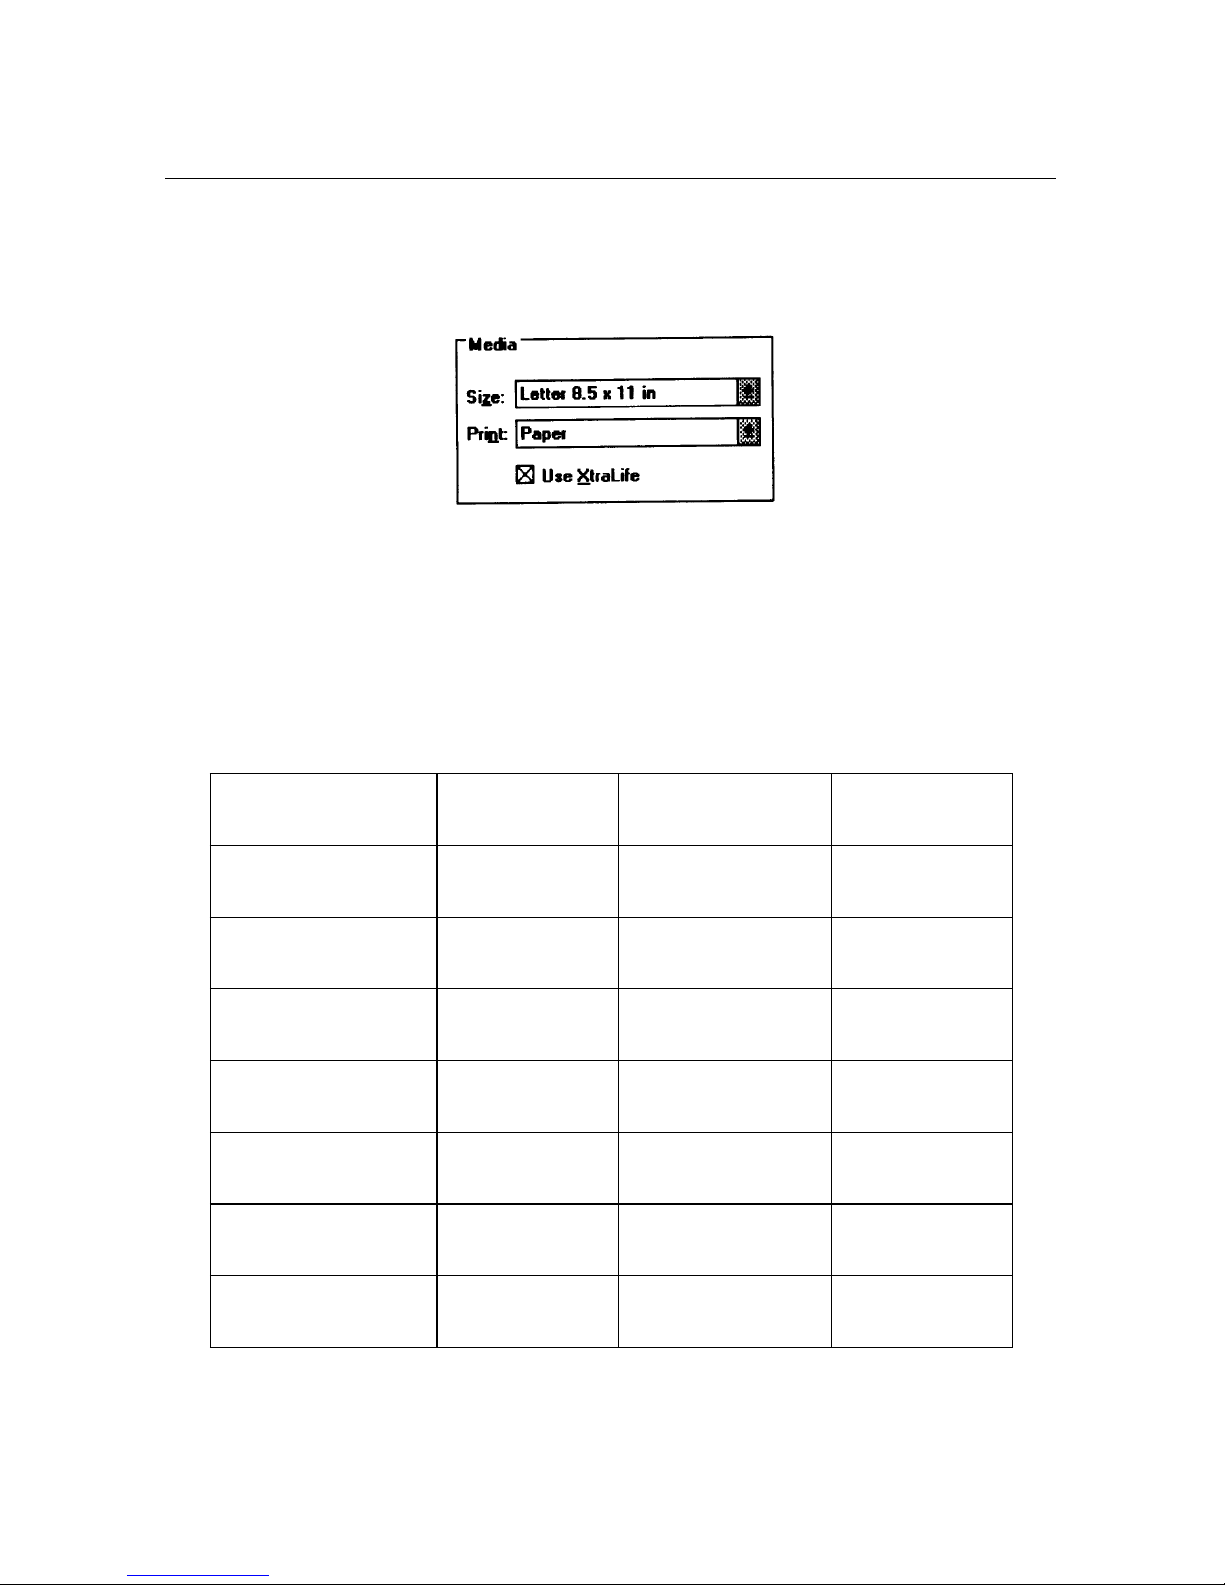
Media
The Media group box allows you to specify the following
media options
Size
- this list box allows you to specify the size of the
paper or transparency material that will be used.
Av ailable siz es are “Letter 8.5 x 11 in,” “A4 210 x 297mm,”
“8.5 x 14 in,” “8.5 x 12 in (216 x 307mm),” “9.5 x 14 in
(241 x 358mm),” “210 x 307mm,” and “210 x 358mm.”
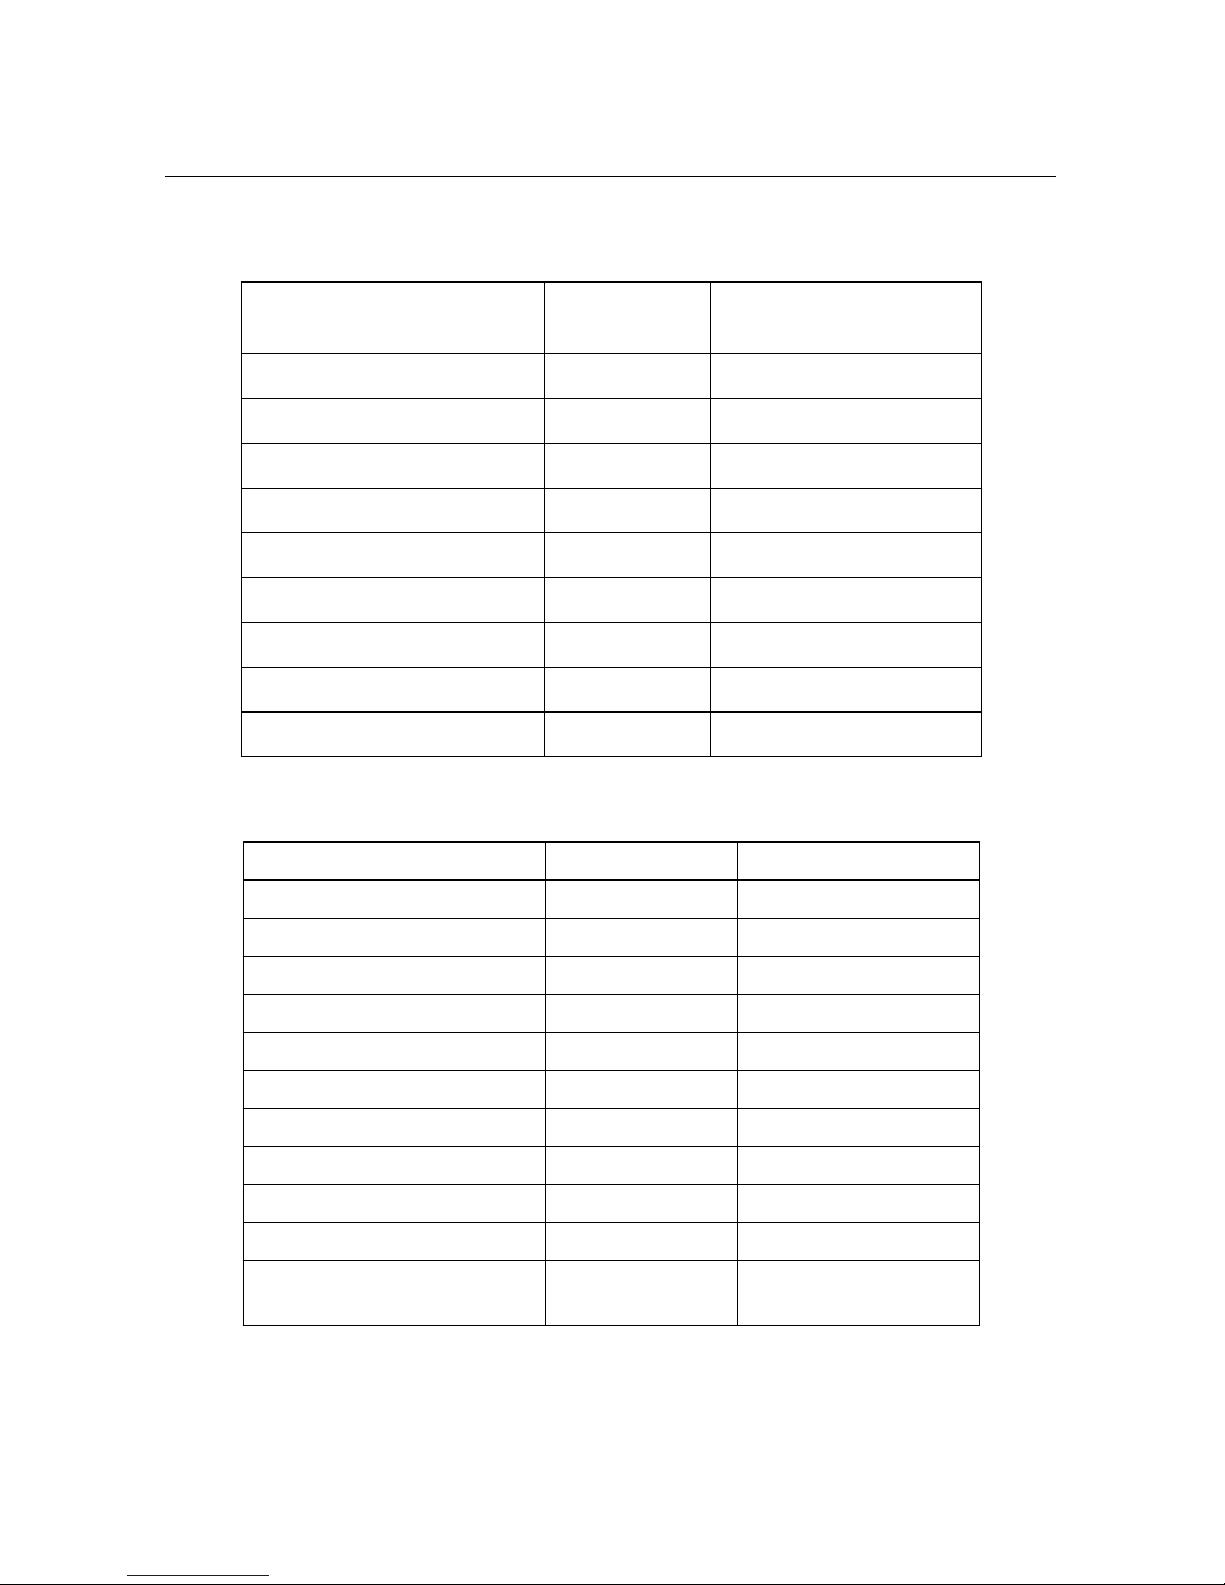
The following table lists the imageable areas.
Media Size Image Size
(in Inches)
8.5 x 11I
8.0 x 8.93I 204 x 228mm 2400 x 2679
216 x 281mm
8.27 x 11.69I
8.0 x 9.6I 204 x 246mm 2400 x 2880
210 x 297mm (A4)
8.5 x 12I
8.0 x 10I 204 x 256mm 2400 x 3000
216 x 307mm
8.27 x 12I
8.0 x 10I 204 x 256mm 2400 x 3000
210 x 307mm
8.5 x 14I
8.0 x 12I 204 x 307mm 2400 x 3600
216 x 358mm
8.27 x 14I
8.0 x 12I 204 x 307mm 2400 x 3600
210 x 358mm
9.5 x 14I
8.5 x 12I 217 x 307mm 2550 x 3600
243 X 358mm
Image Size
(in Millimeters)
Image Size
(in Pixels)
April 1996 I-7
Page 16

Section I
Print
—This list box allows y ou to specify the material on
which the job will be printed. Select “Paper” if y ou want to
print on paper. Select “Transparency” if you want to print
on transparency material. The default is “Paper.”
NOTE: If the wrong material is loaded in the printer after
the job has been received and processed, the
printer will display a message requesting that the
correct media be loaded.
If Size is set to “9.5 x 14 in (241 x 358mm)”,
“Transparency” will be grayed out and cannot be
selected, because transparency media is not
available in this size.
Use XtraLife
—This check box allo ws y ou to specify that
prints should have XtraLife lamination applied, which
increases shelf life and protects prints from fingerprints.
XtraLife ribbon must be loaded in the printer in order for
this option to work.
NOTE: If the Size list box is set to “8.5 x 14 in,” “9.5 x 14
in (241 x 358mm),” or “210 x 358mm” and this
check box is selected, a media mismatch will
occur on the printer, since XtraLife ribbon is not
available for these sizes.
Copies
The Copies box allows you to specify the number of
times that you want the job to be printed. Up to 999
copies can be printed at a time. The default is “1.”
I-8 April 1996
Page 17
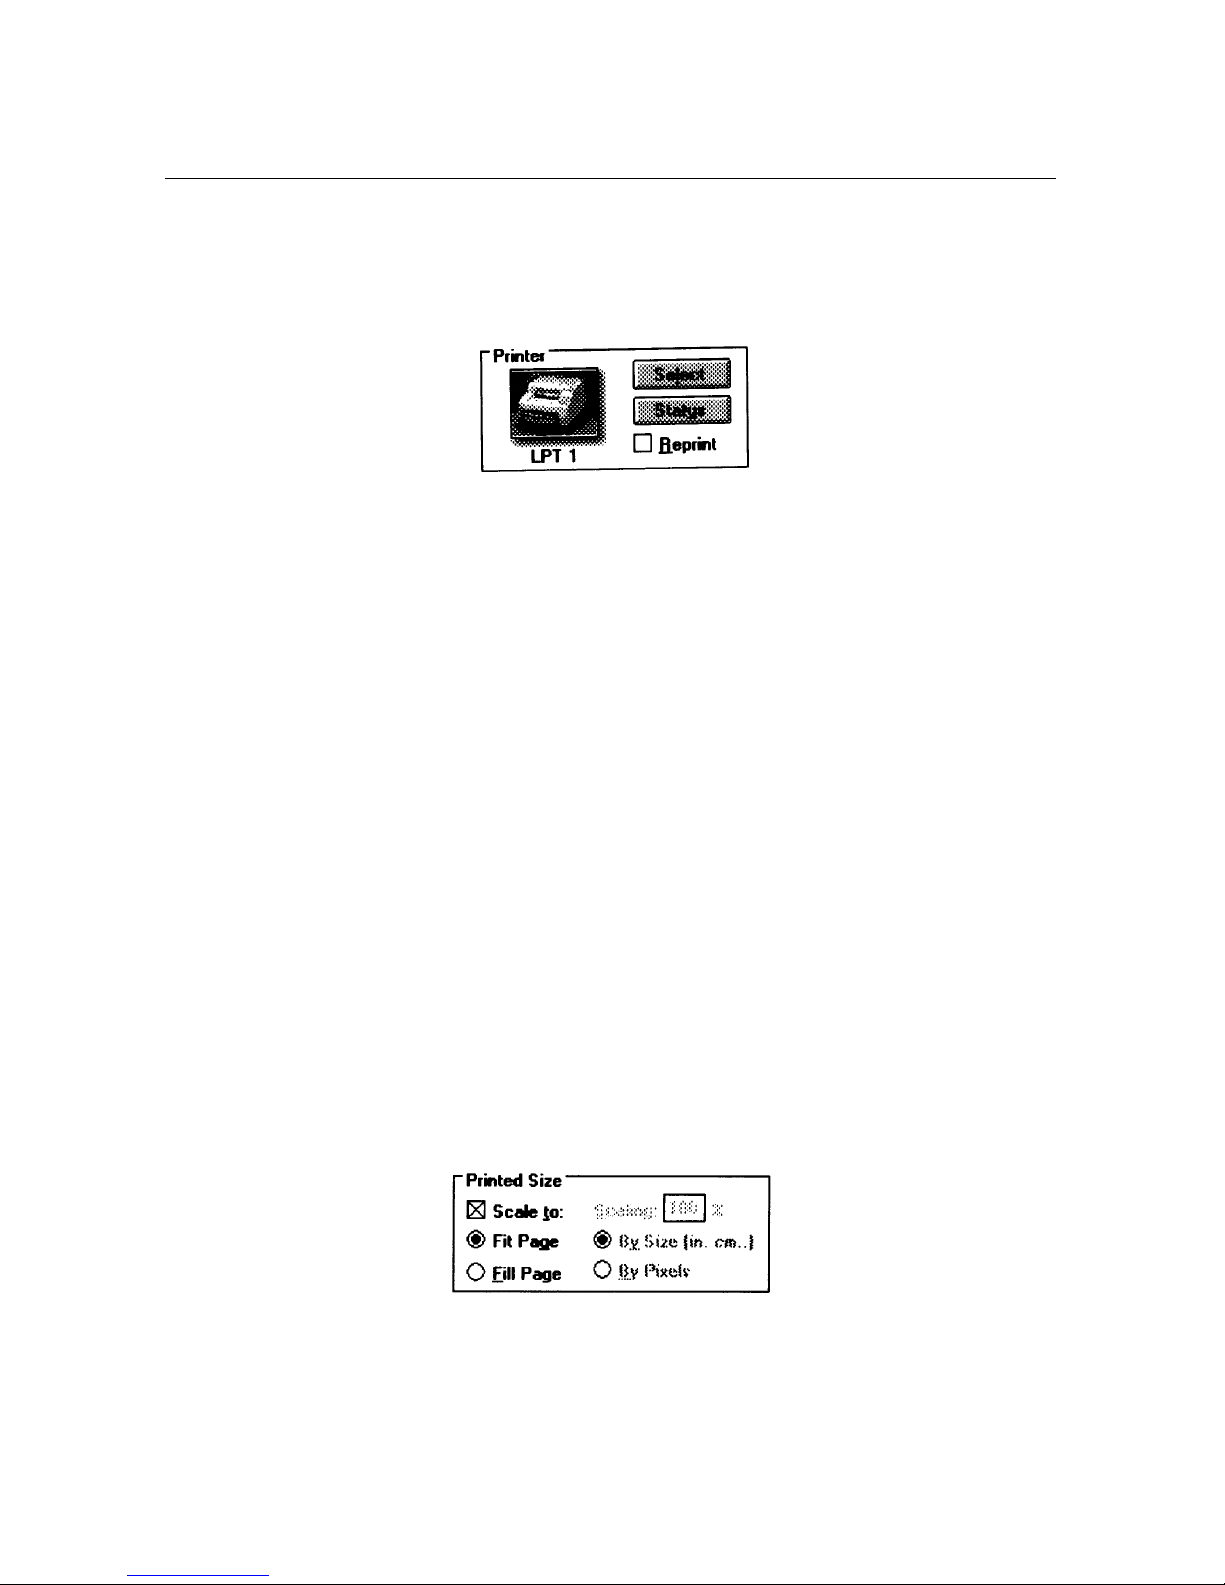
Printer
The
Printer
options.
Section I
group box allows you to choose the following
Select
— this button opens the Select a Printer dialog
box. Refer to “Select a Printer dialog box” in this section
for more information.
Status
—this button opens the printer status dialog box.
Refer to “Printer Status dialog box” in this section for
more information.
Reprint
—this check box allows you to print the specified
number of copies of the last image that was sent to the
printer. The last image sent to the printer remains in the
buffer until the printer is shut off, the computer is
restarted, the next image is sent, or the SCSI bus is
reset. If no image is stored, an error will be generated.
When this check box is selected, the Size and Print
options in the Media group box, and all the options in the
Printed Size, Lay out, and Image Processing group boxes
will be grayed out and cannot be selected.
Printed Size
April 1996 I-9
The Printed Size group box allows you to choose the
following image size options.
Page 18

Section I
Scale to:
—this check box indicates whether page
images should be scaled. When the check box is
selected, the Fit Page and Fill Page buttons become
active so that you can select a scaling method.
Fit Page
—If this button is selected, an image that is
larger or smaller than the size of the current media
will be resized to just fit the page without cropping or
distorting the image. This button is active only when
the Scale to: check box is selected.
Fill Page
—If this button is selected, an image that is
larger or smaller than the size of the current media
will be cropped in order to completely fill the page.
This button is active only when the Scale to: check
box is selected.
Scaling
—this text entry box indicates the percentage
that images will be sized. The range that can be specified
is from 1% to 999%.The percentage specified in this box
is applied to the image based on whether the By Size or
By Pixels button is selected. The Scaling box is set to
“100” by default.
By Size (in. cm.)
—If this button is selected, scaling will
be based on the width and height of your image. For
example, scaling an 8 x 10I image b y 50% will print a 4 x
5I image.
This button is active only when the Scale to: check box is
deselected.
By Pixels
—If this button is selected, scaling will be
based on the number of pixels in the width and height of
the image. For example, scaling an 800 x 1000 pixel
image by 200% will print a 1600 x 2000 pixel image.
When scaling using this method, remember that the XLS
8600/XLS 8600 PS Printer prints 300 pixels per inch. If
the image resolution is less than 300 pixels per inch, the
printed image will be smaller. If the image resolution is
greater than 300 pixels per inch, the printed image will be
larger.
I-10 April 1996
Page 19

Section I
This button is active only when the Scale to: check box is
deselected.
NOTE: You can use Photoshop’s Image Size option from
the Image menu to find the width, height, and
resolution of images.
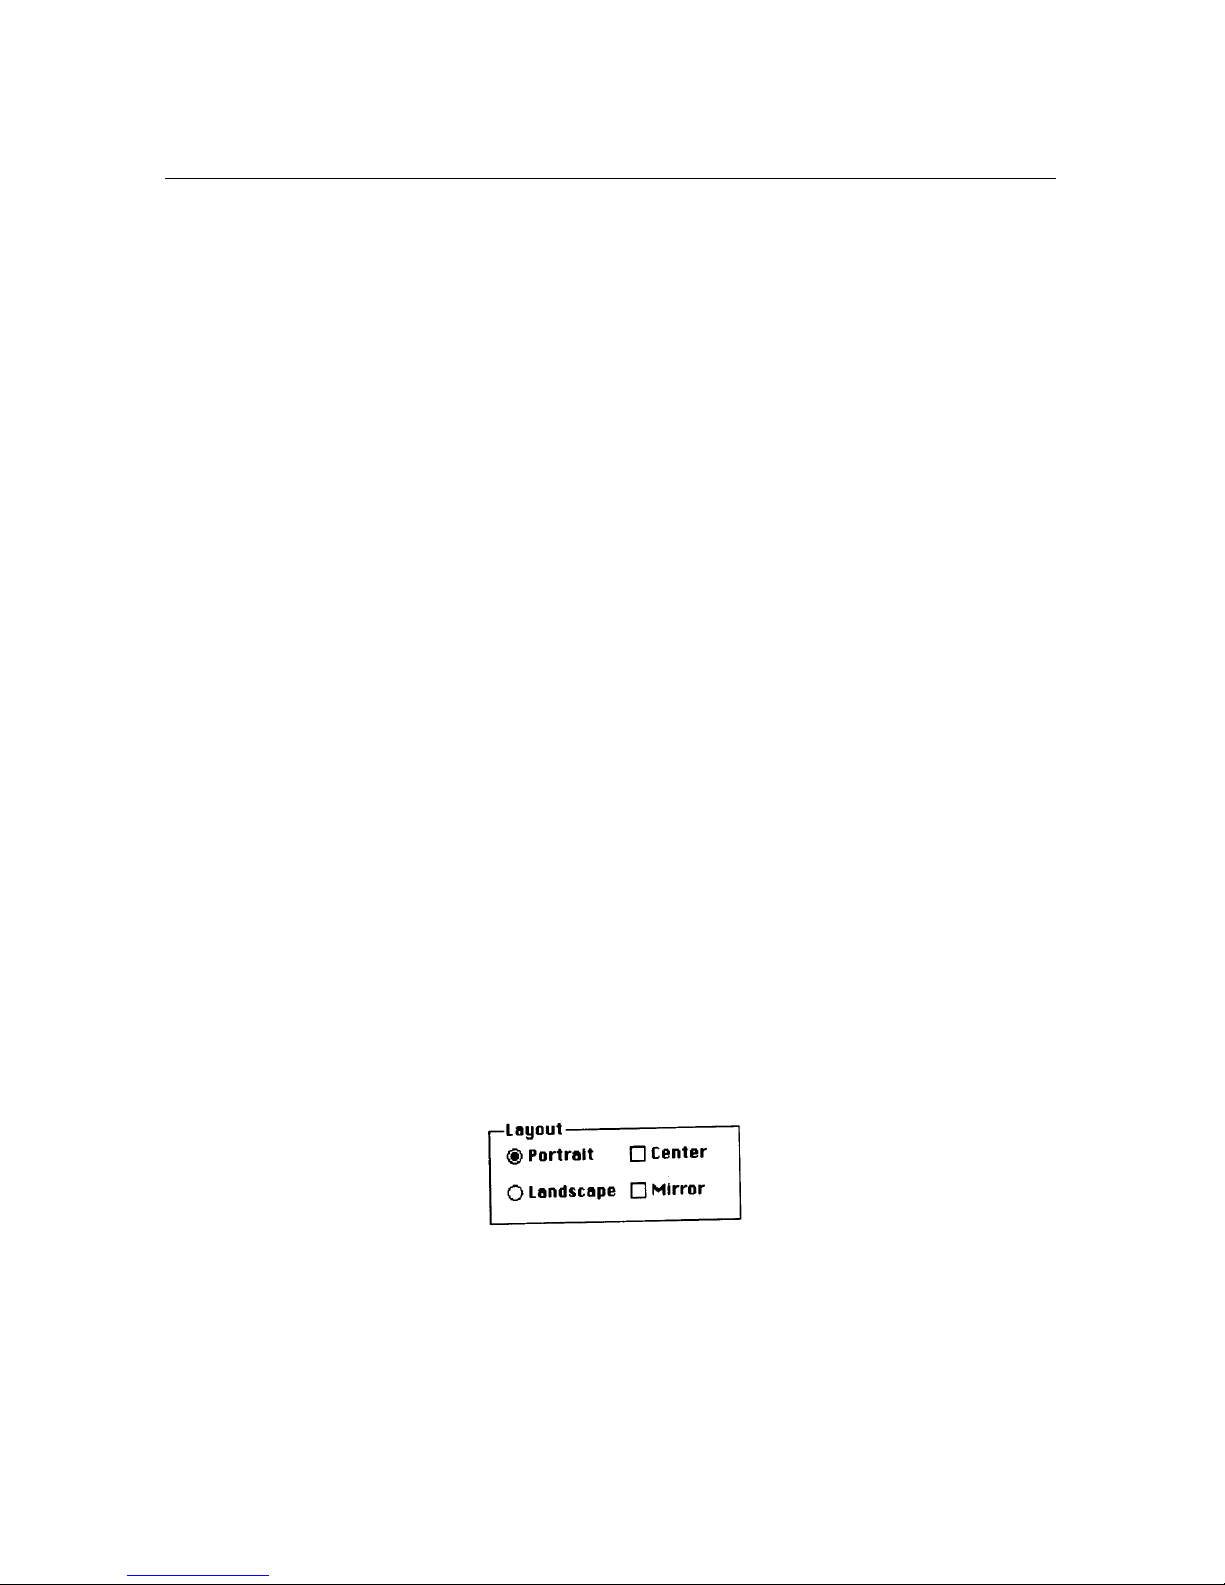
Layout
The Layout g roup box allows you to choose the following
image orientation options.
Portrait
—this button indicates that page images should
be vertically oriented.
Landscape
—this button indicates that page images
should be horizontally oriented.
Center
—this check box indicates that page images
should be centered in the page. If left unchec ked, images
will be positioned in the upper left corner of the page.
Mirror
—this check box indicates that page images
should be flipped left to right, producing a mirror image.
NOTE: The selection of landscape or portrait mode is
usually determined by image size. Depending on
the size, changing the orientation may be the only
way to fit the image on the page without scaling.
April 1996 I-11
Page 20

Section I
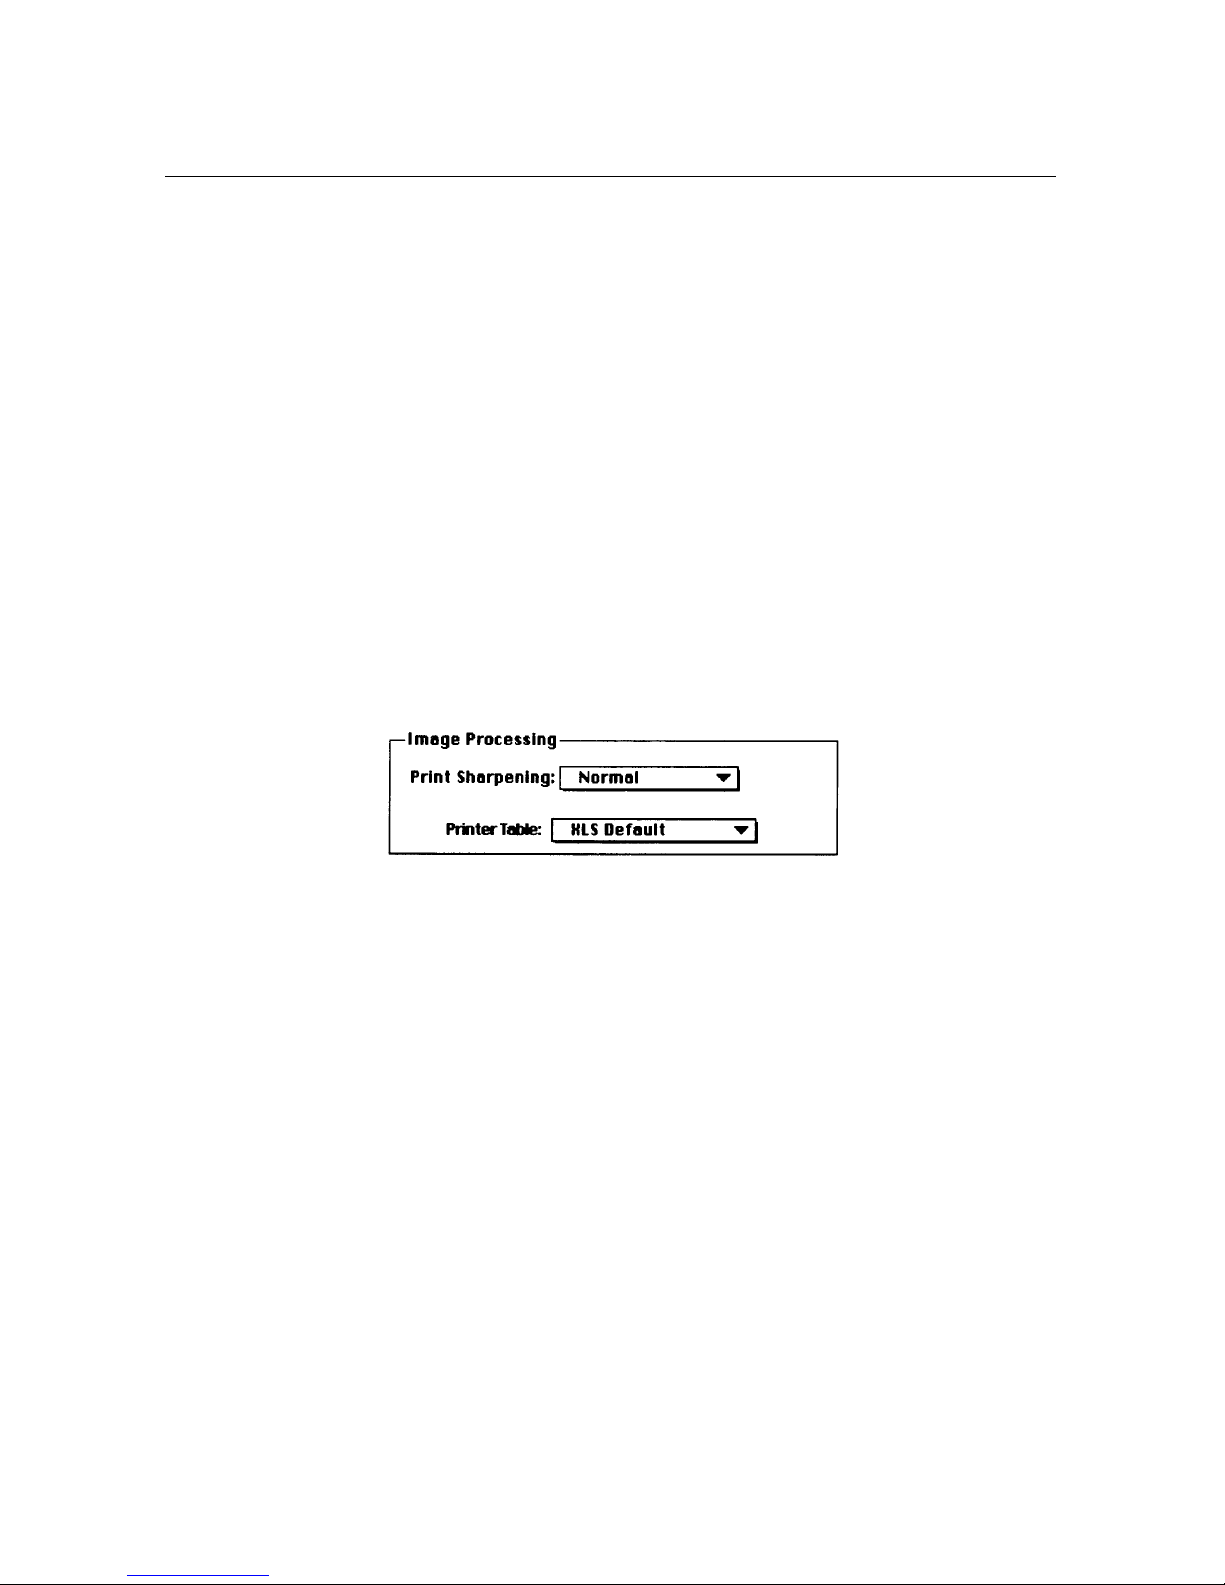
Image Processing
The Image Processing group box allows you to specify
the following image manipulation options.
Print Sharpening
—this list box allows y ou to specify the
type of image enhancement that should be performed.
Available options are “None,” “Normal,” and “High.”
Selecting “Normal” or “High” enhances edge definition of
images by different amounts, but it also increases
processing time.
Select this box to improve the sharpness of continuous
tone or photographic images. Leave it unchecked for
sharp images such as computer–generated graphics.
Printer T able
—this field displays the name of the printer
table that is currently loaded. The default table uses
correction values appropriate for most print jobs.
Refer to Appendix A, About Printer Tables, for more
information.
Default
Load
—this button loads the default printer table.
—this button accesses the standard Windows Open
dialog box which allows you to select a printer table from
the available tables.
I-12 April 1996
Print
The
Print
button sends the image to the XLS 8600/XLS
8600 PS Printer.
Page 21
Section I
Cancel
The
Cancel
the image or saving changes (except those made to the
Printer Table list box).
Help
The
Help
find information about the Export Module from within the
software itself.
button closes the dialog box without printing
button opens help dialog boxes so that you can
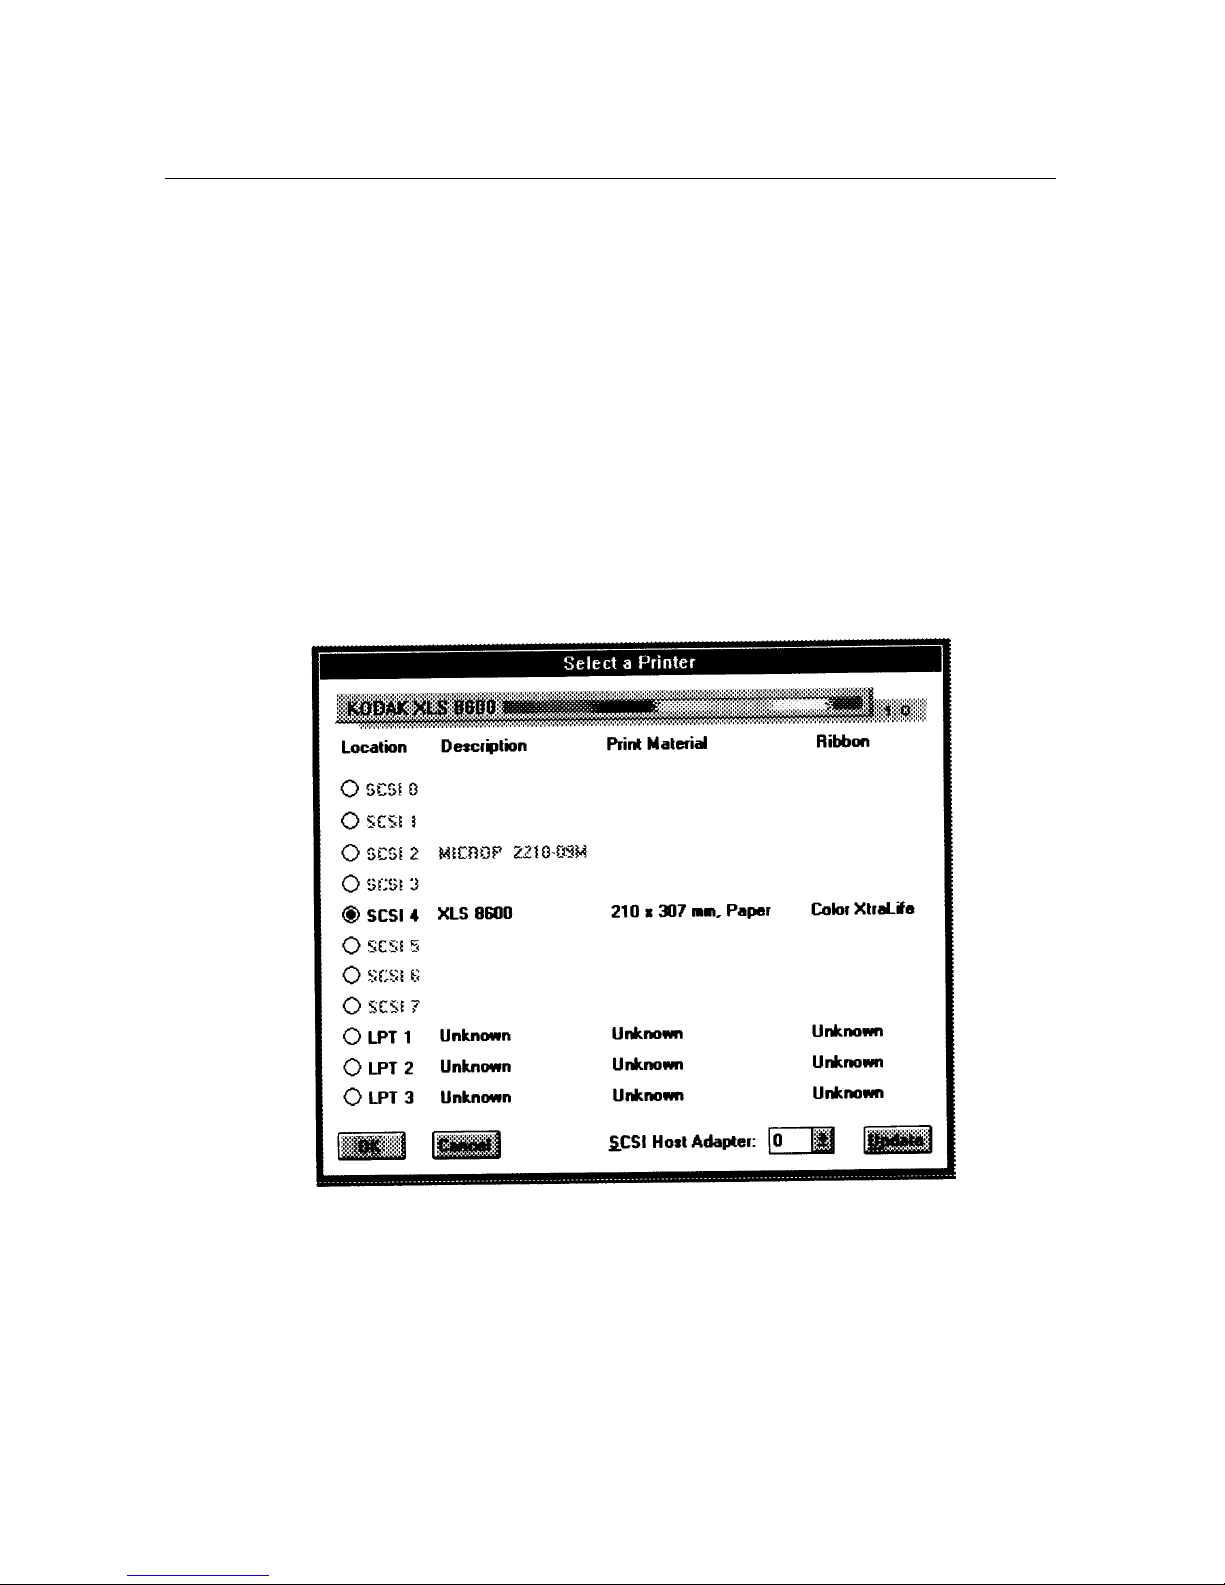
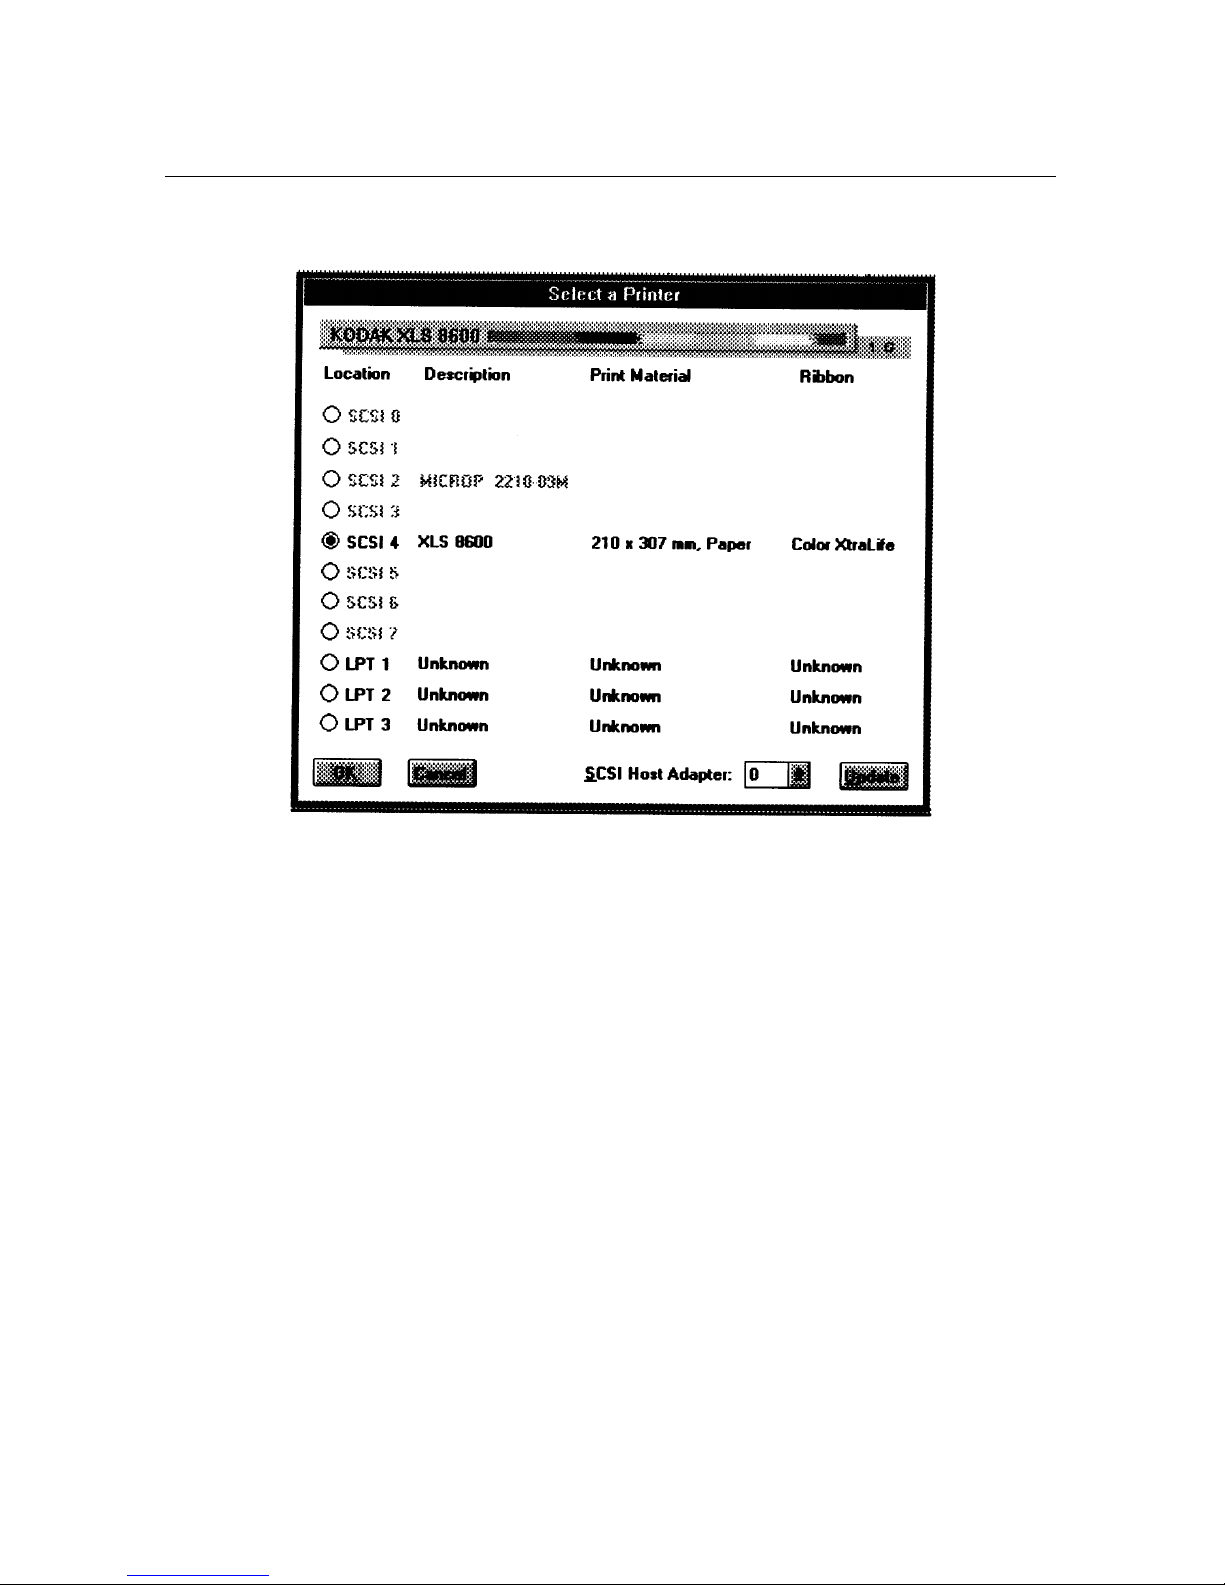
Select a Printer Dialog Box
The Select a Printer dialog box is shown below.
April 1996 I-13
This dialog box lists the ports on the computer and the
XLS 8600 Printers that are connected to them. When
printers are listed, the media and ribbon type currently
loaded in them are also listed.
Page 22

Section I
Following are descriptions of the options in the Select a
Printer dialog box.
OK
The OK button closes the Select a Printer dialog box and
redirects the print job to the newly selected printer port.
Cancel
The
Cancel
changing the current printer selection.
SCSI Host Adapter
The
SCSI Host
choose the adapter card to which the printer is
connected. The Export Module supports up to three of
these cards. If only one adapter card is installed, the only
option is “0”. If multiple cards are installed, select “0” to
specify the first adapter, “1” to specify the second
adapter, or “2” to specify the third adapter.
button closes the dialog box without
Adapter drop down list box allows you to
Update
The
Update
any information that has changed.
button refreshes the screen and replaces
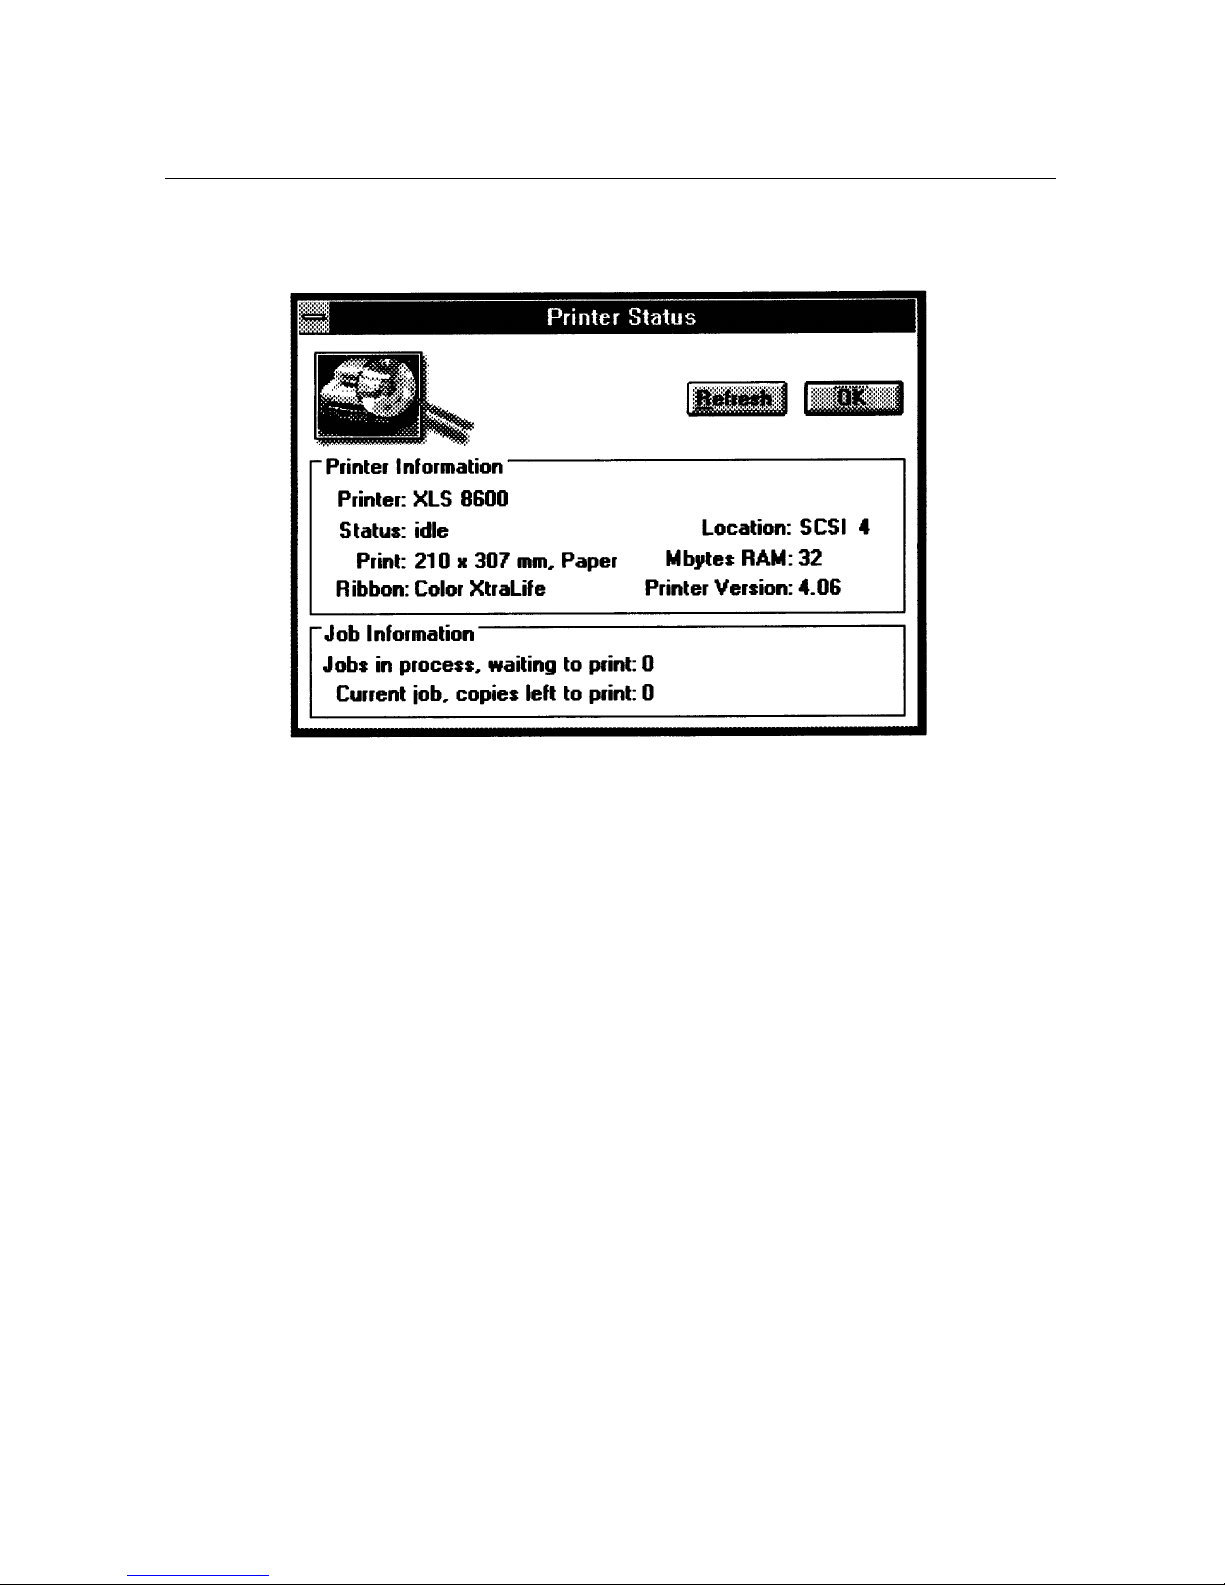
Printer Status Dialog Box
The Printer Status dialog box is displayed by selecting
the Status button on the XLS 8600 Printer Setup dialog
box. The information displayed corresponds to the
currently selected printer.
I-14 April 1996
Page 23
Section I
NOTE: This dialog is available only when the printer is
connected through a SCSI port.
Following are descriptions of the options in the Printer
Status dialog box.
Printer Information
The Printer Information group box describes the state of
the selected printer. Information included is the printer
model, the printer status (Idle, Printing, or Busy), the
media and ribbon types that are loaded, the location of
the printer, the amount of RAM installed in your system,
and the printer version number.
April 1996 I-15
Page 24

Section I
Job Information
The Job Information group box lists the number of jobs
being processed and the number of copies left to print of
the current job.
Refresh
The
Refresh
button updates the screen and replaces any
information that has changed.
OK
The OK button closes the Printer Status dialog box.
I-16 April 1996
Page 25

Section I
Selecting a Port for the Printer
This section describes how to select a port through which
the printer will communicate with your PC. Refer to Select
a Printer Dialog Box in this section for more information.
1. Select the Select button from the XLS 8600 Printer
Setup dialog box.
April 1996 I-17
Page 26
Section I
The Select a Printer dialog box will appear.
2. Select the radio button of the appropriate LPT port if
the printer is directly connected via parallel cable.
or
Select the radio button of the appropriate LPT port if
you will print via Novell NetWare using a redirected
parallel port.
I-18 April 1996
Page 27

Section I
NOTE: If you will be printing through a Novell NetWare
network, the LPT port must be connected to a
NetWare print queue. Refer to your Novell
NetWare system administrator for more
information.
or
Select the appropriate SCSI host adapter from the
SCSI Host Adapter drop–down list box, and then the
select the radio button of the appropriate SCSI port if
you will print via SCSI connection.
3. Select OK.
The printer on the selected port will now be the active
printer.
Printing
This section summarizes the process of printing an
image. Refer to Dialog Boxes and Print Options in this
section for more inf ormation about selecting print options.
1. Run Photoshop and open an image file.
2. Choose Export from the File menu.
You cannot access the Export submenu if an image
is not open in Photoshop).
3. Choose Print to XLS 8600 Printer from the Export
submenu.
The XLS 8600 Printer Setup dialog box will appear.
4. Make a new printer selection by clicking on the
Select button if required.
5. Make remaining print option choices to meet the
needs of your print job.
6. Select Print to send the job to the printer.
If you want to cancel the print job , press the Esc key while
the progress bar is displayed on your screen.
April 1996 I-19
Page 28

Section I
Error Messages
Many of the error messages displayed by the Export
Module are self explanatory. The following list provides
additional information about some of the more frequently
encountered messages. If the message is not specific to
the Export Module, refer to the Windows and/or
Photoshop documentation.
General Error Messages
The image is not in RGB Color or Grayscale Mode!
Convert to RGB Color or Grayscale in Photoshop
before printing (exporting).
You must change the color mode using Photoshop’s
Mode menu before the file can be printed. Click on OK to
close the error dialog and return to Photoshop.
The file is too large for the XLS 8600 Printer!
Resize the image in Photoshop before printing.
The maximum size is 120 MB.
You must make the image smaller before the file can be
printed. This can be done by selecting the Image Size
command on the Image menu and entering a smaller
height or width. Click on OK to close the error dialog and
return to Photoshop.
The printer port will be set to LPT-1.
Press the “Select” button on the Print dialog to select
another port.
This message appears the first time the Export Module is
run or when the Export Module determines that no SCSI
connections to an XLS 8600/XLS 8600 PS Printer can be
established. Click on OK to open the Print dialog with
LPT-1 selected. Click on Cancel to close the error dialog
and return to Photoshop.
I-20 April 1996
Page 29

Section I
The printer on PORT is busy.
Jobs in process, waiting to print: #
Current job, copies to print: #
This message appears when the printer does not have
memory available to take on new jobs. PORT will be
replaced by the port number or address that is in use for
the printer. The # symbols will be replaced by the actual
numbers, or “Unkno wn” if this inf ormation is not av ailab le.
The error dialog will close automatically when enough
memory becomes available in the printer to allow a job to
be sent, or you can click on Cancel to close the error
dialog and return to the Print dialog.
The selected printer is not available!
Check connections and make sure the printer is
turned on, or select another printer.
This message appears when the printer is not connected
or is not turned on when the Print button is selected. Clic k
on OK to close the error dialog and return to the Print
dialog.
Media Mismatch Messages
A number of messages appear when the media that you
request does not match the media loaded in the printer.
Follow the instructions in the message to resolve the
problem.
Other Error Messages
For other errors, a good approach is to check all
connections and make sure the printer display shows the
READ Y prompt. If the problem persists, restart the printer
and the computer. If you still have trouble, try reinstalling
the Export Module.
April 1996 I-21
Page 30

Page 31

Section II
Kodak XLS 8600 Printer and XLS 8600 PS Printer
Export Module for ADOBE PHOTOSHOP Software and
MACINTOSH Computers
Section II
This section explains how to install and use the Export
Module on your Macintosh system. It assumes that you
are familiar with the Macintosh system environment.
Installation
Hardware Requirements
The following hardw are is recommended to load and use
the Export Module.
•
Macintosh II or any Quadra family CPU (68020,
68030, 68040).
•
Minimum of 2 MB of RAM (required by Photoshop).
•
Hard disk space at least three times your image size.
•
A special Apple SCSI terminator if you are using a
Macintosh IIfx and you have an external SCSI disk
drive or other peripheral device.
•
A standard SCSI terminator if you are daisy–chaining
your external disk drive or other peripheral with the
XLS 8600 Printer and you are not using a Macintosh
IIfx computer.
Software Requirements
Your Macintosh system must be installed with:
•
Apple System 7.0 or later.
•
ADOBE PHOTOSHOP for MACINTOSH version 2.5
or later.
April 1996 II-1
Page 32

Section II
Installing the Software
1. Insert the KODAK XLS 8600 Printer Export Module
disk into the disk drive.
The KODAK XLS 8600 Printer disk icon will appear
on the desktop.
2. Double click on the KODAK XLS 8600 Printer disk
icon to open it.
3. Double click on the XLS 8600 Expander icon.
II-2 April 1996
Page 33

The dialog box below will appear.
4. Click on Expand.
The message “Please wait. Checking files...” will
appear, and will be replaced by the dialog box below.
Section II
April 1996 II-3
This dialog box allows you to specify the location of
the PhotoShop Plug–Ins directory. This is the
directory in which the Export Module will be installed.
Page 34

Section II
5. Use the dialog box to find the PhotoShop Plug–Ins
folder.
6. Click on Save once the Plug–Ins folder is open.
The message “Please wait. Expanding XLS 8600...”
will appear, and will be replaced by the dialog box
below.
This dialog box allows you to specify the directory in
which you want to install the Kodak Printer. This
utility allows you to change the network name of the
printer when the printer is running in raster mode.
7. Use the dialog box to find the directory in which you
want to store the Kodak Printer Utility.
8. Click on Save once the desired directory is open.
The message “Please wait. Expanding Kodak Printer
Utility...” will appear, and will be replaced by the
dialog box below.
II-4 April 1996
Page 35

Section II
This dialog box indicates that installation is complete.
9. Click on OK.
The Export Module will now be accessible from the
Export submenu of the Photoshop File menu.
10. Remove the diskette from the drive.
Installing Printer Tables
Printer tables allow you to specify color calibrations to
precisely adjust image colors rather than using the
Export Module’s default color rendering methods. In
order to use the set of tables which comes with the
Export Module, you must copy the tables from the
installation disk to a directory on your system.
NOTE: You can place the tables anywhere on your
system that you want, but placing them
somewhere within the PhotoShop directory is
recommended.
Refer to Appendix B, About Printer Tables, for more
information.
1. Open the Adobe Photoshop folder.
April 1996 II-5
Page 36

Section II
The Adobe Photoshop window will look similar to the one
shown below.
2. Click on the XLS Printer Tables icon to select it.
II-6 April 1996
Page 37

Section II
3. Drag the XLS Printer Tables icon to the Printer
Tables folder.
The printer tables will now be available for use with
the Export Module.
Changing the Printer’s Network Name
When the Export Module was installed, you specified a
directory in which to load the Kodak Printer Utility. This
utility allows you to change the name of the printer as it is
known over an Ethernet network.
NOTE: The name you specify is the name for the printer
only when it is running in raster mode, and only
when the printer is connected to the network
through the optional Network Interface Card.
Refer to the User’s Guide
XLS 8600 PS Printer
modes and network connectivity.
1. Open the folder in which you installed the Kodak
Printer Utility.
KODAK XLS 8600 Printer and
for more information about printer
April 1996 II-7
Page 38
Section II
If an XLS 8600 Printer running in raster mode is not
found within your AppleTalk zone, the Kodak Raster
Printers dialog box will appear. Go to step 3.
If an XLS 8600 Printer running in raster mode is
found within your AppleTalk zone, the dialog box will
not appear.
2. Choose Select Printer from the File menu.
The Kodak Raster Printers dialog box will appear.
II-8 April 1996
Page 39

Section II
3. Select the AppleTalk Zone in which the printer you
want to rename resides from the AppleTalk Zones
list box.
4. Select the printer you want to rename from the
Select a Kodak Printer list box.
5. Click on OK.
6. Choose Rename Printer from the Utilities menu.
A dialog box like the one shown below will appear.
April 1996 II-9
7. Type the new name for the printer in the New Name
text entry box.
8. Click on Rename.
Page 40

Section II
A confirmation panel like the one below will appear.
9. Click on OK.
The dialog boxes will close. When the printer is
running in raster mode, it will now be known across
the network as the name you specified.
Dialog Boxes and Print Options
This section describes the Export Module dialog boxes
which allow you to specify print options to be used when
printing to the XLS 8600/XLS 8600 PS Printer.
Kodak XLS 8600 Printer Dialog Box
The steps below describe how to access the Kodak XLS
8600 Printer dialog box.
1. Run Photoshop.
2. Open the image that you want to print.
NOTE: You cannot access the Export submenu if an
image is not open in Photoshop).
The Export Module does not accept indexed (8–bit)
color images for printing; you must select an RGB
format such as PICT, Targa, TIFF, or Raw. You can
also change an 8–bit image to RGB by selecting
RGB Color from the Mode menu.
3. Choose Export from the File menu.
II-10 April 1996
Page 41

Section II
4. Choose KODAK XLS 8600 from the Export
submenu.
The Kodak XLS 8600 Printer dialog box will appear.
Following are descriptions of the options in the Kodak
XLS 8600 Printer dialog box.
Media
The
Media
group box allows you to specify the following
media options.
Size
—this list box allows you to specify the size of the
paper or transparency material that will be used.
April 1996 II-11
Page 42
Section II
Av ailable siz es are “Letter 8.5 x 11 in,” “A4 210 x 297mm,”
“8.5 x 14 in,” “8.5 x 12 in (216 x 307mm),” “9.5 x 14 in
(241 x 358mm),” “210 x 307mm,” and “210 x 358mm.”
The following table lists the imageable areas on each
media size.
Media Size Image Size
(in Inches)
8.5 x 11I
8.0 x 8.93I
216 x 281mm
8.27 x 11.69I
8.0 x 9.6I 204 x 246mm 2400 x 2880
210 x 297mm (A4)
8.5 x 12I
8.0 x 10I 204 x 256mm 2400 x 3000
216 x 307mm
8.27 x 12I
8.0 x 10I
210 x 307mm
8.5 x 14I
8.0 x 12I
216 x 358mm
8.27 x 14I
8.0 x 12I
210 x 358mm
9.5 x 14I
8.5 x 12I
243 X 358mm
Image Size
(in Millimeters)
Image Size
(in Pixels)
204 x 228mm 2400 x 2679
204 x 256mm 2400 x 3000
204 x 307mm 2400 x 3600
204 x 307mm 2400 x 3600
217 x 307mm 2550 x 3600
II-12 April 1996
If the selected size does not match the media in the
printer, an error message will appear on your Macintosh
system.
Print
—this list box allows you to specify the material on
which the job will be printed. Select “Paper” if y ou want to
print on paper. Select “Transparency” if you want to print
on transparency material. The default is “Paper.”
Page 43
Section II
NOTE: If the wrong material is loaded in the printer after
the job has been received and processed, the
printer will display a message requesting that the
correct media be loaded, and an error message
will appear on your Macintosh system.
Use XtraLife
—this check box allows you to specify that
prints should have XtraLife lamination applied, which
increases shelf life and protects prints from fingerprints.
XtraLife ribbon must be loaded in the printer in order for
this option to work.
NOTE: If the Size list box is set to “8.5 x 14 in,” “9.5 x 14
in (241 x 358mm),” or “210 x 358mm” and this
check box is selected, a media mismatch will
occur on the printer, since XtraLife ribbon is not
available for these sizes.
Copies
The Copies box allows you to specify the number of
times that you want the job to be printed. Up to 100
copies can be printed at a time. The default is “1.”
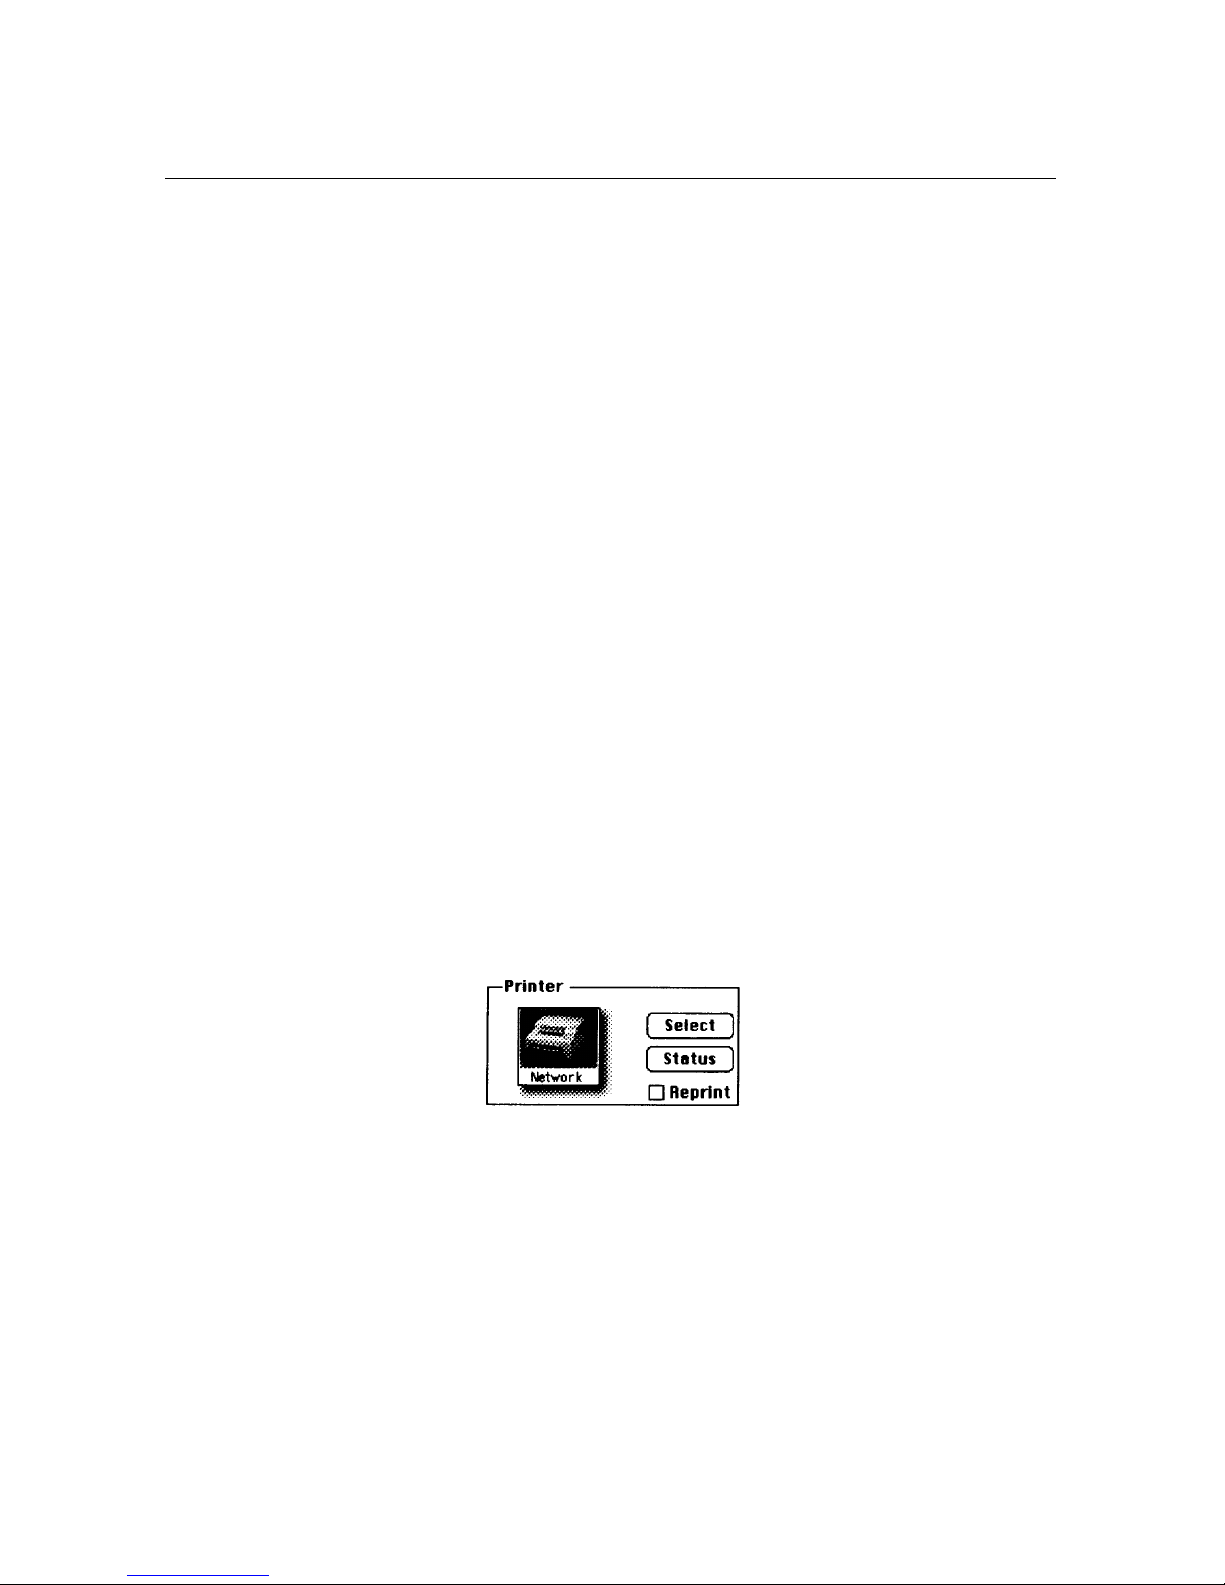
Printer
The
Printer
group box allows you to choose the following
options.
April 1996 II-13
Select
—this button opens the Select a Kodak Printer
dialog box. Refer to “Select a Kodak Printer Dialog Box”
in this section for more information.
Status
—this button opens the printer status dialog box.
Refer to “Printer Status dialog box” in this section for
more information.
Page 44

Section II
Reprint
—this check box allows you to print the specified
number of copies of the last image that was sent to the
printer. The last image sent to the printer remains in the
buffer until the printer is shut off, the computer is
restarted, the next image is sent, or the SCSI bus is
reset. If no image is stored, an error will be generated.
When this check box is selected, the options in the
Media, Printed Size, Layout, and Image Processing
group boxes will be grayed out and cannot be selected.
Printed Size
The
Printed Size
group box allows you to choose the
following image size options.
Scale to
:—this check box indicates whether page
images should be scaled to fit the page or to fill the entire
page. When the check box is selected, the Fit Page and
Fill Page buttons become active so that you can select
the scaling method. The Scale to: check box is not
selected by default.
Fit Page
—If this button is selected, an image that is
larger or smaller than the size of the current media
will be resized to fit the page without cropping or
distorting the image. This button is active only when
the Scale to: check box is selected.
Fill Page
—If this button is selected, an image that is
larger or smaller than the size of the current media
will be cropped in order to fill the page. This button is
active only when the Scale to: check box is selected.
Scaling
—this text entry box indicates the percentage
that images will be sized. The range that can be specified
is from 1% to 999%.The percentage specified in this box
II-14 April 1996
Page 45
Section II
is applied to the image based on whether the By Pixels or
By Dimensions button is selected. The Scaling box is set
to “100” by default.
By Size (in. cm.)
—If this button is selected, scaling
will be based on the width and height of your image.
For example, scaling an 8 x 10I image by 50% will
print a 4 x 5I image.
This button is active only when the Scale to: check
box is deselected.
By Pixels
—If this button is selected, scaling will be
based on the number of pixels in the width and height
of the image. For example, scaling an 800 x 1000
pixel image by 200% will print a 1600 x 2000 pixel
image. When scaling using this method, remember
that the XLS 8600/XLS 8600 PS Printer prints 300
pixels per inch. If the image resolution is less than
300 pixels per inch, the printed image will be smaller.
If the image resolution is greater than 300 pixels per
inch, the printed image will be larger.
This button is active only when the Scale to: check
box is deselected.
NOTE: You can use Photoshop’s Image Size option from
the Image menu to find the width, height, and
resolution of images.
April 1996 II-15
Layout
The Layout g roup box allows you to choose the following
image orientation options.Orientation:specifying:on
Macintosh systems
Portrait
—this button indicates that page images should
be vertically oriented.
Page 46
Section II
Landscape
—this button indicates that page images
should be horizontally oriented.
Center
—this check box indicates that page images
should be centered in the page. If left unchec ked, images
will be positioned in the upper left corner of the page.
Mirror
—this check box indicates that page images
should be flipped left to right, producing a mirror image.
NOTE: The selection of landscape or portrait mode is
usually determined by image size. Depending on
the size, changing the orientation may be the only
way to fit the image on the page without scaling.
Image Processing
The
Image Processing
group box allows you to specify
the following image manipulation options.
II-16 April 1996
Page 47

Section II
Print Sharpening
—this list box allows y ou to specify the
type of image enhancement that should be performed.
Available options are “None,” “Normal,” and “High.”
Selecting “Normal” or “High” enhances edge definition of
images to varying degrees, but it also increases
processing time.
Select this box to improve the sharpness of continuous
tone or photographic images. Leave it unchecked for
sharp images such as computer–generated graphics.
Printer T able
—this list box displays the name of the
printer table that is currently loaded, and allows you to
select a printer table from the available tables.
The default table uses correction values appropriate for
most print jobs.
Refer to Appendix A, About Printer Tables, for more
information.
Print
The Print button sends the image to the XLS 8600/XLS
8600 PS Printer.
Cancels
The Cancel button closes the dialog box without printing
the image or saving changes (except those made to the
Printer Table list box).
April 1996 II-17
Page 48

Section II
Select a Kodak Printer Dialog Box
The Select a Kodak Printer dialog box is shown below,
and is accessed by clicking on the Select button in the
KODAK XLS 8600 Printer dialog box.
This dialog box displays the ports on the Macintosh
system and the XLS 8600 Printers that are connected
(either directly or by network) to them. When printers are
listed, the media and ribbon type currently loaded in them
are also listed.
Following are descriptions of the options in the Select a
Kodak Printer dialog box.
Update
The
Update
any information that has changed.
button refreshes the screen and replaces
II-18 April 1996
Page 49

Section II
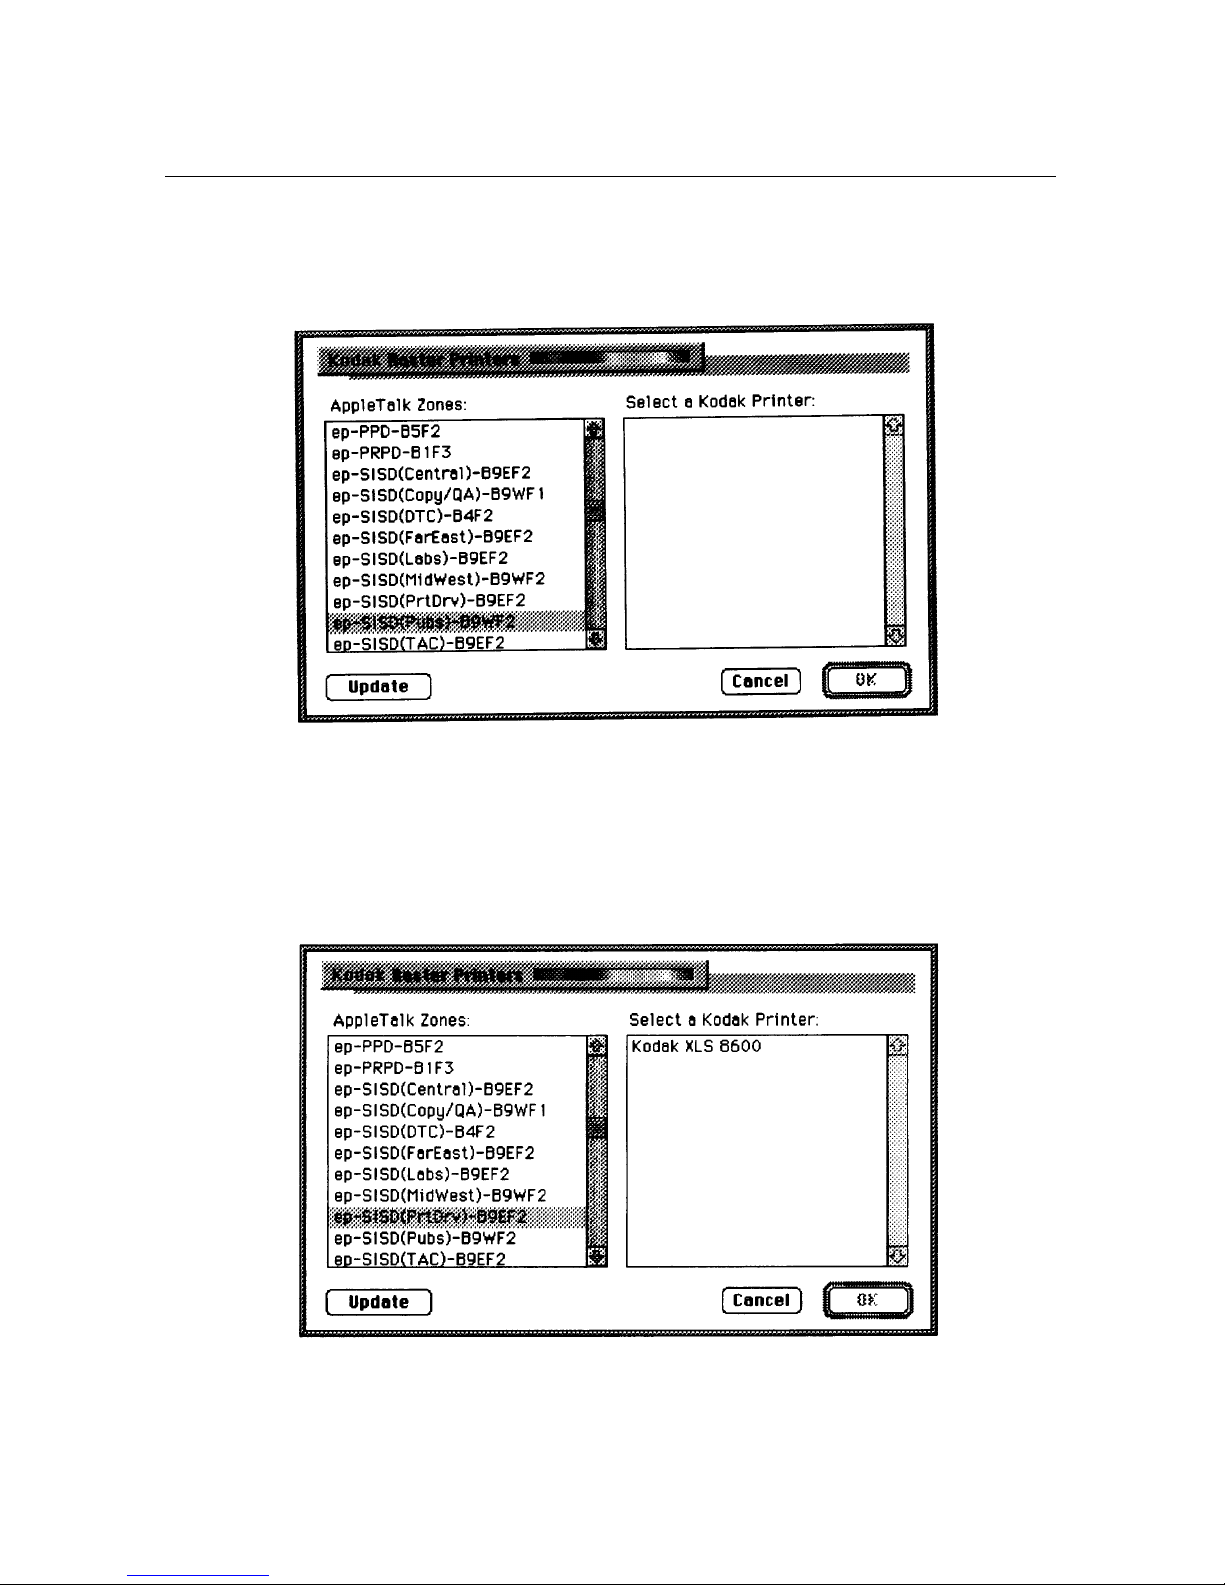
Network...
The Network... button is available only when the optional
Network Interface Card is installed on the printer , and the
printer is connected to an Ethernet network. When you
select this button, the Kodak Printers dialog box shown
below will appear.
This dialog box allows you to select from the available
AppleTalk zones so that you can choose a printer.
Selecting Update refreshes the screen and replaces any
information that has changed.
Selecting Cancel closes the dialog box and returns you to
the Select a Kodak Printer dialog box.
Selecting OK closes the dialog box and indicates that the
printer you have highlighted in the Select a Kodak Printer
list box should be the active printer. OK can be selected
only when a printer is highlighted.
April 1996 II-19
Page 50

Section II
Once you have selected a printer and clicked on OK, the
Select a Kodak Printer dialog box will look similar to the
one shown below.
Cancel
The Cancel button closes the Select a Kodak Printer
dialog box without changing the current printer selection.
OK
The OK button closes the Select a Kodak Printer dialog
box.
II-20 April 1996
Page 51

Section II
Printer Status Dialog Box
The Printer Status dialog box is accessed by selecting
the Status button on the KODAK XLS 8600 dialog box.
The information displayed corresponds to the printer that
is currently selected for printing.
Following are descriptions of the options in the Printer
Status dialog box.
Printer Information
The Printer Information group box describes the state of
the selected printer. Information included is the printer
model, the printer status (Idle, Printing, or Busy), the
media and ribbon types that are loaded, the location of
the printer, the amount of RAM installed in your
Macintosh system, and the printer version number.
Job Information
The Job Information group box lists the number of jobs
being processed and the number of copies left to print of
the current job.
Update
The Update button refreshes the screen and replaces
any information that has changed.
April 1996 II-21
Page 52

Section II
OK
The OK button closes the Printer Status dialog box.
Printing
This section summarizes the process of printing an
image. Refer to Dialog Boxes and Print Options in this
section for more inf ormation about selecting print options.
1. Run Photoshop and open an image file.
2. Choose Export from the File menu.
You cannot access the Export submenu if an image
is not open in Photoshop).
3. Choose XLS 8600 from the Export submenu.
The XLS 8600/XLS 8600 PS Printer dialog box will
appear.
4. Make a new printer selection by clicking on the
Select button if required.
5. Make remaining print option choices to meet the
needs of your print job.
6. Select Print to send the job to the printer.
To cancel printing, press the command key and type.
(period). If the cancel command is ignored, press the
Cancel Printing button in the PHOTOSHOP progress
dialog.
II-22 April 1996
Page 53

Section II
Error Messages
Many of the error messages displayed by the Export
Module are self explanatory. The following list provides
additional information about some of the more frequently
encountered messages. If you do not find a displayed
error message in the list, refer to the Macintosh and/or
Photoshop documentation.
General Error Messages
The image is not in RGB Color or Grayscale Mode!
Convert to RGB Color or Grayscale in Photoshop
before printing (exporting).
You must change the color mode before the file can be
printed. Click on OK to close the error dialog and return
to Photoshop.
The file is too large for the XLS 8600 Printer!
Resize the image in Photoshop before printing.
The maximum size is 120 MB.
You must make the image smaller before the file can be
printed. This can be done by selecting the Image Size
command on the Image menu and entering a smaller
height or width. Click on OK to close the error dialog and
return to Photoshop.
The selected printer is not available!
Check connections and make sure the printer is
turned on, or select another printer.
This message appears when the printer is not connected
or is not turned on when the Print button is selected. Clic k
on OK to close the error dialog and return to the Print
dialog.
April 1996 II-23
Page 54

Section II
AppleTalk is not turned on.
This message appears when AppleTalk is not running.
Open the Chooser, turn AppleTalk on, and then restart
the Macintosh.
The printer cannot be found!
This message appears when the printer is not connected
or is not turned on when the Print button is selected. Clic k
on OK to close the error dialog and return to the Print
dialog.
The printer is not receiving!
This message appears when the printer is not connected
or is not turned on when the Print button is selected. Clic k
on OK to close the error dialog and return to the Print
dialog.
The printer is not responding!
This message appears when the printer is not connected
or is not turned on when the Print button is selected. Clic k
on OK to close the error dialog and return to the Print
dialog.
Media Mismatch Messages
A number of messages appear when the media that you
request does not match the media loaded in the printer.
Follow the instructions in the message to resolve the
problem.
Other Error Messages
For other errors, a good approach is to check all
connections and make sure the printer display shows the
READ Y prompt. If the problem persists, restart the printer
and the computer. If you still have trouble, try reinstalling
the Export Module.
II-24 April 1996
Page 55

Appendix A: About Printer Tables
Appendix A: About Printer Tables
Printer tables are powerful tools for precisely adjusting
the colors”, in prints. The tables allow you to obtain the
closest possible match between a displa yed image and a
print of that image. KODAK TableMaker Software”, allo ws
you to create new tables or modify existing tables.
Printer tables can be used to change print
characteristics, such as making images lighter or darker.
Additive and Subtractive Color
Displayed images and printed images have different
appearances due to the nature of the processes used to
produce the colors on monitors and in prints.
A monitor’s uses an additive color process to produce a
screen image. Red, green, and blue light from the color
phosphors in the tube are added together to produce
white light. Various mixtures of the three colors produce a
variety of colors. A color printer uses a subtractive color
process, where ambient light passes through layers of
color dyes (cyan, magenta, yellow, and sometimes
black), reflects off a white paper base, and passes back
through the color dye layers to your eyes. The dyes
produce color by absorbing portions of the color
spectrum from the light striking the surface of the print.
The perceived color of a print is also strongly influenced
by the type and intensity of the light in which it is viewed.
April 1996 A-1
A color gamut is the range of visible colors that can be
produced by a specific set of primary colors (such as red,
blue, and green or cyan, magenta, yellow, and black).
Monitors, scanners, and color prints also have different
color gamuts. Many different CRT phosphors and color
dyes are available, and each produces a different range
of colors. Phosphors generally produce a wider color
gamut than photographic printing dyes, particularly in the
blue and green regions. However, some printable colors
cannot be displayed on a typical monitor.
Page 56

Appendix A: About Printer Tables
Standard T ables”
Each printer table is named according to its correction
formula. The standard 45 printer tables consist of all
combinations of one of the available gamma correction
values”, (1.0, 1.2, 1.4, 1.6, 1.8, 2.0, 2.2, 2.5, 2.8) and one
of the available black level values (-40, -30, -20, -10, 0).
For example, the printer table SG16BN30 has a gamma
correction value of 1.6 and a black level value of -30.
The standard tables are all set for a hue shift of 0°, a
saturation level of 100%, and an automatic contrast
calculation.
Custom Windows T ab les
Four custom tables are included with the Windows version of the Export Module.
SLINEAR.TBL
color data it receives from the application. It outputs the
same values it receives, and so allows you to use
calibrated digital color data directly from a color
calibration program.
SLEMON.TBL
produces a yellow hue commonly associated with
photographic applications. This table has a color matrix
that modifies the yellow digital image data it receives.
These modified values produce a lighter shade of yello w,
which is better suited for graphic arts applications.
SPHOTOCD.TBL
image quality from Photo CD images that were opened
using the RGB video metric.
SDEFAULT.TBL
values as the XLS Default selection and the
SG20BN20.TBL printer table.
—this table does not modify the digital
—the XLS 8600/XLS 8600 PS Printer
—use this table to obtain maximum
—this table has the same correction
A-2 April 1996
Page 57

Appendix A: About Printer Tables
Custom Macintosh Tables
Four custom tables are included with the Macintosh
version of the Export Module. They are stored in a folder
named Custom Tables within the directory in which you
placed the tables.
XLS Linear Table
digital color data it receives from the application. It
outputs the same values that it receives. This allows
you to output an image’s calibrated digital color data
from some other color calibration program.
XLS Graphic Arts Yellow Table
XLS 8600 PS Printer produces a yellow hue commonly associated with photographic applications.
This table has a color matrix that modifies the yellow
digital image data it receives. These modified values
produce a lighter shade of yellow, which is better
suited for graphic arts applications.
XLS Photo CD Table
imum image quality from Photo CD images that were
opened using a video metric.
XLS PostScript Level 1 Table
achieve PostScript Level 1 color rendering.
—this table does not modify the
—the XLS 8600/
—use this table to obtain max-
—use this table to
April 1996 A-3
Page 58

Appendix A: About Printer Tables
Creating New Printer Tables
The printer tables supplied with the Export Module
should be sufficient for most of your printing needs.
However, if you have a special printing requirement that
cannot be met by an existing printer table, you can use
KODAK TableMaker Software to create new tables. The
catalog number for the Macintosh system version of this
software is 8248833. The catalog number for the DOS
version of this software is 8404998.
A-4 April 1996
Page 59

Appendix B: Getting Additional Help
Appendix B: Getting Additional Help
If you have questions about the XLS 8600/XLS 8600 PS
Printer, the retailer from whom you purchased the printer
may be able to answer them. Eastman Kodak Company
provides retailers with additional technical information.
You can also call for technical support at 1-800-344-0006
between 9:00 a.m. and 8:00 p.m. Eastern Standard Time
on regular business days if you:
•
have questions about your
warrantyWarranty:questions about
•
want to know where to get supplies
•
want to know where to get service
•
want information about other Kodak products
•
have questions about software/printer interaction
•
have trouble setting up or operating the printer
April 1996 B-1
Page 60
Appendix B: Getting Additional Help
Asia/Pacific Region helpline numbers
Country Country
code
Australia 61 3 353 2173
Hong Kong 85 2 5649387
Indonesia 62 21 430 4527
Korea 82 02 708 5471 4
Malaysia 60 3 757 2722
Philippines 63 2 816 67 18
Singapore 65 4736611
Thailand 66 2 271 3040 x396
Taiwan 88 6 2 893 8234
Helpline number
European helpline numbers
Country Country code Helpline number
Belgium 32 02/2632400
Denmark 45 43/717111
Finland 358 90/87071
France 33 1/4989-0083
Germany 49 0711/406-5561
Italy 39 02/66028454
Netherlands 31 03405/99704
Norway 47 02/818181
Spain 34 91/6267100
Sweden 46 08/58023663
UK 44 044261122
Ext. 44239
B-2 April 1996
Page 61

Appendix C: About SCSI connection
Appendix C: About SCSI connection
Windows systems
A SCSI terminator is included with the printer. You must
obtain the proper cabling required for your configuration
from your printer dealer or distributor.
To connect the XLS 8600/XLS 8600 PS Printer directly to
your computer (or to daisy–chain the printer through an
external SCSI device), perform the following steps.
1. Turn off all equipment before connecting or
disconnecting any equipment from the SCSI bus.
2. Install the SCSI host adapter board in the computer.
3. Attach a SCSI cable appropriate to your equipment’ s
configuration.
If you are connecting the cable directly to the PC, use
a 50–pin submini “D” to a DB 50 cable.
If you are connecting the cable to an external disk
drive, use the cable type appropriate for the drive.
4. Attach a SCSI terminator.
NOTE: Some equipment is internally terminated. Refer to
the equipment documentation for details.
5. Turn on the printer and the computer.
6. Set the SCSI device number using the printer’s
display panel.
Refer to the KODAK XLS 8600 and XLS 8600 PS
Printer, User’s Guide for instructions about setting
the SCSI device number. This number typically has
to be between 1 and 6. This is because the CPU is
commonly set as SCSI device 7 and internal hard
drives are almost always configured as device 0.
7. Run the Adaptec EZ–SCSI Software install program
to install the software on your system.
April 1996 C-1
Page 62
Appendix C: About SCSI connection
Instructions for installation are included in the
Adaptec EZ-SCSI for DOS/Windows, User’s Manual.
Make sure that you select the option Install ASPI For
Windows and follow the instructions on the screen
for that installation option.
Macintosh Systems
A SCSI terminator is included with the printer. You must
obtain the proper cabling required for your configuration
from your printer dealer or distributor.
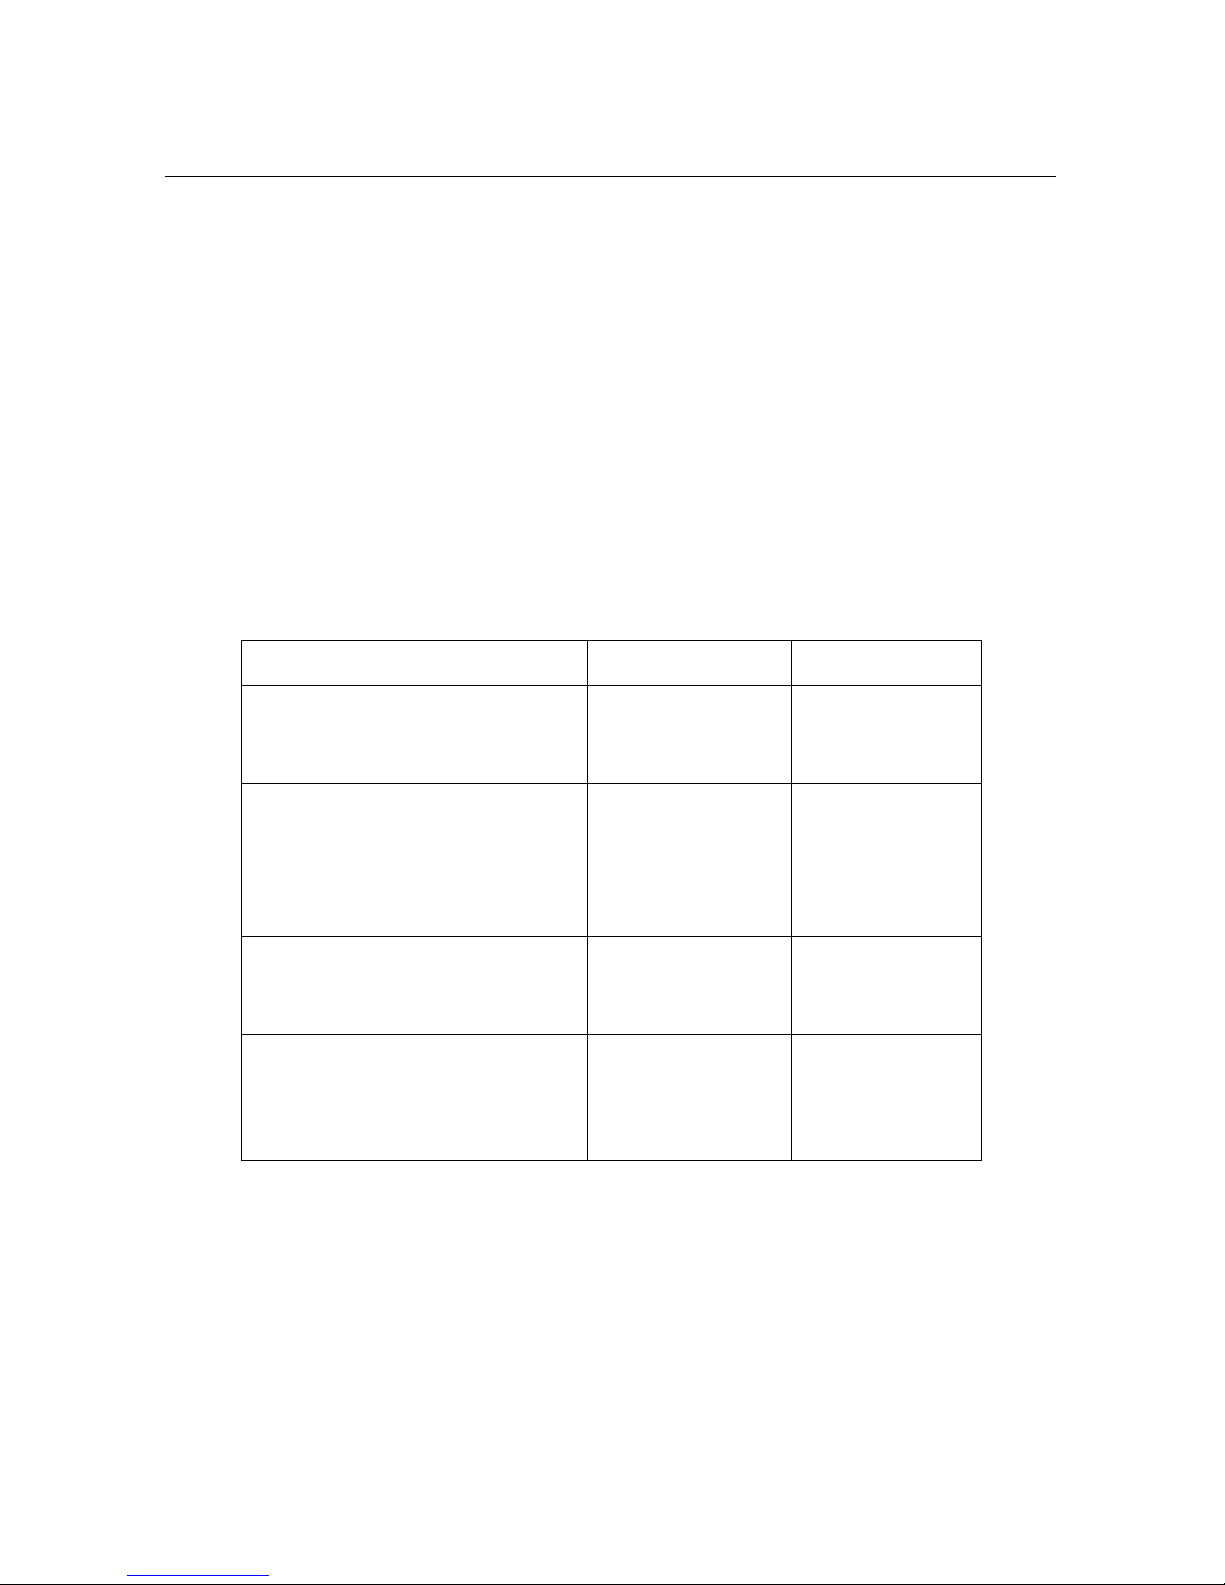
Use the following table to determine what cable and
terminator you need.
Computer Type Cable Terminator
Any Macintosh except IIfx
Without an external disk drive
(or other peripheral)
With an external disk drive (or
other peripheral)
Macintosh IIfx
Without an external disk drive
(or other peripheral)
With an external disk drive (or
other peripheral)
To connect the XLS 8600/XLS 8600 PS Printer directly to
your MACINTOSH computer (or to daisy–chain the
printer with an external SCSI device), perform the
following steps. Refer to the KODAK XLS 8600 and XLS
8600 PS Printer, User’s Guide for additional information.
25 pin-50 pin Not required
50–pin submini
“D” to Centronics
“D” type
25 pin-50 pin Not required
50 pin submini
“D” to Centronics
“D” type
Terminator supplied with printer
or standard
Macintosh terminator
Special Apple
IIfx terminator
supplied with
Macintosh IIfx
C-2 April 1996
Page 63

Appendix C: About SCSI connection
1. Turn off all equipment before plugging or unplugging
equipment on the SCSI bus.
2. Attach the SCSI cable and SCSI terminator.
NOTE: Some equipment is internally terminated. If you
have questions, refer to your equipment
documentation.
IMPORTANT
:If you are using a MACINTOSH IIfx
computer, you must install a special
terminator provided by Apple Computer or
unpredictable results can occur.
3. Turn on the printer and the computer.
4. Set the SCSI device number using the printer’s
display panel.
Refer to the KODAK XLS 8600 and XLS 8600 PS
Printer, User’s Guide for instructions about setting
the SCSI device number. This number typically has
to be between 1 and 6. This is because the CPU is
commonly set as SCSI device 7 and internal hard
drives are almost always configured as device 0.
April 1996 C-3
Page 64

Page 65

Index
Index
A
Adaptec I-2, C-2
AppleTalk
error messages about II-23
AppleTalk zones II-8, II-19
Available memory
in printer viii
C
Cancel button
of the Select a Kodak Printer dialog box
on Macintosh systems II-20
of the Select a Printer dialog box
on Windows systems I-15
Canceling print jobs
on Macintosh systems II-22
on Windows systems I-19
Centering images on the page
on Macintosh systems II-16
Checking the printer’s status
on Macintosh systems II-20
on Windows systems I-15
Closing the Kodak XLS 8600 Printer dialog box
on Macintosh systems II-18
Closing the XLS 8600 Printer Setup dialog box
on Windows systems I-13
Color mode
error messages about
on Macintosh systems II-23
on Windows systems I-20
Cropping
on Macintosh systems II-15
on Windows systems I-10
April 1996 Index-1
D
Dialog boxes and print options
on Macintosh systems II-10
on Windows systems I-5
Page 66

Index
Disk space requirements
for Macintosh systems II-1
for Windows systems I-1
DOS I-2
E
Ethernet connection viii
Ethernet network II-19
Export option of the File menu
on Macintosh systems II-5, II-11
on Windows systems I-6
External disk drive
with SCSI connections
on Macintosh systems C-3
on Windows systems C-1
EZ-SCSI software I-2, C-2
F
File size
error messages about
on Macintosh systems II-23
Fingerprints
protecting images from I-8, II-13
H
Hard disk
required for Macintosh systems II-1
required for Windows systems I-1
Hardware requirements
for Windows systems I-1
I
Image enhancement
on Macintosh systems II-17
on Windows systems I-12
Image manipulation options
on Windows systems I-12
Imageable area I-7, II-12
Index-2 April 1996
Page 67

Installation
on Macintosh systems II-1
on Windows systems I-1
Installing the software
on Windows systems I-2
J
Job Information group box
in the Printer Status dialog box
on Macintosh systems II-21
on Windows systems I-16
Job scheduling viii
Jobs being processed
finding information about
on Macintosh systems II-21
on Windows systems I-16
K
Index
Kodak Printer Utility
on Macintosh systems II-4, II-7
Kodak Printers dialog box
on Macintosh systems II-19
Kodak Raster Printers dialog box II-8, II-9
Kodak XLS 8600 Printer dialog box
opening
on Macintosh systems II-11
option descriptions
on Macintosh systems II-12
L
Lamination
requesting
on Macintosh systems II-13
on Windows systems I-8
Landscape button
on Macintosh systems II-16
Layout group box
on Macintosh systems II-16
on Windows systems I-11
April 1996 Index-3
Page 68

Index
LPT port
selecting
on Windows systems I-18
M
Macintosh IIfx
cable for C-4
Macintosh IIfx systems
cable for C-3
terminator requirements for II-1
Media
error messages about
on Windows systems I-21
Media group box
on Macintosh systems II-12
on Windows systems I-7
Media options
on Macintosh systems II-12
on Windows systems I-7
Media size
specifying
on Macintosh systems II-12
on Windows systems I-7
Media sizes I-7, II-12
Memory
error messages about
on Windows systems I-21
Mirror images
specifying on Macintosh systems II-16
specifying on Windows systems I-12
MS-DOS I-2
Index-4 April 1996
N
NetWare print queue
on Windows systems I-18
Network button
of the Select a Kodak Printer dialog box
on Macintosh systems II-19
Network configuration
impact on job scheduling viii
Network Interface Card viii, II-7, II-19
Page 69

Network name
changing
on Macintosh systems II-7
Novell NetWare
Using on Windows systems I-18
Number of copies
specifying
on Macintosh systems II-14
on Windows systems I-9
Number of jobs viii
O
OK button
of the Printer Status dialog box
on Macintosh systems II-22
on Windows systems I-17
of the Select a Kodak Printer dialog box
on Macintosh systems II-20
of the Select a Printer dialog box
on Windows systems I-14
Optional memory viii
Orientation
specifying
on Macintosh systems II-16
on Windows systems I-11
Index
P
Paper
specifying
on Macintosh systems II-13
on Windows systems I-8
Paper sizes I-7, II-12
Parallel cable
on Windows systems I-18
Parallel connection viii
PhotoShop
version required
for Macintosh systems II-2
for Windows systems I-2
April 1996 Index-5
Page 70

Index
Plugins directory
on Macintosh systems II-3
on Windows systems I-4
Port
selecting
on Windows systems I-17
Portrait button
on Macintosh systems II-16
Ports
on Macintosh systems II-18
on Windows systems I-14
Print Sharpening list box
on Macintosh systems II-17
on Windows systems I-12
Printed Size group box
on Windows systems I-10
Printer
changing the network name
on Macintosh systems II-4
error messages about
from Macintosh systems II-22
from Windows systems I-20
finding the version number
on Macintosh systems II-21
on Windows systems I-16
not connected
error messages about
on Windows systems I-21
Printer buffer I-9, II-14
Printer group box
on Macintosh systems II-14
on Windows systems I-9
Printer Information group box
on Macintosh systems II-21
on Windows systems I-16
Printer Status dialog box
option descriptions
on Macintosh systems II-21
on Windows systems I-16
Printer table
loading the default
on Windows systems I-12
Index-6 April 1996
Page 71

Printer Table field
on Windows systems I-12
Printer Table list box
on Macintosh systems II-17
Printer Tables folder
on Macintosh systems II-7
Printing
on Macintosh systems II-22
on Windows systems I-19
Program Manager window I-3
Progress window
on Windows systems I-4
R
RAM
installed in Macintosh systems II-21
installed in Windows systems I-16
RAM requirements
for Macintosh systems II-1
for Windows systems I-1
Refresh button
of the Printer Status dialog box
on Windows systems I-17
Reprint check box
on Macintosh systems II-14
Run dialog box I-3
Run option of the File menu
on Windows systems I-3
Index
April 1996 Index-7
S
Scale to
check box
on Macintosh systems II-15
on Windows systems I-10
Scaling images by resolution
on Windows systems I-11
Scaling images by size
on Macintosh systems II-15
on Windows systems I-10
Scaling images to fill the page
on Windows systems I-10
Page 72

Index
Scaling images to fit the page
on Macintosh systems II-15
SCSI bus
on Macintosh systems II-14, C-1, C-3
on Windows systems I-9
SCSI cable C-1, C-3, C-4
for Windows systems I-2
SCSI communications
for Windows systems I-1
SCSI connection viii, I-15, C-1
error messages about
on Windows systems I-20
for Macintosh systems C-3
for Windows systems I-19, C-1
SCSI device number C-1, C-4
SCSI host adapter C-1
for Windows systems I-1, I-19
SCSI Host Adapter list box
on Windows systems I-15
SCSI software
for Windows systems I-2
SCSI terminator C-1, C-3, C-4
Apple
for Macintosh systems II-1
for Windows systems I-2
standard
for Macintosh systems II-1
Select a Kodak Printer dialog box
on Macintosh systems II-20
option descriptions
for Macintosh systems II-18
Select a Printer dialog box
on Windows systems I-18
option descriptions
for Windows systems I-14
Select button
on Macintosh systems II-14
on Windows systems I-9
Selecting a printer
on Windows systems I-9, I-14
Index-8 April 1996
Page 73

Sending the job to the printer
on Macintosh systems II-18
on Windows systems I-13
Sharpening image edges viii
Sharpening images
on Macintosh systems II-17
on Windows systems I-12
Size list box
on Windows systems I-7
Sizing images
on Macintosh systems II-15
on Windows systems I-10
Software
for SCSI installations
on Windows systems I-2
Software requirements
for Windows systems I-2
Status button
on Macintosh systems II-14, II-20
on Windows systems I-9, I-15
System version
required for Macintosh systems II-2
Index
T
Tables
copying
on Macintosh systems II-5
Technical support B-1
U
Update button
of the Printer Status dialog box
on Macintosh systems II-21
of the Select a Kodak Printer dialog box
on Macintosh systems II-19
of the Select a Printer dialog box
on Windows systems I-15
April 1996 Index-9
Page 74

Index
W
Warranty
questions about B-1
Windows
version required I-2
X
XLS 8600 Expander icon II-2
XLS 8600 Printer dialog box
on Windows systems I-6
XLS 8600 Printer Setup dialog box
on Windows systems I-6, I-17, I-19
opening
on Windows systems I-6
option descriptions
for Windows systems I-6
XLS Printer Tables icon
on Macintosh systems II-6
Index-10 April 1996
 Loading...