

Kodak EasyShare V610
dual lens digital camera
User’s guide
www.kodak.com
For interactive tutorials, www.kodak.com/go/howto
For help with your camera, www.kodak.com/go/v610support

Eastman Kodak Company
Rochester, New York 14650
© Eastman Kodak Company, 2006
All screen images are simulated.
Kodak, EasyShare, and Perfect Touch are trademarks of Eastman Kodak Company.
Schneider-Kreuznach and C-Variogon are trademarks of Jos. Schneider Optische
Werke GmbH used under license by Eastman Kodak Company.
The Bluetooth word mark and logos are owned by Bluetooth SIG, Inc. and any use of
such marks by Kodak is under license.
P/N 4J4375_en

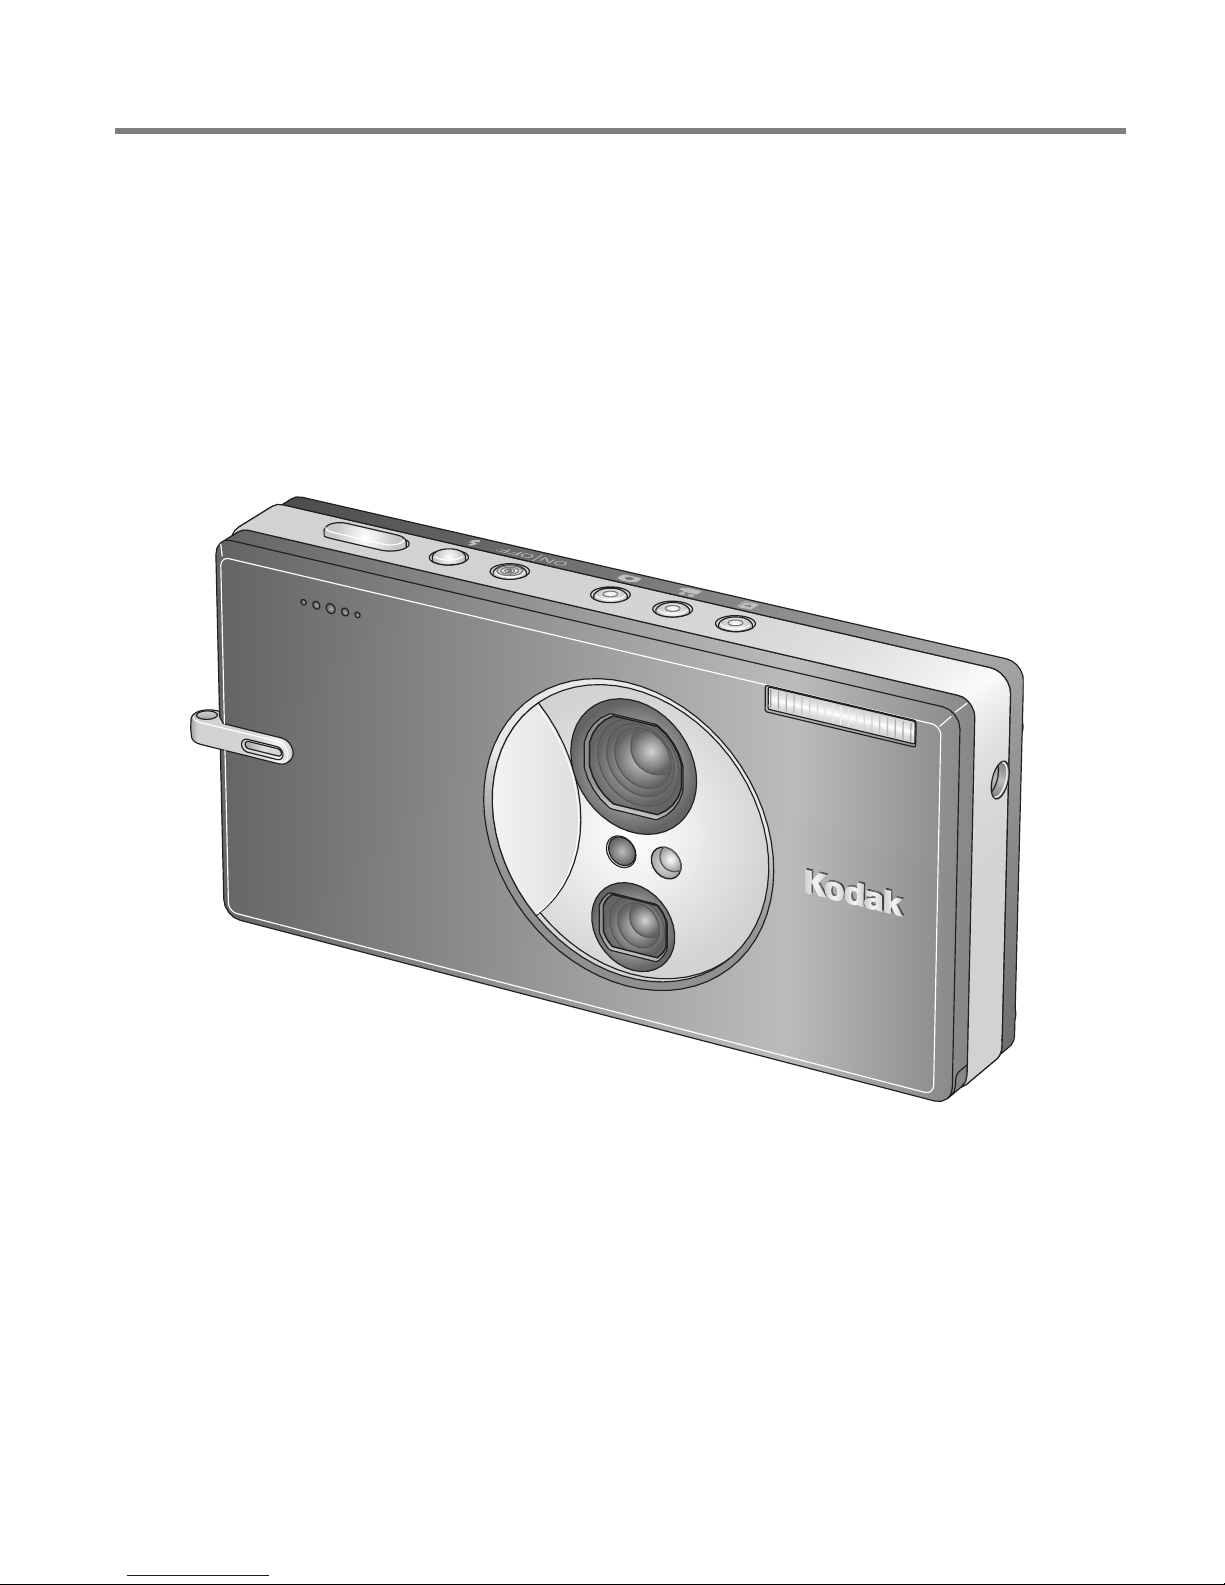
Front view
Product features
21
3
13
12
11
10
4
5
6
7
8
9
1 Shutter button 7 Flash
2 Flash button 8 DC-In (5V)
3 On/Off button 9 Lenses
4 Auto (pictures) mode button 10 Video/Self-timer lights
5 Video mode button 11 Light sensor
6 Favorites mode button 12 Strap post
13 Microphone
www.kodak.com/go/support
i
Product features
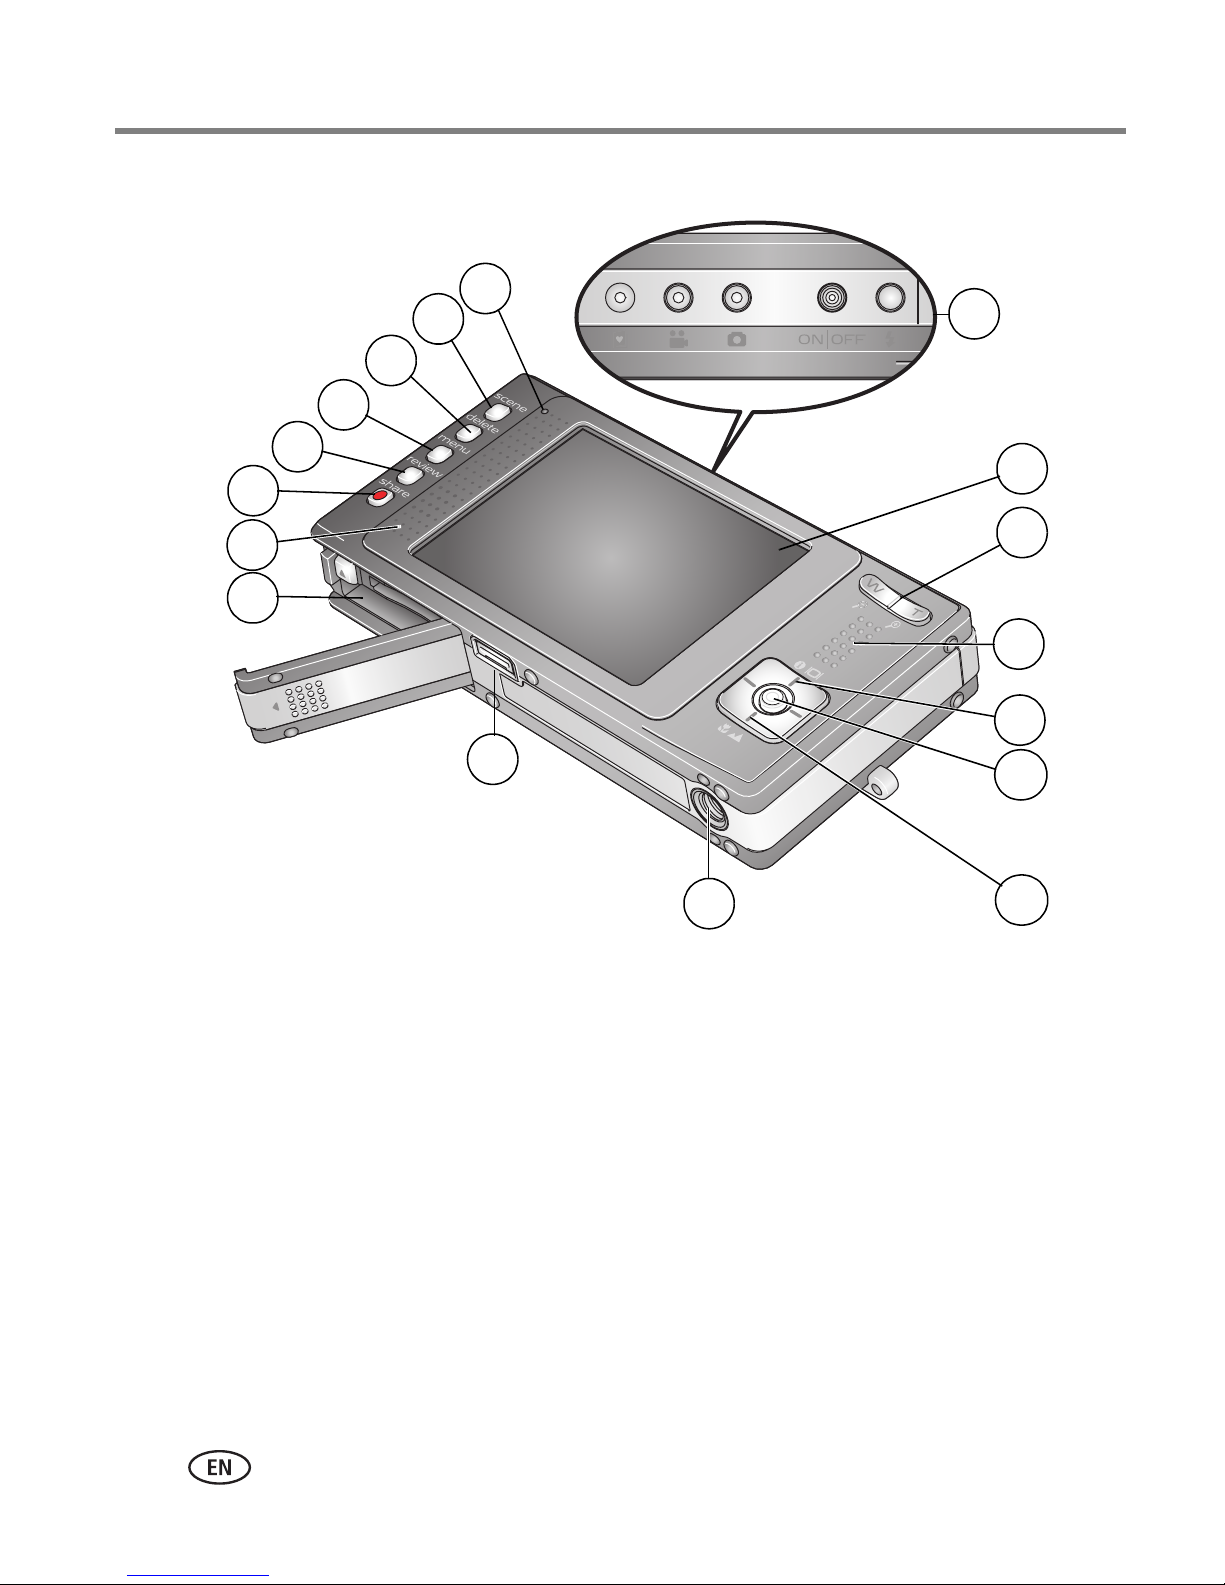
Back view
13
12
14
15
16
17
1
2
11
10
9
8
1 On/Off, Mode buttons/Battery charging
lights/Bluetooth status lights
2 LCD 11 Speaker
3 Wide angle/Telephoto button 12 Share button
10 Battery compartment; slot for optional
SD or MMC card
3
4
5
6
7
4Grip 13Review button
5 LCD/Info button 14 Menu button
6 OK button 15 Delete button
7 Macro/Landscape mode button 16 Scene mode button
8 Tripod socket 17 Ready light
9 Dock connector, USB, A/V Out
ii www.kodak.com/go/support

Table of contents 1
1 Setting up your camera .........................................................................1
Attaching the strap .......................................................................................1
Loading the KLIC-7001 battery......................................................................1
Charging the battery .....................................................................................2
Turning on the camera ..................................................................................3
Setting the language and date/time...............................................................3
Storing pictures on an SD or MMC card .........................................................4
2 Taking pictures/videos ...........................................................................5
Taking a picture ............................................................................................5
Using the framing marks to take pictures.......................................................6
Taking a video .............................................................................................. 6
Using the optical zoom..................................................................................7
Using the self-timer.......................................................................................8
Using the flash..............................................................................................9
Using different modes .................................................................................10
Taking panoramic pictures...........................................................................14
Understanding the picture-taking icons........................................................15
3 Working with pictures/videos ..............................................................16
Reviewing pictures/videos ........................................................................... 16
Deleting pictures/videos ..............................................................................17
Cropping pictures........................................................................................18
Using Kodak Perfect Touch technology ........................................................ 18
Editing videos .............................................................................................19
Running a slide show..................................................................................20
Viewing pictures/videos in different ways..................................................... 24
Selecting multiple pictures/videos ................................................................ 25
Copying pictures/videos...............................................................................25
Understanding the review icons................................................................... 26
www.kodak.com/go/support iii

Table of contents
4 Doing more with your camera .............................................................28
Using the menu to change settings.............................................................. 28
Customizing your camera ............................................................................32
Using exposure compensation to adjust picture brightness ...........................35
Using the histogram to view picture brightness............................................36
Using the framing grid to compose a picture................................................ 36
Sharing your pictures...................................................................................36
5 Transferring and printing pictures .......................................................43
Installing the software.................................................................................43
Transferring pictures/videos.........................................................................44
Printing pictures..........................................................................................45
Dock compatibility for your camera..............................................................47
6 Using Bluetooth wireless technology features .....................................48
Setting up the Bluetooth feature of your camera.......................................... 48
Making the “set as trusted” choice .............................................................49
Getting the best Bluetooth reception ........................................................... 50
Sending pictures to a device........................................................................51
Receiving pictures from a device.................................................................. 52
Sending pictures to a printer........................................................................53
Sending pictures to a computer ...................................................................54
7 Troubleshooting ..................................................................................55
8 Getting help ........................................................................................60
9 Appendix .............................................................................................62
Camera specifications ................................................................................. 62
Important safety instructions .......................................................................67
Battery replacement, battery life..................................................................68
Upgrading your software and firmware........................................................69
Additional care and maintenance ................................................................69
Warranty..................................................................................................... 69
Regulatory compliance ................................................................................71
iv www.kodak.com/go/support
1 Setting up your camera
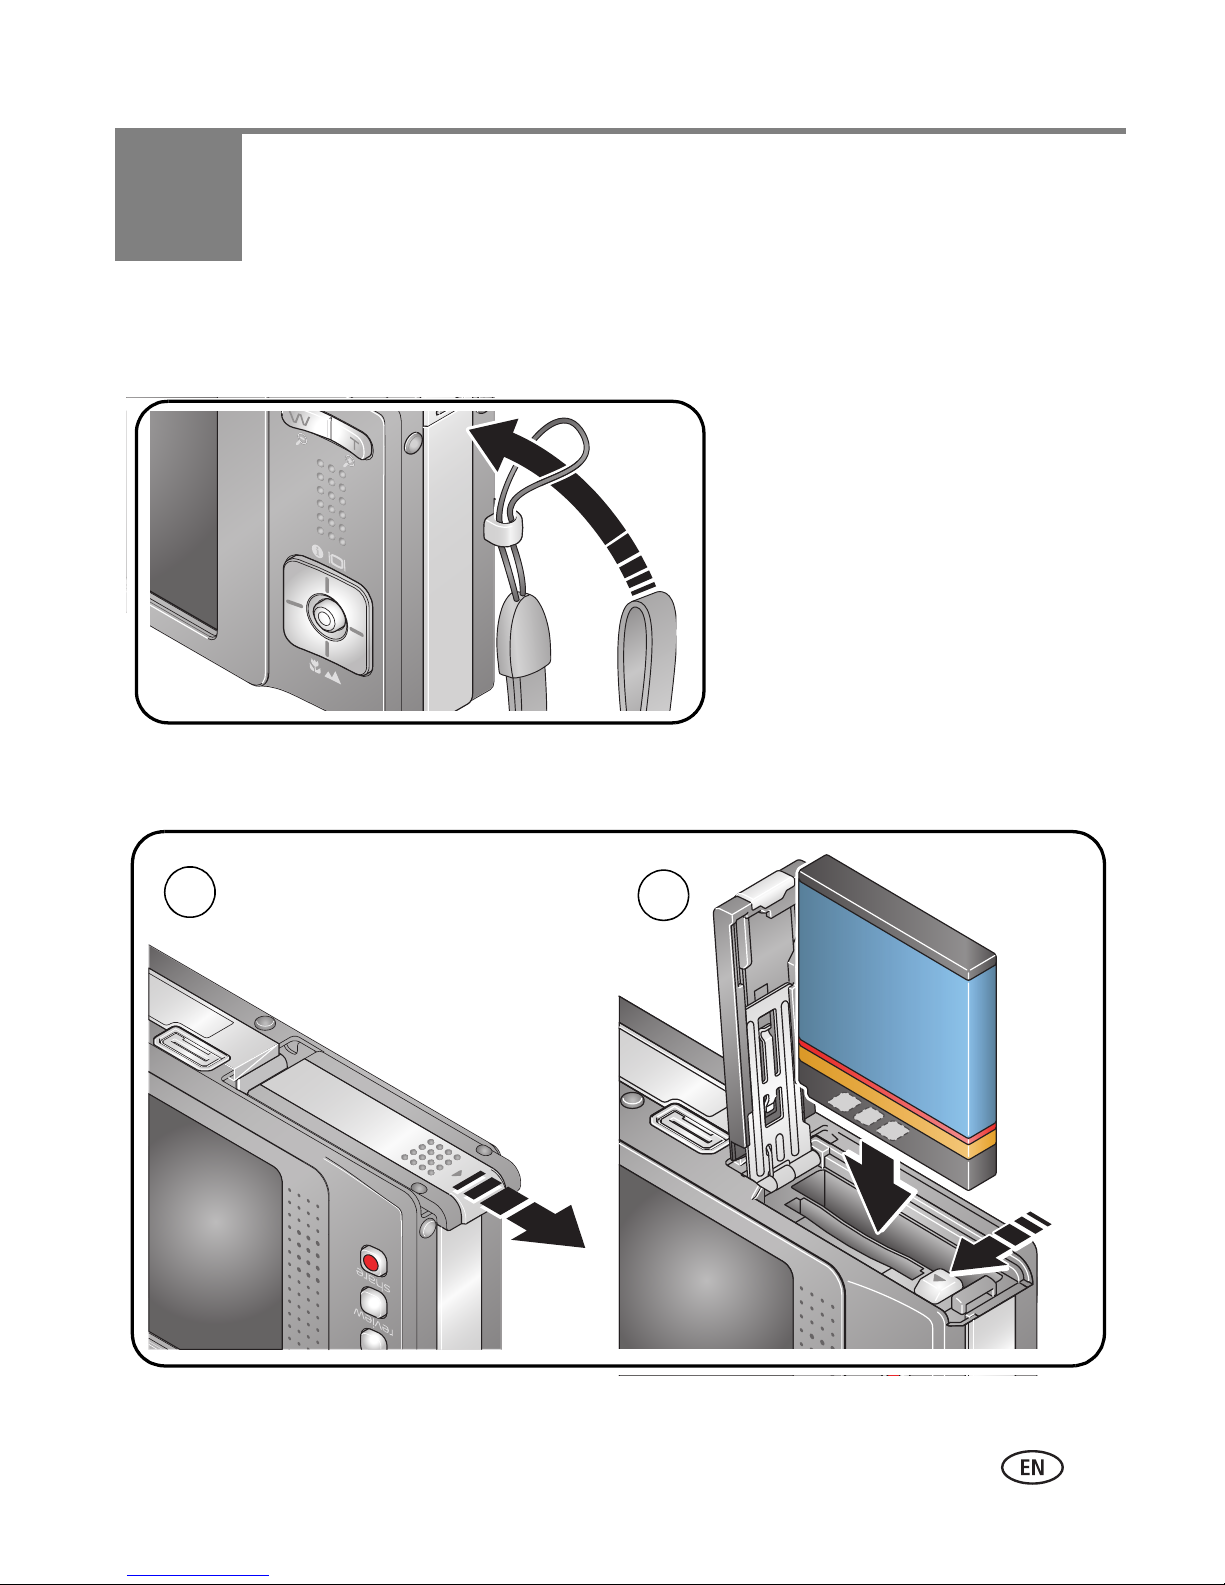
Attaching the strap
Loading the KLIC-7001 battery
1
For information on replacing batteries and extending battery life, see page 68.
www.kodak.com/go/support 1
2
Setting up your camera
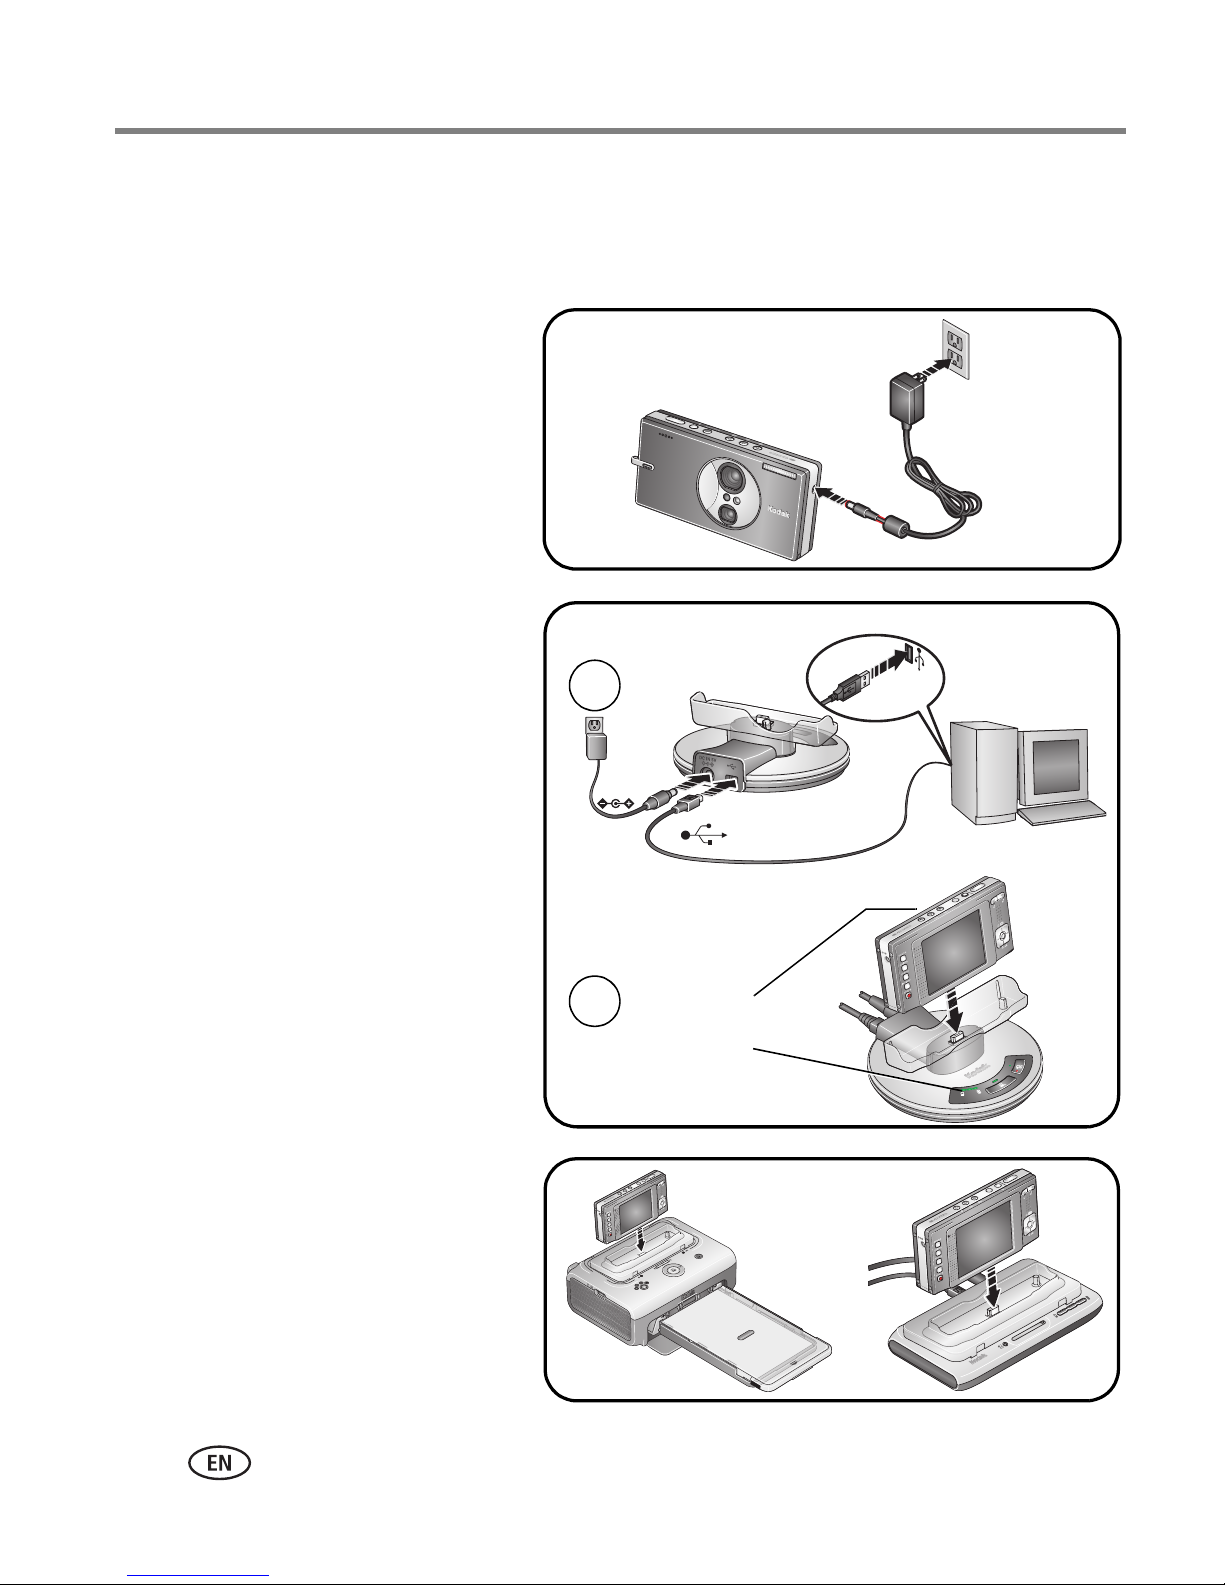
Charging the battery
Charge until all 3 battery charging lights are lit (approximately 2 hours).
5-volt AC adapter
(included with your camera)
NOTE: Use this AC adapter to charge the
battery and to power the EasyShare photo
frame dock 2.
Kodak EasyShare photo frame
dock 2
May be sold separately. Visit
www.kodak.com/go/v610accessories.
Kodak EasyShare printer dock
series 3 or EasyShare camera
dock series 3
1
2
Battery
charging
lights
May be sold separately. Visit
www.kodak.com/go/v610accessories.
For details, see the dock user’s guide.
For dock compatibility, see page 47.
2 www.kodak.com/go/support
Setting up your camera
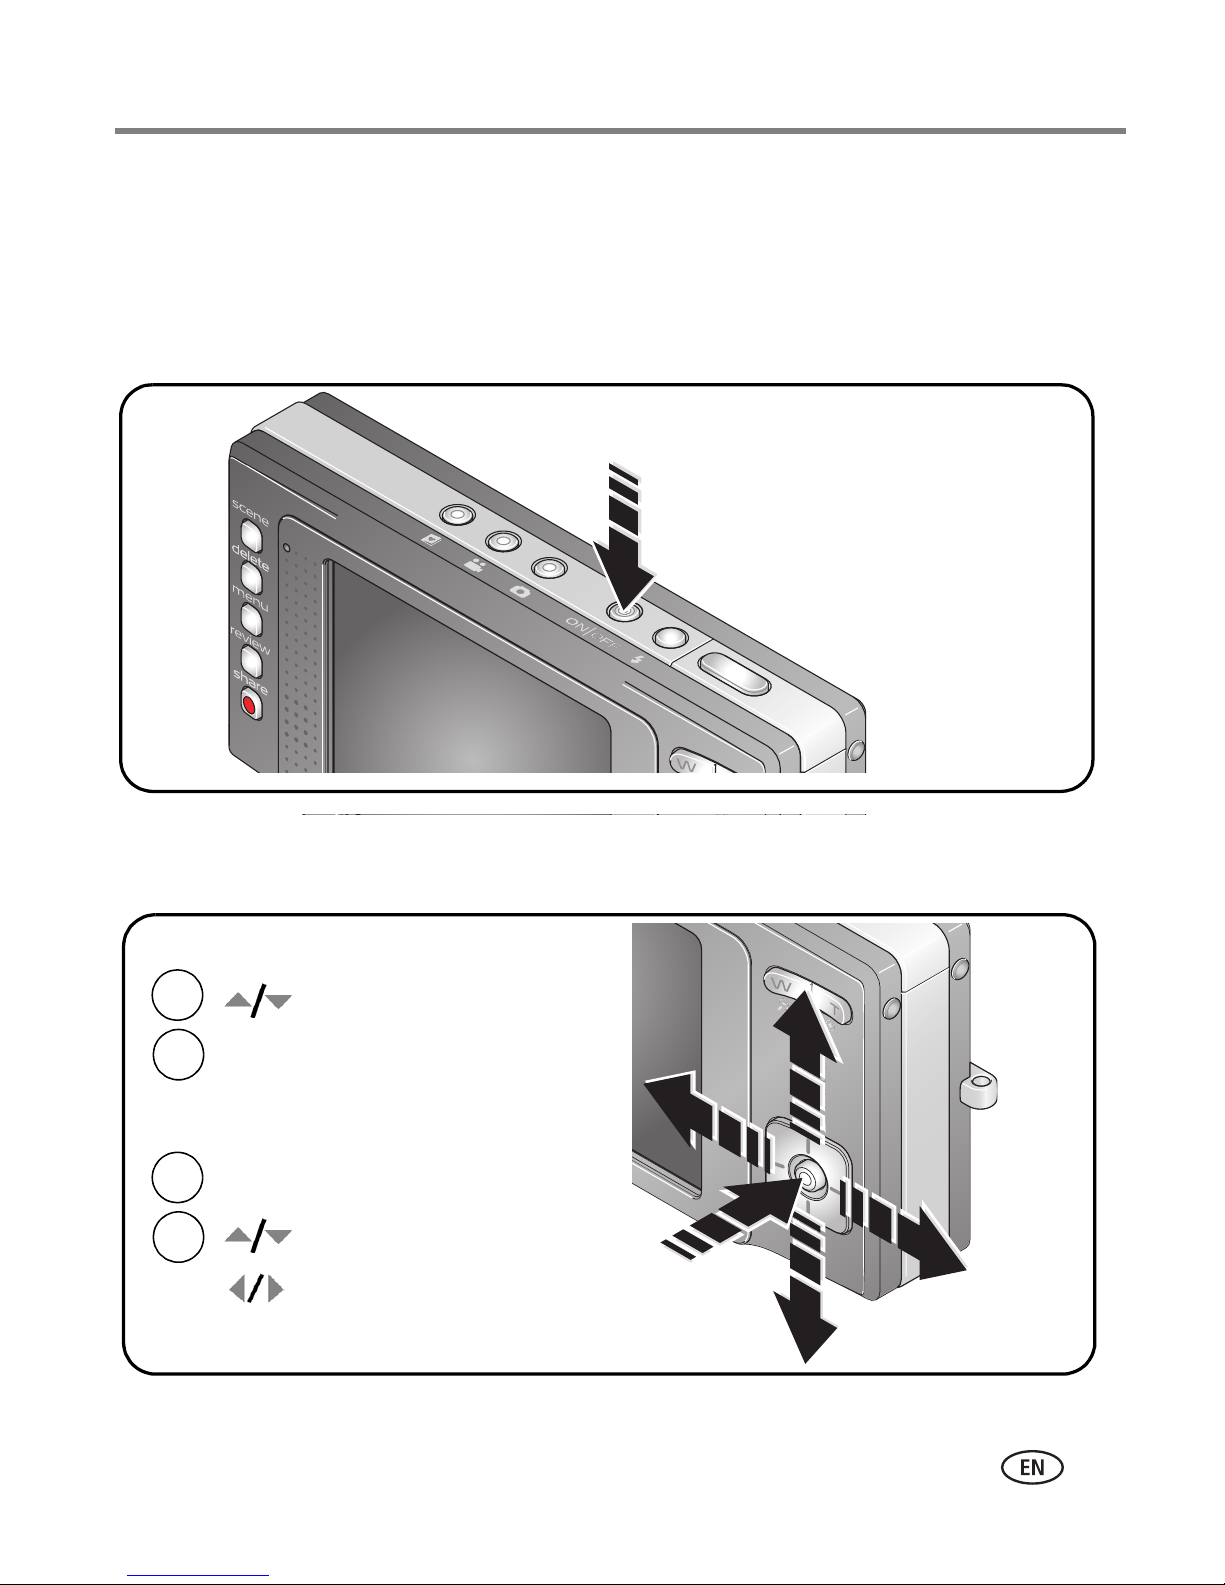
Turning on the camera
Press the On/Off button to turn the camera on in Auto mode.
NOTE:
You can also press the Auto, Video, or Favorites button to turn on the camera in
that mode.
Setting the language and date/time
Language:
1
2
1
OK
Date/Time:
At the prompt, press OK.
2
OK
to change.
to accept.
to change.
for previous/next field.
to accept.
www.kodak.com/go/support
OK
3
Setting up your camera
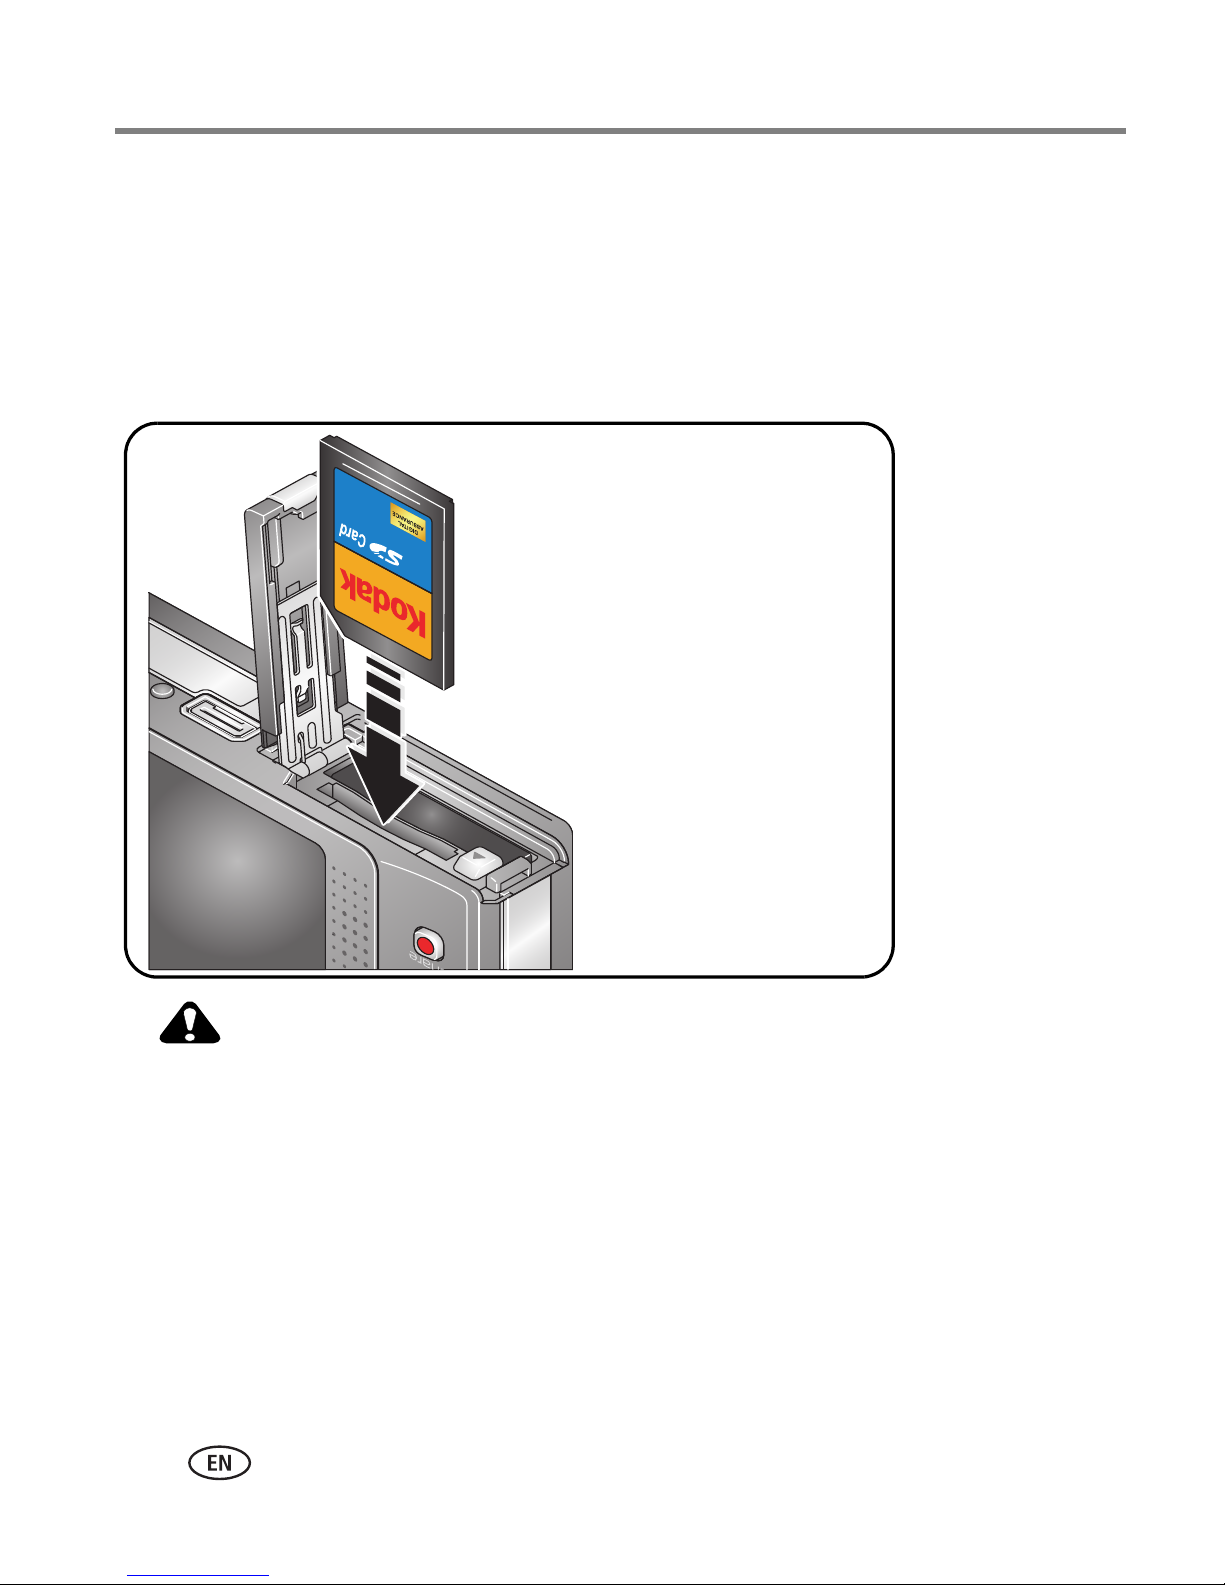
Storing pictures on an SD or MMC card
Your camera has internal memory. You can purchase an SD or MMC card to
conveniently store more pictures/videos (www.kodak.com/go/v610accessories). We
recommend Kodak SD cards.
NOTE: When using the card for the first time, format it in this camera before taking pictures (see page 35).
CAUTION:
A card can only be inserted one way; forcing it may cause damage.
Inserting or removing a card when the Ready light is blinking may
damage the pictures, card, or camera.
See page 66 for storage capacities.
4 www.kodak.com/go/support
2 Taking pictures/videos
Taking a picture
1 Press the On/Off or the Auto mode button to turn on
Ready
light
the camera.
2 Compose the picture.
3 Press the Shutter button halfway to focus and
set exposure.
When the Ready light turns green, press the Shutter
button completely down.
NOTE: You can repeatedly press LCD/Info to turn on/off
status icons, histogram, and framing grid.
Reviewing the picture just taken
After you take a picture/video, the LCD displays a quickview for approximately 5
seconds. If you press no buttons, the picture/video is saved.
Delete
to play a video
to
Tag a picture/video for email or
as a favorite; tag a picture to print.
To review pictures/videos anytime, see page 16.
www.kodak.com/go/support 5
adjust volume
Taking pictures/videos
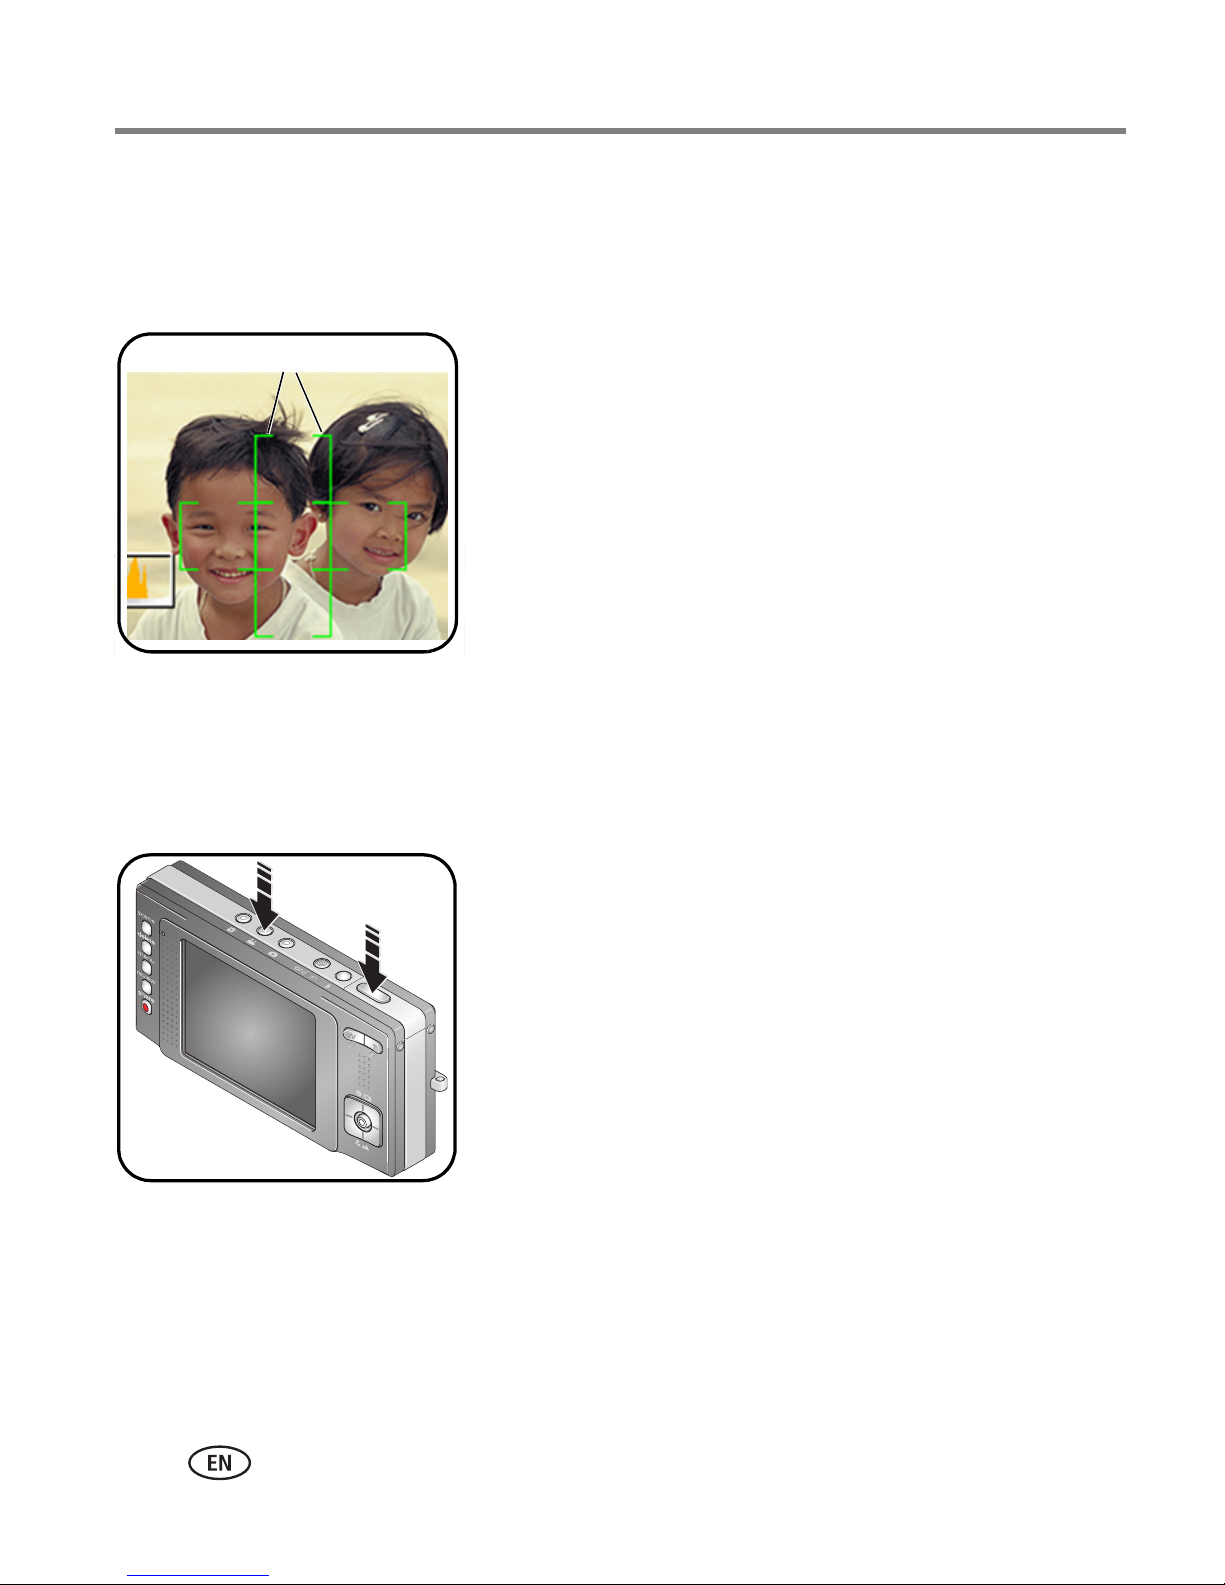
Using the framing marks to take pictures
Framing marks indicate the camera focus area. The camera attempts to focus on
foreground subjects, even if the subjects are not centered in the scene.
Framing marks
NOTE: Framing marks do not appear in Landscape or Video mode. When you use Focus
Zone and set Center Zone, the framing marks are fixed at Center Wide.
1 Press the Shutter button halfway.
When the framing marks turn green, focus is
accomplished.
2 If the camera is not focusing on the desired subject
(or if the framing marks disappear), release the
Shutter button and recompose the scene.
3 Press the Shutter button completely down to
take the picture.
Taking a video
1 Press the Video mode button.
The camera enters Video mode.
2 Press the Shutter button completely down,
then release it. To stop recording, press and release
the Shutter button again.
To review and edit videos, see page 16.
6 www.kodak.com/go/support
Taking pictures/videos
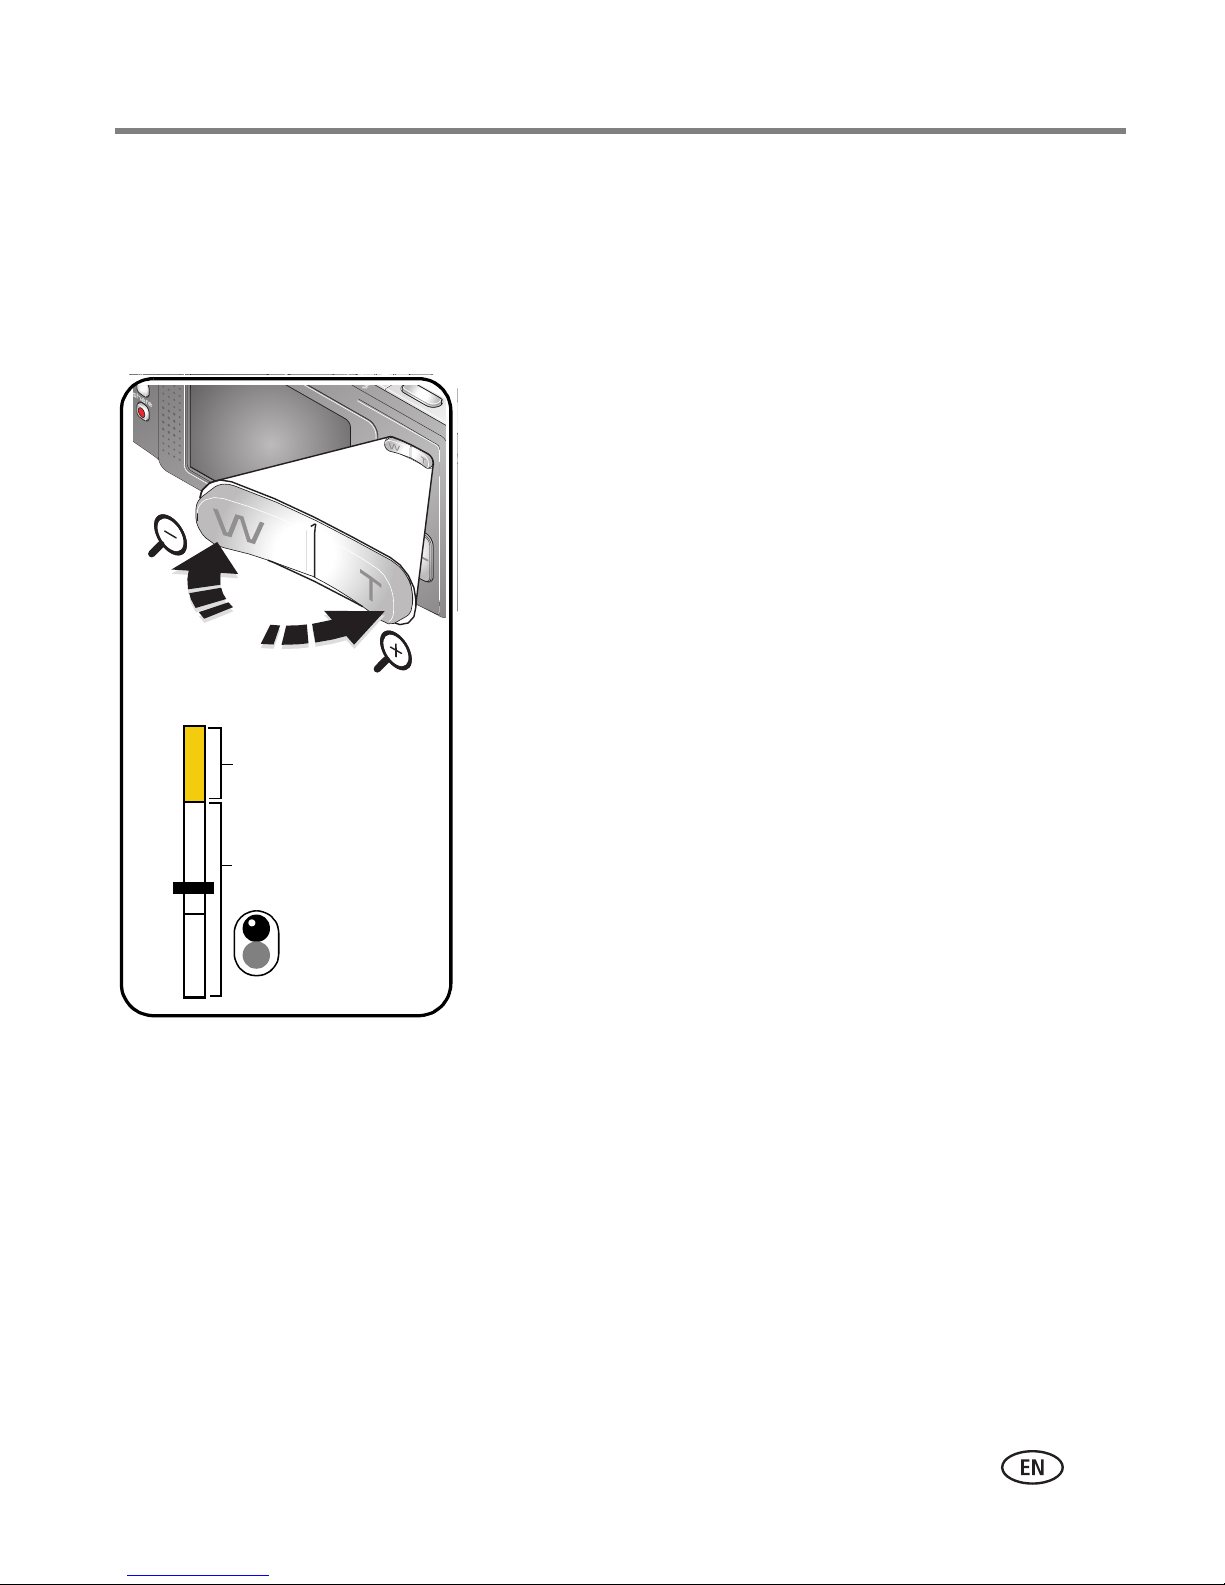
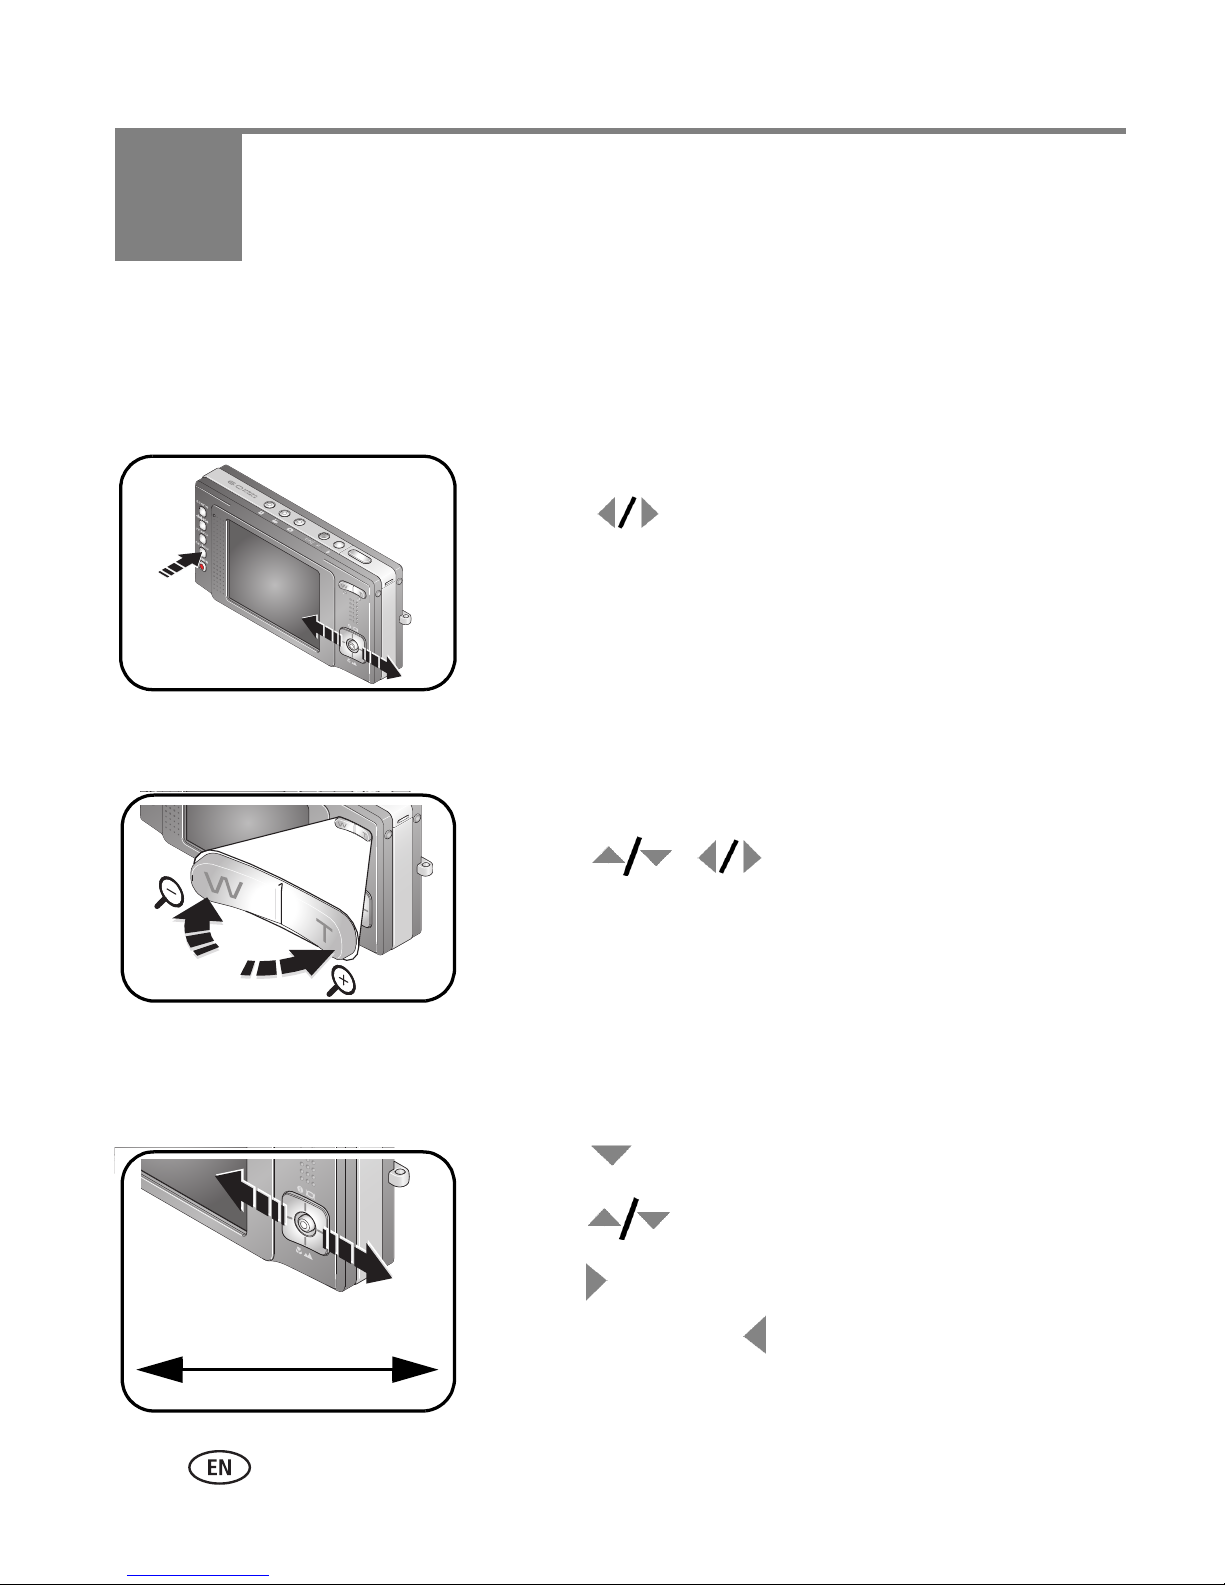
Using the optical zoom
When taking pictures/videos, use optical zoom to get up to 10X closer to your subject.
Optical zoom is effective when the lens is no closer than 24 in. (60 cm) to the subject
or 2 in. (5 cm) in Macro mode.
1 Use the LCD to frame your subject.
2 Press Telephoto (T) to zoom in. Press Wide Angle
(W) to zoom out.
The zoom indicator shows zoom status. The Lens
Transition icon indicates when the camera transitions
from one lens to another.
3 Take the picture/video.
LCD zoom indicator
D
Digital zoom range
T
Optical zoom range
Lens transition
W
Using digital zoom
Use digital zoom in any Still mode to get up to 4X magnification beyond optical zoom.
1 Press Telephoto (T) to the optical zoom limit (10X). Release the button, then
press it again.
2 Take the picture.
NOTE: You cannot use digital zoom for video recording. You may notice decreased image quality when
using digital zoom. The slider on the zoom indicator turns red when the picture quality reaches the
limit for an acceptable 4 x 6-in. (10 x 15 cm) print.
www.kodak.com/go/support
7
Taking pictures/videos
Using the self-timer
Use the self-timer when you want to be included in a picture, or to ensure a steady
Shutter button press.
1 Place camera on a tripod or flat surface.
2 In any Still mode, press the Menu button.
3 Press to highlight Self-timer, then press the
OK button. Choose:
2 seconds—A picture is taken after a 2-second
delay (for a steady, auto-shutter release on a
Menu
tripod).
10 seconds—A picture is taken after a 10-second
delay (so you have time to get into the scene).
Off
2 shot —The first picture is taken after a
10-second delay. A second picture is taken 8
seconds later.
Then press the OK button.
4 Compose the scene.
5 Press the Shutter button halfway, then
completely down.
The camera takes the picture/pictures after the delay.
Use the same procedure to take a video, but:
■ Press the Video mode button .
■ Press the Shutter button completely down.
NOTE: The video stops when no storage space remains. Only the 2- and 10-second options are available in
video mode.
8 www.kodak.com/go/support
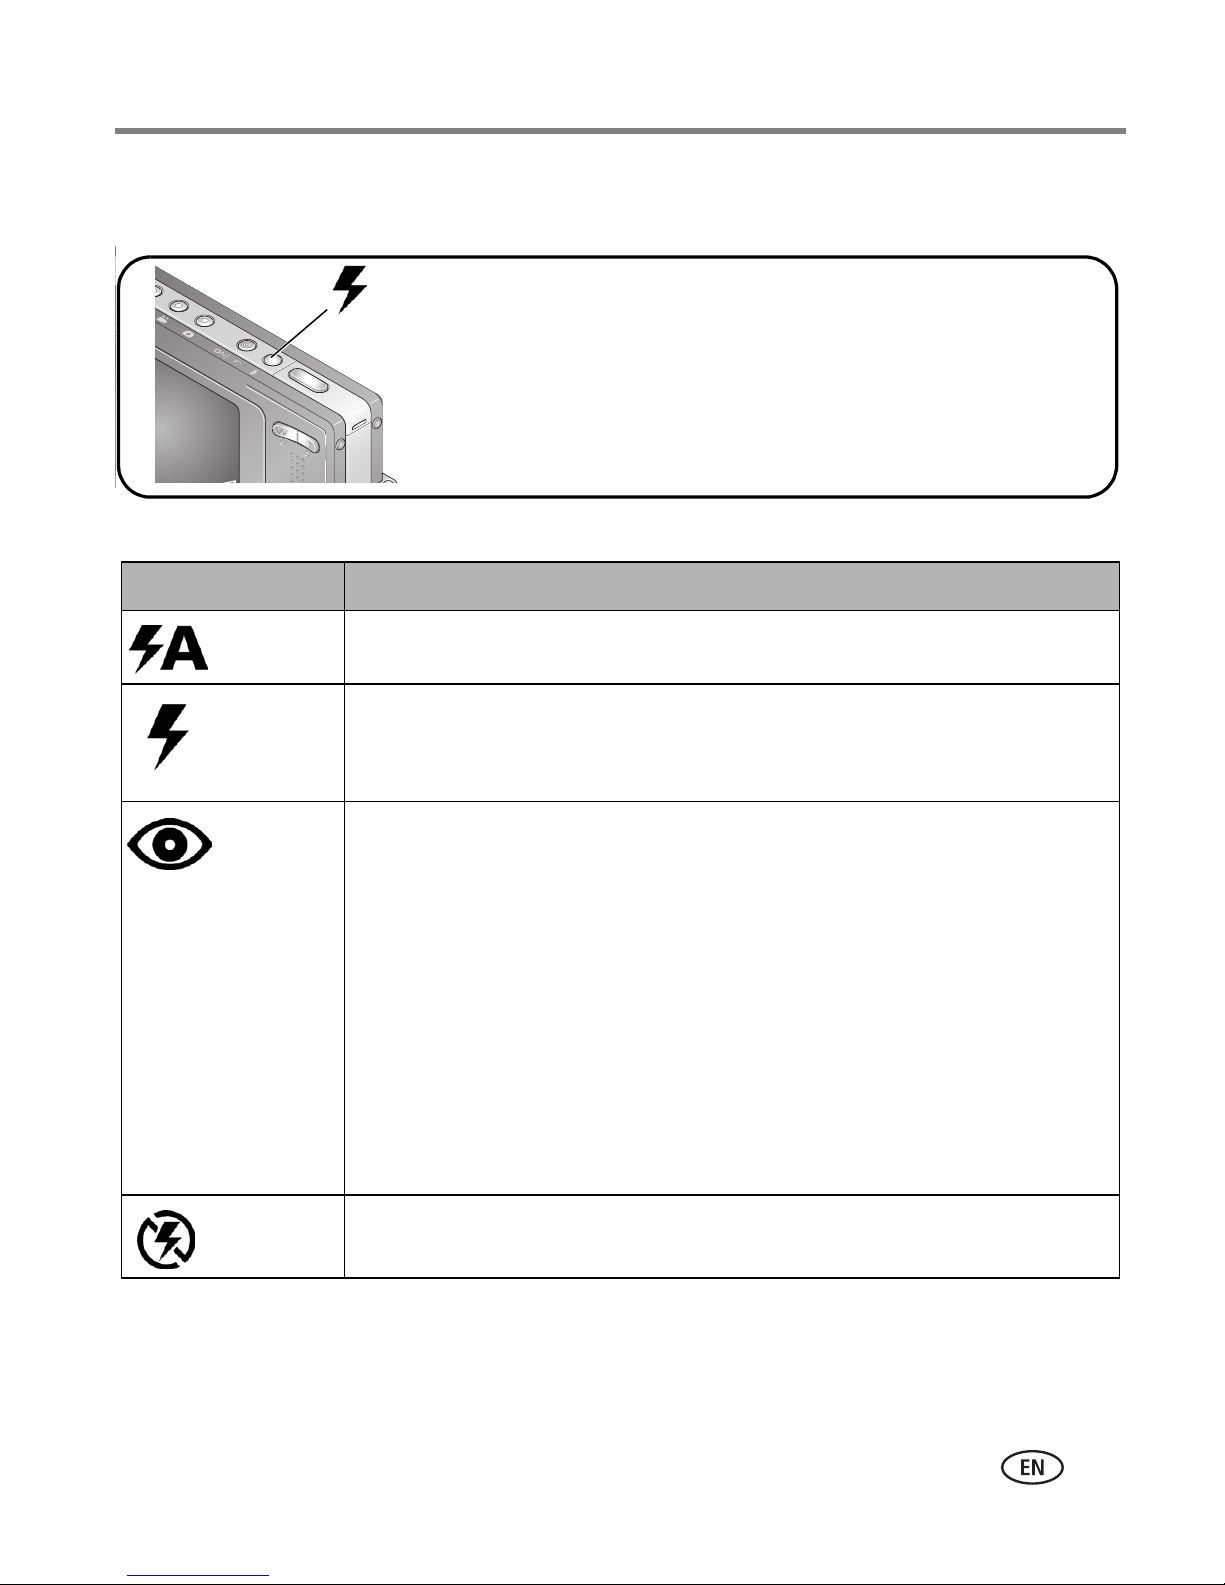
Using the flash
Taking pictures/videos
Press the flash button repeatedly to
scroll through flash modes.
Flash modes Flash fires
Auto When the lighting conditions require it.
Fill Every time you take a picture, regardless of the lighting conditions. Use
when the subject is in shadow or is “backlit” (when light is behind the
subject). In low light, hold the camera steady or use a tripod.
Red Eye In Red Eye flash, you can reduce red eye by using a preflash or by using
automatic red eye reduction. To make the camera:
■ Preflash, turn the Red Eye Preflash on. (The first flash shrinks the
eye pupil to reduce the chance of red eye.)
■ Flash once and automatically remove red eye, turn the Red Eye
Preflash off.
The current flash mode is shown
in the LCD status area.
(To turn the Red Eye Preflash on/off, see page 34.)
NOTE: When automatic red eye reduction is on, the camera cannot take more
Off Never
For flash settings in each mode, see page 65.
www.kodak.com/go/support
than 2 pictures in quick succession. Take more pictures when the Ready
light turns green.
9
Taking pictures/videos
Using different modes
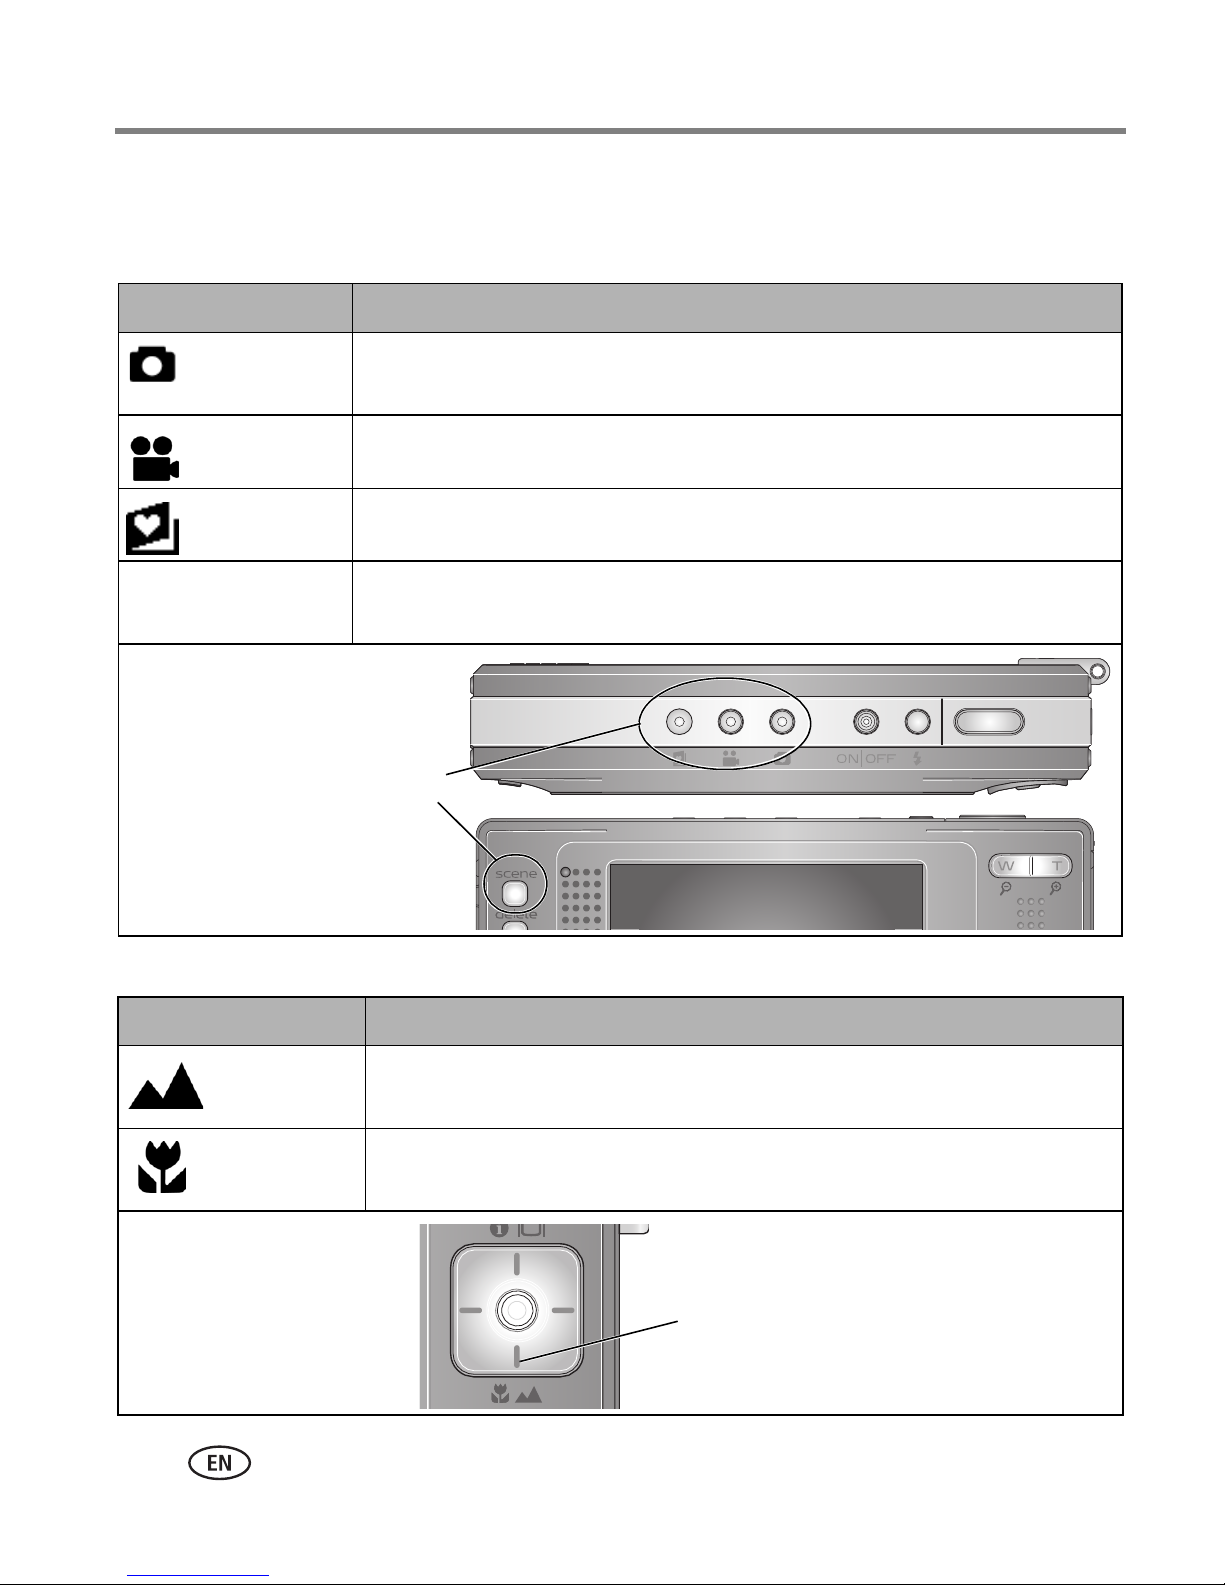
Choose the mode that best suits your subjects and surroundings.
Use this mode For
Auto General picture-taking—offers an excellent balance of image quality
and ease of use.
Video Capturing video with sound. (See page 6.)
Favorites Viewing favorite pictures. (See page 39.)
Scene Point-and-shoot simplicity when taking pictures under special
conditions. (See page 11.)
Press a button to
choose a mode.
Use this mode For
Landscape Far-away scenes. The camera uses infinity auto-focus. Auto-focus
framing marks are not available in Landscape.
Macro Close range. Use available light instead of flash, if possible. Camera
automatically sets focus distance depending on the zoom position.
Press until the Macro or Landscape
icon appears in the LCD status area.
10 www.kodak.com/go/support

Taking pictures/videos
Using Scene modes
Choose a Scene mode—for great pictures in practically any situation!
1 Press the Scene mode button.
2 Press to view scene mode descriptions. (If the mode description turns
off, press the OK or Scene button.)
3 Press the OK button to choose a Scene mode.
NOTE: To exit a Scene mode, press the Auto mode button.
Scene mode For Camera pre-settings
Portrait Full-frame portraits of
people.
Panorama
Left-Right
Panorama
Right-Left
Sport Subjects that are in motion. Fast shutter speed, Multi-Pattern Exposure
Landscape Far-away scenes. The
Close-up Close range. Use available
See page 14. Multi-Zone Focus, Flash off
See page 14. Multi-Zone Focus, Flash off
camera uses infinity
auto-focus.
light instead of flash if
Subject is sharp and the background is indistinct.
Position your subject at least 6 ft (2 m) away and
fill the frame with a head and shoulder pose. Use
Telephoto to exaggerate background blur.
Metering
Auto-focus framing marks are not available in
Landscape.
The camera automatically sets the focus distance
depending on the zoom position.
possible.
Night
Portrait
Reduces red eye of people in
night scenes or low-light
conditions. Place the camera
on a flat, steady surface or
use a tripod.
www.kodak.com/go/support
Multi-Pattern Exposure Metering, Multi-Zone
Focus, Red Eye flash
11

Taking pictures/videos
Scene mode For Camera pre-settings
Night
Landscape
Distant scenery at night.
Flash does not fire. Place the
camera on a flat, steady
Infinity Focus, Center-Weight Metering, Daylight
White Balance, Flash Off, maximum 2-second
exposure
surface or use a tripod.
Snow Bright snow scenes. Center-Weight Metering, Multi-Zone Focus, +1
Exposure Compensation
Beach Bright beach scenes. Center-Weight Metering, Daylight White
Balance, +1 Exposure Compensation
Text Documents. Place the
camera on a flat, steady
Macro Focus, Center-Weight Metering,
Multi-Zone Focus, +1 Exposure Compensation
surface or use a tripod.
Fireworks Flash does not fire. Place the
camera on a flat, steady
surface or use a tripod.
Flower Close-ups of flowers or other
2-second exposure, Infinity Focus,
Center-Weight Metering, Daylight White
Balance
Macro Focus, Daylight White Balance,
small subjects in bright light.
Manner/
Museum
Quiet occasions, like a
wedding or lecture. Flash
and sound are disabled.
Place the camera on a flat,
steady surface or use a
tripod.
SelfPortrait
Close-ups of yourself.
Assures proper focus and
minimizes red eye.
Party People indoors. Minimizes
red eye.
Children Action pictures of children in
bright light.
Center-Zone Focus, Center-Weight Metering
No sounds, no flash, Multi-Pattern Exposure
Metering, Multi-Zone Focus
Macro Focus, Multi-Pattern Exposure Metering,
Multi-Zone Focus, Red Eye Flash
Multi-Pattern Exposure Metering, Multi-Zone
Focus, Red Eye Flash
Multi-Pattern Exposure Metering, Multi-Zone
Focus
12 www.kodak.com/go/support

Taking pictures/videos
Scene mode For Camera pre-settings
Backlight Subjects that are in shadow
or “backlit” (when light is
Multi-Pattern Exposure Metering, Multi-Zone
Focus, Fill-Flash
behind the subject).
Panning
Shot
Shooting a fast-moving
subject. The background
Shutter speed > 1/180 sec., Multi-Zone Focus,
Multi-Pattern Exposure Metering
gives the sense of
movement, while the subject
appears still.
Candle
Light
Subjects illuminated by
candle light.
Multi-Pattern Exposure Metering, Multi-Zone
Focus, Daylight White Balance
Sunset Subjects at dusk. Multi-Pattern Exposure Metering, Multi-Zone
Focus, Daylight White Balance
Custom Choosing your own settings. Settings are saved, even after the camera is
turned off. (To reset, see page 31.)
www.kodak.com/go/support
13
Taking pictures/videos
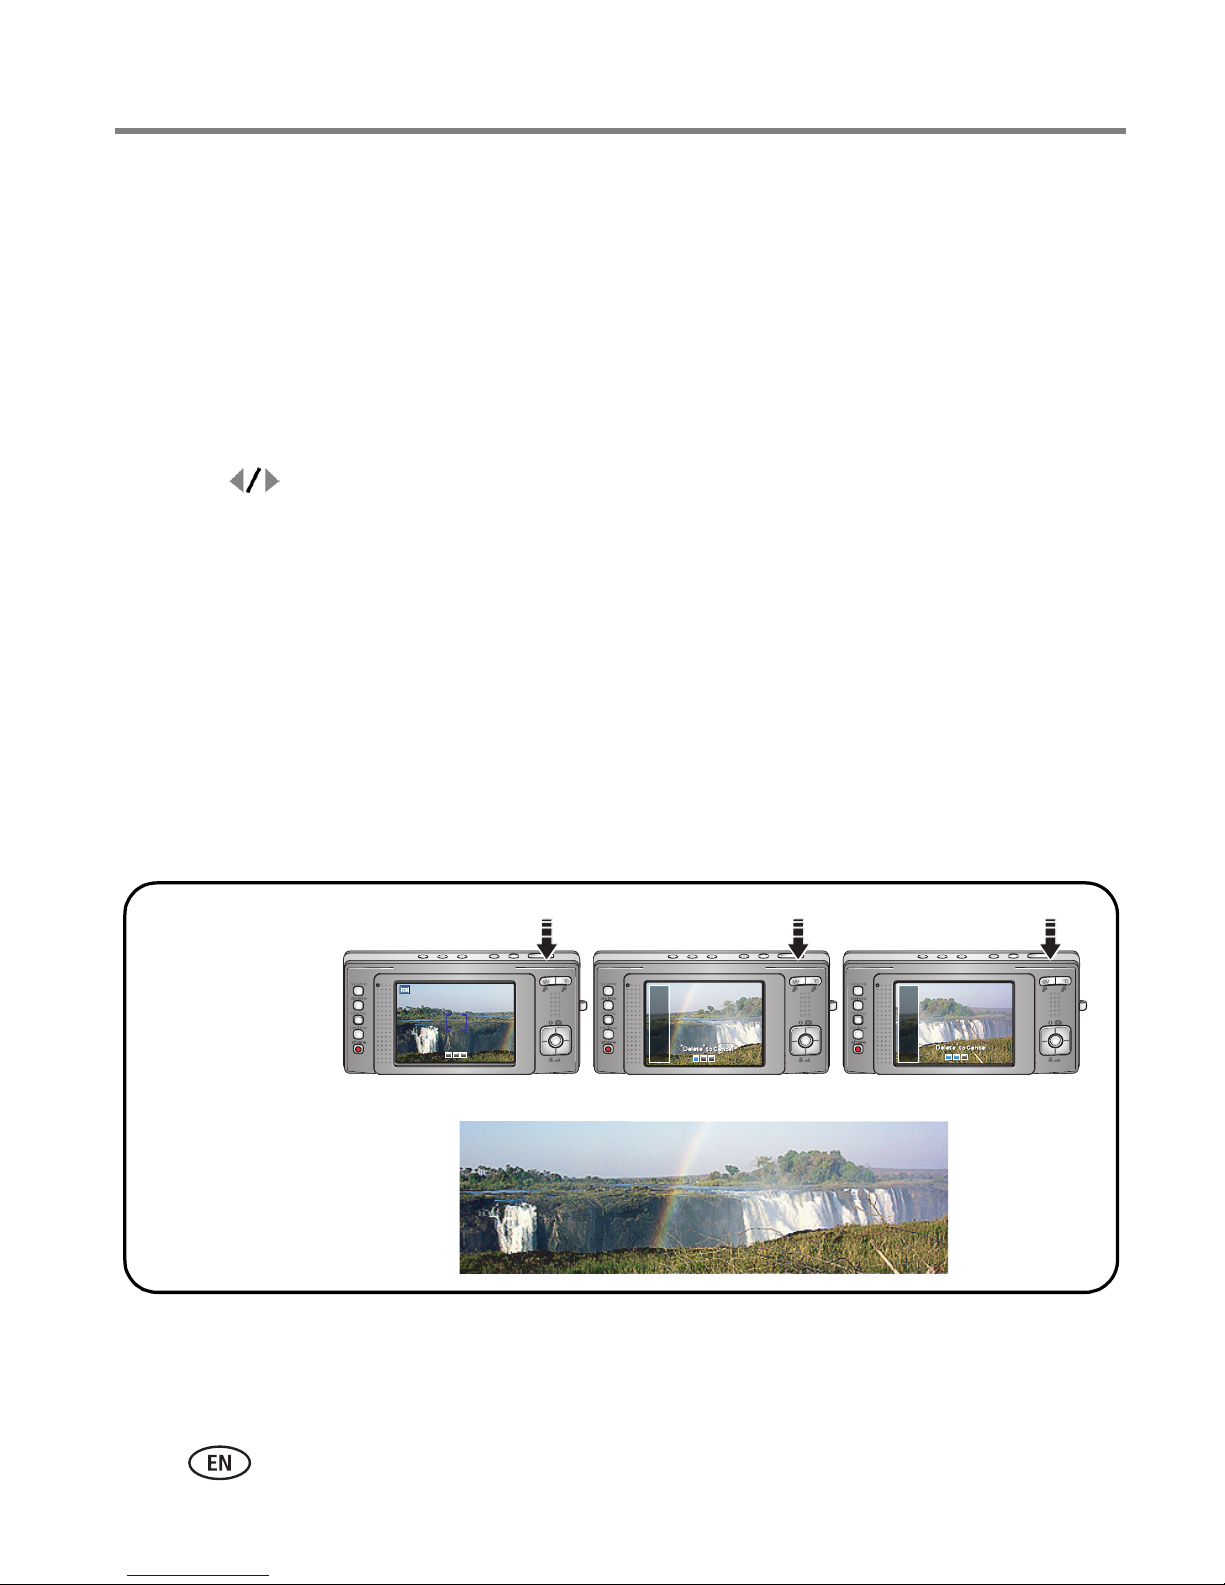
Taking panoramic pictures
Use panorama to “stitch” up to 3 pictures into a panoramic scene.
NOTE: For best results, use a tripod. Only the panoramic picture is saved; individual pictures are not.
(Picture size is set to 3.1 MP for each picture. Exposure and white balance are set with the first
picture. The flash is set to Off.)
1 Press the Scene mode button.
2 Press to highlight Panorama Left-Right or Panorama Right-Left (depending
on the direction you want to pan), then press the OK button.
3 Take the first picture.
After a quickview, the LCD displays the liveview and an “overlay” from the first picture.
4 Compose the second picture. Make the overlay from the first picture cover the
same portion in the new picture. (You may press the Delete button to re-take a
picture.)
5 If you are taking only 2 pictures, press the OK button to stitch them together.
After you take 3 pictures, the pictures are automatically stitched together.
12 3
Take 2 or 3
pictures.
Get 1
panoramic picture.
NOTE: For printing options, visit the
14 www.kodak.com/go/support
Kodak EasyShare
Gallery
www.kodakgallery.com
.
Taking pictures/videos
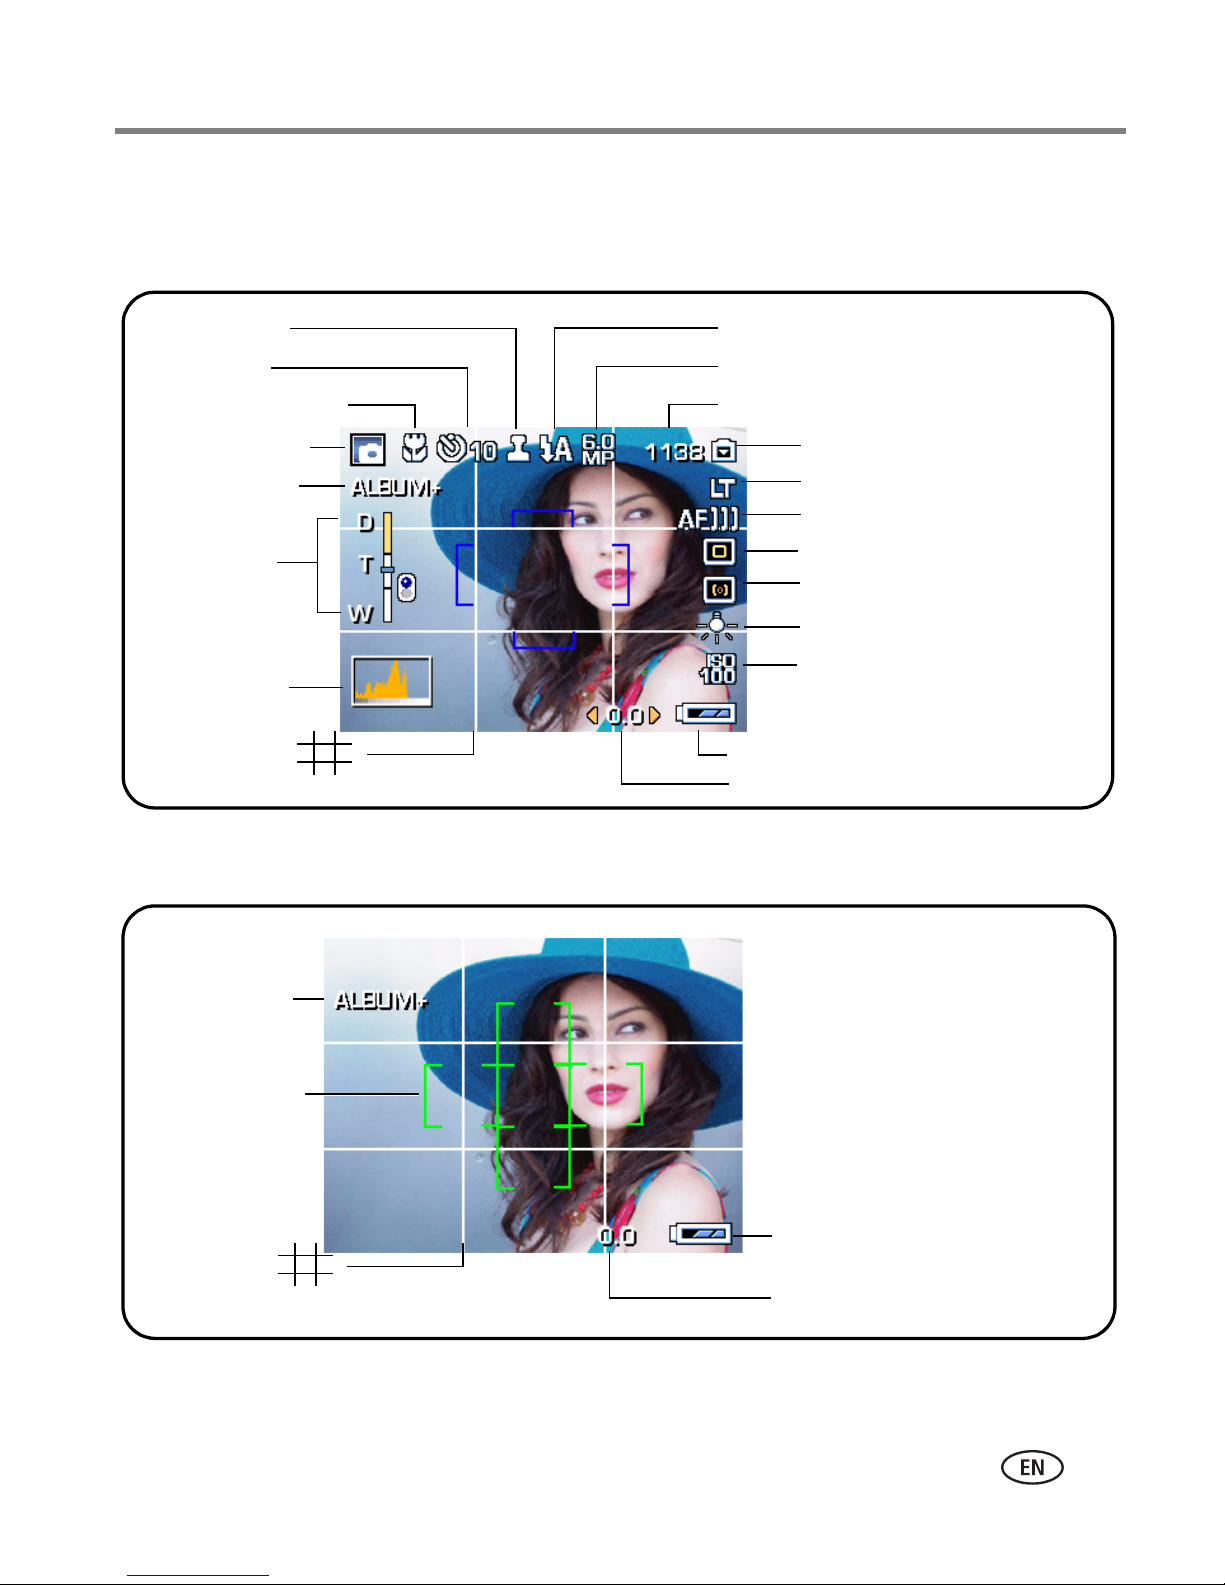
Understanding the picture-taking icons
In capture mode—no buttons pressed
Date stamp
Self timer
Landscape/Macro
Camera mode
Album name
Zoom:
digital
telephoto
wide
Histogram
Framing grid
In capture mode—shutter button pressed halfway
Flash
Picture size
Pictures/time remaining
Image storage location
Long time exposure
AF mode
Focus zone
Exposure metering
White Balance
ISO
Low battery
Exposure compensation
Album name
Focus brackets
Framing grid
www.kodak.com/go/support
Low battery
Exposure compensation
15
3 Working with pictures/videos
Reviewing pictures/videos
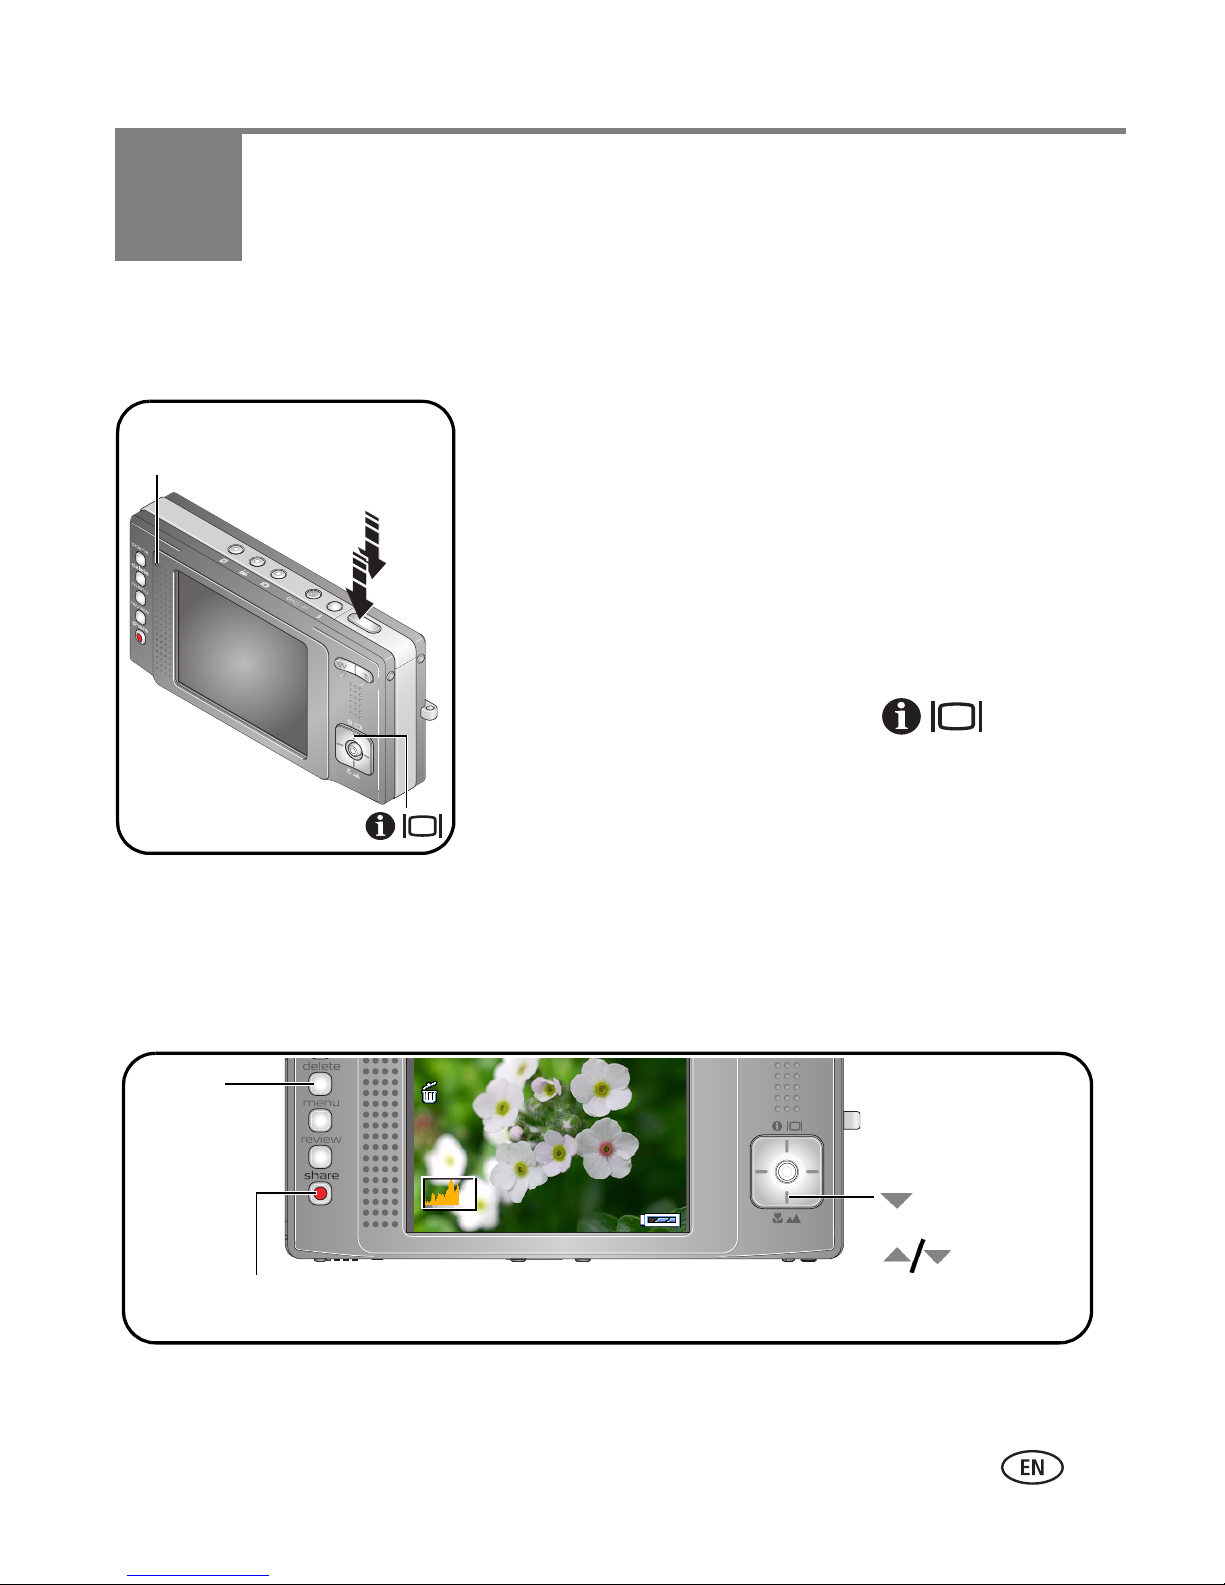
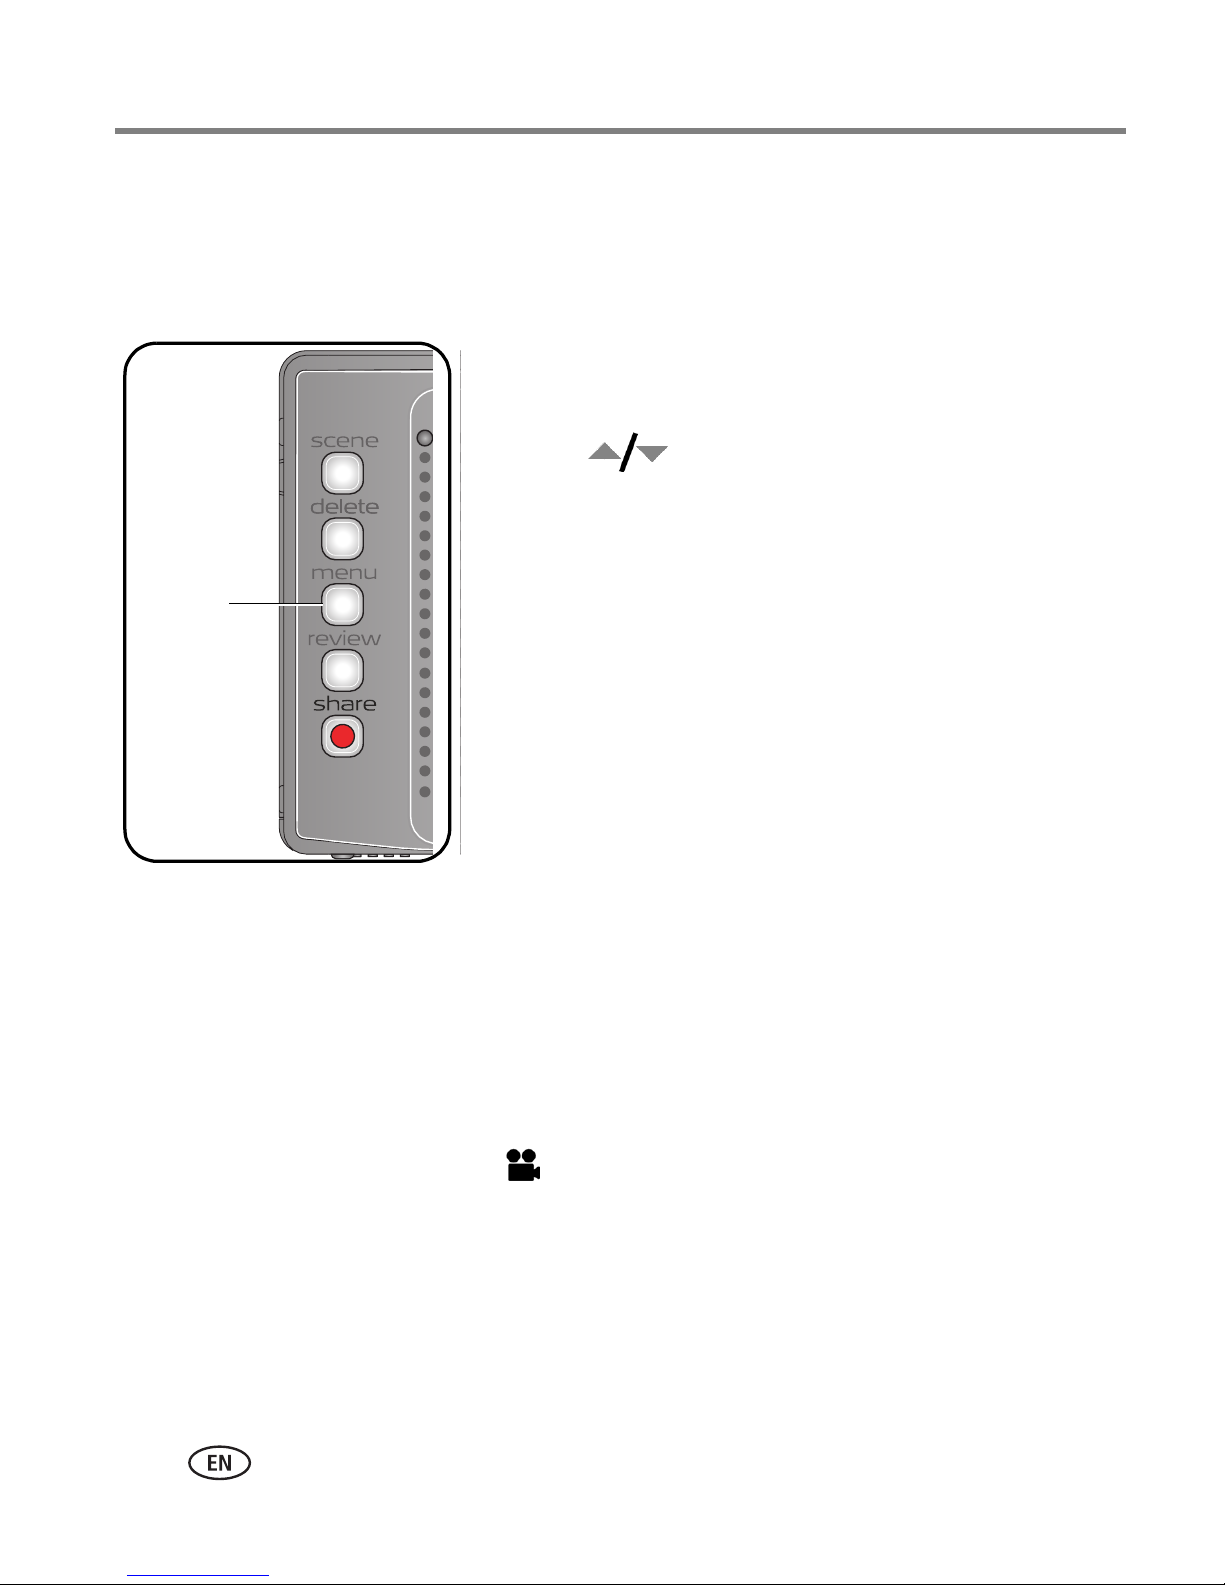
Press the Review button to view and work with your pictures/videos.
1 Press the Review button.
2 Press to view previous/next picture/video.
NOTE: To view pictures with the lens closed, press the Favorites
mode button, then the Review button. To save battery power,
use a Kodak EasyShare photo frame dock 2 or an EasyShare
dock. (Visit
www.kodak.com/go/v610accessories
Magnifying a picture during review
1 Press W/T to magnify 1X–8X.
2 Press to view other parts of the
picture.
3 Press the OK button to return to 1X.
NOTE: If you press W while at 1X, the view changes from
single-picture to multi-up thumbnails. (See page 24.)
Playing a video during review
■ Press to play a video. Press OK pause/unpause.
■ Press to adjust the audio volume playback.
.)
Playback speed
4X
2X
Reverse
2X
Forward
16 www.kodak.com/go/support
4X
■ Press during playback to play at 2X speed; press
again for 4X. Press during playback to reverse at
2X speed; press again for 4X.
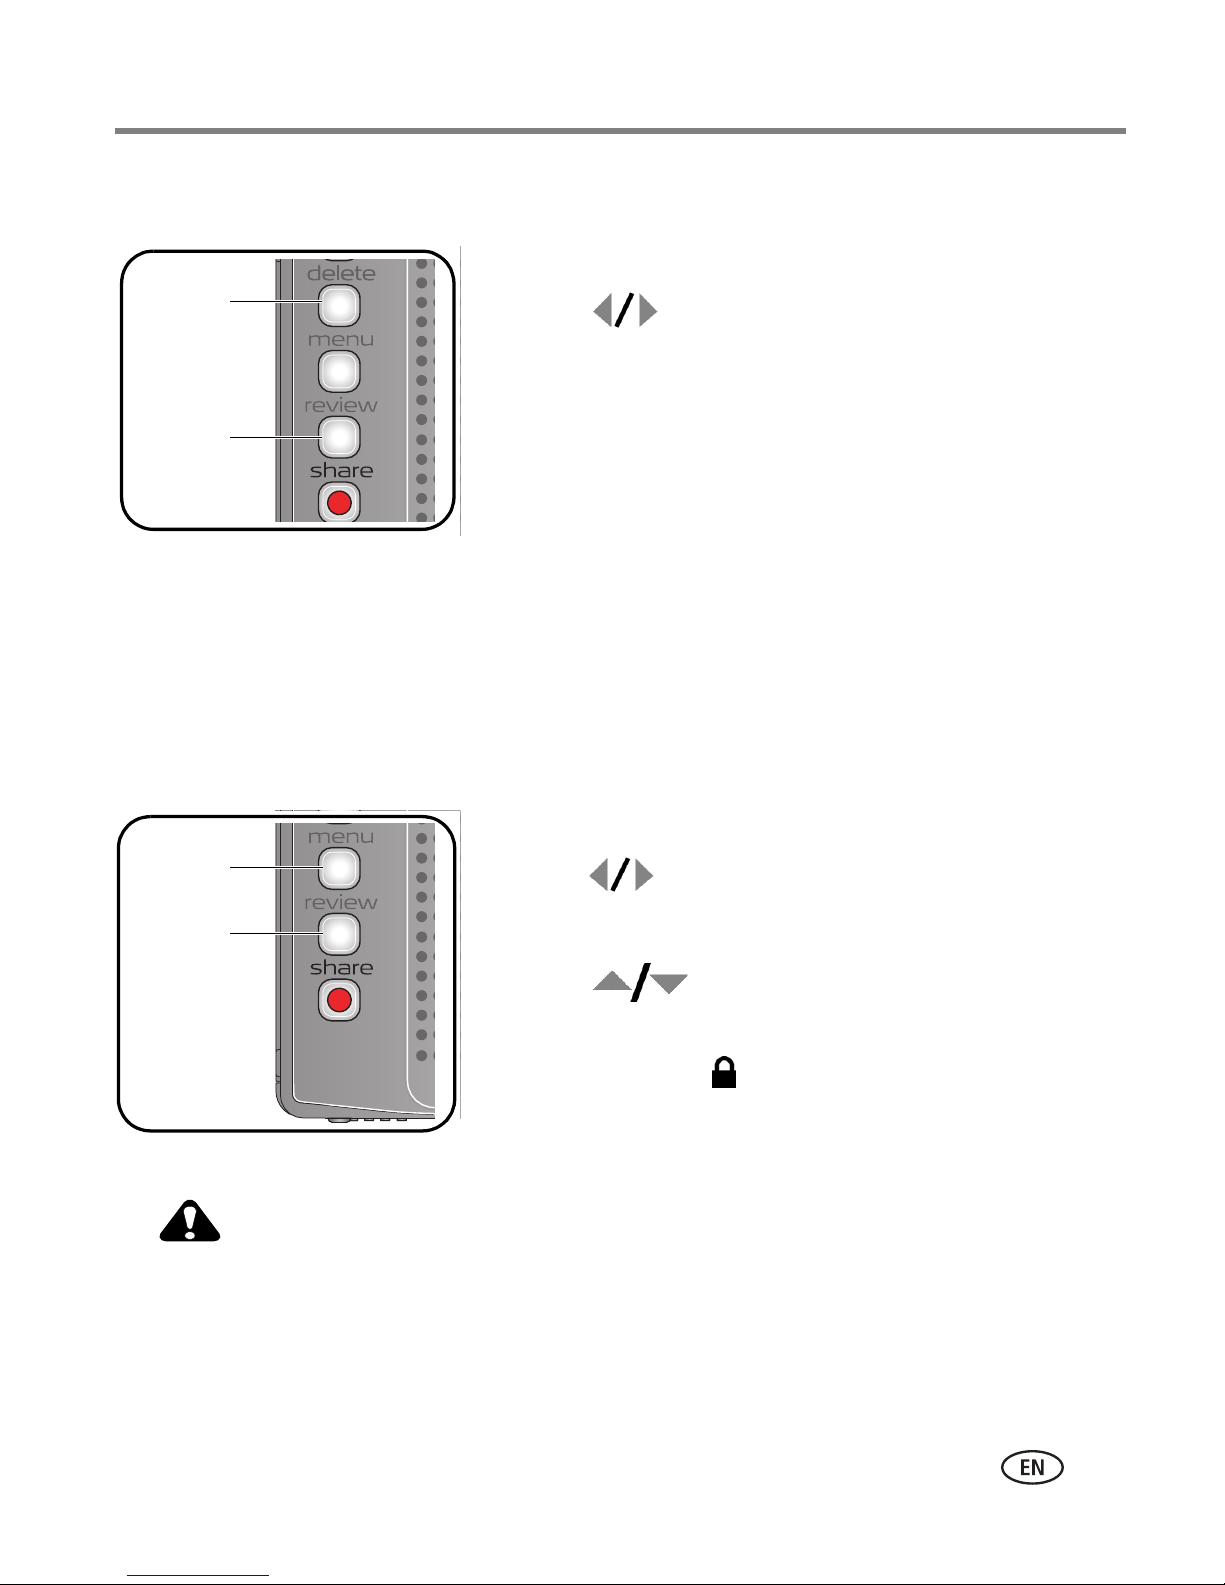
Deleting pictures/videos
1 Press the Review button.
Working with pictures/videos
Delete
2 Press for previous/next picture/video.
3 Press the Delete button.
4 Follow the screen prompts.
Review
NOTE: To select more than one picture, see Viewing as thumbnails
(multi-up), page 24. To delete protected pictures/videos,
remove protection before deleting.
Using the undo delete feature
If you accidentally delete a picture, you may be able to use Undo Delete to retrieve it.
This feature is only available immediately after you delete a picture.
Protecting pictures/videos from deletion
1 Press the Review button.
Menu
2 Press for previous/next picture/video.
Review
3 Press the Menu button.
4 Press to highlight Protect, then press OK.
The picture/video is protected and cannot be deleted.
The Protect icon appears with the protected
picture/video.
■ Press the Menu button to exit the menu.
CAUTION:
Formatting internal memory or an SD or MMC card deletes all (including
protected) pictures/videos. (Formatting internal memory also deletes
email addresses, album names, and favorites. To restore them, see
EasyShare software Help.)
www.kodak.com/go/support
17
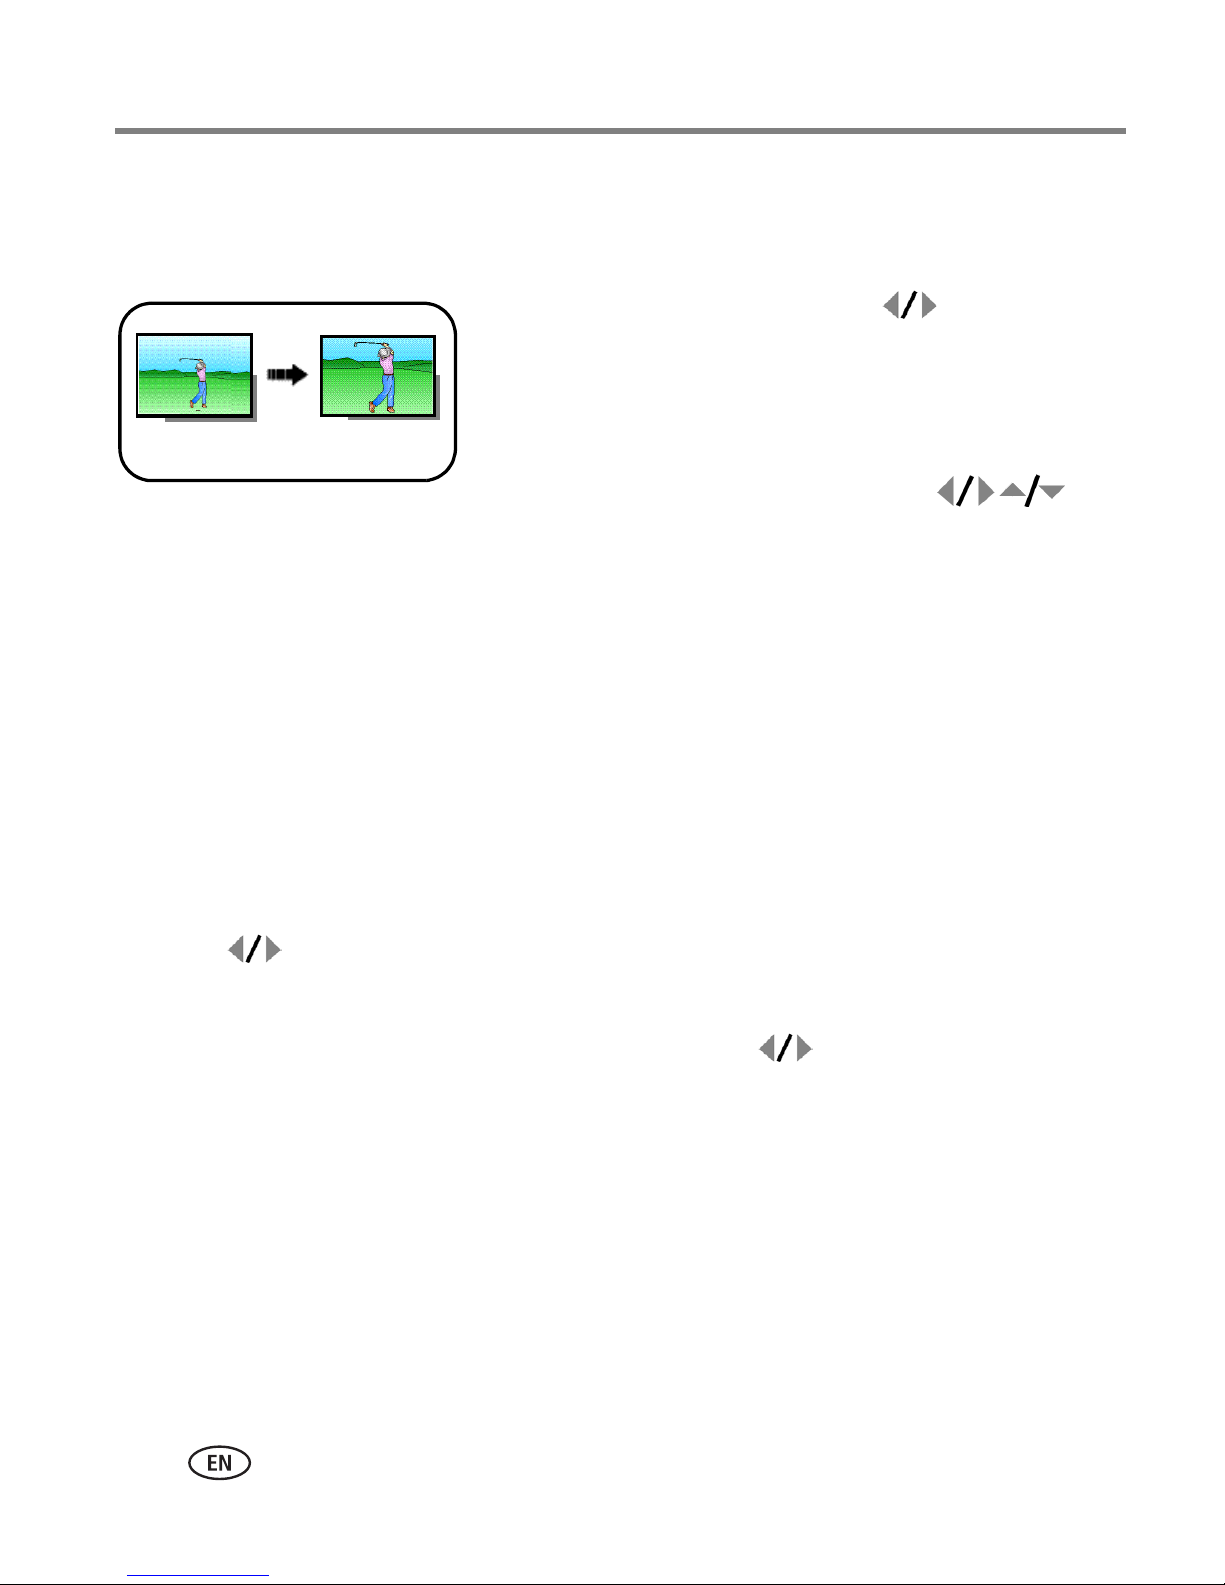
Working with pictures/videos
Cropping pictures
You can crop a picture so that only the desired portion of the picture remains.
1 Press the Review button, then to find a
picture to crop.
2 Press the Menu button, choose Crop, then press the
Picture
Cropped picture
3 Press Telephoto (T) to zoom in, or to
move the crop box. Press the OK button.
4 Follow the screen prompts.
The picture is cropped. (The original is saved.) Cropped
pictures cannot be cropped again on the camera.
OK button.
■ Press the Menu button to exit the menu.
Using Kodak Perfect Touch technology
Kodak Perfect Touch technology helps ensure better, brighter pictures.
1 Press the Review button.
2 Press for previous/next picture.
3 Press the Menu button, choose Perfect Touch tech., then press the OK button.
The enhancement is previewed in a split screen. Press to view other parts of the
picture.
4 Follow the screen prompts to apply or discard the enhancement, and to save as a
new picture or replace the original.
The picture is enhanced. An enhanced picture cannot be enhanced again on the
camera. Kodak Perfect Touch technology can only be used with pictures, not video.
■ Press the Menu button to exit the menu.
18 www.kodak.com/go/support
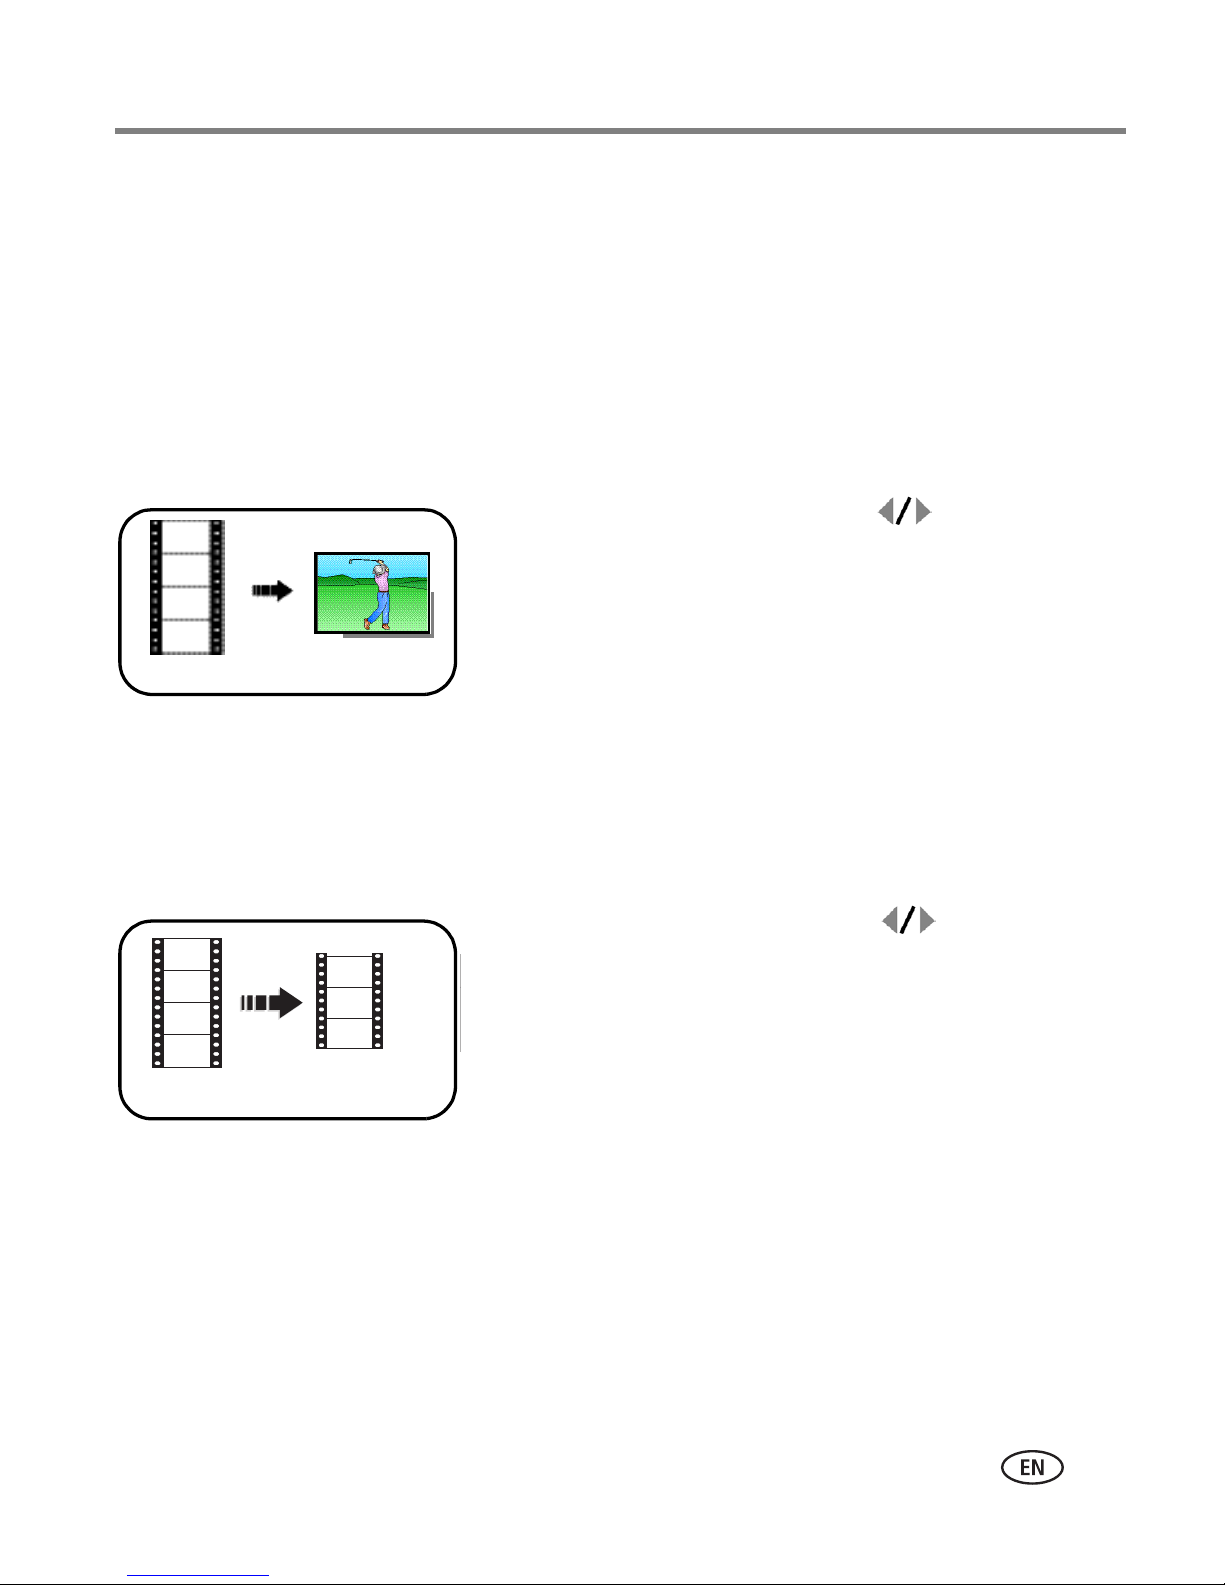
Working with pictures/videos
Editing videos
You can do incredible things with your videos!
Making a picture from a video
You can choose a single frame from a video, then make a picture suitable for a
4 x 6-inch (10 x 15 cm) print.
NOTE: You cannot make a picture from a QVGA 320 x 240 video. (See page 29.)
1 Press the Review button, then to find a video.
2 Press the Menu button, choose Make Picture, then
press the OK button.
Video
Picture
A picture is created. (The original video is saved.)
3 Follow the screen prompts.
■ Press the Menu button to exit the menu.
Trimming a video
You can delete an unwanted portion from the beginning or end of a video.
1 Press the Review button, then to find a video.
2 Press the Menu button, choose Edit Video, then
press the OK button. Choose Trim, then press OK.
3 Follow the screen prompts.
Video
Trimm ed video
The video is trimmed.(You can save it as a new video or
replace the original.)
■ Press the Menu button to exit the menu.
www.kodak.com/go/support
19
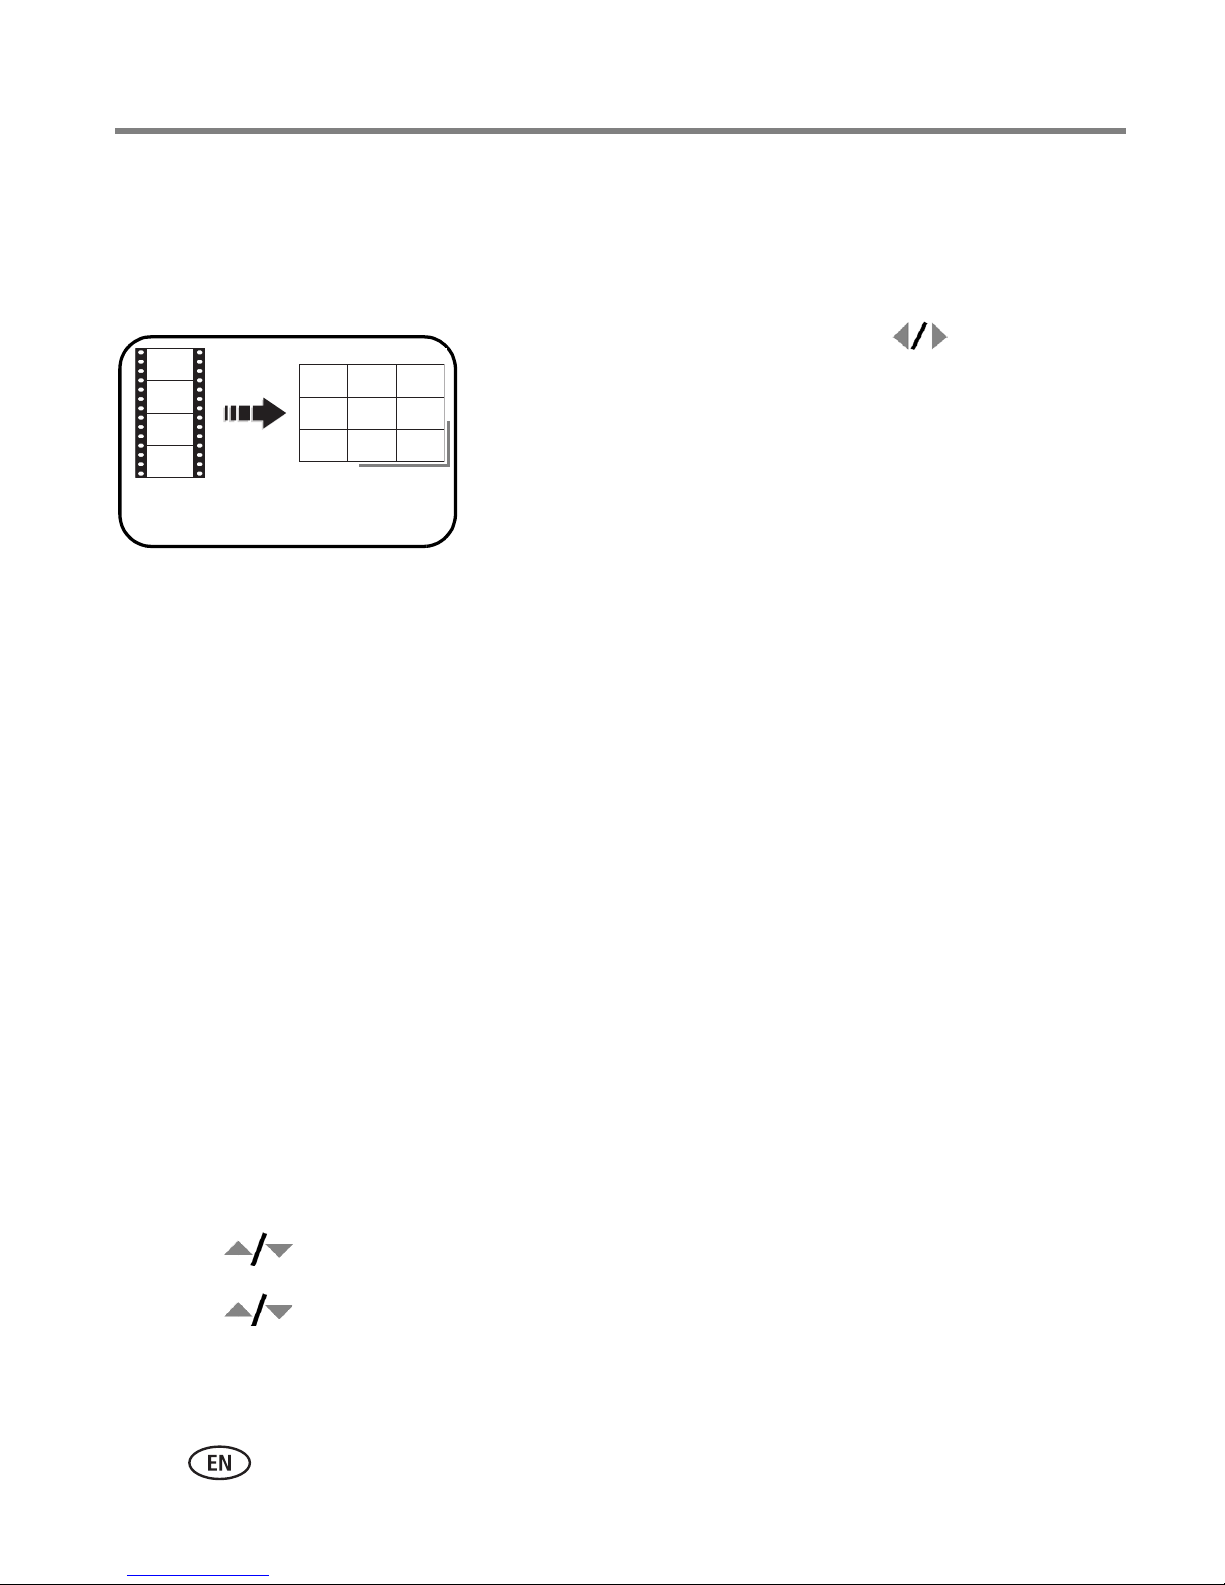
Working with pictures/videos
Making a video action print
From a video, you can make a 4-, 9-, or 16-up picture, suitable for a 4 x 6-inch
(10 x 15 cm) print.
1 Press the Review button, then to find a
video.
2 Press the Menu button, choose Edit Video, then
press the OK button. Choose Action Print, then
Video
3 Choose an option, then press the OK button.
Auto options: The camera includes the first and last frames, then 2, 7, or 14
equally spaced frames.
4-, 9-, or
16-up picture
press the OK button.
Manual options: You choose the first and last frames; the camera chooses 2, 7,
or 14 equally spaced frames.
Full Manual options: You choose all frames.
A 4-, 9-, or 16-up picture is created. (The original video is saved.)
■ Press the Menu button to exit the menu.
Running a slide show
Use Slide Show to display your pictures/videos on the LCD.
NOTE: If you have an EasyShare photo frame dock 2, see page 23.
Starting the slide show
1 Press the Review button, then the Menu button.
2 Press to highlight Slide Show, then press the OK button.
3 Press to highlight Begin Show, then press the OK button.
Each picture/video is displayed once.
To interrupt the Slide Show, press the OK button.
20 www.kodak.com/go/support

Working with pictures/videos
Changing the slide show display interval
The default interval setting displays each picture for 5 seconds. You can set the display
interval from 3–60 seconds.
1 On the Slide Show menu, press to highlight Interval, then press the OK
button.
2 Select a display interval.
To scroll through the seconds quickly, press and hold .
3 Press the OK button.
The interval setting remains until you change it.
Running a continuous slide show loop
When you turn on Loop, the slide show is continuously repeated.
1 On the Slide Show menu, press to highlight Loop, then press the OK button.
2 Press to highlight On, then press the OK button.
3 Press to highlight Begin Show, then press the OK button.
The slide show repeats until you press the OK button or until battery power is
exhausted. The Loop feature remains until you change it.
Choosing a slide show transition
1 On the Slide Show menu, press to highlight Transition, then press the OK
button.
2 Press to select a transition, then press the OK button.
www.kodak.com/go/support
21
 Loading...