

Page 1
Using Kodak EasyShare Cameras
Josh Burker | josh_burker@misd.wednet.edu
October 2005
The Kodak EasyShare DX6340 is a digital still camera. These instructions will walk you through
the basics of using the camera.
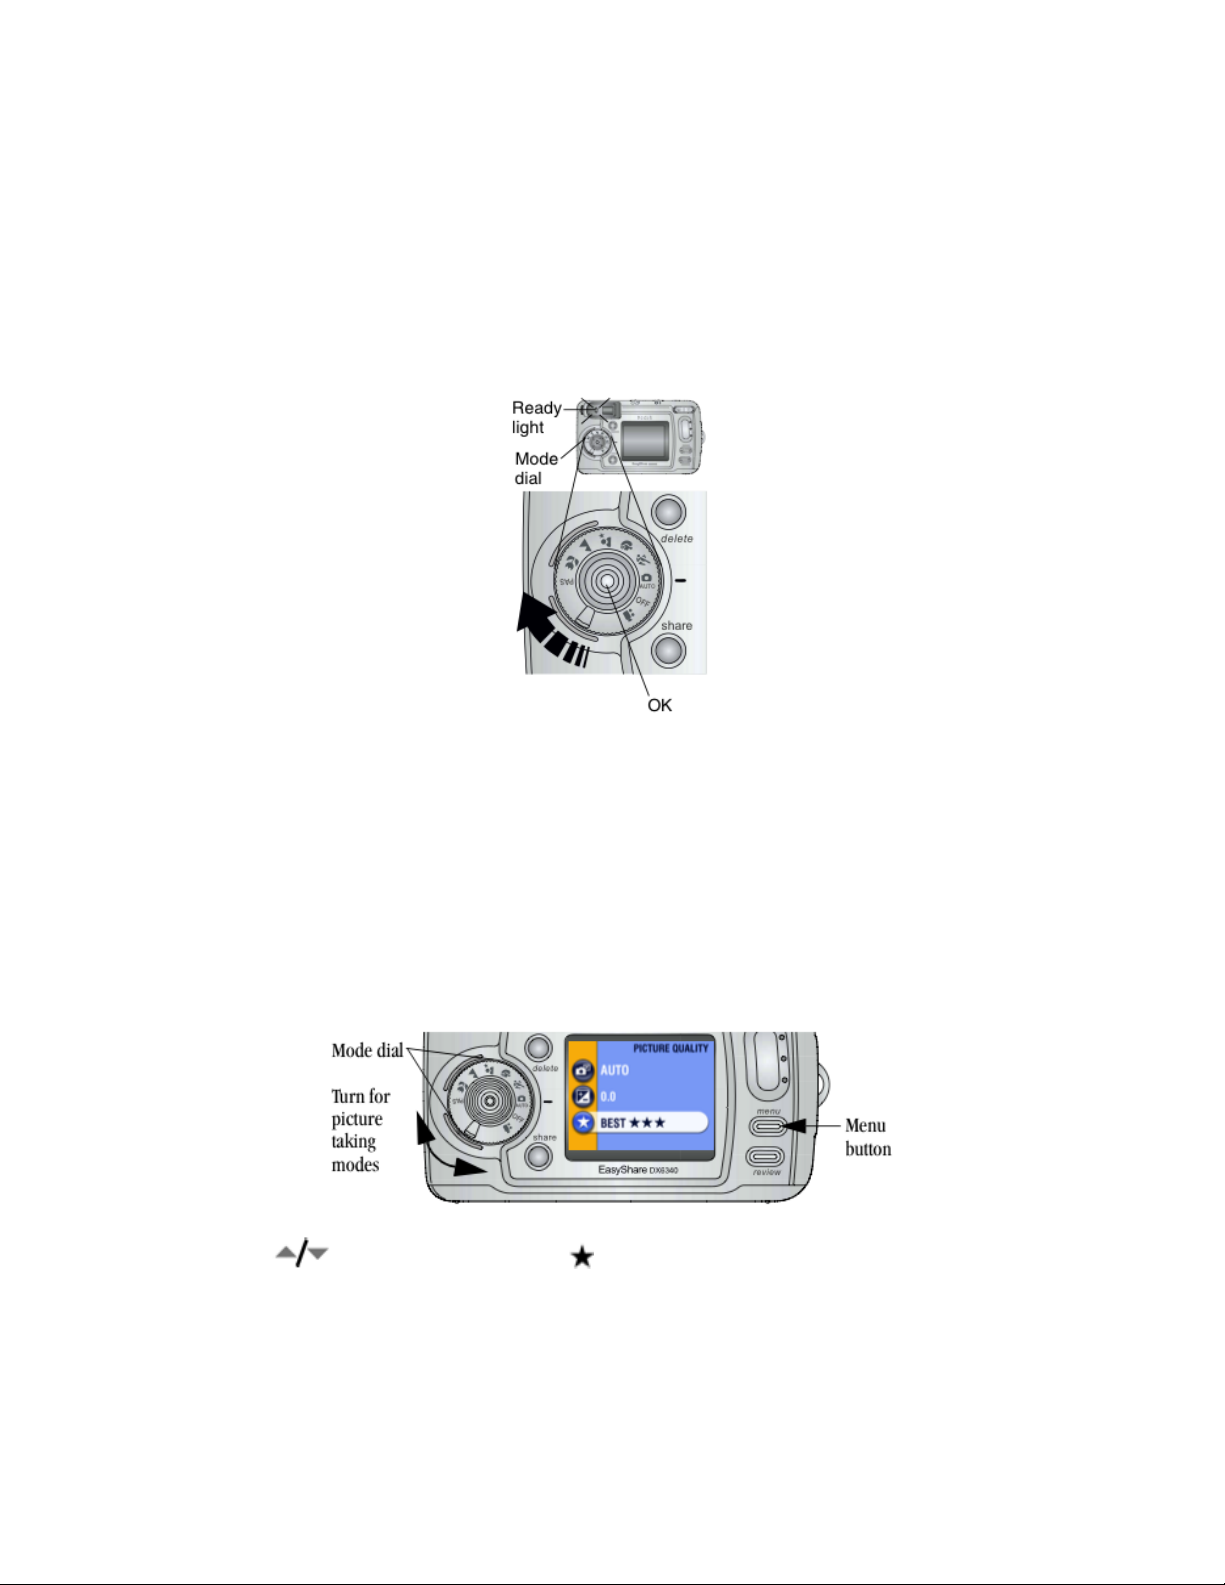
Begin by turning on the camera. You move the mode dial clockwise to the Auto position to turn
on the camera.
The Ready light will blink green as the camera warms up and performs diagnostic checks.
When the Ready light glows solid green the camera is ready to take photos.
The back of the camera includes an LCD display that you can use while you take your
photographs. To turn on the display press the OK button in the middle of the mode dial, pictured
above. Note that using the display will reduce the battery life of the camera.
In order to fit the maximum number of photographs in the camera’s memory it is advisable that
you take your photos in Good or Better quality. Picture quality is configured from the camera’s
menu. Make sure the camera is powered on. Press the Menu button on the camera to show the
picture quality setting.
Press the button to highlight Quality then press the OK button in the middle of the
mode dial. Highlight either Good or Better picture quality settings. Press the OK button in the
middle of the mode dial to exit the menu. The picture quality setting will remain the same until it
is changed.
Once you have set the picture quality you are ready to start taking your photographs.
Page 2
Make sure the camera is powered on by turning the mode dial to Auto. If you wish you may turn
on the display on the back of the camera by pressing the OK button in the middle of the mode
dial. Otherwise, frame your subject in the viewfinder on the back of the camera.
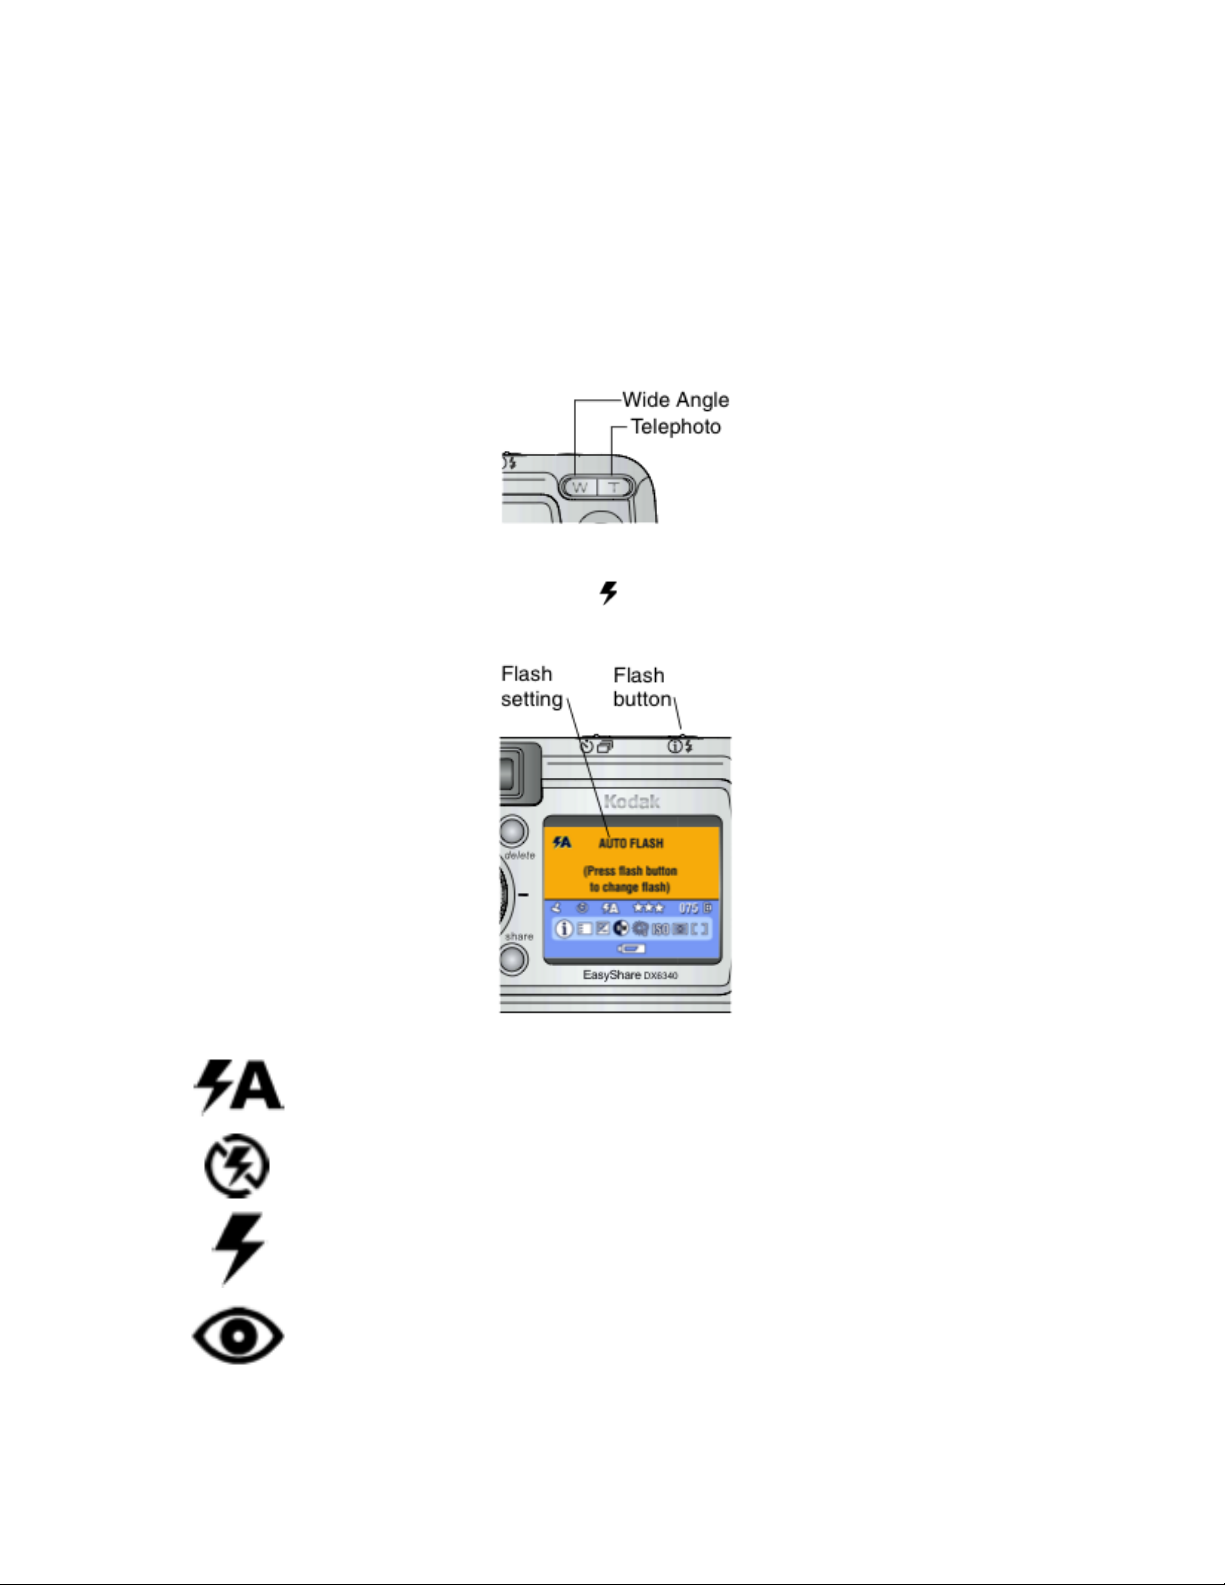
The camera is equipped with an optical zoom that allows you to get “closer” to your subject. The
optical zoom is most effective when you are at least 20 inches from your subject. When the
camera is first powered on the lens extends to the Wide Angle position. Use the viewfinder or the
camera’s display to frame your subject. Then use the Telephoto (T) button to zoom in, or the
Wide Angle (W) button to zoom out.
Additionally, the camera is equipped with a flash. You use the flash indoors, at night, or outdoors
when there is heavy shadow. Press the Flash button repeatedly to cycle through the various
flash options.
Auto Flash: The flash will fire when lighting conditions require it.
Flash Off: The flash will not fire with this setting.
Fill Flash: The flash will fire every time you take a picture regardless of the
lighting conditions.
Red-eye: The flash will flash once to get the subject’s eyes used to the flash,
then a second time when the photo is taken for illumination. The flash may not
fire a second time if lighting conditions do not require it.
Page 3

When you are ready to take your picture press the shutter button halfway down. This sets the
exposure as well as the focus. When the ready light glows solid green you may press the
shutter button completely down to take the photo.
After you take a photograph the image is displayed on the camera’s screen for five seconds.
While the picture is displayed there are a few options you may take. If you take no action the
picture will be saved to the camera’s memory. You may choose to delete the photo. While the
picture and the icon are displayed you may press the Delete button to remove the photo from
the camera.
Once you have taken all the photos you need you should connect the camera to your computer to
download the photos. Make sure the camera is powered off by turning the mode dial to OFF.
Plug the labeled end of the USB cable into your computer’s USB port. Plug the other end of
the cable into the USB port on the camera. You need to open the cover on the side of the
camera to access the USB port. Please see the Using iPhoto documentation for instructions on
downloading the pictures to your computer.
Page 4

After downloading your photos to from the camera to your computer and before you return the
camera you should charge the camera’s battery. This gets the camera ready for the next person
who uses it.
The camera charges on the included Camera Dock. Make sure the camera is powered off by
turning the mode dial to OFF. Match the alignment pins and the connector on the Camera Dock
to the camera.
Push down the camera until it is secure. Plug the AC adapter into the back of the Camera Dock
and plug the transformer into an electrical socket. The charging lights on the Camera Dock will
illuminate after the battery is tested.
It takes about two and a half hours to completely charge the battery. Charging stops if the
camera is turned on, so make sure the mode dial is set to OFF when the camera is in the dock.
When you are finished using the camera make sure the Camera Dock, the AC adapter, the
camera, and the USB cable are all returned to their box. Sign off on the checkout sheet to make
certain all the parts are in the box and that the battery is charged and return the camera to the
library.
Images from the Kodak EasyShare DX6340 Instruction Manual are used here for non-commercial purposes and are ©
Kodak
 Loading...