

KitchenAid KSM2CB5BM Owner's Manual
Tigela de Cerâmica
Imagem meramente ilustrativa.
W11368199B.indb 1W11368199B.indb 1 3/19/2020 12:32:51 PM3/19/2020 12:32:51 PM
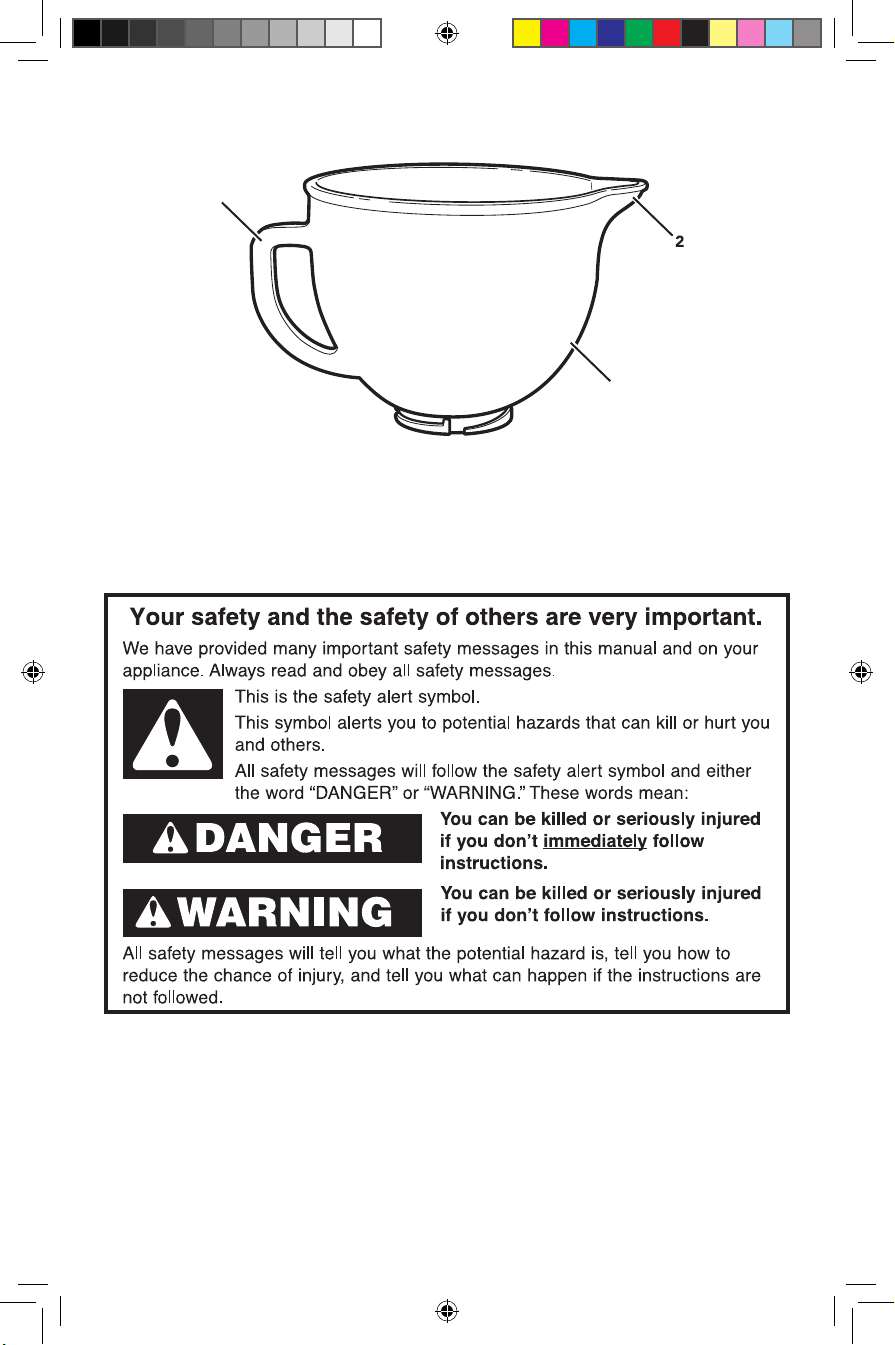
PARTS AND FEATURES
1
2
3
1 Bowl Handle
2 Pour Spout
3 Ceramic Bowl
PRODUCT SAFETY
IMPORTANT SAFEGUARDS
When using electrical appliances, basic safety precautions should always be
followed. Please refer to the basic Important Safeguards as outlined in the
Instructions manual included with your Stand Mixer.
SAVE THESE INSTRUCTIONS
2
W11368199B.indb 2W11368199B.indb 2 3/19/2020 12:32:52 PM3/19/2020 12:32:52 PM
ENGLISH
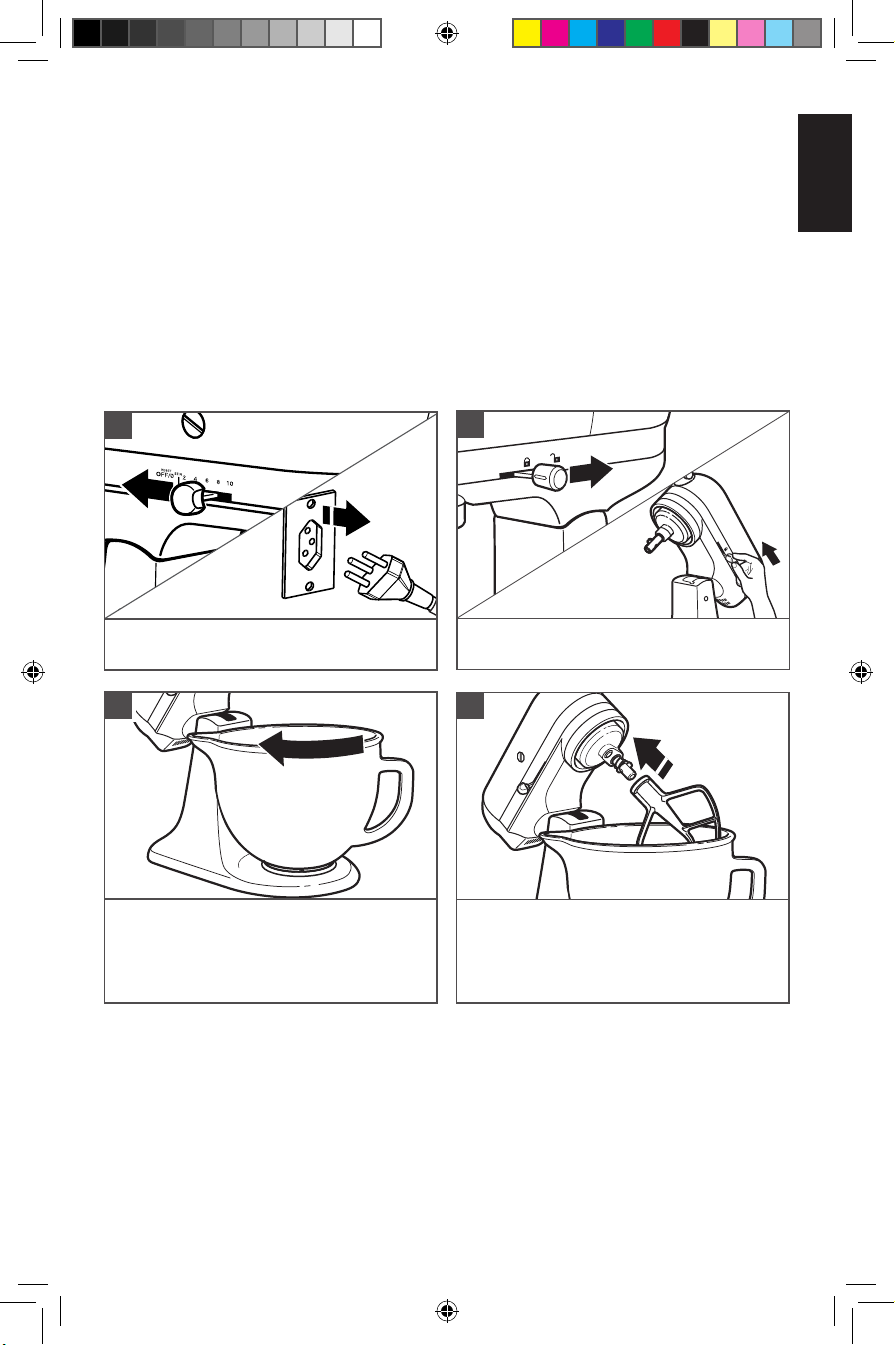
PRODUCT ASSEMBLY
Before First Use
Your Stand Mixer is individually adjusted at the factory for optimal performance. When
using the Ceramic Bowl, it may be necessary to readjust the Beater-to-Bowl Clearance.
When correctly positioned, the Bowl Handle and Pour Spout should not touch the
pedestal of the Stand Mixer. Please refer to the Stand Mixer Instructions Manual for
complete information on adjusting the Beater-To-Bowl Clearance.
IMPORTANT: Before use, wash with hot, soapy water; rinse and dry thoroughly. It is not
necessary to season the Ceramic Bowl before use.
NOTE: This Ceramic Bowl is designed to fit all 4.3 and 4.8 liters: Classic (KEA26) and
Artisan (KEA28, KEA30, KEA33, KED33). Follow these instructions to attach the Ceramic
Bowl to your Stand Mixer.
1
Turn the Stand Mixer OFF (0) and unplug.
3
Place the Ceramic Bowl on the clamping
plate, and attach by turning gently in a
clockwise direction.
2
Unlock and lift the Motor Head. Then,
lock* the head to keep it lifted.
4
Attach the appropriate accessory for your
recipe, using the directions in the Stand
Mixer Instructions Manual. Then place the
Motor Head back in the down position and
lock into place.
*Locking option is available on selected models.
3
W11368199B.indb 3W11368199B.indb 3 3/19/2020 12:32:52 PM3/19/2020 12:32:52 PM
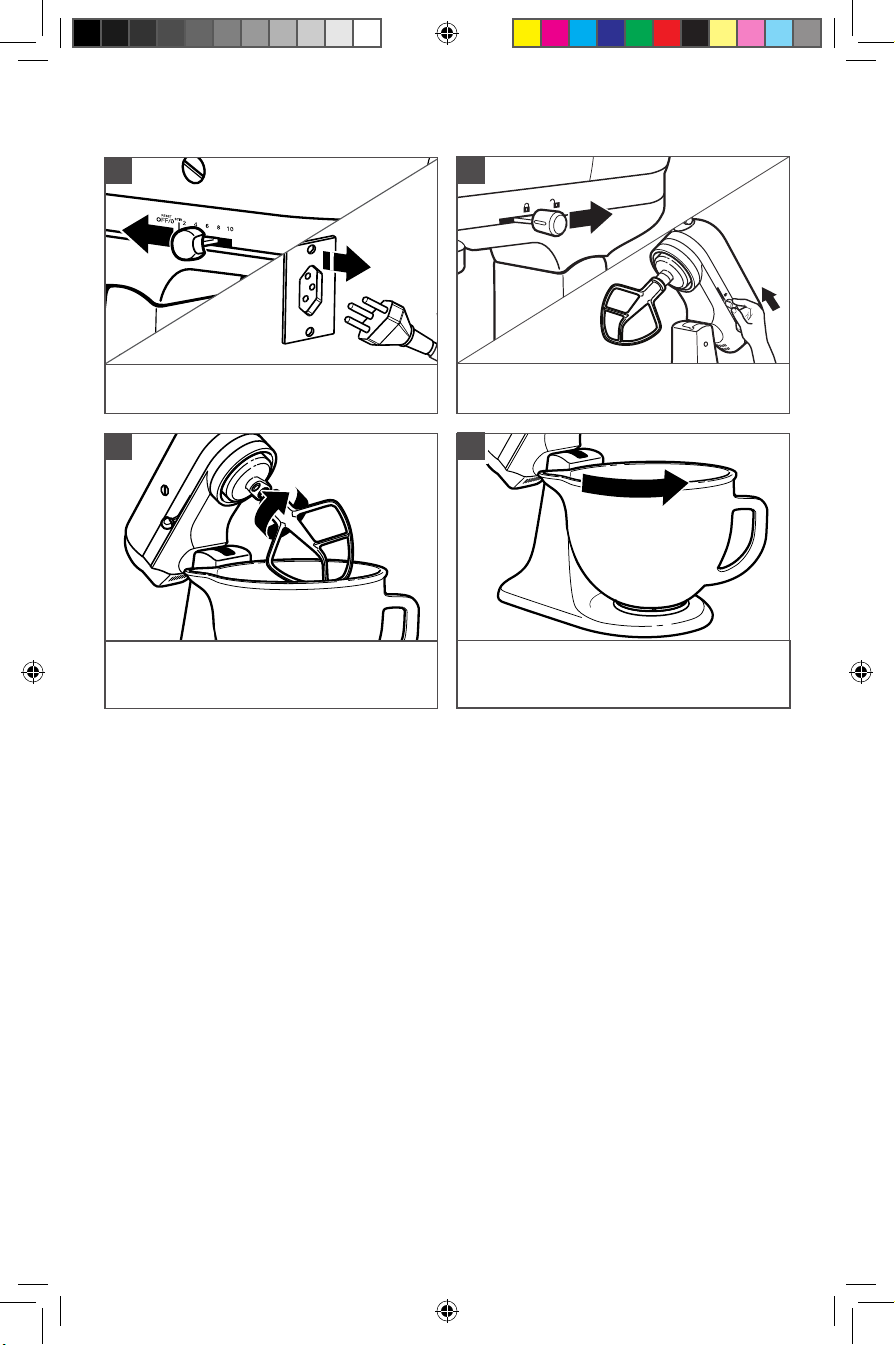
PRODUCT DISASSEMBLY
1
Turn the Stand Mixer OFF (0) and unplug.
3
Press the accessory upward as far as
possible, then turn the accessory clockwise
and pull it away from the Beater Shaft.
*Locking option is available on selected models.
2
Unlock and lift the Motor Head. Then,
lock* the head to keep it lifted.
4
Gently turn the Ceramic Bowl
counterclockwise to release it from the Bowl
Clamping Plate.
4
W11368199B.indb 4W11368199B.indb 4 3/19/2020 12:32:52 PM3/19/2020 12:32:52 PM
 Loading...