


GET
GRINDING!
GET GRINDING!
DISCOVER MORE
AT KITCHENAID.COM.AU OR KITCHENAID.CO.NZ
For exciting recipes, demo videos, product registration, and more, our quick start
page has what you need to help you get the most from your new product.
VIDEOSGUIDES
KitchenAid.au | KitchenAid.nz
W11244095A
5KSMMGAA
06/18
W11244095Av02.indd 1 6/5/2018 5:46:01 PM
SUPPORT
Specifications subject to change without notice.
REGISTERRECIPES
©2018 All rights reserved.
GET STARTED
QUICK START GUIDE
In a few easy steps, you’ll be on your way to enjoying something delicious!
For complete instructions and videos, go online to KitchenAid.au or KitchenAid.nz.
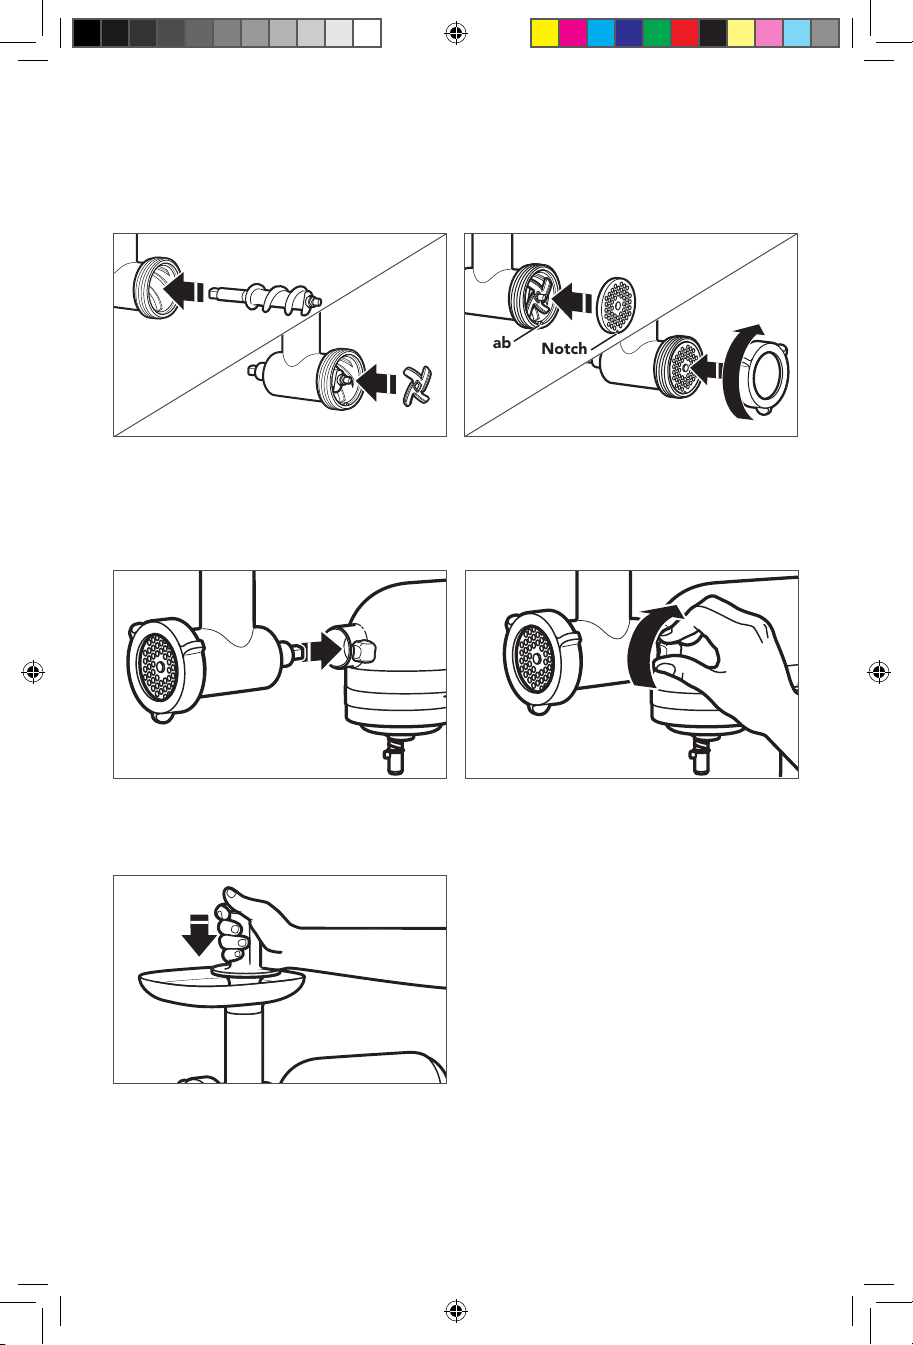
Tab
Notch
1. Insert the grind screw into the main
housing. Then, place the blade over the
end of the grind screw. The blade should
fit entirely inside the housing. If it doesn’t,
pull it off, turn it over, and place it again.
3. Insert the attachment shaft housing into
the attachment hub, making certain
the power shaft fits into the square hub
socket.
2. To grind food: Place grinding plate over
the blade, matching the notch of the
plate with the tab on the bottom of the
main housing. Then, place the collar on
the main housing, turning clockwise until
secured but not tightened.
4. Tighten the Stand Mixer attachment hub
knob clockwise until the attachment is
completely secured to the Stand Mixer.
NOTE: To use the sausage stuffer, please
refer to your Use and Care Guide for
detailed instructions for assembly, use,
and helpful tips for best results.
5. Cut food into pieces sized to fit through
the feed tube. Then, turn the Stand
Mixer to Speed 4 and feed food into the
feed tube using the food pusher.
W11244095Av02.indd 2 6/5/2018 5:46:01 PM
 Loading...