

Page 1

WD 222 / 2 / 2001
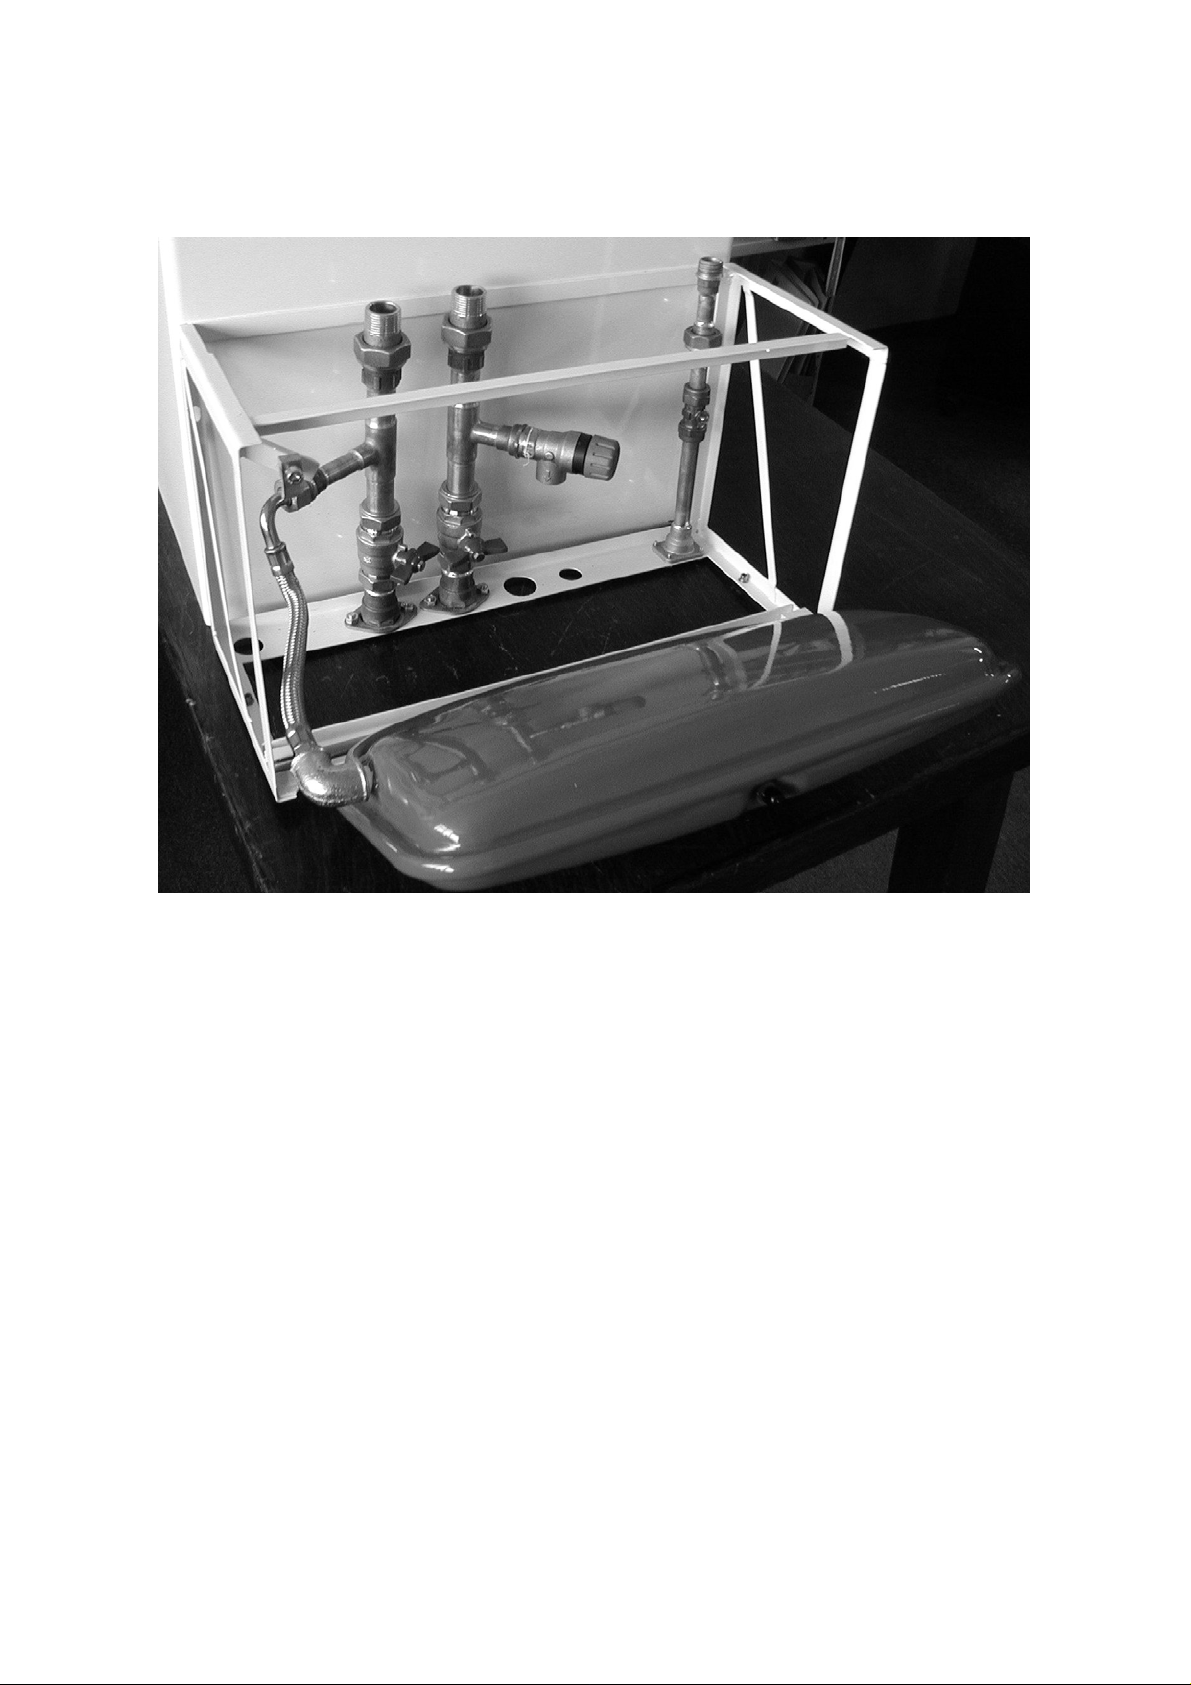
SEALED SYSTEM POD
Installation Instructions
The Celsius 25 sealed system kit incorporates a 3.0 bar safety valve and an 8 litre
expansion vessel. Consideration should be given to total system volume to ensure
that the 8 litre vessel supplied is of adequate capacity. In the event the required
expansion vessel volume exceed 8 litres an appropriately sized additional expansion
vessel should be installed on the primary system return.
1) Remove the system pod assembly from the packaging.
2) Remove the pod cover by removing the two securing allen bolts from the
underside of the pod.
3) Using the template supplied with the Celsius 25 boiler for guidance mark, drill
and plug the two holes in the wall for the fixing screws.
4) Fix the pod frame to the wall using No. 8 screws or equivalent. Ensure the
pod is levelled and secure.
5) Make flow, return and gas connections to the underside of the system pod.
6) Connect the safety valve discharge pipe to the safety valve incorporated in
the system pod. Ensure all requirements regarding discharge pipe termination
are observed.
By closing the flow, return and gas isolating valves incorporated in the system pod
the external pipework can be soundness tested. The pod also serves are a
pre-installation "jig" so that the boiler can be fitted at a later date.
7) Fit the gas, flow and return pipe tails, packed with the system pod, to the
system kit valves and loosely tighten the compression connections - see the
sketch on the next page.
8) Fix the boiler wall bracket to the wall using the fixing holes drilled in step 3)
above. Mount the boiler and connect following the installation instructions
supplied with the boiler. Tighten the union fittings for gas, flow and return to
the underside of the boiler.
9) Tighten the compression connections to the isolating valves in the system
pod. Check there are no leaks on any of the connections.
10) Open the isolating valves and commission the boiler.
11) Fit the system pod cover to the pod frame and secure in position using the
allen bolts removed in step 2.
END
Page 2
WD 222 / 2 / 2001
 Loading...