

Page 1
DVD PLAYER
KDV-S210P
INSTRUCTION MANUAL
Take the time to read through this instruction manual.
Familiarity with installation and operation procedures will help you
obtain the best performance from your new DVD player.
For your records
Record the serial number, found on the back of the unit, in the spaces
designated on the warranty card, and in the space provided below. Refer to the
model and serial numbers whenever you call upon your KENWOOD dealer for
information or service on the product.
Model KDV-S210P Serial number
© B64-2805-10/10 (K)
Page 2

Contents
2Warning
3
Safety precautions 4
Before Use 5
Notes on playing MP3 6
About the remote 7
About discs 8
Basic features 9
Power
Play
Mute
Skip
Fast Forward and Reverse
Repeat play
A-B Repeat Play [DVD][VCD][CD]
Switching Display
DVD Video/Video CD features 12
Search Play
Slow Motion Play
DVD menu/Top (title) menu [DVD]
Audio Language select [DVD]
Subtitle Language select [DVD]
Picture Angle select [DVD]
Zoom [DVD]
PBC [VCD]
Digest Screen [DVD]
CD/MP3 features 15
MP3 Folder List [MP3]
Program Play
Direct Skip Play
Play Time Search [CD]
MP3 Play Mode [MP3]
Random Play
Setup menu 18
Setup menu
General Setup
Speaker Setup
Audio Setup
Preferences
Accessories 21
Installation 21
Connecting Wires to Terminals 22
Troubleshooting Guide 23
Specifications 24
2
|
English
[DVD]: Function of during DVD playback only.
[VCD]: Function of during Video CD playback. only
[CD]: Function of during CD playback. only
[MP3]: Function of during MP3 playback only.
Page 3

2Warning
2CAUTION
Use of controls or adjustments or performance of
procedures other than those specified herein may
result in hazardous radiation exposure.
In compliance with Federal Regulations, following
are reproductions of labels on, or inside the product
relating to laser product safety.
KENWOOD CORPORATION
2967-3, ISHIKAWA-CHO,
HACHIOJI-SHI
TOKYO, JAPAN
KENWOOD CORP. CERTIFIES THIS EQUIPMENT
CONFORMS TO DHHS REGULATIONS N0.21 CFR
1040. 10, CHAPTER 1, SUBCHAPTER J.
Location : Bottom Panel
FCC WARNING
This equipment may generate or use radio
frequency energy. Changes or modifications to
this equipment may cause harmful interference
unless the modifications are expressly approved
in the instruction manual. The user could lose
the authority to operate this equipment if an
unauthorized change or modification is made.
NOTE
This equipment has been tested and found to
comply with the limits for a Class B digital device,
pursuant to Part 15 of the FCC Rules. These limits
are designed to provide reasonable protection
against harmful interference in a residential
installation. This equipment may cause harmful
interference to radio communications, if it is
not installed and used in accordance with the
instructions. However, there is no guarantee
that interference will not occur in a particular
installation. If this equipment does cause harmful
interference to radio or television reception, which
can be determined by turning the equipment off
and on, the user is encouraged to try to correct
the interference by one or more of the following
measures:
• Reorient or relocate the receiving antenna.
• Increase the separation between the equipment
and receiver.
• Connect the equipment into an outlet on a
circuit different from that to which the receiver is
connected.
• Consult the dealer or an experienced radio/TV
technician for help.
English
|
3
Page 4

Safety precautions
2WARNING
To prevent injury or fire, take the
following precautions:
• Insert the unit all the way in until it is fully locked
in place. Otherwise it may fall out of place when
jolted.
• To prevent a short circuit, never put or leave any
metallic objects (such as coins or metal tools)
inside the unit.
• If the unit starts to emit smoke or strange smells,
turn off the power immediately and consult your
Kenwood dealer.
• Do not connect the unit to the front monitor. This
unit is for rear seat entertainment.
• Do not use any power cable other than the
accessory. This could cause fire.
2CAUTION
To prevent damage to the machine, take
the following precautions:
• Make sure to ground the unit to a negative 12V
DC power supply.
• Do not open the top or bottom covers of the unit.
• Do not install the unit in a spot exposed to direct
sunlight or excessive heat or humidity. Also avoid
places with too much dust or the possibility of
water splashing.
• Do not use your own screws. Use only the screws
provided. If you use the wrong screws, you could
damage the unit.
• When replacing a fuse, only use a new one with
the prescribed rating. Using a fuse with the wrong
rating may cause your unit to malfunction.
NOTE
• If you experience problems during installation,
consult your Kenwood dealer.
• The illustrations of the display and the panel
appearing in this manual are examples used to
explain more clearly how the controls are used.
Therefore, what appears on the display in the
illustrations may differ from what appears on
the display on the actual equipment, and some
of the illustrations on the display may represent
something impossible in actual operation.
• If the unit fails to operate properly, turn the power
off and then on. If the unit still fails to operate
properly after the power has been turned off
and on, contact your local Kenwood dealer for
assistance.
|
4
English
Restrictions due to difference beteen
discs
Inhibition
some functions may not work as intended by you.
Please be sure to read the instructions provided
with each disc. When an inhibition icon is displayed
on the monitor, it indicates that the disc being
played is under the restriction as described above.
Some DVD and VCD discs can be
icon
played only in certain playback modes
according to the intentions of the
software producers. As this player plays
discs according to their intentions,
Lens Fogging
Right after you turn on the car heater in cold
weather, dew or condensation may form on
the lens in the CD player of the unit. Called lens
fogging, CDs may be impossible to play. In such
a situation, remove the disc and wait for the
condensation to evaporate. If the unit still does
not operate normally after a while, consult your
Kenwood dealer.
Cleaning the Unit
If the faceplate of this unit is stained, wipe it with a
dry soft cloth such as a silicon cloth.
If the faceplate is stained badly, wipe the stain off
with a cloth moistened with neutral cleaner, then
wipe neutral detergent off.
• Applying spray cleaner directly to the unit may affect its
mechanical parts. Wiping the faceplate with a hard cloth
or using a volatile liquid such as thinner or alcohol may
scratch the surface or erases characters.
This product incorporates copyright protection
technology that is protected by U.S. patents
and other intellectual property rights. Use of
this copyright protection technology must be
authorized by Macrovision, and is intended for
home and other limited viewing uses only unless
otherwise authorized by Macrovision. Reverse
engineering or disassembly is prohibited.
NOTE
This Class B digital apparatus complies with
Canadian ICES-003.
Page 5
Before Use
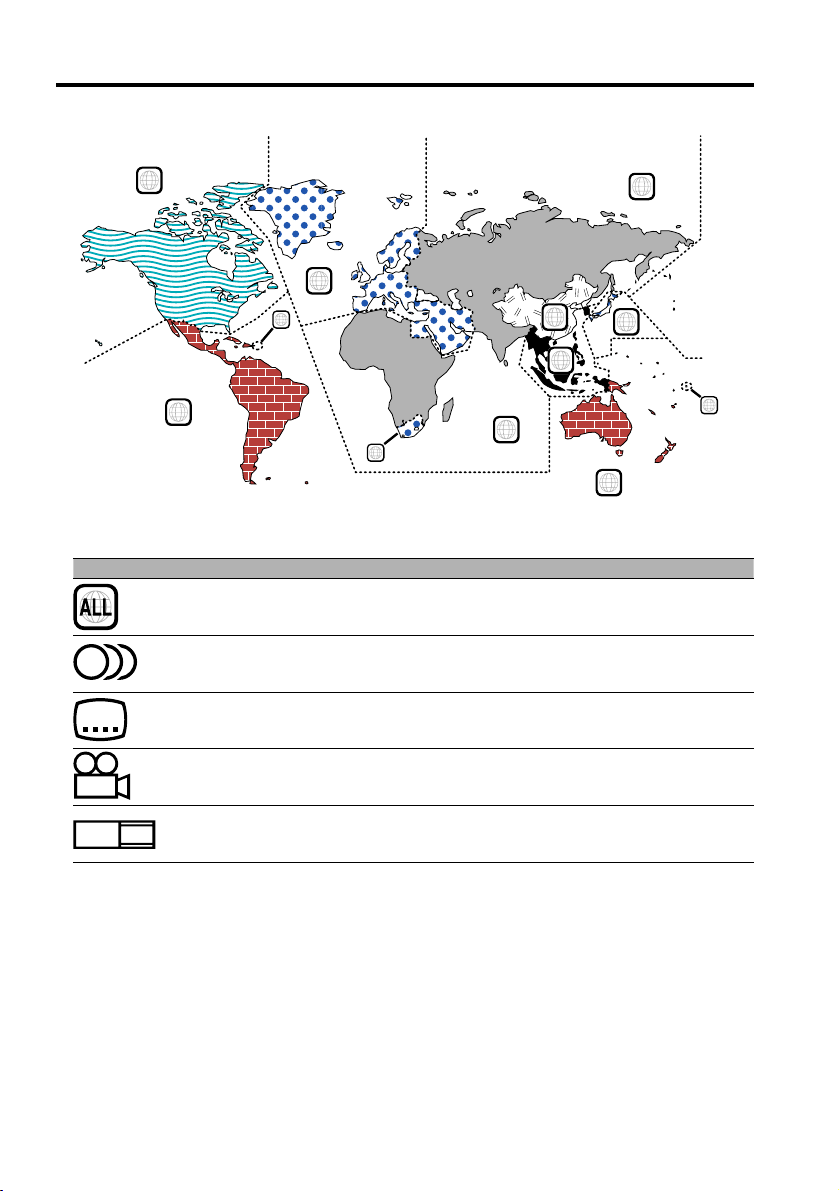
Region codes in the world
1
4
Icons on the DVD discs
Icon Description
Indicates the region code where the disc can be played.
8
32
Number of voice languages recorded with the audio function. The number in the
icon indicates the number of voice languages. (Max. 8 languages)
Number of subtitle languages recorded with the subtitle function. The number in the
icon indicates the number of subtitle languages. (Max. 32 languages)
5
2
1
2
6
3
5
2
1
4
Number of angles provided by the angle function. The number in the icon indicates
9
16:9 LB
the number of angles. (Max. 9 angles)
Aspect ratios that can be selected. "LB" stands for Letter Box and “PS” for Pan/Scan. In
the example on the left, the 16:9 video can be converted into letter box video.
Playable discs
• DVD-Video
• Audio Disc (CD)
• MP3 format Disc (CD)
• CD-R/RW format Disc
• Video CD Disc
Also, you cannot play back the DVD-R discs if not recorded in the DVD-Video format.
About the usable temperatures
The protective circuit in the unit activates when the temperature inside the DVD player exceeds 60°C
(140°F). Refer to Trouble Shootiing Guide (p 23).
English
|
5
Page 6
Notes on playing MP3
KDV-S210P can play MP3 (MPEG1, 2 Audio Layer 3).
Note, however, that the MP3 recording media and
formats acceptable are limited. When writing MP3,
pay attention to the following restrictions.
Acceptable media
The MP3 recording media acceptable to this unit
are CD-ROM, CD-R, and CD-RW.
When using CD-RW, do full format not quick format
to prevent malfunction.
Acceptable medium formats
The following formats are available for the media
used in this unit. The maximum number of
characters used for file and folder name including
the delimiter (".") and three-character extension are
indicated in parentheses.
• ISO 9660 Level 1 (12 characters; Up to 11
characters are displayed)
• ISO 9660 Level 2 (31 characters; Up to 11
characters are displayed)
• Joliet (64 character; Up to 11 characters are
displayed)
• Romeo (128 character; Up to 11 characters are
displayed)
• Long file name (200 characters; Up to 11
characters are displayed)
• Maximum number of characters for folder name:
128 (Up to 11 characters are displayed)
For a list of available characters, see the instruction
manual of the writing software and the section
Entering file and folder names below.
The media reproducible on this unit has the
following limitations:
• Maximum number of directory levels: 8
• Maximum number of files per folder: 185
• Maximum number of folders: 127
MP3 written in the formats other than the above
may not be successfully played and their file names
or folder names are not properly displayed.
Settings for your MP3 encoder and CD
writer
Do the following setting when compressing audio
data in MP3 data with the MP3 encoder.
• Transfer bit rate: 56 – 320 kbps
• Sampling frequency
: 11.025, 12, 16, 22.05, 24, 32, 44.1, 48 kHz
When you use your CD writer to record MP3 up
to the maximum disc capacity, disable additional
writing. For recording on an empty disc up to the
maximum capacity at once, check Disc at Once.
ID3 tag display
The ID3 tag cannot be displayed.
|
6
English
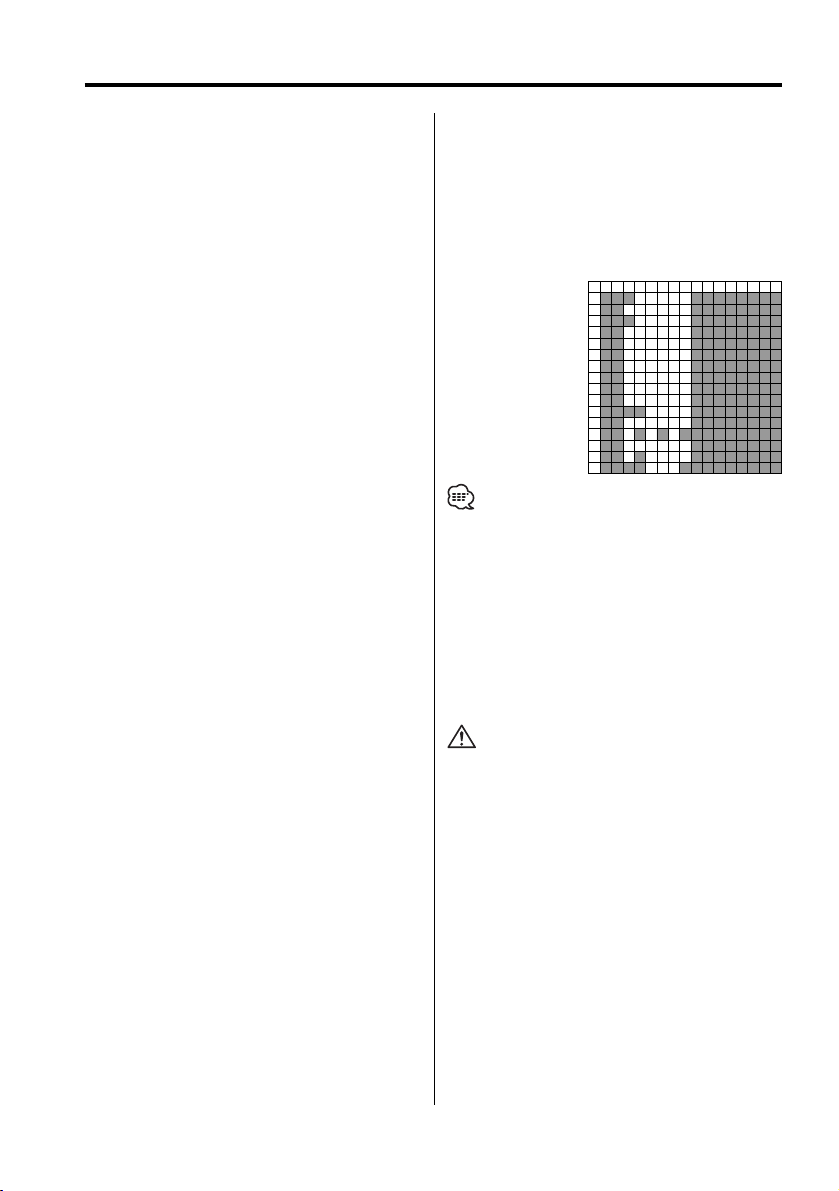
Entering file and folder names
The code list characters are the only file names and
folder names that can be entered and displayed.
If you use any other character for entry, the file and
folder names are not displayed correctly. They may
neither be displayed correctly depending on the CD
writer used.
The unit recognizes and plays only those MP3
which have the MP3 extension (.MP3).
0123456789ABCDEF
00@P‘p
1!1AQaq
22BRbr
3#3CScs
4$4DTdt
5%5EUeu
6&6FVfv
7’7GWgw
8(8HXhx
9)9IYiy
AJZjz
B+;K[k{
C,Ll
D-=M]m}
E.N^n~
FO_o
• A file with a name entered with characters not on the
code list may not play correctly.
Writing files into a medium
When a medium containing MP3 data is loaded,
the unit checks all the data on the medium. If the
medium contains a lot of folders or non-MP3 files,
therefore, it takes a long time until the unit starts
playing MP3.
In addition, it may take time for the unit to move to
the next MP3 file or a File Search or Folder Search
may not be performed smoothly.
Loading such a medium may produce loud noise to
damage the speakers.
• Do no attempt to play a medium containing a non-MP3
file with the MP3 extension.
The unit mistakes non-MP3 files for MP3 data as long as
they have the MP3 extension.
• Do not attempt to play a medium containing non MP3.
MP3 playing order
When selected for play or Skip, files and folders are
accessed in the order in which they were written by
the CD writer.
Because of this, the order in which they are
expected to be played may not match the order
in which they are actually played. You may be able
to set the order in which MP3 are to be played by
writing them onto a medium such as a CD-R with
their file names beginning with play sequence
numbers such as "01" to "99", depending on your
CD writer.
Page 7
About the remote
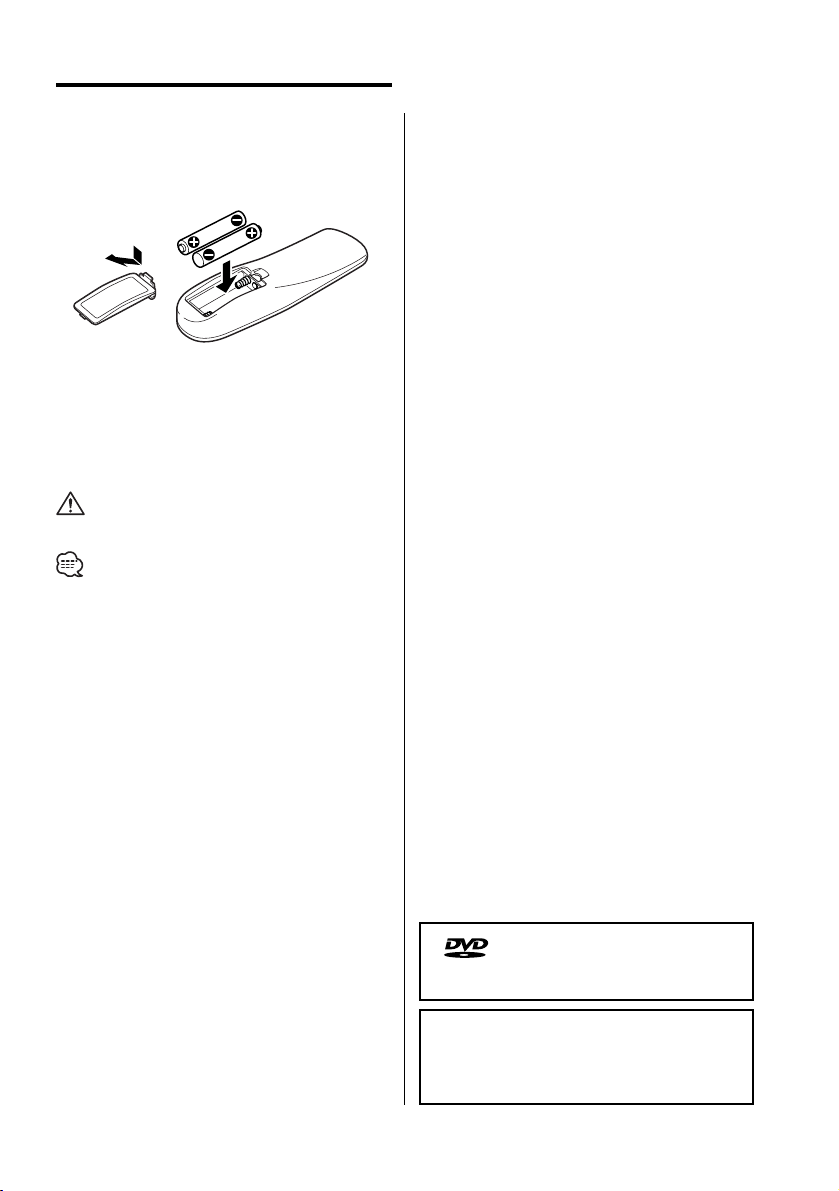
Loading the battery
1. Use two "AAA"-size batteries.
Remove the cover as illustrated.
2. Insert the batteries with the + and - poles aligned
properly, following the illustration inside the case.
2WARNING
• Store unused batteries out of the reach of
children. Contact a doctor immediately if the
battery is accidentally swallowed.
• Do not put the remote in a place where it moves
when you drive. If it falls under the brake pedal,
etc., it will hinder your driving, causing danger.
• Do not set the remote on hot places such as above the
dashboard.
• The provided batteries are intended for use in operation
checking, and their service life may be short.
• When the remote controllable distance becomes short,
replace both of the batteries with new ones.
is a trademark of DVD Format/Logo
Licensing Corporation registered in the U.S.,
Japan and other countries.
Manufactured under license from Dolby
Laboratories.
"Dolby" and the double-D symbol are
trademarks of Dolby Laboratories.
English
|
7
Page 8
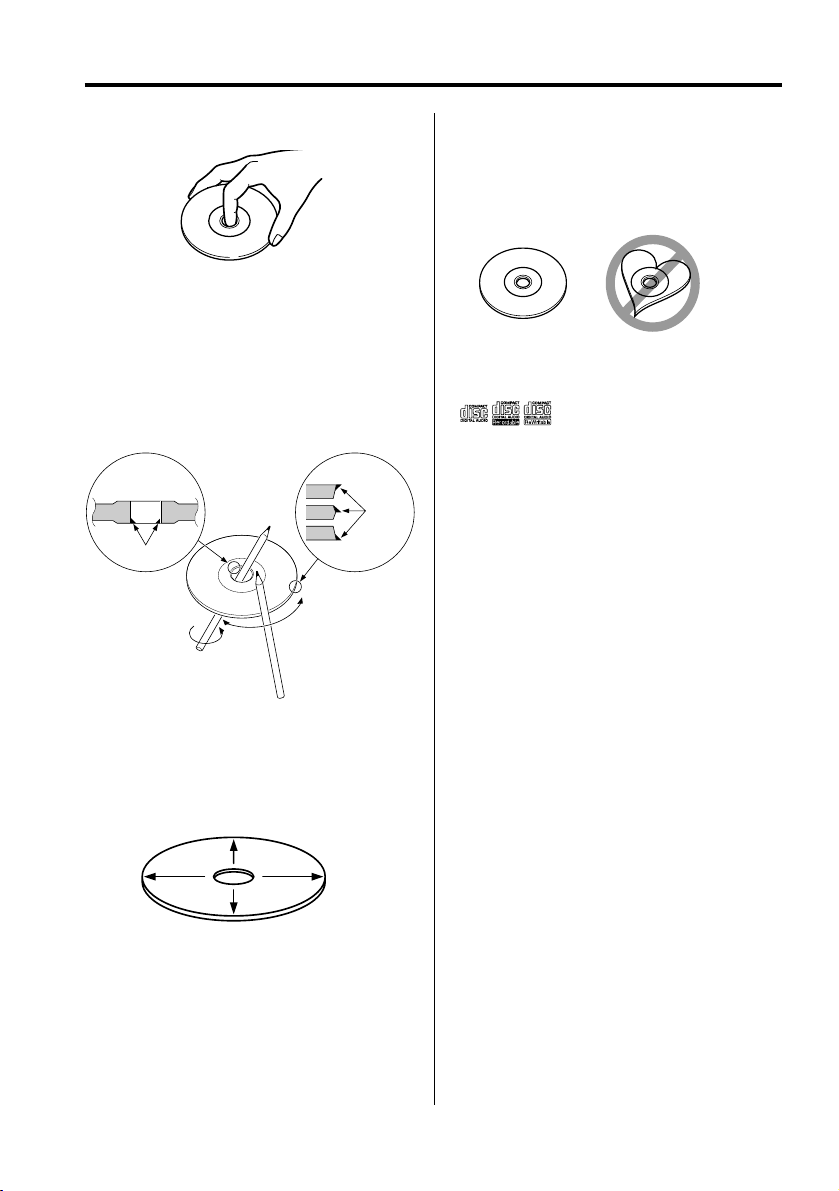
About discs
Handling discs
• Don’t touch the recording surface of the disc.
• CD-R/RW and DVD-R are easier to damage than a
normal music CD. Use a CD-R/RW or a DVD-R after
reading the caution items on the package etc.
• Don’t stick tape etc. on the disc.
Also, don’t use a disc with tape stuck on it.
When using a new disc
If the disc center hole or outside rim has burrs, use
it after removing them with a ball pen etc.
Burrs
Burrs
Removing discs
When removing discs from this unit pull them out
horizontally.
Discs that can’t be used
• Discs that aren’t round can’t be used.
• Discs with coloring on the recording surface or
that are dirty can’t be used.
• This unit can only play the CDs with
It may not correctly play discs which do not have
the mark.
• A CD-R or CD-RW that hasn’t been finalized can’t
be played. (For the finalization process refer to
your CD-R/CD-RW writing software, and your CDR/CD-RW recorder instruction manual.)
.
Disc storage
• Don’t place them in direct sunlight (On the seat
or dashboard etc.) and where the temperature is
high.
• Store discs in their cases.
Disc accessories
Don’t use disc type accessories.
Disc cleaning
Clean from the center of the disc and move
outward.
|
8
English
Page 9

Basic features
POWER EJECT
1
/¡
DISPLAY
4/¢
38
7
REPEAT
Power
Press the [POWER] button.
• Unplug the cigarette lighter plug when you turn
off the ignition in order to prevent the battery from
running out.
MUTE
A–B
English
|
9
Page 10

Basic features
Play
Play
Open the cover and insert a disc into the unit.
If a disc has been inserted, press the [38]
button.
To play back MP3 when 'FOLDER LIST' is set to
"WITH MENU", refer to 'MP3 Folder List' (page 15)
to select the file you want to play back.
Starts playing the disc.
• If you insert a disc, it will start playing from the
beginning of the disc.
If you turn the power off while playing a disc, turning
the power back on will resume playing the disc where
it stopped.
Pause
Press the [38] button.
Each time the button is pressed, it pauses or
plays.
Stop
Press the [7] button.
To restart playback, press the [38] button.
• If you press the [7] button twice during DVD
playback, it starts from the beginning of the disc next
time you play it.
Eject
Press the [EJECT] button.
Skip
Skips a chapter, select, track or song.
Press the [4] or [¢] button.
• To skip on a VCD, turn the PBC function off by pressing
the [PBC] button.
Fast Forward and Reverse
Press the [1] or [¡] button.
The speed changes at 4 levels (X2, X4, X6, X8)
each time the button is pressed.
To restart playback, press the [38] button.
Repeat Play
Plays a song, a chapter, a title, etc. repeatedly.
Press the [REPEAT] button.
Each time the button is pressed, the Repeat Play
function switches as shown below.
In DVD source
Display Setting
"CHAPTER REPEAT ON" Plays the chapter repeatedly.
"TITLE REPEAT ON" Plays the title repeatedly.
"REPEAT OFF" Turns Repeat Play off.
In CD/VCD source
Display Setting
"REP-ONE" Plays the track repeatedly.
"REP-ALL" Plays the disc repeatedly.
"REPEAT OFF" Turns Repeat Play off.
• If you want to restart playback with the disc ejected
from the unit, press the [EJECT] button again. The disc
is inserted into the unit, and playback is restarted.
Mute
Turning the volume down quickly.
Press the [MUTE] button.
Each time the button is pressed, the Mute turns
ON or OFF.
|
10
English
In MP3 source
Display Setting
"REP-ONE" Plays the song repeatedly.
"FOLDER-REP"/"REP-ALL" Plays the songs in the folder repeatedly.
"FOLDER"/"REPEAT OFF" Turns Repeat Play off.
• To repeat play a VCD, turn the PBC function off by
pressing the [PBC] button.
Page 11

A-B Repeat Play [DVD][VCD][CD]
Specify the Start and End points to play the
portion between the specified points repeatedly.
1 Specify Point A (Start point)
Press the [A-B] button.
2 Specify Point B (End point)
Press the [A-B] button.
Plays from Point A to Point B repeatedly.
Canceling A-B Repeat
Press the [A-B] button.
Switching Display
Switches the information displayed on the
monitor screen.
Press the [DISPLAY] button.
Each time the button is pressed, the display
switches as shown below.
In DVD source
Display Information
"TITLE CHAPTER" Title / chapter elapsed time
"TITLE REMAIN" Title remaining time
"CHAPTER ELAPSED" Chapter elapsed time
"CHAPTER REMAIN" Chapter remaining time
"OFF" Not displayed
In VCD (with PBC on) /MP3 source
Display Information
"SINGLE ELAPSED" Song elapsed time
"SINGLE REMAIN" Song remaining time
"OFF" Not displayed
In VCD (with PBC off) /CD source
Display Information
"SINGLE ELAPSED" Track elapsed time
"SINGLE REMAIN" Track remaining time
"TOTAL ELAPSED" Disc elapsed time
"TOTAL REMAIN" Disc remaining time
"OFF" Not displayed
English
|
11
Page 12

DVD Video/Video CD features
0–9
SEARCH
MENU
ZOOM
TOP MENU
PBC
Search Play
Directly calls the scene you want to play.
1 Enter the Search mode
Press the [SEARCH] button.
• To search play a VCD, turn the PBC function off by
pressing the [PBC] button.
2 For DVD, select the Search mode
Press the [SEARCH] button.
Each time the button is pressed, the item that
can be called switches as shown below.
Item
Chapter number
Play time
• If you press the [2] or [3] button during the
Chapter Number Search mode, you can search for a
title number.
3 Enter the scene you want to play
Press the [0] – [9] button.
|
12
English
ENTER
SUB TITLE
ANGLE
AUDIO
Starts playing the scene you entered during VCD
playback.
4 For DVD, start Search Play
Press the [ENTER] button.
Starts playing the scene you entered.
Slow Motion play
Press the [2 I] or [I 3] button.
Each time the button is pressed, it plays in slow
motion as shown below.
Disc Button Movement
2
I
DVD
DVD
VCD
VCD
• To return to the normal speed, press the [38] button.
The speed of slow reverse changes in order of
2X, 4X and 8X.
3
I
The speed of slow forward changes in order of
2X, 4X and 8X.
2 I
Reverses by one step.
3
I
The speed of slow forward changes in order of
1X, 2X and 3X.
Page 13

DVD menu/Top (title) menu [DVD]
Calls the DVD menu and the Top (title) menu to
set up various settings.
1 Display the DVD menu
Press the [MENU] button.
Display the Top (title) menu
Press the [TOP MENU] button.
2 Select the item
Press the [2]/[5]/[3]/[∞] or [0] – [9] button.
3 Finalize the item
Press the [38] button.
Refer to the disc manual for instructions on using
each menu.
4 Cancel the menu display
Press the [MENU] or [TOP MENU] button.
Audio Language select [DVD]
Press the [AUDIO] button.
Switches the languages recorded on the disc in
order.
Picture Angle select [DVD]
Press the [ANGLE] button.
Switches the angles recorded on the disc in
order.
• If no more than one angle is recorded on the disc, it
does not switch.
Zoom [DVD]
Zooms the image.
1 Select the zoom ratio
Press the [ZOOM] button.
Each time the button is pressed, the zoom ratio
changes at 3 levels (X1.5, X2, X3).
2 Select the displaying position
Press the [2]/[5]/[3]/[∞] button.
PBC [VCD]
Uses the playback control (PBC) function.
• If no more than one language is recorded on the disc,
it does not switch.
Subtitle Language select [DVD]
Press the [SUB TITLE] button.
Switches the languages recorded on the disc in
order.
• If no more than one language is recorded on the disc,
it does not switch.
1 Turn the PBC function on
Press the [PBC] button.
Each time the button is pressed, the PBC function
turns ON or OFF.
2 Select the item
Press the [0] – [9] button.
3 Finalize the item
Press the [38] button.
Refer to the disc manual for instructions on using
PBC.
• You can use the PBC function when playing a VCD of
Ver2.0 or higher.
English
|
13
Page 14

DVD Video/Video CD features
Digest Screen [DVD]
Displays the chapters of a title to call the scene
you want to see.
1 Enter Title Information
Press the [PBC] button.
2 Select Title
Press the [2] or [3] button.
• Press the [1] or [¡] button to change 10 titles at a
time.
• Press the [4] or [¢] button to switch to the first
or last title.
3 Play Title
Press the [ENTER] button.
Selecting Scene
4 Stop play
Press the [7] button.
5 Display Digest Screen
Press the [MENU] button.
6 Play the scene you want to see
Press the [1] - [9] button.
Press the [1] - [9] button corresponding to the
number displayed on the Digest screen.
• Press the [4] or [¢] button to go to the previous
or next page.
7 Play the scene you selected
Press the [ENTER] button.
• Press the [7] button to return to the previous screen.
Canceling Digest Screen
Press the [PBC] button.
• Some titles or chapters may not be displayed. In this
case, the previous screen will be displayed.
• Press the [7] button to return to the previous screen.
|
14
English
Page 15

CD/MP3 features
0–9
SEARCH
7
MP3 Folder List [MP3]
Select the folder or file you want to play back.
1 Stop playback
Press the [7] button.
2 Move the cursor to the Folder List
Press the [2]/[3] button.
RANDOM
38
ENTER
PROG
4 Finalize your selection
Press the [ENTER] button.
5 Select the file
Press the [5]/[∞] button.
• Press the [4] or [¢] button to scroll the list up or
down.
6 Play back the selected file
Press the [ENTER] button.
Folder List
3 Select the folder
Press the [5]/[∞] button.
File List
English
|
15
Page 16

CD/MP3 features
Program Play
Plays the selected songs only in order.
1 Stop playback
Press the [7] button.
2 Enter the Program mode
Press the [PROG] button.
Switches "PLAY MODE" displayed at the bottom
of the screen to "PROGRAM PO" during MP3
playback.
3 Select the song you want to play
Press the [2]/[5]/[3]/[∞] (during MP3
playback only) or [0] – [9] button.
Specifies the file containing the song you want
to play.
4 Finalize the song you want to play
Press the [ENTER] button.
The song selected in Step 3 is registered as
Program number 1.
5 Repeat Steps 3 and 4 to register all the songs
you want to program play.
For MP3, if you have finished programming, press
the [7] button to exit the Program mode.
6 Start Program Play
Press the [38] button.
Plays the registered songs in order.
Canceling Program Play for CD
Press the [7], [PROG] and [ENTER] buttons in
order.
Canceling Program Play for MP3
Press the [7] and [PROG] buttons in order.
Direct Skip Play
Directly calls the song you want to play.
1 Enter the Track, File, or Folder number you
want to play
Press the [0] – [9] button.
2 Play
Press the [ENTER] button.
• If you do not per form the operation of Step 2 for
about 5 seconds, the song entered in Step 1 is
automatically searched for.
Play Time Search [CD]
Enter the play time to start from where you want.
1 Enter the Play Time Search mode
Press the [SEARCH] button.
2 Enter the play time where you want to start
Press the [0] – [9] button.
For example
5:07 ➪ [0], [5], [0], [7]
Starts playing from the time you entered.
16
|
English
Page 17

MP3 Play Mode [MP3]
Select the play method.
1 Stop playback
Press the [7] button.
2 Highlight the Play mode button
Press the [2]/[3] button.
Play mode button
3 Select the play method
Press the [5]/[∞] button.
You can select the play method as shown below.
Display Setting
"SINGLE" Stops after playing one song.
"REP-ONE" Plays one song repeatedly.
"FOLDER" Stops after playing the songs in the folder.
"FOLDER REP" Plays the songs in the folder repeatedly.
"DISC SCAN" Plays approximately the first 10 seconds of each
song on the disc.
"DISC" Stops after playing the songs on the disc.
"DISC REP" Plays the songs on the disc repeatedly.
"RANDOM" Plays the songs in the folder in random order.
"SHUFFLE ON" Stops after playing the songs in the folder in
random order.
Random Play
Songs are chosen from those recorded on the
disc opened at random and are played.
1 Stop playback
Press the [7] button.
2 Select the Random Play mode
Press the [RANDOM] button.
Each time the button is pressed, the Random
Play mode switches as shown below.
In CD source
Display Setting
"RANDOM ON" Plays the songs on the CD in random order.
"RANDOM OFF" Turns Random Play off.
In MP3 source
Display Setting
"RANDOM" Plays the songs in the folder in random order.
"SHUFFLE ON" Stops after playing the songs in the folder in
random order.
"FOLDER" Turns Random Play off.
3 For MP3, select the folder
Press the [2]/[5]/[3]/[∞] button.
Place the cursor to any file in the folder you want
to random play.
4 Start Random Play
Press the [38] button.
4 Select the song(s)
Press the [2]/[5]/[3]/[∞] button.
Select the file or folder you want to play.
5 Play
Press the [ENTER] button.
Plays the song(s) in the selected play method.
English
|
17
Page 18

Setup menu
Setup menu
You can customize default settings for various
functions of the unit using the Setup menu.
1 Stop playback
Press the [7] button.
During DVD playback, press the button twice.
During VCD playback, turn the PBC function off
by pressing the [PBC] button first.
2 Display the SETUP MENU screen
Press the [SETUP] button.
SETUP MENU is displayed on the monitor screen
connected.
3 Select the menu page you want to set up
Press the [2]/[5]/[3]/[∞] button.
4 Enter the selected menu page
Press the [ENTER] button.
The menu page selected in Step 3 is displayed.
5 Select the setup item and the option
Press the [2]/[5]/[3]/[∞] button.
Refer to the subsequent descriptions for the
setup items and options on each menu.
|
18
English
6 Finalize your selection
Press the [ENTER] button.
7 Exit the Setup menu
Press the [2]/[5]/[3]/[∞] and [ENTER]
buttons.
Select and execute "MAIN PAGE" and "EXIT
SETUP" in order.
General Setup
TV DISPLAY
Use the procedure described below to set the
output screen.
Display Setting
"NORMAL/PS" Wide-screen software with pan & scan
specification is played in a panned & scanned
screen (with the left and right sides cut off).
"NORMAL/LB" Wide-screen software with pan & scan
specification is played in a letter box screen (with
black stripes on the top and bottom).
"WIDE" Set the picture mode of the wide-screen monitor
to "FULL"
Page 19

PIC (Picture) MODE
Select a DVD image mode.
Display Setting
"AUTO" The image is switched automatically depending
on the original image.
"HI-RES" The original image recorded on the DVD is the
Video mode.
"N-FLICKER" The original image recorded on the DVD is the
Movie Picture mode.
ANGLE MARK
When multiple image angles are recorded on
a DVD, they are shown by the mark during
playback.
Display Setting
"ON" Displays the Angle mark.
"OFF" Does not display the Angle mark.
OSD LANG (On Screen Display Language)
Use it in "ENGLISH" as it is.
CAPTIONS
When a disc having the Closed Captions
information is played back, this information can
be output.
Display Setting
"ON" Outputs the Closed Captions signal.
"OFF" Does not output the Closed Captions signal.
SCR (Screen) SAVER
To prevent the screen burn-out, you can start the
screen saver automatically when the on-screen
image does not change for a certain time period.
Display Setting
"ON" Star ts the screen saver automatically.
"OFF" Does not use the screen saver.
Speaker Setup
DOWNMIX
Set the mixed sound output to the 2-channel
stereo port.
Display Setting
"LT/RT" Outputs the sound mixed to the Dolby Surround audio.
"STEREO" Outputs the sound mixed to the stereo sound.
Audio setup
AUDI O OUT
Display Setting
"ANALOG" Outputs an analog sound. (No digital signal is
"SPDIF/RAW" Outputs a 5.1ch S/PDIF Bitstream digital sound. (No
"SPDIF/PCM" Outputs a 2ch S/PDIF PCM digital sound. (No
OP MODE
Display Setting
"LINE MODE" Outputs a Normal LINE sound.
"RF MODE" Narrows down the dynamic range of an audio
DUAL MODE
Set the sound which will be output when playing
DVD recorded by Dual Mono (1+1) of Dolby
Digital.
Display Setting
"STEREO" Stereo (L / R)
"L-MONO" Monaural Left (L / L)
"R-MONO" Monaural Right (R / R)
"MIX-MONO" Mixed Left and Right (L+R / L+R)
DYNA MIC
Sets the dynamic range of playback sound
recorded on a Dolby Digital system DVD.
Display Setting
"FULL" For more powerful sound at regular volumes
"7/8"
"6/8" / "3/4"
"5/8"
"4/8" / "1/2"
"3/8"
"2/8" / "1/4"
"1/8"
"OFF" For the regular sound
LPCM OUTPUT
Display Setting
"LPCM 48k" Outputs a song of 96kfs in 48kfs from DIGITAL OUT.
"LPCM 96k" Outputs a song of 96kfs in 96kfs from DIGITAL OUT.
output.)
analog signal is output.)
analog signal is output.)
signal to output via the RF modulator.
Large
±
Compression rate
≠
Small
English
|
19
Page 20

Setup menu
Preferences
TV TYPE
A TV type can be set according to the TV color
display mode.
Display Setting
"MULTI" The color signal output is switched automatically
according to the recording system of the current disc.
"NTSC" The color signals are output in the standard NTSC system.
"PAL" The color signals are output in the standard PAL system.
AUDIO
Set the audio language produced from the
speakers.
Display Setting
"ENGLISH" English
"FRENCH" French
"SPANISH" Spanish
"CHINESE" Chinese
"JAPANESE" Japanese
SUB TITLE
Set the language of the subtitles displayed on the
screen.
Display Setting
"ENGLISH" English
"FRENCH" French
"SPANISH" Spanish
"CHINESE" Chinese
"JAPANESE" Japanese
"OFF" No subtitle is displayed
DISC MENU
Set the language of the disc menu.
Display Setting
"ENGLISH" English
"FRENCH" French
"SPANISH" Spanish
"CHINESE" Chinese
"JAPANESE" Japanese
PARENTAL
Set the parental level. The higher the level is, the
higher protection you get.
Display Setting
"1 G" G-rated movies (for children) can only be played.
"2"
"3 PG"
"4 PG 13"
"5"
"6 PG-R"
"7 NC-17"
"8 ADULT"
"NO_PARENTAL" Cancels the parental protection.
1 Press the [Enter] button on the remote.
2 Set up the parental level.
3 Enter the password.
4 Press the [Enter] button on the remote.
• The password is set to "0000" by default.
• The parental setting is enabled for "R" sign discs only.
PASSWORD
CHANGE: Change the password.
1 Select "CHANGE" and press the [Enter] button
on the remote.
2 Enter the current password.
3 Enter the new password twice.
4 Press the [Enter] button on the remote.
• The password is set to "0000" by default.
DEFAULTS
RESET: Resets the customized items on the Setup
menu.
FOLDER LIST
Set to display the directory on the monitor screen
when MP3 is played back.
Display Setting
"NO MENU" The directory is not displayed.
"WITH MENU" The directory is displayed.
20
|
English
Page 21

Accessories
1
2
3
4
5
..........1
..........1
..........2
..........5
Installation
Installation using the Brackets
Tap ping Screw 5
Bracket 3
Installation using the velcro tapes
Semusu Screw 4
..........4
6
..........2
7
..........1
• If the fuse blows, first make sure that the wires have not
caused a short circuit, then replace the old fuse with one
with the same rating.
Carpet
• Do not use your own screws. Use only the screws
provided. If you use the wrong screws, you could
damage the unit.
• Do not install the unit to an unatable place and a place
where it vibrates.
• You can mount the unit at any angle between the
regular horizontal position and the vertical position on
its back (0° through 90°). You cannot mount the unit with
the disc slot facing downwards, angled or upside down.
Velcro tape 6
English
|
21
Page 22

Connecting Wires to Terminals
Power Cable 1
DVD Player back view
M4 X 5mm
Audio left output
Audio right output
Video output
Ground wire 7 (Black) - (To car chassis)
Digital output
Remote Control Sensor 2
Attaching Remote Control Sensor
1 Remove the backing paper from the Velcro tape on the
back of the Remote Control Sensor.
2 After wiping off the dirt or oil from the attachment location,
attach the Remote Control Sensor.
Cigarette Lighter Plug
Fuse (3A) built in
m
m
5
X
4
M
E
T
O
M
E
R
Battey
To Cigarette
Lighter Socket
Semusu
Screw 4
Backing paper
• Wipe off the dirt or oil from the surface to which the Sensor is
attached.
• Avoid locations under direct sunlight or near the TV monitor where
signals from the remote controller are not received easily.
|
22
English
Page 23

Troubleshooting Guide
What might seem to be a malfunction in your unit
may just be the result of slight misoperation or
miswiring. Before calling service, first check the
following table for possible problems.
? No sound can be heard, or the volume is low.
✔ Mute is turned on.
☞ Turn off Mute.
? The sound/picture skips on a DVD/VCD/CD.
✔ The disc is scratched or dirty.
☞ Clean the disc, referring to the section on “Disc
cleaning” (see page 8).
? A VCD cannot be played using menus.
✔ The VCD disc being played is not compatible with
P.B.C.
☞ Menu playback is available only with VCD discs
recorded with P.B.C.
? The subtitle is not displayed.
✔ The DVD disc being played does not contain the
recording of subtitles.
☞ The subtitle cannot be displayed when the
DVD disc being played does not contain the
recording of subtitles.
? The voice (or subtitle) language cannot be
changed.
✔ The DVD disc being played does not contain the
recording of more than one audio (or subtitle)
language.
☞ The voice (or subtitle) language cannot be
changed when the DVD disc being played
does not contain the recording of more than
one voice (or subtitle) language.
? The specified disc does not play, but another one
plays instead.
✔ The specified disc is quite dirty.
☞ Clean the disc.
✔ The disc is upside-down.
☞ Load the disc with the labeled side up.
✔ The disc is severely scratched.
☞ Try another disc instead.
? Cannot perform operations for MP3 Folder List,
MP3 Play Mode, Program Play or Random Play
during MP3 playback.
✔ 'FOLDER LIST' is set to "NO MENU" on the Setup
menu.
☞ Set 'FOLDER LIST' to "WITH MENU" (see
page20).
The messages shown below display your
systems condition.
"THERMAL PROTECTION PLEASE SHUT OFF POWER"
: The protective circuit in the unit activates when the
temperature inside the DVD player exceeds 60°C (140°F),
stopping all operation.
➪ Cool down the unit by opening the windows or
turning on the air conditioner. As the temperature
falls below 60°C (140°F), the disc will start playing
again.
To eject the disc in this situation, turn the power off
and then turn it back on.
"NO DISC"
: No disc is inserted in the unit.
"WRONG REGION"
: A DVD with the wrong region code was inserted into
the unit.
"DISC ERROR"
: A disc that cannot be played in the unit was inserted..
"INVALID ENTRY"
: The disc inserted contains damaged or non-standard
data.
"PASSWORD INCORRECT"
: The password entered does not match the one
registered.
"NEW PASSWORD NOT CONFIRMED"
: Appears if the second new password entered does not
match the first one when changing the password.
➪ When you enter the new password, you are required
to enter the same password twice for confirmation
purposes.
English
|
23
Page 24

Specifications
Specifications subject to change without notice.
DVD section
D/A Converter
: 8Level∆Σ, 24bit
Wow & Flutter
: Below Measurable Limit
Frequency response
: 17- 44 kHz (DVD96kHz Sampling)
Total harmonic distortion 1kHz
: 0.02 %
Signal to noise ratio
: 106 dB
Dynamic range
: 90 dB
MP3 Decode
: Compliant with MPEG-1/2 Audio Layer-3
DISC Format
: DVD-VIDEO/ VIDEO-CD/ CD-DA/ MP3
Output
Composite Video Output Level (V)
: 1V p-p (75Ω)
Audio 2ch Output Level (V)
:1.2 V/ 10 kΩ (DVD/CD)
Coaxial Digital Audio Interface Output Level (V )
: 0.5 V/ 75 Ω
General
Operating voltage
: 14.4 V (11 – 16 V)
Current consumption
: 2 A
Dimensions WxHxD
: 194 mm x 54 mm x 245 mm
Weight
: 1.85 kg
24
|
English
 Loading...