

Kenwood KDC-C601, KDC-C600, KDC-C401, KDC-C302, KDC-C400 User Manual
...
KRC-208S
KRC-218
KRC-28MR
CASSETTE RECEIVER
INSTRUCTION MANUAL
AMPLI-TUNER-LECTEUR DE CASSETTE
MODE D’EMPLOI
RADIO CASETE
MANUAL DE INSTRUCCIONES
RADIO CASSETE
MANUAL DE INSTRUÇÕES
Take the time to read through this instruction manual.
Familiarity with installation and operation procedures will help you obtain the best
performance from your new cassette-receiver.
For your records
Record the serial number, found on the back of the unit, in the spaces designated on the
warranty card, and in the space provided below. Refer to the model and serial numbers
whenever you call upon your KENWOOD dealer for information or service on the product.
Model KRC-208S/218/28MR Serial number
© B64-1538-00 (KW)

Contents
Before use
Safety precautions ........................................................................3
English
General features
Power............................................................................................5
Switching Modes ..........................................................................5
Volume..........................................................................................6
Attenuator .....................................................................................6
Loudness ......................................................................................6
Audio Control Setting....................................................................6
ec4/dB(Sound Coordinate) ............................................................7
Clock display .................................................................................7
Adjusting Time ..............................................................................7
Theft Deterrent Faceplate.............................................................8
Tuner features
Tuning ...........................................................................................9
Station Preset Memory .................................................................9
Auto Memory Entry.......................................................................9
Cleam Reception System Circuit (CRSC)....................................10
Cassette player features
Playing Cassette Tapes...............................................................11
Fast Forwarding and Rewinding Cassette Tapes........................11
Tuner Call ....................................................................................11
External disc control features
Playing Disc mode.......................................................................12
Fast Forwarding and Reversing Disc Play...................................12
Track Search................................................................................13
Disc Search .................................................................................13
Track / Disc Repeat .....................................................................13
Track Scan...................................................................................14
Disc Scan ....................................................................................14
Random Play ...............................................................................14
Magazine Random Play...............................................................14
Installation
Accessories.................................................................................16
Installation Procedure..................................................................16
Connecting Wires to Terminals...................................................17
Installation...................................................................................18
Troubleshooting Guide .......................................21
Specifications .....................................................24
— 2 —

Safety precautions
2WARNING
To prevent injury or fire, take the
following precautions:
• Insert the unit all the way in until it is fully
locked in place. Otherwise it may fall out of
place when jolted.
• When extending the ignition, battery, or
ground wires, make sure to use automotivegrade wires or other wires with a 0.75mm
(AWG18) or more to prevent wire
deterioration and damage to the wire coating.
• To prevent a short circuit, never put or leave
any metallic objects (such as coins or metal
tools) inside the unit.
• If the unit starts to emit smoke or strange
smells, turn off the power immediately and
consult your Kenwood dealer.
• Make sure not to get your fingers caught
between the faceplate and the unit.
• Be careful not to drop the unit or subject it to
strong shock.
The unit may break or crack because it
contains glass parts.
• Do not touch the liquid crystal fluid if the LCD
is damaged or broken due to shock. The
liquid crystal fluid may be dangerous to your
health or even fatal.
If the liquid crystal fluid from the LCD
contacts your body or clothing, wash it off
with soap immediately.
2
2CAUTION
To prevent damage to the machine,
take the following precautions:
• Make sure to ground the unit to a negative
12V DC power supply.
• Do not open the top or bottom covers of the
unit.
• Do not install the unit in a spot exposed to
direct sunlight or excessive heat or humidity.
Also avoid places with too much dust or the
possibility of water splashing.
• Do not set the removed faceplate or the
faceplate case in areas exposed to direct
sunlight, excessive heat or humidity. Also
avoid places with too much dust or the
possibility of water splashing.
• To prevent deterioration, do not touch the
terminals of the unit or faceplate with your
fingers.
• Do not subject the faceplate to excessive
shock, as it is a piece of precision equipment.
• When replacing a fuse, only use a new one
with the prescribed rating. Using a fuse with
the wrong rating may cause your unit to
malfunction.
• To prevent a short circuit when replacing a
fuse, first disconnect the wiring harness.
• Do not place any object between the
faceplate and the unit.
• Do not use your own screws. Use only the
screws provided. If you use the wrong
screws, you could damage the unit.
IMPORTANT INFORMATION
You cannot connect the unit directly to the
following CD automatic changers. If you want
to use older changers with the unit, follow
the directions below according to the type of
changer you own:
• KDC-C200 / KDC-C300 / KDC-C400
Use the extension cable and the control box
attached to the CD changer, and the optional
CA-DS100 converter cord.
• KDC-C301 / KDC-C600 / KDC-C800 / KDCC601 / KDC-C401
Use the extension cable attached to the CD
changer, and the optional CA-DS100
converter cord.
• KDC-C100 / KDC-C302 / C205 / C705 /
non-Kenwood CD changers
Cannot be used with this model.
2CAUTION
You can damage both your unit and
the CD changer if you connect them
incorrectly.
— 3 —
40Wx4
40Wx
Safety precautions
NOTE
• If you experience problems during
installation, consult your Kenwood dealer.
English
• If the unit does not seem to be working right,
try pressing the reset button first. If that does
not solve the problem, consult your Kenwood
dealer.
PWR
SRC
OFF
CLK
40Wx
4
HIGH POWER
AME ADJAUTO
SCAN RDM REP TC/D.SCN M.RDM
LOUD
1
ATT
• Characters in the LCD may become difficult
to read in temperatures below 41 ˚F (5 ˚C).
• The illustrations of the display and the panel
appearing in this manual are examples used
to explain more clearly how the controls are
used. Therefore, what appears on the display
in the illustrations may differ from what
appears on the display on the actual
equipment, and some of the illustrations on
the display may represent something
impossible in actual operation.
• The functions that can be used and the
information that can be displayed will differ
depending on the external disc players being
connected.
23456
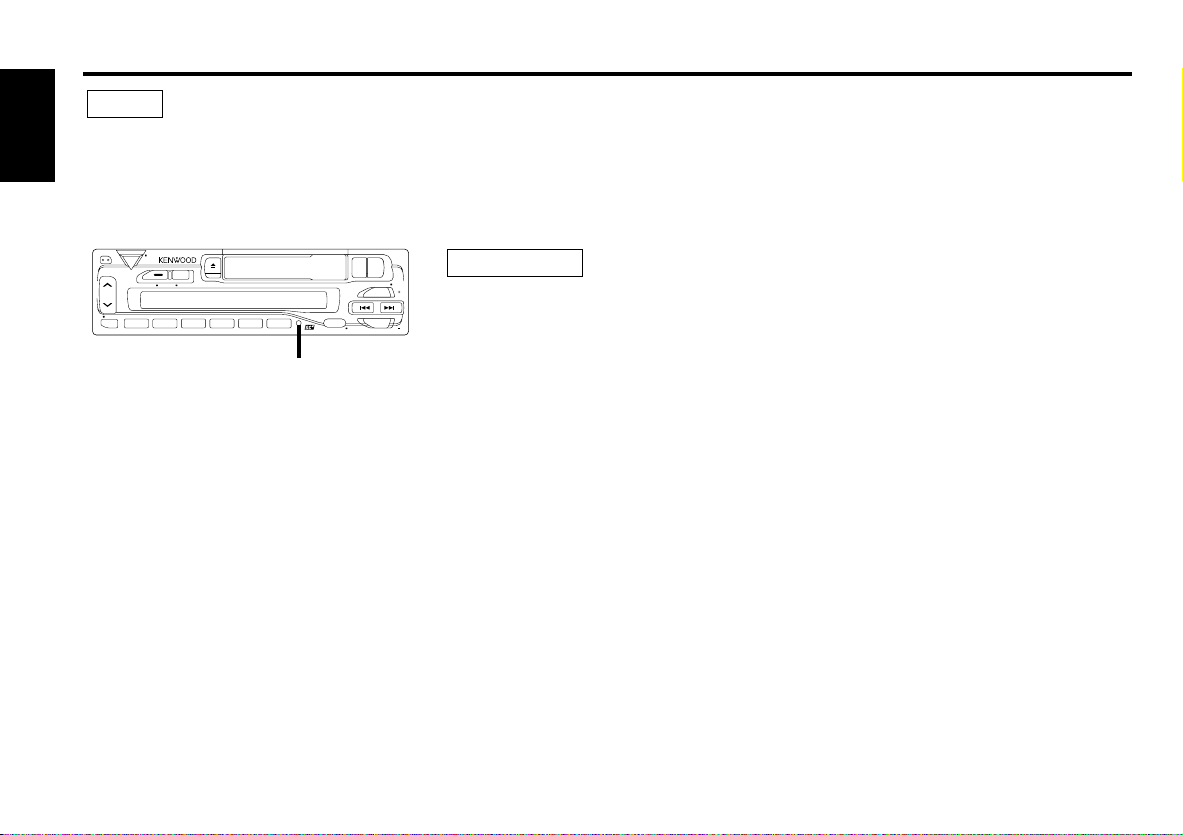
Reset button
Cleaning the Faceplate Terminals
If the terminals on the unit or faceplate get
dirty, wipe them with a dry, soft cloth.
Cleaning the Tape Head
After you have listened to many cassettes
over a long period of time, magnetic powder
from the tapes and dust accumulates on the
Cleaning the Unit
If the front panel gets dirty, turn off the
power and wipe the panel with a dry silicon
cloth or soft cloth.
FF
REW
PR OG
CRSC
DISC
FM
AM
AUD
A.ADJ
2CAUTION
Do not wipe the panel with a hard cloth or a
cloth dampened by volatile solvents such as
paint thinner and alcohol. They can scratch
the surface of the panel and/or cause the
indicator letters to peel off.
tape head, causing noise and a deterioration
in sound quality. Clean the tape head using a
cleaning tape or cleaning kit designed for use
in car audio systems.
Handling Cassette Tapes
• Do not play a cassette whose tape has gone
slack. In such a case, wind it tight using a
pencil or the like in one of the spools. Playing
slack cassette tapes can result in the tape
tangling around the capstan and/or pinch
rollers, causing trouble.
• Do not play a deformed cassette or one
whose label is starting to come off, as it can
cause the unit to malfunction.
FCC WARNING
This equipment may generate or use radio
frequency energy. Changes or modifications
to this equipment may cause harmful
interference unless the modifications are
expressly approved in the instruction manual.
The user could lose the authority to operate
this equipment if an unauthorized change or
modification is made.
• Do not leave tapes in hot places, such as on
dashboards and other spots exposed to
direct sunlight, or near heater outlets. They
can deform the cassette.
• Avoid using extremely long cassette tapes,
such as 100-minute-long tapes. Such tapes
are very thin, and can tangle easily around
the pinch rollers or other parts inside the unit,
causing unit failure.
• Remove a cassette tape from the unit when
not listening to it for a while. If you leave a
tape in the unit too long, it may stick to the
tape head and cause unit malfunction.
— 4 —
▼
Tuner mode
▼
Tape mode
▼
External disc control mode (KRC-208S/28MR only)
▼
Standby mode
General features
u
d
AUD
SRC /
PWR OFF
#1 ~ 5
CLK
40Wx4
40Wx4
40Wx4
4
¢
AUD
1
23456
CLK
ATT
FF
REW
SRC
PR OG
PWR
OFF
AME ADJAUTO
SCAN RDM REP TC/D.SCN M.RDM
LOUD
DISC
CRSC
HIGH POWER
40Wx40Wx4
A.ADJ
FM
AM
ATT / LOUD
AM
FM
Release button
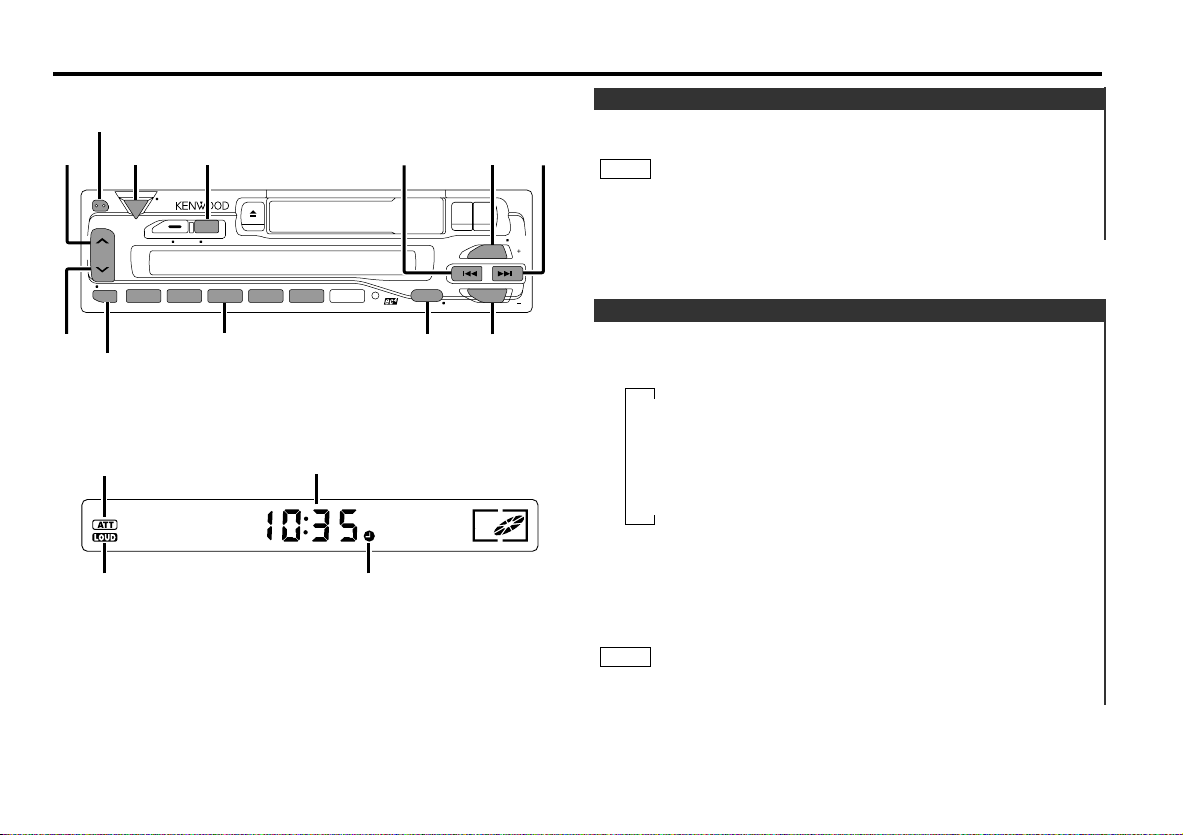
Power
Turning on the power:
Press the SRC (source) button.
NOTE
Turn the power on before carrying out the following procedures.
Turning off the power:
Press the PWR OFF button for at least one second.
Switching Modes
Switching Modes:
Each time you press the SRC (source) button, the mode
switches as follows:
ATT indicator
LOUD indicator
Clock display
£ indicator
Selecting standby mode:
Press the SRC button repeatedly and switch to "OFF" .
When "OFF" is displayed, the standby mode is activated.
The standby mode turns all functions off while leaving the
power to the unit on. Use this mode when you want to have
the display illuminated but don't want to listen to anything.
NOTE
The mode switches to the next mode from any mode which
cannot be used.
— 5 —

General features
Volume
Increasing Volume:
English
Press the u button to turn up the volume.
Decreasing Volume:
Press the d button to turn down the volume.
Attenuator
This function allows you to turn down the volume quickly.
Turning Attenuator On/Off:
Press the ATT button to switch the attenuator on and off.
When the attenuator is on, the ATT indicator blinks.
When the attenuator is off, the volume returns to the original
level.
NOTE
Turning the volume up, or turning it all the way down deactivates
the attenuator function.
Loudness
This function amplifies low and high tones when the volume is
turned down.
The LOUD indicator lights up when the loudness function is on.
Turning Loudness On/Off:
Press the LOUD button for at least one second to switch the
loudness on and off.
1
Press the AUD button for at least one second to enter the
control mode.
2
Selecting mode
Press either the FM or AM button.
Each time the button is pressed, the adjustment mode will
change.
Please refer to the following for the contents of the adjustment
modes.
NOTE
Source tone memory
Each source ( tape, CD, FM, AM and disc changer ) has its own
memory in which to store the bass and treble tone settings.
The settings made for a particular source are recalled
automatically whenever you use that source ( for example, FM
mode uses the tone settings made for FM, AM for AM, etc.).
3
Adjust each mode
Press the 4/¢ button.
Please refer to the following for the adjusting values.
4
Press the AUD button to end the control mode.
"BAS" : Adjust the bass level.
Setting values: - 4 – + 4
"TRE" : Adjust the treble level.
Setting values: - 4 – + 4
Audio Control Setting
Adjust various parameters of sound quality.
"BAL" : Adjust the balance level.
Setting values: Left 15 – Right 15
— 6 —

"FAD" : Adjust the fader level.
Setting values: Front 15 – Rear 15
ec4/dB (Sound Coordinate)
You can recall the best audio setting preset for different types
of the music.
1
Press the AUD button to enter the Sound Coordinate mode.
2
Press a preset button (#1-5).
The preset settings of the bass and treble tones are recalled.
#1: Flat
#2: Rock
#3: Pops/Top 40
#4: Jazz
#5: Easy
3
Press the AUD button to end the sound coordinate mode.
NOTE
You can call the following settings with this function; bass center
frequency, bass level, bass quality factor, bass extension, treble
center frequency, and treble level setting.
Clock display
Turning clock display On/Off:
Press the CLK button to switch the clock display on and off.
The £ indicator lights while the clock is displayed.
Adjusting Time
Adjust the time.
1
When the time is not displayed, first press the CLK button to
display the time.
2
Press the CLK button for at least one second to enter the clock
adjustment mode. The time display will blink.
3
• Adjusting the hours
Press the FM button to advance the hours, or press the AM
button to make the hours go back.
• Adjusting the minutes
Press the ¢ button to advance the minutes, or press the
4 button to make the minutes go back.
4
Press the CLK button to end the clock adjustment mode.
— 7 —
General features
AUTO / AME
#1 ~ 6
4
¢
FM / CRSC
SRC
AM
AUD
1
23456
CLK
ATT
FF
REW
SRC
PR OG
PWR
OFF
AME ADJAUTO
SCAN RDM REP TC/D.SCN M.RDM
LOUD
DISC
CRSC
HIGH POWER
40Wx40Wx4
A.ADJ
FM
AM
40Wx4
40Wx4
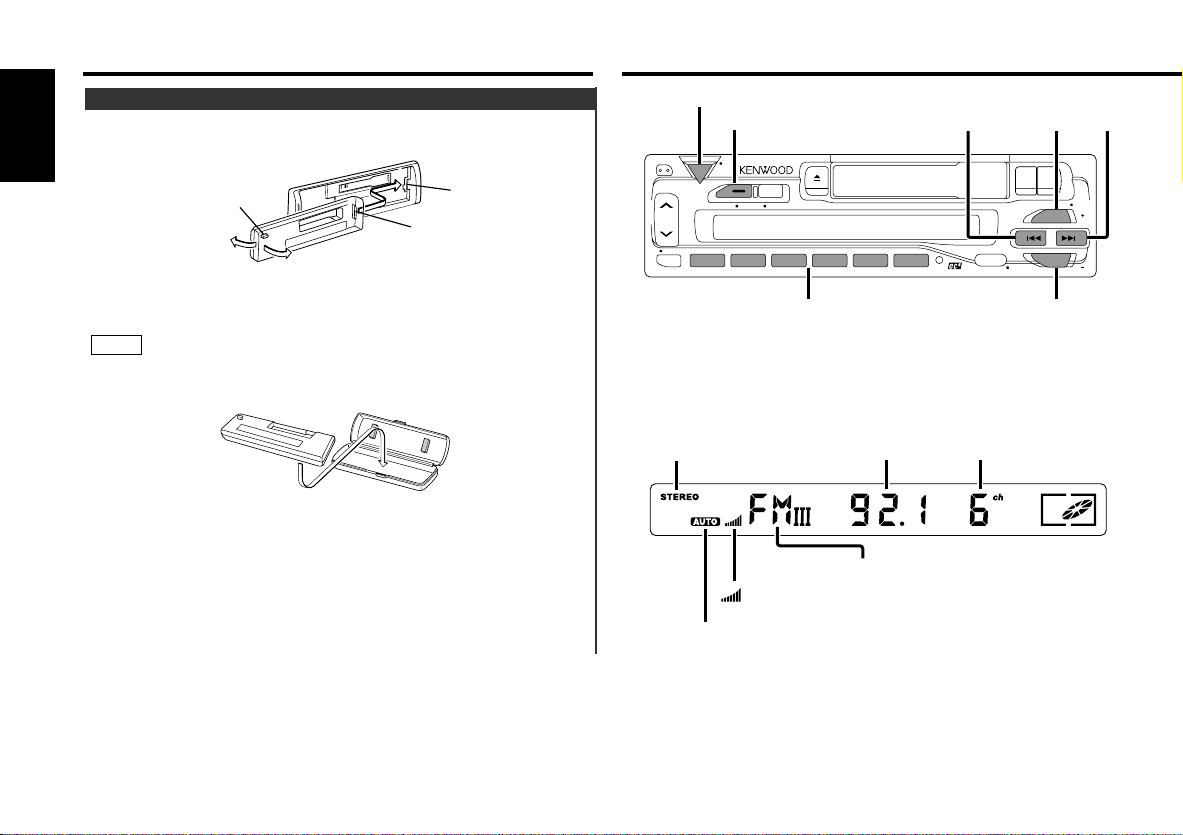
Theft Deterrent Faceplate
The faceplate of the unit can be detached and taken with you,
helping to deter theft.
English
Tuner features
Release button
Grooves
Removing the Faceplate:
Press the release button.
The faceplate is unlocked, allowing you to detach it.
NOTE
• The faceplate is a precision piece of equipment and can be
damaged by shocks or jolts. For that reason, keep the faceplate
in its special storage case while detached.
• Do not expose the faceplate or its storage case to direct
sunlight or excessive heat or humidity. Also avoid places with
too much dust or the possibility of water splashing.
Reattaching the Faceplate:
1
Align the projections on the unit with the grooves on the
faceplate.
2
Push the faceplate in until it clicks.
The faceplate is locked in place, allowing you to use the unit.
Projections
STEREO indicator
AUTO indicator
indicator
Frequency
Band display
Preset station number
— 8 —
 Loading...