How it Works
Log In / Sign Up
Buy Points
How it Works
FAQ
Contact Us
Questions and Suggestions
Users
Kenwood
Loading...
E
ESP101
ESP107
EW210
3
EW6708K
EW7307K
EW7507EBK
EW7507EK
2
Excelon KCA-RC800AV
Excelon KFC-X1730
excelon KFC-X174
EXCELON KFC-X682C
eXcelon KFC-Xr51p
2
Excelon KFC-Xr61p
2
eXcelon KFC-Xr71p
Excelon KFC-XT14
eXcelon KFC-XW1005dB
3
Excelon KFC-XW1025dB
4
Excelon KFC-XW10dB
eXcelon KFC-XW1100DVC
eXcelon KFC-XW1205dB
Excelon KFC-XW1225dB
4
Excelon KFC-XW12dB
eXcelon KFC-XW1300DVC
Excelon KVT-911DVD
Excelon Music Keg
Excelon Music Keg KHD-CX910
eXcelon XR-1800P
EZ500
2
Ez700SR
4
EZ900HDS
6
F
FC-1
3
FC-10
FC-2
3
FC-754A
FC-756
FDM10
2
FDM100
FDM100BA
FDM30
2
FDM301SS
2
FDM302
FDM302SS
FDM303SS
FDM304SS
FDM316SS
FDM73480SS
FDM78
2
FDM780
2
FDM786BA
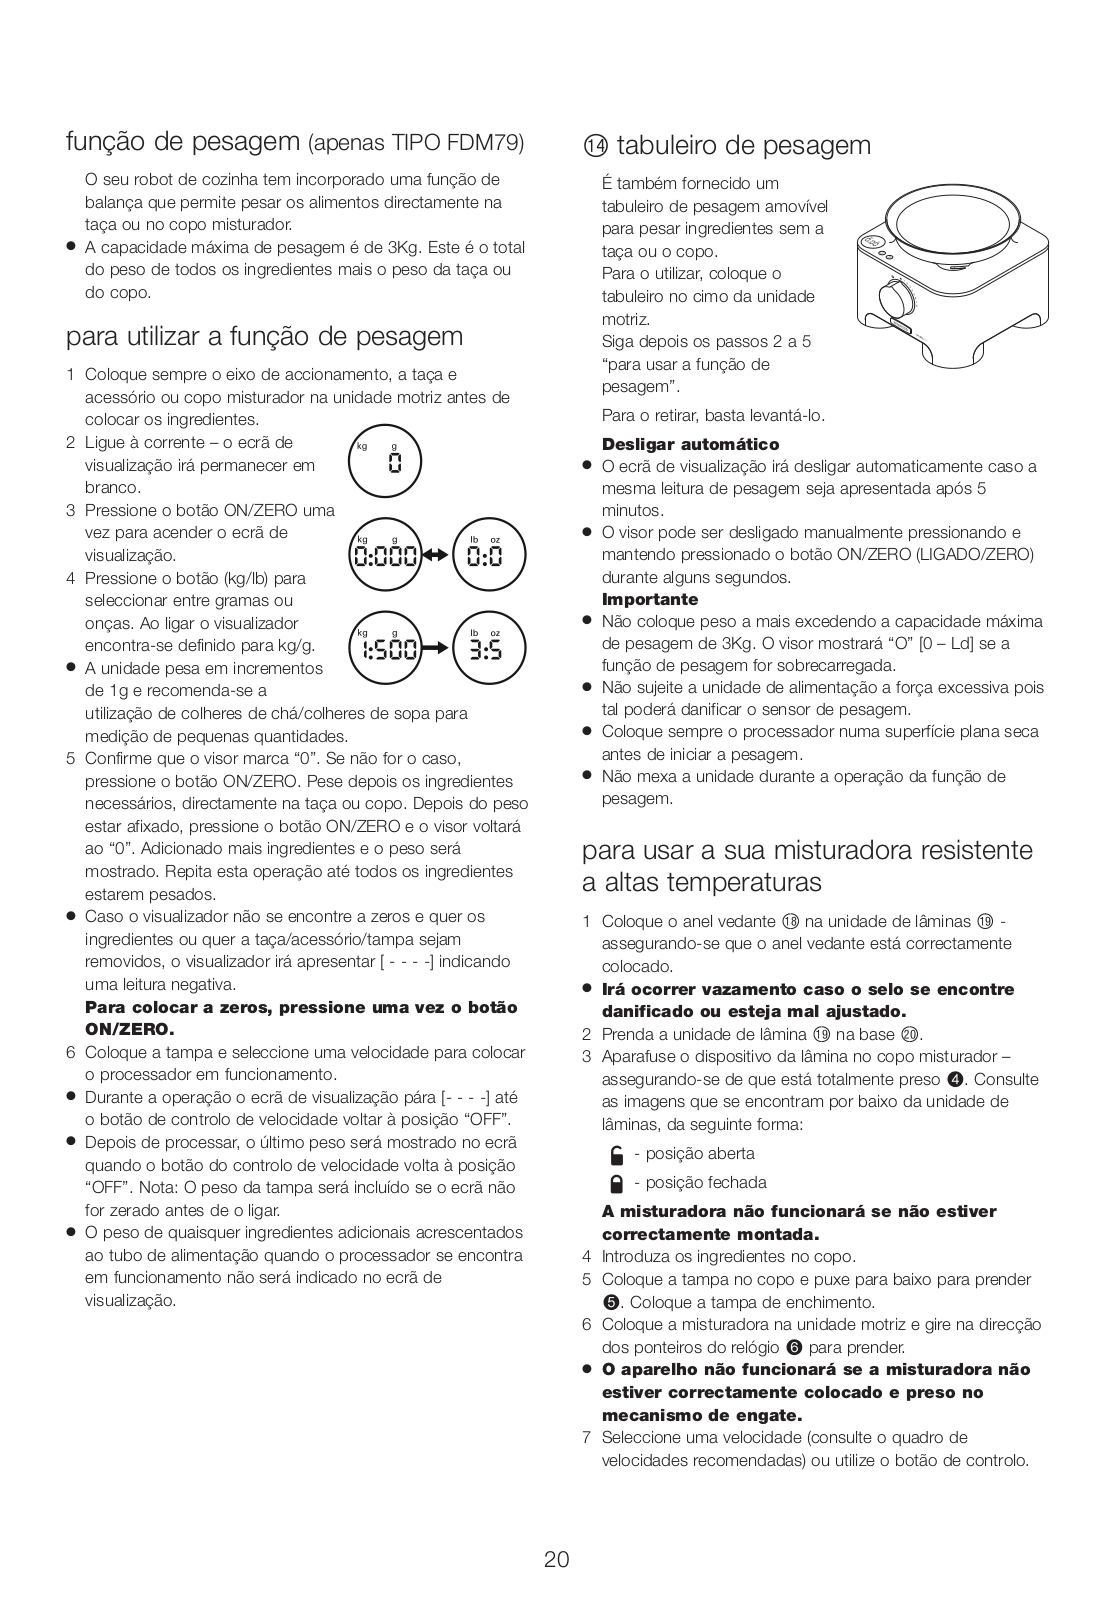
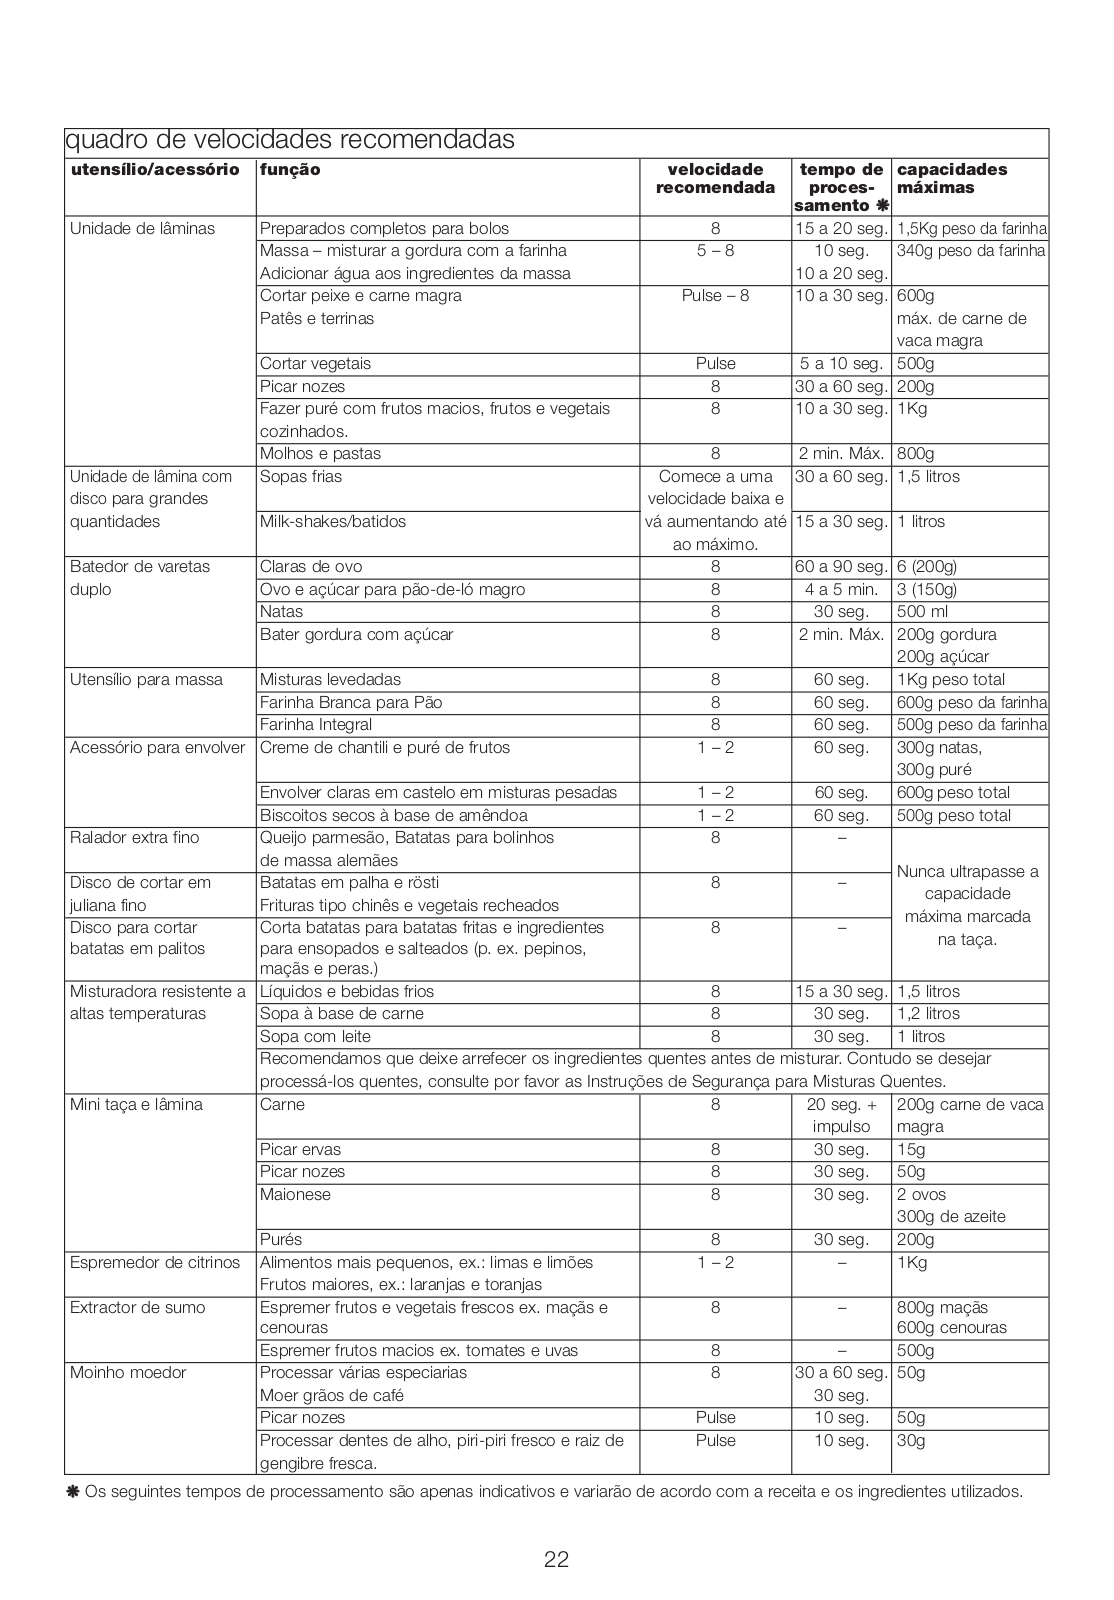
FDM79
4
FDM791
2
FDP22130GY
FDP22.130GY 650W
FDP300
FDP301
FDP301SI
FDP301WH
FDP302
FDP304
FDP304SI
FDP31360GY
FDP60
2
FDP600BK
FDP601WH
FDP 613 WH
FDP641WH
FDP642BK
FDP 643 WH
FDP 645 WH
FDP646SI
FDP65
FFDP64WH
FFINELINE RFU-6100
FG200
FGP20
2
FGP203WG
FGP204WG
FGZ-000-UF-2
FGZ201ELF2
5
FGZ-201-ERF-2
6
FGZ806EOP
FGZ80EF2
FHM15
FHM155SI
Fineline HTB-S710DV
FleetDispatchPRO
FleetSync KDS-100
FleetSync KMC-38GPS
FleetSync TK-5710(H)
FleetSync TK-690
FleetSync TK-7150
FleetSync TK-790
FleetSync TK-8102H
FleetSync TK-8150
FleetSync TK-890
FleetSync TK-980
FM-430
FNA-TM320
5
FP 270
2
FP 723
5
Loading...
Loading...
Nothing found
FDM791
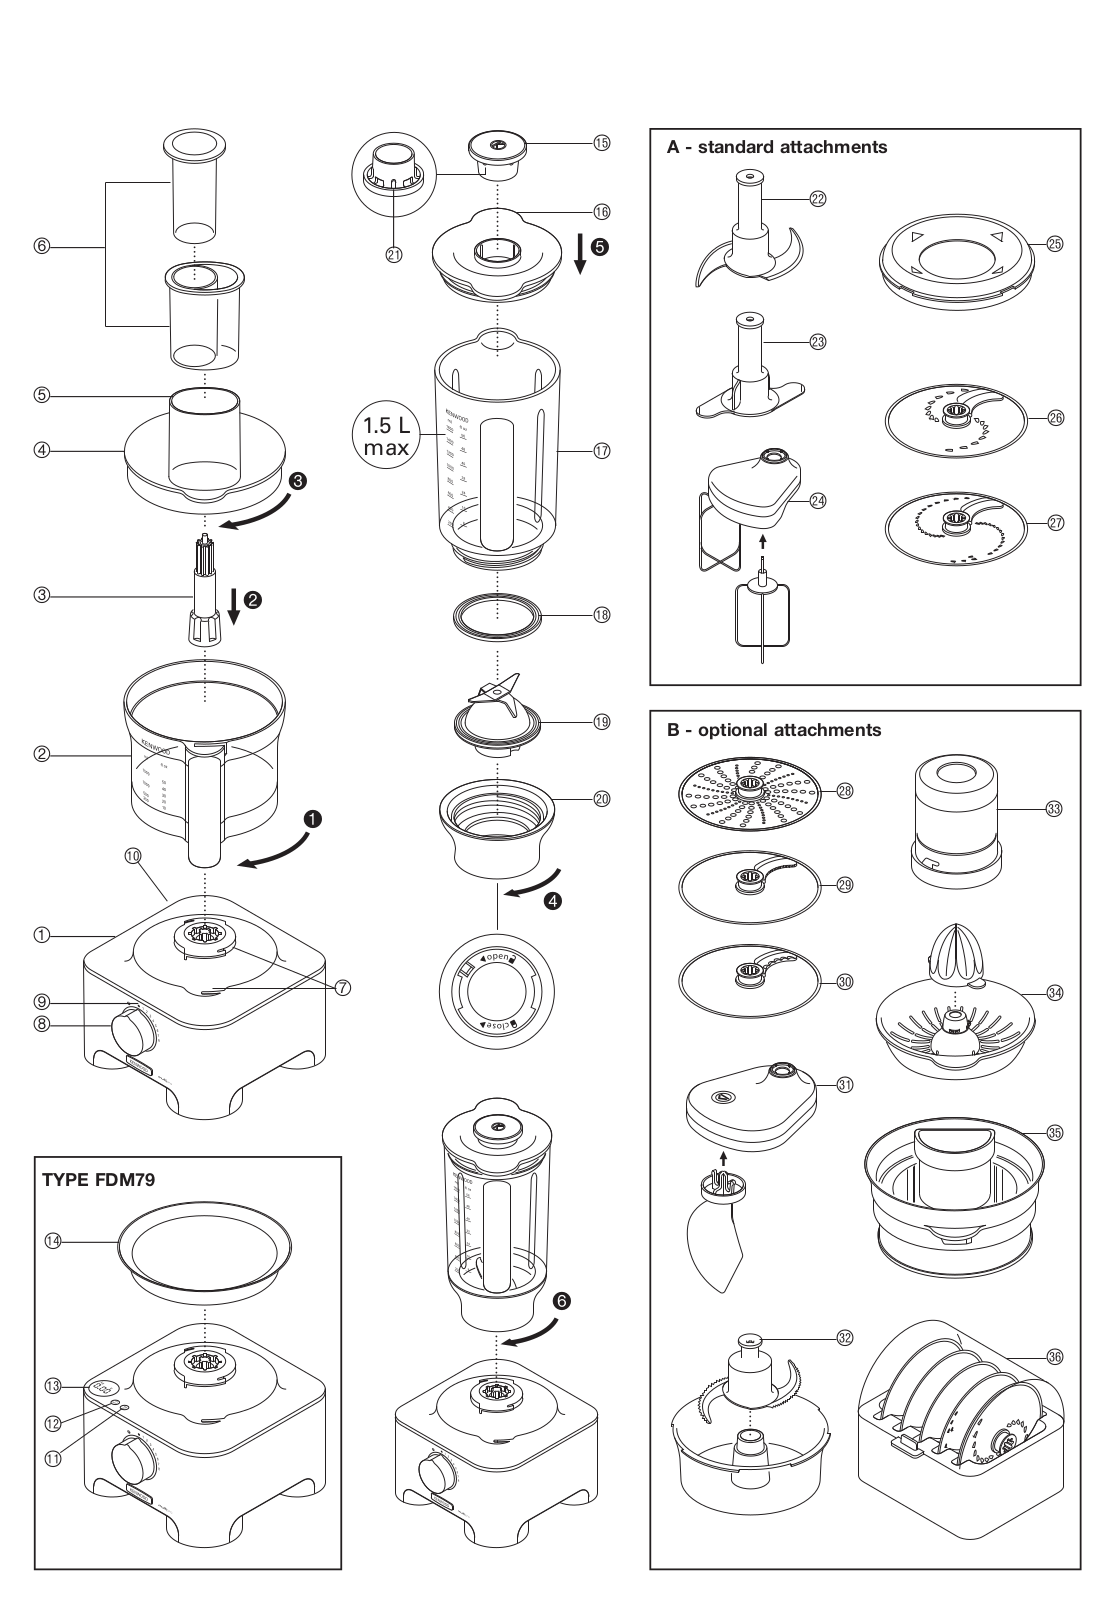
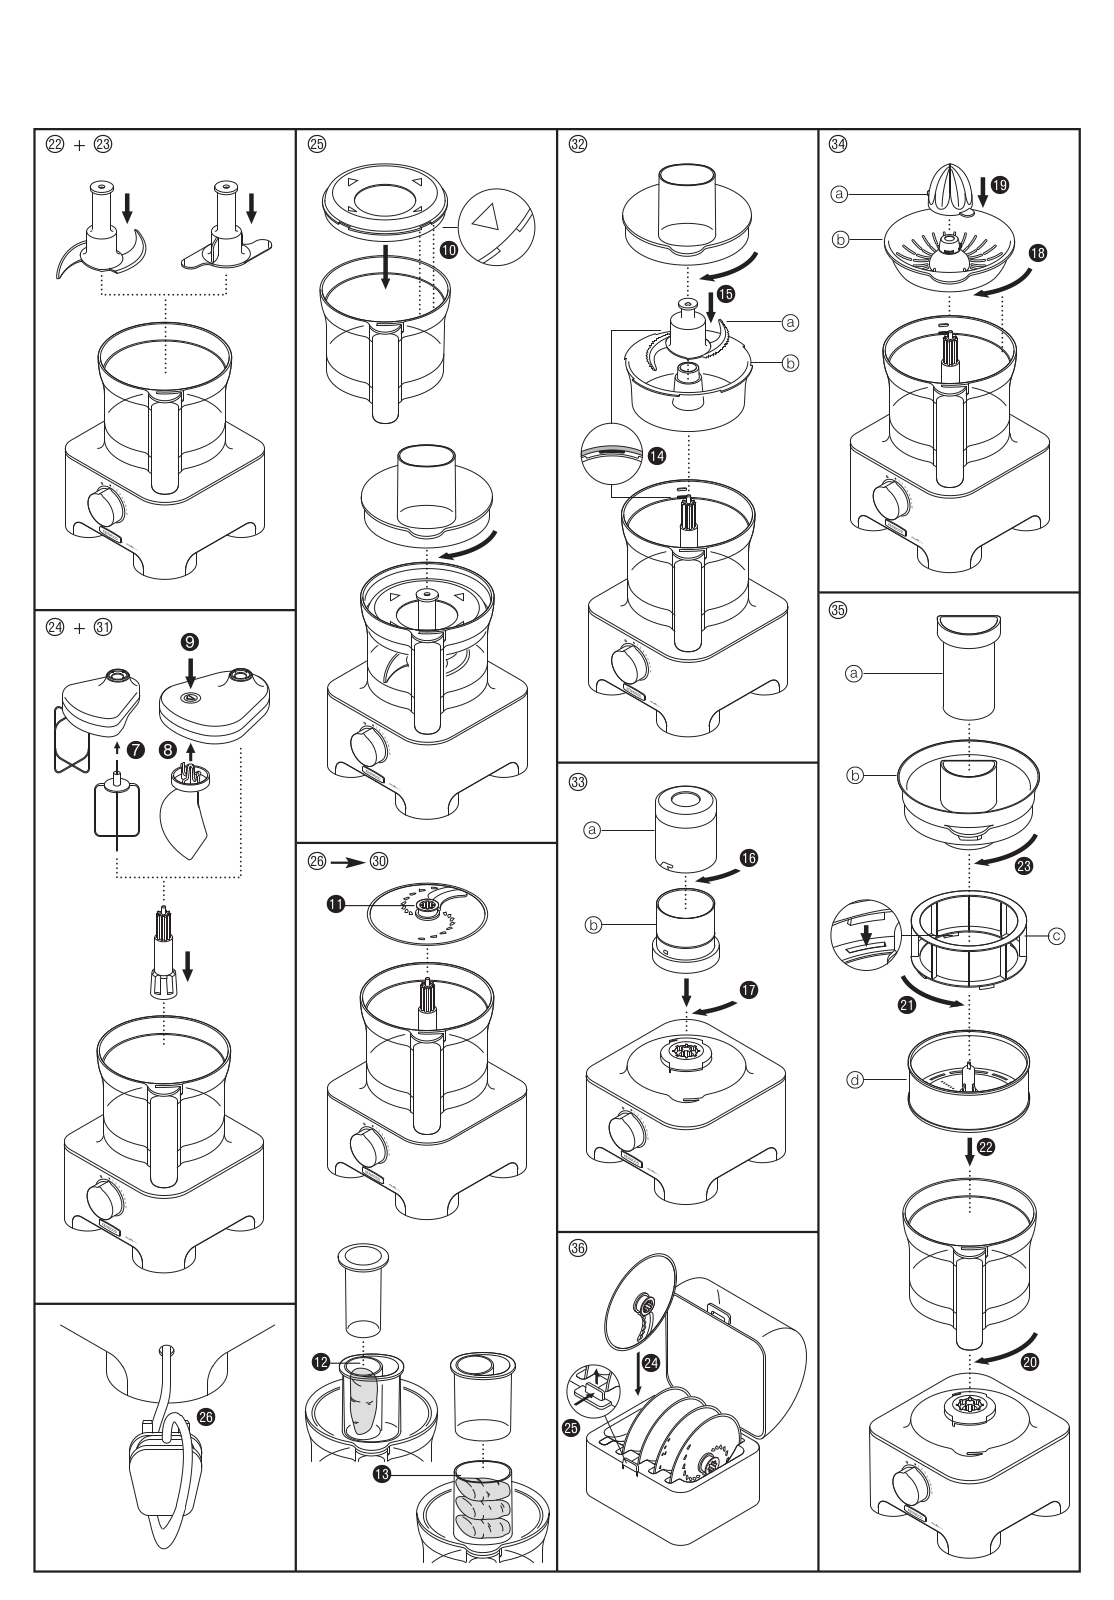
Operating Instructions
150 pgs
1.84 Mb
0
User Manual [nl]
121 pgs
1.48 Mb
0
Table of contents
Loading...
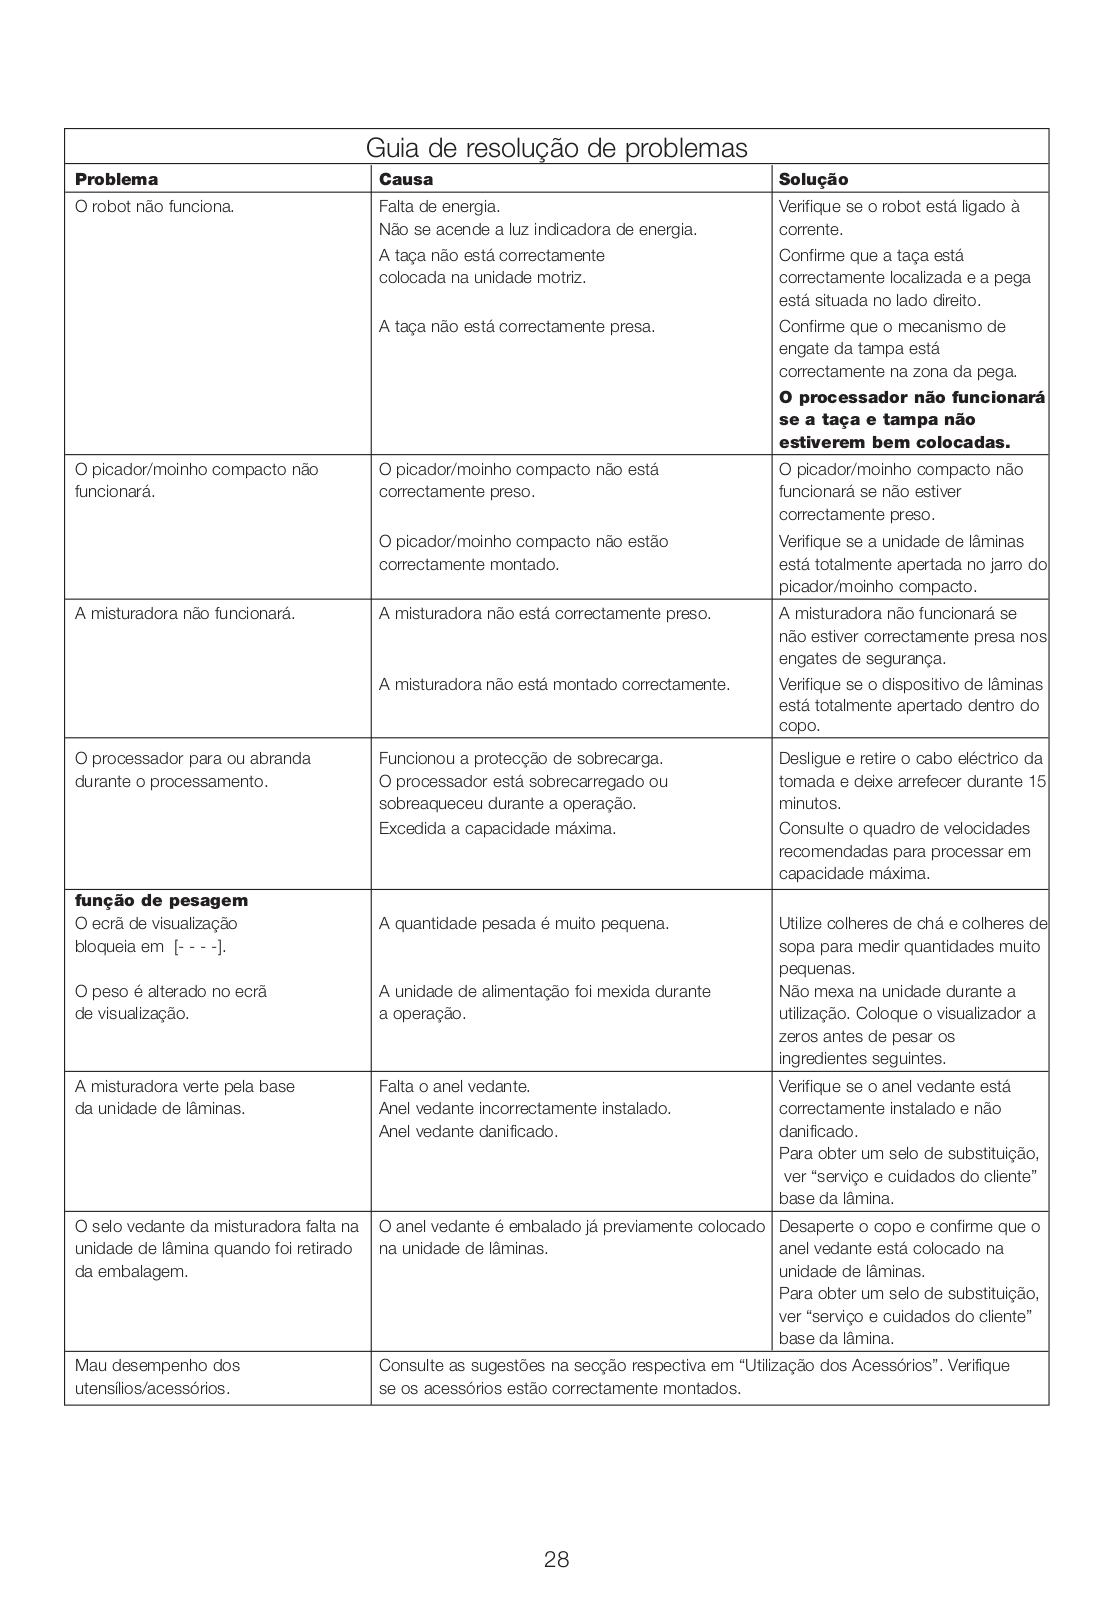
Kenwood FDM 791 Operating Instructions
...
Kenwood Operating Instructions
Download
Specifications and Main Features
Frequently Asked Questions
User Manual
Download
Loading...
+
hidden pages
Unhide
You need points to download manuals.
1 point = 1 manual.
You can buy points or you can get point for every manual you upload.
Buy points
Upload your manuals