


58716259401

Dishwasher
Use & Care Guide
Lavavajillas
Manual de uso y cuidado
Model/Modelo 587.1525\, 587.1625\
\
=color number , número de color
154578601
ENGLISHENGLISH
ENGLISHENGLISH
ENGLISH
ESPESP
ESPESP
ESP
AÑOLAÑOL
AÑOLAÑOL
AÑOL
®
Sears Roebuck and Co., Hoffman Estates, IL 60179 U.S.A.
Sears Canada Inc., T oronto, Ont ario, Canada M5B 2B8
www.sears.com
www.sears.ca

2
Warranty...................................................................... 3
Safety Instructions ...................................................... 4
Before Using Y our Dishwasher .................................. 5
Dishwasher Features.................................................. 6
Wash System .............................................................. 7
Operating Instructions ............................................. 7-9
Preparing and Loading Dishes ...................... 10-12
Dishwasher Dispenser and Detergents .............. 13-14
Factors Affecting Performance................................ 14
Care and Cleaning ................................................... 15
Solutions to Common
Dishwashing Problems........................................ 16-17
Service .......................................................Back Cover
TT
TT
T
able of Contentsable of Contents
able of Contentsable of Contents
able of Contents
ENGLISHENGLISH
ENGLISHENGLISH
ENGLISH
Master ProtectionMaster Protection
Master ProtectionMaster Protection
Master Protection
AgreementsAgreements
AgreementsAgreements
Agreements
Congratulations on making a smart purchase.
Y our new
Kenmore
®
appliance is designed and manufactured for
years of dependable operation. But like all products, it
may require preventive maintenance or repair from time
to time. That's when having a Master Protection Agree-
ment can save you money and aggravation.
Purchase a Master Protection Agreement now and
protect yourself from unexpected hassle and expense.
The Master Protection Agreement also help s extend the
life of your new appliance. Here's what's included
in the Agreement:
Expert Service by our 12,000 professional repair
specialists
Unlimited service and no charge for parts and
labor on all covered repairs
“No-lemon” guarantee – replacement of your
covered product if more than three product failures
occur within twelve months
Product replacement if your covered product can't
be fixed
Annual Preventive Maintenance Check at your
request - no extra charge
Fast help by phone – non-technical and
instructional assistance on products repaired
in your home, plus convenient repair scheduling
Power surge protection against electrical
damage due to power fluctuations
Rental reimbursement if repair of your covered
product takes longer than promised
Once you purchase the Agreement, a simple phone call
is all that it takes for you to schedule service. You can
call anytime day or night, or schedule a service
appointment online.
Sears has over 12,000 professional repair specialists,
who have access to over 4.5 million quality parts and
accessories. That's the kind of professionalism you can
count on to help prolong the life of your new purchase
for years to come. Purchase your Master Protection
Agreement today!
Some limitations and exclusions apply. For prices
and additional information call 1-800-827-6655.
Sears Installation Service
For Sears guaranteed professional installation
of home
appliances and items like garage door openers and
water heaters, in the U.S.A. call 1-800-4-MY-HOME
®
.

3
KenmorKenmor
KenmorKenmor
Kenmor
e Appliance We Appliance W
e Appliance We Appliance W
e Appliance W
arar
arar
ar
rantyranty
rantyranty
ranty
ENGLISHENGLISH
ENGLISHENGLISH
ENGLISH
One Year Limited Warranty
When installed, operated and maintained according to
all instructions supplied with the product, if this
appliance fails due to a defect in material or
workmanship within one year from the date of purchase,
call 1-800-4-MY-HOME® to arrange for free repair. If this
appliance is used for other than private family purposes,
this warranty applies for only 90 days from the date of
purchase.
This warranty covers only defects in material and
workmanship. Sears will NOT pay for:
1. Expendable items that can wear out from normal use,
including but not limited to filters, belts, light bulbs, and
bags.
2. A service technician to instruct the user in correct
product installation, operation or maintenance.
3. A service technician to clean or maintain this product.
4. Damage to or failure of this product if it is not
installed, operated or maintained according to all
instructions supplied with the product.
5. Damage to or failure of this product resulting from
accident, abuse, misuse or use for other than its
intended purpose.
6. Damage to or failure of this product caused by the
use of detergents, cleaners, chemicals or utensils other
than those recommended in all instructions supplied
with the product.
7. Damage to or failure of parts or systems resulting
from unauthorized modifications made to this product.
Disclaimer of implied warranties; limitations of
remedies
Customer’s sole and exclusive remedy under this limited
warranty shall be product repair as providedherein.
Implied warranties, including warranties of
merchantability or fitness for a particular purpose, are
limited to one year or the shortest period allowed by law.
Sears shall not be liable for incidental or consequential
damages. Some states and provinces do not allow the
exclusion or limitation of incidental or consequential
damages, or limitations on the duration of implied
warranties of merchantability or fitness, so these
exclusions or limitations may not apply to you.
This warranty applies only while this appliance is used in
the United States and Canada.
This warranty gives you specific legal rights, and you
may also have other rights which vary from state to state.
Sears, Roebuck and Co.,
Dept. 817WA, Hoffman Estates, IL 60179
Sears Canada Inc.
Toronto, Ontario, Canada M5B 2B8
In the space below, record your complete model number,
serial number and purchase date. You can find this
information on the model and serial number label,
located as shown in the Dishwasher Features section of
this book. Have this information available to help you
quickly obtain assistance or service when you contact
Sears concerning your appliance.
Model Number: 587.
Serial Number:
Purchase Date:
Save these instructions and your sales receipt for
future reference.
4
Dishwasher SafetyDishwasher Safety
Dishwasher SafetyDishwasher Safety
Dishwasher Safety
SAVE THESE INSTRUCTIONS
n If the dishwasher drains into a food disposer,
make sure disposer is completely empty before
running dishwasher.
n Disconnect electrical power to dishwasher before
servicing.
n Do not tamper with controls.
n Do not let children abuse, sit, stand or play on
door or racks of a dishwasher.
n Keep young children and infants away from
dishwasher when it is operating.
n Under certain conditions, hydrogen gas may be
produced in a hot water system that has not been
used for two weeks or more. HYDROGEN GAS
IS EXPLOSIVE. If the hot water system has not
been used for such a period, before using the
dishwasher turn on all hot water faucets and let
the water flow from each for several minutes. This
will release any accumulated hydrogen gas. As
the gas is flammable, do not smoke or use an
open flame during this time.
n To avoid entrapment and/or suffocation, remove
door or door latch mechanism from any
dishwasher that is discarded or not in use.
WARNING: When using the dishwasher , follow basic precautions, including the following:
IMPORTANT SAFETY INSTRUCTIONS
n Read all instructions before using the dishwasher.
n Use your dishwasher only as instructed in this
Use and Care Guide.
n Use only detergents or rinse agents recommended
for use in a dishwasher, and keep them out of the
reach of children.
n When loading items to be washed:
- Locate sharp items and knives so that they
are not likely to damage the door seal or
tub.
- Load sharp items and knives with the
handles up to reduce the risk of cut-type
injuries.
n Do not wash plastic items unless marked
“dishwasher safe” or the equivalent. Check with
manufacturer for recommendations, if not marked.
Items that are not dishwasher safe may melt and
create a potential fire hazard.
n Do not touch the heating element during or
immediately after use.
n Do not operate your dishwasher unless all
enclosure panels are properly in place.
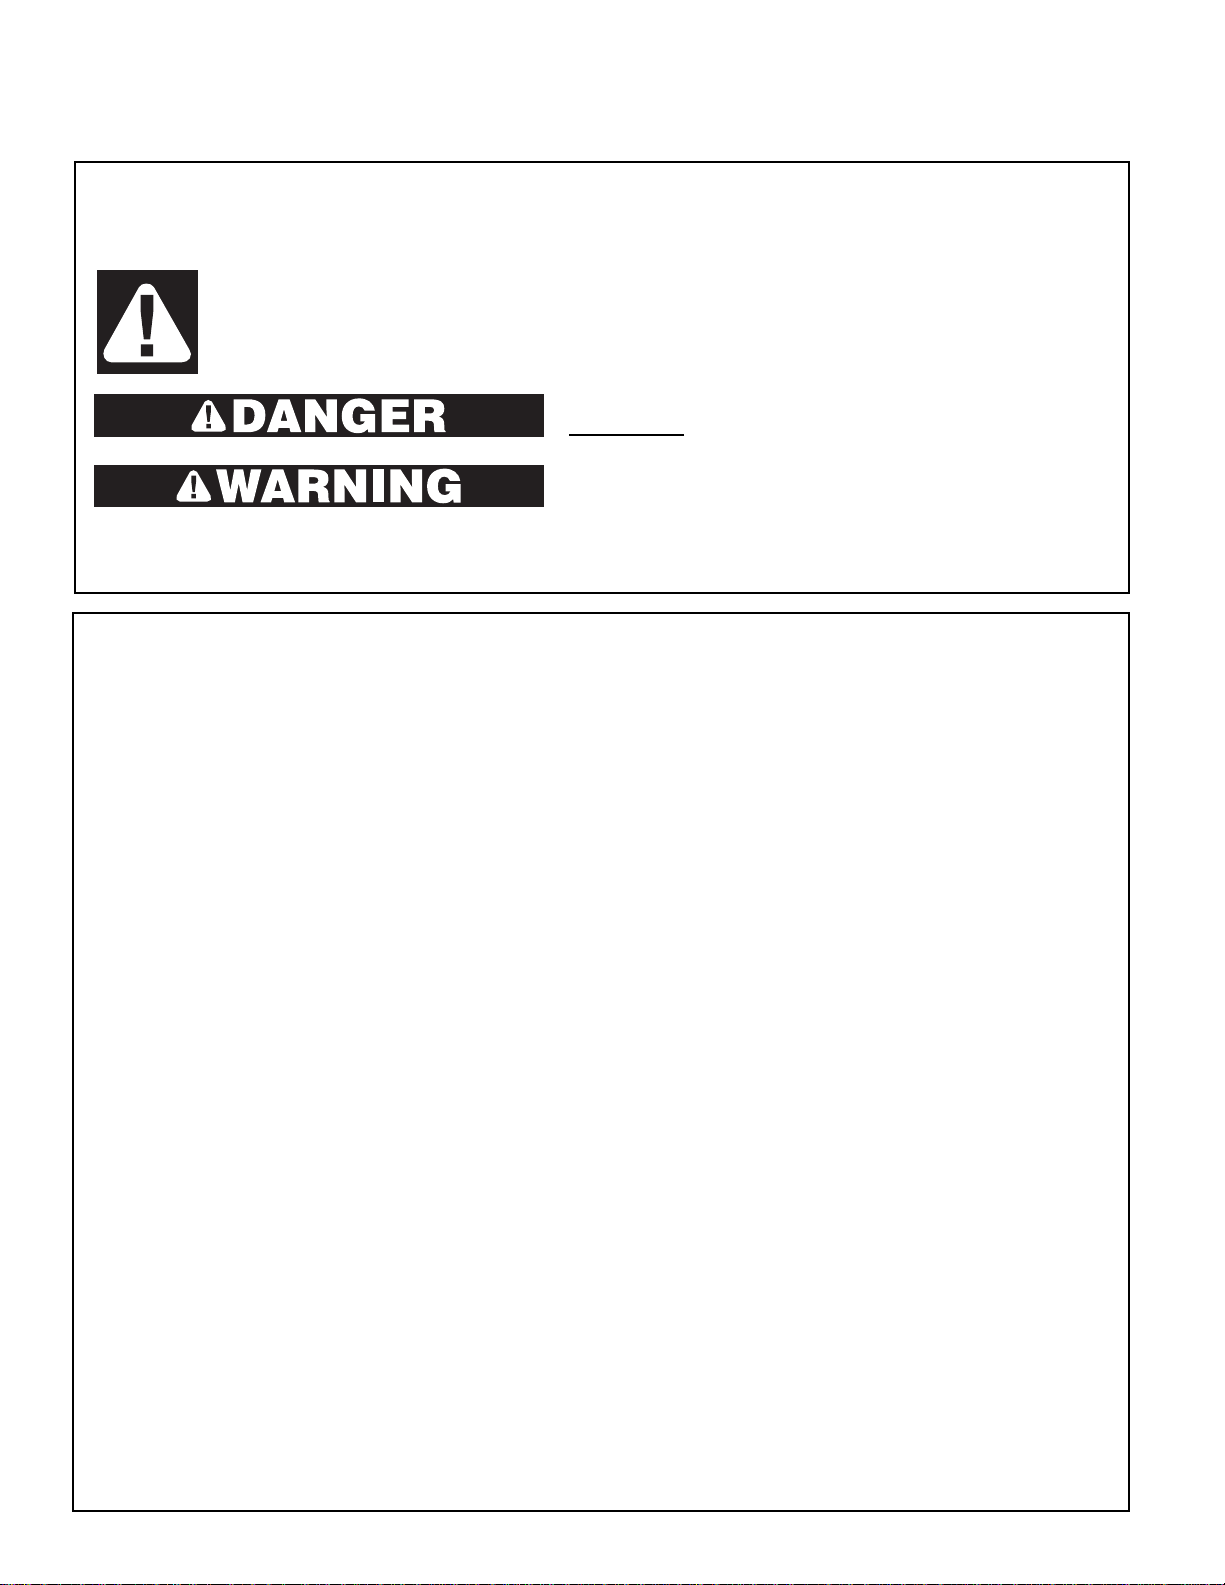
Your safety and the safety of others are very important.
We have provided many important safety messages in the manual and on your appliance. Always read and obey all
safety messages.
This is the safety alert symbol.
This symbol alerts you to potential hazards that can kill or hurt you and others.
All safety messages will follow the safety alert symbol and either the word “DANGER” or
“WARNING.” These words mean:
You can be killed or seriously injured if you don't
immediately follow instructions.
You can be killed or seriously injured if you don't follow
instructions.
All safety messages will tell you what the potential hazard is, tell you how to reduce the chance of injury, and tell you
what can happen if the instructions are not followed.
ENGLISHENGLISH
ENGLISHENGLISH
ENGLISH
5
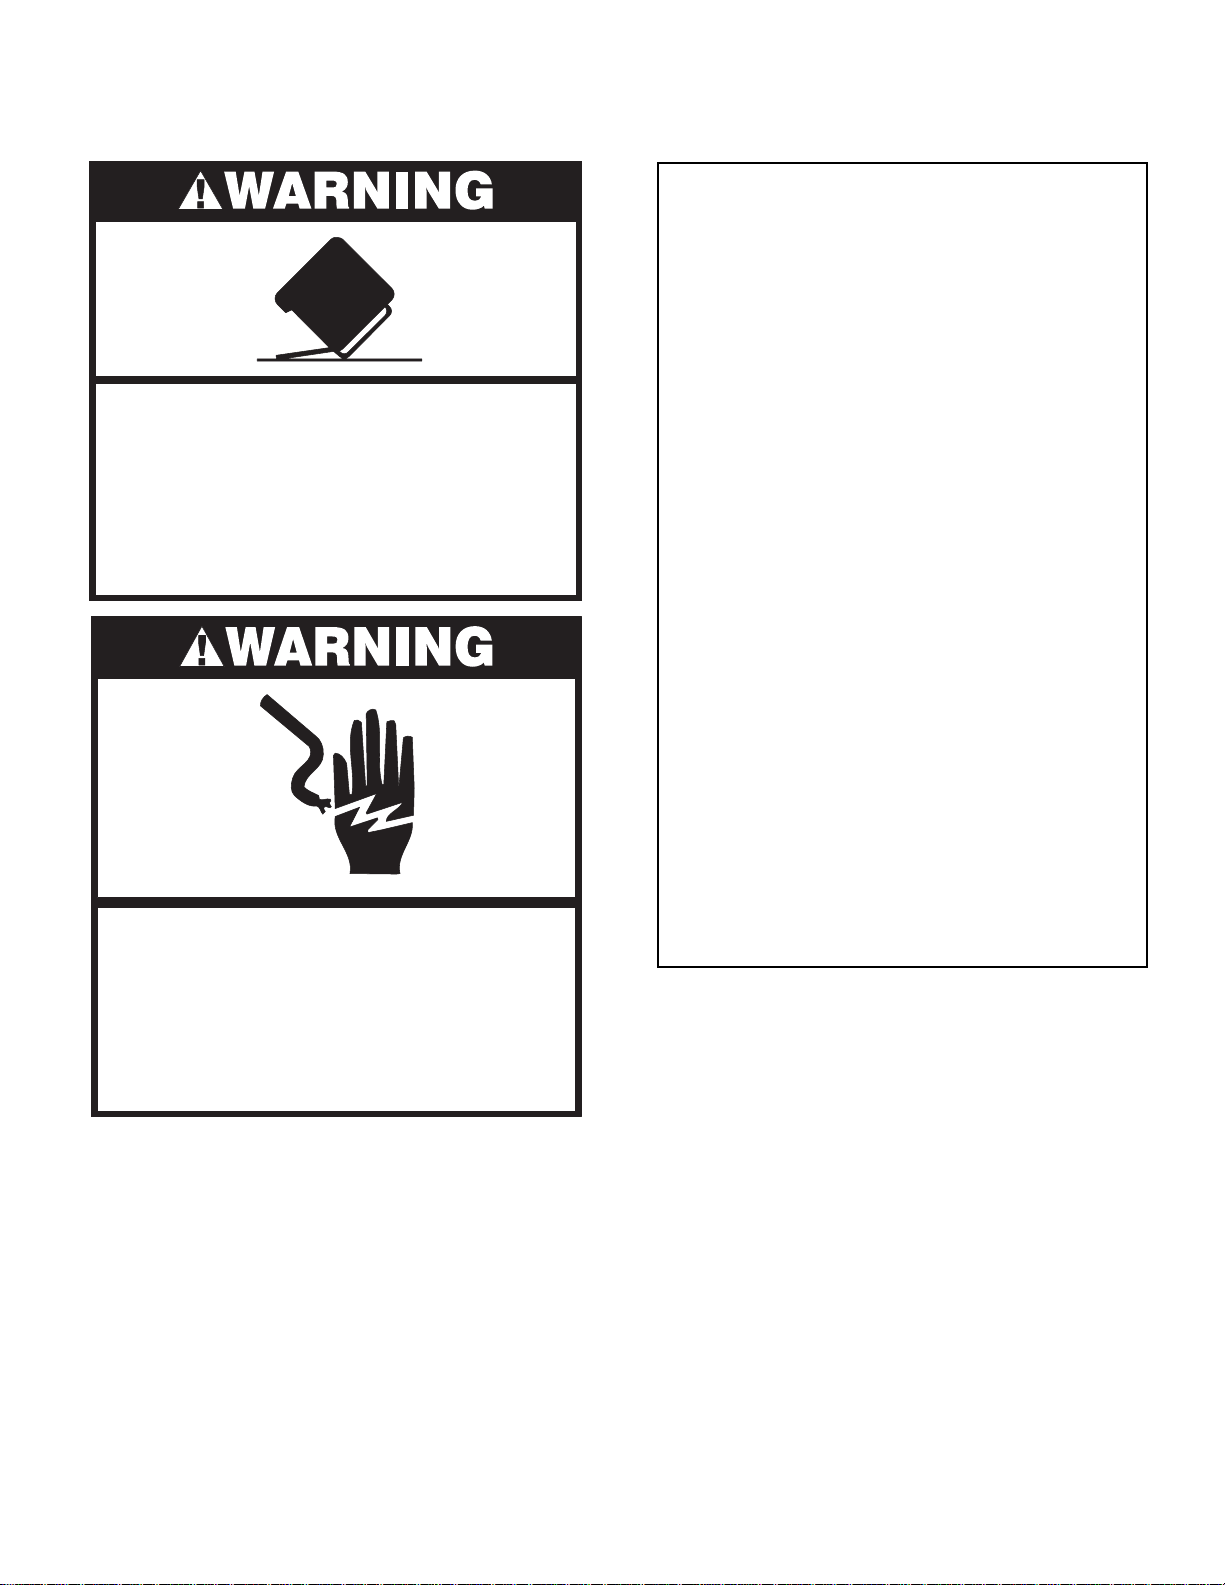
Electrical Shock Hazard
Electrically ground dishwasher.
Connect ground wire to green ground nut in
terminal box.
Do not use an extension cord.
Failure to do so can result in death, fire, or
electrical shock.
Do not use dishwasher until completely
installed.
Do not push down on open door.
Doing so can result in serious injury or cuts.
Tip Over Hazard
n For a grounded, cord-connected dishwasher:
The dishwasher must be grounded. In the event
of a malfunction or breakdown, grounding will
reduce the risk of electric shock by providing a
path of least resistance for electric current. The
dishwasher is equipped with a cord having an
equipment-grounding conductor and a grounding
plug. The plug must be plugged into an
appropriate outlet that is installed and grounded
in accordance with all local codes and
ordinances.
WARNING: Improper connection of the
equipment-grounding conductor can result in a
risk of electric shock. Check with a qualified
electrician or service representative if you are in
doubt whether the dishwasher is properly
grounded. Do not modify the plug provided with
the dishwasher. If it will not fit the outlet, have a
proper outlet installed by a qualified electrician.
n For a permanently connected dishwasher:
The dishwasher must be connected to a
grounded metal, permanent wiring system, or a
equipment-grounding conductor must be run with
the circuit conductors and connected to the
equipment-grounding terminal or lead on the
dishwasher.
SAVE THESE INSTRUCTIONS
GROUNDING INSTRUCTIONS
BeforBefor
BeforBefor
Befor
e Using Ye Using Y
e Using Ye Using Y
e Using Y
our Dishwasherour Dishwasher
our Dishwasherour Dishwasher
our Dishwasher
ENGLISHENGLISH
ENGLISHENGLISH
ENGLISH
6
ENGLISHENGLISH
ENGLISHENGLISH
ENGLISH
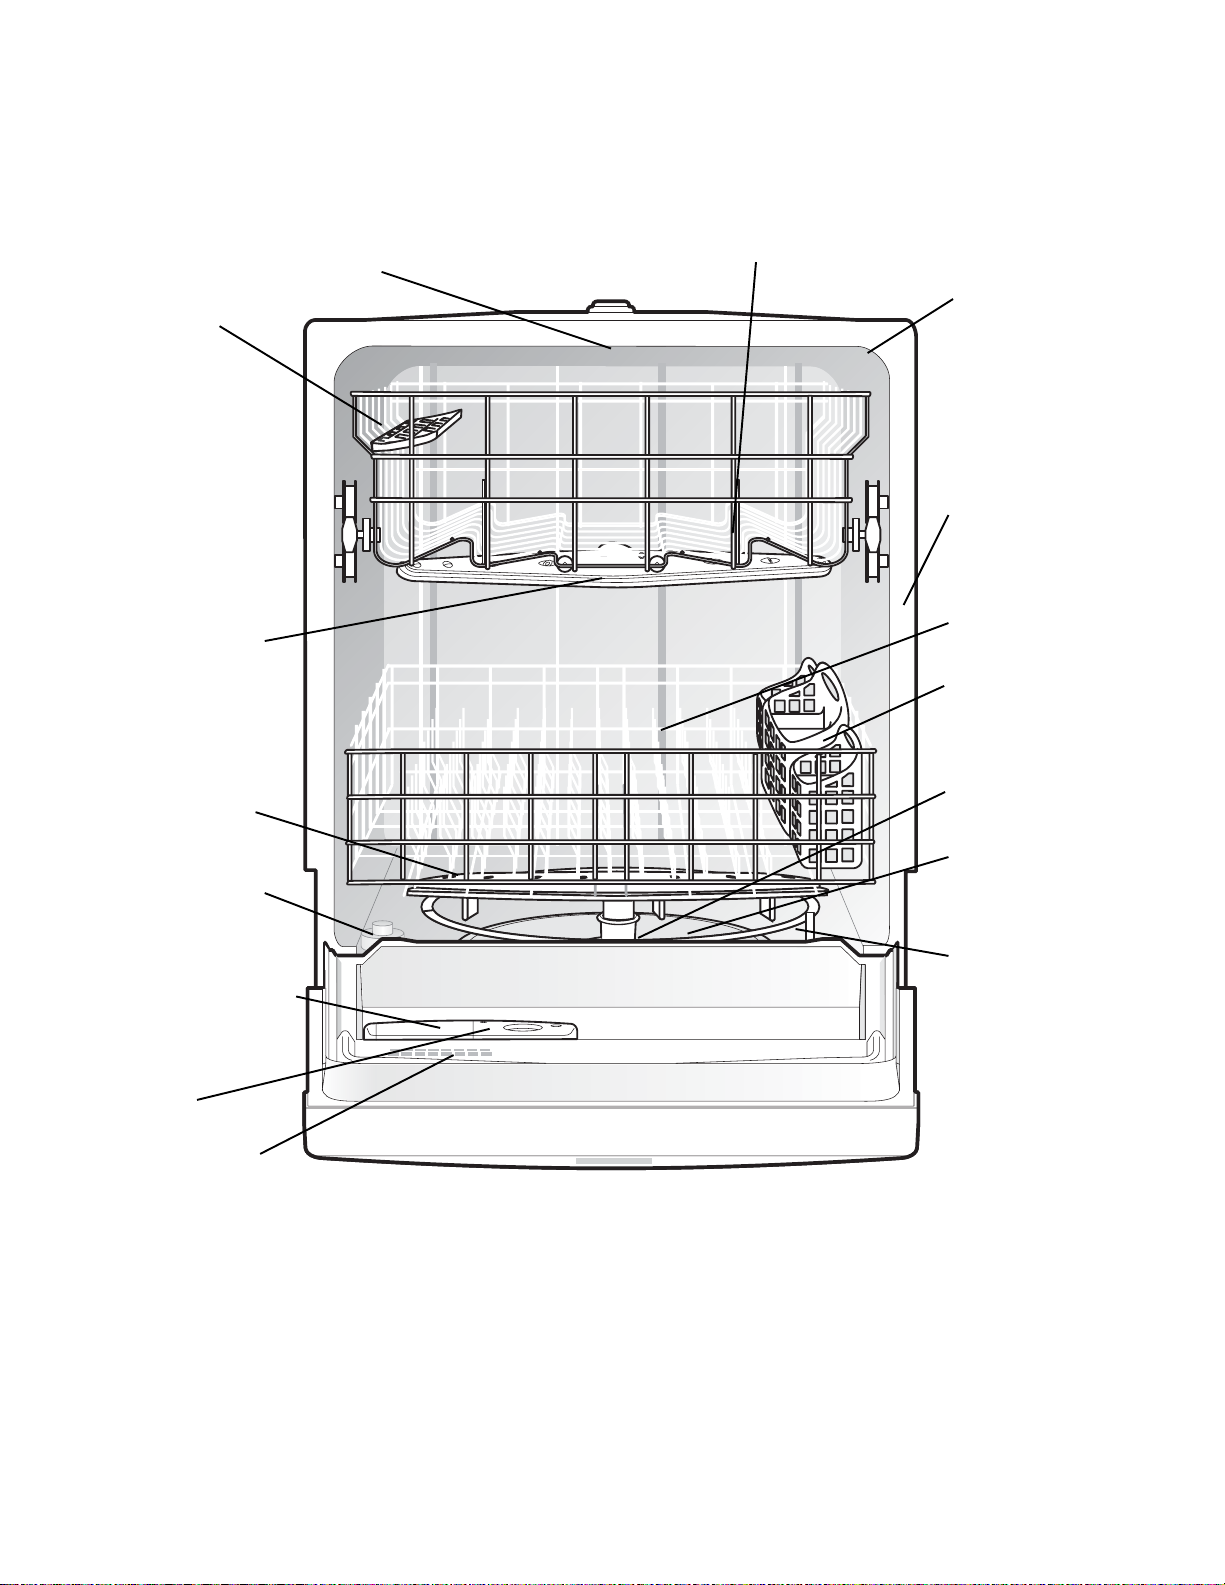
Dishwasher FeaturesDishwasher Features
Dishwasher FeaturesDishwasher Features
Dishwasher Features
Self-Cleaning
Filter
page 16
Rinse Aid
Dispenser
page 15
Nozzle
Tub Gasket
page 16
Middle Spray Arm
pages 11,12,17
Lower Spray Arm
pages 12,13,17
Detergent Dispenser
page 14
Vent
pages
6,8,18
Top Rack
pages 11,12
Silverware
Basket
page13
Cup Shelves
Overfill Protector
page 16
Appearance may vary from your model.
Serial Label
(located on right
side of tub)
Bottom Rack
page 11
Glass Trap
page 15
Heating Element
page 15
7
ENGLISHENGLISH
ENGLISHENGLISH
ENGLISH
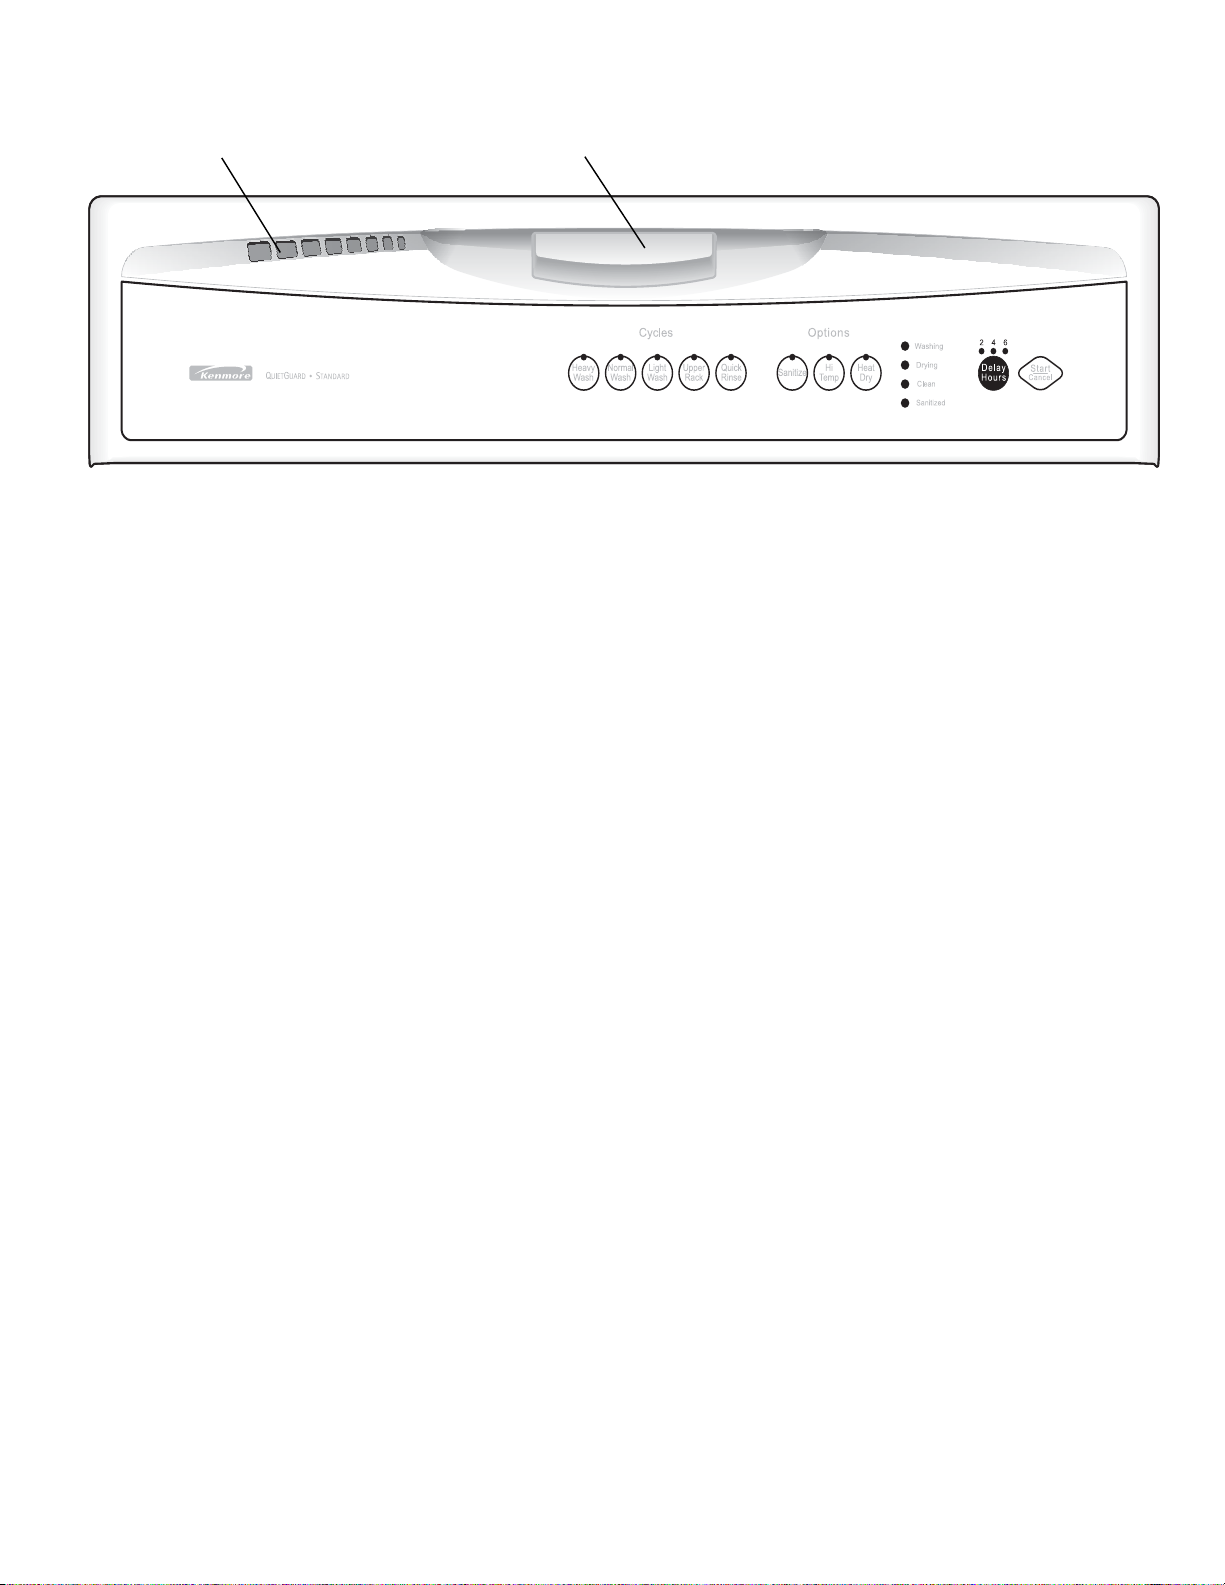
Status Indicator Lights
The WASHING light comes on at the beginning of cycle
and remains on until the end of the final rinse.
The DRYING light indicates the drying portion of the
cycle. The light will come on when either drying option is
selected.
When the SANITIZE option is selected, the SANITIZED
light will glow when the SANITIZE cycle is finished. If the
dishwasher did not properly sanitize the dishes, the light
will not come on. This can happen if the cycle is
interrupted. The light will remain on until the door is
opened.
The CLEAN light will come on at end of cycle and
remain on until door is opened.
Getting Started
Operating InstructionsOperating Instructions
Operating InstructionsOperating Instructions
Operating Instructions
1. Load dishwasher (See Preparing and
Loading Dishes).
2. Add detergent (See Dishwasher
Dispenser & Detergents).
3. Add rinse aid, if needed (See Rinse Aid).
4. Select desired CYCLE (See Cycle Chart).
The indicator will glow when selected.
5. Select desired OPTIONS (See Option
Selections). The indicator will glow when
selected.
6. If using WASH DELAY, go to step number
8.
7. Run hot water faucet nearest dishwasher
until water is hot. Turn water off.
8. To start, press START/CANCEL pad.
Vent
Latch
Appearance may vary from your model.
Wash System
Your Kenmore dishwasher filters 100% of the water
for optimum cleaning. The wash system uses
alternating arms to save water and energy and
includes a heavy-duty stainless steel food disposer
that grinds up large food particles.
How the wash system works
1. Load the dishwasher (See Preparing and Loading
Dishes).
2. Hot water enters the dishwasher, covers the filter,
and rises to the bottom of the heater clips.
3. Detergent is dispensed at the appropriate time and
mixed with the hot water. This mixture is pumped
through the lower spray arm and sprays against the
soiled surfaces of the dishes to remove food
particles.
4. Water passes through the fine mesh primary filter
where food soil is removed and the clean water is
then recirculated.
5. Ports under the lower wash arm direct the food soil
through a secondary filter into a collection chamber.
6. Food soil is held in the collection chamber until it is
flushed away during the drain cycle.
7. Clean, hot water enters the dishwasher and the
sequence is repeated.
8. Beginning with the third water fill, the wash action
switches between the lower spray arm and middle
spray arm in 90 second intervals. You may notice a
change in sound as the wash action pauses and
switches to the other arm.
9. The dishwasher may pause during the cycle while
water is being heated. Wash action will continue
during this time.
10. Rinse aid is automatically dispensed in the final
rinse to aid in drying.

8
Operating Instructions Operating Instructions
Operating Instructions Operating Instructions
Operating Instructions
(continued)(continued)
(continued)(continued)
(continued)
ENGLISHENGLISH
ENGLISHENGLISH
ENGLISH
Option Selections
Hi Temp Wash Option
When HI TEMP WASH option is selected, the
dishwasher heats the water in the main wash to
approximately 140°F (60°C). Wash action will continue
but timer will not advance until proper temperature is
reached. The hotter water provided by this option helps
activate dishwasher detergent to clean food grease and
soil from dishes. HI TEMP WASH option can be used
with any cycle except QUICK RINSE.
When HI TEMP WASH option is selected, the light
above the pad will come on and remain on until end of
cycle. To turn off the HI TEMP WASH option, press the
pad a second time. The light above the pad will turn off.
To turn off the HI TEMP option, press the pad a second
time. The light above the pad will turn off.
Heat Dry Option
The HEAT DRY option in combination with rinse aid will
give you excellent drying results. The energy to use
HEAT DRY costs pennies per cycle. You may turn off
the HEAT DRY option, however you will have items in
your dish load that will not be dry at the end of the
cycle.
With either option, you may see water vapor coming
from vent during the drying portion of the cycle. Some
models have a vent that is closed during washing to hold
moisture and sound inside and then opens for drying.
To turn off the HEAT DRY option, press the pad a
second time. The light above the pad will turn off.
The drying option may be changed at any time during
the cycle and affects only the drying period.
gal.
liters
1 3/4 hrs.8.5
32.2
For heavily soiled dishes
and silverware.
Heavy
Wash
• Turn dial to HEAVY WASH.
• Select desired OPTIONS.
Wash Cycle Selections
Note: Cycle times are approximate and will vary with options selected. Not all cycles available on all models.
2 washes
5 rinses
• DO NOT USE detergent.
• Turn dial to QUICK RINSE.
• Select HEAT DRY OFF.
• Turn dial to LIGHT WASH.
• Select desired options.
gal.
liters
2 wash
3 rinses
1 1/2 hrs.6.1
23.1
For lightly soiled or pre-
rinsed dishes and
silverware.
For rinsing dishes that will
be washed later.
2 rinse1/4 hrs.
gal.
liters
2.4
9.1
* Includes dry time.
Cycle Chart
Description Time*
(approx.)
Washes/
Rinses
Water
(approx.)
To Select CycleCycle
Light
Wash
Quick
Rinse
gal.
liters
2 washes
3 rinses
1 1/2 hrs.6.1
23.1
For regularly soiled dishes
and silverware.
Normal
Wash
• Turn dial to NORMAL WASH.
• Select desired options.
• Turn dial to UPPER RACK.
• Select desired options.
gal.
liters
1 wash
2 rinses
1 hrs.3.7
14.0
For glasses and other
lightly soiled items.
Upper
Rack

9
ENGLISHENGLISH
ENGLISHENGLISH
ENGLISH
Operating Instructions Operating Instructions
Operating Instructions Operating Instructions
Operating Instructions
(continued)(continued)
(continued)(continued)
(continued)
Sanitize Option
To sanitize your dishes and glassware, select the
SANITIZE option. When selected, the light above the pad
will come on and remain on until end of cycle. The water
temperature in the final rinse will be raised to 155°F
(68°C) and will maintain that temperature for 9 minutes.
This option is available in HEAVY, NORMAL and LIGHT
WASH cycles. Only these sanitization cycles have been
designed to meet NSF requirements.
The cycle time will be extended until the proper water
temperature is reached.
Washing action will continue
during the water heating delay. For best results, the
incoming water temperature should be at least 120°F
(49°C).
The sanitize criteria may not be satisfied if there is an
interruption of the cycle, power failure or if the incoming
water temperature is below 120°F (49°C).
To turn off the SANITIZE option, press the pad a second
time. The light above the pad will turn off.
Delay Start
The DELAY START option allows you to automatically
delay starting your dishwasher from 2-4 or 2-4-6 hours
depending on your model.
On models with 2-4-6 hour delay, press the pad once for
a 2 hour delay, twice for 4 hours and three times for 6
hours. A light will come on
indicating the delay start hours and will remain on until
cycle starts.
To cancel the DELAY START option and begin the cycle
before the delay period is over, press the START/
CANCEL pad.
To Cancel a Cycle
You can cancel a cycle anytime during the cycle. Press
START/CANCEL pad and the dishwasher will start a 90
second drain. At the end of the drain, select the desired
cycle.
Child Lock Controls
To prevent children from accidently changing the
dishwasher cycle or starting the dishwasher, lock the
dishwasher controls by pressing and releasing the HEAT
DRY pad for 3 seconds while the door is latched. An
indicator light on the lock graphic pad will illuminate
when the controls are locked and no new selections can
be made until the lock is released. To unlock the
controls, press the HEAT DRY pad until the indicator
light goes out.
10
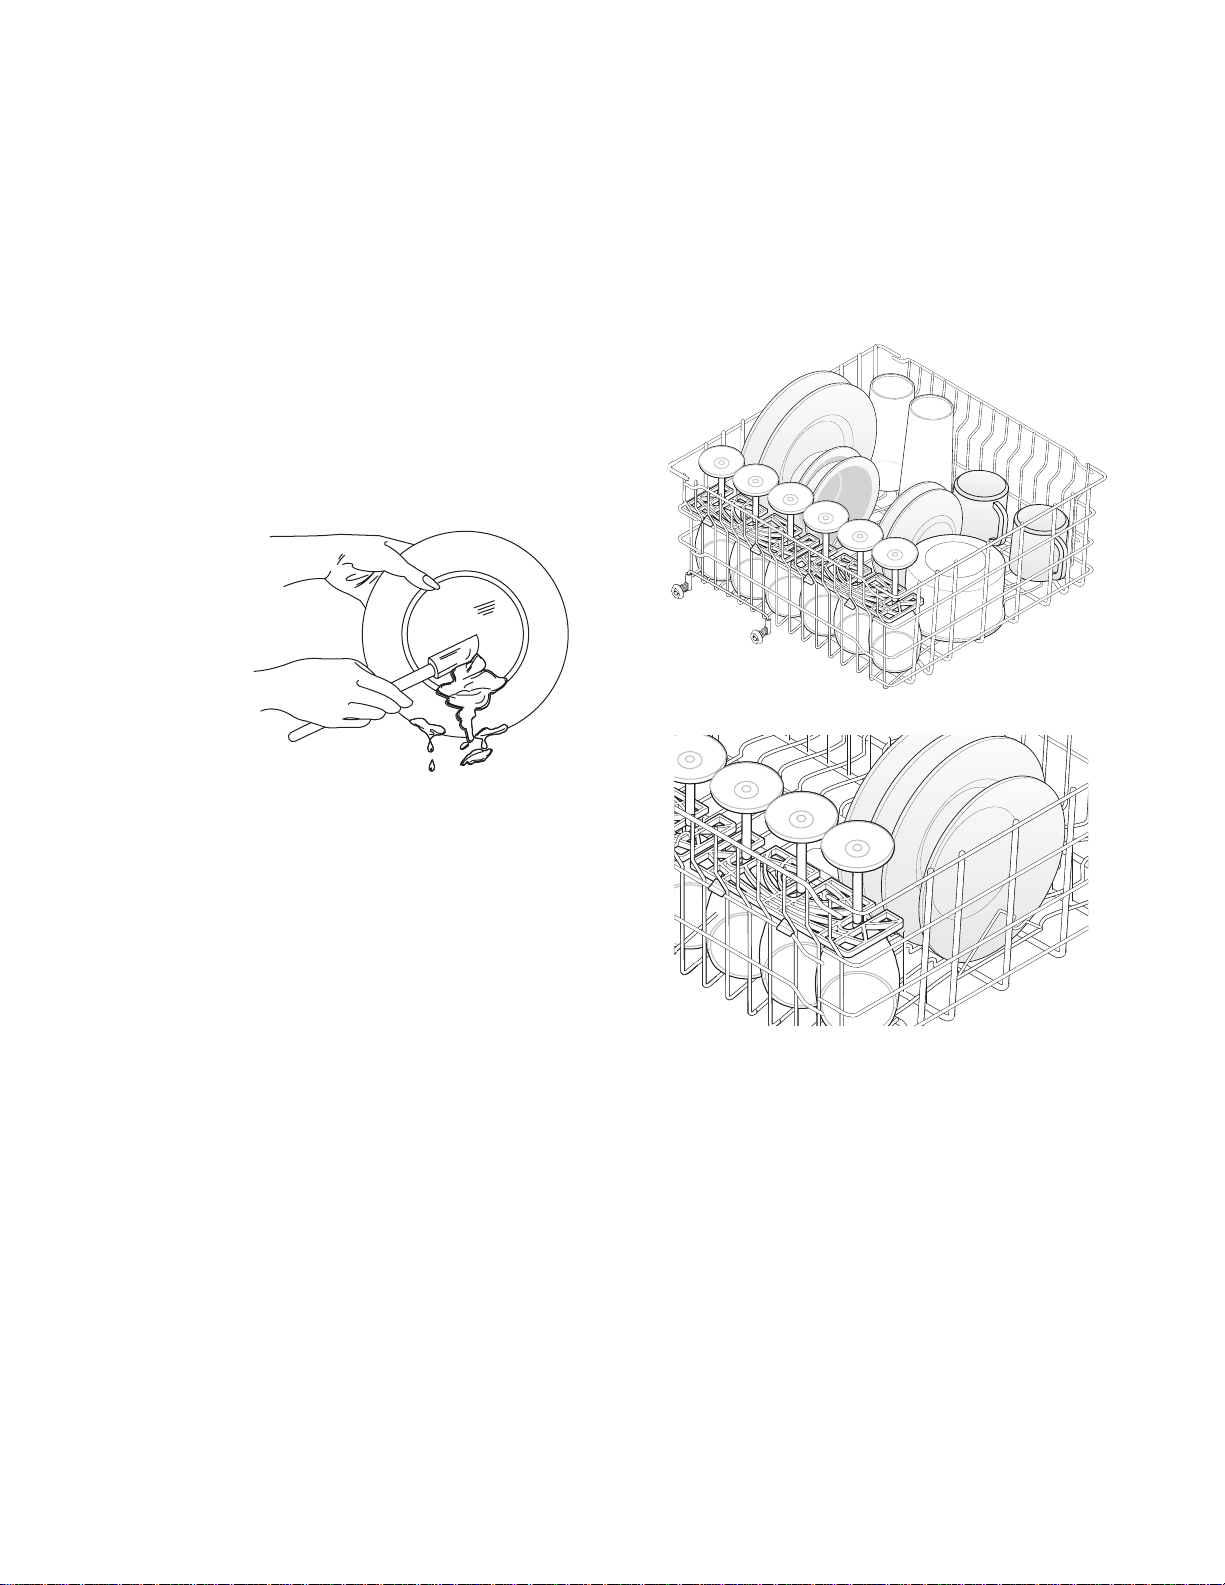
Dish Preparation
Scrape away large pieces of food, bones, pits,
toothpicks, etc. The continuous filtered wash system will
remove remaining food particles. Burned-on foods should
be loosened before loading. Empty liquids from glasses
and cups.
Foods such as mustard, mayonnaise, vinegar, lemon
juice and tomato based products may cause
discoloration of stainless steel and plastics if allowed to
sit for a long period of time. Unless the dishwasher is to
be operated at once, it is best to rinse off these food
soils.
• Load racks so
that large items
do not
prevent the
detergent
dispenser
from opening.
• Check
manufacturer's
recommendations
before washing items in question.
• If the dishwasher drains into a food disposer, be
sure disposer is completely empty before
starting dishwasher.
Loading the Top Rack
Features and appearance of racks and silverware basket
may vary from your model.
The top rack is designed for flexibility in loading a wide
variety of items including cups, glasses, stemware,
small plates, bowls, etc.
Load glasses in top rack. Damage may occur if placed
in bottom rack.
Load plastic items in top rack only. Melting may occur if
placed in bottom rack.
Load items with open ends facing down for better
cleaning and draining.
Damage may occur if delicate items touch each other
during dishwasher operation.
Preparing and Loading DishesPreparing and Loading Dishes
Preparing and Loading DishesPreparing and Loading Dishes
Preparing and Loading Dishes
ENGLISHENGLISH
ENGLISHENGLISH
ENGLISH
Long-handled knives and utensils can be placed in top
rack.
Be sure nothing protrudes through the bottom of the rack
to block rotation of middle spray arm.
Some models have a fold-down cup shelf or a cup shelf/
stemware holder. They can be used to load two levels of
cups, juice glasses, and other short items. Stagger
items on upper level so that water can reach all inside
surfaces. Fold up to load tall glasses.

11
Loading the Bottom Rack
Features and appearance of racks and silverware basket
may vary from your model.
The bottom rack is best for plates, saucers, bowls, and
cookware. Large items should be placed along the edge
so they do not block the spray arm rotation. For best
results, place bowls, casseroles, and sauce pans with
soiled surface facing down or toward the center. Tilt
slightly for better drainage.
Make sure tall items do not block spray arm rotation.
Be sure pan handles do not protrude through the bottom
of the rack and block the spray arm rotation.
10 place setting
10 place setting
Preparing and Loading Dishes Preparing and Loading Dishes
Preparing and Loading Dishes Preparing and Loading Dishes
Preparing and Loading Dishes
(continued)(continued)
(continued)(continued)
(continued)
ENGLISHENGLISH
ENGLISHENGLISH
ENGLISH
12 place setting
12 place setting
 Loading...