

Keating Of Chicago Safe and Easy Filter User Manual

“Serving Those Who Serve The Very Best”®
SAFE & EASY™
FILTER
OWNERS MANUAL
1-800-KEATING
www.keatingofchicago.com
037402
This Owner’s Guide provides specific operating instructions for your model.
Use the Safe & Easy Filter only as instructed in this Service Guide.
Versión en español
Si desea obtener usa copia en español de estes Manual del Usuario,
sirvase escribir la dirección que se incluye a continuadión.

READ AND SAVE THIS MANUAL FOR FUTURE REFERENCE
Record the Model No. and Serial No. (located on the back of the motor housing) of this
Safe & Easy Filter in the space provided below.
Serial No. ____________________________________________________________
Model No. ____________________________________________________________
Keep these numbers for future reference
IMPORTANT: Keep a copy of your bill of sale. The date on the bill establishes the warranty period
should service be required. If service is performed, it is in your interest to obtain and keep all
receipts. Keating commercial fryers are intended for other than household use.
This Owner’s Guide provides specific operating instructions for your model. Use the Safe & Easy
Filter only as instructed in this Service Guide.
CONTENTS
:
SECTION A - Preparing the Filter Drawer
Removing the Filter ..................................................1
Installing Components ..............................................1
Connecting the Tub ..................................................1
Connecting the Filter Assembley ..........................1-2
SECTION B - Preparing the Oil for Filtration
Oil Temperature ........................................................2
Removing the Screen................................................3
SECTION C - Filtration
Draining Oil ..............................................................2
Returning the Oil ....................................................2-3
Rinsing the Fryer....................................................2-3
SECTION D - Clean Up
Instructions ................................................................3
Drain Valve Handle Placement ................................3
SECTION E - Discarding the Oil
Preparing the Filter....................................................3
Connecting the Discard Hose ................................3-4
Instructions ................................................................4
Filter Side View ........................................................4
SECTION F - Quick Hits
Do’s & Don’ts ............................................................4
SECTION G
Parts List ..................................................................5
SECTION H - Self Help Guide
Problem/Solutions ..................................................6-7
Preventative Maintenance ........................................7
SECTION I
Wiring Diagram ........................................................8
SECTION J
Warranty Information ................................................9
A. PREPARING THE FILTER-DRAWER
CAUTION
WATER IN ANY FORM & HOT OIL DON'T MIX!
NOTE: Operator should be outfitted with proper
protective attire: safety goggles, oil and heat
resistant gloves, apron and footwear
Filter assembly inside of cabinet:
1. Pull the handle marked “Pull to Release Filter”
(top of filter panel).
2. Remove the entire assembly from the cabinet by rolling it
forward.
3. Pull the handle marked “Pull to Release Tub”
(bottom of panel)
4. Slide the tub back, lift up and remove from cart.
5. Ensure all compnents are clean
(NOTE: Filter tub and components are dishwasher safe).
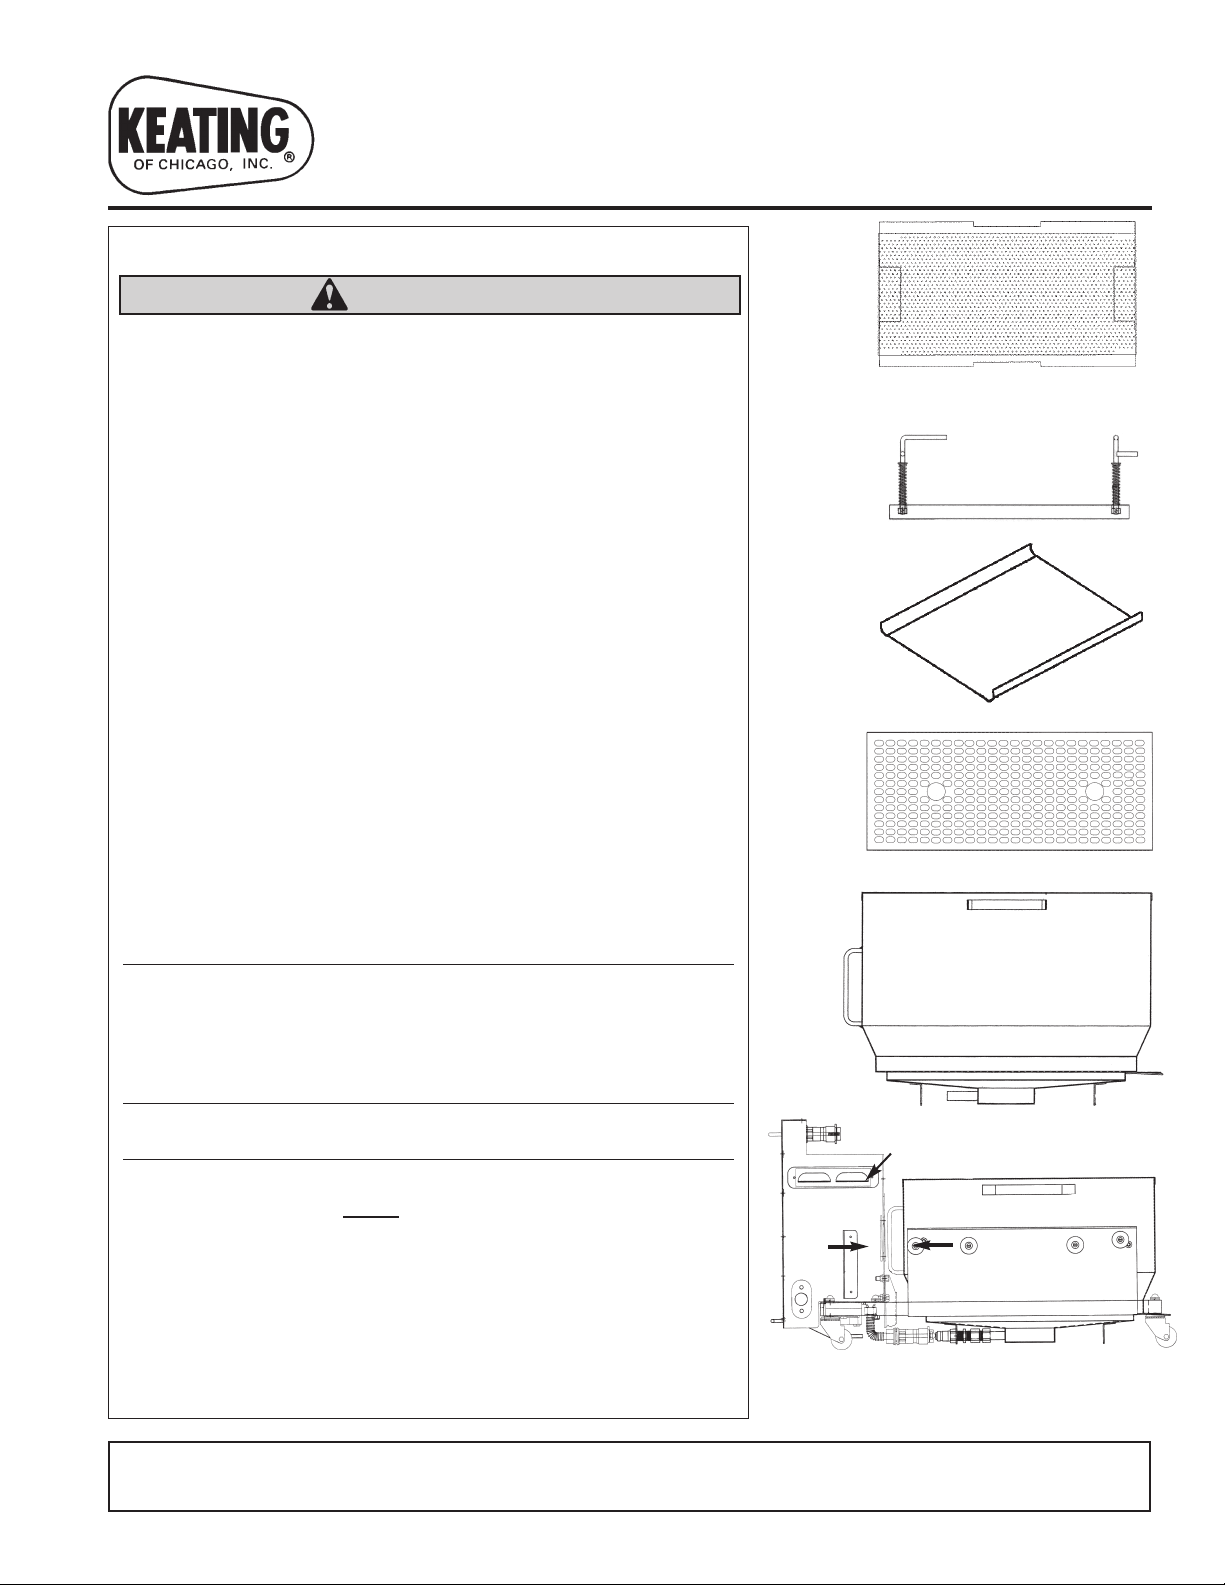
6. Install components into tub as follows:
a. Sump screen
b. Filter paper
c. Hold down ring (Note 1)
d. Acidox (1 package per 40lbs oil) (Note 2)
e. Crumb basket
See Figure 1
NOTE 1: Hold down ring makes a gasket-like seal on filter
paper. Filter paper must be placed edge to edge from front to
back, overlapping on sides. Filter Paper must be smooth and
flat under hold down ring to get a proper seal. Lock the two
tension arms into place.
NOTE 2: One package of Acidox is needed for every 40
pounds of oil.
7. Place entire tub assembly onto the cart (NOTE: Ensure
the lip on the tub goes under
the cart frame in the rear).
8. Reconnect the tub to the motor by pulling together the
handles on the front of the tub and the handles on the
side of the motor housing.
See Figure 2
NOTE: Push on the front of the tub to verify connection. If tub
moves, repeat steps 7-8.
SAFE & EASY FILTER
OOPPEERRAATTIINNGG IINNSSTTRRUUCCTTIIOONNSS
KEEP THIS MANUAL FOR TRAINING NEW PERSONNEL
– 1 –
CRUMB
BASKET
FILTER
TUB
HOLD
DOWN RING
FILTER
PAPER
SUMP
SCREEN
SPRINKLE ACIDOX EVENLY ON PAPER
FIGURE 1.
FIGURE 2.
Pull handles to connect tub to pump
Motor Housing
9. Sprinkle Keating Acidox Powder evenly over the paper.
10. Replace crumb basket and push drawer fully into cabinet.
Ensure the connection on top of the housing mates with the
connection inside the cabinet.
Pull the front of the filter system lightly to verify proper
connection
NOTE: Cabinet door should be closed during filtration.
NOTE: For best results, new filter paper and Acidox Powder
must be used for each fryer.
B. PREPARING OIL FOR FILTRATION
NOTE: Oil in fryer must be between 250° - 350°F.
1. Turn fryer completely off.
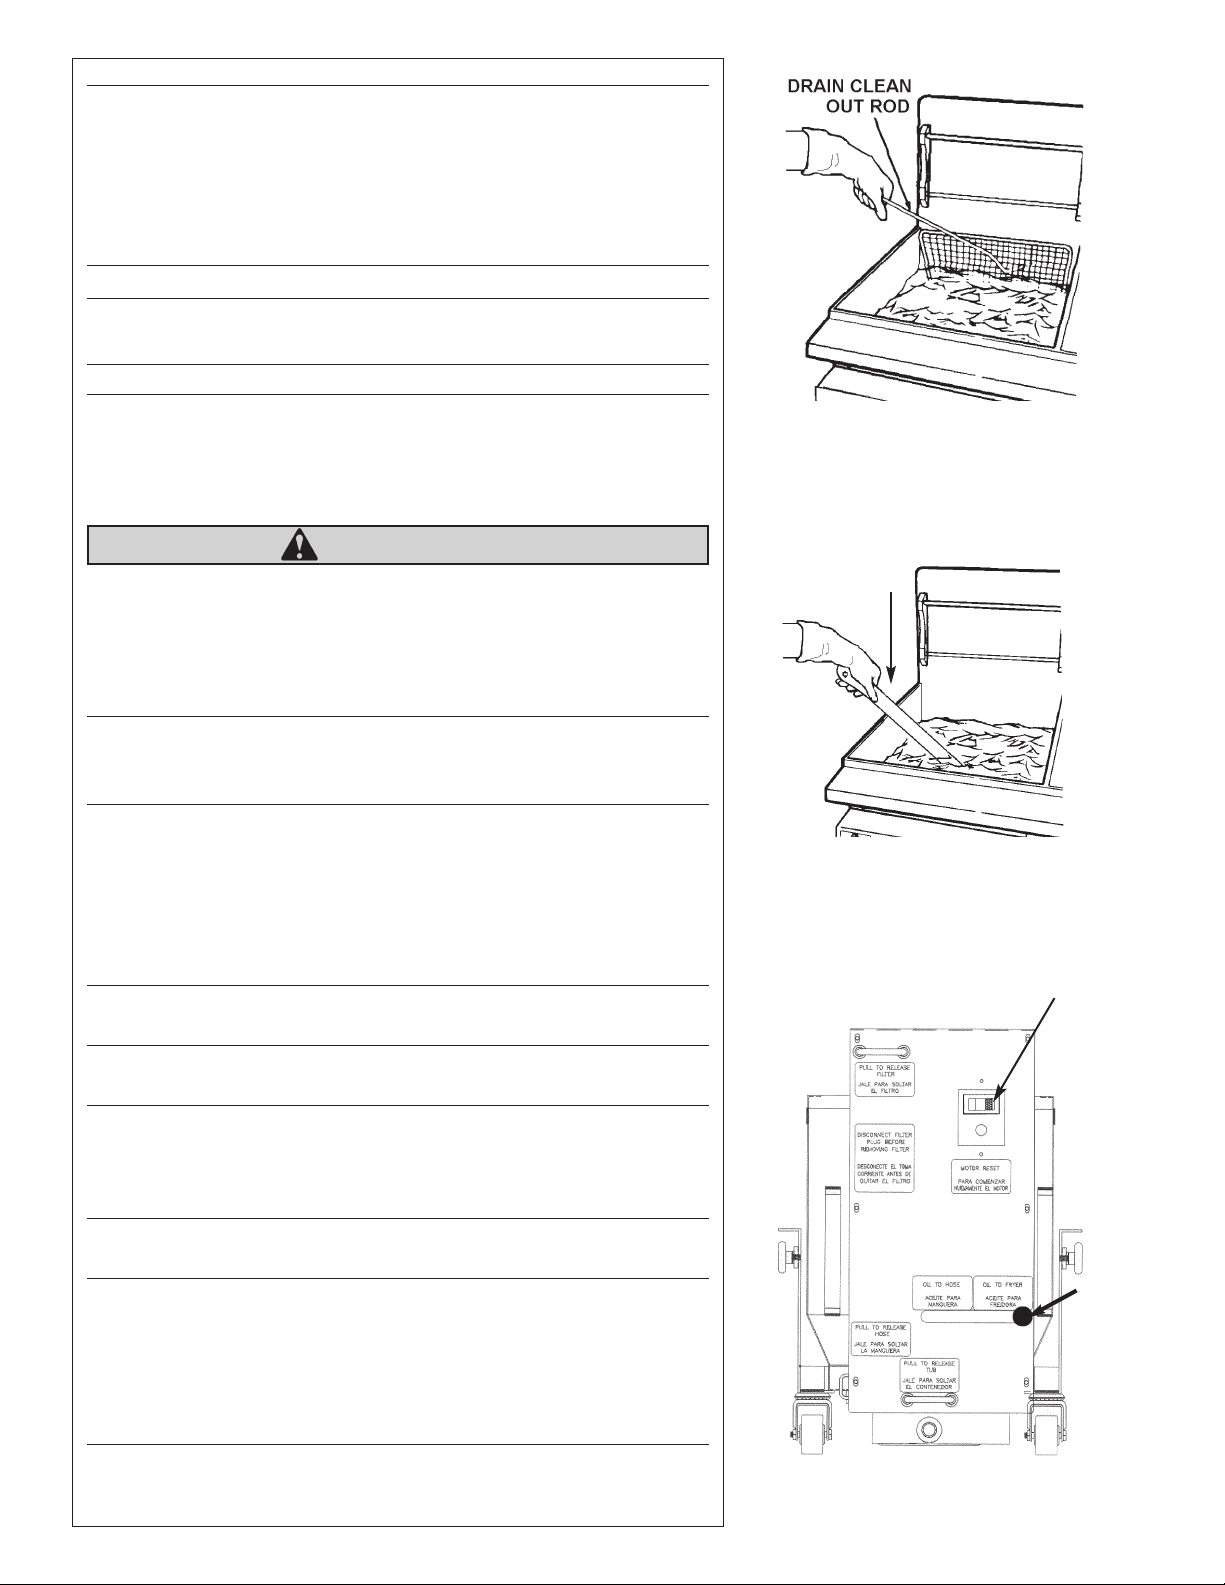
2. Remove screen from over tubes/element with tongs or a
Drain Clean Out Rod. Refer to Figure 3.
CAUTION
Screen over tubes will be very hot and should be moved to
a safe place.
3. Use spoon provided to stir oil. Bubbling will occur until all
water is removed. Failure to do so will clog the filter paper.
Refer to Figure 4.
NOTE: Water settles in the cooler oil in the Cold Zone. If the
water is not removed, the filter paper absorbs the water
preventing the oil from passing through it.
C. FILTRATION
1. On filter assembly, have handle with the black knob set to
oil to fryer. Refer to Figure 5.
2. Open the drain valve slowly by lifting and then pulling the
drain valve handle and drain fryer (handle with largest black
knob).
NOTE: A Drain Clean Out Rod may be needed to loosen any
solid residue. Use it only when valve is fully open.
3. Wipe crumbs from splashdeck while fryer is empty. Plug
the motor into the outlet.
NOTE: On units with more than one fryer or a separate cabinet
for the filter system, you must open the return valve handle
(small black knob next to drain handle) by pulling it forward. This
will allow the oil to pump into the correct fryer.
4. On the filter panel, turn the pump switch to the “ON” position.
The green light will illuminate. Refer to Figure 5.
NOTE: If oil does not return to fryer, check the following:
1. Filter tub setup (See Fig. 1)
2. Tub to motor connection (See Fig. 2)
3. Figure 4 (Water may have clogged the paper)
4. Return valve for units with more than one fryer or
separate filter cabinet is not opened.
5. Let the pump run with drain valve open to remove crumbs
and residue from the bottom of fryer and the drain lines.
FIGURE 3.
REMOVE SCREEN OVER
TUBES/ELEMENTS
FIGURE 4.
STIR WITH SPOON PROVIDED TO
REMOVE WATER
– 2 –
SPOON
FIGURE 5.
FRONT VIEW OF FILTER
Knob must
be in this
position
when hose
is not used
ON/OFF
Switch
 Loading...