

Page 1

.
COMPACT COMPONENT SYSTEM
NX-W5W/NX-W5B
.
.
ENGLISHDEUTSCHFRANÇAISNEDERLANDSITALIANO
INSTRUCTIONS
LVT2491-002B
[E]
Page 2

Listening to FM/AM radio
Play back MP3/WMA files on a
music CD or USB device
Play back files on your BLUETOOTH
device by operating the System
Play back files on your iPod or
iPhone by operating the System
Play back an external device that
does not support USB connection
Enjoy listening to music by adjusting the
sound mode or the bass sound! ( page 33)
Page 30
Page 26
Page 18
Page 23
Page 16
What you can do using the System
.
2
Page 3
Release quickly
Press and hold down
Introduction
Auto Power Save function (APS)
0
The System comes with an “Auto Power Save (APS)” function, which turns off the
power automatically when no sound is output for 15 minutes. This function is
enabled in the default setting. (page 15)
In this manual...
0
The remote control buttons are used for explaining the operations unless mentioned otherwise. Button
unless mentioned otherwise indicates the remote control buttons. However, if the System has buttons
with the same or similar names, they can also be used for the operations.
0
The display shown in this manual may differ from the actual display in some cases.
In this manual...
0
In this manual, “iPod” includes iPod, iPod touch and iPhone devices. When referring specifically to
iPod touch or iPhone, “iPod touch” or “iPhone” is used respectively.
0
In this manual, the term “Android device” is referred to as a smartphone and a tablet device, that are
equipped with the Android OS.
0
In this manual, “file” and “track”, “folder” and “group” are used interchangeably.
A copy of the Declaration of Conformity with regard to the R&TTE Directive 1999/5/ EC can be
downloaded from the following Web sites. (http://www.jvc.co.jp/ecdoc/)
.
Hereby, JVC declares that this System [NX-W5W]/[NX-W5B] is in compliance with the essential
requirements and other relevant provisions of Directive 1999/5/EC.
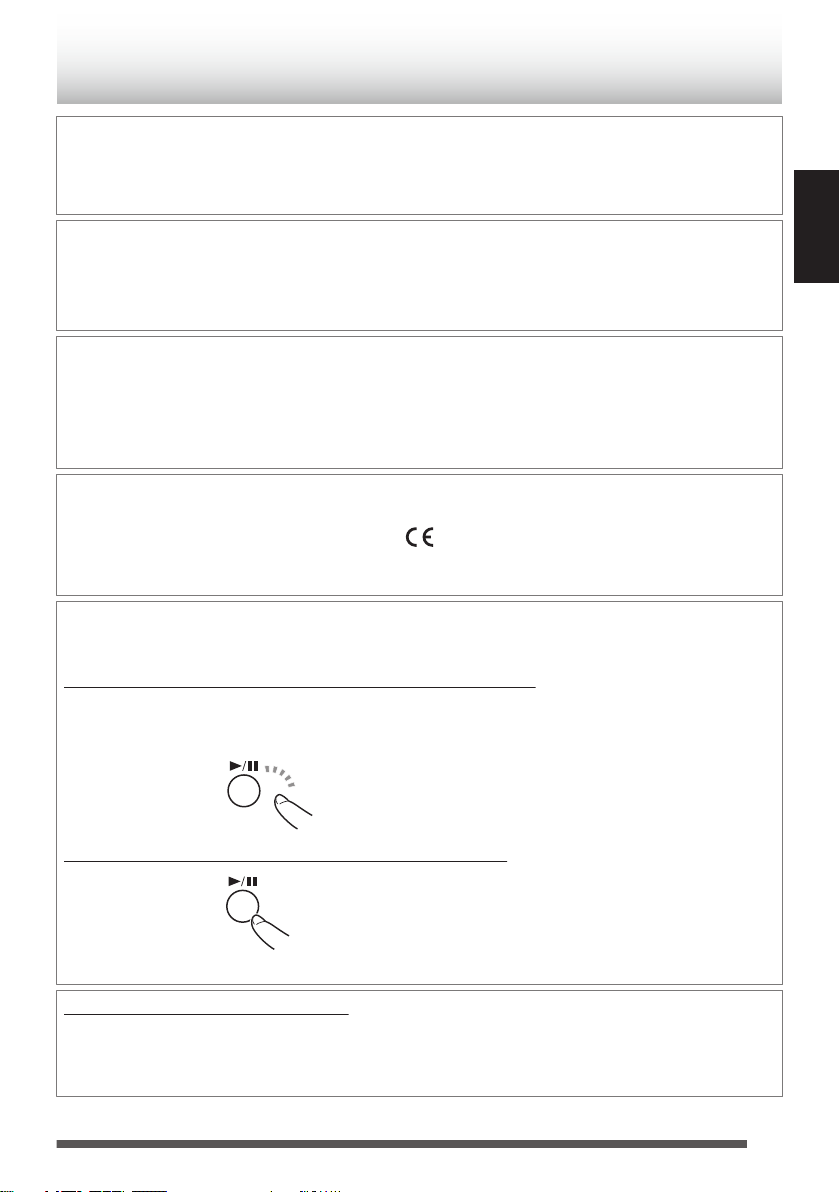
Ways to press the buttons
There are two ways of pressing the buttons on the System. “Short press” refers to the action of pressing
a button and releasing it immediately, while “long press” refers to pressing and holding down a button.
Short press: Applicable to cases where “long press” is not indicated
Press a button lightly and release it instantly. The System may not respond if excessive force is applied
to a button or if the button is not released instantly. If it does not respond as intended, retry by adjusting
how long a button is pressed or the amount of force applied.
ENGLISH
.
Long press: Applicable to cases where “long press” is indicated
.
Press and hold down a button, followed by releasing the finger.
IMPORTANT FOR LASER PRODUCTS
1. CLASS 1 LASER PRODUCT
2. CAUTION: Do not open the top cover or cabinet. There are no user serviceable parts inside the unit;
leave all servicing to qualified service personnel.
The product label of this product or the other information are located at the bottom of the System.
3
Page 4

15 cm
15 cm
15 cm
15 cm
Rear of the System
Installation
Caution: Proper Ventilation
To avoid the risk of electric shock and fire, and to prevent damage, locate the apparatus as follows:
1
Front: No obstructions and open spacing.
2 Sides/ Top/ Back: No obstructions should be placed in the areas indicated by the dimensions in the
illustration.
3 Bottom: Place on a level surface.
Front view
.
Side view
.
Notes on installation
Select a place which is level, dry and neither too hot nor too cold — between 5 ˚C and 35 ˚C.
4
Page 5

Contents
What you can do using the System 2
Introduction ..................................... 3
Installation ........................................................... 4
Preparation ...................................... 6
Accessories ........................................................ 6
Preparing the remote control ............................... 6
Part names ....................................... 7
Remote control .................................................... 7
Top of the main unit / Front .................................. 8
Side ..................................................................... 9
Rear .................................................................... 9
Display .............................................................. 10
Connections .................................. 11
Connecting antennas ........................................ 11
Connecting an AC adapter ................................ 13
Connecting headphones ................................... 13
Basic operations ........................... 14
Turning on/off the System ................................. 14
Setting the clock ................................................ 14
Getting started .................................................. 14
Activating/deactivating the Auto Power Save
(A.P.S.) ............................................................. 15
Listening to iPod ........................... 16
Connecting iPod ................................................ 16
Playing back ...................................................... 16
iPod menu operation ......................................... 17
Listening to a USB device/CD ...... 18
Preparing a USB device/CD .............................. 18
Playing back ...................................................... 19
Program playback ............................................. 20
Random playback ............................................. 21
Repeat playback ............................................... 22
Listening to a BLUETOOTH device
......................................................... 23
Connecting a BLUETOOTH device ................... 23
Playing back ...................................................... 24
Canceling the connection .................................. 25
Listening to the radio ................... 26
Searching for stations ....................................... 26
Presetting stations ............................................ 27
Using Radio Data System ................................. 28
Listening to an external device ... 30
Connecting an external device .......................... 30
Listening to an external device .......................... 30
Using the timer .............................. 31
Setting the sleep timer ...................................... 31
Setting the daily timer ........................................ 31
Other functions ............................. 33
Adjusting the sound quality ............................... 33
Adjusting the display/downlight ......................... 34
Changing the display information ...................... 35
References ..................................... 36
Compatible iPod ................................................ 36
Playable BLUETOOTH devices ........................ 36
Playable discs/files ............................................ 36
Important for USB mass storage class devices . 37
Precautions on CD-R/CD-RW ........................... 37
Precautions on MP3/WMA files ......................... 37
Maintenance ..................................................... 38
Trademarks ....................................................... 38
Troubleshooting ............................ 39
Resetting the System ........................................ 41
Specifications ................................ 42
ENGLISH
5
Page 6
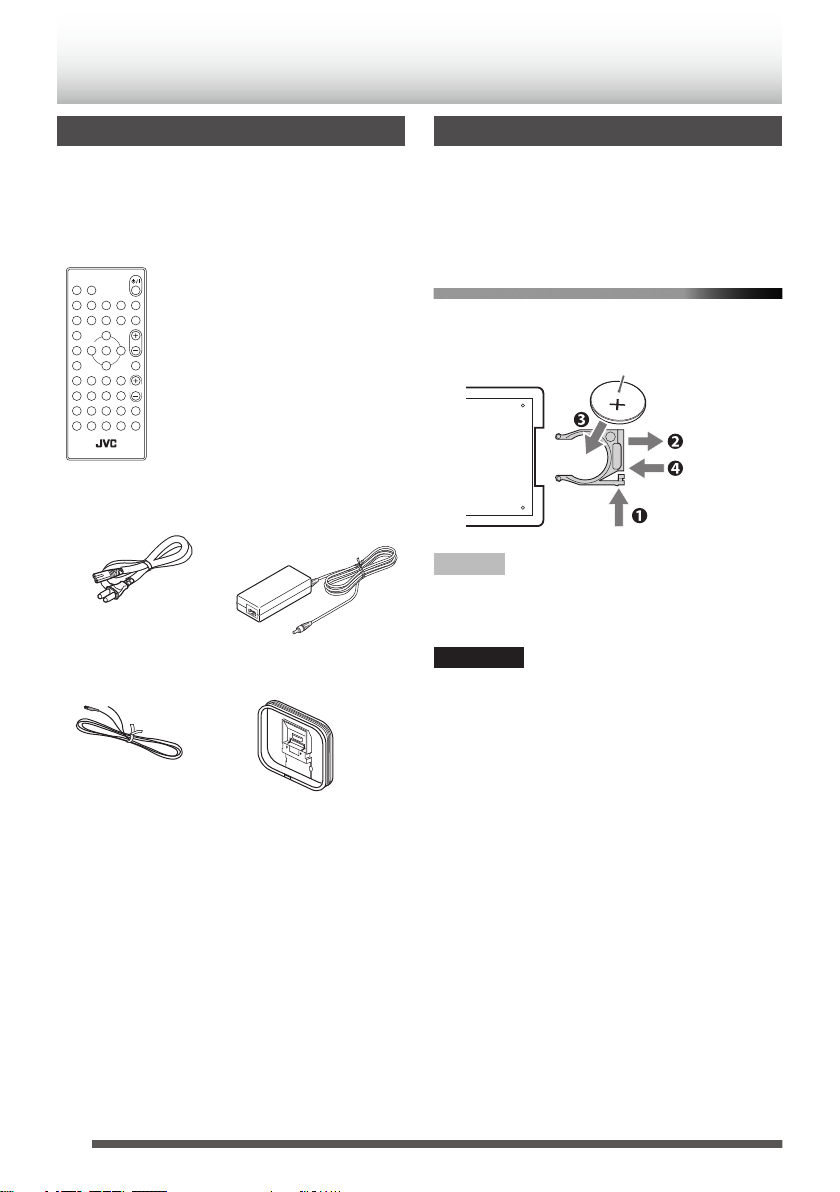
AM loop antenna (1)FM antenna (1)
Power cord (1)
AC adapter
AA-R1809 (1)
NX-W5B: RM-SNXW5R (1)
NX-W5W: RM-SNXW5R-W (1)
Remote control
Lithium coin battery (CR2025)
Preparation
Accessories
Check that you have all the following items,
which are supplied for the System.
.
Preparing the remote control
When you use the remote control for the first time,
pull out the insulation sheet.
If the range or effectiveness of the remote control
decreases, replace the battery.
To replace the battery in the remote control
Match the polarities (+ and –) of the batteries with
those indicated on the remote control.
.
NOTE
0
The batteries supplied are intended for checking
system operation. Replace them with new ones
as soon as possible.
CAUTION
0
Danger of explosion if the battery is incorrectly
replaced.
0
Replace only with the same or equivalent type.
0
Store the battery in a place where children
cannot reach. If a child accidentally swallows the
battery, consult a doctor immediately.
0
To prevent the battery from overheating,
cracking, or starting a fire:
- Do not recharge, short, disassemble or heat
the battery, or dispose of it in a fire.
- Do not leave the battery with other metallic
materials.
- Wrap the battery with tape and insulate when
throwing away or storing it.
- Do not poke the battery with tweezers or similar
tools.
0
Dispose the battery in the proper manner,
according to federal, state, and local regulations.
6
Page 7
(
)
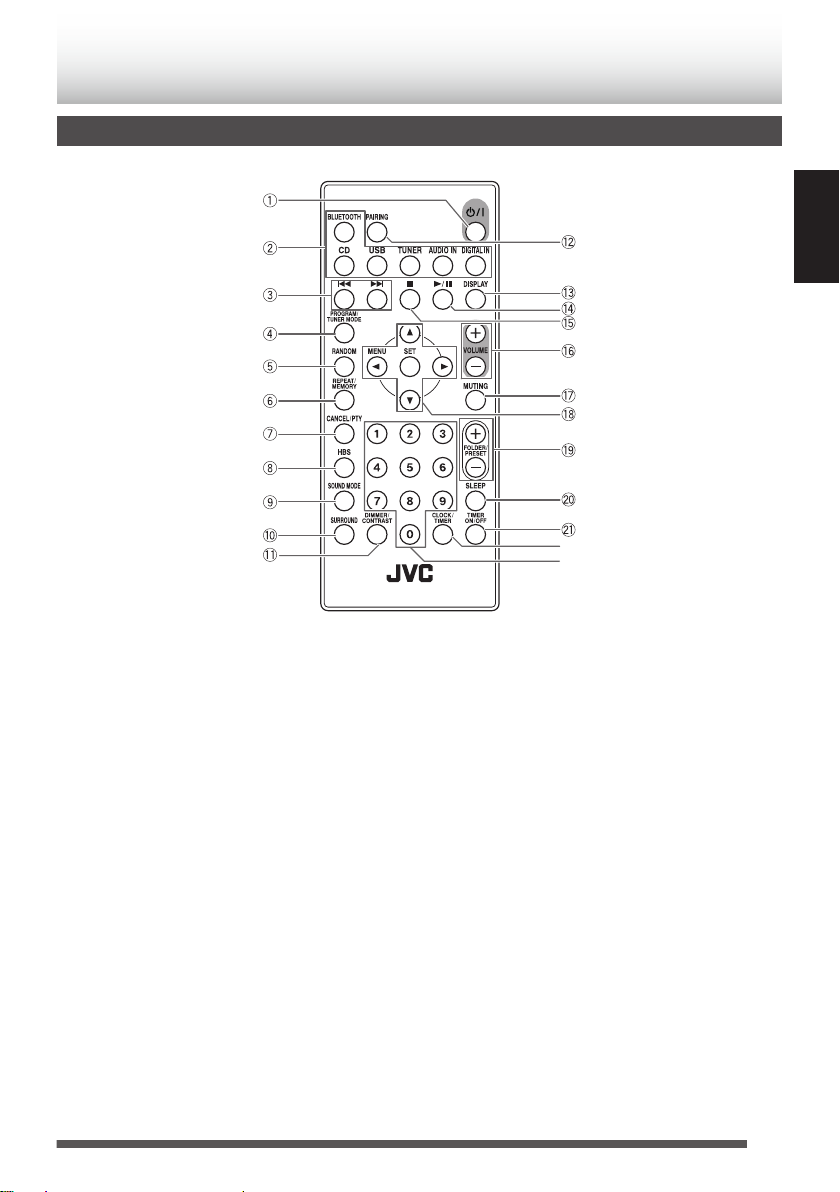
Part names
Remote control
0
The reference pages are mainly pages containing descriptions of the respective parts.
ENGLISH
.
A
A (Power)
(page 14)
B
BLUETOOTH, CD, USB, TUNER, AUDIO IN,
DIGITAL IN
(pages 16, 19, 23, 26, 30)
C
S / T
(pages 16, 19, 24, 26)
D
PROGRAM / TUNER MODE
(pages 20, 26)
E
RANDOM
(pages 17, 21)
F
REPEAT / MEMORY
(pages 17, 22, 27)
G
CANCEL/PTY
(pages 27, 29)
H
HBS
(page 33)
I
SOUND MODE
(page 33)
J
SURROUND
(page 33)
K
DIMMER / CONTRAST
(page 34)
L
PAIRING
(page 23)
M
DISPLAY
(pages 28, 35)
N
I / W
(pages 16, 19, 24)
O
o
(page 19)
P
VOLUME +/–
(page 14)
Q
MUTING
(page 15)
R
J / K / H / I / SET
(pages 14, 17, 27, 30, 31, 34)
S
FOLDER/PRESET
(pages 19, 27)
T
SLEEP
(page 31)
U
TIMER ON/OFF
(page 32)
V
CLOCK/TIMER
(pages 14, 31)
W
Number buttons
(pages 19, 27)
7
Page 8
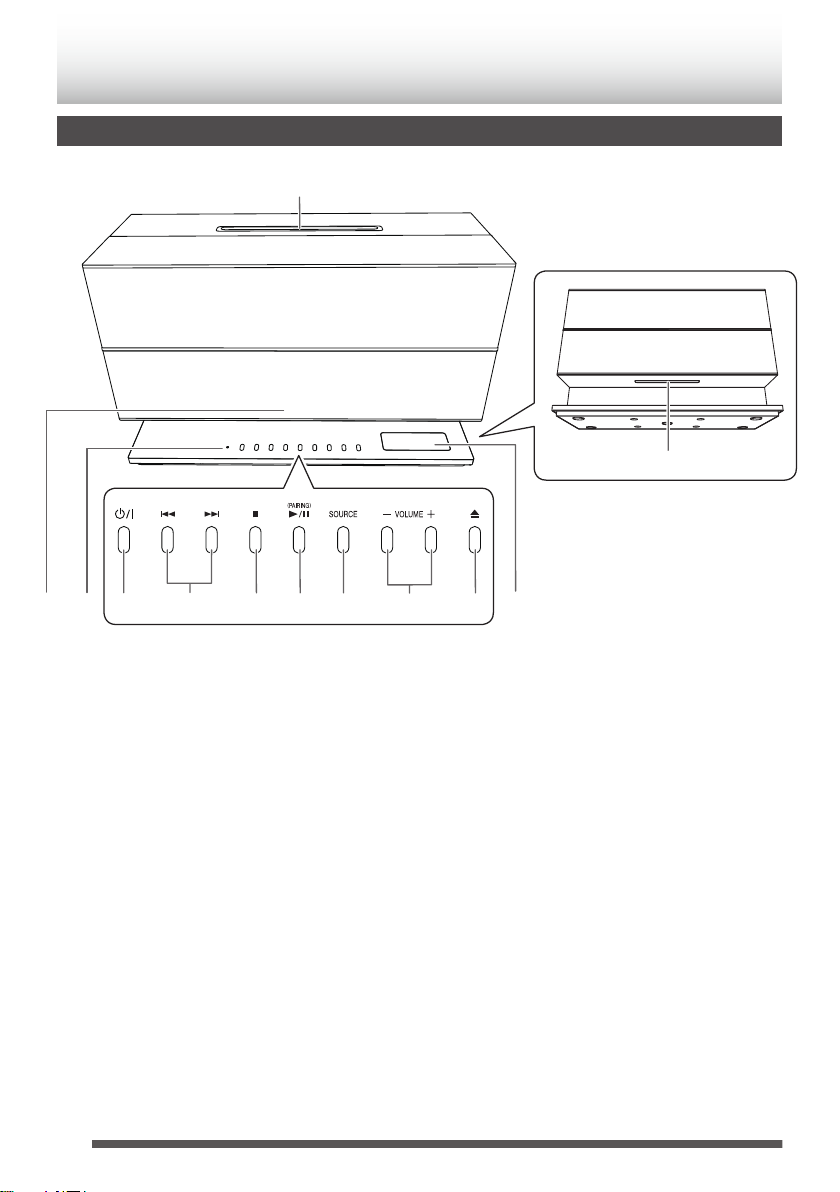
Top of the main unit / Front
1
-
02 34567 98
=
.
A
Remote control sensor
B
Standby indicator
Lights up in red when the power of the System
is off. The light goes off when the power is on.
Lights up in orange when the daily timer is
activated.
C
A (Power) button
(page 14)
D
S / T button
(pages 16, 19, 24, 26)
E
o button
(page 19)
F
(PAIRING) I/W button
(pages 16, 19, 23)
G
SOURCE button
(pages 16, 19, 23, 26, 30)
H
VOLUME -/+ button
(page 14)
I
M (Ejecting CD) button
(page 18)
J
Display
Pressing [DIMMER / CONTRAST] changes the
brightness of the display and downlight. (page
34)
K
CD slot
(page 18)
L
Downlight
Lights up in white when the power is on. (page
34)
8
Page 9

Side
2
1
3
3.35A
18V
2341
Rear
A
USB terminal
Connect iPod/iPhone or a USB device.
(pages 16, 18)
B
AUDIO IN jack
Connect an external device.
(page 30)
C
PHONES jack
Connect headphones.
(page 13)
A
FM 75Ω COAXIAL antenna terminal
(page 11)
B
AM LOOP antenna terminal
(page 12)
C
DIGITAL IN (OPTICAL) terminal
(page 30)
D
DC IN jack
(page 13)
ENGLISH
9
Page 10

Display
1
23 4
657
89 0 - =
.
A
PGM (program) indicator
(page 20)
Lights up during program playback. (“CD”,
“USB”)
B
File indicator
Lights up when an audio files are played back.
C
Repeat mode icon
(page 22)
REP. : Lights up when one track is
REP.ALB* : Lights up when the current folder
REP. ALL : Lights up when all tracks are
* MP3/WMA only
D
USB icon
(page 18)
Lights up when the USB device is connected to
the System.
E
Display switching icon
TOTAL : Lights up when the playback time
REMAIN : Lights up when the remaining
repeated.
(“CD”, “USB”)
is repeated.
(“CD”, “USB”)
repeated.
(“CD”, “USB”)
of whole disc is displayed while
the disc is played back.
playback time of whole disc is
displayed while the disc is played
back.
F
BLUETOOTH icon
(page 23)
Lights up when BLUETOOTH device is
connected to the System.
G
iPod icon
(page 16)
Lights up when iPod is connected to the System.
H
STEREO icon
(page 26)
Lights up when receiving an stereo broadcast.
I
RDM icon
(page 21)
Lights up during random playback. (“CD”,
“USB”)
J
Timer icon
(pages 31, 32)
TIMER : Lights up when the timer has
been set. Flashes while the
timer is functioning.
TIMER ON : Flashes when setting the
starting time of daily timer.
TIMER OFF : Flashes when setting the
ending time of daily timer.
K
SLEEP icon
(page 31)
Lights up when setting the sleep timer.
L
Main display
Shows the text information of each source.
10
Page 11

3.35A
18V
Insert the wire into the
center of the terminal.
The fit of the terminal is
tight. This is to prevent
the wire from falling off.
Connections
Connect the AC power cord to the wall outlet after all other connections have been made.
Connecting antennas
Make sure to connect the antenna before listening to radio broadcast.
Generally, installing the antenna near a window helps to improve reception.
Included FM antenna
ENGLISH
.
After you untied the bundled string, extend the FM aerial when connecting so that you can obtain the best
reception.
11
Page 12

Included AM loop antenna
3.35A
18V
Follow the same steps to insert the other wire
Insert the
wire core
Press hard
・Inserting the antenna wire
Adjust the connected AM loop
antenna to the left or right to
position it in the direction with
the best reception.
Fit the tab into the groove
until it clicks into place
Foldable part at the far end
Ta b
Groove
・Assembling the antenna
Release
①
②
③
④
0
Place the AM loop antenna as near as possible to the window to obtain the best reception.
CAUTION
0
Use the AM loop antenna with the antenna wire wound around the frame. Removing the wire from the
.
frame deteriorates the sensitivity of the antenna.
0
Make sure that the antenna conductor is not in contact with other terminals or cables. Position the
antenna away from other cables. Reception may be interfered if they are placed too close to the antenna.
12
Page 13

3.35A
18V
To th e
AC outlet
Power cord
(supplied)
AC adapter
(supplied)
Stereo mini plug
Headphones(not supplied)
Connecting an AC adapter
Connect the supplied AC adapter to DC IN jack of
the System. After connecting the supplied AC
power cord to the AC adapter, plug the AC power
cord into the wall outlet.
.
0
Unplug the AC adapter from the wall outlet if the
System will not be in use for a prolonged period
of time.
CAUTION
0
To avoid the risk of electric shock and fire
Connecting headphones
Be sure to turn down the volume before connecting
or putting on the headphones.
NOTE
0
Connecting the headphones deactivates the
speakers.
0
Use commercially available headphones with a
standard 3-pin stereo mini plug.
.
ENGLISH
- Do not use any other adapters except the
supplied AC adapter.
- Do not use the supplied AC adapter with any
other products other than this System.
- Do not use any power cords except the
supplied power cord.
- Do not use the supplied power cord with any
other products other than this System.
About memory backup setting
Backup function can protect the various settings
even if the AC power cord is disconnected. The
protected settings are as follows.
0
Switching the source
0
Setting the volume
0
Setting the sound quality
0
The contents of timer setting
0
Setting the tuner
13
Page 14
Main unitRemote control
/
(Press repeatedly)
CLOCK
/
(Press repeatedly)
/ / / / /
Remote control
Main unit
(Press repeatedly)
(Press repeatedly) (Press repeatedly)
Main unitRemote control
Basic operations
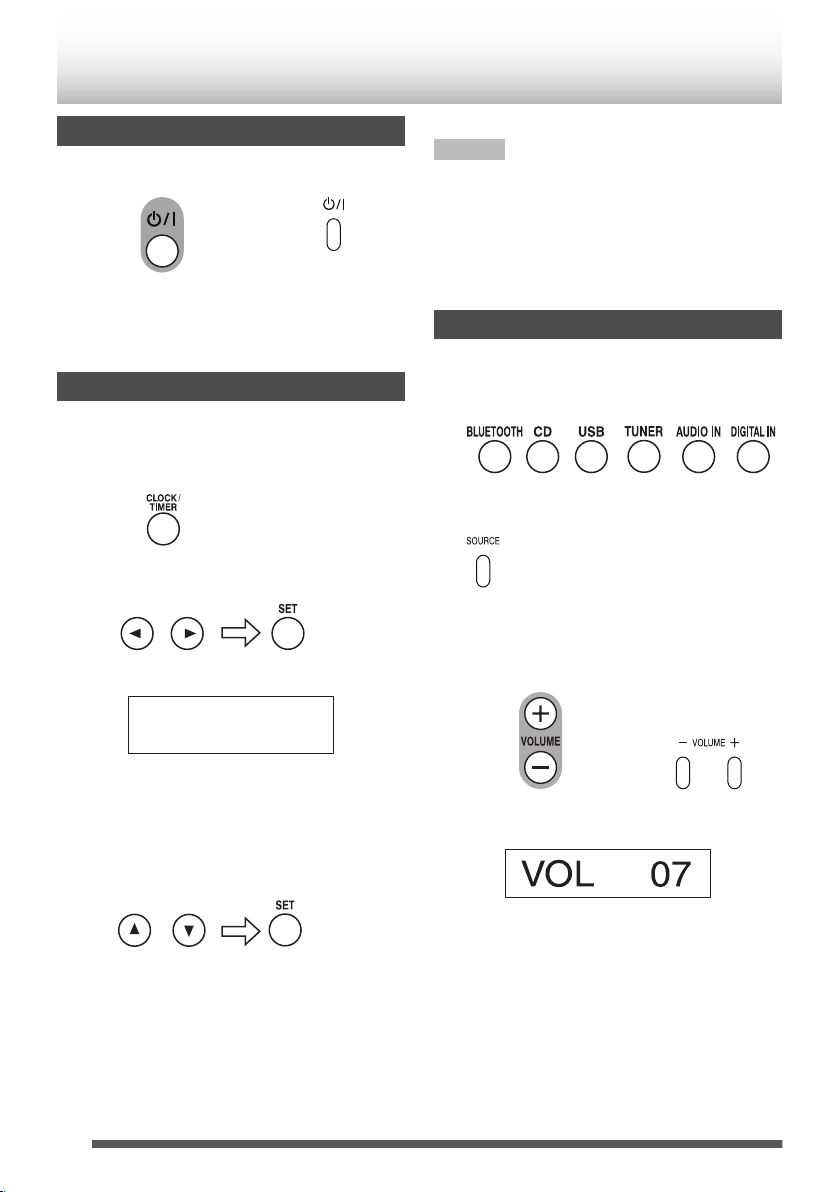
Turning on/off the System
.
0
You can also turn on the System by pressing the
source buttons such as [CD] on the remote
control.
Setting the clock
Set the clock to use the timer setting, etc.
1
Display the clock setting screen.
.
2
Select “CLOCK”.
.
NOTE
0
The clock may gain or lose 1 to 2 minutes per
month. You may need to readjust the clock
periodically.
0
Set the clock again if the AC power cord is
unplugged or the System is turned off due to the
power failure.
Getting started
1
Select a source.
.
.
2
Adjust the volume.
.
0
If you have already set the clock, after
pressing [CLOCK/TIMER], press [H]/[I]
repeatedly to display “CLOCK”, then press
[SET].
3
Adjust the hour.
.
4
Repeat Step 3 to adjust the minute.
After adjusting the minute, “COMPLETE” is
displayed and the setting is completed.
14
.
.
0
Adjustable range: MIN (0) to MAX (40)
Page 15
/
(Press repeatedly)
/
(Press repeatedly)
A.P.S. ON
A.P.S. OFF
(Cancel)
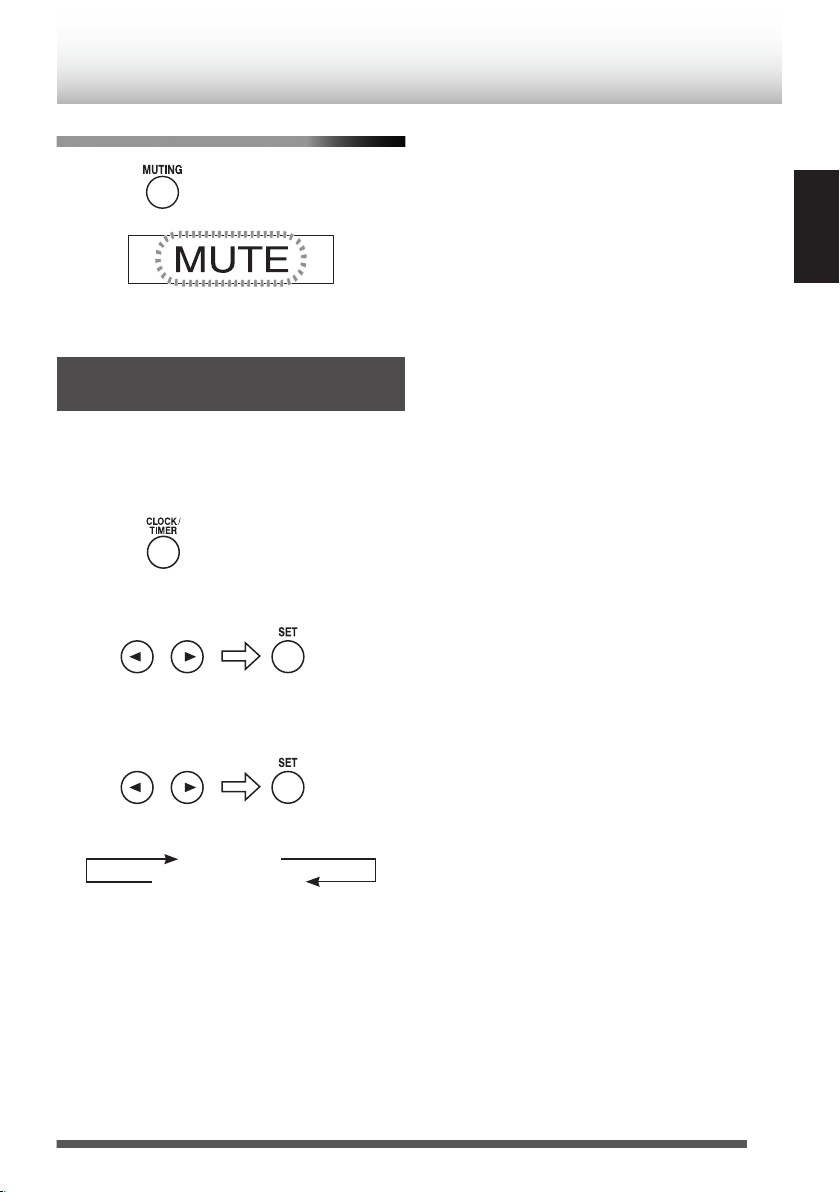
To mute the sound temporarily
.
.
To restore the sound, press the button again or
[VOLUME+].
Activating/deactivating the Auto Power Save (A.P.S.)
This function turns off the System automatically if
no operation is performed for 15 minutes.
1
Display the timer setting screen.
.
2
Select “A.P.S”.
.
3
Set the item.
A.P.S ON:
If no operation is performed for 15 minutes in the
following situations, the System turns off
automatically.
- The volume level is set to “MIN” or Muting is
activated.
- “USB” or “BLUETOOTH” is selected as the
source, and no device is connected.
- “USB” or “CD” is selected as the source, and
playback is stopped.
- “AUDIO IN” or “DIGITAL IN” is selected as the
source, and there is no sound input
A.P.S OFF:
Auto Power Save is set to Off.
0
Approximately 1 minute before the power is
turned off, “A.P.S.” starts to blink.
0
The 15-minute countdown restarts when you
operate any buttons.
0
The initial setting is “A.P.S. ON”.
ENGLISH
.
.
The setting is completed when “COMPLETE” is
displayed after performing the setting.
15
Page 16

USB cable for iPod
(supplied with iPod or
commercially available)
Main unitRemote control
(Press repeatedly)
Main unit
Remote control
Main unit
Remote control
/
/
(Press repeatedly)(Press repeatedly)
Main unitRemote control
Listening to iPod
0
For compatible iPod, see page 36.
Playing back
Connecting iPod
You can operate the iPod using the System by
connecting it to the USB terminal of the System
using an USB cable (supplied with iPod or
commercially available).
.
0
The “iPod” icon lights up after the cable is
connected.
NOTE
0
iPod will be able to charge when iPod is
connected to the System.
1
Set the source to “USB”.
.
2
Start playback.
.
iPod is turned on and starts playing.
To pause
.
To cancel pause, press the button again.
To select a track
CAUTION
0
Stop playback before disconnecting the iPod.
Disconnecting during playback may cause
damage to the files or file system of the iPod.
0
You cannot send any data to iPod from the
System.
16
.
0
Press [T] once to skip to the beginning of the
next track.
0
Press [S] to skip to the beginning of the track
being played. Press twice to skip to the
beginning of the previous track.
Page 17

/
/
Main unitRemote control
(Hold)(Hold)
(Press repeatedly)
(Press repeatedly)
/
(Press repeatedly)
To fast reverse/forward
During playback...
.
0
To fast reverse, press and hold [S].
0
To fast forward, press and hold [T].
Shuffle playback
.
Each press switches the selection of iPod shuffle
songs.
Repeat playback
.
Each press switches the selection of iPod repeat
songs.
iPod menu operation
1
Display the menu.
.
2
Select a menu item.
.
To return to the previous menu
Press [MENU].
NOTE
0
If iPod/iPhone is compatible with iOS 7.0.x, the
above menu operations cannot be available on
the System. Operate the menu on iPod/iPhone
itself.
0
Depending on the type of iPod, you can operate
the menu only on the screen of iPod.
ENGLISH
NOTE
0
Depending on the type of iPod, iPod may operate
differently.
0
Sound distortion may occur when playing back
audio sources with high recording levels. If
distortion occurs, it is recommended to turn off
the equalizer of iPod.
0
Operate iPhone or iPod touch itself in the
following cases:
- When operating the home button
- When selecting application icons on the home
screen
- When dragging the slider
0
For information on operating iPod, see the
instruction manual for iPod.
17
Page 18

USB cable
(not supplied)
USB memory
(not supplied)
Main unitRemote control
(Press repeatedly)
Main unit
Listening to a USB device/CD
Preparing a USB device/CD
To connect a USB device
.
0
The “USB” icon lights up after it is connected.
NOTE
0
Power is supplied to the USB device and the
device will be charged through the System when
the USB device is connected to the System.
CAUTION
0
Stop playback before disconnecting the USB
device. Disconnecting the USB device during
playback may cause damage to the files and file
system of the USB device.
0
You cannot send any data from the System to the
USB device.
To insert a disc
1
Set the source to “CD”.
.
2
Insert a disc.
.
Insert the CD with the label side facing the
same direction as the front of the System.
0
The CD will be inserted automatically when
you insert it in partially.
0
“READING” is displayed when the CD is
being read. Wait until the display
disappears.
To eject a disc
.
18
Page 19

/
Main unitRemote control
(Press repeatedly)
Main unit
Remote control
Main unitRemote control
Main unit
Remote control
/
/
(Press repeatedly)(Press repeatedly)
Main unitRemote control
to
/
/
Main unitRemote control
(Hold)(Hold)
(Press repeatedly)
Playing back
1
Set the source to “USB” or “CD”.
.
0
“READING” is displayed when the USB
device is being read. Wait until the display
disappears.
2
Start playback.
.
To stop
.
0
For MP3/WMA files, resuming playback after
stopping a file starts playback from the beginning
of the track (resume function). Pressing [o]
again when playback is stopped cancels the
resume function.
0
If other source is selected, the resume function
is canceled.
To pause
To select a track
.
0
Press [T] once to skip to the beginning of the
next track.
0
Press [S] to skip to the beginning of the track
being played. Press twice to skip to the
beginning of the previous track.
To select a track with the track number
.
Examples:
0
To select track no. 3: 3
0
To select track no. 17: 1 7
0
To select track no. 123: 1 2 3
To fast forward/reverse
During playback...
.
0
To fast reverse, press and hold [S].
0
To fast forward, press and hold [T].
To select a group (MP3/WMA only)
ENGLISH
.
0
To cancel pause and start playback, press the
button again.
.
19
Page 20

/
(Press repeatedly)
to
Main unit
Remote control
/
(Press repeatedly)
to
Program playback
You can program up to 30 tracks from a USB device
or a disc in any desired order including the same
tracks.
1
Stop playback of USB device or CD.
2
Display the program setting.
.
0
The “PGM” icon lights up.
0
Pressing the button again deletes the
programmed contents and program
playback is canceled (to go back to normal
playback).
3
Select a track to register to the program.
.
To select a track with the track number
.
To add tracks to a program
Select a track to add to the program.
While in the stop mode
.
To select a track with the track number
.
.
NOTE
0
“PGM FULL” is displayed when the 30th track is
programmed, and more tracks cannot be
programmed.
.
0
For operations to select the track, see “ To
select a track ” on page 19.
4
Repeat step 3 to add other tracks to the
program.
5
Start playback.
.
The tracks are played back in the programmed
order.
20
Page 21

/
Main unitRemote control
(Press repeatedly)
Main unit
Remote control
To delete tracks from the program
While in the stop mode
.
Each time you press the button, the last track in the
program is erased.
To cancel program playback
While in the stop mode
.
Programmed contents are deleted.
0
The “PGM” icon disappears.
0
In the following cases, programmed contents are
deleted and program playback is canceled.
- When the power is turned off
- When the audio source is changed
- When the USB device is removed
- When the disc is ejected
NOTE
0
Program playback can also be repeated.
Random playback
1
Set the source to “USB” or “CD”.
.
2
Play back the USB device/CD.
.
3
Start random playback.
.
You can play back the tracks in random order.
0
The “RDM” icon lights up during random
playback.
0
All tracks are played in random order instead of
random playback within a group.
0
During random playback, pressing [S] does
not bring you back to the previous track.
ENGLISH
To cancel random playback
During random playback
.
The “RDM” indicator goes off.
0
Random playback is also canceled in the
following cases:
- When the power is turned off
- When the audio source is changed
- When the USB device is removed
- When the disc is ejected
- When playback is stopped
21
Page 22

Repeat playback
(Press repeatedly)
Main unit
Remote control
(Press repeatedly)
1
Select the type of repeat mode.
While in the play or stop mode
.
Each time you press the button, the setting
changes as follows:
REP. : Repeats the current track.
REP.ALB* : Repeats the tracks in the
REP. ALL : Repeats all the tracks on the
* MP3/WMA only
2
Start playback (when playback is
stopped).
current group.
disc or USB device.
.
To cancel repeat playback
Turn off the “REP” icon.
.
0
Repeat playback is also canceled in the
following cases.
- When the power is turned off
- When the audio source is changed
- When the USB device is removed
- When the disc is ejected
22
Page 23
Main unitRemote control
(Press repeatedly)
CONNECTED
Main unitRemote control
(Hold)
Listening to a BLUETOOTH device
You can listen to music from your BLUETOOTH
device, such as portable audio player through the
System.
When you connect your device for the first time, it
is necessary to register (pair) your BLUETOOTH
device and the System.
Connecting a BLUETOOTH device
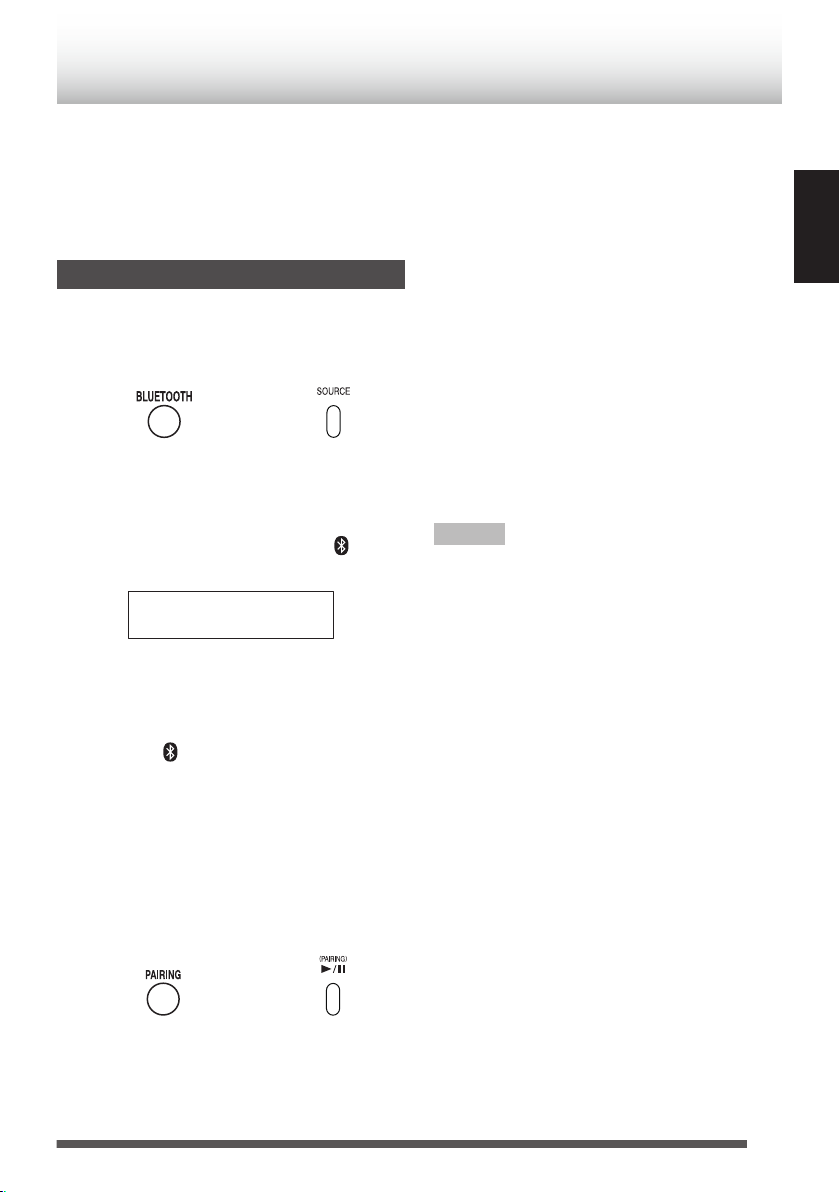
1
Set the source to “BLUETOOTH”.
.
“CONNECTING” flashes, and the System will
reconnect automatically to the BLUETOOTH
device that was last connected.
“CONNECTED” is displayed and “
(BLUETOOTH icon) lights up.
.
0
The pairing operation is necessary when
you connect the BLUETOOTH device for
the first time, or connect the System to the
new BLUETOOTH device.
0
When “ ” icon (BLUETOOTH icon) lights
up, cancel the connection once by pressing
and holding the [BLUETOOTH] on the
remote control or [(PAIRING) I/W] on the
System.
“DISCONNECTED” is displayed then the
display disappears.
2
Set the System to pairing standby.
” icon
3
Turn on the BLUETOOTH function on the
BLUETOOTH device.
0
Select “Bluetooth” from “Settings” on the
iPod touch/iPhone and Android device.
0
Refer to the instruction manual of your
device for further details.
4
Select “NX-W5” from the list of device.
The pairing is completed and the
BLUETOOTH device is connected to the
System automatically.
0
When the target device requests for
password during pairing, enter “0000”.
5
Start playback on the BLUETOOTH
device.
The sound from the BLUETOOTH device is
emitted from the System.
NOTE
0
Up to 9 BLUETOOTH devices can be registered.
When the 10th BLUETOOTH device is
registered, registration of the device with the
oldest connection history is deleted.
0
Some BLUETOOTH devices may not be
available to the System.
ENGLISH
.
23
Page 24

Main unit
Remote control
Main unit
Remote control
/
/
(Press repeatedly)(Press repeatedly)
Main unitRemote control
/
/
Main unitRemote control
(Hold)(Hold)
Playing back
You can connect to and play back from the
BLUETOOTH device that was last connected to
the System.
.
To pause
.
0
To cancel pause and start playback, press the
button again.
To select a track
.
0
Press [T] once to skip to the beginning of the
next track.
0
Press [S] to skip to the beginning of the track
being played. Press twice to skip to the
beginning of the previous track.
To fast forward/reverse
During playback...
.
0
To fast reverse, press and hold [S].
0
To fast forward, press and hold [T].
0
To resume normal playback, release the button.
24
Page 25

Canceling the connection
Main unitRemote control
(Hold)(Hold)
DISCONNECTED
.
.
NOTE
The connection is canceled automatically in the
following cases.
0
Connection is canceled on the BLUETOOTH
device, or BLUETOOTH function is set to OFF.
0
When the System or the BLUETOOTH device is
turned off.
0
When the source is changed to another audio
sources.
ENGLISH
CAUTION
0
To connect the device to this System, the device
must be compatible with the
BLUETOOTH A2DP and AVRCP profiles.
0
The maximum distance for a possible
BLUETOOTH connection is 10 m. The distance
may be shorter depending on the usage
environment.
0
When the iPhone or smartphone is connected to
the System via BLUETOOTH, ring alert of phone
calls and mails can also be heard from the
speakers of the System.
0
This System is not equipped with a microphone
feature. To make a call, cancel the connection
with the System or use the microphone on the
iPhone or smartphone.
25
Page 26
(Press repeatedly)(Press repeatedly)
Main unitRemote control
/
/
Main unitRemote control
Listening to the radio
You can listen to FM and AM broadcasting stations.
NOTE
0
Connect the antenna before listening to radio
broadcast. (page 11)
Searching for stations
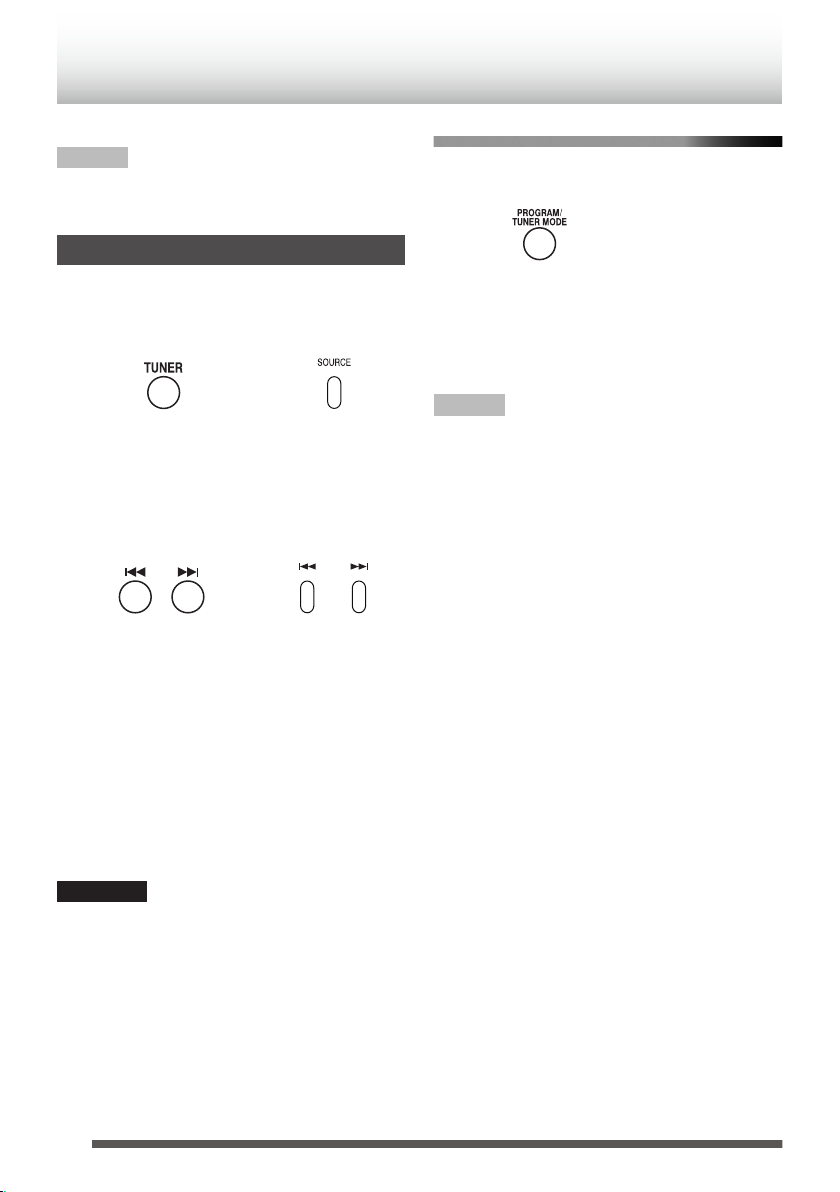
1
Select “FM” or “AM”.
.
Alternates between “AM” and “FM” each time
you press the button.
2
Select a station.
.
A long press on the button activates auto tuning,
and tuning will stop when it receives a broadcast
station.
0
To stop the search manually, press the buttons
again.
0
Pressing the button repeatedly changes the
reception frequency in steps of 0.1 MHz for FM
broadcast and in steps of 9 kHz for AM
broadcast.
0
“STEREO” icon lights up when stereo broadcast
signal is received.
To improve the FM reception
When an FM stereo broadcast is hard to receive or
noisy, select the monaural reception mode.
.
Each time you press the button, the setting
changes.
“STEREO” icon lights up : Stereo auto
“STEREO” icon goes off : Monaural reception
NOTE
0
Monaural reception improves the reception but
the stereo effect is lost.
reception
CAUTION
0
No sound is heard during station tuning.
26
Page 27

(Press repeatedly)
(Press repeatedly)
to
Presetting stations
Up to 30 FM stations or up to 10 AM stations can
be stored in the memory.
1
Tune in to a station you want to preset.
2
Display the preset setting screen.
.
3
Select a preset number to store
information.
.
0
You can also select by specifying the
number using the number buttons.
Examples:
0
To select track no. 3: 3
0
To select track no. 17: 1 7
0
If a preset number that has been registered
with a station is selected, the old registered
station is overwritten.
4
Store the station.
To tune in to a preset station
.
0
You can also select by specifying the number
using the number buttons.
.
Examples:
0
To select track no. 3: 3
0
To select track no. 17: 1 7
CAUTION
0
Depending on the signal condition, you may
have reception problems even for the preset
stations.
To erase the preset memory
1
Select the preset number you want to
erase.
2
Erase the preset station.
ENGLISH
.
.
While “CLEAR?” is displayed, press [SET].
The selected station is erased. The subsequent
preset numbers of the stations are moved forward.
0
Empty preset numbers are automatically stored
as 87.50 MHz for FM and 522 kHz for AM.
27
Page 28

(Press repeatedly)
RTPTYPS
Frequency display and
preset number display
Using Radio Data System
Radio Data System is a system that transmits
useful information (in the form of digital data) for FM
broadcasts along with the broadcast signal. Audio
devices designed for Radio Data System reception
can extract the information from the broadcast
signal for use with various functions, such as
automatic display of the station name.
Radio Data System have the following
functions.
0
PTY(Program TYpe Identification) Search
Automatically tunes to a station that is currently
broadcasting the specified program type
(genre).
0
PS (Program Service Name) Display
Automatically displays the station name
transmitted by the Radio Data System station.
0
Radio Text function
Displays the radio text data transmitted by some
Radio Data System stations when you press the
[DISPLAY]. “NO TEXT” is displayed if no text
data is transmitted.
NOTE
0
Some functions and function names may differ
in certain countries and areas.
To change the Radio Data System
display information
Change the contents of the display while receiving
a Radio Data System station.
During receiving a Radio Data System station
.
Each time you press the button, the setting
changes as follows:
.
PS
: Program Service name
PTY
: Program TYpe
RT
: Radio Text
28
Page 29

(Press repeatedly)(Press repeatedly)
Main unitRemote control
(Press repeatedly)
To tune by Program Type (PTY search)
This function allows you to set the System to
automatically search for the stations which are
currently broadcasting the type of program (genre)
you want to listen to.
1
Select “FM”.
.
2
Display the PTY code setting screen.
.
0
If the current station is with Radio Data
System, the program type of the station is
displayed.
3
Select the program type you want to listen
to.
.
0
For the program type, refer to “Program
type table”.
4
Start searching the station.
.
NOTE
0
Under certain receiving conditions, it may take
more than 1 minute to complete the search.
0
If the desired program type cannot be found, “NO
PROGRAM” is displayed, then after several
seconds the display returns to the original
display.
Program type table
Program Type Name Display
News “NEWS”
Current Affairs “AFFAIRS”
Information “INFO”
Sport “SPORT”
Education “EDUCATE”
Drama “DRAMA”
Culture “CULTURE”
Science “SCIENCE”
Varied Speech “VARIED”
Pop Music “POP M”
Rock Music “ROCK M”
Easy Music “EASY M”
Light Classical Music “LIGHT M”
Serious Classical Music “CLASSICS”
Other Music “OTHER M”
Weather “WEATHER”
Finance “FINANCE”
Children’s Program “CHILDREN”
Social Affairs “SOCIAL”
Religion “RELIGION”
Phone In “PHONE IN”
Travel “TRAVEL”
Leisure “LEISURE”
Jazz Music “JAZZ”
Country Music “COUNTRY”
National Music “NATION M”
Oldies Music “OLDIES”
Folk Music “FOLK M”
Documentary “DOCUMENT”
ENGLISH
29
Page 30

Stereo mini plug
cord
(not supplied)
Headphone jack,
etc.
External device (not supplied)
3.35A
18V
TV, BD/DVD recorder, etc.
Optical digital output terminal
Optical digital cable
(not supplied)
/
(Press repeatedly)
Main unitRemote control
(Press repeatedly)
Listening to an external device
Refer also to the instruction manual for the external
device.
Connecting an external device
1
Set the volume level of the System to
minimum.
To connect the analog terminal
2
Connect an external device to the AUDIO
IN jack.
.
To connect the digital terminal
2
Connect an external device to the
DIGITAL IN (OPTICAL) terminal.
NOTE
0
When the device is connected to the digital input
terminal, set the digital audio output setting for
the connected device (TV, BD recorder, etc.) to
“PCM”.
Listening to an external device
1
Select “AUDIO IN” or “DIGITAL IN”.
.
.
2
Start playback of the external device.
0
Do not disconnect the digital audio player
during playback. It may cause malfunction.
3
Adjust the volume.
To adjust the audio input level
Adjust the audio input level when there is a contrast
between the volume of the external device
connected to the AUDIO IN jack and that of other
sources.
.
30
.
Press repeatedly to change the setting
LEVEL 1 : Standard audio input level
LEVEL 2 : Higher level than LEVEL 1
LEVEL 3 : Higher level than LEVEL 2
Page 31

(Press repeatedly)
12
/
(Press repeatedly)
/
(Press repeatedly)
Using the timer
This System is equipped with sleep timer and
playback timer (the daily timer). (Timer recording is
not available with this System.)
Setting the sleep timer
The power of the System automatically turns off
after the shut-off time you set has elapsed.
You can set the timer up to 90 minutes in 10-minute
interval.
.
.
Each time you press the button, the shut-off time
changes.
0
While the sleep timer is set, “SLEEP” icon lights
up.
0
To cancel the sleep timer, select “SLEEP OFF”.
To check the remaining time until the
System shuts off
Press the [SLEEP] button once.
Example: the remaining time is 12 minutes
.
The remaining time is displayed for 5 seconds.
Setting the daily timer
Using the daily timer, you can wake up with your
favorite music.
0
Set the clock in advance. (page 14)
0
Tune into a station, load a disc, or connect a USB
device/iPod to the System, and make sure that
the source works properly beforehand.
0
Preset the desired station before setting the daily
timer.
1
Display the timer setting screen.
.
2
Select and confirm on “TIMER”.
.
3
Set and confirm the timer contents.
.
You can set the following items:
0
Press [H]/[I] to select the next or previous item.
The “hour” and “minute” of the starting
and ending time
0
During the setting, the “TIMER ON” icon
(starting time) and “TIMER OFF” icon
(ending time) flashes.
Playback source
Select the source from “CD”, “USB”, “FM”,
“AM”.
0
When the selected source is “AM” or “FM”,
select the preset number.
Playback volume
The setting is completed when “COMPLETE”
is displayed after performing the setting.
ENGLISH
Continue on the next page
31
Page 32

4
Main unitRemote control
Turn off the System.
.
Standby indicator lights up in orange.
0
The System turns on automatically and
starts playback about 30 seconds before
the starting time of the daily timer.
0
The daily timer works only when the
System is on standby.
0
While the daily timer is set, “TIMER” icon
lights up.
0
While the daily timer is functioning,
“TIMER” icon flashes.
0
Once set, the daily timer works every day.
0
You can not set the same time for the
starting time and ending time.
To cancel the daily timer
While the System is turned on
.
The “TIMER” icon disappears.
To set the daily timer with the same
settings again after canceling
While the System is turned on
.
The “TIMER” icon lights up.
32
Page 33

(Press repeatedly)
ROCK
ROCKCLASSIC
JAZZGAME
(Press repeatedly)
SURROUND OFF SURROUND ON
(Press repeatedly)
HBS OFF HBS ON
Other functions
Adjusting the sound quality
Using the sound mode
Sound modes can be selected to enhance the type
of music being played.
.
Example:
.
Each time you press the button, the setting is
changed.
.
To set the surround
.
Each time you press the button, the surround effect
is turned on or off.
To increase the bass sound
.
Each time you press the button, the bass sound
effect is turned on or off.
.
0
The initial setting is “HBS OFF”.
NOTE
0
The sound mode, surround and bass sound
(HBS) also take effects on the sounds from the
headphones.
0
When the sound mode is enabled, the surround
or the bass sound (HBS) is canceled.
0
When the surround is enabled, the sound mode
is canceled.
0
When the bass sound (HBS) is enabled, the
sound mode is canceled.
ENGLISH
.
0
The initial setting is “SURROUND OFF”.
33
Page 34

(Press repeatedly)
(Hold)
/
(Press repeatedly)
Adjusting the display/downlight
Adjust according to your preferences or the
surrounding conditions.
To turn on/off and set the brightness
.
Each time you press the button, the display and
downlight turn on/off, or the brightness changes.
DIMMER OFF : Display: Bright,
Downlight: Bright
DIMMER 1 : Display: Slightly dark,
Downlight: Dark
DIMMER 2 : Display: Dark,
Downlight: Off
0
The brightness of the display and downlight
changes at the same time.
0
The setting will be memorized even if the System
is turned off.
0
The initial setting is “DIMMER OFF”.
To adjust the color depth (CONTRAST)
of the display window
1
Display the color depth setting screen.
.
“CONTRAST SET1” will be displayed.
2
Adjust the color depth (CONTRAST).
.
Each time you press [H] / [I], the color depth
(CONTRAST) of the display window changes
in five levels (“CONTRAST SET1” to
“CONTRAST SET5”).
The setting is completed when “COMPLETE”
is displayed after performing the setting.
0
The display returns to the original display
after about 3 seconds.
0
To return to the original display while
setting, press [DIMMER / CONTRAST].
0
The initial setting is “CONTRAST SET3”.
34
Page 35

Changing the display information
(Press repeatedly)
T01 0:46
REMAIN
TOTAL
TOTAL REMAIN
T001 0:46
FOLDER.. FILE..
TAG information
F001 T0003
During playback...
.
Each time you press the button, the display
information changes to other information.
0
The information shown on the display differs
depending on the source.
0
The System can display ID3 TAG VERSION1,2
(song title, artist name and album name), file
name and folder name (some characters cannot
be displayed. These characters may not be
displayed correctly, or “*” is displayed).
0
iPod cannot show the Tag data of MP3/WMA.
For audio CD
: The elapsed time of
.
.
.
.
the playing track
: The remaining time of
the playing track
: The elapsed time of
the whole CD
: The remaining time of
the whole CD
ENGLISH
For MP3/WMA files
.
.
.
.
: The elapsed time of
the playing track
: Folder name/ file
name
: Tag information
: Folder number/ file
number
35
Page 36

References
Compatible iPod
Made for Version*
iPod nano (7th generation) 1.0.2
iPod nano (6th generation) 1.2
iPod nano (5th generation) 1.0.2
iPod nano (4th generation) 1.0.4
iPod nano (3rd generation) 1.1.3
iPod nano (2nd generation) 1.1.3
iPod touch (5th generation) 6.1.3
iPod touch (4th generation) 6.1.3
iPod touch (3rd generation) 5.1.1
iPod touch (2nd generation) 4.2.1
iPod touch 3.1.3
iPhone 5 6.1.4
iPhone 4S 6.1.3
iPhone 4 6.1.3
iPhone 3GS 6.1.3
iPhone 3G 4.2.1
* Software version at the time of operation
confirmation
0
Reset your iPod/iPhone if your iPod/iPhone is not
playing back correctly. (Please visit Apple's
homepage for information about resetting your
iPod/iPhone.)
0
For details on the iPod/iPhone, check Apple's
web site. <http://www.apple.com>
0
To check the latest supporting status of the iPod/
iPhone, refer to the product information on our
home page.
Playable BLUETOOTH devices
0
To connect the device to this System via
BLUETOOTH, the device must be compatible
with the A2DP and the AVRCP profiles.
Playable discs/files
0
We do not guarantee the operation and sound
quality of CDs that are not compliant with the CDDA standard
Before playing a CD, look for a “CD logo mark”,
and read through the precautions on the
package to check whether it complies with the
CD standard.
0
Playback of a CD on the System may fail due to
the CD’s characteristics, recording condition,
scratches or dirt on it, or when there is dirt or
condensation on the lens of the player.
0
Read through the precautions on the use of the
CD carefully.
0
The System does not support the display of CD
texts.
Discs CDs with any of the following marks
Files
are playable.
.
0
CD-R or CD-RW in the audio CD
format
0
CD-R/CD-RW or the MP3/WMA
files of USB devices
36
Page 37

Important for USB mass storage class devices
0
It is recommended that you use a USB device
with a capacity of 16 GB or smaller.
0
The more files there are in a USB device, the
longer it takes for the System to load them.
0
Deactivate the security function of the USB
device before connecting.
0
When connecting with a USB cable, use a USB
2.0 cable less than 1 m in length.
0
You cannot connect a computer to the USB
MEMORY terminal of the System.
0
Do not use a USB hub.
0
If the USB device is divided into multiple partitions,
the System recognizes only the first partition.
0
Power is supplied to the USB device and the
device will be charged through the System when
the USB device is connected to the System.
0
Electrostatic shock at connecting a USB device
may cause abnormal playback of the device. In
this case, disconnect the USB device then reset
this System and the USB device.
0
JVC bears no responsibility for any loss of data
on the USB mass storage class device while
using this System.
0
Some USB devices may not be recognized or
may not operate properly.
0
For information on operating the USB device,
see the instruction manual for the USB device.
Precautions on CD-R/CD-RW
For CD-Rs/CD-RWs edited by the user, only
finalized CDs can be played back on the System.
0
To create a CD-R/CD-RW disc, set the format to
“ISO 9660 Level 1”. Do not use discs that are
packet-written (UDF format).
0
For CD-RW that have been recorded in the
format other than CD-DA format or MP3/WMA
files, erase all tracks before listening to. If the
disc is used before erasing, the loud sound is
output suddenly, it might cause the failure such
as damage the speaker.
0
For CD-Rs/CD-RWs that contain MP3/WMA
files, it may take a longer time to read the disc
compared to normal audio discs. (The amount of
reading time needed varies with the
configuration of the folders and files.)
0
If CD-R/CD-RW that is printable on the label side
is used, the disc may not be ejected from the
System due to the label side is sticked to the
System. Using such discs may cause
malfunction, do not use them.
Precautions on MP3/WMA files
0
Playable MP3/WMA files are files with the
extension of <.mp3> or <.wma>.
0
The System can play back MP3/WMA files
recorded with the following sampling frequency
and bitrate.
Sampling frequency: 32/44.1/48 kHz
Bitrate: 32 kbps to 320 kbps
0
This System can recognize up to 255 folders and
3,000 files on a USB device.
0
DRM (Digital Rights Management) files cannot
be played back.
0
The System cannot play back files larger than 2
GB.
0
Some MP3/WMA files may not be playable due
to the condition or method of recording. The
System will skip the playback of these files.
0
Playing order of MP3/WMA files
(Folders without MP3/WMA files are ignored.)
- Groups are played in creation order. In a
group, tracks are played in created order.
- The playing order may be changed if you
change a folder name (group name) or file
name (track name) on the PC.
0
The maximum number of displayable characters
in the System is as follows.
- Folder name: 16 characters
- File name: 64 characters (including the
extension)
- Tag display (track title/artist/album title):
MP3 ID3 tag/WMA contents property: 64
characters (compatible with ID3 v1.0/ 1.1/ 2.2/
2.3/2.4)
0
Some characters cannot be displayed. These
characters may not be displayed correctly, or
“*” is displayed.
ENGLISH
37
Page 38

To place back to the case
To take out from the case
Consecutive scratches can
cause noise or mistracking.
Straight out from the
centre, along the radius
Maintenance
Care of compact discs
.
0
Do not write on either side of the disc, particularly
the non-label side from which signals are read.
Do not mark this surface.
0
Do not bend the disc.
0
Do not play discs of special shapes (heart,
flower, etc). It may cause malfunctions.
0
If a CD is dusty, clean it with a soft, dry cloth and
remove dirt or fingerprints.
.
0
Do not wipe it with thinner or benzine.
Trademarks
0
“Made for iPod” and “Made for iPhone” mean that
an electronic accessory has been designed to
connect specifically to iPod or iPhone,
respectively, and has been certified by the
developer to meet Apple performance
standards. Apple is not responsible for the
operation of this device or its compliance with
safety and regulatory standards. Please note
that the use of this accessory with iPod or iPhone
may affect wireless performance.
0
iPhone, iPod, iPod classic, iPod nano and iPod
touch are trademarks of Apple Inc., registered in
the U.S. and other countries.
0
Microsoft and Windows Media are either
registered trademarks or trademarks of
Microsoft Corporation in the United States
and/or other countries.
0
The Bluetooth® word mark and logos are
registered trademarks owned by Bluetooth SIG,
Inc. and any use of such marks by
JVC KENWOOD Corporation is under license.
0
Android is a trademark of Google Inc..
38
Page 39

Troubleshooting
If you are having a problem with your System,
check this list for a possible solution before calling
for service.
If the following measures do not resolve the
problems:
The System works using a built-in microprocessor.
If buttons are not operative, disconnect the AC
power cord from the wall outlet, wait for a while,
then connect the cord again.
General
Power does not come on.
Connect the AC adapter correctly.
B
The System turns off automatically.
Auto power save function is functioning. (page
B
15)
The buttons do not function.
Reset the System. (page 41)
B
Adjustments or settings are suddenly
canceled before you finish.
There is a time limit. Repeat the procedure.
B
Unable to operate the System from the remote
control.
The path between the remote control and the
B
remote sensor on the System is blocked.
Batteries of the remote control are exhausted.
B
Change the batteries.
No sound is heard.
Adjust the volume.
B
Cancel muting.
B
Disconnect the headphones.
B
“0:00” blinks on the display.
Set the clock again. (page 14)
B
No audio output from the digital input terminal
(DIGITAL IN).
Connect the devices correctly.
B
Check to ensure that the digital audio output
B
setting of the connected device is set to “PCM”.
iPod operations
iPod does not play.
Connect the USB cable correctly.
B
Check the compatibility of your iPod. (page
B
36)
Battery of iPod are exhausted. Charge the
B
battery of iPod.
Reset your iPod after disconnecting it from the
B
System, unplug the power cord of the System,
and plug it in again. (For details on resetting
your iPod, please visit Apple’s official website.)
USB device/CD
Unable to eject a disc.
Press [M] until “EJECT” is displayed.
B
If CD-R/CD-RW that is printable on the label
B
side is used, the disc may not be ejected from
the System due to the label side is sticked to
the System.
The disc/USB device does not play.
Connect the USB devices correctly.
B
Turn on the power of the USB audio player.
B
Try using a different USB flash memory device.
B
Insert the disc with the label side facing you.
B
The disc or lens is scratched or dirty. Clean the
B
disc or lens.
Playback is not possible if an audio file is
B
corrupted.
Check whether the audio file format is
B
supported by the System.
The disc is recorded using “packet writing
B
(UDF file unit)” and cannot be played back.
MP3/WMA groups and tracks are not played
back as you expect.
The playback order is determined by the
B
writing software used for recording the groups
and tracks.
ENGLISH
39
Page 40

The sound from the USB device or disc is
choppy.
The disc is dirty or scratched. Clean or replace
B
the disc.
Play MP3/WMA files that are properly written.
B
Turn off the System, disconnect and reconnect
B
the USB device.
Tag information is not displayed correctly
Check whether the tag information can be
B
displayed on the System. (page 35)
Tuner operations
No broadcast is heard.
Connect the antenna correctly. (page 11)
B
For AM broadcast, place the AM loop antenna
B
as near as possible to the window and adjust
the antenna direction until you obtain the best
reception.
When a FM antenna is used, extend and
B
secure the wire to the position where you
obtain the best reception.
Adjust the frequency to the station you want to
B
listen to.
Hard to listen to broadcasts because of noise.
Adjust the antenna.
B
Turn off and on the System.
B
Place the System away from the television.
B
BLUETOOTH device
Unable to pair.
Set the System in pairing standby, and perform
B
pairing from the target device, such as a
smartphone. (page 23)
Unable to connect to BLUETOOTH device.
Check that the BLUETOOTH function is set to
B
ON.
Check to ensure that the BLUETOOTH device
B
supports the BLUETOOTH A2DP profile.
Unable to operate the BLUETOOTH device.
Check to ensure that the BLUETOOTH device
B
supports the BLUETOOTH AVRCP profile.
The sound is choppy. Noise is generated.
The System is out of the BLUETOOTH range
B
limitation, or there may be an equipment
interfering with the radio waves between the
System and the BLUETOOTH device. Try
placing the BLUETOOTH device nearer to the
System, or change location.
Timer operations
Unable to set the sleep timer
The daily timer is functioning. While the daily
B
timer is functioning, sleep timer does not work.
The daily timer does not work.
The clock needs to be set. Clock setting is
B
canceled when the AC power cord is
unplugged from the AC outlet, causing the
daily timer to stop functioning.
The System is turned on. The daily timer
B
functions only when the System is turned off.
40
Page 41

Resetting the System
Main unitRemote control
–
Main unitRemote control
and
If the System cannot be oprated or the display
window is shown incorrectly, reset the System
using the following procedures.
After resetting, the contents of the settings will be
restored to the factory default.
1
Turn off the System.
.
2
Resetting the System.
.
Press and hold the two buttons at the same
time until “FACTORY RESET” is dsiplayed.
3
When “RESET FINISHED” is displayed,
unplug the AC power cord from the wall
socket.
The System have been reset.
4
Plug the AC power cord of the System into
the outlet.
ENGLISH
41
Page 42

Specifications
Main unit (NX-W5W/NX-W5B)
Amplifier
Maximum useful output: 20 W + 20 W (1 kHz,10% THD,8Ω)
CD player
Playable files: Audio CD, MP3, WMA
Tuner
AM tuning range: 522 kHz - 1 629 kHz
FM tuning range: 87.50 MHz - 108.00 MHz
Antenna: Wire antenna
Input/output terminals
USB: Output power:
Specifications: Compatible with USB 2.0 Full Speed
Compatible devices: Mass storage class
Compatible file systems: FAT16, FAT32
Playable files: MP3, WMA
DIGITAL IN: OPTICAL x 1
AUDIO IN:
PHONES:
Stereo mini (ø 3.5 mm) x 1
LEVEL 1: 1 V/30 kΩ
LEVEL 2: 500 mV/30 kΩ
LEVEL 3: 250 mV/30 kΩ
Stereo mini (ø 3.5 mm) x 1
DC 5 V P 1 A
BLUETOOTH
Version: BLUETOOTH Ver. 3.0
Output power: Class 2
Maximum service area: About 10 m
(Communication range may vary depending on the environmental conditions.)
Frequency band: 2.4 GHz range
Compatible
BLUETOOTH profile:
A2DP (Advanced Audio Distribution Profile)
AVRCP (Audio/Video Remote Control Profile)
42
Page 43

General
Supplied AC adapter
(AA-R1809):
Power consumption: 18 W (during operation)
Dimensions: 325 mm ´ 211 mm ´ 150 mm (W x H x D)
Weight: Approx. 3.8 kg
Speakers
System: Full range Bass-Reflex type
Speakers unit: 7 cm cone speaker
Impedance: 8 Ω
Maximum input: 20 W
Specifications and appearance of this unit are subject to change without prior notice for improvement.
Input: AC 100 V - 240 V ~,50 Hz/60 Hz,1.5 A - 0.5 A
Output: DC 18 V P 3.35 A
1.00 W and below (during standby)
ENGLISH
43
Page 44

.
.
.
V EN
© 2013 JVCKENWOOD Corporation
1013KMYSANCDT
Page 45

.
KOMPAKT-KOMPONENTEN-SYSTEM
NX-W5W/NX-W5B
.
DEUTSCH
.
BEDIENUNGSANLEITUNG
LVT2491-002B
[E]
Page 46

Hören von UKW/MW-Radio
Wiedergabe von MP3/WMA-Dateien auf
einer Musik-CD oder einem USB-Gerät
Abspielen von Dateien auf Ihrem BLUETOOTH-
Gerät über die Bedienung des Systems
Abspielen von Dateien auf Ihrem
iPod oder iPhone über das System
Wiedergeben eines externen Geräts,
das keine USB-Verbindung unterstützt
Genießen Sie das Hören von Musik durch Einstellung
des Sound-Modus oder des Basssounds! (Seite 33)
Seite 30
Seite 26
Seite 18
Seite 23
Seite 16
Was Sie mit dem System tun können
.
2
Page 47

Lassen Sie schnell los
Nach unten gedrückt halten
Einleitung
Automatisches Energiesparen (APS)
0
Das ist System ist mit der Funktion „Automatisches Energiesparen (APS)“ ausgestattet,
das das Gerät automatisch ausschaltet, wenn 15 Minuten lang keine Wiedergabe
erfolgt. Diese Funktion ist in der Standardeinstellung aktiviert. (Seite 15)
In dieser Bedienungsanleitung...
0
Sofern nicht anders angegeben, werden die Fernbedienungstasten zur Erklärung von
Bedienungsvorgängen verwendet. Tasten bezeichnen, wenn nicht anders angegeben, die Tasten
der Fernbedienung. Wenn sich am System jedoch Tasten mit gleichen oder ähnlichen Namen
befinden, können diese ebenfalls für die Bedienung verwendet werden.
0
Die Anzeige, die in dieser Bedienungsanleitung angezeigt wird, kann in manchen Fällen von der
tatsächlichen Anzeige abweichen.
In dieser Bedienungsanleitung...
0
In dieser Bedienungsanleitung beinhaltet „iPod“ die Geräte iPod, iPod touch und iPhone. Wenn ausdrücklich
auf iPod touch oder iPhone hingewiesen wird, wird entsprechend „iPod touch“ oder „iPhone“ verwendet.
0
In dieser Bedienungsanleitung wird der Begriff „Android-Gerät“ für ein Smartphone und ein TabletGerät verwendet, die über das Android-Betriebssystem verfügen.
0
In dieser Anleitung werden die Ausdrücke „Datei“ und „Titel“, „Ordner“ und „Gruppe“ gleichbedeutend verwendet.
Eine Kopie der Übereinstimmungserklärung bezüglich der R&TTE-Richtlinie 1999/5/EG kann von den
folgenden Websites heruntergeladen werden. (http://www.jvc.co.jp/ecdoc/)
.
Hiermit erklärt JVC, dass sich das System [NX-W5W]/[NX-W5B] in Übereinstimmung mit den grundlegenden
Anforderungen und den übrigen einschlägigen Bestimmungen der Richtlinie 1999/5/EG befindet.
Möglichkeiten, die Tasten zu drücken
Es gibt zwei Möglichkeiten, die Tasten des Systems zu drücken. „Kurzes Drücken“ bezieht sich auf das
kurze Drücken und sofortige Loslassen einer Taste, während sich „Langes Drücken“ auf das gedrückt
halten einer Taste bezieht.
Kurzes Drücken: Für Fälle, bei denen „Langes Drücken“ nicht angezeigt wird
Drücken Sie eine Taste leicht und lassen Sie sie sofort wieder los. Das System reagiert möglicherweise
nicht, wenn übermäßige Kraft auf einer Taste angewendet oder wenn die Taste nicht sofort losgelassen
wird. Wenn das Gerät nicht wie gewünscht reagiert, versuchen Sie es erneut mit veränderter Länge
oder Kraft, mit der die Taste gedrückt wird.
.
Langes Drücken: Für alle Fälle, bei denen „Langes Drücken“ angezeigt wird
DEUTSCH
.
Halten Sie eine Taste nach unten gedrückt, und heben Sie dann den Finger.
WICHTIG FÜR LASER-PRODUKTE
1. LASER-PRODUKT DER KLASSE 1
2.
VORSICHT: Nicht die obere Abdeckung oder das Gehäuse öffnen. Das Gerät enthält keine Teile, die vom
Benutzer gewartet werden können; Wartungen nur von qualifiziertem Fachpersonal durchführen lassen.
Das Produktlabel dieses Produktes oder andere Informationen befinden sich auf der Unterseite des Systems.
3
Page 48

15 cm
15 cm
15 cm
15 cm
Rückseite des Geräts
Aufstellung
Achtung: Angemessene Ventilation
Stellen Sie das Gerät zur Verhütung von elektrischem Schlag und Feuer und zur Vermeidung von
Beschädigung wie folgt auf:
1
Vorderseite: Offener Platz ohne Hindernisse.
2 Seiten/ Oben/ Hinten: Innerhalb der in der Abbildung dargestellten Bereiche dürfen sich keine
Hindernisse befinden.
3 Unterseite: Auf eine ebene Oberfläche stellen.
Vorderansicht
.
Seitenansicht
.
Hinweise zur Aufstellung
Wählen Sie einen Ort, der eben, trocken und nicht zu heiß oder zu kalt ist—zwischen 5˚C und 35˚C.
4
Page 49

Inhalt
Was Sie mit dem System tun können
........................................................... 2
Einleitung ......................................... 3
Aufstellung .......................................................... 4
Vorbereitung .................................... 6
Zubehör .............................................................. 6
Vorbereiten der Fernbedienung .......................... 6
Teilebezeichnungen ....................... 7
Fernbedienung .................................................... 7
Oberteil des Hauptgeräts / Vorderseite ............... 8
Seite .................................................................... 9
Hinten ................................................................. 9
Anzeige ............................................................. 10
Anschlüsse .................................... 11
Anschließen von Antennen ............................... 11
Anschließen eines Wechselstromadapters ....... 13
Anschließen der Kopfhörer ............................... 13
Grundlegende Bedienungsverfahren
......................................................... 14
Ein-/Ausschalten des Systems .......................... 14
Einstellung der Uhr ............................................ 14
Erste Schritte .................................................... 14
Aktivieren/Deaktivieren von APS (Automatisches
Energiesparen) ................................................. 15
Hören von iPod .............................. 16
Anschließen von iPod ....................................... 16
Wiedergabe ...................................................... 16
iPod-Menübedienung ........................................ 17
Anhören eines USB-Geräts/CD ... 18
Vorbereiten eines USB-Geräts/CD ................... 18
Wiedergabe ...................................................... 19
Programmwiedergabe ....................................... 20
Zufallswiedergabe ............................................. 21
Wiedergabewiederholung ................................. 22
Ein BLUETOOTH-Gerät anhören . 23
Ein BLUETOOTH Gerät anschließen ................ 23
Wiedergabe ...................................................... 24
Den Anschluss abbrechen ................................ 25
Radio hören ................................... 26
Sendersuchlauf ................................................. 26
Sender voreinstellen ......................................... 27
Mit Radio-Datensystem ..................................... 28
Hören von einem externen Gerät
......................................................... 30
Anschließen eines externen Geräts .................. 30
Hören von einem externen Gerät ...................... 30
Verwendung des Timers .............. 31
Einstellung des Sleep-Timers ........................... 31
Einstellung des Tages-Timers ........................... 31
Andere Funktionen ....................... 33
Einstellen der Klangqualität ............................... 33
Einstellen der Anzeige/Hintergrundbeleuchtung
........................................................................... 34
Ändern der Anzeige-Information ....................... 35
Referenz ......................................... 36
Kompatibel iPod ................................................ 36
Abspielbare BLUETOOTH Geräte .................... 36
Abspielbare Discs/Dateien ................................ 36
Wichtig für USB-Massenspeichergeräte ........... 36
Vorsichtsmaßnahmen bei CD-R/CD-RW .......... 37
Vorsichtsmaßnahmen für MP3/WMA-Dateien .. 37
Wartung ............................................................ 38
Warenzeichen ................................................... 38
Fehlersuche ................................... 39
Das System zurücksetzen ................................. 41
Technische Daten ......................... 42
DEUTSCH
5
Page 50

MW-Rahmenantenne (1)UKW-Antenne (1)
Netzkabel (1)
Wechselstromadapter
AA-R1809 (1)
NX-W5B: RM-SNXW5R (1)
NX-W5W: RM-SNXW5R-W (1)
Fernbedienung
Lithiumknopfbatterie (CR2025)
Vorbereitung
Zubehör
Überprüfen Sie, ob folgende mit dem System
mitgelieferte Artikel vorhanden sind.
.
6
Vorbereiten der Fernbedienung
Ziehen Sie bei der ersten Verwendung der
Fernbedienung die Schutzfolie heraus.
Falls sich die Leistungsfähigkeit der
Fernbedienung verringert, tauschen Sie die
Batterie aus.
Ersetzen der Batterie in der Fernbedienung
Passen Sie die Polarität (+und –) der Batterie mit
den auf der Fernbedienung angezeigten an.
.
HINWEIS
0
Die im Lieferumfang enthalten Batterien dienen
zur Überprüfung des Systembetriebs. Tauschen
Sie sie sobald wie möglich gegen neue aus.
VORSICHT
0
Explosionsgefahr, wenn Batterie falsch
eingesetzt wird.
0
Nur durch den selben oder entsprechenden Typ
ersetzen.
0
Legen Sie die Batterie an einem Ort ab, wo sie
außer Reichweiter kleiner Kinder ist. Falls ein
Kind vesehentlich die Batterie verschluckt,
sofort einen Arzt rufen.
0
Um Überhitzen, Bersten oder Brand der Batterie
zu vermeiden:
- Die Batterie nicht aufladen, kurzschließen,
zerlegen, erhitzen oder in ein Feuer werfen.
- Die Batterie nicht zusammen mit anderen
Metallgegenständen ablegen.
- Umwickeln Sie die Batterie beim Entsorgen
oder Lagern mit Klebeband und Isolierstoff.
- Die Batterie nicht mit Pinzetten oder ähnlichen
Werkzeugen anstoßen.
0
Entsorgen Sie Batterie sachgemäß unter
Beachtung aller nationalen, bundesstaatlichen
und lokalen Vorschriften.
Page 51

(
)
Teilebezeichnungen
Fernbedienung
0
Die Referenzseiten sind hauptsächlich die Seiten mit den Beschreibungen der jeweiligen Teile.
DEUTSCH
.
A
A (Stromversorgung)
(Seite 14)
B
BLUETOOTH, CD, USB, TUNER, AUDIO IN,
DIGITAL IN
(Seiten 16, 19, 23, 26, 30)
C
S / T
(Seiten 16, 19, 24, 26)
D
PROGRAM / TUNER MODE
(Seiten 20, 26)
E
RANDOM
(Seiten 17, 21)
F
REPEAT / MEMORY
(Seiten 17, 22, 27)
G
CANCEL/PTY
(Seiten 27, 29)
H
HBS
(Seite 33)
I
SOUND MODE
(Seite 33)
J
SURROUND
(Seite 33)
K
DIMMER / CONTRAST
(Seite 34)
L
PAIRING
(Seite 23)
M
DISPLAY
(Seiten 28, 35)
N
I / W
(Seiten 16, 19, 24)
O
o
(Seite 19)
P
VOLUME +/–
(Seite 14)
Q
MUTING
(Seite 15)
R
J / K / H / I / SET
(Seiten 14, 17, 27, 30, 31, 34)
S
FOLDER/PRESET
(Seiten 19, 27)
T
SLEEP
(Seite 31)
U
TIMER ON/OFF
(Seite 32)
V
CLOCK/TIMER
(Seiten 14, 31)
W
Zifferntasten
(Seiten 19, 27)
7
Page 52

Oberteil des Hauptgeräts / Vorderseite
1
-
02 34567 98
=
.
A
Fernbedienungssensor
B
STANDBY Anzeige
Leuchtet rot, wenn die Stromversorgung des
Systems ausgeschaltet ist. Die Leuchte erlischt,
wenn der Strom eingeschaltet ist.
Leuchtet orange auf, wenn der Tages-Timer
aktiviert ist.
C
A (Stromversorgung)-Taste
(Seite 14)
D
S / T-Taste
(Seiten 16, 19, 24, 26)
E
o-Taste
(Seite 19)
F
(PAIRING) I/W-Taste
(Seiten 16, 19, 23)
G
SOURCE-Taste
(Seiten 16, 19, 23, 26, 30)
H
VOLUME -/+ Taste
(Seite 14)
I
M (Auswerfen der CD) Taste
(Seite 18)
J
Anzeige
Drücken von [DIMMER / CONTRAST] ändert
die Helligkeit der Anzeige und der
Hintergrundbeleuchtung. (Seite 34)
K
CD-Schacht
(Seite 18)
L
Hintergrundbeleuchtung
Leuchtet weiß auf, wenn der Strom
eingeschaltet ist. (Seite 34)
8
Page 53

Seite
2
1
3
3.35A
18V
2341
Hinten
A
USB-Anschluss
Schließen Sie das iPod/iPhone oder ein USB-Gerät
an.
(Seiten 16, 18)
B
AUDIO IN-Buchse
Schließen Sie ein externes Gerät an.
(Seite 30)
C
PHONES-Buchse
Schließen Sie die Kopfhörer an.
(Seite 13)
A
FM 75Ω COAXIAL Antennenanschluss
(Seite 11)
B
AM LOOP Antennenanschluss
(Seite 12)
C
DIGITAL IN (OPTICAL)-Anschluss
(Seite 30)
D
DC IN-Buchse
(Seite 13)
DEUTSCH
9
Page 54

Anzeige
1
23 4
657
89 0 - =
.
A
PGM (Programm)-Anzeige
(Seite 20)
Leuchtet während der Programmwiedergabe.
(„CD“, „USB“)
B
Datei-Anzeige
Leuchtet auf, wenn Audiodateien
wiedergegeben werden.
C
Wiederholungsbetriebs-Symbol
(Seite 22)
REP.
REP.ALB*:Leuchtet auf, wenn der
REP. ALL:Leuchtet auf, wenn alle Titel
* nur MP3/WMA
D
USB-Symbol
(Seite 18)
Leuchtet auf, wenn ein USB-Gerät an das
System angeschlossen wird.
E
Anzeigewechsel-Symbol
TOTAL
REMAIN:Leuchtet auf, wenn die
Leuchtet auf, wenn ein Titel
:
wiederholt wird.
(„CD“, „USB“)
derzeitige Ordner wiederholt
wird.
(„CD“, „USB“)
wiederholt werden.
(„CD“, „USB“)
Leuchtet auf, wenn die
:
Wiedergabezeit der gesamten
Disc angezeigt wird, während die
Disc wiedergegeben wird.
verbleibende Wiedergabezeit der
gesamten Disc angezeigt wird,
während die Disc wiedergegeben
wird.
F
BLUETOOTH-Symbol
(Seite 23)
Leuchtet auf, wenn ein BLUETOOTH -Gerät an
das System angeschlossen wird.
G
iPod-Symbol
(Seite 16)
Leuchtet auf, wenn iPod an das System
angeschlossen wird.
H
STEREO-Symbol
(Seite 26)
Leuchtet auf, wenn eine Stereosendung
empfangen wird.
I
RDM-Symbol
(Seite 21)
Leuchtet während der Zufallswiedergabe auf.
(„CD“, „USB“)
J
Timer-Symbol
(Seiten 31, 32)
TIMER
Leuchtet auf, wenn der Timer
:
eingestellt wurde. Blinkt,
während der Timer funktioniert.
TIMER ON:Blinkt, wenn die Startzeit des
Tages-Timer eingestellt wird.
TIMER OFF:Blinkt, wenn die Endzeit des
K
SLEEP-Symbol
Tages-Timers eingestellt wird.
(Seite 31)
Leuchtet auf, wenn der Sleep-Timer eingestellt
wird.
L
Hauptanzeige
Zeigt die Textinformationen jeder Quelle an.
10
Page 55

3.35A
18V
Setzen Sie den Draht in der
Mitte des Anschlusses ein.
Der Sitz des Anschluss ist
eng. Dadurch wird verhindert,
dass der Draht herausfällt.
Anschlüsse
Schließen Sie das Netzkabel immer erst an die Steckdose an, nachdem alle anderen Anschlüsse
hergestellt worden sind.
Anschließen von Antennen
Stellen Sie sicher, dass Sie die Antenne anschließen, bevor Sie eine Radiosendung hören.
Die Installation der Antenne in der Nähe eines Fensters hilft generell, den Empfang zu verbessern.
Enthaltene UKW-Antenne
DEUTSCH
.
Ziehen Sie die FM-Hauptantenne heraus, nachdem Sie die gebündelte Schnur gelöst haben, sodass Sie
besten Empfang erhalten.
11
Page 56

Mitgelieferte AM-Rahmenantenne
3.35A
18V
Führen Sie die gleichen Schritte durch, um das andere Kabel einzusetzen
Setzen Sie den
Drahtkern ein
Feste drücken
・Einsetzen des Antennendrahts
Stellen Sie die angeschlossene
MW-Rahmenantenne nach
links oder rechts in die Position
mit dem besten Empfang ein.
Setzen Sie die Lasche
in die Ritze hinein, bis
sie hörbar einrastet
Klappbarer Teil am hinteren Ende
Lasche
Ritze
・Montage der Antenne
Lassen Sie los
①
②
③
④
0
Stellen Sie die MW-Rahmenantenne so nah wie möglich am Fenster auf, um den besten Empfang zu
erzielen.
0
VORSICHT
Verwenden Sie die MW-Rahmenantenne mit dem um den Rahmen gewickelten Antennendraht. Das
.
Entfernen des Drahtes vom Rahmen verschlechtert die Empfindlichkeit der Antenne.
0
Stellen Sie sicher, dass der Antennenleiter nicht im Kontakt mit anderen Anschlüssen oder Kabeln steht.
Positionieren Sie die Antenne entfernt von anderen Kabeln. Der Empfang kann gestört werden, wenn
sie sich zu nah an der Antenne befinden.
12
Page 57

3.35A
18V
Zur
Netzsteckdose
Netzkabel
(im Lieferumfang
enthalten)
AC-Adapter
(im Lieferumfang
enthalten)
Stereo-
Ministecker
Kopfhörer
(nicht im Lieferumfang enthalten)
Anschließen eines Wechselstromadapters
Schließen Sie den mitgelieferten AC-Adapter an
der DC IN Buchse des Systems an. Stecken Sie
das Netzkabel in die Steckdose, nachdem Sie das
mitgelieferte Netzkabel an den AC-Adapter
angeschlossen haben.
.
0
Ziehen Sie den AC-Adapter aus der
Wandsteckdose, wenn das Gerät längere Zeit
nicht verwendet wird.
VORSICHT
0
Um das Risiko eines Stromschlags und Feuer zu
vermeiden
-
Verwenden Sie keinen anderen Netzadapter, als
den im Lieferumfang enthaltenen AC-Adapter.
- Verwenden Sie den im Lieferumfang
enthaltenen AC-Adapter nicht mit anderen
Geräten, als diesem System.
- Verwenden Sie keine anderen Netzkabel, als
das im Lieferumfang enthaltene Netzkabel.
- Verwenden Sie das im Lieferumfang
enthaltene Netzkabel nicht mit anderen
Geräten, als diesem System.
Über SpeicherWiederherstellungseinstellungen
Über die Sicherungsfunktion können die
verschiedenen Einstellungen auch dann
gespeichert werden, wenn das Netzkabel
abgetrennt wird. Die geschützten Einstellungen
sind die folgenden.
0
Wechseln der Quelle
0
Einstellung der Lautstärke
0
Einstellung der Klangqualität
0
Die Inhalte der Timer-Einstellung
0
Einstellung des Tuners
Anschließen der Kopfhörer
Stellen Sie die Lautstärke immer niedrig, bevor Sie
Kopfhörer anschließen oder aufsetzen.
HINWEIS
0
Durch Anschließen der Kopfhörer werden die
Lautsprecher deaktiviert.
0
Verwenden Sie im Handel erhältliche Kopfhörer
mit einem 3-poligen Stereo-Ministecker.
.
13
DEUTSCH
Page 58

HauptgerätFernbedienung
/
(Drücken Sie wiederholt)
CLOCK
/
(Drücken Sie wiederholt)
/ / / / /
Fernbedienung
Hauptgerät
(Drücken Sie wiederholt)
(Drücken Sie wiederholt)
(Drücken Sie wiederholt)
HauptgerätFernbedienung
Grundlegende Bedienungsverfahren
Ein-/Ausschalten des Systems
.
0
Sie können das System auch durch Drücken der
Quellentasten, wie beispielsweise [CD] auf der
Fernbedienung, einschalten.
Einstellung der Uhr
Stellen Sie die Uhrzeit ein, um die TimerEinstellung usw. zu verwenden
1
Anzeigen des
Uhreinstellungsbildschirms.
.
2
Auswählen „CLOCK“.
.
HINWEIS
0
Die Uhr kann 1 oder 2 Minuten im Monat voroder nachgehen. Sie müssen möglicherweise
die Uhrzeit regelmäßig neu einstellen.
0
Stellen Sie die Uhrzeit erneut ein, wenn das
Netzkabel abgezogen wird oder das System
durch einen Stromausfall ausgeschaltet wird.
Erste Schritte
1
Wählen Sie eine Quelle.
.
.
2
Einstellen der Lautstärke.
.
0
Wenn Sie die Uhr bereits eingestellt haben,
drücken Sie nach dem Drücken von
[CLOCK/TIMER] [H]/[I] wiederholt, um
„CLOCK“ anzuzeigen und drücken Sie
dann [SET].
3
Stellen Sie die Stunde ein.
.
4
Wiederholen Sie Schritt 3 zur Einstellung
der Minuten.
Nach der Einstellung der Minuten wird
„COMPLETE“ angezeigt und die Einstellung
ist abgeschlossen.
14
.
.
0
Einstellbereich: MIN (0) bis MAX (40)
Page 59

/
(Drücken Sie wiederholt)
/
(Drücken Sie wiederholt)
A.P.S. ON
A.P.S. OFF
(Abbrechen)
Um vorübergehend stummzuschalten
.
.
Um den Ton wiederherzustellen, drücken Sie die
Taste erneut oder [VOLUME+].
Aktivieren/Deaktivieren von APS (Automatisches Energiesparen)
Diese Funktion schaltet das System automatisch
aus, wenn länger als 15 Minuten keine
Bedienvorgänge durchgeführt werden.
1
Anzeigen der Timer-Einstellungs-Anzeige.
.
2
Auswählen „A.P.S“.
A.P.S ON:
Wenn 15 Minuten lang in den folgenden
Situationen keine Bedienung erfolgt, schaltet sich
das System automatisch aus.
- Der Lautstärkepegel ist auf „MIN“ gestellt, oder
die Stummschaltung ist aktiviert.
- „USB“ oder „BLUETOOTH“ ist als Quelle
ausgewählt und es ist kein Gerät angeschlossen.
- „USB“ oder „CD“ ist als Quelle ausgewählt und
die Wiedergabe ist angehalten.
- „AUDIO IN“ oder „DIGITAL IN“ ist als Quelle
ausgewählt und es gibt keine Toneingabe
A.P.S OFF:
Automatisches Energiesparen ist auf Aus gesetzt.
0
Etwa 1 Minute vor dem Ausschalten beginnt
„A.P.S.“ zu blinken.
0
Der 15-Minuten-Countdown beginnt erneut,
wenn Sie irgendwelche Tasten betätigen.
0
Die Werkseinstellung ist „A.P.S. ON“.
DEUTSCH
.
3
Wählen Sie den Menüpunkt aus.
.
.
Die Einstellung ist abgeschlossen, wenn
„COMPLETE“ angezeigt wird, nachdem die
Einstellung vorgenommen wurde.
15
Page 60

USB-Kabel für iPod
(im Lieferumfang von iPod
enthalten oder im Handel erhältlich)
HauptgerätFernbedienung
(Drücken Sie wiederholt)
Hauptgerät
Fernbedienung
Hauptgerät
Fernbedienung
/
/
(Drücken Sie wiederholt)
(Drücken Sie wiederholt)
HauptgerätFernbedienung
Hören von iPod
0
Für kompatible iPods, siehe Seite 36.
Wiedergabe
Anschließen von iPod
Sie können den iPod mit dem System durch
Anschluss an den USB-Anschluss des Systems
mit einem USB-Kabel (im Lieferumfang des iPod
enthalten oder im Handel erhältlich) bedienen.
.
0
Das „iPod“ Symbol leuchtet auf, nachdem das
Kabel angeschlossen ist.
HINWEIS
0
Der iPod kann aufgeladen werden, wenn der
iPod an das System angeschlossen ist.
VORSICHT
0
Stoppen Sie die Wiedergabe vor dem Trennen
von iPod. Das Trennen während der
Wiedergabe kann die Datei oder das
Dateisystem des iPod beschädigen.
0
Sie können keine Daten vom System zu Ihrem
iPod übertragen.
1
Stellen Sie die Quelle auf „USB“ ein.
.
2
Starten Sie die Wiedergabe.
.
Der iPod schaltet ein und beginnt mit der
Wiedergabe.
Zum Pausieren
.
Zum Aufheben der Pause, drücken Sie die Taste
erneut.
Zum Wählen eines Titels
.
0
Drücken Sie [T] einmal, um zum Anfang des
nächsten Titels zu springen.
0
Drücken Sie [S], um zum Anfang des
wiedergegebenen Titels zu springen. Drücken
Sie zweimal, um zum Anfang des vorherigen
Titels zu springen.
16
Page 61

/
/
HauptgerätFernbedienung
(Gedrückt halten)(Gedrückt halten)
(Drücken Sie wiederholt)
(Drücken Sie wiederholt)
/
(Drücken Sie wiederholt)
Für schnellen Rücklauf/Vorlauf
Während der Wiedergabe...
.
0
Für schnellen Rücklauf [S] gedrückt halten.
0
Für schnellen Vorlauf [T] gedrückt halten.
Abspielen in willkürlicher Reihenfolge
(Shuffle)-Wiedergabe
.
Bei jedem Tastendruck wird die Auswahl von iPod
Songs zum Abspielen in willkürlicher Reihenfolge
(Shuffle) geändert.
Wiedergabewiederholung
iPod-Menübedienung
1
Rufen Sie das Menü ab.
.
2
Wählen Sie eine Menüoption.
.
Um zum vorherigen Menü
zurückzukehren
Drücken Sie [MENU].
HINWEIS
0
Wenn der/das iPod/iPhone kompatibel mit dem
iOS 7.0.x ist, können die obigen
Menübedienungen auf dem System nicht
verfügbar sein. Bedienen Sie das Menü auf dem
iPod/iPhone selbst.
0
Je nach iPod-Typ können Sie das Menü nur auf
dem Bildschirm des iPod bedienen.
DEUTSCH
.
Bei jedem Tastendruck wird die Wahl von iPod
Wiederhol-Songs umgeschaltet.
HINWEIS
0
Je nach dem Typ des iPods, arbeitet der iPod
unterschiedlich.
0
Klangverzerrungen können auftreten, wenn
Audioquellen mit hohen Aufnahmepegeln
wiedergegeben werden. Wenn Verzerrung
auftritt, wird empfohlen, den Equalizer des iPod
auszuschalten.
0
Bedienen Sie das iPhone oder den iPod touch
direkt in den folgenden Fällen:
- Wenn die Home-Taste bedient wird
- Wenn Anwendungssymbole auf der Startseite
gewählt werden
- Wenn der Schieberegler gezogen wird
0
Für Information zur Bedienung des iPod siehe
Bedienungsanleitung des iPod.
17
Page 62

USB-Kabel
(nicht im Lieferumfang
enthalten)
USB-Speicher
(nicht im Lieferumfang
enthalten)
HauptgerätFernbedienung
(Drücken Sie wiederholt)
Hauptgerät
Anhören eines USB-Geräts/CD
Vorbereiten eines USB-Geräts/CD
Zum Anschließen eines USB-Geräts
0
Das „USB“ Symbol leuchtet auf, nachdem es
angeschlossen ist.
HINWEIS
0
Der Strom wird an das USB-Gerät geleitet und
das Gerät wird durch das System aufgeladen,
wenn das USB-Gerät an das System
angeschlossen ist.
VORSICHT
0
Stoppen Sie die Wiedergabe vor dem Trennen
des USB-Geräts. Das Trennen des USB-Geräts
während der Wiedergabe kann die Datei und
das Dateisystem des USB-Geräts beschädigen.
0
Das Versenden von Daten von dem System an
das USB-Gerät ist nicht möglich.
Zum Einsetzen einer Disc
1
Stellen Sie die Quelle auf „CD“ ein.
.
2
Einsetzen einer Disc.
.
.
Setzen Sie die CD mit der bedruckten Seite
nach oben in gleicher Richtung wie die
Vorderseite des Systems ein.
0
Die CD wird automatisch eingesetzt, wenn
Sie sie teilweise einsetzen.
0
„READING“ wird angezeigt, wenn die CD
gelesen wird. Warten Sie, bis die Anzeige
ausgeblendet wird.
Zum Auswerfen einer Disc
.
18
Page 63

/
HauptgerätFernbedienung
(Drücken Sie wiederholt)
Hauptgerät
Fernbedienung
HauptgerätFernbedienung
Hauptgerät
Fernbedienung
/
/
(Drücken Sie wiederholt)
(Drücken Sie wiederholt)
HauptgerätFernbedienung
um
/
/
HauptgerätFernbedienung
(Gedrückt halten)(Gedrückt halten)
(Drücken Sie wiederholt)
Wiedergabe
1
Stellen Sie die Quelle auf „USB“ oder
„CD“ ein.
.
0
„READING“ wird angezeigt, wenn das
USB-Gerät gelesen wird. Warten Sie, bis
die Anzeige ausgeblendet wird.
2
Starten Sie die Wiedergabe.
.
Zum Beenden der Wiedergabe
.
0
Bei MP3/WMA-Dateien wird die
Wiedergabefortsetzung nach dem Stoppen
einer Datei vom Anfang des Titels neu begonnen
(Fortsetzen-Funktion). Das nochmalige
Drücken von [o], wenn die Wiedergabe
angehalten ist, bricht die Fortsetzungsfunktion
ab.
0
Wenn eine andere Quelle ausgewählt ist, wird
die Wiederaufnahmefunktion abgebrochen.
Zum Wählen eines Titels
.
0
Drücken Sie [T] einmal, um zum Anfang des
nächsten Titels zu springen.
0
Drücken Sie [S], um zum Anfang des
wiedergegebenen Titels zu springen. Drücken
Sie zweimal, um zum Anfang des vorherigen
Titels zu springen.
Zum Auswählen eines Titels mit der
Titelnummer
.
Beispiele:
0
Zum Auswählen von Titel Nr. 3: 3
0
Zum Auswählen von Titel Nr. 17: 1 7
0
Zum Auswählen von Titel Nr. 123: 1 2 3
Zum schnellen Vorlauf/Rücklauf
Während der Wiedergabe...
.
0
Für schnellen Rücklauf [S] gedrückt halten.
0
Für schnellen Vorlauf [T] gedrückt halten.
DEUTSCH
Zum Pausieren
.
0
Drücken Sie die Taste erneut, um die Pause
abzubrechen und die Wiedergabe zu starten.
Zum Auswählen einer Gruppe (nur MP3/
WMA)
.
19
Page 64

/
(Drücken Sie wiederholt)
um
Hauptgerät
Fernbedienung
/
(Drücken Sie wiederholt)
um
Programmwiedergabe
Sie können die Reihenfolge von bis zu 30 Titeln von
einer Disc oder einem USB-Gerät beliebig,
einschließlich gleicher Titel, programmieren.
1
Wiedergabe des USB-Geräts oder der CD
stoppen.
2
Die Programmeinstellung anzeigen.
.
0
Das „PGM“ Symbol leuchtet auf.
0
Bei erneutem Drücken der Taste werden
die programmierten Inhalte gelöscht und
die Programmwiedergabe wird
abgebrochen (zurück zur normalen
Wiedergabe).
3
Wählen Sie einen Titel aus, um ihn zum
Programm hinzuzufügen.
.
Zum Auswählen eines Titels mit der
Titelnummer
5
Starten Sie die Wiedergabe.
.
Die Titel werden in der programmierten
Reihenfolge wiedergegeben.
Um Titel zum Programm hinzuzufügen
Wählen Sie einen Titel, um ihn zum Programm
hinzuzufügen.
Während dem Stopp-Modus
.
Zum Auswählen eines Titels mit der Titelnummer
.
.
.
0
Für Bedienvorgänge, um die Titel
auszuwählen, siehe „ Zum Auswählen von
Titel Nr. “ auf Seite 19.
4
Wiederholen Sie Schritt 3, um weitere
Titel zum Programm hinzuzufügen.
20
.
HINWEIS
0
„PGM FULL“ wird angezeigt, wenn der 30-er
Titel programmiert ist und keine weiteren Titel
programmiert werden können.
Page 65

/
HauptgerätFernbedienung
(Drücken Sie wiederholt)
Hauptgerät
Fernbedienung
Zum Löschen von Titeln aus dem
Programm
Während dem Stopp-Modus
.
Bei jedem Drücken der Taste wird der jeweils letzte
Titel im Programm gelöscht.
Zum Abbrechen der ProgrammWiedergabe
Während dem Stopp-Modus
.
Die programmierten Inhalte werden gelöscht.
0
Das „PGM“-Symbol verschwindet.
0
In den folgenden Fällen werden die
programmierten Inhalte gelöscht und die
Programm-Wiedergabe wird abgebrochen.
- Wenn die Stromversorgung ausgeschaltet ist
- Wenn die Audioquelle geändert wird
- Wenn das USB-Gerät entfernt wird
- Wenn die Disc ausgeworfen wird
HINWEIS
0
Programmwiedergabe kann auch wiederholt
werden.
Zufallswiedergabe
1
Stellen Sie die Quelle auf „USB“ oder
„CD“ ein.
.
2
Wiedergabe des USB-Geräts/CD.
.
3
Zufallswiedergabe starten.
.
Sie können die Titel in zufälliger Reihenfolge
abspielen.
0
Das „RDM“ Symbol leuchtet während der
Zufallswiedergabe auf.
0
Alle Titel werden in zufälliger Reihenfolge
wiedergegeben, anstelle der Zufallswiedergabe
innerhalb einer Gruppe.
0
Während der Zufallswiedergabe bringt Sie das
Drücken von [S] nicht zum vorherigen Titel zurück.
Zum Abbrechen der Zufallswiedergabe
Während der Zufallswiedergabe
DEUTSCH
.
Die „RDM“-Anzeige erlischt.
0
Zufallswiedergabe wird auch in den folgenden
Fällen abgebrochen:
- Wenn die Stromversorgung ausgeschaltet ist
- Wenn die Audioquelle geändert wird
- Wenn das USB-Gerät entfernt wird
- Wenn die Disc ausgeworfen wird
- Wenn die Wiedergabe gestoppt wird
21
Page 66

Wiedergabewiederholung
(Drücken Sie wiederholt)
Hauptgerät
Fernbedienung
(Drücken Sie wiederholt)
1
Auswählen der Art des
Wiederholungsbetriebs.
Während des Wiedergabe- oder StoppModus
.
Bei jedem Drücken der Taste ändert sich die
Einstellung wie folgt:
REP. : Wiederholt den aktuellen
REP.ALB* : Wiederholt die Titel der
REP. ALL : Wiederholt alle Titel auf der
* nur MP3/WMA
2
Wiedergabe starten (wenn Wiedergabe
gestoppt ist).
Titel.
aktuellen Gruppe.
Disc oder dem USB-Gerät.
.
Zum Abbrechen der
Wiedergabewiederholung
Schalten Sie das „REP“ Symbol aus.
.
0
Wiedergabewiederholung wird auch in den
folgenden Fällen abgebrochen.
- Wenn die Stromversorgung ausgeschaltet ist
- Wenn die Audioquelle geändert wird
- Wenn das USB-Gerät entfernt wird
- Wenn die Disc ausgeworfen wird
22
Page 67

HauptgerätFernbedienung
(Drücken Sie wiederholt)
CONNECTED
HauptgerätFernbedienung
(Gedrückt halten)
Ein BLUETOOTH-Gerät anhören
Sie können Musik von Ihrem BLUETOOTH Gerät,
wie beispielsweise einem tragbaren Audio-Player,
über das System hören.
Wenn Sie Ihr Gerät zum ersten Mal anschließen,
ist es notwendig, Ihr BLUETOOTH-Gerät und das
System zu registrieren (pairen).
Ein BLUETOOTH Gerät anschließen
1
Stellen Sie die Quelle auf „BLUETOOTH“ ein.
.
„CONNECTING“ blinkt und das System wird
sich automatisch erneut zu dem
BLUETOOTH Gerät verbinden, das zuletzt
verbunden war. „CONNECTED“ wird
angezeigt und „
Symbol) leuchtet auf.
.
0
Der Pairing-Vorgang ist notwendig, wenn
Sie das BLUETOOTH-Gerät zum ersten
Mal anschließen oder das System mit dem
neuen BLUETOOTH-Gerät verbinden.
0
Wenn das „ “-Symbol (BLUETOOTHSymbol) aufleuchtet, brechen Sie die
Verbindung einmal durch Drücken und
Halten der [BLUETOOTH]-Taste auf der
Fernbedienung oder der [(PAIRING) I/W]Taste auf dem System ab.
„DISCONNECTED“ wird angezeigt, dann
wird die Anzeige ausgeblendet.
2
Stellen Sie das System auf PaarungsStandby.
“ Symbol (BLUETOOTH
3
Schalten Sie die BLUETOOTH Funktion
am BLUETOOTH Gerät ein.
0
Wählen Sie „Bluetooth“ aus „Settings“ auf
dem iPod touch/iPhone und Android Gerät.
0
Weiterführende Informationen dazu finden
Sie in der Bedienungsanleitung Ihres
Geräts.
4
Wählen Sie „NX-W5“ aus der Liste der
Geräte aus.
Die Paarung ist abgeschlossen und das
BLUETOOTH Gerät verbindet sich
automatisch mit dem System.
0
Wenn das Zielgerät während des PairingVorgangs ein Passwort anfragt, geben Sie
„0000“ ein.
5
Starten Sie die Wiedergabe auf dem
BLUETOOTH Gerät.
Der Ton des BLUETOOTH Geräts wird aus
dem System ausgegeben.
HINWEIS
0
Bis zu 9 BLUETOOTH Geräte können registriert
werden. Wenn ein 10. BLUETOOTH Gerät
registriert wird, wird die Registrierung des
Geräts mit der ältesten Verbindungsgeschichte
gelöscht.
0
Einige BLUETOOTH-Geräte sind
möglicherweise für das System nicht verfügbar.
DEUTSCH
.
23
Page 68

Hauptgerät
Fernbedienung
Hauptgerät
Fernbedienung
/
/
(Drücken Sie wiederholt)
(Drücken Sie wiederholt)
HauptgerätFernbedienung
/
/
HauptgerätFernbedienung
(Gedrückt halten)(Gedrückt halten)
Wiedergabe
Sie können das BLUETOOTH Gerät, das zuletzt an
das System angeschlossen war, anschließen und
von ihm abspielen.
.
Zum Pausieren
.
0
Drücken Sie die Taste erneut, um die Pause
abzubrechen und die Wiedergabe zu starten.
Zum Wählen eines Titels
.
0
Drücken Sie [T] einmal, um zum Anfang des
nächsten Titels zu springen.
0
Drücken Sie [S], um zum Anfang des
wiedergegebenen Titels zu springen. Drücken
Sie zweimal, um zum Anfang des vorherigen
Titels zu springen.
Zum schnellen Vorlauf/Rücklauf
Während der Wiedergabe...
.
0
Für schnellen Rücklauf [S] gedrückt halten.
0
Für schnellen Vorlauf [T] gedrückt halten.
0
Lassen Sie die Taste los, um zur normalen
Wiedergabe zurückzukehren.
24
Page 69

Den Anschluss abbrechen
HauptgerätFernbedienung
(Gedrückt halten)(Gedrückt halten)
DISCONNECTED
.
.
HINWEIS
Das Anschließen wird in den folgenden Fällen
automatisch abgebrochen.
0
Die Verbindung mit dem BLUETOOTH Gerät
wurde abgebrochen oder die BLUETOOTH
Funktion wird auf AUS gesetzt.
0
Wenn das System oder das BLUETOOTH Gerät
ausgeschaltet wird.
0
Wenn die Quelle zu anderen Audioquellen
geändert wird.
VORSICHT
0
Um das Gerät an dieses System anzuschließen
muss das Gerät kompatibel mit den
BLUETOOTH A2DP und AVRCP Profilen sein.
0
Der maximale Abstand für einen möglichen
BLUETOOTH-Anschluss beträgt 10 m. Die
Entfernung kann in Abhängigkeit von den
Umgebungsbedingungen kürzer sein.
0
Wenn das iPhone oder Smartphone per
BLUETOOTH mit dem System verbunden ist,
können die Klingelsignale für Anrufe oder EMails auch über die Lautsprecher des Systems
gehört werden.
0
Dieses System ist nicht mit einer
Mikrofonfunktion ausgestattet. Um einen Anruf
zu tätigen, brechen Sie den Anschluss mit dem
System ab oder benutzen Sie das Mikrofon am
iPhone oder Smartphone.
DEUTSCH
25
Page 70

(Drücken Sie wiederholt)(Drücken Sie wiederholt)
HauptgerätFernbedienung
/
/
HauptgerätFernbedienung
Radio hören
Sie können UKW und MW Radiosender hören.
HINWEIS
0
Schließen Sie die Antenne vor dem Hören von
Radiosendungen an. (Seite 11)
Sendersuchlauf
1
Auswählen von „FM“ oder „AM“.
.
Schaltet zwischen „AM“ und „FM“ bei jedem
Drücken der Taste um.
2
Wählen Sie einen Sender.
.
Langes Drücken der Taste aktiviert das AutoTuning und das Tuning endet, wenn ein
Radiosender gefunden wurde.
0
Drücken Sie die Tasten erneut, um die Suche
manuell zu beenden.
0
Wiederholtes Drücken der Taste ändert die
Empfangsfrequenz in Schritten von 0,1 MHz für
FM Rundfunk und in Schritten von 9 kHz für AM
Rundfunk.
0
„STEREO“ Symbol leuchtet auf, wenn ein
Stereo-Sendesignal empfangen wird.
Zum Verbessern des FM Empfangs
Wenn eine FM Stereosendung nur schlecht zu
empfangen ist oder rauscht, wählen Sie den MonoEmpfangsmodus.
.
Bei jedem Drücken der Taste schaltet die
Einstellung um.
„STEREO“ Symbol leuchtet
auf
„STEREO“ Symbol erlischt:Mono-Empfang
HINWEIS
0
Mono-Empfang verbessert den Empfang, aber
der Stereo-Effekt geht verloren.
Stereo-
:
Autoempfang
VORSICHT
0
Während des Sender-Tunings ist kein Ton zu
hören.
26
Page 71

(Drücken Sie wiederholt)
(Drücken Sie wiederholt)
um
Sender voreinstellen
Insgesamt können bis zu 30 FM Sender oder bis
zu 10 AM Sender im Speicher abgelegt werden.
1
Stellen Sie einen Sender ein, den Sie
voreinstellen möchten.
2
Anzeigen des
Voreinstellungsbildschirms.
.
3
Wählen Sie eine gespeicherte Nummer,
um Informationen zu speichern.
.
0
Sie können auch auswählen, indem Sie die
Nummer mit Hilfe der Zifferntasten
eingeben.
Beispiele:
0
Zum Auswählen von Titel Nr. 3: 3
0
Zum Auswählen von Titel Nr. 17: 1 7
0
Wenn eine gespeicherte Nummer, die
bereits mit einem Sender registriert ist
ausgewählt wird, wird der alte registrierte
Sender überschrieben.
4
Speichern Sie den Sender.
.
So stellen Sie einen voreingestellten
Sender ein
.
0
Sie können auch auswählen, indem Sie die
Nummer mit Hilfe der Zifferntasten eingeben.
.
Beispiele:
0
Zum Auswählen von Titel Nr. 3: 3
0
Zum Auswählen von Titel Nr. 17: 1 7
VORSICHT
0
Abhängig von den Signalbedingungen können
Sie möglicherweise sogar Empfangsprobleme
bei den voreingestellten Sendern haben.
Zum Löschen der Voreinstellungen
1
Wählen Sie die gespeicherte Nummer
aus, die Sie löschen möchten.
2
Löschen Sie den voreingestellten Sender.
.
Drücken Sie [SET], wenn „CLEAR?“ angezeigt
wird.
Der ausgewählte Sender wird gelöscht. Die
folgenden gespeicherten Nummern werden nach
vorne verschoben.
0
Leere gespeicherte Nummern werden
automatisch als 87,50 MHz für UKW und 522
kHz für MW gespeichert.
DEUTSCH
27
Page 72

(Drücken Sie wiederholt)
RTPTYPS
Frequenz und
gespeicherte Nummer
Anzeige
Mit Radio-Datensystem
Radio Data System ist ein System, das nützliche
Informationen (in Form von digitalen Daten) für
UKW-Sendungen mit dem Sendesignal überträgt.
Audiogeräte, die für Radio Data System-Empfanng
ausgelegt sind, können diese Information aus dem
Sendesignal für verschiedene Funktionen, wie z.B.
automatische Anzeigen des Sendernamens
extrahieren.
Das Radio Data System hat folgende
Funktionen.
0
PTY(Program TYpe Identification) Suche
Stellt automatisch einen Sender ein, der gerade
den ausgewählten Programmtyp (Genre)
überträgt.
0
PS (Program Service Name) Anzeige
Zeigt automatisch den durch Radio Data System
übertragenen Sendernamen an.
0
Radiotext-Funktion
Zeigt beim Drücken von [DISPLAY] die von
einigen Radio Data System-Sendern
übertragenen Radiotext-Daten an. „NO
TEXT“ wird angezeigt, wenn keine Textdaten
übertragen werden.
HINWEIS
0
Einige Funktionen und
Funktionsbezeichnungen können sich in
bestimmten Ländern und Regionen
unterscheiden.
Um die Radio Data SystemAnzeigeninformation zu ändern
Ändern Sie den Inhalt der Anzeige während des
Empfangs eines Radio Data System-Senders.
Während des Empfangs eines Radio Data
System-Senders
.
Bei jedem Drücken der Taste ändert sich die
Einstellung wie folgt:
.
PS
: Programmservicename
PTY
: Programmtyp
RT
: Radiotext
28
Page 73

(Drücken Sie wiederholt)(Drücken Sie wiederholt)
HauptgerätFernbedienung
(Drücken Sie wiederholt)
Zum Einstellen nach Programmtyp
(PTY-Suchlauf)
Diese Funktion ermöglicht Ihnen den System
automatisch nach Sendern suchen zu lassen, die
momentan den Programmtyp (Genre) senden, den
Sie hören wollen.
1
Auswählen „FM“.
.
2
Zeigen Sie den PTY-CodeEinstellungsbildschirm an.
.
0
Wenn der aktuelle Sender Radio Data
System verwendet, wird der Programmtyp
des Senders angezeigt.
3
Wählen Sie den Programmtyp, den Sie
hören möchten.
.
0
Für die Programmarten, siehe
„Programmartentabelle“.
4
Suchlauf des Senders starten.
.
HINWEIS
0
Unter bestimmten Empfangsbedingungen
dauert es möglicherweise länger als 1 Minute,
um den Suchlauf abzuschließen.
0
Wenn der gewünschte Programmtyp nicht
gefunden wird, wird „NO PROGRAM“ angezeigt,
dann kehrt die Anzeige nach einigen Sekunden
zur ursprünglichen Anzeige zurück.
Programmtyptabelle
Programmtypname Anzeige
Nachrichten „NEWS“
Aktuelle Meldungen „AFFAIRS“
Information „INFO“
Sport „SPORT“
Bildung „EDUCATE“
Drama „DRAMA“
Kultur „CULTURE“
Technik „SCIENCE“
Verschiedene Reden „VARIED“
Popmusik „POP M“
Rockmusik „ROCK M“
Einfache Musik „EASY M“
Seichte klassische Musik „LIGHT M“
Ernste klassische Musik „CLASSICS“
Andere Musik „OTHER M“
Wetter „WEATHER“
Finanzen „FINANCE“
Kinderprogramm „CHILDREN“
Soziales „SOCIAL“
Religion „RELIGION“
Eingehender Anruf „PHONE IN“
Reise „TRAVEL“
Freizeit „LEISURE“
Jazzmusik „JAZZ“
Countrymusik „COUNTRY“
Volksmusik „NATION M“
Oldies „OLDIES“
Folkmusik „FOLK M“
Dokumentation „DOCUMENT“
DEUTSCH
29
Page 74

Stereo-Ministeckerkabel
(nicht im Lieferumfang
enthalten)
Kopfhörerbuchse, usw.
Externes Gerät (nicht mitgeliefert)
3.35A
18V
TV, BD/DVD-Rekorder, usw.
Optischer Digitalausgang-Anschluss
Optisches Digitalkabel (nicht
im Lieferumfang enthalten)
/
(Drücken Sie wiederholt)
HauptgerätFernbedienung
(Drücken Sie wiederholt)
Hören von einem externen Gerät
Siehe auch die Bedienungsanleitung des externen Geräts.
Anschließen eines externen Geräts
1
Stellen Sie den Lautstärkepegel des
Systems auf minimal.
Zum Anschließen des analogen Anschlusses
2
Schließen Sie ein externes Gerät an die
AUDIO IN-Buchse an.
.
Zum Anschließen des digitalen Anschlusses
2
Schließen Sie ein externes Gerät an den
DIGITAL IN (OPTICAL) -Anschluss an.
Hören von einem externen Gerät
1
Auswählen von „AUDIO IN“ oder
„DIGITAL IN“.
.
.
2
Starten Sie die Wiedergabe des externen
Geräts.
0
Trennen Sie den digitalen Audio-Player
nicht während der Wiedergabe. Dies kann
zu Fehlfunktionen führen.
3
Stellen Sie die Lautstärke ein.
Zum Einstellen des AudioEingangspegels
Stellen Sie die Lautstärke des Eingangsignals ein,
wenn es einen Unterschied zwischen der
Lautstärke des externes Geräts an der AUDIO IN
Buchse und anderen Quellen gibt.
.
HINWEIS
0
Wenn das Gerät an den optischen
Digitaleingang angeschlossen ist, stellen Sie die
digitale Audioausgabe für das angeschlossene
Gerät (TV, BD-Recorder, usw.) auf „PCM“ ein.
30
.
Drücken Sie die Taste wiederholt, um die
Einstellung zu ändern
LEVEL 1 : Standard-Audioeingangspegel
LEVEL 2 : Höherer Pegel als LEVEL 1
LEVEL 3 : Höherer Pegel als LEVEL 2
Page 75

(Drücken Sie wiederholt)
12
/
(Drücken Sie wiederholt)
/
(Drücken Sie wiederholt)
Verwendung des Timers
Dieses System ist mit einem Sleep-Timer und
einem Wiedergabe-Timer (der Tages-Timer)
ausgestattet. (Timer-Aufnahme ist mit diesem
System nicht möglich.)
Einstellung des Sleep-Timers
Das System schaltet automatisch aus, nachdem
die von Ihnen eingestellte Ausschaltzeit
abgelaufen ist.
Sie können den Timer auf bis zu 90 Minuten in 10Minuten-Intervallen einstellen.
.
.
Bei jedem Drücken der Taste ändert sich die
Ausschaltzeit.
0
Wenn der Sleep-Timer eingestellt ist leuchtet
das „SLEEP“ Symbol.
0
Wählen Sie zum Deaktivieren des Sleep-Timers
„SLEEP OFF“ aus.
Um die Restzeit bis zum Ausschalten
des Systems zu prüfen
Drücken Sie die [SLEEP]-Taste einmal.
Beispiel: Die verbleibende Zeit ist 12 Minuten
.
Die verbleibende Zeit wird für 5 Sekunden
angezeigt.
Einstellung des Tages-Timers
Bei Verwendung des Tages-Timers können Sie mit
Ihrer Lieblingsmusik geweckt werden.
0
Stellen Sie die Uhr im Voraus ein. (Seite 14)
0
Schalten Sie einen Sender ein, laden Sie eine
Disc oder schließen Sie ein USB-Gerät/iPod an
das System an und stellen Sie vorher sicher,
dass die Quelle ordnungsgemäß funktioniert.
0
Stellen Sie den gewünschten Sender vorher ein,
bevor Sie den Tages-Timer einstellen.
1
Anzeigen der Timer-EinstellungsAnzeige.
.
2
Wählen Sie aus und bestätigen Sie auf
„TIMER“.
.
3
Stellen Sie die Timer-Inhalte ein und
bestätigen Sie.
.
Sie können die folgende Punkte einstellen:
0
Drücken Sie [H]/[I], um das nächste oder
vorherige Objekt auszuwählen.
Die „Stunden“ und „Minuten“ der Startund Endzeit
0
Während der Einstellung blinken das
„TIMER ON“ Symbol (Startzeit) und das
„TIMER OFF“ Symbol (Endzeit).
Wiedergabequelle
Wählen Sie die Quelle aus „CD“, „USB“, „FM“,
„AM“.
0
Wählen Sie die gespeicherte Nummer,
wenn die ausgewählte Quelle „AM“ oder
„FM“ ist.
Lautstärke
Die Einstellung ist abgeschlossen, wenn
„COMPLETE“ angezeigt wird, nachdem die
Einstellung vorgenommen wurde.
Fortsetzung auf der nächsten Seite
31
DEUTSCH
Page 76

4
HauptgerätFernbedienung
Schalten Sie das System aus.
.
Die Standby-Anzeige leuchtet orange auf.
0
Das System schaltet sich automatisch ein
und beginnt mit der Wiedergabe etwa 30
Sekunden vor der Startzeit des TagesTimers.
0
Der Tages-Timer arbeitet nur, wenn die
Anlage im Standby-Modus ist.
0
Wenn der Tages-Timer eingestellt ist,
leuchtet das „TIMER“ Symbol.
0
Wenn der Tages-Timer funktioniert, blinkt
das „TIMER“ Symbol.
0
Sobald der Tages-Timer eingestellt ist,
funktioniert er täglich.
0
Sie können nicht die gleiche Zeit als Start-und Endzeit eingeben.
Um den Tages-Timer zu unterbrechen
Während das System eingeschaltet ist
.
Das „TIMER“-Symbol verschwindet.
Um den Tages-Timer nach dem
Abbrechen mit denselben
Einstellungen erneut zu stellen
Während das System eingeschaltet ist
.
Das „TIMER“ Symbol leuchtet auf.
32
Page 77

(Drücken Sie wiederholt)
ROCK
ROCKCLASSIC
JAZZGAME
(Drücken Sie wiederholt)
SURROUND OFF SURROUND ON
(Drücken Sie wiederholt)
HBS OFF HBS ON
Andere Funktionen
Einstellen der Klangqualität
Verwendung des Sound-Modus
Die Sound-Modi sind abrufbar, um für den
jeweiligen Musikstil ein optimales Klangbild zu
erzielen.
.
Beispiel:
.
Bei jedem Drücken der Taste wird die Einstellung
geändert.
.
Zum Einstellen von Surround
Um den Basssound zu erhöhen
.
Bei jedem Drücken der Taste wird der BasssoundEffekt ein- oder ausgeschaltet.
.
0
Die Werkseinstellung ist „HBS OFF“.
HINWEIS
0
Der Sound-Modus, Surround- und Basssound
(HBS) wirken sich auch auf den Sound der
Kopfhörer aus.
0
Wenn der Sound-Modus aktiviert ist, wird der
Surround oder der Basssound (HBS)
abgebrochen.
0
Wenn der Surround aktiviert ist, wird der SoundModus abgebrochen.
0
Wenn der Basssound (HBS) aktiviert ist, wird
der Sound-Modus abgebrochen.
DEUTSCH
.
Bei jedem Drücken der Taste wird der SurroundEffekt ein- oder ausgeschaltet.
.
0
Die Werkseinstellung ist „SURROUND OFF“.
33
Page 78

(Drücken Sie wiederholt)
(Gedrückt halten)
/
(Drücken Sie wiederholt)
Einstellen der Anzeige/ Hintergrundbeleuchtung
Stellen Sie es entsprechend Ihrer Präferenzen und
den Rahmenbedingungen ein.
Zum Ein-/Ausschalten und Einstellen
der Helligkeit
.
Bei jedem Drücken der Taste werden Anzeige und
Hintergrundbeleuchtung ein-/ausgeschaltet, oder
die Helligkeit wird geändert.
DIMMER OFF : Anzeigen: Hell,
Hintergrundbeleuchtung: Hell
DIMMER 1 : Anzeige: Etwas dunkler,
Hintergrundbeleuchtung:
Dunkel
DIMMER 2 : Anzeige: Dunkel,
Hintergrundbeleuchtung: Aus
0
Die Helligkeit der Anzeige und der
Hintergrundbeleuchtung wechseln gleichzeitig.
0
Die Einstellung wird auch gespeichert, wenn das
System ausgeschaltet wird.
0
Die Werkseinstellung ist „DIMMER OFF“.
Zum Einstellen der Farbtiefe
(KONTRAST) des Anzeigefensters
1
Den Farbtiefe-Einstellungsbildschirm
anzeigen.
.
„CONTRAST SET1“ wird dann angezeigt.
2
Stellen Sie die Farbtiefe (KONTRAST) ein.
.
Jedes mal, wenn Sie [H] / [I] drücken, ändert
sich die Farbtiefe (KONTRAST) des
Anzeigefensters in fünf Stufen („CONTRAST
SET1“ bis „CONTRAST SET5“).
Die Einstellung ist abgeschlossen, wenn
„COMPLETE“ angezeigt wird, nachdem die
Einstellung vorgenommen wurde.
0
Die Anzeige kehrt nach etwa 3 Sekunden
zur ursprünglichen Anzeige zurück.
0
Um zur ursprünglichen Anzeige während
der Einstellung zurückzukehren, drücken
Sie [DIMMER / CONTRAST].
0
Die Werkseinstellung ist „CONTRAST
SET3“.
34
Page 79

(Drücken Sie wiederholt)
T01 0:46
REMAIN
TOTAL
TOTAL REMAIN
T001 0:46
FOLDER.. FILE..
TAG information
F001 T0003
Ändern der Anzeige-Information
Während der Wiedergabe...
.
Bei jedem Drücken der Taste wechselt die
Anzeige-Information auf andere Informationen um.
0
In der Anzeige angezeigte Informationen sind je
nach der Quelle unterschiedlich.
0
Das System kann den ID3 TAG VERSION1,2
(Songtitel, Interpretenname und Albumname),
Dateinamen und Ordnernamen anzeigen (einige
Zeichen können nicht angezeigt werden. Diese
Zeichen werden möglicherweise nicht korrekt
angezeigt oder „*“ wird angezeigt).
0
iPod kann die Tag-Daten von MP3/WMA nicht
anzeigen.
Für Audio-CDs
: Die abgelaufene Zeit
des wiedergegebenen
.
.
.
.
Titel
: Die verbleibende Zeit
des wiedergegebenen
Titel
: Die abgelaufene Zeit
der gesamten CD
: Die verbleibende Zeit
der gesamten CD
Für MP3/WMA Dateien
.
.
.
.
: Die abgelaufene Zeit
des wiedergegebenen
Titel
: Ordner- / Dateiname
: Tag-Information
: Ordnernummer/
Dateinummer
DEUTSCH
35
Page 80

Referenz
Kompatibel iPod
Hergestellt für Version*
iPod nano (7. Generation) 1,0.2
iPod nano (6. Generation) 1,2
iPod nano (5. Generation) 1,0.2
iPod nano (4. Generation) 1,0.4
iPod nano (3. Generation) 1,1.3
iPod nano (2. Generation) 1,1.3
iPod touch (5. Generation) 6,1.3
iPod touch (4. Generation) 6,1.3
iPod touch (3. Generation) 5,1.1
iPod touch (2. Generation) 4,2.1
iPod touch 3,1.3
iPhone 5 6,1.4
iPhone 4S 6,1.3
iPhone 4 6,1.3
iPhone 3GS 6,1.3
iPhone 3G 4,2.1
* Software-Version während der
Funktionsbestätigung
0
Setzen Sie Ihr iPod/Phone zurück, wenn Ihr
iPod/iPhone nicht richtig abspielt. (Bitte
besuchen Sie die Apple-Homepage für
Informationen zum Zurücksetzen Ihres iPods/
iPhones.)
0
Für Details zum iPod/iPhone siehe die AppleWebsite. <http://www.apple.com/de/>
0
Den neusten Status zur Unterstützung des iPod/
iPhone finden Sie in den Produktinformationen
auf unserer Homepage.
36
Abspielbare BLUETOOTH Geräte
0
Zum Anschluss des Geräts an dieses System
per BLUETOOTH muss das Gerät kompatibel
mit den A2DP und AVRCP-Profilen sein.
Abspielbare Discs/Dateien
0
Wir garantieren nicht für den Betrieb und die
Klangqualität von CDs, die nicht dem CD-DA
Standard entsprechen
Suchen Sie vor dem Abspielen einer CD nach
dem „CD-Logozeichen“ und lesen Sie die
Sicherheitshinweise auf der Packung, um
sicherzustellen, dass sie mit dem CD-Standard
übereinstimmt.
0
Die Wiedergabe einer CD über das System kann
durch die CD-Eigenschaften,
Aufnahmebedingungen, Kratzer oder Schmutz
auf der CD, oder bei Schmutz oder
Kondensierung auf der Player-Linse
fehlschlagen.
0
Lesen Sie die Vorsichtsmaßnahmen zur
Benutzung der CD sorgfältig durch.
0
Das System unterstützt nicht die Anzeigen von
CD-Texten.
Discs CDs mit einer der folgenden
Markierungen können
wiedergegeben werden.
.
Dateien
0
CD-R oder CD-RW im Audio-CDFormat
0
CD-R/CD-RW oder die MP3/WMA
Dateien von USB-Geräten
Wichtig für USB-Massenspeichergeräte
0
Es wird empfohlen, ein USB-Gerät mit einer
Kapazität von 16 GB oder weniger zu benutzen.
0
Je mehr Dateien sich auf einem USB-Gerät
befinden, desto länger dauert es, bis das System
sie geladen hat.
0
Deaktivieren Sie die Sicherheitsfunktion des
USB-Geräts vor dem Anschließen.
0
Beim Anschließen über ein USB-Kabel
verwenden Sie ein USB 2.0-Kabel mit einer
Länge von weniger als 1 m.
0
Sie können nicht einen Computer an die USB
MEMORY-Klemme der Anlage anschließen.
Page 81

0
Verwenden Sie keinen USB-Hub.
0
Wenn das USB-Gerät in mehrere Partitionen
aufgeteilt ist, erkennt das System nur die erste
Partition.
0
Der Strom wird an das USB-Gerät geleitet und
das Gerät wird durch das System aufgeladen,
wenn das USB-Gerät an das System
angeschlossen ist.
0
Ein elektrostatischer Schlag beim Anschließen
eines USB-Geräts kann anormale Wiedergabe
vom Gerät bewirken. In diesem Fall trennen Sie
das USB-Gerät ab, setzen diese Anlage und das
USB-Gerät zurück.
0
JVC übernimmt keine Verantwortung für
jeglichen Datenverlust in einem USBMassenspeichergerät bei der Verwendung
dieser Anlage.
0
Manche USB-Geräte werden möglicherweise
nicht erkannt oder arbeiten nicht richtig.
0
Informationen zur Bedienung des USB-Geräts
finden Sie in der Bedienungsanleitung des USBGeräts.
Vorsichtsmaßnahmen bei CD-R/CD-RW
Vom Benutzer erstellte CD-Rs/CD-RWs
können nur über das System abgespielt
werden, wenn Sie finalisiert wurden.
0
Stellen Sie zum Erstellen einer CD-R/CD-RW
Disc das Format auf „ISO 9660 Level 1“.
Verwenden Sie keine Discs, die im Paketformat
(UDF-Format) geschrieben sind.
0
Löschen Sie bei CD-RWs, die in einem anderen
Format als im CD-DA Format oder MP3/WMA
geschrieben sind, vor dem Hören alle Titel.
Wenn die Disc wird vor dem Löschen benutzt
wird, wird plötzlich ein lautes Geräusch
ausgegeben, was zu Fehlern wie Schäden am
Lautsprecher führen kann.
0
Bei CD-Rs/CD-RWs, die MP3-/WMA-Dateien
enthalten, kann es im Vergleich zu normalen
Audio-Discs länger dauern, die Disc zu lesen.
(Die benötigte Lesezeit variiert abhängig von
den Einstellungen der Ordner und Dateien.)
0
Wenn CD-Rs/CD-RWs benutzt werden, die auf
der Etikettseite bedruckbar sind, kann die Disc
möglicherweise nicht aus dem System
ausgeworfen werden, weil die Etikettseite am
System festklebt. Die Verwendung solcher
Discs kann eine Fehlfunktion verursachen,
verwenden Sie sie nicht.
Vorsichtsmaßnahmen für MP3/ WMA-Dateien
0
Abspielbare MP3/WMA-Dateien sind Dateien
mit den Endungen <.mp3> oder <.wma>.
0
Das System kann MP3/WMA-Dateien
abspielen, die mit der folgenden Abtastfrequenz
und Bitrate aufgenommen wurden.
Samplingfrequenz: 32/44,1/48 kHz
Bitrate: 32 kbps bis 320 kbps
0
Dieses System kann bis zu 255 Ordner und
3.000 Dateien auf einem USB-Gerät erkennen.
0
DRM (Digital Rights Management)-Dateien
können nicht wiedergegeben werden.
0
Das System kann keine Dateien abspielen, die
größer als 2 GB sind.
0
Einige MP3/WMA-Dateien können
möglicherweise aufgrund ihres Zustands oder
der Aufnahmemethode nicht abgespielt werden.
Das System überspringt die Wiedergabe dieser
Dateien.
0
Wiedergabereihenfolge von MP3/WMA-Dateien
(Ordner ohne MP3/WMA-Dateien werden
ignoriert.)
- Die Gruppen werden in der
Erstellungsreihenfolge wiedergegeben. In
einer Gruppe werden die Titel in der
Erstellungsreihenfolge abgespielt.
- Die Wiedergabe-Reihenfolge kann sich
ändern, wenn Sie einen Ordnernamen
(Gruppenname) oder Dateinamen
(Titelname) auf dem PC ändern.
0
Die maximale Anzahl der im System
anzeigbaren Zeichen ist wie folgt.
- Ordnername: 16 Zeichen
- Dateiname: 64 Zeichen (einschließlich der
Erweiterung)
- Tag-Anzeige (Name des Titels/Interpreten/
Albums):
Eigentum des MP3-ID3-Tags/der WMA-Inhalte:
64 Zeichen (kompatibel mit ID3 v1.0/ 1.1/ 2.2/
2.3/2.4)
0
Einige Zeichen können nicht angezeigt werden.
Diese Zeichen werden möglicherweise nicht
korrekt angezeigt oder „*“ wird angezeigt.
DEUTSCH
37
Page 82

In die CD-Hülle zurückgeben
Aus der CD-Hülle nehmen
Fortlaufende Kratzer können
Knistergeräusche oder
Falschabtastungen verursachen.
Direkt aus der Mitte,
dem Radius entlang
Wartung
Pflege von Compact Discs (CDs)
.
0
Auf die Disc darf nichts geschrieben werden,
insbesondere nicht auf die Seite ohne Etikett;
hier werden die Tonsignale abgetastet.
Beschreiben Sie diese Oberfläche nicht.
0
Biegen Sie die Disc nicht.
0
Spielen Sie keine Discs mit speziellen Formen
(z. B. mit Herz oder Blume) ab. Das kann zu
Störungen führen.
0
Falls eine CD staubig ist, reinigen Sie diese mit
einem weichen, trockenen Tuch und entfernen
Sie Schmutz oder Fingerabdrücke.
Warenzeichen
0
“Made for iPod” and “Made for iPhone” mean that
an electronic accessory has been designed to
connect specifically to iPod or iPhone,
respectively, and has been certified by the
developer to meet Apple performance
standards. Apple is not responsible for the
operation of this device or its compliance with
safety and regulatory standards. Please note
that the use of this accessory with iPod or iPhone
may affect wireless performance.
0
iPhone, iPod, iPod classic, iPod nano and iPod
touch are trademarks of Apple Inc., registered in
the U.S. and other countries.
0
Microsoft und Windows Media sind entweder
eingetragene Warenzeichen oder Marken von
Microsoft Corporation in den Vereinigten
Staaten und/oder anderen Ländern.
0
Die Wortmarke Bluetooth® und die Logos sind
eingetragene Warenzeichen der Bluetooth SIG,
Inc., und jegliche Verwendung solcher Marken
durch die JVC KENWOOD Corporation
geschieht unter Lizenz.
0
Android ist eine Handelsmarke von Google Inc..
.
0
Wischen Sie die CD nicht mit Verdünnungsmittel
oder Benzin ab.
38
Page 83

Fehlersuche
Wenn Sie ein Problem mit Ihrem System haben,
gehen Sie zunächst diese Liste durch, um hier eine
mögliche Lösung zu finden, bevor Sie den
Kundenservice anrufen.
Wenn durch die folgenden Schritte die
Probleme nicht behoben werden können:
Das System funktioniert mit einen eingebauten
Mikroprozessor. Wenn die Tasten nicht richtig
funktionieren, ziehen Sie einmal das Netzkabel ab,
warten Sie eine kurze Zeit lang und stecken Sie
dann das Netzkabel wieder ein.
Allgemein
Die Anlage kann nicht eingeschaltet werden.
Schließen Sie das Netzkabel richtig an.
B
Die Anlage schaltet sich automatisch ab.
Das automatische Energiesparen ist in
B
Betrieb. (Seite 15)
Die Tasten funktionieren nicht.
Setzen Sie das System zurück. (Seite 41)
B
Einstellungen oder Eingaben werden plötzlich
aufgehoben, bevor Sie fertig sind.
Es gibt eine Zeitgrenze. Wiederholen Sie das
B
Verfahren.
Unfähig, das System mit der Fernbedienung
zu steuern.
Es befindet sich ein Hindernis zwischen
B
Fernbedienung und dem
Fernbedienungssensor am System.
Batterien der Fernbedienung sind leer.
B
Tauschen Sie die Batterien aus.
Kein Ton.
Stellen Sie die Lautstärke ein.
B
Schalten Sie die Stummschaltung aus.
B
Trennen Sie die Kopfhörer.
B
„0:00“ blinkt in der Anzeige.
Die Uhr erneut einstellen. (Seite 14)
B
Keine Tonausgabe vom digitalen
Eingangsanschluss (DIGITAL IN).
Schließen Sie die Geräte korrekt an.
B
Stellen Sie sicher, dass die digitale
B
Audioausgangs-Einstellung des
angeschlossenen Geräts auf „PCM“ gesetzt ist.
iPod-Bedienverfahren
Es erfolgt keine Wiedergabe des iPods.
Schließen Sie das USB-Kabel korrekt an.
B
Überprüfen Sie die Kompatibilität Ihres iPod.
B
(Seite 36)
Batterie des iPod ist leer. Laden Sie die
B
Batterie des iPod.
Setzen Sie Ihr iPod nach dem Trennen vom
B
System zurück, ziehen Sie das Netzkabel des
Systems heraus und stecken Sie es dann
wieder ein. (Für weitere Informationen zum
Zurücksetzen Ihres iPod besuchen Sie bitte
Apples offizielle Website.)
USB Gerät/CD
Kann eine Disc nicht auswerfen.
Drücken Sie [M], bis „EJECT“ angezeigt wird.
B
Wenn CD-Rs/CD-RWs benutzt werden, die
B
auf der Etikettseite bedruckbar sind, kann die
Disc möglicherweise nicht aus dem System
ausgeworfen werden, weil die Etikettseite am
System festklebt.
Die Disc/das USB-Gerät spielt nicht ab.
Schließen Sie das USB-Gerät korrekt an.
B
Schalten Sie die Stromversorgung des USB-
B
Audio-Players ein.
Versuchen Sie, ein anders USB-
B
Speichergerät zu benutzen.
Setzen Sie die Disc mit der Beschriftungsseite
B
nach oben weisend ein.
Die Disc oder die Linse ist zerkratzt oder
B
schmutzig. Reinigen Sie die Disc oder die
Linse.
Wiedergabe ist nicht möglich, wenn eine
B
Audiodatei beschädigt ist.
Überprüfen Sie, ob das Audio-Dateiformat
B
vom System unterstützt wird.
Die Disc ist im „Paketschreib-Verfahren (UDF-
B
Dateieinheit)“ aufgezeichnet worden und kann
nicht wiedergegeben werden.
MP3/WMA-Gruppen und Tracks werden nicht
erwartungsgemäß abgespielt.
Die Wiedergabereihenfolge hängt von der
B
Schreibesoftware ab, mit der die Gruppen und
Titel aufgenommen worden sind.
39
DEUTSCH
Page 84

Der Ton vom USB-Gerät oder von der Disc ist
abgehackt.
Die Disc ist verschmutzt oder verkratzt.
B
Reinigen Sie oder ersetzen Sie die Disc.
Spielen Sie MP3/WMA-Dateien ab, die
B
fehlerfrei aufgezeichnet wurden.
Schalten Sie das System aus, trennen Sie und
B
schließen Sie das USB Gerät wieder an.
Tag-Informationen werden nicht korrekt
angezeigt
Überprüfen Sie, ob Tag-Information im System
B
angezeigt werden kann. (Seite 35)
Tuner-Funktionen
Keine Sendung ist zu hören.
Schließen Sie die Antenne korrekt an. (Seite
B
11)
Für Mittelwellensender stellen Sie die MW-
B
Rahmenantenne so nah wie möglich an das
Fenster und stellen Sie die Antenne in die
Richtung ein, in der Sie den besten Empfang
erhalten.
Wenn eine UKW-Antenne verwendet wird,
B
ziehen Sie sie aus und befestigen Sie das
Kabel an der Stelle, an der Sie den besten
Empfang erhalten.
Stellen Sie die Frequenz des Senders ein, den
B
Sie hören möchten.
Sendungen schwer hörbar wegen Rauschen.
Stellen Sie die Antenne ein.
B
Schalten Sie das System aus und wieder ein.
B
Stellen Sie das System entfernt vom
B
Fernseher auf.
BLUETOOTH Gerät
Kann nicht gepaart werden.
Stellen Sie das System auf Paarungs-Standby
B
und führen Sie die Paarung von einem
Zielgerät, wie etwa einem Smartphone, durch.
(Seite 23)
Kann nicht mit dem BLUETOOTH-Gerät
verbinden.
Überprüfen Sie, dass die BLUETOOTH
B
Funktion auf EIN gestellt ist.
Überprüfen Sie, dass das BLUETOOTH Gerät
B
das BLUETOOTH A2DP Profil unterstützt.
Kann das BLUETOOTH-Gerät nicht bedienen.
Überprüfen Sie, dass das BLUETOOTH Gerät
B
das BLUETOOTH AVRCP Profil unterstützt.
Der Ton ist abgehackt. Rauschen wird erzeugt.
Das System ist außerhalb der BLUETOOTH-
B
Reichweitenbeschränkung oder ein Gerät
stört die Funkwellen zwischen dem System
und dem BLUETOOTH-Gerät. Versuchen Sie,
das BLUETOOTH-Gerät näher ans System zu
bringen, oder ändern Sie die Position.
Timer-Bedienungen
Der Sleep-Timer kann nicht eingestellt werden
Der Tages-Timer ist in Betrieb. Während der
B
Tages-Timer in Betrieb ist, funktioniert der
Sleep-Timer nicht.
Der Tages-Timer arbeitet nicht.
Die Uhr muss eingestellt werden. Die
B
Uhreneinstellung wird abgebrochen, wenn
das Netzkabel von der Netzsteckdose
abgetrennt wird, was dazu führt, dass der
Tages-Timer nicht mehr in Betrieb ist.
Das System ist eingeschaltet. Der Tages-
B
Timer funktioniert nur bei ausgeschaltetem
System.
40
Page 85

Das System zurücksetzen
HauptgerätFernbedienung
–
HauptgerätFernbedienung
und
Setzen Sie das System mit den folgenden
Verfahren zurück, wenn das System nicht arbeitet
oder die Anzeigefenster falsch angezeigt wird.
Nach dem Zurücksetzen werden die Inhalte der
Werkseinstellungen wiederhergestellt.
1
Schalten Sie das System aus.
.
2
Das System zurücksetzen.
.
Halten Sie die zwei Tasten gleichzeitig
gedrückt, bis „FACTORY RESET“ angezeigt
wird.
3
Wenn „RESET FINISHED“ angezeigt wird,
ziehen Sie das Netzkabel aus der
Steckdose.
Das System wurde zurückgesetzt.
4
Stecken Sie das Netzkabel des Systems
in die Steckdose.
DEUTSCH
41
Page 86

Technische Daten
Hauptgerät (NX-W5W/NX-W5B)
Verstärker
Maximaler geeigneter
Ausgang:
CD-Player
Abspielbare Dateien: Audio-CD, MP3, WMA
Tuner
MW-Frequenzbereich: 522 kHz - 1.629 kHz
UKW-Frequenzbereich: 87,50 MHz – 108,00 MHz
Antenne: Drahtantenne
Eingang/Ausgang-Anschlüsse
USB: Ausgangsleistung:
DIGITAL IN: OPTICAL x 1
AUDIO IN:
PHONES:
20 W + 20 W (1 kHz,10% THD,8 Ω)
Technische Daten: Kompatibel mit USB 2.0 Full-Speed
Kompatible Geräte: Massenspeichergerät
Kompatible
Dateisysteme:
Abspielbare Dateien: MP3, WMA
Stereo-Ministecker (ø 3,5 mm) x 1
STUFE 1: 1 V/30 kΩ
STUFE 2: 500 mV/30 kΩ
STUFE 3: 250 mV/30 kΩ
Stereo-Ministecker (ø 3,5 mm) x 1
5 V Gleichstrom P 1 A
FAT16, FAT32
BLUETOOTH
Version: BLUETOOTH Ver. 3.0
Ausgangsleistung: Klasse 2
Maximaler
Betriebsbereich:
Frequenzband: 2,4 GHz-Bereich
Kompatibles
BLUETOOTH Profil:
Ungefähr 10 m
(Die Kommunikationsreichweite kann je nach Umgebungsbedingungen
abweichen.)
A2DP (Erweitertes Audioverteilungsprofil)
AVRCP (Audio/Video Fernbedienungsprofil)
42
Page 87

Allgemein
Netzteil (im Lieferumfang
enthalten)
(AA-R1809):
Stromverbrauch: 18 W (während des Betriebs)
Abmessungen: 325 mm ´ 211 mm ´ 150 mm (B x H x T)
Gewicht: Ungefähr 3,8 kg
Lautsprecher
System: Voller Bassreflex-Typ
Lautsprechereinheit: 7 cm Kegellautsprecher
Impedanz: 8 Ω
Maximaler Eingang: 20 W
Technische Einzelheiten und Design dieses Geräts unterliegen ohne vorherige Ankündigung im Rahmen
der Produktverbesserung Änderungen.
Eingang: Wechselspannung 100 V - 240 V~,50 Hz/60 Hz,1,5 A - 0,5 A
Ausgang: Gleichstrom 18 V P 3,35 A
1,00 W und weniger (im Standby)
DEUTSCH
43
Page 88

.
.
.
V GE
© 2013 JVCKENWOOD Corporation
1013KMYSANCDT
Page 89

.
SYSTEME DE COMPOSANTS COMPACT
NX-W5W/NX-W5B
.
.
MANUEL D’INSTRUCTIONS
FRANÇAIS
LVT2491-002B
[E]
Page 90

Écoute de la radio FM/AM
Lire les fichiers MP3/WMA sur un
CD de musique ou un dispositif USB
Lisez les fichiers sur votre dispositif
BLUETOOTH en actionnant le système
Lire les fichiers sur votre iPod ou
iPhone en utilisant le système
Lire un dispositif externe qui ne prend
pas en charge la connexion USB
Appréciez d’écouter de la musique en réglant
le mode son ou le son de basse ! (page 33)
Page 30
Page 26
Page 18
Page 23
Page 16
Ce que vous pouvez faire avec le système
.
2
Page 91

Relâchez rapidement
Maintenir appuyé
Introduction
Fonction Auto Power Save (APS)
0
Le système est livré avec une fonction “Auto Power Save (APS)”, qui met
automatiquement hors tension l’alimentation quand aucun son n’est émis pendant
15 minutes. Cette fonction est activée dans les réglages par défaut. (page 15)
Dans ce manuel...
0
Sauf mention contraire, les touches de la télécommande sont utilisées pour expliquer les opérations.
Sauf mention contraire, la touche indique les touches de la télécommande. Toutefois, si le système
comporte des touches avec des noms identiques ou similaires, elles peuvent aussi être utilisées pour
le fonctionnement.
0
L’affichage indiqué dans ce manuel peut être différent de l’affichage réel dans certains cas.
Dans ce manuel...
0
Dans ce manuel, “iPod” comprend les dispositifs iPod, iPod touch et iPhone. Quand on fait référence
en particulier à iPod touch ou iPhone, “iPod touch” ou “iPhone” est utilisé respectivement.
0
Dans ce manuel, le terme “dispositif Android” désigne un smartphone et une tablette équipés de l’OS
Android.
0
Dans ce manuel, les mots “fichier” et “plage”, “dossier” et “groupe” sont utilisés de façon
interchangeable.
Une copie de la Déclaration de Conformité relative à la Directive R&TTE 1999/5/CE peut être
téléchargée à partir des sites Web suivants. (http://www.jvc.co.jp/ecdoc/)
.
Par la présente, JVC déclare que ce système [NX-W5W]/[NX-W5B] est conforme aux exigences
essentielles et aux autres dispositions pertinentes de la Directive 1999/5/CE.
Façon d’appuyer sur les touches
Il y a deux façons d’appuyer sur les touches dans le système. “Appui court” désigne l’action consistant
à appuyer sur une touche et à la relâcher immédiatement, tandis que “appui long” fait référence à
maintenir appuyé une touche.
Appui court : applicable pour les cas où “appui long” n’est pas indiqué
Appuyez légèrement sur une touche et relâchez-la immédiatement. Le système peut ne pas répondre
si une force excessive est appliquée à une touche ou si la touche n’est pas relâchée immédiatement.
S’il ne répond pas comme prévu, réessayez en réglant le temps pendant lequel une touche est enfoncée
ou la quantité de force exercée.
.
Appui long : applicable pour les cas où “appui long” est indiqué
.
Maintenir appuyé une touche, puis retirer le doigt.
IMPORTANT POUR LES PRODUITS LASER
1. PRODUIT LASER CLASSE 1
2. ATTENTION : Ne pas ouvrir le couvercle supérieur ni le coffret de l’appareil. Il n’y a aucune pièce
réparable par l’utilisateur à l’intérieur de l’appareil; confiez toute réparation à un personnel qualifié.
FRANÇAIS
L’étiquette produit de ce produit ou les autres informations sont situées au bas du système.
3
Page 92

15 cm
15 cm
15 cm
15 cm
Arrière de l’ appareil
Installation
Attention : Ventilation Correcte
Pour éviter tout risque de choc électrique et d’incendie, et pour éviter tout dommage, placez l’appareil en
respectant ce qui suit:
1
Avant : Rien ne doit gêner le dégagement.
2 Flancs/ Dessus/ Arrière : Aucun obstacle ne doit être placé dans les zones indiquées par les dimensions
dans l’illustration.
3 Dessous : Poser l’appareil sur une surface plate.
Vue avant
.
Vue latérale
.
Remarques sur l’installation
Choisissez un endroit plat, sec, et ni trop chaud, ni trop froid—entre 5˚C et 35˚C.
4
Page 93

Table des matières
Ce que vous pouvez faire avec le
système ............................................ 2
Introduction ..................................... 3
Installation ........................................................... 4
Préparation ...................................... 6
Accessoires ........................................................ 6
Préparation de la télécommande ........................ 6
Nom des pièces ............................... 7
Télécommande ................................................... 7
Partie supérieure de l’appareil principal / Avant .. 8
Côté .................................................................... 9
Arrière ................................................................. 9
Affichage ........................................................... 10
Connexions ................................... 11
Connexion des antennes .................................. 11
Connexion d’un adaptateur CA ......................... 13
Connexion d’un casque .................................... 13
Opérations de base ...................... 14
Mise sous/hors tension du système .................. 14
Réglage de l’horloge ......................................... 14
Pour commencer ............................................... 14
Activation/désactivation du Auto Power Save
(A.P.S.) ............................................................. 15
Écoute de iPod .............................. 16
Connexion de iPod ............................................ 16
Lecture .............................................................. 16
Utilisation du menu de l’iPod ............................. 17
Écoute d’un dispositif USB/CD .... 18
Préparation d’un dispositif USB/CD .................. 18
Lecture .............................................................. 19
Lecture programmée ......................................... 20
Lecture aléatoire ............................................... 21
Lecture répétée ................................................. 22
Écouter un dispositif BLUETOOTH
......................................................... 23
Connexion d’un dispositif BLUETOOTH ........... 23
Lecture .............................................................. 24
Annulation de la connexion ............................... 25
Écoute de la radio ......................... 26
Recherche de stations ...................................... 26
Présélection des stations .................................. 27
Utilisation du RDS (Radio Data System) ........... 28
Écouter un dispositif externe ...... 30
Connexion d’un dispositif externe ..................... 30
Écouter un dispositif externe ............................. 30
Utilisation de la minuterie ............ 31
Réglage du minuteur de mise en sommeil ........ 31
Réglage du minuteur journalier ......................... 31
Autres fonctions ............................ 33
Réglage de la qualité du son ............................. 33
Réglage de l’affichage/éclairage ....................... 34
Changement des informations sur l’affichage ... 35
Références ..................................... 36
iPod compatible ................................................ 36
Dispositifs BLUETOOTH lisibles ....................... 36
Disques/fichiers lisibles ..................................... 36
Important pour les dispositifs de stockage de masse
USB .................................................................. 36
Précautions sur les CD-R/CD-RW .................... 37
Précautions sur les fichiers MP3/WMA ............. 37
Entretien ............................................................ 38
Marques commerciales ..................................... 38
Résolution des problèmes ........... 39
Réinitialisation du système ................................ 41
Spécifications ................................ 42
FRANÇAIS
5
Page 94

Antenne à boucle AM (1)Antenne FM (1)
Cordon d’alimentation (1)
Adaptateur CA
AA-R1809 (1)
NX-W5B: RM-SNXW5R (1)
NX-W5W: RM-SNXW5R-W (1)
Télécommande
Pile bouton au lithium (CR2025)
Préparation
Accessoires
Vérifiez que tous les éléments suivants sont
bien présents, et qu’ils sont fournis avec le
système.
.
6
Préparation de la télécommande
Quand vous utilisez la télécommande pour la
première fois, retirez la feuille isolante.
Si la portée ou l’efficacité de la télécommande
diminue, remplacez la pile.
Pour remplacer la pile dans la
télécommande
Faites correspondre les polarités (+ et -) des piles
avec celles indiquées sur la télécommande.
.
REMARQUE
0
Les piles fournies sont destinées à la vérification
du fonctionnement du système. Remplacez-les
par des neuves dès que possible.
ATTENTION
0
Danger d’explosion si la pile est remplacée de
façon incorrecte.
0
Remplacez-la uniquement avec le même type
de pile ou un type équivalent.
0
Rangez la pile dans un endroit hors d’atteinte
des enfants. Si un enfant avale accidentellement
la pile, consultez immédiatement un médecin.
0
Pour éviter que la pile ne chauffe, ne se fissure
ou cause un incendie :
- Ne rechargez pas, ne court-circuitez pas, ne
démontez pas, ne chauffer pas la pile ni ne la
jeter dans un feu.
- Ne laissez pas la pile avec d’autres objets
métalliques.
- Enveloppez la pile de ruban isolant avant de la
mettre au rebut ou de la ranger.
- Ne piquez pas la pile avec des ciseaux ou
d’autres objets similaires.
0
Mettez la pile au rebut correctement en
respectant la régulation fédérale, régionale ou
locale.
Page 95

(
)
Nom des pièces
Télécommande
0
Les pages de référence sont principalement des pages contenant des descriptions des pièces
respectives.
FRANÇAIS
.
A
A (Alimentation)
(page 14)
B
BLUETOOTH, CD, USB, TUNER, AUDIO IN,
DIGITAL IN
(pages 16, 19, 23, 26, 30)
C
S / T
(pages 16, 19, 24, 26)
D
PROGRAM / TUNER MODE
(pages 20, 26)
E
RANDOM
(pages 17, 21)
F
REPEAT / MEMORY
(pages 17, 22, 27)
G
CANCEL/PTY
(pages 27, 29)
H
HBS
(page 33)
I
SOUND MODE
(page 33)
J
SURROUND
(page 33)
K
DIMMER / CONTRAST
(page 34)
L
PAIRING
(page 23)
M
DISPLAY
(pages 28, 35)
N
I / W
(pages 16, 19, 24)
O
o
(page 19)
P
VOLUME +/–
(page 14)
Q
MUTING
(page 15)
R
J / K / H / I / SET
(pages 14, 17, 27, 30, 31, 34)
S
FOLDER/PRESET
(pages 19, 27)
T
SLEEP
(page 31)
U
TIMER ON/OFF
(page 32)
V
CLOCK/TIMER
(pages 14, 31)
W
Touches numériques
(pages 19, 27)
7
Page 96

Partie supérieure de l’appareil principal / Avant
1
-
02 34567 98
=
.
A
Capteur de télécommande
B
Indicateur de veille
S’allume en rouge lorsque l’alimentation du
système est éteinte. La lumière s’éteint lorsque
l’alimentation est sous tension.
S’allume en orange quand le minuteur journalier
est activé.
C
A Touche (alimentation)
(page 14)
D
Touche S / T
(pages 16, 19, 24, 26)
E
Touche o
(page 19)
F
Touche (PAIRING) I/W
(pages 16, 19, 23)
G
Touche SOURCE
(pages 16, 19, 23, 26, 30)
H
Touche VOLUME -/+
(page 14)
I
M Touche (éjection de CD)
(page 18)
J
Affichage
Appuyer sur [DIMMER / CONTRAST] change la
luminosité de l’affichage et l’éclairage. (page
34)
K
Fente CD
(page 18)
L
Éclairage
S’allume en blanc lorsque l’alimentation est
sous tension. (page 34)
8
Page 97

Côté
2
1
3
3.35A
18V
2341
Arrière
A
Borne USB
Connectez iPod/iPhone ou un dispositif USB.
(pages 16, 18)
B
Prise AUDIO IN
Connectez un dispositif externe.
(page 30)
C
Prise PHONES
Connectez un casque.
(page 13)
A
FM 75Ω COAXIAL borne d’antenne
(page 11)
B
AM LOOP borne d’antenne
(page 12)
C
Borne DIGITAL IN (OPTICAL)
(page 30)
D
Prise DC IN
(page 13)
FRANÇAIS
9
Page 98

Affichage
1
23 4
657
89 0 - =
.
A
Indicateur PGM (programme)
(page 20)
S’allume pendant la lecture programmée.
(“CD”, “USB”)
B
Indicateur de fichier
S’allume lorsque des fichiers audio sont lus.
C
Icône de mode répétition
(page 22)
REP. : S’allume lorsqu’une piste est
REP.ALB* : S’allume lorsque le dossier en
REP. ALL : S’allume lorsque toutes les
* MP3/WMA uniquement
D
Icône USB
(page 18)
S’allume lorsque le dispositif USB est connecté
au système.
E
Icône de commutation de l’affichage
TOTAL : S’allume lorsque le temps de
REMAIN : S’allume lorsque le temps restant
répétée.
(“CD”, “USB”)
cours est répété.
(“CD”, “USB”)
pistes sont répétées.
(“CD”, “USB”)
lecture du disque entier est
affiché pendant qu’un disque est
lu.
de lecture de disque entier est
affiché lorsqu’un disque est lu.
F
Icône BLUETOOTH
(page 23)
S’allume lorsque le dispositif BLUETOOTH est
connecté au système.
G
Icône iPod
(page 16)
S’allume lorsque iPod est connecté au système.
H
Icône STEREO
(page 26)
S’allume lors de la réception d’une émission de
radio en stéréo.
I
Icône RDM
(page 21)
S’allume pendant la lecture aléatoire. (“CD”,
“USB”)
J
Icône minuteur
(pages 31, 32)
TIMER : S’allume lorsque le minuteur a
été réglé. Clignote pendant que
le minuteur fonctionne.
TIMER ON : Clignote lors du réglage de
l’heure de démarrage du
minuteur journalier.
TIMER OFF : Clignote lors du réglage de
l’heure de fin du minuteur
journalier.
K
Icône SLEEP
(page 31)
S’allume lors du réglage du minuteur de mise en
sommeil.
L
Affichage principal
Affiche les informations de texte de chaque
source.
10
Page 99

3.35A
18V
Insérez le fil dans le centre
de la borne. L’ajustement
de la borne est bien
tendue. Cela permet
d’éviter que le fil ne tombe.
Connexions
Branchez le cordon d’alimentation AC à la prise murale après que tous les autres branchements
aient été effectués.
Connexion des antennes
Veillez à connecter l’antenne avant l’écoute d’une émission de radio.
En règle générale, l’installation de l’antenne à proximité d’une fenêtre permet d’améliorer la réception.
Antenne FM fournie
FRANÇAIS
.
Après avoir délié la corde fournie, étendez l’antenne FM lors de la connexion afin que vous puissiez obtenir
la meilleure réception.
11
Page 100

Antenne boucle AM fournie
3.35A
18V
Suivez les même étapes pour insérer l’autre fil
Insérez le
noyau du fil
Appuyez fort
・Insérez le fil de l’antenne
Réglez l’antenne boucle AM
connectée vers la gauche ou vers
la droite pour la placer dans le
sens avec la meilleure réception.
Insérez la languette
dans la fente jusqu’à
ce qu’elle s’enclenche
Partie pliable à l’extrémité
Languette
Rainure
・Montage de l’antenne
Relâchez
①
②
③
④
0
Placez l’antenne à boucle AM aussi près que possible de la fenêtre pour obtenir la meilleure réception.
ATTENTION
0
Utilisation de l’antenne à boucle AM avec le fil de l’antenne enroulé autour du cadre. Retirez le fil du
.
cadre détériore la sensibilité de l’antenne.
0
Assurez-vous que le conducteur de l’antenne ne soit pas en contact avec d’autres bornes ou câbles.
Installez l’antenne à l’écart des autres câbles. Peuvent perturber la réception s’ils sont placés trop près
de l’antenne.
12
 Loading...