

Page 1

Operator’s manual
Manual d’utilisation
Manual de instrucciones
Please read these instructions and make sure you understand them before using the machine.
Lire attentivement et bien assimiler le manuel d’utilisation avant d’utiliser la machine.
Lea detenidamente el manual de instrucciones y asegúrese de entender su contenido antes de utilizar la máquina.
EN (2-21)
FR (22-43)
ES (44-65)
Page 2
E n g l i s h --- 2
545186855 Rev. 8 5/15/12
CONTENTS
Contents
CONTENTS
Contents 2........................
Note the following before starting 2....
KEY TO SYMBOLS
Symbols 3.........................
SAFETY INSTRUCTIONS
Personal protective equipment 4......
Machine’s safety equipment 4........
Cutting equipment 5.................
Checking, maintaining and servicing
the machine’s safety equipment 5.....
General safety precautions 7.........
Starting 8.........................
Fuel safety 8.......................
Transporting and storage 8...........
General working instructions 8........
Basic safety rules 8.................
Basic working techniques 9..........
WHAT IS WHAT?
What is what? 11....................
ASSEMBLY
Fitting the loop handle 12.............
Fitting the trimmer guard and
trimmer head 12.....................
FUEL HANDLING
Fuel 13............................
Fueling 13..........................
STARTING AND STOPPING
Check before starting 14..............
Starting and stopping 14..............
MAINTENANCE
Carburetor 15.......................
Muffler 16..........................
Spark plug 16.......................
Air filter 17..........................
Maintenance schedule 17.............
Trimmer head line loading instructions 18..
TECHNICAL DATA
Technical data 19....................
EMISSION CONTROL
WARRANTY STATEMENT 20.........
Note the following before
starting:
Jonsered has a policy of continuous product development and therefore
reserves the right to modify the design and
appearance of products without prior
notice. Long--term exposure to noise can
result in permanent hearing impairment.
Always use approved hearing protection.
Maintenance, replacement, or repair of the
emission control devices and system may
be performed by any nonroad engine repair establishment or individual.
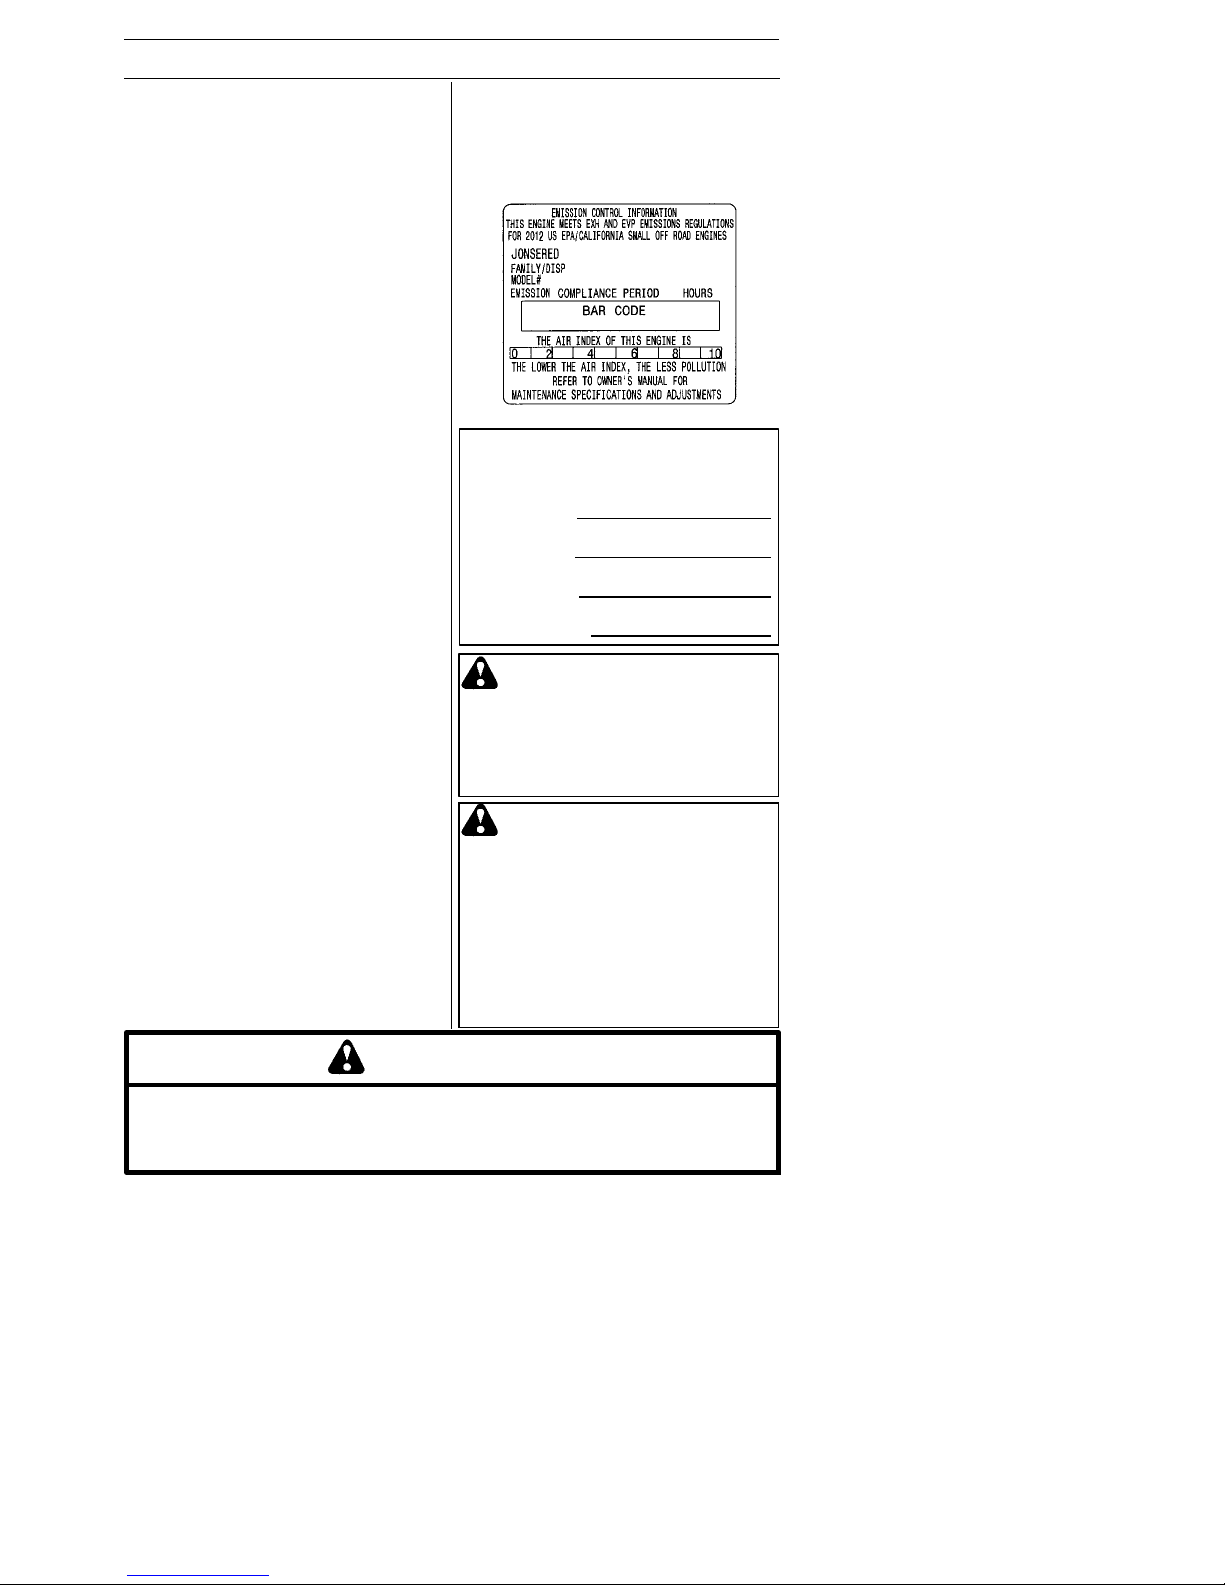
The Emissions Compliance Period referred
to on the Emissions Compliance label indicates the number of operating hours for
which the engine has been shown to meet
Federal emissions requirements.
Category C = 50 hours, B= 125 hours, and
A = 300 hours.
For reference, please fill out the following
information that will be needed for future
servicing of your trimmer:
Model Number:
Serial Number:
Purchase Date:
Purchased From:
WARNING: A clearing saw,
brushcutter or trimmer can be
dangerous if used incorrectly or
carelessly, and can cause serious
or fatal injury to the operator or
others. It is extremely important
that you read and understand the
contents of this operator’s manual.
WARNING: Under no circum-
stances may the design of the
machine be modified without the
permission of the manufacturer.
Always use genuine accessories.
Non--authorized modifications
and/or accessories can result
in serious personal injury or the
death of the operator or others.
Your warranty may not cover
damage or liability caused by the
use of non --authorized accessories or replacement parts.
WARNING
The engine exhaust from this product contains
chemicals known to the State of California to cause
cancer, birth defects or other reproductive harm.
Page 3
E n g l i s h --- 3
545186855 Rev. 8 5/15/12
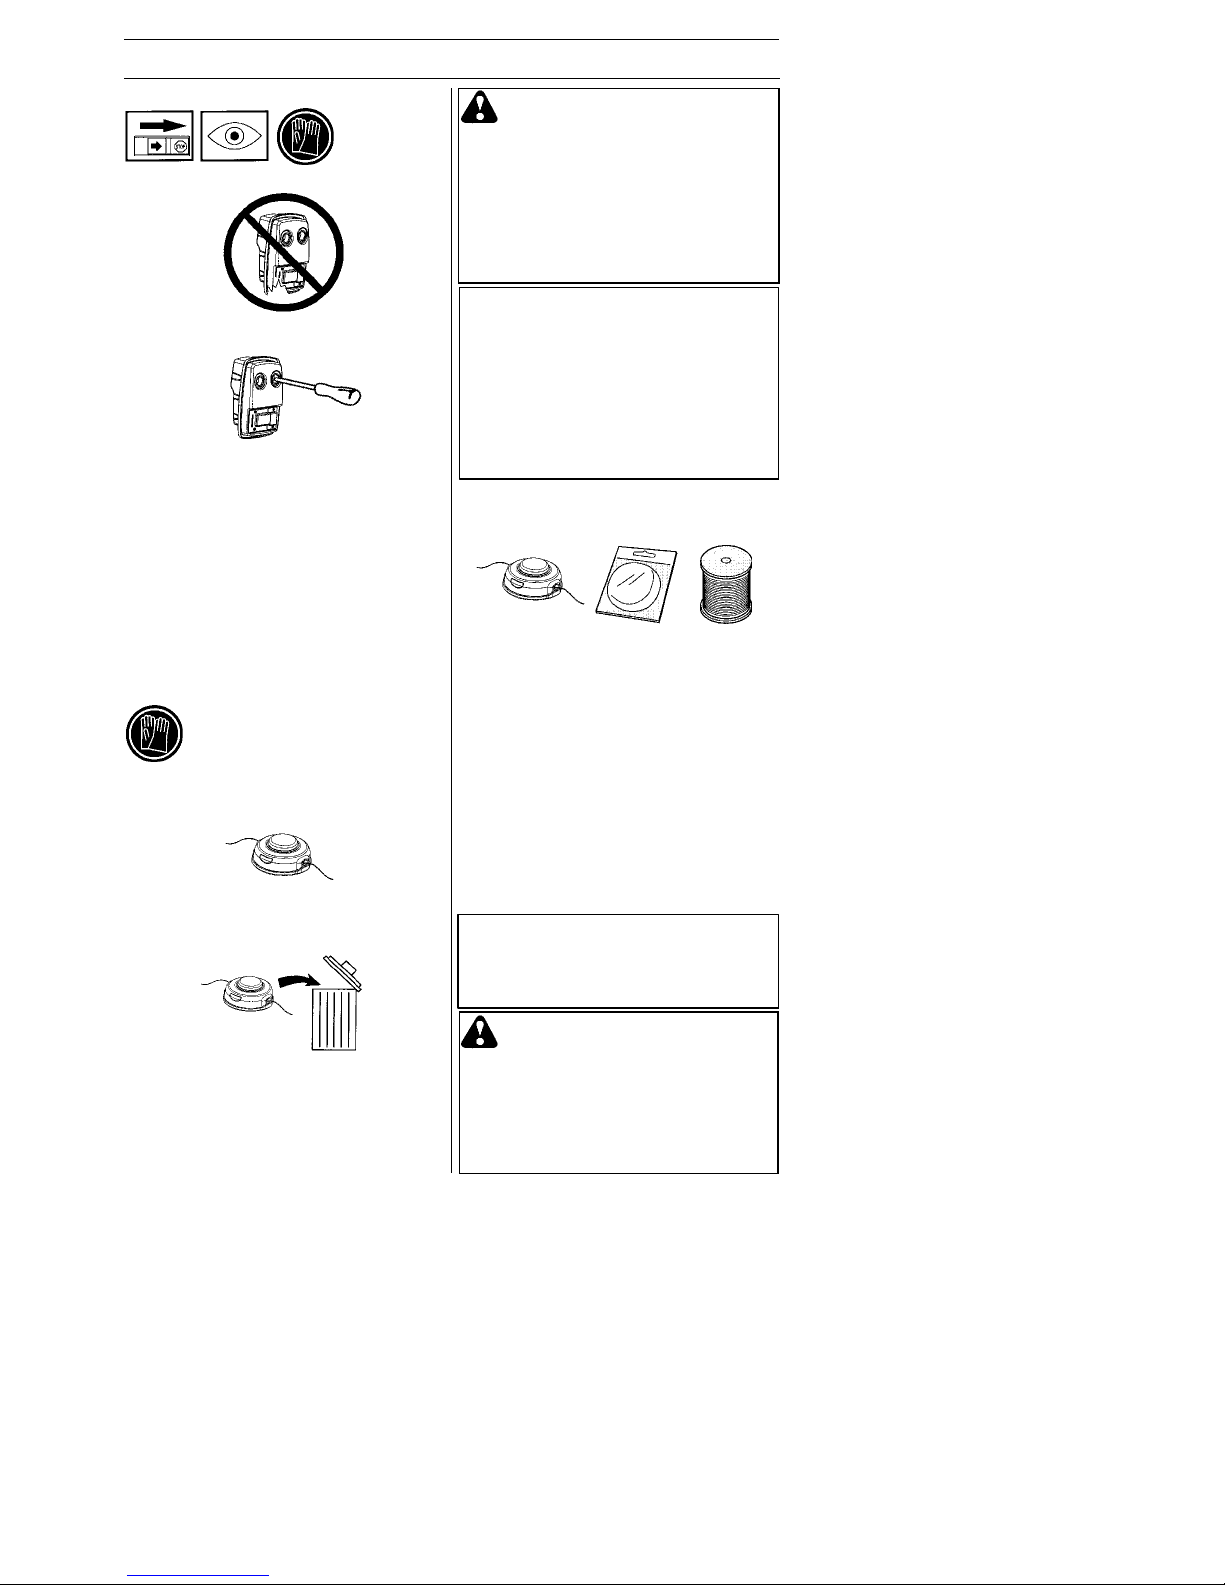
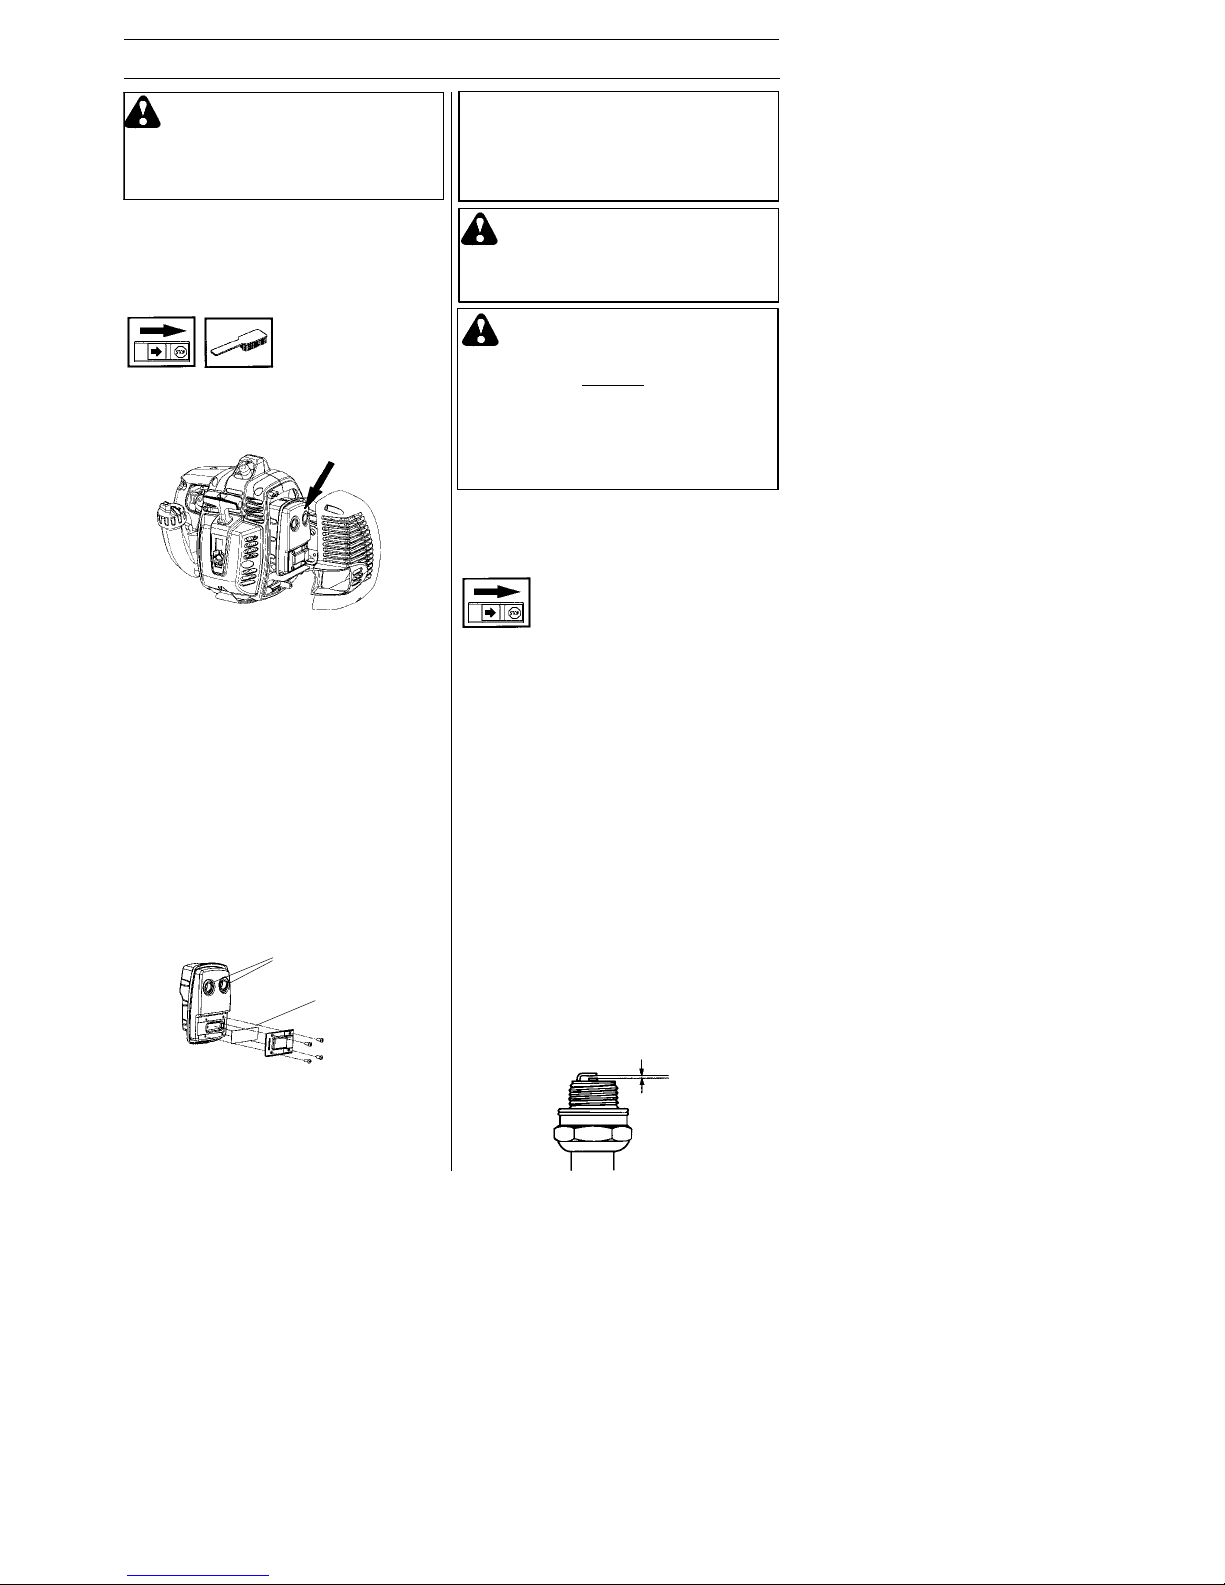
KEY TO SYMBOLS
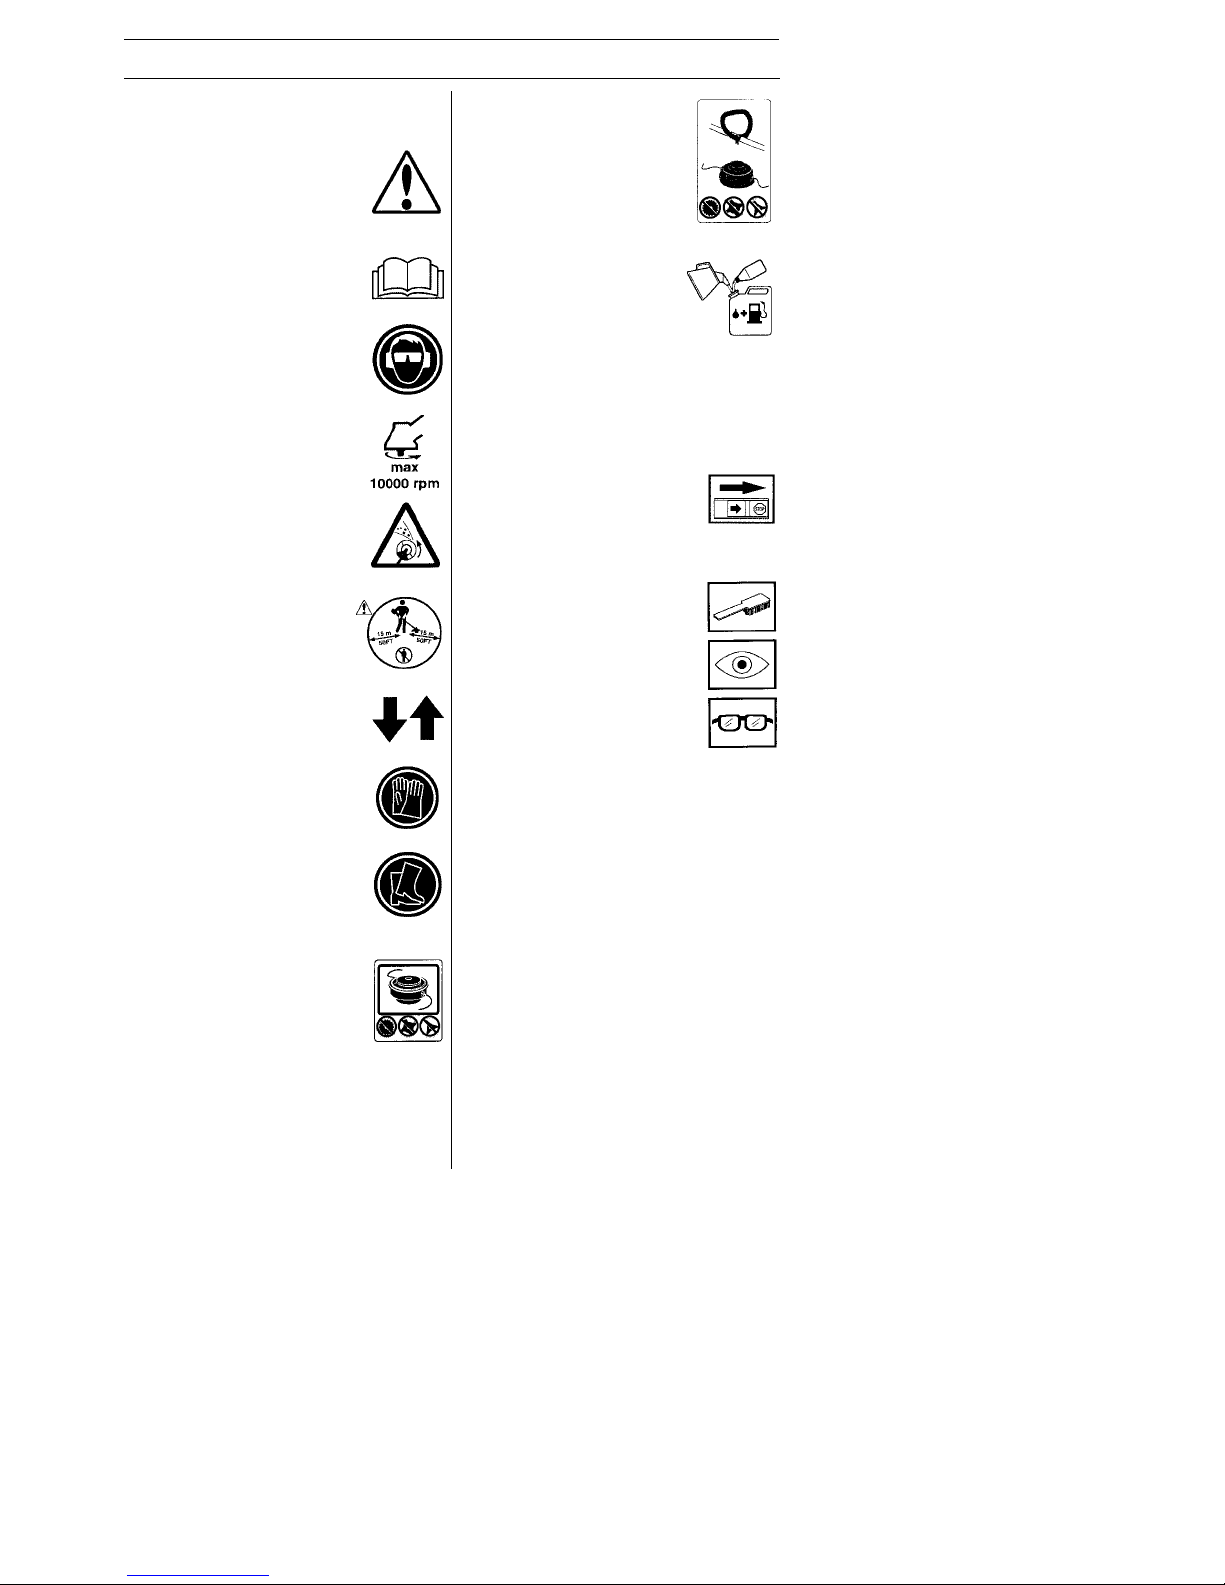
Only intended for trimmer heads.
Use unleaded or quality leaded
gasoline and two--stroke oil
mixed at a ratio of 2% (1:50).
Other symbols/decals on the machine
refer to special certification requirements
for certain markets.
Stop the engine by pushing
and holding the stop switch
in the STOP position until the
engine stops before carrying
out any checks or maintenance.
Regular cleaning is required.
Visual check.
Approved eye protection must
always be used.
Symbols
WARNING: Clearing saws, brush-
cutters and trimmers can be dangerous! Careless or incorrect use
can result in serious or fatal
injury to the operator or others.
WARNING: Read the operator’s
manual before use. Failure to follow
instructions could result in serious
injury to the operator and/or
bystanders. Save operator’ s manual.
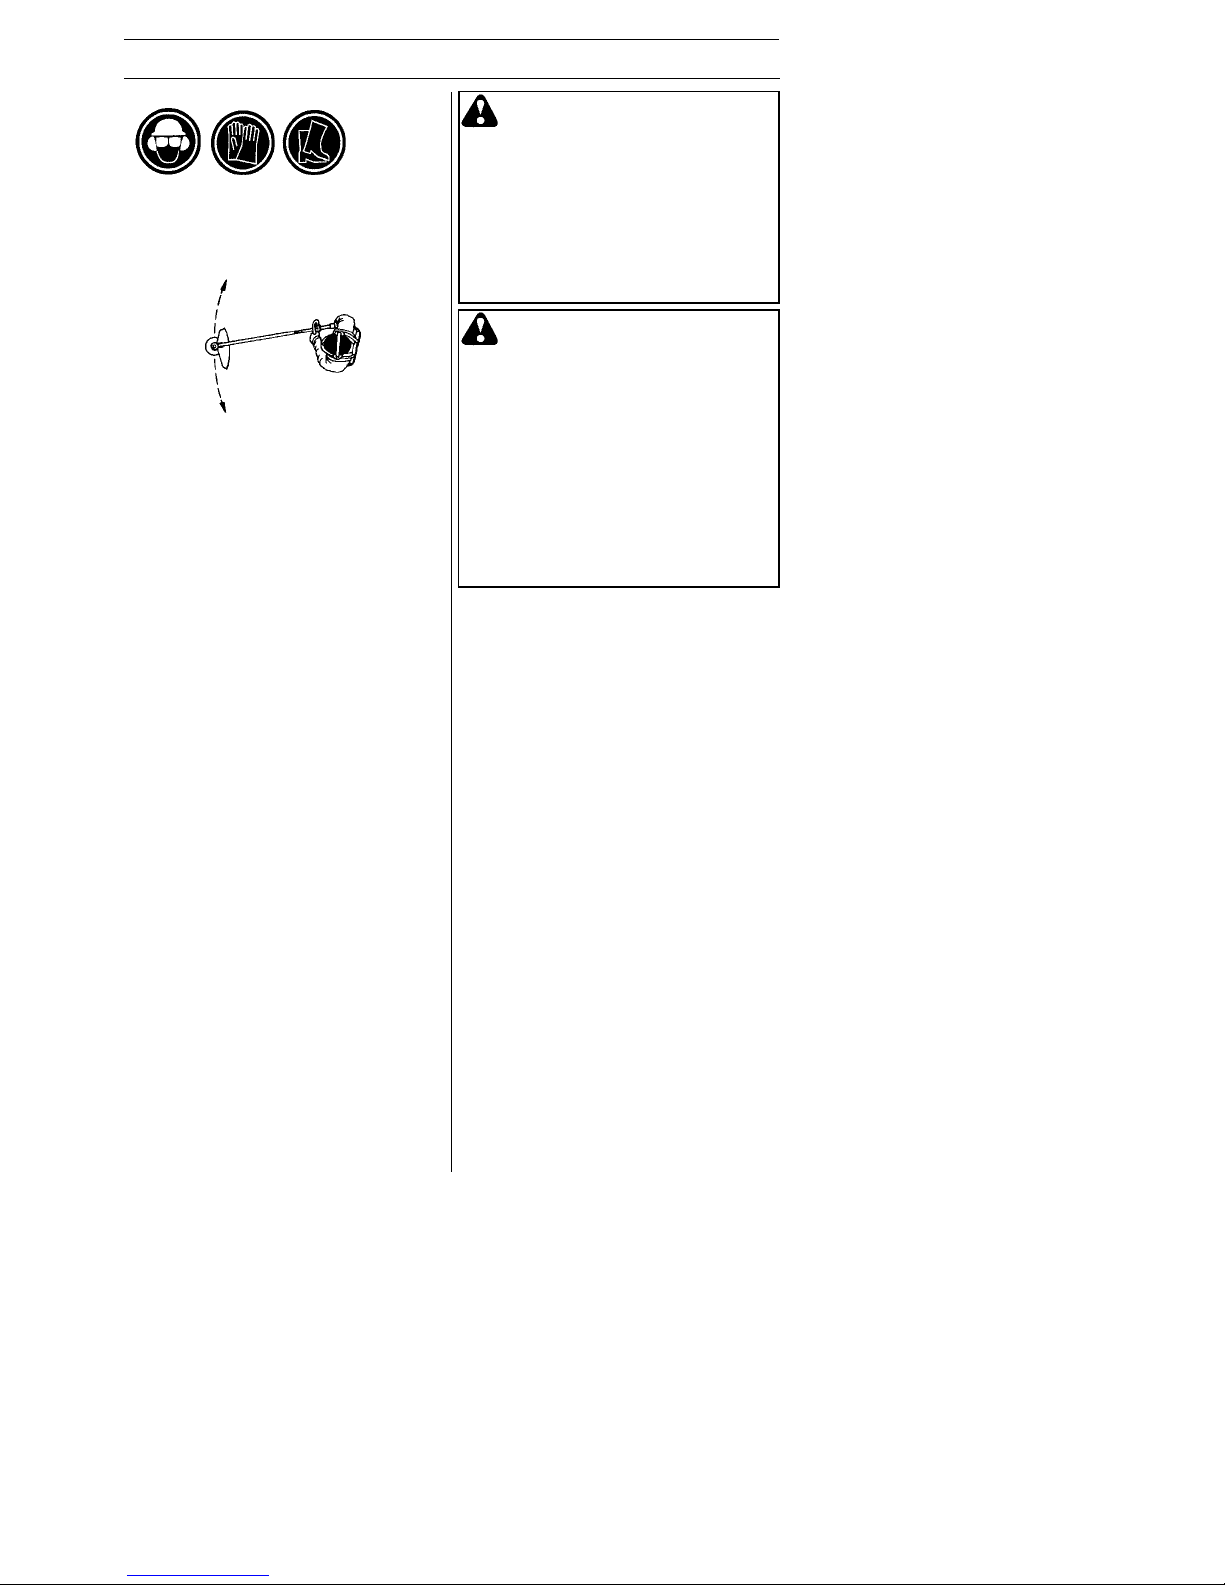
Always wear:
S Hearing protection
S Approved eye protection
Max. speed of output shaft, rpm
Watch out for thrown objects and
ricochets.
The operator of the machine
must ensure, while working,
that no persons or animals
come closer than 50 feet
(15 meters).
Arrows which show limits for
handle positioning.
Always wear approved protective
gloves.
Wear sturdy, non--slip boots.
Only use non--metallic, flexible
cutting attachments, i.e. trimmer
heads with trimmer line.
Page 4
E n g l i s h --- 4
545186855 Rev. 8 5/15/12
SAFETY INSTRUCTIONS
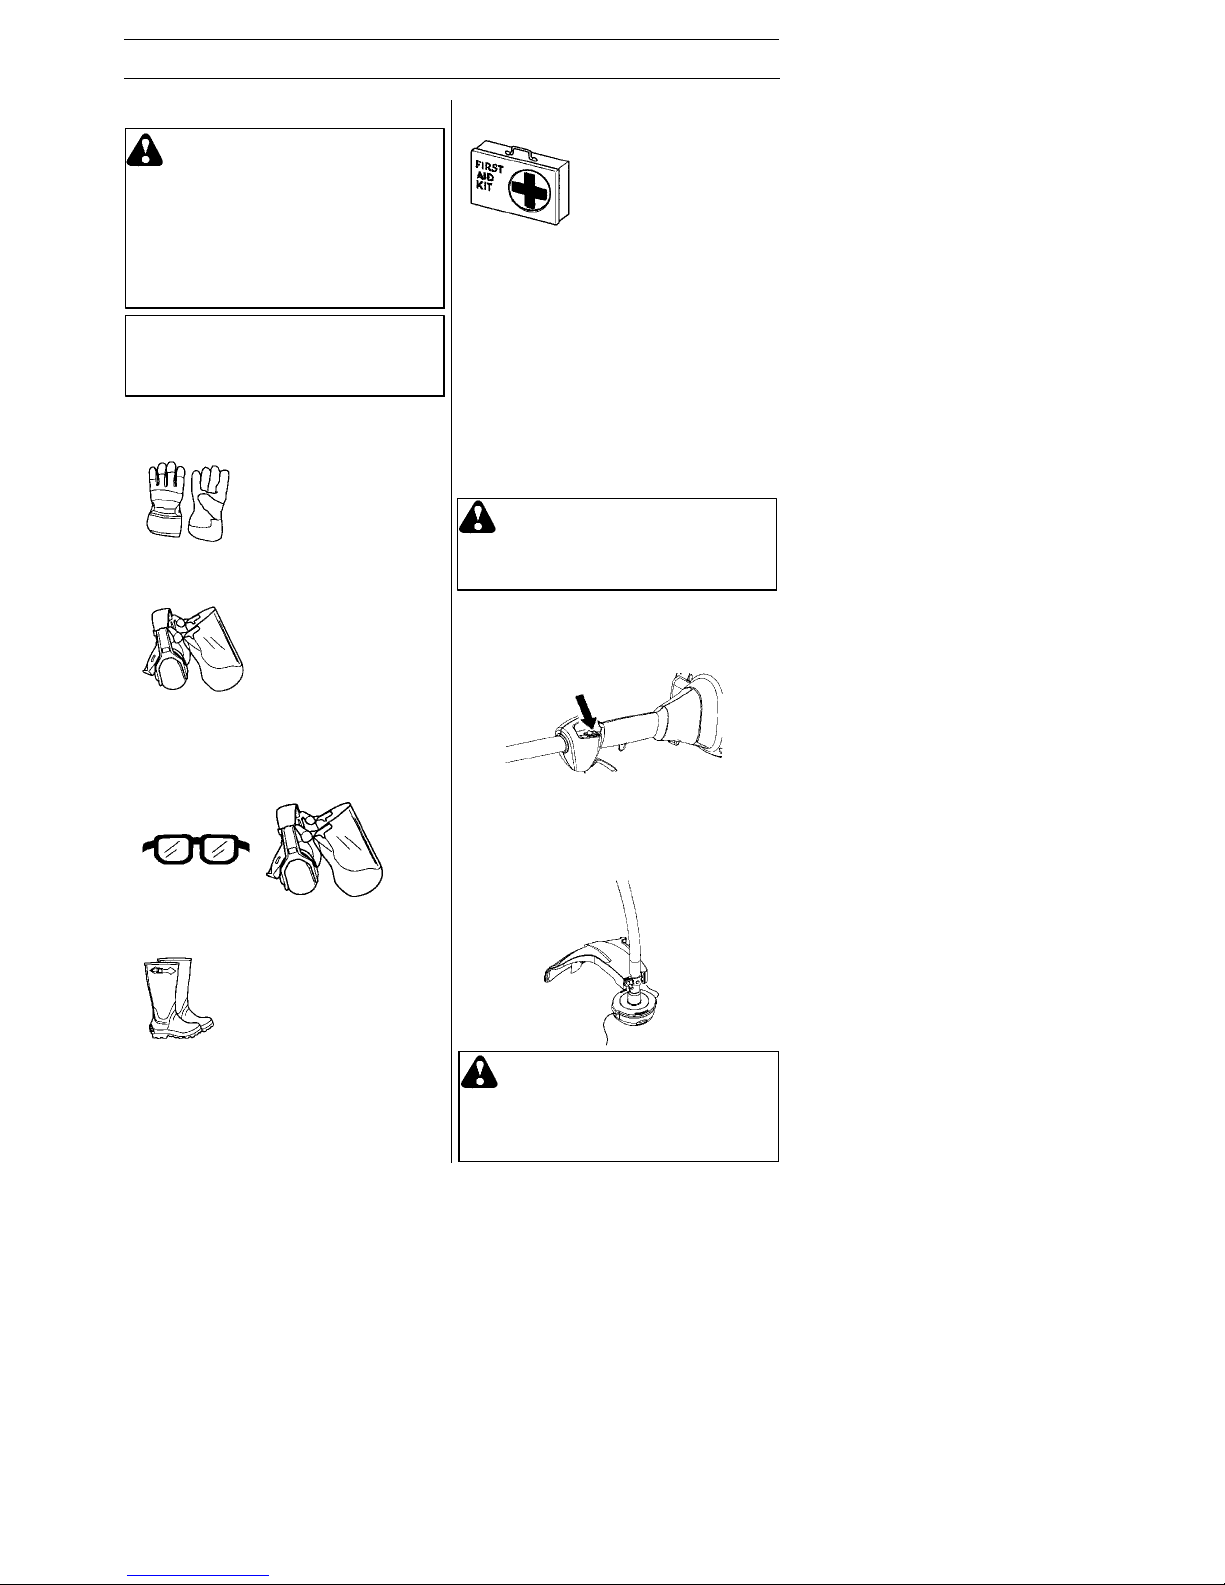
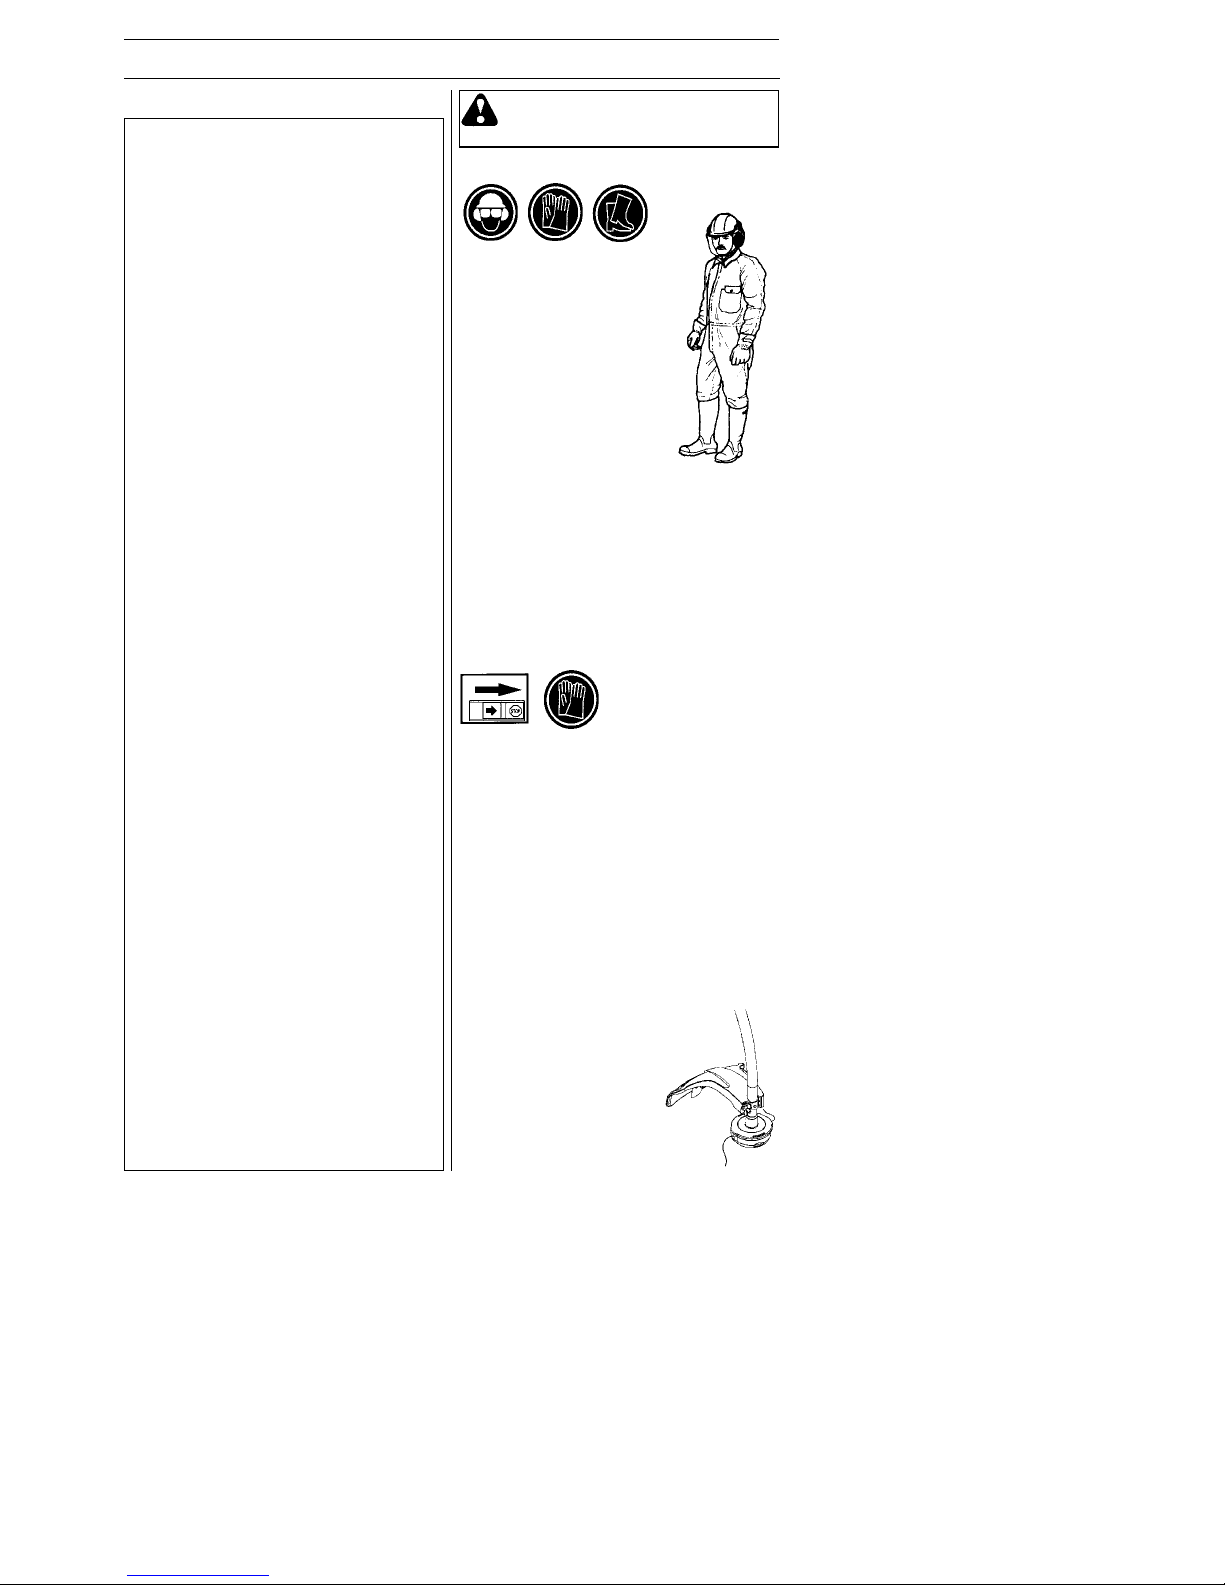
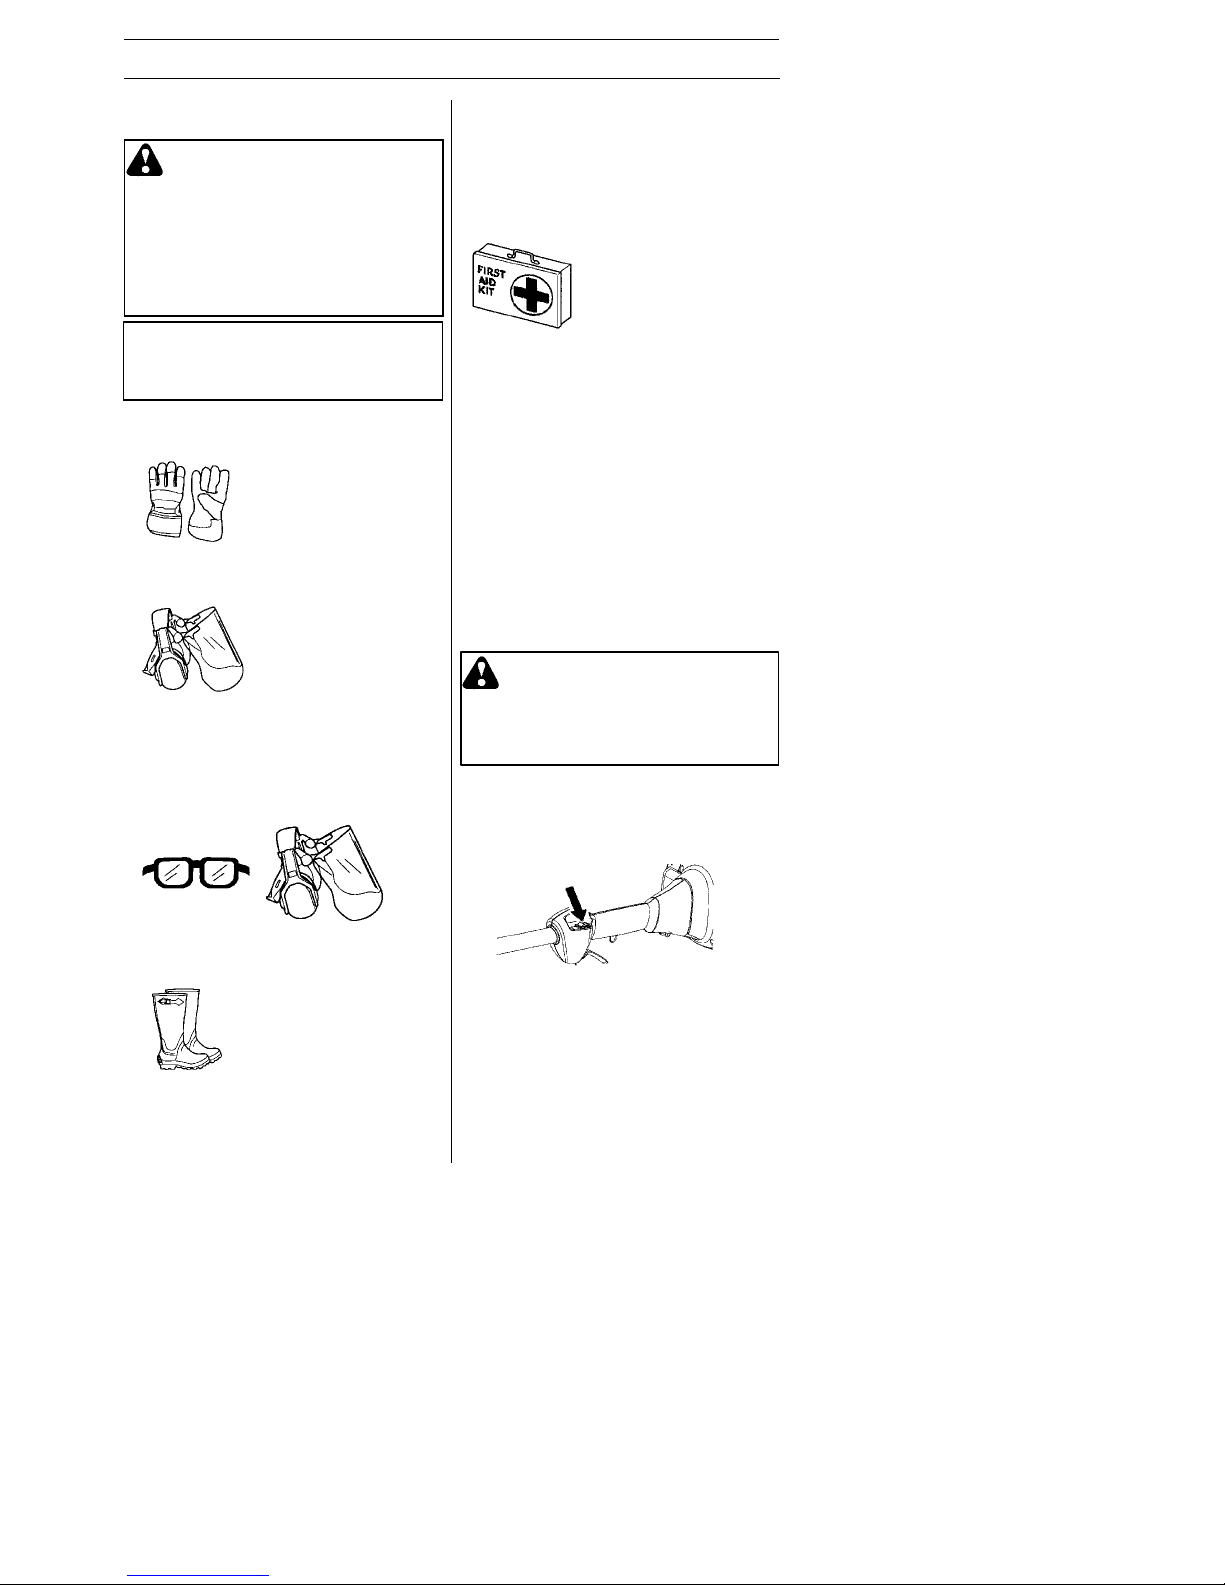
GLOVES
Gloves should be worn when necessary,
e.g., when fitting cutting attachments.
HEARING PROTECTION
Wear hearing protection that provides
adequate noise reduction.
EYE PROTECTION
Always wear approved eye protection. If
you use a visor then you must also wear
approved protective goggles. Approved
protective goggles must comply with
standard ANSI Z87.1.
BOOTS
Wear sturdy, non--slip boots.
CLOTHING
Wear clothes made of a strong fabric and
avoid loose clothing that can catch on
twigs and branches. Always wear heavy,
long pants. Do not wear jewelry , shorts
sandals or go barefoot. Secure hair so it is
above shoulder level.
Personal protective equipment
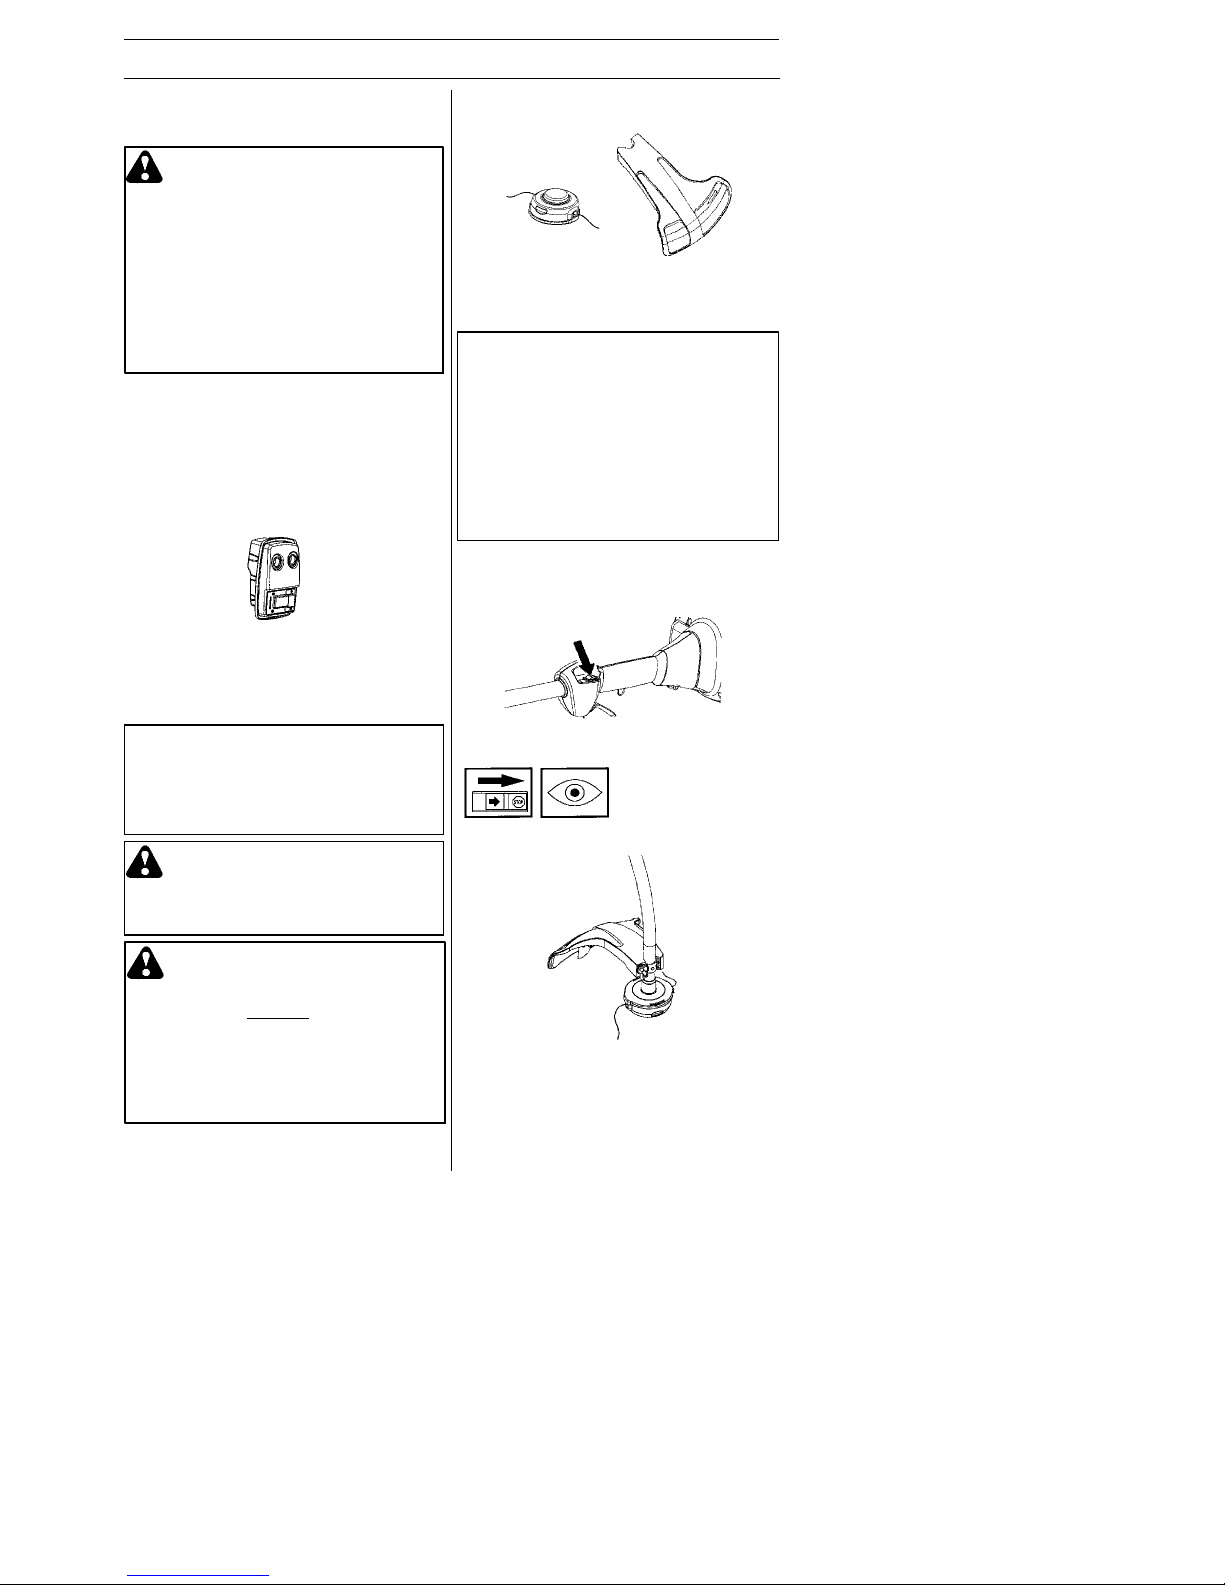
FIRST AID KIT
Always have a first aid kit nearby.
Machine’ s safety equipment
This section describes the machine’s safety equipment, its purpose, and how checks
and maintenance should be carried out to
ensure that it operates correctly. See the
“Know your trimmer ” section to locate
where this equipment is positioned on your
machine.
The life span of the machine can be reduced
and the risk of accidents can increase if
machine maintenance is not carried out
correctly and if service and/or repairs are not
carried out professionally. If you need further
information please contact your nearest servicing dealer.
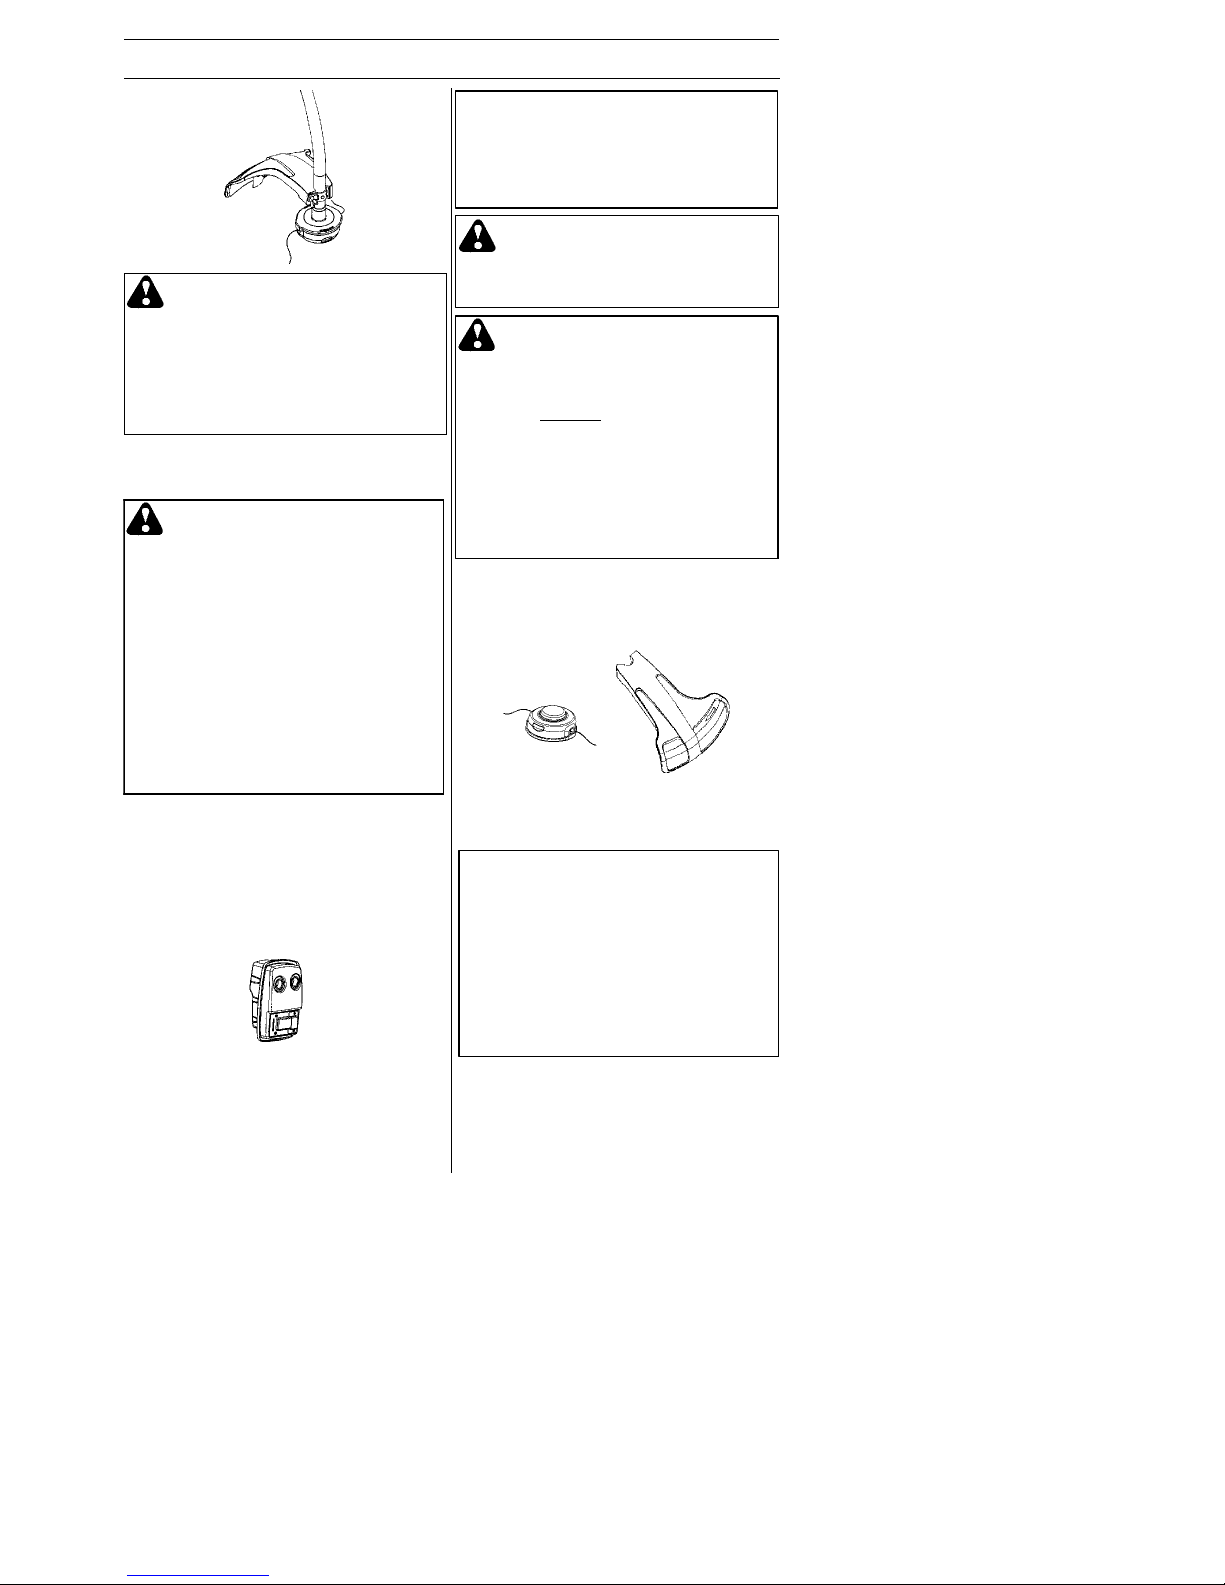
Stop switch
Make sure the engine stops when you push
and hold the stop switch.
WARNING: Never use a machine
that has faulty safety equipment!
Carry out the inspection, maintenance and service routines listed in
this section.
Cutting attachment guard
This guard is intended to prevent loose objects from being thrown towards the operator. The guard also protects the operator
from accidental contact with the cutting attachment.
WARNING: Never use a cutting
attachment without an approved
guard. See the section on “Technical
data”. If an incorrect or faulty guard
is fitted this can cause serious
personal injury.
WARNING: Whenever you use a
clearing saw, brushcutter or trimmer
you must wear personal protective
equipment that is approved by the
authorities. Personal protective
equipment does not eliminate the risk
of accidents, but it can reduce the ef fects of an injury in the event of an
accident. Ask your dealer for help
when choosing protective equipment.
IMPORTANT! Listen for warning signals
or shouts when you are wearing hearing
protection. Always remove your hearing
protection as soon as the engine stops.
Page 5
E n g l i s h --- 5
545186855 Rev. 8 5/15/12
SAFETY INSTRUCTIONS
Use ofincorrectly wound trimmer line or an
incorrect cutting attachment increases the
level of vibration.
Muffler
The muffler is designed to reduce the noise
level and to direct the exhaust gases away
from the operator.
CAUTION! Muffler is fitted with a catalytic
converter designed to reduce exhaust gas
emissions.
For mufflers, it is very important that you follow the instructions on checking, maintaining, and servicing your machine.
See Checking, maintaining and servicing the
machine’s safety equipment section.
WARNING: Overexposure to
vibration can lead to circulatory
damage or nerve damage in people
who have impaired circulation.
Contact your doctor if you experience symptoms of overexposure to
vibration. Such symptoms include
numbness, loss of feeling, tingling,
pricking, pain, loss of strength,
changes in skin color or condition.
Thesesymptomsnormallyappear
in the fingers, hands or wrists. The
risk increases at low temperatures.
Cutting equipment
A trimmer head is intended for trimming
grass.
Checking, maintaining and
servicing the machine’s
safety equipment
IMPORTANT!
All servicing and repair work on the machine
requires special training. This is especially
true of the machine’s safety equipment. If
your machine fails any of the checks described below you must contact your service
agent. When you buy any of our products we
guarantee the availability of professional repairs and service. If the retailer who sells
your machine is not a servicing dealer, ask
him for the address of your nearest service
agent.
Stop switch
S Start the engine and make sure the engine
stops when you push and hold the stop
switch.
Cutting attachment guard
S Ensure that the guard is undamaged and
is not cracked.
S Replace the guard if it has been exposed
to impact or is cracked.
S Always use the recommended guard for
the cutting attachment you are using. See
section on “Technical data”.
WARNING: The inside of the
muffler contain chemicals that may
be carcinogenic. Avoid contact
with these elements in the event of
a damaged muffler.
CAUTION: Mufflers fitted with cata -
lytic converters get very hot during use
and remain so for some time after stopping. This also applies at idle speed. Contact can result in burns to the skin. Remembertheriskoffire!
WARNING: Engine exhaust
fumes contain carbon monoxide,
which can cause carbon monoxide
poisoning. DO NOT
start or run the
machine indoors, or anywhere that
is poorly ventilated. The exhaust
fumes from the engine are hot and
may contain sparks which can start
a fire. Never start the machine in doors or near combustible material!
Page 6
E n g l i s h --- 6
545186855 Rev. 8 5/15/12
SAFETY INSTRUCTIONS
Muffler
S Never use a machine that has a faulty
muffler.
S Regularly check that the muffler is securely
attached to the machine.
S The muffler on this unit is equipped with a
special spark arrestor mesh. The mesh
should be checked and, if necessary.
cleaned by a servicing dealer. A blocked
mesh will cause the machine to overheat,
which can lead to serious damage. Never
use a muffler with a defective spark arrestor mesh. See the Maintenance section.
Cutting equipment
This section describes how to choose and
maintain your cutting equipment in order to:
S Obtain maximum cutting performance.
S Extend the life of cutting equipment.
General rules
:
1. Only use cutting attachments with the
guards we recommend! See the section
on “Technical Data”.
2. Check the cutting attachment for damage
or cracks. A damaged cutting attachment
should always be replaced.
WARNING: Never use a machine
with faulty safety equipment. The
machine’s safety equipment must be
checked and maintained as
described in this section.
If your machine fails any of these
checks contact your service agent to
getitrepaired.Useofamachine
with faulty safety equipment increases the risk of serious personal
injury to the operator or others.
IMPORTANT!
This section describes how to choose and
maintain your cutting equipment in order to:
Obtain maximum cutting performance.
Extend the life of cutting equipment.
Only use cutting attachments with the guards
we recommend! See the section on
“T echnical data”.
Refer to the instructions for the cutting attachment to check the correct way to load the
trimmer line and the correct line diameter.
Trimmer head
S Only use the recommended cutting at-
tachments. See the section on “T echnical
data”.
S Smaller machines generally require small
trimmer heads and vice versa. This is because when clearing using trimmer line the
engine must throw out the trimmer line radially from the trimmer head and overcome
the resistance of the grass being cleared.
S The length of the trimmer line is also im-
portant. A longer trimmer line requires
greater engine power than a shorter
trimmer line of the same diameter.
S Make sure that the cutter on the trimmer
guard is intact. This is used to cut the
trimmer line to the correct length.
S To increase the life of the trimmer line it
can be soaked in water for a couple of
days. This will make the line tougher so
that it lasts longer.
IMPORTANT!
Always ensure the trimmer line is wound
tightly and evenly around the drum, otherwise the machine will generate harmful
vibration.
WARNING: Always stop the en-
gine before doing any work on the
cutting attachment. This continues
to rotate even after the throttle has
been released. Ensure that the
cutting attachment has stopped
completely and disconnect the
lead from the spark plug before
you start to work on it.
Page 7
E n g l i s h --- 7
545186855 Rev. 8 5/15/12
SAFETY INSTRUCTIONS
Safety instructions regarding the
surroundings
S Never allow children to use the machine.
S Ensure no one comes closer than 50 feet
(15 meters) when working.
S Never allow anyone else to use the
machine without first ensuring that they
have understood the contents of the
operator’s manual.
Safety instructions before starting
work
S Inspect the working area. Remove any
objects such as stones, broken glass,
nails, steel wire, string, etc. that can be
thrown or can wrap around the cutting
head or shaft.
S Keep others at a safe distance. Children,
animals, onlookers and helpers should
stand outside of the safety zone of 50
feet (15 meters). Bystanders should be
encouraged to wear safety glasses. Stop
the machine immediately if anyone
should approach.
S Check the entire machine before starting
work. Replace damaged parts. Check for
fuel leakage and that all safety guards
and covers are complete and fastened
securely. Check all nuts and bolts.
S Check the cutting head
for cracks or any other
damage.
S Ensure the trimmer guard
is mounted and not
damaged.
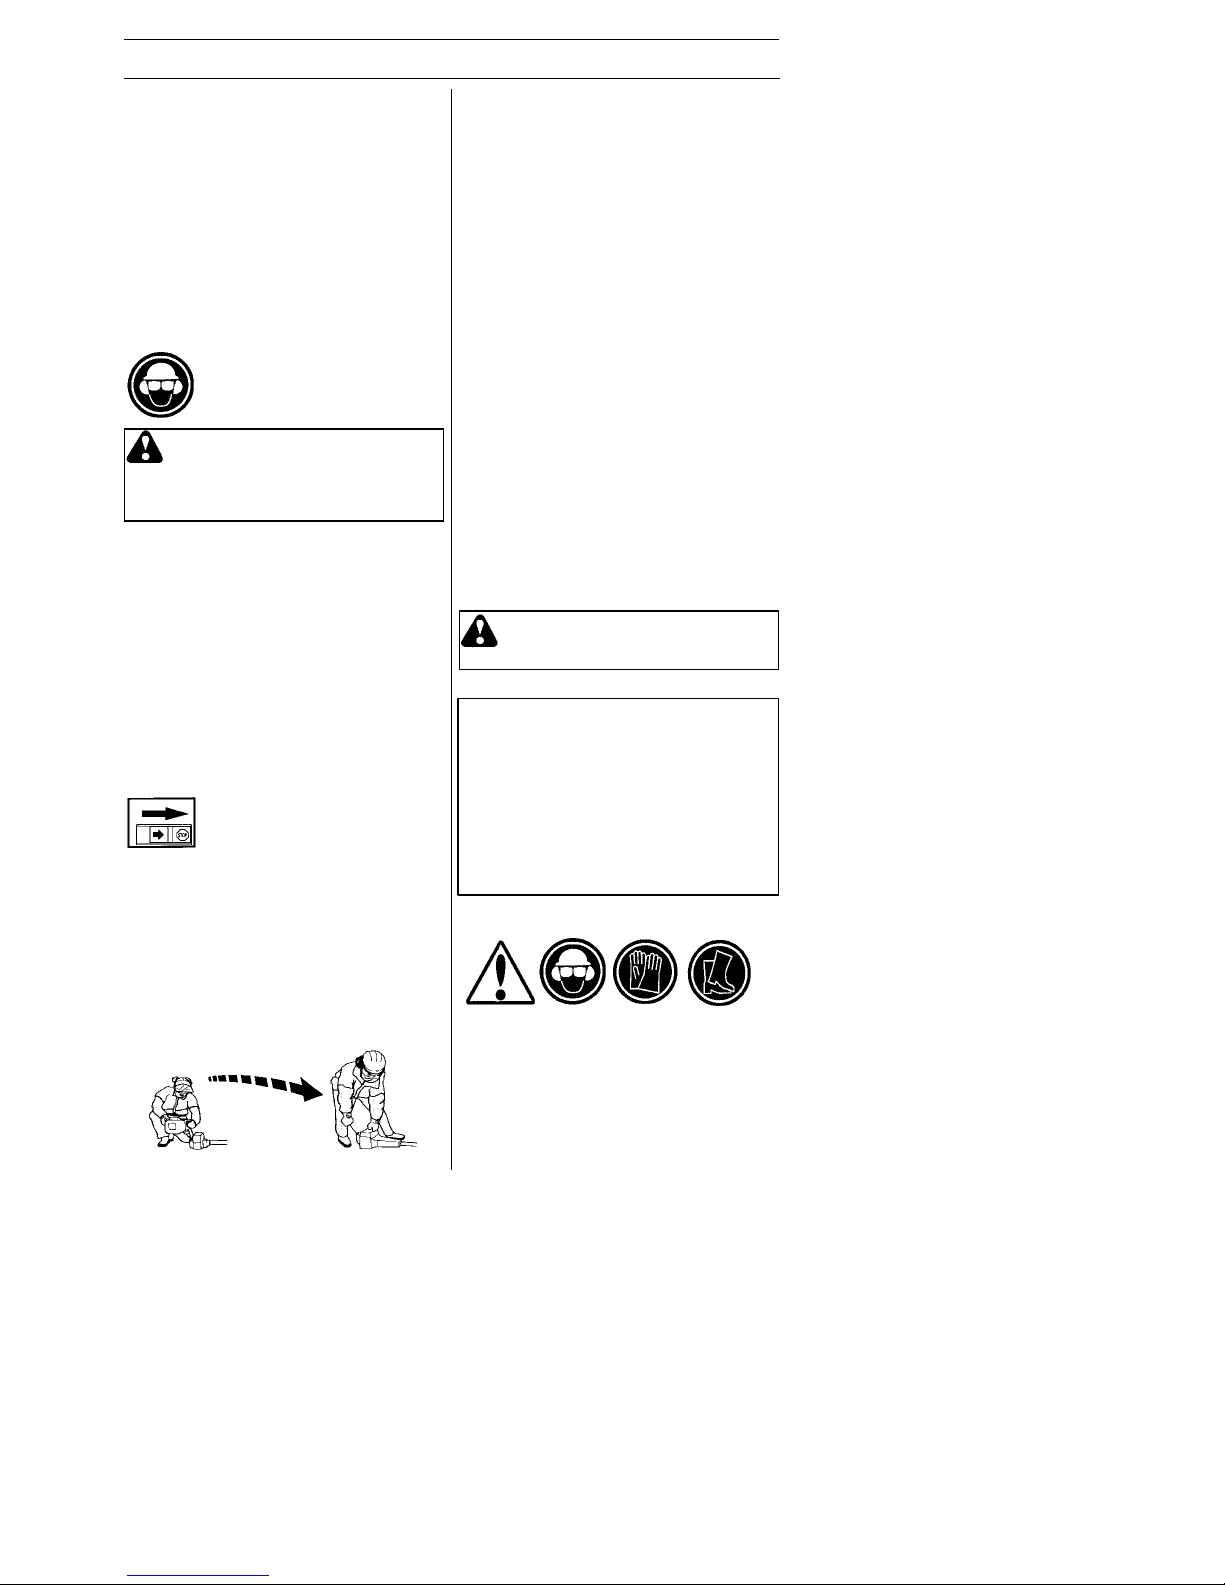
Personal protection
S Always wear boots and
other equipment described
in the “Personal protective
equipment” section.
S Always wear working
clothes and heavy--duty
long pants.
S Never wear loose fitting
clothes or jewelry.
S Persons with long hair
should (for personal safety)
put their hair up.
General safety preca utions
IMPORTANT!
S The machine is only designed for trimming
grass.
S The only accessories you can operate
with this engine unit are the cutting attachments we recommend in the “Technical data” section.
S Never use wire, rope, string, etc.
S Never use the machine if you are tired, if
you have drunk alcohol, or if you are taking medication that could affect your vision, your judgment or your coordination.
S Never use the machine in extreme weath-
er conditions such as severe cold , very hot
and/or humid climates.
S Never use a machine that has been modi-
fied in any way from its original specification.
S Wear personal protective equipment. See
instructions in the “Personal protective
equipment” section.
S Never use a machine that is faulty . Carry
out the checks, maintenance and service
instructions described in this manual.
Some maintenance and service measures
must be carried out by trained and qualified specialists. See instructions in the
“Maintenance” section.
S All covers and guards must be fitted before
starting. Make sure the spark plug cap and
lead are not damaged. Otherwise you
could get an electric shock.
S The machine operator must ensure that
no people or animals come closer than
50 feet (15 meters) while working.
S Stay clear of spinning line.
S Secure or remove loose clothing or cloth-
ing with loosely hanging ties, straps, tassels, etc. They can be caught in moving
parts.
S Being fully covered also helps protect you
from debris and pieces of toxic plants
thrown by spinning line.
S Keep handles free of oil and fuel.
S Always keep the engine on the right hand
side of your body .
S Hold the unit firmly with both hands.
S Keep trimmer head below waist level and
away from all parts of your body. Do not
raise engine above your waist.
S Keep all parts of your body away from
muffler and spinning line. Keep engine below waist level. A hot muffler can cause
serious burns.
S Keep firm footing and balance. Do not
overreach or use from unstable surfaces
such as ladders, trees, steep slopes, rooftops, etc.
S Use only in daylight or good artificial light.
S Use only for jobs explained in this manual.
WARNING: A faulty cutting at-
tachment may increase the risk of
accidents.
Page 8
E n g l i s h --- 8
545186855 Rev. 8 5/15/12
SAFETY INSTRUCTIONS
S Check that the trimmer head and guard
are correctly secured.
S When adjusting the carburetor, make sure
the lower end is supported and that no one
is in the immediate vicinity.
S Make sure the cutting head does not rotate
when idling.
S Make sure the handle and safety features
are in order. Never use a machine that has
parts missing or has been changed in
relation to the specification.
S Only use the machine for the purpose for
which it was intended.
Starting
S Ensure that all of the engine covers and
housings are properly fitted before the unit
is started.
S Never start or attempt to run the unit with
the clutch, clutch drum, clutch cover, or
driveshaft removed.
S Never start the machine indoors. Exhaust
fumes can be dangerous if inhaled.
S Observe your surroundings and make sure
that there is no risk of people or animals
coming into contact with the cutting equipment.
S See the “Starting and Stopping” section for
complete instructions.
Fuel safety
S Always use a fuel container with an anti--
spill valve.
S Never refuel the machine while the engine
is running.
S Always stop the engine and let it cool for a
few minutes before refueling.
S Make sure there is plenty of ventilation
when refueling or mixing fuel (gasoline and
2--stroke oil).
S Move the machine at least 10 feet (3 me-
ters) from the refueling point before starting it.
S Never start the machine:
S If you have spilled fuel on it. Wipe off
the spillage and allow remaining fuel to
evaporate.
S If you have spilled fuel on yourself or
your clothes, change your clothes. Was
h
any part of your body that has come in
contact with fuel. Use soap and water.
WARNING: When the engine is
startedwiththechokeineitherthe
choke or start throttle positions the
cutting attachment will start to
rotate immediately.
Min. 10 ft.
(3 m)
S If the machine is leaking fuel. Check
regularly for leaks from the fuel cap
and fuel lines.
S Avoid all skin contact with fuel. Fuel is
a skin irritant and may even cause
skin changes.
Transporting and storage
S Store and transport the machine and fuel
so that there is no risk of any leakage or
fumes coming into contact with sparks or
naked flames, for example, from electrical machinery, electric motors, electrical
relays/switches or boilers.
S When storing and transporting fuel al-
ways use approved containers intended
for this purpose.
S When storing the machine for long peri-
ods the fuel tank must be emptied. Contact your local gas station to find out
where to dispose of excess fuel.
S Ensure the machine is cleaned and that
a complete service is carried out before
long--term storage.
General working instructions
IMPORTANT!
This section describes the basic safety precautions for working with trimmers. If you
encounter a situation where you are uncertain how to proceed you should ask an expert. Contact your servicing dealer.
Avoid all usage which you consider to be
beyond your capability.
You must understand the difference between
forestry cle aring, grass clearing and grass
trimming before use.
Basic safety rules
1. Look around you:
S To ensure that people, animals or other
things cannot affect your control of the
machine.
S To ensure that people, animals, etc.,
do not come into contact with the cutting attachment or loose objects that
are thrown out by the cutting attachment.
WARNING: Take care when han-
dling fuel. Bear in mind the risk of
fire, explosion and inhaling fumes.
Page 9
E n g l i s h --- 9
545186855 Rev. 8 5/15/12
SAFETY INSTRUCTIONS
3. Make sure you can move and stand safely.
Check the area around you for possible obstacles (roots, rocks, branches, ditches, etc.)
in case you have to move suddenly. T ake
great care when working on sloping ground.
4. Switch off the engine before moving to
another area.
5. Never put the machine down with the engine
running or while the cutting attachment is
rotating.
Basic working techniques
S Always slow the engine to idle speed after
each working operation. Long periods at
full throttle without any load on the engine
can lead to serious engine damage.
S It is recommended that the engine not
be operated for longer than 1 minute at
full throttle.
Grass trimming using a trimmer head
Tri mmi ng
S Hold the trimmer head just above the
ground at an angle. It is the end of the trimmer line that does the work. Let the trimmer line work at its own pace. Never press
the trimmer line into the area to be cut.
S The trimmer line can easily remove grass
and weeds up against walls, fences, trees
and borders, however it can also damage
sensitive bark on trees and bushes, and
damage fence posts.
WARNING: Sometimes branches
or grass get caught between the
guard and cutting attachment.
Always stop the engine before
cleaning.
S CAUTION! Do not use the machine
unless you are able to call for help in
the event of an accident.
2. Do not use the machine in bad weather,
such as dense fog, heavy rain, strong
wind, intense cold, etc. Working in bad
weather is tiring and often brings added
risks, such as icy ground, unpredictable
felling direction, etc.
S Reduce the risk ofdamaging plants by
shortening the trimmer line to 4- -4 1/2 inches
(10--12 cm) and reducing the engine speed.
S When trimming you should use less than
full throttle so that the trimmer line lasts
longer and to reduce the wear on the
trimmer head.
Clearing
S The clearing technique removes all un-
wanted vegetation. Keep the trimmer
head just above the ground and tilt it. Let
the end of the trimmer line strike the
ground around trees, posts, statues and
the like. IMPORTANT! This technique
increases the wear on the trimmer line.
S The trimmer line wears quicker and must
be fed forward more often when working
against stones, brick, concrete, metal
fences, etc., than when coming into contact with trees and wooden fences.
Cutting
S The trimmer is ideal for cutting grass that
is difficult to reach using a normal lawn
mower. Keep the trimmer line parallel to
the ground when cutting. Avoid pressing
the trimmer head against the ground as
this can ruin the lawn and damage the
tool.
S Do not allow the trimmer head to con--
stantly come into contact with the ground
during normal cutting. Constant contact
of this type can cause damage and wear
to the trimmer head.
Page 10
E n g l i s h --- 1 0
545186855 Rev. 8 5/15/12
SAFETY INSTRUCTIONS
Sweeping
S The fan effect of the rotating line can be
used for quick and easy clearing up.
Hold the trimmer line parallel to and
above the area to be swept and move
the tool to and fro.
S When cutting and sweeping you should
use full throttle to obtain the best results.
WARNING: Watch out for
thrown objects. Always wear
approved eye protection. Never
lean over the cutting attachment
guard. Stones, rubbish, etc. can be
thrown up into the eyes causing
blindness or serious injury. Keep
unauthorised persons at a distance. Children, animals, onlookers
and helpers should be kept outside
the safety zone of 15 m. Stop the
machine immediately if anyone
approaches. Never swing the machine around without first checking
behind you t o make sure no one is
within the safety zone.
WARNING: Sometimes
branches or grass get caught
between the guard and cutting
attachment or wrapped around the
shaft. Neither the operator of the
machine nor anyone else may attempt to remove the cut material
while the engine is running or the
cutting equipment is rotating,
as this can result in serious injury.
Stop the engine and cutting equipment before you remove material.
Page 11
E n g l i s h --- 1 1
545186855 Rev. 8 5/15/12
WHAT IS WHAT?
1. Trimmer head 8. Starter handle
2. Cutting attachment guard 9. Fuel tank
3. Shaft 10. Choke control
4. Loop handle 11. Air purge
5. Throttle control 12. Air filter cover
6. Stop switch 13. Handle adjustment
7. Cylinder cover 14. Operator’s manual
What is what?
3
7
4
1
2
12
1
6
8
11
10
5
9
14
13
Page 12

E n g l i s h --- 1 2
545186855 Rev. 8 5/15/12
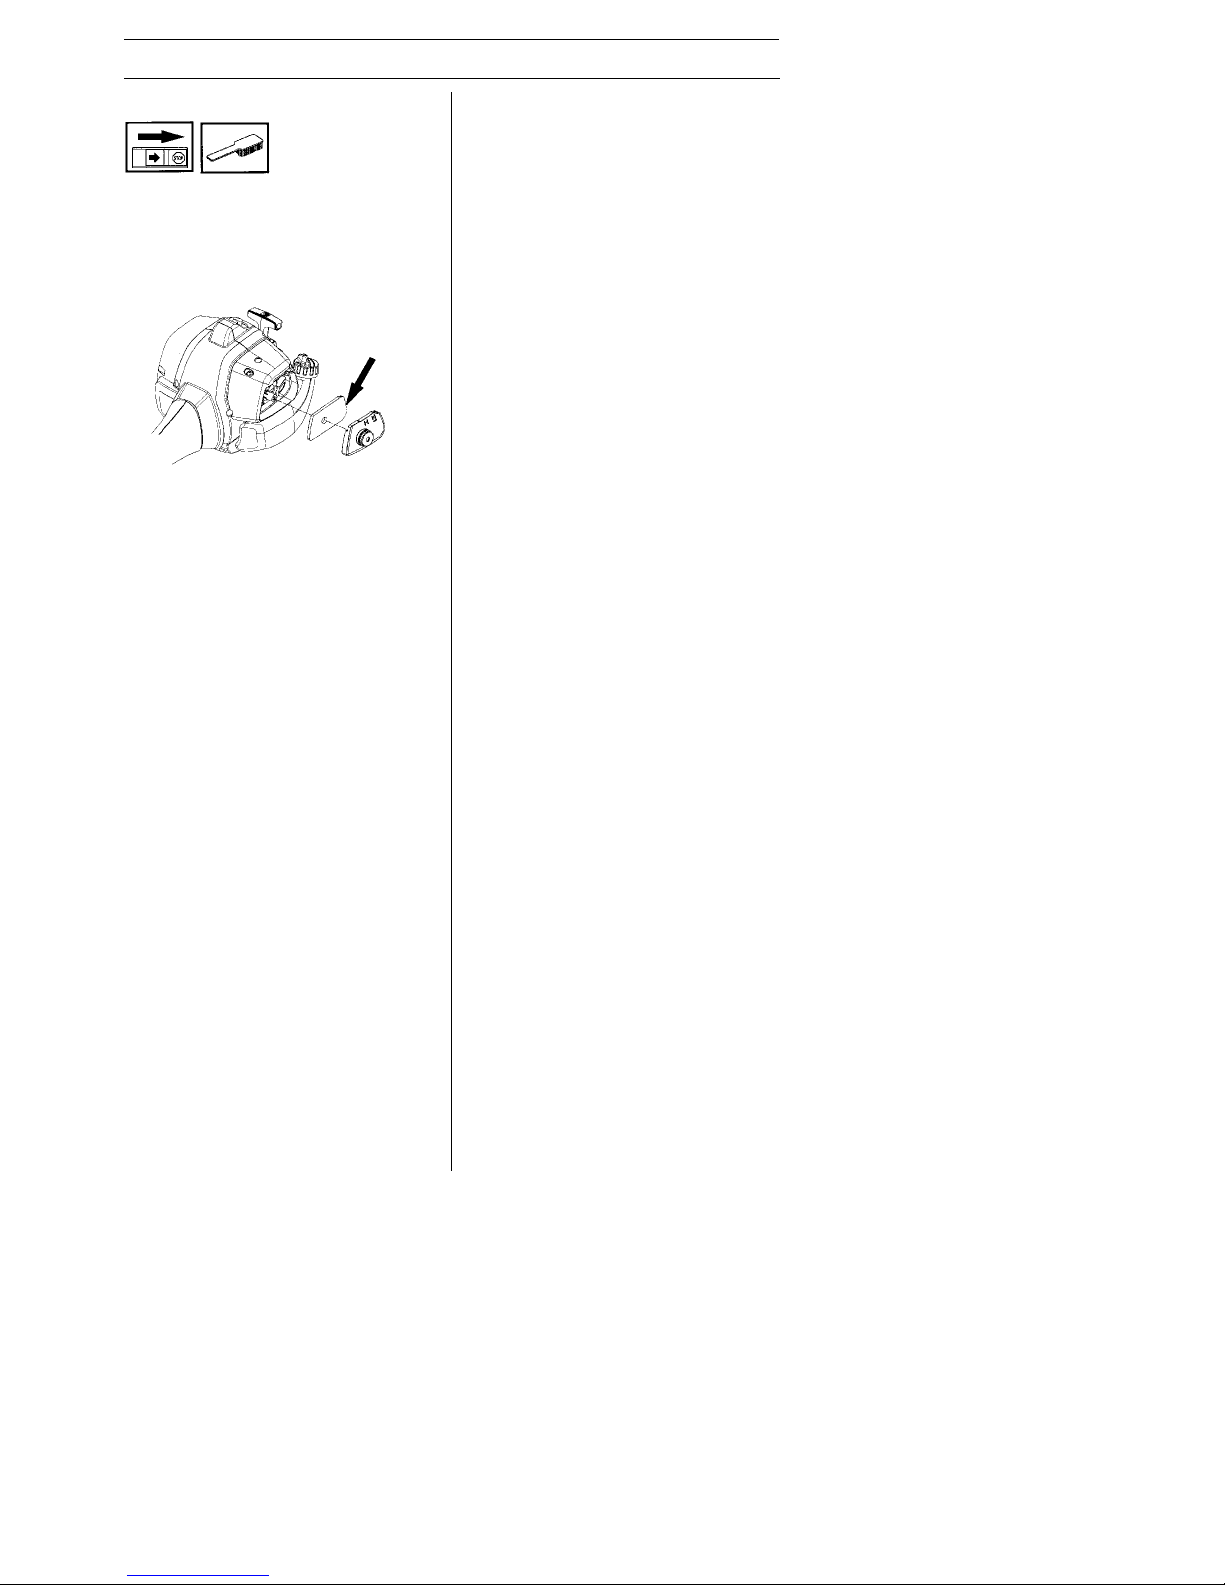
ASSEMBLY
NOTE: Make sure unit is assembled cor-
rectly as shown in this manual.
Fitting the loop handle
S Position the handle on the shaft. Note
that the handle must be mounted between the two arrows on the shaft.
S Fit the screw, securing plate and wing
nut as shown in the diagram.
S Tighten the wing nut.
Fitting the trimmer guard and
trimmer head
S Fit the correct trimmer guard (A) for use
with the trimmer head. Hook the trimmer
guard/combination guard onto the fitting on
the shaft and secure with the wing nut (B).
A
C
B
S Fit the dust cup (C) on the shaft. The nut
must be completely covered by the dust
cup.
S Hold the dust cup with a wrench to pre-
vent the shaft from rotating.
S Screw the trimmer head (D) onto the
shaft.
S To dismantle, follow the instructions in
the reverse order.
D
Page 13
E n g l i s h --- 1 3
545186855 Rev. 8 5/15/12
FUEL HANDLING
Fuel mixture
CAUTION! The machine is equipped with
a two--stroke engine and must always be
run using a mixture of gasoline and two-stroke engine oil. It is important to accurately measure the amount of oil to be
mixed to ensure that the correct mixture is
obtained. When mixing small amounts of
fuel, even small inaccuracies can drastically affect the ratio of the mixture.
Gasoline
CAUTION! Always use high quality
unleaded gasoline.
S This engine is certified to operate on
unleaded gasoline.
S The lowest recommended octane rating
is 87. If you run the engine on lower octane rating than 87, “knocking” can occur. This leads to an increased engine
temperature, which can result in a serious engine breakdown.
S When working at continuous high revs a
higher octane rating is recommended.
Two-- s trok e o il
S For great results and performance use
JONSERED two--stroke oil, which is
specially formulated for our two--stroke
engines. Mixture 1:50 (2%).
S To maximize the life of your trimmer, you
may choose to use a high quality synthetic oil formulated for two--stroke
engines. Mixture 1:50 (2%).
S Never use two--stroke oil intended for
water--cooled outboard engines,
sometimes referred to as outboard oil.
S Never use oil intended for four --stroke
engines.
WARNING: Fuel and fuel fumes
are highly flammable and can cause
serious injury when inhaled or al lowed to come in contact with the
skin. For this reason, observe caution when handling fuel and make
sure there is adequate ventilation.
U.S. gallon U.S. fl. oz.
121/2
2 1/2 6 1/2
5127/8
Gasoline
Two - -stroke oil
2% (1:50)
S Always start by flling half the amount of the
gasoline to be used. Then add the entire
amount of oil. Mix (shake) the fuel mixture.
Add the remaining amount of gasoline.
S Mix (shake) the fuel mixture thoroughly
before filling the machine’s fuel tank.
S Do not mix more than one month’s sup-
ply of fuel at a time.
S If the machine is not used for some time,
the fuel tank should be emptied and
cleaned.
WARNING: The catalytic convert-
er muffler gets very hot during and
after use. This also applies during
idling.Beawareofthefirehazard,
especially when working near flammable substances and/or vapors.
Fueling
WARNING: Taking the following
precautions, will lessen the risk of
fire:
Do not smoke or place hot objects
near fuel.
Always shut off the engine before
refueling.
Always stop the engine and let it
cool for a few minutes before refueling.
When refueling, open the fuel cap
slowly so that any excess pressure
is released gently.
Tighten the fuel cap carefully after
refueling.
Always move the machine away
from the refueling area before
starting.
Min. 10 ft.
(3 m)
S Clean the area around the fuel cap.
Contamination in the tank can cause
operating problems.
S Ensure that the fuel is well mixed by shak-
ing the container before filling the tank.
Mixing
S Always mix the gasoline and oil in a
clean container intended for fuel.
Page 14
E n g l i s h --- 1 4
545186855 Rev. 8 5/15/12
STARTING AND STOPPING
Check before starting
S Inspect the unit before each use. Re-
place damaged parts. Check for fuel
leaks. Make sure all fasteners are in
place and secure. Make sure the cutting
attachment is properly installed and securely fastened. Use only flexible, nonmetallic line recommended by the
manufacturer. Never use, for example,
wire or wire rope, which can break off
and become a dangerous projectile.
S Check that the trimmer head and trimmer
guard are not damaged or cracked.
Replace the trimmer head or trimmer
guard if they have been exposed to
impact or are cracked.
S Never use the machine without a guard
nor with a defective guard.
Starting and stopping
WARNING: The complete clutch,
clutch cover, and shaft must be
fitted before the machine is started,
otherwise parts could come loose
and cause personal injury.
Always move the machine away
from the refueling area before
starting. Place the machine on a
flat surface. Ensure the cutting attachment cannot come into contact
with any object.
Make sure no unauthorized persons
are in the working area, otherwise
there is a risk of serious personal
injury. The safety distance is 50 feet
(15 meters).
Cold engine
Primer bulb: Press the primer bulb 10
times until fuel begins to fill the bulb. The
primer bulb need not be completely filled.
Choke: Move the blue engine choke lever
to the closed position.
Starting
Hold the body of the machine on the
ground using your left hand (CAUTION!
Not with your foot!).
Firmly grip the starter rope handle with
your right hand. DO NOT squeeze
throttle trigger. Slowly pull out the cord
until you feel some resistance (the starter
pawls grip); then quickly and powerfully
pull the cord.
Never wrap the starter cord around
your hand.
Repeat pulling the cord until the engine
attempts to start. Move the blue engine
choke lever to the ½ position. Pull starter
rope until engine runs. Move the blue engine choke lever to the opened position.
NOTE: If engine dies, return blue engine
choke lever to the closed position and
repeat starting steps.
CAUTION! Do not pull the starter cord all
the way out and do not let go of the starter
handle when the cord is fully extended.
This can damage the machine.
Page 15

E n g l i s h --- 1 5
545186855 Rev. 8 5/15/12
STARTING AND STOPPING
Warm engine
With a warm engine, move the blue engine
choke lever to the ½ position. Pull starter
rope until engine runs. Move the blue
engine choke lever to the opened position.
WARNING: When the engine is
started with the choke in the closed
position the cutting attachment will
start to rotate immediately.
Stopping
Stop the engine by pushing and holding
the stop switch in the STOP position until
the engine stops.
MAINTENANCE
Carburetor
Y our Jonsered product has been designed
and manufactured to specifications that reduce harmful emissions. After the engine
has used 8--10 tanks of fuel, the engine will
be run--in. To ensure that it continues to run
at peak performance and to minimize harmful exhaust emissions after the run--in period, ask your servicing dealer to adjust your
carburetor.
The owner is responsible for the per
f
ormance of all required maintenance as
defined in the operator’s manual.
WARNING: The complete clutch,
clutch cover , and shaft must be
fitted before the machine is started,
otherwise parts could come loose
and cause personal injury.
Function
S The carburetor governs the engine’s
speed via the throttle control. Air and fuel
are mixed in the carburetor.
S The T--screw regulates the throttle setting
at idle speed. If the T--screw is turned
clockwise this gives a higher idle speed;
turning it counterclockwise gives a lower
idle speed.
Basic setting
S The basic carburetor settings are ad-
justed during testing at the factory. Fine
adjustment should be carried out by a
skilled technician.
CAUTION! If the cutting attachment rotates
when the engine is idling the idle adjustment
screw T should be turned counterclockwise
until the cutting attachment stops.
WARNING: The cutting attach-
ment may be spinning during carburetor adjustments. Wear your protective equipment and observe all safety instructions. Be sure the cutting
attachment stops turning when the
engine idles. When the unit is turned
off, make sure the cutting attach ments has stopped before the unit is
set down.
Rec. idle speed:
See “Te chnical data” section.
Recommended max. speed:
See “Te chnical data” section.
Fine adjustment of the idle speed--T
Adjust the idle speed using the idle adjustment screw --T if it is necessary to readjust.
First, turn the idle adjustment screw--T
clockwise until the cutting attachment starts
to rotate. Then, turn the screw counterclockwise until the cutting attachment stops.
The idle speed is correctly adjusted when
the engine will run smoothly in every position. The idle speed should also be well
below the speed at which the cutting attachment starts to rotate.
Idle Speed
Screw--T
WARNING: Improper mainte-
nance could result in serious engine
damage or in serious injury.
Page 16
E n g l i s h --- 1 6
545186855 Rev. 8 5/15/12
MAINTENANCE
WARNING: If the idle speed can-
not be adjusted so that the cutting
attachment stops, contact your servicing dealer. Do not use the machine until it has been correctly adjusted or repa ired.
Unit/Maintenance Safety
Disconnect the spark plug before performing maintenance, except carburetor adjustments.
Muffler
CAUTION! Muffler is fitted with a catalytic
converter designed to reduce harmful exhaust gases.
The muffler is designed to reduce the noise
level and to direct the exhaust gases away
from the operator. The exhaust gases are
hot and can contain sparks, which may
cause fire if directed against dry and combustible material.
Mufflers are equipped with a special spark
arrestor mesh. The mesh should be
checked and, if necessary. cleaned by a
servicing dealer. If the mesh is damaged,
it should be replaced. Ifthemeshisfrequently blocked, this can be a sign that the
performance of the catalytic converter is
impaired. Contact your servicing dealer to
inspect the muffler. A blocked mesh will
cause the machine to overheat and result
in damage to the cylinder and piston.
CAUTION! Never use a machine that has
a faulty or loose muffler. Ensure the muffler
bolts are tight.
Muffler bolts
Spark plug
The spark plug condition is influenced by:
S Incorrect carburetor adjustment.
S An incorrect fuel mixture (too much or in-
correct type of oil).
S A dirty air filter.
These factors cause deposits on the spark
plug electrodes, which may result in operating problems and starting difficulties.
If the machine is low on power, difficult to
start or runs poorly at idle speed: always
check the spark plug first before taking
any further action. If the spark plug is dirty,
clean it and check that the electrode gap is
0.024″ (0.6 mm). The spark plug should be
replaced after about a month in operation or
earlier if necessary.
CAUTION! Always use the recommended
spark plug type! Use of the wrong spark
plug can damage the piston/cylinder.
0.024″ (0.6 mm)
Spark arrestor mesh
WARNING: The inside of the
muffler contain chemicals that may
be carcinogenic. Avoid contact
with these elements in the event of
a damaged muffler.
CAUTION: Mufflers fitted with cata-
lytic converters get very hot during use
and remain so for some time after stopping. This also applies at idle speed. Contact can result in burns to the skin. Remember the risk of fire!
WARNING: Engine exhaust
fumes contain carbon monoxide,
which can cause carbon monoxide
poisoning. DO NOT
start or run the
machine indoors, or anywhere that
is poorly ventilated. The exhaust
fumes from the engine are hot and
may contain sparks which can start
a fire. Never start the machine in doors or near combustible material!
Page 17
E n g l i s h --- 1 7
545186855 Rev. 8 5/15/12
MAINTENANCE
Air filter
The air filter must be regularly cleaned to
remove dust and dirt in order to avoid:
S Carburetor malfunctions
S Starting problems
S Loss of engine power
S Unnecessary wear to engine parts
S Excessive fuel consumption
Clean the filter every 25 hours, or more
regularly if conditions are exceptionally
dusty.
Cleaning the air filter
Remove the air filter cover and take out the
filter. Wash it clean in warm, soapy water.
Rinse thoroughly. Ensure that the filter is dry
before refitting it.
An air filter that has been in use for a long
time cannot be cleaned completely. The
filter must therefore be replaced with a new
one at regular intervals. A damaged air
filter must always be replaced.
Maintenance schedule
Below you will find some general maintenance instructions.
Daily maintenance
S Check throttle trigger and throttle trigger
lockout function.
S Check that the stop switch works
correctly.
S Check that there are no fuel leaks from
the engine, tank or fuel lines.
S Check that the cutter does not rotate
when the engine is idling.
S Clean the outside of the machine.
S Check that the harness is not damaged.
S Check that the blade guard is not dam-
aged or cracked.
S Replace the blade guard if it is exposed to
impact or is cracked.
S A non--balanced trimmer head induces
heavy vibrations that may damage the
machine.
S Check that nuts and screws are tight.
S Check that the trimmer head is tight.
Weekly maintenance
S Check the starter and starter cord.
S Clean the carburetor area.
S Clean the outside of the spark plug. Re-
move it and check the electrode gap. Adjust the gap to 0.024″ (0.6 mm), or
replace the spark plug. Use resistor spark
plug Champion RCJ --8Y or equivalent.
S Clean the cooling fins on the cylinder and
check that the air intake near the starter
is not blocked.
S Clean the air filter.
Monthly maintenance
S Clean the fuel tank.
S Clean the outside of the carburetor and
the space around it.
S Clean the fan and the area around it.
S Check fuel lines for cracks or other dam-
age. Change if necessary.
S Change the fuel filter in fuel tank.
S Check the clutch, clutch springs and the
clutch drum for wear. Replace if necessary.
S Check electrical wires and connections.
S Replace the spark plug. Use resistor
spark plug Champion RCJ --8Y or equivalent.
S Change the air filter.
Page 18

E n g l i s h --- 1 8
545186855 Rev. 8 5/15/12
Trimmer Head Line Loading Instructions
20i
10i
3m
6m
1
23
45
6
78
9
Page 19

E n g l i s h --- 1 9
545186855 Rev. 8 5/15/12
TECHNICAL DATA
Technical data
GT 2128
Engine
Cylinder volume, cu.in./cm
3
1.7/28
Cylinder bore, inch/mm 1.4/35
Stroke, inch/mm 1.130/28.7
Idle speed, rpm 2,800--3,200
Recommended max. speed, rpm 10,000
Speed of output shaft, rpm 8,000
Max. engine output, acc. to ISO 8893, hp/kW 1.1/0.8
Catalytic converter muffler Yes
Speed--regulated ignition system Yes
Ignition system
Manufacturer/type of ignition system Walbro/CD
Spark plug Champion RCJ --8Y
Electrode gap, inch/mm 0.024/0.6
Fuel and lubrication system
Manufacturer/type of carburetor Zama
Fuel tank capacity, US pint/liter 0.85/0.4
Weight
Weight without fuel, cutting attachment and guard, lbs/kg 10/4.4
Sound levels
(see note 1)
Equivalent sound pressure level at the user’s ear,
measured according to ANSI B175.3--1997, dB(A),
min/max: 94/97
Vibration levels
Vibration levels at handles, measured according to
ANSIB175.3--1997, m/s
2
At idle, left/right handles: 3/5
At max. speed, left/right handles: 9/8
NOTE! This spark ignition system complies with the Canadian standard ICES- -002.
Note 1: Equivalent noise pressure level is calculated as the time--weighted energy total for
noise pressure levels under various working conditions with the following time distribution:
1/2 idle and 1/2 max. speed.
NOTE! Noise pressure at the user’s ear and vibration on the handles are measured with all
the machine’s approved cutting equipment fitted. The table indicates the highest and lowest
values.
Model GT 2128 (3/8 RH arbor shaft thread)
Approved accessories Type Cutting attachment / guard, part. no.
Trimmer head T25 537 33 83--07 / 545 006 049
Page 20

E n g l i s h --- 2 0
545186855 Rev. 8 5/15/12
U.S. EPA / CALIFORNIA / ENVIRONMENT CANADA
EMISSION CONTROL WARRANTY STATEMENT
IMPORTANT: This product is compliant
with U.S. EPA Phase 3 regulations for
exhaust and evaporative emissions. To
ensure EPA Phase 3 compliance, we
recommend using only genuine Jonsered
brand replacement parts. Use of noncompliant replacements parts is a
violation of federal law.
YOUR WARRANTY RIGHTS AND
OBLIGATIONS:
The U.S. Environmental Protection Agency ,
California Air Resources Board, Environment
Canada and Jonsered are pleased to explain
the emissions control system warranty on
your year 2012 and later small off--road engine. In California, all small off--road engines
must be designed, built, and equipped to meet
the State’s stringent anti--smog standards.
Jonsered must warrant the emission control
system on your small off- -road engine for the
periods of time listed below provided there
has been no abuse, neglect, or improper
maintenance of your small off--road engine.
Your emission control system includes parts
such as the carburet or, the ignition system
and the fuel tank. Where a warrantable condition exists, Jonsered will repair your small off-road engine at no cost to you. Expenses
covered under warranty include diagnosis,
parts and labor.
MANUFACTURER’S WARRANTY
COVERAGE:
If any emissions related part on your engine
(as listed under Emissions Control Warranty Parts List) is defective or a defect in the
materials or workmanship of the engine
causes the failure of such an emission related part, the part will be repaired or replaced by Jonsered.
OWNER’S WARRANTY RESPONSIBILITIES:
As the small off--road engine owner, you are
responsible for the performance of the required maintenance listed in your operator’s
manual. Jonsered recommends that you
retain all receipts covering maintenance on
your small off-- road engine, but Jonsered
cannot deny warranty solely for the lack of
receipts or for your failure to ensure the performance of all scheduled maintenance. As
the small off--road engine owner, you should
be aware that Jonsered may deny you warranty coverage if your small off--road engine
or a part of it has failed due to abuse, neglect, improper maintenance, unapproved
modifications, or the use of parts not made
or approved by the original equipment
manufacturer.
WARRANTY COMMENCEMENT
DATE:
The warranty period begins on the date the
small off--road engine is purchased.
LENGTH OF COVERAGE:
This warranty shall be for a period of two
years from the initial date of purchase, or
until the end of the product warranty (whichever is longer).
WHAT IS COVERED: REPAIR OR
REPLACEMENT OF PARTS.
Repair or replacement of any warranted
part will be performed at no charge to the
owner at an approved Jonsered servicing
center. If you have any questions regarding
your warranty rights and responsibilities,
you should contact your nearest authorized
service center, call Jonsered at
1--800-- 487--5951, or visit
www.charlotte.usa.jonsered.com
.
WARRANTY PERIOD:
Any warranted part which is not scheduled
for replacement as required maintenance,
or which is scheduled only for regular inspection to the effect of “repair or replace
as necessary” shall be warranted for 2
years. Any warranted part which is scheduled for replacement as required maintenance shall be warranted for the period of
time up to the first scheduled replacement
point for that part.
DIAGNOSIS:
The owner shall not be charged for diagnostic labor which leads to the determination that a warranted part is defective if the
diagnostic work is performed at an approved Jonsered servicing center.
CONSEQUENTIAL DAMAGES:
Jonsered may be liable for damages to other
engine components caused by the failure of a
warranted part still under warranty.
WHAT IS NOT COVERED:
All failures caused by abuse, neglect, or
improper maintenance are not covered.
Y
ou are responsiblefor presenting your
small off--road engine to a Jonsered authorized repair center as soon as a problem
exists . Warranty repairs should be completed
in a reasonable amount of time, not to exceed
30 days. If you have any questions regarding
your warranty rights and responsibilities,
you should contact your nearest authorized
service center, call Jonsered at
1--800-- 487--5951, or visit
www.charlotte.usa.jonsered.com
.
Page 21

E n g l i s h --- 2 1
545186855 Rev. 8 5/15/12
U.S. EPA / CALIFORNIA / ENVIRONMENT CANADA
EMISSION CONTROL WARRANTY STATEMENT
EMISSION CONTROL WARRANTY
PARTS LIST:
Carburetor, Air Filter (covered up to maintenance schedule), Ignition System: Spark
Plug (covered up to maintenance schedule), Ignition Module, Muffler including Catalyst (if equipped), Fuel Tank, Line and Cap.
MAINTENANCE STATEMENT:
The owner is responsible for the performance of all required maintenance as defined in the operator’s manual.
MAINTENANCE, REPLACEMENT
AND REPAIR OF EMISSION RELATED PARTS:
Any Jonsered approved replacement part
used in the performance of any warranty
maintenance or repair on emission related
parts will be provided without charge to the
owner if the part is under warranty.
ADD-- ON OR MODIFIED PARTS:
The use of add--on or modified parts can be
grounds for disallowing a warranty claim.
Jonsered is not liable to cover failures of
warranted parts caused by the use of add-on or modified parts.
HOW TO FILE A CLAIM:
If you have any questions regarding your warranty rights and responsibilities, you should
contact your nearest authorized service center, call Jonsered at 1--800-- 487--5951,
or visit www.charlotte.usa.jonsered.com
.
WHERE TO GET WARRANTY SERVICE:
Warranty services or repairs shall be
provided at all Jonsered service centers.
Call 1- -800--487--5951 or visit
www.charlotte.usa.jonsered.com
.
This engine is certified to be emissions compliant for the following use:
Moderate (50 hours)
Intermediate (125 hours)
Extended (300 hours)
Page 22
F r e n c h --- 2 2
545186855 Rev. 8 5/15/12
CONTENU
Contenu
CONTENU
Contenu 22.........................
Contrôler les points suivants avant
la mise en marche 22................
EXPLICATION DES SYMBOLES
Symboles 23........................
INSTRUCTIONS DE SÉCURITÉ
Équipement de protection personnelle 24..
Équipement de sécurité de la machine 24.
Equipement de coupe 25..............
Contrôle, maintenance, et entretien des
équipements de sécurité de la machine 25
Instructions générales de sécurité 27.....
Sécurité du mise en marche 28.........
Sécurité carburant 29.................
Transport et entreposage 29............
Méthodes de travail 29................
Règles élémentaires de sécurité 29......
T echniques de travail de base 30........
QUELS SONT LES COMPOSANTS?
Quels sont les composants? 32.........
MONTAGE
Montage de la poignée en boucle 33....
Montage de la protectuer et de la
tête de coupe 33....................
MANIPULATION DU CARBURANT
Carburant 34........................
Remplissage de carburant 35..........
DÉMARRAGE ET ARRÊT
Contrôles avant la mise en marche 36..
Démarrage et arrêt 36................
ENTRETIEN
Carburateur 37......................
Silencieux 38.......................
Bougie 38..........................
Filtre à air 39........................
Schéma d’entretien 39................
Remplacement du fil dans la tête de
coupe 40...........................
CARACTÉRISTIQUES TECHNIQUES
Caractéristiques techniques 41........
DÉCLARATION DE GARANTIE
DE LUTTE AN MISSIONS 42.........
Contrôler les points suivants
avant la mise en marche:
Jonsered travaille continuellement au développement de ses produits et se réserve
le droit d’en modifier, entre autres, la conception et l’aspect sans préavis. Une exposition prolongée au bruit risque de causer des lésions auditives permanentes.
Toujours utiliser des protecteurs d’oreille
agréés. L’entretien, le remplacement, ou la
réparation des dispositifs d’émission et le
système peuvent être exécutés par n’importe quel distributeur ou individu de réparation de moteur tout--terrain.
Pour la référence, veuillez enregistrer l’information suivante qui sera nécessaire
pour le futur entretien de votre appareil :
Numéro de Modèle :
Numéro de série:
Date d’achat:
Distributeur:
AVERTISSEMENT: Utilisés de
manière négligente ou erronée, les
débroussailleuses et les coupe-herbes peuvent devenir des outils
dangereux pouvant occasionner
des blessures graves, voire mortelles pour l’utilisateur ou d’autres.
Il est très important de lire attentivement et de bien comprendre les
instructions contenues dans ce
mode d’emploi.
AVERTISSEMENT: Ne jamais
modifier sous aucun prétexte la machine sans l’autorisation du fabricant. N’utiliser que des accessoires
et des pièces d’origine. Des modifications non--autorisées et l’emploi
d’accessoires non--homologués
peuvent provoquer des accidents
graves et même mortels, à l’utilisateur ou d’autres personnes. Votre
garantie peut ne pas couvrir des
dommages ou la respons abilité
provoqués par l’utilisation des
accessoires ou des pièces de
rechange non--autorisés.
L
a période de conformité d’émissions énuméré sur l’étiquette de conformité d’émissions indique le nombre de temps d’exploitation l’où le moteur a été montré pour
répondre à des exigences fédérales d’émissions. Catégorie C = 50 heures, B = 125
heures, et A = 300 heures.
Page 23
F r e n c h --- 2 3
545186855 Rev. 8 5/15/12
EXPLICATION DES SYMBOLES
Destiné uniquement à des
équipements de coupe flexibles
et non métalliques, c’est--àdire
les têtes de coupe avec fil.
Destiné uniquement aux têtes
de coupe.
Utilisez de l’essence sans
plomb ou de l’essence avec
plomb de haute qualité et un
huile deux temps mélangée
dans un rapport de 2,5% (1:50).
Les autres symboles/autocollants présents sur la machine concernent des
exigences de certification spécifiques à
certains marchés.
Arrêt le moteur avant tout contrôle
ou réparation en poussant le
bouton d’arrêt et maintenez-- le
dans la position «STOP» jusqu’à
ce que le moteur soit completement
arrêté.
Un nettoyage régulier est
indispensable.
Examen visuel.
Le port de protège--yeux
homologués est obligatoire.
Symboles
AVERTISSEMENT: Les débrous-
sailleuses et les coupe- -herbes
peuvent être dangereux! Une utilisation erronée ou négligente peut
occasionner des blessures graves,
voire mortelles pour l’utilisateur ou
d’autres personnes.
AVERTISSEMENT: Lisez le manuel
d’instructions complètement avant
d’utiliser l’appareil. T out défaut
de respecter tous les instructions
peut entraîner des blessures graves
aux utilisateur et/ou spectateurs.
Conservez ces instructions.
Toujours utiliser:
S Protecteur d’oreilles
S Des protège--yeux homologués
Régime maxi. recommandé de
l’axe sortant, tr/min
Attention: projections et ricochets.
L’utilisateur de la machine doit
s’assurer qu’aucune personne
ou animal ne s’approche à moins
de 15 mètres (50 pieds)
pendant le travail.
Flèches indiquant les limites quant
à l’emplacement de la fixation de
la poignée.
Toujours porter des gants de
protection homologués.
Utiliser des bottes antidérapantes
et stables.
ADVERTENCIA
Los gases de escape del motor de este producto
contienen sustancias químicas conocidas en el
Estado de California como causantes d e cáncer,
defectos congénitos y otros daños reproductivos.
Page 24
F r e n c h --- 2 4
545186855 Rev. 8 5/15/12
INSTRUCTIONS DE SÉCURITÉ
GANTS
Au besoin, utiliser des gants, notamment lors
du montage de l’équipement de coupe.
PROTÈGE--OREILLES
Porter des protège--oreilles ayant un effet
atténuateur suffisant.
PROTÈGE--YEUX
T oujours porter des protège- -yeux homologués. L’usage d’une visière doit toujours
s’accompagner du port de lunettes de
protection homologuées. Par lunettes de
protection homologuées, on entend celles
qui sont en conformité avec les normes
ANSI Z87.1.
BOTTES
Utiliser des bottes antidéparapantes et
stables.
HABITS
Porter des vêtements fabriqués dans un matériau résistant à la déchirure, éviter les vêtements excessivement amples qui risqueraient de se
p
rendre dans les broussailles et
É
quipement de protection
personnelle
les branches. Toujours utiliser des pantalons
longs et robustes. Ne pas porter de bijoux,
de shorts ou de sandales, et ne pas marcher pieds--nus. Veiller à ce que les cheveux
ne tombent pas sur les épaules.
PREMIERS SECOURS
Une trousse de premiers secours doit toujours être disponible.
A VERTISSEMENT: Ne jamais
utiliser une machine dont les équipements de sécurité sont défectueux.
Suivre les directives de maintenance,
d’entretien et les instructions de réparation indiquées dans ce section.
Équipement de sécurité de la
machine
Ce section présente les équipements de
sécurité de la machine, leur fonction, comment les utiliser et les maintenir en bon
état. Voir la section ”Familiarisez--vous
avec votre appareil” sont les composants
pour trouver leur emplacement sur la machine.
La durée de vie de la machine risque d’être
écourtée et le risque d’accidents accru si la
maintenance de la machine n’est pas effectuée correctement et si les mesures d’entretien et/ou de réparation ne sont pas effectuées de manière professionnelle. Pour
obtenir de plus amples informations, contacter votre distributeur autorisé de service
le plus proche.
Bouton d’arrêt
Mettre le moteur en marche et s’assurer
qu’il s’arrête lorsque le boiuton d’arrêt est
amené den position d’arrêt.
Protecteur pour l’équipement de
coupe
Cette protecteur a pour but d’empêcher que
des objets ne soient projetés en direction
de l’utilisateur. La protecteur prévient aussi
le contact entre l’utilisateur et l’équipement
de coupe.
AVERTISSEMENT: Un équipe-
ment de protection personnelle
homologué doit impérativement être
utilisé lors de tout travail avec la machine. L’équipement de protection
personnelle n’élimine pas les risques
mais réduit la gravité des blessures
en cas d’accident. Demander conseil
au concessionnaire afin de choisir un
équipement adéquat.
IMPORTANT! .Soyez toujours attentifs
aux signaux d’alerte ou aux appels en
portant des protège--oreilles. Enlevez--les
sitôt le moteur arrêté.
Page 25
F r e n c h --- 2 5
545186855 Rev. 8 5/15/12
INSTRUCTIONS DE SÉCURITÉ
Silencieux
Le silencieux est conçu pour réduire au
maximum le niveau sonore et détourner
les gaz d’echappement loin de l’utilisateur.
ATTENTION! Votre silencieux est équipé
d’un pot catalytique conçu pour réduire la
teneur des gaz d’échappement.
En ce qui concerne le silencieux, il importe
de bien suivre les instructions de contrôle,
de maintenance et d’entretien. Voir les instructions au section Contrôle, maintenance et entretien des équipements de sécurité de la machine.
A V ER TISSEMEN T: Une ex-
position excessive aux vibrations
peut entraîner des troubles circulatoires ou nerveux chez les personnes sujettes à des troubles cardio--vasculaires. Consulter un médecin en cas de symptômes liés à une
exposition excessive aux vibrations.
De tels symptômes peuvent être:
engourdissement, perte de sensibilité, chatouillements, picotements,
douleur, faiblesse musculaire, décolorationoumodificationépidermique.
Ces symptômes affectent généralement les doigts, les mains ou les
poignets. Les risques peuvent
augmenter à basses températures.
A VERTISSEMENT: Un équipe-
ment de coupe ne peut en aucun
cas être utilisé si une protection
homologuée n’a pas été préalablement montée. Voir la section “Caractéristiques techniques”. La mise en
place d’une protection erronée ou
défectueuse peut provoquer des
blessures graves.
L’utilisation d’un fil mal enroulé ou d’un
équipement de coupe inadéquat augmente
le niveau de vibration.
Équipement de coupe
La tête de coupe est destinée au désherbage.
Contrôle, maintenance, et entretien des équipements de
sécurité de la machine
IMPORTANT!
L’entretien et la réparation de la machine
exigent une formation spéciale. Ceci concerne particulièrement l’équipement de sécurité de la machine. Si les contrôles suivants
ne donnent pas un résultat positif, s’adresser
à un distributeur autorisé. L’achat de l’un de
nos produits offre à l’acheteur la garantie
d’un service et de réparations qualifiés. Si le
point de vente n’assure pas ce service,
s’adresser un distributeur autorisé le plus
proche.
A VERTISSEMENT: L’intérieur
du silencieux contient des produits
chimiques pouvant être cancérigènes.
Eviter tout contact avec ces éléments
si le silencieux est endommagé.
A TTENTION: Un silencieux muni d’un
pot catalytique est très chaud aussi bien à
l’utilisation qu’après arrêt. Ceci est également vrai pour le régime au ralenti. Tout
contact peut causer des brûlures à la
peau. Attention au risque d’incendie!
A VERTISSEMENT: Les gaz
d’échappement du moteur
contiennent du monoxyde de
carbone, qui peut provoquer une
intoxication. Ne démarrez ou n’utilisez JAMAIS
l’appareil dans
un local fermé ou un lieu mal aéré.
Les gaz d’échappement du moteur
sont très chauds et peuvent
contenir des étincelles pouvant
provoquer un incendie. Ne jamais
démarrer l’appareil dans un local
ferméouàproximitédematériaux
inflammables !
Page 26

F r e n c h --- 2 6
545186855 Rev. 8 5/15/12
INSTRUCTIONS DE SÉCURITÉ
Bouton d’arrêt
S Mettre le moteur en marche et s’assurer
qu’il s’arrête lorsque le boiuton d’arrêt est
amené den position d’arrêt.
Protecteur pour l’équipement de
coupe
S S’assurer que la protecteur est intacte et
qu’elle ne présente pas de fissures.
S Remplacer la protecteur si elle a subi des
impacts ou si elle présente des fissures.
S Toujours utiliser la protecteur recomman-
dée prévue pour l’équipement de coupe
en question. Voir “Caractéristiques
techniques”.
Silencieux
S Ne jamais utiliser une machine dont le silen-
cieux est défectueux.
S Vérifier régulièrement la fixation du silen-
cieux dans la machine.
S
L
e silencieux de la machine est muni d’une
grille antiflamme, il faut le nettoyer régulièrement. Une grille antiflamme bouchéeentraîne
une surchauffe du moteur pouvant provoquer
des dommages graves. Ne jamais utiliser un
silencieux avec une grille antiflamme défectueuse. Voir la section Entretien.
Équipement de coupe
Cette section explique comment, grâce à
l’utilisation du bon équipement de coupe et
grâce à un entretien correct:
S Obtenir la meilleure coupe possible.
S Augmenter la durée de vie de l’équipement
de coupe.
Règles élémentaires
:
1. N’utiliser l’équipement de coupe qu’avec
la protecteur recommandée! Voir la section “Caractéristiques techniques”.
2. Inspecter l’équipement de coupe afin de
détecter d’éventuels dommages ou fissures. Toujours remplacer un équipement
de coupe endommagé.
A VERTISSEMENT: Ne jamais
utiliser une machine dont les
équipements de sécurité sont défectueux. Contrôler et entretenir
les équipements de sécurité de la
machine conformément aux instructions données dans ce chapitre. Si les contrôles ne donnent
pas de résultat positif, confier la
machine à un distributeur autorisé.
L’utilisa tion d’une machine dont les
équipements de sécurité sont défectueuxaugmentelerisquede
blessures graves pour l’opérateur
ou d’autres personnes.
IMPORTANT!
Cette section explique comment, grâce à
l’utilisation du bon équipement de coupe et
grâce à un entretien correct:
Réduire le risque de rebond de la machine.
Obtenir la meilleure coupe possible.
Augmenter la durée de vie de l’équipement
de coupe.
N’utiliser l’équipement de coupe qu’avec le
protecteur recommandée! Voir la section
“Caractéristiques techniques”.
Voir les instructions relatives à l’équipement
de coupe pour poser correctement le fil et
choisir le diamètre de fil approprié.
Page 27

F r e n c h --- 2 7
545186855 Rev. 8 5/15/12
INSTRUCTIONS DE SÉCURITÉ
Tête de coupe
S N’utiliser l’équipement de coupe qu’avec la
protecteur recommandée! Voir la section
“Caractéristiques techniques”.
S En général, les petites machines de-
mandent des petites têtes de désherbage, et vice versa. Cela vient du fait que
lors du désherbage au moyen de fils, le
moteur doit éjecter le fil radialement depuis la tête de désherbage tout en affrontant la résistance de l’herbe à couper.
S La longueur du fil est également impor-
tante. Un fil long demande un moteur
plus puissant qu’un fil court, même
en cas de diamètre égal de fil.
S S’assurer que le couteau monté sur le
carter de protection est intact. Il sert à
découper le fil à la bonne longueur.
S Pour améliorer la durée de vie du fil,
laisser le fil tremper dans de l’eau pendant quelques nuits. Le fil devient alors
plus résistant et dure plus longtemps.
IMPORTANT!
Veiller à ce que le fil du coupe--herbe soit
toujours enroulé de manière serrée et régulière autour du tambour, autrement la machine produit des vibrations dangereuses
pour la santé.
A V ER TISSEMEN T: Toujours
arrêter le moteur avant d’entamer
des travaux sur l’équipement de
coupe. Celui--ci continue de tourner
après qu’on a relâché l’accélérateur.
S’assurer que l’équipement de
coupe est complètement immobilisé
et débrancher le câble de la bougie
d’allumage avant de commencer
l’intervention sur l’équipement
de coupe.
Instructions générales de
sécurité
IMPORTANT!
S La machine est conçue uniquement pour
le désherbage.
S Les seuls accessoires pouvant utiliser le
moteurcommesourcemotricesontles
équipements de coupe que nous recommandons dans la section “Caractéristiques
techniques”.
S Ne utilisez pas jamais de broche, de
corde, de ficelle, etc.
S Éviter d’utiliser la machine en cas de fa-
tigue, d’absorption d’alcool ou de prise de
médicaments susceptib les d’affecter l’acuité visuelle, le jugement ou la maîtrise du
corps .
S Ne jamais utiliser la machine dans des
conditions climatiques extrêmes telles que
la froid intense ou climat très chaud et/ou
humide.
S Ne jamais utiliser une machine qui a été
modifiée au point de ne plus être conforme
au modèle original.
S Utiliser les équipements de protection per-
sonnelle. Voir la section “Équipement de
protection personnelle”.
S Ne jamais utiliser une machine qui n’est
pas en parfait état de marche. Suivre dans
ce manuel d’utilisation les instructions de
maintenance, de contrôle et d’entretien.
Certaines mesures de maintenance et
d’entretien doivent être confiées à un spécialiste dûment formé et qualifié. Voir la
section “Entretien”.
S Tous les carters et toutes les protections
doivent être montés avant le démarrage.
Vérifier que le chapeau de bougie et le
câble d’allumage ne sont pas endommagés. Risque de chocs électriques.
S L’utilisateur de la machine doit s’assurer
qu’aucune personne ou animal ne s’approche à moins de 15 mètres (50 pieds)
pendant le travail.
S Tenez--vous à l’écart du fil tournante.
S Attachez ou enlevez tous les vêtements
amples et les bijoux ou les vêtements qui
ont des attaches, des bretelles, des pompons, etc. qui pendent. Ils peuvent se
prendre dans les pieces mobiles.
S Si vous êtes bien couvert(e), cela vous
aidera à vous protéger contre les débris
et brins de plantes toxiques qui sont projetés par le fil qui tourne.
S Conservez les poignée libres d’huile et
de carburant.
S Maintenez le moteur toujours à votre
droite.
S Maintenez l’appareil fermement avec vos
deux mains.
S Maintenez la tête de coupe sous le niveau
de la ceinture. Ne soulevez pas lemoteur
au dessus de votre taille.
Page 28

F r e n c h --- 2 8
545186855 Rev. 8 5/15/12
INSTRUCTIONS DE SÉCURITÉ
Protection personnelle
S Toujours porter des bottes
ainsi que l’équipement de
protection indiqué au section
“Equipement de protection
personnelle”.
S Toujours porter des vêtements
de travail et des pantalons
longs résistants.
S Ne jamais porter des vêtements
amples ou des bijoux.
S La longueur des cheveux ne
doit pas dépasser les épaules.
Consignes de sécurité pour
l’entourage
S Ne jamais laisser un enfant utiliser la ma-
chine.
S S’assurer qu’aucune personne ne
s’approche à moins de 15 mètres (50
pieds) pendant le travail.
S Ne jamais laisser d’autres personnes
utiliser la machine avant d’avoir vérifié
que le contenu du manuel d’utilisation a
été assimilé par ces personnes.
S Eloignez toutes les parties de votre corps
de la tête de coupe et du silencieux lorsque le moteur est allumé.
S Tener les pieds toujours sur une surface
stable et maintenez l’équilibre. Ne vous
penchez pas excessivement.
S N’utilisez l’appareil que le jour ou sous
une bonne lumière artificielle.
S N’utilisez l’appareil que pour les travaux
indiqués dans ce manuel.
AVERTISSEMENT: Un équipe-
ment de coupe inadéquat peut augmenter les risques d’accidents.
Consignes de sécurité avant la mise
en ser vice
S Inspecter la zone de travail. Enlever tout
objet traînant par terre, tels que cailloux,
débris de verre, clous, fil de fer, ficelle
etc., pouvant être projetés ou s’enrouler
autour de la lame ou dans le protecteur.
S Maintenir les enfants, animaux, specta-
teurs et aides à 15 mètres (50 pieds) de
la zone de travail. Encouragez--les à
por ter des prot ection des yeux. Stopper la
machine immédiatement si quelqu’un
s’approche.
S Contrôler toute la machine avant de la
mettre en service. Remplacer les pièces
endommagées. S’assurer que le carburant ne fuit pas et que toutes les protections et carters ne sont pas endommagés et correctement fixés. Vérifier toutes
les vis et écrous.
S S’assurer que la tête
de coupe n’est pas
endommagée
ou fissurée.
S S’assurer que le
protecteur est monté
et en bon état.
S S’assurer que la tête de coupe et le pro-
tecteur sont correctement fixés.
S Pendant le réglage du carburateur, s’as-
surer que le bout inférieur supporté et
que personne ne se trouve à proximité.
S S’assurer que la tête de coupe s’arrête
toujours au ralenti.
S S’assurer que la poignée et le dispositif
de sécurité sont en bon état. Ne jamais
utiliser la machine avec une pièce manquante ou ayant été modifiée.
S Utiliser la machine uniquement pour les
travaux auxquels elle est destinée.
Sécurit é du mise en marche
S Un couvercle d’embrayage et boîtiers
complet doit être monté avant de démarrer
la machine.
S Ne démarrer jamais ou essayez pour
marcher l’appareil avec l’embrayage, le
tambour d’embrayage, la couvercle d’embrayage, ou l’axe étant enlevé.
S Ne jamais mettre la machine en marche à
l’intérieur. Les gaz d’échappement du moteur sont nocifs.
AVERTISSEMENT: Lorsque le
moteur est démarré avec la commande de starter en position starter/accélérateur, l’équipement
de coupe commence à tourner
immédiatement.
S S’assurer que la zone de travail est bien
dégagée et qu’aucune personne et aucun
animal ne risquent d’entrer en contact
avec l’équipement de coupe.
S Voir la section “Démarrage et arrêt” pour
des instructions complètes.
Page 29

F r e n c h --- 2 9
545186855 Rev. 8 5/15/12
INSTRUCTIONS DE SÉCURITÉ
Sécurité carburant
S Utiliser un bidon d’essence comportant un
dispositif d’arrêt de remplissage automatique.
S Ne jamais effectuer le remplissage de la
machine lorsque le moteur tourne.
S Arrêter le moteur et le laisser refroidir pen-
dant quelques minutes avant de faire le
plein.
S Veiller à une bonne aération lors du rem-
plissage et du mélange de carburant (essence et huile 2 temps).
S Avant de mettre la machine en marche, la
déplacer à au moins 3 mètres (10 pieds)
de l’endroit où a été fait le plein.
S Ne jamais démarrer la machine:
S Si du carburant a été renversé soig-
neusement. Essuyer toute trace et laisser les restes d’essence s’évaporer.
S Si vous avez renversé du carburant sur
vous ou sur vos vêtements, changez de
vêtements. Lavez les parties du corps
qui ont été en contact avec le carburant.
Utilisez de l’eau et du savon.
Min. 3 m
(10 ft.)
S S’il y a fuite de carburant. Vérifier ré-
gulièrement que le bouchon du réservoir et la conduite de carburant ne
fuient pas.
S Éviter tout contact de la peau avec du
carburant. Le carburant a un effet irritant sur la peau et peut aussi entraîner
des altérations dermiques.
Transport et rangement
S Transporter et ranger la machine et le
carburant de façon à éviter que toute
fuite ou émanation éventuelle entre en
contact avec une flamme vive ou une
étincelle: machine électrique, moteur
électrique, contact/interrupteur électrique
ou chaudière.
S Lors du stockage et du transport de car-
burant, toujours utiliser un récipient
homologué et conçu à cet effet.
S Lors des remisages de la machine, vider
le réservoir de carburant. S’informer
auprès d’une station--service comment
se débarrasser du carburant résiduel.
S Avant de remiser la machine pour une
période prolongée, veiller à ce qu’elle
soit bein nettoyée et que toutes les mesures d’entretien aient été effectuées.
AVERTISSEMENT: Manipuler
le carburant avec précaution.
Penser aux risques d’incendie,
d’explosion et d’inhalation.
Méthodes de travail
IMPORTANT!
Ce section traite des consignes de sécurité
de base lors du travail avec un coupe-- herbe.
Dans l’éventualité d’une situation rendant la
suite du travail incertaine, consulter un expert. S’adresser au revendeur ou à l’atelier
de réparation.
Évitez les tâches pour lesquelles vous ne
vous sentez pas suffisamment qualifié.
Avant l’utilisation, il est essentiel de comprendre la différence entre le déblayage forestier, le débroussaillage et le désherbage.
Règles élémentaires de
sécurité
1. Bien observer la zone de travail:
S S’assurer qu’aucune personne, aucun
animal ou aucun autre facteur ne risque de gêner l’utilisateur de la
machine.
S Afin d’éviter que des personnes, des
animaux ou autre n’entrent en contact
avec l’équipement de coupe ou avec
des objets lancés par celui--ci.
S REMARQUE! Ne jamais utiliser une
machine s’il n’est pas possible d’appeler au secours en cas d’accident.
2. Ne pas travailler par mauvais temps:
brouillard épais, pluie diluvienne, vent violent, grand froid, etc. Travailler par mauvais temps est cause de fatigue et peut
même être dangereux: sol glissant, direction de chute d’arbre modifiée, etc.
3. S’assurer de pouvoir se tenir et se déplac-
er en toute sécurité. Repérer les éventuels
obstacles en cas de déplacement imprévu: souches, pierres, branchages, fondrières, etc. Observer la plus grande prudence lors de travail sur des terrains en
pente.
Page 30

F r e n c h --- 3 0
545186855 Rev. 8 5/15/12
INSTRUCTIONS DE SÉCURITÉ
S Le fil s’use plus vite et doit être déroulé
plus souvent au contact de cailloux, briques, béton, clôtures métalliques, etc.
qu’au contact d’arbres et de clôtures en
bois.
Coupe
S Le coupe--herbe est idéal pour atteindre
l’herbe aux endroits difficilement accessibles avec une tondeuse ordinaire.
Maintenir le fil parallèlement au sol lors
du désherbage. Éviter de presser la tête
de désherbage contre le sol, puisque
cela risque d’endommager la pelouse et
le matériel.
S Éviter de maintenir la tête de désher-
bage constamment au contact avec le
sol en utilisation normale. Un contact
permanent peut endommager la tête de
désherbage et accélérer son usure.
4. Lors des déplacements, arrêter le moteur.
5. Ne jamais placer la machine sur le sol avec
le moteur en marche ou tandis que l’équipement de coupe tourne.
Techniques de travail de base
S Ramener le moteur au régime de ralenti
après chaque étape de travail. Laisser le
moteur tourner à pleins gaz sans lui faire
subir de charge peut endommager sérieusement le moteur.
S On lui recommande que le moteur pour
ne pas être fonctionné pour plus d’une
minute à la vitesse maximum.
Débroussaillage avec tête de coupe
Désherbage
S Maintenir la tête de coupe juste au--dessus
du sol, l’incliner. Le travail est effectué par
l’extrémité du fil. Laisser le fil travailler à
son propre rythme. Ne jamais forcer le fil
dans le matériau à couper.
S Le fil facilite l’enlèvement d’herbe et de
mauvaises herbes au pied des murs,
clôtures, arbres et massifs fleuris, mais
il peut aussi endommager l’écorce des
arbres et des broussailles ainsi que les
poteaux des clôtures.
S Réduire les risques d’endommager la vé-
gétation en limitant la longueur du fil à 10- -12
cm (4,5 pouces) et en réduisant le régime
moteur.
S En désherbage, vous devriez utiliser le mo-
teur tourner à gaz moins de pleine force de
sorte que le fil de coupe durera plus long-temps et réduirera l’usage sur la tête de
coupe.
A VERTISSEMENT: Il arrive que
des branches ou de l’herbe se coincent entre la protection et l’équipement
de coupe. Toujours arrêter le moteur
avant de procéder au nettoyage.
Nettoyage par grattage
S La technique du grattage permet d’enlev-
er toute végétation indésirable. Maintenir
la tête de désherbage juste au--dessus
du sol, puis l’incliner. Laisser l’extrémité
du fil battre le sol autour des arbres, poteaux, statues et similaires.
IMPORTANT! Cette technique accélère
l’usure du fil.
Page 31

F r e n c h --- 3 1
545186855 Rev. 8 5/15/12
INSTRUCTIONS DE SÉCURITÉ
Balayage
S L’effet soufflant du fil rotatif peut être utili-
sé pour un nettoyage simple et rapide.
Maintenir le fil parallèle et audessus des
surfaces à balayer, puis balader l’outil
suivant un mouvement de balancier.
S Lors de la coupe et du balayage, faire
tourner à plein régime afin d’obtenir un
bon résultat.
A
VERTISSEMENT: Il arrive que
des branches ou de l’herbe se coincent entre la protection et l’équipement de coupe ou s’enrouler autour de l’axe. Ni l’utilisateur de la
machine, ni qui que ce soit ne doit
essayer de retirer le matériel végétal coupé tant que le moteur ou
l’équipement de coupe tourne,
sous peine de blessures graves.
Arrêter le moteur et l’équipement
de coupe avant de retirer le matériel végétal qui s’est enroulé autour
de l’axe de la lame, sous peine de
blessures.
A V ER TISSEMEN T: Attention
aux objets projetés. Toujours utiliser
des protections homologuées pour
les yeux. Ne jamais se pencher au-dessus de la protecteur pour
l’équipement de coupe. Des cailloux,
débris, etc. peuvent être projetés
dans les yeux et causer des
blessures très graves, voire la cécité.
Maintenir à distance toutes les personnes non concernées par le travail. Les enfants, les animaux, les
spectateurs et les collègues de travail devront se trouver en dehors de
la zone de sécurité, soit à au moins
15 mètres. Arrêter immédiatement la
machine si une personne s’approche. Ne tournez jamais sur vous-même avec la machine sans vous
assurer d’abord que personne ne se
trouve dans la zone de sécurité.
Page 32
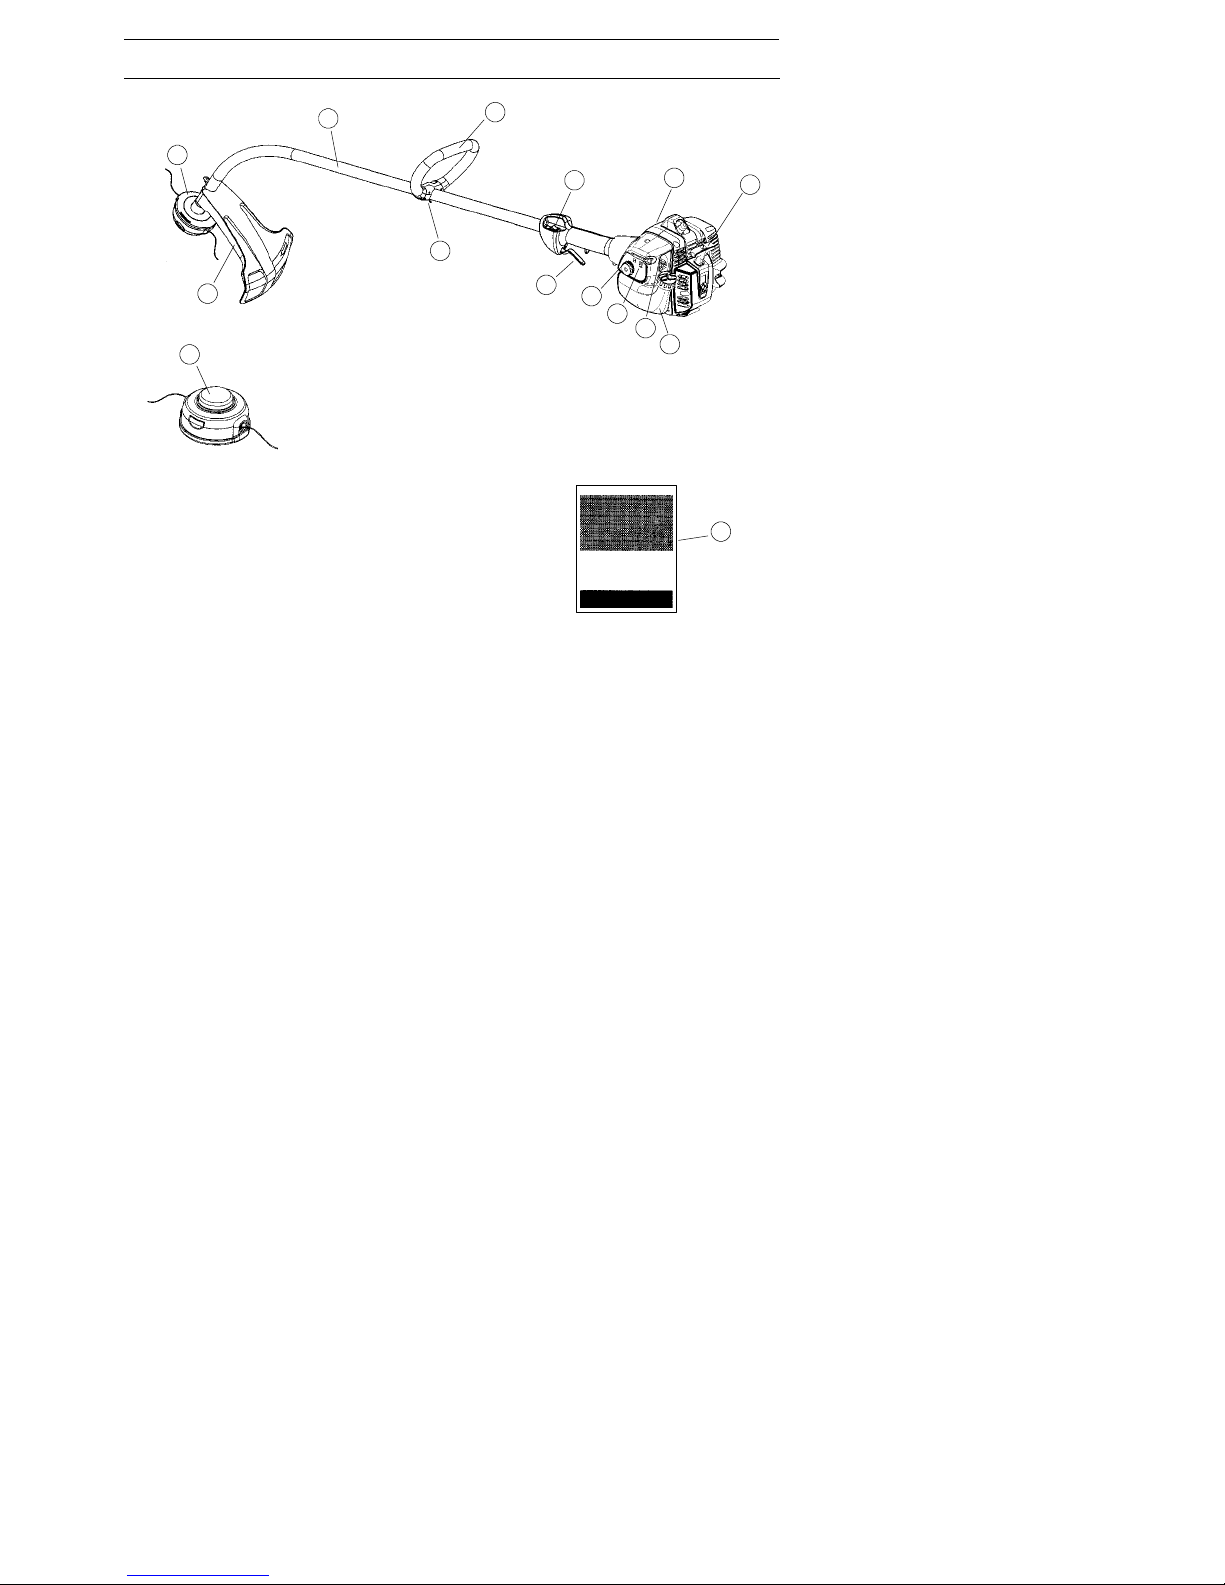
F r e n c h --- 3 2
545186855 Rev. 8 5/15/12
QUELS SONT LES COMPOSANTS?
1. Tête de coupe 8. Poignée de démarrage
2. Protecteur pour l’équipement 9. Réservoir d’essence
de coupe
3. Axe 10. Levier de l’étrangleur
4. Poignée anneau 11. Pompe à carburant
5. Gâchette de l’accélération 12. Couvercle du filtre à air
6. Bouton d’arrêt 13. Réglage de poignée
7. Couvercle du cylindre 14. Manuel d’instructions
Quels sont les composants?
3
7
4
1
2
12
1
6
8
11
10
5
9
14
13
Page 33
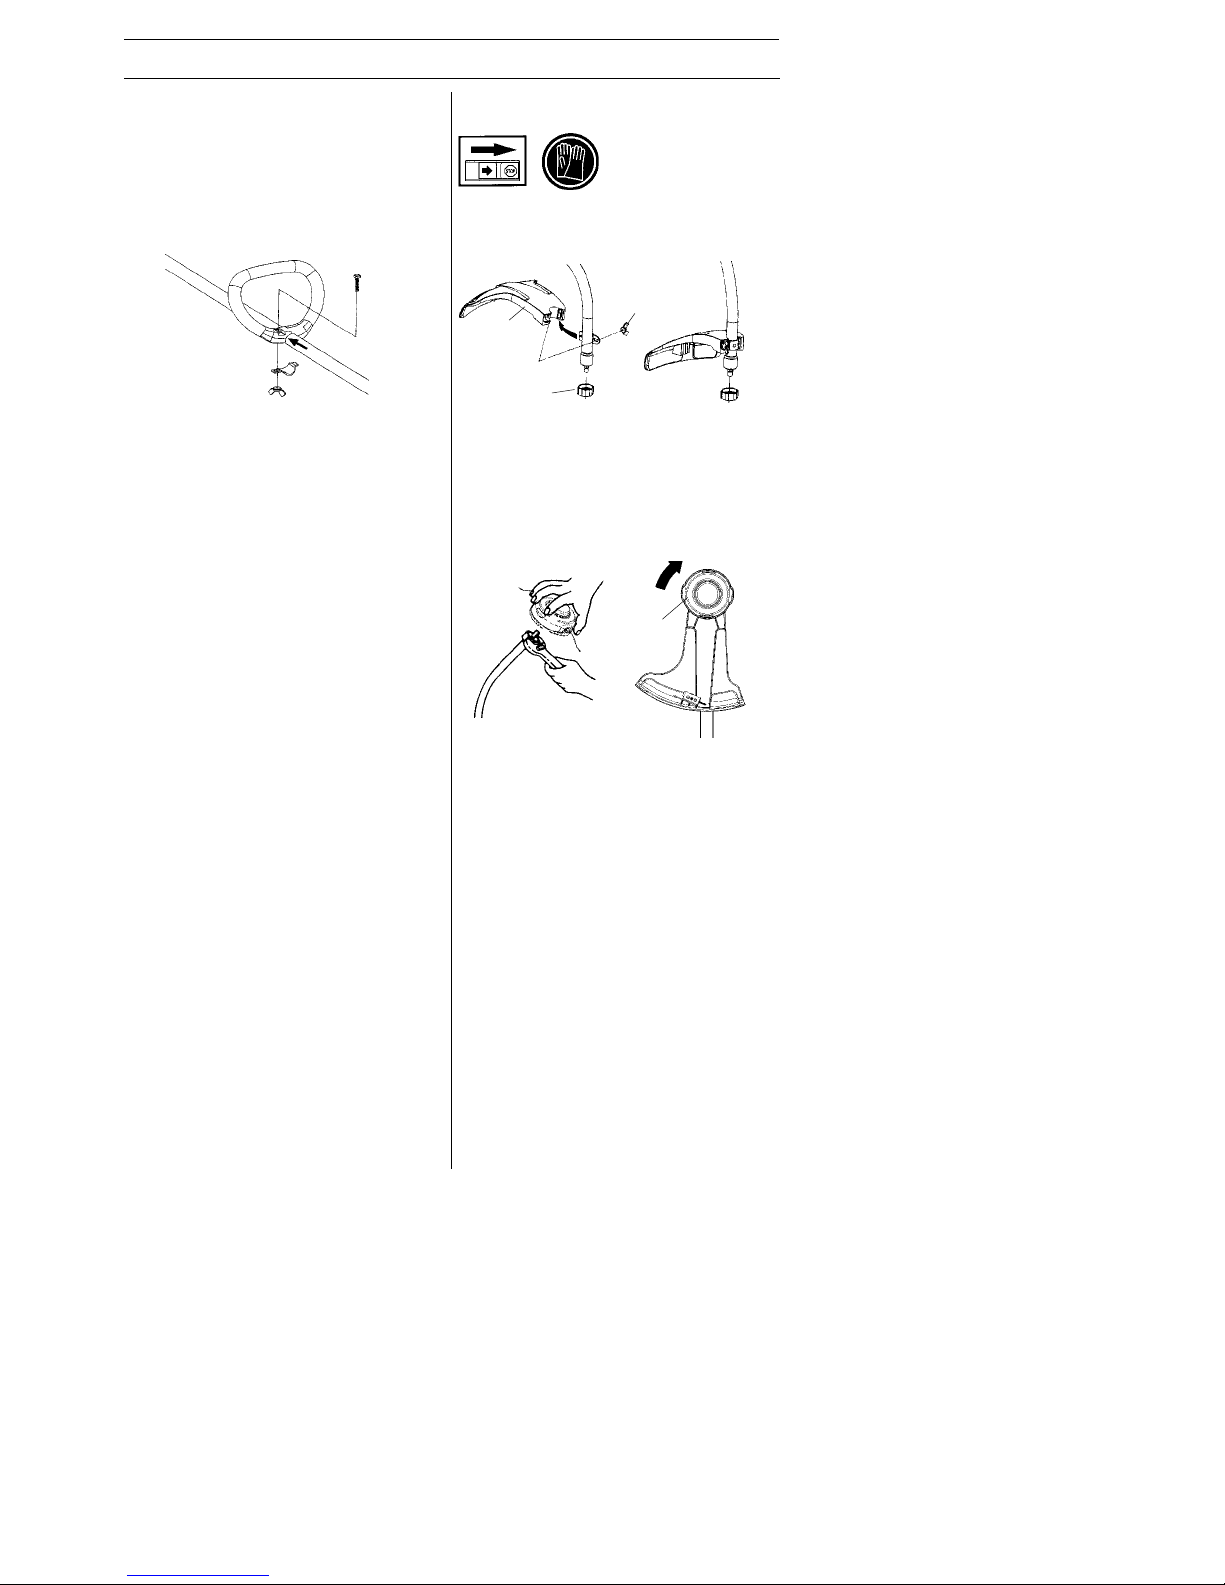
F r e n c h --- 3 3
545186855 Rev. 8 5/15/12
MONTAGE
REMARQUE:
A
ssurez--vous que l’appareil est assemblée correctement comme indiqué en ce manuel.
Montagedelapoignéeen
boucle
S Placer la poignée contre l’axe. Noter que
la poignée doit être montée en entre les
deux flèches situé sur l’axe.
S Monter la vis, la plaque de serrage et l’écrou
à oreilles comme indiqué sur la figure.
S Serrer l’écrou à oreilles.
Montage du protecteur et la
tête de coupe
S Monter le protecteur (A) destiné au tra-
vail avec la tête de coupe. Emboîter le
protecteur dans la fixation d’axe et fixer
à l’aide d’une écrou papillon (B).
A
C
B
S Monter le pare--poussière sur l’arbre.
L’écrou doit être complètement entouré
par le pare--poussière.
S Maintenir le pare--poussière avec la clé
pour l’empêcher de tourner.
S Visser la tête de coupe (D) sur l’arbre.
S Le démontage s’effectue dans l’ordre in-
verse.
D
Page 34
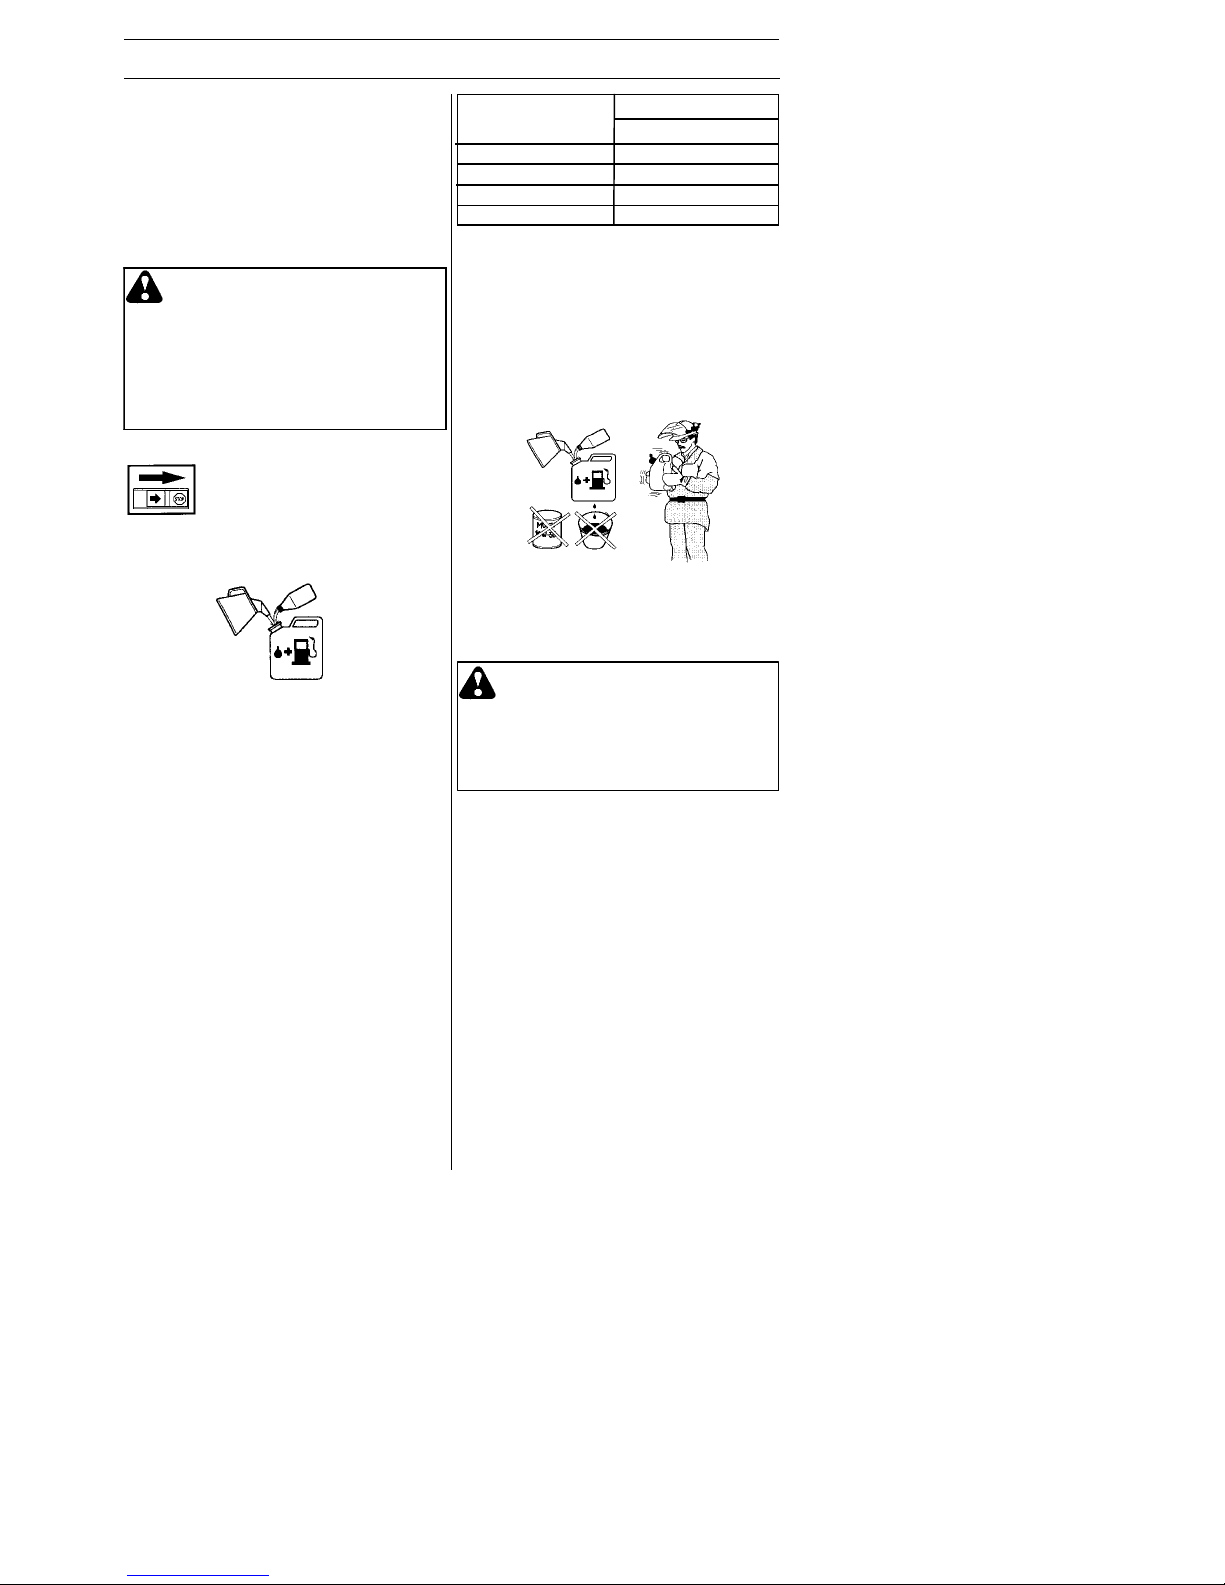
F r e n c h --- 3 4
545186855 Rev. 8 5/15/12
MANIPULATION DU CARBURANT
S Il est certifié que ce moteur fonctionnera
avec de l’essence sans plomb.
S L’indice d’octane minimum recommandé es
de 87. Faire fonctionner le moteur avec un
carburant d’un indice d’octane inférieur à
87 peut provoquer des cognements. Cela
entraîne une augmentation de la température du moteur, ce qui peut occasionner
des avaries graves.
S Si on travaille en permanence à des ré-
gimes élevés, il est conseillé d’utiliser un
carburant d’un indice d’octane supérieur.
Huile deux temps
S Pour le meilleur résultat et un fonctionne-
ment optimal, toujours utiliser une huile deux
temps JONSERED, spécialement conçue
pour nos moteurs à deux temps. Coefficient
de mélange 1:50 (2%).
S Pour maximiser la vie de votre appare il,
vous pouvez choisir d’employer une huile
synthétique de haute qualité formulé pour
des moteurs de deux temps. Coefficient de
mélange 1:50 (2%).
S Ne jamais utiliser d’huile deux temps pour
moteurs horsbord refroidis par eau.
S Ne jamais utiliser d’huile pour moteurs à
quatre temps.
Mélange
S Toujours effectuer le mélange dans un récipi-
ent propre et destiné à contenir de l’essence
.
S Toujours commencer par verser la moitié de
l’essence à mélanger. Verser ensuite la totali
-
té de l’huile. Mélanger en secouant le récipient. Enfin, verser le reste de l’essence.
S Mélanger (secouer) soigneusement le mé-
lange avant de faire le plein du réservoir de
la machine.
S Ne jamais préparer plus d’un mois de con-
sommation de carburant à l’avance.
S Si la machine n’est pas utilisée pendant
une longue période, vidanger et nettoyer l
e
réservoir.
Carburant
REMARQUE! La machine est équipée d’un
moteur à deux temps et doit toujours être alimentée avec un mélange essence/huile. Afin
d’assurer un rapport de mélange correct, il est
important de mesurer avec précision la quantité
d’huile à mélanger. Pour le mélange de petites
quantités de carburant, même les moindres erreurs au niveau de la quantité d’huile affectent
sérieusement le rapport de mélange.
Essence
REMARQUE! To ujours utiliser une essence
de qualité.
A V ER TISSEMEN T: Le carbu-
rant et les vapeurs de carburant sont
très inflammables et peuvent causer
des blessures graves en cas d’inhalation ou de contact avec la peau.
Il convient donc d’observer la plus
grande prudence lors de la manipulation du carburant et de veiller à
disposer d’une bonne aération.
Litres Litres
50,10
10 0,20
15 0,30
Essence
Huile deux temps
2% (1:50)
A VERTISSEMENT: Le pot
d’échappement à catalyseur est très
chaud pendant et après le service.
C’est également vrai pour le ralenti.
Soyez attentif au risque d’incendie,
surtout à proximité de produits inflammables et/ou en présence de gaz.
Page 35
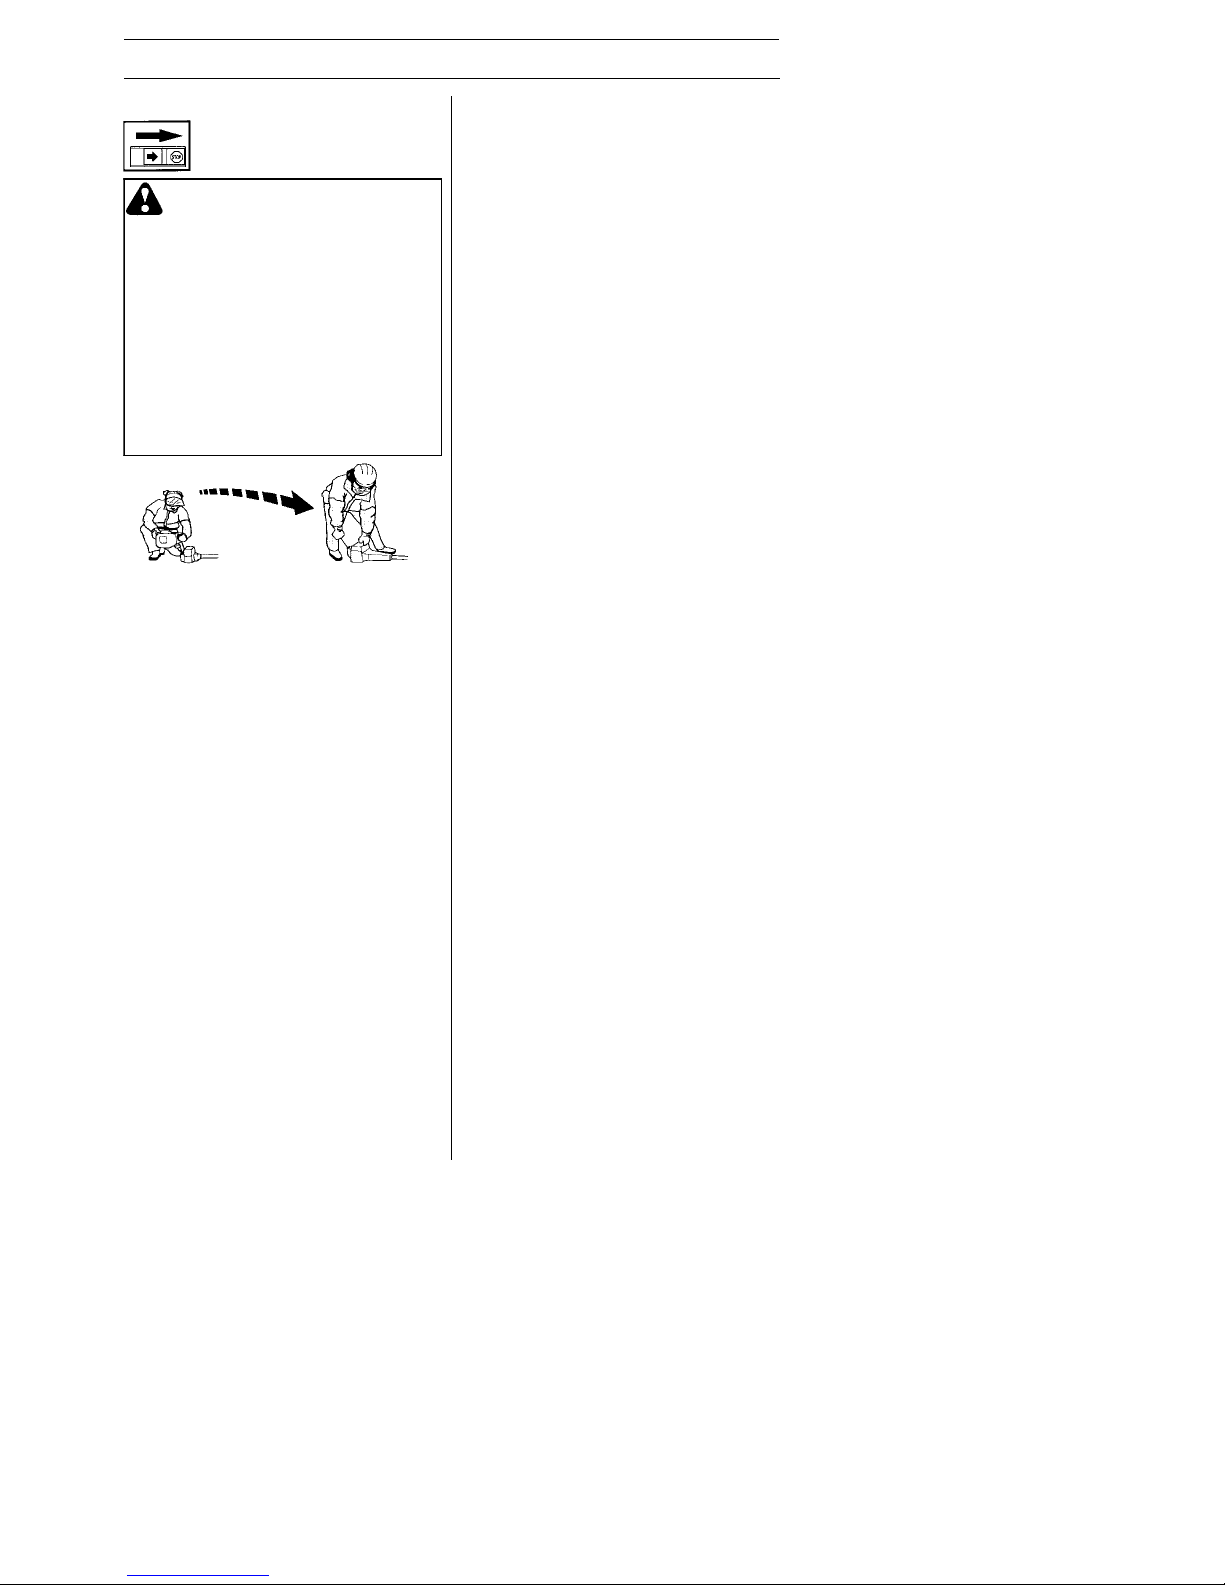
F r e n c h --- 3 5
545186855 Rev. 8 5/15/12
MANIPULATION DU CARBURANT
Remplissage de carburant
A V ER TISSEM EN T: Les me-
sures de sécurité ci--dessous réduisent le risque d’incendie: Ne jamais
fumer ni placer d’objet chaud à proximité du carburant. Ne jamais faire
le plein, moteur en marche. Arrêter
le moteur et le laisser refroidir pendant quelques minutes avant de faire
le plein. Ouvrir le bouchon du réser voir lentement pour laisser baisser la
surpression pouvant régner dans le
réservoir. Serrer soigneusement le
bouchon du réservoir après le remplissage. Toujours éloigner la machine de l’endroit où le plein a été
fait avant de la mettre en marche.
Min. 3 m
(10 ft.)
S Nettoyer le pourtour du bouchon de rés-
ervoir. Les impuretés dans le réservoir
causent des troubles de fonctionnement.
S Bien mélanger le carburant en agitant le
récipient avant de remplir le réservoir.
Page 36

F r e n c h --- 3 6
545186855 Rev. 8 5/15/12
DÉMARRAGE ET ARRÊT
Moteur froid
Pompe à carburant: Appuyer sur la
poche en caoutchouc de la pompe à carburant 10 fois jusqu’à ce que le carburant
commence à remplir la poche. Il n’est pas
nécessaire de remplir la poche complètement.
Étrangleur: Mettez le levier bleu de
l’étrangleur du moteur à la position fermée.
Contrôles avant la mise en
marche
S Inspectez l’appareil avant chaque utilisa-
tion. Remplacez les pièces endommagées.
Vérifiez les fuites de carburant. Assurez-vous que toutes les attaches sont en place
et fixez. Assurez--vous que la tête de
coupe est correctement installé et solidement attaché. Employez seulement la fil
flexible et non métallique recommandée
par le fabricant. N’employez jamais, par
exemple, fil de fer, de corde de ficelle, etc.
qui peuvent se casser et devenir des missiles dangereux.
S Contrôler la tête de coupe et le protec-
teur afin de détecter d’éventuels dommages ou fissures. Remplacer la tête de
coupe ou le protecteur si l’un ou l’autre a
subi des dommages ou présente des fissures.
S Ne jamais utiliser la machine sans pro-
tecteur ou avec une protecteur défectueuse.
Démarrage et arrêt
A V ER TISSEMEN T: Un couv-
ercle d’embrayage complet avec
l’axe de transmission doit être
monté avant de démarrer la machine, sinon l’embrayage risque de
lâcher et de provoquer des blessures. Toujours éloigner la machine
de l’endroit où le plein a été fait
avant de la mettre en marche. Placer
la machine sur une surface plane.
S’assurer que l’équipement de coupene risque pas de rencontrer un
obstacle. Veiller à ce qu’aucune personne non autorisée ne se trouve
dans la zone de travail pour éviter le
risque de blessures graves. Distance
de sécurité: 15 mètres (50 pieds).
Démarrage
Plaquer la machine contre le sol à l’aide de
la main gauche (REMARQUE! Pas à l’aide
du pied!). Saisir ensuite la poignée de
démarrage de la main droite. NE SERREZ
PAS la gâchette d’accélérateur. Tirer
lentement sur le lanceur jusqu’à ce qu’une
résistance se fasse sentir (les cliquets
d’entraînement grippent), puis tirer énergiquement et rapidement sur le lanceur.
Ne jamais enrouler la corde du
lanceur autour de la main.
Répétez tirer la corde jusqu à ce que le moteur pourrait sembler comme s’il allait démarrer. Mettez le levier bleu de l’étrangleur du
moteur à la position ½. Tirer la corde jusqu’ à ce que le moteur tou rne. Mettez le levier bleu de l’étrangleur du moteur à la position ouvert.
REMARQUE: Si le moteur meurt, mettez le
levier bleu de l’étrangleur du moteur à la
position fermée et répétez instructions de
démarrage.
ATTENTION! Ne pas sortir complètement la
corde du lanceur et ne pas lâcher la poignée
avec la corde du lanceur complètement sortie. Cela pourrait endommager la machine.
Page 37
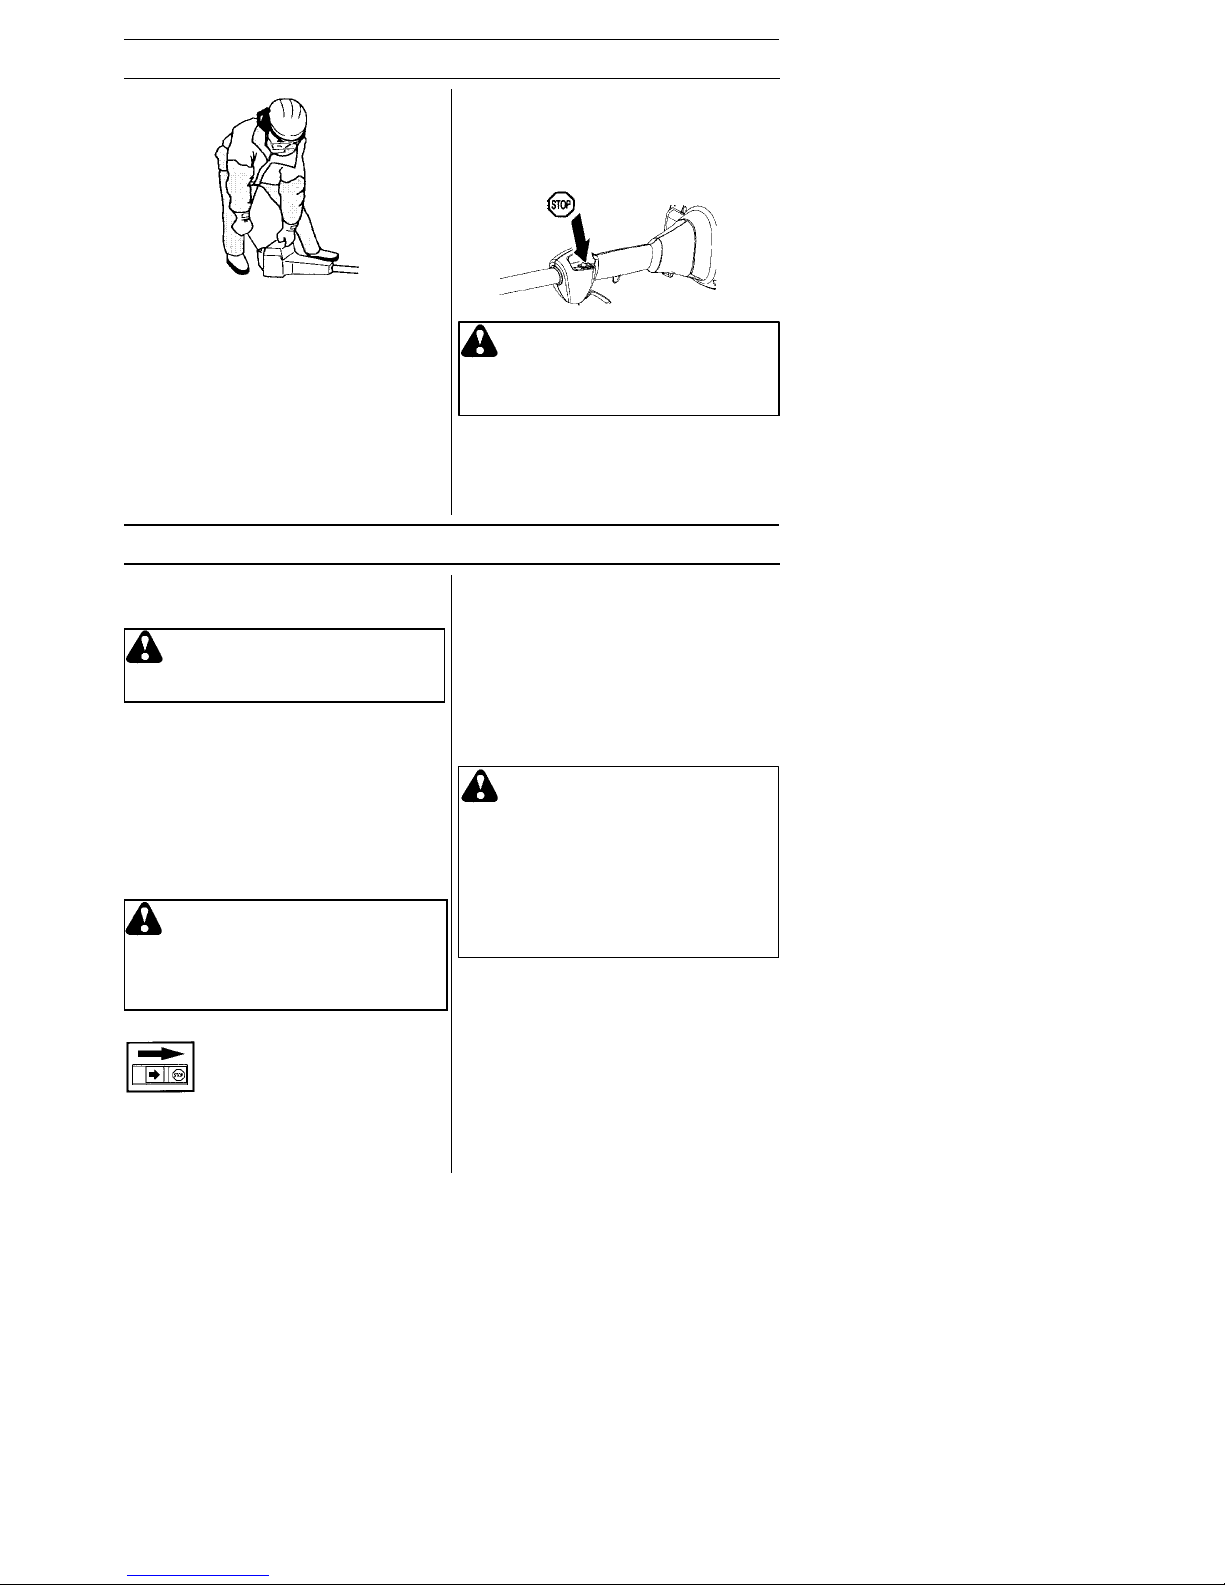
F r e n c h --- 3 7
545186855 Rev. 8 5/15/12
DÉMARRAGE ET ARRÊT
Moteur chaud
Avec un moteur chaud, mettez le levier bleu
de l’étrangleur du moteur à la position ½.
Tirer la corde jusqu’à ce que le moteur
tou rne. Mettez le levier bleu de l’étrangleur
du moteur à la position ouvert.
A V ERTISS EMEN T: Lorsque le
moteur est démarré avec l’étrangleur
en position fermée, l’équipement de
coupe commence à tourner immédiatement.
Arrêt
Pour arrêter le moteur , poussant bouton
d’arrêt et maintenez-- le dans la position
«arrêt» jusqu’à ce que le moteur soit completement arrêté.
ENTRETIEN
S La vis T règle la position de la gâchette
de l’accélération au ralenti. Si la vis T est
tournée dans le sens des aiguilles d’une
montre, on obtient un régime de ralenti
plus haut; si elle est tournée dans le sens
contraire des aiguilles d’une montre, on
obtient un régime de ralenti plus bas.
Réglage de base
S Le réglage de base du carburateur est
effectué à l’usine. Le réglage fin doit être
effectué par une personne qualifiée.
REMARQUE! Si l’équipement de coupe
tourne au ralenti, tourner le pointeau de ralenti T dans le sens contraire des aiguilles
jusqu’à l’arrêt de l’équipement de coupe.
Régime de realenti recommandé:
Voir la section “Caractéristiques techniques”.
Surrégime maxi. recommandé:
Voir la section “Caractéristiques techniques”.
Fonctionnement
S Le carburateur détermine le régime du
moteur via la gâchette de l’accélération.
C’est dans le carburateur que l’air est mélangé à l’essence.
Carburateur
Les caractéristiques techniques de cette machine Jonsered assurent des émissions de
gaz nocifs réduites au minimum. Après 8- -10
pleins, le moteur est rodé. Pour s’assurer qu’il
fonctionne de manière optimale en émetant
aussi peu de gaz nocifs que possible après la
période de rodage, il convient de demander
au revendeur/à l’atelier de réparation (s’il dispose d’un compte--tours) d’effectuer un réglage fin du carburateur.
A VERTISSEMENT: L ’embray-
age complet, couvercle d’embrayage
et l’axe de transmission doit être
monté avant de démarrer la machine,
sinon l’embrayage risque de lâcher et
de provoquer des blessures.
L
e propriétaire est responsable d’e
f
f
ectuer tout
l’entretien requis tel qu’indiqué dans le manuel
d’in str u ct i o n s.
A V ERTISS EMEN T: L’équipe -
ment de coupe peut tourner pendant
les réglages de carburateur . Portez
votre équipement de sécurité et observez toutes les instructions de sécurité. Soyez sûr de l’arrêts de
l’équipement de coupe quand le moteur tourne au ralenti. Quand l’appareil est arrêtée, assurez--vous que
l’équipement de coupe s’est arrêtés
avant de déposer l’appareil au sol.
A VERTISSEMENT: L ’entretien
incorrect pourrait provoquer des
dommages sérieux au moteur ou des
blessures graves.
Page 38
F r e n c h --- 3 8
545186855 Rev. 8 5/15/12
ENTRETIEN
A V ER TISSEM EN T: S’il est
impossible de régler le régime de
ralenti de manière à immobiliser
l’équipement de coupe, contacter le
revendeur ou l’atelier de réparation.
Ne pas utiliser la machine tant
qu’elle n’est pas correctement réglée
ou réparée.
Sécurité de l’appareil et dans
le entretien
Débranchez toujours le fil de la bougie
quand vous ferez des réparations. saif les
réglages de caburateur.
Silencieux
REMARQUE! Votre silencieux est équipé
d’un pot catalytique conçu pour réduire la
teneur des gaz d’échappement en substances toxiques.
Le silencieux est conçu pour réduire au
maximum le niveau sonore et détourner les
gaz d’échappement loin de l’utilisateur . Le
silencieux est conçu pour atténuer le bruit et
dévier le flux des gaz d’échappement loin de
l’utilisateur.
Ces gaz sont chauds et peuvent transporter
des étincelles risquant de causer un incendie
si elles entrent en contact avec un matériau
sec et inflammable.
Votre silencieux sont munis d’une grille pare- étincelles. La grille devrait être vérifiée et, au
besoin, nettoyée par un distributeur autorisé.
Si la grille est endommagée, elle devrait
être remplacée. Si la grille est souvent bou-
chée, ceci peut être dû à un mauvais fonctionnement du pot catalytique. Contacter le
revendeur pour ef fectuer un contrôle. Une
grille antiflamme bouchée provoque la surchauffe de la machine et la détérioration du
cylindre et du piston.
Vis de silencieux
Bougie
L’état de la bougie dépend de:
S L’exactitude du réglage du carburateur .
S Mauvais mélange de l’huile dans le car-
burant (trop d’huile ou huile inappropriée).
S La propreté du filtre à air.
Grille pare--étincelles
Réglage final du régime de ralenti--T
Régler le régime de ralenti avec le pointeau
de ralenti T si un ajustage est nécessaire.
T ourner d’abord le pointeau T dans le sens
des aiguilles jusqu’à ce que l’équipement de
coupe commence à tourner . T ourner ensuite
le pointeau dans le sens inverse jusqu’à l’arrêt
de l’équipement de coupe. Un régime de ralenti correctement réglé permet au moteur de
tourner régulièrement dans toutes les positions. Il doit également y avoir une bonne
marge avant que l’équipement de coupe se
mette à tourner.
Vis de réglage
au ralenti
REMARQUE! Ne jamais utiliser la machine
si le silencieux est en mauvais état.
A VERTISSEMENT: L’intérieur
du silencieux contient des produits
chimiques pouvant être cancérigènes.
Eviter tout contact avec ces éléments
si le silencieux est endommagé.
A TTENTION: Un silencieux muni d’un
pot catalytique est très chaud aussi bien à
l’utilisation qu’après arrêt. Ceci est également vrai pour le régime au ralenti. Tout
contact peut causer des brûlures à la
peau. Attention au risque d’incendie!
A VERTISSEMENT: Les gaz
d’échappement du moteur
contiennent du monoxyde de
carbone, qui peut provoquer une
intoxication. Ne démarrez ou n’utilisez JAMAIS
l’appareil dans
un local fermé ou un lieu mal aéré.
Les gaz d’échappement du moteur
sont très chauds et peuvent
contenir des étincelles pouvant
provoquer un incendie. Ne jamais
démarrer l’appareil dans un local
ferméouàproximitédematériaux
inflammables !
Page 39
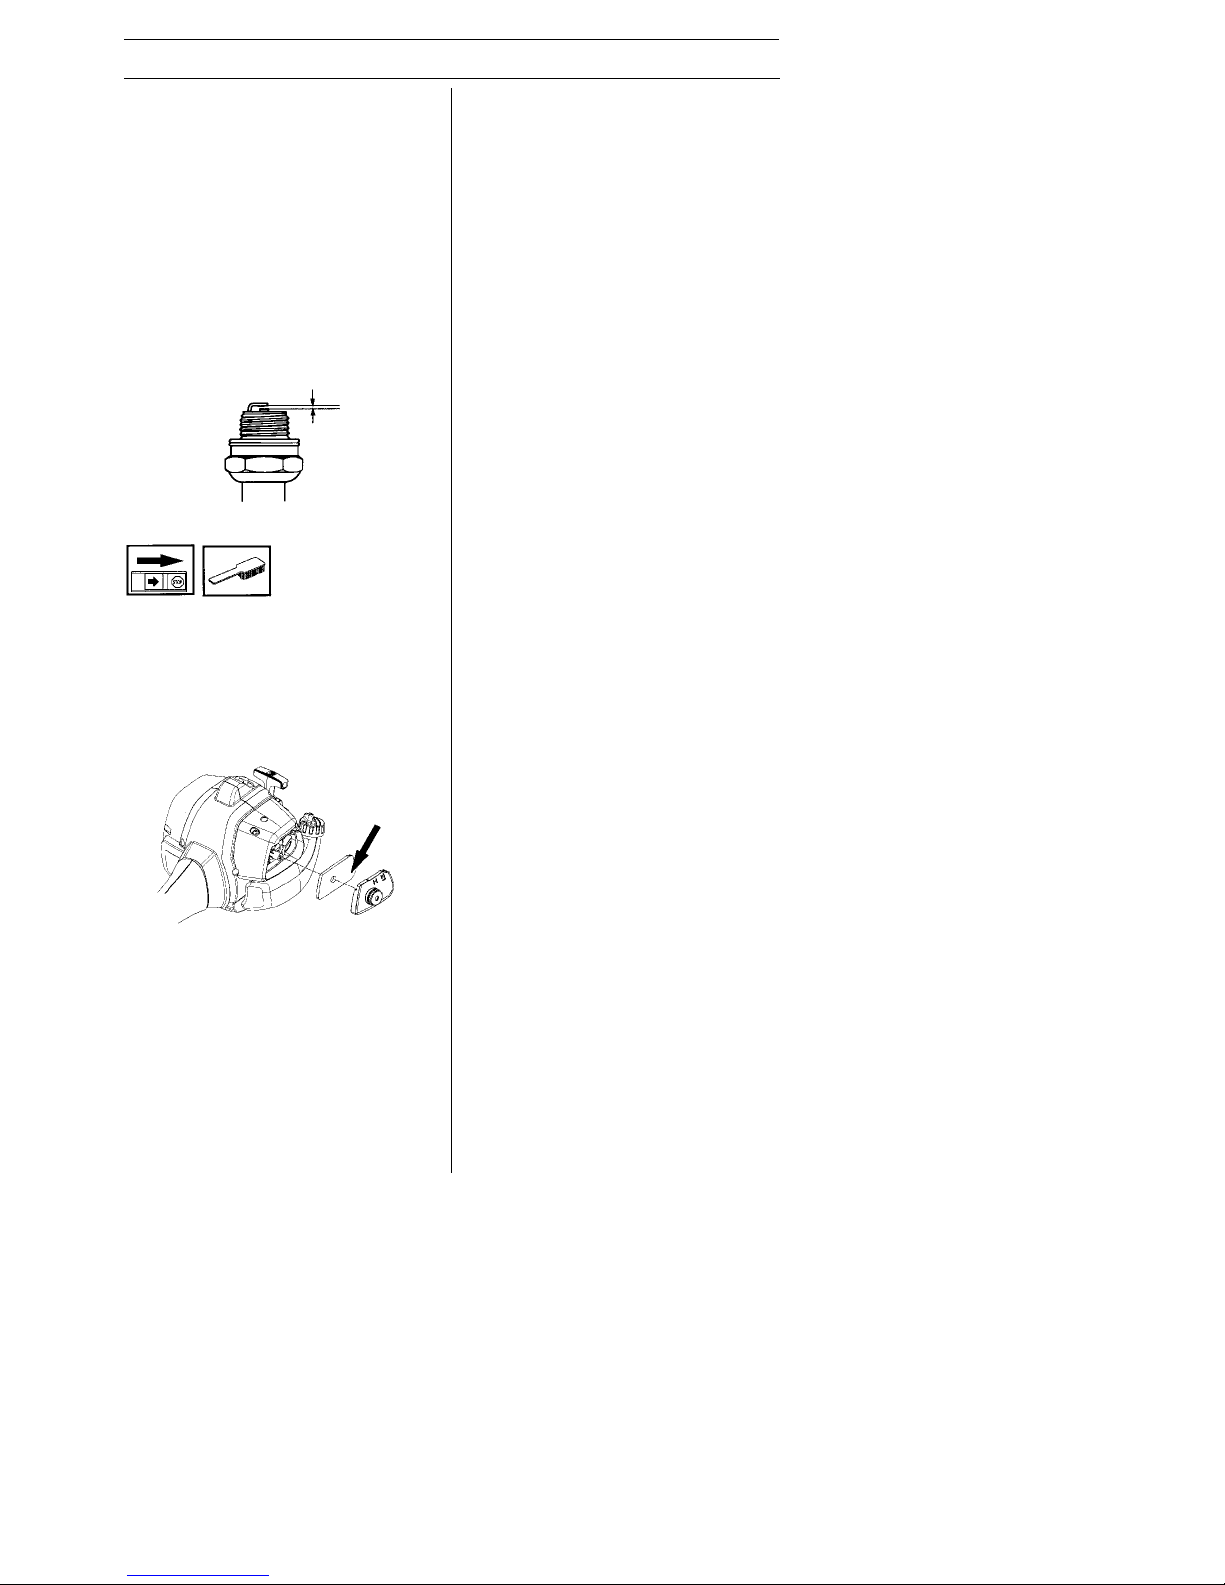
F r e n c h --- 3 9
545186855 Rev. 8 5/15/12
ENTRETIEN
Filtre à air
Le filtre à air doit être maintenu propre pour
éviter:
S Un mauvais fonctionnement du carburateur
S Des problèmes de démarrage
S Une perte de puissance
S Une usure prématurée des éléments du
moteur
S Une consommation anormalement élevée
de carburant
Nettoyer le filtre après 25 heures de service,
ou plus souvent si les conditions de travail
sont exceptionnellement poussiéreuses.
Nettoyage du filtre à air
Déposer le capot de filtre et retirer le filtre.
Nettoyer le filtre avec de l’eau chaude savonneuse. Rinçage complètement. S’assurer que le filtre est sec avant de le remonter. Un filtre ayant servi longtemps ne
peut plus être complètement nettoyé. Le
filtre à air doit donc être remplacé à intervalles réguliers. Tout filtre endommagé
doit être remplacé immédiatement.
Entretien quotidien
S Vérifier que les composants de la gâchette
de l’accélération fonctionnent correctement
en ce qui concerne la sécurité. (Blocage de
l’accélération et gâchette de l’accélération.)
S Contrôler le bon fonctionnement du bouton
d’arrêt.
S Vérifier qu’il n’y a pas de fuite de carburant
du moteur, du réservoir ou des conduits de
carburant.
S S’assurer que l’équipement de coupe ne
tourne pas lorsque le moteur tourne au
ralenti.
S Nettoyer l’extérieur de la machine.
S Vérifier que le harnais n’est pas endommagé
S S’assurer que le protecteur est intacte et
qu’elle ne présente pas de fissures.
S Remplacer le protecteur si elle a subi des
coups ou si elle présente des fissures.
S Une tête de coupe non--équilibrée peut
causer les vibrations lourdes qui peuvent
endommager l’appareil.
S S’assurer que toutes les vis et tous les
écrous sont bien serrés.
S S’assurer que la tête de coupe sont serrées.
Schéma d’entretien
Nous donnons ici quelques conseils d’entretien à caractère général.
Ces
f
acteurs peuvent concourir à l’apparition
de calamine sur les électrodes, ce qui à son
tour entraîne un mauvais fonctionnement du
moteur et des démarrages difficiles.
Si la puissance de la machine est trop faible,
si la machine est difficile à mettre en marche
ou si le ralenti est irrégulier, toujours commencer par contrôler l’état de la bougie avant
de prendre d’autres mesures. Si la bougie est
encrassée, la nettoyer et vérifier que l’écartement des électrodes est de 0,6 mm (0,024
pouce). Remplacer la bougie une fois par
mois ou plus souvent si nécessaire.
REMARQUE! To ujours utiliser le type de
bougie recommandé! Une bougie incorrecte
peut endommager le piston/le cylindre.
0,6 mm (0,024 pouce)
Entret ien hebdomadair e
S Contrôler le démarreur et son lanceur.
S Nettoyer le compartiment du carburateur.
S Nettoyer la bougie d’allumage extérieure-
ment. Déposer la bougie et vérifier la distance entre les électrodes. Au besoin, ajuster la distance de sorte qu’elle soit de 0,6
mm (0,024 pouce), ou remplacer la bougie.
Utilisez la bougie de résistance Champion
RCJ--8Y ou l’équivalent.
S Nettoyer les brides de refroidissement du
cylindre et s’assurer que la prise d’air près
du démarreur n’est pas obstruée.
S Nettoyer le filtre à aire.
Entret ien mensuel
S Nettoyer le réservoir de carburant.
S Nettoyer le carburateur extérieurement, ain-
si que l’espace autour.
S Nettoyer la roue du ventilateur, ainsi que
l’espace autour.
S Contrôler le filtre à carburant et le conduit à
carburant. Remplacer au besoin.
S Remplacez le filtre du carburant dans le
réservoir d’essence.
S Inspecter l’embrayage, les ressorts d’em-
brayage et le tambour d’embrayage pour
déceler l’usage. Remplacez au besoin.
S Inspecter tous les câbles et connexions.
S Remplacer la bougie. Utilisez la bougie de
rési s tance Champion RCJ--8Y ou l’équivalent.
S Remplacer le filtre à aire.
Page 40

F r e n c h --- 4 0
545186855 Rev. 8 5/15/12
20i
10i
3m
6m
Remplacementdufildanslatêtedecoupe
Page 41

F r e n c h --- 4 1
545186855 Rev. 8 5/15/12
CARACTÉRISTIQUES TECHNIQUES
Modèle GT 2128 (Axe de fileté 3/8 R)
Équipement de coupe / protecteur,
Accessoires homologués Type numéro de la pièce
Tête de coupe T25 537 33 83--07 / 545 006 049
Caractéristiques techniques
GT 2128
Moteur
Cylindrée, cm
3
28
Alésage, mm 35
Course, mm 28,7
Régime de ralenti, tr/min 2800--3200
Régime d’emballement maximal recommandé, tr/min 10000
Régime de l’axe sortant, tr/min 8000
Puissance moteur maxi selon ISO 8893, hp/kW 1,1/0,8
Silencieux avec pot catalytique Oui
Système d’allumage réglé en fonction du régime Oui
Système d’allumage
Fabricant/type de système d’allumage Walbro/CD
Bougie Champion RCJ--8Y
Écartement de électrodes, mm 0,6
Carburant, système de graissage
Fabricant/type de carbureteur Zama
Contenance du réservoir de carburant, litres 0,4
Poids
Poids, sans carburant, équipement de coupe et
dispositifs de sécurité, kg 4,4
Niveaux sonores
(voir Remarque 1)
Pression acoustique équivalente au niveau des oreilles
de l’utilisateur, mesurée selon ANSI B175.3--1997, dB(A),
min/max: 94/97
Niveaux de vibrations
Niveau de vibrations au niveau des poignées, mesurée
selon ANSI B175.3--1997, m/s
2
Au ralenti, poignée gauche/droite: 3/5
À plein régime, poignée gauche/droite: 9/8
REMARQUE! Ce système d’allumage par étincelles est conforme à la norme NMB- -002 du
Canada.
Remarque 1: le niveau de pression acoustique équivalent correspond à la somme d’énergie pondérée en fonction du temps pour les niveaux de pression acoustique à différents
régimes pendant les durées suivantes: 1/2 ralenti et 1/2 plein régime.
REMARQUE! Le niveau de pression acoustique à l’oreille de l’utilisateur et les vibrations
dans les poignées sont mesurés avec tous les équipements de coupe agréés de la
machine. Les valeurs les plus hautes et les plus basses sont indiquées dans le tableau.
Page 42

F r e n c h --- 4 2
545186855 Rev. 8 5/15/12
DÉCLARATION DE GARANTIE DE LUTTE AN MISSIONS
U.S. EPA / CALIFORNIE / ENVIRONNEMENT CANADA
DROITS ET OBLIGATIONS DE
VOTRE GARANTIE:
L’Agence de Protection de l’Environnement des
E--U, California Air Resources Board, Environnement Canada et Jonsered ont le plaisir
d’expliquer la garantie du système de contrôle
des émissions sur votre petit moteur tout- -terrain, pour les années 2012 et plus tard. En
Californie, tous les petits moteurs tout- -terrain
doivent être conçus, construits et équipés de
manière à se conformer aux normes sévères
anti--smog de l’État. Jonsered doit garantir le
système de contrôle des émissions de votre
petit moteur tout--terrain pendant la période indiquée ci--dessous, à condition qu’il n’y ait eu
aucun mauvais traitement, négligence ou mauvais entretien du petit moteur tout- -terrain. Votre
système de contrôle des émissions comprend
des pièces comme le carburateur, le système
d’allumage et le réservoir de carburant. S’il se
produit une panne couverte par la garantie,
Jonsered réparera votre petit moteur tout--terrain gratuitement pour vous. Les frais couvertes
par la garantie comprennent le diagnostic, les
pièces et la main- -d’oeuvre.
COUVERTURE DE GARANTIE DU
FABRICANT :
Si une pièce relative aux émissions de votre
moteur (figurant sur la liste de pièces garanties à titre du contrôle des émissions) est
défectueuse ou si un vice de matériau ou
de main--d’oeuvre du moteur occasionne la
panne d’une pièce relative aux émissions,
cette pièce sera changée ou réparée par
Jonsered.
RESPONSABILITÉS DE GARANTIE
DU PROPRIÉTAIRE :
En qualité de propriétaire du petit moteur tout-terrain, vous êtes responsable d’effectuer l’entretien requis tel qu’indiqué dans votre manuel
d’instructions, mais Jonsered ne peut annuler
votre garantie uniquement parce que vous
n’avez pas conservé vos reçus ou parce que
vous n’avez pas effectué tout l’entretien prévu.
En qualité de propriétaire du petit moteur tout-terrain, vous devez réaliser que Jonsered peut
vous refuser de couvrir votre garanti e si votre
petit moteur tout--terrain ou une pièce de ce
moteur tombe en panne à la suite d’un
DATE DE DÉBUT DE GARANTIE :
La période de garantie commence à la date
à laquelle vous avez acheté votre petit
moteur tout--terrain.
DURÉE DE COUVERTURE :
Cette garantie est valable pendant deux
ans à partir de la date d’achat initial, ou
jusqu’à l’extrémité de la garantie de
l’appareil (celui qui est plus long).
CE QUI EST COUVERT : RÉPARATION OU REMPLACEMENT DES
PARTIES.
La réparation ou le remplacement de toute
pièce sous garantie sera effectuée gratuitement pour le propriétaire de l’appareil dans
un distributeur autorisé de service
Jonsered. Si vous avez des questions sur
vos droits et vos responsabilités relativement à cette garantie, vous devez contacter
votre distributeur autorisé de service le
plus proche, appeler Jonsered au numéro
1--800--487--5951, ou visitez
www.charlotte.usa.jonsered.com
.
mauvais traitement, de négligence, de mauvais entretien, de modifications non approuvées ou à la suite de l’utilisation de pièces qui
ne sont pas faites ou approuvées par le fabricant de matériel original. Vous êtes responsable de présenter votre petit moteur tout--terrain à un distributeur autorisé de service de
Jonsered aussitôt que se présente un
problème. Les réparations couvertes par
cette garantie doivent être terminées dans
des délais raisonnables, ne pouvant pas dépasser 30 jours. Si vous avez des questions
sur vos droits et vos responsabilités en
vertu de la garantie, vous pouvez contacter
votre distributeur autorisé de service le
plus proche, appeler Jonsered au
numéro 1--800--487--5951, ou visitez
www.charlotte.usa.jonsered.com
.
DIAGNOSTIC :
Le propriétaire ne doit pas payer la main-d’oeuvre pour le diagnostic à l’aide duquel
on a déterminé qu’une pièce sous garantie
est défectueuse si le travail de diagnostic a
été effectué dans un distributeur de service
Jonsered.
PÉRIODE DE GARANTIE:
Toute pièce sous garantie qui ne doit pas
être remplacée pour un entretien normal, ou
qui doit seulement être inspectée régulièrement pour voir s’il faut la réparer ou la remplacer, est garantie pendant deux ans.
Toute pièce qui doit être remplacée pour un
entretien normal est garantie jusqu’à la date
de premier remplacement prévu.
IMPORTANT: Ce produit est conforme à
la réglementation de la Phase 3 de l’Agence
de Protection de l’Environnement des
États-Unis (EPA) en ce qui touche les
émissions d’échappement et d’évaporation.
Pour assurer la conformité à la Phase 3 de
l’EPA, nous recommandons le recours à
des pièces de remplacement d’origine
Jonsered uniquement. L’utilisation de
pièces de remplacement non conformes
est une infraction à la législation fédérale.
Page 43

F r e n c h --- 4 3
545186855 Rev. 8 5/15/12
DÉCLARATION DE GARANTIE DE LUTTE AN MISSIONS
U.S. EPA / CALIFORNIE / ENVIRONNEMENT CANADA
DOMMAGES INDIRECTS :
Jonsered peuvent être responsables de
dommages à d’autres éléments de moteur
occasionnés par la panne d’une pièce sous
garantie.
CE QUI N’EST PAS COUVERT :
Toute panne occasionnée par un mauvais
traitement, la négligence ou un mauvais entretien n’est pas couverte.
PIÈCES AJOUTÉES OU MODIFIÉES :
L’utilisation de pièces ajoutées ou modifiées
peut constituer une raison d’annulation de
réclamation en vertu de la garantie.
Jonsered n’est pas responsable de couvrir
les pannes de pièces sous garantie occasionnées par l’utilisation de pièces ajoutées
ou modifiées.
COMMENT REMPLIR UNE RÉCLAMATION :
Si vous avez des questions sur vos droits et
vos responsabilités de garantie, vous pouvez
contacter votre distributeur autorisé de service
le plus proche, appeler Jonsered au
numéro 1--800--487- -5951, ou visitez
www.charlotte.usa.jonsered.com
.
ENTRETIEN, REMPLACEMENT
OU RÉPARATION DE PIÈCES
RELATIVES À L’ÉMISSION :
Toute pièce de remplacement approuvée
Jonsered utilisée dans l’accomplissement
de tout entretien ou réparation en vertu de
la garantie sur les pièces relatives à l’émission sera fournie gratuitement au propriétaire si cette pièce est sous garantie.
LISTE DES PIÈCES GARANTIES
RELATIVES AU CONTRÔLE DES
ÉMISSIONS :
Carburateur, filtre à air (couverte jusqu’à la
date de remplacement pour l’entretien),
système d’allumage: bougie (couverte jusqu’à la date de remplacement pour l’entretien), module d’allumage, silencieux avec
d’un pot catalytique (si équipé), réservoir de
carburant, tuyau de carburant, et capuchon
de remplissage.
DÉCLARATION D’ENTRETIEN :
Le propriétaire est responsable d’effectuer
tout l’entretien requis tel qu’indiqué dans le
manuel d’instructions.
OÙ OBTENIR LE SERVICE EN VERTU DE LA GARANT IE :
Le service ou les réparations en vertu de la
garantie sont offerts dans tous les distributeurs autorisé de service Jonsered.
Appelez le numéro 1--8 00--487--5951 ou
visitez www.charlotte.usa.jonsered.com
.
Ce moteur est certifié se conformer aux règles d’émissions pour les usages suivants :
Modéré (50 heures)
Intermédiaire (125 heures)
Étendu (300 heures)
Page 44

Spanish ---44
545186855 Rev. 8 5/15/12
CONTENIDO
Contenido
CONTENIDO
Contenido 44.......................
Antes de arrancar , observe lo siguiente: 44
IDENTIFICACION DE SIMBOLOS
Símbolos 45........................
INSTRUCCIONES DE SEGURIDAD
Equipo de protección personal 46......
Equipo de seguridad de la máquina 46..
Equipo de corte 47...................
Control, mantenimiento y servicio del
equipo del seguridad de la máquina 47..
Instrucciones generales de seguridad 49
Seguridad de arranque 50.............
Seguridad en el uso del combustible 51.
Transporte y almacenamiento 51.......
Instrucciones generales de trabajo 51...
Reglas básicas de seguridad 51.......
Técnica básicas de trabajo 51.........
¿QUÉ ES QUÉ?
¿Qué es qué? 54....................
MONTAJE
Montaje del mango de tipo cerrado 55...
Montaje de la protector y la
cabezal de corte 55..................
MANIPULACION DEL COMBUSTIBLE
Carburante 56......................
Repostaje 57.......................
ARRANQUE Y PARADA
Control antes de arrancar 58..........
Arranque y parada 58................
MAINTENIMIENTO
Carburador 59......................
Silenciador 60.......................
Bujía 60............................
Filtro de aire 61.....................
Programa de mantenimiento 61........
Reemplazo de la línea en el
cabezal de corte 62..................
DATOS TECNICOS
Datos técnicos 63...................
DECLARACION DE GARANTIA DE
CONTROL DE EMISION 64..........
Antes de arrancar, observe lo
siguiente:
Jonsered trabaja constantemente para perfeccionar sus productos y se reserva, por lo
tanto, el derecho a introducir modificaciones
en la construcción y el diseño sin previo aviso. La exposición prolongada al ruido puede
causar daños crónicos en el oído. Use
siempre protectores auriculares homologados. El mantenimiento, el reemplazo, o la
reparación de los dispositivos del control de
emisión y el sistema se pueden realizar por
cualquier establecimiento o individuo de la
reparación del motor para uso fuera de carretera.
El período de con
f
ormidad de las emisiones
referido en la etiqueta de las emisiones indica
el número de las horas de funcionamiento
para las cuales el motor se ha comprovado
para satisfacer requisitos federales de las
emisiones. Categoría C = 50 horas, B = 125
horas, y A = 300 horas.
Para la referencia por favor, complete la
información siguiente que seá necesaria para el mantenimiento futuro de su
aparato:
Número de modelo:
Número de serie:
Fechadelacompra:
Distribuidor:
ADVERTENCIA: Una desbroza-
dora, quita arbustos o recortadora
puede ser una herramienta peligrosa si se utiliza de manera errónea o
descuidada, y provocar heridas
graves o mortales al usuario o terceros. Es sumamente importante
que lea y comprenda el contenido
de este manual de instrucciones.
ADVERTENCIA: Bajo ningu-
na circunstancia debe modificarse la configuración original
de la máquina sin autorización
del fabricante. Utilizar siempre recambios originales. Las modificaciones y/o la utilización de accesorios no autorizadas pueden
ocasionar accidentes graves o
incluso la muerte del operador o
de terceros. Su garantía puede no
cubrir el daño causada por el uso
de accesorios o de piezas de recambio que no se recomiendan.
Page 45

Spanish ---45
545186855 Rev. 8 5/15/12
IDENTIFICACION DE SIMBOLOS
Indicado únicamente para los
cabezales de corte.
Utilice gasolina sin plomo o
de gran calidad y aceite para
motores de dos tiempos
mezclado en proporción al
2,5% (1:50).
Los demás símbolos/etiquetas que aparecen en la máquina corresponden a requisitos de homologación específicos en
determinados mercados.
Para detener el motor, empuje
y sostenga el interruptor stop
en la posición STOP hasta que
el motor se haya detenido por
completo antes de hacer
cualquier mantenimiento.
La máquina debe limpiarse
regularmente.
Control visual.
Debe utilizarse protección ocular
homologada.
Símbolos
ADVERTENCIA: Las desbrozado-
ras, quita arbustos y recortadoras
pueden ser peligrosas! Su uso
descuidado o erróneo puede provocar heridas graves o mortales
al usuario o terceros.
ADVERTENCIA: Lea el manual
de instrucciones antes de usar.
No seguir las instrucciones podía
causar graves heridas tanto al
operador como a otras personas.
Guarde el manual de instrucciones.
Utilice siempre:
S Protectores auriculares
S Protección ocular homologada
Velocidad máxima en el eje de
salida, rpm
Cuidado con los objetos lanzados
o rebotados.
Durante el trabajo, el usuario
de la máquina debe procurar
que ninguna persona o animal
se acerque a más de 15 metros
(50 pies) a la máquina.
Marcas de flechas que indican
los límites para colocar la
sujeción del mango.
Utilice siempre guantes protectores homologados.
Utilice botas antideslizantes y
seguras.
Indicado únicamente para equipo
de corte flexible, no metálico, es
decir cabezal de corte con línea
de corte.
Page 46

Spanish ---46
545186855 Rev. 8 5/15/12
INSTRUCCIONES DE SEGURIDAD
GUANTES
Se deben utilizar guantes cuando sea
necesario, por ejemplo al montar el equipo
de corte.
PROTECCION AUDITIVA
Se debe utilizar protección auditiva con
suficiente capacidad de reducción sonora.
PROTECCION OCULAR
Se debe utilizar siempre protección ocular
homologada. Si se utiliza visor , deben utilizarse también gafas protectoras homologadas. Por gafas protectoras homologadas se
entienden las que cumplen con la norma
ANSI Z87.1.
BOTAS
Utilice botas antideslizantes y seguras.
VESTIMENTA
Use ropas de material resistente a los
desgarros y no demasiado amplias para
evitar que se enganchen en ramas, etc.
Use siempre pantalones largos gruesos.
No trabaje con joyas, pantalones cortos,
sandalias ni los pies descalzos. No lleve el
cabello suelto
p
or debajo de los hombros.
Equipo de protección personal
EQUIPO DE PRIMEROS AUXILIOS
Tenga siempre a mano el equipo de primeros auxilios.
Equipo de seguridad de la
máquina
En la sección se describen los componentes de seguridad de la máquina, su función y el modo de efectuar el control y
el mantenimiento para garantizar un funcionamiento óptimo. En cuanto a la ubicación
de estos componentes en su máquina, vea
la sección “Conozca su aparato”.
La vida útil de la máquina puede acortarse
y el riesgo de accidentes puede aumentar
si el mantenimiento de la máquina no se
hace de forma adecuada y si los trabajos
de servicio y/o reparación no se efectúan
de forma profesional. Para más información, consulte con el distribuidor autorizado
del servicio más cercano.
ADVERTENCIA: Nunca utilic e
una máquina con componentes de
seguridad defectuosos. Siga las
instrucciones de control, mantenimiento y servicio indicadas en este
sección.
Parada
Arranque el motor y asegúrese que el se
haya detenido por completo cuando usted
empuja y sostenga el interruptor STOP.
Protector d el equipo de corte
Esta protector tiene por fin evitar que el
usuario reciba el impacto de objetos desprendidos. La protector evita también que
el usuario entre en contacto con el equipo
de corte.
ADVERTENCIA: Para trabajar
con la máquina debe utilizarse un
equipo de protección personal
homologado. El equipo de protección personal no elimina el riesgo
de lesiones, pero reduce su efecto
en caso de accidente. Pida a su distribuidor que le asesore en la elección del equipo.
¡IMPORTANTE! Cuando use protección
auditivapreste siempre atención a las
señales o llamados de advertencia. Sáquese
siempre la protección auditiva inmediatamente después de parar el motor.
Page 47

Spanish ---47
545186855 Rev. 8 5/15/12
INSTRUCCIONES DE SEGURIDAD
ADVERTENCIA: Bajo ninguna
circunstancia se puede utilizar un
equipo de corte sin haber montado
antes la protección recomendada.
Consultar el capítulo Datos técnicos.
Si se monta una protección incorrecta o defectuosa, esto puede causar daños personales graves.
El uso de un bobina mal enroscado o del
equipo de corte incorrecto aumenta el nivel
de vibraciones.
ADVERTENCIA: La sobre ex-
posición a las vibraciones puede
producir lesiones vasculares o nerviosas en personas que padecen
de trastornos circulatorios. Si advierte síntomas que puedan relacionarse con la sobreexposición a
las vibraciones, consulte a un médico. Ejemplos de estos síntomas
son entumecimiento, falta de sensibilidad, “hormigueo”, “puntadas”, dolor, pérdida o reducción de
la fuerza normal, cambios en el
color o la superficie de la piel. Generalmente, estos síntomas se presentan en los dedos, las manos y
las muñecas. El riesgo puede ser
mayor a bajas temperaturas.
Silenciador
El silenciador está diseñado para reducir al
máximo posible el nivel sonoro y para
apartar los gases de escape del usuario.
PRECAUCION: El silenciador con
catalizador está deseñado para reducir
los gases de escape.
Para el silenciador, es sumamente importante seguir las instrucciones de control,
mantenimiento y servicio. Vea las instrucciones en la sección Control, mantenimiento y servicio del equipo de seguridad de la
máquina.
Equipo de corte
El cabezal de corte está diseñado a recortar la hierba.
Control, mantenimiento y servicio del equipo del seguridad de
la máquina
¡IMPORTANTE!
T odos los trabajos de servicio y reparación
de la máquina requieren una formación especial. Esto es especialmente importante
para el equipo de seguridad de
la máquina. Si la máquina no pasa alguno de
los controles indicados a continuación, acuda
asutallerdeserviciolocal.Lacomprade
alguno de nuestros productos le garantiza
que puede recibir un mantenimiento y servicio profesional. Si no ha adquirido la máquina en una de nuestras tiendas especializadas con servicio, solicite información sobre el
taller de servicio más cercano.
Interruptor de parada
S Arranque el motor y compruebe que se
pare cuando usted empuje y sostenga el
interruptor en la posición de parada.
PRECAUCIÓN: El silenciador con
catalizador se calienta mucho durante el
uso y permanece caliente aún luego de
apagado el motor. Lo mismo rige para la
marcha en ralentí. Su contacto puede
quemar la piel. ¡Tenga en cuenta el peligro de incendio!
ADVERTENCIA: En el interior
del silenciador hay sustancias
químicas que pueden ser cancerígenas. Evitar el contacto con estas
sustancias si se daña el silenciador .
ADVERTENCIA: Los humos de
escape del motor contienen
monóxido de carbono, que puede
provocar envenenamiento. NO
ponga la máquina en marcha en sitios cerrados o mal ventilados. Los
humos de escape del motor son
calientes y pueden contener chispas capaces de iniciar un incendio.
No arranque nunca la máquina en
sitios cerrados ni cerca de material
combustible.
Page 48

Spanish ---48
545186855 Rev. 8 5/15/12
INSTRUCCIONES DE SEGURIDAD
Protector del equipo de corte
Esta protector tiene por fin evitar que el
usuario reciba el impacto de objetos desprendidos. La protector evita también que
el usuario entre en contacto con el equipo
de corte.
S Controle que la protección no esté daña-
da y que no tenga grietas.
S Cambie la protección si ha estado ex-
puesta a golpes o si tiene grietas.
S Utilice siempre la protector recomendada
para cada equipo de corte en particular.
Consulte el la sección “Datos Técnicos”.
Silenciador
S Nunca utilice una máquina que tenga
un silenciador defectuoso.
S Compruebe regularmente que el silenciador
esté firmemente montado en la máquina.
S El silenciador en este aparato incorporan
una rejilla apagachispas. El rejilla debe ser
comprobado y en caso de necesidad, limpiar por una distribuidor autorizado del servicio. Si el rejilla se obstruye, la máquina se recalienta y produce daños serios. No utilice
nunca un silenciador con el rejilla apagachispas dañado. Vea la sección Mantenimiento.
Equipo de corte
Este sección describe cómo Ud., con un
mantenimiento correcto y utilizando el
equipo de corte adecuado, podrá:
S Obtener un resultado de corte óptimo.
S Aumentar la duración del equipo de corte.
Reglas básicas
:
1. ¡Utilice sólamente el equipo de corte con
la protectors recomendada por nosotros!
Vea la sección Datos técnicos.
2. Revise el equipo de corte para ver si está
dañado o agrietado. Un equipo de corte
dañado debe ser siempre reemplazado.
ADVERTENCIA: Nunca utilic e
una máquina que tenga un equipo
de seguridad defectuoso. Efectúe el
control y mantenimiento del equipo
de seguridad de la máquina como se
describió en este capítulo. Si su
máquinanopasatodosloscontroles, entréguela a un taller de servicio para su reparación. El uso de
una máquina con componentes de
seguridad defectuosos aumenta el
riesgo de heridas graves para el
operador u otras personas.
¡IMPORTANTE!
Este capítulo describe cómo Ud., con un
mantenimiento correcto y utilizando el equipo
de corte adecuado, podrá:
Reducir la propensión a las reculadas de la
máquina.
Obtener un resultado de corte óptimo.
Aumentar la duración del equipo de corte.
¡Utilice sólamente el equipo de corte con la
protectors recomendada por nosotros! Vea la
sección “Datos Técnicos”.
Lea las instrucciones del equipo de corte
para montar correctamente el hilo y elegir el
diámetro de hilo correcto.
Page 49
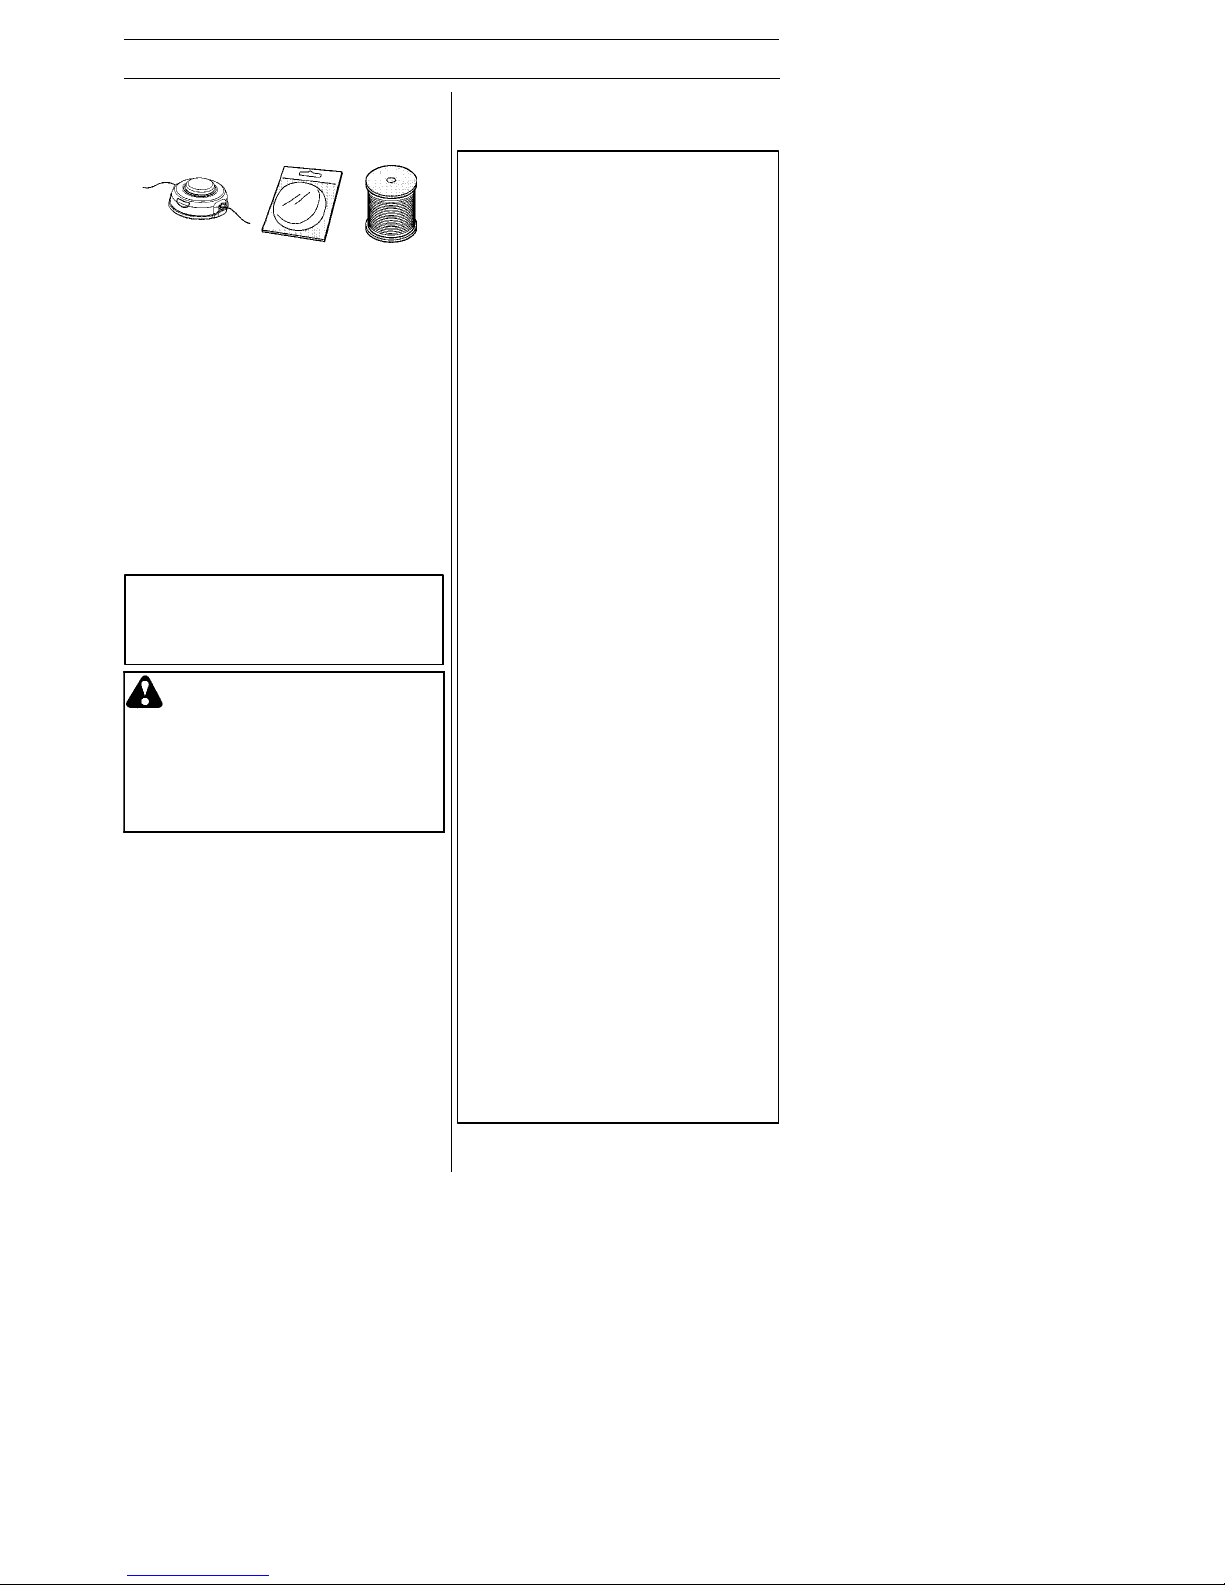
Spanish ---49
545186855 Rev. 8 5/15/12
INSTRUCCIONES DE SEGURIDAD
S Utilice únicamente el equipo de corte
recomendado. Vea la sección “Datos
Técnicos”.
S En general, una máquina pequeña re-
quiere un cabezal pequeño y viceversa.
Esto se debe a que, al cortar con línea,
el motor debe lanzarlo radialmente hacia
afuera desde el cabezal de corte y vencer la resistencia de la hierba que se va a
cortar.
S El largo del línea también es importante.
Las línea más largo requiere mayor potencia del motor que uno corto, con el
mismo diámetro de la línea.
S Controle que el cuchillo que hay en la
protección de la recortadora esté intacto.
Se utiliza para cortar la línea en el largo
correcto.
S Para prolongar la vida útil de la línea, se
puede poner en remojo un par de días.
De esta manera la línea se refuerza y
dura más.
ADVERTENCIA: Pare siempre
el motor antes de trabajar con alguna parte del equipo de corte.
Éste continúa girando incluso
después de haber soltado el acelerador. Controle que el equipo de
corte se haya detenido completamente y desconecte el cable de la
bujía antes de comenzar a trabajar.
¡IMPORTANTE!
Observe siempre que la línea de corte esté
arrollado en forma firme y uniforme al rodillo, de lo contrario la máquina producirá vibraciones perjudiciales para la salud.
Cabezal de corte
Instrucciones generales de
seguridad
¡IMPORTANTE!
S La máquina está destinada exclusiva-
mente a recortar la hierba.
S Los únicos accesorios que Ud. puede aco-
plar al motor como fuente propulsora son
los equipos de corte que nosotros recomendamos en la sección de “Datos Técnicos”.
S Nunca use alambre, soga, hilo, etc.
S Nunca utilice la máquina si está cansa-
do, si ha ingerido alcohol o si toma medicamentos que puedan afectarle la vista,
su capacidad de discernimiento o el control del cuerpo.
S Nunca utilice la máquina en condiciones
atmosféricas extremas como frío intenso o
clima muy caluroso y/o húme do.
S No utilice nunca una máquina que haya
sido modificada de modo que ya no coincida con la configuración original.
S Utilice el equipo de protección personal.
Vea las instrucciones en la sección de
“Equipo de protección personal”.
S No utilice nunca una máquina defectuosa.
Siga las instrucciones de mantenimiento,
control y servicio de este manual. Algunas
medidas de mantenimiento y servicio deben ser efectuadas por especialistas formados y
cualificados. Vea las instrucciones en la
sección “Ma ntenim iento”.
S Todas las cubiertas y protecciones deben
estar montadas antes del arranque. Controle que la cápsula y el cable de encendido estén en buenas condiciones. Pueden
producirse descargas eléctricas.
S El usuario de la máquina debe asegurarse
de que ninguna persona o animal se acerquen más de 15 metros (50 pies) durante
el trabajo.
S Evite la línea girante.
S No use ropa suelta ni ropa con corbatas,
tiras, borlas, etc. que cuelgan libremente.
Pueden enredarse en las piezas en movimiento.
S Si está completament tapado, estará
más protegido de los escombros y pedazos de plantas tóxicos arrojados por la
línea girante.
S Mantenga las mangos libres de aceite y
de combustible.
S Mantenga siempre el motor junto al lado
derechodesucuerpo.
S Sujete firmemente el aparato con ambas
manos.
S Mantenga la cabezal de corte por debajo
de la cintura. No levante el motor por encima de su cintura.
Page 50
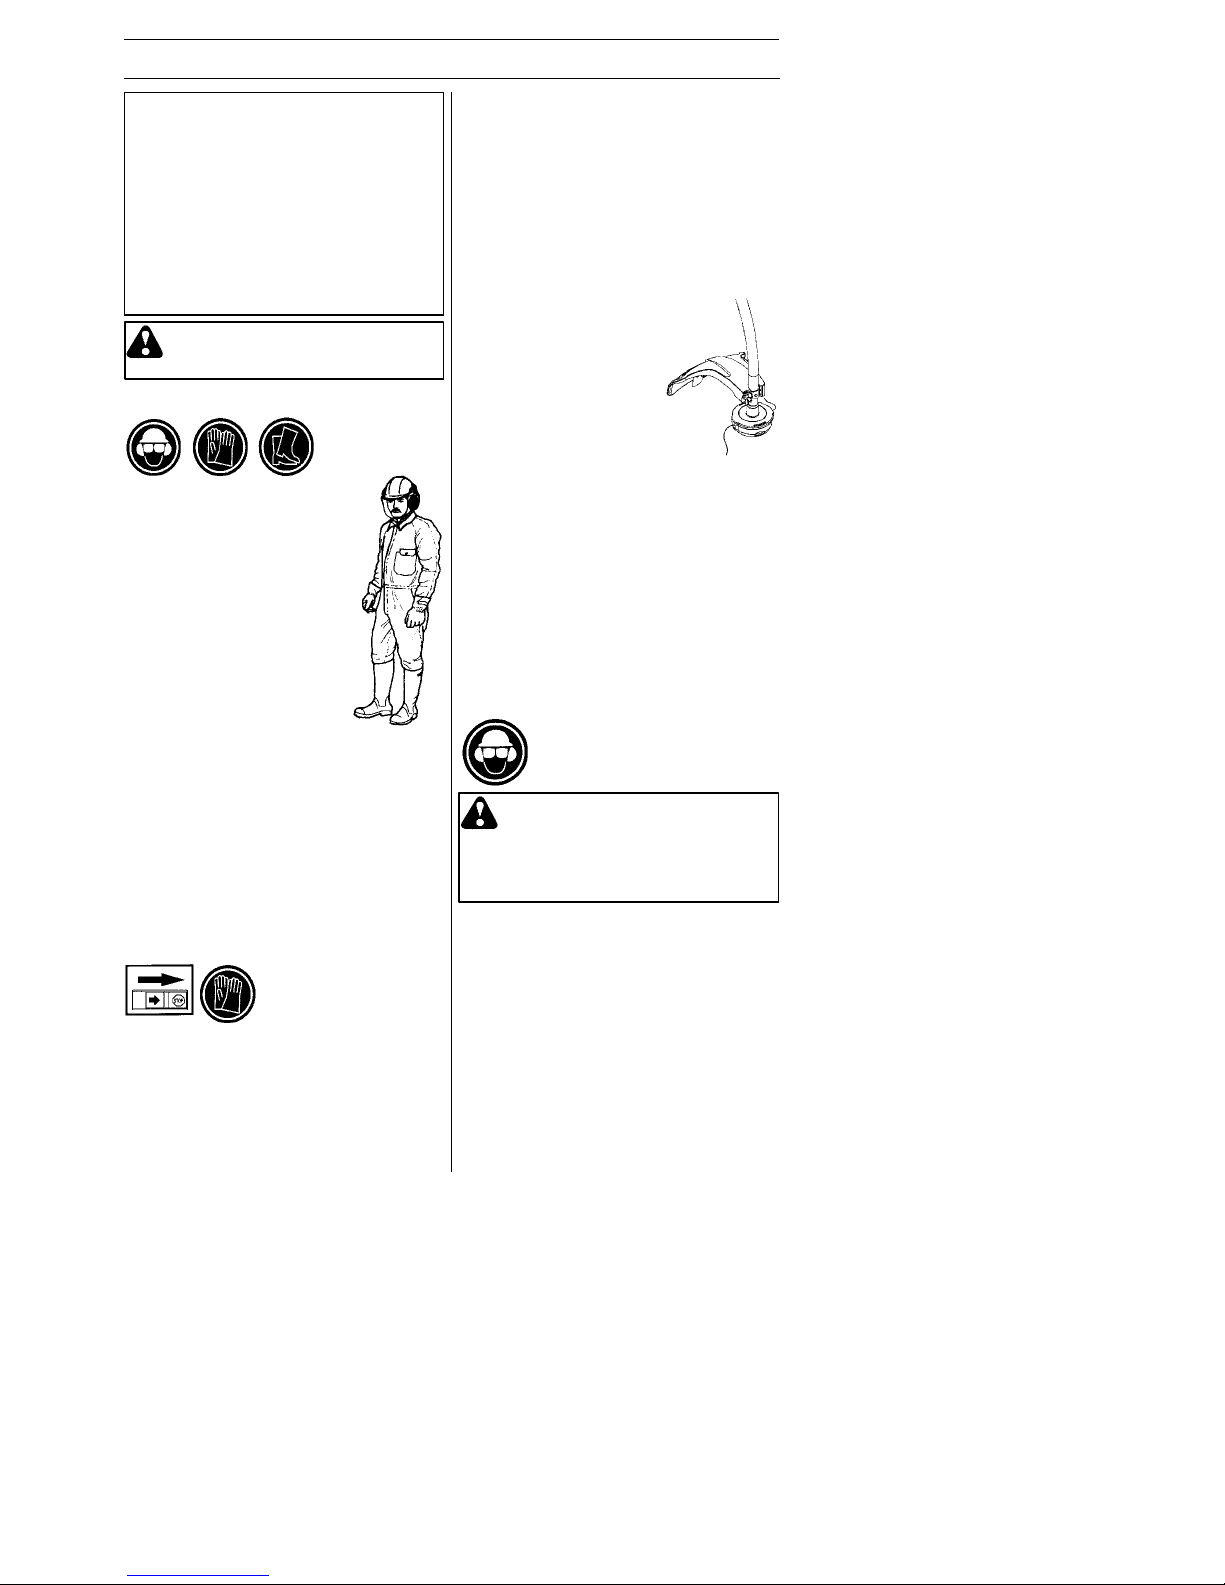
Spanish ---50
545186855 Rev. 8 5/15/12
INSTRUCCIONES DE SEGURIDAD
S Mantenga todas las partes del cuerpo
alejadas de la línea girante y del silenciador. Mantenga el motor por debajo del
nivel de la cintura. El silenciador puede
causar graves quemaduras cuando está
caliente.
S Mantenga el equilibrio, con los pies en
una superficie estable. No se extienda
demasiado.
S Use el aparato únicamente de día o en
luz artificial fuerte.
S Utilice el aparato solamente para las ta-
reas explicadas en este manual.
ADVERTENCIA: Un equipo de
corte defectuoso puede aumentar
el riesgo de accidentes.
Protección personal
S Utilice siempre botas y
además, el equipo indicado
en la sección Equipo de protección personal.
S Utilice siempre indumentaria
de trabajo y pantalones largos fuertes.
S No utilice nunca ropas
amplias ni joyas.
S Las personas que tengan
cabellos largos, deben
levantarlo por arriba de los
hombros.
Instrucciones de seguridad para el
entorno
S No permita nunca que los niños utilicen la
máquina.
S Controle que nadie se acerque a menos
de 15 metros (50 pies) durante el trabajo.
S No permita que otros utilicen la máquina
sin asegurarse primero de que hayan
comprendido el contenido del manual
de instrucciones.
Instrucciones de seguridad antes
de arrancar
S Inspeccione el lugar de trabajo. Aleje todos
los objetos sueltos, como piedras, cristales
rotos, claves, alambre de acero, cuerdas,
etc., que pueden ser despedidos o enredarse en la cuchilla o la protector de ésta.
S Mantenga alejados a terceros.Los niños,
animales, curiosos y ayudantes deben
mantenerse fuera de la zona de seguridad
de 15 metros (50 pies). Se debe exhortar
a los espectadores a que usen protección
para los ojos. Pare la máquina inmediatamente si alguien se acerca.
S Controle toda la máquina antes de arran-
car. Cambie las piezas defectuosas. Controle que no haya fuga de combustible y
que todas las protecciones y tapas estén
en buenas condiciones y bien fijas. Controle todos los tornillos y tuercas.
S Controle que el cabezal
de corte no tenga
grietas ni otros daños.
S Verifique que la
protector está montada
y sin dañar.
S Controle que el cabezal de corte y su pro-
tección estén correctamente montadas.
S Al ajustar el carburador, controle que el
cabezal apoyado y que no haya nadie
en las cercanías.
S Controle que el cabezal de corte siempre
se detenga en régimen de ralentí.
S Controle que los mangos y la función de
seguridad estén en orden. No utilice
nunca una máquina a la que le falte una
parte o que haya sido modificada y no
coincida con las especificaciones.
S Utilice la máquina solamente para lo que
está destinada.
Seguridad de arranque
S Antes de arrancar la máchina, asegúrese
de que todas las cubiertas y cajas del motor estén montadas correctamente.
S Nunca ponga en marcha el motor con el
embrague, el cilindro del embrague, la
cubierta del embrague, o el eje desmontado.
S No ponga nunca en marcha la máquina en
interiores. Tenga en cuenta el riesgo de inhalación de los gases de escape del motor.
S Observe el entorno y asegúrese de que
no haya riesgo de tocar a personas o
animales con el equipo de corte.
S Vea la sección “Arranque y Parada” para
las instrucciones completas.
ADVERTENCIA: Cuando el
motor es arrancado con el estrangulador en la posición activada o
de aceleración de arranque, el equipo de corte comienza a girar inmediatamente.
Page 51
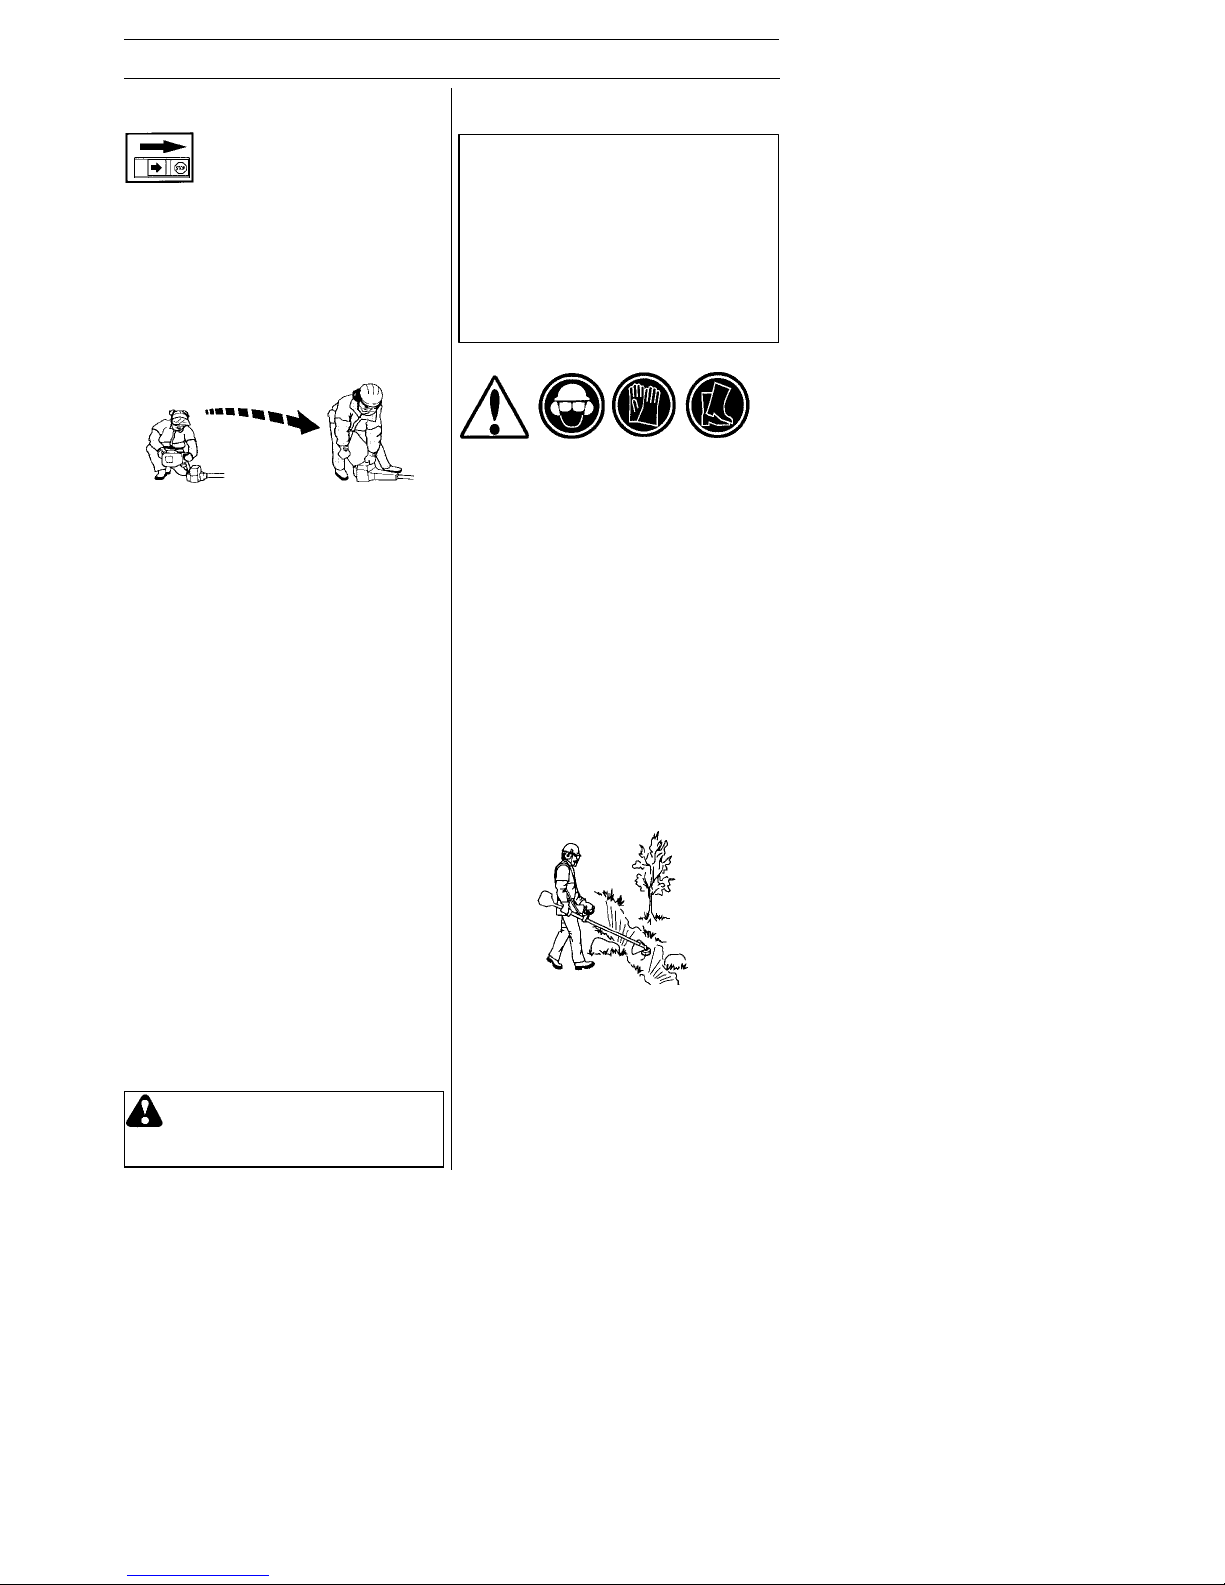
Spanish ---51
545186855 Rev. 8 5/15/12
INSTRUCCIONES DE SEGURIDAD
Seguridad en el uso del combustible
S Utilice un recipiente de combustible con
protección antirebose.
S No reposte nunca la máquina con el motor
en marcha.
S Apague el motor y deje que se enfríe unos
minutos antes de repostar.
S Procure que haya buena ventilación durante
el repostaje y la mezcla de combustible (gasolina y aceite para motores de 2 tiempos).
S Antes de arrancar, aparte la máquina a 3
m como mínimo del lugar de repostaje.
S Nunca arranque la máquina:
S Si derramó combustible sobre la máquina.
Seque cualquier residuo y espere a que
se evaporen los restos de combustible.
S Si se salpicó el cuerpo o las ropas, cam-
bie de ropas. Lave las partes del cuerpo
que han entrado en contacto con el
combustible. Use agua y jabón.
S Si hay fugas de combustible en la
máquina. Compruebe regularmente si
hay fugas en la tapa del depósito o en
los conductos de combustible.
S Evite que el combustible entre en con-
tacto con la piel. El combustible causa
irritación y, en algunos casos, puede
causar manchas en la piel.
Transporte y almacenamiento
S Almacene y transporte la máquina y el
combustible de manera que eventuales
fugas o vapores no puedan entrar en contacto con chispas o llamas, por ejemplo,
máquinas eléctricas, motores eléctricos,
contactos eléctricos/interruptores de corriente o calderas.
S Para almacenar y transportar combustible
se deben utilizar recipientes diseñados y
homologados para tal efecto.
S Si la máquina se va a almacenar por un
período largo, se debe vaciar el depósito
de combustible. Pregunte en la estación
de servicio más cercana qué hacer con el
combustible sobrante.
S Antes del almacenaje prolongado, limpie
bien la máquina y haga el servicio completo.
Min. 3 m
(10 ft.)
ADVERTENCIA: Sea cuidadoso
al manejar el combustible. Piense en
los riesgos de incendio, explosión e
intoxicación respiratoria.
Instrucciones generales de
trabajo
¡IMPORTANTE!
Esta sección trata reglas de seguridad
fundamentales para el trabajo con la
recortadora. Cuando se vea en una situación insegura para continuar el trabajo,
debe consultar a un experto. Póngase en
contacto con su distribuidor autorizado del
servicio. Evite todo uso para el cual no se
sienta suficientemente calificado.
Antes del uso, Ud. debe haber entendido
la diferencia entre desbroce forestal, des-broce de hierba y recorte de hierba.
Reglas básicas de seguridad
1. Observe el entorno para:
S Comprobar que no hayan personas,
animales, etc., que puedan influir en su
control de la máquina.
S Para evitar que personas, animales,
etc. entren en contacto con el equipo
de corte u objetos lanzados por el
equipo de corte.
S ¡NOTA! No use nunca una máquina si
no tiene posibilidad de pedir auxilio si
se produce un accidente.
2. No trabaje en condiciones atmosféricas
desfavorables como niebla, lluvia intensa,
tempestad, frío intenso, etc. El trabajo con
mal tiempo es fatigoso y puede crear
circunstancias peligrosas, como terreno
resbal a d i zo , cambio impr e vist o de la dirección de derribo de los árboles, etc.
3. Compruebe que pueda caminar y manten-
erse de pie con seguridad. Vea si hay
eventuales impedimentos para desplazamie ntos imprevistos (raíces, piedras, ramas,
fosos, zanjas, etc.). Proceda con sumo cuidado al trabajar en terreno inclinado.
4. Si va a trasladarse de un lugar a otro, apa-
gue primero el motor.
5. No apoye nunca la máquina con el motor
en marcha o mientras que el equipo de
corte está rotando.
Técnica básicas de trabajo
S Después de cada momento de trabajo re-
duzca siempre la velocidad del motor a ralentí. Un tiempo demasiado largo a máxima
velocidad sin que el motor esté cargado
puede averiar seriamente el motor .
Page 52
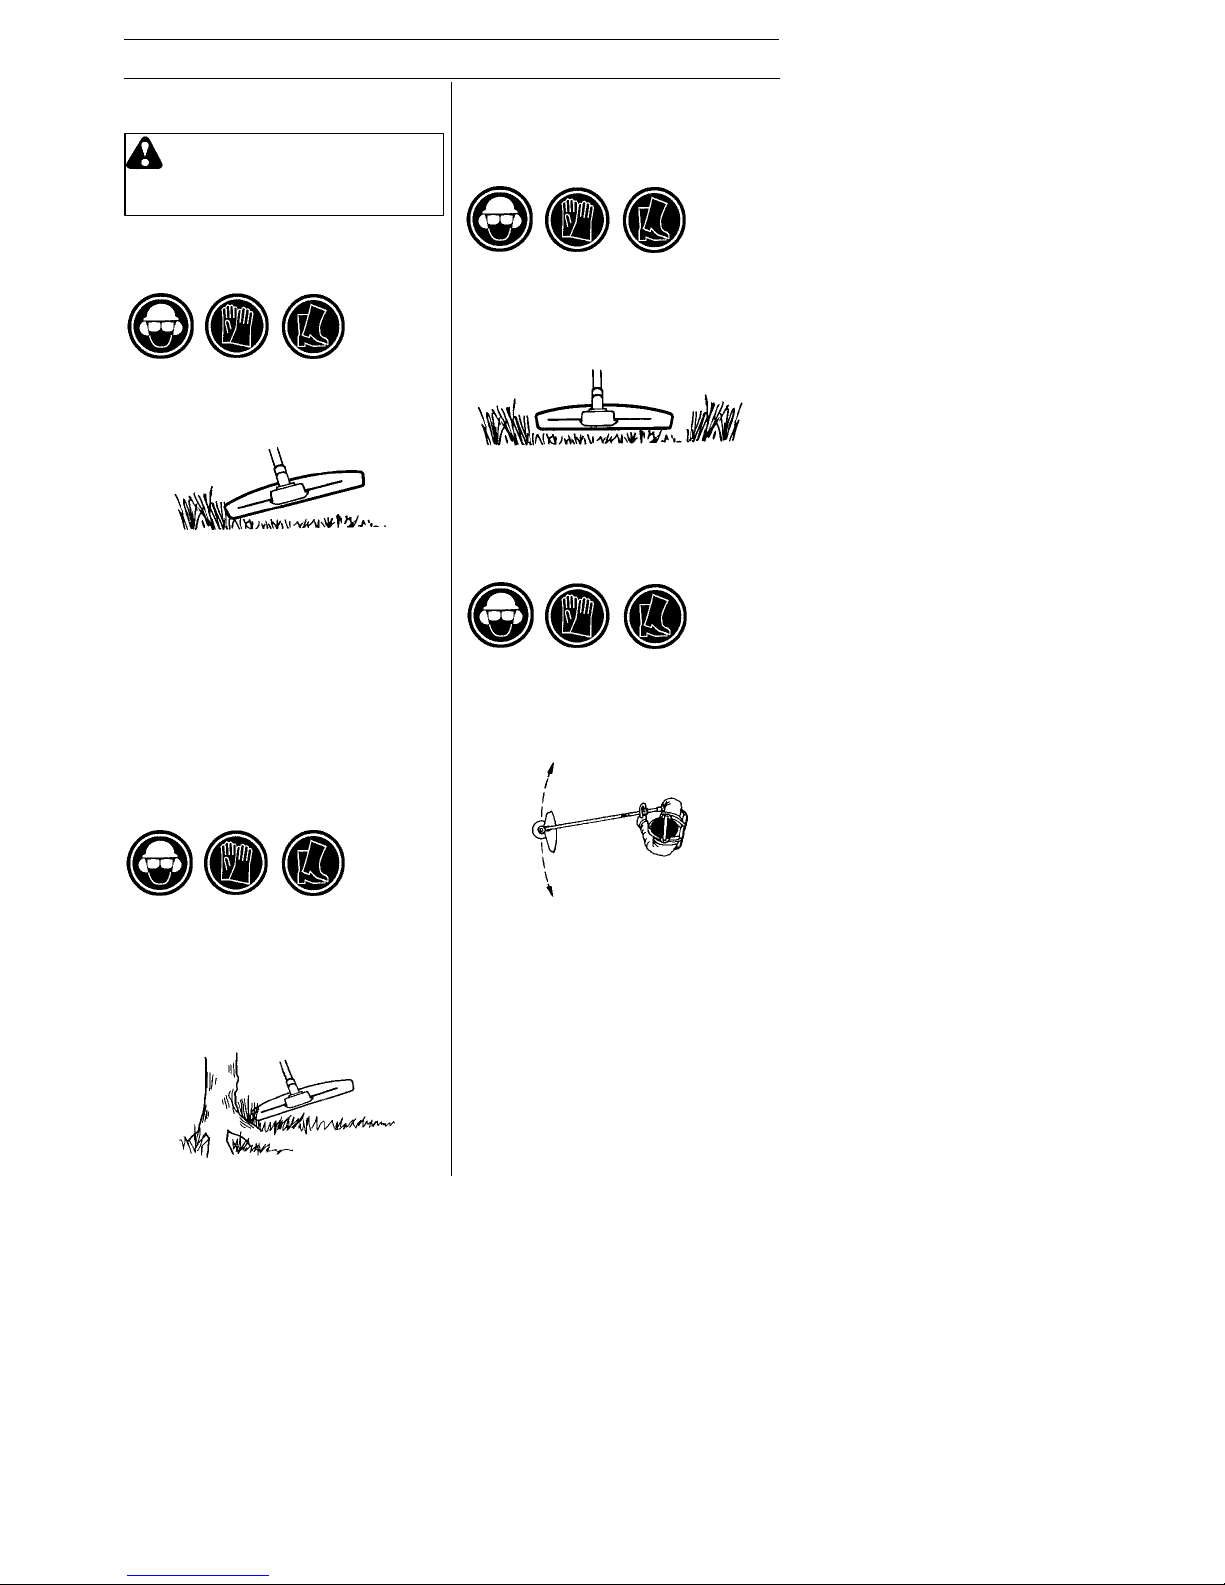
Spanish ---52
545186855 Rev. 8 5/15/12
INSTRUCCIONES DE SEGURIDAD
S Se recomienda que no opere el motor
por mas de un minuto a la velocidad
máxima.
ADVERTENCIA: A veces, se
atascan ramas o hierba entre la protección y el equipo de corte. Antes
de retirarlos, pare siempre el motor.
Recorte de hierba con el cabezal de
corte
Recorte
S Mantenga el cabezal de corte justo por en-
cima del suelo, en posición inclinada. Es la
punta del hilo la que realiza el trabajo. Deje
que el hilo trabaje con su propio ritmo.
S Nunca lo presione contra la vegetación
que quiere segar. La línea corta con facilidad la hierba y las malas hierbas que hay
contra paredes, cercas, árboles y arriates,
pero también puede dañar la corteza delicada de árboles y arbustos, y postes de
cercas.
S Disminuya el peligro de daños en las plan-
tas acortando el hilo a 10--12 cm (4--4,5
pul gadas) y disminuyendo las revoluciones
del motor.
S Al recortar y raspar debe utilizar una velo-
cidad un poco menor que la aceleración
máxima para que el hilo dure más y el cabezal de corte se desgaste menos.
Raspado
S La técnica de raspado corta toda la vege-
tación no deseada. Mantenga el cabezal
de corte justo por encima del suelo, en posición inclinada. Deje que la punta del hilo
golpee el suelo alrededor de árboles, columnas, estatuas, etc. ¡IMPORTANTE!
Esta técnica aumenta el desgaste de la
línea.
S El hilo se desgasta másrápido y se debe
alimentar más seguido al trabajar contra
piedras, ladrillos, hormigón, cercas de
metal, etc. que al estar en contacto con
árboles y cercas de madera.
Corte
S La recortadora es ideal para cortar en lu-
gares que son difícil mente accesibles para
un cortacésped común. Al cortar , mantenga el hilo paralelo al suelo. Evite presionar
el cabezal de corte contra el suelo para no
dañar el césped ni el equipo.
S Durante el corte normal evite que el ca-
bezal de corte esté en contacto continuo
con el suelo. Un contacto continuo de
este tipo puede causar daños y desgaste en el cabezal de corte.
Barrido
S El efecto ventilador del hilo giratorio
puede utilizarse para una limpieza rápida
y sencilla. Mantenga el hilo paralelo y
por encima de la superficie a barrer y
mueva la máquina de un lado a otro.
S Al cortar y barrer debe utilizar la acelera-
ción máxima para obtener un buen resultado.
Page 53

Spanish ---53
545186855 Rev. 8 5/15/12
INSTRUCCIONES DE SEGURIDAD
ADVERTENCIA: A veces, se ata-
scan ramas o hierba entre la protector y el equipo de corte, o envueltas
alrededordeleje.Nielusuariodela
máquina ni ninguna otra persona
debe intentar quitar la vegetación
cortada cuando el motor o el equipo de corte aún están girando,
dado que esto comporta riesgo de
daños graves. Pare el motor y el
equipo de corte antes de quitar la
vegetación.
ADVERTENCIA: Advertencia de
objetos lanzados. Utilice siempre gafas protectoras homologadas. No se
incline nunca sobre la protector del
equipo de corte. Hay riesgo de lanzamiento de piedras, suciedad,
etcétera, contra los ojos; causando
ceguera o daños graves. Mantenga
alejados a los terceros. Los niños,
animales, curiosos y ayudantes
deben mantenerse fuera de la zona
de seguridad de 15 metros. Pare la
máquina inmediatamente si alguien
se acerca. Nunca gire con la máquina si no ha verificado antes que la
zona de seguridad atrás de Ud. está
vacía.
Page 54
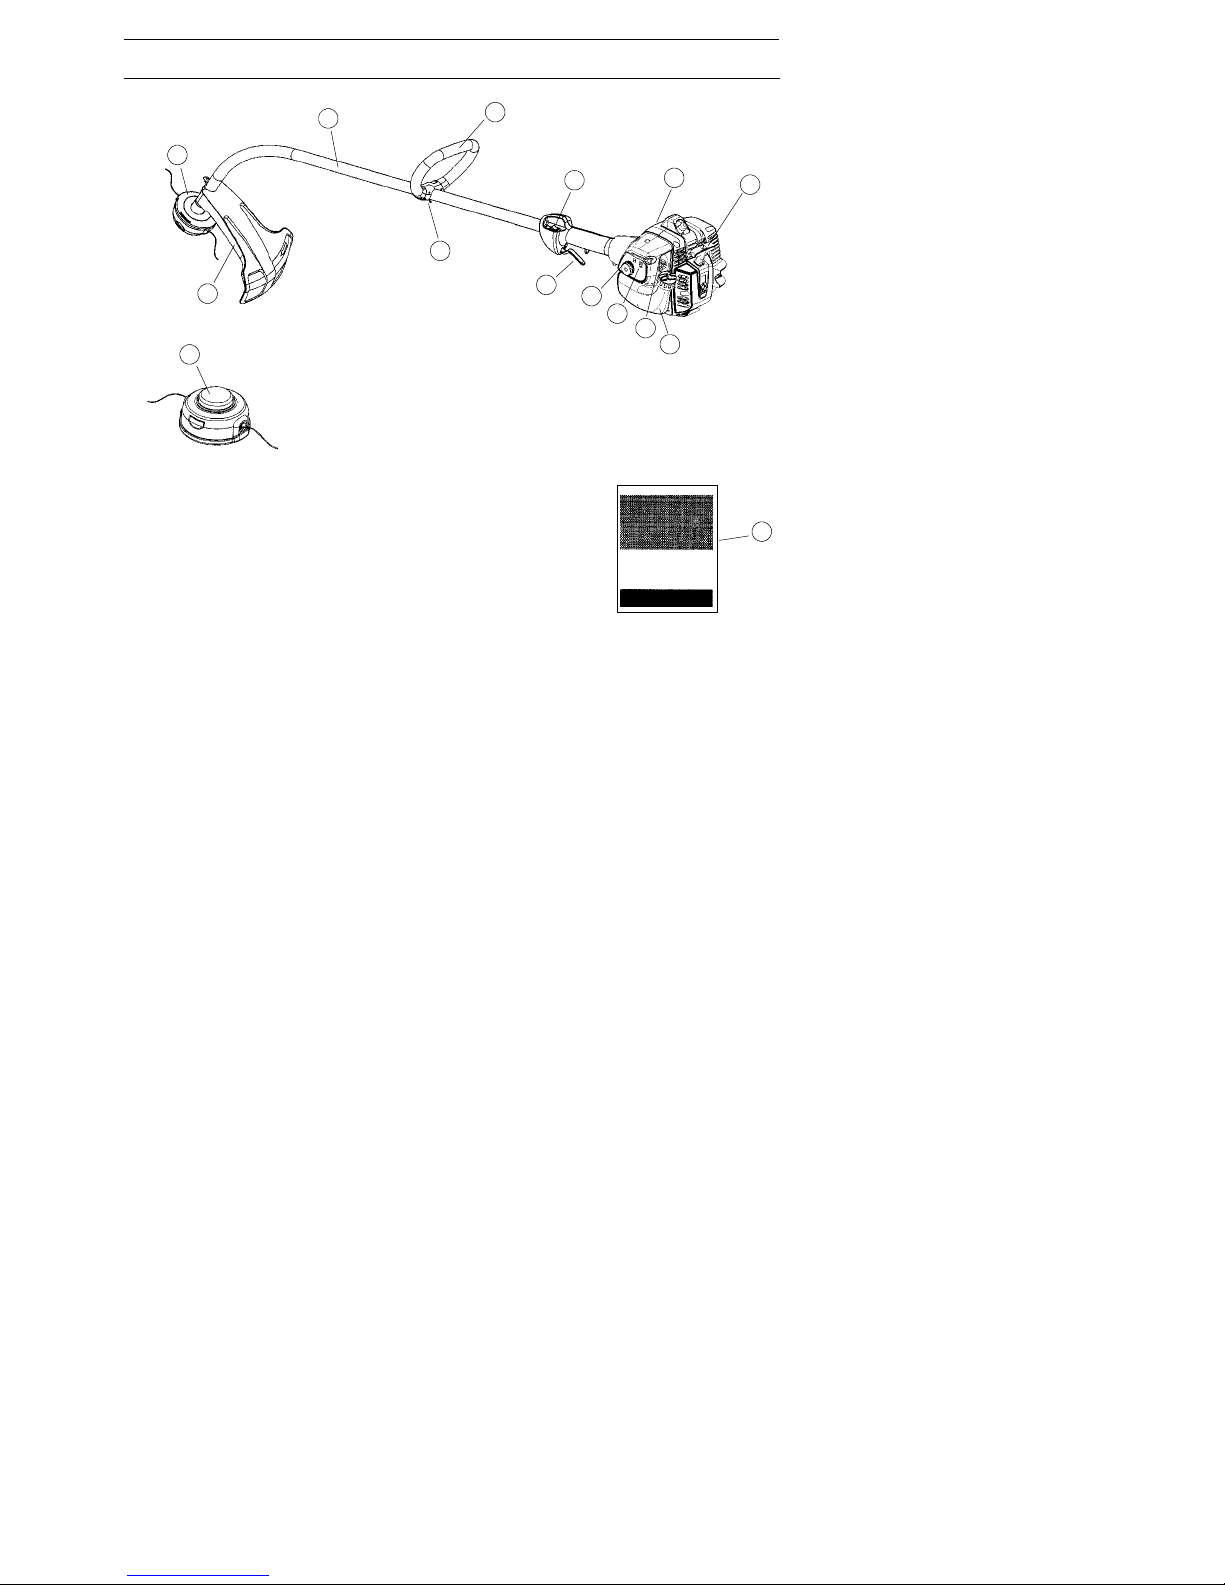
Spanish ---54
545186855 Rev. 8 5/15/12
¿QUÉ ES QUÉ?
1. Cabezal de corte 8. Mango de la cuerda de arranque
2. Protector 9. Depósito de combustible
3. Eje 10. Estrangulador
4. Mango cerrado 11. Bomba de combustible
5. Acelerador 12. Cubierta del filtro de aire
6. Interruptor stop 13. Regulación de mango
7. Cubierta del cilindro 14. Manual de instrucciones
3
7
4
1
2
12
1
6
8
11
10
5
9
14
13
¿Qué es qué?
Page 55
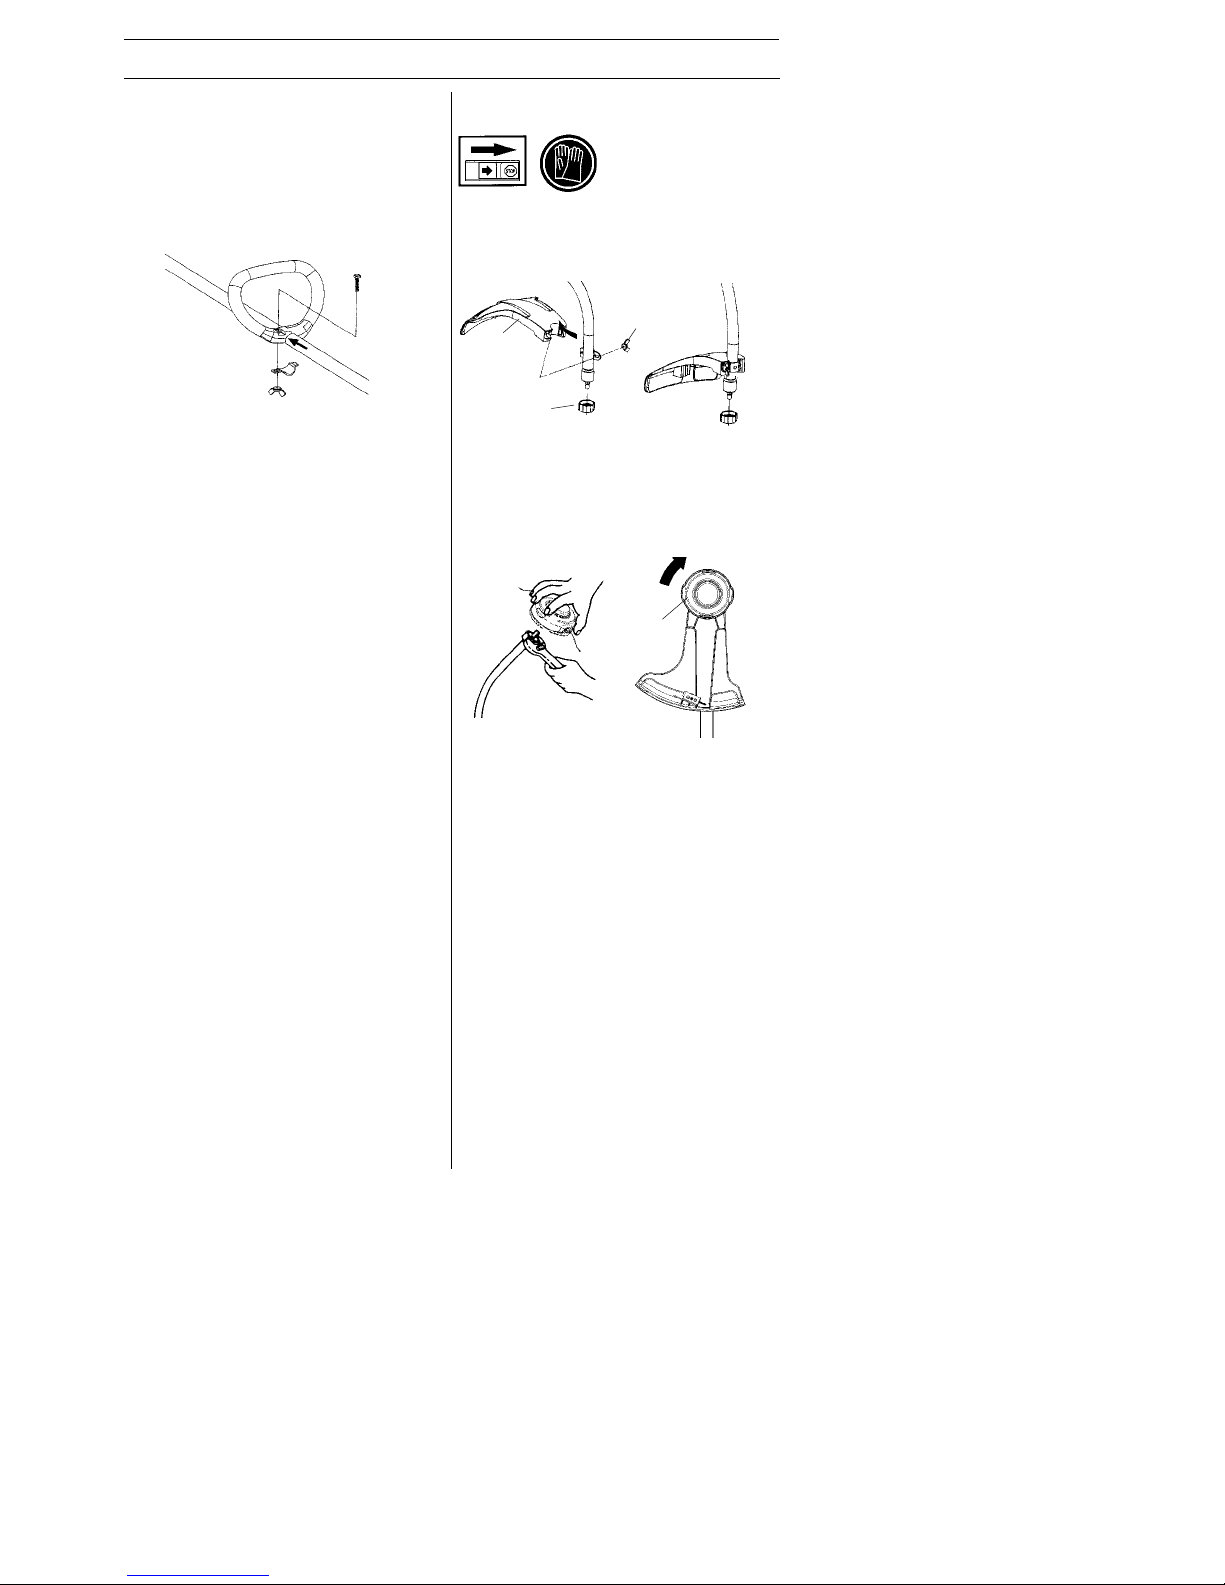
Spanish ---55
545186855 Rev. 8 5/15/12
MONTAJE
NOTA:
A
segúrese de que el aparato esté
montada correctamente según lo demostrado en este manual.
Montaje de mango de tipo
cerrado
S Coloque el mango contra el eje. El man-
go se debe montar entre las dos flechas
en el eje.
S Monte el tornillo, la chapa de fijación y la
tuerca de mariposa como indica la figura.
S Apriete la tuerca de mariposa.
Montajedelaprotectoryla
cabezal de corte
S Montar la protector de la recortadora (A)
para trabajar con el cabezal de corte.
La protección de la recortadora/protector
combinada se engancha en la sujeción del
eje y se fija con un tuerca mariposa (B).
A
C
B
S Coloque el protector de polvo (C) en el
eje. La tuerca debe quedar totalmente
rodeada por el protector de polvo.
S Para que el eje no gire, mantenga fijo el
protector de polvo con una llave.
S Enrosque el cabezal de corte (D) en el
eje.
S El desmontaje se realiza en el orden in-
verso.
D
Page 56
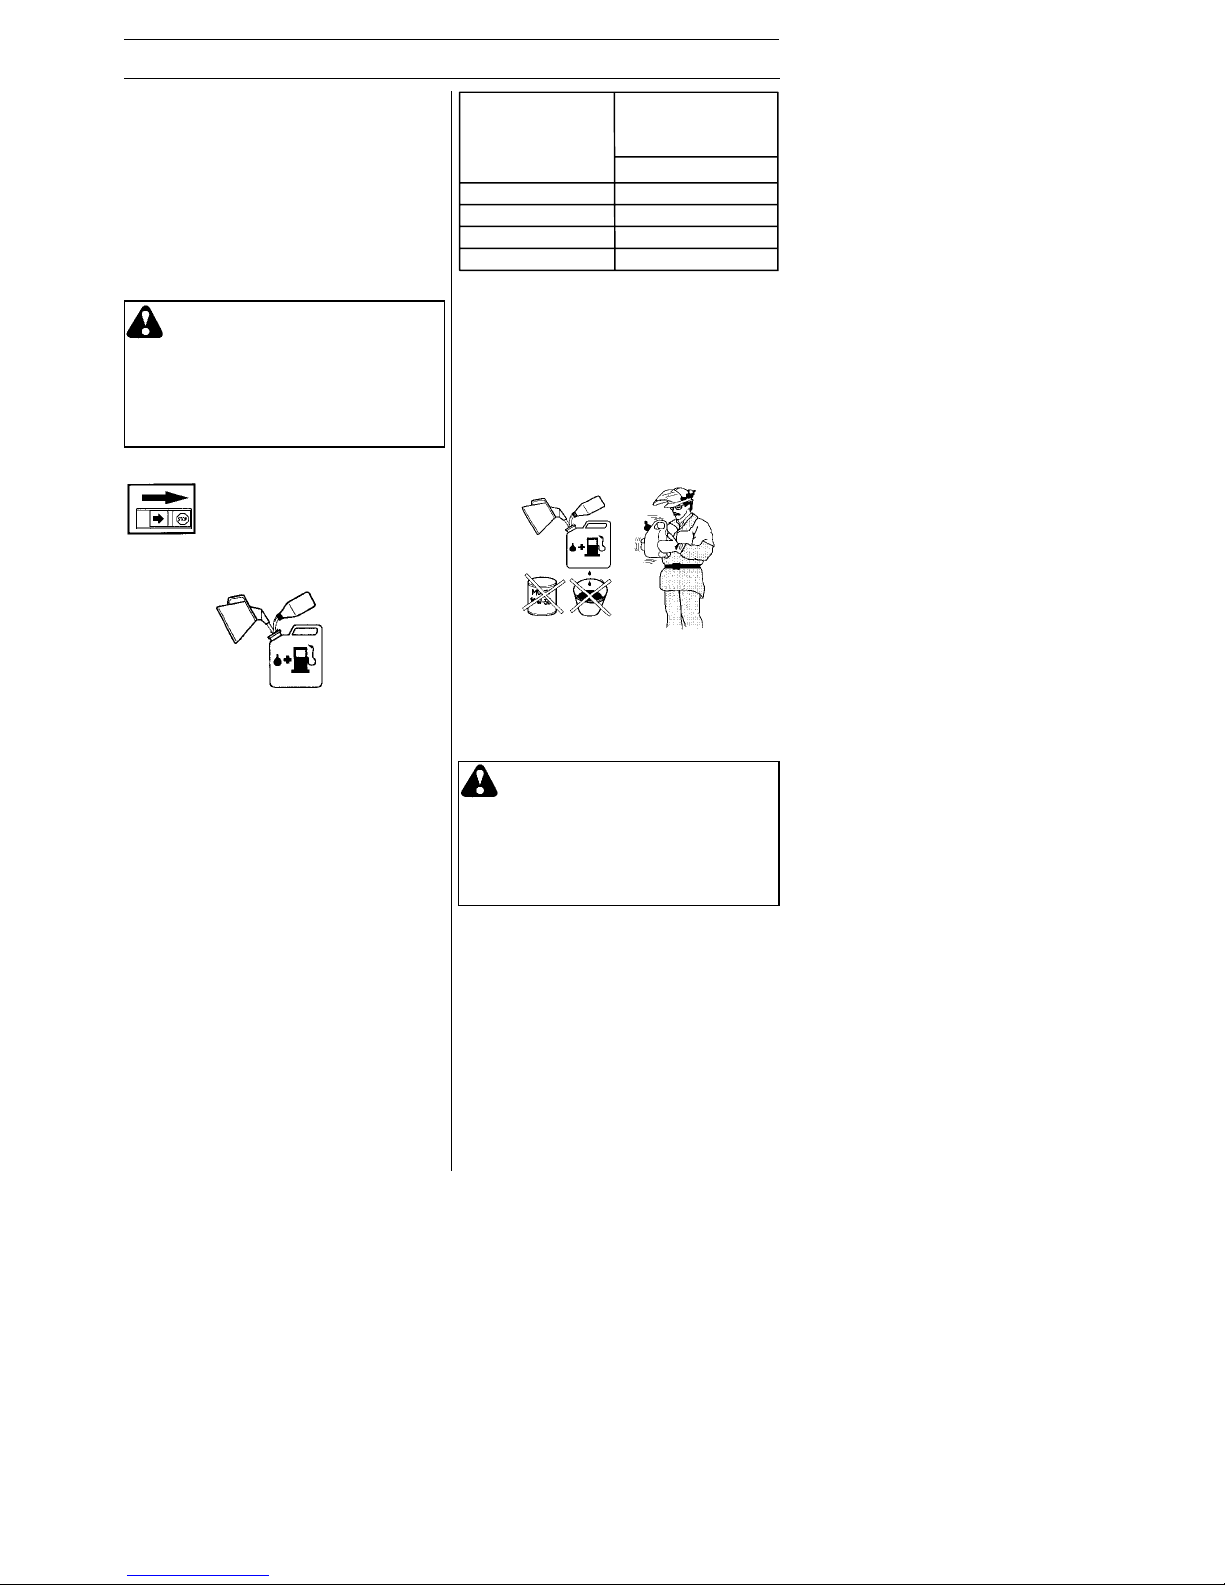
Spanish ---56
545186855 Rev. 8 5/15/12
MANIPULACION DEL COMBUSTIBLE
Carburante
¡NOTA! El motor de la máquina es de dos
tiempos y debe funcionar con una mezcla
de gasolina y aceite para motores de dos
tiempos. Para obtener una mezcla con las
proporciones correctas debe medirse con
precisión la cantidad de aceite a mezclar.
En la mezcla de pequeñas cantidades de
combustible, los errores más insignificantes en la medición del aceite influyen
considerablemente en las proporciones de
la mezcla.
Gasolina
¡NOTA! Use siempre gasolina sin plomo
de alta calidad.
ADVERTENCIA: El combus-
tible y los vapores de combustible
son muy inflamables y pueden causar daños graves por inhalación y
contacto con la piel. Por consiguiente, al manipular combustible
proceda con cuidado y procure que
haya buena ventilación.
S Este motor está habilitado para fun-
cionar con gasolina sin plomo.
S El octanaje mínimo recomendado es de 87
octanos. Si usa gasolina de menos de 87
octanos, el motor puede pistonear. Esto
aumenta la temperatura del motor y puede
ocasionar averías graves del mismo.
S Para trabajar durante mucho tiempo en
altas revoluciones se recomienda el uso
de gasolina con más octanos.
Aceite para motores de dos tiempos
S Para obtener el mejor resultado y funcio-
namiento, use el aceite JONSERED para
motores de dos tiempos, que ha sido
elaborado especialmente para nuestros
motores de dos tiempos. Proporción de
mezcla 1:50 (2%).
S Paramaximizarlavidadesurecortadora,
usted puede elegir utilizar un aceite sintético de alta calidad, formulado y que ha sido
elaborado para motores de dos tiempos.
Proporción de mezcla 1:50 (2%).
S No utilice nunca aceite para motores de
dos tiempos fuera borda refrigerados por
agua (outboard oil).
S No utilice nunca aceite para motores de
cuatro tiempos.
Gasolina
Aceite para
motores de dos
tiempos
2% (1:50)
Litros Litros
50,10
10 0,20
15 0,30
Mezcla
S Siempre haga la mezcla de gasolina y
aceite en un recipiente limpio, homologado para gasolina.
S Primero, ponga la mitad de la gasolina
que se va a mezclar . Luego, añada todo
el aceite y agite la mezcla. A continuación, añada el resto de la gasolina.
S Agite bien la mezcla de combustible
antes de ponerla en el depósito de combustible de la máquina.
S No mezcle más combustible que el ne-
cesario para utilizar un mes como máximo.
S Si no se ha utilizado la máquina por un
tiempo prolongado, vacíe el depósito de
combustible y límpielo.
ADVERTENCIA: El silenciador
del catalizador se calienta mucho,
tanto durante el funcionamiento
como después de la parada.
Incluso funcionando éste en ralentí. Tenga presente el peligro de
incendio, especialmente al manejar
sustancias y/o gases inflamables.
Page 57
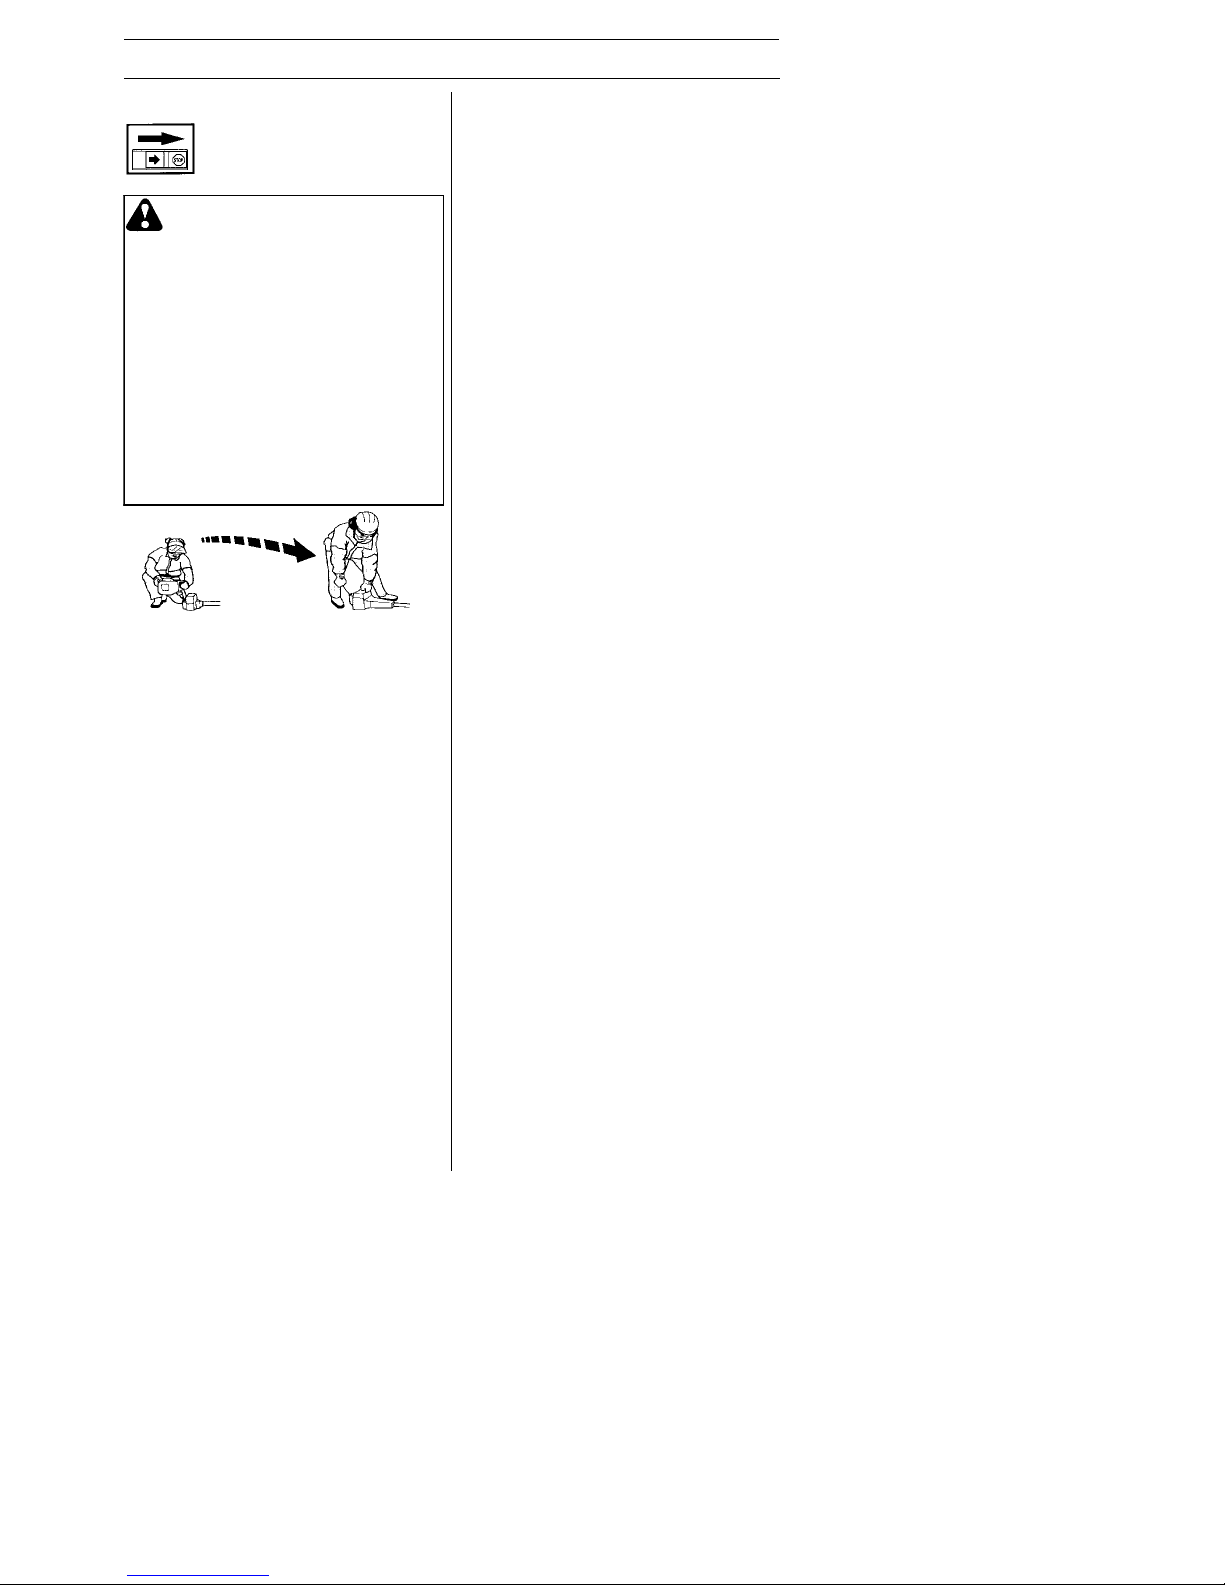
Spanish ---57
545186855 Rev. 8 5/15/12
MANIPULACION DEL COMBUSTIBLE
ADVERTENCIA: Las siguientes
medidas preventivas reducen el riesgo de incendio:
No fume ni ponga objetos calientes
cerca del combustible.
No haga nunca el repostaje con el
motor en marcha. Apague el motor
y deje que se enfríe unos minutos
antesderepostar.
Para repostar, abra despacio la
tapa del depósito de combustible
para evacuar lentamente la eventual sobrepresión.
Después de repostar, apriete bien
la tapa del depósito de combustible. Antes de arrancar, aparte
siempre la máquina del lugar de
repostaje.
Repostaje
Min. 3 m
(10 ft.)
S Limpie alrededor de la tapa del depósito.
Los residuos en el depósito ocasionan
problemas de funcionamiento.
S Asegúrese de que el combustible esté
bien mezclado sacudiendo el recipiente
antes de llenar el depósito.
Page 58

Spanish ---58
545186855 Rev. 8 5/15/12
ARRANQUE Y PARADA
S Controle que el cabezal de corte y la pro-
tector de la recortadora no estén dañados
ni presenten grietas. Cambie el cabezal o
la protector de la recortadora si han recibido golpes o están agrietados.
S Nunca utilice la máquina sin la protec-
ción o con una protección defectuosa.
Control antes de arrancar
S Inspeccione el aparato y cambie las pie-
zas dañadas o flojas antes de cada uso.
Repare toda fuga de combustible antes
de usar el aparato. Asegúrese todos los
fijadores se encuentren bien ajustados.
Asegúrese que el equipo de corte esté
correctamente instalada y esté bien fijo.
Utilice siempre línea flexible, no metálico, recomendado por el fabricante. Nunca use, por ejemplo, alambre, cuerda,
hilo, etc., los cuales pueden romperse y
convertirse en proyectiles peligrosos.
Arranque y parada
ADVERTENCIA: Antes de ar-
rancar la máquina debe montarse
la cubierta del embrague completa
con el tubo, de lo contrario el embrague puede zafar y provocar
daños personales. Antes de arrancar, aparte siempre la máquina del
lugar de repostaje. Coloque la
máquina sobre una base firme.
Controle que el equipo de corte no
pueda atascarse en algún objeto.
Asegúrese de que no haya personas desautorizadas en la zona de
trabajo, de lo contrario se corre el
riesgo de ocasionar graves daños
personales. La distancia de seguridadesde15metros(50pies).
Motor frio
Bombadecombustible: Presione 10
veces la burbuja de goma de la bomba de
combustible hasta que comience a llenarse de combustible. No es necesario
llenarla totalmente.
Estrangulador: Coloque la palanca azul
del estrangulador de la motor a la posición
estrangulamiento.
Arranque
Presione el cuerpo de la máquina contra el
suelo con la mano izquierda (ATENCIÓN:
¡No con el pie!). Agarre la empuñadura de
arranque con la mano derecha. NO
apriete el gatillo acelerador. Tire despacio de la cuerda con la mano derecha,
hasta sentir una resistencia (los dientes de
arranque engranan), y después tire rápido
y con fuerza.
Nunca enrosque el cuerda de
arranque alrededor de la mano.
Repita tirar de la cuerda hasta que el motor suene como si esté intentando arrancar. Coloque la palanca azul del estrangulador de la motor a la posición ½. Tire del
cuerda hasta que el motor arranca. Coloque la palanca azul del estrangulador de la
motor a la posición abierta.
NOTA: Si el motor se apaga, coloque la
palanca azul del estrangulador de la motor a
la posición estrangulamiento y repita los
instrucciones de arranque.
¡PRECAUCION! No extraiga el cuerda de
arranque al máximo, y no suelte la empuñadura de arranque si ha extraido todo
el cuerda. Ello puede ocasionar averías en
la máquina.
Page 59

Spanish ---59
545186855 Rev. 8 5/15/12
ARRANQUE Y PARADA
Motor caliente
Con un motor caliente, coloque la palanca
azul del estrangulador de la motor a la
posición ½. Tire del cuerda hasta que el
motor arranca. Coloque la palanca azul del
estrangulador de la motor a la posición
abierta.
Parada
Para detener el motor, empuje y sostenga el
interruptor stop en la posición STOP hasta
que el motor se haya detenido por completo.
ADVERTENCIA: Cuando el
motor es arrancado con el estrangulador en la posición activada o
de aceleración de arranque, el
equipo de corte comienza a girar
inmediatamente.
MANTENIMIENTO
¡NOTA! Si el equipo de corte gira en ralentí,
debe girarse el tornillo de ralentí-- T en sentido contrario a las agujas del reloj hasta que el
equipo de corte quede inmóvil.
Régimen recomendado en ralentí:
Vea la sección “Datos Técnicos”.
Aceleración máxima recomendada:
Vea la sección “Datos Técnicos”.
Carburador
Su producto Jonsered ha sido construido y
fabricado conforme a especificaciones que
reducen los gases de escape tóxicos.
Cuando el motor ha consumido 8--10
depósitos de combustible, se dice que el
motor ha sido rodado. Para asegurarse de
que funcione de la mejor manera y despida
la menor cantidad posible de gases tóxicos
después del período de rodaje, contacte a
su distribuidor autorizado del servicio para
que ajuste su carburador.
Functionamiento
S El régimen del motor se controla me-
diante el acelerador y el carburador . En el
carburador se efectúa la dosificación de
la mezcla de aire
y
combustible.
ADVERTENCIA: Antes de ar-
rancar la máquina debe montarse la
cubierta del embrague completa con
el tubo, de lo contrario el embrague
puede zafar y provocar daños personales.
ADVERTENCIA: El equipo de
corte tal vez pueda girar al hacer
ajustes al carburador. Use su equipo
de protección y observe todas las
instrucciones de seguridad. Este seguro que el equipo de corte pare de
dar vueltas cuando el motor este inactivo. Cuando el aparato este apagado, cerciórese de que los equipo
de corte hayan parado completamente antes de sentarlo en algún
lado.
El dueño es responsable de adquirir todo el
mantenimiento requerido como lo define en
el manual de instrucciones.
ADVERTENCIA: El mantenimien-
to incorrecto podría provocar daños
serios al motor o personales.
S Con el tornillo T se regula la posición del
acelerador en ralentí. El ralentí se aumenta girando el tornillo T en el sentido
de las agujas del reloj y se reduce
girándolo en sentido contrario a las agujas del reloj.
Reglaje básico
S El reglaje básico del carburador se lleva a
cabo en las pruebas que se hacen en fábrica. El reglaje final debe ser realizado por un
técnico especiali za d o .
Page 60

Spanish ---60
545186855 Rev. 8 5/15/12
MANTENIMIENTO
Seguridad del aparato y su
mantenimiento
Antes de realizar cualquier tarea de mantenimiento, salvo reglajes en el carburador,
desconecte la bujía.
ADVERTENCIA: Si no puede
regular el régimen en ralentí para
que el equipo de corte deje de girar,
consulte a su distribuidor autorizado
del servicio. No utilice la máquina
hasta que no esté correctamente
regulada o reparada.
Silenciador
¡NOTA! El silenciador tiene un catalizador
diseñado para reducir los gas de escape
dañosos.
El silenciador está diseñado para amortiguar
el ruido y para apartar del usuario los gases
de escape. Los gases de escape están calientes y pueden contener chispas que pueden ocasionar incendios si se dirigen los
gases a materiales secos e inflamables.
Tornillos del
silenciador
Bujía
Los factores siguientes afectan al estado
de la bujía:
S Carburador mal regulado.
S Mezcla de aceite inadecuada en el com-
bustible (demasiado aceite o aceite inadecuado).
S Filtro de aire sucio.
Rejilla
apagachispas
Reglaje definitivo del régimen de
ralentí--T
Regule el régimen de ralentí con el tornillo T ,
si es necesario un reajuste. Gire primero el
tornillo de ralentí T en el sentido de las agujas del reloj, hasta que comience a girar el
equipo de corte. Después gire el tornillo en el
sentido contrario, hasta que el equipo de
corte se detenga. El régimen de ralentí es
correcto cuando el motor funciona en forma
uniforme en cada posición. T ambién debe
existir un buen margen hasta el régimen en
que empieza a girar el equipo de corte.
Tornillo de
ajuste de
ralentí
El silenciador incorporan una rejilla apagachispas. El rejilla debe ser comprobado y
en caso de necesidad, limpiar por una distribuidor autorizado del servicio. Si el rejil-
la presenta daños, se debe cambiar el
rejilla.
Si el rejilla se obstruye con frecuencia,
esto puede ser señal de que el catalizador
no funciona correctamente. Consulte a su
distribuidor para un inspección. Si el rejilla
se obstruye, la máquina se recalienta y se
dañan el cilindro y el pistón.
¡PRECAUCION! No utilice nunca la
máquina con un silenciador en mal estado.
ADVERTENCIA: En el interior
del silenciador hay sustancias
químicas que pueden ser cancerígenas. Evitar el contacto con estas
sustancias si se daña el silenciador .
ADVERTENCIA: Los humos de
escape del motor contienen
monóxido de carbono, que puede
provocar envenenamiento. NO
ponga la máquina en marcha en sitios cerrados o mal ventilados. Los
humos de escape del motor son
calientes y pueden contener chispas capaces de iniciar un incendio.
No arranque nunca la máquina en
sitios cerrados ni cerca de material
combustible.
PRECAUCIÓN: El silenciador con
catalizador se calienta mucho durante el
uso y permanece caliente aún luego de
apagado el motor. Lo mismo rige para la
marcha en ralentí. Su contacto puede
quemar la piel. ¡Tenga en cuenta el peligro de incendio!
Page 61

Spanish ---61
545186855 Rev. 8 5/15/12
MANTENIMIENTO
Filtro de aire
El filtro de aire debe limpiarse regularmente de polvo y suciedad para evitar:
S Fallos del carburador
S Problemas de arranque
S Reducción de la potencia
S Desgaste innecesario de las piezas del
motor.
S Un consumo de combustible excesivo.
Limpie el filtro cada 25 horas de funcionamiento o más seguido si trabaja en un entorno muy polvoriento.
Limpieza del filtro de aire
Desmonte la cubierta del filtro de aire y retire el filtro. Lávelo en agua jabonosa caliente. Aclare el filtro totalmente. Controle
que el filtro esté seco antes de volver a
montarlo. Un filtro utilizado durante mucho
tiempo no puede limpiarse del todo. Por
tanto, hay que cambiarlo a intervalos regulares. Un filtro de aire averiado debe
cambiarse.
Mantenimiento diario
S Compruebe que los componentes del
acelerador funcionen con seguridad. (Fiador y acelerador.)
S Controle que el interruptor stop funcione.
S Controle que no haya fugas de combus-
tible del motor, del depósito o de los conductos de combustible.
S Controle que el equipo de corte no gire en
ralentí.
S Limpie la parte exterior de la máquina.
S Controle que el arnés no sea dañado.
S Controle que la protección no esté daña-
da y que no tenga grietas.
S Cambie la protección si ha estado ex-
puesta a golpes o si tiene grietas.
S Una cabezal de corte desequilibrada cau-
sa las vibraciones pesadas que pueden
dañar la máquina.
S Compruebe que los tornillos y las tuercas
estén apretados.
S Controle que el cabezal de corte estén
apretados.
Programa de mantenimiento
A continuación, se indican algunas instrucciones generales de mantenimiento.
Estos factores producen revestimientos en
los electrodos de la bujía que pueden ocasionar perturbaciones del funcionamiento y
dificultades de arranque. Si la potencia de
la máquina es demasiado baja, si es difícil
arrancar la máquina o si el ralentí es irregular: revise primero la bujía antes de tomar
otras medidas. Si la bujía está muy sucia,
límpiela y compruebe que la separación de
los electrodos sea de 0,6 mm (0,024 de pulgada). La bujía debe cambiarse aproximadamente después de un mes de funcionamiento o más a menudo si es necesario.
¡PRECAUCION! ¡Utilice siempre el tipo de
bujía recomendado! Una bujía incorrecta
puede arruinar el pistón y el cilindro.
Asegúrese de que la bujía tenga supresión
de perturbaciones radioeléctricas.
0,6 mm (0,024 de pulgada)
Mantenimiento semanal
S Controle el mecanismo de arranque y la
cuerda del mismo.
S Limpie el compartimento del carburador.
S Limpie la bujía por fuera. Quítela y con-
trole la distancia entre los electrodos.
Ajuste la distancia a 0,5 mm o cambie la
bujía. Utilice la bujía con resistor Champion RCJ--8Y o equivalente.
S Limpie las aletas de refrigeración del cilin-
dro y controle que la entrada de aire del
mecanismo de arranque no esté obstruida.
S Limpie el filtro de aire.
Mantenimiento mensual
S Limpie el depósito de combustible.
S Limpie el exterior del carburador y la zona
alrededor del mismo.
S Limpie el rotor del ventilador y la zona al-
rededor del mismo.
S Revise el filtro y el conducto de combus-
tible. Cámbielos si es necesario.
S Cambie el filtro de combustible en el
depósito de combustible.
S Compruebe el embrague, los resortes del
embrague y el cilindro del embrague para
saber si hay desgaste. Cambie en caso
de necesidad.
S Revise todos los cables y conexiones.
S Cambie la bujía. Utilice la bujía con resis-
tor Champion RCJ--8Y o equivalente.
S Cambie el filtro de aire.
Page 62

Spanish ---62
545186855 Rev. 8 5/15/12
20i
10i
3m
6m
Reemplazo de la línea en el cabezal de corte
Page 63

Spanish ---63
545186855 Rev. 8 5/15/12
DATOS TECNICOS
Modelo GT2128 (Rosca para eje de hoja 3/8 RH)
Equipo de corte / protector ,
Accessorios homologados Tipo número de pieza
Cabezal de corte T25 537 33 83--07 / 545 006 049
Datos técnicos
GT2128
Motor
Cilindrada, cm
3
28
Diámetro del cilindro, mm 35
Carrera, mm 28,7
Régimen de ralentí, r.p.m. 2800--3200
Régimen máximo de embalamiento recomendado, rpm 11000
Velocidad en el eje de salida, rpm 8000
Potencia máxima del motor según ISO 8893, hp/kW 1,1/0,8
Silenciador con catalizador Sí
Sistema de encendido conreg. de velocidad Sí
Sistema de encendido
Fabricante/tipo de sistema de encendido Walbro/CD
Bujía Champion RCJ--8Y
Distancia de electrodos, mm 0,6
Sistema de combustible y lubricación
Fabricante/tipo de carburador Zama
Capacidad del depósito de gasolina, litros 0,4
Peso
Peso sin combustible, equipo de corte y protector, kg 4,4
Niveles acústicos
(vea nota 1)
Nivel de presión de ruido equivalente en el oído del operador,
medido según ANSI B175.3--1997, dB(A), mín./máx.: 94/97
Niveles de vibraciones
Niveles de vibraciones en el mangos, según
ANSI B175.3--1997, m/s
2
En ralentí, mango izquierdo/derecho: 3/5
En aceleración máxima, mango izquierdo/derecho: 9/8
Nota 1: El nivel equivalente de presión acústica se calcula como la suma de energía, ponderada en el tiempo, de los niveles de presión acústica en diferentes estados de funcionamiento, con la siguiente división temporal: 1/2 en vacío y 1/2 a régimen máximo.
¡NOTE! La presión acústica en el oído del usuario y las vibraciones en los mangos se
miden con todos los equipos de corte homologados para la máquina. En la tabla se indican
los valores mínimo y máximo.
Page 64

Spanish ---64
545186855 Rev. 8 5/15/12
DECLARACION DE GARANTIA DE CONTROL
DE EMISION DE U.S. EPA / CALIFORNIA /
AGENCIA AMBIENTAL CANADIENSE
IMPORTANTE: Este producto es con
f
orme con la normativa Fase 3 de la Agencia
de Protección Ambiental de los Estados
Unidos (EPA) referente a emisiones de
escape y evaporación. Para asegurar la
conformidad con EPA Fase 3, se recomienda utilizar sólo repuestos originales de la
marca Jonsered. El uso de otro tipo de
repuestos incumple las leyes federales.
SUS DERECHOS Y OBLIGACIONES
DE GARANTIA:
La Agencia de Protección Ambiental de los
Estados Unidos, la Junta de Recursos Ambientales de California, la Agencia Ambiental
Canadiense y Jonsered se complacen en explicar la garantía con la que cuenta el sistema
de control de emisión en su motor pequeño,
modelo 2012 y más adelante, para uso fuera
de carretera. En California, todos los motores
pequeños para uso fuera de carretera deben
ser diseñados, construídos y equipados para
satisfacer las rigurosas normas antihumo que
posee el estado. Jonsered deberá garantizar
el sistema de control de emisión en su máquina de motor pequeño para uso fuera de carretera por los períodos de tiempo que explicamos a continuación y con la condición de que
su máquina de motor pequeño para uso fuera
de carretera no haya sufrido ningún tipo de
abuso, negligencia o mantenimiento inapropiado. Su sistema de control de emisión incluye piezas tales como el carburador, el sis tema de ignición y el tanque de combustible.
Donde exista una condición que requiera reparación bajo garantía, Jonsered reparará
gratis su motor pequeño para uso fuera de
carretera. Los gatos cubiertos bajo la garantía incluyen el diagnóstico, las piezas y
labor.
CUBIERTA DE GARANTIA DEL FABRICANTE:
Si cualquier pieza relacionada con el sistema
de emisión de su motor (como hemos enumerado en la lista de piezas de control de emisión bajo garantía) se encontrara defectuosa
o defectos en el material o en la labor del motor causaran que tal pieza comenzara a fallar ,
la pieza será reparada o reemplazada por
Jonsered.
el servicio bajo garantía únicamente a causa de la falta de recibos o por el incumplimiento de su parte en asegurarse que el
mantenimiento programado haya sido desempeñado. Como dueño de una máquina
de motor pequeño para uso fuera de carretera, usted deberá contar con el conocimiento de que Jonsered puede negar la cubierta
bajo garantía si su máquina de motor pequeño para uso fuera de carretera o alguna
pieza de la misma ha dejado de funcionar
debido al abuso, negligencia, mantenimiento inapropiado, modificaciones no aprobadas o el uso de piezas que no hayan sido
fabricadas o aprobadas por el fabricante
original del equipo. Es responsabilida d suya
el llevar su máquina de motor pequeño para
uso fuera de carretera a un centro de reparación autorizado Jonsered tan pronto como se
presente el problema. Las reparaciones bajo
garantía deberán ser completadas en un período de tiempo razonable, que no exceda los
30 días. Si cuenta usted con alguna pregunta
en relación a sus derechos y responsabilidades de garantía, usted deberá comunicarse
con su centro de servicio autorizado más cercano, llamar a Jonsered al 1- -800--487--5951,
o visite www.charlotte.usa.jonsered.com
.
FECHA DEL COMIENZA DE LA
GARANTIA:
El período de garantía comienza en la fecha
de compra de la máquina de motor pequeño
para uso fuera de carretera.
DURACION DE LA GARANTIA:
Esta garantía cuenta con un período de duración de dos años comenzando en la fecha
inicial de compra, o hasta el final del garantía
de producto (cualquiera que sea más largo).
QUE CUBRE LA GARANTIA: REPARACION O REEMPLAZO DE PIEZAS.
La reparación o el reemplazo de cualquier
pieza garantizada serán desempeñados y
ofrecidos al dueño sin costo alguno en un
centro de servicio Jonsered. Si cuenta
usted con alguna pregunta en relación a
sus derechos y responsabilidades de garantía, usted deberá comunicarse con su
centro de servicio autorizado más cercano,
llamar a Jonsered al 1--800--487--5951, o
visite www.charlotte.usa.jonsered.com
GARANTIA DE RESPONSABILIDAD
DE DEL DUENO:
Como dueño de una máquina de motor pequeño para uso fuera de carretera, usted
será responsable por el mantenimiento adecuado en los períodos previamente programados y enumerados en su manual de
instrucciones. Jonsered recomienda que
guarde todos los recibos que indiquen que
se ha desempeñado mantenimiento en su
máquina de motor pequeño para uso fuera
de carretera, pero Jonsered no podrá negar
Page 65

Spanish ---65
545186855 Rev. 8 5/15/12
DECLARACION DE GARANTIA DE CONTROL
DE EMISION DE U.S. EPA / CALIFORNIA /
AGENCIA AMBIENTAL CANADIENSE
PERIODO DE GARANTIA:
Cualquier pieza garantizada que no esté programada para ser reemplazada como parte
del mantenimiento requerido, o que esté programada únicamente para inspección regular
para efectos de “reparación o reemplazo si
fuera necesario” deberá garantizarse por un
período de dos años. Cualquier pieza garantizada que esté programada para ser reemplazada como parte del mantenimiento requerido deberá estar garantizada por el período de tiempo que comienza en la fecha de
compra inicial hasta la fecha del primer reemplazo programado para dicha pieza.
DIAGNOSTICO:
No se deberá cobrar al dueño ningún tipo
de cargos por la labor de diagnóstico la
cual determine que una pieza garantizada
se encuentra defectuosa si el trabajo de
diagnóstico ha sido desempeñado por un
centro de servicio autorizado Jonsered.
DANOS POR CONSECUECIA:
Jonsered podrá ser responsable de daños
ocurridos a otras piezas del motor causados
por la falla de una pieza garantizada que se
encuentre bajo el período de garantía.
DONDE OBTENER SERVICIO DE
GARANTIA:
Servicio o reparaciones bajo garantía deberán ser provistas en todos los centros de
servicio Jonsered . Por favor comuníquese
al 1-- 800- -487--5951 o visite
www.charlotte.usa.jonsered.com
.
MANTENIMIENTO, REEMPLAZO Y
REP ARACI O N DE PIEZAS RELACIONADAS CON LA EMISION:
Cualquier pieza de repuesto Jonsered aprobada y utilizada en el desempeño de cualquier servicio de mantenimiento o servicio de
reparación bajo garantía de piezas relacionadas con la emisión será provisto sin costo
alguno al dueño si la pieza se encuentra bajo
garantía.
LISTA SE PIEZAS DE CONTROL DE
EMISION GARANTIZADAS:
Carburador, filtro de aire (cubierta hasta la
fecha de mantenimiento programada), sistema de ignición: bujía (cubierta hasta la fecha
de mantenimiento programada), módulo de
ignición, silenciador incluido al catalizador (si
está equipado), tanque de combustible, línea
de combustible, y tapa.
DECLARACION DE MANTENI-MIENTO:
El dueño es responsable de adquirir todo el
mantenimiento requerido como lo define en
el manual de instrucciones.
QUE NO CUBRE LA GARANTIA:
T odas las fallas causadas por el abuso, negligencia o mantenimiento inapropiado no
están cubiertas.
PIEZAS AÑADIDAS O MODIFICADAS:
El uso de piezas añadidas o la modificación
de piezas podrán servir como base para que
se anule la reclamación de garantía. La garantía de Jonsered no se responsabiliza por
el mal funcionamiento debido al uso de piezas añadidas o de piezas modificadas.
COMO ENTABLAR UNA RECLAMACION:
Si cuenta usted con alguna pregunta relacionada con sus derechos y responsabilidades
de garantía, usted deberá entrar en contacto
con su centro de servicio autorizado
Jonsered más cercano, llamar a
Jonsered al 1 --800--487--5951, o visite
www.charlotte.usa.jonsered.com
.
Se certifica este motor para satisfacer los requisitos de emisión para los uso siguientes:
Moderado (50 horas)
Intermedio (125 horas)
Extendido (300 horas)
Page 66

Spanish ---66
545186855 Rev. 8 5/15/12
Page 67

Spanish ---67
545186855 Rev. 8 5/15/12
 Loading...