

Page 1

5103E, 5103, 5103S,
5203, 5104 And 5204
Tractors
OPERATOR’S MANUAL
5103E, 5103, 5103S, 5203, 5104 And
5204 Tractors
OMRE73705 Issue A7 (ENGLISH)
CALIFORNIA
Proposition 65 Warning
Diesel engine exhaust and some of its constituents are
known to the State of California to cause cancer, birth
defects, and other reproductive harm.
If this product contains a gasoline engine:
WARNING
The engine exhaust from this product contains chemicals
known to the State of California to cause cancer, birth
defects or other reproductive harm.
The State of California requires the above two warnings.
John Deere Equipment Private Limited
Printed in India.
Page 2

Foreword
Introduction
READ THIS MANUAL carefully to learn how to operate
and service your machine correctly. Failure to do so
could result in personal injury or equipment damage.
This manual and safety signs on your machine may
also be available in other languages (see your John
Deere dealer to order).
THIS MANUAL SHOULD BE CONSIDERED a
permanent part of your machine and should remain
with the machine.
MEASUREMENTS in this manual are given in both
metric and customary U.S. unit equivalents. Use only
correct replacement parts and fasteners. Metric and
inch fasteners may require a specific metric or inch
wrench.
RIGHT-HAND AND LEFT-HAND sides are determined
by facing the direction of forward travel.
WRITE TRACTOR SERIAL (CHASSIS) NUMBER in
the Specification or Identification Numbers section.
Accurately record all the numbers to help in tracing the
machine should it be stolen. Your dealer also needs
these numbers when you order parts. File the
identification numbers in a secure place off the
machine.
BEFORE DELIVERING THIS MACHINE, your dealer
performed a predelivery inspection. After operating for
the first 100 hours, schedule an after-sale inspection
with your dealer to ensure best performance.
THIS TRACTOR IS DESIGNED SOLELY for use in
customary agricultural or similar operations
("INTENDED USE"). Use in any other way is
considered as contrary to the intended use. The
manufacturer accepts no liability for damage or injury
resulting from this misuse, and these risks must be
borne solely by the user. Compliance with and strict
adherence to the conditions of operation, service and
repair as specified by the manufacturer also constitute
essential elements for the intended use.
THIS TRACTOR SHOULD BE OPERATED, serviced
and repaired only by persons familiar with all its
particular characteristics and acquainted with the
relevant safety rules (accident prevention). The
accident prevention regulations, all other generally
recognized regulations on safety and occupational
medicine and the road traffic regulations must be
observed at all times. Any arbitrary modifications
carried out on this tractor will relieve the manufacturer
of all liability for any resulting damage or injury.
SETTING FUEL DELIVERY BEYOND PUBLISHED
factory specifications or otherwise overpowering will
result in loss of warranty protection for this machine.
NR25796,0000344 –19–17JAN07–1/2
022607
PN=2
Page 3

Introduction
John Deere 5103E Ttractor
John Deere 5103S Ttractor
PY6072 –UN–06AUG06
PY6071 –UN–06AUG06
John Deere 5103 Tractor
PY6069 –UN–06AUG06
PY6077 –UN–06AUG06
John Deere 5203 Tractor
John Deere 5104 Tractor
NOTE: Tractor shown may have optional equipment.
PY6839 –UN–11JAN07
John Deere 5204 Tractor
PY6840 –UN–11JAN07
NR25796,0000344 –19–17JAN07–2/2
022607
PN=3
Page 4

Introduction
022607
PN=4
Page 5

Contents
Page Page
Safety ................................05-1
Restart Stalled Engine ....................45-8
Avoid Idling the Engine....................45-8
Safety Signs ...........................10-1
Observe Engine Work and Idle Speeds .......45-9
Working With Speed/Hour Meter ............45-9
Controls and Instruments
Tractor Controls .........................15-1
Stopping the Engine.....................45-10
Using Booster Battery....................45-11
Instrument Panel ........................15-3
Instrument Panel (5103E Tractor)............15-3
Driving the Tractor
Operator Training Required ................50-1
Lights
Light Switch Positions.....................20-1
Using Headlights ........................20-2
Using High Beam Indicator.................20-2
Using Tail Lights.........................20-3
Using Turn Signals.......................20-4
Using Hazard Lights......................20-5
Using Flood Lamp .......................20-6
Seven-Terminal Outlet ....................20-6
Operator’s Platform
Selecting Seat Position....................25-1
Adjusting Ride Comfort....................25-1
Driving on Public Roads...................50-1
Operating Transmission ...................50-3
Shifting Transmission .....................50-3
Operating Transmission ...................50-4
Selecting a Gear ........................50-5
Using Brakes ...........................50-6
Using Differential Lock (Optional For 5103E
Tractor ) .............................50-7
Stopping Tractor.........................50-8
Rockshaft and 3-Point Hitch
Match Tractor Power to Implement...........55-1
3-Point Hitch Components .................55-1
Rockshaft Control Levers ..................55-2
Break-In Period
Observe Engine Operation Closely...........35-1
Break-In Service.........................35-2
Setting Position Control Lever Stop ..........55-2
Using Rockshaft Position Control ............55-3
Using Draft Control.......................55-4
Adjusting Rockshaft Rate-of-Drop/
Prestarting Checks
Service Daily Before Start-Up...............40-1
Implement lock ........................55-5
Attaching Tipping Trailer...................55-5
Preparing Implement .....................55-6
Operating the Engine
Before Starting the Engine .................45-1
Starting the Engine.......................45-2
Check Instruments After Starting ............45-3
Oil Pressure Indicator.....................45-3
Charging System Indicator .................45-4
Air Restriction Sensor.....................45-4
Positioning Center Link....................55-7
Attaching Implements to 3-Point Hitch ........55-8
Adjusting Hitch Side Sway .................55-9
Leveling the Hitch.......................55-10
Adjusting Lateral Float ...................55-11
Adjusting Rockshaft Control Lever Friction ....55-11
Warming Hydraulic System Oil.............55-12
Air Restriction Sensor (5103E Tractor)........45-5
Coolant Temperature Gauge ...............45-5 Drawbar and PTO
Observe Drawbar Load Limitations...........65-1Watch Fuel Level ........................45-6
Watch Fuel Level (5103E Tractor) ...........45-6 Stay Clear of Rotating Drivelines ............65-1
Changing Engine Speeds..................45-7
Warming Up the Engine ...................45-7
Continued on next page
All information, illustrations and specifications in this manual are based on
the latest information available at the time of publication. The right is
reserved to make changes at any time without notice.
COPYRIGHT2006
DEERE & COMPANY
Moline, Illinois
A John Deere ILLUSTRUCTIONManual
All rights reserved
Previous Editions
Copyright2004
i
022607
PN=1
Page 6

Contents
Page Page
Attaching PTO-Driven Implement ............65-2 Lubricant Storage........................85-4
Diesel Engine Oil ........................85-4Operating Tractor PTO....................65-3
Adjusting PTO Clutch Operating Rod .........65-5 Diesel Engine Coolant ....................85-5
Use Correct Transmission-Hydraulic Filter
Ballast
Planning for Maximum Productivity...........70-1
Selecting Ballast Carefully .................70-1
Element .............................85-6
Transmission and Hydraulic Oil .............85-6
Grease................................85-7
Matching Ballast to Load Work..............70-1
Measuring Wheel Slip—Manually ............70-2
Ballast Limitations........................70-3
Ballasting Front End for Transport ...........70-3
Ballasting Front End for Transport (5103E
Service and Maintenance
Observe Service Intervals..................90-1
Break-In Service.........................90-1
Service Intervals.........................90-2
Tractor)..............................70-4
Ballasting Tractor ........................70-4
Determining Maximum Rear Ballast ..........70-5
Determining Maximum Front Ballast..........70-5
Using Cast Iron Weights...................70-5
Installing Rear Cast Iron Weights ............70-6
Service—Every 10 Hours
Check Engine Oil Level ...................95-1
Check Coolant Level .....................95-1
Drain Water and Sediment From Fuel Filter ....95-2
Lubricate as Necessary ...................95-2
Using Liquid Weight ......................70-6
Service—Every 50 Hours
Wheels, Tyres and Treads
Service Tyres Safely .....................75-1
Check Implement-to-Tyre Clearance .........75-1
Check Tyre Inflation Pressure ..............75-2
Tyre Inflation Pressure Chart ...............75-3
Tighten Wheel/Axle Hardware Correctly .......75-3
Tighten Bolts— Front Axle .................75-3
Check Transmission-Hydraulic System
Oil Level ............................100-1
Clean and Check Battery .................100-1
Lubricate Front Axle Pivot Pin .............100-2
Lubricate Steering Spindles ...............100-2
Lubricate Clutch Pedal and Brake Pedal .....100-3
Inspect Tyres and Loose Hardwares ........100-4
Tighten Bolt Adjustable Front Axle––If
Equipped ............................75-4
Tighten Bolts—Rear Axle (M-14 Bolts)........75-5
Tighten Bolts—Rear Axle (M-20 Stud) ........75-6
Observe Rear Wheel Tread Width Limitations . . 75-6
Tread Settings—Multi-Position Rear Wheels . . . 75-7
Tread Settings—Adjustable Front Axle––If
Equipped ............................75-8
Checking Toe-In.........................75-9
Adjusting Toe-In........................75-10
Service—Every 250 Hours
Change Engine Oil and Filter ..............110-1
Service Air Cleaner .....................110-1
Replace Fuel Filter Inserts ................110-2
Inspect and Adjust Alternator/Fan Belt .......110-2
Lubricate 3-Point Hitch...................110-3
Check Neutral Start System ...............110-3
Check and Adjust Clutch Pedal Free Play ....110-4
Check and Adjust Brake Pedal Free Play.....110-5
Adjusting Toe-In - Adjustable Front Axle––
IF Equipped .........................75-11
Service—Every 500 Hours
Replace Transmission-Hydraulic Filter .......112-1
Transporting
Use Safety Lights and Devices..............80-1
Driving Tractor on Roads ..................80-1
Transport on Carrier......................80-4
Towing Tractor ..........................80-4
Service—Every 600 Hours
Clean Engine Crankcase Vent Tube.........115-1
Pack Front Wheel Bearings (Only For
Carraro Front Axle)....................115-1
Check Hoses and Hose Clamps for
Tightness ...........................115-2Fuels, Lubricants and Coolant
Handle Fuel Safely—Avoid Fires ............85-1 Lubricate Rear Axle Bearings..............115-3
Check Engine Idle Speeds ................115-4Handle Fluids Safely—Avoid Fires ...........85-1
Fuel Storage............................85-2 Check Front Axle Pivot Pin................115-4
Adjust Engine Valve Clearance ............115-5Diesel Fuel.............................85-2
Diesel Fuel Filters........................85-2
Fill Fuel Tank ...........................85-3
Continued on next page
ii
022607
PN=2
Page 7

Contents
Page Page
Service—Every 1250 Hours Connecting Alternator Wiring For (5103E) . . . 140-21
Connecting Alternator Wiring For (5103,Change Transmission-Hydraulic Oil and
Filter ...............................120-1 5103S, 5203) .......................140-22
Locating Fusible Link ...................140-22Clean Transmission-Hydraulic Pickup
Screen .............................120-2 Locating Fuses........................140-23
Fuse Size and Function .................140-24
Service—Annually
Replace Air Cleaner Elements .............125-1
Fuse Size and Function (5103E Tractor) ....140-25
Aiming Headlights......................140-26
Adjusting Headlights....................140-27
Service—2 Years/2000 Hours
Flush Cooling System....................130-1
Replace Headlight Bulb .................140-28
Replace Tail Light and Warning Light
Bulbs .............................140-29
Service—As Required
Service Air Cleaner .....................135-1
Replace Flood Lamp Bulb ...............140-29
Checking Tyres .......................140-30
Adjust Throttle Friction ...................135-1
Troubleshooting
Service
Additional Service Information .............140-1
Service Tractor Safely ...................140-2
Engine Break-In Oil .....................140-3
Work In Ventilated Area ..................140-3
Using High-Pressure Washers .............140-3
Opening Hood .........................140-4
Engine Troubleshooting ..................145-1
Transmission Troubleshooting .............145-4
Hydraulic System Troubleshooting ..........145-5
Brakes Troubleshooting ..................145-5
Rockshaft and 3-Point Hitch
Troubleshooting ......................145-6
Electrical System Troubleshooting ..........145-8
Removing Side Screens..................140-4
Removing Hood ........................140-5
Air Intake System Components ............140-5
Service Air Cleaner at Regular Intervals......140-6
Tractor Storage
Storing Tractor .........................150-1
Removing Tractor From Storage ...........150-4
Service Air Cleaner at Regular Intervals
(5103E Tractor).......................140-6
Checking Air Intake System ...............140-7
Removing Primary Air Cleaner Element ......140-8
Cleaning Primary Element ................140-8
Washing Primary Element ................140-9
Inspecting Element......................140-9
Storing Element .......................140-10
Replacing Alternator/Fan Belt.............140-10
Fuel System Components ...............140-11
Do Not Modify Fuel System ..............140-11
Bleeding Fuel System...................140-12
Bleed Fuel System At Fuel Injection
Specifications
John Deere 5103E Tractor ................155-1
John Deere 5103 Tractor .................155-2
John Deere 5103S Tractor ................155-3
John Deere 5203 Tractor .................155-4
John Deere 5104 Tractor .................155-5
John Deere 5204 Tractor .................155-6
Ground Speed at Rated Engine Speed
(2300 rpm) ..........................155-7
Metric Bolt and Cap Screw Torque Values....155-8
Unified Inch Bolt and Cap Screw Torque
Values..............................155-9
Nozzles............................140-12
Engine Cooling System .................140-13
Cleaning Grille, Screens, Radiator and
Oil Cooler ..........................140-14
Prevent Battery Explosions...............140-14
Observe Electrical Service Precautions .....140-15
Battery Access ........................140-15
Identification Numbers
Identification Plates .....................160-1
Record Tractor Serial (Chassis) Number .....160-1
Record Front Axle Serial Number...........160-2
Record Engine Serial Number .............160-2
Record Transmission Serial Number ........160-3
Removing Battery......................140-16
Checking Battery Condition ..............140-17 Lubrication Maintenance Record Charts
50, 250 Hour Service Chart ...............165-1Servicing Battery ......................140-18
Charging Battery ......................140-20 500,600 Hour Service Chart ...............165-2
Battery Replacement Specifications ........140-20
Connecting Starter Wiring................140-21
Continued on next page
iii
022607
PN=3
Page 8

Page
1000, 1250 Hour Service Chart ............165-3
Annual Service Chart ...................165-4
2000 Hour Service Chart .................165-5
As Required Service Chart................165-6
John Deere Service
John Deere Parts .......................170-1
The Right Tools ........................170-1
Well Trained Technician..................170-1
Prompt Service.........................170-1
Contents
iv
022607
PN=4
Page 9
Safety
Recognize Safety Information
This is a safety-alert symbol. When you see this symbol
on your machine or in this manual, be alert to the
potential for personal injury.
Follow recommended precautions and safe operating
practices.
Understand Signal Words
A signal word—DANGER, WARNING, or CAUTION—is
used with the safety-alert symbol. DANGER identifies the
most serious hazards.
DANGER or WARNING safety signs are located near
specific hazards. General precautions are listed on
CAUTION safety signs. CAUTION also calls attention to
safety messages in this manual.
Follow Safety Instructions
Carefully read all safety messages in this manual and on
your machine safety signs. Keep safety signs in good
condition. Replace missing or damaged safety signs. Be
sure new equipment components and repair parts include
the current safety signs. Replacement safety signs are
available from your John Deere dealer.
DX,ALERT –19–29SEP98–1/1
T81389 –UN–07DEC88
TS187 –19–30SEP88
DX,SIGNAL –19–03MAR93–1/1
Learn how to operate the machine and how to use
controls properly. Do not let anyone operate without
instruction.
Keep your machine in proper working condition.
Unauthorized modifications to the machine may impair the
function and/or safety and affect machine life.
If you do not understand any part of this manual and need
assistance, contact your John Deere dealer.
05-1
TS201 –UN–23AUG88
DX,READ –19–03MAR93–1/1
022607
PN=7
Page 10

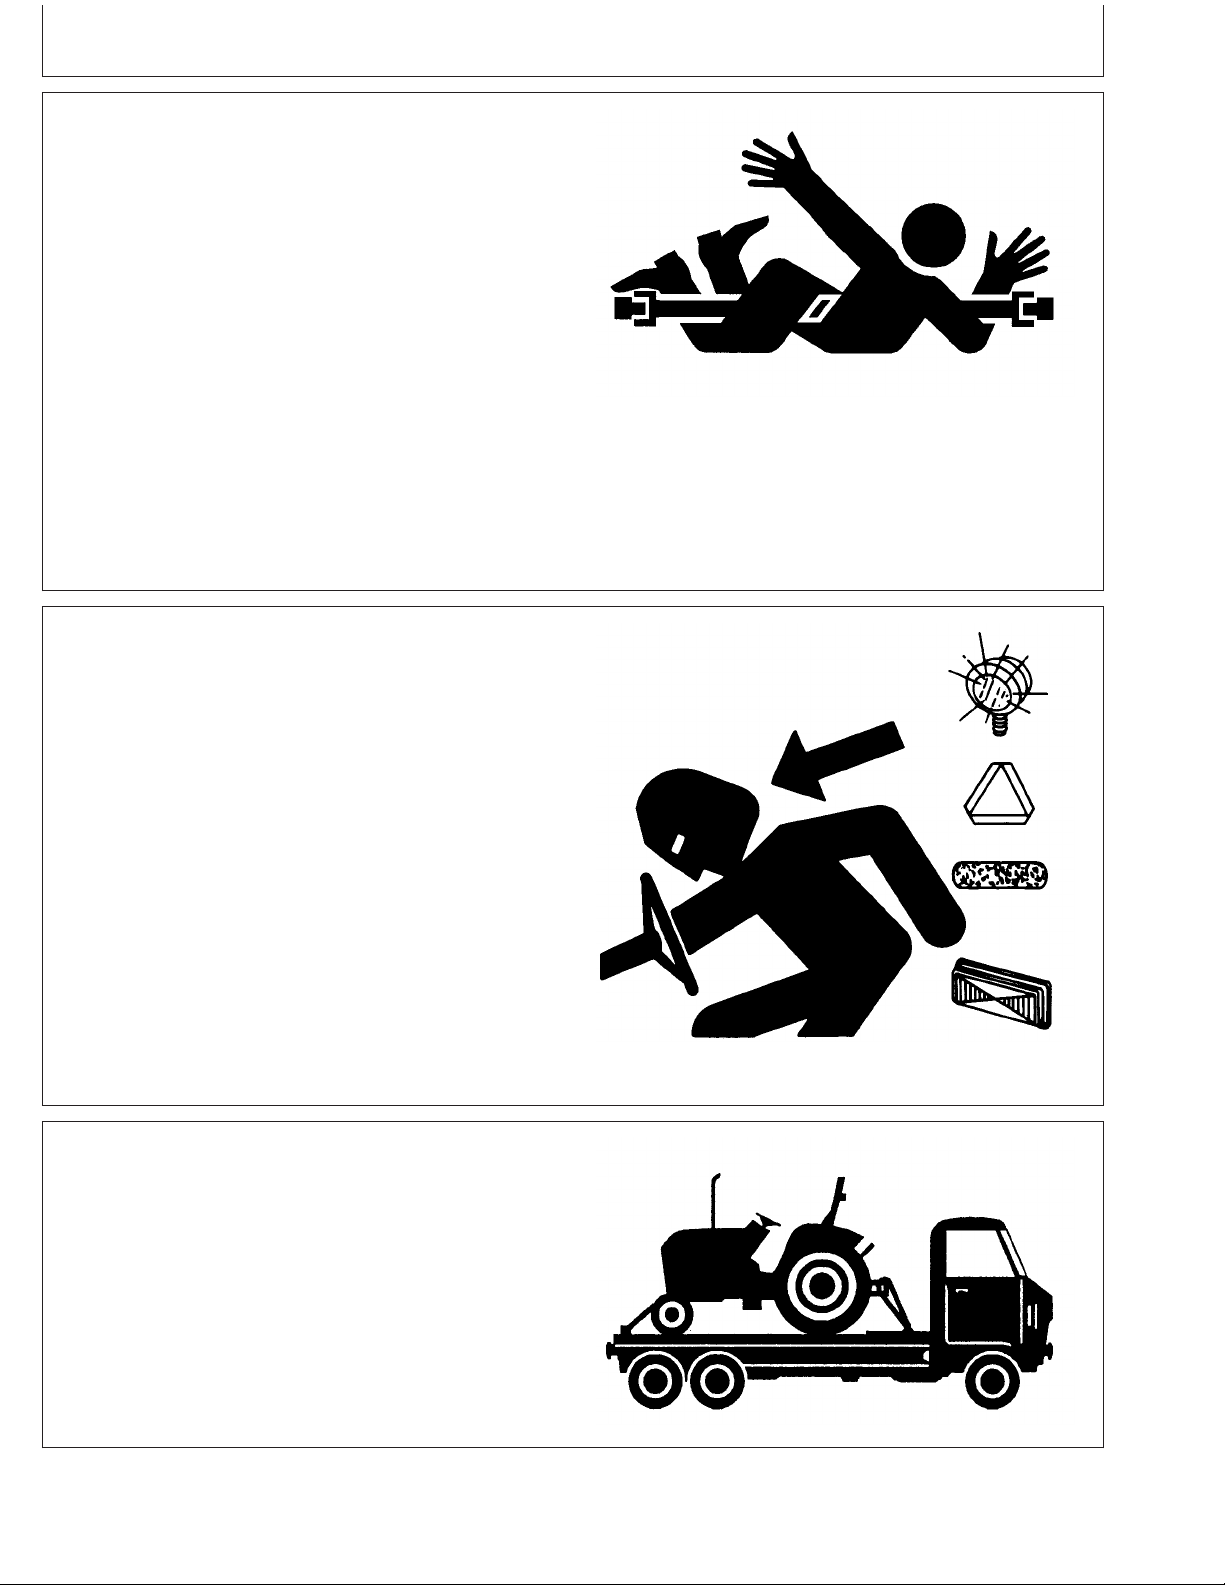
Prevent Machine Runaway
Avoid possible injury or death from machinery runaway.
Do not start engine by shorting across starter terminals.
Machine will start in gear if normal circuitry is bypassed.
NEVER start engine while standing on ground. Start
engine only from operator’s seat, with transmission in
neutral.
Safety
Operate Tractor Safely
Features designed into your tractor make operation safer
and let it perform a wide variety of jobs. Use your tractor
only for specified jobs it was designed to perform:
implement carrier, load mover, remote power source, or
transport unit—not a recreational vehicle.
Careless use or misuse can result in unnecessary
accidents. Be alert to hazards of tractor operation.
Understand causes of accidents and take every
precaution to avoid them. Most common accidents are
caused from:
• Tractor upsets
• Improper starting procedures
• Crushing and pinching during hitching
• Collisions with other motor vehicles
• Getting entangled in PTO shafts
• Falls from tractors
CED,OUO1032,2778 –19–15OCT99–1/1
TS177 –UN–11JAN89
M47224A –19–02JUN97
Avoid accidents by taking the following precautions:
• Put transmission in neutral (N) and set brakes before
dismounting. Leaving transmission in gear with engine
stopped will NOT prevent the tractor from moving.
• Be sure everyone is clear of tractor and attached
equipment before starting engine.
• Never try to get on or off a moving tractor.
• When tractor is left unattended, place in neutral (N), set
brakes, lower implements to the ground, stop the
engine, and remove the key.
05-2
TS276 –UN–23AUG88
AG,OUO6035,84 –19–18MAY00–1/1
022607
PN=8
Page 11

Safety
Use Caution on Hillsides
Avoid holes, ditches, and obstructions which cause the
tractor to tip, especially on hillsides. Avoid sharp, uphill
turns.
Never drive near the edge of a gully or steep
embankment -- it might cave in.
Driving forward out of a ditch or mired condition or up a
steep slope could cause tractor to tip over rearward. Back
out of these situations if possible.
Danger of overturn increases greatly with narrow tread
setting, at high speed.
Hitch towed loads only to drawbar. When using a chain,
take up the slack slowly.
Shift to Low Gear on Hills
Shift to a low gear before descending a steep hill to
improve your control of the tractor with little or no braking.
Use engine braking to reduce speed before applying
tractor brakes. Run-away tractors often tip over. Never
coast downhill.
When driving on icy, wet or graveled surfaces, reduce
speed and be sure tractor is properly ballasted to avoid
skidding and loss of steering control.
Additional ballast may be needed for transporting heavy
hitch mounted implements. When implement is raised,
drive slowly over rough ground, regardless of how much
ballast is used.
AG,OUO6035,65 –19–17MAY00–1/1
LV4042 –UN–09JUL99
AG,OUO6035,83 –19–17MAY00–1/1
05-3
022607
PN=9
Page 12

Avoid Tipping
Safety
Do not drive where machine could slip or tip.
Stay alert for holes, rocks, and roots in the terrain, and
other hidden hazards. Keep away from drop-offs.
Slow down before you make a sharp turn.
Use care when pulling loads or using heavy
equipment:
• Use only approved drawbar hitch points.
• Limit loads to those you can safely control.
• Use counterweights or wheel weights when
suggested in this operator’s manual.
Freeing a Mired Machine
Attempting to free a mired machine can involve safety
hazards such as the mired tractor tipping rearward, the
towing tractor overturning, and the tow chain or tow bar (a
cable is not recommended) failing and recoiling from its
stretched condition.
Reduce speed and exercise extreme caution on slopes
and in sharp turns to prevent tipping or loss of control.
Be especially cautious when changing direction on
slopes.
Do not stop or start suddenly when going uphill or
downhill.
If machine stops going up hill:
• STOP the PTO.
• Back down slowly.
MX,AVOIDTIP1A1 –19–22JUL94–1/1
Back your tractor out if it gets mired down in mud. Unhitch
any towed implements. Dig mud from behind the rear
wheels. Place boards behind the wheels to provide a solid
base and try to back out slowly. If necessary, dig mud
from the front of all wheels and drive slowly ahead.
If necessary to tow with another unit, use a tow bar or a
long chain (a cable is not recommended). Inspect the
chain for flaws. Make sure all parts of towing devices are
of adequate size and strong enough to handle the load.
Always hitch to the drawbar of the towing unit. Do not
hitch to the front pushbar attachment point. Before
moving, clear the area of people. Apply power smoothly to
take up the slack: a sudden pull could snap any towing
device causing it to whip or recoil dangerously.
TS1645 –UN–15SEP95TS263 –UN–23AUG88
05-4
DX,MIRED –19–07JUL99–1/1
022607
PN=10
Page 13

Park Tractor Safely
To park tractor safely:
• Disengage PTO.
• Lower equipment to the ground.
• Put gear shift lever in NEUTRAL.
• Set brakes.
• STOP the engine.
• Remove key.
Safety
Before you leave the operator’s seat, wait for engine and
attachment parts to stop moving.
Keep Riders Off Machine
Only allow the operator on the machine. Keep riders off.
Riders on machine are subject to injury such as being
struck by foreign objects and being thrown off of the
machine. Riders also obstruct the operator’s view resulting
in the machine being operated in an unsafe manner.
M35691 –UN–26APR89
MX,SAIP,AAA1 –19–21AUG99–1/1
TS290 –UN–23AUG88
DX,RIDER –19–03MAR93–1/1
Handle Fuel Safely—Avoid Fires
Handle fuel with care: it is highly flammable. Do not refuel
the machine while smoking or when near open flame or
sparks.
Always stop engine before refueling machine. Fill fuel tank
outdoors.
Prevent fires by keeping machine clean of accumulated
trash, grease, and debris. Always clean up spilled fuel.
05-5
TS202 –UN–23AUG88
DX,FIRE1 –19–03MAR93–1/1
022607
PN=11
Page 14

Safety
Prepare for Emergencies
Be prepared if a fire starts.
Keep a first aid kit and fire extinguisher handy.
Keep emergency numbers for doctors, ambulance service,
hospital, and fire department near your telephone.
Wear Protective Clothing
Wear close fitting clothing and safety equipment
appropriate to the job.
Prolonged exposure to loud noise can cause impairment
or loss of hearing.
Wear a suitable hearing protective device such as
earmuffs or earplugs to protect against objectionable or
uncomfortable loud noises.
Operating equipment safely requires the full attention of
the operator. Do not wear radio or music headphones
while operating machine.
DX,FIRE2 –19–03MAR93–1/1
TS291 –UN–23AUG88
TS206 –UN–23AUG88
DX,WEAR –19–10SEP90–1/1
Protect Against Noise
Prolonged exposure to loud noise can cause impairment
or loss of hearing.
Wear a suitable hearing protective device such as
earmuffs or earplugs to protect against objectionable or
uncomfortable loud noises.
05-6
DX,NOISE –19–03MAR93–1/1
TS207 –UN–23AUG88
022607
PN=12
Page 15
Safety
Stay Clear of Rotating Drivelines
Entanglement in rotating driveline can cause serious injury
or death.
Keep tractor master shield and driveline shields in place
at all times. Make sure rotating shields turn freely.
Wear close fitting clothing. Stop the engine and be sure
PTO driveline is stopped before making adjustments,
connections, or cleaning out PTO driven equipment.
Use Safety Lights and Devices
TS1644 –UN–22AUG95
DX,PTO –19–12SEP95–1/1
Prevent collisions between other road users, slow moving
tractors with attachments or towed equipment, and
self-propelled machines on public roads. Frequently check
for traffic from the rear, especially in turns, and use turn
signal lights.
Use headlights, flashing warning lights, and turn signals
day and night. Follow local regulations for equipment
lighting and marking. Keep lighting and marking visible,
clean, and in good working order. Replace or repair
lighting and marking that has been damaged or lost. An
implement safety lighting kit is available from your John
Deere dealer.
Safely Transporting the Tractor
A disabled tractor is best transported on a flatbed carrier.
Use chains to secure the tractor to the carrier.
TS951 –UN–12APR90
DX,FLASH –19–07JUL99–1/1
Never tow a tractor at a speed greater than 16 km/h (10
mph). An operator must steer and brake the tractor under
tow.
05-7
MX,SAIP,LA1 –19–29JUL94–1/1
LV610 –UN–22APR94
022607
PN=13
Page 16

Safety
Tow Loads Safely
Stopping distance increases with speed and weight of
towed loads, and on slopes. Towed loads with or without
brakes that are too heavy for the tractor or are towed too
fast can cause loss of control. Consider the total weight of
the equipment and its load.
Observe these recommended maximum road speeds, or
local speed limits which may be lower:
• If towed equipment does not have brakes, do not travel
more than 32 km/h (20 mph) and do not tow loads more
than 1.5 times the tractor weight.
• If towed equipment has brakes, do not travel more than
40 km/h (25 mph) and do not tow loads more than 4.5
times the tractor weight.
Ensure the load does not exceed the recommended
weight ratio. Add ballast to recommended maximum for
tractor, lighten the load, or get a heavier towing unit. The
tractor must be heavy and powerful enough with adequate
braking power for the towed load. Use additional caution
when towing loads under adverse surface conditions,
when turning, and on inclines.
TS216 –UN–23AUG88
DX,TOW –19–02OCT95–1/1
05-8
022607
PN=14
Page 17

Safety
Practice Safe Maintenance
Understand service procedure before doing work. Keep
area clean and dry.
Never lubricate, service, or adjust machine while it is
moving. Keep hands, feet , and clothing from
power-driven parts. Disengage all power and operate
controls to relieve pressure. Lower equipment to the
ground. Stop the engine. Remove the key. Allow machine
to cool.
Securely support any machine elements that must be
raised for service work.
Keep all parts in good condition and properly installed. Fix
damage immediately. Replace worn or broken parts.
Remove any buildup of grease, oil, or debris.
On self-propelled equipment, disconnect battery ground
cable (-) before making adjustments on electrical systems
or welding on machine.
On towed implements, disconnect wiring harnesses from
tractor before servicing electrical system components or
welding on machine.
Service Tractor Safely
Do not service the tractor while it is in motion or while the
engine is running.
Tighten wheel hardware to correct torque as specified in
Wheels, Tyress and Tread section. Torque at intervals
shown in Break-In Period and Lubrication and
Maintenance sections, to ensure that wheel hardware
does not loosen.
Reinstall shields removed during service.
TS218 –UN–23AUG88
DX,SERV –19–17FEB99–1/1
LV828 –UN–08AUG94
05-9
AG,OUO6035,70 –19–17MAY00–1/1
022607
PN=15
Page 18

Safety
Support Machine Properly
Always lower the attachment or implement to the ground
before you work on the machine. If the work requires that
the machine or attachment be lifted, provide secure
support for them. If left in a raised position, hydraulically
supported devices can settle or leak down.
Do not support the machine on cinder blocks, hollow tiles,
or props that may crumble under continuous load. Do not
work under a machine that is supported solely by a jack.
Follow recommended procedures in this manual.
When implements or attachments are used with a
machine, always follow safety precautions listed in the
implement or attachment operator’s manual.
Avoid Heating Near Pressurized Fluid Lines
TS229 –UN–23AUG88
DX,LOWER –19–24FEB00–1/1
Flammable spray can be generated by heating near
pressurized fluid lines, resulting in severe burns to
yourself and bystanders. Do not heat by welding,
soldering, or using a torch near pressurized fluid lines or
other flammable materials. Pressurized lines can
accidentally burst when heat goes beyond the immediate
flame area.
DX,TORCH –19–10DEC04–1/1
TS953 –UN–15MAY90
05-10
022607
PN=16
Page 19

Safety
Avoid High-Pressure Fluids
Escaping fluid under pressure can penetrate the skin
causing serious injury.
Avoid the hazard by relieving pressure before
disconnecting hydraulic or other lines. Tighten all
connections before applying pressure.
Search for leaks with a piece of cardboard. Protect hands
and body from high pressure fluids.
If an accident occurs, see a doctor immediately. Any fluid
injected into the skin must be surgically removed within a
few hours or gangrene may result. Doctors unfamiliar with
this type of injury should reference a knowledgeable
medical source. Such information is available from Deere
& Company Medical Department in Moline, Illinois, U.S.A.
X9811 –UN–23AUG88
Service Cooling System Safely
Explosive release of fluids from pressurized cooling
system can cause serious burns.
If radiator cap must be removed, do not remove when
engine is hot. Shut engine off and wait until cap is cool
enough to touch with bare hands. Slowly loosen cap to
first stop to relieve pressure before removing completely.
Store Attachments Safely
Stored attachments such as dual wheels, cage wheels,
and loaders can fall and cause serious injury or death.
Securely store attachments and implements to prevent
falling. Keep playing children and bystanders away from
storage area.
DX,FLUID –19–03MAR93–1/1
TS281 –UN–23AUG88
AG,OUO1032,2682 –19–30SEP99–1/1
05-11
DX,STORE –19–03MAR93–1/1
TS219 –UN–23AUG88
022607
PN=17
Page 20

Safety
Prevent Acid Burns
Sulfuric acid in battery electrolyte is poisonous. It is strong
enough to burn skin, eat holes in clothing, and cause
blindness if splashed into eyes.
Avoid the hazard by:
1. Filling batteries in a well-ventilated area.
2. Wearing eye protection and rubber gloves.
3. Avoiding breathing fumes when electrolyte is added.
4. Avoiding spilling or dripping electrolyte.
5. Use proper jump start procedure.
If you spill acid on yourself:
1. Flush your skin with water.
2. Apply baking soda or lime to help neutralize the acid.
3. Flush your eyes with water for 15—30 minutes. Get
medical attention immediately.
If acid is swallowed:
1. Do not induce vomiting.
2. Drink large amounts of water or milk, but do not
exceed2L(2quarts).
3. Get medical attention immediately.
TS203 –UN–23AUG88
DX,POISON –19–21APR93–1/1
05-12
022607
PN=18
Page 21

Safety
Service Tires Safely
Explosive separation of a tire and rim parts can cause
serious injury or death.
Do not attempt to mount a tire unless you have the proper
equipment and experience to perform the job.
Always maintain the correct tire pressure. Do not inflate
the tires above the recommended pressure. Never weld or
heat a wheel and tire assembly. The heat can cause an
increase in air pressure resulting in a tire explosion.
Welding can structurally weaken or deform the wheel.
When inflating tires, use a clip-on chuck and extension
hose long enough to allow you to stand to one side and
NOT in front of or over the tire assembly. Use a safety
cage if available.
Check wheels for low pressure, cuts, bubbles, damaged
rims or missing lug bolts and nuts.
Dispose of Waste Properly
Improperly disposing of waste can threaten the
environment and ecology. Potentially harmful waste used
with John Deere equipment include such items as oil, fuel,
coolant, brake fluid, filters, and batteries.
Use leakproof containers when draining fluids. Do not use
food or beverage containers that may mislead someone
into drinking from them.
Do not pour waste onto the ground, down a drain, or into
any water source.
Inquire on the proper way to recycle or dispose of waste
from your local environmental or recycling center, or from
your John Deere dealer.
DX,RIM –19–24AUG90–1/1
TS211 –UN–23AUG88
TS1133 –UN–26NOV90
05-13
AG,OUO1032,2683 –19–30SEP99–1/1
022607
PN=19
Page 22

Safety Signs
Warning Labels
Keep warning labels in good condition, replace if not in
readable condition.
PY80265,05GO801 –19–12JUN06–1/3
PY5798 –UN–11JUL06
PY5801 –UN–11JUL06
M71026 –19–02JUL90
LV1932 –19–02JUN97
LV4307 –19–04NOV05
PY4880 –UN–06DEC05
Continued on next page
10-1
PY80265,05GO801 –19–12JUN06–2/3
022607
PN=20
Page 23

Safety Signs
PY4879 –UN–06DEC05
PY1089 –UN–16JUL01
PY1667 –UN–06DEC05
PY5353 –UN–06DEC05
PY4140 –UN–26AUG04
10-2
PY80265,05GO801 –19–12JUN06–3/3
022607
PN=21
PY4141 –UN–26AUG04
Page 24

Tractor Controls
Controls and Instruments
A—Steering Wheel D—Light Switch G—Clutch Pedal J—Foot Throttle
B—Hand Throttle E—Hazard Switch H—Key Switch K—Brake Pedals
C—Horn F—Turn Signal Switch I—Hand Brake Lever
Continued on next page
NR25796,0000345 –19–10AUG06–1/2
PY6079 –UN–06AUG06
15-1
022607
PN=22
Page 25

Controls and Instruments
A—Gear Shift Lever
B—Rockshaft Draft Control Lever
C—Rockshaft Position Control Lever
D—PTO Lever
E—Range Shift Lever
F—Differential Lock
G—Rate of Drop of Knob
PY6080 –UN–06AUG06
PY4947 –UN–19MAY05
PY4127 –UN–26AUG04
PY6081 –UN–06AUG06PY5908 –UN–11JUL06
15-2
NR25796,0000345 –19–10AUG06–2/2
022607
PN=23
Page 26

Instrument Panel
Controls and Instruments
For 5103, 5103S, 5203, 5104 and 5204 Tractor
PY5750 –UN–01JUN06
A—Air Restriction Indicator D—Charging System Indicator F—Coolant Temperature H—Tachometer
B—High Beam Indicator E—Engine Oil Pressure Gauge I—Fuel Gauge
C—Hour Meter Indicator G—Turn Signal Direction
Indicators
PY80265,05GO804 –19–29DEC06–1/1
Instrument Panel (5103E Tractor)
For 5103E Tractor
PY5751 –UN–08JUN06
A—Hour Meter D—Engine Oil Pressure F—Turn Signal Direction G—Tachometer
B—Charging System Indicator Indicator Indicators
C—High Beam Indicator E—Coolant Temperature
Gauge
PY80265,05GO805 –19–08JUN06–1/1
15-3
022607
PN=24
Page 27

Lights
Light Switch Positions
Tractor light switch has five positions:
A—Turns off all lights.
B—Turns on warning lights only. Use for parking the
vehicle
C—Turns on dim headlights,tail lights, and warning
lights.Turn switch to this position before meeting other
vehicles.
D—Turns on bright headlights, tail lights, and warning
lights. For highway driving during night time
E—Turns on high beamlight.
F— Switch on flood lamp (plough lamp). For field use
only. Do not use on roads. Flood light might blind or
confuse other drivers
PY4106 –UN–23FEB06PY4107 –UN–21AUG04
A—Lights Off
B—Warning Lights Position
C—Dim Headlights, Tail Lights, and Warning Light
Position
D—Bright Headlights, Tail Lights and Warning Lights
Position
E—High Beamlight
F—Flood Light Switch
PY80265,05GO806 –19–03JUL06–1/1
20-1
022607
PN=25
Page 28

Lights
Using Headlights
Dual-beam headlights (F) are switched on by either “High
Beamlight” (E), “Bright Headlight” (D), or “Dim Headlight”
(C) light switch positions.
Always dim lights before meeting another vehicle.
Keep headlights adjusted properly, (see Adjusting
Headlights in Service section).
A—Lights Off
B—Warning Lights Position
C—Dim Headlights, Tail Lights, and Warning Light
Position
D—Bright Headlights, Tail Lights and Warning Lights
Position
E—High Beamlight
F— Headlights
Using High Beam Indicator
High beam indicator (A) should glow when light switch is
turned to “Bright Headlight” position or “Flood Light”
position. Bright headlights, tail lights, flood light and
warning lights should be on.
PY4106 –UN–23FEB06
PY5148 –UN–23FEB06
PY80265,05GO807 –19–10SEP05–1/1
A—High Beam Indicator
20-2
For 5103, 5103S, 5203, 5104 and 5204 Tractor
For 5103E Tractor
PY80265,05GO808 –19–29DEC06–1/1
PY5726 –UN–02JUN06
PY5752 –UN–01JUN06
022607
PN=26
Page 29

Using Tail Lights
Red tail lights (F) are switched on by either bright
headlight or dim headlight light switch position.
Be sure tail light lenses are clean before driving on a
road, so other drivers can see it easily.
CAUTION: Prevent collisions between other
road users, slow moving tractors with
attachments or towed equipment, and
self-propelled machines on public roads.
Frequently check for traffic from the rear,
especially in turns, and use hand signals or
turn signal lights.
Use headlights, flashing warning lights, and
turn signals day and night. Follow local
regulations for equipment lighting and marking.
Keep lighting and marking visible and in good
working order. Replace or repair lighting and
marking that has been damaged or lost. An
implement safety lighting kit is available from
your John Deere dealer.
Lights
PY5005 –UN–09JAN06
For 5103, 5103S, 5203, 5104 and 5204 Tractor
F— Tail Lights
G—Turn Signal Lights
H—Reflex Reflector
I—Flood Light Switch
For 5103E Tractor
PY5007 –UN–09JUN06
PY4128 –UN–26AUG04
PY80265,05GO809 –19–29DEC06–1/1
20-3
022607
PN=27
Page 30

Using Turn Signals
Lights
PY4114 –UN–23FEB06
PY5006 –UN–09JUN06
For 5103E Tractor
Move turn signal lever (A) down to indicate left-hand turn
or up for right-hand turn. Indicator lights (D) will flash to
signal turn direction.
When lever is up, front and rear facing lights on right-hand
side (C) will flash while left-hand lights (B) glow steady.
Left-hand lights (B) flash and right-hand lights (C) glow
steady when lever is down.
For 5103, 5103S, 5203, 5104 and 5204 Tractor
PY5008 –UN–09JUN06
PY5727 –UN–02JUN06
For 5103, 5103S, 5203, 5104 and 5204 Tractor
NOTE: Be sure to manually return lever to center position
after turning.
20-4
5103E Tractor
PY5753 –UN–01JUN06
A—Turn Signal Lever
B—Left-Hand Lights
C—Right-Hand Lights
D—Dash Indicator Lights
PY80265,05GO810 –19–29DEC06–1/1
022607
PN=28
Page 31

Using Hazard Lights
Lights
For 5103, 5103S, 5203, 5104 and 5204 Tractor
For 5103E Tractor
All 4 turn signal lights ( 2 front and 2 rear) start to blink
when hazard light switch (C) is pushed out. Use hazard
lights to warn incoming vehicles when tractor is stopped
on the road
A—Turn Signal Light on Rear Side
B— Turn Signal Light on Front Side
C— Hazard Light Switch
PY5009 –UN–09JUN06
PY5011 –UN–13JUN06
For 5103, 5103S, 5203, 5104 and 5204 Tractor
PY5010 –UN–09JUN06
PY5012 –UN–09JUN06
For 5103E Tractor
20-5
PY1072 –UN–16FEB06
PY80265,05GO811 –19–29DEC06–1/1
022607
PN=29
Page 32

Using Flood Lamp
Flood lamp (G) is switched on by flood light switch (H).
CAUTION: When operating on a road, move
light switch to either “Bright or Dim Head
Lamp” positions Never use flood lamp when
transporting. A clear, bright light at the rear of
the tractor could confuse drivers of other
vehicles as they approach from the rear.
Lights
A—Lights Off
B—Warning Lights Position
C—Dim Headlights, Tail Lights and Warning Light
Position
D—Bright Headlights, Tail Lights and Warning Lights
Position
E—High Beamlight
F—Horn
G—Flood Lamp
H—Flood Light switch
Seven-Terminal Outlet
Outlet (A) is used to connect lights, turn signals and
remote electrical equipment on trailers or implements.
Always use auxiliary light on towed implement when
tractor rear signals and other lights are obscured.
PY5365 –UN–20FEB06PY4150 –UN–20FEB06
PY80265,05GO812 –19–04JUL06–1/1
NOTE: Matching plug is available through your John
Deere dealer.
Terminal Function Wire Color
1 Ground Black
2 Flood Lamp Purple
3 Left Turn Dark Green
4 Accessory Red
5 Right Turn Dark Green
6 Tail Lamp Gray
7 Accessory Red
A—Seven-Terminal Outlet
20-6
PY4132 –UN–09DEC05PY5526 –UN–11JUL06
PY80265,05GO813 –19–11JUL06–1/1
022607
PN=30
Page 33

Selecting Seat Position
Operator’s Platform
PY1047 –UN–25JUN01
A—Cap Screws
Standard Seat
Loosen two cap screws (A) and move seat forward or
backward depending on operator’s requirement. After
getting right position, tighten both cap screws.
Delux Seat
Seat can be moved forward or backward depending on
operator’s requirement. To move seat on either side, just
lift lever (A) and push the seat.
A—Seat Adjustment Lever
PY4126 –UN–25AUG04
PY80265,05GO814 –19–10SEP05–1/2
Adjusting Ride Comfort
Adjustment knob is located behind seat.
Weight markings are given on the rear of seat.Turn
adjustment knob (A) for a firm or soft ride. Seat
suspension will function properly relative to operator’s
weight.
A—Weight Adjustment Knob
25-1
PY1032 –UN–24JUN01
PY80265,05GO814 –19–10SEP05–2/2
PY1033 –UN–24JUN01
PY80265,05GO815 –19–10SEP05–1/1
022607
PN=31
Page 34

Break-In Period
Observe Engine Operation Closely
IMPORTANT: The engine is ready for normal
operation. Be extra cautious during the
first 100 hours, until you become
thoroughly familiar with the sound and
feel of your new tractor. Stay extra
attentive and alert.
Warm up tractor carefully. Check charging (A) and oil
pressure (B) warning indicator lights and coolant
temperature gauge (C).
Avoid unnecessary engine idling.
Check engine oil, coolant and transmission/hydraulic fluid
levels frequently. Watch for fluid leaks.
NOTE: If engine oil must be added, use seasonal
viscosity grade oil. Use only lubricants meeting
specifications given in the Fuels, Lubricants and
Coolant section.
For 5103, 5103S, 5203, 5104 and 5204 Tractor
PY5728 –UN–31MAY06
A—Charging Indicator
B—Oil Pressure Indicator
C—Coolant Temperature Indicator
For 5103E Tractor
PY5754 –UN–01JUN06
PY80265,05GO816 –19–29DEC06–1/1
35-1
022607
PN=32
Page 35

Break-In Service
Break-In Period
IMPORTANT: Keep wheel hardware tight to avoid
tractor damage. Check wheel
hardware torque before operating,
twice during first ten hours of
operation, after fifty hours of
operation, and periodically
thereafter.
During the First 10 Hours of Operation:
Perform daily or 10 hours service. (See Service
Intervals in Lubrication and Maintenance section)
Tighten wheel hardware. (See Wheels, tyres, and
Treads section)
1
See Engine Break-In Oil in Service section for additional
information.
After the First 50 Hours of Operation:
Tighten wheel hardware. (See Wheels, tyres, and
Treads section)
Check alternator/fan belt tension and tighten air intake
and cooling system hose clamps
Perform 50 Hours Service
After the First 100 Hours of Operation:
Replace transmission-hydraulic filter element
Change engine oil and filter
1
PY80265,05GO817 –19–10SEP05–1/1
35-2
022607
PN=33
Page 36

Prestarting Checks
Service Daily Before Start-Up
1. Check the engine oil level. Wipe dipstick (B) off and
reinsert it fully. Remove and locate oil level.
Safe operating range is between two marks on
dipstick. Do not operate engine when oil level is below
lower mark on dipstick. Add seasonal viscosity grade
oil through filler hole (A). (See Fuel, Lubricants, and
Coolant section for oil specifications.)
2. Drain water and sediment from fuel filter drain (C).
(See Drain Water and Sediment from Fuel Filter in
Service—10 Hours.
CAUTION: DO NOT remove radiator cap or drain
coolant until coolant is cold. Always loosen
radiator cap slowly to relieve any excess
pressure.
3. Check coolant level in recovery tank (D). If engine is
COOL and level is below “LOW” mark, add coolant to
recovery tank to bring level to “LOW” mark.
NOTE: Coolant level with a cold engine should be at the
“LOW” mark. A tractor at operating temperature
should have a coolant level at the “FULL” mark.
4. Lubricate the following items at 10 hour intervals if
operating in extremely wet or muddy conditions.
• Front axle pivot pin(s)
• Steering spindles
• Tie rod ends
PY5366 –UN–09DEC05
FD000047 –UN–13MAR96
Use multipurpose grease. For detailed information see
Lubrication and Maintenance section.
A—Engine Oil Filler Cap
B—Engine Oil Dipstick
C—Fuel Filter Drain
D—Recovery Tank
E—Radiator Cap
40-1
PY5369 –UN–09DEC05PY5370 –UN–09DEC05
PY80265,05GO818 –19–11JUL06–1/1
022607
PN=34
Page 37

Operating the Engine
Before Starting the Engine
TS220 –UN–23AUG88
CAUTION: Prevent asphyxiation. Engine
exhaust fumes can cause sickness or death to
you or someone else.
If you must operate engine in a building, be
positive there is adequate ventilation. Either use
an exhaust pipe extension to remove the
exhaust fumes or open doors and windows to
bring enough outside air into the area.
1. Check fuel gauge to be sure tractor has plenty of fuel.
2. Place range shift lever (A) in neutral (N) position.
Starter will not operate if range shift lever is not in this
position.
3. Place rockshaft control levers (C and D) in lowered
position.
4. Check indicator lights. Indicators should illuminate
when key switch is turned to the “ON” position.
If any indicator does not function properly, see your
John Deere dealer.
Single Clutch Tractor
PY4108 –UN–21AUG04
PY4953 –UN–27MAY05
Dual Clutch Tractor
A—Range Shift Lever
B—PTO Lever
C—Rockshaft Position Control Lever
D—Rockshaft Draft Control Lever
45-1
PY4964 –UN–22APR05
PY80265,05GO819 –19–04JUL06–1/1
022607
PN=35
Page 38

Operating the Engine
Starting the Engine
1. Push hand throttle (A) forward off idle position
(approximately 1/3 of full throttle). Engine may not start
with throttle pulled completely down.
2. Make sure fuel shut-off knob (C) is pushed in.
CAUTION: Avoid possible injury or death from a
machine runaway.
Do not start engine by shorting across starter
terminals. Machine will start in gear and move if
normal circuitry is bypassed.
Start engine only from operator’s seat with
transmission in NEUTRAL.
NEVER start engine while standing on ground.
IMPORTANT: DO NOT run a cold engine at full
throttle.
3. Depress clutch pedal and turn key switch fully
clockwise (B) to engage starter. Release key when
engine starts. If key is released before engine starts,
wait until starter and engine stop turning before trying
again.
IMPORTANT: DO NOT operate starter more than 20
seconds at a time. If engine does not
start, wait at least two minutes for the
starter motor to cool before trying
again. If engine does not start in four
attempts, refer to “Troubleshooting”
section.
Machinery Runaway
TS177 –UN–11JAN89
PY4497 –UN–13JAN05
Hand Throttle and Key Switch
A—Hand Throttle
B—Key Switch On
C—Fuel Shut Off Knob
45-2
Fuel Shut-off Knob
PY6082 –UN–06AUG06
NR25796,0000346 –19–29DEC06–1/1
022607
PN=36
Page 39

Operating the Engine
Check Instruments After Starting
IMPORTANT: If charging system (A) or oil pressure
(B) indicators fail to go out, or
temperature gauge (C) indicates hot,
stop engine and determine the cause.
A—Charging System Indicator
B—Oil Pressure Indicator
C—Coolant Temperature Gauge
Oil Pressure Indicator
Oil pressure indicator (A) will light if engine oil pressure is
low. Indicator should light when key is turned to engage
starter and go out when engine starts.
IMPORTANT: NEVER operate engine without
sufficient oil pressure. If indicator stays
lit for longer than five seconds under
normal operating conditions, stop
engine and check for cause.
If low oil level is not the problem, see your John Deere
dealer.
For 5103, 5103S, 5203, 5104 and 5204 Tractor
For 5103E Tractor
For 5103, 5103S, 5203, 5104 and 5204 Tractor
PY80265,05GO821 –19–29DEC06–1/1
PY5728 –UN–31MAY06
PY5754 –UN–01JUN06
PY5729 –UN–31MAY06
A—Oil Pressure Indicator
45-3
For 5103E Tractor
PY80265,05GO822 –19–29DEC06–1/1
PY5755 –UN–01JUN06
022607
PN=37
Page 40

Charging System Indicator
Operating the Engine
For 5103, 5103S, 5203, 5104 and 5204 Tractor
PY5730 –UN–31MAY06
A—Charging System Indicator
Charging system indicator (A) will light when alternator
output is low. Indicator should light when key is turned
to engage starter, and go out when engine starts.
If indicator stays lit for longer than five seconds in
normal operation, stop engine and check for cause. If
Air Restriction Sensor
Air restriction indicator (A) will light if air cleaner becomes
plugged. Service air cleaner as soon as possible.
Indicator should light momentarily when key is turned
slowly to starter engagement position.
A—Air Restriction Indicator
For 5103E Tractor
PY5756 –UN–01JUN06
loose or broken fan belt is not the cause, see your
John Deere dealer.
PY80265,05GO823 –19–29DEC06–1/1
45-4
For 5103, 5103S, 5203, 5104 and 5204 Tractor
PY5731 –UN–31MAY06
PY80265,05GO824 –19–29DEC06–1/1
022607
PN=38
Page 41

Operating the Engine
Air Restriction Sensor (5103E Tractor)
When red indicator is seen in transparent area of air
restriction sensor (A). Service air cleaner as soon as
possible.
After servicing the air cleaner, reset the sensor by
pressing top of the sensor (B).
Coolant Temperature Gauge
For 5103, 5103S, 5203, 5104 and 5204 Tractor
A—Coolant Temperature
Gauge
The needle on the temperature gauge (A) rises as
engine warms up. If needle reaches red zone, stop
engine and determine the cause.
PY80265,05GO825 –19–04JUL06–1/1
PY5732 –UN–31MAY06
For 5103E Tractor
Check coolant level in radiator when engine cools.
Also check grille, radiator and radiator side screens for
plugging. Check fan belt tension. If problem is not
corrected, see your John Deere dealer.
PY4093 –UN–25AUG04
PY5757 –UN–01JUN06
CAUTION: DO NOT remove radiator cap or
drain coolant until coolant is cold. Always
loosen radiator cap slowly to relieve any
excess pressure.
45-5
PY80265,05GO826 –19–29DEC06–1/1
022607
PN=39
Page 42

Operating the Engine
Watch Fuel Level
Stop to refuel before gauge (A) reaches empty mark.
IMPORTANT: Use diesel fuel only. See Fuel and
Lubricants section for fuel
specifications.
Should tractor run out of fuel and not start in several tries,
air must be bled from fuel system. (See Bleeding Fuel
System in Service section).
A—Fuel Gauge
Watch Fuel Level (5103E Tractor)
For 5103, 5103S, 5203, 5104 and 5204 Tractor
PY5733 –UN–31MAY06
PY80265,05GO827 –19–29DEC06–1/1
Watch level indicator (A) for fuel level, while refilling tank.
IMPORTANT: Use diesel fuel only. See Fuel and
Lubricants section for fuel
specifications.
Should tractor run out of fuel and not start in several tries,
air must be bled from fuel system. (See Bleeding Fuel
System in Service section).
A—Level Indicator
PY4094 –UN–20AUG04
PY80265,05GO828 –19–04JUL06–1/1
45-6
022607
PN=40
Page 43

Changing Engine Speeds
Operating the Engine
Hand Throttle
A—Hand Throttle B—Foot Throttle
To increase speed, push hand throttle (A) forward.
To temporarily increase engine speed above hand
throttle setting, depress foot throttle (B).
Warming Up the Engine
PY4111 –UN–21AUG04
Foot Throttle
PY6083 –UN–06AUG06
NR25796,0000347 –19–04AUG06–1/1
For 5103, 5103S, 5203, 5104 and 5204 Tractor
Do not place tractor under full load until it is properly
warmed up.
1. Idle engine at about 1500 rpm for several minutes.
PY5734 –UN–31MAY06
For 5103E Tractor
2. Run engine at about 1900 rpm and under light load
until engine reaches normal operation condition.
PY80265,05GO830 –19–29DEC06–1/1
45-7
PY5758 –UN–01JUN06
022607
PN=41
Page 44

Operating the Engine
Restart Stalled Engine
Should the engine stall when operating under load,
depress clutch pedal (A) and restart it immediately to
prevent abnormal heat build up and continue with normal
operation or operate at slow idle for one or two minutes
before stopping.
Avoid Idling the Engine
For 5103, 5103S, 5203, 5104 and 5204 Tractor
Allowing engine to idle at low rpm uses fuel
inefficiently, and can cause a build-up of carbon in the
engine.
NR25796,0000348 –19–04AUG06–1/1
PY5734 –UN–31MAY06
For 5103E Tractor
If tractor must be left with the engine running more
than three or four minutes, minimum engine speed
should be 1200 rpm.
PY6084 –UN–06AUG06
PY5758 –UN–01JUN06
45-8
PY80265,05GO832 –19–29DEC06–1/1
022607
PN=42
Page 45

Operating the Engine
Observe Engine Work and Idle Speeds
For 5103, 5103S, 5203, 5104 and 5204 Tractor
Slow idle speed should be 850 ± 75 rpm. At light or no
load, full throttle speed will increase to 2500 rpm.
Normal working speed is 1400—2300 rpm rated
speed. Within these limits engine can be put under full
load.
Working With Speed/Hour Meter
PY5734 –UN–31MAY06
For 5103E Tractor
For correct PTO speed, run engine at 2200 rpm for
standard 540 rpm operation (load requiring full engine
power).
PY80265,05GO833 –19–29DEC06–1/1
PY5758 –UN–01JUN06
For 5103, 5103S, 5203, 5104 and 5204 Tractor
A—Tachometer B—2200 RPM Mark (540) C—Hour Meter
Tachometer (A) shows engine rpm, read in hundreds.
For 540 rpm PTO speed, increase engine speed until
tachometer needle is aligned with 2200 rpm mark (B).
PY5735 –UN–31MAY06
For 5103E tractor
Hour meter (C) shows hours of operation in full hours
and tenths.
PY80265,05GO834 –19–29DEC06–1/1
45-9
PY5759 –UN–01JUN06
022607
PN=43
Page 46

Operating the Engine
Stopping the Engine
1. Pull hand throttle (A) down to slow idle position. Allow
engine to idle for one to two minutes.
2. Put range shift lever in neutral (N) and set brakes.
IMPORTANT: Cooling of certain engine parts is
provided by engine oil. Stopping a hot
engine suddenly could cause damage
to these parts by overheating or lack of
lubrication.
3. Turn key switch to the OFF position (B).
4. Pull manual fuel shut-off knob (C) (at lower left side of
control support) rearward and hold until engine has
completely stopped.
CAUTION: Remove key from key switch to
prevent operation by untrained personnel.
A—Hand Throttle
B—Key Switch OFF Position
C—Fuel Shut Off Knob
PY4501 –UN–13JAN05PY6082 –UN–06AUG06
NR25796,0000349 –19–04AUG06–1/1
45-10
022607
PN=44
Page 47

Operating the Engine
Using Booster Battery
Battery gas is explosive:
• DO NOT smoke while charging battery.
• Keep all flames and sparks away.
• DO NOT charge frozen battery.
• DO NOT connect booster battery negative (—) cable to
starting vehicle negative (—) terminal.
1. Access battery. (See procedure in Service section.)
2. Connect positive (+) booster cable to booster battery
positive (+) post (D).
3. Connect the other end of positive (+) booster cable to
tractor battery positive (+) post (A).
4. Connect negative (—) booster cable to booster battery
negative (—) post (C).
5. Connect the other end of negative (—) booster cable to
engine ground (B), away from battery and starter.
PY5821 –UN–12JUL06
A—Tractor Battery Positive (+) Post
B—Engine Ground
C—Booster Battery Negative (—) Post
D—Booster Battery Positive (+) Post
PY80265,05GO836 –19–11JUL06–1/1
45-11
022607
PN=45
Page 48

Operator Training Required
Driving the Tractor
• Study the Operation section of this manual before
operating tractor.
• Operate tractor in an open, unobstructed area under
direction of an experienced operator.
Driving on Public Roads
CAUTION: When transporting on a public road
or highway, use accessory lights and devices
for adequate warning to operators of other
vehicles. Check local governmental regulations.
Various safety devices are available from your
John Deere dealer. Keep safety items in good
condition. Replace missing or damaged items.
Observe the following precautions when operating the
tractor on the road:
• Learn use of all controls.
• Operator experience is required to learn moving,
stopping, turning and other operating characteristics
of tractor.
NR25796,000034A –19–04AUG06–1/1
PY6085 –UN–06AUG06
Brake pedals
CAUTION: Before operating tractor on a road,
lock brake pedals together. Use brake lightly
and cautiously at transport speeds.
1. Couple brake pedals together using brake locking bar
(A). Avoid hard applications of brakes. Reduce speed if
towed load weighs more than the tractor and is not
equipped with brakes.
Use additional caution when transporting towed loads
under adverse surface conditions and when turning or
braking on inclines. Be sure wheel tread is adjusted
wide to provide maximum stability.
IMPORTANT: To prevent unnecessary wear, never
ride the brakes by resting a foot on the
pedals.
A—Brake Pedals Locking Plate
Continued on next page
50-1
NR25796,000034B –19–29DEC06–1/2
022607
PN=46
Page 49

Driving the Tractor
For 5103, 5103S, 5203, 5104 and 5204 Tractor
2. Check local laws and regulations for lighting
requirements. Be sure Slow Moving vehicle (SMV)
emblem (G), turn signal lights (B) and tail lights (F) are
clean and visible. If towed or rear-mounted equipment
obstucts these safety devices, install SMV emblem and
warning lamps on equipment. (See your John Deere
dealer)
3. Turn light switch to position (D).
Always turn light switch to dim lights position (A) when
meeting another vehicle. Never use flood lamps or any
other lights which could blind or confuse other drivers.
4. Use turn signal when turning. Be sure to return lever
(E) to center position after turning.
5. Drive slowly enough to maintain safe control at all
times. Before descending a hill, shift to a gear low
enough to control speed without using brakes. Slow
down for rough ground, and sharp turns, especially
when transporting heavy, rear mounted equipment.
PY5013 –UN–09JUN06
For 5103E Tractor
PY5014 –UN–09JUN06
PY4136 –UN–09JUN06
PY4137 –UN–09JUN06
A—Dim Headlight Switch Position
B—Turn Signal Light
C—Reflex Reflector
D—Bright Headlight Switch Position
E—Turn Signal Lever
F—Tail Light
G—SMV Emblem
50-2
NR25796,000034B –19–29DEC06–2/2
022607
PN=47
Page 50

Operating Transmission
Driving the Tractor
Range Shift Lever
A—Range Shift Lever B—Speed Shift Lever
Range shift lever (A) provides two forward speed
ranges, (A and B) and one reverse range (R).
Speed shift lever (B) provides four travel speeds.
Using range and speed shift levers in different
combinations, eight forward speeds and four reverse
speeds can be obtained.
Shifting Transmission
Speed Shift Lever
PY5824 –UN–20JUN06
PY5807 –UN–12JUN06
Range shift must be in neutral for the engine to be
started.
NR25796,000034C –19–04AUG06–1/1
IMPORTANT: To prevent transmission damage, do
not use speed shift on-the-go. To
prevent unnecessary wear, never “ride”
the clutch by resting a foot on the
pedal.
Depress clutch pedal (A) and stop tractor before shifting
either range shift lever or speed shift lever. Release clutch
pedal gradually to take up load smoothly.
A—Clutch Pedal
50-3
PY6084 –UN–06AUG06
NR25796,000034D –19–04AUG06–1/1
022607
PN=48
Page 51

Operating Transmission
Driving the Tractor
Range Shift Lever
A—Range Shift Lever B—Speed Shift Lever
Range shift lever (A) provides two forward speed
ranges, (A and B) and one reverse range (R).
Speed shift lever (B) provides four travel speeds.
Using range and speed shift levers in different
combinations, eight forward speeds and four reverse
speeds can be obtained.
Speed Shift Lever
PY5824 –UN–20JUN06
PY5807 –UN–12JUN06
Range shift must be in neutral for the engine to be
started.
PY80265,05GO839 –19–20JUN06–1/1
50-4
022607
PN=49
Page 52

Selecting a Gear
Driving the Tractor
For 5103, 5103S, 5203, 5104 and 5204 Tractor
IMPORTANT: To extend drive train life and avoid
excessive soil compaction and
rolling resistance when using
ballast, operate one gear lower than
normal.
The tractor may be operated in any gear with engine
speeds between 1400 rpm and 2300 rated engine rpm.
PY5734 –UN–31MAY06
For 5103E Tractor
Within these limits the engine can be put under full
load. For light load operation, use a higher gear and
lower engine speed. This saves fuel and reduces
wear.
Ground Speed Estimates for different tyre sizes are
located in Specifications section.
PY80265,05GO841 –19–29DEC06–1/1
PY5758 –UN–01JUN06
50-5
022607
PN=50
Page 53

Driving the Tractor
Using Brakes
CAUTION: Before operating tractor on a road,
lock pedals together. Use brake lightly and
cautiously at transport speeds.
Use individual brakes to assist in making sharp turns.
Disengage brake pedal locking bar (A) and depress only
one brake pedal.
To stop tractor, depress both brake pedals.
IMPORTANT: To prevent unnecessary wear, never
ride the brakes by resting a foot on the
pedals.
Reduce speed if towed load is not equipped with brakes
and weighs more than the tractor. Avoid hard braking
applications. Consult implement operators manual for
recommended transport speeds.
Use additional caution when transporting towed loads
under adverse conditions, when turning or stopping on
inclines.
Brake Pedals
PY6085 –UN–06AUG06
A—Brake Pedal Locking Bar
NR25796,000034E –19–04AUG06–1/1
50-6
022607
PN=51
Page 54

Driving the Tractor
Using Differential Lock (Optional For 5103E Tractor )
CAUTION: DO NOT operate tractor at high
speed or attempt to turn with differential lock
engaged.
IMPORTANT: To prevent damage to drive train, DO
NOT engage differential lock when one
wheel is spinning and the other is
completely stopped.
When one wheel starts to lose traction, engage differential
lock by depressing pedal (A) down.
Unequal traction will keep the lock engaged. When
traction equalizes, lock will disengage itself by spring
action. If lock does not disengage, depress one brake
pedal and then the other.
If tyres repeatedly slip, then get traction, then slip again,
hold pedal in the engaged position.
Differential Lock Pedal
PY6081 –UN–06AUG06
A—Differential Lock Pedal
NR25796,000034F –19–04AUG06–1/1
50-7
022607
PN=52
Page 55

Driving the Tractor
Stopping Tractor
CAUTION: Always place the range shift lever in
neutral (N) and set brakes before dismounting.
Leaving transmission in gear with engine off
MAY NOT prevent tractor from moving.
1. Stop the tractor and place range shift lever (A) in
neutral.
2. Apply brakes.
3. Lower all equipment to ground using rockshaft position
control lever (D) and rockshaft draft control lever (C),
4. Pull hand throttle (B) down to slow idle position. Allow
engine to idle for one to two minutes.
IMPORTANT: Cooling of certain engine parts is
provided by engine oil. Stopping a hot
engine suddenly could cause damage
to these parts by overheating or lack of
lubrication.
CAUTION: Remove the key from key switch to
prevent operation by untrained personnel.
5. Turn key switch to OFF position.
6. Pull manual fuel shut-off knob (E) (at lower left side of
control support) rearward and hold until engine has
completely stopped.
A—Range Shift Lever
B—Hand Throttle Lever
C—Rockshaft Draft Control Lever
D—Rockshaft Position Control Lever
E—Fuel Shut Off Knob
PY6080 –UN–06AUG06PY4911 –UN–14APR05PY4138 –UN–26AUG04PY6086 –UN–06AUG06
50-8
NR25796,0000351 –19–04AUG06–1/1
022607
PN=53
Page 56

Rockshaft and 3-Point Hitch
Match Tractor Power to Implement
IMPORTANT: Tractor power should be matched to the
size of certain implements. Excessive
power can damage an implement, and
too large an implement can damage the
tractor. (Refer to your implement
operator’s manual for minimum and
maximum power requirements before
attaching an implement.)
3-Point Hitch Components
PY80265,05GO845 –19–10SEP05–1/1
A—Lift Arms C—Sway Chains D—Center Link E— Draft Links
B—Lift Links
PY80265,05GO846 –19–12JUN06–1/1
55-1
PY4959 –UN–27APR05
022607
PN=54
Page 57

Rockshaft and 3-Point Hitch
Rockshaft Control Levers
The rockshaft position is controlled by two levers, the
rockshaft position control lever (A) and the rockshaft draft
control lever (B)
The rockshaft position control lever (A) raises the hitch
when pulled rearward, and lowers the hitch when moved
forward. See Using Rockshaft Position Control in this
section for more information.
The rockshaft draft control lever (B) controls hitch position
relative to draft loads. See Using Draft Control in this
section for more information.
Setting Position Control Lever Stop
NOTE: Position control lever stop is used when operating
depth or height needs to be repeated.
1. Operate implement for a few minutes to determine
proper depth or height.
2. Loosen lever stop (A), and slide against position
control lever. Lock stop in position by turning in a
clockwise direction. Rockshaft will now lower to same
position each time control lever is pushed forward to
the stop.
PY4960 –UN–22APR05
A—Rockshaft Position Control Lever
B—Rockshaft Draft Control Lever
PY80265,05GO848 –19–04JUL06–1/1
PY4961 –UN–22APR05
A—Lever Stop
55-2
PY80265,05GO849 –19–10SEP05–1/1
022607
PN=55
Page 58

Rockshaft and 3-Point Hitch
Using Rockshaft Position Control
CAUTION: To prevent unexpected movement of
rockshaft, place draft control lever (B) in a full
forward position before attaching an implement.
Put draft control lever (B) forward when you DO NOT
want rockshaft to adjust automatically to draft load, such
as attaching implement to tractor.
Use position control lever (A) to control hitch movement
and depth. Position control should be used for the
following applications:
TRANSPORT of implements and end of field turn-around.
Position control lever should be moved fully rearward (C)
for transport for both load and non-load sensing usage.
CONSTANT DEPTH of implements on level terrain and
for non- ground engaging implements such as spreaders
or sprayers. Place position control lever at depth desired
(D).
FLOAT operation for implements with skids or depth
gauge wheels designed to carry full implement weight.
Push both levers all the way forward (E) so implement
can follow the ground contour.
NOTE: Lift links can be adjusted for lateral float. (See
Lateral Float in this section.)
A—Rockshaft Position Control Lever
B—Rockshaft Draft Control Lever
C—Position Control Lever in Rearward Position
D—Position Control Lever in Desired Depth Position
E—Position Control Lever and Draft Control Lever in
Float Position
PY4960 –UN–22APR05
55-3
M47168 –UN–31JAN92
PY80265,05GO850 –19–10SEP05–1/1
022607
PN=56
Page 59

Rockshaft and 3-Point Hitch
Using Draft Control
The rockshaft may be equipped with variable draft control
system.
Use draft load sensing when:
• Operating with a fully mounted implement in hill and
swale terrain. The implement will raise and lower to
follow the ground contours while maintaining a nearly
constant depth.
• Operating in varying soil conditions. The implement is
raised slightly to get through tough spots so you do not
have to shift to a lower gear.
Draft control lever (B) controls amount of load required
before hitch responds. With lever placed fully forward to
the position marked “off” (C), there is no draft sensing.
Placing the lever toward the rear position reduces the
amount of draft load required to override the position
setting set by the position control lever (A) and raise the
rockshaft.
PY4965 –UN–27APR05
Draft sensitivity ranges can be changed by repositioning
the center link. (See Positioning Center Link in this section
for additional information.)
For draft load sensing operation:
• Initially place position control lever (A) in its fully
rearward position and the draft control lever (B) in the
fully forward (least draft) position.
• With tractor moving, push position control lever (A)
forward to set implement operating depth. Set position
control lever stop (D) so control lever can be brought
back to the same position. The operating depth set-up
will prevent the rockshaft from lowering all the way
when the tractor begins to slip. Then pull draft sensing
lever (B) rearward until desired draft sensing sensitivity
is obtained.
• The position control lever (A) can also be raised slightly
to override the draft control setting to help get through
slippery spots without getting stuck.
• The position control lever (A) can be moved fully
rearward to raise the hitch at the end of the field.
M47169 –19–29JAN92
A—Rockshaft Position Control Lever
B—Rockshaft Draft Control Lever
C—Draft Sensing OFF Position
D—Position Control Lever Stop
55-4
PY80265,05GO851 –19–10SEP05–1/1
022607
PN=57
Page 60

Rockshaft and 3-Point Hitch
Adjusting Rockshaft Rate-of-Drop/ Implement lock
CAUTION: Excessive rate-of-drop may cause
damage or injury. Fully lowering implement
should require at least two seconds.
Rockshaft drops faster when a heavy implement is
attached. Adjust rate-of-drop knob so that it is slow
enough to be safe and prevent implement damage.
Turn rockshaft rate-of-drop knob (A), located under the
seat, clockwise to slow rockshaft drop.
Turn knob counterclockwise to increase rate-of-drop.
Rate-of-drop knob is also called implement lock. When
knob is fully screw in, implement will not lower down even
if position control lever is fully down. Use implement lock
while transporting implement.
Attaching Tipping Trailer
Hydraulic power can be extended to tipping trailor through
auxiliary port (A). When preselector (B) is fully screwed-in,
hydraulic oil will move to tipping trailer. Use draft control
lever for lowering or raising of trailor.
NOTE: When tipping trailor is not attached to tractor, fully
screw-out preselector knob, otherwise rockshaft
will not function.
PY4076 –UN–11AUG04
A—Rockshaft Rate-of-Drop Knob cum Implement
Lock
PY80265,05GO852 –19–10SEP05–1/1
A—Auxiliary Port
B—Preselector Knob
55-5
PY4096 –UN–21AUG04
PY80265,05GO853 –19–10SEP05–1/1
022607
PN=58
Page 61

Rockshaft and 3-Point Hitch
Preparing Implement
Category II implements should have the top hole of the
implement mast located 610 mm (24 in.) above the lower
pins. Drill another hole in top mast or extend top mast if
necessary.
Category Mast Width Pin Size
Height Between
Lower Pins
Lower Upper
II 610 mm 824 mm 28.7 mm 25.5 mm
(24 in.) (32-7/16 in.) (1-1/8 in.) (1 in.)
PY2274 –UN–07JUN06
PY80265,05GO854 –19–10SEP05–1/1
55-6
022607
PN=59
Page 62

Rockshaft and 3-Point Hitch
Positioning Center Link
The draft sensing rockshaft center link attaching bracket
has holes which allow three different positions for
attaching the center link. The position effects the draft
sensing sensitivity.
Standard position is (C).
Move the center link attachment to holes (B) if:
• Excessive hitch activity or hunting occurs in draft control
operation.
• The rear of the implement raises too much when lifted.
The implement weight which can be lifted is reduced
slightly with the center link attachment in the lower
holes.
• The draft control lever range is too small.
Move the center link attachment to holes (C) if:
• The hitch seems unresponsive in draft control operation
and allows the engine speed to drop too far before
raising the rockshaft.
• The rear of the implement droops and drags the ground
as the implement is lifted.
Upper hole (A) eliminates nearly all draft sensing.
NOTE: Implements with Category II mast height 610 mm
(24 in.) will use the upper two holes.
PY4967 –UN–11DEC05
A—Upper Hole
B—Middle Hole
C—Lower Hole
55-7
PY80265,05GO855 –19–10SEP05–1/1
022607
PN=60
Page 63

Rockshaft and 3-Point Hitch
Attaching Implements to 3-Point Hitch
1. Be sure drawbar will not interfere. If necessary, move
drawbar ahead, or remove it. Check for any other
potential interference.
CAUTION: Prevent unexpected movement of
rockshaft by placing draft sensing lever in the
forward or OFF position before attaching
implement to hitch.
2. Back tractor up to implement (A) so hitch points (B)
align. Place transmission in neutral (N), stop the
engine and engage brakes BEFORE leaving the tractor
seat.
3. Slip draft links over implement hitch pins (B), and
retain with quick-lock pins.
NOTE: Locking pins can be stored on draft links (through
holes in sway chain ears) when not in use.
PY5374 –UN–09DEC05PY5375 –UN–09DEC05PY5376 –UN–11DEC05
4. To remove center-link from transport hook, lift center
link locking clip (C), and rotate tab (D) to rear of center
link clip.
5. Attach center link to implement top mast.
6. Adjust center link and lift links as necessary. (See
Leveling the Hitch in this section.)
CAUTION: To avoid bodily injury or machine
damage whenever an implement, implement
quick coupler, or other attachment is connected
to the tractor 3-Point Hitch, check full range of
operation for interference, binding or PTO
separation.
7. Using rockshaft position control lever (E), lower and
raise implement slowly and check for any point of
interference.
A—Implement
B—Implement Hitch Pins
C—Center Link Locking Clip
D—Tab
E—Rockshaft Position Control Lever
F—Rockshaft Draft Control Lever
55-8
PY80265,05GO856 –19–10SEP05–1/1
022607
PN=61
Page 64

Rockshaft and 3-Point Hitch
Adjusting Hitch Side Sway
NOTE: Check implement operator’s manual for instruction
on whether to allow side sway.
NOTE: Use spring or rubber strap to keep draft links out
of rear tyres when draft links are not attached to
implement.
Implement side sway should be adjusted when the
rockshaft is raised for transport by loosening the jam nut
on the threaded link (A) and turning the center rod to
increase or decrease the length of chain. Tighten jam nut
again when adjusted.
A—Threaded Link
For 5103, 5103S, 5203, 5104 and 5204 Tractor
PY4970 –UN–10DEC05
PY5825 –UN–20JUN06
For 5103E Tractor
55-9
PY80265,05GO857 –19–29DEC06–1/1
022607
PN=62
Page 65

Rockshaft and 3-Point Hitch
Leveling the Hitch
1. Lower implement to take weight off hitch.
IMPORTANT: DO NOT attempt to overextend center
link beyond limits of locking clip or lift
links past the stops. Link body threads
could be damaged.
NOTE: Maximum adjustment range of the center link can
only be obtained if the ends are positioned equally
within the body when attached to an implement.
2. Adjust center link to level implement front-to-rear.
Unlatch locking clip (A). Rotate center link body
clockwise to lengthen center link or counterclockwise to
shorten it. Be sure to latch the locking clip.
3. Adjust right-hand link to level implement side-to-side.
Lift locking handle (C) and turn 1/4 turn to engage slot
(D) onto roll-pin in the center portion of the lift link.
PY4968 –UN–23APR05PY5914 –UN–12JUL06
Turn crank handle (C) clockwise to raise draft link.
Turn crank handle (C) counterclockwise to lower draft
link.
After adjustment, lift handle (C) and turn to engage slot
(D) onto the lower body to prevent change of
adjustment during operation.
4. The left-hand lift link is also adjustable in length to
accommodate different tyre sizes.
To change the left-hand lift link length, remove the
upper lift link pin and rotate the upper end assembly
clockwise to shorten or counterclockwise to lengthen,
and then reinstall the upper pin and locking pin.
Adjust left and right lift links to accommodate various
tyre sizes. Set the lift links to have fully-lowered draft
link balls approximately seven inches off the ground for
greatest range of usable hitch motion.
For 5103, 5103S, 5203, 5104 and 5204 Tractor
PY5915 –UN–12JUL06
For 5103E Tractor
A—Locking Clip
B—Center Link Body
C—Locking Handle
D—Slot
55-10
PY80265,05GO858 –19–29DEC06–1/1
022607
PN=63
Page 66

Rockshaft and 3-Point Hitch
Adjusting Lateral Float
To allow the draft link to raise slightly as implement
follows ground contour, place head of float pin and the
rectangular washer on the inside end of the pin in a
vertical position (A).
To hold implement rigid, place head of float pin and the
rectangular washer in the horizontal position (B).
Use lift link pins in the float position for hitch-mounted
implements such as a cultivator or mower, which have
ground gauging skids or wheels which may cause the
implement to twist relative to the tractor.
Use the rigid position for implements such as plows and
ground engaging implements that should not twist relative
to the tractor.
PY5381 –UN–10DEC05
A—Pin in Vertical Position
B—Pin in Horizontal Position
PY5380 –UN–10DEC05
Adjusting Rockshaft Control Lever Friction
A—Adjustment Set Screws B—Adjustment Set Screws
Back Side Of Control Lever Front Side Of Control
If the rockshaft position control lever or rockshaft draft
control lever do not stay in set position, increase lever
PY80265,05GO859 –19–10SEP05–1/1
PY4406 –UN–10DEC05
Lever
friction by tightening the set screws (A) for the
appropriate lever until the proper friction is obtained.
PY4385 –UN–10DEC05
55-11
PY80265,05GO860 –19–10SEP05–1/1
022607
PN=64
Page 67

Rockshaft and 3-Point Hitch
Warming Hydraulic System Oil
Hydraulic system may be slow to function when tractor is
started in cold weather. This is because cold oil will not
flow as easily through the hydraulic system filter (A).
Steering may be slow until system warms up.
Hydraulic system will function normally when oil warms
up.
A—Hydraulic Oil Filter
IMPORTANT: To prevent damaging hydraulic pump or
relief valve, DO NOT exceed two to
three minutes warm-up time with
steering wheel held in full left or full
right turn position.
1. Depress clutch pedal, start engine and idle at about
1000 rpm.
2. Turn and hold steering wheel in full left or right turn.
Right Side of Transmission
PY6097 –UN–06AUG06
NR25796,0000352 –19–29DEC06–1/2
PY5734 –UN–31MAY06
For 5103, 5103S, 5203, 5104 and 5204 Tractor
55-12
For 5103E Tractor
NR25796,0000352 –19–29DEC06–2/2
PY5758 –UN–01JUN06
022607
PN=65
Page 68

Drawbar and PTO
Observe Drawbar Load Limitations
IMPORTANT: Certain heavy equipment, such as a
loaded single-axle trailer, can place
excessive strain on drawbar. Strain is
greatly increased by speed and rough
ground.
Static vertical load on drawbar should
not exceed 556 kg (1225 lb).
Drive slowly with heavy loads.
Specification
Drawbar Static Vertical Load—
Capacity 556 kg (1225 lb) Maximum...........................................................
Stay Clear of Rotating Drivelines
Entanglement in rotating driveline can cause serious injury
or death.
Keep tractor master shield and driveline shields in place
at all times. Make sure rotating shields turn freely.
Wear close fitting clothing. Stop the engine and be sure
PTO driveline is stopped before making adjustments,
connections, or cleaning out PTO driven equipment.
Drawbar
PY1094 –UN–10APR05
NR25796,0000257 –19–11JUL06–1/1
TS1644 –UN–22AUG95
65-1
PY80265,05GO862 –19–10SEP05–1/1
022607
PN=66
Page 69

Drawbar and PTO
Attaching PTO-Driven Implement
CAUTION: Stop engine before attaching
implement or working in area of implement
hitch.
1. Attach implement to tractor before connecting PTO
drive line. Raise hitch to upward position if it is not to
be used.
2. Range shift lever in neutral (N), key to OFF position to
stop engine and set brakes.
3. If PTO driven implement will be attached to drawbar
(A), the drawbar must be positioned so there is 355
mm (14 in.) between end of PTO shaft and center of
drawbar pin hole. Make sure drawbar locking pins and
spring pins are in place. If implement will be connected
to 3-Point Hitch, be sure drawbar will not interfere.
Remove it if necessary.
NOTE: There are two holes at the front of the drawbar.
Place the drawbar pin in the second hole for the
proper 355 mm (14 in.) length.
4. Rotate PTO shield upward for clearance. With engine
off, turn shaft slightly by hand if necessary to line up
splines. Connect drive line to PTO shaft. Pull out on
shaft to be sure drive line is locked to PTO shaft. Place
PTO shield in downward position.
5. Be sure all shields are in place and in good condition.
Never operate PTO unless master shield is properly
installed. WITH ENGINE STOPPED, check integral
shields on drive line by making sure they rotate freely
on shaft. Lubricate or repair as necessary.
PY1094 –UN–10APR05
A—Drawbar
6. Check carefully for any interference, make sure hitch is
raised to the upper position if it is not used.
65-2
PY80265,05GO863 –19–10SEP05–1/1
022607
PN=67
Page 70

Operating Tractor PTO
Drawbar and PTO
Hand Throttle Lever
1. Depress clutch pedal, start engine and push hand
throttle lever (A) forward until engine speed is sufficient
to start PTO implement. Engine speed must be less
than 2200 rpm (B).
2. Move control lever (A) forward to engage PTO. PTO
indicator (B) will light when PTO is engaged.
3. Increase engine speed to rated PTO speed of 2200
rpm for 540 operation.
A—Hand Throttle Lever
B—540 Operation Speed
PY4485 –UN–16FEB06
Continued on next page
For 5103, 5103S, 5203, 5104 and 5204 Tractor
PY5736 –UN–31MAY06
PY5760 –UN–01JUN06
For 5103E Tractor
PY80265,05GO864 –19–29DEC06–1/2
65-3
022607
PN=68
Page 71

CAUTION: Turn key OFF and pull Fuel Shut-off
Knob to stop engine, set brakes and make sure
all mechanisms have stopped before cleaning
out machine or making any adjustments to PTO
driven implement.
4. Pull control lever back to disengage PTO.
C—PTO Control Lever
Drawbar and PTO
Dual Clutch
Single Clutch
PY5383 –UN–10DEC05
PY5382 –UN–10DEC05
PY80265,05GO864 –19–29DEC06–2/2
65-4
022607
PN=69
Page 72

Drawbar and PTO
Adjusting PTO Clutch Operating Rod
PY5912 –UN–11JUL06
1. Move PTO lever (A) to rearward (disengaged) position.
2. Remove clip pin (B) from forward end of PTO clutch
rod.
3. Check for equal thread engagement at turnbuckle (G).
Loosen jam nuts (F) and (C). Turn rod (D) until threads
on each side of turnbuckle are equal. Tighten jam nut
(F).
4. Loosen jam nut (C) from rear of front clevis (E).
5. Adjust length of arm (D) so the clip pin (B) can be
inserted with the rod pulled forward and the arm pulled
rearward to eliminate free play. Lengthen rod by turn of
the clevis to provide PTO clutch lever free play and
PTO clutch rod travel in fully engaged position to
specification.
Specification
PTO Clutch Lever—Free Play 15 mm........................................................
PTO Clutch Rod (In Fully
Engaged Position)—Travel 14 mm -16 mm................................................
NOTE: Adjust turnbuckle (G) if you cannot make proper
adjustment with clevis.
6. Reinstall clip pin (B) in clevis (E) and arm (D).
7. Tighten jam nut (C) at clevis.
LV4082 –UN–02NOV99
PY5019 –UN–21MAY05
A—PTO Clutch Lever
B—Clip Pin
C—Jam Nut
D—Arm
E—Clevis
F—Jam Nut
G—Turnbuckle
65-5
PY80265,05GO865 –19–11JUL06–1/1
022607
PN=70
Page 73

Planning for Maximum Productivity
Ballast
Proper ballasting is an important factor in tractor
performance. maximum productivity can be achieved
only if tractor weight is appropriate for the job.
John Deere FMO (Fundamentals of Machine
Operations) Tractors, discusses methods of
determining correct tractor weight and ballast selection.
Selecting Ballast Carefully
Match amount of ballast needed for each job. What is
right for one job may be wrong for another job. Ballast
for traction and stability.
Factors determining amount of ballast:
FMO-Machinery Management includes information on
tractor and implement matching and increasing
productivity. .
Your John Deere dealer can assist you with
information on these subjects.
PY80265,05GO866 –19–10SEP05–1/1
• Soil surface-loose or firm.
• Type of implement-integral/semi-integral or towed.
• Travel speed-slow or fast.
• Tractor power output-partial or full load.
• tyres-single, oversize, or dual.
PY80265,05GO867 –19–10SEP05–1/1
Matching Ballast to Load Work
Use no more ballast than necessary, and remove
ballast when it is no longer needed.
Rather than weighing tractor down to pull heavy loads,
try to reduce load. Pulling a lighter load at a higher
speed is more economical and more efficient.
The best way to check for correct ballast is to measure
amount of travel reduction (% slip) of the drive wheels.
Under normal field conditions, travel reduction should
be 10—15 percent.
Add more weight to drive wheels if slip is excessive. If
there is less than 10 percent slip, weight should be
removed.
Too Little Ballast Too Much Ballast
1. Excessive wheel slip 1. Increased load
2. Power loss due to 2. Power loss due to
churning soil carrying extra weight
3. tyre wear 3. tyre strain
4. Fuel waste 4. Soil compaction
5. Lower productivity 5. Fuel waste
6. Lower productivity
70-1
PY80265,05GO868 –19–10SEP05–1/1
022607
PN=71
Page 74

Ballast
Measuring Wheel Slip—Manually
1. Place a mark (A) on a rear tyre which is easily
observed (a chalk mark is recommended).
2. With tractor working and implement lowered, mark a
starting point (B) on the ground at the place where the
tyre mark (A) meets the ground.
3. Mark the ground again where the tyre mark (A)
completes 10 full revolutions (C).
4. With implement raised return in the opposite direction.
At the second mark on the ground (C) remark the tyre
(D).
5. While driving the tractor along the same path
(implement raised), count the tyre revolutions required
to reach the starting point (B).
6. Use the return tyre revolutions count and “Wheel
Slippage Chart” to determine slippage. 10—15 percent
is ideal.
7. Adjust ballast or load to give correct slippage.
NOTE: Available horsepower is greatly reduced when
wheel slip drops below 10 percent.
WHEEL SLIPPAGE CHART
Non-Loaded Wheel Estimated % Recommended Action
Revolutions (Step 5) Slip
10 0 Remove Ballast
9-1/2 5 Remove Ballast
9 10 Proper Ballast
8-1/2 15 Proper Ballast
8 20 Add Ballast
7-1/2 25 Add Ballast
7 30 Add Ballast
M47166 –UN–31JAN92
PY80265,05GO869 –19–10SEP05–1/1
70-2
022607
PN=72
Page 75

Ballast Limitations
Ballast
Ballast should be limited by either tyre capacity or
tractor capacity. Each tyre has a recommended
carrying capacity which should not be exceeded (see
Wheels, tyres and Treads section). If a greater amount
Ballasting Front End for Transport
CAUTION: Additional front ballast may be
needed for transporting rear-mounted
implements. When implement is raised, drive
slowly over rough ground, regardless of how
much ballast is used.
CAUTION: Weights are heavy. Use proper lifting
equipment. Approximate weight of starter
weight (C) is : 49 kg (109 lb). Approximate
weight of QUIK-TATCH weights (D) are 45 kg
(99 lb).
Specification
Starter Weight (Ballast)—Weight 49 kg (109 lb).........................................
QUIK-TATCH Weight
(Ballast)—Weight 45 kg (99 lb) Each..........................................................
of weight is needed for traction, a larger tyre should be
considered.
Ballast can be added as either liquid or cast iron.
PY80265,05GO870 –19–10SEP05–1/1
PY4523 –UN–24JAN05
A—Ballast Center
B—Ballast Retaining Bolts
C—Starter Weight
D—QUIK-TATCH Weights
Installing QUIK-TATCH Weights: QUIK-TATCH
weights can be installed on the front of the tractor.
One starter weight and up to 8 QUIK-TATCH weights
can be installed.
1. Install weights in pairs, one on each side of center (A).
2. To hold weights in place, run retaining bolts (B)
through holes from side-to-side. Tighten to
specification.
Specification
Ballast Weights Retaining Bolts—
Torque 230 N•m (170 lb-ft)........................................................................
QUIK-TATCH is a trademark of Deere & Company
70-3
PY80265,05GO871 –19–10SEP05–1/1
022607
PN=73
Page 76

Ballast
Ballasting Front End for Transport (5103E Tractor)
CAUTION: Additional front ballast may be
needed for transporting rear-mounted
implements. When implement is raised, drive
slowly over rough ground, regardless of how
much ballast is used.
CAUTION: Weights are heavy. Use proper lifting
equipment. Approximate weight of Front
Bumper (A) is : 61 kg (135 lb). Approximate
weight of each Ballast weight (C) is 23 kg (51
lb).
Specification
Front Bumper—Weight 61 kg (135 lb).........................................................
Ballast Weight—Weight 23 kg (51 lb)..........................................................
Installing Weights: Upto 8 weights can be installed on the
front bumper of the tractor as per requirement.
Front Bumper
PY4099 –UN–12JUN06
A—Front Bumper
B—Ballast Center
C—Ballast Weight
D—Ballast Retaining Bolt
1. Install weights in pairs, one on each side of ballast
center (B).
2. To hold weights in place, run retaining bolts (D)
through holes. Tighten to specification.
Specification
Ballast Weights Retaining Bolts—
Torque 130 N•m (96 lb-ft)..........................................................................
Ballasting Tractor
Add weight to front end if needed for stability. Heavy
pulling and heavy rear-mounted implements tend to lift
front wheels. Add enough ballast to maintain steering
control and prevent tip-over.
PY80265,05GO872 –19–12JUN06–1/1
Refer to the implement operator’s manual, along with
“Using Implement Codes” in this section, to determine
the minimum number of front weights that are required
for your tractor model.
70-4
PY80265,05GO873 –19–10SEP05–1/1
022607
PN=74
Page 77

Determining Maximum Rear Ballast
Ballast
IMPORTANT: DO NOT overload tyres. If maximum
weight shown in chart is not enough
for safety, reduce load or install
heavier ply tyres.
To extend drive train life, avoid
excessive soil compaction and
rolling resistance, avoid adding too
much ballast. Ballast should never
exceed the weight required to
provide traction for continuous full
power loads in 3rd gear. Remove
ballast if tractor engine labors when
Determining Maximum Front Ballast
Use appropriate front ballast for a particular operating
condition. Two-wheel drive tractors should only have
enough ballast to maintain safe steering control.
Remove ballast when it is no longer needed.
Chart shows carrying capacity per tyre.
pulling heavy loads in the first three
gears.
Chart shows carrying capacity per tyre.
MAXIMUM LOAD PER WHEEL
Tyre Size Capacity
Bias Ply tyres Ply Rating kg (lb)
14.9-28 12 1545 (3406)
13.6-28 12 1329 (2930)
12.4-28 12 1211 (2670)
PY80265,05GO874 –19–10SEP05–1/1
MAXIMUM LOAD PER WHEEL
2-WD
Capacity
Tyre Size Ply Rating kg (lb)
6.00-16 8 534 (1177)
6.50-20 8 725 (1599)
IMPORTANT: DO NOT overload tyres. If maximum
weight shown in chart is not enough
for safety, reduce load or install
tyres with a higher load rating.
Using Cast Iron Weights
Cast iron weights are available in a 48 kg (106 lb) size.
Weights can be installed on the inside or outside of wheel.
See your John Deere dealer for more information and
recommendations on weight use and placement.
Specification
Cast Iron Weights—Weight 48 kg (106 lb)..................................................
70-5
PY80265,05GO875 –19–17JAN07–1/1
M47215 –UN–29JAN92
PY80265,05GO876 –19–10SEP05–1/1
022607
PN=75
Page 78

Ballast
Installing Rear Cast Iron Weights
CAUTION: Optional cast iron weight weighs 48
kg (106 lb). Handle with care! Use appropriate
equipment or have the job done by your John
Deere dealer.
1. Attach first weight to wheel disks.
2. To install additional weights (A), install bolts in previous
weight (B). Rotate the added weight to align bolts with
weight holes (C).
3. Tighten attaching bolts securely. Tighten again after a
few hours service. Check tightness regularly.
Using Liquid Weight
PY1635 –UN–17FEB06
A—Additional Weight
B—Weight
C—Weight Holes
PY80265,05GO877 –19–10SEP05–1/1
CAUTION: Installing liquid ballast requires
special equipment and training. Have the job
done by your John Deere dealer or a tyre
service store.
IMPORTANT: NEVER fill tyre to more than 75%
full. More solution would leave too
little air space to absorb shocks.
Damage to tyre could occur.
A solution of water and calcium chloride provides safe,
economical ballast. Used properly, it will not damage
tyres, tubes, or rims.
Use calcium chloride to prevent water from freezing. A
mixture of 0.6 kg per liter (5.0 lb of calcium chloride
per gal) will not freeze solid above —45°C (—53°F).
Charts on this page show how much each tyre size
holds if filled to 75 percent full.
LIQUID WEIGHT FOR FRONT TYRES
With 0.6 kg/L (5 lb/gal) Calcium Chloride Solution
Liquid Weight per tyre
Tyre Size kg (lb)—75% Full
6.00-16 30 (67)
LIQUID WEIGHT FOR REAR TYRES
With 0.6 kg/L (5 lb/gal) Calcium Chloride Solution
Liquid weight per Tyre
Tyre Size kg (lb)—75% Full
12.4-28 216 (478)
13.6-28 237 (524)
14.9-28 339 (747)
PY80265,05GO878 –19–17JAN07–1/1
70-6
022607
PN=76
Page 79

Wheels, Tyres and Treads
Service Tyres Safely
Explosive separation of at tyre and rim parts can cause
serious injury or death.
Do not attempt to mount a tyre unless you have the
proper equipment and experience to perform the job.
Always maintain the correct tyre pressure. Do not inflate
the tyres above the recommended pressure. Never weld
or heat a wheel and tyre assembly. The heat can cause
an increase in air pressure resulting in a tyre explosion.
Welding can structurally weaken or deform the wheel.
When inflating tyres, use a clip-on chuck and extension
hose long enough to allow you to stand to one side and
NOT in front of or over the tyre assembly. Use a safety
cage if available.
Check wheels for low pressure, cuts, bubbles, damaged
rims or missing lug bolts and nuts.
Check Implement-to-Tyre Clearance
IMPORTANT: Check for adequate clearance (A)
between outside diameter of the tyre
and implement with hitch in raised
position.
When large diameter rear tyres are
installed on a tractor with a 3-Point
Hitch, a quick coupler or similar device
may be required to provide adequate
implement-to-tyre clearance.
A—Clearance
PY80265,05GO879 –19–10SEP05–1/1
TS211 –UN–23AUG88
M47177 –UN–31JAN92
PY80265,05GO880 –19–10SEP05–1/1
75-1
022607
PN=77
Page 80

Check Tyre Inflation Pressure
Wheels, Tyres and Treads
Check tyres daily for damage or noticeably low
pressure.
At least every 100 hours of operation, check inflation
pressure with a gauge. Use an accurate gauge having
10 kPa (0.1 bar) (1 psi) graduations.
If tyres contain liquid ballast, use a special air-water
gauge and measure with valve stem at bottom.
NOTE: When furrow plowing or during hillside
operation, tyre pressure can be increased 28
kPa (0.28 bar) (4 psi) ABOVE maximum to
prevent tyre wrinkling or buckling.
IMPORTANT: Always check inflation pressure with
an accurate tyre gauge to prevent
over-inflation. Over-inflation reduces
performance and increases strain of
both tyre and rim.
NOTE: Following inflation information applies to both
front and rear tyres and Tyre Inflation Pressure
Chart.
2. Operation of tyres at the inflation pressures listed
on chart will result in optimum tractive performance
of the tyre/vehicle system. Correctly inflated radial
tyres will show a large deflection of the sidewall or
“cheeks”. This is normal and will not hurt the tyre if
the inflation pressure is maintained.
3. Inflation pressures less than 80 kPa (12 psi) should
be monitored regularly because of the increased
risk of low pressure air leaks (especially due to
leaking valve cores).
4. Tractors operating on steep side slopes should
increase inflation pressures 28 kPa (4 psi) above
the values listed to compensate for lateral weight
transfer.
5. Tyres run as singles in high traction conditions
sometimes experience bead slip if the bead was not
fully seated or if too much lubricant was used to
mount the tyre. Increasing the inflation pressure will
compensate for this condition but will not cause
reduced traction. Consult your tyre dealer if this
problem occurs.
1. All inflation pressures are calculated for 29 km/h
(18 mph) travel speeds for both diagonal (bias) ply
and radial ply tyres.
6. If higher load capacities are needed, contact your
John Deere dealer for tyre manufacturers load and
inflation table information.
PY80265,05GO881 –19–09JAN07–1/1
75-2
022607
PN=78
Page 81

Tyre Inflation Pressure Chart
Wheels, Tyres and Treads
Front Tyres With Little or No Added Weight Mounted Implement
Tyre Size Ply Rating Tread kPa (bar) (psi) kPa (bar) (psi)
6.00-16 8 F2 160 (1.6) (23) 280 (2.8) (40)
Rear Tyres With Little or No Added Weight Mounted Implement
Tyre Size Ply Rating Tread kPa (bar) (psi) kPa (bar) (psi)
12.4-28 12 R1 80 (0.8) (12) 140 (1.4) (20)
13.6-28 12 R1, R3, R4 90 (0.9) (13) 120 (1.2) (18)
14.9-28 12 R1 80 (0.8) (12) 140 (1.4) (20)
With Maximum Ballast or Heavy
With Maximum Ballast or Heavy
PY80265,05GO882 –19–17JAN07–1/1
Tighten Wheel/Axle Hardware Correctly
CAUTION: NEVER operate tractor with a
loose rim, wheel, hub, or axle.
1. After driving tractor about 100 m (109 yd), and
before placing it under load, tighten hardware to
specified torque.
Any time hardware is loosened, tighten to specified
torque.
NOTE: Follow checking procedure when a new tractor
is first used, or wheels have been off.
Tighten Bolts— Front Axle
Tighten bolts in the following locations to specifications:
Specification
Front Axle—Axle-to-Knee Bolts—
Torque 480 N•m (350 lb-ft).........................................................................
Front Axle—Disk-to-Flange
Bolts—Torque 210 N•m (130 lb-ft)..............................................................
B—Disk-to-Flange
2. Check hardware after working three hours and
again after 10 hours.
3. Check all hardware frequently and keep it tight.
PY80265,05GO883 –19–10SEP05–1/1
PY4526 –UN–21JAN05
75-3
PY80265,05GO884 –19–10SEP05–1/1
022607
PN=79
Page 82

Wheels, Tyres and Treads
Tighten Bolt Adjustable Front Axle––If
Equipped
Tighten bolts in the following locations to specifications:
Adjustable Front Axle-to-Knee
Specification
Bolts—Torque 480 N•m...............................................................................
Adjustable Front Axle
Disk-to-Flange Bolts—Torque 210 N•m......................................................
A—Axle-to-Knee
B—Disk-to-Flange
PY5021 –UN–21MAY05PY5844 –UN–21JUN06
NR25796,0000683 –19–15JAN07–1/1
75-4
022607
PN=80
Page 83

Wheels, Tyres and Treads
Tighten Bolts—Rear Axle (M-14 Bolts)
Tighten bolts in the following locations to specifications:
Rear Axle Rim-to-Disk (Steel
Specification
Disk)—Torque 245 N•m (180 lb-ft)..............................................................
Rear Axle Disk-to-Flange (Steel
Disk)—Torque 210 N•m (155 lb-ft)..............................................................
A—Rim-to-Disk Bolts
B—Disk-to-Flange Bolts
C—M-14 Bolt
PY4282 –UN–06DEC04PY1955 –UN–12JAN04
75-5
Current Arrangement with M-14 Bolt
PY80265,05GO885 –19–10SEP05–1/1
022607
PN=81
Page 84

Wheels, Tyres and Treads
Tighten Bolts—Rear Axle (M-20 Stud)
Tighten bolts in the following locations to specifications:
Rear Axle Rim-to-Disk (Steel
Specification
Disk)—Torque 245 N•m (180 lb-ft)..............................................................
Rear Axle Disk-to-Flange (Steel
Disk)—Torque 550 N•m (406 lb-ft)..............................................................
A—Rim-to-Disk Bolts
B—Disk-to-Flange Bolts
C—Stud
D—Nut
PY4282 –UN–06DEC04PY1956 –UN–12JAN04
Observe Rear Wheel Tread Width Limitations
IMPORTANT: Tyres must have at least 25 mm (1 in.)
clearance with fenders (A) and fuel
tank. When large diameter rear tyres are
installed, check clearance between tyre
and fenders and fuel tank.
75-6
New Arrangement with M-20 Stud and Nut
PY80265,05GO886 –19–10SEP05–1/1
M47179 –UN–31JAN92
PY80265,05GO887 –19–10SEP05–1/1
022607
PN=82
Page 85

Wheels, Tyres and Treads
Tread Settings—Multi-Position Rear Wheels
Wheel tread on rear axle with multi-position wheels
can be adjusted by repositioning or exchanging the
rims or by reversing the wheel disks.
Wheel tread can also be adjusted by exchanging the
complete wheel to the opposite side of the tractor (This
maneuver permits the change from disk-dished-in to
disk-dished-out operations without disassembling the
wheel). When changing rear wheels from one side to
the other, the arrow on side wall of tyre points in the
direction of forward rotation.
The relationship of the wheel disk and rim in obtaining
the different tread settings is shown in the diagrams on
the facing page.
A study of these diagrams, before attempting to
change tread settings, will save unnecessary labor.
IMPORTANT: After setting wheel spacing, tighten
rim-to-disk and disk-to-flange bolts.
Drive tractor 100 m (109 yd) and
tighten again.
Multi-Position Rear Wheels
Specification
Rim-to-Disk (Steel Disk)—
Torque 245 N•m (180 lb-ft)...................................................................
Multi-Position Rear Wheels
Disk-to-Flange (Steel Disk)—
Torque 175 N•m (130 lb-ft)...................................................................
NOTE: Tread settings are measured at bottom of
centerline.
STEEL DISKS
REAR TREAD WIDTH
Centerline-to-Centerline
Diagram Tyre Sizes
13.6-28
12.4-28
A 1417 mm (55.8 in.)
B 1513 mm (59.6 in.)
C 1617 mm (63.7 in.)
D 1716 mm (67.6 in.)
E 1820 mm (71.7 in.)
75-7
PY80265,05GO888 –19–10SEP05–1/2
IN227 –UN–24MAY00
PY80265,05GO888 –19–10SEP05–2/2
022607
PN=83
Page 86

Wheels, Tyres and Treads
Tread Settings—Adjustable Front Axle––If Equipped
PY5021 –UN–21MAY05
Front rims are offset. With some tires, this provides
two tread spacings, at each axle setting.
ADJUSTABLE FRONT AXLE TREAD SETTINGS
Diagram C
Centerline-to-centerline
Tread Positionª For 2 WD
Tire123456
7.5-16 1449 mm 1549 1649 1749 1849 1949
(57.0 in.) (61.0 in.) (64.9 in.) (68.9 in) (72.8 in.) (76.7 in.)
6.0-16 1435 mm (56.5 1535 mm (60.4 1635 mm (64.4 1735 mm (68.3 1835 mm (72.2 1935 mm (76.2
in.) in.) in.) in.) in.) in.)
ªTread position 1 is with axle adjustment at its most inward location. See adjust Front Axle Tread Width in this section.
ADJUSTABLE FRONT AXLE TREAD SETTINGS
Diagram D
Centerline-to-centerline
Tread Positionª
Tire123456
7.5-16 1583 1683 mm 1783 mm 1883 mm 1983 mm 2083 mm
(62.3 in.) (66.3 in.) (70.2 in.) (74.1 in.) (78.1 in.) (82.0 in.)
ªTread position 1 is with axle adjustment at its most inward location. See adjust Front Axle Tread Width in this section.
LV1515 –UN–05MAR96
75-8
NR25796,0000684 –19–15JAN07–1/1
022607
PN=84
Page 87

Checking Toe-In
Wheels, Tyres and Treads
A—Front Axle Toe-In Distance
1. Park machine on level surface.
2. Turn steering wheel so front wheels are in the
straight-ahead position. Stop engine.
3. Measure distance (A) between tyres at hub level in
front of axle. Record measurement and mark the
tyres.
4. Move tractor back about1m(3ft), so mark is at
hub level behind the axle. Again, measure distance
between tyres at same point on tyre. Record
measurement.
5. Determine the difference between front and rear
measurements. If the front measurement is smaller,
toe is “in”. If the rear is smaller, toe is “out”.
PY5170 –UN–25AUG05
6. Distance (A) at front of tyres should be 3—6 mm
less than distance measured at rear of tyres for
CARRARO front axle and 0—2 mm for DANA front
axle. Adjust toe-in if necessary. (See procedure in
this section.)
Toe-In Value Chart
Make Toe-In Value
DANA FRONT AXLE 0-2 mm
CARRARO FRONT AXLE 3-6 mm
75-9
PY80265,05GO889 –19–10SEP05–1/1
022607
PN=85
Page 88

Wheels, Tyres and Treads
Adjusting Toe-In
1. Loosen lock nut (A) on tie rod.
2. Adjust tie rod equally by rotating tube (B) to lengthen
or shorten tie rod. Adjust toe-in to 3 to 6 mm for
CARRARO front axle and 0—2 mm for DANA front
axle.
3. Tighten bolt to specification. Do not overtighten as
damage to the tube may occur.
.
Specification
Tie Rod Jam Nut—Torque 90 N•m (66 lb-ft)..............................................
Toe-In Value Chart
Make Toe-In Value
DANA FRONT AXLE 0-2 mm
CARRARO FRONT AXLE 3-6 mm
A—Tie Rod Lock Nut
B—Tie Rod Tube
Powered Axle
PY4882 –UN–12JUN06
PY4148 –UN–26AUG04
Non-Powered Axle
PY80265,05GO890 –19–04JUL06–1/1
75-10
022607
PN=86
Page 89

Wheels, Tyres and Treads
Adjusting Toe-In - Adjustable Front Axle––IF
Equipped
1. Loosen locker nuts (A) on locker (B).
2. Loose ball joint lock nut (E).
3. Adjust tie rods on both sides of the tractor equally by
the extensioner to lengthen or shorten. Adjust toe-in to
3 to 6 mm (1/8 to 1/4 in.)
4. Tighten nut on locker (A) to specification.
Locker Nut—Torque 40 N•m......................................................................
Specification
5. Tighten the ball joint lock nuts (E) to specification.
Specification
Extensioner Lock Nut—Torque 160 N•m...................................................
PY5025 –UN–25MAY05
A—Locker Nut
B—Locker
C—Tie Rod
D—Extensioner
E—Lock Nut
NR25796,0000686 –19–15JAN07–1/1
75-11
022607
PN=87
Page 90

Transporting
Use Safety Lights and Devices
Prevent collisions between other road users, slow moving
tractors with attachments or towed equipment, and
self-propelled machines on public roads. Frequently check
for traffic from the rear, especially in turns, and use hand
signals or turn signal lights.
Use headlights, flashing warning lights, and turn signals
day and night. Follow local regulations for equipment
lighting and marking. Keep lighting and marking visible
and in good working order. Replace or repair lighting and
marking that has been damaged or lost.
Driving Tractor on Roads
TS951 –UN–12APR90
PY80265,05GO891 –19–10SEP05–1/1
CAUTION: Observe the following precautions
when operating on a road.
1. Before operating tractor on highway be sure tail lights
(A) and flashing turning lights (B) work properly. Install
and use auxiliary lighting to equipment as required for
safety and by local regulations.
A—Tail light
B—Turning Lights
C—Reflex Reflector
For 5103, 5103S, 5203, 5104 and 5204 Tractor
Continued on next page
For 5103E Tractor
PY5017 –UN–12JUN06
PY5029 –UN–12JUN06
NR25796,0000353 –19–11JAN07–1/5
80-1
022607
PN=88
Page 91

Transporting
CAUTION: NEVER operate flood lampwhen
transporting tractor. Clear bright light at the
rear of the tractor could confuse drivers of
other vehicles as they approach from the rear.
IMPORTANT: Refer to Lights section for detailed
descriptions of lighting operations and
functions.
2. Turn light switch to high beam headlights or low beam
headlights position. Never use bright lights which are
visible from the rear. Always dim headlights before
meeting another vehicle. Keep headlights properly
adjusted.
PY4106 –UN–23FEB06
A—Lights OFF
B—Parking Lights
C—Dim Headlights
D—Bright Headlights
E—High Beamlight
NR25796,0000353 –19–11JAN07–2/5
3. Use turn signals when turning. Be sure to return turn
signal lever (A) to center position after turning.
A—Turn Signal Lever
4. Couple brake pedals (A) together before driving on a
road. Avoid hard applications of brakes.
5. Drive slowly enough to maintain safe control at all
times. Slow down for hillsides, rough ground, and
sharp turns, especially when transporting heavy,
rear-mounted equipment.
6. Before going down a hill, shift to a gear low enough to
control speed without using brakes. Never coast down
hill.
7. When transporting downhill on icy or graveled grades,
be alert for skids which could result in loss of steering
control. To decrease chance of skids, reduce speed
and be sure tractor has proper ballast.
NR25796,0000353 –19–11JAN07–3/5
PY4114 –UN–23FEB06
PY6098 –UN–06AUG06
Brake Pedals
A—Brake Pedals
Continued on next page
80-2
NR25796,0000353 –19–11JAN07–4/5
022607
PN=89
Page 92

Transporting
CAUTION: Stopping distance increases with
speed and weight of towed loads, and on
slopes. Towed loads with or without brakes that
are too heavy for the tractor or are towed too
fast can cause loss of control. Consider the
total weight of the equipment and its load.
Observe these recommended maximum road
speeds, or local speed limits which may be
lower:
If towed equipment does not have brakes, do
not travel more than 32 km/h (20 mph) and do
not tow loads more than 1.5 times the tractor
weight.
If towed equipment has brakes, do not travel
more than 40 km/h (25 mph) and do not tow
loads more than 4.5 times the tractor weight.
Ensure the load does not exceed the
recommended weight ratio. Add ballast to
recommended maximum for tractor, lighten the
load, or get a heavier towing unit. The tractor
must be heavy and powerful enough with
adequate braking power for the towed load. Use
additional caution when towing loads under
adverse surface conditions, when turning, and
on inclines.
8. Use caution when operating tractor at transport
speeds. Reduce speed if towed load weighs more than
tractor and is not equipped with brakes. (See Towed
Equipment operator’s manual for recommended
transport speeds.)
LV4042 –UN–09JUL99
9. Use additional caution when transporting towed loads
under adverse surface conditions, when turning and on
inclines.
10. Heavy towed or rear mounted implements may start
swaying in transport. Excessive swaying will result in
loss of steering control. Drive slowly and avoid quick
turns of steering wheel. Refer to your implement
operator’s manual regarding maximum travel speed
limitations.
80-3
NR25796,0000353 –19–11JAN07–5/5
022607
PN=90
Page 93

Transporting
Transport on Carrier
CAUTION: Chain tractor to carrier securely.
Drive carrier slowly.
The best method of transporting a disabled tractor is to
haul it on a flatbed carrier.
IMPORTANT: Seal exhaust to prevent dirt from
entering and damaging engine.
Towing Tractor
CAUTION: NEVER tow tractor faster than 16
km/h (10 mph). Have an operator steer and
brake tractor.
IMPORTANT: To avoid damaging
transmission-hydraulic system, observe
the following precautions:
1. Be sure transmission-hydraulic system oil is to the full
level line on sight gauge (A). If the tractor is to be
towed with the front wheels raised, add 1 liter of oil to
hydraulic fill port (C) for each 90 mm (3-1/2 in.) the
wheels are raised. DO NOT raise front wheels more
than 305 mm (12 in.) above ground.
NOTE: After transporting tractor, drain oil that was added
for towing.
2. Make sure the differential lock is disengaged.
PY80265,05GO893 –19–10SEP05–1/1
LV610 –UN–22APR94
PY4143 –UN–12JUN06
For 5103E Tractor
3. Make sure range lever is in neutral and gear lever is in
4th gear.
80-4
For 5103, 5103S, 5203, 5104 and 5204 Tractor
PY4142 –UN–12DEC05
A—Full Level Mark
B—Low Level Mark
C—Hydraulic Oil Filler Port
NR25796,0000354 –19–12JAN07–1/1
022607
PN=91
Page 94

Fuels, Lubricants and Coolant
Handle Fuel Safely—Avoid Fires
Use only diesel fuel.
Handle fuel with care, it is highly flammable.
DO NOT refuel machine:
• While you smoke.
• When machine is near open flame or sparks.
• When engine is running. STOP engine.
Fill fuel tank outdoors.
Help prevent fires:
• Clean oil, grease and dirt from machine.
• Clean up spilled fuel immediately.
Do not store machine with fuel in tank in a building where
fumes may reach an open flame or spark.
M73115 –UN–09MAR90
Handle Fluids Safely—Avoid Fires
When you work around fuel, do not smoke or work near
heaters or other fire hazards.
Store flammable fluids away from fire hazards. Do not
incinerate or puncture pressurized containers.
Make sure machine is clean of trash, grease, and debris.
Do not store oily rags; they can ignite and burn
spontaneously.
PY80265,05GO895 –19–10SEP05–1/1
TS227 –UN–23AUG88
PY80265,05GO896 –19–10SEP05–1/1
85-1
022607
PN=92
Page 95

Fuel Storage
Fuels, Lubricants and Coolant
Buy good quality, clean fuel from a reputable supplier.
Proper fuel storage is critically important. Use clean
storage and transfer tanks. Periodically drain water
and sediment from bottom.
Diesel Fuel
Fuel sulphur content should be less than 1.0 percent
preferably less than 0.5 percent. Diesel fuel having
sulphur content higher than 1.0 percent may cause
increase wear on metal engine parts because of acids
produced by sulphur during combustion.
IMPORTANT: If fuel sulphur content exceeds 0.7
percent, the engine oil drain interval
must be reduced by 50 percent to
125 hours.
Avoid storing fuel over long periods of time.
Store fuel in a convenient place away from buildings.
PY80265,05GO897 –19–10SEP05–1/1
Cetane number should be no less than 40 to assure
satisfactory starting and overall performance.
Fitleration of fuel is critical for proper operation of
engine. Use genuine MICO fuel filters. Alwasy change
fuel filter insert at given interval
Diesel Fuel Filters
Fitleration of fuel is critical for proper operation of engine.
Use genuine MICO fuel filters. Alwasy change fuel filter
inserts (primary and seconary)at given interval
85-2
PY80265,05GO898 –19–10SEP05–1/1
PY4145 –UN–26AUG04
.
PY80265,05GO899 –19–10SEP05–1/1
022607
PN=93
Page 96

Fuels, Lubricants and Coolant
Fill Fuel Tank
CAUTION: Handle fuel with care: It is highly
flammable. DO NOT refuel the machine while
smoking or when near open flame or sparks.
Always stop engine before refueling machine.
Fill fuel tank outdoors.
Prevent fires by keeping machine clean of
accumulated trash, grease and debris. Always
clean up spilled fuel.
Fuel tank can be filled through either fill cap (A). Fill fuel
tank at end of each days operation. This prevents
condensation in tank as moist air cools.
TS202 –UN–23AUG88PY5027 –UN–27MAY05
Fuel Tank (5103, 5103S, 5203,
Specification
5104 and 5204 Tractor)—
Capacity 62 lit..............................................................................................
Fuel Tank (5103E Tractor)—
Capacity 50 lit..............................................................................................
A—Fuel Tank Filler Cap
For 5103, 5103S, 5203, 5104 and 5204 Tractor
PY4101 –UN–20AUG04
For 5103E Tractor
85-3
PY80265,05GO901 –19–29DEC06–1/1
022607
PN=94
Page 97

Lubricant Storage
Fuels, Lubricants and Coolant
Your equipment can operate at top efficiency only
when clean lubricants are used.
Use clean containers to handle all lubricants.
Whenever possible, store lubricants and containers in
an area protected from dust, moisture, and other
contamination. Store containers on their side to avoid
water and dirt accumulation.
Diesel Engine Oil
Use genuine engine oil. This oil is available in pack of
1litre and 8.5 litre at John Deere Dealership only
Make certain that all containers are properly marked to
identify their contents.
Properly dispose of all old containers and any residual
lubricant they may contain.
PY80265,05GO902 –19–10SEP05–1/1
85-4
PY5826 –UN–20JUN06
PY80265,05G1309 –19–20JUN06–1/1
022607
PN=95
Page 98

Diesel Engine Coolant
Fuels, Lubricants and Coolant
The engine cooling system is filled to provide
year-round protection against corrosion and cylinder
liner pitting, and winter freeze protection to -37°C
(-34°F). If protection at lower temperatures is required,
consult your John Deere dealer for recommendations.
John Deere COOL-GARD Prediluted Coolant is
preferred for service.
John Deere COOL-GARD Prediluted Coolant is
available in a concentration of either 50% ethylene
glycol or 55% propylene glycol.
Additional recommended coolants
The following engine coolant is also recommended:
• John Deere COOL-GARD Coolant Concentrate in a
40% to 60% mixture of concentrate with quality
water.
John Deere COOL-GARD coolants do not require use
of supplemental coolant additives, except for periodic
replenishment of additives during the drain interval.
Other fully formulated coolants
Other fully formulated low silicate ethylene or
propylene glycol base coolants for heavy-duty engines
may be used if they meet one of the following
specifications:
Other low silicate ethylene glycol base coolants for
heavy-duty engines may also be used if they meet one
of the following specifications:
• ASTM D4985 ethylene glycol base prediluted (50%)
coolant
• ASTM D4985 ethylene glycol base coolant
concentrate in a 40% to 60% mixture of concentrate
with quality water
Coolants meeting ASTM D4985 require an initial
charge of supplemental coolant additives, formulated
for protection of heavy duty diesel engines against
corrosion and cylinder liner erosion and pitting. They
also require periodic replenishment of additives during
the drain interval.
Other coolants
It is possible that neither John Deere COOL-GARD nor
coolants meeting one of the coolant standards listed
above is available in the geographical area where
service is performed. If these coolants are unavailable,
use a coolant concentrate or prediluted coolant with a
quality additive package that provides cylinder liner
cavitation protection and protects the cooling system
metals (cast iron, aluminum alloys, and copper alloys
such as brass) from corrosion.
The additive package must be part of one of the
following coolant mixtures:
• ASTM D6210 prediluted (50%) coolant
• ASTM D6210 coolant concentrate in a 40% to 60%
mixture of concentrate with quality water
Coolants meeting ASTM D6210 do not require use of
supplemental coolant additives, except for periodic
replenishment of additives during the drain interval.
Coolants requiring supplemental coolant additives
COOL-GARD is a trademark of Deere & Company
• ethylene glycol or propylene glycol base prediluted
(40% to 60%) coolant
• ethylene glycol or propylene glycol base coolant
concentrate in a 40% to 60% mixture of concentrate
with quality water
Water quality
Continued on next page
DX,COOL3 –19–27OCT05–1/2
85-5
022607
PN=96
Page 99

Fuels, Lubricants and Coolant
Water quality is important to the performance of the
cooling system. Distilled, deionized, or demineralized
water is recommended for mixing with ethylene glycol
and propylene glycol base engine coolant concentrate.
IMPORTANT: Do not use cooling system sealing
additives or antifreeze that contains
sealing additives.
Use Correct Transmission-Hydraulic Filter Element
To protect systems, replace transmission-hydraulic oil filter
with a John Deere service filter element. Minimum and
maximum performance specifications are printed on John
Deere filters. Other filters may be used if they meet these
performance specifications.
See Lubrication and Maintenance section for
recommended filter change intervals.
IMPORTANT: Do not mix ethylene glycol and
propylene glycol base coolants.
DX,COOL3 –19–27OCT05–2/2
Transmission and Hydraulic Oil
Same oil is used for transmission and hydraulic. Use
HY-GARDtransmission-hydraulic oil. This oil is available
in pack of 1 litre and 20 litre at John Deere Dealership
only
HY-GARD is a trademark of Deere & Company
85-6
PY80265,05GO905 –19–10SEP05–1/1
PY5827 –UN–20JUN06
PY80265,05GO906 –19–20JUN06–1/1
022607
PN=97
Page 100

Grease
Fuels, Lubricants and Coolant
Depending upon the expected air temperature range
during the service interval, use grease as shown on
the adjoining table.
John Deere
High-Temperature/Extreme-Pressure/Non-Clay Grease
is recommended.
If other greases are used, they must be greases
meeting SAE Multipurpose High Temperature Grease
with Extreme Pressure (EP) Performance and capable
of operating at compartment temperatures above
150°C (302°F)
At temperatures below —30°C (—22°F), use arctic
greases such as those meeting Military Specification
MIL-G-10942C.
Grease Type Temperature Limits
Arctic Grease Below —10°C (14°F)
SAE(NLGI)#0or#1 0°Cto—30°C (32°Fto—22°F)
SAE (NLGI) #2 50°Cto0°C (122°Fto32°F)
JD High Temperature 50°Cto—10°C (122°Fto14°F)
PY80265,05GO907 –19–10SEP05–1/1
85-7
022607
PN=98
 Loading...