

Page 1
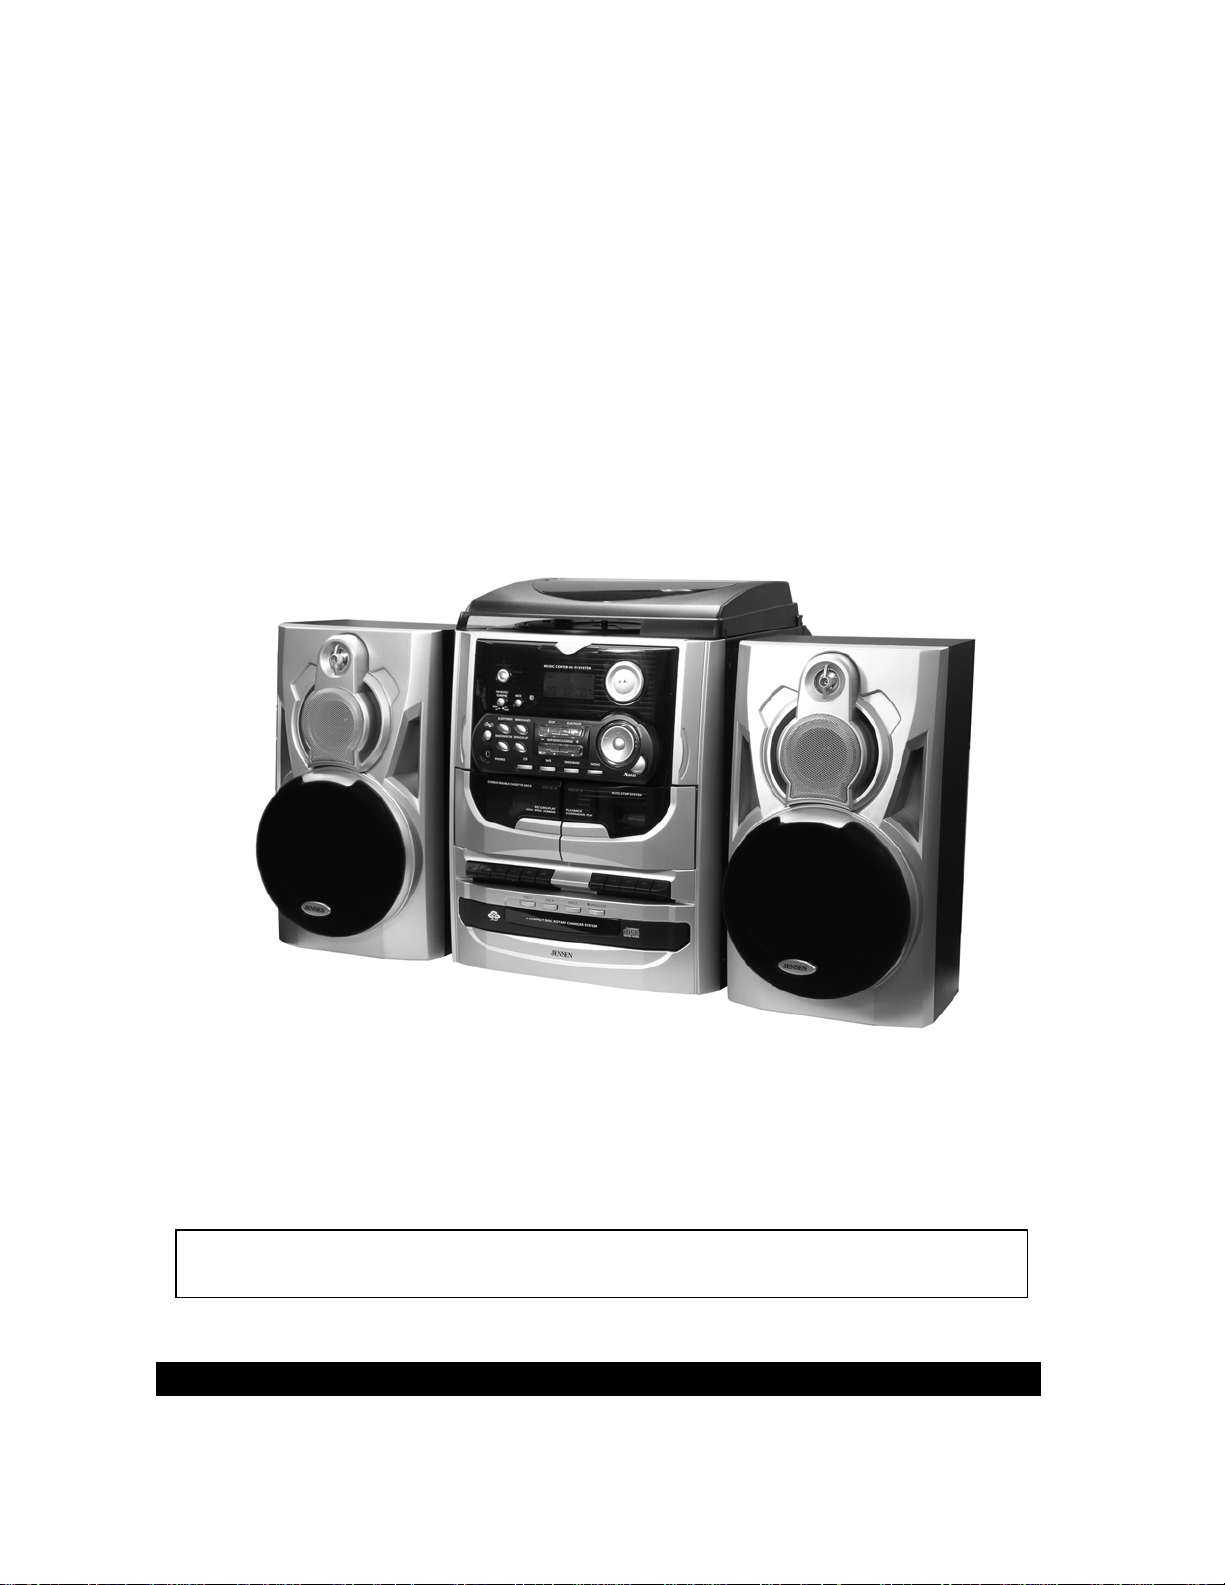
3-SPEED STEREO TURNTABLE
3 CD CHANGER MUSIC SYSTEM WITH
DUAL CASSETTE DECK AND
REMOTE CONTROL
OWNER’S MANUAL
JMC-1100
PLEASE READ THIS OPERATING MANUAL COMPLETELY BEFORE OPERATING
Selecting fine audio equipment such as the unit you've just purchased is only the start of your
musical enjoyment. Now it's time to consider how you can maximize the fun and excitement
your equipment offers. This manufacturer and the Electronic Industries Association's
THIS UNIT AND RETAIN THIS BOOKLET FOR FUTURE REFERE NCE.
DEAR JENSEN® CUSTOMER
Page 2

Consumer Electronics Group want you to get the most out of your equipment by playing it at a
safe level. One that lets the sound come through loud and clear without annoying blaring or
distortion and, most importantly, without affecting your sensitive hearing.
Sound can be deceiving. Over time your hearing "comfort level" adapts to higher volumes of
sound. So what sounds "normal" can actually be loud and harmful to your hearing. Guard
against this by setting your equipment at a safe level BEFORE your hearing adapts.
To establish a safe level:
• Start your volume control at a low setting.
• Slowly increase the sound until you can hear it comfortably and clearly, and without
distortion.
Once you have established a comfortable sound level:
Set the dial and leave it there.
Taking a minute to do this now will help to prevent hearing damage or loss in the future. After
all, we want you listening for a lifetime.
We Want You Listening For a Lifetime
Used wisely, your new sound equipment will provide a lifetime of fun and enjoyment. Since
hearing damage from loud noise is often undetectable until it is too late, this manufacturer and
the Electronic Industries Association's Consumer Electronics Group recommend you avoid
prolonged exposure to excessive noise.
Customer's Record:
The serial number of this product is found on its back cover. You should note the serial
number of this unit in the space provided as a permanent record of your purchase to aid in
identification in the event of theft of loss.
Model Number: JMC-1100 Serial Number: ____________________
1
WARNING
TO PREVENT FIRE OR SHOCK HAZARD, DO NOT USE THIS PLUG WITH AN EXTENSION
CORD, RECEPTACLE OR OTHER OUTLET UNLESS THE BLADES CAN BE FULLY
Page 3
INSERTED TO PREVENT BLADE EXPOSURE. TO PREVENT FIRE OR SHOCK HAZARD, DO
NOT EXPOSE THIS APPLIANCE TO RAIN OR MOISTURE.
IMPORTANT SAFETY INSTRUCTIONS
1. Read these instructions - All the safety and operating instructions should be read before
the appliance is operated
2. Keep these instructions - The safety and operating instructions should be kept for future
reference.
3. Heed all warnings - All warnings on the appliance and in the operating instructions should
be adhered to.
4. Follow all instructions - All operation and use instructions should be followed.
5. Do not use this apparatus near water - The appliance should not be used near water; for
example, near a bathtub, washbowl, kitchen sink, laundry tub, in a wet basement, or near a
swimming pool, and the like.
6. Clean only with dry cloth - The appliance should be cleaned only as recommended by the
manufacturer.
7. Do not block any ventilation openings. Install in accordance with the manufacturer’s
instructions. - The appliance should be situated so that its location or position does not
interfere with its proper ventilation. For example, the appliance should not be situated on a
bed, sofa, rug, or similar surface that may block the ventilation openings; or placed in a
built-in installation, such as a bookcase or cabinet that may impede the flow of air through
the ventilation openings.
8. Do not install near any heat sources such as radiators, heat registers, stoves or other
apparatus (including amplifiers) that produce heat.
9. Do not defeat the safety purpose of the polarized or grounding-type plug. A polarized plug
has two blades with one wider than the other. A grounding type has two blades and a third
grounding prong. The wide blade or the third prong are provided for your safety. If the
provided plug does not fit into your outlet, consult an electrician for replacement of the
obsolete outlet.
10. Protect the power cord from being walked on or pinched particularly at plugs, convenience
receptacles, and the point where they exit from the apparatus.
11. Only u se attachments / accessories specified by the manufacturer
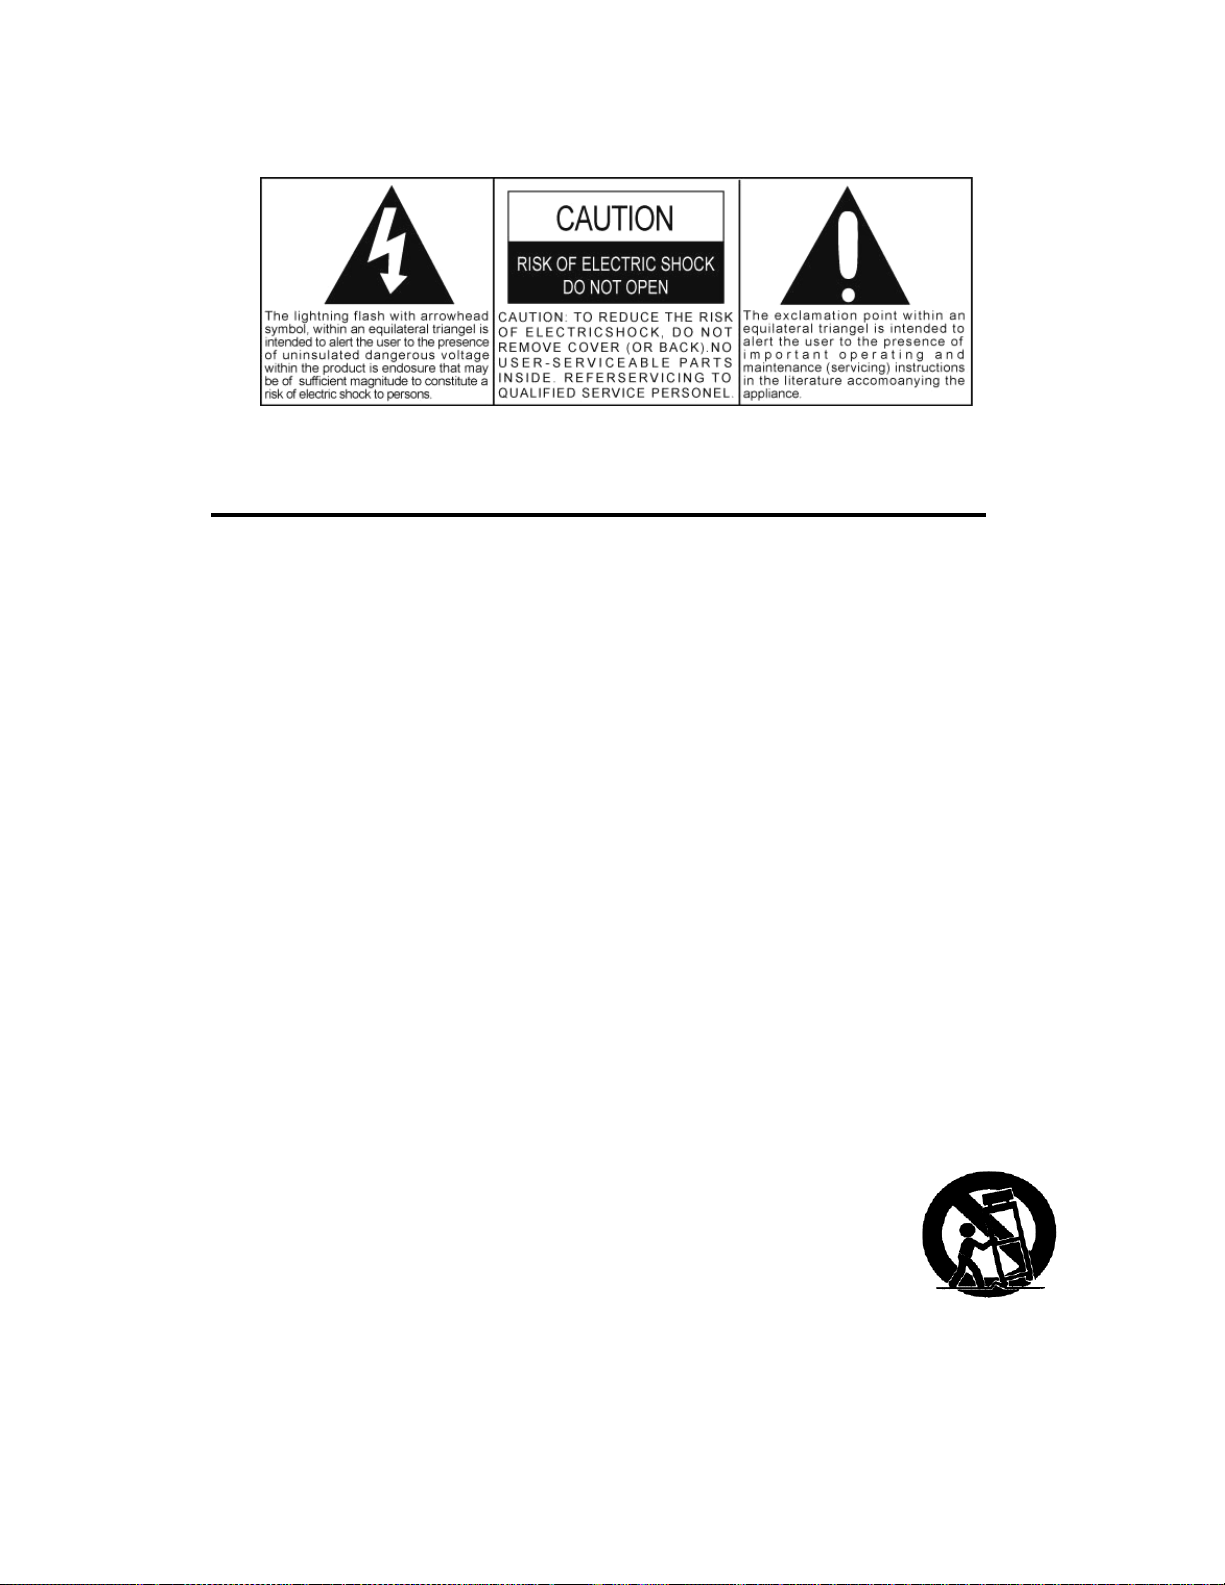
12. Use only with the cart, stand, tripod, bracket, or table specified by the
manufacturer, or sold with the apparatus. When a cart is used, use caution
when moving the cart/apparatus combination to avoid injury from tip-over.
2
13. Unplug this apparatus during lightning storms or when unused for a long periods of time.
14. Power Sources - The appliance should be connected to a power supply only of the type
described in the operating instructions or as marked on the appliance. Do not overload wall
outlet.
15. Wall and Ceiling Mounting - The appliance should be mounted to a wall or ceiling only as
recommended by the manufacturer.
Page 4
16. Power Line s - An outdoor antenna should be located away from power lines.
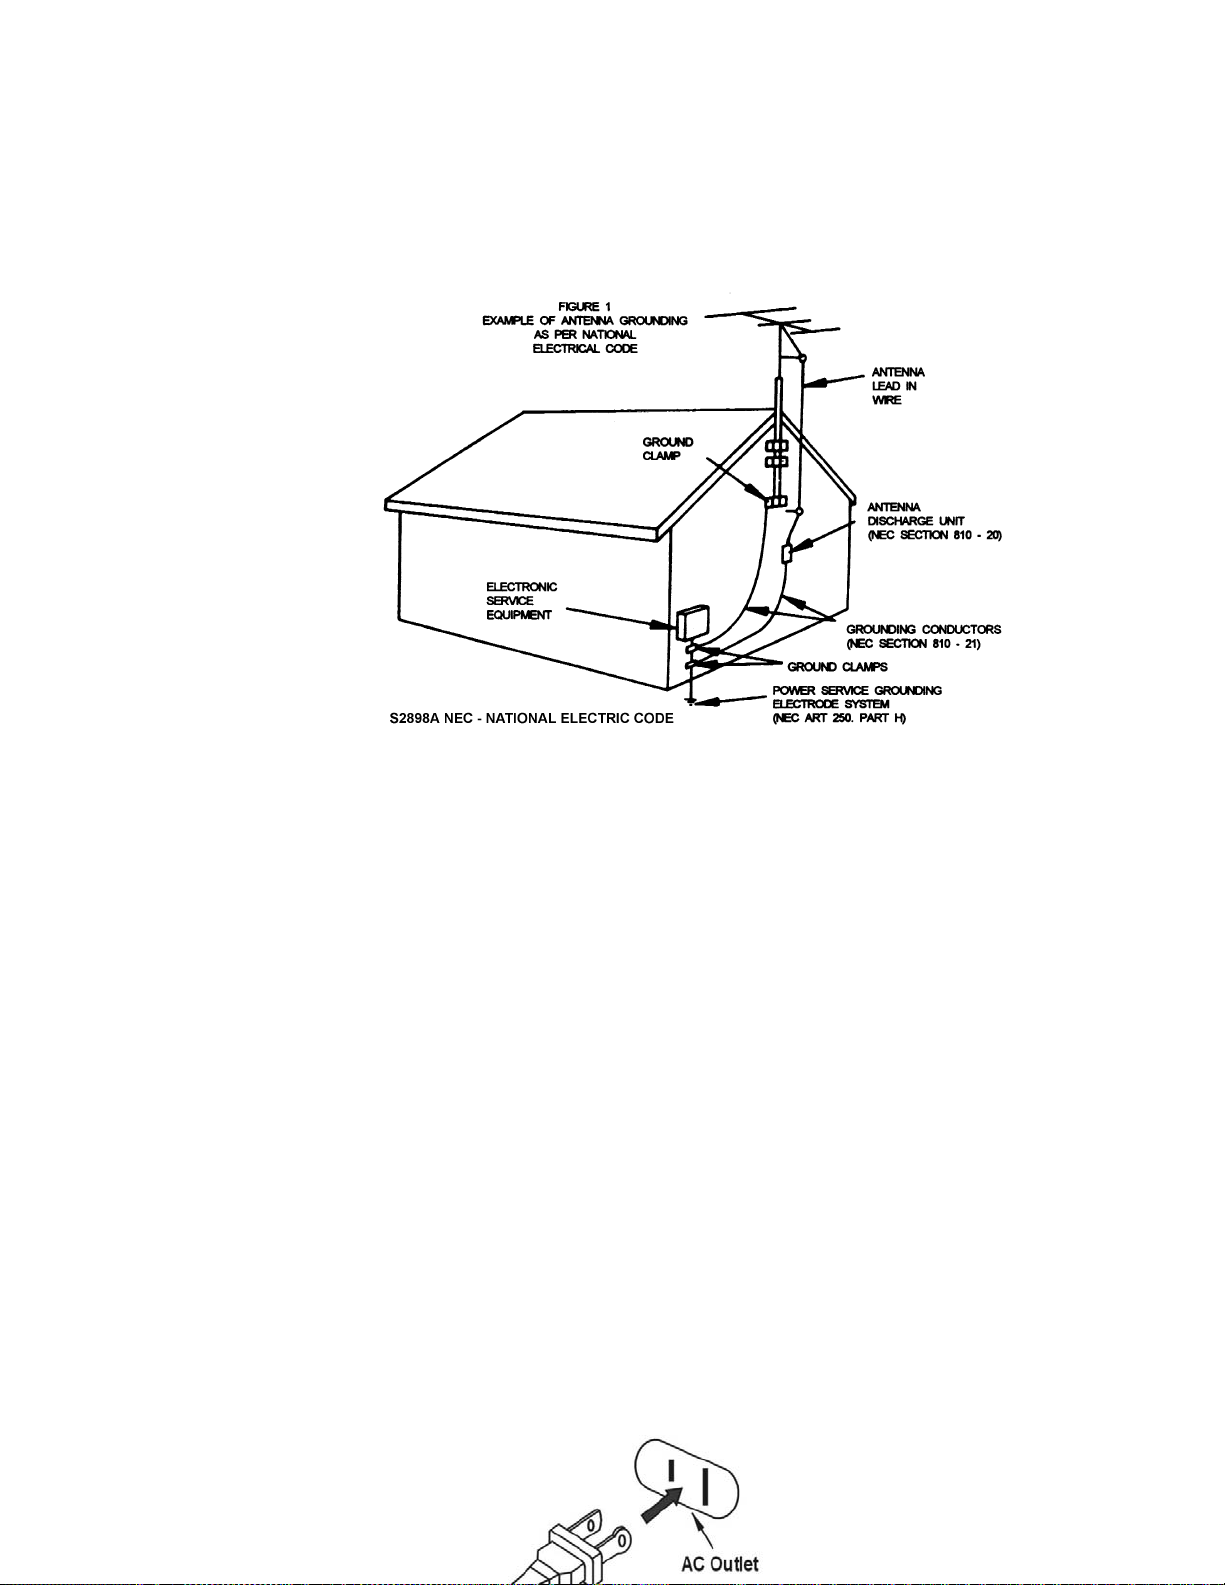
17. Outdoor Antenna Grounding - If an outside antenna is connected to the receiver, be sure
the antenna system is grounded so as to provide some protection against voltage surges
and built up static charges. Section 810 of the National Electrical Code, ANSI/ NFPA
No.70-1984, provides information with respect to proper grounding of the mast and
supporting structure, grounding of the lead-in wire to an antenna discharge unit, size of
grounding conductors, location of antenna discharge unit, connection to grounding
electrodes, and requirements for the grounding electrode. See figure 1.
18. Object and Liquid Entry - Care should be taken so that objects do not fall and liquids are
not spilled into the enclosure through openings.
19. Refer all servicing to qualified service personnel. Servicing is required when the apparatus
has been damaged in any way, such as power-supply cord or plug is damaged, liquid has
been spilled or objects have fallen into the apparatus, the apparatus has been exposed to
rain or moisture, does not operate normally, or has been dropped.
20. Servicing - The user should not attempt to service the appliance beyond that described in
the operating instructions. All other servicing should be referred to qualified service
personnel.
21. The MAINS plug or an appliance coupler is used as the disconnect device, the disconnect
device shall remain readily operable.
22. Battery pack or battery installed should not be exposed to excessive heat such as
sunshine, fire or the like.
23. Caution marking and nameplate are located on back of product.
Caution
Danger of explosion if battery is incorrectly replaced. Replace only with the same or
equivalent type.
The apparatus shall not be exposed to dripping or splashing and that no objects filled with
liquids, such as vases, shall be placed on apparatus.
3
CAUTION
TO PREVENT ELECTRIC SHOCK, MATCH WIDE BLADE OF PLUG TO WIDE SLOT. FULLY INSERT
THE PLUG TO MAIN POWER SOCKET.
Page 5
CAUTION
Note:
Follow the advice below for safe and appropriate operation.
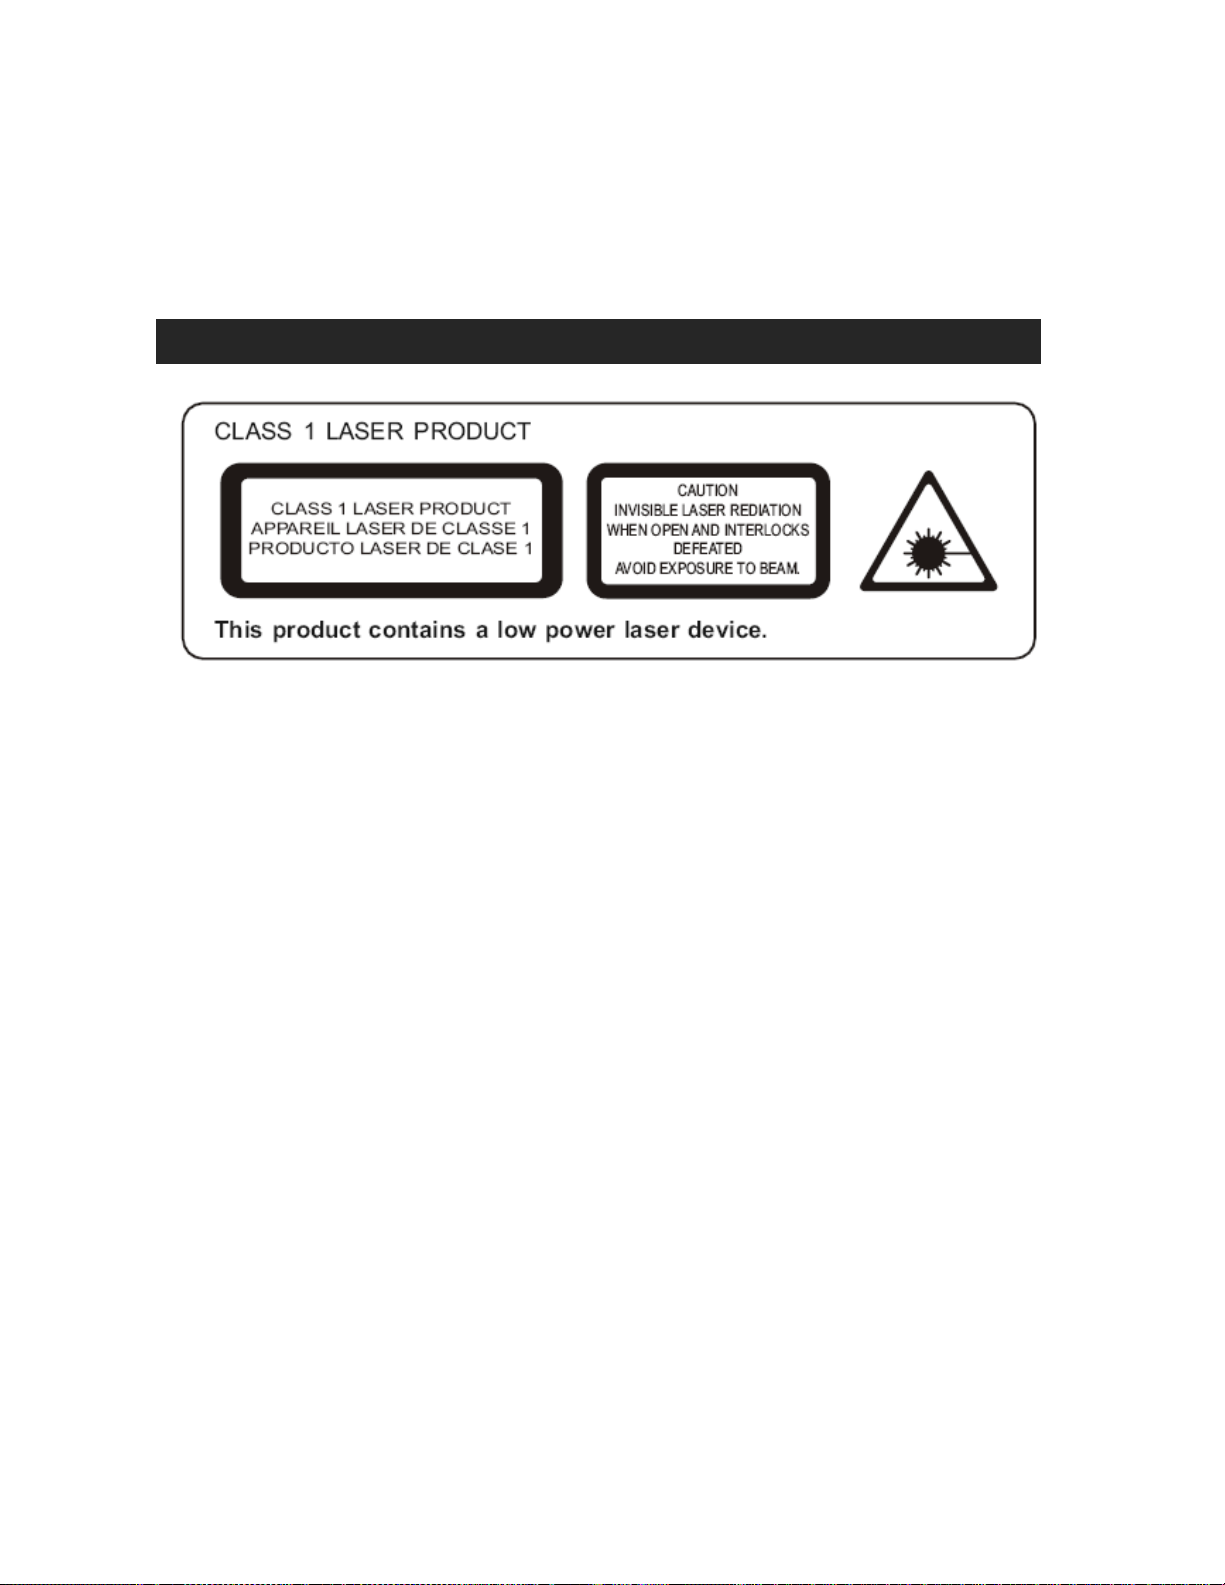
ON PROTECTION AGAINST LASER ENERGY EXPOSURE
ON PLACEMENT
• Do not use the unit in places which are extremely hot
• Place the unit on a flat and even surface.
• Do not restrict the air-flow of the unit by placing it in a place with poor ventilation, by covering it
ON CONDENSATION
•
• When there is condensation inside the unit, the unit may not function normally. Let it stand for
This product complies with DHHS Rule 21 Subchapter J at date of manufacture.
o As the laser beam used in this compact disc player is harmful to the eyes, do not
attempt to disassemble the casing.
o Stop operation immediately if any liquid or solid object should fall into the cabinet.
o Do not touch the lens or poke at it. If you do, you may damage the lens and the player
may not operate properly.
o Do not put anything in the safety slot. If you do, the laser diode will be ON when the
CD door is still open.
o This unit employs a laser. The use of controls or adjustment or performance of
procedures other than those specified here may result in exposure to hazardous
radiation.
cold, dusty or humid.
,
with a cloth or by placing it on a carpet.
4
When left in a heated room where it is warm and damp, water droplets or condensation may
form inside the unit.
1 to 2 hours before turning the power on, or gradually heat the room up and dry the unit before
Page 6

use.
Should any trouble occur, remove the power source and refer servicing to qualified personnel.
PRECAUTION FORE USE
• UNPACK ALL PARTS AND REMOVE PROTECTIVE MATERIAL.
• DO NOT CONNECT THE UNIT TO THE MAINS BEFORE CHECKING THE MAINS
VOLTAGE AND ALL OTHER CONNECTIONS HAVE BEEN MADE.
• DO NOT COVER ANY VENTS AND MAKE SURE THAT THERE IS A SPACE OF
SEVERAL CENTIMETERS AROUND THE UNIT FOR VENTILATION.
IMPORTANT NOTES
Avoid installing the unit in locations described below:
Places exposed to direct sunlight or close to heat radiating appliances such as
•
electric heaters.
• Places subject to constant vibration.
• Dusty, humid or moist places.
PROTECT YOUR FURNITURE !!
This model is equipped with non-skid rubber 'feet' to prevent the product from moving
when you operate the controls. These 'feet' are made from no n-migrating rubber m aterial
specially formulated to avoid leaving any marks or stains on your furniture. However
certain types of oil based furniture polishes, wood preservatives, or cleaning sprays may
cause the rubber 'feet' to soften, and leave marks or a rubber residue on the furniture. To
prevent any damage to your furniture we strongly recommend that you purchase small
self-adhesive felt pads, available at hardware stores and home improvement centers
everywhere, and apply these pads to the bottom of the rubber 'feet' before you place the
product on fine wooden furniture.
5
COMPLIANCE WITH FCC REGULATIONS
This device complies with Part 15 of the FCC Rules. Operation is subject to the following two
conditions:
Page 7

(1) this device may not cause harmful interference, and
(2) this device must accept any interference received, including interference that may cause
undesired operation.
NOTE : This equipment has been tested and found to comply with the limits for a Class B digital
device, pursuant to Part 15 of the FCC Rules. These limits are designed to provide reasonable
protection against harmful interference in a residential installation. This equipment generates,
uses and can radiate radio frequency energy and, if not installed and used in accordance with
the instructions, may cause harmful interference to radio communications. However, there is no
guarantee that interference will not occur in a particular installation. If this equipment does cause
harmful interference to radio or television reception, which can be determined by turning the
equipment off and on, the user is encouraged to try to correct the interference by one or more of
the following measures:
- Reorient or relocate the receiving antenna.
- Increase the separation between the equipment and receiver.
- Connect the equipment into an outlet on a circuit different from that to which the receiver is
connected.
- Consult the dealer or an experienced radio/TV technician for help.
CAUTION: Changes or modifications not expressly approved by the party
responsible for compliance could void the user’s authority to operate
the equipment.
6
SPEAKER CONNECTION
GETTING START
1. Insert the speaker cable ends ( exposed wires) into the terminals located on the back
Page 8

of the main unit by pushing down the lever of the left speaker terminal and then the
right speaker terminal
2. Connect the left speaker to the left speaker terminal with the red wire to L+ and the
black wire to L -.
3. Connect the right speaker to the right speaker terminal with the red wire to R+ and the
black wire to R -.
NOTE:
Make sure that the power is switch off when connect or disconnect the speakers. Make
sure that the speakers are connected to the correct terminals.
CONNECTING THE AC POWER CORD
After connecting the speakers unwind the AC power cord fully and connect it to any convenient
household 12
NOTE:
The product is designed to operate on normal 120V~ 60Hz
AC only. Connecting this system to any other power supply
could result in damage to the unit which is not covered by
your warranty. You will noted that this system is equipped
with a polarized AC power plug having one blade wider than
the other. This is a safety feature.
If this plug does not fit into your existing AC outlet, do not try
to defeat this safety feature by filling the wide blade to make
it fit into your outlet. If this plug will not fit into your outlet, you
probably have an outdated non-polarized AC outlet. You
should have your outlet changed by a qualified licensed electrician.
0V~ 50Hz AC outlet.
7
LOCATION OF CONTROLS AND INDICATORS
Page 9

FRONT VIEW & BACK VIEW
1) LCD DISPLAY 14) DISC 1, 2, 3 SELECTOR
2) REMOTE SENSOR 15) CD DOOR
3) STANDBY LED INDICATOR 16) PRE-SET EQ BUTTON
4) POWER BUTTON 17) CD STOP BUTTON
5) MUTE BUTTON 18) CD PLAY / PAUSE BUTTON
6) FM MODE / DUBBING SPEED SELECTOR 19) VOLUME UP-DOWN BUTTON
7) MEMEORY / CLOCK ADJUST BUTTON 20) SKIP / SEARCH / TUNING UP BUTTON
8) SLEEP / TIMER BUTTON 21) SKIP / SEARCH / TUNING DOWN BUTTON
9) DISC CHANGE BUTTON 22) EXTRA BASS CONTROL BUTTON
10) RANDOM / M-DN BUTTON 23) FUNCTION BUTTONS
11) HEADPHONE JACK 24) DECK 2 CONTROL KEYS
12) REPEAT / M-UP BUTTON 25) CD DOOR OPEN/CLOSE BUTTON
13) DECK 1 CONTROL KEY 26) 45RPM RECORD ADAPTOR
RECORD KEY 27) 33/45/78 RPM SPEED SELECTOR
33) AC POWER CORD
PLAYBACK KEY 28) TONE ARM HOLDER
REWIND KEY 29) AM MODE BEAT CUT 1-2 SELECTOR
FAST FORWARD KEY 30) SPEAKER WIRE TERMINAL
STOP/EJECT KEY 31) TURNTABLE AUTO STOP SWITCH
PAUSE KEY 32) FM WIRE ANTENNA
8
REMOTE CONTROL
OPEN/CLOSE PRESS TO OPEN / CLOSE THE CD DOOR
Page 10

POWER TURNS THE UNIT POWER ON / STANDBY
DISC 1,2,3 PRESS TO SELECT THE DISC FOR PLAYBACK DIRECTLY
DISC-CH PRESS TO SELECT THE NEXT DESIRE DISC AND ROTATE THE DISC TRAY
SLEEP PRESS AND HOLD TO ACTIVE SLEEP FUNCTION
TIMER ACTIVE/DE-ACTIVE THE ON/OFF TIMER
PHONO PRESS TO ACTIVE PHONO MODE
EQ PRESS TO SELECT EQ MODE
MUTE PRESS TO ACTIVE MUTE FUNCTION
CD PRESS TO ACTIVE CD MODE
TAPE PRESS TO ACTIVE TAPE MODE
TUNER/BAND PRESS TO ACTIVE TUNER MODE AND
VOLUME -/+ CONTROL VOLUME UP/DOWN
SKIP UP/DOWN IN CD MODE : TO SELECT PREVIOUS / NEXT CD TRACK
IN TUNER MODE : PRESS TO STEP UP/DOWN OF RADIO FREQUENCY
IN CLOCK/TIMER MODE: PRESS TO ADJUST HOUR/MINUTE
PLAY/PAUSE PRESS TO START CD PLAYBACK / PAUSE MODE.
STOP IN CD MODE, PRESS TO STOP CD PLAYBACK
REPEAT/M-UP IN CD MODE : PRESS TO ACTIVE THE REPEAT PLAYBACK FUNCTION
IN TUNER MODE : PRESS TO RECALL THE PRESET RADIO STATIONS
RANDOM/M-DOWN IN CD MODE : PRESS TO ACTIVE THE RANDOM PLAYBACK FUNCTION
IN TUNER MODE : PRESS TO RECALL OUT THE PRESET RADIO STATIONS
REMAIN PRESS TO DISPLAY THE REMAINING TIME OF CD PLAYBACK
MEMORY/CLK-ADJ IN STANDBY MODE, FOR CLOCK SETTING
IN TUNER MODE, FOR PRE-SETTING OF RADIO STATION INTO MEMORY
IN CD MODE, PRESS TO PROGRAM CD TRACKS.
MODE TO CHECK CURRENT TIME AND SET THE ON/OFF TIMER
INTRO PRESS TO ST ART CD INTRO SCAN PLAYBACK
SELECT AM/FM RADIO BAND
9
BATTERY INSTALLATION
The battery compartment is located on the back of the remote control.
1. Remove the battery compartment door by pressing in on the tab and lifting it off.
Page 11

2. Insert two (2) AAA size batteries (not included) into the battery compartment as the polarity
markings inside the battery compartment.
3. Replace the battery compartment door.
BATTERY PRECAUTIONS
Follow these precautions when using a battery in this device:
1. Use only the size and type of battery specified.
2. Be sure to follow the correct polarity when installing the battery as indicated in the
battery compartment. A reversed battery may cause damage to the device.
3. Do not mix different types of batteries together (e.g. Alkaline and Carbon-zinc) or old
batteries with fresh ones.
4. If the batteries in the device are consumed or the device is not to be used for a long
period of time, remove the battery to prevent damage or injury from possible battery
leakage.
5. Do not try to recharge the battery not intended to be recharged; it can overheat and
rupture. (Follow battery manufacturer’s directions.)
6. Do not dispose of batteries in fire. Battery may explodes or leak.
7. Clean the battery contacts and also those of the device prior to battery installation.
10
SETTING THE CLOCK
1. Make sure the unit is in STANDBY mode.
OPERATING INSTRUCTIONS
Page 12

2. Press the “MEM/CLK-ADJ” button, the first two digits of the time (hours) “00” are flashing.
Press “SKIP DOWN
or UP
button to set the correct hour. Press “MEM/CLK-ADJ”
”
button to store the correct hour.
3. The third & fourth digits of the time (minutes) “00” are flashing, press the “SKIP DOWN
or UP
” button to set the correct minutes. Press “MEM/CLK-ADJ” to store the correct
minutes.
4. To select 12/24 hours display mode, press and hold the CD “STOP” button on main unit and
then press the “MEM/CLK-ADJ ” button to switch the clock between 12H (12 Hour) and 24H
(24 Hour).
Note: 1. The pre-set time will need to be reset completely if the main power button on system is
turned off. You are recommended to only switch the system into standby mode for
convenience and also to avoid having to reset the time again.
2. 12/24 hour format mode can only be set by control buttons on the main unit.
LISTENING TO RADIO
Manual Tuning
1. Press the POWER button to turn on the unit.
2. Press “TUNER/BAND” button and select the desired band (AM or FM).
3. Tune to the required radio station by pressing the “TUNING + / -“ button on main unit or SKIP
UP / DOWN on remote manually.
4. Adjust volume controls to the desired volume level.
Auto Tuning
1. Press “TUNER/BAND” button and select the desired band (AM or FM).
2. Press and hold the “TUNING + or – “ button for 1-2 seconds and then release.
3. The unit will start seeking automatically and stop until a radio station is reached.
4. Repeat step 2-3 until the desired radio station is being reached.
5. Adjust volume controls to the desired volume level.
Preset Radio Stations
You can store up to total of 20 radio stations in the memory.
1. Set to TUNER mode
2. Turn to the desired radio station by “MANUAL” or “AUTO” tuning method.
3. Press “MEM/CLK-ADJ” button to enable program state.
4. Press “REPEAT/M-UP” button to select the desired station memory for storage.
5. Press “MEM/CLK-ADJ” button again to confirm the setting.
6. Repeat step 2 to 5 to store other stations if necessary.
Note:
1. The pre-set memories will be cancelled completely if switching off the main power button on
system. You are recommended to switch the system into standby mode for convenience
usage.
2. There are 5 seconds for program state, after 5 sec. this state would release to normal tuner
mode automatically.
3. You can overwrite a present station by storing another frequency in its place.
Recall the Preset Stations
1. In AM or FM radio mode, press “M-UP” or “M-DN” button to select the preset stations in
order.
11
FM & FM-Stereo reception
Set the FM mode selector at “MONO” position. Programs are received in mono mode. In
particular when stereo signals are weak. It is preferable to receive the program in mono.
Page 13

Set the FM mode selector at “ST” position for receiving stereo programs. The “ST” indicator
will appear on LCD to show fm stereo program is receiving.
Hints for Best Reception:-
- AM: The receiver has a built-in AM bar antenna. If AM reception is weak, slight rotate or
re-positioning of the unit will usually improve the AM reception.
- FM: The receiver has a build-in FM wire antenna hanging at the rear cabinet. This wire
should be totally unraveled and extended from best reception.
STEREO PHONOGRAPH OPERATION
Note Before Use
- Remove the stylus protector.
- Be sure that the tone arm is being detached from the tone arm rest
before operating, and re-secured again afterwards.
1. Raise the turntable dust cover.
2. Press the “PHONO” function button.
3. Set the 33/45/78 speed selector to the proper position depending on the
record to be played.
4. Place the record on the platter (use the 45 RPM record adaptor when
playing 45 RPM record).
5. Lift the tone arm from the rest and slowly move it to the record side. The
platter will being to rotate.
6. Place the tone arm to the desired position of the record.
7. Adjust the volume to the desired level.
8. At the end of record, the platter will automatically stop rotating. Lift the tone arm from the
record and return it to the rest.
9. To stop manually, lift the tone arm from the record and return it to the rest.
Remark: as some kind of record the auto-stop area was out of the unit setting, so it will stop
before the last track finish. in this case, select the auto-stop switch to “OFF” position, then it will
run to the end of the record but will not stop automatically (turn off the unit by power button or
switch back the auto-stop switch to “ON” position to stop the platter rotate). Then put back the
tone arm to the rest position.
PLAYING COMPACT DISC
LOADING THE DISCS
1. Press “CD” button.
2. Press “OPEN/CLOSE” button to open the CD door.
3. Place a CD with the printed side facing up inside the tray.
4. Press the “
” or “ DISC-CH” button to turning the CD tray, and loading out the other disc
compartment.
5. Press the “OPEN/CLOSE” button again to close the CD door.
6. CD search is performing; the display will show the total number of disc, number of tracks and
playing time of disc.
Note: CD searching will be performed every time when switching to CD mode or closing the CD
door. All CD functions will be responded only after the CD searching is completed.
CD PLAY / PAUSE MODE
1. Press the “PLAY/PAUSE” button to start playback, the first track of the first disc will be played
and the play indicator will appear on the LCD display.
12
2. or press either the “ DISC 1”, “ DISC 2 ”, “ DISC 3 ” button, unit will play the disc inside the
desire tray directly.
3. To interrupt, press the “ PLAY/PAUSE ” button once, and the display will start flashing. Press
Page 14

again to resume playback.
STOP MODE
1. If “STOP” button is pressed during PLAY or PAUSE mode, system will go to stop mode.
SKIP MODE (SKIP UP
/SKIP DOWN )
1. During PLAY or PAUSE mode, if “SKIP +” button is pressed it will go to next track and display
the track no. and then remain the PLAY or PAUSE mode.
2. During PLAY or PAUSE mode, if “SKIP -” button is pressed. It will go back to the beginning of
the track, original track no. is display and remains the play or pause mode.
3. After step 2, press “SKIP -” button again will go to the previous track and remain the play or
pause mode.
SEARCH MODE (SEARCH UP
/SEARCH DOWN )
1. During PLAY mode, if “SEARCH +” button is pressed & hold for few seconds, it will start
searching forward.
2. During play mode, if “SEARCH -” button is pressed & hold for few seconds, it will star
searching backwards.
REPEAT PLAY
This function allows to repeat 1 single track, 1 single disc or all discs:Press the “REPEAT” keys repeatedly to switch the function:-
REP . ALL DISC
REP. 1 DISC REP. 1 TRACK REP. OFF
Note: Single track repeat function is possible in normal or programmed playback, repeat one
disc or all discs is only available in normal playback.
RANDOM PLAY
You can listen all the tracks of all available discs in a random order by this function
1. Press “RANDOM” button once, unit will play all disc randomly; press again, unit will play 1
disc randomly.
2. Press “PLAY/PAUSE” button to start random playback.
3. All tracks of all discs or all tracks of 1 disc will be started playback in random order.
4. Press “RANDOM” button again to cancel random mode.
INTRO PLAY (BY REMOTE ONLY)
You can listen the beginning (10 seconds) of each track in a CD by this function & saving your
time to search the desire song
1. Press “INTRO” button after placing a CD inside the unit at CD mode
2. System start playing the first 10 seconds of each track of the entire CD continuously.
3. Press “INTRO” button once again when it reach your desired track for normal playback.
REMAIN FUNCTION (BY REMOTE ONLY)
In CD playback mode, press to check the remain time on LCD display during CD playback
Press “REMAIN” button repeatedly to switch the function as below:
TRACK PL AYING TIME TRACK REMAINING TIME DISC REMAINING TIME DISC PLAYING TIME
13
Page 15

CD PROGRAMMING
Up to 60 tacks can be programmed to be programmed to be played in any required order from
one CD or all CDs in the CD changer.
1. Set in CD mode and press the “STOP
” button.
2. Press the MEM/CLK-ADJ button
3. Press the “
4. Press SKIP DOWN
” to select the desired disc.
or UP
button to select the desired track.
5. Press the “MEM/CLK-ADJ” button again to store the track in memory.
6. Repeat steps 2 to 5 to enter additional program
7. Press “PLAY/PAUSE” button to start playback in order.
8. Press “STOP
” button to stop playback and press it twice to clear all programmed tracks.
LISTING TO TAPE
GENERAL OPERATION
STOP / EJECT KEY
Press to stop all deck operation. Press again to open the cassette
door.
FAST FORWARD KEY
Press to start rapid tape winding in either forward or reveres
& REWIND KEY direction. Press stop / eject key when the cassette spools stop
turning.
PLAY KEY
Press to start playing tape.
PAUSE KEY
Press to stop tape operation temporarily. Press again to resume.
RECORD KEY
Press together with play key to start tape recording.
(DECK 1 ONLY)
PLAYBACK
Press “TAPE” button to active tape function
Put in the cassette tape.
Press PLAY key to active playback
Adjust the volume control to the desired level.
Use PAUSE key when you want to stop playback temporarily.
Press STOP / EJECT key when finished.
RECORDING
This cassette recorder features an Automatic Recording Volume Level Control System that
prevents overloaded or distorted recordings. You can change the volume level as often as you
like during the recording process. It will not have any effect on the volume level of the recording
itself.
Insert a good quality blank tape into DECK A with the exposed tape facing down and the full reel
on the left side. Close DECK A door.
14
Page 16

A. RECORDING FROM TAPE (DECK B TO DECK A)
This unit enables you to duplicate a pre-recorded tape to another tape. It is performed only one
way from deck B (playback) to deck A (recording).
DUBBING A T NORMAL SPEED
Press the “ TAPE ” function button.
Inset a pre-recorded cassette into deck B and a blank cassette tape into deck A.
Press the “ PAUSE ” key and then press the “ RECORD ” and “ PLAY ” key at deck A.
Press the “ PLAY ” key to start playback at deck B and then release “ PAUSE ” key at deck A
to start dubbing.
Press “ PAUSE ” key at deck A and “ STOP ” key at deck B when finish.
DUBBING AT HIGH SPEED
This unit is equipped with a high speed dubbing system which can save the time for dubbing by
2/3 when compare to normal speed.
Press the dubbing button to “ HI ” position and then follow the same procedures as stipulated
in “dubbing at normal speed”.
When dubbing a pre-recorded cassette tape at high speed, a chattering sound is being heard.
to avoid this, set the volume control to a minimum level.
Do no active/de-active the “Hi-Nor Dubbing” button during dubbing, this will vary the speed of
recording and may be damage the cassette tape.
B. RECORDING FROM RADIO
Press “RADIO” button to active radio mode
Tune to the desired station and insert a blank cassette tape in deck A.
Press “RECORD” & “PLAY” key to start recording.
Press “PAUSE” keys and then “STOP/EJECT” key when finish.
NOTE: During recording of AM, beating whistle at some reception stations may happen, by
selecting “BEAT CUT 1-2” switch may help to reduce the background noise.
C. RECORDING FROM CD
Press the “CD” function button.
Insert a black cassette tape in deck A which suitable for recording.
Press “PAUSE” key first and then “RECORD” & “PLAY” key at cassette. Recording function is
now on STANDBY.
Activate the CD player, and then press “PAUSE” at cassette to start recording.
To stop recording, press “STOP” button on CD player first, then press the “PAUSE” key and
then “STOP/EJECT” key on cassette tape deck.
15
D. RECORDING FROM PHONO
Press the “PHONO” function button.
Place a record onto turntable and insert a blank cassette tape into deck A.
Press the “ PAUSE ” key and then press the “ RECORD ” and “ PLAY ” key at deck A.
Place tone arm to start playback the record and then release “ P AUSE ” key at deck A to start
dubbing.
Press “ PAUSE ” or “ STOP ” key at deck A when finish.
MORE FEATURES
A. SLEEP TIMER SETTING
1. Press and hold the “ SLEEP/TIMER ” button on main unit or “SLEEP” button on remote, to
active and adjust the sleep timer in the order of 90 > 80 >70….10 minutes automatically.
Release the button at sleep timer you want to select.
2. System will stop and go to STANDBY mode automatically after the selected timing.
3. To cancel the sleep mode, press the “SLEEP/TIMER” button on main unit or “SLEEP” on the
remote once, “ SLEEP ” indicator on the display disappears.
Page 17

B. ON/OFF TIMER SETTING (BY REMOTE ONLY)
This function allows the system to turn on automatically and wake you up by soft CD music or
radio and shut off itself into standby mode when time is up.
1. In unit standby mode, press the “ MODE ” button on remote once, the LCD display will show
“
ON” timer icon and flashing.
2. Press “ MEM/CLOCK-ADJ ” button and then “ SKIP UP/ DOWN ” to set the hour.
3. Press “ MEM/CLOCK-ADJ “ button to confirm. Minute digits are flashing and prompt for
input.
4. Press the “SKIP UP/ DOWN “ button to set the minute.
5. Press “ MODE ” button to store the timer starting time. “
flashing.
6. Follow above step 2-4 to set OFF timer.
7. Press the “MODE” button to confirm, “
CD/PHONO/TUNER/TAPE appears on the display.
8. Press the “ MEM/CLOCK-ADJ ” button once, timer source flashing.
9. Press the “ SKIP UP/ DOWN ” to set source to be controlled by timer and then press the
“MODE” button to finish.
10. You can press the “ MODE ” button repeatedly to review the presets time in order.
NOTE: 1. The timer setting will automatically cancel if no button is being pressed in a period of
about 10 seconds.
2. If you set ON/OFF timer for PHONO or TAPE, please make sure record or
pre-recorded tape is installed and tone arm or cassette PLAY key is set and ready to
play.
ACTIVE/DE-ACTIVE TIMER FUNCTION
1. To active the ON/OFF timer, press the “ SLEEP/TIMER ” button on main unit or “TIMER”
button on remote once, the timer indicator
2. To cancel ON/OFF timer function, press again “SLEEP/TIMER” button until the timer
indicator “
C. PRESETS EQ FUNCTION
This unit provides 5 differences sound mode to enhance your listening experience. You can
select the desired effect by pressing the “EQ” button repeatedly at following sequence:-
FLAT
D. EXTRA BASS FUNCTION
Press down the “Xbass” switch on main unit if you want more bass effect when listening. Press it
again to turn off extra bass effect.
E. MUTE FUNCTION
Press to terminate the sound output from system temporarily and press again to cancel this
mode.
F. HEADPHONE JACK
” disappear
JAZZ ROCK CLASSIC POP
is shown on LCD
16
” icon flash and timer source
OFF” timer will appear and
Page 18

Inserting the plug of your headphones (not included) into the Headphone jack will enable you to
listen in private. When using headphones, the speakers will be disconnected.
READ THIS IMPORTANT INFORMATION BEFO RE USING YOUR HEADPHONES
1. Avoid extended play at very high volume as it may impair your hearing.
2. If you experience ringing in your ears, reduce the volume or shut off your unit.
3. Keep the volume at a reasonable level even if your headset is an open-air type designed to
allow you to hear outside sounds. Please note that excessively high volume may still block
outside sounds.
17
CARE AND MAINTENANCE
1. Do not subject the unit to excessive force, shock, dust or extreme temperature.
2. Do not tamper the internal components of the unit.
3. Clean your unit with a dry cloth. Solvent or detergent should never be used.
4. Avoid leaving your unit in direct sunlight or in hot, humid or dusty places.
5. Keep your unit away from heating appliances and sources of electrical noise such as
fluorescent lamps or motors.
ABOUT CASSETTE TAPES
Whenever you record on a cassette any previously recorded material is erased as the new
material is recorded. To prevent you from accidentally erasing material which you wish to save,
blank cassettes are equipped with erase prevention tabs for each side of the tape. If the erase
prevention tab for side A is removed, you cannot accidentally record on side A. The Record
key cannot be depressed if the erase prevention tab on the cassette has been removed.
To prevent accidental erasing on side A of a cassette use a small screw driver or similar tool to
Page 19

break off the erase prevention tab for side A. This prevents the record key form locking.
If later you do wish to record on side A of the cassette, cover the tab opening with a piece of
cellophane tape. This will allow the Record
to function again.
CASSETTE CARE
Two common causes of trouble experienced when using cassettes are:
1) Tape Jamming – Leading to uneven speed in playback, and
2) Tape Tangling – Where the tape wraps itself around ital parts of the mechanism.
To reduce the likelihood of these problems occurring, the following precautions should be
observed:
Check that there are no loose layers of tape visible through the
cassette center window (see Fig. 1). Take up any loose layers,
using a pencil or hexagonal barrelled ballpoint pen, before
inserting the cassette into the machine (see Fig.2)
If the cassette feels tight while performing operation shown (see
Fig.2), the tape may be jamming due to ridges formed in the winding of the tape (visible
through the center window). These may be removed, in most cases, by fast winding of the
cassette from one end to the other and back again.
Use only well-known brands of tape. Avoid use of C-120 cassettes.
Furthermore, do not expose cassettes to direct sunlight, dust or oil, and do not touch the tape
surfaces.
18
HEAD CLEANING
The tape heads, pinch roller and capstan require periodic cleaning. This removes particles of the
metal oxide coating that wear off the tape and accumulate on these parts and impair
performance. Switch off the power, press the Stop/Eject
press the Play
key. Clean the tape heads, pinch roller and capstan with a soft cloth or cotton
key to open the cassette door, and
pad dampened in isopropyl alcohol or special tape head cleaner.
1. Avoid operating your unit un der di rec t sunli ght o r in hot , humid o r dus ty pl aces.
Page 20

2. Keep your unit away from heating appliances and sources of electrical noise such as
fluorescent lamps or motors.
3. For better Cl ock Displa y clarity, avoid operating the unit under direct sunlight or in stro ng roo m
illumination.
4. Unplug the unit from the elect rical power outlet immedia tely in cas e of mal functi on.
19
COMPACT DISC CARE
Handle the disc only by its edges. Never allow your fingers to come in contact with the shiny,
unprinted side of the disc.
Do not attach adhesive tape, stickers etc., to the disc label.
Clean the disc periodically with soft, lint-free, dry cloth. Never use detergents or adhesive
cleaners to clean the disc. If necessary, use a CD cleaning kit.
If disc skips or gets stuck on a section of the disc, it is probably dirty or damaged (scratched).
When cleaning the disc, wipe in straight lines from the center of the disc to the edge of the
disc. Never wipe in circular motions.
T o remov e a disc from its storage case, press down on the center of the case and lift the disc
outs, holding it carefully by the edges.
Fingerprints and dust should be carefully wiped off the disc's recorded surface with a soft
cloth. Unlike conventional records. compact discs have no grooves to collect dust and
microscopic debris so gently wiping with a soft cloth should remove most particles.
Page 21

CLEANING THE UNIT
To prevent fire or shock hazard, disconnect your unit from the AC power source when
cleaning.
The finish on the unit may be cleaned with a dust cloth and cared for as other furniture, Use
caution when cleaning and wiping the plastic parts.
If the cabinet becomes dusty wipe it with a soft dry dust cloth. Do not use any wax or polish
sprays on the cabinet.
If the front panel becomes dirty or smudged with fingerprints it may be cleaned with a soft
cloth slightly dampened with a mild soap and water solution. Never use abrasive cloths or
polishes as these will damage the finish of your unit.
CAUTION: Never allow any water or other liquids to get inside the unit while cleaning.
20
TROUBLE SHOOTING GUIDE
Page 22

PROBLEM POSSIBLE CAUSE SOLUTION
The unit does not
respond (no
power)
AM band is too
noisy
Radio paused
about 1 second
when switch from
phonograph mode
to tuner mode
Sound is distorted
CD Player does
not play.
CD skip while
playing
The unit is disconnected from the
AC outlet
AC outlet is not functioning.
The reception at the set location is
poor.
This is normal.
Volume level is set to high. Decrease the volume.
Sound source is distorted.
CD Mode is not selected.
CD is not installed or installed
incorrectly.
Disc is dirty or scratched. Wipe with cloth or another disc.
Reconnect to the AC outlet.
Plug another device into the same
outlet to confirm the outlet is
working.
Slightly rotate the unit for the best
reception.
Radio will resume normal function in
1-2 seconds.
Try a different audio source such as
a music CD.
Slide the FUNCTION switch to select
CD mode.
Press the CD onto spindle, printed
side facing up.
Unit gets warm
after extended play
at high volume
This is normal
Turn the unit off for a period of time
or lower volume.
21
SPECIFICATION
Page 23

Power Requirement
Main unit: AC120V~ 60Hz
Remote control 2 x 1.5V “AAA” (UM-4) size batteries (not included)
Frequency Range
Radio Band FM 88 ~ 108 MHz
Power Consumption
Main Unit: 35Watts
Please refer to the instructions on the enclosed warranty card for returning your unit for service.
When returning the unit, please remove the battery to prevent damage to the unit in transit
and/or from possible battery leakage. We are not responsible for battery returned with the
product or for the cost of replacement.
Distributed by:
Spectra Merchandising International, Inc.
Chicago Industry Tech Park
4230 North Normandy Avenue
Chicago, IL 60634, U.S.A.
Please have model number ready, for Customer Service, call 1-800-777-5331
AM 520 ~ 1710 KHz
SERVICE
*The specification and external appearance of the set are subject to change without prior notice.*
Printed in China
22
 Loading...