

Page 1

Internet Radio
with DAB+, FM and Bluetooth
MODEL NO.: FOX1000i
M
Page 2

1
Page index
1. Getting started
1.1 Appearance and key descriptions
1.2 Remote control
1.3 Display symbols
1.4 Connect to the wireless network
1.5 AirMusic Control app
2. Internet radio
2.1 Listen to radio station
2.2 My favorite
2.3 History
2.4 MyMediaU
3. DAB
4. FM
5. Bluetooth
6. Media Center
7. Music Streaming
8. Alarm and timer
9. Configuration
10. Troubleshooting
11. Specifications
1. Getting started
The packaging box contains the following items:
FOX1000i DAB+/FM/Internet Radio
Remote Control
AC Power Cord
User Manual (English, Norsk)
Page 3

2
Thank you
for choosing Jensen of Scandinavia
At Jensen of Scandinavia satisfied customers mean everything
to us. We are therefore constantly seeking knowledge in order to
meet the requirements and expectations of our customers.
Our goal is to be the obvious first choice, the best provider of
customer service and offer products that are easy to use.
We would like to take this opportunity to once again thank you
for choosing our product!
Best Regards
Jensen of Scandinavia
Network Requirement
The FOX1000i is an internet radio and will require the following:
A wireless internet connection (Wi-Fi)
Smartphone or Tablet that runs iOS or Android system.
Please make sure that both FOX1000i and your
smartphone/tablet is connected to the same wireless network
Page 4

3
1.1 Appearance and Key Description
FRONT VIEW
1. Home button
Press to return to the main menu
2. M - Mode button
Switch between audio sources like Bluetooth, FM, DAB etc.
3. 2.4” TFT full color display
4. Power on/Standby button
5. IR Remote Sensor
Page 5

4
TOP VIEW
6. < Left cursor / Previous button
7. Play/Pause button
8. > Right cursor / Next button
9. Preset 1, 2, 3, 4
10. Preset button
Press and hold to save the stations.
11. Volume/Navigate + OK dial
Adjust volume;
Cursor up/down;
Confirm selection
Page 6

5
BACK VIEW
12. USB port for charging (5V,1A)
13. 3.5mm head phone jack (Music out)
14. AC Socket
15. Telescopic Antenna
12 1 3 14
15
USB
Page 7

6
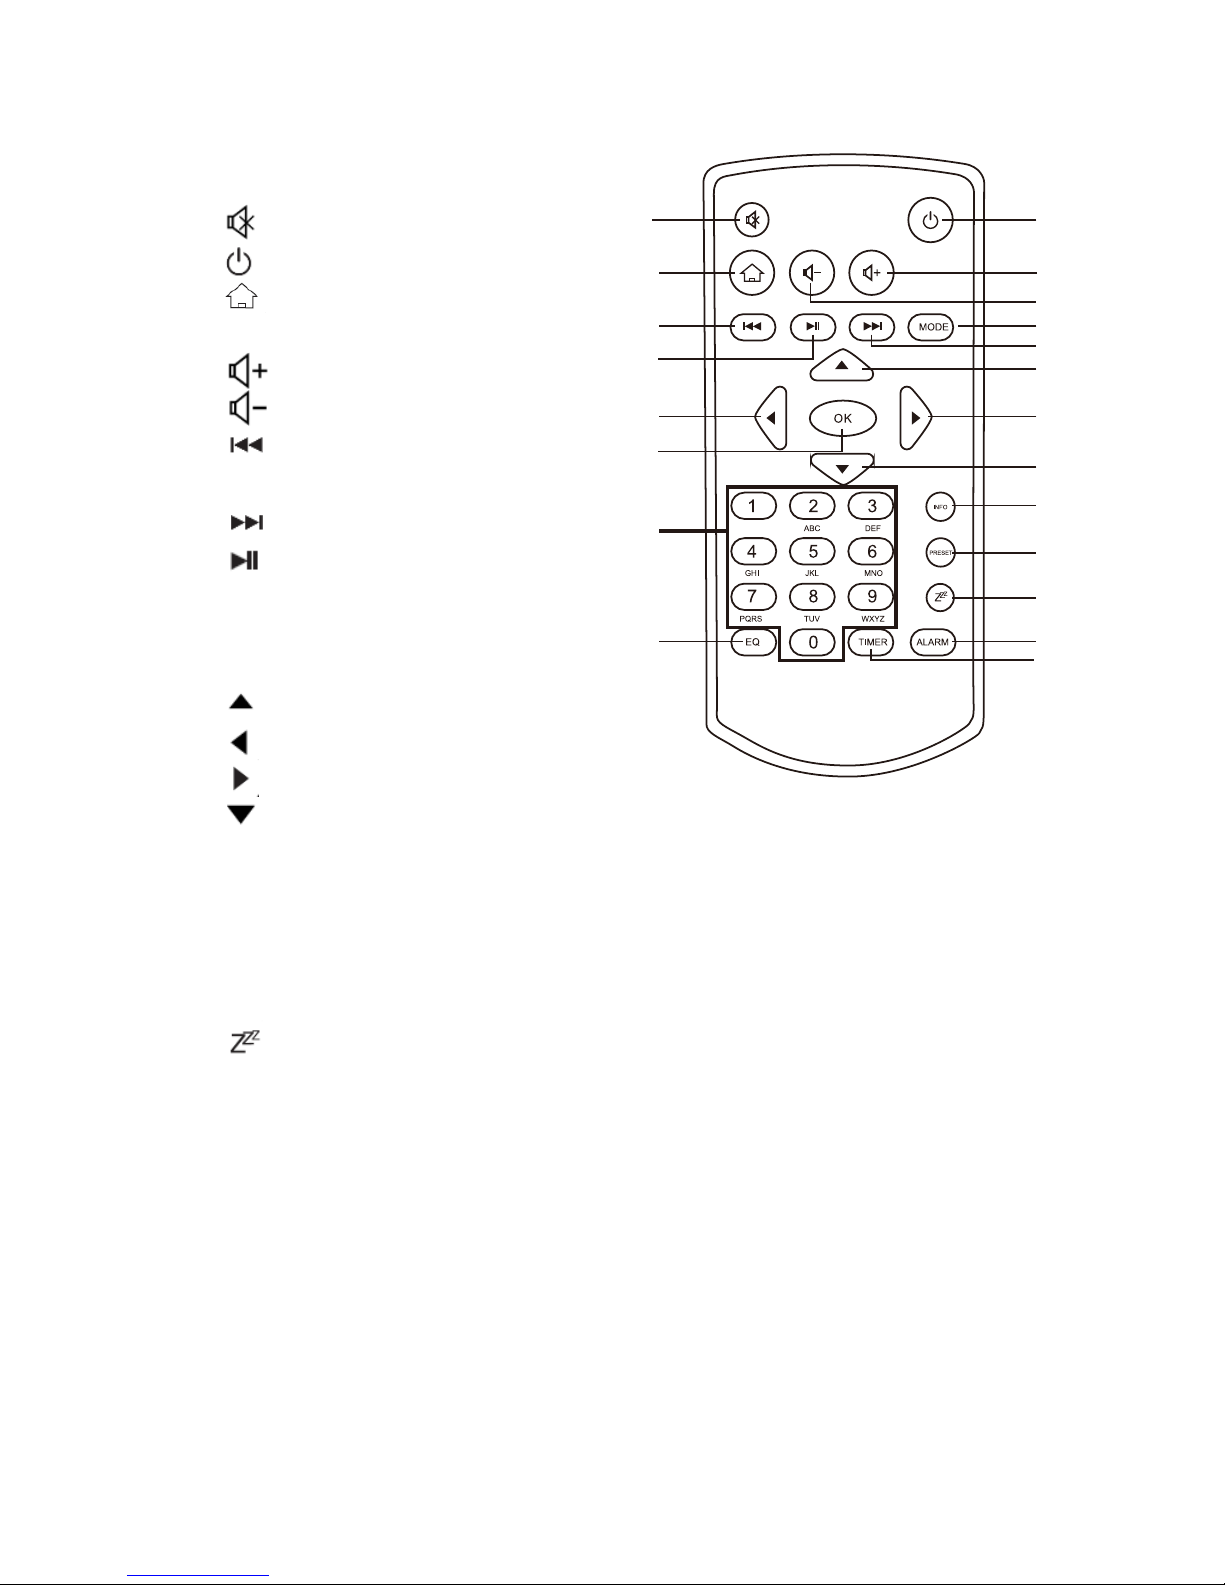
1.2 Remote Control
1. Mute button
2. Power On/Standby
3. Button. Press to return to
the main menu.
4. Increase volume button
5. Decrease volume button
6. Button. Press to go back
to previous track
7. Button. Press to change
to next track
8. Play/Pause button
9. Mode button. Press to go to
main menu.
10.
Up cursor button
11. Left cursor button
12. Right cursor button
13.
Down cursor button
14. OK button
15. 0~9 call up favorites/memory; Input letters and numbers
16. EQ button
17. INFO button
18. PRESET button
19. Sleep button
20. ALARM button
21. TIMER button
Remember to pull out the clear plastic tab from the battery
compartment before using the remote.
To remove the battery from the remote, use your thumb to pull out the
battery tray. Replace it with 2 x AAA type battery.
Caution: Risk of explosion
of battery is replaced by an incorrect type.
Please dispose used batteries to an environment station or to the local
consumer store.
1 2
3 4
6 9
8
10
7
5
1211
14
13
17
16
21
18
19
20
15
Page 8

7
1.3 Display symbols
Connection is being established, device functioning
No wireless connection
Wireless connection established
Search
DAB/FM radio function selected
DAB/FM radio reception: Mono
DAB/FM radio reception: Stereo
Speaker off
Alarm on
Internet radio station saved as favorite
FM radio station saved
1.4 Connect to the wireless network
Note: Any walls or ceilings may reduce the strength of
the WiFi connectivity.
Therefore, try to locate the FOX1000i in a place it can
receive good Wi-Fi signals.
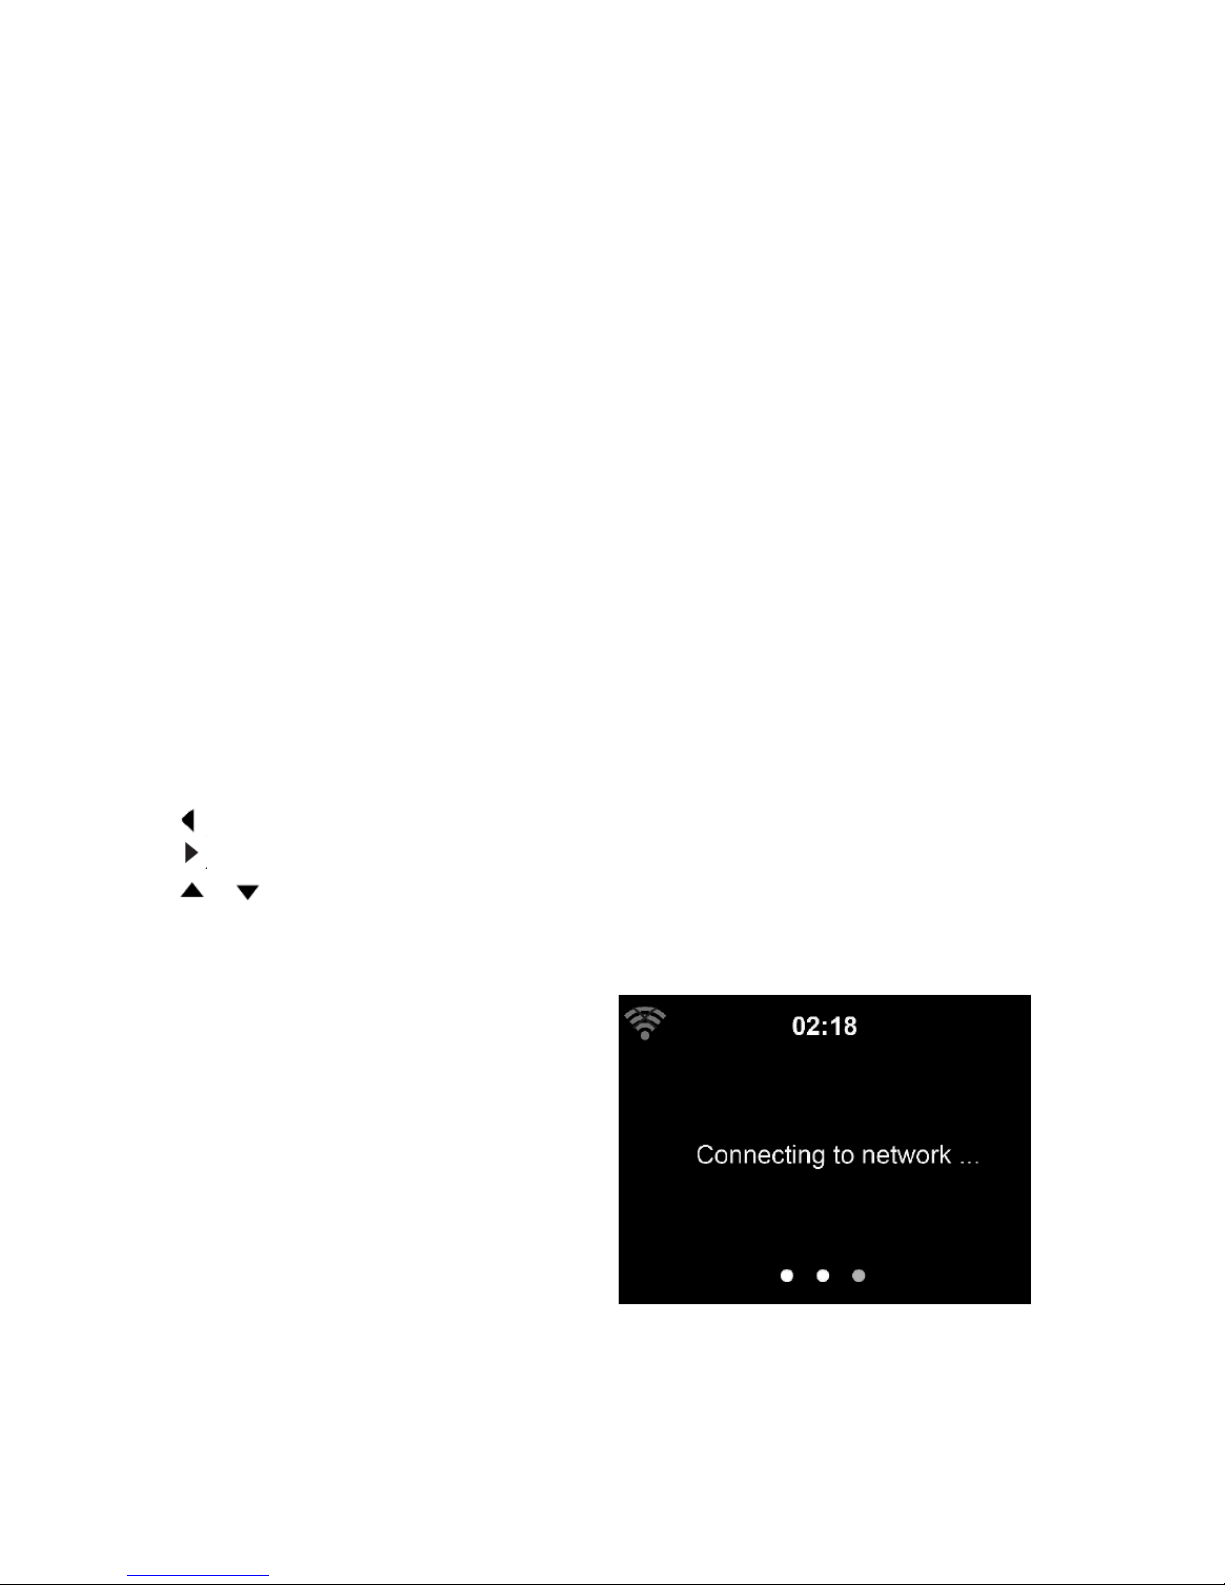
Plug the power cord into the AC socket on the FOX1000i
The first time you start the FOX1000i, the system will ask you
to set Language and Network Configurations.
Page 9

8
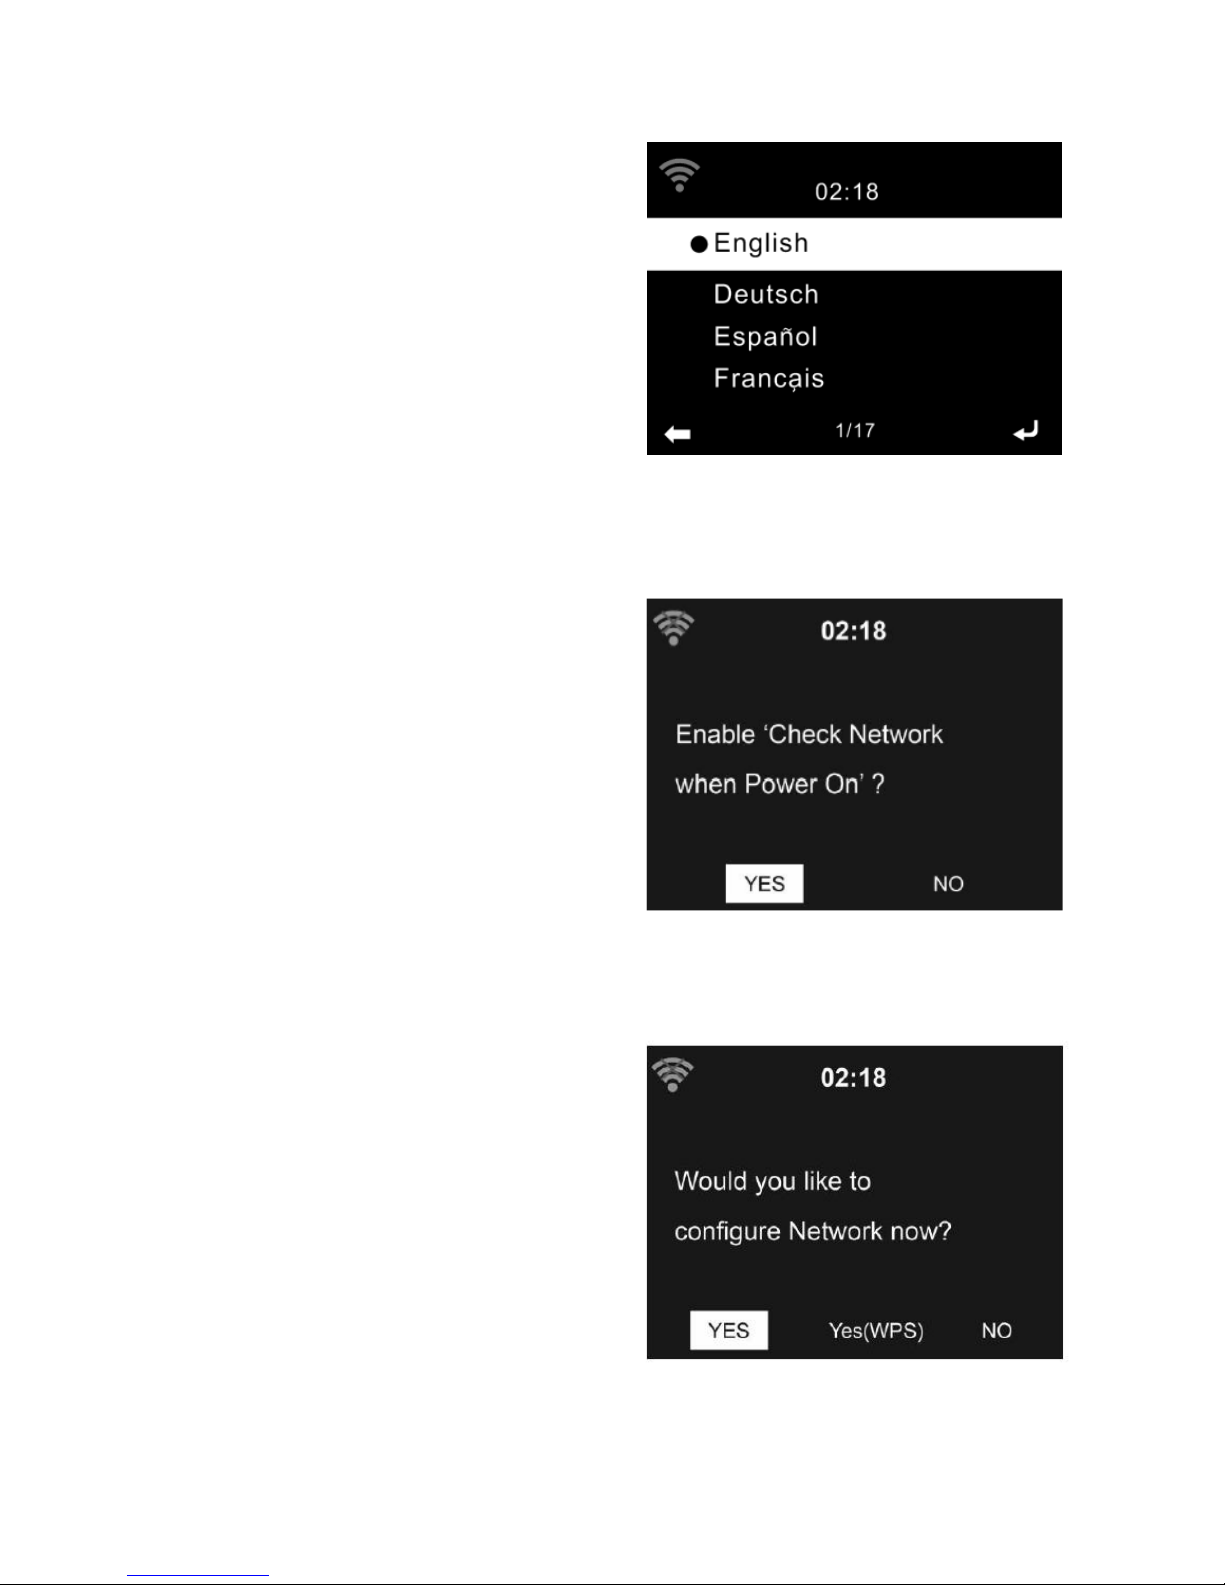
Select language using remote
Control or the volume knob.
Select YES for the FOX1000i to
automatically connect to the
wireless network each time it is
powered on.
Select if you want to setup the
wireless connection now.
See next page for more
information.
Page 10

9
There are two ways to connect FOX1000i to the wireless network:
Option 1 - Connect entering the wireless password:
Select Yes to connect the FOX1000i to the wireless network using the
normal wireless password.
Select No if you would prefer to listen to a terrestrial station (DAB/FM)
or to use the speaker with an external playback device.
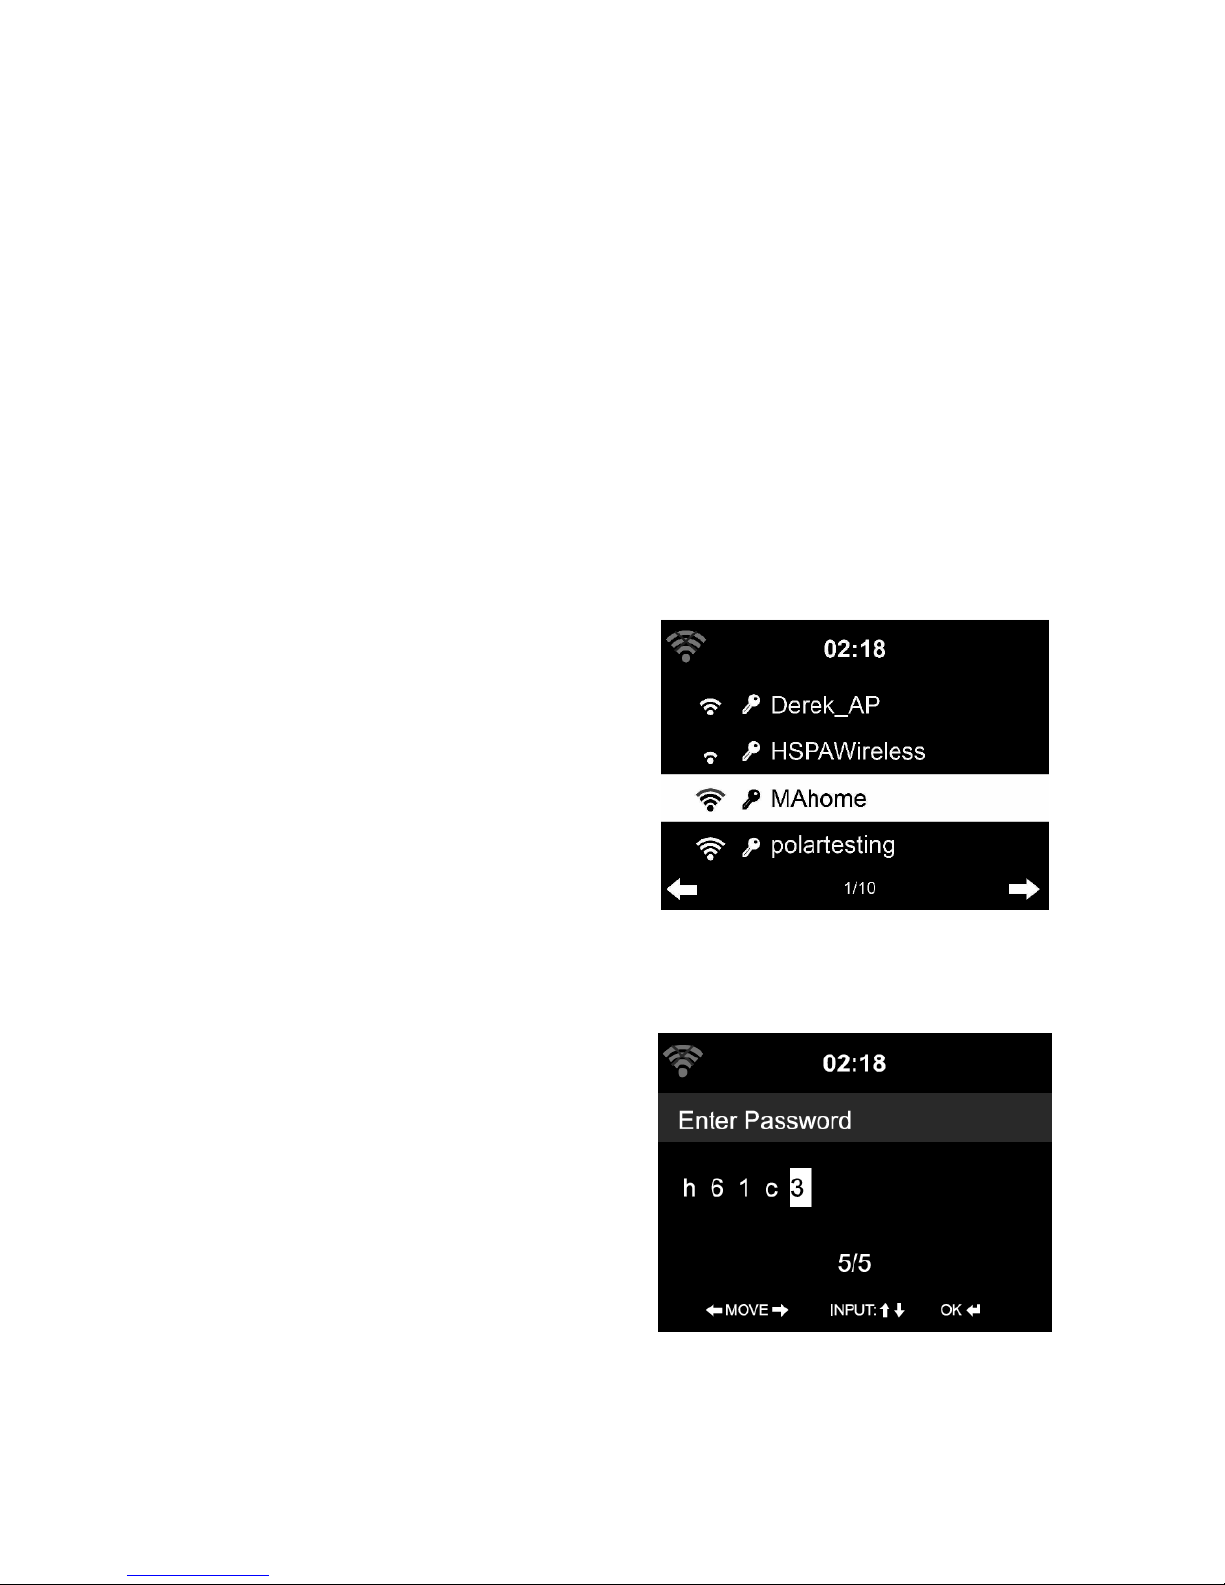
If you answer Yes, the FOX1000i will scan for Wireless Network and
shortly afterwards a list of available wir
eless networks will appear.
Select wireless network and enter
password:
A. Select your network from the list
and confirm with OK
(use the remote control or the
volume knop).
B. If your WLAN is
password-protected, you will be
prompted to enter your password.
Entering password using volume
knob:
C. Rotate the volume knob to
choose the code.
D. Click the > on the FOX1000i to
enter next letter.
E. Press down the volume knob
when you are finished entering the
whole password.
F. It may take a few seconds to
establish the connection to the
network.
Page 11

10
Entering password with Remote Control
Enter the password using the number and letter buttons of the remote
control. Note the use of upper and lower case when entering the
password. The cursor indicates the current entry space.
Press the corresponding number button repeatedly:
0 0(delete entry)
1 1(space) @! # $ % & ( ) + - . / : ; < = > ? [ \ ] ^ { | } ~
2 2 A B C a b c
3 3 D E F d e f
4 4 G H I g h i
5 5 J K L j k l
6 6 M N O m n o
7 7 P Q R S p q r s
8 8 T U V t u v
9 9 W X Y Z w x y z
Alternatively, you can enter the numbers and letter using only the cursor
buttons:
Go to previous entry space, entry can be overwritten
Go to next entry space, the last entry is saved
/ Select number / letter
OK confirm entire entry
It may take a few seconds to
establish the connection to the
network.
Page 12

11
Option 2 - Connect using WPS:
Select Yes (WPS) (only for WPS routers).
A. Press the WPS button on your router within 120 seconds
Please refer to the manual of your wireless router for to activate
WPS.
B. Wait for the FOX1000i to connect.
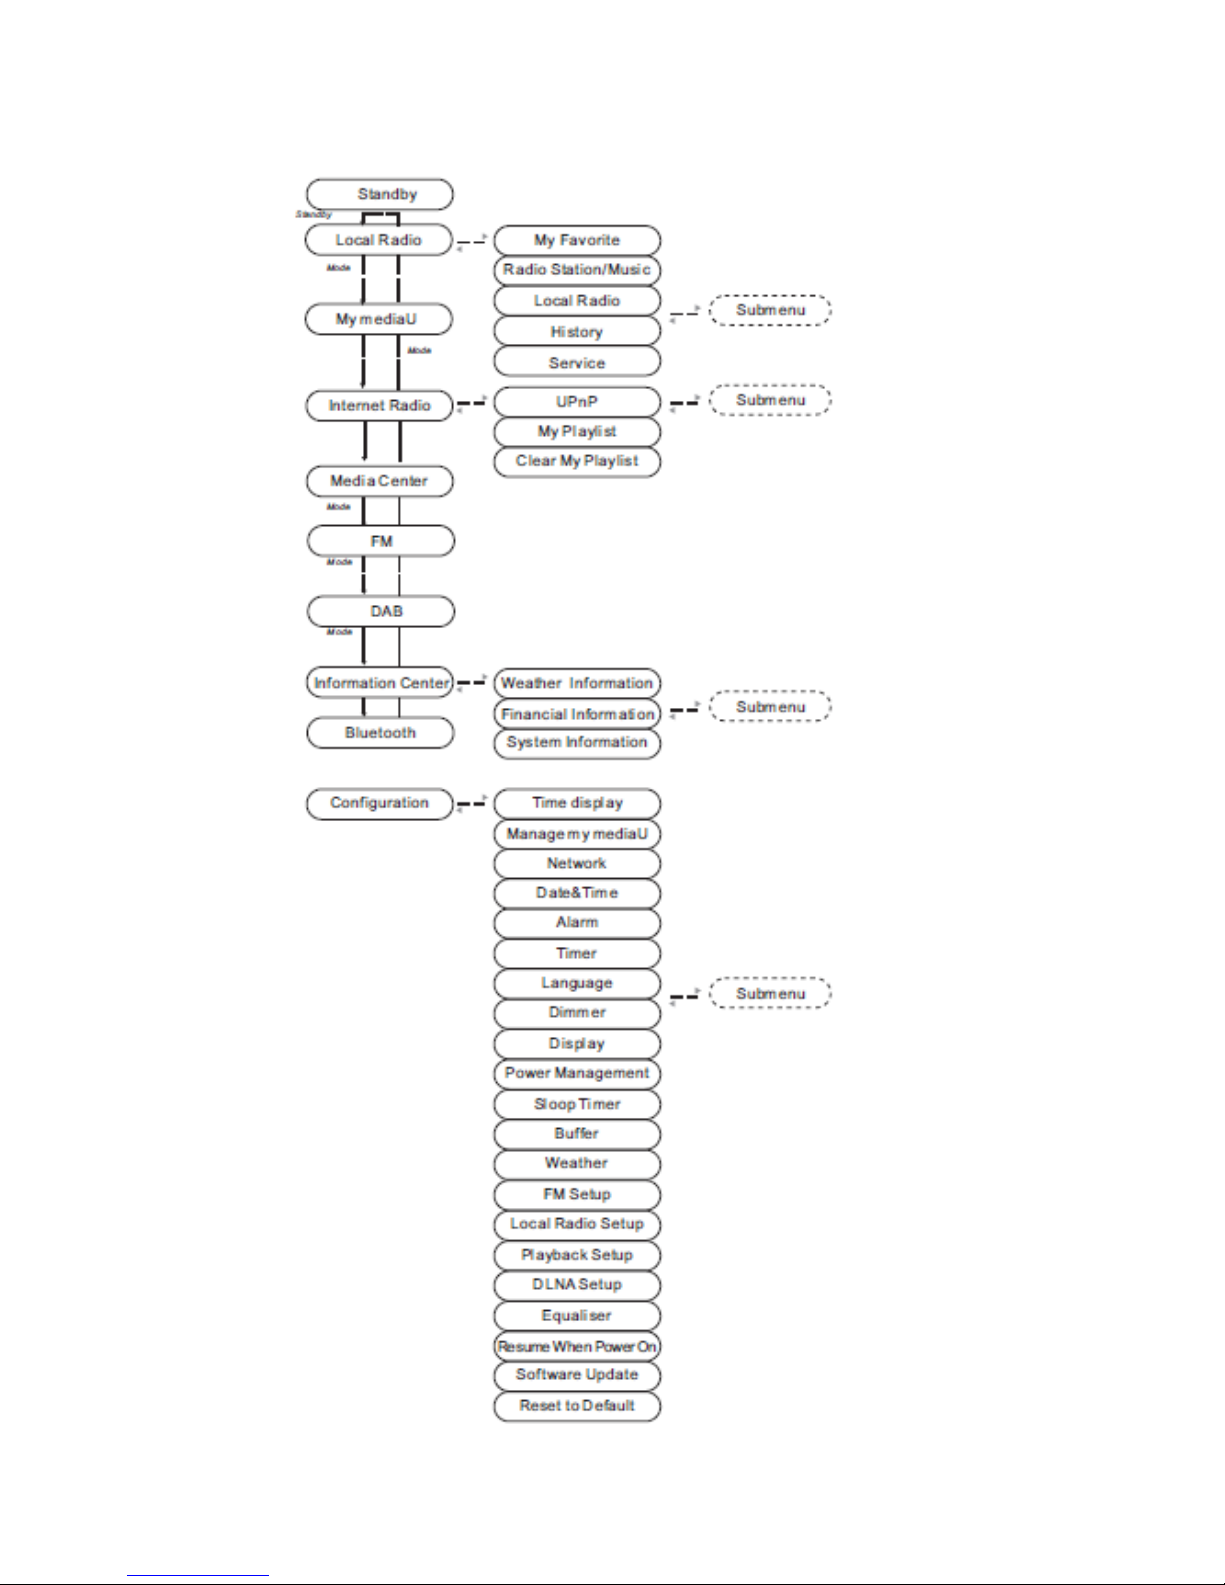
Once the connection is established, the main menu appears with the
main menu items:
Internet Radio: Access to worldwide radio stations
Media Centre: Access to your UPnP devices via software with
straming capability.
Information Center: Access to weather, financial and system
information.
Bluetooth: Access to all devices connected via bluetooth.
Configuration: Various system settings
Local Radio: Access to radio stations in a particular region (e.g.
onlyGerman Stations)
FM
DAB
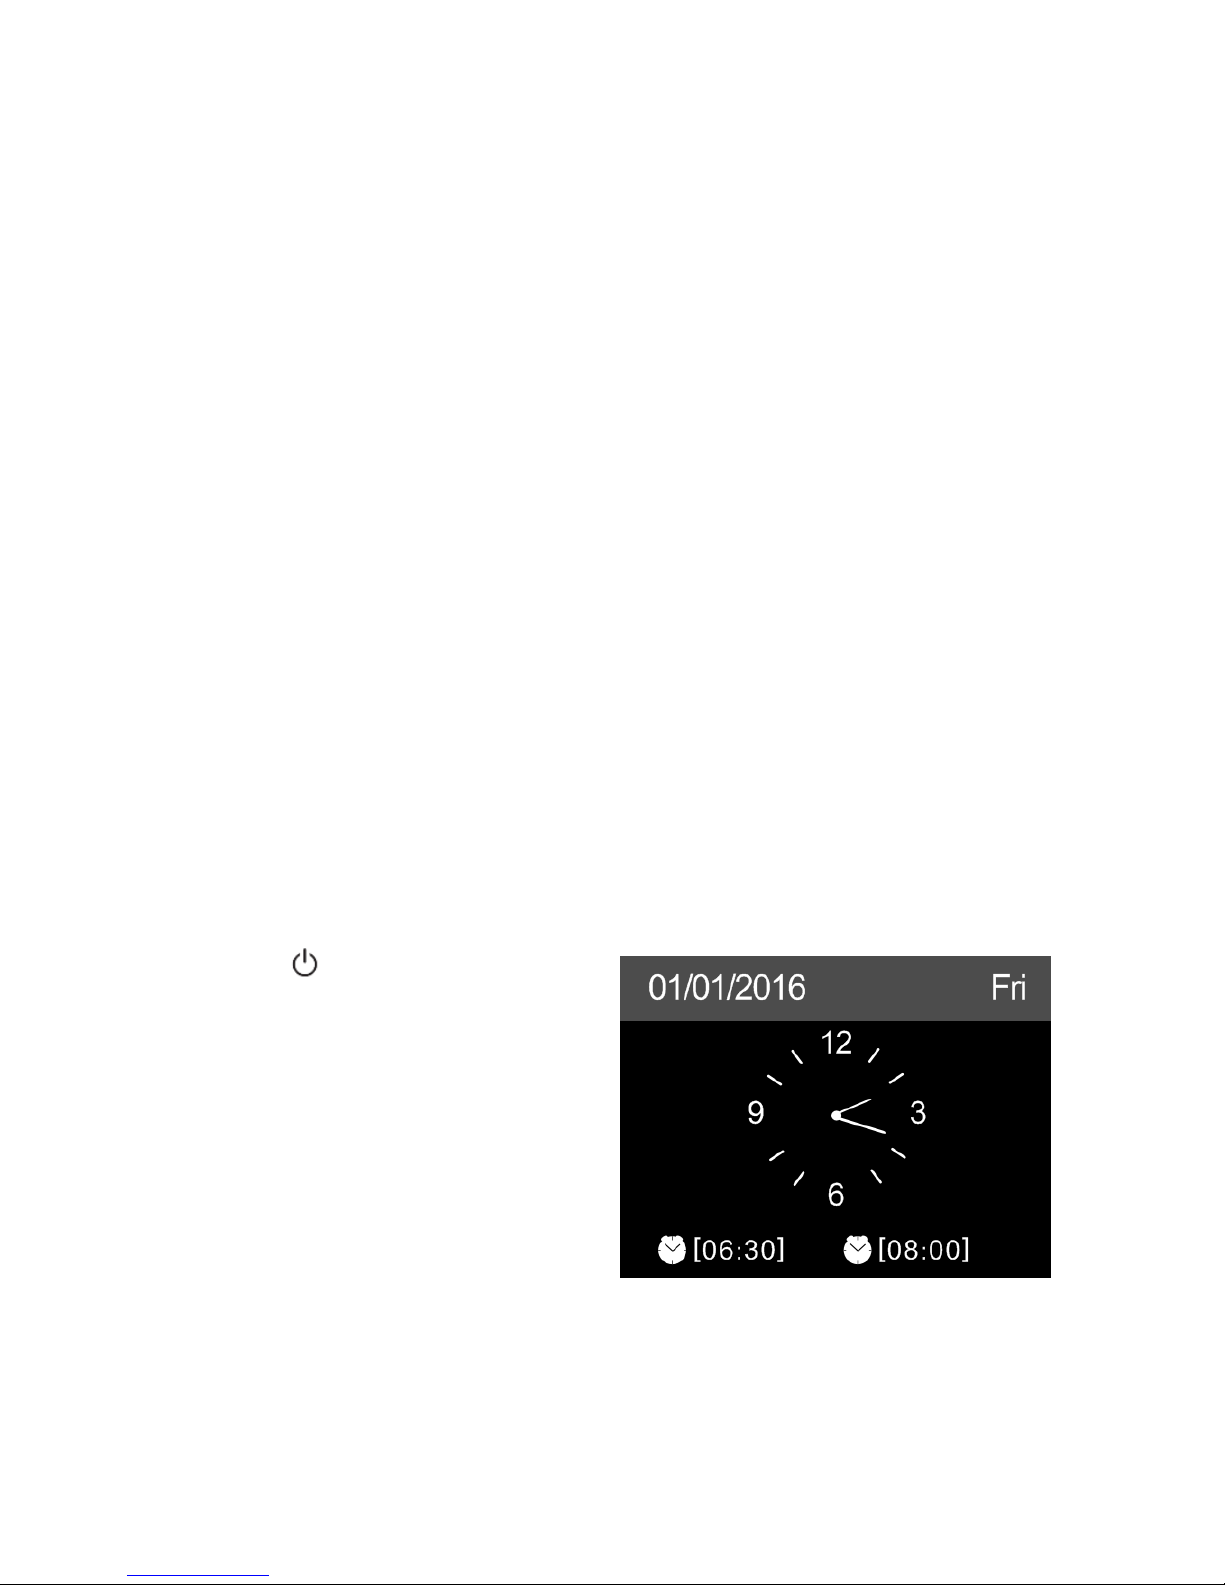
Press to enter standby mode.
The time, date and any active
alarm times display on the screen.
If you have setup a network
connection, and use FOX1000i
again within the network, it will
automatically establish the
connection. In case you desire to
change the network, enter
configuration to setup the corresponding connection.
Page 13

12
1.5 AirMusic Control App
The FOX1000i can be controlled with your smartphone via Wi-Fi. We
recommend you to use the AirMusic Control App. Additionally to
controlling the radio, the app is able to play the smartphone’s local
music files on the FOX 1000i.
The AirMusic Control app is avaiable for both Andriod and iOS.
It can be downloaded using these QR codes, or you can just search for
AirMusic Control.
Main Menu
Start the desired function by tapping
on the appropriate symbol.
Page 14

13
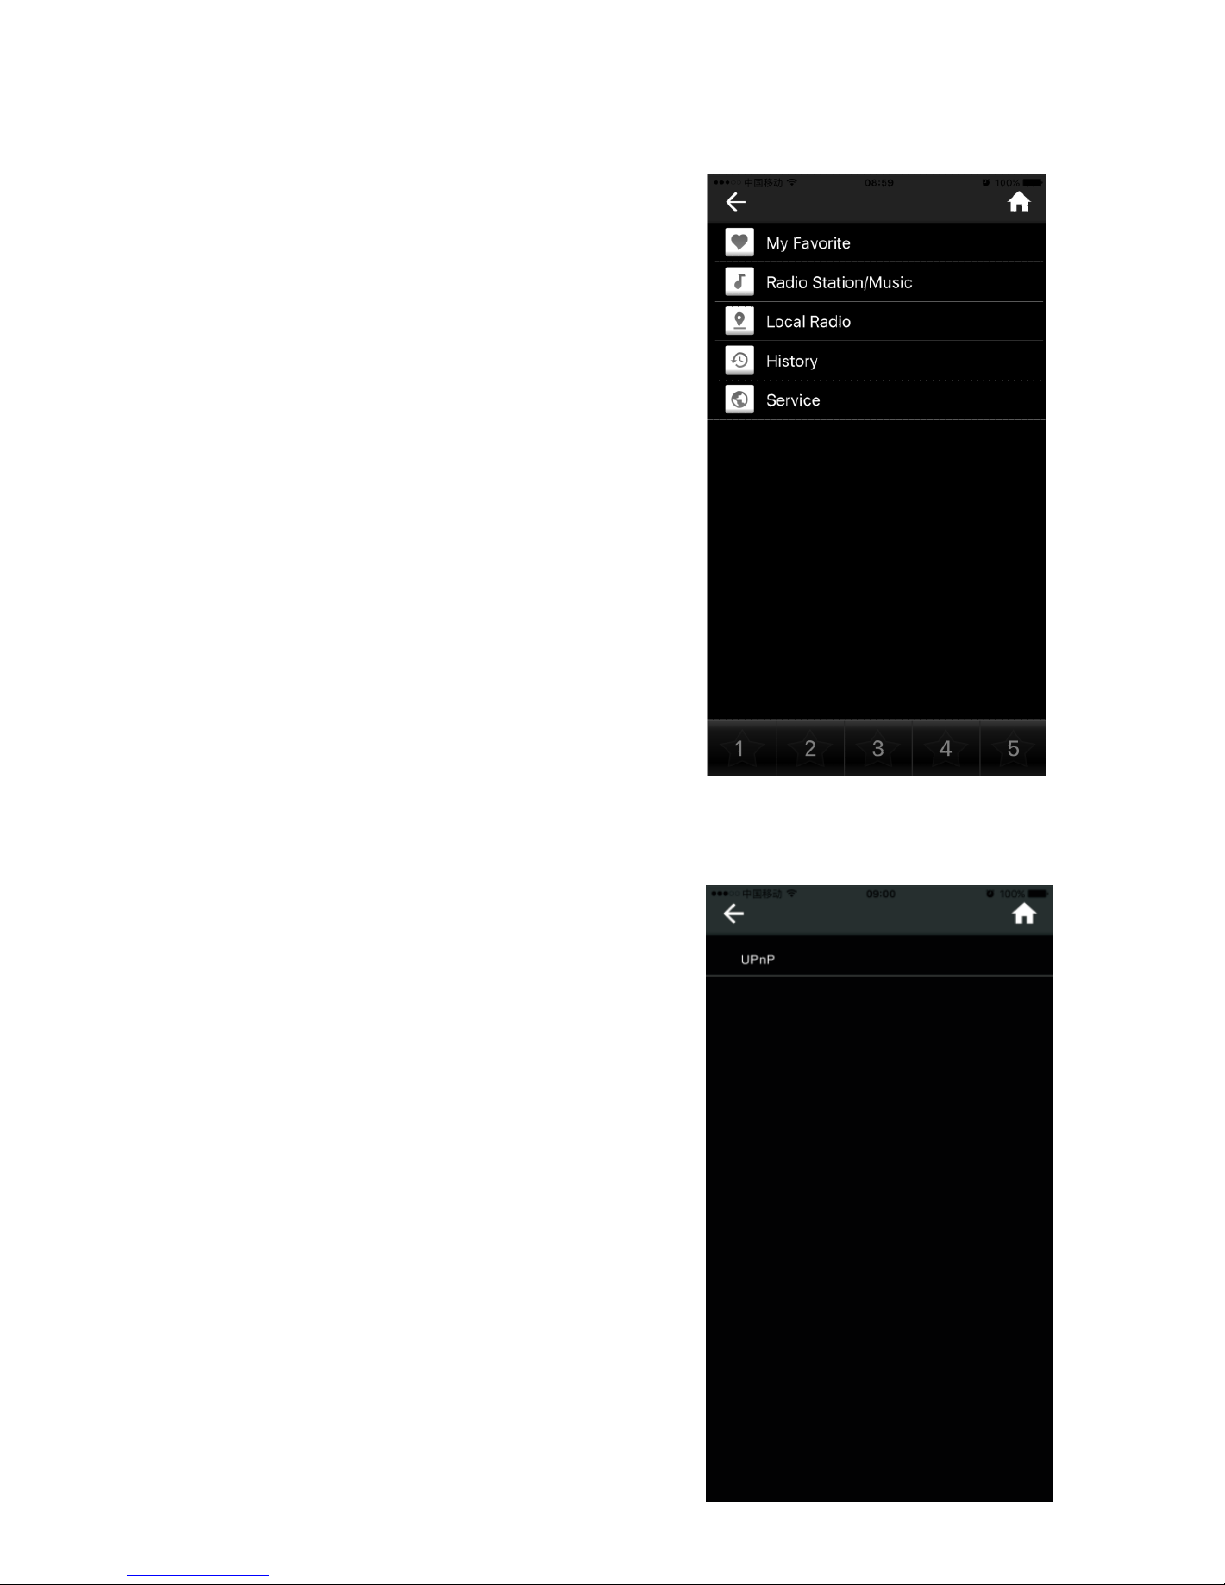
Internet Radio
In this mode, all the functions of internet
radio operation can be selected.
In the lower section, you can select the
saved stations with button 1-5.
Media Center
In this area, you can connect with media
serves in your network.
Page 15

14
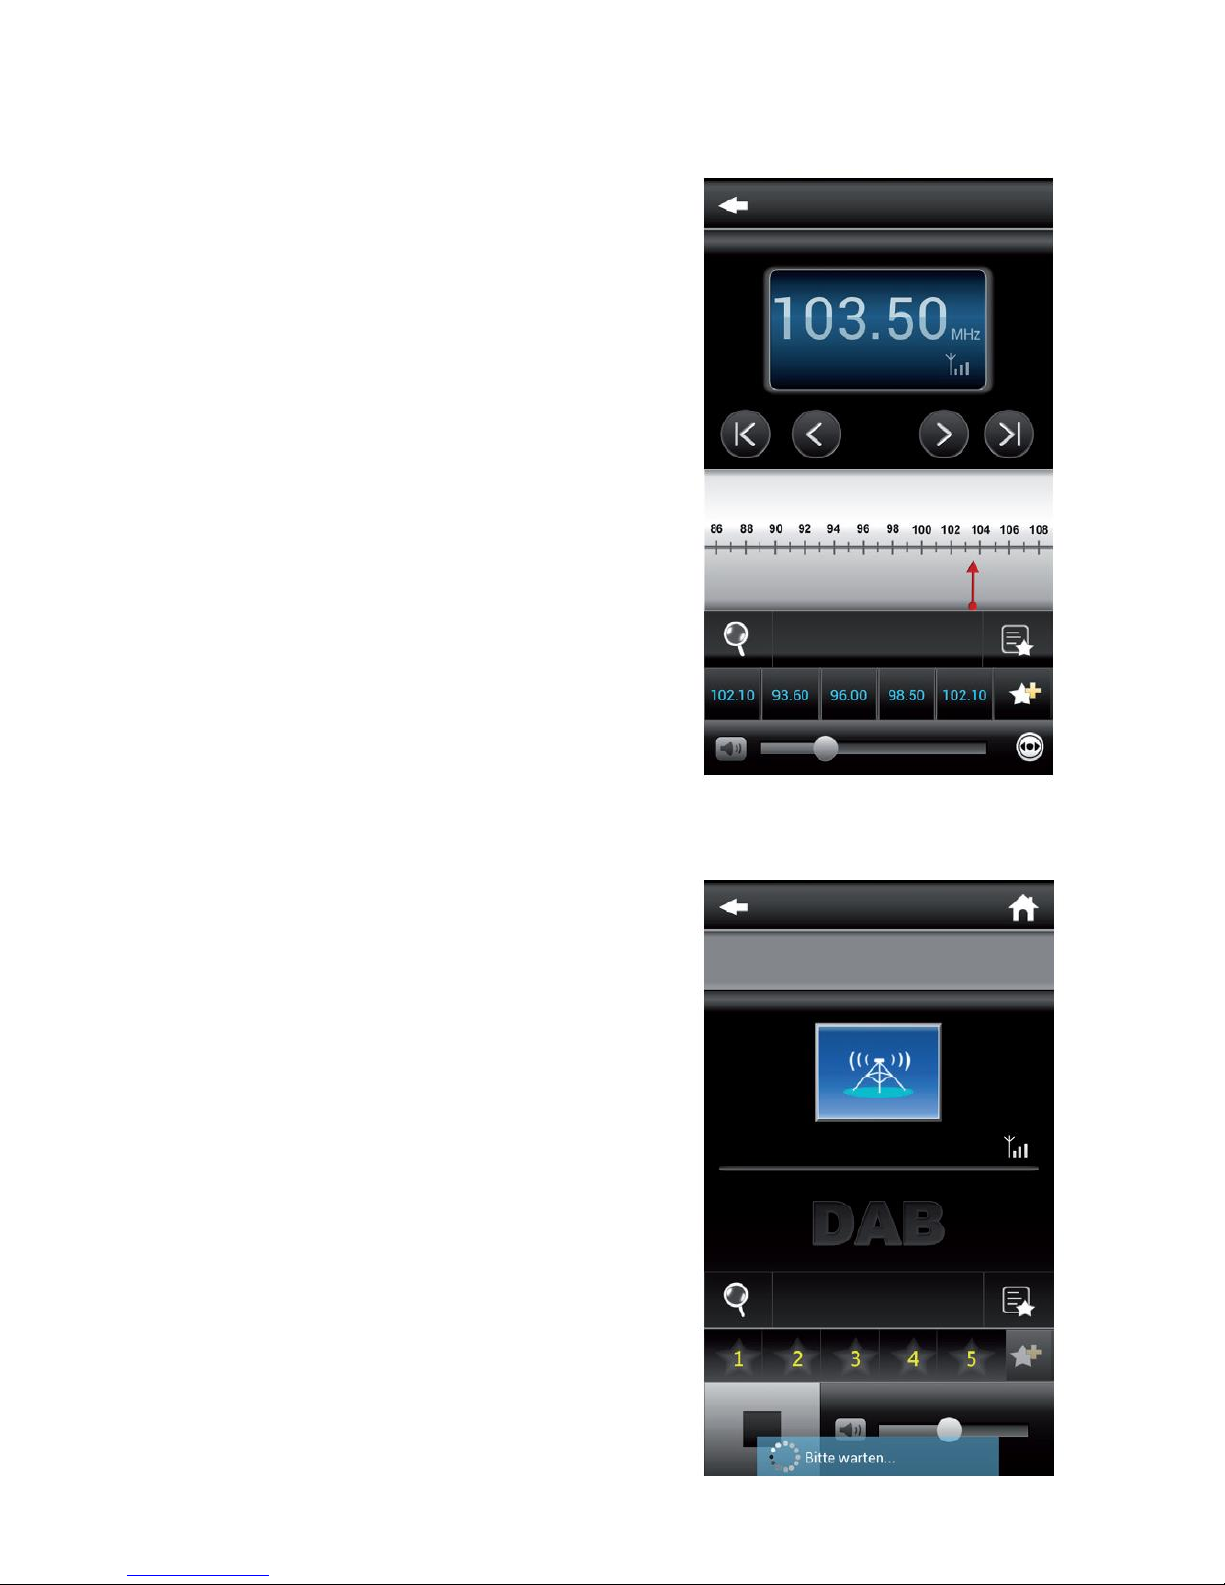
FM Radio
In this mode, you can operate the FM
radio.
DAB Radio
In this mode, you can operate the DAB
radio.
Page 16

15
Bluetooth
In this mode, you can operate to play in
bluetooth.
Press the to operate the remote
control function.
Page 17

16
Press to leave a message.
Press to record.
Page 18

17
Press to play local music
(e. g. from your smartphone)
2. Internet Radio
Press the M button on the radio or the / MODE button on the remote
control, and use the to select Internet radio.
2.1 Listen to internet radio
Stations are categorized into Global
Top 20, Genre, Country/Location
and Highlight. Enter to continue the
subcategories and choose the
station to listen.
For each station, press OK to play
directly. You may press to enter
its submenu. You can
Add to Favorite, Auto Scan or Play. When you choose Auto Scan, the
radio introduces every station in the list by playing it for 30 seconds.
This is stopped when every station is played or you press the OK
button.
Page 19

18
2.2 My Favorite
You can create a list of your favorite preset stations. FOX1000i supports
up to 250 favorite entries including station and folder.
When you listen to a radio station, press and hold Preset on the
FOX1000i and use the volume knop to find an available preset position.
Then push down the volume knob to save.
You also can save the station to
your favorite while scrolling
through the station list. When the
station is highlighted you can
press to enter this menu where
you can add the station to your
favorites.
If the selected station has been saved, you cannot save it again.
Under the preset station list, move to your station, press OK to listen.
You may also press to enter its submenu to Delete, Shift Up, Shift
Down along the list, Rename or Play.
2.3 History
Shows you a list of last listened stations. It can save up to 10 history
stations.
For each station, press OK to play directly. You may press to enter
its submenu. You can Add to Favorite, Auto Scan or Play.
When you choose Auto Scan, the radio introduces every station in the
list by playing it for 30 seconds. This is stopped when every station is
played or you press the OK button.
Page 20

19
Service
Search Radio Station - Enter your
keyword by the remote control to
search radio station from the list.
Add New Radio Station - The
added stations will be stored in My
Favorite. Note that the maximum
character of the station name is
250.
2.4 My mediaU
Display and playback your own
mediaU station list on the mediaU
server. Set your account first.
When it is enabled, My mediaU will
be shown on the main menu.
If various mediaU accounts exist in
the FOX1000i, select the default
login account in here.
To activate your own station list,
follow the steps below:
1. Access http://www.mediayou.net.
2. Join my mediaU membership
3. Login to the website
4. Enter the wireless MAC address of FOX1000i to the mediaU
website. This information can be obtained in Information Center >
System Information > Wireless Info
5. After successfully configuring, you are able to save and view your
own mediaU station playlist(s). Username and password are not
required to enter into the FOX1000i.
6. If there are different accounts stored in FOX1000i, you can choose
the one you currently use under Configuration menu.
Page 21

20
Each time you have made any updates on the playlist from the website,
go to Configuration > Manage my MediaU to synchronize the change to
the FOX1000i.
3. DAB
Press the M button on the radio or the / MODE button on the remote
control, and use the to select DAB.
DAB Station Scan
When the radio is switched on to DAB mode for the first time, it will start
an automatic station scan in order to scan for all stations that can be
received at that location.
The station scan will begin and the display will show a scan progress
bar. As soon as the scan has been completed, it will start playing the
first station on the station list it finds.
Station selection
While in DAB mode, use the buttons to navigate through the
DAB+ stations that can be received, press the OK to confirm to change
station. The radio is equipped with a favorites memory for 20 radio
stations. To save a station, switch to the station you wish to save as
described above. Now press the number key 0-9 on the remote control,
and keep it pressed down for approx. 2 seconds, or press the station
saving key 1-4 to save the station.
The display will show a message that the station has been saved under
the favorites slot selected.
DAB Radio Operation
If you have saved stations in the favorites memory, you can call these
up by pressing the desired number key.
Or while in DAB mode press the Preset button to call up the favorites
list. Use the </> button on the radio or on the remote to navigate
through the favorites list, then press OK /Volume Knob to confirm your
selection.
Page 22

21
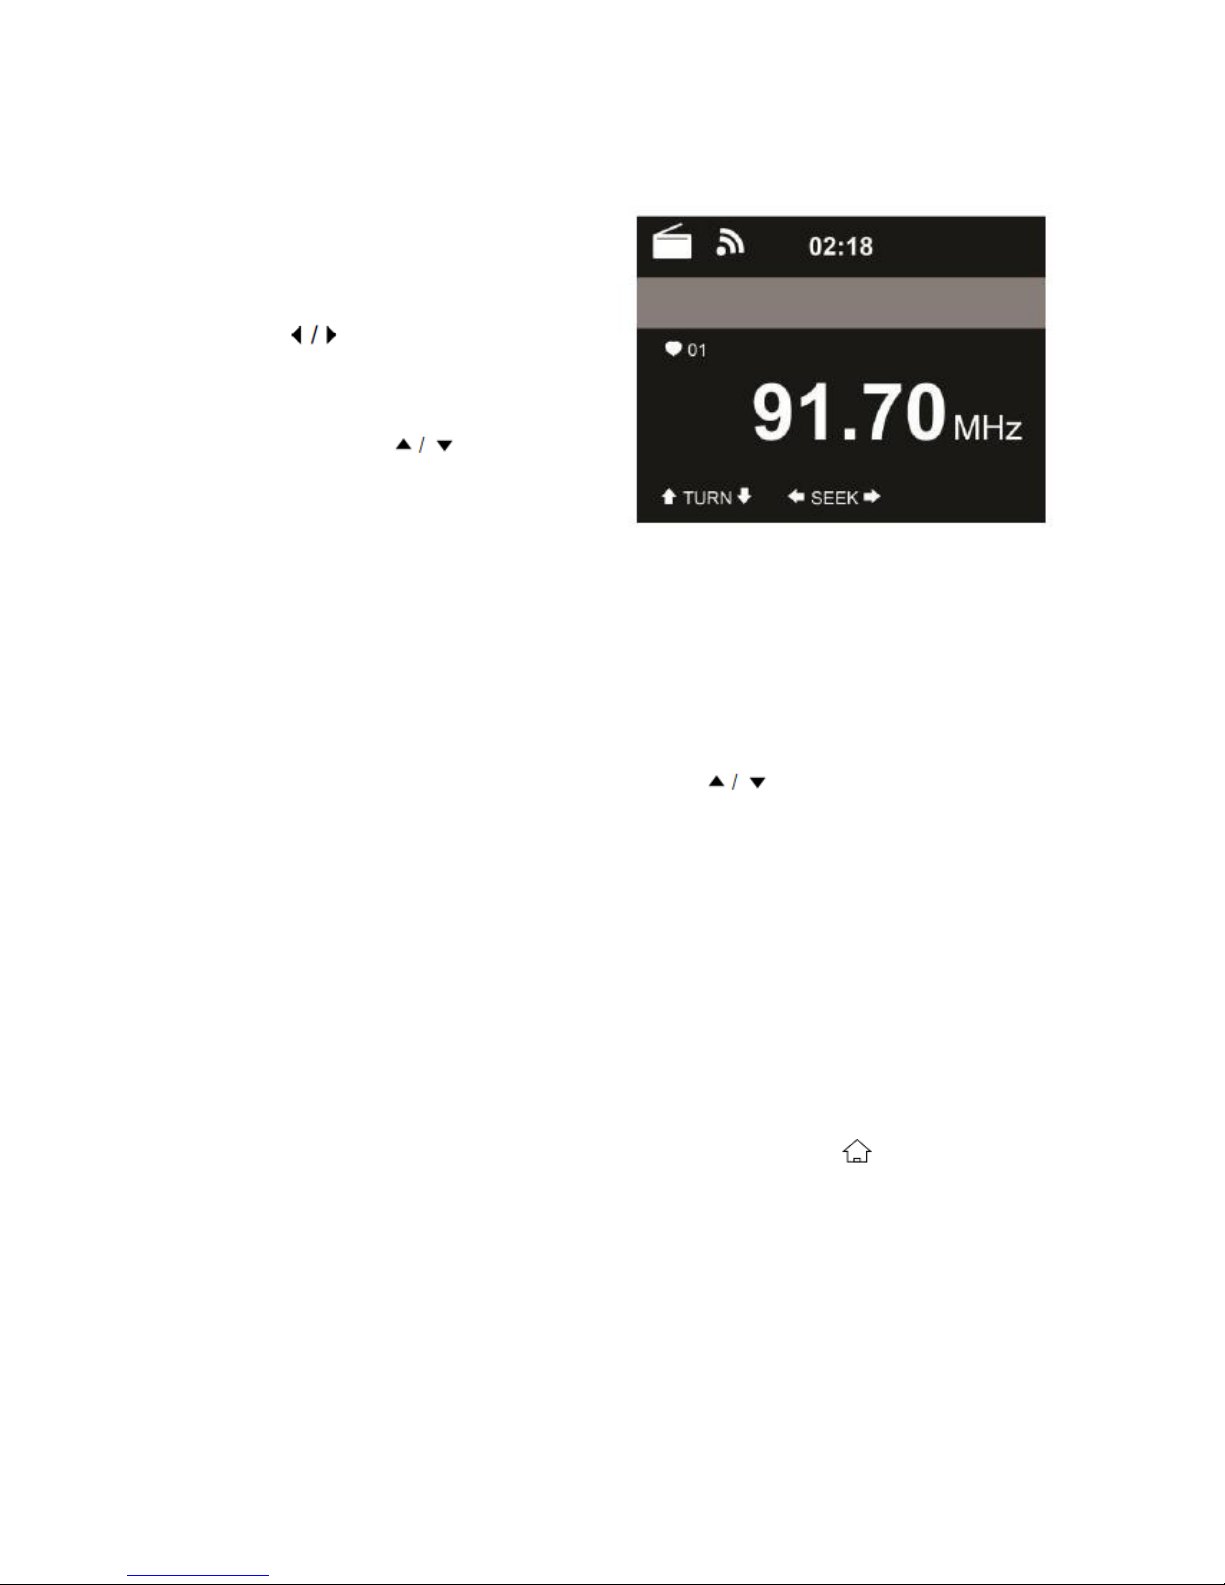
4. FM
FM radio mode receives
analogue radio from the FM band.
Press to search for FM
stations. It stops when it has
received a station.
You may press on the
remote control to tune station
manually. Each step moves
0.05MHz.
Press and hold the PRESET on the remote control and device to save
the station.
You can save up to 20 stations, press PRESET, then press on
the remote control to choose the saved station.
Alternatively, you can let the system scan ALL stations for you by
pressing OK, the searched stations will automatically be stored in
preset station list.
5. Bluetooth
Press M button on the FOX1000i or / MODE button on the remote
control until the display shows Bluetooth or select Bluetooth in the
main menu.
From your device (e. g. smartphone) select the Bluetooth device:
“FOX1000i” from the list of found devices.
Tips: Only one playback unit can be connected to the speaker. If
the speaker is already connected to another playback unit, the
speaker will not appear in the BT selection list.
Page 23

22
If your device asks for a passkey (depending on the device
manufacturers, model, and software version), then enter digits “0000”
(four zeros) and press OK.
If pairing has been carried out successfully, a sound
“Connected” can be heard.
After connected completely, you can listen to music wirelessly through
Bluetooth and select music in Bluetooth device.
Short press button on the FOX1000i and remote control to pause
or resume playback.
Pres
s “>/<” button on the FOX1000i or “ / ” to skip to next/previous
track.
6. Media Center
UPnP
If you have set up shared media,
you should see the shared media
from UPnP. If you have more than
one computer sharing media, the
alternatives are listed. Select the
shared media you want to play.
Press on the remote control
to play previous/next music track
Press to stop or play.
Press INFO on the remote to view the display inf
ormation of the playing
track.
Tips: The radio can only read the track of file names with less than 40
characters. And the characters should be in European language. If you
encounter failure of reading the track under UPnP mode, you may try to
rename the file.
Page 24

23
However, if the track is still unable to play, you can try converting the file
to a different format.
My Playlist
You can create a playlist of favorite music from UPnP. When you play
the music, press and hold OK to save it into My Playlist.
Clear My Playlist
You can remove all the saved music under My Playlist.
7. Music Streaming
FOX1000i or iRadio is the default device name for DLNA, and you may
rename it as you like.
The information below is the introduction of how to setup up media
streaming from PC or other media server. Study the own instruction of
the software or apps you use to enjoy music streaming if necessary.
Make sure the music files are in the format of MP3, WMA, WAV, FLAC
or AAC for music streaming to FOX1000i.
UPnP
To enjoy music streaming from your PC, the following steps are to
be done on the PC:
Connect the PC to the network
Ensure the FOX1000i is powered on and connected to the same
network
Open the UPnP platform Windows Media Player (11 or later).
Alternatively, other platforms or server such as Windows Media
Connection may be used.
Page 25

24
Allow to share your media to FOX1000i.
Add the audio files and folders you want to share with FOX1000i to
the media library.
You may also enjoy the streaming music from other music server,
such as smart phone (Android platform):
- Connect the mobile to the network
- Search and install media sharing apps from Google Play.
- Add the audio files from your mobile you want to share.
Page 26

25
After setup the shared server, choose the music and control
playback on the FOX1000i.
DLNA
Besides UPnP, the FOX1000i also can support DLNA function. You can
share music files from PC or Android mobile and use your PC/Android
mobile/iPhone/iPad to control music playback on the FOX1000i. (It is
not required to control each playback on the FOX1000i.)
The PC system requirement for DLNA is Windows 7 and Windows
Media Player 12.
Setup as below:
Firstly, share the media on your PC to FOX1000i.
Control Panel > Network and Internet > Network and Sharing
Center > Media streaming options.
Open Windows Media Player to enable Allow remote control of my
Player.
Right click any music in the library and choose Play to FOX1000i.
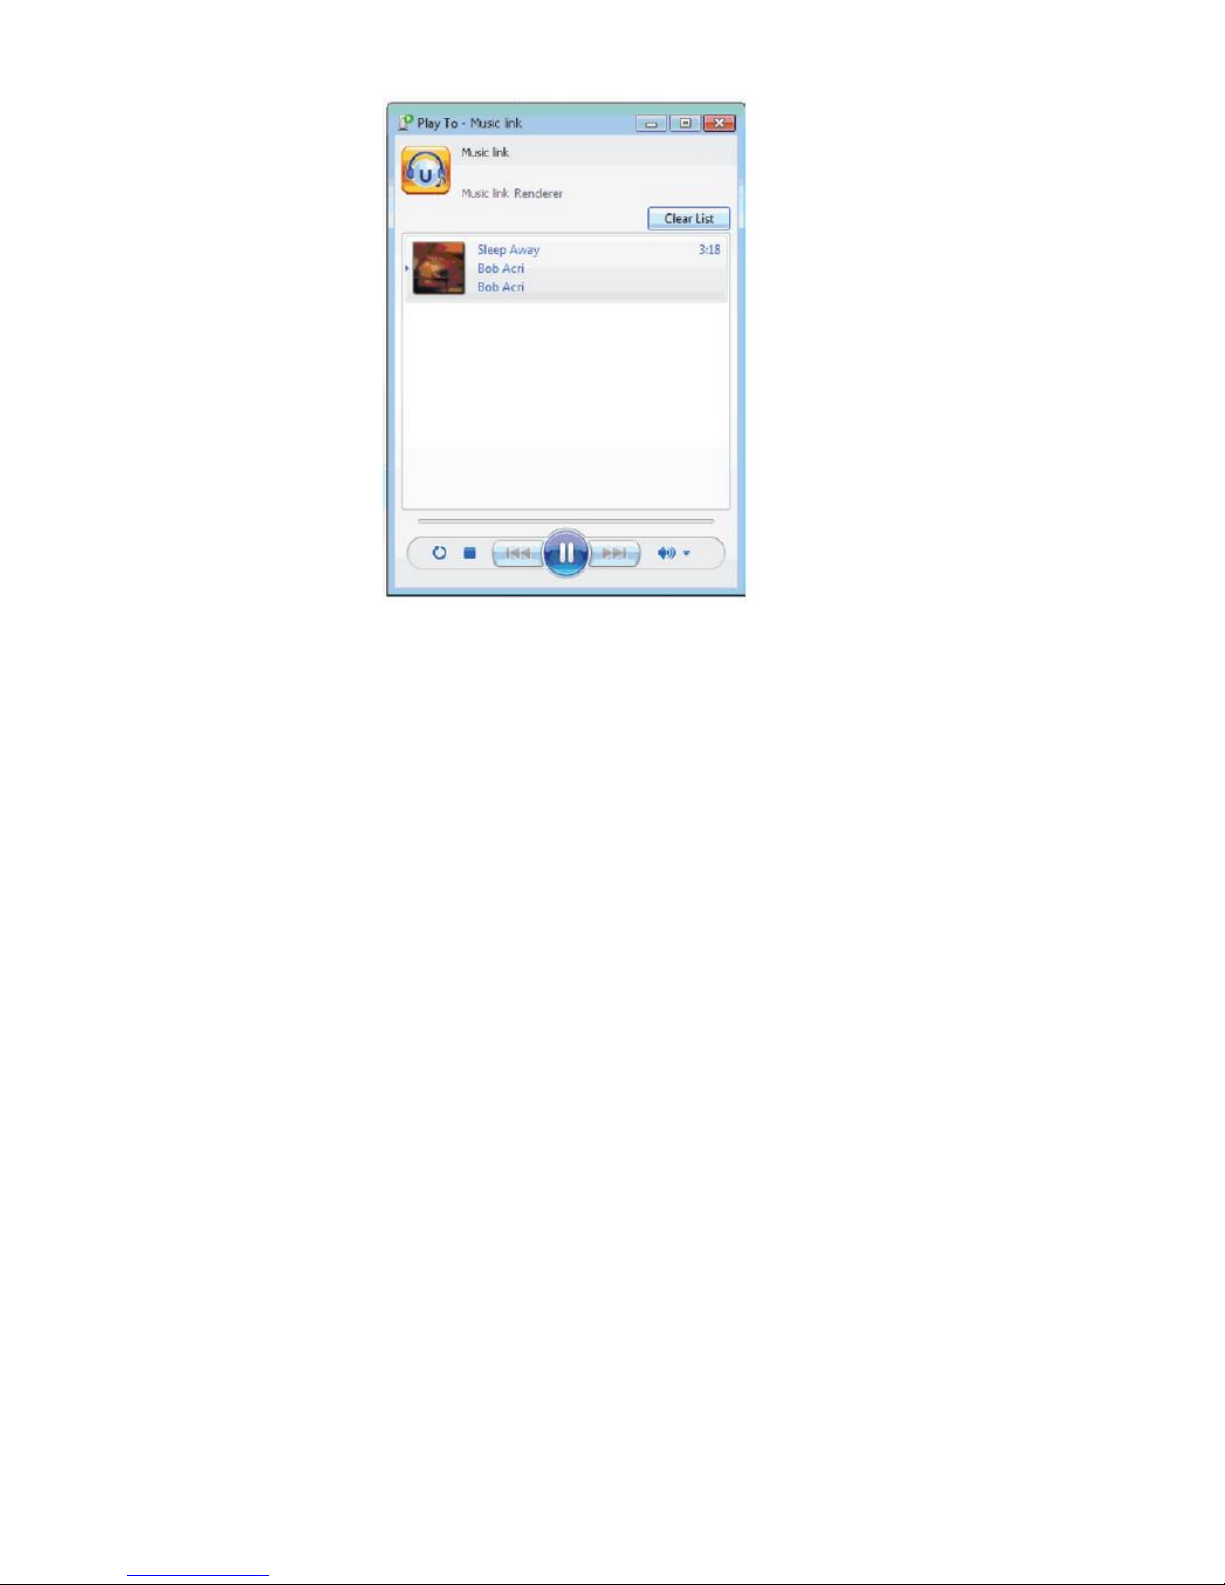
Page 27

26
There will be a window for controlling music playback on FOX1000i.
You may search and install any free or commercial DLNA apps from
Google Play or Apple Store. If you are using an Android mobile, tablet
or iPhone/iPad. We suggest to use Airmusic Control or Bubble UPnP.
Some apps may not support streaming music from iPhone/iPod but
iPhone/iPod could still be used to control streaming music from other
servers.
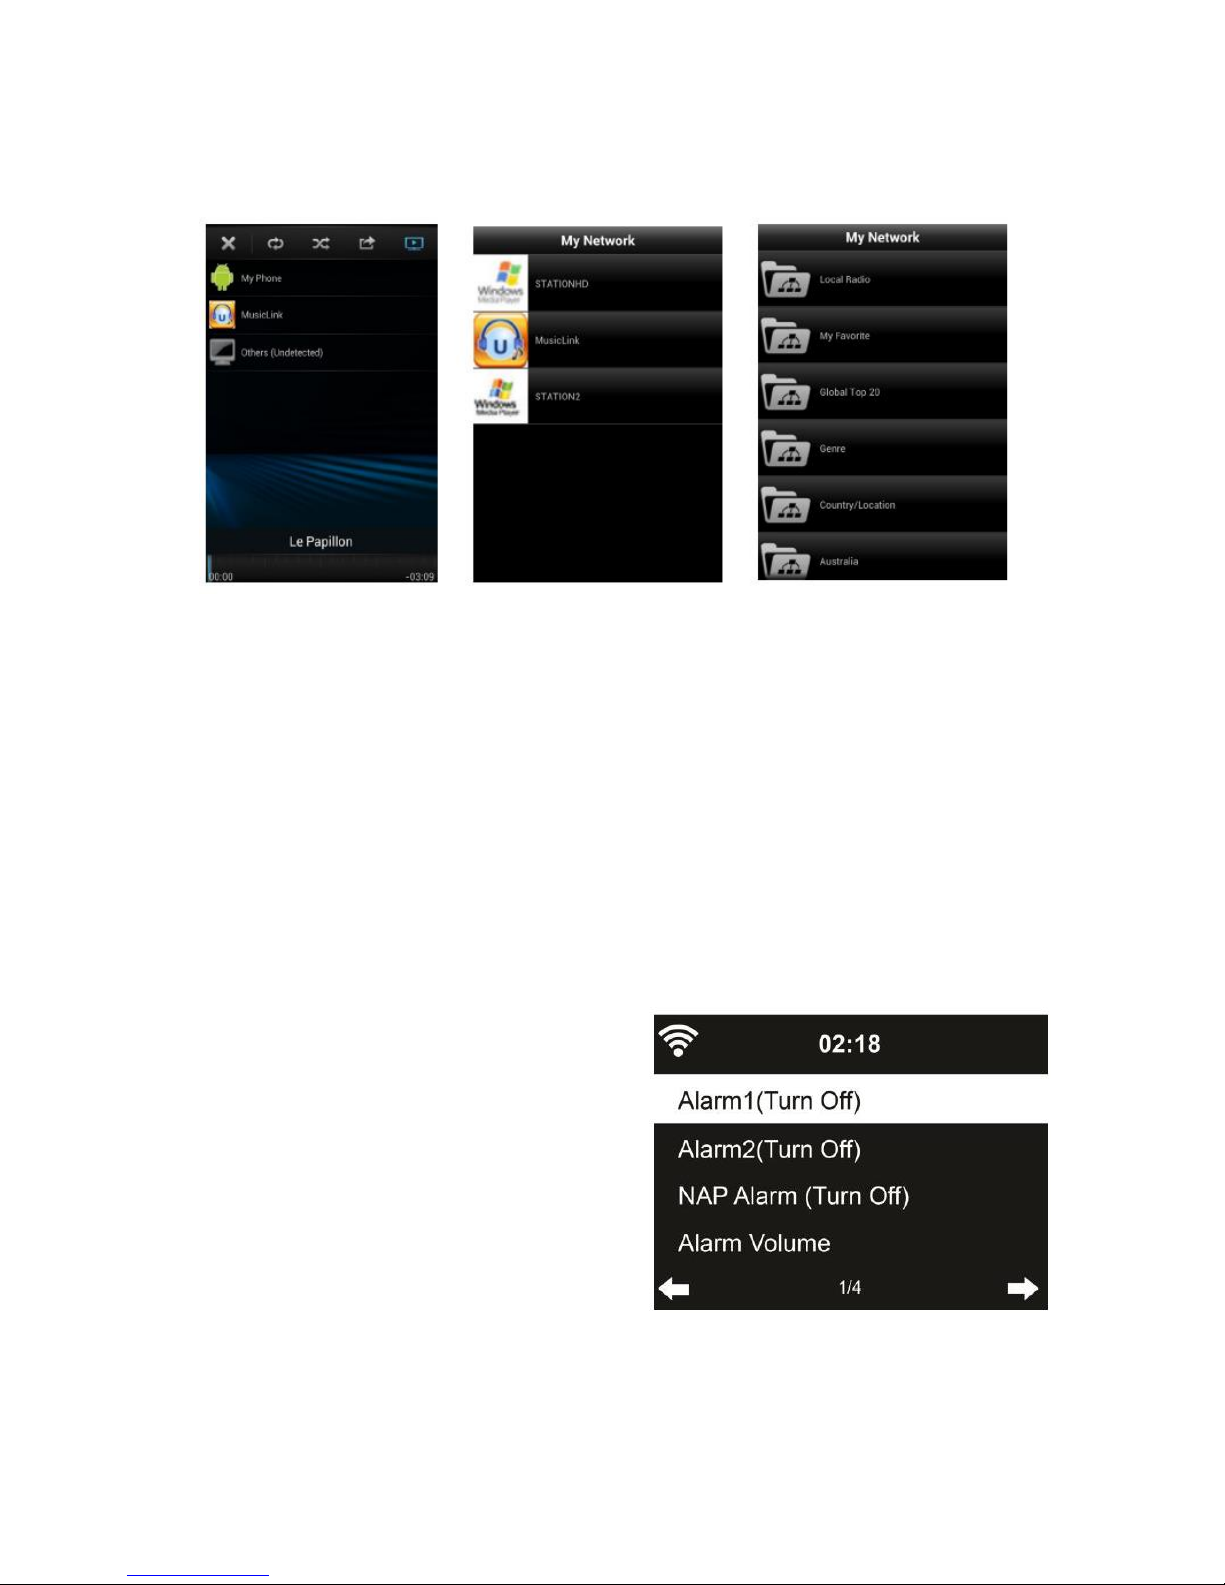
Procedures for playing shared music on the app are as follow:
Select FOX1000i as the player. Some apps may allow to play the music
to multi players at the same time.
Select music server and choose the music. Some apps can create a
playlist if you choose several music.
Page 28

27
You may choose FOX1000i itself as a server, then you can view the
internet radio list and select your internet radio on the app.
Select player Select server View station list
When using DLNA music streaming function on the FOX 1000i, you
can only control the volume and standby via the unit. It is restricted
to control the other function. Stop DLNA on PC, mobile or tablet
before you resume FOX1000i’s own control.
8. Alarm and Timer
Alarm
There are three independent
alarms – 2 alarms of absolute time
setting (Alarm 1 and Alarm 2) and
1 alarm for relative time setting
(NAP Alarm). Press Alarm on the
remote control to enter this menu
directly
The first two alarms are similar to the normal alarm, turn on then set the
time and set it alarms every day, once or every specific day of week.
Choose Sound to set the sound to Beep, Melody or Internet Radio
Note that the alarm source is from the last listened or preset internet
radio if Alarm Sound is set to Internet Radio.
Page 29

28
It can only set one station for both alarms. When it reaches the alarm
time, the unit connects to the internet if the set network is available.
Therefore, there may be some delay from the alarm to the radio play. If
no network is connection in one minute, the alarm will change to
Melody automatically.
After Alarm NAP is set, it alarms once is 5/10/20//30/6090/120 minutes
depending on which one you have set.
You may choose Alarm Volume to configure the volume of the alarms.
When the alarm(s) is/are set, there will be a clock icon at the top of the
display. The clock icon with alarm time will also clearly display on the
standby mode screen.
During alarm, press any key to enter snooze mode. It will alarm again in
5 minutes. Press the STANDBY key to stop the alarm.
Timer
Press Timer on the remote control
to setup the timer. Use the arrow
keys on the remote to set the timer
and press OK to confirm.
Page 30

29
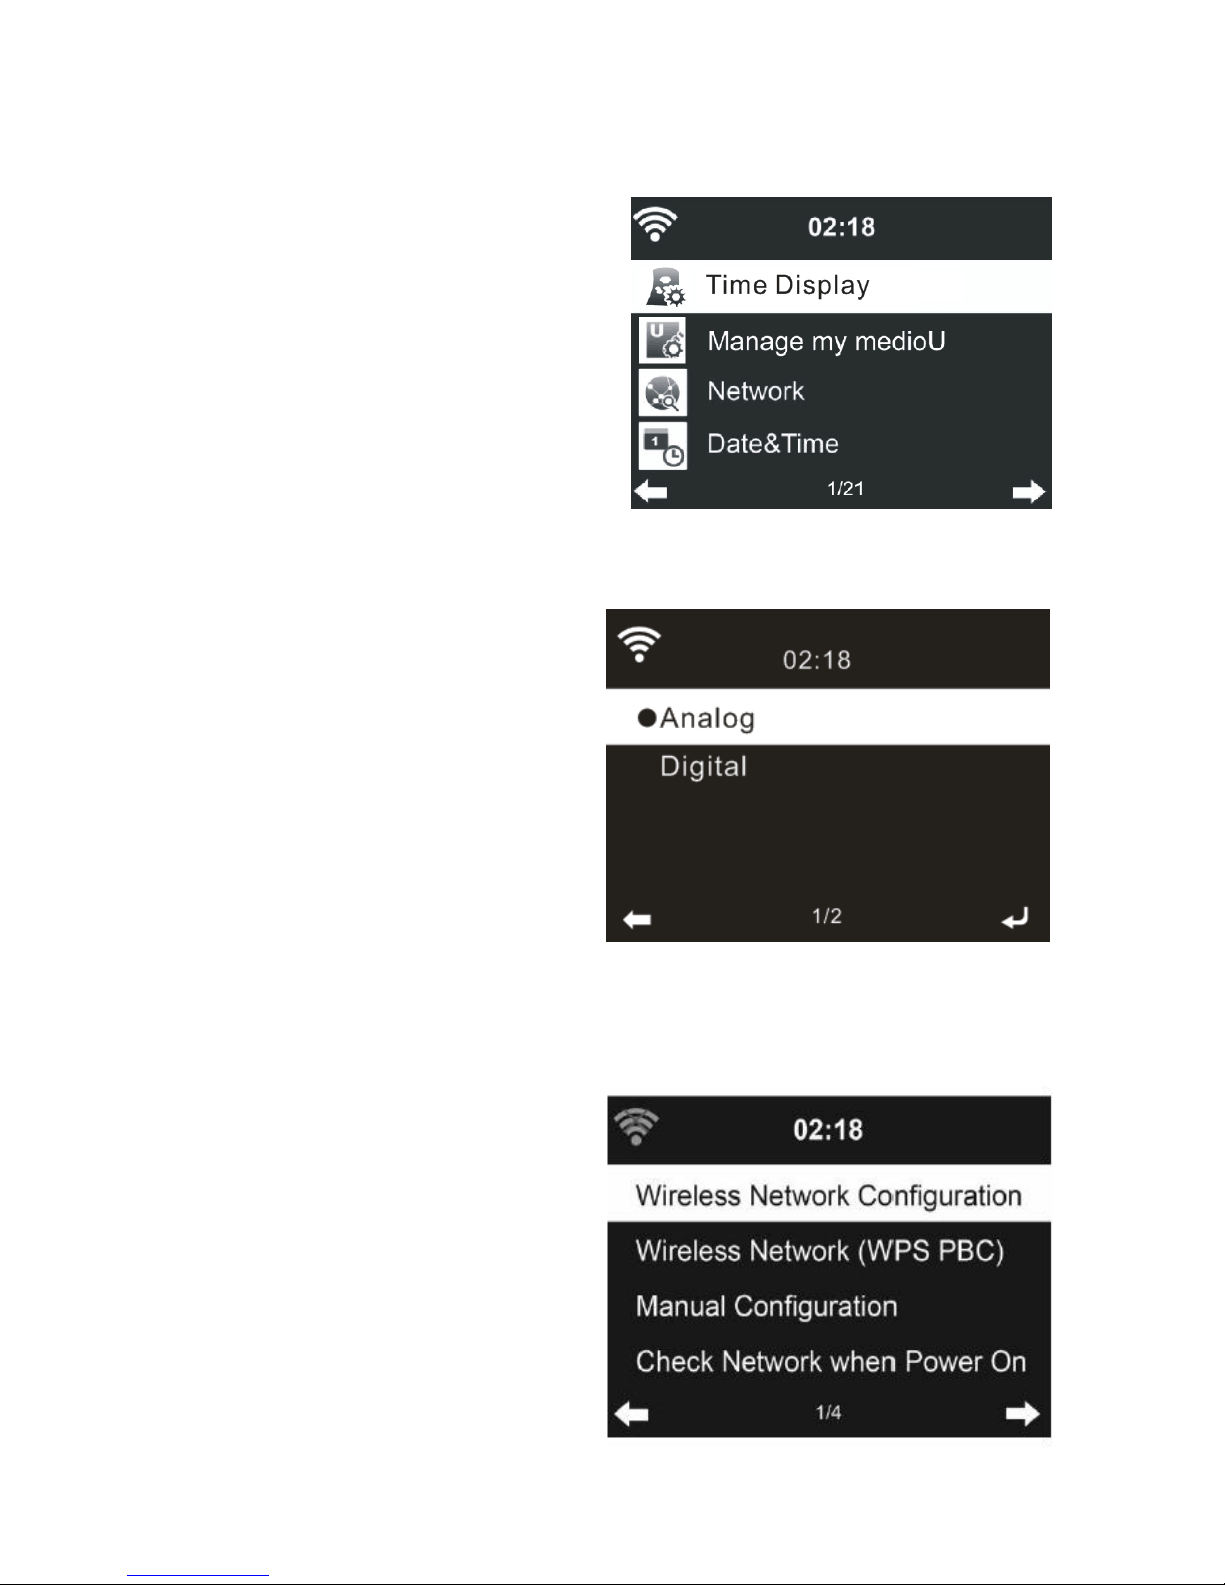
9. Configuration
Time Display
You may choose the standby
display with Analog or Digital.
Manage my mediaU
When it is enabled, My mediaU
will be shown on the main menu.
If various mediaU accounts exist
in the FOX1000i, select the
default login account in here.
Wireless Network Configuration
Enable / disable WiFi network.
When you enable the WiFi
network, the system will
automatically connnected to
the network.
Page 31

30
Select your required AP.
Enter WEP or WPA/WPA 2
code to connect the WiFi.
If it is accidentally pressed to
move a redundant entry,
press to correct.
Wireless Network (WPS PBC)
If you are using a router with
WPS/QSS button, you may set
up the network connection
simple via WPS function. Enter it
and go to press the WPS/QSS
button on your router within 120
seconds. The connection
between the router and the
FOX1000i will then be
configured automatically.
Page 32
31
Manual Configuration
You can choose DHPC (which IP assigned automatically) ir manually
input IP address for wireless network connection.
When you select manual setting for wired connection, the followings
have to entered:
1. SSID (the name of Access Point);
2. IP Address
3. Subnet Mask
4. Default Gateway
5. Preferred DNS Server
6. Alternate DNS Server
You may choose (Manage) specific network if you have setup more
than one network connection within an area.
Check Network when Power On
“Enable / disable WiFi network”:
When you enable the WiFi network, the system will automatically
search the avaiable AP.
Select your required AP.
Enter WEP or WPA/WPA 2 code to connect the WiFi.
If the wireless network does not exist or connection failed, the icon at
the top left conner will have a cross on it.
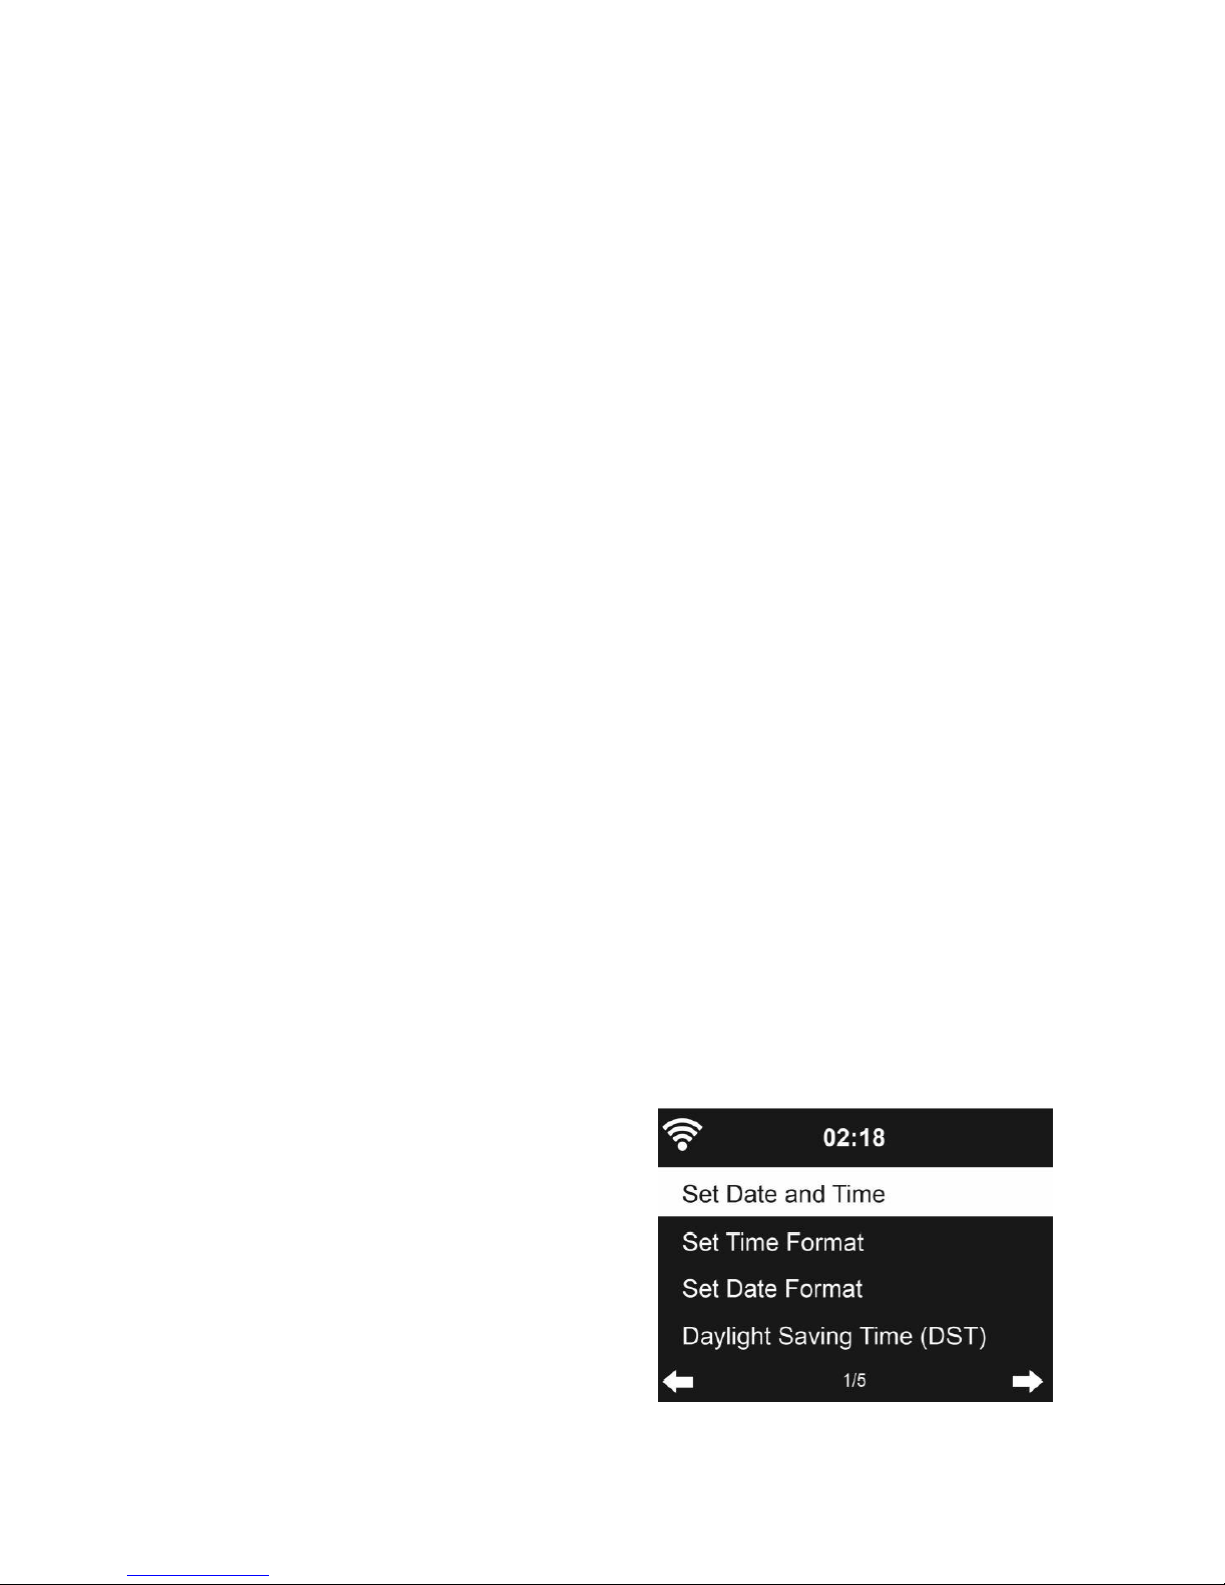
Date & Time
Setup the date and time
Set time format display as 12
Hour or 24 Hour (default).
Set date format in the positions
of YY (year), MM (month) and
DD (day) – YY/MM/DD,
DD/MM/YY (default) or
MM/DD/YY.
Turn on/off (default) the
Daylight Saving Time(DST).
Page 33
32
With a wireless network connected, GMT (+00:00) time is a time
reference of time setting. Add or deduce the hour according to your time
zone when you set the time.
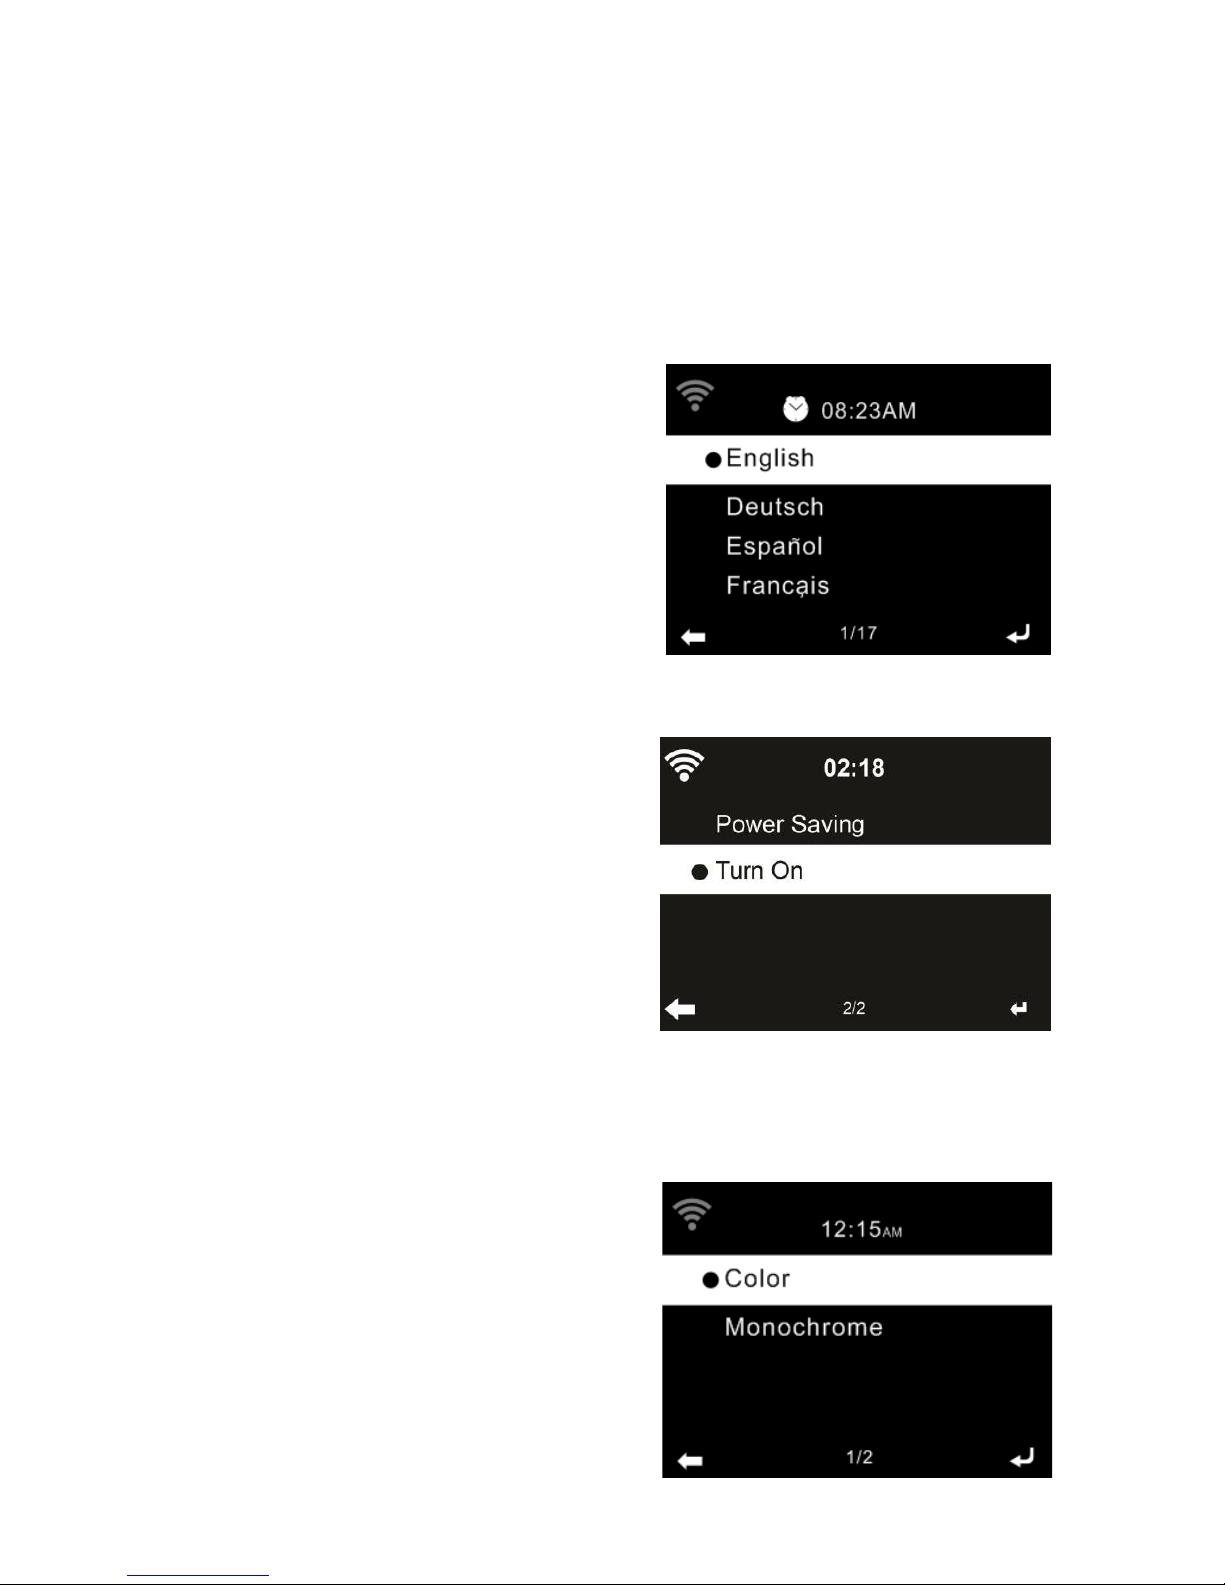
Language
Select the OSD language: English,
German, Spanish, French, Portuguese,
Dutch, Italian, Russian, Swedish,
Norweigian, Danish and so on.
Dimmer
Configure the brightness of
backlight on the display. If you select
Power Saving, you can select the
level to which the display
is dimmed
down when the radio enters the
standby mode or when the radio
gets no key input for 15 seconds.
The Turn On options keep the
display illumination always. If you
select it, you can choose how bright the display shall be.
Display
You may choose to set the display in
Color or Monochrome.
Page 34
33
Power Management
Choose the power management timer (5/15/30mins) to set the duration
of the radio to switch to the standby mode automatically when no
network connection is available. Choose “Turn Off” to ignore the power
management function.
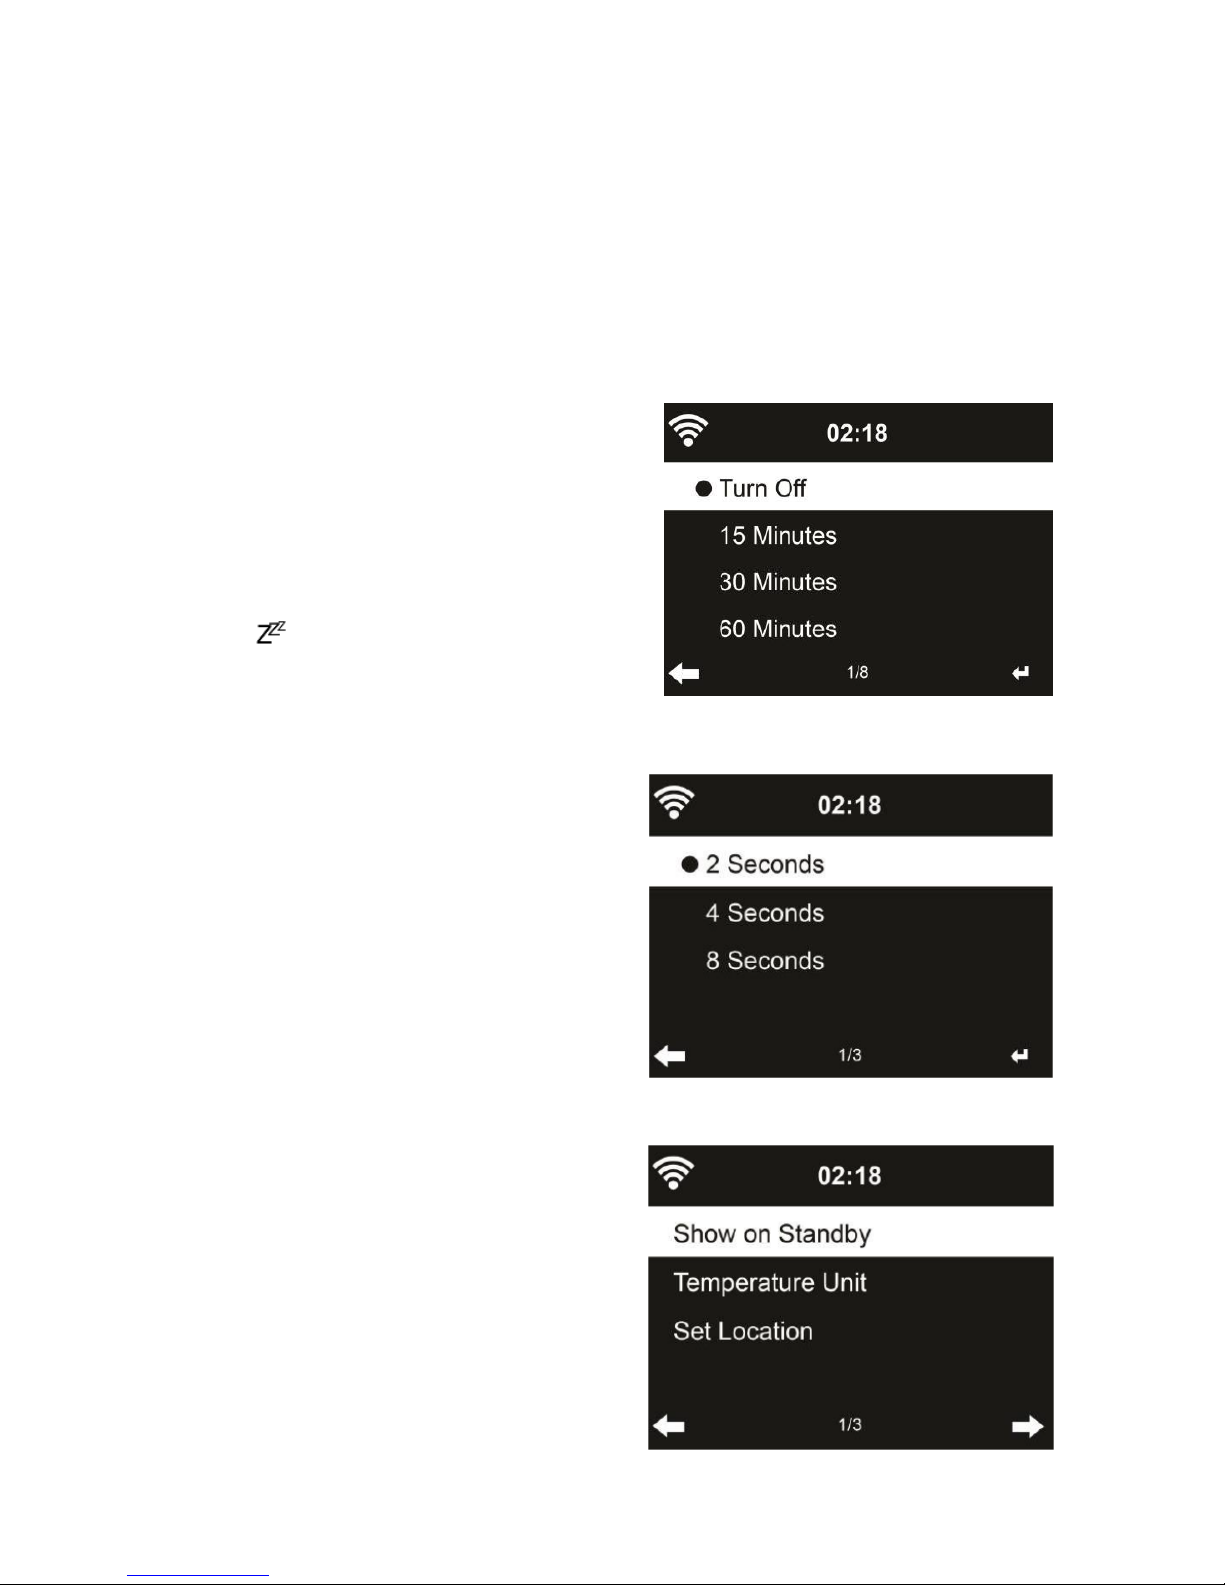
Sleep Timer
Turn off or set the sleep time to
15/30/60/90/120/150/180 minutes.
Once the time is set, there will be a
bed icon with remaining minutes at
the top right corner. The FOX1000i
will shut down once the time runs out.
Press on the remote control for
the shortcut of this function.
Buffer
Configure the buffer time of the
music playback, 2/4/8 seconds.
Weather
FOX1000i is able to display current
weather information under standby
mode. Turn on Standby Display
and set Temperature Unit ( ℃ or
℉ ) to get the weather displayed at
the standby mode. When it is
turned on, the display will switch
between time and weather while
being in standby mode.
Page 35
34
FM Setup
Choose Mono/Stereo audio output.
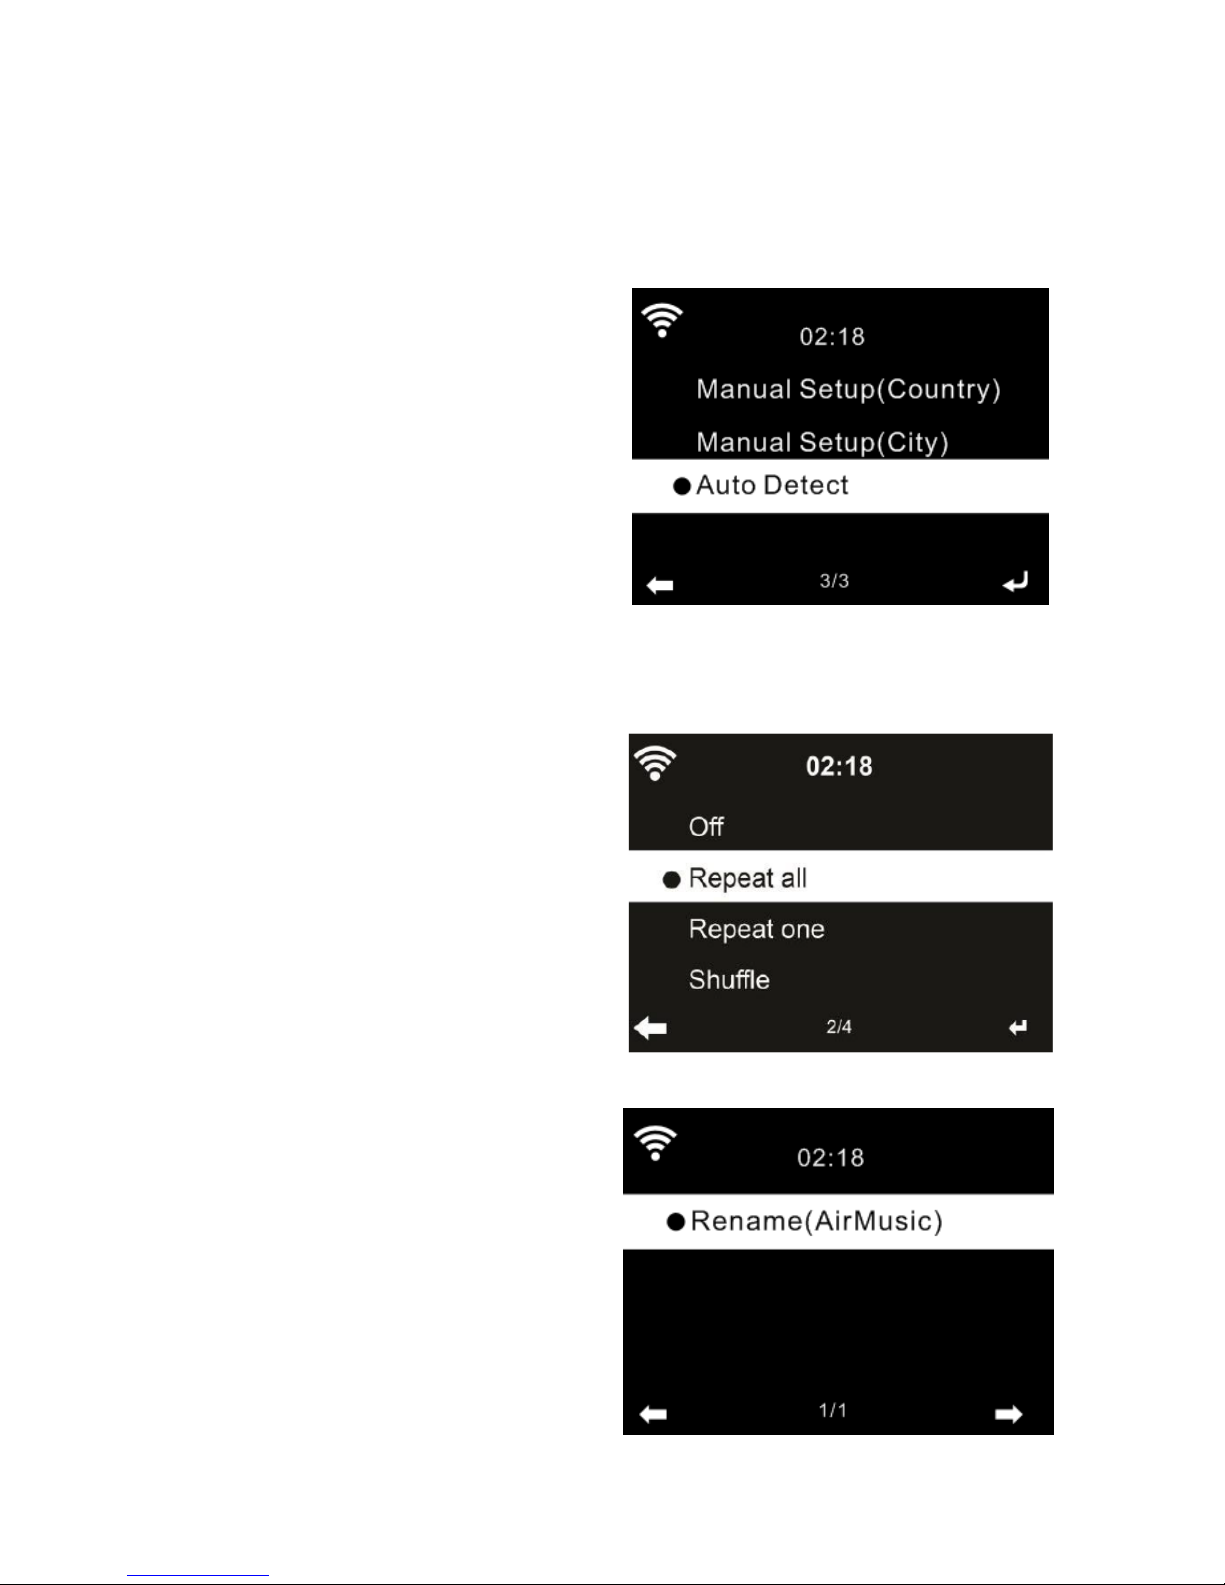
Local Radio Setup
You may Manual Setup (Country /
City) your location, or let the
system Auto Detect your current
location. The system detects
location according to the IP
address of your connected
network.
Press Local Radio to enter this
local radio list directly.
Playback Setup
Select the playback mode of
media center – Off (no repeat or
shuffle), Repeat all, Repeat one
or Shuffle.
DLNA Setup
The default device name for DLNA
is AirMusic. You may rename it for
DLNA setup on the PC or mobile.
Page 36
35
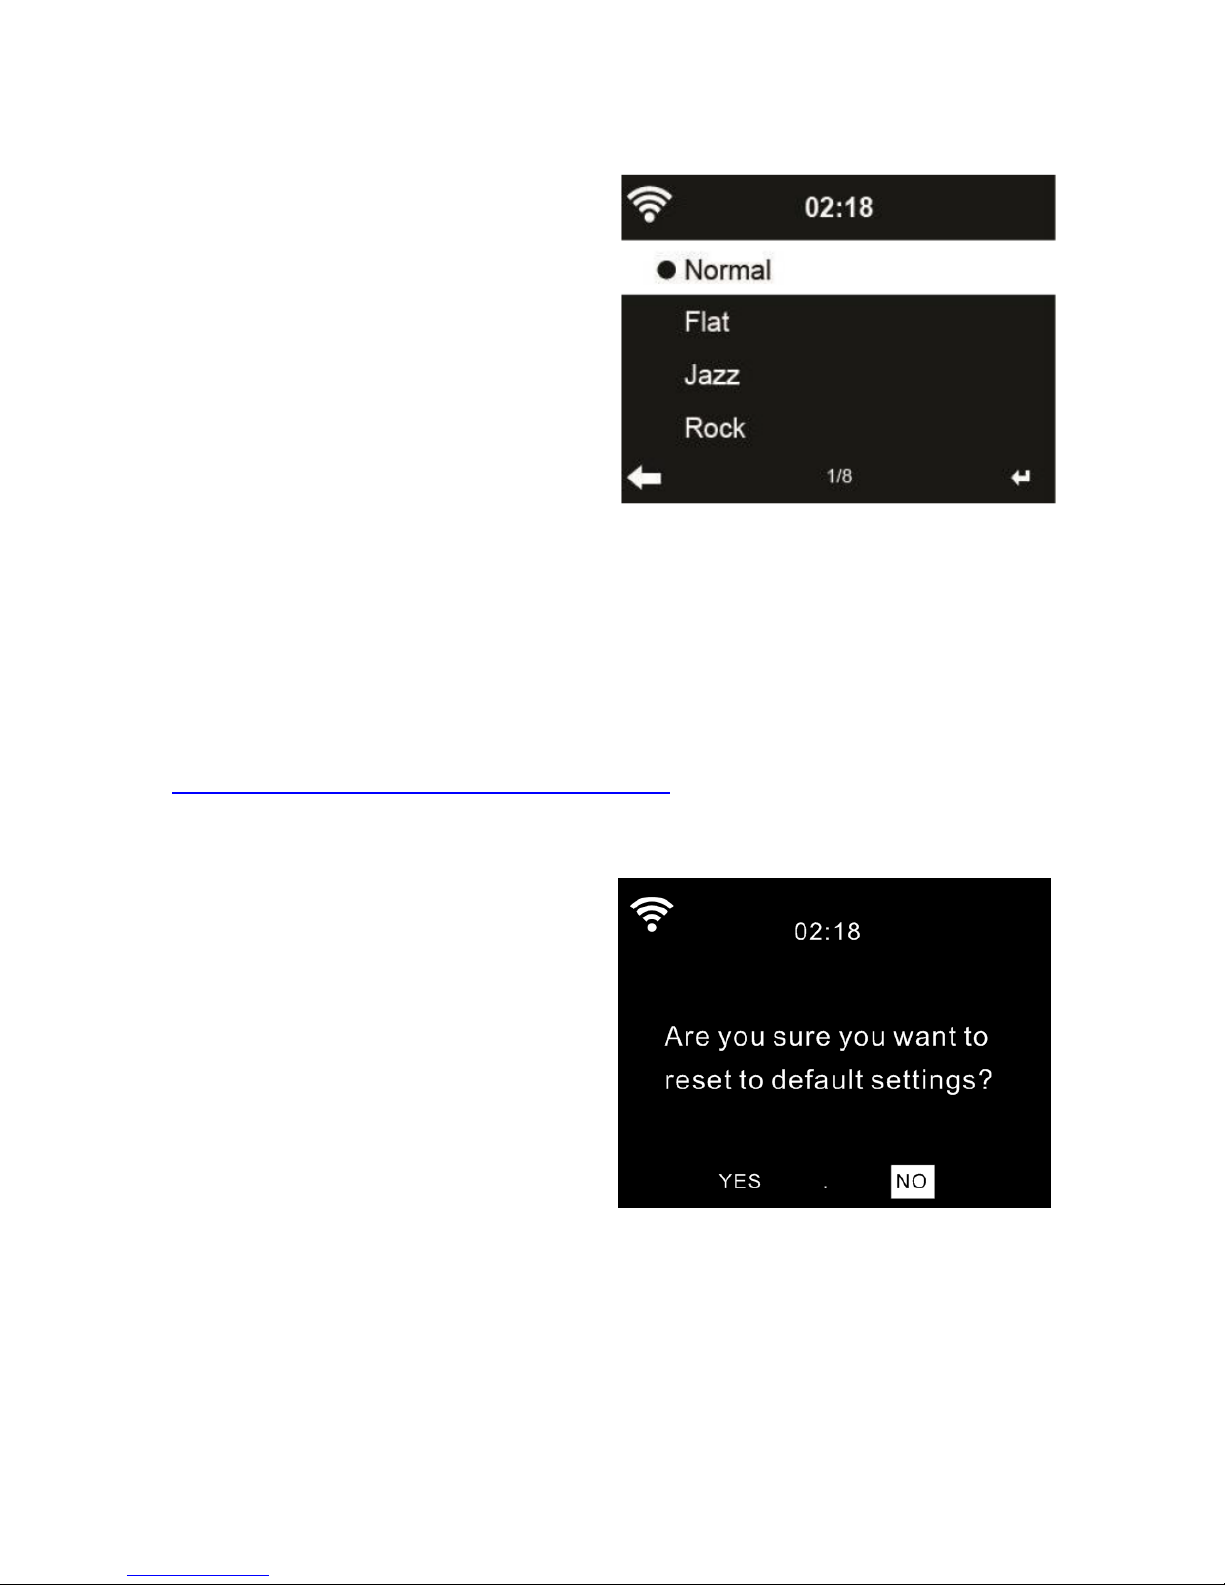
Equalizer (EQ)
Default equalizer is Normal, you
may change to Flat, Jazz, Rock,
Soundtracks, Classical, Pop,
News.
Press EQ on the remote control
to swap among the EQ mode for
shortcut.
Resume When Power On
The system is default to resume internet radio playback if you were
listening to internet radio or media center before switch off the unit.
Software Update
If available, new firmware will be available on our homepage
www.jensenscandinavia.com/downloads
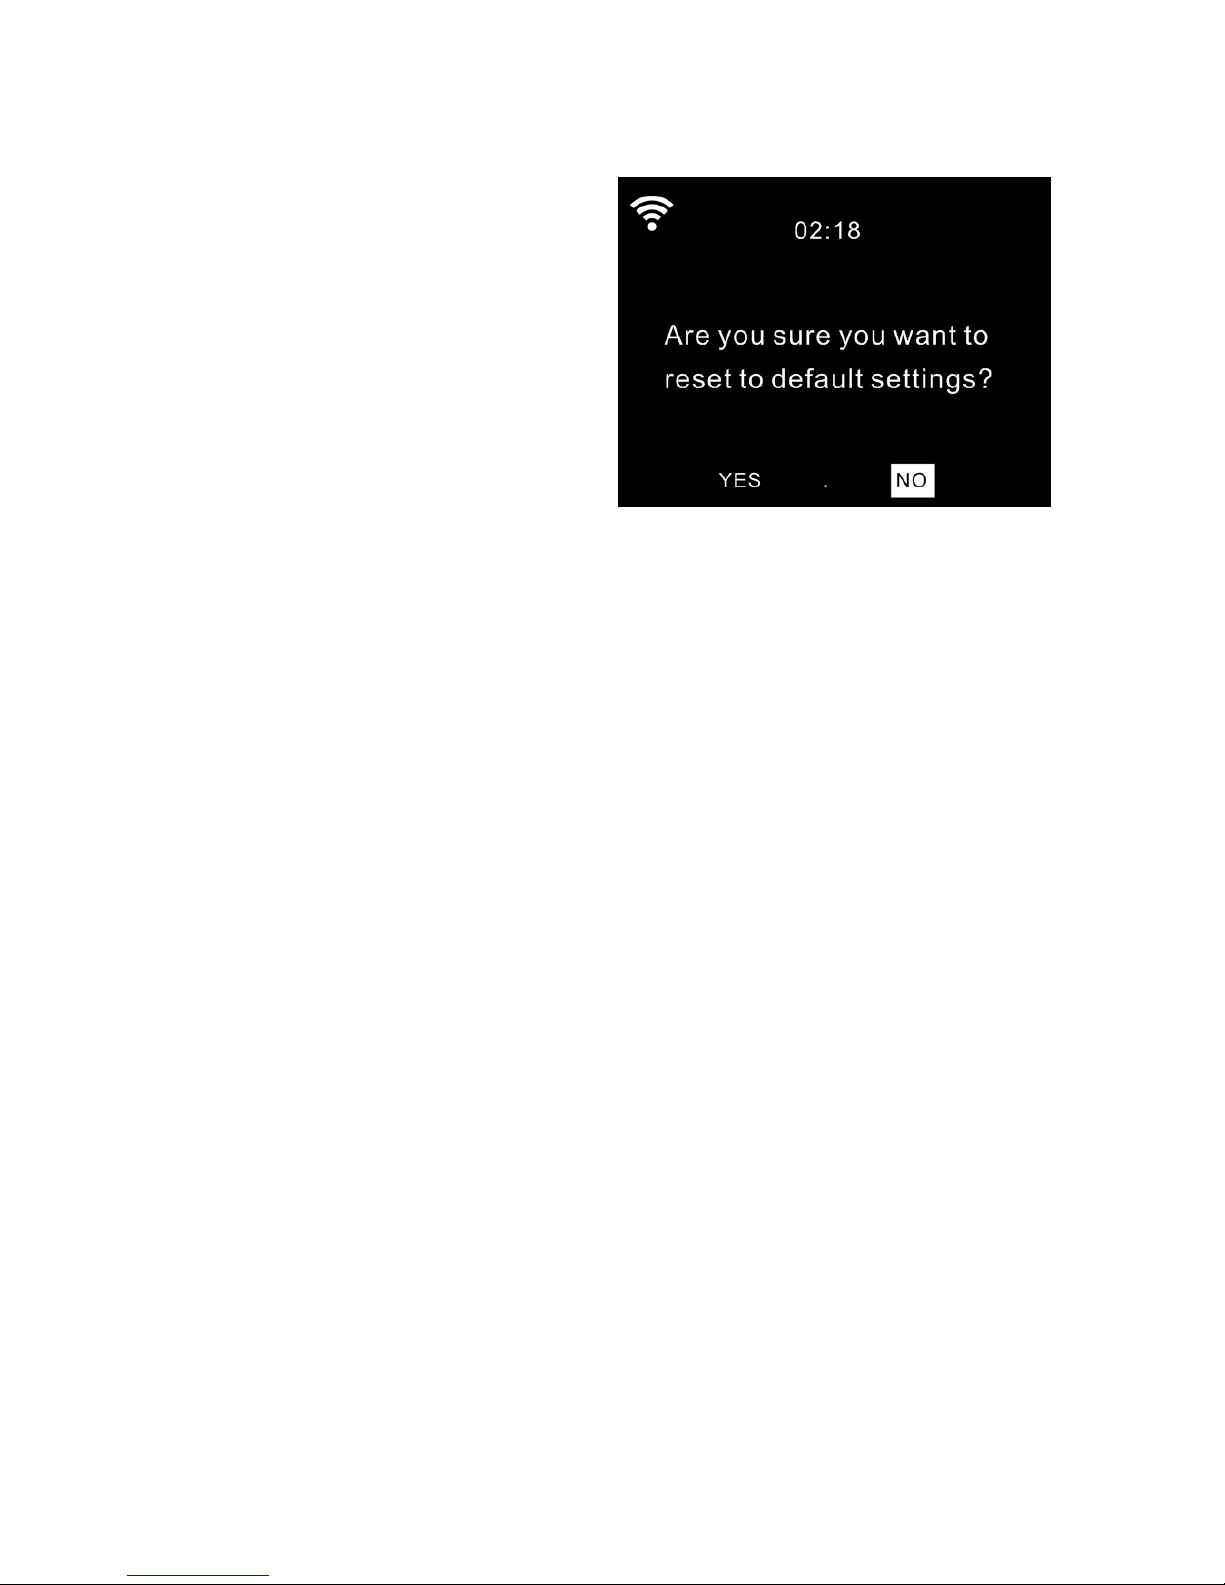
Reset to Default
Restore the default settings.
After FOX1000i is reset, the
system will move to Language
setting menu. And it will
automatically turn to Network
setting menu once the OSD
language is selected.
Local Radio
There is a shortcut Local Radio under Internet Radio so that you can
easily go to the station list of your location.
The device can use the IP address to detect its current location and can
then automatically generate a list of local radio stations. However, you
can also enter a different country.
Page 37

36
10. Troubleshooting
Error
Remedy
No display indication,
radio does not
respond to operation
Set up power supply via mains adapter
supplied
No operation via
remote
control possible
Batteries discharged or incorrectly
inserted. Please check whether batteries
inserted in correct direction.
DAB+ reception poor
No stations found, perform a station
scan (see Chapter 3 ) Antenna not
fully extended.
Change the location of the radio (e.g.
closer to window), Repeat station scan
FM reception poor
Antenna not fully extended, extend the
FM antenna to its full length.
Change the location of the radio (e.g.
closer to window), Repeat station scan
Poor audio quality
when playing music
File with low bit rate. Check the audio file.
Tip: For MP3 files, bit rate should be
192Kbit/s or higher
The device does not
switch on.
1. Check if the power adaptor is connected
properly.
2. The device may malfunction when used in
areas with strong radio interference. The
device will work properly again once there is
no more interference.
No sound.
1. Turn on the sound as it may be muted.
2. Increase the volume.
Page 38

37
No network
connection can be
established.
1. Check the wireless function.
2. Try to set an IP address at the device.
3. Activate the DHCP function on the router
and make the connection again at the device.
4. A firewall is activated on the network – set
the respective program in such a way that
access is possible.
5. Reboot the unit to try.
WLAN connection
can’t be established
1. Check the availability of wireless network on
the access point.
2. Place the device closer to the router.
3. Make sure the WEP/WPA password is
correct.
No station is found.
1. Check the network as well as the access
point and firewall.
2. The station may not be available currently,
try it again later or select another station.
3. The link of the station is changed or the
station no longer transmits – ask the provider
for information.
4. The link of manual added station is not
correct, make sure it is correct and re-enter.
Alarm does not work.
1. Switch on the alarm.
2. Due to the volume setting, refer to the
solutions of “No sound”.
3. The source of alarm was set to be station
but there is no network connection. Change
the source of alarm or reconfigure the
connection.
Page 39

38
Unable to do DLNA
streaming.
1. Check the connection of the network. FOX
1000i and your device need to be in the same
network, and test if the network in good
condition.
2. Make sure the settings on your device are
correct.
Electro-Magnetic
Interference
1.The normal function of the product may be
disturbed by strong Electro-Magnetic
Interference. If so, simply reset the product to
resume normal operation by following the
instruction manual. In case the function could
not resume, please use the product in other
location.
System freezes
suddently.
1.The radio is overloaded, reboot the unit.
Page 40

39
Safety Precautions
Do not drop the FOX1000i, and do not expose it to liquid, moisture
or humidity. These might lead to damage to the device.
If the FOX1000i, is moved from a cold environment into a warmer
one, do let it adapt to the new temperature before operate the
device. Otherwise, it might lead to condensation and cause
malfunctions in the device.
Do not us the FOX1000i, in the dust environment as dust can
damage the interior electronic components and lead to
malfunctions in the device.
Protect the FOX1000i, from strong vibrations and place it on stable
surface.
Do not attempt to disassembly the FOX1000i.
Only use the power cord delivered with the FOX1000i.
The socket outlet should be installed near the FOX1000i and
should be easily accessible.
Never touch the power cord with wet hands.
Make sure the electrical voltage specified on the FOX1000i and its
power plug is corresponding to the voltage of the power socket.
Incorrect voltage will destroy the device.
If the FOX1000i is not using for a long period of time, disconnect it
from the power supply by unplugging the power cord. This is to
avoid the risk of fire.
Never use any harsh or strong solvents to clean the FOX1000i
since these may damage the surface of the device. Dry, soft cloth
is appropriate; however, if the FOX1000i is extremely dirty, it may
be wiped off with a slightly moist cloth. Make sure the device is
dried off after cleaning.
When you are necessary to ship the FOX1000i, store it in its
original package. Save the package for this purpose.
Page 41

40
11. Specifications
SPECIFICATIONS
Model No. FOX1000i
Description
Internet Radio with DAB, FM and
Bluetooth
Display 2.4” TFT color display
Network supported
OPEN
WEP
WPA PSK AES
WPA PSK AES / TKIP
WPA PSK TKIP
WPA 2 PSK AES
WPA 2 PSK AES / TKIP
WPA 2 PSK TKIP
Streaming UPnP, DLNA
Supported playback formats MP3,WMA,AAC,FLAC,WAV
DAB Frequency
Band III 174.928-239.2MHz
FM Frequency
FM 87.5-108Mhz
Output power (RMS) 7W x 2
Power adaptor (included)
Input: AC 100-240V ~ 50/60Hz
USB Port Output: DC 5V 1A
Power Consumption 29 W
Standby Power Consumption < 3W
Bluetooth support V2.1+ EDR
Bluetooth operation range Up to 10 meters
Transmission frequency 2.4 GHz
Protocols A2DP 1.2
Working Temperature 0℃~ +35℃
Working Humidity 20%~80%
Page 42

41
Page 43

M
42
Internett-radio
med DAB+, FM og Bluetooth
MODELL NO.: FOX1000i
Page 44

43
Innhold
1. Komme i gang
1.1 Utseende og beskrivelse av knapper
1.2 Fjernkontroll
1.3 Skjermsymboler
1.4 Koble til det trådløse nettverket
1.5 Appen AirMusic Control
2. Internett-radio
2.1 Lytte til radiokanaler
2.2 Min favoritt
2.3 Historikk
2.4 Min MediaU
3. DAB+
4. FM
5. Bluetooth
6. Mediesenter
7. Strømme musikk
8. Alarm og tidsinnstilling
9. Konfigurasjon
10. Feilsøking
11. Spesifikasjoner
1. Komme i gang
Esken inneholder følgende:
FOX1000i DAB+/FM/Internett-radio
Fjernkontroll
AC-strømledning
Brukerhåndbok (Engelsk, Norsk)
Page 45

44
Takk
for at du valgte Jensen of Scandinavia
Fornøyde kunder betyr alt for oss hos i Jensen of Scandinavia.
Derfor prøver vi hele tiden å tilegne oss mer kunnskap slik at vi
kan innfri kravene og forventningene til kundene våre.
Vi har som mål å væ re det opplagte førstevalget – den som gir
best kundeservice og som tilbyr brukervennlige produkter.
Vi vil gjerne takke deg nok en gang for at du valgte produktet
vårt!
Vennlig hilsen
Jensen of Scandinavia
Nettverkskrav
FOX1000i er en DAB+/FM/Internett-radio, og stiller følgende krav:
Trådløs Internett-tilkobling (Wi-Fi)
Smarttelefon eller nettbrett som kjører iOS- eller
Android-system.
Kontroller at både FOX1000i og smarttelefonen/nettbrettet er
koblet til samme trådløse nettverk.
Page 46

45
1.1 Utseende og beskrivelse av knapper
SETT FORFRA
1. Hjem-knapp
Trykkes på for å gå tilbake til hovedmenyen
2. M – Modus-knappe
Veksle mellom lydkilder som Bluetooth, FM, DAB+ osv.
3. 2,4” TFT full fargeskjerm
4. På/ventemodus-knapp
5. IR fjernsensor
Page 47

46
SETT OVERFRA
6. < Venstre markør / forrige-knapp
7. Spill av- / pause-knapp
8. > Høyre markør / neste-knapp
9. Forhåndslagre 1, 2, 3, 4
10. Forhåndslagre-knapp. Trykk og hold inne for å lagre kanaler.
11. Volum/naviger- + OK-hjul
Juster volum
Markør opp/ned
Bekreft valg
Page 48

47
SETT BAKFRA
12. USB-port til lading (5 V, 1 A)
13. 3,5 mm kontakt til hodetelefon (musikkutgang)
14. AC-kontakt
15. Teleskopantenne
12 1 3 14
15
USB
Page 49
48
1.2 Fjernkontroll
1. Demp lyd-knapp
2. På/ventemodus-knapp
3. Knapp. Trykkes på for å gå
tilbake til hovedmenyen
4. Knapp for å øke volumet
5. Knapp for å senke volumet
6. Knapp. Trykkes på for å gå
tilbake til forrige spor
7. Knapp
8. Spill av- / pause-knapp
Trykkes på for å gå til neste spor
9. Mode-knapp (Modus). Trykkes
på for å gå til hovedmenyen
10.
Knapp for markør opp
11. Knapp for markør venstre
12. Knapp for markør høyre
13.
Knapp for markør ned
14. OK-knapp
15. 0~9 hent favoritter/mine. Tast inn tall og bokstaver
16. EQ-knapp
17. INFO-knapp
18. PRESET-knapp (Forhåndslagre)
19. Søvn-knapp
20. ALARM-knapp
21. TIMER-knapp (Tidsinnstilling)
Husk å fjerne den gjennomsiktige plastfliken fra batterirommet før du
bruker fjernkontrollen.
Bruk tommelen til å trekke ut batteriskuffen når du skal ta ut batteriet fra
fjernkontrollen. Erstattes med 2 x AAA-batterier.
Forsiktig: Eksplo
sjonsfare hvis batteriet erstattes med feil type.
Lever inn brukte batterier til egnet mottak eller til butikker som selger
batterier.
1 2
3 4
6 9
8
10
7
5
1211
14
13
17
16
21
18
19
20
15
Page 50

49
1.3 Skjermsymboler
Tilkobling etableres, og enheten fungerer
Ingen trådløs tilkobling
Trådløs tilkobling er etablert
Søk
DAB/FM-radiofunksjon er valgt
DAB/FM-radiomottak: Mono
DAB/FM-radiomottak: Stereo
Høyttaler av
Alarm på
Internett-radiokanal er lagret som favoritt
FM-radiokanal er lagret
1.4 Koble til det trådløse nettverket
Merk: Vegger eller tak kan redusere styrken på
Wi-Fi-tilkoblingen.
Prøv derfor å plassere FOX1000i der den kan motta gode
Wi-Fi-signaler.
Koble strømledningen til AC-kontakten på FOX1000i
Første gangen du starter FOX1000i, blir du bedt om å angi
Language (Språk) og Network Configurations
(Nettverkskonfigurasjoner).
Page 51
50
Velg språk via fjernkontrollen
eller volumknappen.
Velg YES (JA) hvis du vil at
FOX1000i automatisk skal koble til
det trådløse nettverket hver gang
den slås på.
Velg YES (JA) hvis du vil
konfigurere den trådløse
tilkoblingen nå.
Se neste side for mer informasjon.
Page 52
51
Det finnes to måter for å koble FOX1000i til det trådløse nettverket:
Alternativ 1 – Tilkoble ved å oppgi trådløst passord:
Velg Yes (Ja) for å koble FOX1000i til det trådløse nettverket med det
vanlige trådløse passordet.
Velg No (Nei) hvis du heller vil lytte til en bakkesendt kanal (DAB/FM)
eller bruker høyttaleren med en ekstern avspillingsenhet.
Hvis du velger Yes (Ja), vil FOX1000i søke etter og vise en oversikt
over tilgjengelige trådløse nettverk.
Velg trådløst nettverk, og oppgi
passord:
A. Velg nettverket ditt fra listen, og
bekreft med OK
(bruk fjernkontrollen eller
volumknappen).
B. Du vil bli bedt om å oppgi
passordet hvis WLAN er
passordbeskyttet.
Oppgi passord med
volumknappen:
C. Drei volumknappen for å velge
koden.
D. Trykk på > på FOX1000i for å
skrive inn neste bokstav.
E. Trykk ned volumknappen når du
har skrevet inn hele passordet.
F. Det kan ta noen sekunder å
etablere tilkoblingen til nettverket.
Page 53
52
Oppgi passord med fjernkontrollen
Oppgi passordet med tall- og bokstavknappene på fjernkontrollen. Merk
bruken av store og små bokstaver når du oppgir passordet. Markøren
viser hvor tegnet ble skrevet inn.
Trykk gjentatte ganger på tilhørende tallknapp:
1 0 (slett skrevet tegn)
2 1 (mellomrom) @ ! # $ % & ( ) + - . / : ; < = > ? [ \ ] ^ { | } ~
3 2 A B C a b c
4 3 D E F d e f
5 4 G H I g h i
6 5 J K L j k l
7 6 M N O m n o
8 7 P Q R S p q r s
9 8 T U V t u v
10 9 W X Y Z w x y z
Du kan også skrive inn tallene og bokstavene med markør-knappene:
Gå til forrige tegn du skrev inn, tegn kan overskrives
Gå til neste sted for å skrive inn, forrige tegn er lagret
/ Velg tall/bokstav
OK bekreft alt som er skrevet inn
Det kan ta noen sekunder å
etablere tilkoblingen til
nettverket.
Page 54
53
Alternativ 2 – Tilkoble via WPS:
Velg Yes (WPS) (Ja (WPS)) (kun for WPS-rutere).
A. Trykk på WPS-knappen på ruteren innen 120 sekunder
Se i håndboken for den trådløse ruteren om hvordan du aktiverer WPS.
B. Vent på at FOX1000i skal tilkobles.
Når tilkoblingen er etablert, vises hovedmenyen med
hovedmenyelementene:
Internett-radio: Tilgang til radiokanaler over hele verden
Mediesenter: Tilgang til UPnP-enheter via programvare med
strømmefunksjon.
Informasjonssenter: Tilgang til væ rmeldinger, økonomi og
systeminformasjon.
Bluetooth: Tilgang til alle enheter som er tilkoblet via Bluetooth.
Konfigurasjon: Ulike systeminnstillinger
Lokalradio: Tilgang til radiokanaler innenfor et bestemt område
(f.eks. kun tyske kanaler)
FM
DAB
Trykk på for å gå til
ventemodus. Klokkeslett, dato og
aktive alarminnstillinger vises på
skjermen.
Hvis du har konfigurert en
nettverkstilkobling og bruker
FOX1000i på nytt i nettverket, så
opprettes tilkoblingen automatisk.
Hvis du vil endre nettverket, går
du til Configuration (Konfigurasjon) for å konfigurere tilkoblingen slik
du vil ha den.
Page 55

54
1.5 Appen AirMusic Control
FOX 1000i kan styres med smarttelefonen via Wi-Fi. Vi anbefaler at du
bruker appen AirMusic Control. I tillegg til å styre radioen, kan appen
også spille av smarttelefonens lokale musikkfiler på FOX 1000i.
Appen AirMusic Control fås til både Android og iOS.
Den kan lastes ned med disse QR-kodene, eller du kan bare søke etter
AirMusic Control.
Hovedmeny
Start ønsket funksjon ved å trykke på
tilhørende symbol.
Page 56
55
Internet-radio
I denne modusen kan du velge alle
funksjonene for Internett-radio.
Nederst kan du velge forhåndslagrede
kanaler med knappene 1–5.
Mediesenter
Her kan du koble til medieservere i
nettverket.
Page 57
56
FM-radio
Her kan du bruke FM-radioen.
DAB-radio
Her kan du bruke DAB-radioen.
Page 58

57
Bluetooth
Her kan du spille av i Bluetooth.
Trykk på for å bruke funksjonen
på fjernkontrollen.
Page 59

58
Trykk på for å legge igjen en
beskjed.
Trykk på for å ta opp.
Page 60

59
Trykk på for å spille av lokal
musikk (f.eks. fra smarttelefonen)
Page 61

60
2. Internett-radio
Trykk på M-knappen på radioen eller knappen / MODE (MODUS)
på fjernkontrollen, og bruk til å velge Internet radio
(Internett-radio).
2.1 Lytte til Internett-radio
Kanalene er kategorisert i Global
Top 20 (Topp 20 i verden),
Genre (Sjanger), Country/Location
(Land/sted) og Highlight
(Merk). Velg kategori for å vise
underkategoriene, og velg radiokanal.
For hver kanal trykker du på OK for
å spille av direkte. Du kan trykke
på for å åpne undermenyen.
Du kan Add to Favorite (Legg til favoritt), Auto Scan (Automatisk søk)
eller Play (Spill av).
Når du velger Auto Scan (Automatisk søk), spilles de ulike kanalene på
listen av i 30 sekunder. Dette stanses når alle kanalene er spilt av, eller
når du trykker på OK-knappen.
2.2 Min favoritt
Lag en liste over forhåndslagrede favorittkanaler. Du kan legge til 250
favoritter, inkludert kanal og mappe.
Når kanalen spilles av, trykker og holder du nede Preset
(Forhåndslagre) på skjermen til FOX1000i for å lagre kanalen som
favoritt. Du kan erstatte forrige lagrede kanal med den nye.
Page 62

61
Du kan også lagre kanalen som
favoritt mens du blar gjennom
kanaloversikten. Når kanalen er
merket, kan du trykke på for å
åpne menyen der du kan legge til
kanalen som favoritt. Hvis valgt
kanal er blitt lagret, kan du ikke
lagre den på nytt.
Velg kanalen på listen over forhåndslagrede kanaler, og trykk på OK for
å lytte. Du kan også trykke på for å åpne undermenyen og bruke
Delete (Slett), Shift Up (Flytt opp), Shift Down (Flytt ned) sammen
med listen, og Rename (Gi nytt navn) eller Play (Spill av).
2.3 Historikk
Viser en liste over kanalene du lyttet til sist. Den kan lagre opptil 10
historikk-kanaler. For hver kanal trykker du på OK for å spille av direkte.
Du kan trykke på for å åpne undermenyen. Du kan Add to Favorite
(Legg til favoritt), Auto Scan (Automatisk søk) eller Play (Spill av).
Når du velger Auto Scan (Automatisk søk), spilles de ulike kanalene på
listen av i 30 sekunder. Dette stanses når alle kanalene er spilt av, eller
når du trykker på OK-knappen.
Vedlikehold
Search Radio Station (Søk etter
radiokanal) – Skriv inn en
tilgangsnøkkel via fjernkontrollen
for å søke etter radiokanaler på
listen. Add New Radio Station
(Legg til ny radiokanal) – Kanaler
som legges til, lagres i My
Favorite (Min favoritt). Merk at
maksimalt antall tegn på
kanalnavnet er 250.
Page 63

62
2.4 Min mediaU
Viser og spiller av din egen
mediaU-kanalliste på
mediaU-serveren. Du må først
oppgi kontoen din.
Når den er aktivert, vises My
mediaU (Min mediaU) på
hovedmenyen. Hvis det finnes flere
mediaU-kontoer på FOX1000i,
velger du standard påloggingskonto her.
Følg trinnene nedenfor for å aktivere din egen kanalliste:
1. Gå til http://www.mediayou.net.
2. Bli medlem av my mediaU.
3. Logg på nettsiden.
4. Skriv inn den trådløse MAC-adressen til FOX1000i på nettstedet
mediaU. Du finner denne informasjonen under Information
Center (Informasjonssenter) > System Information
(Systeminformasjon) > Wireless Info (Trådløs informasjon).
5. Etter konfigurering kan du lagre og vise dine egne spillelister med
mediaU-kanaler. Du trenger ikke brukernavn og passord for å
bruke FOX 1000i.
6. Hvis det er lagret flere kontoer i FOX1000i, kan du velge den du
bruker nå, på menyen Configuration (Konfigurasjon).
Hver gang du har oppdatert spillelisten fra nettsiden, kan du gå til
Configuration (Konfigurasjon) > Manage my MediaU (Behandle my
MediaU) for å synkronisere endringen med FOX1000i.
Page 64

63
3. DAB
Trykk på M-knappen på radioen eller knappen / MODE (MODUS)
på fjernkontrollen, og bruk til å velge DAB.
Søke etter DAB-kanal
Når radioen slås på DAB-modus for første gang, vil den automatisk
søke etter alle kanaler som kan mottas på det aktuelle stedet.
Søket etter kanaler starter, og det vises et fremdriftsfelt for søket. Straks
søket er fullført, vil radioen spille av den første kanalen på
kanaloversikten.
Kanalvalg
I DAB-modus kan du bruke knappene til å navigere mellom alle
DAB+-kanalene som kan mottas, og deretter trykker du på OK for å
bekrefte kanalendring.
Radioen har et favorittminne for 20 radiokanaler.
Hvis du vil lagre en kanal, bytter du til kanalen du vil lagre, som
beskrevet ovenfor. Deretter trykker du på talltasten 0–9 på
fjernkontrollen og holder den inne i ca. 2 sekunder, eller du kan trykke
på kanallagringstasten 1–4 for å lagre kanalen.
Det vises en melding på skjermen om at kanalen er lagret under valgt
favorittspor.
Bruke DAB-radioen
Hvis du har lagret kanaler i favorittminnet, kan du hente frem disse ved
å trykke på ønsket nummertast.
Du kan også trykke på knappen Preset (Forhåndslagre) i DAB-modus
for å hente frem listen med favoritter.
Bruk knappene </> på radioen eller på fjernkontrollen for å
navigere gjennom listen med favoritter, og trykk deretter på
OK/volumknappen for å bekrefte valget.
Page 65
64
4. FM
FM-radiomodus mottar analog
radio fra FM-båndet.
Trykk på for å søke etter
FM-kanaler. Den stanser når den
får inn en kanal.
Du kan trykke på på
fjernkontrollen for å fininnstille
kanalen manuelt. Hvert trinn
flytter 0,05 MHz.
Trykk og hold nede PRESET (FORHÅNDSLAGRE) på fjernkontrollen
og enheten for å lagre kanalen.
Du kan lagre opptil 20 kanaler. Trykk på PRESET
(FORHÅNDSLAGRE), og trykk deretter på på fjernkontrollen for
å velge lagret kanal.
Du kan også la systemet søke etter ALLE kanalene for deg ved å trykke
på OK. Da lagres kanalene automatisk på listen over forhåndslagrede
kanaler.
5. Bluetooth
Trykk på M-knappen på FOX1000i eller knappen /MODE
(MODUS) på fjernkontrollen til skjermen viser Bluetooth, eller du
kan velge Bluetooth på hovedmenyen.
Velg Bluetooth-enheten fra enheten din (f.eks. smarttelefon):
«FOX1000i» fra listen over enheter som ble funnet.
Tips: Du kan bare koble til én avspillingsenhet til høyttaleren.
Hvis høyttaleren allerede er koblet til en annen
avspillingsenhet, så vises ikke høyttaleren på
Bluetooth-listen.
Page 66

65
Hvis enheten spør etter tilgangsnøkkel (avhengig av enhetens
produsent, modell og programvareversjon), kan du taste inn tallene
«0000» (fire nuller) og trykke på OK.
Ordet «Connected» (Tilkoblet) høres hvis paringen er utført.
Etter tilkobling kan du lytte til musikk trådløst
via Bluetooth og velge musikk fra Bluetooth-enheten.
Trykk raskt på knappen på FOX1000i og fjernkontrollen for å
pause eller fortsette avspillingen.
Trykk på knappen >/< på FOX1000i eller / for å hoppe til
neste/forrige spor.
6. Mediesenter
UPnP
Hvis du har konfigurert delte medier,
skal du kunne se de delte mediene
fra UPnP. Hvis det er flere
datamaskiner som deler medier, så
vises de på listen. Velg de delte
mediene du vil spille av.
Trykk på på fjernkontrollen for
å spille av forrige/neste musikkspor
Trykk på for å stanse eller spille av.
Trykk på INFO på fjernkontrollen for å vise skjerminformasjonen om
sporet som spilles av.
Tips: Radioen kan bare lese av spor med filnavn på under 40 tegn.
Tegnene bør dessuten væ re på et europeisk språk. Hvis du oppdager
feil når sporet leses av i UPnP-modus, kan du prøve å gi nytt navn til
filen.
Men hvis sporet fortsatt ikke kan spilles av, kan du prøve å konvertere
filen til et annet format.
Page 67

66
Min spilleliste
Du kan lage en spilleliste med favorittmusikk fra UPnP. Når du spiller av
musikken, trykker du på og holder inne OK for å lagre den i My Playlist
(Min spilleliste).
Tømme spillelisten
Du kan fjerne all musikk som er lagret under My Playlist (Min spilleliste).
7. Strømme musikk
FOX1000i eller iRadio er standard enhetsnavn for DLNA, og du kan
endre navn som du ønsker.
Informasjonen under viser hvordan du konfigurerer mediestrømming fra
PC eller annen medieserver. Det kan hende du må lese veiledningen
for programvaren eller appene du bruker for å kunne strømme musikk.
Pass på at musikkfilene har formatet MP3, WMA, WAV, FLAC eller AAC
for å strømme musikk til FOX1000i.
UPnP
Hvis du vil strømme musikk fra PCen, må du utføre
følgende trinn på PCen:
Koble PCen til nettverket.
Kontroller at FOX1000i er slått på og koblet til samme nettverk.
Åpne UPnP-plattformen Windows Media Player (11 eller nyere).
Du kan også bruke andre plattformer eller servere, slik som
Windows Media Connection.
Tillat deling av medier med FOX1000i.
Page 68

67
Legg til lydfilene og mappene du vil dele med FOX1000i, i
mediebiblioteket.
Du kan også strømme musikk fra andre musikkservere, slik som
smarttelefon (Android-plattform):
- Koble mobilen til nettverket.
- Søk etter og installer apper for mediedeling fra Google Play.
Page 69

68
- Legg til lydfilene du vil dele fra mobilen.
Når du har konfigurert den delte serveren, velger du musikk og
styrer avspillingen på FOX1000i.
DLNA
I tillegg til UPnP støtter FOX1000i også DLNA-funksjonen. Du kan dele
musikkfiler fra PCen eller Android-mobilen, og bruke din
PC/Android-mobil/iPhone/iPad til å styre avspillingen av musikk på
FOX1000i. (Du må ikke styre avspillingen på FOX1000i.)
Systemkravet for PC for DLNA er Windows 7 og Windows Media Player
12.
Konfigurer slik:
Først deler du mediene på PCen med FOX1000i.
Control Panel (Kontrollpanel) > Network and Internet (Nettverk og
Internett) > Network and Sharing Center (Nettverks- og
delingssenter) > Media streaming options (Alternativer for
mediedeling).
Åpne Windows Media Player for å aktivere Allow remote control of
my Player (Tillat fjernstyring av min spiller).
Høyreklikk musikk i biblioteket, og velg Play to FOX1000i
Page 70
69
Det vises et vindu der du kan styre musikkavspilling på FOX1000i.
Du kan søke etter og installere gratis apper eller andre apper for DLNA
fra Google Play eller Apple Store. Hvis du bruker Android-mobil,
nettbrett eller iPhone/iPad, så anbefaler vi at du bruker AirMusic Control
eller Bubble UPnP.
Enkelte apper støtter ikke strømming av musikk fra iPhone/iPod, men
iPhone/iPod kan fremdeles brukes til å styre strømming av musikk fra
andre servere.
Følg disse trinnene for å spille av delt musikk på appen:
Velg FOX1000i som spiller. Noen apper tillater ikke at musikk spilles av
til flere spillere samtidig.
Velg musikkserver og musikk. Noen apper kan lage en spilleliste hvis
du velger forskjellig musikk.
Page 71
70
Du kan velge FOX1000i som server, og deretter kan du vise listen med
Internett-radioer og velge din Internett-radio på appen.
Velg spiller Velg server Vis kanaloversikt
Når du bruker DLNA-funksjonen til å strømme musikk på FOX1000i,
kan du bare styre volumet og ventemodus via enheten. Det er ikke
mulig å styre de andre funksjonene. Stans DLNA på PCen, mobilen
eller nettbrettet for å fortsetter å bruke FOX1000i sin egen fjernkontroll.
8. Alarm og Tidsinnstilling
Alarm
Det finnes tre uavhengige alarmer
– 2 alarmer absolutt tidsinnstilling
(Alarm 1 og Alarm 2), og 1 alarm
for relativ tidsinnstilling (NAP Alarm
– Slumrealarm). Trykk på Alarm på
fjernkontrollen for å gå rett til
menyen.
De to første alarmene er som en vanlig alarm. Slå på alarmen, still inn
klokkeslett, og angi at den skal starte hver dag, én gang eller på en
spesiell ukedag. Velg Sound (Lyd) for å stille lyden på Beep (Pipetone),
Melody (Melodi) eller Internet Radio (Internett-radio).
Page 72

71
Merk at alarmkilden kommer fra sist brukte eller en forhåndslagret
Internett-radio hvis Alarm Sound (Alarmlyd) er stilt på Internet Radio
(Internett-radio). Du kan bare angi én kanal for begge alarmene. Når
alarmtiden er inne, kobles enheten til Internett hvis nettverket er
tilgjengelig. Derfor kan det ta litt tid fra alarmen går og til radioen spiller.
Hvis den fortsatt ikke kan koble til nettverket etter ett minutt, endres
alarmen automatisk til melodi.
Når NAP Alarm (Slumrealarm) er angitt, lyder alarmen én gang hvert
5./10./20./30./60./90./120. minutt, avhengig av hvilken innstilling du har
valgt.
Du kan velge Alarm Volume (Alarmvolum) for å stille inn volumet på
alarmene.
Når alarmen(e) er angitt, vises det et klokkeikon øverst på skjermen.
Klokkeikonet med alarmtiden vises også tydelig på skjermen i
ventemodus.
Når alarmen går, kan du trykke på en hvilken som helst knapp for å gå
til slumremodus. Da starter alarmen på nytt om 5 minutter. Trykk på
knappen STANDBY (VENTEMODUS) for å stanse alarmen.
Tidsinnstilling
Trykk på Timer (Tidsinnstilling) på
fjernkontrollen for å angi en
tidsinnstilling. Bruk piltastene på
fjernkontrollen til å angi en
tidsinnstilling, og trykk på OK for å
bekrefte.
Page 73
72
9. Konfigurasjon
Visning av klokkeslett
Du kan velge Analog eller
Digital tidsvisning i ventemodus.
Behandle min mediaU
Når den er aktivert, vises My
mediaU (Min mediaU) på
hovedmenyen. Hvis det finnes
flere mediaU-kontoer på
FOX1000i, velger du standard
påloggingskonto her.
Konfigurere trådløst nettverk
Aktiver/deaktiver
Wi-Fi-nettverket. Når du
aktiverer Wi-Fi-nettverket,
kobles systemet automatisk til
nettverket.
Page 74

73
Velg påkrevd AP.
Skriv inn koden for WEP eller
WPA/WPA 2 for å koble til Wi-Fi.
Hvis du ved et uhell får trykket
på når du skal fjerne et tegn
som er feil, trykker du på for
å korrigere det.
Trådløst nettverk (WPS PBC)
Hvis du bruker en ruter med
WPS/QSS-knapp, kan du enkelt
konfigurere nettverkstilkoblingen
via WPS-funksjonen. Åpne den,
og trykk på WPS/QSS-knappen
på ruteren innen 120 sekunder.
Tilkoblingen mellom ruteren og
FOX1000i konfigureres dermed
automatisk.
Page 75

74
Manuell konfigurasjon
Du kan velge DHPC (som tilordner IP-adressen automatisk), eller du
kan oppgi IP-adressen manuelt for å koble til det trådløse nettverket.
Du må oppgi følgende når du velger manuell innstilling for kablet
tilkobling:
1. SSID (navnet på tilgangspunktet)
2. IP-adressen
3. Nettverksmasken
4. Standard gateway
5. Foretrukket DNS-server
6. Alternativ DNS-server
Du kan velge Manage (Behandle) for et bestemt nettverk hvis du har
konfigurert flere nettverkstilkoblinger i et område.
Kontrollere nettverket når den slås på
Enable/disable WiFi network (Aktiver/deaktiver Wi-Fi-nettverk):
Når du aktiverer Wi-Fi-nettverket, vil systemet automatisk søke etter
tilgjengelig AP.
Velg påkrevd AP.
Skriv inn koden for WEP eller WPA/WPA 2 for å koble til Wi-Fi.
Hvis det trådløse nettverket ikke eksisterer eller tilkoblingen mislyktes,
vises det et kryss over ikonet øverst til venstre.
Dato og klokkeslett
Still inn dato og klokkeslett.
Still klokkeslettet slik at det
vises i 12-timers eller 24-timers
format (standard).
Still datoformatet i posisjonene
for YY (år), MM (måned) og DD
(dag) - YY/MM/DD, DD/MM/YY
(standard) eller MM/DD/YY.
Aktiver/deaktiver (standard)
Daylight Saving Time (DST) (Sommertid).
Page 76

75
Når et trådløst nettverk er tilkoblet, brukes GMT (+00:00) som
tidsreferanse for tidsinnstillinger. Legg til eller trekk fra timer avhengig
av hvilken tidssone du befinner deg i når du stiller tiden.
Språk
Velg OSD-språk: Engelsk, tysk,
spansk, fransk, portugisisk,
nederlandsk, italiensk, russisk,
svensk, norsk, dansk og så videre.
Lysdemper
Still inn lysstyrken til skjermens
bakgrunnslys. Hvis du velger Power
Saving (Strømsparing), kan du velge
hvilket nivå skjermen skal dempes til
når radioen går til ventemodus eller
det ikke er trykket på én av radioens
knapper på 15 sekunder.
Alternativet Turn On (Slå på) gjør at
skjermen alltid er belyst. Hvis du
velger dette, kan du angi hvor lys skjermen skal væ re.
Skjerm
Du kan stille inn skjermen for Color
(Farge) eller Monochrome
(Svart/hvitt).
Page 77

76
Strømstyring
Velg tidsinnstilling for strømsparing (5/15/30 minutter) for å angi hvor
lang tid det skal gå før radioen automatisk går til ventemodus når det
ikke er nettverkstilkobling. Velg Turn Off (Slå av) hvis du ikke vil bruke
funksjonen for strømsparing.
Tidsinnstilling for søvn
Slå av eller still tidsinnstillingen for
søvn på 15/30/60/90/120/150/180
minutter. Når tiden er angitt, vises
det et ikon av en seng med
gjenvæ rende minutter øverst til
høyre. FOX1000i slås av når tiden er
ute. Trykk på på fjernkontrollen
for å åpne snarveien til denne
funksjonen.
Buffer
Still inn buffertiden for avspilling av
musikk til 2/4/8 sekunder.
Væ rmeldning
FOX1000i kan vise aktuell
informasjon om væ ret når den er i
ventemodus. Slå på Standby
Display (Visning i ventemodus), og
angi Temperature Unit
(Temperaturenhet) Unit ( ℃ or
℉ ) for å vise væ rmelding i
ventemodus.
Page 78

77
Når funksjonen er aktivert, vil skjermen veksle mellom klokkeslett og
væ r så lenge den er i ventemodus.
FM-oppsett
Velg Mono/Stereo som lydutgang.
Oppsett av lokalradio
Du kan velge Manual Setup
(Country/City) (Manuelt oppsett
(land/by)) for å angi hvor du er,
eller du kan velge Auto Detect
(Registrer automatisk) hvis du vil at
systemet skal finne ut hvor du er.
Systemet registrerer stedet ut fra
IP-adressen til tilkoblet nettverk.
Trykk på Local Radio (Lokalradio)
for å gå rett til oversikten over lokale radiokanaler.
Oppsett av avspilling
Velg avspillingsmodusen for
mediesenteret: Off (Av) (verken
gjentar eller spiller av i tilfeldig
rekkefølge), Repeat all (Gjenta
alle), Repeat one (Gjenta én)
eller Shuffle (Tilfeldig
rekkefølge).
Page 79

78
DLNA-oppsett
Standard enhetsnavn for DLNA er
AirMusic. Du kan gi den et nytt
navn for DLNA-oppsettet på PCen
eller mobilen.
Equalizer (EQ)
Standard equalizer er Normal,
men du kan endre den til Flat
(Dempet), Jazz, Rock,
Soundtracks (Lydspor), Classical
(Klassisk), Pop og News
(Nyheter).
Trykk på EQ på fjernkontrollen
for å veksle raskt mellom
EQ-modusene.
Fortsett når den slås på
Systemet fortsetter som standard med å spille av Internett-radio hvis du
lyttet til Internett-radio eller mediesenteret før du slo av enheten.
Programvareoppdatering
Ny fastvare gjøres tilgjengelig på nettsiden vår,
www.jensenscandinavia.com/downloads
Page 80
79
Tilbakestille til standard
Gjenopprett
standardinnstillingene.
Når FOX1000i er stilt tilbake, går
systemet til innstillingsmenyen
Language (Språk). Og den går
automatisk til innstillingsmenyen
Network (Nettverk) når
OSD-språket er valgt.
Lokalradio
Det finnes en snarvei til lokalradio under Internett-radio slik at du enkelt
kan gå til kanaloversikten for der du er.
Enheten bruker IP-adressen til å finne gjeldende plassering, og den kan
deretter automatisk sette sammen en liste over lokale radiokanaler. Du
kan imidlertid også velge et annet land.
Page 81

80
10. Feilsøking
Feil
Løsning
Ingen skjermvisning,
radioen reagerer ikke
på betjening
Tilkoble strømforsyningen via medfølgende
strømadapter.
Kan ikke betjenes via
fjernkontrollen
Batteriene er utladet eller feil satt inn.
Kontroller at batteriene er satt riktig vei.
Dårlig DAB+-mottak
Finner ingen kanaler, så søk etter kanaler (se
kapittel 3 ). Antennen er ikke trukket helt ut.
Flytt radioen til et annet sted (f.eks.
næ rmere vinduet), og søk etter kanaler på nytt.
Dårlig FM-mottak
Antennen er ikke trukket helt ut, så trekk ut
FM-antennen så langt det går.
Flytt radioen til et annet sted (f.eks.
næ rmere vinduet), og søk etter kanaler på nytt.
Dårlig lydkvalitet
ved avspilling av
musikk
Fil med lav bithastighet. Kontroller lydfilen.
Tips: MP3-files bør ha en bithastighet på
192 Kbit/s eller høyere
Enheten slås ikke på
1. Kontroller at strømadapteren er riktig
tilkoblet.
2. Enheten kan fungere feilaktig når den
brukes i områder med kraftige
radioforstyrrelser. Enheten vil fungere riktig
igjen når det ikke er forstyrrelser.
Ingen lyd
1. Slå på lyden for den kan væ re dempet.
2. Ø k volumet.
Page 82

81
Kan ikke etablere en
nettverksforbindelse
1. Kontroller den trådløse funksjonen.
2. Prøv å angi en IP-adresse på enheten.
3. Aktiver DHCP-funksjonen på ruteren, og
foreta tilkoblingen på nytt på enheten.
4. Det er aktivert en brannmur på nettverket –
still dette programmet slik at tilgang tillates.
5. Start enheten på nytt for å prøve.
Kan ikke etablere en
WLAN-tilkobling
1. Kontroller at det trådløse nettverket er
tilgjengelig på tilgangspunktet.
2. Plasser enheten næ rmere ruteren.
3. Kontroller at WEP/WPA-passordet er
korrekt.
Finner ingen kanaler
1. Kontroller både nettverket og
tilgangspunktet og brannmuren.
2. Kanalen er kanskje ikke tilgjengelig for
øyeblikket, så prøv igjen senere eller velg en
annen kanal.
3. Koblingen til kanalen er endret eller kanalen
sender ikke lenger – be leverandøren om mer
informasjon.
4. Koblingen til en manuelt lagt til kanal er ikke
riktig, så kontroller at den er riktig, og oppgi
den på nytt.
Alarmen virker ikke
1. Slå på alarmen.
2. Se løsningene under «Ingen lyd» for
voluminnstillinger.
3. Alarmkilden ble innstilt som kanal, men det
er ingen nettverkstilkobling. Endre alarmkilden
eller konfigurer tilkoblingen på nytt.
Page 83

82
Kan ikke strømme
DLNA
1. Kontroller tilkoblingen til nettverket.
FOX1000i og enheten må væ re i samme
nettverk, så du bør teste at nettverket fungerer.
2. Kontroller at innstillingene på enheten er
korrekte.
Elektromagnetiske
forstyrrelser
1. Produktets normale funksjon kan bli påvirket
av kraftig elektromagnetisk
forstyrrelse. I så fall tilbakestiller du produktet
for å gjenoppta normal drift ved å følge
instruksjonshåndboken. Bruk produktet et
annet sted hvis funksjonen ikke kan
gjenopptas.
Systemet stopper
plutselig helt opp
1. Radioen er overbelastet, så start enheten på
nytt.
Page 84

83
Sikkerhetsregler
FOX1000i må ikke falle i gulvet eller utsettes for væ ske, fuktighet
eller fuktig luft. Dette kan skade enheten.
Hvis FOX1000i flyttes fra et kaldt miljø til et varmere sted, må du la
enheten tilpasse seg den nye temperaturen før du bruker den.
Ellers kan det dannes kondens og funksjonsfeil i enheten.
FOX1000i må ikke brukes i støvete omgivelser, for støv kan skade
innvendige elektroniske komponenter og føre til funksjonsfeil i
enheten.
Beskytt FOX1000i mot sterke vibrasjoner, og la den stå på et stabilt
underlag.
Du må ikke prøve å demontere FOX1000i.
Bruk kun strømledningen som fulgte med FOX1000i.
Stikkontakten bør væ re installert i næ rheten av FOX1000i, og den
skal væ re lett å komme til.
Du må aldri berøre strømledningen med våte hender.
Kontroller at den elektriske spenningen som er angitt på FOX1000i
og på støpselet, samsvarer med spenningen for stikkontakten. Feil
spenning vil ødelegge enheten.
Hvis FOX1000i ikke skal brukes på en stund, bør du koble den fra
strømforsyningen ved å trekke ut støpselet. Dette er for å unngå
brannfare.
Bruk aldri grove eller sterke løsemidler til å rengjøre FOX1000i, for
disse kan skade enhetens overflate. Bruk en tørr og myk klut, eller
tørk over med en lett fuktet klut hvis FOX1000i er svæ rt skitten.
Kontroller at enheten tørkes godt etter rengjøring.
Hvis du må sende FOX1000i, skal den oppbevares i
originalemballasjen. Ta vare på emballasjen til dette formålet.
Page 85
84
11. Spesifikasjoner
SPESIFIKASJONER
Modell nr. FOX1000i
Beskrivelse
Internett-radio med DAB, FM og
Bluetooth
Skjerm 2.4” TFT fargeskjerm
Støttede nettverk
OPEN
WEP
WPA PSK AES
WPA PSK AES / TKIP
WPA PSK TKIP
WPA 2 PSK AES
WPA 2 PSK AES / TKIP
WPA 2 PSK TKIP
Strømming UPnP, DLNA
Støttede avspillingsformater MP3, WMA, AAC, FLAC og WAV
DAB-frekvens
Bånd III 174.928-239.2 MHz
FM-frekvens
FM 87,5-108 Mhz
Utgangseffekt (RMS) 7 W x 2
Strømadapter (følger med)
Inngang: AC 100–240 V ~ 50/60 Hz
USB-portutgang: DC 5 V 1 A
Strømforbruk 29 W
Strømforbruk i ventemodus < 3 W
Støtte for Bluetooth V2.1+ EDR
Bruksområde for Bluetooth Opptil 10 meter
Overføringsfrekvens 2,4 GHz
Protokoller A2DP 1.2
Optimal brukstemperatur 0℃~ +35℃
Optimal bruksfuktighet 20 %~80 %
Page 86
85
 Loading...