


S4700
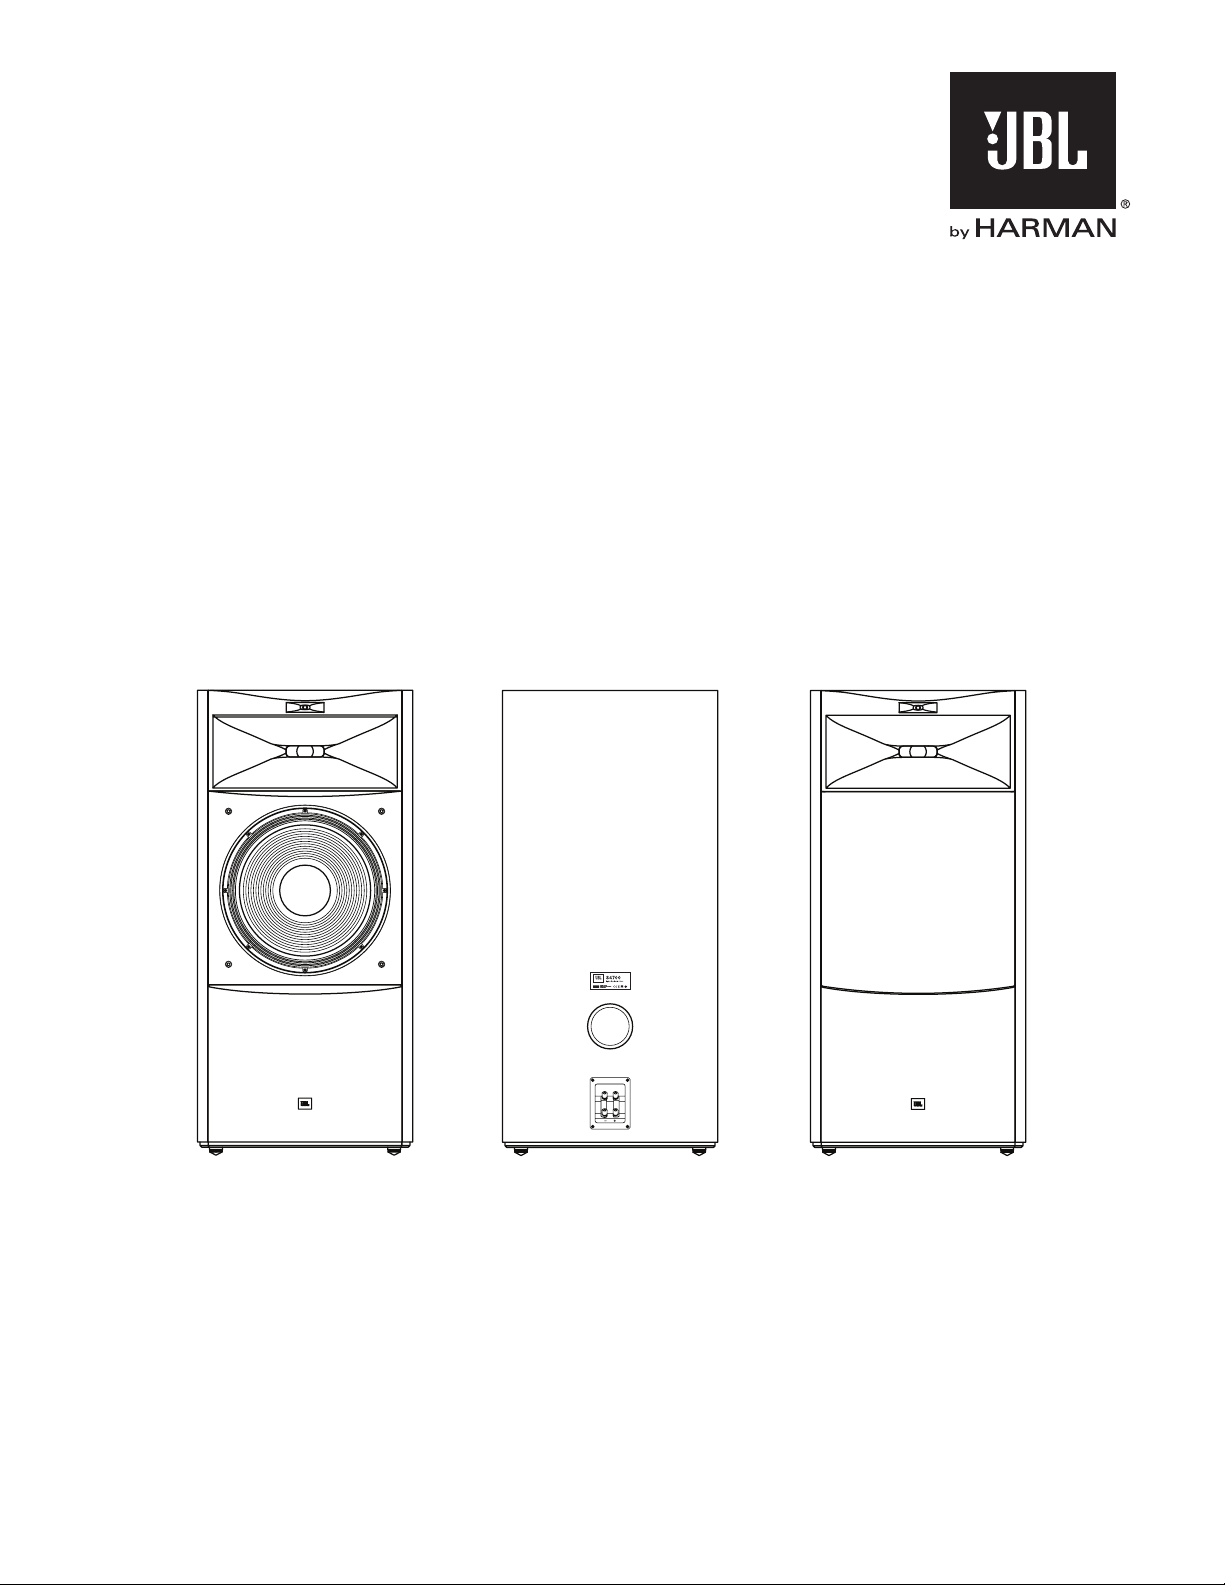
JBL® S4700
15-inch (380mm) 3-way floorstanding loudspeaker
OWNER’S MANUAL
INTRODUCTION
THANK YOU for purchasing the JBL® S4700 3-way floorstanding loudspeaker. For more than 60 years, JBL engineers
have been providing audio equipment for homes, concert halls, recording studios and movie theaters around the
world, and JBL products have become the hands-down choice of leading recording artists and sound engineers.
The S4700 is a new member of the family of JBL floorstanding loudspeakers designed for home use. To get the best
performance from your new loudspeakers, please read these instructions thoroughly.
PACKAGE CONTENTS
EACH JBL S4700 BOX CONTAINS:
• One (1) JBL S4700 floorstanding speaker
• Four (4) spike inserts to be installed on the speaker’s feet
• Four (4) metal coasters for use on tile, wood and linoleum floors
If you suspect that there has been shipping damage, report it immediately to your dealer. We recommend that you
keep the box and packing materials for future use.
UNPACKING THE SPEAKER
CAUTION: The S4700 weighs 54.5kg (120 lb). To avoid personal injury or damage to floors or the speaker,
we strongly recommend that at least two people unpack and move the speaker.
The speaker has stainless-steel feet that accept the supplied spiked inserts installed on the bottom of its cabinet. To
avoid damage to your floor, we strongly advise that you unpack the speaker on a well-protected surface, such as a
thick carpet or a thick piece of cardboard.
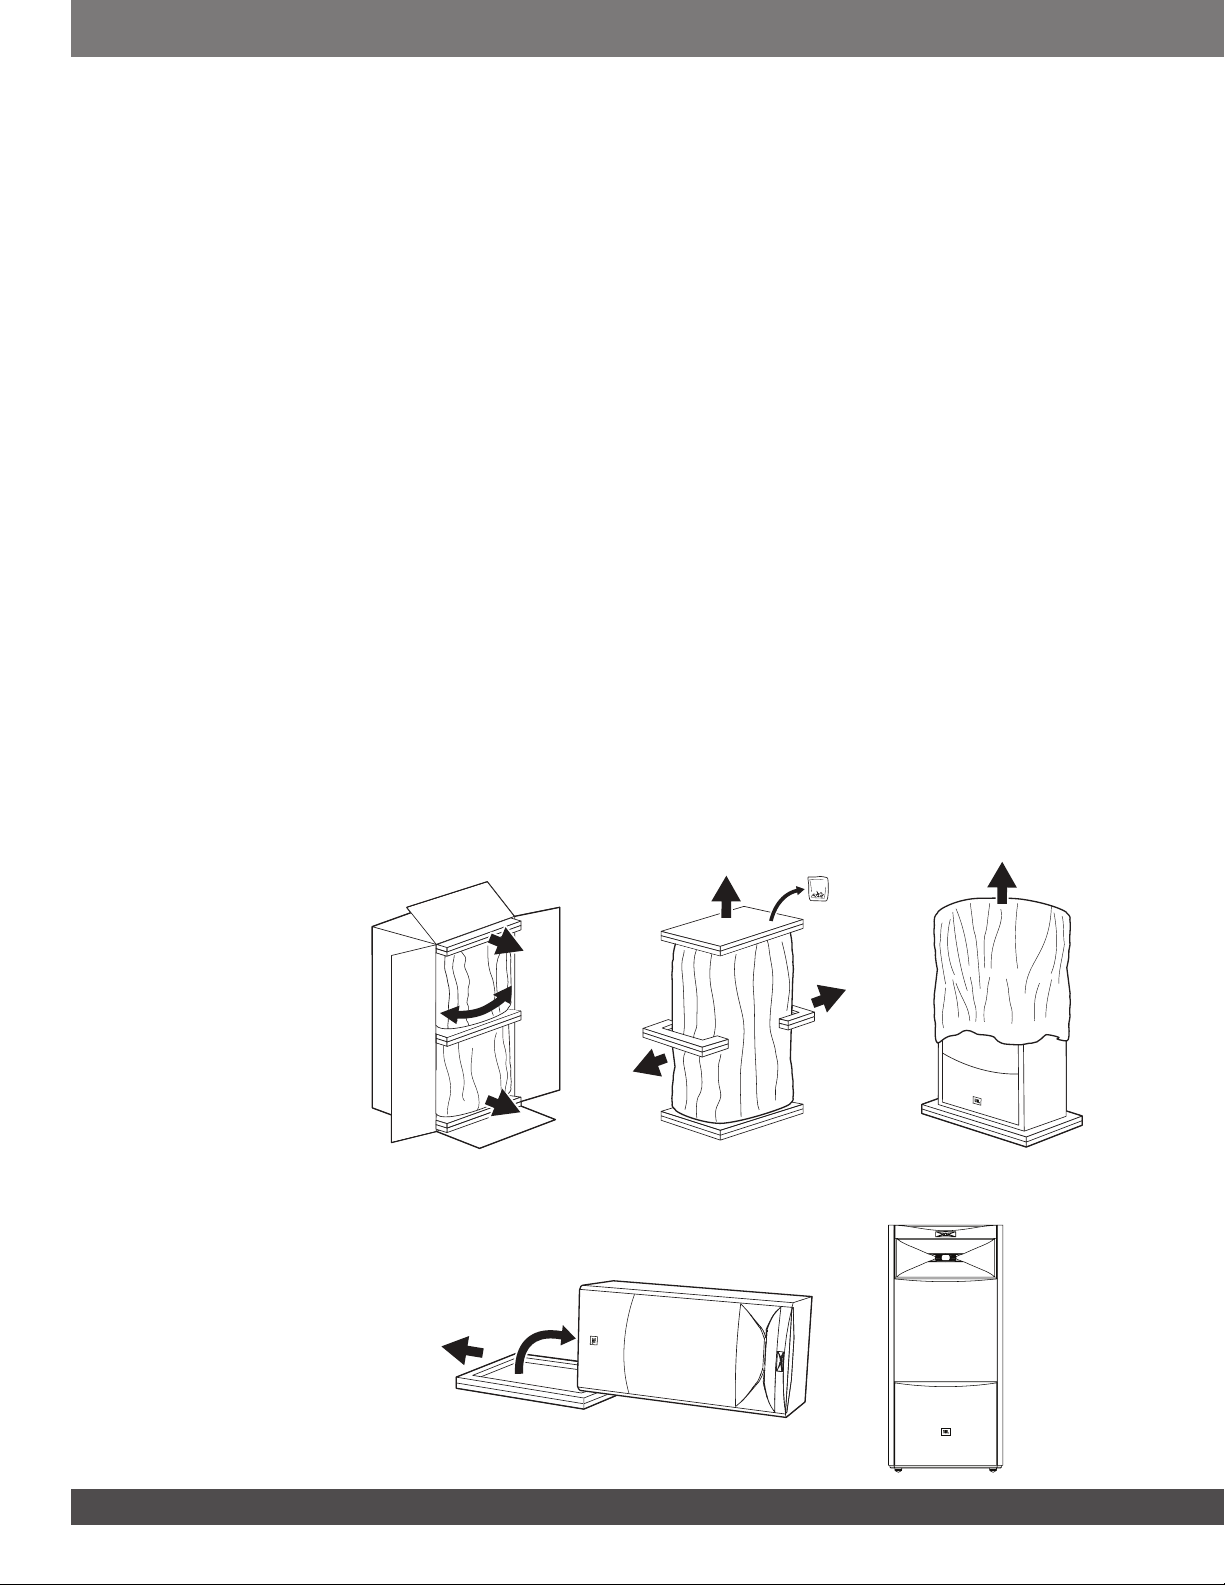
TO UNPACK THE SPEAKER:
1. Open the box flaps and, while standing on the box’s lower flap, gently rock the speaker and its packing back and
forth while pulling it out of the carton. In this way you can “walk” the speaker out of the carton. It helps to have a
second person hold the carton steady from the back side.
2. Once the speaker is out of the carton, remove the upper and middle pads. The speaker’s accessories are packed
on the top end of the upper pad, so be careful not to discard them.
3. Remove the cloth bag covering the speaker.
4. With another person’s help, carefully tilt the speaker on its side onto a thickly carpeted or well-padded surface and
remove the bottom pad.
5. Tilt the speaker back up on its feet.
1.
4. 5.
2. 3.
22

INSTALLING THE SPIKED FOOT INSERTS
Before using the speaker, install the supplied spiked inserts into the speaker’s metal feet.
1. Turn the speaker upside down onto a thickly carpeted or well-padded surface.
2. Screw the spiked inserts into the feet.
IMPORTANT: To prevent damage (scratches, indentations, etc.) to wood or linoleum floors due to the weight of these
speakers, always use the included coasters. Be especially sure to use the coasters on tile surfaces to prevent cracking
the tile.
PLACEMENT
Because the stainless-steel spikes solidly couple the speaker to the floor, a flat, hard surface such as wood or linoleum
is preferable. However, the coupling system, along with the speakers’ weight, should result in excellent performance
on any surface, even carpeting.
IMPORTANT: To prevent damage (scratches, indentations, etc.) to wood or linoleum floors, always use the included
coasters. Be especially sure to use the coasters on tile surfaces to prevent cracking the tile.
Englis h
To decide on a final location for your speakers, survey your room and think about placement, using the illustration
below as a guide.
>50cm
(20 in)
For the best results, place the speakers about one and one-half to two and one-half meters (about five to eight feet)
apart. If you place the speakers farther apart, angle them toward the listening position.
The speakers will produce the most accurate stereo soundstage when the angle between the listener and the speakers
is between 40 and 60 degrees.
Position each speaker so that its tweeter is approximately at ear level.
Generally, bass output will increase as the speaker is moved closer to a wall or corner. For the best performance, we
recommend that you place the speakers at least 50cm (about 20 inches) away from the side walls.
1.5m – 2.5m
(5' – 8')
40° – 60°
Listening Position
>50cm
(20 in)
NOTES ABOUT SPEAKER PLACEMENT:
• To prevent damage (scratches, indentations, etc.) to wood or linoleum floors due to the weight of these speakers,
always use the included coasters. Be especially sure to use the coasters on tile surfaces to prevent cracking the tile.
• Avoid placing the speakers near power amplifiers, heat registers or other objects that generate large amounts of heat.
• Do not place the speakers in very humid or dusty places.
• Do not place the speakers in direct sunlight or in places where they will be exposed to other strong light.
• The S4700 is not video-shielded and may distort or discolor the picture if placed close to some types of TVs. If
the speakers do distort or discolor your TV’s picture, move the speakers away from the TV until the distortion or
discoloration disappears.
www.jbl.com
www.jbl.com
33
CONNECTIONS
CAUTION: Make sure that all of the system’s electrical components are turned OFF (and preferably
unplugged from their AC outlets) before making any connections.
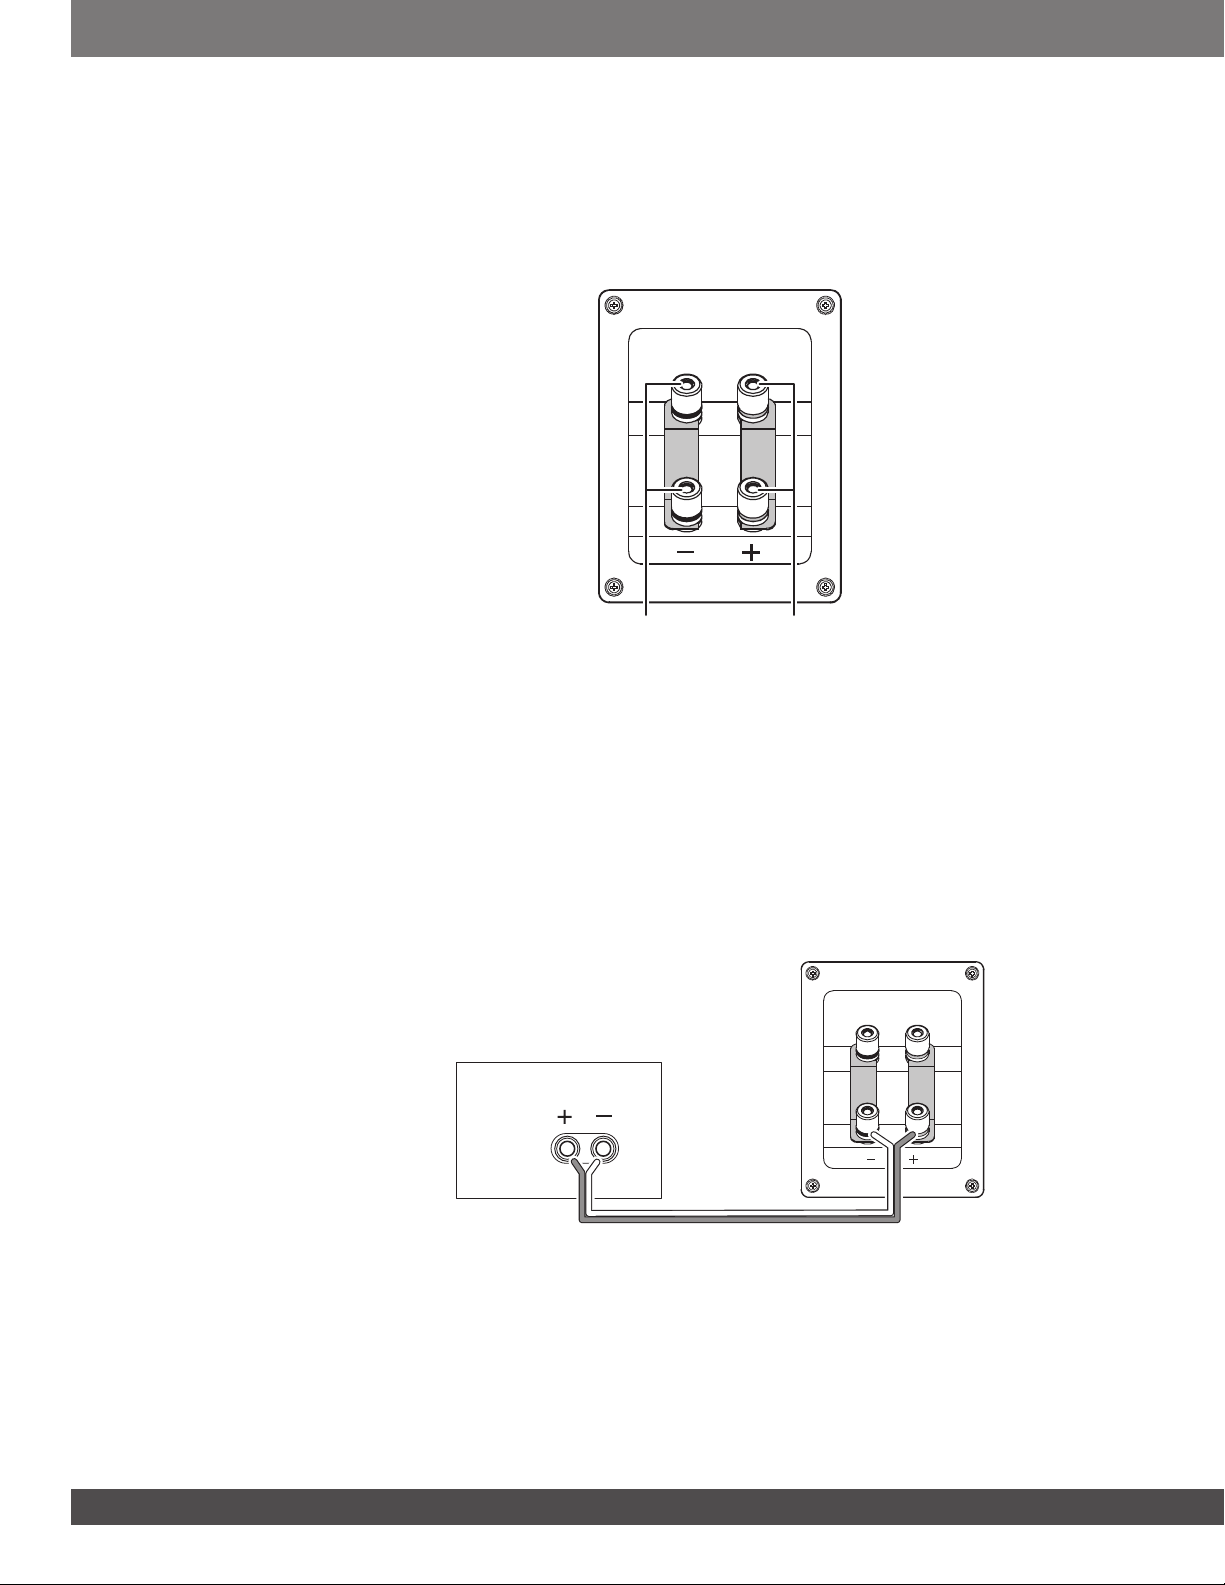
Speakers and amplifiers have corresponding positive and negative (“+” and “–”) connectors. The S4700 has two
sets of connectors; jumper bars connect the connectors to each other. The connectors are marked “+” and “–.”
Additionally, the “+” connectors have red rings, while the “–” connectors have black rings. See the illustration below.
Negative (–)
Connectors
We have designed the S4700 so that a positive voltage at the “+” (red) connector will cause the speaker transducers to
move outward (toward the room).
We recommend using a high-quality speaker wire with polarity coding. The side of the wire with a ridge or other coding
is usually considered positive polarity (“+”).
To ensure proper polarity, connect the left- and right-channel “+” connectors on the back of the amplifier or receiver
to their respective “+” (red) connectors on the speakers. Connect the “–” (black) connectors in a similar way. See the
owner’s manual of your receiver or amplifier to confirm its connection procedures.
BASIC SINGLE-WIRE CONNECTION:
Connect the amplifier to each speaker as shown in the illustration below. You can use either set of connectors on
the speaker. NOTE: Do not remove the jumper bars from between the two sets of connectors when connecting the
speaker wires.
Positive (+)
Connectors
Receiver or Amplifier
(one channel shown)
IMPORTANT: Do not reverse polarities (i.e., “+” to “–” or “–” to “+”) when making connections. Doing so will cause
poor stereo imaging and diminished bass performance.
The S4700’s gold-plated speaker connectors can accept a variety of wire-connector types: bare wire, spade
connectors, pin connectors and banana connectors.
4
4
Speaker
Connector Panel
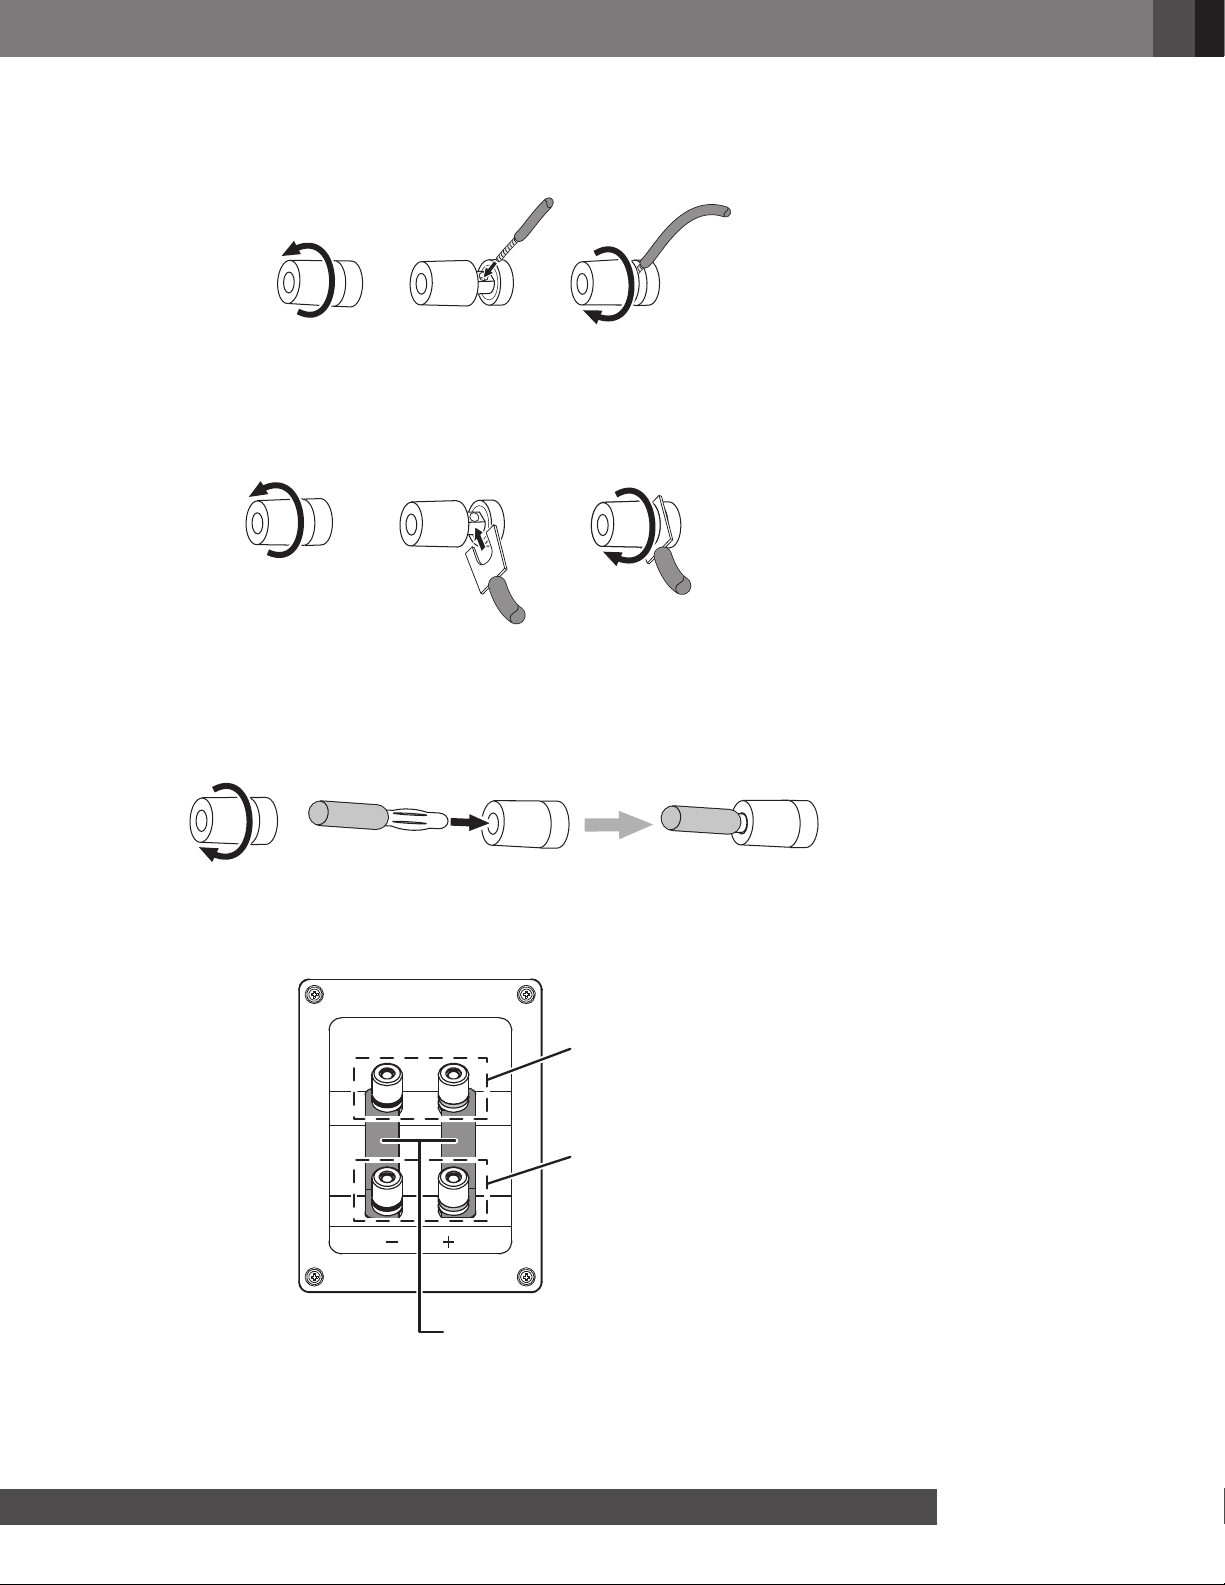
Using Bare Wire or Pin Connectors:
Englis h
A. Unscrew Cap B. Insert Bare Wire or
Pin Connector through
C. Tighten Cap
to Secure Wire
Hole in Post
IMPORTANT: Make sure the “+” and “–” wires or pins do not touch each other or the other connector. Touching wires
can cause a short circuit that can damage your receiver or amplifier.
Using Spade Connectors:
A. Unscrew Cap C. Tighten Cap to Secure
B. Insert Spade Connector
Blades around Post
Spade Connector
IMPORTANT: Make sure the “+” and “–” spade connector blades do not touch each other or the other connector.
Touching blades can cause a short circuit that can damage your receiver or amplifier.
Using Banana Connectors:
A. Tighten Cap B. Insert Banana Connector
into Hole in Cap
BI-WIRE CONNECTION:
The S4700 connection assembly has two sets of input connectors that are connected by jumper bars. The upper set
of connectors is for high-frequency/ultrahigh-frequency drivers, and the lower set of connectors is for the woofer.
High-Frequency/
Ultrahigh-Frequency
Connectors
Low-Frequency
Connectors
Jumper
Bars
This arrangement allows you to bi-wire the speakers using a single stereo power amplifier or two stereo power
amplifiers. Bi-wiring can offer performance advantages and more flexibility in power-amplifier selection over a
conventional single-wire connection.
www.jbl.com
5
 Loading...