


English User Manual - Table of Contents................................................ |
4 |
Deutsch Benutzerhandbuch - Inhaltsverzeichnis.................................... |
29 |
Français Manuel d’utilisation - Table des matières................................ |
50 |
0.3 v – Manual ®2PRO diskAshur iStorage
www.istorage-uk.com |
#1 |
|
|
U s e r M a n u a l
HDD & SSD Range
iStorage diskAshur PRO2® Manual – v 3.0
Please make sure you remember your PIN (password), without it there is no way to access the data on the drive.
If you are having difficulty using your diskAshur PRO2 drive please contact our technical department by email - support@istorage-uk.com or by phone on +44 (0) 20 8991 6260.
#2 |
www.istorage-uk.com |
|
|
Copyright © iStorage, Inc 2017. All rights reserved.
Windows is a registered trademark of Microsoft Corporation.
All other trademarks and copyrights referred to are the property of their respective owners.
Distribution of modified versions of this document is prohibited without the explicit permission of the copyright holder.
Distribution of the work or derivative work in any standard (paper) book form for commercial purposes is prohibited unless prior permission is obtained from the copyright holder.
DOCUMENTATION IS PROVIDED AS IS AND ALL EXPRESS OR IMPLIED CONDITIONS, REPRESENTATIONS AND WARRANTIES, INCLUDING ANY IMPLIED WARRANTY OF MERCHANTABILITY, FITNESS FOR A PARTICULAR
PURPOSE OR NON-INFRINGEMENT, ARE DISCLAIMED, EXCEPT TO THE EXTENT THAT SUCH DISCLAIMERS ARE HELD TO BE LEGALLY INVALID
All trademarks and brand names are the property of their respective owners
Trade Agreements Act (TAA) Compliant
0.3 v – Manual ®2PRO diskAshur iStorage
www.istorage-uk.com |
#3 |
|
|

iStorage diskAshur PRO2® Manual – v 3.0
Table of Contents |
|
|
Introduction .................................................................................................................................... |
5 |
|
Box contents ................................................................................................................................... |
5 |
|
1. |
diskAshur PRO2 LED States ..................................................................................................... |
6 |
2. |
How to use the diskAshur PRO2 for the first time ..................................................................... |
6 |
3. |
Unlocking the diskAshur PRO2 ............................................................................................... |
7 |
4. |
Locking the diskAshur PRO2 .................................................................................................... |
7 |
5. |
Entering Admin Mode .............................................................................................................. |
7 |
6. |
Changing the Admin PIN ......................................................................................................... |
8 |
7. |
Adding a new User PIN in Admin Mode ................................................................................... |
9 |
8. |
Changing the User PIN in Admin Mode ................................................................................... |
9 |
9. |
Deleting the User PIN in Admin Mode ..................................................................................... |
9 |
10. |
Set Read-Only in Admin Mode ................................................................................................ |
10 |
11. |
Enable Read/Write in Admin Mode .......................................................................................... |
10 |
12. |
How to create a Self-Destruct PIN ............................................................................................ |
10 |
13. |
How to delete the Self-Destruct PIN ......................................................................................... |
11 |
14. |
How to Unlock with the Self-Destruct PIN ................................................................................ |
11 |
15. |
How to Create an Admin PIN after a Brute Force attack or Reset ............................................. |
12 |
16. |
Setting the Unattended Auto-Lock Clock ................................................................................. |
12 |
17. |
Turn off the Unattended Auto-Lock Clock ................................................................................ |
13 |
18. |
How to Unlock diskAshur PRO2 with User PIN ......................................................................... |
13 |
19. |
Changing the User PIN in User Mode ...................................................................................... |
13 |
20. |
Set Read-Only in User Mode ................................................................................................... |
14 |
21. |
Enable Read/Write in User Mode ............................................................................................. |
14 |
22. |
Brute Force Protection ............................................................................................................. |
15 |
23. |
How to perform a complete reset ............................................................................................ |
15 |
24. |
Initialising and formatting the diskAshur PRO2 ....................................................................... |
16 |
25. |
diskAshur PRO2 Setup for Mac OS ......................................................................................... |
18 |
26. |
diskAshur PRO2 Setup for Linux (Ubuntu 14.04) .................................................................... |
20 |
27. |
Hibernating, Suspending or Logging off from the Operating System ...................................... |
23 |
28. |
How to check Firmware in Admin Mode .................................................................................. |
23 |
29. |
How to check Firmware in User Mode ..................................................................................... |
24 |
30. |
Technical Support .................................................................................................................... |
25 |
31. |
Warranty and RMA information ................................................................................................ |
25 |
#4 |
www.istorage-uk.com |
|
|

Tamper Proof and Evident Design
DESK LOCK
SLOT CONNECTION
LED LIGHTS
- Standby State/Locked
 - User Mode/Unlocked
- Admin Mode
Alphanumeric Keypad 
LOCK
SHIFT
UNLOCK
Integrated USB 3.1 Cable
Introduction
The diskAshur PRO2 is an easy to use, ultra-secure, hardware encrypted portable drive with capacities of up to 2TB. Simply connect the integrated USB 3.1 cable to any computer and enter a 7-15 digit PIN, if the correct PIN is entered, all data stored on the drive will be decrypted and accessible. To lock the drive and encrypt all data, simply eject the diskAshur PRO2 from the host computer and the entire contents of the drive will be encrypted (full disk encryption) using military grade AES 256-bit hardware encryption (XTS mode). If the drive is lost or stolen and an incorrect PIN is entered 15 consecutive times, the drive will reset, the encryption key will be deleted and all data previously stored on the drive will be lost forever.
One of the unique and underlying security features of the GDPR compliant diskAshur PRO2 is the dedicated hardware based secure microprocessor (Common Criteria EAL4+ ready), which employs built-in physical protection mechanisms designed to defend against external tamper, bypass attacks and fault injections. Unlike other solutions, the diskAshur PRO2 reacts to an automated attack by entering the deadlock frozen state, which renders all such attacks as useless. In plain and simple terms, without the PIN there’s no way in!
Box Contents
1.diskAshur PRO2 Drive with integrated USB Cable
2.Elegant Travel Case
3.Quick Start Guide
0.3 v – Manual ®2PRO diskAshur iStorage
www.istorage-uk.com |
#5 |
|
|
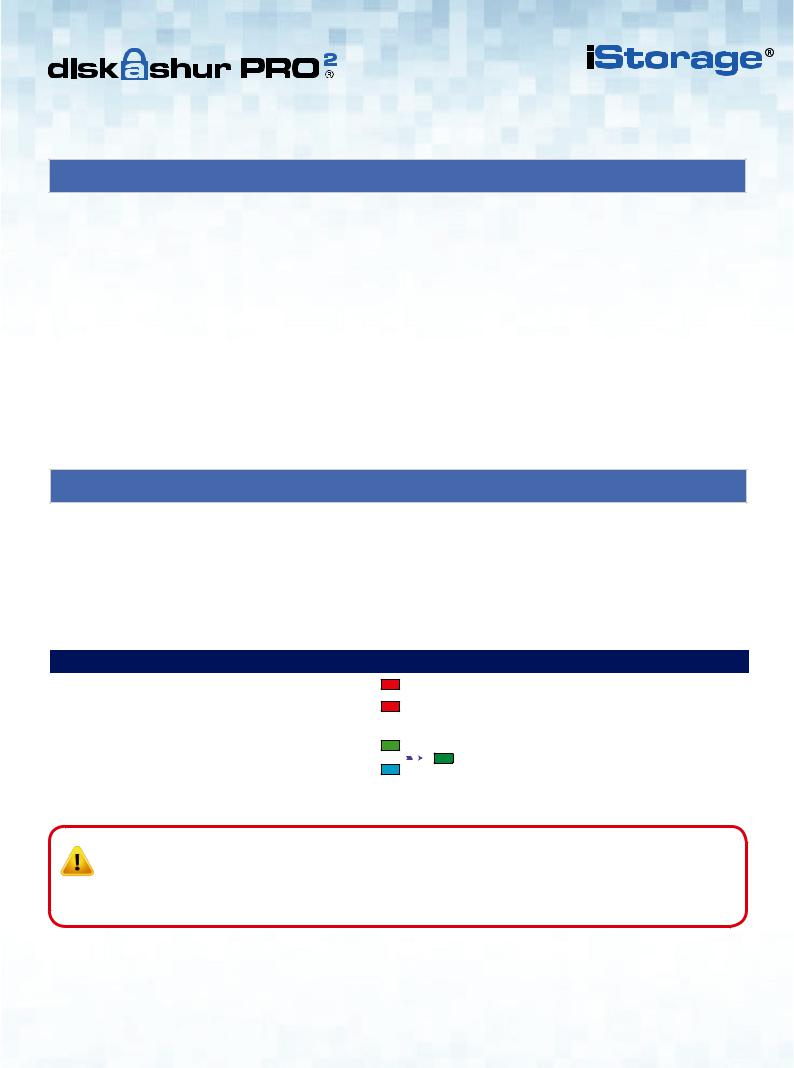
1. diskAshur PRO2 LED States
When the diskAshur PRO2 is plugged in, there are three possible behaviours for the LED indicators as shown in the table below.
RED |
GREEN |
BLUE |
diskAshur PRO2 State |
Solid |
Off |
Off |
Factory Reset 1 |
Solid |
Solid |
Solid |
Brute Force 2 |
Solid |
Off |
Off |
Standby 3 |
1.In Factory Reset State, the drive is waiting for the operation to set up an Admin PIN.
2.In Brute Force state, the drive is waiting for an operation to get more PIN entry attempts.
3.In Standby state, the drive is waiting for an operation to unlock the drive, or enter Admin mode, or reset the drive.
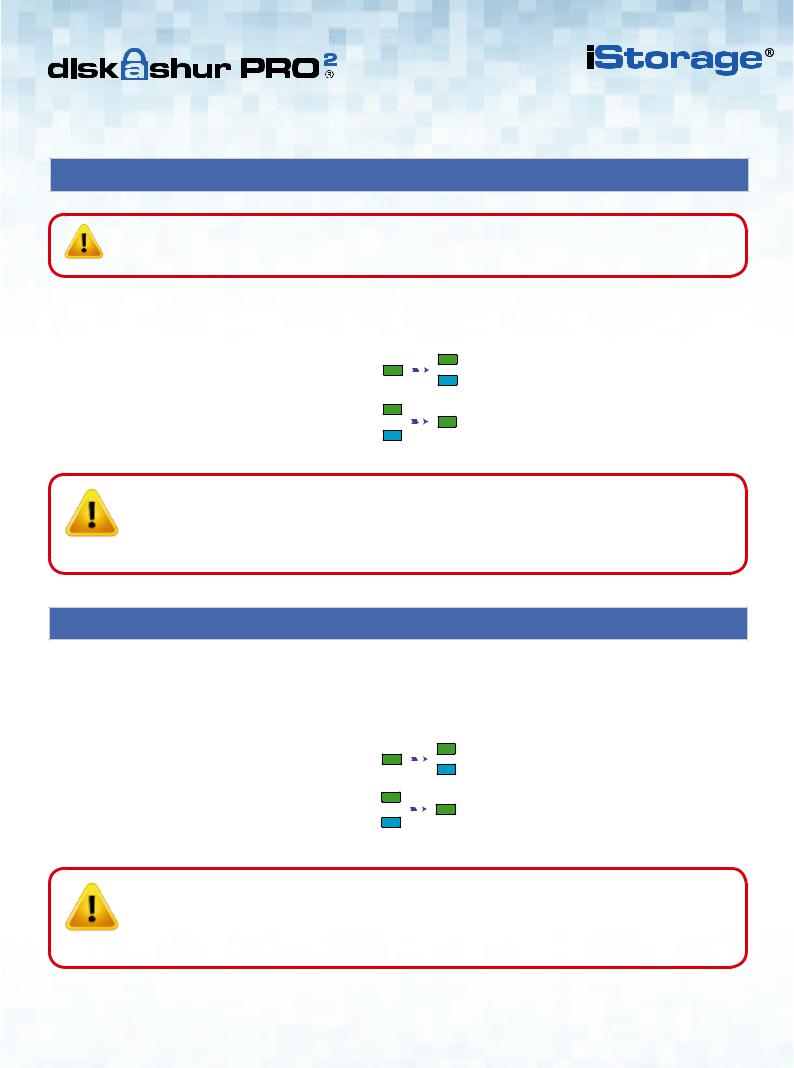
2.How to use the diskAshur PRO2 for the first time
The diskAshur PRO2 is shipped with a default Admin PIN of 11223344 and although it can be used straight out of the box with the default Admin PIN, for security reasons we highly recommend a new Admin PIN be created immediately by following the instructions under section 6 ‘Changing the Admin PIN’.
Please follow the 3 simple steps in the table below to unlock the diskAshur PRO2 for the first time with the default Admin PIN.
Instructions - first time use |
LED |
LED State |
|||
1. |
Connect the diskAshur PRO2 to a USB port |
|
|
|
RED LED will be solid awaiting PIN entry |
2. |
Enter Admin PIN (default - 11223344) |
|
|
|
RED LED remains solid |
|
Within 10 seconds press the “UNLOCK” button once |
|
|
|
GREEN and BLUE LEDs will alternately blink |
3. |
|
|
|
several times and then to a solid BLUE LED |
|
to unlock diskAshur PRO2 |
|
|
|
changing to a blinking GREEN and finally solid |
|
|
|
|
|
|
GREEN LED |
iStorage diskAshur PRO2® Manual – v 3.0
Note: Once the diskAshur PRO2 has been successfully unlocked, the GREEN LED will remain on and in a solid state. It can be locked down immediately by pressing the “LOCK” button once or by clicking the ‘Safely
Remove Hardware/Eject’ icon within your operating system. To ensure no data is corrupted, we recommend using ‘Safely Remove Hardware/Eject’.
#6 |
www.istorage-uk.com |
|
|

3.Unlocking the diskAshur PRO2
The diskAshur PRO2 can be unlocked with either an Admin or User PIN whilst in standby state (solid RED LED).
1.To unlock as the Administrator, enter the Admin PIN and press the “UNLOCK” button.
2.To unlock as a User, first press the “UNLOCK” button (all LEDs,

 blink on and off) and then enter the User PIN and press the “UNLOCK” button again.
3.If correct User PIN is entered, both GREEN and BLUE LEDs will blink alternately and then return to a solid GREEN LED.
4.If correct Admin PIN is entered, both GREEN and BLUE LEDs will blink alternately, then to a solid BLUE for 1 second and then to the unlocked state, a solid GREEN LED.
5.If correct PIN is entered, the drive displays as “iStorage diskAshur PRO2 USB Device” under “Computer Management/ Device Manager”.
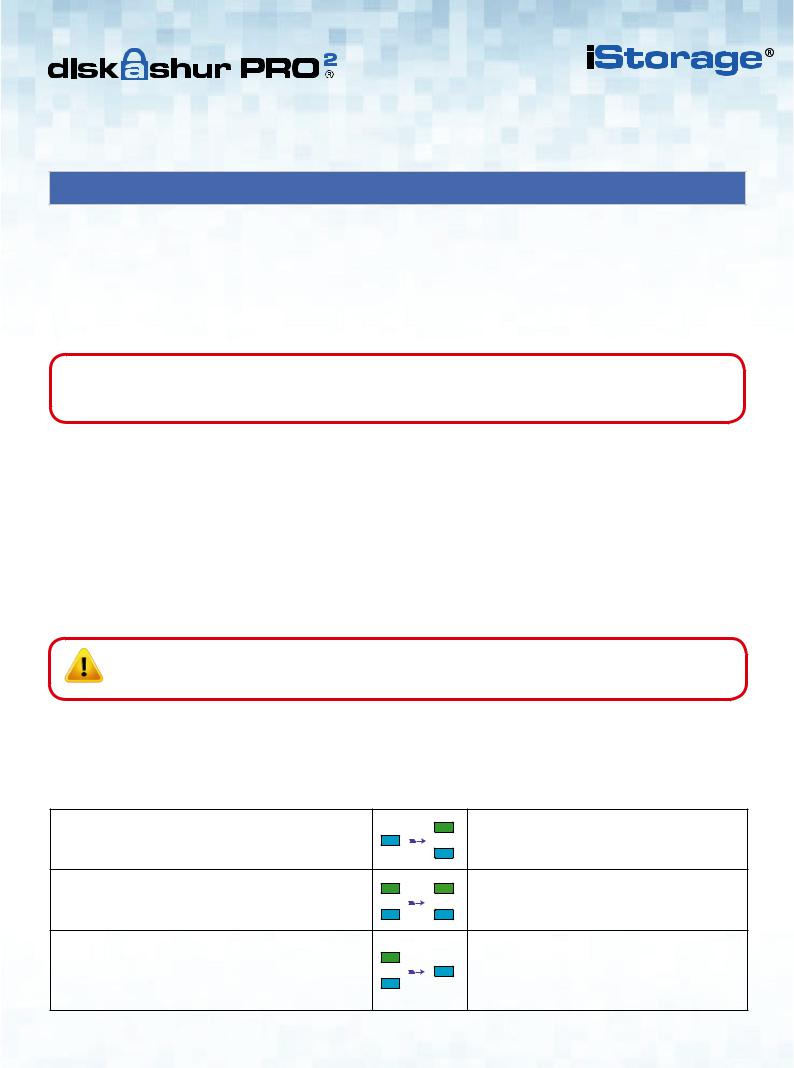
In an unlocked state (GREEN LED), there are two possible behaviours for the LED indicators, shown in the table below.
RED |
GREEN |
BLUE |
diskAshur PRO2 |
Off |
Solid |
Off |
No data transfer |
Off |
Blink |
Off |
Data transfer in progress |
4.Locking the diskAshur PRO2
To lock the drive, press the “LOCK” button once or by clicking the ‘Safely Remove Hardware/Eject’ icon within your operating system. If data is still being written to the drive, please wait until all data has been written to the drive before pressing the ‘LOCK’ button or safely ejecting from the Operating System. When the unattended Auto-Lock timeout is activated, the drive will automatically lock after a predetermined amount of time.
Note: The diskAshur PRO2 cannot be recognized by the operating system in standby state.
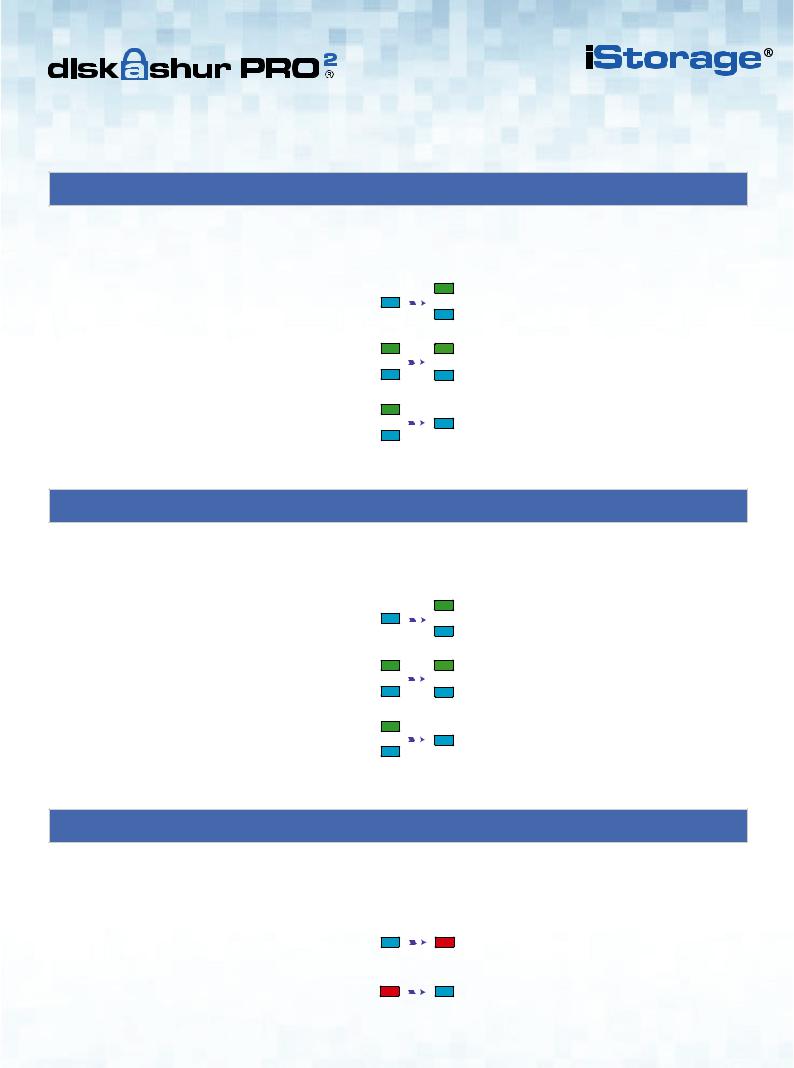
5. Entering Admin Mode
To enter the Admin Mode, do the following:
1. In standby state (solid RED LED), press and hold |
|
|
|
Solid RED LED will change to blinking GREEN |
down “UNLOCK + 1” buttons |
|
|
|
and BLUE LEDs |
|
|
|
|
|
|
|
|
|
GREEN and BLUE LEDs blink rapidly together |
2. Enter the Admin PIN (default - 11223344) and press |
|
|
|
for a few seconds then to a solid GREEN and |
“UNLOCK” button |
|
|
|
finally a solid BLUE LED indicating the |
|
|
|
|
diskAshur PRO2 is in “Admin Mode” |
To exist Admin mode, press the “LOCK” button. |
|
|
|
|
0.3 v – Manual ®2PRO diskAshur iStorage
www.istorage-uk.com |
#7 |
|
|
6.Changing the Admin PIN
PIN requirements:
•Must be between 7-15 digits in length
•Must not contain only repetitive numbers, e.g. (3-3-3-3-3-3-3)
•Must not contain only consecutive numbers, e.g. (1-2-3-4-5-6-7), (7-8-9-0-1-2-3-4), (7-6-5-4-3-2-1)
Password Tip: You can create a memorable word, name, phrase or any other Alphanumerical PIN combination by simply pressing the key with the corresponding letters on it.
Examples of these types of Alphanumerical PINs are:
• |
For “Password” you would press the following keys: |
|
|
7 (pqrs) 2 (abc) 7 (pqrs) 7 (pqrs) 9 (wxyz) |
6 (mno) 7 (pqrs) 3 (def) |
• |
For “iStorage” you would press: |
|
|
4 (ghi) 7 (pqrs) 8 (tuv) 6 (mno) 7 (pqrs) 2 |
(abc) 4 (ghi) 3 (def) |
Using this method, long and easy to remember PINs can be created.
Note: The SHIFT key can be used for additional combinations. SHIFT + 1 is a separate value than just 1. To create a PIN using additional combinations, press and hold down the SHIFT button whilst entering your 7-15 digit PIN. e.g. SHIFT + 26756498.
To change the Admin PIN, first enter the “Admin Mode” as described in section 5. Once the drive is in Admin Mode (solid BLUE LED) proceed with the following steps.
iStorage diskAshur PRO2® Manual – v 3.0
1.In Admin mode, press and hold down “UNLOCK + 2” buttons
2.Enter NEW Admin PIN and press “UNLOCK” button
3.Re-enter the NEW Admin PIN and press “UNLOCK” button
Solid BLUE LED will change to blinking GREEN and solid BLUE LEDs
Blinking GREEN and solid BLUE LEDs will switch to a single GREEN LED blink and then back to blinking GREEN and solid BLUE LEDs
Blinking GREEN and solid BLUE LEDs change to a rapidly blinking BLUE LED and finally to a solid BLUE LED indicating the Admin PIN has been successfully changed
#8 |
www.istorage-uk.com |
|
|
7.Adding a new User PIN in Admin Mode
To add a New User, first enter the “Admin Mode” as described in section 5. Once the drive is in Admin Mode (solid BLUE LED) proceed with the following steps.
1. |
In Admin mode, press and hold down |
|
|
|
Solid BLUE LED will change to blinking GREEN |
“UNLOCK + 3” buttons |
|
|
|
and solid BLUE LEDs |
|
|
|
|
|||
|
|
|
|
|
|
|
Enter New User PIN and press “UNLOCK” button |
|
|
|
Blinking GREEN and solid BLUE LEDs will |
2. |
|
|
|
switch to a single GREEN LED blink and then |
|
|
|
|
|||
|
|
|
|
|
back to blinking GREEN and solid BLUE LEDs |
3. |
Re-enter the New User PIN and press “UNLOCK” |
|
|
|
GREEN LED rapidly blinks for a few seconds |
button |
|
|
|
then changes to a solid BLUE LED indicating the |
|
|
|
|
|||
|
|
|
|
|
User PIN has been successfully created |
8.Changing the User PIN in Admin Mode
To change an existing User PIN, first enter the “Admin Mode” as described in section 5. Once the drive is in Admin Mode (solid BLUE LED) proceed with the following steps.
1. |
In Admin mode, press and hold down |
|
|
|
Solid BLUE LED will change to blinking GREEN |
“UNLOCK + 3” buttons |
|
|
|
and solid BLUE LEDs |
|
|
|
|
|||
|
|
|
|
|
|
|
Enter New User PIN and press “UNLOCK” button |
|
|
|
Blinking GREEN and solid BLUE LEDs will |
2. |
|
|
|
switch to a single GREEN LED blink and then |
|
|
|
|
|||
|
|
|
|
|
back to blinking GREEN and solid BLUE LEDs |
3. |
Re-enter the New User PIN and press “UNLOCK” |
|
|
|
GREEN LED rapidly blinks for a few seconds |
button |
|
|
|
then changes to a solid BLUE LED indicating the |
|
|
|
|
|||
|
|
|
|
|
User PIN has been successfully changed |
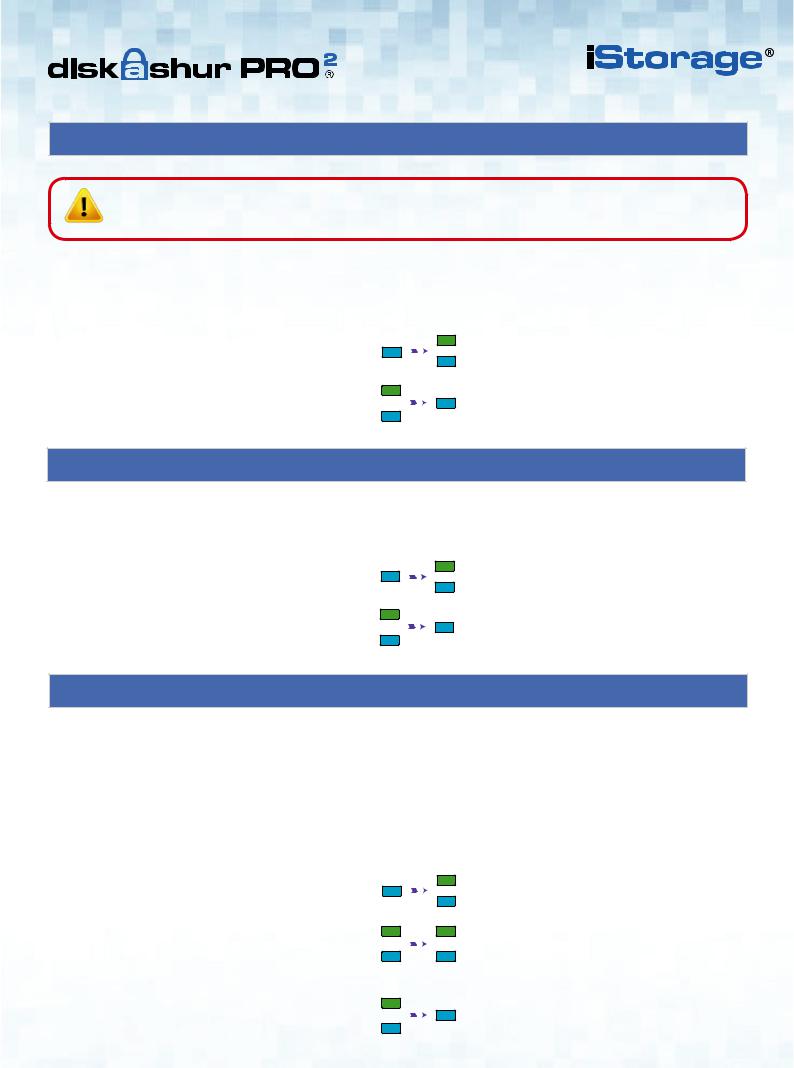
9.Deleting the User PIN in Admin Mode
To delete a User PIN, first enter the “Admin Mode” as described in section 5. Once the drive is in Admin Mode (solid BLUE LED) proceed with the following steps.
1. |
In Admin mode, press and hold down “SHIFT + 3” |
|
|
|
Solid BLUE LED will change to blinking RED |
buttons |
|
|
|
LED |
|
|
|
|
|||
|
Press and hold down “SHIFT + 3” buttons again. |
|
|
|
Blinking RED LED will change to solid RED |
2. |
|
|
|
LED and then to a solid BLUE LED indicating |
|
|
|
|
|||
|
|
|
|
|
the User PIN was successfully deleted |
0.3 v – Manual ®2PRO diskAshur iStorage
www.istorage-uk.com |
#9 |
|
|
iStorage diskAshur PRO2® Manual – v 3.0
10. Set Read-Only in Admin Mode
Important: If data has just been copied to the diskAshur PRO2, make sure to properly disconnect the drive first by clicking ‘Safely Remove Hardware/Eject’ the diskAshur PRO2 from the Operating System before reconnecting and setting the diskAshur PRO2 as ‘Read-Only/Write-Protect’.
When Admin writes content to the diskAshur PRO2 and restricts access to read-only, the User cannot change this setting in User mode. To set the diskAshur PRO2 to Read-Only, first enter the “Admin Mode” as described in section 5. Once the drive is in Admin Mode (solid BLUE LED) proceed with the following steps.
1. |
In Admin mode, press and hold down “7 + 6” |
|
|
|
Solid BLUE LED will change to blinking GREEN |
buttons. (7=Read + 6=Only) |
|
|
|
and BLUE LEDs |
|
|
|
|
|
|
|
|
Release 7+6 buttons and press “UNLOCK” |
|
|
|
GREEN and BLUE LEDs will change to a solid |
2. |
|
|
|
GREEN LED and then to a solid BLUE LED |
|
|
|
|
|||
|
|
|
|
|
indicating the drive is configured as Read-Only |
11. Enable Read/Write in Admin Mode
To set the diskAshur PRO2 to Read/Write, first enter the “Admin Mode” as described in section 5. Once the drive is in Admin Mode (solid BLUE LED) proceed with the following steps.
1. |
In Admin mode, press and hold down “7 + 9” |
|
|
|
Solid BLUE LED will change to blinking GREEN |
buttons. (7=Read + 9=Write) |
|
|
|
and BLUE LEDs |
|
|
|
|
|||
|
|
|
|
|
|
|
Release 7+9 buttons and press “UNLOCK” |
|
|
|
GREEN and BLUE LEDs change to a solid |
2. |
|
|
|
GREEN LED then to a solid BLUE LED |
|
|
|
|
|||
|
|
|
|
|
indicating the drive is configured as Read/Write |
12. How to create a Self-Destruct PIN
The self-destruct feature allows you to set a PIN which can be used to perform a crypto-erase on the entire drive.
When used, the self-destruct PIN will delete ALL data, Admin/User PINs and then unlock the drive. Activating this feature will cause the Self-Destruct PIN to become the new User PIN and the diskAshur PRO2 will need to be partitioned and formatted before any new data can be added to the drive.
To set the Self-Destruct PIN, first enter the “Admin Mode” as described in section 5. Once the drive is in Admin Mode (solid BLUE LED) proceed with the following steps.
1. |
In Admin mode, press and hold down |
|
|
|
Solid BLUE LED will change to blinking GREEN |
“UNLOCK + 6” buttons |
|
|
|
and solid BLUE LEDs |
|
|
|
|
|
|
|
2. |
Create a 7-15 digit Self-Destruct PIN and press the |
|
|
|
Blinking GREEN and solid BLUE LEDs will |
|
|
|
switch to a single GREEN LED blink and then |
||
“UNLOCK” button |
|
|
|
||
|
|
|
back to blinking GREEN and solid BLUE LEDs |
||
|
|
|
|
|
|
|
|
|
|
|
GREEN LED will rapidly blink for several |
3. |
Re-enter the PIN and press the “UNLOCK” button |
|
|
|
seconds and then changes to a solid BLUE LED |
|
|
|
to indicate the Self-Destruct PIN has been |
||
|
|
|
|
|
|
|
|
|
|
|
successfully configured |
#10 |
www.istorage-uk.com |
|
|
13. How to Delete the Self-Destruct PIN
To delete the Self-Destruct PIN, first enter the “Admin Mode” as described in section 5. Once the drive is in Admin Mode (solid BLUE LED) proceed with the following steps.
1. |
In Admin mode, press and hold down |
|
|
|
Solid BLUE LED will change to a blinking RED |
“SHIFT + 6” buttons |
|
|
|
LED |
|
|
|
|
|||
|
|
|
|
|
|
|
Press and hold down “SHIFT + 6” buttons again |
|
|
|
Blinking RED LED will become solid and then |
2. |
|
|
|
change to a solid BLUE LED indicating the |
|
|
|
|
|||
|
|
|
|
|
Self-Destruct PIN was successfully deleted |
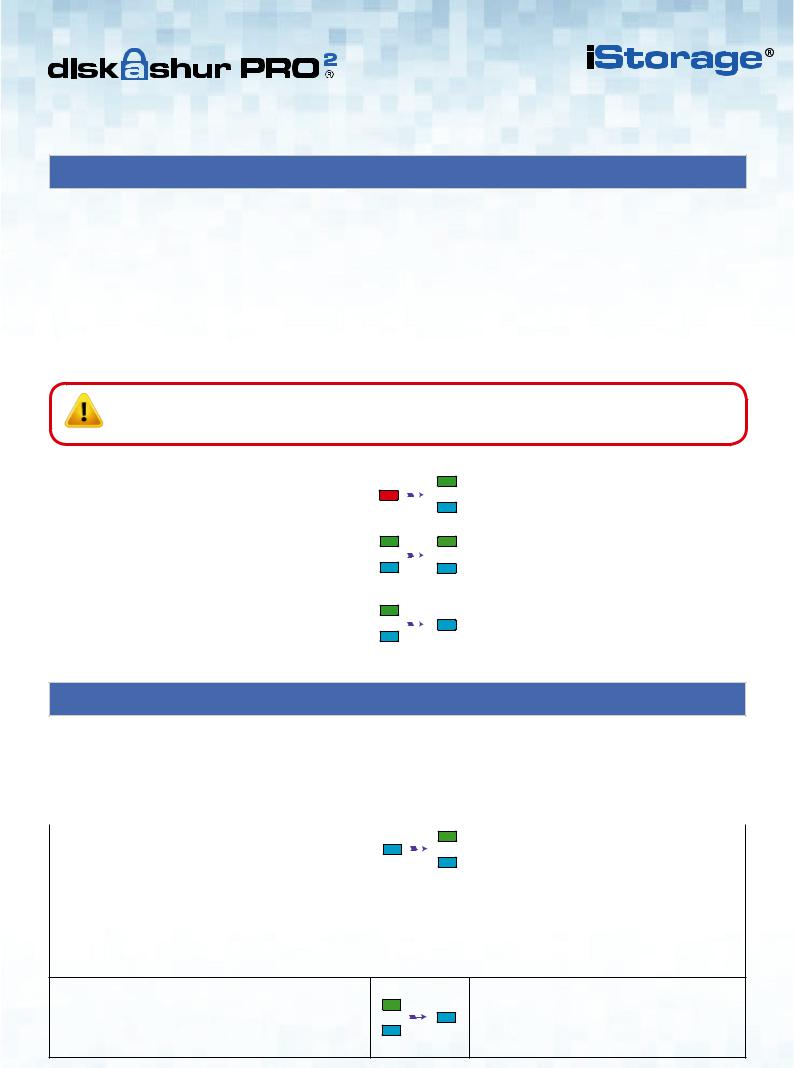
14. How to Unlock with the Self-Destruct PIN
When used, the self-destruct PIN will delete the encryption key, ALL data, Admin/User PINs and then unlock the drive. Activating this feature will cause the Self-Destruct PIN to become the new User PIN and the diskAshur PRO2 will need to be partitioned and formatted before any new data can be added to the drive.
To activate the Self-Destruct mechanism, the drive needs to be in the standby state (solid RED LED) and then proceed with the following steps.
1. |
In standby state, press the “UNLOCK” button |
|
|
|
RED LED switches to all LEDs, RED, GREEN & |
|
|
|
BLUE blinking on and off |
||
|
|
|
|
|
|
|
|
|
|
|
|
|
|
|
|
|
RED, GREEN and BLUE blinking LEDs will |
2. |
Enter the Self-Destruct PIN and press the |
|
|
|
change to GREEN and BLUE LEDs alternating |
“UNLOCK” button |
|
|
|
on and off for approximately 15 seconds and |
|
|
|
|
|
|
finally shifts to a solid GREEN LED |
Important: When the Self-Destruct mechanism is activated, all data, the encryption key and the Admin/User PINs are deleted. The Self-Destruct PIN becomes the User PIN. No Admin PIN exists after the Self-Destruct mechanism is activated. The diskAshur PRO2 will need to be reset (see ‘How to perform a complete reset’ Section 23, on page 15) first in order to create an Admin PIN with full Admin privileges including the ability to create a User PIN.
0.3 v – Manual ®2PRO diskAshur iStorage
www.istorage-uk.com |
#11 |
|
|
15. How to Create an Admin PIN after a Brute Force attack or Reset
It will be necessary after a Brute Force attack or when the diskAshur PRO2 has been reset to create an Admin PIN before the drive can be used. If the drive has been brute forced or reset, the drive will be in a standby state (solid RED LED). to create an Admin PIN proceed with the following steps.
PIN requirements:
•Must be between 7-15 digits in length
•Must not contain only repetitive numbers, e.g. (3-3-3-3-3-3-3)
•Must not contain only consecutive numbers, e.g. (1-2-3-4-5-6-7), (7-8-9-0-1-2-3-4), (7-6-5-4-3-2-1)
Note: The SHIFT key can be used for additional combinations. SHIFT + 1 is a separate value than just 1. To create a PIN using additional combinations, press and hold down the SHIFT button whilst entering your 7-15 digit PIN. e.g. SHIFT + 26756498.
iStorage diskAshur PRO2® Manual – v 3.0
1. |
In Standby state, press and hold down |
|
|
|
Solid RED LED will change to blinking GREEN |
“Shift + 1” buttons |
|
|
|
and solid BLUE LEDs |
|
|
|
|
|
|
|
|
Enter NEW Admin PIN and press “UNLOCK” button |
|
|
|
Blinking GREEN and solid BLUE LEDs will |
2. |
|
|
|
switch to a single GREEN LED blink and then |
|
|
|
|
|||
|
|
|
|
|
back to blinking GREEN and solid BLUE LEDs |
|
Re-enter the NEW Admin PIN and press “UNLOCK” |
|
|
|
Blinking GREEN LED and solid BLUE LED |
3. |
|
|
|
change to BLUE LED rapidly blinking for a few |
|
button |
|
|
|
seconds and then to a solid BLUE LED indicat- |
|
|
|
|
|
|
ing the Admin PIN was successfully configured. |
16. Setting the Unattended Auto-Lock Clock
To protect against unauthorised access if the drive is unlocked and unattended, the diskAshur PRO2 can be set to
automatically lock after a pre-set amount of time. In its default state, the diskAshur PRO2 Unattended Auto Lock feature is turned off. The Unattended Auto Lock can be set to activate between 5 - 99 minutes.
To set the Unattended Auto Lock, first enter the “Admin Mode” as described in section 5. Once the drive is in Admin Mode (solid BLUE LED) proceed with the following steps.
1. In Admin mode, press and hold down |
|
|
|
Solid BLUE LED will change to blinking GREEN |
“UNLOCK + 5” buttons |
|
|
|
and BLUE LEDs |
|
|
|
|
|
2. Enter the amount of time that you would like to set the Auto-Lock timeout feature for, the minimum time that can be set is 5 minutes and the maximum being 99 minutes (5-99 minutes). For example enter:
05 for 5 minutes
20 for 20 minutes
99 for 99 minutes
Blinking GREEN and BLUE LEDs will change to
3. Press the “SHIFT” button |
a solid GREEN for a second and then finally to a |
solid BLUE LED indicating the Auto-Lock time out is successfully configured
#12 |
www.istorage-uk.com |
|
|
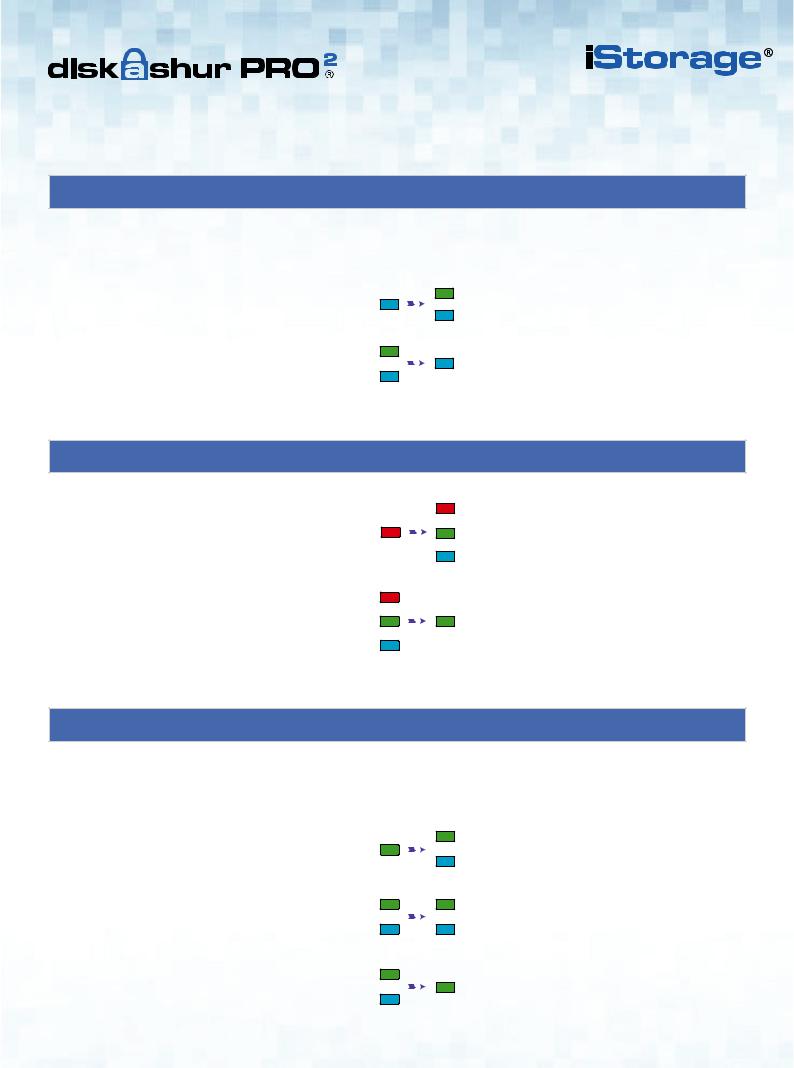
17. Turn off the Unattended Auto-Lock Clock
To turn off the Unattended Auto Lock, first enter the “Admin Mode” as described in section 5. Once the drive is in Admin Mode (solid BLUE LED) proceed with the following steps.
1. |
In Admin mode, press and hold down |
|
|
|
Solid BLUE LED will change to blinking GREEN |
“UNLOCK + 5” buttons |
|
|
|
and BLUE LEDs |
|
|
Enter “00” and press the “SHIFT” button |
|
|
|
Blinking GREEN and BLUE LEDs will change to |
2. |
|
|
|
a solid GREEN for a second and then finally to a |
|
|
|
|
|
|
solid BLUE LED indicating the Auto-Lock time |
|
|
|
|
|
out has been successfully switched off |
18. How to Unlock diskAshur PRO2 with User PIN
1. |
In a standby state (solid RED LED) Press the |
|
|
|
RED LED switches to all LEDs, RED, GREEN & |
“UNLOCK” button |
|
|
|
BLUE blinking on and off |
|
|
|
|
|
|
|
|
|
|
|
|
RED, GREEN and BLUE blinking LEDs will |
|
Enter User PIN and press the “UNLOCK” button |
|
|
|
change to alternating GREEN and BLUE LEDs |
2. |
|
|
|
then to a rapidly blinking GREEN LED and |
|
|
|
|
|||
|
|
|
|
|
finally shifts to a solid Green LED indicating |
|
|
|
|
|
drive successfully unlocked in User mode |
19. Changing the User PIN in User Mode
To change the User PIN, first unlock the diskAshur PRO2 with a User PIN as described above in section 18. Once the drive is in User Mode (solid GREEN LED) proceed with the following steps.
1. |
In User mode press and hold down “UNLOCK + 4” |
|
|
|
Solid GREEN LED will change to a blinking |
|
|
|
GREEN LED and a solid BLUE LED |
||
|
|
|
|
|
|
|
|
|
|
|
|
|
Enter New User PIN and press the “UNLOCK” button |
|
|
|
Blinking GREEN and solid BLUE LEDs will |
2. |
|
|
|
switch to a single GREEN LED blink and then |
|
|
|
|
|||
|
|
|
|
|
back to blinking GREEN and solid BLUE LEDs |
|
Re-enter New User PIN and press the “UNLOCK” |
|
|
|
Blinking GREEN and solid BLUE LEDs will |
3. |
|
|
|
switch to a rapidly blinking GREEN LED and |
|
button |
|
|
|
then to a solid GREEN LED indicating |
|
|
|
|
|
|
successful User PIN change |
0.3 v – Manual ®2PRO diskAshur iStorage
www.istorage-uk.com |
#13 |
|
|
iStorage diskAshur PRO2® Manual – v 3.0
20. Set Read-Only in User Mode
Important: If data has just been copied to the diskAshur PRO2, make sure to properly disconnect the drive first by clicking ‘Safely Remove Hardware/Eject’ the diskAshur PRO2 from the Operating System before reconnecting and setting the diskAshur PRO2 as ‘Read-Only/Write-Protect’.
To set the diskAshur PRO2 to Read-Only, first enter the “User Mode” as described in section 18. Once the drive is in User Mode (solid GREEN LED) proceed with the following steps.
1. |
In User mode, press and hold down “7 + 6” |
|
|
|
Solid GREEN LED will change to blinking |
buttons. (7=Read + 6=Only) |
|
|
|
GREEN and BLUE LEDs |
|
|
|
|
|
|
|
|
Release 7+6 buttons and press “UNLOCK” |
|
|
|
GREEN and BLUE LEDs will change to a solid |
2. |
|
|
|
GREEN LED indicating the drive is configured |
|
|
|
|
|||
|
|
|
|
|
as Read-Only |
Note: 1. This setting is activated the next time the drive is unlocked.
2.If a User set the drive as Read-Only, Admin can override it by setting the drive as Read/Write in Admin mode.
3.If Admin set the drive as Read-Only, the User cannot set the drive as Read/Write
21.Enable Read/Write in User Mode
To set the diskAshur PRO2 to Read/Write, first enter the “User Mode” as described in section 18. Once the drive is in User Mode (solid GREEN LED) proceed with the following steps.
1. |
In User mode, press and hold down “7 + 9” |
|
|
|
Solid GREEN LED will change to blinking |
buttons. (7=Read + 9=Write) |
|
|
|
GREEN and BLUE LEDs |
|
|
|
|
|
|
|
|
Release 7+9 buttons and press “UNLOCK” |
|
|
|
GREEN and BLUE LEDs will change to a solid |
2. |
|
|
|
GREEN LED indicating the drive is configured |
|
|
|
|
|||
|
|
|
|
|
as Read/Write |
Note: 1. This setting is activated the next time the drive is unlocked.
2. If a User set the drive as Read-Only, Admin can override it by setting the drive as Read/Write in Admin mode.
3. If Admin set the drive as Read-Only, the User cannot set the drive as Read/Write
#14 |
www.istorage-uk.com |
|
|
22. Brute Force Protection
If an incorrect PIN is entered 15 (3 x 5 PIN clusters) consecutive times, then all Admin/User PINs, the encryption key and all data will be deleted and lost forever. The diskAshur PRO2 will then need to be formatted and partitioned before it can be reused.
1.If a PIN is entered incorrectly 5 (five) consecutive times, all LEDs - RED, GREEN, BLUE will light up and become solid.
2.Unplug the drive and re-plug it into the host to get five more PIN attempts. If PIN is incorrectly entered 5 more times, (10 in total - 5 from step 1 and 5 from step 2) all LEDs - RED, GREEN, BLUE will light up and become solid again.
3. Unplug the drive, hold down the “SHIFT” button and replug it into the host, all LEDs - RED, GREEN, BLUE will light up and blink together.
4. With all LEDs blinking, enter “47867243” and press the “UNLOCK” button to get 5 final attempts.
Caution: After 15 consecutive incorrect PIN entries the Brute Force Defence Mechanism activates and deletes all Admin/User PINs, the encryption key and data. A new Admin PIN must be created, refer to Section 15 on page 12 on ‘How to Create an Admin PIN after a Brute Force attack or Reset’, the diskAshur PRO2 will also need to be partitioned and formatted before any new data can be added to the drive.
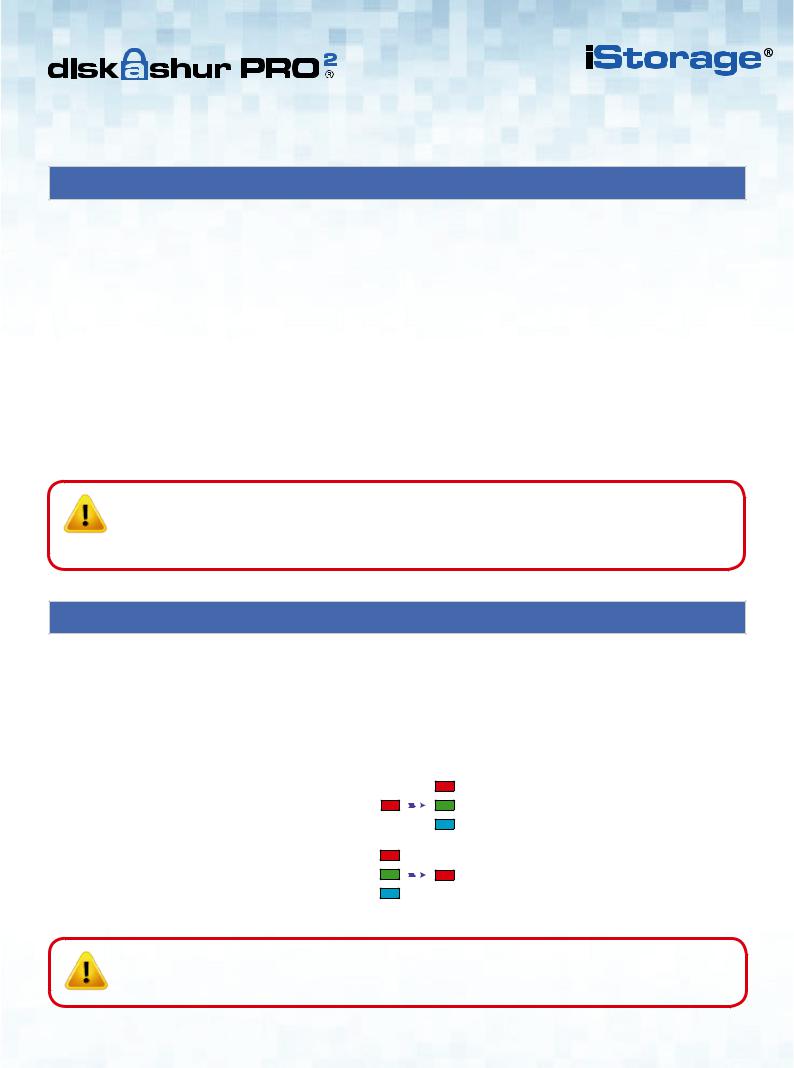
23. How to perform a complete reset
To perform a complete reset, the diskAshur PRO2 must be in a standby state (solid RED LED). Once the drive is reset then all Admin/User PINs, the encryption key and all data will be deleted and lost forever and the drive will need to be formatted and partitioned before it can be reused.
To reset the diskAshur PRO2 proceed with the following steps.
1. In standby state, press and hold down “0” button |
|
|
|
Solid RED LED will change to all LEDs, RED, |
|
|
|
GREEN and BLUE blinking alternately on and |
|
until all LEDs blink alternately on and off |
|
|
|
|
|
|
|
off |
|
|
|
|
|
|
2. Press and hold down “2 + 7” buttons until all LEDs |
|
|
|
RED, GREEN and BLUE alternating LEDs will |
|
|
|
change to all solid for a second and then to a |
|
become solid for a second and then to a solid RED LED |
|
|
|
solid RED LED indicating the drive has been |
|
|
|
|
reset |
Important: After a complete reset a new Admin PIN must be created, refer to Section 15 on page 12 on ‘How to Create an Admin PIN after a Brute Force attack or Reset’, the diskAshur PRO2 will also need to be partitioned and formatted before any new data can be added to the drive.
0.3 v – Manual ®2PRO diskAshur iStorage
www.istorage-uk.com |
#15 |
|
|
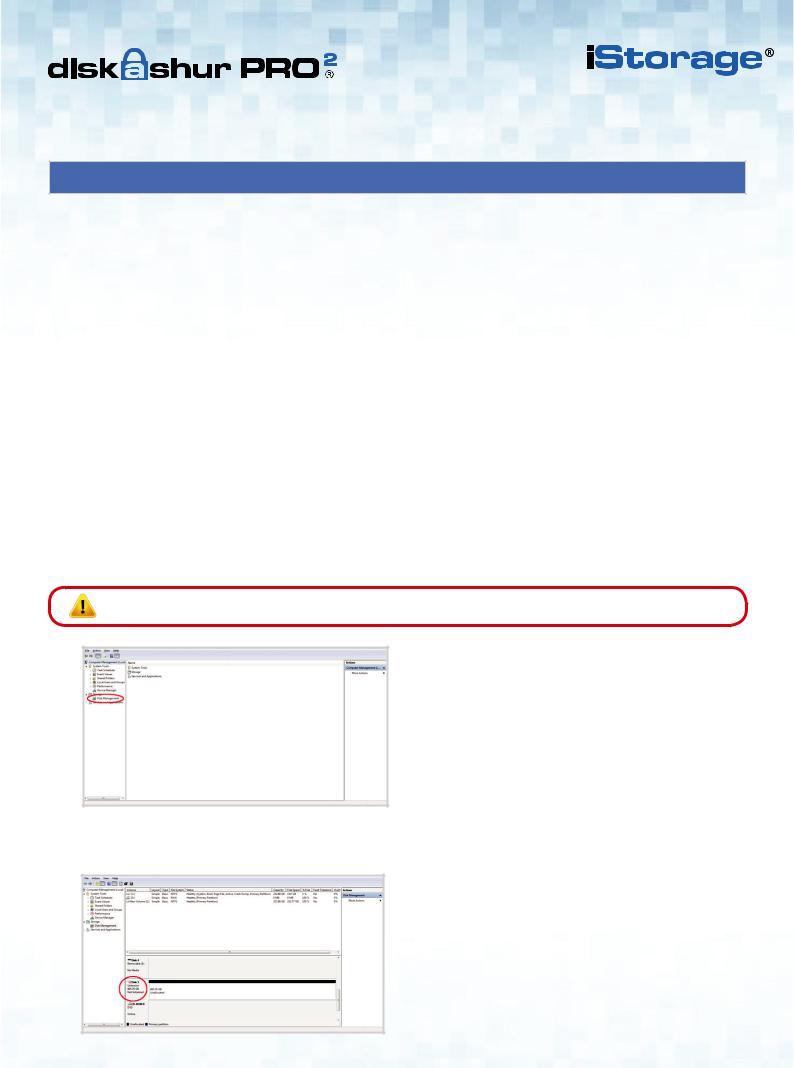
24. Initialising and formatting the diskAshur PRO2
After a ‘Brute Force Attack’ or a complete reset of the diskAshur PRO2 will delete all data, encryption key and partition settings. You will need to initialise and format the diskAshur PRO2 before it can be used.
To initialise your diskAshur PRO2, do the following:
1.Attach the diskAshur PRO2 to the computer.
2.Create a new Admin PIN - see page 12, section 15, ‘How to create an Admin PIN after a Brute Force attack or reset’.
3.With the diskAshur PRO2 in standby state (RED LED) enter New Admin PIN to unlock (GREEN LED).
4.Windows 7: Right click Computer and then click Manage and then select Disk Management Windows 8: Right-click left corner of desktop and select Disk Management
Windows 10: Right click on the start button and select Disk Management
5.In the Computer Manage window, click Disk Management. In the Disk Management window, the diskAshur PRO2 is recognised as an unknown device that is uninitialised and unallocated.
Note: If the Initialise Disk Wizard window opens, click Cancel.
iStorage diskAshur PRO2® Manual – v 3.0
6.Right-click Unknown Disk, and then select Initialise Disk.
#16 |
www.istorage-uk.com |
|
|
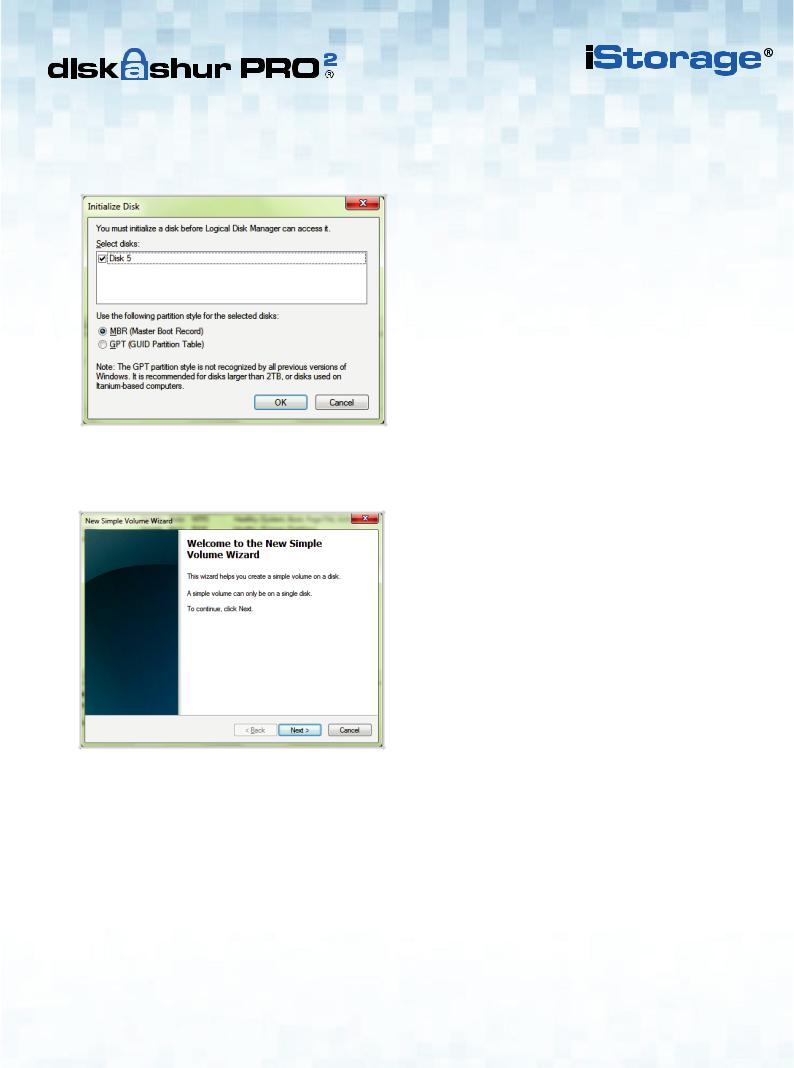
7.In the Initialise Disk window, click OK.
8.Right-click in the blank area under the Unallocated section, and then select New Simple Volume. The Welcome to the New Simple Volume Wizard window opens.
9. |
Click Next. |
|
10. |
If you need only one partition, accept the default partition size and click Next. |
|
11. |
Assign a drive letter or path and click Next. |
iStorage |
12. |
Create a volume label, select Perform a quick format, and then click Next. |
®diskAshurPRO2 |
|
||
13. |
Click Finish. |
v – Manual |
14. |
Wait until the format process is complete. The diskAshur PRO2 will be recognised and it is available for use. |
|
|
|
0.3 |
www.istorage-uk.com |
#17 |
|
|
25. diskAshur PRO2 Setup for Mac OS
Your diskAshur PRO2 is preformatted in NTFS for Windows. To reformat the drive to a Mac compatible format please read below.
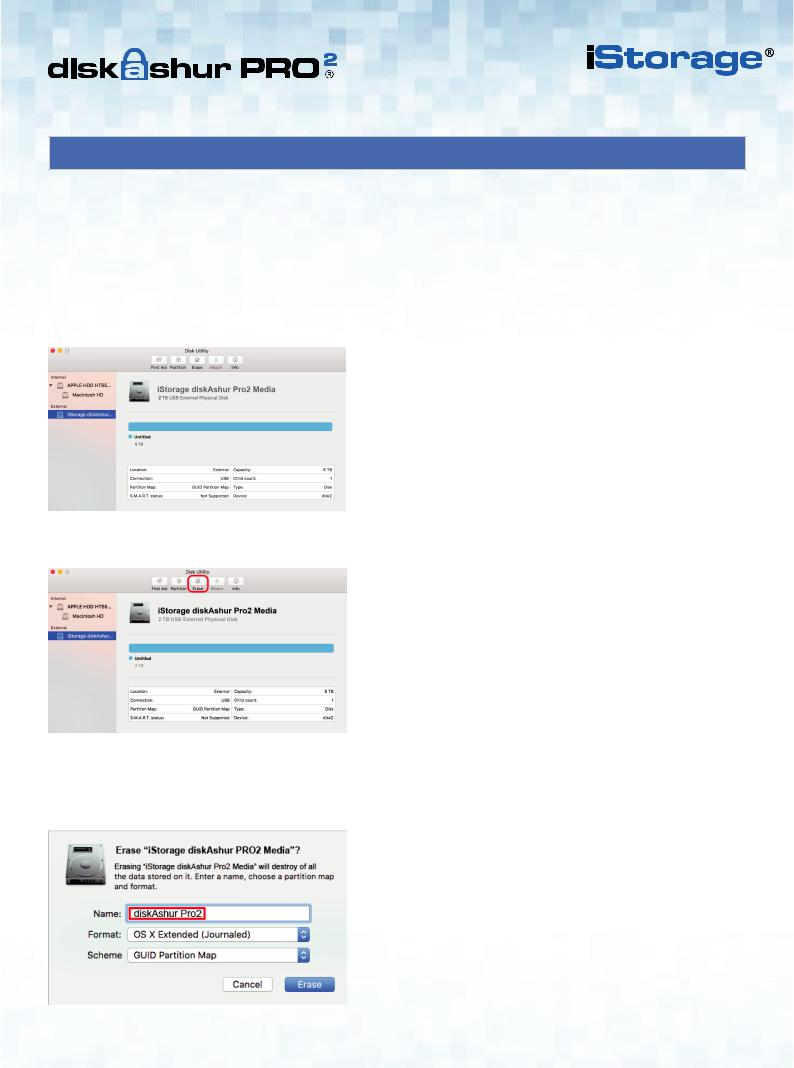
Once the drive is unlocked, open Disk Utility from Applications/Utilities/Disk Utilities.
To format the diskAshur PRO2:
1. Select diskAshur PRO2 from the list of drives and volumes. Each drive in the list will display its capacity, manufacturer, and product name, such as ‘iStorage diskAshur PRO2 Media’ or 232.9 diskAshur PRO2.
2. Click the ‘Erase’ button (figure 1).
figure 1
3. Enter a name for the drive (figure 2). The default name is Untitled. The name of the drive will eventually appear on the desktop.
iStorage diskAshur PRO2® Manual – v 3.0
figure 2
#18 |
www.istorage-uk.com |
|
|
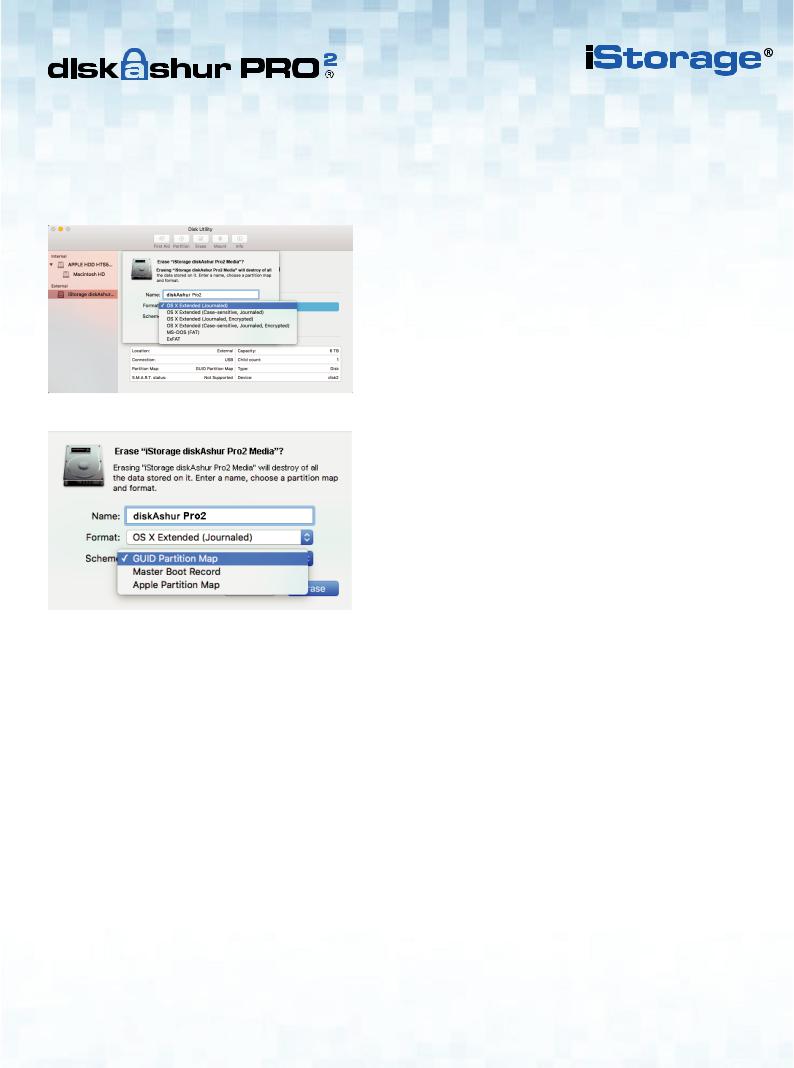
4. Select a scheme and volume format to use. The Volume Format dropdown menu (figure 3) lists the available drive formats that the Mac supports. The recommended format type is ‘Mac OS Extended (Journaled).’ The scheme format dropdown menu lists the available schemes to use (figure 4). We recommend using ‘GUID Partition Map’ on drives larger than 2TB.
figure 3
figure 4
5. Click the ‘Erase’ button. Disk Utility will unmount the volume from the desktop, erase it, and then remount it on the desktop.
0.3 v – Manual ®2PRO diskAshur iStorage
www.istorage-uk.com |
#19 |
|
|
26. diskAshur PRO2 Setup for Linux (Ubuntu 14.04)
If your diskAshur PRO2 has been initialised and formatted in NTFS for Windows, you can directly use the drive on Ubuntu. If not, please read below.
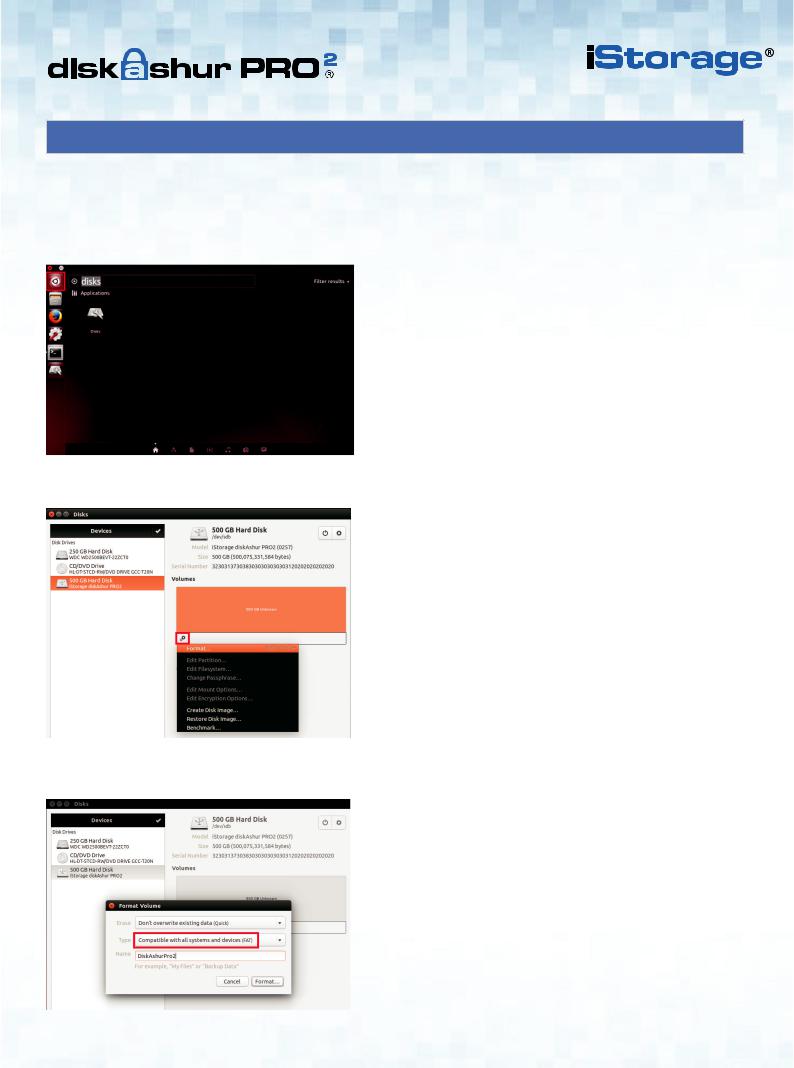
To format the diskAshur PRO2 as FAT filesystem:
1. Open ‘Unity Dash’ and type ‘Disks’ in the search box. Click on the ‘Disks’ utility when displayed.
2. Click to select the drive (500 GB Hard Disk) under ‘Devices’. Next click on the gears icon under ‘Volumes’ and then click on ‘Format’.
3. Select ‘Compatible with all systems and devices(FAT)’ for the ‘Type’ option. And enter a name for the drive, e.g: diskAshur PRO2. Then, click the ‘Format’ button.
iStorage diskAshur PRO2® Manual – v 3.0
#20 |
www.istorage-uk.com |
|
|

4. Click ‘Format’ again.
5. The drive will start to be formatted.
6. After the format process is finished, click  to mount the drive to Ubuntu.
0.3 v – Manual ®2PRO diskAshur iStorage
www.istorage-uk.com |
#21 |
|
|
 Loading...