

Page 1
Iomega®ScreenPlay®TV Link DX
of their respective owners.
Seite
1
von
65
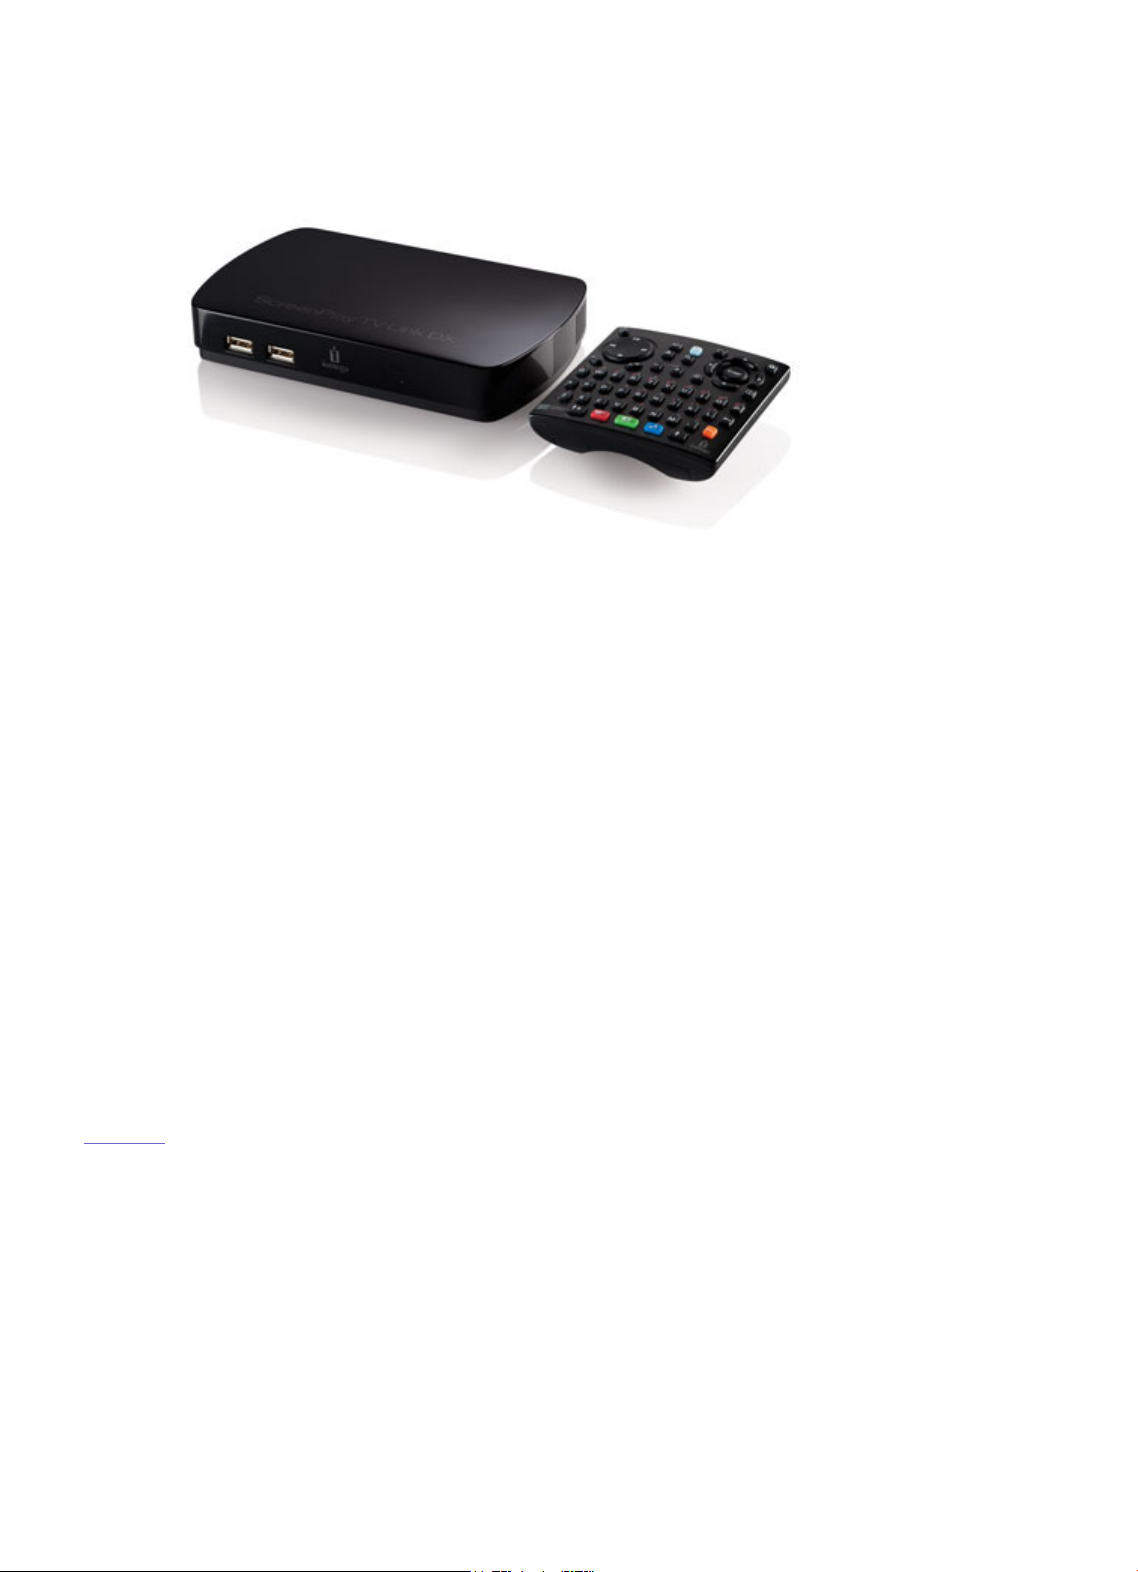
HD Media Player
The Iomega ScreenPlay TV Link DX is an easy and convenient way to browse digital content
transferred to, or stored on, a USB drive and watch it on your TV. In addition, you can stream
content from the Internet directly to your TV and browse and play media files stored on your
home network volumes or DLNA-compliant devices connected to your network.
z Browse and share media files on your home network
z Directly access online content from Internet media sites, including Flickr
®
and YouTube™,
and from Internet feeds such as Internet Radio, podcasts, or RSS
z Access social media sites (for example, Facebook or Twitter)
z 1080p High Definition*
z Compatible with the latest media formats
z DivX
z DLNA certified
®
Plus HD Certified
*Must be supported by the TV. Used automatically if the TV supports it and the ScreenPlay TV Link DX is connected via HDMI with
Auto setting.
NOTE: It may be a criminal offense under applicable copyright laws to make unauthorized copies
of copyright protected material, including videos, films, broadcasts, and non-original sound and
video recordings. This equipment should not be used for these purposes.
Iomega, the stylized "i" logo, and ScreenPlay are either registered trademarks or trademarks of Iomega Corporation in the United
States and/or other countries. Microsoft and Windows are either registered trademarks or trademarks of Microsoft Corporation in
the United States and/or other countries. Apple and Mac are registered trademarks or trademarks of Apple Inc. in the United
States and/or other countries. Certain other product names, brand names, and company names may be trademarks or designations
Page 2

ScreenPlay TV Link DX Specifications
z Supported Media Formats
vibration may damage the ScreenPlay TV Link or connected USB devices.
Video*
Music/Audio
Photos
MPEG
-
1
RMVB up to SD
MP3
JPEG
*Supported file extensions for videos, wrappers, and associated audio/support files include avi, asf, divx, mkv, mov, mp2,
mp4, mpe, mpeg, mpg, m4a, m4v, vob, xvid, ifo, iso (DVD ISO), WMV, FLV, AVCHD, M2TS, TS
Seite
2
von
65
z Supported AV Connections
z Supported Computer Interfaces
z Network Client Requirements
z Format Requirements
Supported Media Formats
The ScreenPlay TV Link DX supports the following types of media files:
z
z MPEG-2 up to HD
z MP@HL 1080p
z MPEG-4 (part 10)
up to 1080p
z XviD
z H.264
z WMV
z VC-1 (SMPTE 421M)
z
z
z AC3 (Dolby Digital Encoding)
z WAV
z WMA
z OGG Vorbis
z DTS
z AAC (non-DRM)
z FLAC
z
z BMP
z GIF
z PNG
z TIFF
NOTE: Although the ScreenPlay TV Link DX supports the listed file types, it might not be able to
support every codec used to create the files. Check the support area on www.iomega.com for the
latest information on supported file types.
| top of page |
Supported AV Connections
The ScreenPlay TV Link DX provides high quality audio/video output* through the following TV
connections:
z HDMI (High-Definition Multimedia Interface)
z Composite video and audio L/R
z Optical Audio (S/PDIF)
*Supported video output resolutions depend on the connection used. An HDMI connection supports the following resolutions:
480p60Hz, 576p50Hz, 720p50Hz, 720p60Hz, 1080i50Hz, 1080i60Hz, 1080p23.976Hz, 1080p24fps, 1080p50fps,
1080p60fps, Auto.
CAUTION! The ScreenPlay TV Link is not intended for in-car entertainment use. Unstable power or
Page 3

| top of page |
Seite
3
von
65
Supported Computer Interfaces
In addition to the AV connections listed above, the ScreenPlay TV Link DX supports the following
computer interfaces:
z 10/100 Ethernet for wired network connection
z Wireless Ready support for Iomega 802.11n WiFi adapters
z USB 2.0 for external USB devices
NOTE: Use of a network router or hub is recommended for network connection. The package does
not include a network router or hub.
| top of page |
Network Client Requirements
When the ScreenPlay TV Link is connected to a network, client computers on the network must
use one of the following operating systems:
z Microsoft
z Mac OS X, version 10.4 - 10.6
®
Windows®XP / Windows Vista™ / Windows 7 (all versions)
| top of page |
Format Requirements
External USB devices connected to the ScreenPlay TV Link DX, such as flash drives or external
hard drives, can be formatted NTFS, FAT32, Mac OS Extended (HFS+), Mac OS Extended Journaled,
Ext2, or Ext3.
| top of page |
Page 4

License Notices
z About DivX Video and Video-On-Demand
Product includes software.
©
DTS, Inc. All Rights Reserved.
Seite
4
von
65
z About AVC and VC-1 Video
z About DTS 2.0+Digital Out
z Open Source
About DivX Video and Video-On-Demand
DivX®is a digital video format created by DivX,Inc. This is an official DivX Certified device that
plays DivX video. Visit www.divx.com for more information and software tools to convert your
files into DivX video.
This DivX Certified®device must be registered in order to play DivX Video-on-Demand (VOD)
content. To generate the registration code, locate the DivX VOD section in the device setup
menu. Go to vod.divx.com with this code to complete the registration process and learn more
about DivX VOD.
| top of page |
About AVC and VC-1 Video
THIS PRODUCT IS LICENSED UNDER THE AVC PATENT PORTFOLIO LICENSE FOR THE PERSONAL AND
NON-COMMERCIAL USE OF A CONSUMER TO (i) ENCODE VIDEO IN COMPLIANCE WITH THE AVC
STANDARD (“AVC VIDEO”) AND/OR (ii) DECODE AVC VIDEO THAT WAS ENCODED BY A CONSUMER
ENGAGED IN A PERSONAL AND NON-COMMERCIAL ACTIVITY AND/OR WAS OBTAINED FROM A VIDEO
PROVIDER LICENSED TO PROVIDE AVC VIDEO. NO LICENSE IS GRANTED OR SHALL BE IMPLIED FOR
ANY OTHER USE. ADDITIONAL INFORMATION MAY BE OBTAINED FROM MPEG LA, L.L.C. SEE
HTTP://WWW.MPEGLA.COM
THIS PRODUCT IS LICENSED UNDER THE VC-1 PATENT PORTFOLIO LICENSE FOR THE PERSONAL AND
NON-COMMERCIAL USE OF A CONSUMER TO (i) ENCODE VIDEO IN COMPLIANCE WITH THE VC-1
STANDARD (“VC-1 VIDEO”) AND/OR (ii) DECODE VC-1 VIDEO THAT WAS ENCODED BY A CONSUMER
ENGAGED IN A PERSONAL AND NON-COMMERCIAL ACTIVITY AND/OR WAS OBTAINED FROM A VIDEO
PROVIDER LICENSED TO PROVIDE VC-1 VIDEO. NO LICENSE IS GRANTED OR SHALL BE IMPLIED FOR
ANY OTHER USE. ADDITIONAL INFORMATION MAY BE OBTAINED FROM MPEG LA, L.L.C. SEE
HTTP://WWW.MPEGLA.COM
| top of page |
About DTS 2.0+Digital Out
Manufactured under license under U.S. Patent #'s: 5,451,942; 5,956,674; 5,974,380; 5,978,762;
6,487,535 & other U.S. and worldwide patents issued and pending. DTS and the Symbol are
registered trademarks, & DTS 2.0+Digital Out and the DTS logos are trademakrs of DTS, Inc.
Page 5

| top of page |
Seite
5
von
65
Open Source
The software included in this product contains copyrighted software that is licensed under open
source agreements. Components of this software covered under GPL or other open source licenses
are fully documented as to license and redistribution requirements in the ReadMe file provided
with the software. A copy of this ReadMe may, at Iomega’s discretion and subject to change at
any time, be available on Iomega’s Support and Download site at www.iomega.com/support. You
may download the corresponding source code (when source code distribution is required) from the
Iomega web site at www.iomega.com/support. To locate the download page for open source
code, select your Iomega product and your operating system. Scroll down the page to the search
field and enter “open source.”
In addition, you can also obtain a copy of the applicable open source code on CD by sending a
money order or check for $10 to:
Iomega Corporation
ATTN: Source Code
4059 South 1900 West
Roy, UT 84067 USA
Please include the model name for your ScreenPlay product with the request.
| top of page |
Page 6

Installation and Setup
z
Installation Overview
Connecting to a TV
Connecting to a Network
Seite
6
von
65
z Package Contents
z Safety Information
z Connectors and Indicators
z
z
z First Time Startup
z Power Down/Disconnect
z Settings
Installation Overview
Your ScreenPlay TV Link DX enables you to easily create a digital home entertainment center with
online access. To get started, connect the ScreenPlay TV Link DX to your TV and home network,
then complete first time setup. It doesn't matter if you connect to your network first or your TV
first. It will be easiest to set up your ScreenPlay TV Link DX if it’s connected to both before you
power it up the first time.
| top of page |
Page 7

Installation and Setup
z
Installation Overview
Connecting to a TV
Connecting to a Network
Seite
7
von
65
z Package Contents
z Safety Information
z Connectors and Indicators
z
Package Contents
z
z First Time Startup
z Power Down/Disconnect
z Settings
Iomega ScreenPlay
TV Link DX
Composite AV Cable HDMI Cable Iomega 802.11n WiFi Adapter
Remote Control with
QWERTY Keyboard
Power Supply
NOTE: Package contents may vary. For maximum transfer rate and reliability, use the cables
provided.
| top of page |
Page 8

Installation and Setup
z
Installation Overview
Connecting to a TV
Connecting to a Network
Device Input Rating
DC 12 volt
Operational Temperature Limits
0-35° C
Seite
8
von
65
z Package Contents
z Safety Information
z Connectors and Indicators
z
z
z First Time Startup
z Power Down/Disconnect
z Settings
Safety Information
Safety Guidelines
z Do not operate the ScreenPlay TV Link DX with wet hands or near water.
z Do not bend cables in a sharp angle.
z Keep the ScreenPlay TV Link DX and cables out of reach of children.
z Keep the ScreenPlay TV Link DX and its accessories away from heat sources.
Safety Ratings
z
z Power Supply Input Voltage 100Vac - 240Vac
z Power Supply Output Voltage 12VDC +/- 6%
z Power Supply Max Current 3 amp
z
| top of page |
Page 9

Installation and Setup
Front Panel
z
Installation Overview
Connecting to a TV
Connecting to a Network
Seite
9
von
65
z Package Contents
z Safety Information
z Connectors and Indicators
z
Connectors and Indicators
Rear Panel
z
z First Time Startup
z Power Down/Disconnect
z Settings
1. Power connector—Always connect the included power supply when using the ScreenPlay
TV Link DX.
2. Composite video output connector—Use for composite connection to a TV; connect to
yellow video input jack on the TV.
3. L/R stereo audio output connectors—Use for composite/RCA audio connection; connect to
red/white audio input jacks on the TV.
4. HDMI connector—Use to connect the ScreenPlay TV Link DX to an HDTV or high definition
Home Theater System. Outputs standard, enhanced, or high-definition video, plus multichannel audio (surround sound).
5. Optical audio connector—Outputs optical audio signal. Connect to a receiver using an
optical audio cable (not included).
6. Ethernet connector—Use for wired network connection (Ethernet cable not included).
7. USB 2.0 host port—Use to connect an Iomega WiFi adapter or external USB device to the
ScreenPlay TV Link DX.
top of page |
|
Page 10
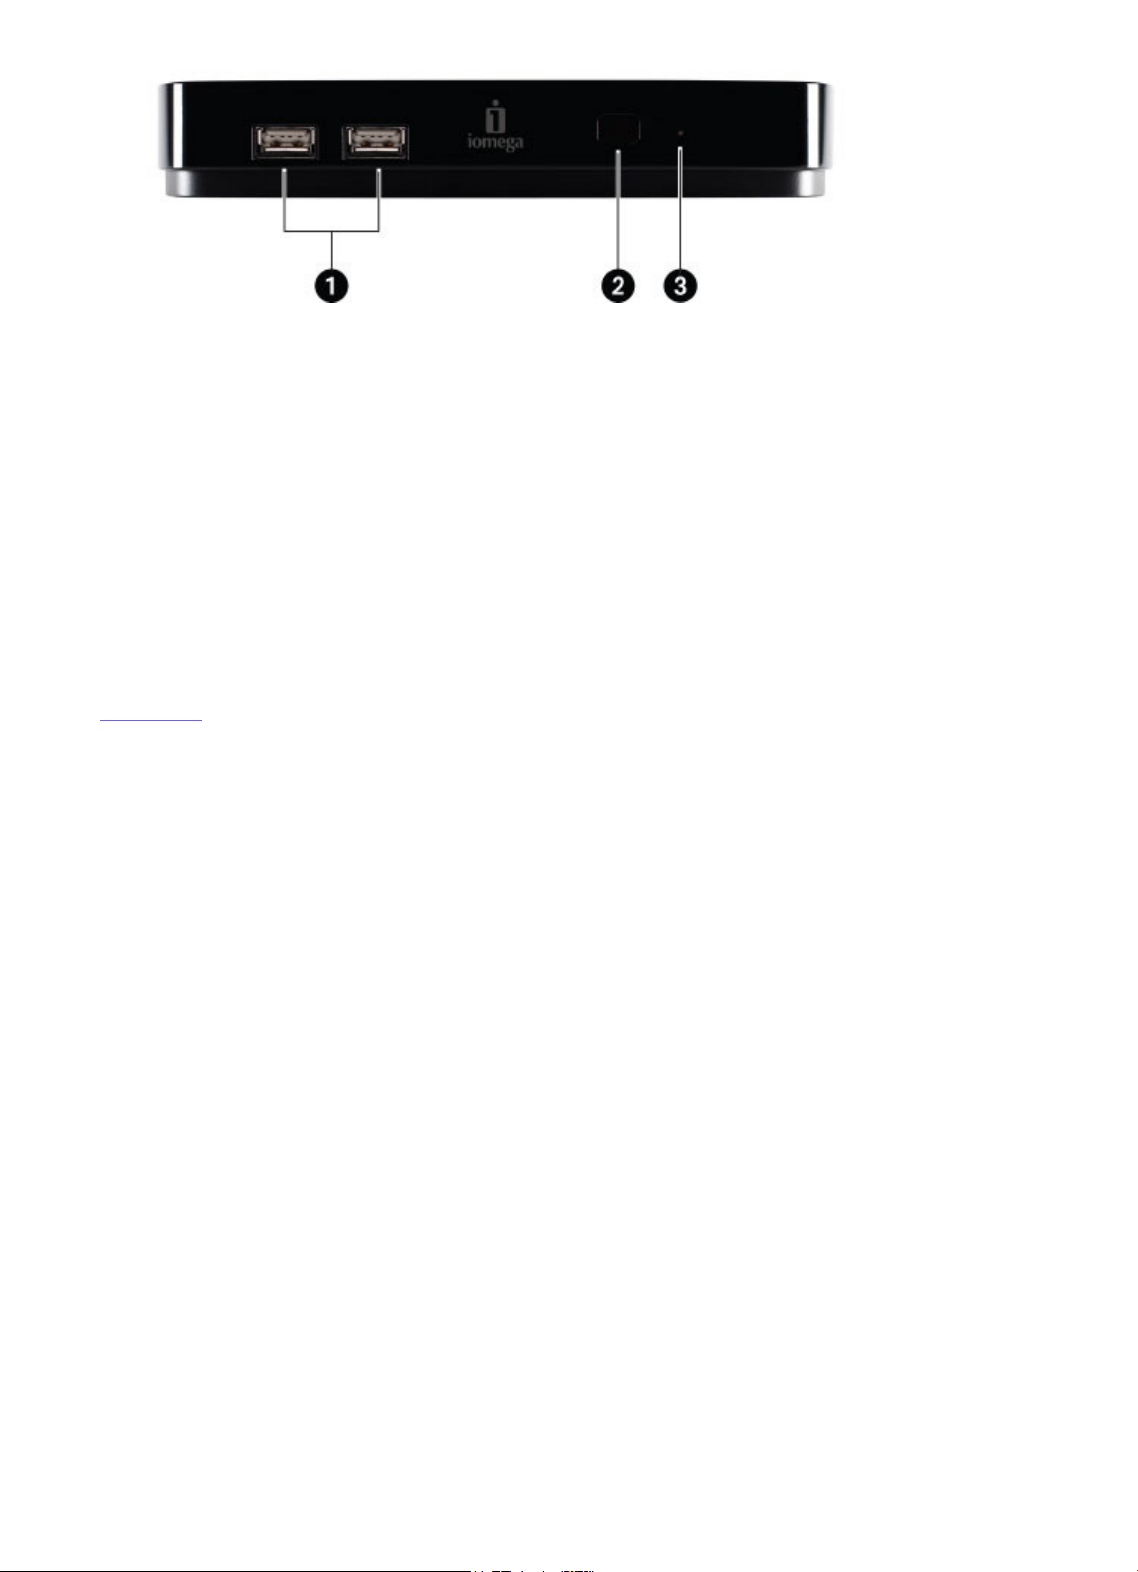
1. USB 2.0 host ports (2)—Use to connect an Iomega WiFi adapter or external USB device to
Seite
10
von
65
the ScreenPlay TV Link DX.
2. Remote receiver—When using the remote control, always point it toward the receiver.
NOTE: Media player functions controlled by the remote are available only when the
ScreenPlay TV Link DX is connected to a TV. Some functions are not supported by all
playable file types.
3. Power/access LED—LED glows blue when the ScreenPlay TV Link DX is powered up; blinks
when the ScreenPlay TV Link DX is loading or accessing files; blinks once when the
ScreenPlay TV Link DX receives a command from the remote control. Glows solid red when
the ScreenPlay TV Link DX is powered off.
| top of page |
Page 11

Installation and Setup
matching the colors.
z
Installation Overview
Connecting to a TV
Connecting to a Network
Seite
11
von
65
z Package Contents
z Safety Information
z Connectors and Indicators
z
z
z First Time Startup
z Power Down/Disconnect
z Settings
Connecting to a TV
The ScreenPlay TV Link DX supports several options for connecting to video and audio on your TV
or home entertainment center. Choose the option that provides the best quality video and audio
supported by your TV.
z HDMI — This is the best connection to use with an HDTV. It uses a single cable for both
video and audio.
z Composite video with L/R audio — This connection type is compatible with most standard
TVs. It uses a single cable for video and audio.
z Optical audio — This option provides better audio quality than L/R audio.
NOTE: Do not connect the ScreenPlay TV Link DX through a VCR. Video signals fed through a VCR
may be affected by copyright protection systems and the picture will be distorted on the
television.
HDMI Connection
HDMI (high-definition media interface) supports standard, enhanced, or high-definition video, plus
multi-channel digital audio, on a single cable connection. This connection option is supported only
on high-definition (HD) TVs.
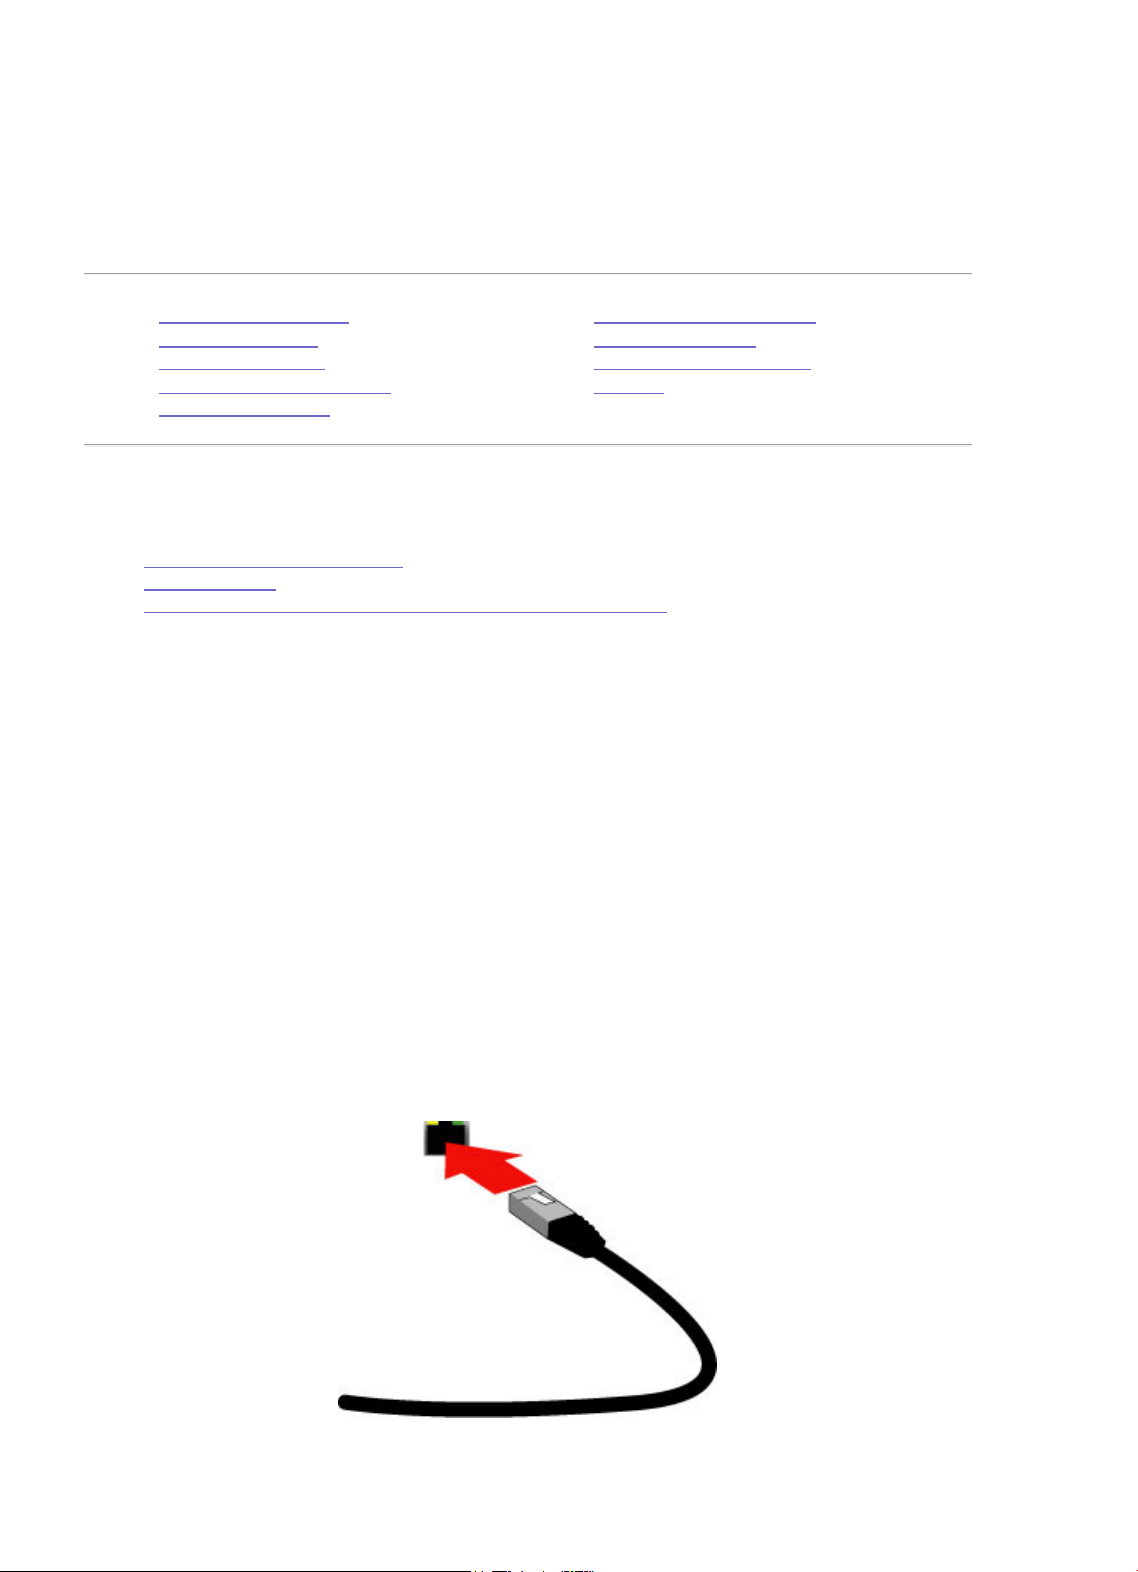
1. Connect the HDMI cable to the back of the ScreenPlay TV Link DX.
2. Connect the other end of the HDMI cable to the HDMI input connection on the TV set.
| top of page |
Composite Video Connection
Composite video is compatible with most TV sets. The following instructions use the composite
video connector on the ScreenPlay TV Link DX and the L/R audio connectors. If desired, you can
use the optical audio option rather than L/R audio.
1. Connect the composite AV cable to the composite video output connector (yellow) and the
L/R audio output connectors (red and white) on the
back of the ScreenPlay TV Link DX,
Page 12

2.
Connect the yellow (video) connector on the other end of the cable to the composite VIDEO
input connection on the TV set.
Seite
12
von
65
3. Connect the white connector to the Left (L) audio input connection on the TV set.
4. Connect the red connector to the Right (R) audio input connection on the TV set.
| top of page |
Optical Audio Connection
The ScreenPlay TV Link DX includes an optical audio connector for high quality digital audio
output. You will need to obtain an optical audio cable to connect the ScreenPlay TV Link DX to an
AV amplifier (receiver) with a digital audio decoder.
NOTE: You will get multi-channel sound effect only if the audio source file carries it.
| top of page |
Page 13
Installation and Setup
z
Installation Overview
Connecting to a TV
Connecting to a Network
Seite
13
von
65
z Package Contents
z Safety Information
z Connectors and Indicators
z
z
z First Time Startup
z Power Down/Disconnect
z Settings
Connecting to a Network
z Physical Network Connection
z Network Setup
z Connecting to the TV Link DX from a Networked Computer
Physical Network Connection
Connect the ScreenPlay TV Link DX to your home network for access to online media, as well as
media content stored on your network volumes. You can connect the ScreenPlay TV Link DX via
Ethernet (wired network) or WiFi (wireless network).
NOTE: The ScreenPlay TV Link DX cannot be connected to Ethernet and WiFi at the same time. An
Ethernet connection will provide the best results when playing videos from your network.
Wired Network:
Use a standard Ethernet cable to connect the ScreenPlay TV Link DX to a network router, hub, or
switch. (Ethernet cable not included.)
— or —
Connect the ScreenPlay TV Link DX to the Ethernet port on a networked computer.
NOTE: A network hub or router is recommended for a wired network connection. The ScreenPlay
TV Link DX package does not include a network hub, router, or ethernet cable.
Page 14

Wireless Network:
The ScreenPlay TV Link DX is fully WiFi-ready and can connect to a wireless network using an
Seite
14
von
65
Iomega 802.11n WiFi adapter. To make the connection, plug the included WiFi adapter into the
USB host port on the back of the ScreenPlay TV Link DX. This will keep the USB host ports on the
front of the ScreenPlay TV Link DX available for connecting external USB devices.
NOTE: You must have a wireless network in place to support a WiFi connection. If you do not
already have a wireless network installed, you will need to obtain a wireless router and install it.
| top of page |
Network Setup
After completing the physical network connection, follow the steps under first time startup to
automatically configure your network connection.
To configure the network connection manually after first time power up, select Network >
Network setup from the Settings menu. Click here to view complete step-by-step instructions for
completing network setup manually.
Once ScreenPlay TV Link DX is configured for your network, you will be able to browse and play
media files stored on your network volumes. You will also be able to use the online media
features. See Using Player Features for additional information.
NOTE: If you need to enter a username and password to login to a network volume, you can use
either the virtual keyboard on the ScreenPlay TV interface or the QWERTY keyboard on the
remote control. The password can use any combination of numbers, letters (lower case or caps),
or extended characters, including punctuation characters. To display and select extended
characters on the virtual keyboard, select the Option button at the bottom of the virtual
keyboard screen.
| top of page |
Connecting to the ScreenPlay TV Link DX from a Networked Computer
You can access an external USB device connected to the ScreenPlay TV Link DX from a computer
on your network. Follow the instructions below.
NOTE: The network computer must be on the same subnet or network segment as the ScreenPlay
DX.
NOTE: You do not need to map a network drive letter in order to access network volumes from
the ScreenPlay DX TV menus. Media files stored on your network volumes will be automatically
available to browse and play.
Manually mapping a drive letter from a Windows PC
1. Select the Settings icon on the ScreenPlay home screen:
Page 15
2. Use the up/down navigation buttons to highlight Network and press Enter.
Seite
15
von
65
3. Select Network setup and press Enter.
4. Note the IP address assigned to the ScreenPlay DX.
5. Using a PC connected to the Network, right click on the Computer (Vista) or My Computer
(XP) icon and select Map Network Drive.
6. Select the drive letter you want to use for the ScreenPlay DX, then enter the IP address for
the ScreenPlay DX in the field next to Folder (for example, \\192.168.1.151).
7. You can now use My Computer or Windows Explorer to browse the ScreenPlay DX and copy
files from your network volumes onto the ScreenPlay DX.
Connecting to the ScreenPlay DX from a Mac
1. Select the Settings icon on the ScreenPlay home screen:
2. Use the up/down navigation buttons to highlight Network and press Enter.
3. Select Network setup and press Enter.
4. Note the IP address assigned to the ScreenPlay DX.
5. On a Mac connected to the network, select Connect to Server from Finder’s Go menu.
6. Under Server Address, enter “smb://” followed by the IP address for the ScreenPlay DX
(for example, smb://192.168.1.151).
7. Click Connect.
8. Select the ScreenPlay public share to mount it on your desktop.
| top of page |
Page 16

Installation and Setup
Link DX using the
Shutdown option
from the Settings menu.
z
Installation Overview
Connecting to a TV
Connecting to a Network
Seite
16
von
65
z Package Contents
z Safety Information
z Connectors and Indicators
z
z
z First Time Startup
z Power Down/Disconnect
z Settings
First Time Startup
The first time you power up the ScreenPlay TV Link DX after connecting it to a TV, you will see a
setup wizard that enables you to select some basic settings. The setup wizard will not appear
again unless you reset the ScreenPlay TV Link DX to factory defaults.
1. If you have not already done so, connect the ScreenPlay TV Link DX to your network and
yourTV.
NOTE: It doesn’t matter if you connect to your network first or your TV first.
2. Connect the included power supply to the back of the ScreenPlay TV Link DX.
3. Place the ScreenPlay TV Link DX on a stable surface and connect the power supply to an
uninterruptible power supply (UPS) or power outlet.
CAUTION! Do not move the ScreenPlay TV Link DX while it is powered up to avoid damage
or data loss. Use only the included power supply.
NOTE: The ScreenPlay TV Link DX will power up automatically when power is connected.
The indicator light will flash while the player powers up, then glow steadily.
4. Turn on your TV and change the input setting as needed to receive input from the
ScreenPlay TV Link DX.
5. When the ScreenPlay setup wizard appears on the TV screen, select your language and
press the Enter button on the remote control.
6. Select the aspect ratio needed for your TV screen (16:9 for wide-screen display or 4:3 for
full-screen).
7. Select ON for Quick Start Mode if you want the ScreenPlay TV Link DX to go into screensaving standby mode when you push the power button on either the remote control or the
player front panel. This will turn off video output without shutting down power to the
ScreenPlay TV Link DX.
If you select OFF for Quick Start Mode, the power buttons on the remote control and player
front panel will turn power to the ScreenPlay TV Link DX off and on.
NOTE: Start up from standby mode is much faster than start up from complete power off.
If you want to use quick start mode, you can completely power down the ScreenPlay TV
Page 17

8.
If the ScreenPlay TV Link DX is connected to a network, select
Network setup
to
automatically configure the network connection.
Seite
17
von
65
NOTE: If your ScreenPlay TV Link DX is not yet connected to a network, you can skip the
network configuration during first time startup. Use Settings > Network > Network setup
to configure a network connection later on. See Network Setup for detailed instructions.
NOTE: If your network is secure, the virtual keyboard will appear so you can enter your
password. You can enter text using the virtual keyboard interface or the QWERTY keyboard
on the remote control. When you are finished, press Enter.
9. When the setup wizard is finished, press Enter to automatically return to the ScreenPlay TV
Link DX home screen.
| top of page |
Page 18
Installation and Setup
z
Installation Overview
Connecting to a TV
Connecting to a Network
Network
Seite
18
von
65
z Package Contents
z Safety Information
z Connectors and Indicators
z
Settings
z
z First Time Startup
z Power Down/Disconnect
z Settings
z Audio/Video
z Playback
z System
z
z Shutdown
z File Management
z Eject USB device
The Settings menu allows you to view or change configuration options for the ScreenPlay TV Link
DX. To access the Settings menu, go to the ScreenPlay TV Link DX home screen and use the
right/left navigation buttons to select the Settings icon:
Use the up/down navigation buttons to scroll through the Settings functions. Press the Enter
button to display menus and options for the highlighted function.
To set the configuration for a function, use the up and down navigation buttons to highlight the
option you want to use, then press Enter to confirm the setting. To return to the list of functions,
press the Back button [ ].
Audio/Video
Video Output
Select the AV connection you are using between the ScreenPlay TV Link DX and the TV
and press Enter to access the configuration options for the video output mode.
Composite Select the appropriate regional television standard:
Component Select the resolution that optimizes display on the TV:
z NTSC — Americas
z PAL — Europe and Asia
NOTE: Your ScreenPlay TV Link DX will be set by default to use
the standard of the region where it was purchased.
Page 19

z 480p60Hz
Seite
19
von
65
z 576p50Hz
z 720p50Hz
z 720p60Hz
z 1080i50Hz
z 1080i60Hz
HDMI Select Auto if you want the ScreenPlay TV Link DX to
automatically adjust the video output resolution based on the
selected video file, or specify a display resolution from the
supported options:
z 480p60Hz
z 576p50Hz
z 720p50Hz
z 720p60Hz
z 1080i50Hz
z 1080i60Hz
z 1080p23.976Hz
z 1080p24fps
z 1080p50fps
z 1080p60fps
Aspect ratio 4:3 — full-screen
16:9 — wide-screen
Audio output Stereo — RCA (red/white) audio connection
Digital — Optical audio connection
| top of page |
Playback
Subtitle mode On — Display subtitles when supported by the selected video
Off — Do not display subtitles
Subtitle font size 24, 28, 32, 36, 40, 44, 48, or 52 pixels
Additional Encoding Western Europe (ISO)
Central Europe (Windows-1250)
Central Europe (ISO)
Traditional Chinese (Big5)
Simplified Chinese (GB18030)
Japanese (Shift-JIS)
Korean (EUC-KR)
Cyrillic (Windows-1251)
Cyrillic (KO18-R)
Turkish (Windows-1254)
Greek (Windows-1253)
Greek (ISO)
Arabic (Windows-1256)
Hebrew (ISO-8859-8)
Audio track display List music tracks by either Title or File name
Photo scaling Keep as original
Fit to screen
Display in full screen
Transition effect Normal
Page 20

Fade
Seite
20
von
65
Wipe
Zoom
Push
Replace
Checkerboard
Random
Slideshow interval 3 sec, 5 sec, 10 sec, 20 sec, 30 sec, 1 min, or 5 min
Browser display Select the browser display mode for Photos, Movies, and Music
files. You can select the mode for each media type separately.
Preview mode — Media files will be listed in the ScreenPlay
browser by title or file name. When a file is selected, the display
will show a preview window for a movie or photo or start playing
a music file.
Thumbnail mode — Media files will be displayed in the
ScreenPlay browser using thumbnails rather than titles or
filenames. For photos, this option will show a thumbnail of each
image file. For music, this option will display the album cover for
each music track.
DivX DRM VOD Registration — Displays the registration code to use when
registering your ScreenPlay TV Link DX for DivX Video-onDemand. Register at http://vod.divx.com
Deactivation — Turns off DivX registration
| top of page |
System
Language — Select the language for the user interface
Options: English
Français
Italiano
Deutsch
Español
简体中文
繁體中文
한국어
日本語
Netherlands
Ελληνικά
Polski
Русский
Svenska
Suomi
Português
עברית
اﻟﻌرﺑﯾﺔ
Čeština
Türkçe
Dansk
Norsk
Magyar
English
French
Italian
German
Spanish
Chinese Simplified
Chinese Traditional
Korean
Japanese
Dutch
Greek
Polish
Russian
Swedish
Finnish
Portuguese
Hebrew
Arabic
Czech
Turkish
Danish
Norwegian
Hungarian
Page 21

Media library When this option is turned On (default setting), the ScreenPlay
Seite
21
von
65
TV Link DX will filter media files by categories that apply to
specific media types. For example, the filter categories for music
files include All music, Artist, Album, Genre, Playlist, and
Recent. When browsing photos, the categories include All photos,
Date, and Recent.
NOTE: The filters depends on meta-data included with the media
files. If the meta-data is missing or incomplete for any media
file, the file will not appear in the expected category.
When this option is turned Off, the ScreenPlay TV Link DX will
display a "Folder" option for browsing all media files.
Screen saver delay Sets the time the
ScreenPlay TV Link DX
can be idle before
automatically
displaying the screen
saver. Options are
Never, 5min, 10min,
or 15min.
Quick start mode On — The power
buttons on the remote
control and player front
panel will put the
ScreenPlay TV Link DX
into standby mode or
start it up from standby
mode. Start up from
standby mode is much
faster than start up
from complete power
off.
Off — The power
buttons on the remote
control and player front
panel will turn the
ScreenPlay TV Link DX
off or on. Turning the
ScreenPlay TV Link DX
completely off reduces
power consumption
when the ScreenPlay TV
Link DX is not in use;
however, start up will
take longer.
NOTE: If Quick start
mode is set to "On", you
can completely power
down the ScreenPlay TV
Link DX using the
Shutdown option.
Netflix deactivation Select this option to
cancel a connection to
Netflix. (Available only
in the United States)
Page 22

System reset Select this option to
Seite
22
von
65
reset all configuration
options on the
ScreenPlay TV Link DX
to factory defaults.
Update device Select this option to
tell the ScreenPlay TV
Link DX to search the
network for a firmware
update file.
About Displays the firmware
version and product
serial number
| top of page |
Network
Network setup Displays details on current network configuration, including
connection type (wired or wireless), IP address, Netmask (subnet
mask), Gateway, DNS server, and MAC address.
Select the Configure button at the bottom of the Network setup
screen to change the network configuration using either Auto
network detection or Static IP address.
Device name This is the name that will appear for the ScreenPlay TV Link DX
on the network. The default device name is "Iomega_HD". Use
the virtual keyboard or the remote control if you want to change
the name.
Media server This option applies only to the ScreenPlay DX with internal
storage. The media server option is off by default.
Shared folder When this option is on (default setting), an external USB device
connected to the ScreenPlay TV Link DX will appear as a shared
volume on the network. Select "Off" if you do not want to the
ScreenPlay TV Link DX to appear as a network share.
Workgroup name The default workgroup name is "WORKGROUP". You can change
the workgroup name using the virtual keyboard or the remote
control.
Auto login This option is off by default. When this option is set to "On", the
ScreenPlay TV Link DX will automatically login to the network at
start up. This option will allow you to set up a network password
as needed.
Clear account
information
This option deletes a previously set network password and clears
network account information.
| top of page |
Shutdown
Shutdown Completely powers down the ScreenPlay TV Link DX. You can use
Page 23

this option to turn off the ScreenPlay TV Link DX when quick start
Seite
23
von
65
mode is set.
Restart Power cycle the ScreenPlay TV Link DX.
Cancel Exit the Shutdown menu without shutting down or restarting.
| top of page |
File Management
The File Management option allows you to copy, move, or delete media files and
folders to or from any location connected to the ScreenPlay TV Link DX, including
network volumes and USB devices. Select a location, then select files or folders to
manage. Press the Option button on the remote control and choose the icon for the
action you want (copy, delete, move, or select/unselect all). If you choose copy or
move, highlight the location where you want the items and press the Option button
to place the files.
| top of page |
Eject USB device
Select this option to safely disconnect a USB device from the ScreenPlay TV Link DX.
After selecting "Eject USB device" highlight the USB port number you want to eject
and press Enter. Ports 1 and 2 are on the front of the ScreenPlay TV Link DX; port 3
is on the back of the ScreenPlay TV Link DX.
| top of page |
Page 24

Using Controls and Menus
z Using the Remote Control
Seite
24
von
65
z Navigating Menus
z Options Menus
Using the Remote Control
Use the ScreenPlay TV Link DX remote control to browse the internet, navigate TV menus, and
play media content. In addition to player and navigation controls, the remote control includes a
keyboard for use with the web browser. Refer to the sections below for information on the button
functions and details on using the keyboard.
NOTE: Always point the remote control towards the receiver on the front of the ScreenPlayDX.
The ScreenPlay TV Link DX will not accept commands from the remote control when is it
connected to USB on a computer.
Navigation and Player Buttons
Power — Press to turn power to the ScreenPlay TV Link DX on or
Page 25

off. When Quick Start Mode is set to ON in the system settings,
Seite
25
von
65
the power button puts the ScreenPlay TV Link DX into standby
mode rather than turning power off.
Player control pad — Standard controls for Play, Pause, Stop, Fast
forward, and Rewind. Use to move the cursor in the web browser.
Navigation Controls — Use the arrow buttons to move the
highlight through lists or options. Use the up/down arrow buttons
to scroll web pages.
Use Enter to select a highlighted item or open a folder when
navigating through lists of files. You can also use Enter to start
playing a media file.
In the web browser, use Enter to select a web link or insert the
cursor in a text field indicated by highlight or the pointer.
Home — Press to display the ScreenPlay TV Link DX home screen.
Use to exit the web browser.
Online media — Press to display the Online Media menu with the
Browser option highlighted.
Back / Return — Press to return to previous option or menu.
Return to the previous web page in the browser; go back through
browser history.
Option — Display context sensitive menus and options.
Click to display the web browser URL bar and browser options
including bookmarks and browser history.
Eject — Use to safely remove a USB device before disconnecting it
from the ScreenPlay TV Link DX.
Search — Search for a specific media file.
You can use the QWERTY keyboard on the remote control or the
onscreen virtual keyboard to enter your search terms.
Previous — Jump to previous music/photo file or video chapter
during playback.
Left mouse click in the web browser (same function as Enter).
1
Next — Jump to next music/photo file or video chapter during
playback.
Decrease volume — Press to decrease the playback volume level
for movies or music tracks.
Increase volume — Press to increase the playback volume level
for movies or music tracks.
Page 26

Mute — Mute volume during playback.
Seite
26
von
65
Info — Press to display file properties, information, and play
status.
Movies — Press to display the ScreenPlay TV Link DX movies menu.
Alt key when using the QWERTY keyboard in the web browser.
Movie shortcut does not work in browser mode.
Photos — Press to display the ScreenPlay TV Link DX Photos menu.
Spacebar when using the QWERTY keyboard in the web browser.
Photo shortcut does not work in browser mode.
Music — Press to display the ScreenPlay TV Link DX Music menu.
Symbol key when using the QWERTY keyboard in the web browser.
Music shortcut does not work in browser mode.
1
NOTE: The Search button on the remote control does not work when using Online Media options
such as YouTube or the web browser.
Using the Keyboard
The keyboard on the ScreenPlay TV Link DX remote control allows you to enter text in the web
browser, as well as when entering network login information or using the search feature.
To access the web browser, select Online Media from the ScreenPlay TV Link DX Home screen,
then select the Browser option. Press the Option button on the remote control to display the URL
bar in the web browser.
To enter a URL, highlight the URL bar and press Enter to insert the cursor, then type the web
address using the QWERTY keyboard. To submit the URL, press the right arrow button to highlight
the Go to button and press Enter.
By default, the keyboard buttons enter lowercase letters. To enter a single capital letter, press
and release the Shift key, then press the desired letter. To enter multiple capital letters, press
and release the Caps Lock key then press the desired letters. Press the key again to release the
Caps Lock.
To enter extended characters, press and release the Alt, Symbol, or Fn (Function) keys, then
press a letter key to select the color-matched extended character on or above the key.
NOTE: The Alt, Symbol, and Space keys are also shortcuts to the ScreenPlay TV Link DX media
menus. The shortcuts are disabled when using keyboard input in the web browser.
| top of page |
Page 27

Using Controls and Menus
z Using the Remote Control
example, if you select the
Music
function, the navigator will list only audio files. If you select
Seite
27
von
65
z Navigating Menus
z Options Menus
Navigating Menus
When the ScreenPlay TV Link DX is connected to a TV and powered up, the ScreenPlay TV Link DX
home screen will display on the TV screen. From the home screen, you can select from the
following media functions to browse and play media files, access online media, or access settings
and general information for your ScreenPlay TV Link DX.
Music
Movies Access and play your digital movies and videos
Photos
Online media
Settings View or change player settings
Listen to music tracks, albums, and playlists.
Create playlists.
Browse and view your photo images. Create
photo slideshows.
Access popular internet media to view on your
TV
Use the right/left navigation buttons on the remote control to scroll through the ScreenPlay TV
Link DX functions. When the function you want is highlighted, use the up/down navigation buttons
to scroll through available locations or options. Press the Enter button to select an option or
location. When browsing content, you can select and play media fles by pressing either the play
button or Enter on the remote control.
Each media function automatically filters files so you will see only the selected media type. For
Page 28

Movies
, you can browse and play your video files.
Navigation Tips:
Seite
28
von
65
z Use the up/down buttons to scroll item-by-item through a list on the current page of the
ScreenPlay TV interface.
z Press Enter to open a selected directory.
z Press the Back button [ ] to exit the current menu or directory and return to the
parent menu or directory.
z Press the play button or Enter to play a selected file.
z Press the stop button to end playback and return to the selected media navigator.
z Press the Home button [ ] to jump to the ScreenPlay TV Link DX home screen while
browsing files and folders.
| top of page |
Page 29

Using Controls and Menus
z Using the Remote Control
Seite
29
von
65
z Navigating Menus
z Options Menus
Options Menus
z Movie Options
z Photo Options
z Music Options
z Browser Options
You can press the Option button on the remote control at any time to display menus that differ
depending on the currently selected media, the type of item, and the context. For example,
when you are browsing your media files, the Option button provides access to file management
options that allow you to select and copy or paste files and folders. When you are playing media
files, the Option button provides access to playback and display options that differ depending on
the media format. This allows you to easily modify your viewing or listening experience. Refer to
the tables below for information on the playback options available for different media types.
NOTE: Because the options menus are context-sensitive and differ according to file format, some
of the options described below are not available for all media files.
Movie Options
Audio channel Press Enter to select an available audio channel. If more than one
channel is available, press Enter again to toggle the channel.
Subtitle Press Enter to turn subtitles on or off. If more than one language
is available for the subtitles, press Enter repeatedly to toggle the
subtitle language.
NOTE: Subtitles will display only if supported by the movie you
are viewing.
Zoom in Press Enter to increase the magnification by 2x, 4x, 8x, or restore
the display to 1x magnification
Zoom out Press Enter to decrease the magnification to 1/2x, 1/4x, 1/8x, or
restore the display to 1x magnification
Pan Press Enter to start pan set, then use the right/left/up/down
navigation buttons to adjust the display position on the TV
screen. Press Enter to confirm the position and exit pan set.
Info Displays an information bar at the bottom of the screen that
shows the movie filename, resolution, play time, format, and
chapter currently playing relative to the total number of chapters
Page 30

in the movie. Press Enter to remove the Info bar display.
Seite
30
von
65
Repeat Press Enter to display an info bar that shows an icon for the
currently selected repeat option. Press Enter repeatedly to toggle
through the available repeat options or turn repeat off. See Music
Options below for information on the repeat icons.
Menu Select this option to display the DVD menu if available.
Chapter Press Enter to display a list of chapters in the movie. Use the
up/down navigation buttons to highlight the chapter you want to
watch, then press Enter to exit the menu and play the selected
chapter.
Title and Edition Press Enter to display the title and edition of the movie.
| top of page |
Photo Options
Pan Press Enter to start pan set, then use the right/left/up/down
navigation buttons to adjust the picture position on the TV
screen. Press Enter to confirm the position and exit pan set.
Rotate right Press Enter to rotate the photo display 90 degrees clockwise.
Rotate left Press Enter to rotate the photo display 90 degrees
counterclockwise.
Zoom in Press Enter to increase the picture magnification by 2x, 4x, 8x, or
restore the picture to 1x magnification
Zoom out Press Enter to decrease the picture magnification to 1/2x, 1/4x,
1/8x, or restore the picture to 1x magnification
Repeat Press Enter to display an info bar that shows an icon for the
currently selected repeat option. Press Enter repeatedly to toggle
through the available repeat options or turn repeat off. See Music
Options below for information on the repeat icons.
Info Displays an information bar at the bottom of the screen that
shows the photo filename, file date, dimensions (in pixels), file
size, and number of the photo relative to the total number of
photos in the folder. Press Enter to remove the Info bar display.
| top of page |
Music Options
Press Enter repeatedly to toggle through the available repeat options. The selected repeat option
displays as an icon on the info bar. If no icon appears, repeat is turned off. Press the Option
button again to exit the repeat menu.
Repeat all once — Replay all music tracks in order from the
currently selected album or folder. Stop play after all tracks
have repeated one time.
Continuous — Replay all music tracks in order from the currently
selected album or folder. Continue replay until another option is
Page 31

selected.
Seite
31
von
65
Shuffle — Play all music tracks from the currently selected album
or folder in random order. Stop play after all tracks have played
once.
Continuous repeat~shuffle — Replay all music tracks from the
currently selected album or folder in random order. Continue
replay until another option is selected.
| top of page |
Browser Options
The following options appear under the URL bar when you press the Option button in the web
browser. Press the down arrow button to move the highlight to the options, then use the
right/left arrow buttons to highlight the option you want to use and press Enter to select it. Press
the Option button again to close the URL bar and browser options.
Back — Go back through the browser history. Return to the
previous web page.
Forward — Go forward through the browser history.
| top of page |
Home — Display the web browser "Favorites" screen.
Refresh — Reload the current web page.
Bookmarks — Access the bookmarks list to load a bookmarked
web page. Add, Edit, or Delete bookmarks.
History — Display the browser history; select a link from the
history to load a web page. Clear the browser history.
Page 32

Seite
32
von
65
Page 33

Seite
33
von
65
Page 34

Using the ScreenPlay TV Link DX Player Features
You can use the ScreenPlay TV interface to easily access and enjoy all of your digital media. The
Movies
See:
Watch digital movies
Playing Digital Movies
Watch video camera recordings
Using External USB Devices
Use a Digial Media Server
Accessing DMS (UPnP/DLNA)
Create a video library
Managing Media Files
Music
Listen to music
Listening to Music
Make playlists
Creating Playlists
Use a Digial Media Server
Accessing DMS (UPnP/DLNA)
Create a music library
Managing Media Files
Photos
View digital photos
Viewing Photo Images
Create / view slideshows
Creating Slideshows
Add music to a slideshow
Playing Music with a Slideshow
Use a Digial Media Server
Accessing DMS (UPnP/DLNA)
Create a photo library
Managing Media Files
Online media
Access popular Internet media
Connecting to Online Media
View YouTube videos
Playing YouTube Videos on Your TV
Mediafly Internet radio or TV
Using Mediafly
Access Flickr internet photos
Using Flickr
Access Facebook from your TV
Interacting with Facebook
Change Player Settings
Video or audio output settings
Settings: Audio/Video
Movie or photo player settings
Settings: Playback
Language, media server, misc.
Settings: System
Network information and setup
Settings: Network
Shutdown or restart
Settings: Shutdown
Seite
34
von
65
following table provides links to instructions for using the player features.
z
z
z
z
z
z
z
z
z
z
z
z
z
z
z
z
z
z
z
z
z
z
z
Page 35

Using the ScreenPlay TV Link DX Player Features
Repeat
z
Playing Digital Movies
Creating Slideshows
Connecting to Online Media
Seite
35
von
65
z Listening to Music
z Creating Playlists
z Viewing Photo Images
z
z
z Using External USB Devices
z Accessing Network Files
z Digital Media Servers
Playing Digital Movies
With ScreenPlay TV Link DX connected to your TV and your home network, you can easily play
digital movies and video files from any of the following locations:
z Network volumes
z Connected USB storage devices (such as flash or external hard drives)
z A computer or NAS with Digital Media Server
z A local computer equipped with Windows Media 11 and UPnP activated
To access your video files, select Movies from the ScreenPlay TV Link DX home screen:
Use the up/down navigation buttons on the remote control to highlight a source location and
press Enter to select it. The video navigator will automatically filter the selected location to
display video content. After choosing a location, you can select an additonal browser filter to
make it easier to find the movie or video you want to watch. The filter options for Movies include
Folders, All movies, or Recent. Press Enter when the filter option you want is highlighted, then
browse to the video file you want to play. See Navigation Tips for details on how to use the
remote control to browse and select files.
NOTE: If the movie or video file you want does not appear or does not play, make sure it is in a
supported format. See Supported Media Formats for a complete list of supported video types and
file formats.
Click here to view step-by-step instructions for playing video files.
Playback Options
While viewing a movie, you can press the Option button to access video playback options where
you can select or change the following:
Audio channel
Subtitles
Pan
Zoom
Info
Page 36

Menu
Chapter
Seite
36
von
65
Title and Edition
NOTE: The options available vary depending on the format of the selected video.
| top of page |
DVD Folder
A DVD folder contains complete files for a DVD movie. The ScreenPlay TV Link DX can play back a
movie from a DVD folder just like playing back a DVD disc. To create a DVD folder, connect the
ScreenPlay TV Link DX to your computer, insert the DVD disc into the computer's optical drive,
and use My Computer or Windows Explorer to browse the disc. Copy the entire "VIDEO_TS" folder
from the DVD to the ScreenPlay TV Link DX. To play the DVD movie, navigate to the VIDEO_TS
folder, select the VIDEO_TS IFO file and press the play button.
NOTE: If the DVD folder is incomplete, you can still play back the VOB files directly. Functions
controlled by the IFO file, such as the selection of subtitles, chapters, and angles, will be lost.
IMPORTANT! Some DVD discs cannot be copied because they have been protected with CSS
protection. Always obey copyright and intellectual property rights. Do not copy DVDs with
copyright and do not distribute them to others.
| top of page |
Page 37

Using the ScreenPlay TV Link DX Player Features
Music Repeat Options
z Playing Digital Movies
Creating Slideshows
Seite
37
von
65
z Listening to Music
z Creating Playlists
z Viewing Photo Images
z
z Connecting to Online Media
z Using External USB Devices
z Accessing Network Files
z Digital Media Servers
Listening to Music
z Playing Music Files
z Music Repeat Options
z Creating Playlists
The ScreenPlay TV Link DX enables you to listen to music files stored on USB devices connected to
the TV Link, your network volumes, or shared UPnP/DLNA devices. Supported formats for music
files include MP3, WAV, WMA, OGG Voorbis, and FLAC. The ScreenPlay TV Link DX also supports
DVD soundtracks in AC3 format (Dolby Digital Encoding). You can play music files through a TV set
or connected amplifier/receiver. For the best music playback quality, use an HDMI connection to
the TV set or an optical audio connection to a connected amplifier/receiver.
Playing Music Files
To access your music files, select the Music icon from the ScreenPlay TV Link DX home screen:
Use the up/down navigation buttons on the remote control to highlight a source location and
press Enter to select it. The music navigator will automatically filter the selected location to
display audio content. After choosing a location, you can select an additonal browser filter to
make it easier to find the music you want to watch. The filter options* for Music include Folders,
All music, Artist, Album, Genre, Playlist, or Recent. Press Enter when the filter option you want
is highlighted, then browse to the music you want to play. Press the play button to start playback
and display the music player on the TV.
*The filters for artist, album, and genre depend on meta-data included with the music files. If the
meta-data is missing or incomplete for any music file, it will not appear in the expected category.
If you can't find a file, try browsing All music.
top of page |
|
Page 38

While the music player is displayed, you can press the Option button to select or change the
music repeat option. Press Enter repeatedly to toggle through the available repeat options. The
Seite
38
von
65
selected repeat option displays as an icon on the info bar. If no icon appears, repeat is turned off.
Press the Option button again to exit the repeat menu.
The available options include:
Repeat all once Replay all music tracks in order from the currently selected
album or folder. Stop play after all tracks have repeated one
time.
Continuous Replay all music tracks in order from the currently selected
album or folder. Continue replay until another option is selected.
Shuffle Play all music tracks from the currently selected album or folder
in random order. Stop play after all tracks have played once.
Continuous
repeat~shuffle
| top of page |
Replay all music tracks from the currently selected album or
folder in random order. Continue replay until another option is
selected.
Creating Playlists
A playlist is a collection of music files which can be played in series. You can use playlists for
continuous playback of music stored in different locations on your ScreenPlay TV Link DX or home
network. You can also use playlists to add background music to your photo slideshows. You can
use the ScreenPlay TV interface to create playlists from your music libraries, or you can organize
music tracks in folder playlists. Follow the instructions below.
How to Create a Playlist Using the ScreenPlay Options Menus
1. Press the Music button on the remote control to display the music navigator.
2. Browse to each file you want to include in the playlist, press the Option button, then
choose Select and press Enter.
3. Once you have selected the tracks you want for the playlist, navigate to the location on
your ScreenPlay TV Link DX where you want to save the playlist.
NOTE: You might find it helpful to create a folder called “Playlists” so you can save all of
your playlists in a single location.
4. Press the Option button, then select Create new playlist and press Enter.
5. Use the virtual keyboard or the remote control keyboard to name your playlist, then select
OK and press Enter.
You can also use the options menus to add music tracks to, or remove tracks from, an existing
playlist.
How to Play a Playlist File (m3u)
Page 39

In addition to playlists created using the ScreenPlay TV interface, the ScreenPlay TV Link DX can
use playlist files from other software players, such as Windows Media Player or Winamp. Playlist
Seite
39
von
65
files usually have an .m3u file extension.
1. Press the Music button on the remote control to display the music navigator.
2. Use the up/down navigation buttons to highlight the source location where the playlist is
stored. The music navigator will list all available sources, including network volumes,
connected USB devices, and UPnP/DLNA compliant Digital Media Servers.
3. Select the Playlist filter to make it easy to find the m3u files.
NOTE: The playlist filter will not appear if the Media libray option is turned off.
4. Browse to the playlist you want and press the Play button to start playback.
5. Press Play/pause again to pause playback or press the Stop button to end playback.
During playback, you can press the Option button to set options to repeat all tracks on the playlist
or shuffle the play order.
Folder Playlists
The ScreenPlay TV Link DX will automatically play all of the music tracks in a folder as a playlist,
so you can also create playlists by organizing your music files in folders as desired. To launch a
folder playlist, just navigate to the folder, select the first music track in the folder and press the
Play button to start playback. The ScreenPlay TV Link DX will then play all of the music tracks in
the folder in order of their filenames (alphanumeric order). If you want to play the music tracks in
random order, press the Option button, then press Enter until the shuffle icon displays on the info
bar.
| top of page |
Page 40

Using the ScreenPlay TV Link DX Player Features
Creating Slideshows
z
Playing Digital Movies
Creating Slideshows
Connecting to Online Media
Seite
40
von
65
z Listening to Music
z Creating Playlists
z Viewing Photo Images
z
z
z Using External USB Devices
z Accessing Network Files
z Digital Media Servers
Viewing Photo Images
z Browsing Your Photos
z Creating Slideshows
z Playing Music with a Slideshow
You can use the ScreenPlay TV Link DX to view photos directly from a USB camera, or images
stored on a connected USB storage device, your network volumes, or shared UPnP/DLNA devices.
Supported formats for photo images include JPEG, BMP, and GIF. You can easily view all of the
photos stored in a single folder or create photo albums or slideshows with images from multiple
locations.
Browsing Your Photos
To access your photos, select Photos from the ScreenPlay TV Link DX home screen:
Use the up/down navigation buttons on the remote control to highlight a source location and
press Enter to select it. The photo navigator will filter the selected storage location to show your
photos. After choosing a location, you can select an additional browser filter to make it easier to
find the photos you want to view. The filter options for Photos include Folders, All photos, Date
(which will display the oldest photos at the top), and Recent.* Press Enter when the filter option
you want is highlighted, then browse to select the photo you want to view. Press the play button
or Enter to display the photo on the TV. If you use the play button, the photo viewer will
automatically display each photo in the same folder using the display interval set under Settings >
Playback. If you use Enter to view the first photo, press the Next button to manually display the
next image.
*NOTE: Browser filters will not appear if the Media libray option is turned off. If you want to use
thumbnails to browse your photos, select Settings > Playback > Browser display > Thumbnails.
top of page |
|
Page 41

ScreenPlay TV Link DX automatically allows you to view all of the photos in a selected folder as a
slideshow. If you want to create a slideshow using photos from multiple folders, you can use the
images, select the first photo and press the Play button. The ScreenPlay TV Link DX will then
Seite
41
von
65
ScreenPlay TV interface to create a new photo album with copies of the images you select. You
can then display all photos in the album as a slideshow. Follow the instructions below.
How to Create a Photo Album Using the ScreenPlay Options Menus
1. Press the Photos button on the remote control to display the photo navigator.
2. Browse to each file you want to include in the album, press the Option button, then choose
Select and press Enter.
3. Once you have selected the images you want for the slideshow, navigate to the location on
your ScreenPlay TV Link DX where you want to save the new photo album.
4. Press the Option button, then select Create new album and press Enter.
5. Use the virtual keyboard or the remote control keyboard to name your photo album, then
select OK and press Enter.
You can also use the options menus to add images to, or remove images from, an existing photo
album.
Folder Slideshows
The ScreenPlay TV Link DX will automatically display all of the photo images in a folder as a
slideshow, so you can also create slideshows by organizing your photos in folders as desired.
1. Connect the ScreenPlay TV Link DX to a computer via USB or use a networked computer to
access the ScreenPlay TV Link DX network share.
NOTE: You can also create slideshows on an external USB device or network volume.
2. Use your computer's operating system to browse to the location you want to store your
slideshow (for example, inside your "Photos" folder).
3. Create and name a new folder for the slideshow.
HINT: Use a name that will make it easy for you to recognize the slideshow.
4. Browse to the photos you want to include in the slideshow and use copy-and-paste or dragand-drop to copy them to the folder you created in step 3.
NOTE: If two photos have the same filename, rename one of the files so it doesn't copy
over the other file.
5. If you want the photos in your slideshow to appear in a specific order, rename them so they
list in the order you want to use. By default, the ScreenPlay TV Link DX will display all
photos in a folder in alphanumeric order, so you can easily set the order simply by
numbering each photo.
6. If the ScreenPlay TV Link DX is connected via USB, disconnect it and re-connect to your TV.
How to View a Slideshow
To launch a slideshow, just navigate to the folder or photo album containing your slideshow
Page 42

automatically display all of the photos in the folder in order of their filenames (alphanumeric
order). If you want to display the photos in random order, press the Option button, then press
Seite
42
von
65
Enter until the shuffle icon displays on the info bar.
1. To set the slideshow interval and transition options, select Settings > Playback. You can
also set the photo scaling option you want to use. See Settings: Playback for information on
available options.
2. When you are finished in Settings, press the Home button [ ] to exit and return to the
ScreenPlay TV Link DX home screen.
3. To view your slideshow, select Photos, then select the location where your slideshow is
stored. Navigate to the folder containing your slideshow, highlight the first photo, and
press the Play button.
NOTE: If you want to run the slideshow manually, press Enter to view the first photo, then press
the Next button when you want to move to the next image.
Photo Display Options
While viewing a photo slideshow, you can press the Option button to set or change the following:
Pan
Rotate right
Rotate left
Zoom in
Zoom out
Repeat
Display an info bar
See Photo Options for details on how to use these settings.
| top of page |
Playing Music with a Slideshow
You can easily add music to your slideshows simply by starting the music before you start the
slideshow. You can place the music tracks you want to use in the same folder as the slideshow
photos, or you can play music from another folder. Here's how to set up music in the same folder
as the slideshow photos.
1. Copy the music files you want to use to the folder that contains your slideshow images.
2. Using a computer connection, name the music tracks in the order you would like them to
play, for example, track01, track02, track03, etc.
3. Disconnect the ScreenPlay TV Link DX from the computer and re-connect to your TV set.
4. Select Music, then choose the location where your slideshow folder is stored.
5. Navigate to the folder containing your slideshow, select the first music track, and press the
Play button. If you want to repeat or shuffle the music tracks, press the Option button,
then press Enter repeatedly until the icon for the option you want displays on the info bar.
6. Press the Photos button on the remote control to bring up the photo navigator.
Page 43

7.
Choose the location where your slideshow is stored, then navigate to the folder.
8. Select the first photo image and press Play.
Seite
43
von
65
9. If you want to repeat the photos or shuffle the display order, press the Option button, then
press Enter repeatedly until the icon for the option you want displays on the info bar.
| top of page |
Page 44

Using the ScreenPlay TV Link DX Player Features
|
top of page
|
z
Playing Digital Movies
Creating Slideshows
Connecting to Online Media
Accessing Online Media
Bookmarking Web Sites
Using Mediafly
Seite
44
von
65
z Listening to Music
z Creating Playlists
z Viewing Photo Images
z
Connecting to Online Media
z
z Using External USB Devices
z Accessing Network Files
z Digital Media Servers
z
z Using the Web Browser
z Favorites
z
z
z Using Flickr
z Playing YouTube Videos on Your TV
ScreenPlay TV Link DX features direct access to online content from Internet media sites,
including Flickr®and YouTube™, and from Internet feeds such as Internet Radio, podcasts, or RSS.
You can also use your ScreenPlay TV Link DX to interact with social media sites, such as Facebook.
IMPORTANT! The ScreenPlay TV Link DX must be connected to a network that is connected to the
Internet in order to access any online content.
Accessing Online Media
To access the ScreenPlay TV Link DX online media options, select the Online Media icon from the
ScreenPlay TV Link DX home screen:
Use the up/down navigation buttons on the remote control to highlight the option you want to use
and press Enter to select it. Refer to the information below for additional instructions on using
the online media options.
You can also use the WEB button on the remote control for quick access to the online media
options.
NOTE: Online media options for the ScreenPlay TV Link DX may change over time or across
regions, so all of the options described in this section might not be available, or other options
could be added. Use the up/down navigation buttons to scroll through all of the online media
options available on your ScreenPlay TV Link DX. Press Enter to explore the highlighted option.
Page 45

Using the Web Browser
Seite
45
von
65
The ScreenPlay TV Link DX web browser provides access to the internet on your TV. Select the
Browser option from the Online Media menu and choose one of the preset areas on the "Favorites"
screen for easy access to popular web sites. To enter a URL, press the Option button to bring up
the web address bar, then use the QWERTY keyboard on the ScreenPlay TV Link DX remote control
to enter any desired web address. See Using the Keyboard for additional information on using the
QWERTY keyboard.
Tips for using the web browser:
z Press the Option button to display the URL bar in the web browser. The Option button is on
the upper right-hand corner of the remote control and looks like the following image:
Press the Option button again to close the URL bar and web browser options.
z To enter text for a web address, highlight the URL bar and press Enter or the left-mouse-
click button to enter a text cursor. You can use the QWERTY keyboard to enter text or
connect an external USB keyboard. When you have finished the web address, press the
right arrow button to highlight the Go to button and press Enter.
z Use the player control pad (play/pause, stop, fast forward, rewind) to move the cursor in
the web browser.
z To select a web link, use the player control pad to position the pointer over the link, then
press Enter or the left-mouse-click button to select the link.
NOTE: The cursor will change from a pointer to a hand when it's over a valid link.
z The icons under the URL bar allow you to easily jump back to a previously viewed web
page, forward a page, refresh the browser display, and access bookmarks and your browser
history. You can also use the Back button on the remote control to return to a previous web
page.
z Use the up/down arrow buttons on the remote control to scroll web pages.
z Select the Home icon under the URL bar to bring up the favorites list that displays when
you first access the web browser.
z Press the Home button on the remote control to exit the web browser and return to the
ScreenPlay TV Link DX home screen.
NOTE: Video must be in a supported format to display. Embedded video may not display for web
sites other than those on the "Favorites" list. Due to the dynamic nature of the internet, some
sites might not display correctly. Performance may vary depending on the coding for a selected
site and network bandwidth.
| top of page |
Favorites
When you access the ScreenPlay TV Link DX
web browser, you will see a list of categories that
Page 46

have preset links to favorite web sites. These provide quick access to frequently used sites
without having to enter a URL. For example, you can use the favorites links to access web search
Seite
46
von
65
sites (for example, Google or Yahoo) or to view social media sites (for example, Facebook or
Twitter).
To select a site from the favorites list, use the up/down/left/right arrow buttons to highlight a
site, then press Enter or the left-mouse-click button to load it.
| top of page |
Bookmarking Web Sites
The ScreenPlay TV Link DX web browser allows you to bookmark web sites so you can readily
access personal favorites that might not be included on the preset favorites list. Here's how to
create a bookmark:
1. Load the web site you want to bookmark and press the Option button to bring up the URL
bar.
2. Highlight the "+" button next to the URL bar and press Enter.
3. A pop-up window will show the web site URL and a title. If you want to change the title,
press the up arrow button to highlight the field and press Enter to insert the text cursor.
When you are finished, use the down arrow button to highlight OK and press Enter.
4. After you add the bookmark, the URL bar will close automatically.
To go to a bookmarked site:
1. From the ScreenPlay TV Link DX web browser Favorites screen, press the Option button to
display the URL bar and browser options.
2. Press the down arrow button to go to the icons below the URL bar, then use the right arrow
button to highlight the Bookmarks icon (looks like a folder with a "+" sign on it).
3. Press Enter to display the Bookmarks list.
4. Use the up/down arrow buttons to highlight the bookmark you want to use and press Enter
to load the site.
| top of page |
Using Mediafly
Mediafly provides access to internet radio and TV channels. When you select Mediafly, you can
browse through popular channels or search for shows and episodes you want to view or listen to.
™
To browse popular channels, select Channels list and press Enter. Select a category and press
Enter to display a list of available channels. Scroll through the channels and press Enter or play to
view or listen to the highlighted channel.
Search
You can search for a specific show or episode. Use the keyboard on the remote control to enter
the search text you want to use. If you want to select categories to search, use the up/down and
Page 47

left/right navigation buttons to highlight the categories you want, then press Enter to select
them. You can search Audio, Movies, or Both. For each of these, you can select to search All,
Seite
47
von
65
Shows, or Episodes. Once you've selected the categories you want to search, you can return to
the search field by pressing the up navigation button.
| top of page |
Using Flickr
Flickr enables you to view popular internet photos. When you select Flickr, you can choose to
explore the Flickr site, view your recent photos, or search for specific photos. Select Search and
use the keyboard on the remote control to enter as much of the photo's filename as you can.
When you have finished entering the filename, select OK and press Enter.
| top of page |
®
Playing YouTube™ Videos on Your TV
You can use the ScreenPlay TV interface to search for YouTube videos and play them on your TV
set. Here’s how:
1. Using the ScreenPlay TV interface, select Online media.
2. Use the up/down navigation buttons to select YouTube and press Enter.
3. To browse through lists of available videos, select Movies and press Enter.
4. Select one of the categories to browse and press Enter to see a list of video titles.
5. As you scroll through the list of titles, you can press Enter to see a preview of the
highlighted video.
6. Press the Play/pause button to view the selected video in full screen mode on the TV. If
you do not want to watch the full video, press the Back button [ ] to return to the list
of titles.
7. If you want to search for a specific video title, select Search from the top-level YouTube
menu and press Enter.
8. Use the keyboard on the remote control to enter the title you want.
HINT: It isn’t necessary to enter the entire title, but the closer your text entry gets the
easier it will be to find the video you want.
9. When you have finished entering the title, select OK and press Enter.
10. The ScreenPlay TV Link DX will list the YouTube videos that match your text entry. Scroll
down the list to highlight the specific title you want and press the Play button to play it on
your TV.
top of page |
|
Page 48

Seite
48
von
65
Page 49

Using the ScreenPlay TV Link DX Player Features
keyboard screen.
z
Playing Digital Movies
Creating Slideshows
Connecting to Online Media
Seite
49
von
65
z Listening to Music
z Creating Playlists
z Viewing Photo Images
z
z
z Using External USB Devices
z Accessing Network Files
z Digital Media Servers
Sharing Media Files
The ScreenPlay TV Link DX is UPnP/DLNA compliant to make it easy to connect and share media
content in the digital home. You can share media files across your home network or access media
content from a media server or external USB devices.
Using External USB Devices
The ScreenPlay TV Link DX will automatically recognize supported media content on external USB
devices that are formatted NTFS, FAT32, Mac OS Extended (HFS+), Ext2, or Ext3. Simply connect
the USB device to one of the USB host ports on the ScreenPlay TV Link DX, then use the TV
interface to select the type of media you want to view or play from the USB device. Select "USB"
from the list of available locations to browse media content and select files you want to play. The
ScreenPlay TV Link DX will assign a number to the USB device depending on which port it's
connected to.
NOTE: The USB host ports on the ScreenPlay TV Link DX can support only one host-powered
external hard drive at a time. You can connect additional USB devices at the same time if they
draw very little power from the USB bus. For example, you could connect one 2.5" portable hard
drive, plus a flash or pen USB drive and an Iomega WiFi adapter.
| top of page |
Accessing Network Files
You can use the ScreenPlay TV Link DX to play media files from your network on your TV. Connect
the ScreenPlay TV Link DX to your network and set up the network configuration. See Connecting
to a Network for more information.
Once the network connection is established, you will be able to select network volumes from the
list of available locations on the ScreenPlay TV interface, then browse folders and files to select
and play media content.
NOTE: If you need to enter a username and password to login to a network volume, you can use
either the virtual keyboard on the ScreenPlay TV interface or the QWERTY keyboard on the
remote control. The password can use any combination of numbers, letters (lower case or caps),
or extended characters, including punctuation characters. To display and select extended
characters on the virtual keyboard, select the Option button at the bottom of the virtual
Page 50

| top of page |
Seite
50
von
65
Digital Media Servers
The ScreenPlay TV Link DX is DLNA certified and can access a Digital Media Server (DMS) that
meets the following requirements:
z The DMS must be UPnP/DLNA compliant.
z The DMS and the ScreenPlay TV Link DX must be connected to the same local network.
The DMS can be either a computer or a network attached storage device with integrated Digital
Media Server. Once the network connection is established, the ScreenPlay TV Link DX will list the
media server as a source location for Movies, Photos, and Music files, so you can browse and play
media content as desired.
NOTE: The ScreenPlay TV Link DX can be used as a digital media player for a DMS on the network,
but it does not function as a DMS.
| top of page |
Page 51

Seite
51
von
65
Page 52

Troubleshooting
z Problems on a TV Connection
Confirm that the ScreenPlay TV Link DX is correctly connected to video input on your
Seite
52
von
65
z Problems Playing Media Files
z Problems on a Network Connection
Click the links below to expand or close the troubleshooting information.
For help with problems that are not covered in this manual, please visit the support area on
www.iomega.com
Problems on a TV Connection
ScreenPlay TV Link DX does not respond to the remote control
z Make sure you are pointing the remote control directly at the receiver on the front
panel. The indicator light on the ScreenPlay TV Link DX will flash once when it receives
a signal from the remote control. If the indicator light is not on, make sure the
ScreenPlay TV Link DX is receiving power (see ScreenPlay TV Link DX LED does not
light), then check the following suggestions.
z If you are using the remote control for the first time, install the included AAA
batteries. Make sure the batteries are oriented correctly.
z If you have used the remote control for some time, the batteries could be depleted.
Try replacing them.
| top of page |
TV screen resolution is not as high as expected
If the ScreenPlay TV Link DX is connected to an HD TV via an HDMI cable, it is recommended
that you use the HDMI Auto setting for video output. The ScreenPlay TV Link DX will then
automatically use the highest resolution supported on the TV for each digital movie you
watch.
If you are using a composite or component video connection for the ScreenPlay TV Link DX,
you might be able to manually select a higher resolution to optimize the display. See Settings
> Audio/Video > Video Output for more information.
| top of page |
Blank or blue screen when the ScreenPlay TV Link DX is connected to a TV
z
Page 53

TV set. Refer to Connecting to a TV for detailed instructions.
Seite
53
von
65
z Make sure the ScreenPlay TV Link DX is connected to power and turned on. The
indicator light glows solid blue when the ScreenPlay TV Link DX is powered up.
z Make sure you have selected the correct video input on your TV to display output from
the ScreenPlay TV Link DX.
z The video output setting on the ScreenPlay might not be correct for your TV. See
Settings > Audio/Video > Video Output for more information.
| top of page |
No audio output
z Check the audio cable connection between the ScreenPlay TV Link DX and the TV. The
ScreenPlay TV Link DX can be connected to right/left RCA connectors on the TV using
the red and white connectors on the included composite cable. You can also connect
the ScreenPlay TV Link DX to an AV amplifier (receiver) using an optical audio cable
(not included). If you are using a composite RCA connection, be sure you have
connected to audio input on the TV set. If you are using an HDMI connection, it
includes both video and audio.
NOTE: Some TV sets are equipped with separate composite and component audio
inputs. Be sure that you have connected the correct one. See Connecting to a TV for
instructions.
z Check the audio output setting under the Audio/Video options on the Settings page. If
the ScreenPlay is connected to an AV amplifier using an optical audio cable, select
Digital for the audio output.
z Check the volume setting on the TV or AV amplifier. You will not be able to hear audio
if the volume is too low. Try pressing the volume increase button on the ScreenPlay TV
Link DX remote control.
z The ScreenPlay TV Link DX might be using the wrong audio channel. Press the Option
button and select Audio channel. Press Enter to select an available audio channel. If
more than one channel is available, press Enter again to toggle the channel.
| top of page |
TV does not have RCA jacks
Try connecting your ScreenPlay TV Link DX through an RF Modulator. You can also use the
optical audio connector on the ScreenPlay TV Link DX to connect to an AV amplifier (receiver)
with a digital audio decoder (optical audio cable not included).
NOTE: Do not connect the ScreenPlay TV Link DX through a VCR. Video signals fed through a
VCR may be affected by copyright protection systems and the picture will be distorted on the
television.
top of page |
|
Page 54

ScreenPlay TV Link DX LED does not light
Seite
54
von
65
The indicator light glows solid blue when the ScreenPlay TV Link DX is powered up and blinks
when the ScreenPlay TV Link DX is loading or accessing files. The indicator glows solid red
when the ScreenPlay TV Link DX is turned off but still connected to power. If the LED does
not light, try the following troubleshooting suggestions.
z Confirm that the power supply that shipped with the ScreenPlay TV Link DX is correctly
connected to the back of the player. Try disconnecting and reconnecting the power
supply cable.
z Confirm that the power supply is connected to a working power outlet or
uninterruptible power supply (UPS).
| top of page |
The TV interface appears in the wrong language
1. Press the Home button [ ] and use the right/left navigation buttons to highlight
the Settings icon:
2. Use the up/down navigation button to hightlight System and press the Enter button.
3. Select Language and press Enter.
4. Scroll through the options to highlight the language you want to use.
5. Press Enter to select the highlighted language.
6. Press Home or the Back button [ ] to exit the Settings screen.
| top of page |
Problems Playing Media Files
Media files are listed when connected to a computer but not on the TV
z The media file format might not be supported on the ScreenPlay TV Link DX. Refer to
Supported Media Formats for information on supported file types and filename
extensions.
z Make sure the folder containing the files is not compressed, encrypted, or hidden. You
can check the folder attributes on a computer by right clicking on the folder icon and
selecting Properties. Make sure the box next to Hidden is not checked. Click the
Advanced button to check whether or not the folder is compressed or encrypted.
Page 55

|
top of page
|
Some media files will not play
Seite
55
von
65
z Confirm that the file format is supported on the ScreenPlay. Refer to Supported Media
Formats for information on supported file types and filename extensions.
z Make sure the file is not compressed.
z Make sure the media file is not damaged. If available, try replacing the file with a
known-good copy.
z If the file still will not play, it might be due to an incompatible codec. Even with a
supported file type, ScreenPlay TV Link DX might not be able to support every codec
used to create that type of media file. With container formats, such as AVI or MKV,
that use multiple codecs for the various data streams included in the container, all of
the codecs must be supported in order for ScreenPlay TV Link DX to play the file.
Although the ScreenPlay TV Link DX includes the most widely used codecs for each
supported files type, there can still be incompatibilities simply because there are
thousands of codecs in use.
For additional information on codecs and codec incompatibilities, please visit the
support area on www.iomega.com.
| top of page |
Unrecognizable subtitle occurs when playing some DivX movies
If the subtitle file is ANSI encoded text, you need to manually set the subtitle language
option to match the language used by the subtitle file. Press the Option button on the remote
control to display the options menu and select Subtitle. Press Enter repeatedly to toggle the
subtitle language. When the language you want appears, press the Option button again to
exit the options menu.
| top of page |
Audio or subtitle is not in the selected language
If the audio or subtitle on a movie does not come up in the language you have selected, the
movie probably does not include that language. Press the Option button on the remote
control to display the options menu. Select Subtitle, then press Enter repeatedly to toggle
through the available subtitle languages. When the language you want appears, press the
Option button again to exit the options menu.
| top of page |
DVD menu behaves incorrectly - blank screen or repeated segments
This happens if the DVD folder lacks some files needed for the menu function. To work
around this issue, press the stop button on the ScreenPlay TV Link DX remote control to stop
playback. Press the Movies button and browse to select the VIDEO_TS file for the DVD movie.
Press the play button to play the Main Title directly.
Page 56

| top of page |
Seite
56
von
65
Problems on a Network Connection
ScreenPlay TV Link DX is not recognized on the network
z Make sure the ScreenPlay TV Link DX is connected to power and turned on. The
indicator light glows solid blue when the ScreenPlay TV Link DX is powered up. If the
ScreenPlay TV Link DX is connected to a TV and the network, the indicator light glows
solid red when the ScreenPlay TV Link DX is powered down. If the indicator light does
not turn on, see ScreenPlay TV Link DX LED does not light.
z If you are using a wired network connection, check the following:
z Make sure you are using a functional Ethernet cable.
z Make sure the Ethernet cable is connected to a 10/100Base-T switch, hub, or
router.
z Check all connections (power and network).
z If you are using a wireless network connection, check the following:
z Make sure you are using an Iomega 802.11n WiFi adapter that is qualified
specifically for ScreenPlay TV Link DX. Other WiFi adapters will not work
correctly.
z Make sure the WiFi adapter is securely connected to one of the USB host ports
on the ScreenPlay TV Link DX. You should see a message on the ScreenPlay TV
Link DX TV display indicating Wifi device plug-in.
z Make sure you have set up the wireless connection for the ScreenPlay TV Link
DX. See Network Setup for more information.
z Wait a few minutes and then try connecting to the ScreenPlay TV Link DX again. See
Mapping a Network Drive Letter to the ScreenPlay TV Link DX for detailed instructions.
z Try rebooting your computer and connecting to the ScreenPlay TV Link DX again.
z Make sure the computer you are using to connect to the ScreenPlay TV Link DX is on
the same subnet or network segment as the ScreenPlay TV Link DX.
| top of page |
Where is the IP address for the ScreenPlay TV Link DX?
The ScreenPlay TV Link DX uses DHCP by default and will be automatically assigned an IP
address by the network. To view the IP address, press the Home button [ ] to bring up
the ScreenPlay TV Link DX home screen on the TV display. Use the right/left navigation
buttons to highlight Settings, then use the up/down navigation buttons to select Network
and press Enter. Highlight Network setup and press Enter. This will display details on the
current network configuration. If the IP address does not appear, make sure the ScreenPlay
TV Link DX is correctly connected to the network (see
ScreenPlay TV Link DX is not
Page 57

recognized on the network
).
| top of page |
Seite
57
von
65
Page 58

How to Get Help
Iomega is committed to providing excellent customer support. To meet this goal, Iomega offers a
Seite
58
von
65
variety of support options designed to meet the needs of a wide range of users. For complete
information on the support options available for your Iomega product, check our website at
www.iomega.com. Please select your region carefully.
Here's just some of what is available on Iomega's award-winning web support site 24 hours a day,
7 days a week:
z Answers to frequently asked questions (FAQs)
z Online help pages with troubleshooting or basic "how to" information
z Up-to-date Iomega software and drivers
z Advanced online support options, such as 1-on-1 live chat and email
z Electronic copies of Iomega product manuals
z Information on telephone support options
z Information on advanced technical service options, such as data recovery
z Warranty information and product return instructions
Support options available may vary depending on your region and language of choice.
NOTE: Iomega's specific customer support policies (including fees for services) and procedures
change as technology and market conditions dictate. To obtain information about Iomega's
current policies, please visit our website or write to: Iomega Customer Service, 4059 South 1900
West, Roy, UT 84067, USA.
| top of page |
Page 59

Limited Warranty
z Coverage
price of the drive or the media disk. Some jurisdictions do not allow the exclusion or limitation of
Seite
59
von
65
z Excluded Products and Problems
z Remedies
z Obtaining Warranty Service
z Limitations
Coverage
Iomega warrants this hardware product to be free from defects in materials and workmanship for
the warranty period. This non-transferable, limited warranty is only to you, the first end-user
purchaser. The warranty begins on the date of purchase and lasts for a period of one (1) year for
product purchased in the Americas or the Asia-Pacific region; ninety (90) days for Iomega
reconditioned products purchased in these regions; or, two (2) years for product purchased by an
end-user in Europe, the Middle East, or Africa. Customers who register their new products at
www.iomegareg.com within 90 days of purchase will receive a warranty extension so that their
total warranty shall be a period of three (3) years in all regions.
NOTE: Reconditioned products are not eligible for a warranty extension.
Excluded Products and Problems
This warranty does not apply to: (a) Iomega software products; (b) expendable components such
as fuses or bulbs; or (c) third party products, hardware or software, supplied with the warranted
product. Iomega makes no warranty of any kind on such products which, if included, are provided
“AS IS.”
This warranty does not cover damage caused by accident, misuse, abuse, failure to follow
instructions given in the product documentation, use of non-Iomega supplied or approved
replaceable components, exposure of media to excessive magnetic fields, external environmental
causes, or damage arising from any cause or causes for which Iomega is not responsible such as
exposure to abnormal temperatures, shock, power surges, power outages, improper power supply,
or damage caused while the product is being shipped from you to Iomega.
Your Iomega product may contain certain replaceable components such as hard drives or power
supplies. Refer to your product documentation or contact Iomega to determine whether specific
components are replaceable. Any alteration, change, modification, or repair (other than
replacement of a replaceable component) made to the product by a party other than Iomega or
Iomega's authorized service provider will void this warranty.
Remedies
Your sole and exclusive remedy for a covered defect is repair or replacement of the defective
product, at Iomega’s sole option and expense (shipping may be charged), and Iomega may use
new or refurbished parts or products to do so. The replaced part/product will be warranted for
the remainder of the original warranty or three (3) months from the date of shipment of such
parts/products, whichever is longer. If Iomega is unable to repair or replace a defective product,
your alternate exclusive remedy shall be a refund of the original purchase price.
The above is Iomega’s entire obligation to you under this warranty. IN NO EVENT SHALL IOMEGA
BE LIABLE FOR INDIRECT, INCIDENTAL, CONSEQUENTIAL OR SPECIAL DAMAGES OR LOSSES,
INCLUDING LOSS OF DATA, USE, OR PROFITS EVEN IF IOMEGA HAS BEEN ADVISED OF THE
POSSIBILITY OF SUCH DAMAGES. In no event shall Iomega’s liability exceed the original purchase
Page 60

incidental or consequential damages, so the above limitation or exclusion may not apply to you.
| top of page |
Seite
60
von
65
Obtaining Warranty Service
You must notify Iomega within the warranty period to receive warranty service. Just as
technology and market conditions vary, Iomega’s specific customer support policies (including
fees for services) and procedures change over time. To obtain information about Iomega’s current
policies or warranty service, please visit our website at www.iomega.com/supportpolicy.html or
write to: Iomega Customer Service, 4059 South 1900 West, Roy, UT 84067.
Contact Information for Iomega Customer Service can be obtained on our Support website at:
z U.S., Canada, and Latin America—www.iomega.com/support
z Europe, the Middle East, and Africa—www.iomega.com/europe/support
z Asia-Pacific Region—www.iomega.com/ap/support
If your product is eligible for warranty service, you will be required to return it to Iomega, along
with proper identification, a return authorization number obtained from the Iomega website or
provided by the Iomega representative, and proof of purchase. Iomega will not protect, recover,
or return data during warranty service so you should duplicate your data before shipment.
Limitations
THE ABOVE WARRANTY IS EXCLUSIVE AND IN LIEU OF ALL OTHER WARRANTIES, EXPRESS OR
IMPLIED. To the extent permitted by applicable law, IOMEGA SPECIFICALLY DISCLAIMS ANY
IMPLIED WARRANTIES, INCLUDING ANY IMPLIED WARRANTY OF MERCHANTABILITY OR FITNESS FOR
A PARTICULAR PURPOSE. Any implied warranty required by applicable law shall be limited in
duration to the express warranty term. Some jurisdictions do not allow disclaimers of implied
warranties or limitations on how long an implied warranty lasts, so the above limitation may not
apply to you. This warranty gives you specific legal rights and you may also have other rights that
vary from jurisdiction to jurisdiction. Any suit for breach of any warranty on your Product must be
filed within one (1) year of the first date the suit could have been brought.
| top of page |
Page 61

Regulatory Information
z FCC (United States)
|
top of page
|
Seite
61
von
65
z Industry Canada Statement
z CE (European Community)
z Waste Electrical and Electronic Equipment (WEEE)
z Manufacturer/Responsible Party
z RoHS
Federal Communication Commission Interference Statement
(United States)
This equipment complies with Part 15 of the FCC Rules. Operation is subject to the following
conditions: (1) This device may not cause harmful interference, and (2) this device must accept
any interference received, including interference that may cause undesired operation.
NOTE: This equipment has been tested and found to comply with the limits for a Class B digital
device, pursuant to part 15 of the FCC Rules. These limits are designed to provide reasonable
protection against harmful interference in a residential installation. This equipment generates,
uses and can radiate radio frequency energy and, if not installed and used in accordance with the
instructions, may cause harmful interference to radio communications. However, there is no
guarantee that interference will not occur in a particular installation. If this equipment does
cause harmful interference to radio or television reception, which can be determined by turning
the equipment off and on, the user is encouraged to try to correct the interference by one or
more of the following measures:
z Reorient or relocate the receiving antenna.
z Increase the separation between the equipment and receiver.
z Connect the equipment into an outlet on a circuit different from that to which the receiver
is connected.
z Consult the dealer or an experienced radio/TV technician for help.
Modifications
Any changes or modifications not expressly approved by the party responsible for compliance
could void the user’s authority to operate this equipment.
FCC Radiation Exposure Statmeent (for WiFi adapter):
This equipment complies with FCC ratiation exposure limits set forth for an uncontrolled
environment. This equipment should be installed and operated with a minimum distance of 20cm
between the raidator and your body.
This transmitter must not be co-located or operating in conjunction with any other antenna or
transmitter.
IEEE 802.11b or 802.11g operation of this product in the U.S.A. is firmware-limited to channels 1
through 11.
Page 62

Industry Canada Statement
For more information concerning the correct disposal of this product, please contact your local
Seite
62
von
65
This Class B digital apparatus complies with Canadian ICES-003.
The WiFi adapter complies with RSS-210 of the Industry Canada Rules. Operation is subject to the
following two conditions:
z this device may not cause interference and
z this device must accept any interference, including interference that may cause undesired
operation of the device.
IMPORTANT NOTE – IC Radiation Exposure Statement:
This equipment complies with IC radiation exposure limits set forth for an uncontrolled
environment. End users must follow the specific operating instructions for satisfying RF exposure
compliance. To maintain compliance with IC RF exposure compliance requirements, please follow
operation instruction as documented in this manual
| top of page |
CE (European Community)
Iomega declares that this Iomega product conforms to all applicable European Directives and
Standards, including by way of example, 2004/108/EC, 2009/125/EC for ScreenPlay TV Link DX
and TV Link DX; 2006/95/EC, 2004/108/EC, 1999/5/EC for WiFi adapter. The Declaration of
Conformity can be obtained by contacting Iomega or is available at www.iomega.com/support/ce.
EU Representative
Iomega International SA
H/O Iomega Netherlands
Hardwareweg 4
3821 BM Amersfoort
NL - The Netherlands
| top of page |
Waste Electrical and Electronic Equipment (WEEE)
In accordance with European Directive 2002/96/EC on Waste Electrical and Electronic Equipment
(WEEE), the presence of the above symbol on the product or on its packaging indicates that this
item must not be disposed of in the normal unsorted municipal waste stream. Instead, it is the
user’s responsibility to dispose of this product by returning it to a collection point designated for
the recycling of electrical and electronic equipment waste. Separate collection of this waste
helps to optimize the recovery and recycling of any reclaimable materials and also reduces the
impact on human health and the environment.
Page 63

authority or the retailer where this product was purchased.
| top of page |
Seite
63
von
65
Manufacturer/Responsible Party
Iomega Corporation
4059 South 1900 West
Roy, UT 84067 USA
| top of page |
Page 64

Using This Manual
Expanding Submenu Topics
Seite
64
von
65
In the left hand menu, click a plus sign to reveal the submenu topic links. If there is no plus
sign next to the title, there are no submenu links. Click the minus sign to hide the submenu.
Expanding Page Topics
Some pages show a list of topics in blue text. Click a topic to show the information. Click the
topic again to collapse the topic.
Using the Search Feature
Type a word or subject in the search box at the top of the page , then
click the magnifying glass icon to quickly locate specific information. You must type three or more
letters for the search function to work.
If you type two words in the search box, such as "Windows format", the search will locate topics
that contain either "Windows" or "format".
Advanced Search
To search for a specific phrase or group of words, enter a "+" (plus) sign followed by the word or
phrase you want to locate. When using the plus sign, do not leave any space between it and the
query string. The search will then bring up topics that have all the words in the search query.
Example: "+Windows format" will search for topics that contain both "format" and "Windows".
Printing
Click the Print icon at the bottom of the menu to print the current page.
Click the Print Manual icon (Internet Explorer for Windows and Apple Safari only) at the
bottom of the menu to print the entire manual.
Mac Users: Click the Print or Print Manual button to open the page in a new window (without the
banner and navigation bar), then select Print from your browser menu.
| top of page |
Page 65

Seite
65
von
65
 Loading...