

Page 1
Printed on recycled paper
for IBM-Compatible PC's
Installation Guide
EN137004
property of their respective companies.
swirl, hand, and eye are trademarks of, Iomega Corporation. All other product and brand names are the
© 1997 Iomega Corporation. Iomega, the Iomega logo and Jaz are registered trademarks of, and the graphic
complete list of European support numbers.
Refer to the electronic manual included with your Jaz software package for a
European Support Numbers
through Friday from 6 a.m. to 6 p.m. Mountain time (U.S. & Canada only).
Iomega's technical support associates are ready to take your call Monday
found by Iomega to be due to a product defect.
on your phone bill. Either way, the charge will be reversed if your issue is
Express, or Discover), or you can call 1-900-988-4747 to put the support cost
to charge the support cost to your credit card (VISA, MasterCard, American
$19.99 per incident for Jaz products. You can call 1-888-4-IOMEGA, toll-free,
relate to a defect in an Iomega product. Other issues are charged at the rate of
One-on-One Technical Support is free of charge for issues Iomega determines
One-on-One Iomega Technical Support
(No technical support information is available at this number.)
Repair and Return Information ........................................... 1-801-779-6100
8,N,1; 9600 baud and above; ANSI (24 hrs - Download only)
Iomega Bulletin Board ......................................................... 1-801-778-5888
(Please type "Jaz" in the subject header when sending your E-Mail)
Automated E-Mail ................................................................ support@iomega.com
Automated FAX Help (U.S. & Canada only) ..................... 1-801-778-5763
Microsoft Network ............................................................... GoWord: Iomega
America Online™ ................................................................ Keyword: Iomega
Internet Home Page: ............................................................ http://www.iomega.com
Iomega's Automated Help Systems
1GB
®
dri ve
Installation Guide
SCSISCSI
SCSI
SCSISCSI
Turn OFF the computer power switch, and pick
up the Jaz data cable.
3
the Radio Interference Regulations of the Canadian Department of Communications.
This digital apparatus does not exceed the Class B limits for radio noise emissions from digital devices as set out in
Canadian DOC Information
user’s authority to operate the equipment may be voided by the FCC. M
modifications to the electronics or enclosure of this product must be expressly approved by Iomega; otherwise, the
with external subsystems. Other types of cables may violate FCC rules and regulations. Also, changes or
WARNING Only the manufacturer’s cable or an equivalent double shielded, host interface cable should be used
• Plug the computer and its peripherals into a different branch circuit from that used by the affected device.
• Increase the distance between the affected device and the computer equipment.
• Reorient the affected device and/or its receiving antenna.
following measures:
television reception. The user may be able to eliminate any interference by implementing one or more of the
particular situation. Interference can be determined by turning the equipment off and on while monitoring radio or
RF emission limits, as specified in the above cited Rules, there is no guarantee that interference will not occur in a
interference in a residential installation. Although the equipment has been tested and found to comply with allowed
Part 15, Class B, of the FCC Rules, is designed to provide reasonable protection against radio and television
interference received, including interference that may cause undesired operation. M
conditions: (1) the equipment may not cause harmful interference, and (2) the equipment must accept any
M Interference This equipment complies with Part 15 of the FCC Rules and its operation is subject to the following
radio and television reception may result.
equipment is not installed and operated in strict accordance with the manufacturer’s instructions, interference to
The computer equipment described in this installation guide generates and uses radio frequency (RF) energy. If the
United States FCC Information
Check your SCSI (Small Computer System
Interface) connection.
1
The instructions in this guide show how to install your Jaz drive on
an external SCSI connection.
• If you plan to use an Iomega SCSI adapter, install it NOW
using the installation guide shipped with the adapter; then
return to step 2 below. If you need to purchase an adapter,
call your Iomega dealer or 1-800-MY-STUFF.
• If you plan to use a non-Iomega SCSI adapter, refer to
"Non-Iomega SCSI Adapters" in the Jaz User's Guide.
M Windows NT Users You may need to install driver software for
your SCSI adapter. Refer to NTReadme.txt on the Windows NT Install
diskette for additional information. M
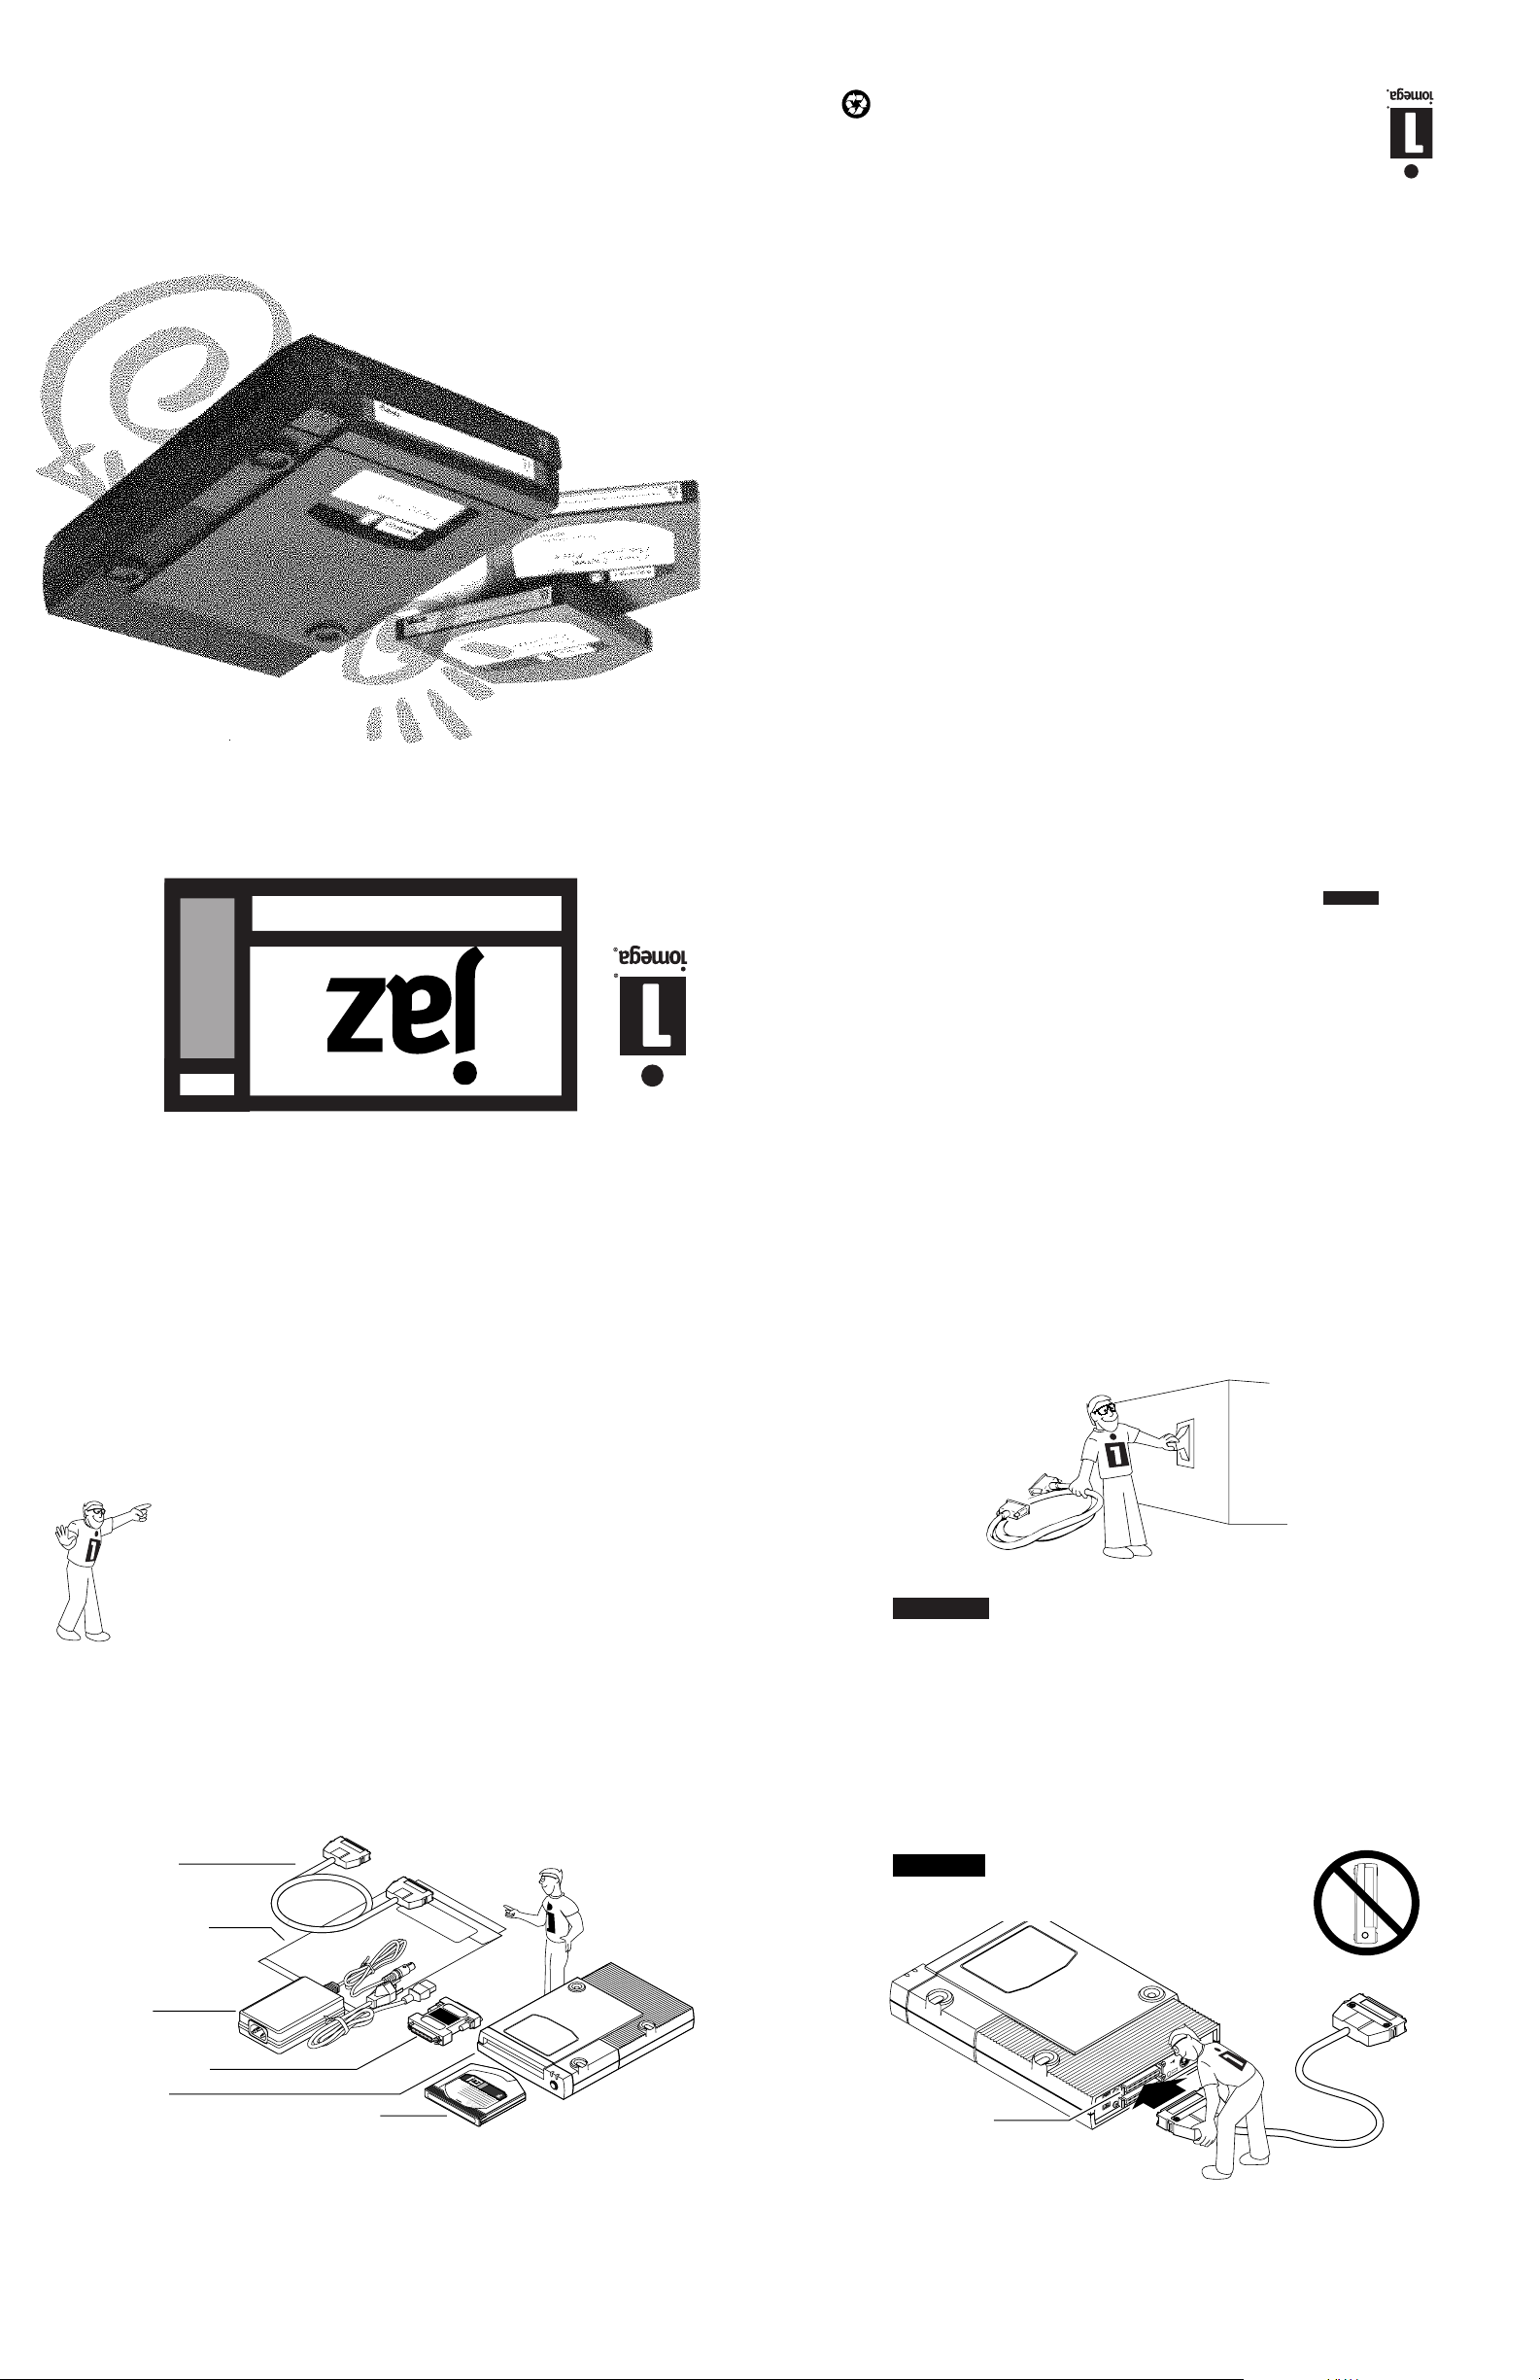
Unpack the Jaz drive and accessories.
2
Data Cable
Manuals and
Install Diskettes
WARNING Always turn off power to the computer and all devices
connected to it (such as printers or drives) before beginning any
computer hardware change. M
Connect one end of the data cable to either
SCSI port on the back of your drive, and PUSH
4
until connector locks into place.
doesn't seem to fit, try turning it over.)
CAUTION
on its side! NEVER move the drive while in use!
DO NOT attempt to stand the Jaz drive
(If the connector
External Power
Supply
50HD to 25D
Cable Converter
Jaz Drive
Jaz "tools" Disk (contains Jaz Tools software)
GB
1
tools
1
GB
M Jaz Tools Software The Jaz "tools" disk includes software
packages for systems running Windows 95, Windows NT, Windows
3.x, or DOS. For systems running OS/2, you can purchase a separate
Iomega Driver and Tools package that provides full support for Jaz
drive under OS/2. Call 1-800-MY-STUFF to order software. M
I
0
PWR
Term
I A O
4
Jaz Connector
SCSI ID
M To Remove the Jaz Data Cable: Squeeze the spring locks
on both sides of the data cable connector while pulling on
the connector. M
(Open up for Step 5)
Page 2
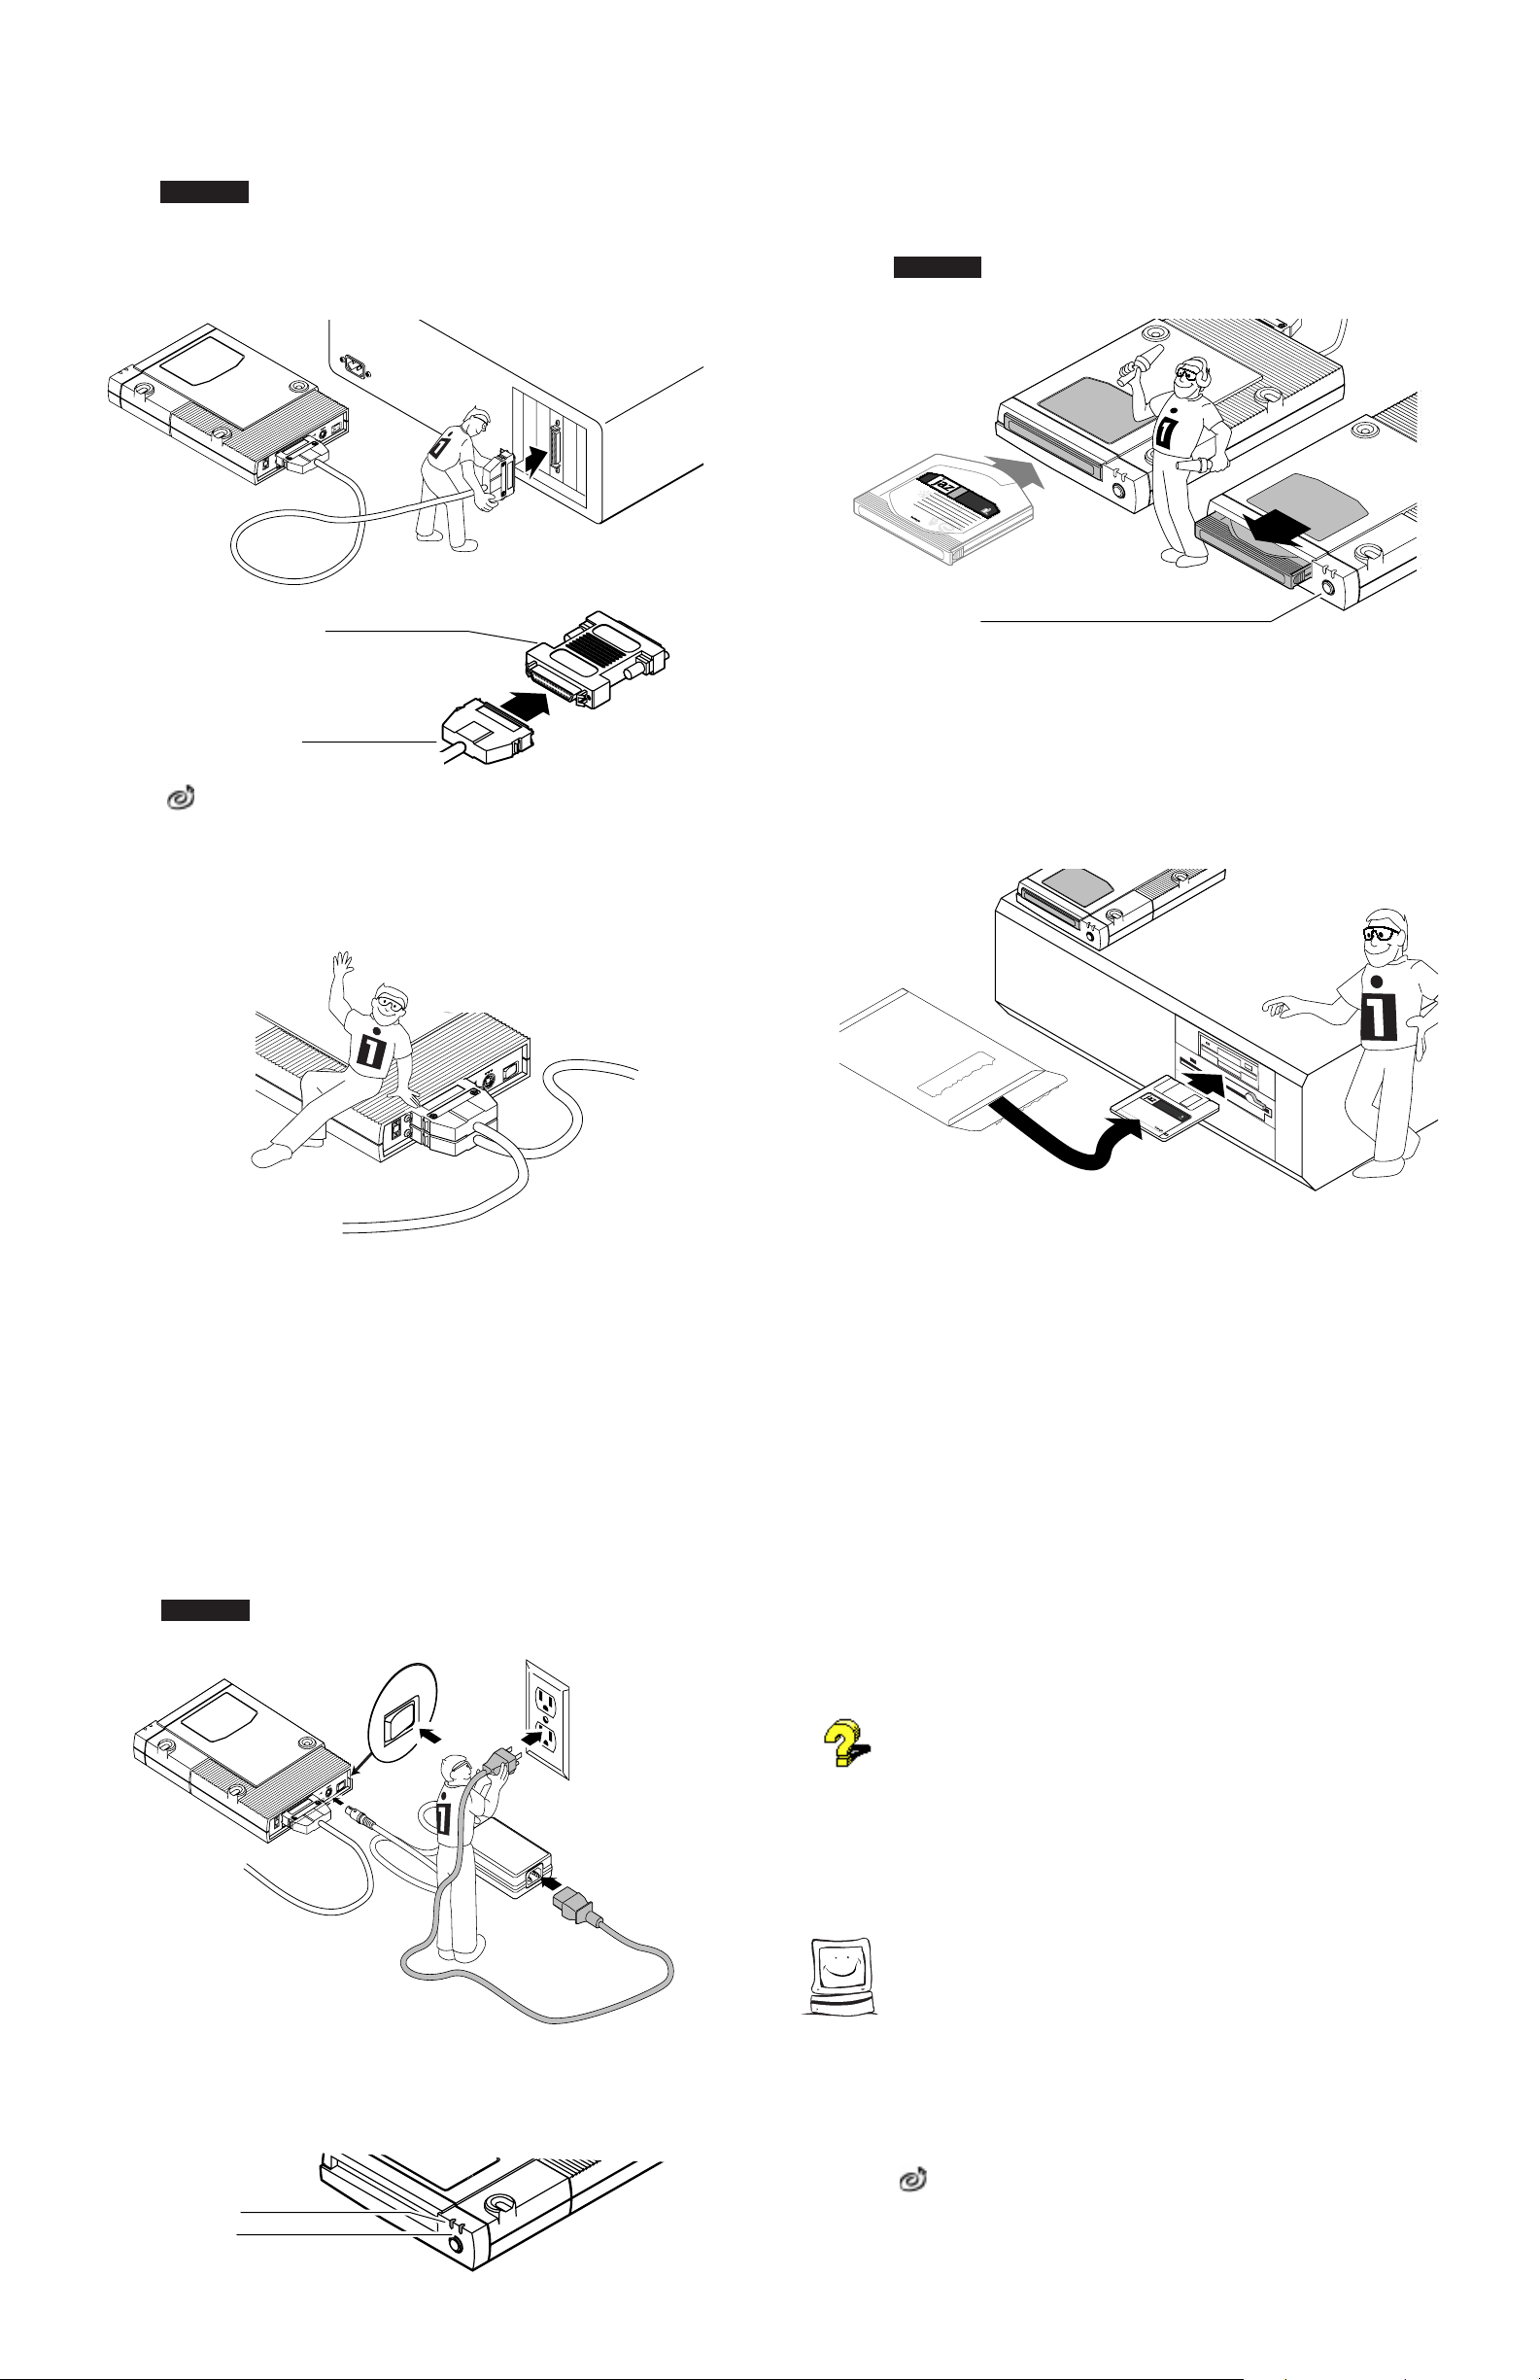
Connect the other end of the data cable to the
5
SCSI connection on your computer.
CAUTION Unless you are using Jaz Traveller, always make sure you
connect the Jaz drive to a SCSI connector and NOT to a printer port
(which is the same size and shape as a 25 pin SCSI connector). If you
need to connect your Jaz drive to a printer port, refer to the Jaz
Traveller Installation Guide. M
I
0
PWR
Term
I A O
4
SCSI ID
50HD to 25D Cable Converter
Use the 50HD to 25D cable converter
if you need to connect your Jaz drive to
a 25 pin SCSI connector.
10
Disk Eject Button
Turn your computer ON and gently insert the
1GB "tools" disk into your Jaz drive.
The amber data light on the Jaz drive flashes as the disk spins up and
glows steadily while it acquires. When the amber data light goes
out, the drive is ready to use.
CAUTION Never put anything except Jaz disks into the Jaz drive as
this could damage your drive. Keep your Jaz disks free of debris. M
Disk shown
fully inserted
GB
1
tools
1
GB
Disk shown
ejected from drive
M Ejecting Jaz Disks After you push the disk eject button, the
drive takes a few seconds to spin down and eject the disk. M
Jaz Data Cable Connector
For a different converter or cable, call 1-800-MY-STUFF.
OPTIONAL: You can connect other SCSI drives
6
to the Jaz drive using another SCSI cable
(usually a high density 50 pin to 50 pin cable).
To Computer or
Previous SCSI Device
Check SCSI ID's if you have a SCSI chain.
7
Each device in the SCSI chain must have a unique SCSI ID. If you
have no other devices, the factory setting of SCSI ID 4 should work.
If you need additional information, refer to "SCSI Guidelines" in
your Jaz User's Guide.
Insert the Install diskette for your system into
11
To Another
I
0
PWR
Term
I A O
4
SCSI ID
SCSI Device
your computer's floppy drive.
Use Disk 1 if your computer is running Windows 95, Windows 3.1,
or DOS. Use Disk 2 if your computer is running Windows NT.
Windows/
Install
DOS
Start the Setup program as described below
12
and follow the screen instructions to install
your Jaz Tools software.
Windows®95 Users: Open My Computer and double click
on the floppy drive icon to open a window for Install Disk 1.
Double click on the Setup icon to install Tools 95 on your system.
8
M SCSI Termination Your Jaz drive is set to handle SCSI
termination automatically. Refer to the Jaz User's Guide if you
need additional information. M
Connect the external power supply and turn
on the power switch.
CAUTION Use only an approved Iomega Jaz power supply. Other
power supplies may damage your Jaz drive. M
I0
|
= ON
I0
PWR
Term
I A O
4
SCSI ID
Windows NT Users: Run SetupNT from Install Disk 2 to
install your ToolsNT software package.
Windows 3.1 Users: Start Windows. In the Windows
Program Manager, select the File menu and choose Run. In the
Command Line box, type a:setup if Install Disk 1 is in drive a: (or
b:setup if it is in drive b:), then click OK or press the Enter key.
DOS Users: Run GUEST.EXE from the DOS prompt for Install
Disk 1, then run INSTALL.EXE from the DOSSTUFF directory on
the Jaz "tools" disk. After the software installation is complete, run
RECLAIM.EXE from the DOSSTUFF directory. If you need detailed
instructions, refer to MANUAL.EXE on Install Disk 1.
If you need help, refer to "Troubleshooting" in the Jaz User's
Guide. The electronic manual (MANUAL.EXE) located on Install
Disk 1 also includes problem solving information for software
installations under Windows 95, Windows 3.1, and DOS.
M IMPORTANT! Your 1GB Jaz "tools" disk contains installation
files for your Jaz Tools software. Avoid deleting the installation files
for your system in case you need to reinstall your software. M
Congratulations! When the software
installation is complete, your Jaz drive will be
ready to use.
Check that the green power light is ON.
9
(Indicates that the power supply is connected
properly.)
Green Power Light
Amber Data Light
(Flashes when drive is busy)
Use your Jaz drive just like any other drive on your system. Your
Jaz drive will have its own drive letter, and you can store and copy
files to and from the Jaz drive using the same methods you use for
your other drives. For more information about using your new drive
and Jaz Tools software, refer to the Jaz User's Guide.
If you want to use your Jaz drive on a Macintosh as well as
your PC: Refer to the GUESTHLP.TXT file on the Windows/DOS Install
diskette for information on accessing your Jaz drive temporarily on a
Macintosh. For full Jaz support, call 1-800-MY-STUFF to order an
additional Jaz tools disk.
EN137004
 Loading...