


NX1192E LCD KEYPAD
.......................
................................
................................
....................
.......................
............
.............
........................
....................
.............................
............
..........................
.............................
..........................
..............
.....................
..........................
.................
INSTALLATION MANUAL
Table of Contents
ENTERING THE PROGRAM MODE................................................................
SELECTING THE MODULE TO PROGRAM.......................................................................... 2
PROGRAMMING A LOCATION ............................................................................................. 2
NX1192E ENGLISH LIBRARY................................................................
NX1192E AMERICAN SPANISH LIBRARY...........................................................................4
LOADING FACTORY DEFAULTS.......................................................................................... 4
ENROLLING MODULES AND KEYPADS.............................................................................. 4
PROGRAMMING THE NX1192E LCD KEYPADS ................................
USING THE FUNCTION MENU .............................................................................................. 5
7
9 1 ADJUSTING THE VIEW / BRIGHTNESS OF THE LCD.................................... 5
7
9 2 PROGRAMMING CUSTOM MESSAGES IN THE KEYPAD.............................6
7
9 3 SET KEYPAD OPTIONS................................................................
7
9 4 SET KEYPAD NUMBER AND PARTITION ................................
KEYPAD FUNCTIONS................................................................................................
7
9 0 READING THE EVENT LOG................................................................
POSSIBLE LOG MESSAGES...........................................................................8
7
9 5 SET ELAPSED TIME IN MINUTES SINCE LAST AUTOTEST......................... 9
7
9 7 SET SYSTEM TIME AND DATE........................................................................ 9
7
0 ADJUST KEYPAD TONE................................................................................... 9
7N
7
7
7
7
7
7
7
7
7
VIEW ZONE STATUS................................................................
3 VIEW ALARM MEMORY................................................................
4 4 TEST FUNCTION................................................................
4 5 DISPLAY TEST FUNCTION ................................................................
4 6 LIGHT CONTROL FOR X-10 DEVICES................................
4 7 HOUSE CODES FOR X-10 DEVICES................................
4 9 CHANGE LANGUAGES................................................................................... 10
5 CHANGING USER CODES.............................................................................11
6 ASSIGNING AUTHORITY LEVEL ................................................................... 11
7 RESET FUNCTION................................................................
.5
10
10
10
10
12
2
3
6
7
7
7
9
9
PARTITIONED SYSTEMS OPERATION................................................................
LIGHTS IN PARTITIONING MASTER MODE.................................................................. 12
DISPLAYS IN THE PARTITIONING MASTER MODE................................
SERVICE DISPLAY............................................................................................................... 14
NX1192E MAXIMUM WIRE RUN................................................................
SPECIFICATIONS................................................................................................
1
12
13
16
16

ENTERING THE PROGRAM MODE
To enter the Program Mode, press [7]-[8]. At this time, the LCD screen will prompt you for
the programming code. Next, enter the "Go To Program Code" (FACTORY DEFAULT IS [9][7]-[1]-[3]). If the "Go To Program Code" is valid, the LCD screen will prompt you for the
device address you wish to program. You are now in the Program Mode and ready to select
the module to program.
SELECTING THE MODULE TO PROGRAM
Since all modules connected to the NX8-E are programmed through the keypad, the module
you are programming should be the first entry. To program the NX8-E Control Panel, enter
[0]-[#]. The [0] is the module number of the control and the [#] is the entry key. Other module
entry numbers can be found in their corresponding manuals.
PROGRAMMING A LOCATION
Once the number of the module to be programmed has been entered, the LCD screen will
prompt you for a location number. Any location can be accessed by directly entering the
desired programming location followed by the pound [#] key. If the location entered is a valid
location, the top line of the LCD screen will display the location number on the left and the
segment number on the right. The bottom line of the display will show the current data. This
data will be displayed and entered according to the type of data used (numerical, binary, or
character data). Follow the instructions below for each type of data.
NUMERICAL DATA
the left and the segment number on the right. The data will be displayed on the bottom line.
The hex equivalent will be shown in parenthesis. To change the data in the current location
enter the number followed by [U]. The data will be entered and the segment will be
incremented by 1. The data for this segment will now be displayed. Continue this process until
the last segment is programmed. When the last segment is reached, the keypad will prompt
you for the next location. If you wish to exit this location before the last segment is reached,
press the [#] key. This keypress will not save the changes made to current segment, but will
exit the location. To proceed to the next location, press the [
previous location, press the [
BINARY DATA
left and the segment number on the right. The data will be displayed on the bottom line with
the numbers 1-8 in the first 8 characters. If the number appears, this binary switch is on. If
a minus sign (-) appears where the number should be, this switch is off. Toggle numbers on
or off using the corresponding number digit (1 to toggle 1; 8 to toggle 8). When the numbers
are in the desired state, enter the [U] key. The data will be entered and the segment will be
incremented by 1. The data for this segment will now be displayed. Continue this process
until the last segment is programmed. When the last segment is reached, the keypad will
prompt you for the next location. If you wish to exit this location before the last segment is
reached, press the [#] key. This keypress will not save the changes made to current segment,
but will exit the location. To proceed to the next location, press the [Police] key. To return to
the previous location, press the [
key.
CHARACTER DATA
[U]-[9]-[2] feature for custom messages, page 4.) Custom zone descriptions and messages
are stored character or ASCII data type. This information is programmed using the bottom line
of the display as a text editor. Once a character location has been entered, the current data
will be displayed on the bottom line. As is always the case, the top line will display the current
location and segment number. The five (5) function keys, as well as the up and down arrow
to the right of the display, are now used to edit the message prior to saving it back to the
location storage. An underscore (_) in the display indicates the current cursor location.
Tomove the cursor to the right, press the [U] key. To move the cursor to the left, press the
: The top line of the display will show the current location number on
Police
] key. To return to the
Fire
] key. To re-enter the last location, press the [
: The top line of the display will show the current location number on the
Fire]
key. To re-enter the last location, press the [
: Character Data is used to enter LCD text when programming. (See
Auxiliary
Auxiliary
] key.
]
2

Cancel
880
0
881
1
882
2
883
3
884
4
885
5
886
6
887
7
888
8
889
9
990
0
991
1
992
2
993
3
994
4
995
5
[
Arrow
to enter the 2-digit number found in Table 1.1 or 1.2 which corresponds to the desired
character. To accept this character, press the [U] key. The character will remain and the
cursor will be advanced one space to the right. To insert spaces, press the [
delete characters, press the [
in the library, the Up and
make a character flash, press the [
Bypass
[
displayed, enter the [U] key. When done editing the line, enter the [#] key to escape from the
edit mode.
Table 1.1 English
] key. To change the character at the current cursor location, press the Up or
until the desired character is displayed. An alternative and possibly faster method, is
Stay
Chime
] key. To access the library, press the [
Down Arrow
] key will cause the entire word to flash. To enter the word or character being
No. No. No. No. No. No.
0
000
001
002
003
004
005
006
007
008
009
110
111
112
113
114
115
1
A
2
B
3
C
4
D
5
E
6
F
7
G
8
H
9
I
0
J
1
K
L
2
M
3
N
4
O
5
116
117
118
119
220
221
222
223
224
225
226
227
228
229
330
331
P
6
Q
7
R
8
S
9
T
0
U
1
V
2
W
3
X
4
Y
5
Z
6
0
7
1
8
2
9
3
0
4
1
332
333
334
335
336
337
338
339
440
441
442
443
444
445
446
447
2
3
4
5
6
7
8
9
0
1
2
3
4
5
6
7
can now be used to scroll through the library. To
Bypass
] key. While in the library mode, entering the flash
5
6
7
8
9
a
b
c
d
e
f
g
h
I
j
k
448
449
550
551
552
553
554
555
556
557
558
559
660
661
662
663
l
8
m
9
n
0
o
1
p
2
q
3
r
4
s
5
t
6
u
7
v
8
w
9
x
0
y
1
z
2
!
3
664
665
666
667
668
669
770
771
772
773
774
775
776
777
778
779
4
5
6
%
7
8
9
0
1
2
3
4
5
6
7
8
9
Exit
"
#
$
&
'
(
)
U
+
,
.
/
:
;
Down
] key. To
] key. Once
<
=
>
?
@
[
Ü
]
^
_
`
{
|
}
NX1192E ENGLISH LIBRARY
ALARM DURESS INSTANT PIR STORAGE
AREA EAST INTERIOR PORCH STUDY
AUDIO EMERGENCY JUNK ROOM TAMPER
BACK EXIT KITCHEN RUMPUS TELEVISION
BATHROOM EXTERIOR LIBRARY SAFE TROUBLE
BEAM FIRE LIGHT SENSOR TV
BEDROOM FRONT LIVING SHOCK UP
BUTTON GAME MASTER SHOP UTILITY
CEILING GARAGE MICROWAVE SIDE VAULT
CLOSET GLASSBREAK MOTION SKYLIGHT WAREHOUSE
DELAY GUEST NORTH SLIDING WEST
DEN HALL NURSERY SMALL WINDOW
DETECTOR HEAT OFFICE SMOKE WING
DINING HOLDUP PANIC SOUND WIRELESS
DOOR HOUSE PANTRY SOUTH YARD
DOWN INFRARED PHONE STAIRS ZONE
3
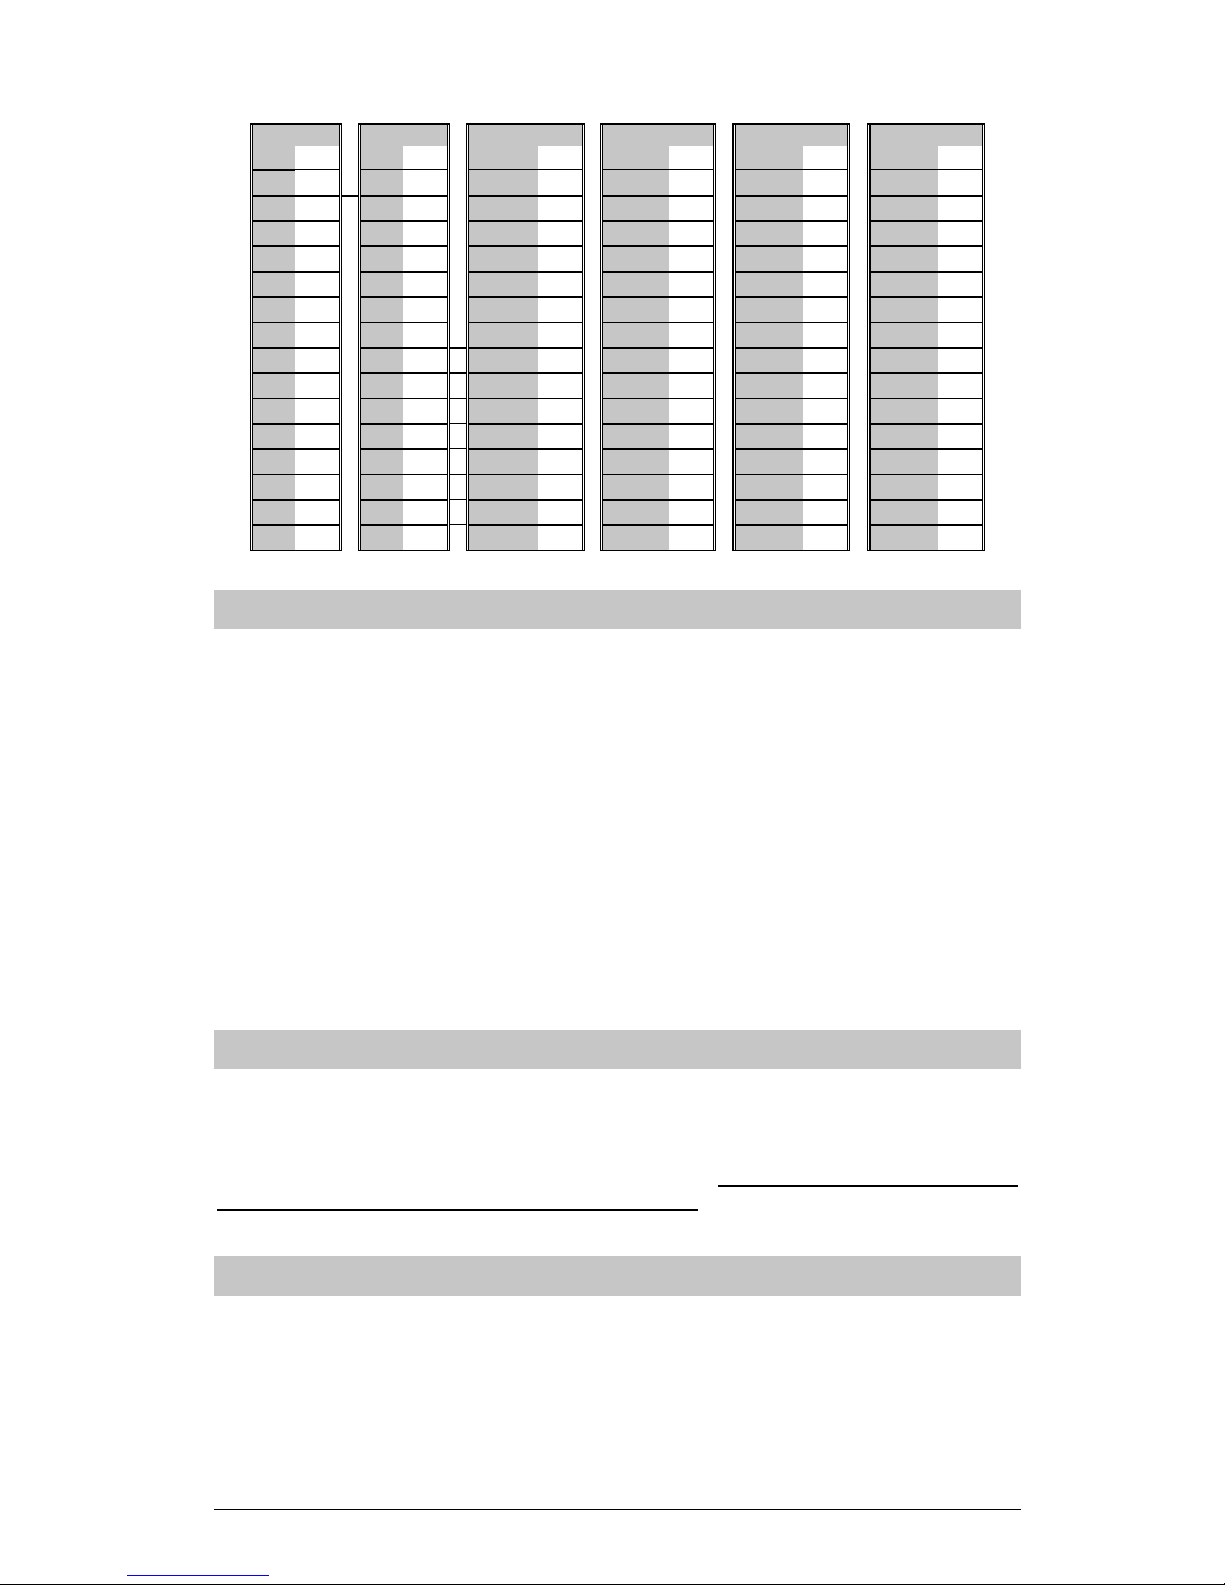
Table 1.2 American Spanish
880
0
881
1
882
2
883
3
884
4
885
5
886
6
887
7
888
8
889
9
990
0
991
1
992
2
993
3
994
4
995
5
No. No. No. No. No. No.
000
001
002
003
004
005
006
007
008
009
110
111
112
113
114
115
0
1
A
2
B
3
C
4
D
5
E
6
F
7
G
8
H
9
I
0
J
1
K
2
L
3
M
4
N
5
Ñ
116
117
118
119
220
221
222
223
224
225
226
227
228
229
330
331
6
O
7
P
8
Q
9
R
0
S
1
T
2
U
3
V
4
W
5
X
6
Y
7
Z
8
0
9
1
0
2
1
3
332
333
334
335
336
337
338
339
440
441
442
443
444
445
446
447
2
4
3
5
4
6
5
7
6
8
7
9
8
a
9
á
0
b
1
c
2
d
3
e
4
é
5
f
6
g
7
h
448
449
550
551
552
553
554
555
556
557
558
559
660
661
662
663
8
i
9
í
0
j
1
k
2
l
3
m
4
n
5
ñ
6
o
7
ó
8
p
9
q
0
r
1
s
2
t
3
u
664
665
666
667
668
669
770
771
772
773
774
775
776
777
778
779
4
ü
5
ú
6
v
7
w
8
x
9
y
0
z
1
!
2
"
3
#
4
&
5
'
6
(
7
)
8
U
9
+
,
-
.
/
:
;
<
=
>
@
[
Ü
]
^
_
`
NX1192E AMERICAN SPANISH LIBRARY
ABAJO DESPACHO GERENCIA PANICO SENSOR
ALARMA DETECTOR GOLPE PARED SILENCIOSA
ALMACEN DISPARO HABITACION PASILLO SIRENA
ARRIBA DOBLE TECHNOLOGIA HUMO PERSIANA SOTANO
AVERIA DORMITORIO INFORMATICA PLANTA TALLER
AZOTEA EMERGENCIA INFRARROJO PRINCIPAL TECHO
BARRERA ENTRADA INTERIOR PUERTA TERRAZA
CAJA FUERTE ESTACIONAMIENTO JARDIN RECEPCION TIENDA
CLARABOYA ESTUDIO LABORATORIO RECIBIDOR TRASERO
COCINA EXTERIOR LATERAL SABOTAJE VALLA
COMEDOR FACHADA LAVABO SALA VENTANA
CONTACTO FUEGO MAGNETICO SALIDA VESTIBULO
CRISTAL GARAJE OFICINA SALON ZONA
To load the factory defaults, enter the Program Mode for the module to be defaulted using the
procedure on page 2, then type [9]-[1]-[0]-[#]. The keypad will beep 3 times indicating that the
loading is in progress. The loading takes about 6 seconds. To load the factory defaults for
the LCD keypad, enter the Program Mode from a
keypad), and follow the procedures mentioned previously.
two-line Shutdown Messages will not be defaulted.
For supervision purposes, the NetworX control panel has the ability to automatically find and
store in its memory the presence of all keypads, zone expanders, wireless receivers, and any
other module connected to the data terminal. This allows these modules to be supervised by
the control panel.
NOTE
to enrolling modules. To enroll the modules, enter the Program Mode of the NetworX control
panel. When the Program Mode is exited, the control will enroll the devices. The enrolling
process takes about 12 seconds, during which time the "Service Required" will be displayed.
Once a module is enrolled, if it is not detected by the control, the "Service Required will be
displayed.
4
LOADING FACTORY DEFAULTS
different
keypad (does not have to be LCD
NOTE: The two-line Custom and
ENROLLING MODULES AND KEYPADS
: All modules should be connected and set to unique addresses prior
S
IRU+HO
S
PROGRAMMING THE NX1192E LCD KEYPADS
U
This section describes how to program the address and partition of each keypad, as well as
the options that are available. The address of the keypad is important because this is how
the panel supervises the keypads. The factory default for the “Master Code” is [1]-[2]-[3]-[4]
when using a 4-digit code, or [1]-[2]-[3]-[4]-[5]-[6] for a 6-digit code. The factory default for
the "Go To Program" code is [9]-[7]-[1]-[3] when using a 4-digit code, or [9]-[7]-[1]-[3]-[0]-[0]
for a 6-digit code.
USING THE FUNCTION MENU
Many of the functions shown below are in the Function Menu. Press [7] to access this menu.
Once the [7] key is depressed, the display will begin scrolling though a list of functions and
the corresponding number(s) associated with those functions. To access a function press the
number(s) listed for that function. If you already know the function numbers simply press [7]
followed by the function number.
NOTE
: Some of the functions are not listed because they are installer-level functions.
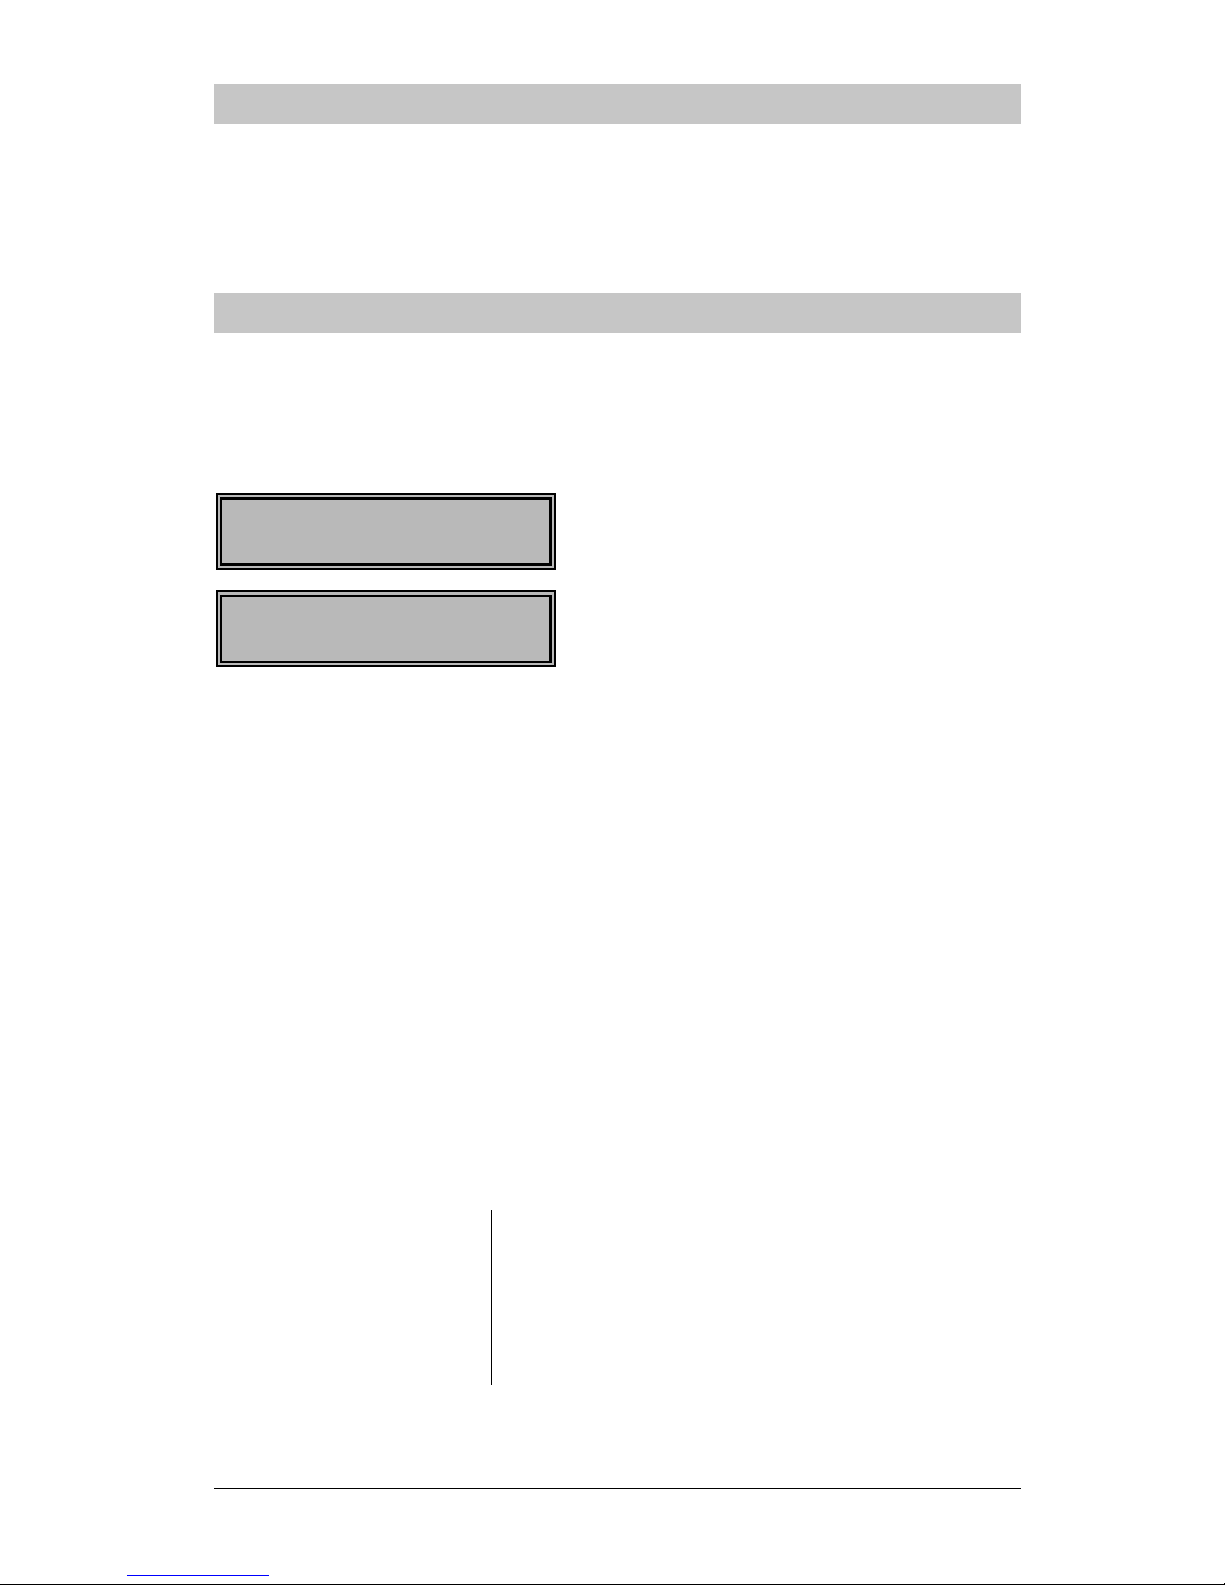
6HOHFWDQ2SWLRQ
3UHVV✱IRU+HO
6HOHFWDQ2SWLRQ
Ü
=RQH5HYLHZ
The menu selections will scroll automatically. The other messages are shown below. For
further details regarding the functions, please refer to the page indicated.
0=Set Tone
1=Master Mode
2=Service Check ......................... Page 14
3=Alarm Memory......................... Page 9
44=Test ....................................... Page 10
45=Display Test
46=Light Control.......................... Page 10
49=Spanish ................................. Page 10
5=User PIN.................................. Page 11
6=User Authority.......................... Page 11
7=Detector Reset......................... Page 12
90=Log Review............................ Page 7
91=View Settings......................... Page 5
97=Set Date/Time........................ Page 9
CHIME=Walk Test....................... Page 12
EXIT=Silent Exit
.................................. Page 9
These are samples of the displays that will
appear in the Function Menu. Each time the [U]
key is pressed the next menu item will be
displayed. Press the number or key to access
the function desired. Press the [#] key to exit.
9 1 ADJUSTING THE VIEW / BRIGHTNESS OF THE LCD
U
1) Enter [U]-[9]-[1]
2) Enter [
3) To advance to the
Brightness option, press
[U]
5
master code
The LCD Screen will prompt “Please Enter Your Code".
]
The LCD will now prompt you to raise or lower the viewing
angle. Using the scroll keys to the right of the LCD, you can
raise or lower the viewing angle of the text.
The LCD will prompt you to brighten or dim the LCD lighting.
Use the scroll keys again to adjust to desired brightness.
When completed, exit by pressing
[U].
 Loading...