

Page 1
RAX High-Definition Animation Recorder
Optional Disk Drive Installation
Each Fibre Channel RAID storage array delivered with
your RAX HD Animation Recorder came with eight
uninstalled Fibre Channel disk drives. Each disk drive was
in a carrier that you installed in one of the storage arrays.
To increase the disk storage for your RAX HD Animation
Recorder, you purchased a set of additional Fibre Channel
disk drives. To use these additional disk drives, you must:
♦ Back up any data on the Fibre Channel disk drives already installed in the storage arrays. You
will lose that data when you install and configure the additional disk drives.
♦ Install the additional disk drives in the storage arrays.
♦ Configure the RAID controller software for each storage array to manage all the disk drives
(twelve) in that storage array.
♦ Configure the storage array stripe set so the base unit’s operating system will recognize and
use the increased disk space in all of the storage arrays.
D1AA00410, 03/00
♦ Replace any data you backed up before installing the additional disk drives.
For instructions on configuring the RAID controller and the storage array stripe set, see the RAX
HD Animation Recorder User’s Guide. For more information on the storage arrays and the disk
drives, see the storage array documentation delivered with the RAX HD Animation Recorder.
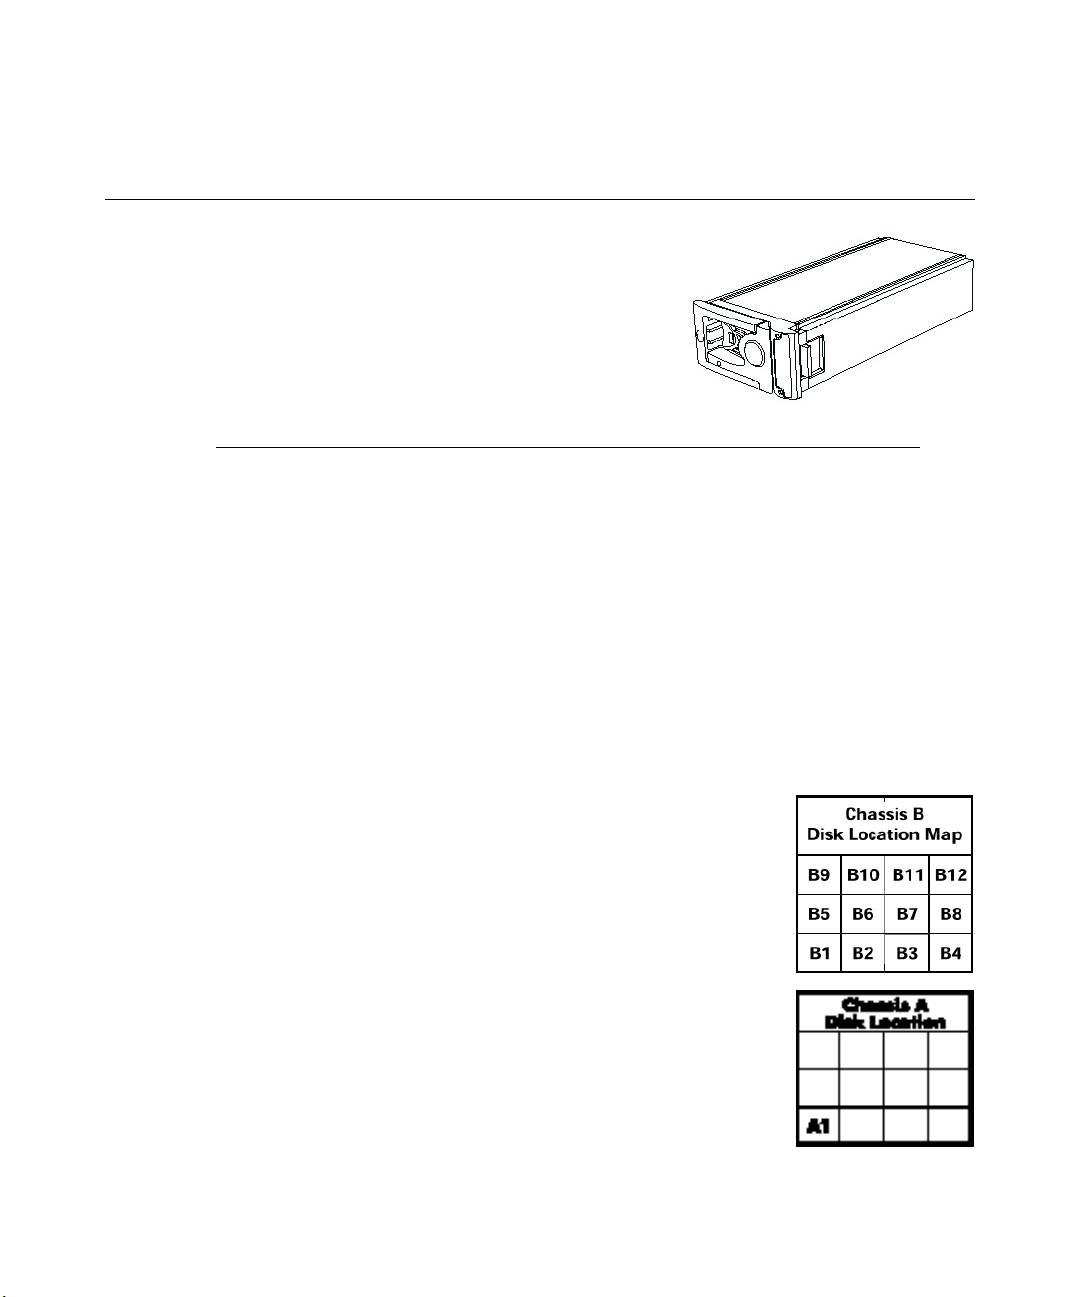
Each Fibre Channel storage array has an installation label on the top of its
chassis. This label:
♦ Identifies the storage array by letter (A, B, or C) and color (red, green,
or blue)
♦ Identifies the disk drive bays (1 through 12) in the storage array
Each disk drive has an installation label on the top of its carrier. This
label:
♦ Identifies the storage array to which the disk drive belongs by letter
(A, B, or C).
♦ Identifies the ba y (1 through 12) in which the disk drive resides.
Page 2
2
Before you install the additional disk drives in one of the storage arrays:
♦ Match the letter on the disk drive label with the letter on the storage array label. For example,
install a disk drive with an A label only in the chassis with an A label.
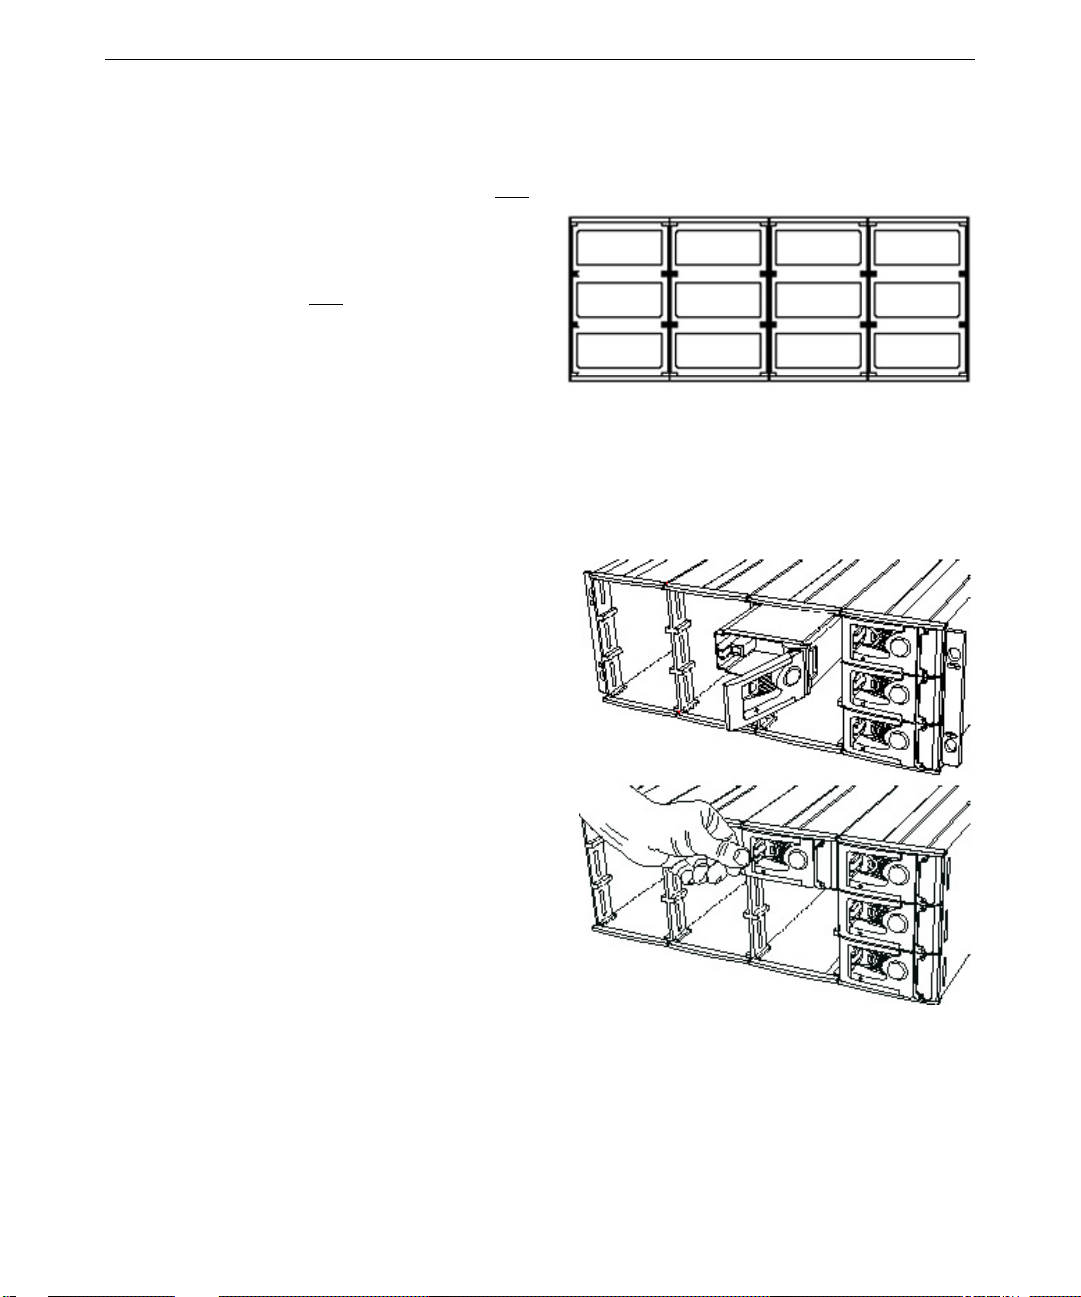
♦ Match the number on the disk drive label
with the bay in the storage array. For
9
10
11
12
example, install the disk drive with a 9
on its label only in bay 9.
5
6
7
8
♦ The additional disk drives for a storage
array must be installed in bays 9 through
1
2
3
4
12 of that storage array.
WARNING If you do not install the disk drives as labeled, the RAID configuration and disk
striping will not work, and the storage arrays will not function correctly. You
must install each disk drive in the correct bay in the correct storage array, as
described in these instructions and on the installation labels.
To install a disk drive in a storage array:
1. Press the left side of the carrier faceplate to
release the carrier handle.
2. Insert the disk drive carrier into the chassis.
3. Push the carrier gently into the chassis until
it stops.
4. Press the left side of the carrier handle to
draw the carrier into the chassis until the
handle clicks cl osed.
5. For added security, use the supplied carrier
lock key to lock each carrier handle and
prevent removal of the disk drives. Insert
the key in the socket on the handle and turn
it counter-clockwise until the indicator in
the handle shows green. To unlock the
carrier handle, turn the key clockwise until
the indicator in the handle shows black.
2000 Intergraph Computer Systems. Intergraph and the Intergraph logo are registered trademarks of Intergraph Corporation.
 Loading...