

Insignia NS-PCG6RGB18 Quick Setup Manual
QUICK SETUP GUIDE
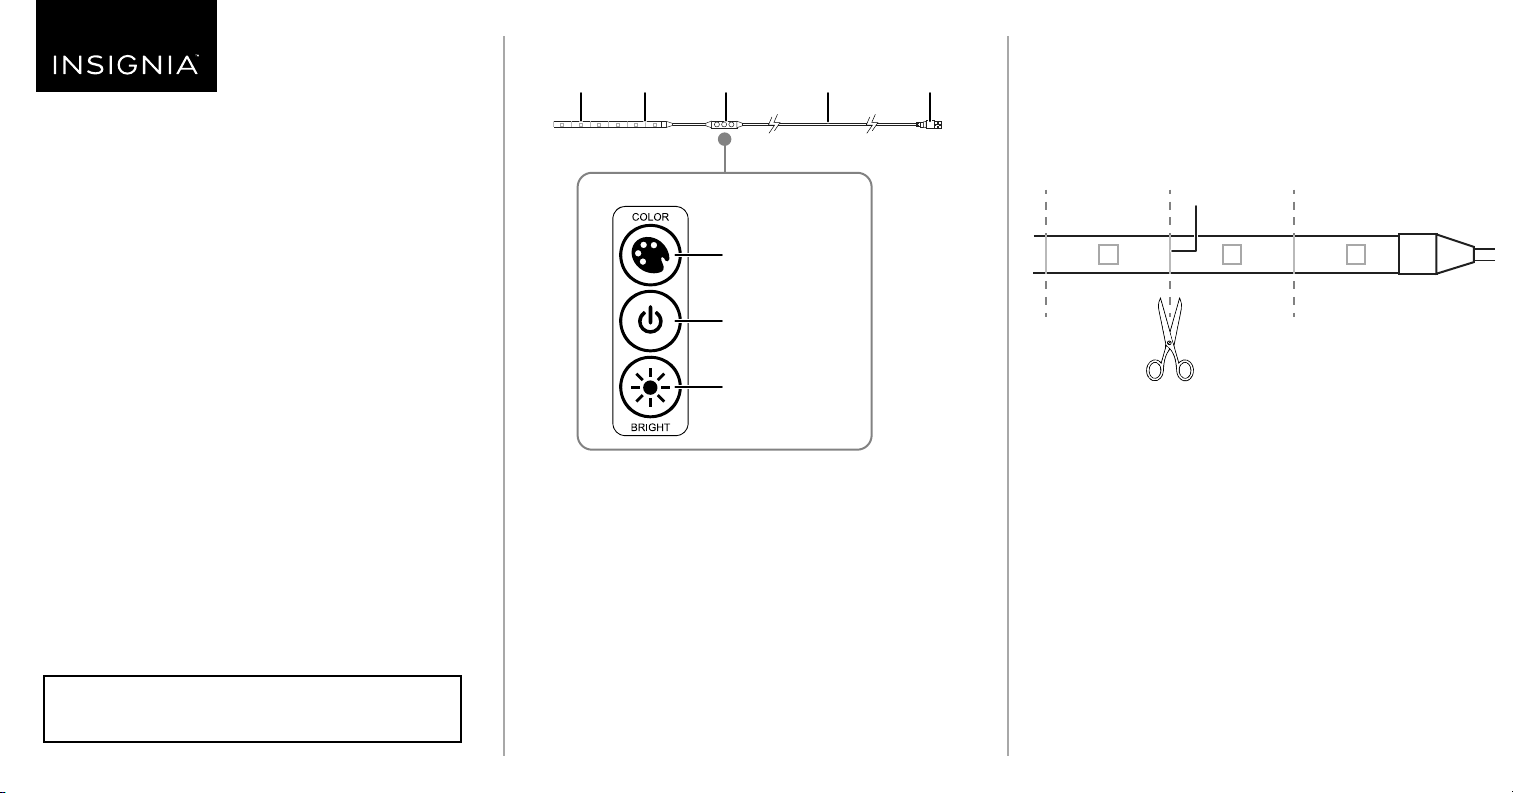
RGB LED
LED
light strip
Light controls
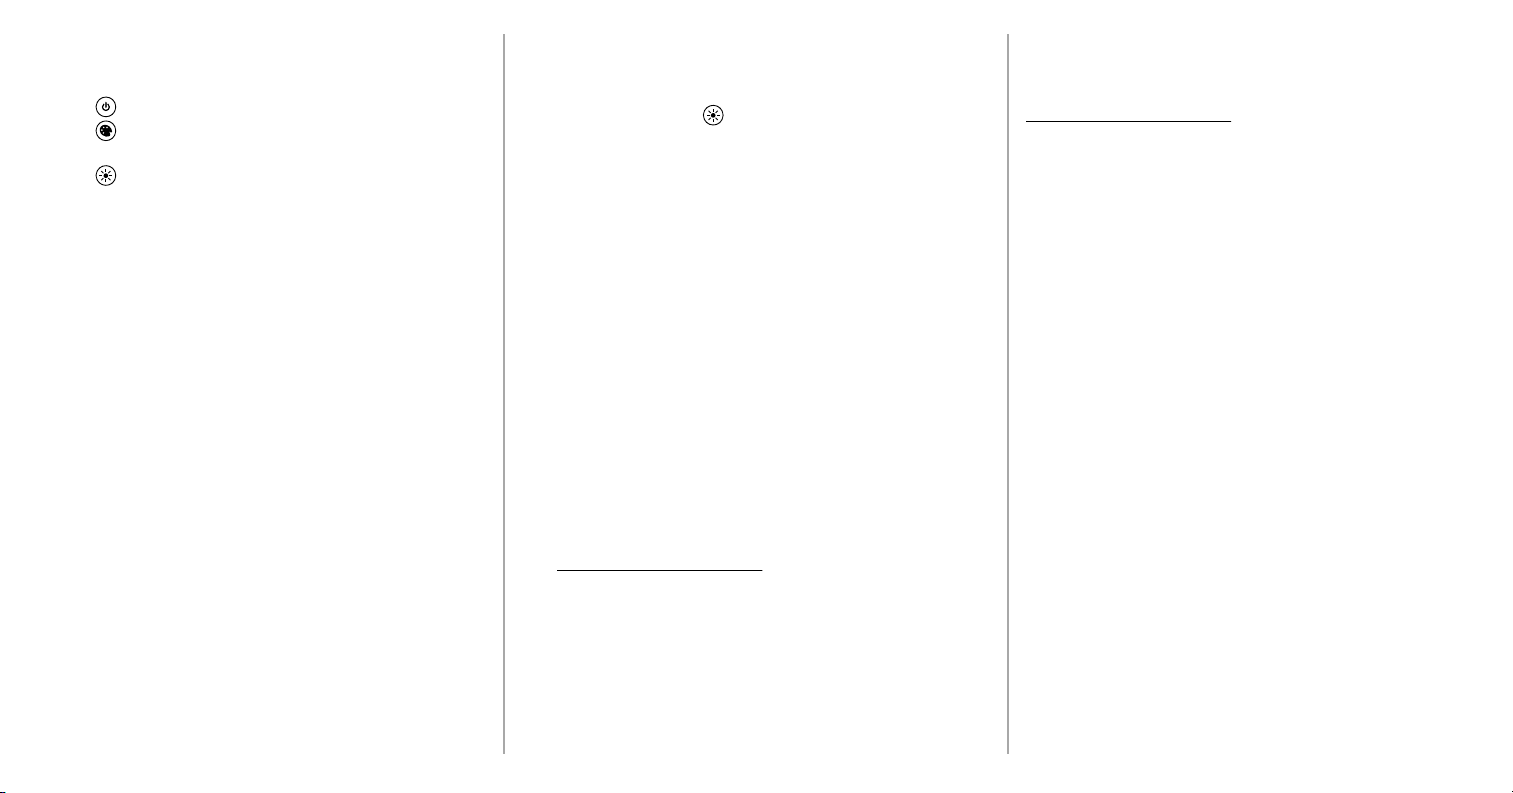
Cut
line
Light
controls
Wire
USB
connector
USING YOUR TAPE LIGHT
Shortening your tape light
• Use a pair of scissors to cut on a cut line. Cut lines are
about 1.3 in. (3.3 cm) apart.
Warning: Do not cut the silver solder markings. Only cut in the
center of the copper-colored pads, as shown.
Cut line
Light Strip
NS-PCG6RGB18
PACKAGE CONTENTS
• LED light strip
• Double-sided tape
• Quick Setup Guide
FEATURES
• Premium LEDs produce 20 selectable colors
•
Multi-step dimmer adjusts to the brightness level you want
• Self-adhesive backing attaches to monitors, computers,
TVs, desks, or other spaces for quick, custom lighting
• Reduces eye strain from monitors or TV's while enhancing
image contrast
• Lights powered through USB (on your computer or TV) or
with a USB power adapter (not included)
Do not plug in your lights when they are coiled.
This can generate excess heat which can damage
the product or connected device.
Before using your new product, please read these instructions to prevent any damage.
Change color
Turn on/o
Adjust brightness
Attaching your lights
1 Peel the adhesive backing o the lights, then adhere the
lights where you want them.
2 Optional: Attach the double-sided tape to the back of the
light control, then adhere it where you want it.
Connecting to power
• Place the light strip where you want it, then connect the
USB connector to your TV, computer, or other USB power
source.
Notes:
• Make sure that the light strip is unrolled, otherwise it can
damage the light strip or cause a re.
• Every surface is dierent, and additional adhesive may be
used if the LED tape detaches from the surface. Small
pieces of clear tape can be used.
Adjusting the lights
Note: If you turn o or unplug your light strip, it will remember
your last brightness and color settings.
• Press (power) to turn the light strip on and o.
• Press (COLOR) repeatedly to change the color
combination. There are 20 available colors.
• Press (BRIGHT) repeatedly to adjust the brightness.
There are eight light levels.
SPECIFICATIONS
• Input: 5V DC, 1A
• USB power supply (not included): 5V DC, 0.5A
minimum (1A or more recommended)
• Length: 6.5 ft. (1.9 m)
TROUBLESHOOTING
LEDs will not turn on.
• Press the power button to make sure that your light is
turned on, then press (BRIGHT) to increase the
brightness.
• Make sure that your lights are connected to a working
USB port or power outlet. If connected to a computer,
turn on your computer.
LEDs icker or turn on and o.
• Make sure that your lights are plugged into a working
power outlet or USB port. Try plugging into a dierent
power source.
• Make sure that the cable is not damaged.
SAFETY INFORMATION
• To avoid damage to the light strip, do not sharply twist or
bend the light strip 90°.
• Do not cut the silver solder markings. Only cut in the
center of the copper-colored pads.
ONEYEAR LIMITED WARRANTY
Visit www.insigniaproducts.com for details.
CONTACT INSIGNIA:
For customer service, call 1-877-467-4289 (U.S. and
Canada) or 01-800-926-3000 (Mexico)
www.insigniaproducts.com
INSIGNIA is a trademark of Best Buy and its aliated companies
Distributed by Best Buy Purchasing, LLC
7601 Penn Ave South, Richeld, MN 55423 U.S.A.
©2017 Best Buy. All rights reserved.
Made in China
V2 ENGLISH 17-0767
 Loading...