

Page 1

Cucina
Installazione e uso
Cooker
Installation and use
Cuisinière
Installation et emploi
Êóõoííaя плита
Установка и пользование
Sporák
Instalace a pouití
K 3C0 M/R
K 3C7 M/R
Page 2

Cucina con forno multifunzione e piano vetroceramica
Istruzioni per l'installazione e l'uso 3
Cooker with multifunction oven and ceramic hob
Instructions for installation and use 13
Cuisinière avec four multifonction et table
vitrocéramique
Instruction pour l'installation et l'emploi 22
Плита с мультифункциональной духовкой и
стеклокерамической поверхностью
Инструкции по использованию и обслуживанию 31
CZ
Sporák s víceúcelovou pecící troubou a sklokeramickou
varnou deskou
Návod k instalaci a pouití 41
Page 3

Importante
Per garantire l'EFFICIENZA e la SICUREZZA di questo elettrodomestico:
• rivolgetevi esclusivamente a centri di assistenza tecnica autorizzati
• richiedete sempre l'utilizzo di parti di ricambio originali
1 Questo apparecchio è stato concepito per un uso di tipo non
professionale all'interno di abitazione.
2 Prima di utilizzare l'apparecchio leggere attentamente le av-
vertenze contenute nel presente libretto in quanto forniscono
importanti indicazioni riguardanti la sicurezza di installazione,
d'uso e di manutenzione T enere questo man uale come guida
di riferimento.
3 Rimuovere l'imballo e controllare che l'apparecchio non sia stato
danneggiato dalle operazioni di trasporto. Nel caso in cui si abbiano
dei dubbi, è meglio non utilizzarlo e rivolgersi ad un tecnico qualificato. Per ragioni di sicurezza, tenere i materiali utilizzati per l'imballo
(buste di plastica, polistirolo espanso, bullette, ecc.) lontano dalla
portata dei bambini.
4 L'apparecchio deve essere installato da un tecnico qualificato se-
condo le istruzioni fornite dal fabbricante. Il fabbricante non si assume alcuna responsabilità per lesioni o danni a persone, animali o
cose causati dalla mancata osservanza di queste istruzioni.
5 La sicurezza elettrica di questo apparecchio è garantita soltanto a
patto che esso sia stato collegato in maniera corretta ad un impianto di messa a terra che sia funzionante e conforme alle norme vigenti sulla sicurezza elettrica. Controllare che questo requisito di
sicurezza fondamentale sia sempre rispettato. Nel caso si abbiano
dei dubbi, farlo controllare da un tecnico qualificato. Il fabbricante
non si assume alcuna responsabilità per danni causati da un collegamento a terra difettoso.
6 Prima di collegare l'apparecchio, controllare che le specifiche della
targhetta dei dati di funzionamento corrispondano a quelle della
vostra alimentazione.
7 Controllare che l'alimentazione e le prese siano sufficienti per il ca-
rico complessivo richiesto dall'apparecchio, così come viene specificato nella targhetta dei dati di funzionamento. Nel caso in cui si
abbiano dei dubbi, rivolgersi ad un tecnico qualificato.
8 Per l'installazione è necessario utilizzare un interruttore multiplo con
uno spazio tra i contatti pari ad almeno 3 mm.
9 In caso di incompatibilità tra la presa e la spina dell'apparecchio fare
sostituire la presa con altra di tipo adatto da personale professionalmente qualificato. Quest'ultimo, in particolare, dovrà anche accertare che la sezione dei cavi della presa sia idonea alla potenza assorbita dall'apparecchio. In generale è sconsigliabile l'uso di adattatori,
prese multiple e/o prolunghe. Se non è possibile fare a meno di
utilizzarli, ricordarsi sempre di utilizzare soltanto prolunghe e adattatori singoli o multipli che siano conformi alle norme vigenti in
materia di sicurezza. e non superare mai la capacità massima indicata sulla prolunga o sull'adattatore singolo e la potenza massima
indicata sull'adattatore multiplo.
10 Non lasciare l'apparecchio inutilmente inserito. Spegnere l'interrut-
tore generale dell'apparecchio quando lo stesso non è utilizzato, e
chiudere il rubinetto del gas.
11 Le aperture e le fessure impiegate per la ventilazione e la di-
spersione del calore non devono in nessun caso essere c hiuse o tappate.
12 Il cavo di alimentazione di questo apparecchio non deve essere
sostituito dall'utente. In caso di danneggiamento del ca vo , o per la
sua sostituzione, rivolgersi esclusivamente ad un centro di assistenza tecnica autorizzato dal costruttore.
13 Questo apparecchio dovrà essere destinato solo all'uso per il quale
14 L'uso di un qualsiasi apparecchio elettrico comporta l'osservanza di
· non toccare l'apparecchio con mani o piedi bagnati o umidi
· non usare l'apparecchio a piedi nudi
· non usare, se non con particolare cautela, prolunghe
· non tirare il cavo di alimentazione , o l'apparecchio stesso, per stac-
· non lasciare esposto l'apparecchio ad agenti atmosferici (pioggia,
· non permettere che l'apparecchio sia usato dai bambini o da inca-
15 Prima di effettuare qualsiasi operazione di pulizia o di manutenzio-
16 Nel caso in cui si rompa la superficie del vetro , scollegare immedia-
17 Allorché si decida di non utilizzare più l'apparecchio, si raccomanda
18 Il piano di cottura in porcellana dura resiste alle fluttuazioni di tem-
19 Ricordarsi che la superficie di cottura resta calda per almeno mez-
20 Evitare di riporre oggetti sulla superficie di vetro del piano cottura.
21 Non accendere le superfici di cottura, se vi sono lamine di alluminio
22 T enersi lontano dalle superfici calde .
23 Quando si utilizzano piccoli elettrodomestici accanto al piano di cot-
24 T enere i manici delle pentole rivolti verso l'interno in modo da evitare
25 Quando si accende la superficie di cottura, riporre sempre una pen-
26 Istruzioni preliminari. Il sigillante del vetro che viene utilizzato po-
è stato espressamente concepito.
Ogni altro uso (ad esempio: riscaldamento di ambienti) è da considerarsi improprio e quindi pericoloso.
Il costruttore non può essere considerato responsabile per eventuali danni derivanti da usi impropri, erronei ed irragionevoli.
alcune regole fondamentali. In particolare:
care la spina dalla presa di corrente.
sole, ecc.)
paci, senza sorveglianza
ne, disinserire l'apparecchio dalla rete di alimentazione elettrica, o
staccando la spina, o spegnendo l'interruttore dell'impianto.
tamente l'apparecchio. Per l'eventuale riparazione rivolgersi sola-
mente ad un centro di assistenza tecnica autorizzato e richiedere
l'utilizzo di ricambi originali. Il mancato rispetto di quanto sopra può
compromettere la sicurezza dell'apparecchio.
di renderlo inoperante tagliandone il cavo di alimentazione, dopo
aver staccato la spina dalla presa di corrente . Si raccomanda inoltre
di rendere innocue quelle parti dell'apparecchio suscettibili di costituire un pericolo, specialmente per i bambini che potrebbero servirsi
dell'apparecchio fuori uso per i propri giochi.
peratura e agli urti. Ricordarsi, tutta via, che lame o utensili da cucina
affilati possono rompere la superficie del piano di cottura. Se ciò
accade, togliere immediatamente la spina della cucina dalla rete e
rivolgersi al servizio di assistenza locale.
z'ora dopo essere stata spenta. Non riporre recipienti o altri oggetti
sulla superficie calda.
o di plastica sul piano di cottura.
tura, controllare che il cavo di alimentazione non si trovi sulle superfici calde.
di urtarle accidentalmente e farle cadere dal piano di cottura.
tola sulla superficie immediatamente per evitare che si surriscaldi
velocemente e rischi di danneggiare gli elementi riscaldanti.
trebbe lasciare tracce di grasso sul vetro stesso. Ricordarsi di ri-
muoverle con una normale sostanza detergente non abrasiva prima di mettere in funzione l'apparecchio. Durante le prime ore di
funzionamento è possibile che venga avvertito un odore di gomma,
che comunque scomparirà presto.
3
Page 4
27 Durante l'uso dell'apparecchio gli elementi riscaldanti e alcune parti
1 2
3
4
5
12345
1
2
3
4
5
R
S
T
N
R
S
N
R
N
400 3N
H05RR-F 5x2.5 CEI-UNEL 35363
400V 2N
H05RR-F 4x2.5 CEI-UNEL 35363
230V 1N
H07RN-F 3x4 CEI-UNEL 35364
V
29 A vvertenza: non posizionate mai contenitori bollenti, pietanze cal-
della porta forno diventano molto calde. Fare attenzione a non
toccarle e tenere i bambini a distanza
30 Se la cucina viene posta su di un piedistallo, prendere adegua-
28 controllare sempre che le manopole siano nella posizione "o"/"o"
quando l'apparecchio non è utilizzato;
Installazione
de e materiale infiammabile all'interno del cassetto scaldavivande.
ti accorgimenti affinché l'apparecchio non scivoli dal piedistallo stesso.
Le istruzioni che seguono sono rivolte all'installatore qualificato affinchè compia le operazioni di installazione
regolazione e manutenzione tecnica nel modo più corretto e secondo le norme in vigore.
Importante: scollegare sempre la cucina dall'alimentazione elettrica prima di effettuare una qualsiasi operazione di manutenzione, regolazione, ecc.
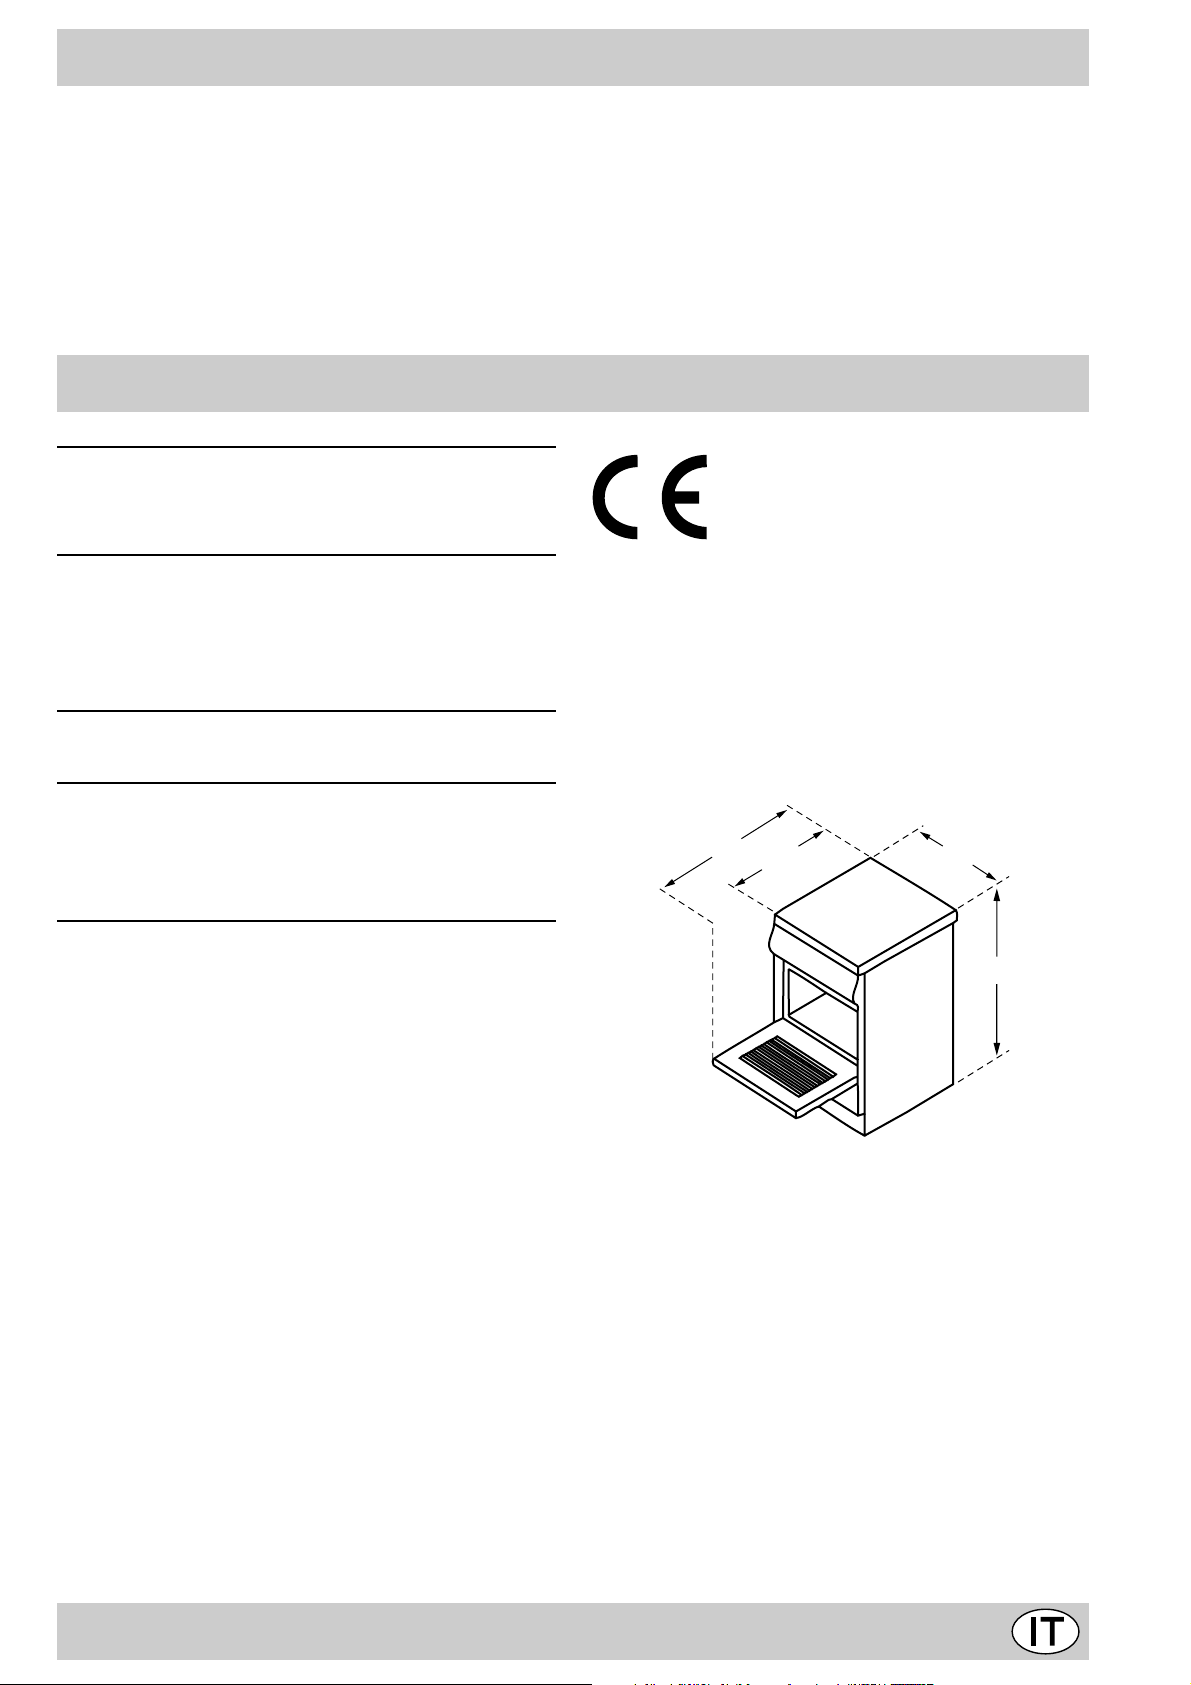
Posizionamento
E' possibile l'installazione a fianco di mobili la cui altezza
non superi quella del piano di lavoro. Per una corretta installazione della cucina vanno osservate le seguenti precauzioni:
a) I mobili situati a fianco, la cui altezza superi quella del
piano di lavoro , debbono essere situati ad almeno 200
mm. dal bordo del piano stesso.
b) Le cappe debbono essere installate secondo i requisi-
ti richiesti nei libretti istruzioni delle cappe stesse e
comunque ad una distanza minima di 650 mm.
c) Posizionare i pensili adiacenti alla cappa ad un'altez-
za minima dal top di 420 mm (vedi figura).
d) Allorché la cucina venga installata sotto un pensile,
quest'ultimo dovrà mantenere una distanza minima dal
piano di 700 mm (millimetri) come da figura.
e) Il vano del mobile dovrà avere le dimensioni indicate
nella figura.
HOOD
Min. mm.
600
mm.
420
Min.
mm. with hood
420
650
Min. mm.
min.
mm. without hood
700
min.
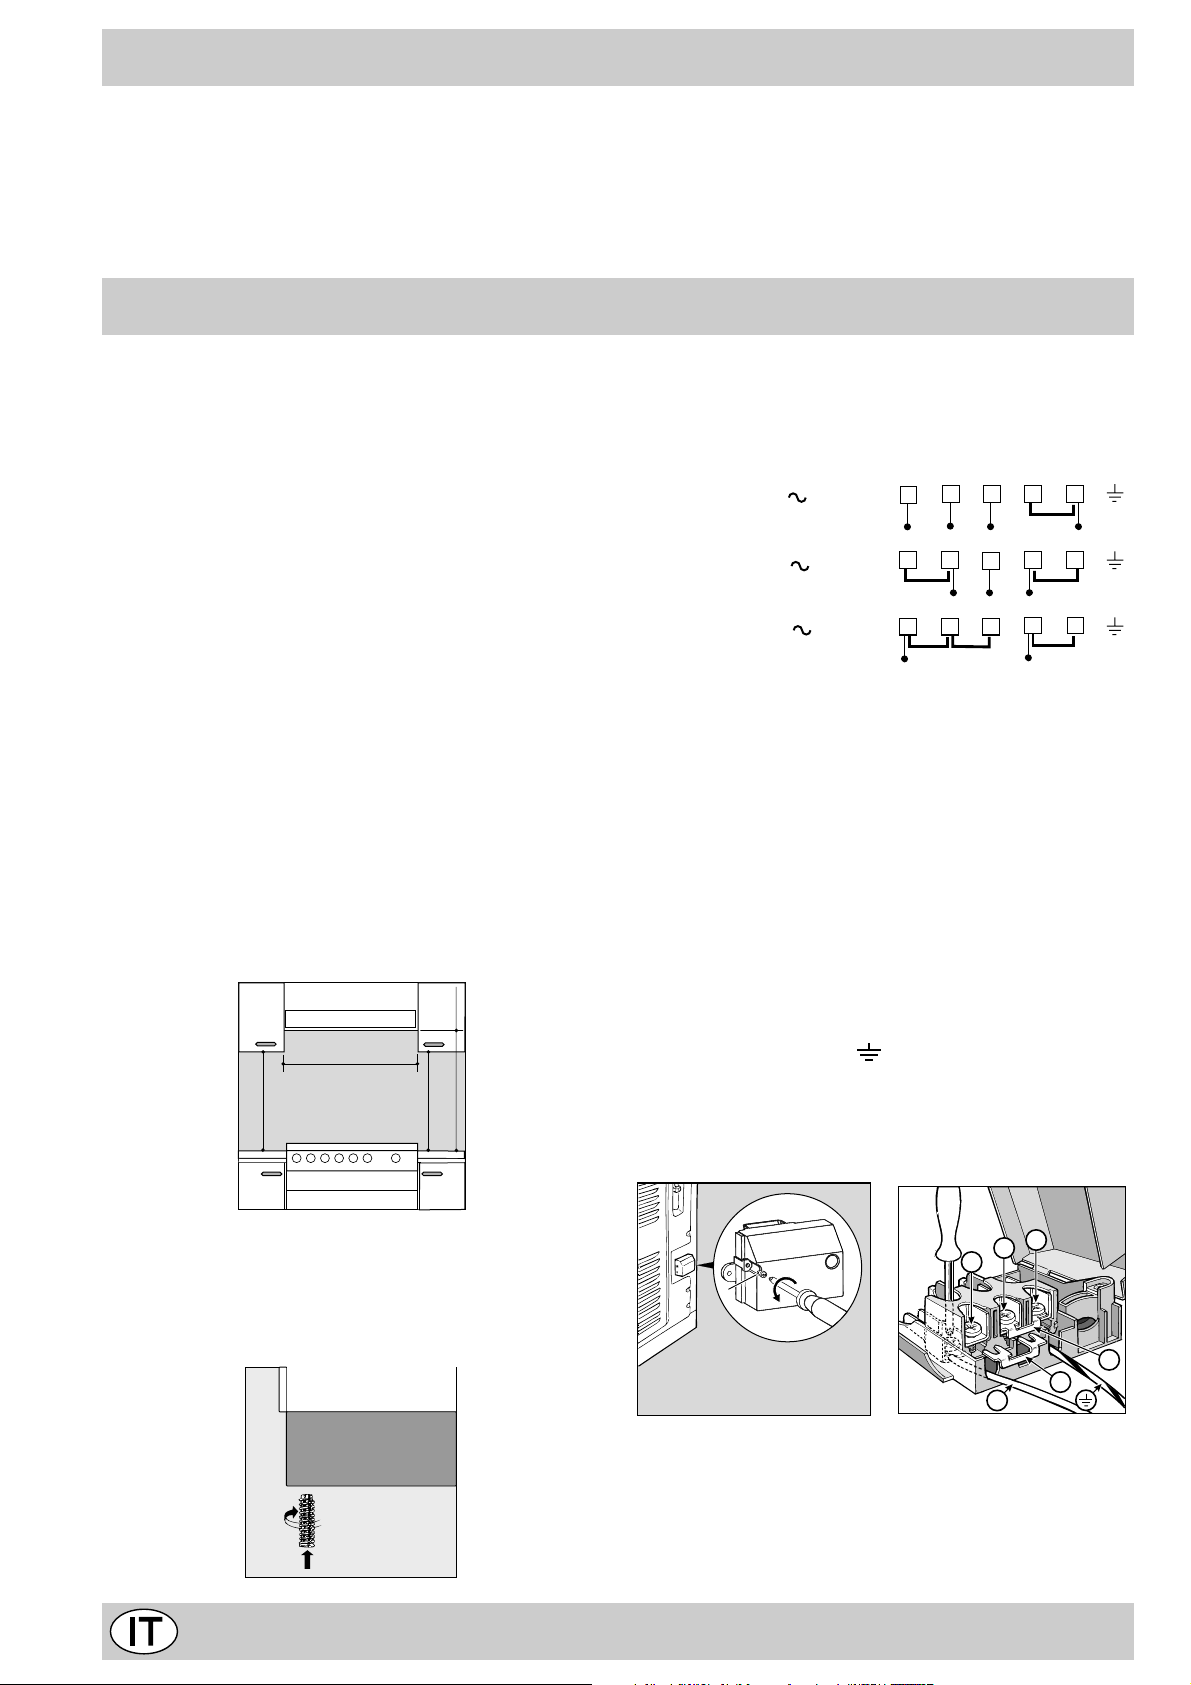
Collegamento elettrico
Il cavo va dimensionato in base al tipo di collegamento
elettrico utilizzato (vedi schema di connessione riportato
di seguito).
Installazione del cavo di alimentazione
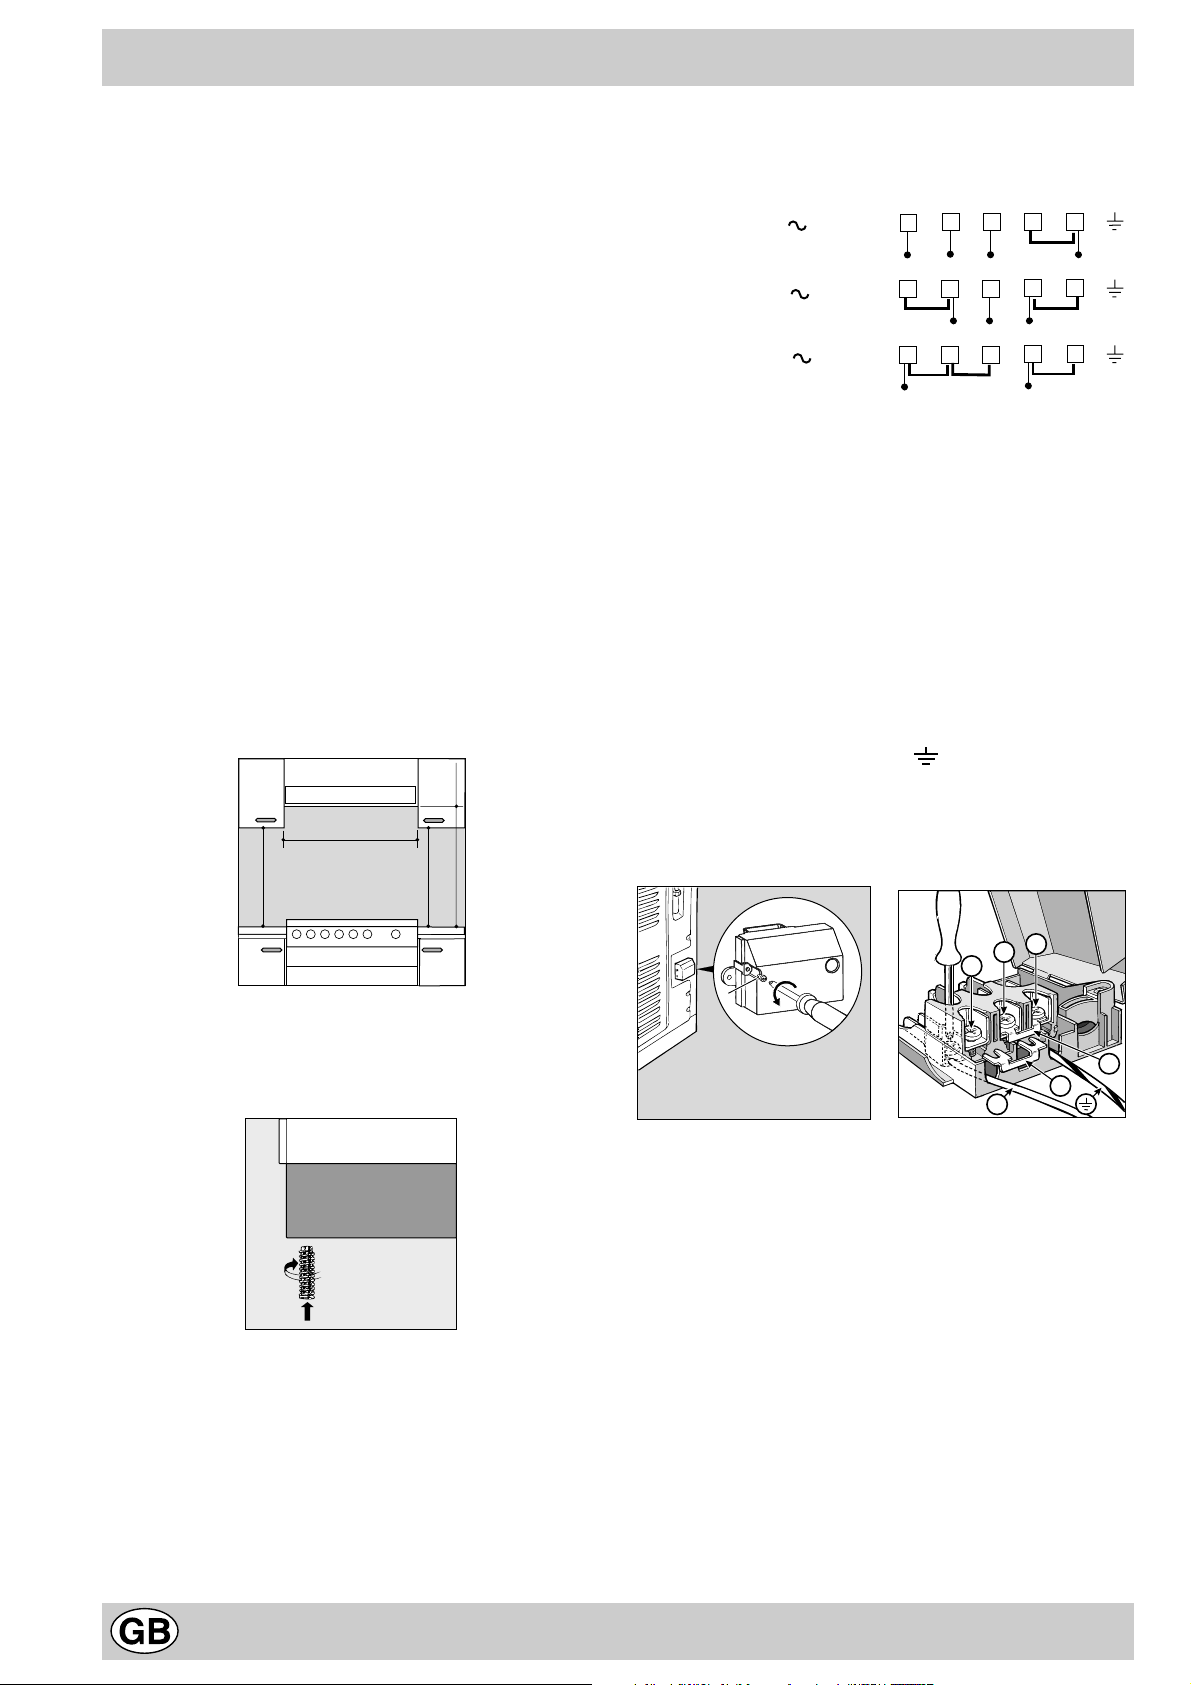
Apertura della morsettiera:
· Svitare la vite “V”
· Tirare il coperchio della basetta di giunzione per aprir-
lo
Per l'installazione del cavo di alimentazione, eseguire le
operazioni seguenti:
· posizionate la piccola connessione A-B secondo il tipo
di collegamento che si desidera effettuare utilizzando
lo schema riportato nella figura 3.
Nota: le piccole connessioni vengono preparate dalla
Fabbrica per il collegamento monof ase a 230V (i contatti
1-2-3 sono connessi l'uno all'altro). Il ponte 4-5 è situato
nella zona inferiore della morsettiera.
· introdurre i cavi (N e ) come viene mostrato nella
figura e serrare le viti corrispondenti.
· fissare i cavi rimanenti sui morsetti 1-2-3.
· fissare il cavo di alimentazione nell'apposito f ermacavo
e chiudere il coperchio per mezzo della vite “V”.
Livellamento
Per ottenere un liv ellamento perfetto della cucina, vengono forniti dei piedini regolabili (vedere la fig.1). che possono essere avvitati nelle sedi poste negli angoli della base
della cucina.
3
2
1
A
N
Allacciamento del cavo di alimentazione alla rete
Per il cavo utilizzare una spina normalizzata per il carico
indicato nella targhetta dei dati. Al momento di eff ettuare
la connessione direttamente alla rete, installare tra l'apparecchio e la rete un interruttore omnipolare con un'apertura minima di 3 mm. tr a i contatti. Questo interruttore de ve
4
B
Page 5
essere sufficiente per il carico e deve essere conforme
104
60
50
85/90
alle norme vigenti (il conduttore di terra non deve essere
interrotto dall'interruttore). Il ca vo dell'alimentazione de ve
essere posizionato in modo tale da non superare 50°C
più della temperatura ambiente per tutta la sua lunghezza. Prima di eff ettuare l'allacciamento accertarsi che:
Caratteristiche T ecniche
Forno
Dimensioni (LxPxH) 39x41x34 cm
Volume 54 lt
Assorbimento forno Max 2100 W
· la valvola limitatrice e l'impianto domestico possano
sopportare il carico dell'apparecchiatura (vedi targhetta
caratteristiche);
· l'impianto di alimentazione è dotato di un collegamento a terra efficiente che è conforme alle disposizioni
contenute nelle norme vigenti;
· la presa o l'interruttore omnipolare è facilmente accessibile, una volta installata la cucina.
Piano di cottura in ceramica
Anteriore sx 1200 W
Posteriore sx 1700 W
Posteriore dx 1200 W
Anteriore dx 1700 W
Assorbimento piano di cottura in ceramica Max 5800 W
Voltaggio e frequenza
230V / 400V 3N AC 50 Hz
Dimensioni utili del cassetto scaldavivande:
Larghezza: 42 cm
Profondità: 44 cm
Altezza: 23 cm
Questo apparecchio è stato costruito in conformità
con le seguenti normative comunitarie:
- 73/23/CEE del 19/02/73 (Bassa Tensione) e successive modifiche;
- 89/336/CEE del 03/05/89 (Compatibilità Elettromagnetica) e successive modifiche;
- 93/68/CEE del 22/07/93 e successive modifiche.
5
Page 6
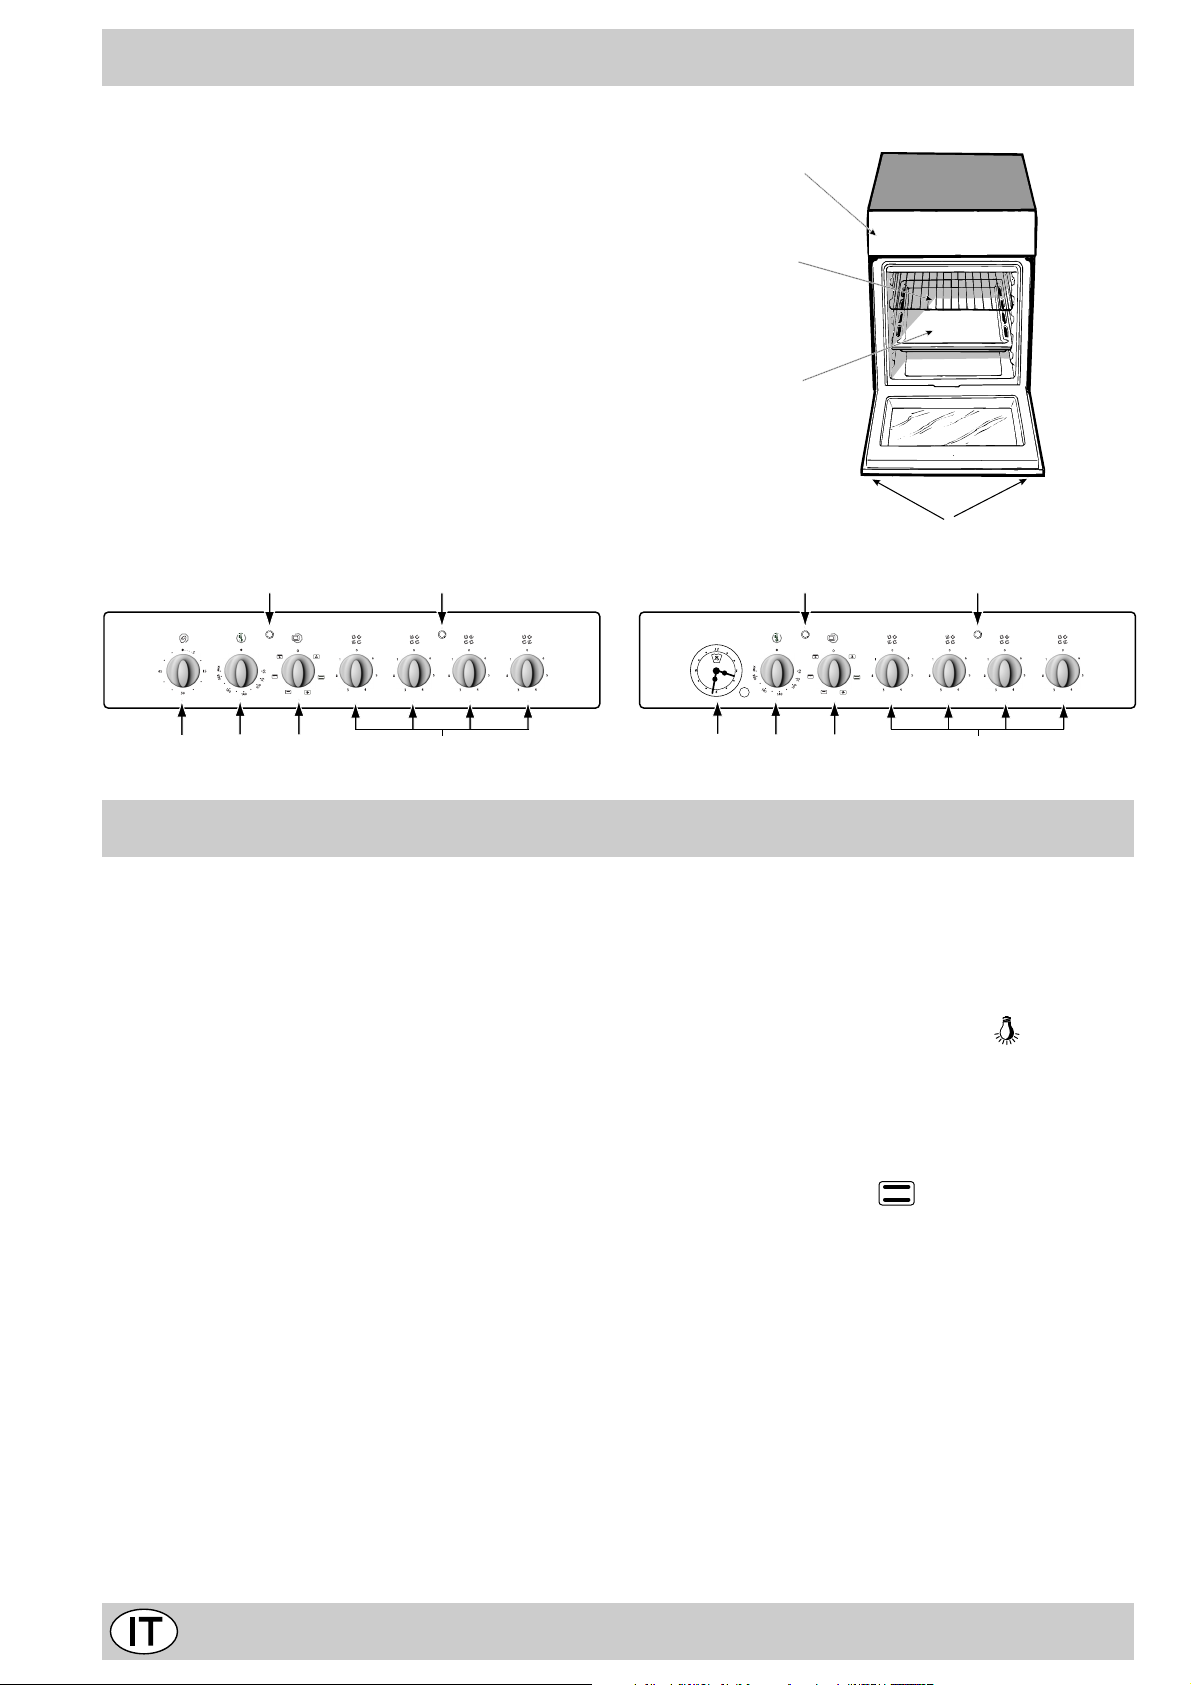
La cucina con forno m ultifunzione
D Leccarda o piatto di cottura
E Cruscotto
F Piedini o gambe regolabili
G Manopola di selezione
H Spia luminosa verde
K Griglia ripiano del forno
I Manopole piastre elettriche
M La spia termostato
N Manopola del timer
N Manopola del termostato
Q Orologio con contaminuti rustico
E
K
D
F
H
I
M
L
GN
Come utilizzare la cucina
La selezione delle varie funzioni presenti nella cucina avviene agendo sui dispositivi ed organi di comando posti
sul cruscotto della stessa.
Attentione: prima di utilizzare il forno e il grill per la prima
volta è bene lasciarli funzionare per circa 30 minuti. Controllare che il forno sia vuoto, il termostato sia al massimo,
la porta aperta ed il locale adeguatamente areato. L'odore che talvolta si avverte durante questa operazione è
dovuto all'evaporazione delle sostanze usate per proteggere il forno e il grill durante l'intervallo di tempo che intercorre tra la produzione e l'installazione del prodotto.
Attentione: Utilizzare il primo ripiano dal basso solamente nel caso di cotture con girarrosto (ove presente). Per le
altre cotture non utilizzate mai il primo ripiano dal basso e
non appoggiate mai oggetti sul fondo del forno mentre
state cuocendo perchè potreste causare danni allo smalto. Ponete sempre i Vostri recipienti di cottura (pirofile,
pellicole di alluminio, ecc.) sulla griglia in dotazione con
l'apparecchio appositamente inserita nelle guide del forno.
Le manopole del forno
Il forno "5 cuochi" combina i vantaggi del tradizionale forno "statico" con quelli del moderno forno "ventilato".
Il forno "5 cuochi" è estremamente versatile e offre 5 diverse modalità di cottura sicure e semplici. Usate le manopole per selezionare le diverse funzioni di cottura disponibili nel forno "5 cuochi".
G - manopola di selezione programmi
N - manopola termostato
L
Q
Per qualsiasi posizione della manopola di selezione, diversa da quella di riposo contrassegnata dallo "o", si ha
l'accensione della luce forno; la posizione della manopola
contrassegnata dal simbolo permette di accendere la luce
del forno senza che alcun elemento riscaldante sia attiva-
to. La posizione identificata dal simbolo
possibile accendere la luce del forno senza che nessuna
resistenza del forno sia attiva. La luce del forno accesa
indica che il forno è in funzione; la luce rimarrà accesa
finché il forno è in funzione.
1. Lo "statico"
- Posizione manopola "G":
- Posizione manopola "N": a scelta fra 50°C e Max
In questa posizione si accende la luce ed i due elementi
riscaldanti inferiore e superiore. E' il classico forno della
nonna che è stato però portato ad un eccezionale livello
di distribuzione della temperatura e di contenimento dei
consumi. Il forno statico resta insuperato nei casi in cui si
debbano cucinare piatti i cui ingredienti risultano composti
da due o più elementi che concorrono a formare un piatto
unico come ad esempio: cavoli con costine di maiale,
baccalà alla spagnola, stoccafisso all'anconetana, teneroni
di vitello con riso ecc... Ottimi risultati si ottengono nella
preparazione di piatti a base di carni di manzo o vitello
quali: brasati, spezzatini, goulasch, carni di selvaggina,
cosciotto e lombo di maiale ecc... che necessitano di
cottura lenta con costante aggiunta di liquidi. Resta
comunque il miglior sistema di cottura per i dolci, per la
GN
H
I
fa sì che sia
6
Page 7
frutta e per le cotture con recipienti coperti specifici per le
cotture al forno. Nella cottura al forno statico utilizzate un
solo ripiano, in quanto su più ripiani si avrebbe una cattiv a
distribuzione della temperatura. Utilizzando i diversi ripiani
a disposizione potrete bilanciare la quantità di calore tra
la parte superiore ed inferiore, in par ticolare il secondo o
il primo ripiano dal basso consentono di avere più calore
inferiormente.
2. . Il "ventilato"
- Posizione manopola "G":
- Posizione manopola "N": a scelta fra 50°C e Max
Dato che la ventilazione rimane costante e uniforme grazie
alla ventola posta nella parte posteriore del forno, il cibo
viene cucinato e rosolato in modo uniforme e in tutti i punti.
Potete cuocere contemporaneamente anche pietanze diverse tra loro , purchè le temperature di cottura siano simili.
E' possibile utilizzare due ripiani contemporaneamente
seguendo le avvertenze riportate nel paragrafo "Cottura
contemporanea su più ripiani". Questa funzione è
particolarmente indicata per piatti che necessitano di
gratinatura o per piatti che necessitano di cottura
abbastanza lunga ad esempio: lasagne, maccheroni
pasticciati, pollo e patate arrosto ecc...
Per le carni, notevoli vantaggi si ottengono per la cottura
degli arrosti in quanto la migliore distribuzione della
temperatura consente di utilizzare temperature più basse.
Negli arrosti di carne la migliore distribuzione del calore
consente di utilizzare temperature più basse che riducono
la dispersione degli umori mantenendoli così più morbidi
e riducendo il calo di peso. Il ventilato è particolarmente
apprezzato per la cottura dei pesci che possono essere
cucinati con pochissima aggiunta di condimenti,
mantenendone così inalterato l'aspetto e il sapore. Per i
contorni, eccellenti risultati si ottengono nelle cotture di
verdure brasate quali zucchine, melanzane, peperoni,
pomodori ecc..
Desserts: risultati sicuri si ottengono cuocendo torte
lievitate come pan di spagna, brioches, croissants. La
funzione ventilato può anche essere usata per scongelare
carne bianca o rossa, pesce, pane, impostando una
temperatura di 80°-100°C. Per scongelare cibi più delicati
potete impostare 50°C o usare la sola circolazione di aria
fredda impostando la manopola termostato a 0°C.
3. Il "grill"
- Posizione manopola "G":
- Posizione manopola "N": Max.
La temperatura assai elevata e diretta del grill consente la
immediata rosolatura superficiale dei cibi che, ostacolando
la fuoriuscita dei liquidi, li mantiene più teneri internamente.
La cottura al grill è particolar mente consigliata per quei
piatti che necessitano di elevata temperatura superficiale:
bistecche di vitello e manzo, entrecote, filetto, hamburger
etc...
4. . Il "Doppio grill"
- Posizione manopola "G":
- Posizione manopola "N": Max.
Un grill più grande dei soliti e con un disegno del tutto
nuovo: il rendimento di cottura è aumentato del 50%. Il
doppio grill elimina le zone angolari di assenza di calore.
Importante: Per ottenere risultati di cottura ottimali e per
risparmiare energia (il 10% circa), tenere sempre
la por-
ta del forno chiusa quando si usa la funzione grill.
Nell'utilizzo delle funzioni grill, posizionare la griglia sul
ripiano più alto (vedere tabella cottura) e inserire sotto la
griglia la leccarda per raccogliere i grassi.
5. Il "doppio grill ventilato"
- Posizione manopola "G":
- Posizione manopola "N": a scelta fra 50 e 200°C
Unisce all'irradiazione termica unidirezionale la
circolazione forzata dell'aria all'interno del forno. Ciò
impedisce la bruciatura degli elementi superficiali
aumentando il potere di penetrazione del calore. Risultati
eccellenti vengono raggiunti con kebab di carne e verdure, salsicce, costolette, braciole di agnello , pollo, quaglia,
braciole di maiale, ecc. Questa modalità è anche ideale
per cuocere trance di pesce (pesce spada, tonno,
epinefelo, ecc.).
IIn questa funzione si mette in rotazione anche il motorino
del girarrosto (ove presente). Le cottura con questa
funzione sono particolarmente consigliate per carni come
lombate, pollame, ecc....
Nota: : Le cotture al grill (funzioni 3, 4, 5) debbono essere
effettuate a porta chiusa.
Spia luminosa del funzionamento del forno (L)
Segnala che il forno sta producendo calore. Si spegne
quando la temperatura all'interno del forno ha raggiunto
la temperatura selezionata tramite la manopola. A questo
punto la spia che si accende e si spegne alternativamente indica che il termostato sta funzionando correttamente
e mantenendo costante la temperatura all'interno del forno.
Attentione
Evitare che i bambini tocchino la porta del forno, perché
essa si riscalda moltissimo durante la cottura.
Timer
Per utilizzare il timer , è necessario caricarlo tramite la manopola "M". Ruotare la manopola di un giro quasi comple-
to in senso orario
. Quindi, ruotarla in senso inverso
e impostare il tempo posizionando il numero (minuti)
sul quadrante della manopola al di sotto della marcatura
sul cruscotto.
7
Page 8
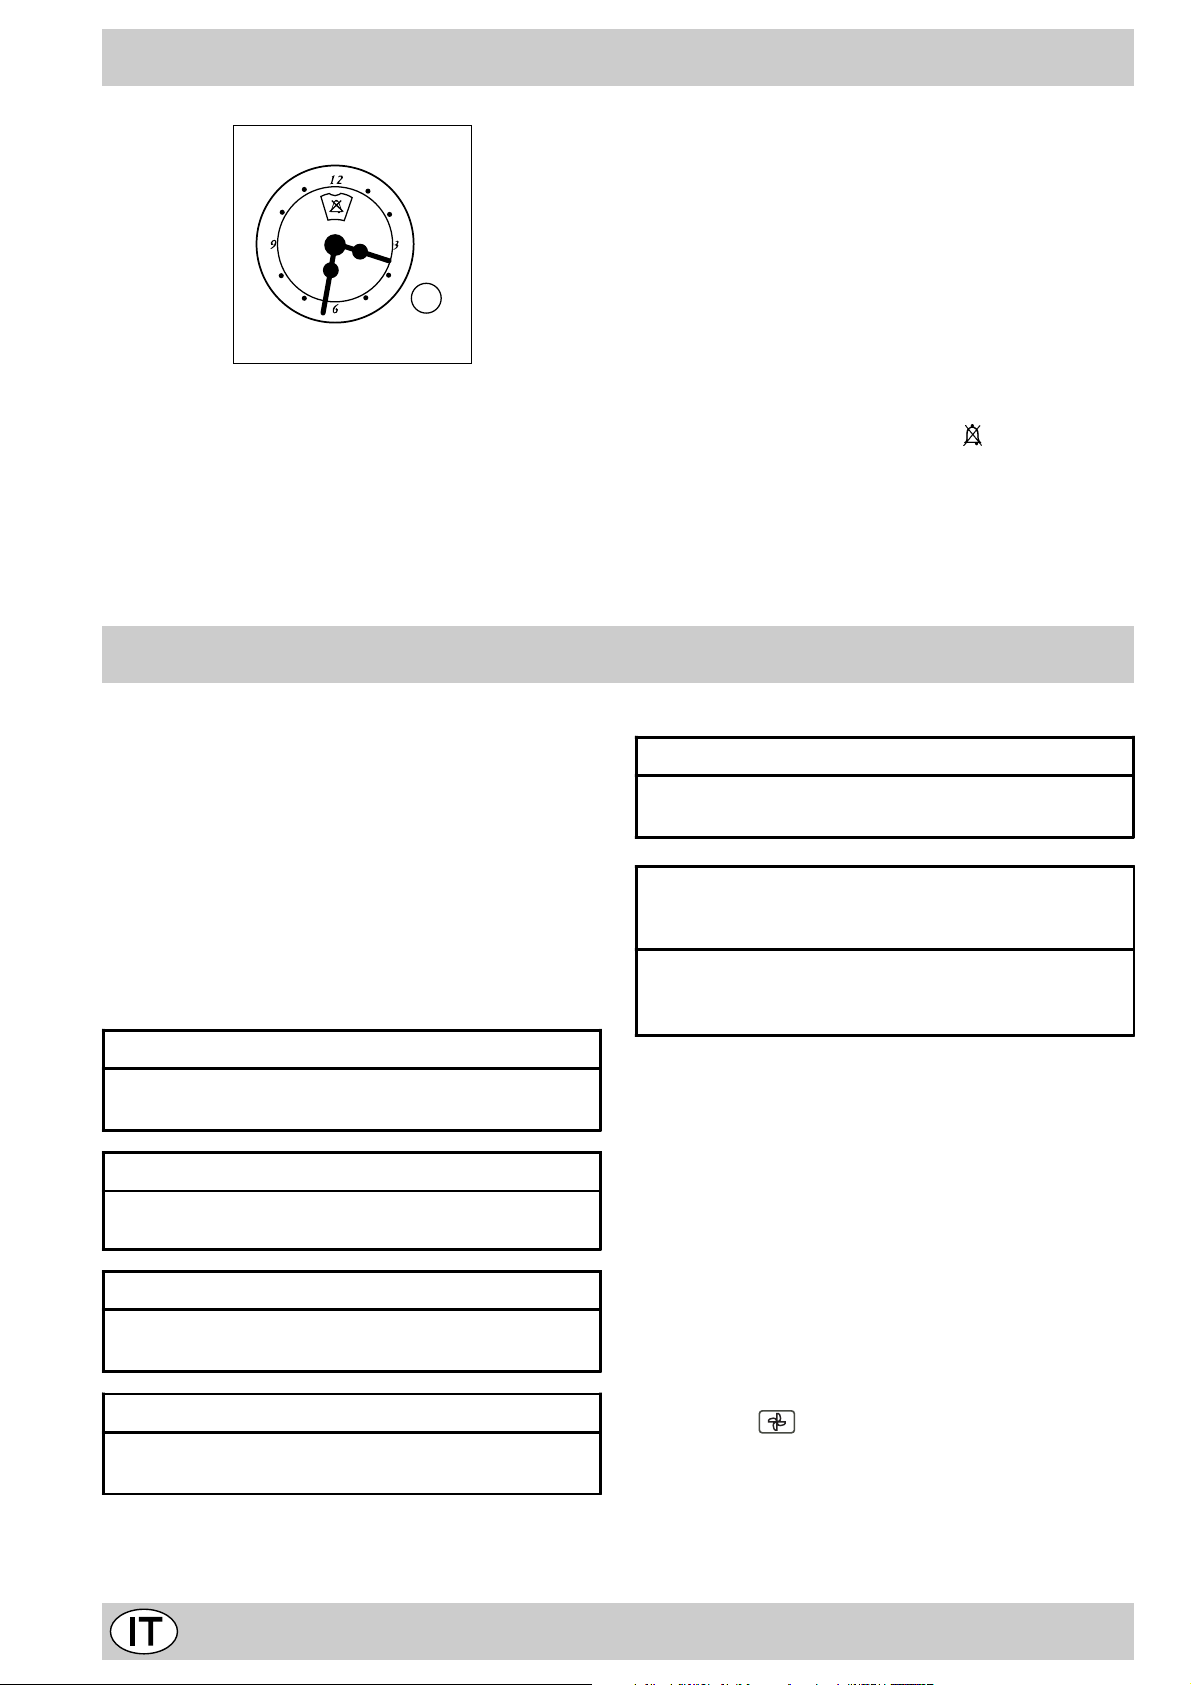
Orologio con contaminuti rustico
Come rimettere l'ora corrente
Il forno dev e essere collegato all'alimentazione elettrica.
Premere e ruotare la manopola in senso antiorario fino a
impostare l'ora esatta.
NB: L'orologio funziona elettronicamente. Quindi, in caso
di mancanza di corrente si fermerà per tutta la durata
della mancanza stessa. Al ritorno della corrente, sarà
necessario ripetere l'operazione di impostazione dell'ora
corrente.
Funzione contaminuti
Nel funzionamento contaminuti viene impostato un tempo dal quale comincia un conto alla rovescia. Questa funzione non controlla l'accensione e lo spegnimento del forno, ma emette solamente un allarme acustico a tempo
scaduto.
Come impostare il contaminuti
Ruotare la manopola in senso antiorario fino a portare
l'indice sul tempo desiderato (scala interna), visibile attraverso la finestrella dell'indice stesso .
Il conteggio del tempo inizierà immediatamente.
Per interrompere il suono , o per utilizzare la sola funzione
orologio, portare l'indice sul simbolo .
Consigli pratici per la cottura
Il forno mette a vostra disposizione una v asta gamma di possibilità che consentono di cuocere ogni cibo nella maniera
migliore. Con il tempo potrete sfruttare al meglio questo versatile apparecchio di cottura, pertanto le note ripor tate di
seguito sono solamente delle indicazioni di massima che
potrete ampliare con la vostra esperienza personale.
Cottura dei dolci
Il forno deve essere già caldo quando si inserisce un dolce;
attendere il termine della fase di preriscaldamento (10-15
min. circa). La temperatura di cottura per i dolci v aria da 160°C
a 200°C. Non apr ire la porta durante la cottura di un dolce
poiché questo si affloscerebbe.
Dolce troppo secco
La prossima volta imp ostat e una tem pera tura di10°C
superiore e riducete il tempo d i cott ura.
Dolce si abbassa
Usate meno liquido o abbas sate la tem peratur a di
10°C.
Dolce scuro superiormente
Inseritelo ad altez za infer iore, im posta te una
temperatura più bas sa e pro lungate la cot tura.
Buona cottura esterna, ma interno colloso
Usate meno liquido, riduc ete la t emper atur a,
aumentate il tempo d i cottur a.
Dolce non si stacca dallo stampo
Ungete bene lo stampo e cospar getelo anche con un
pò di farina oppure uti lizzate ca rta f orno.
Ho cotto su più ripiani (nella funzione "ventilato")
e non tutti sono allo stesso avanzamento di
cottura
Impostate una tem per atura in feri ore.
Non necessariamente ripiani inse riti
contemporanea mente debbono ess ere to lti in siem e.
Cottura del pesce e della carne
Per le carni bianche, i volatili ed il pesce utilizzate temperature basse. (150°C-175°C). Per le carni rosse che si vuole siano ben cotte all'esterno conservando all'inter no il sugo, è
bene iniziare con una temperatura iniziale alta (200-220°C)
per breve tempo, per poi diminuir la successivamente. In linea generale, più carne c'è più bassa sarà la temperatura e
più lungo sarà il periodo di cottura. Porre la car ne al centro
della griglia e posizionare al di sotto di essa un contenitore
per raccogliere le sgocciolature di grasso. Inserite la griglia
centro del forno. Se la cottura necessita di maggior calore
dal basso, utilizzate il primo ripiano dal basso.
Cottura contemporanea su più ripiani
Qualora fosse necessario utilizzare due griglie, utilizzate solo
la funzione 2
soluzione adottabile per questo tipo di cottura.
· Il forno ha 5 differenti ripiani. Utilizzate solo i due ripiani
centrali, in caso di cottura con il forno ventilato: i r ipiani
esterni, superiore ed inferiore, ricevono direttamente il
calore e quindi potrebbero bruciare gli alimenti più delicati.
· In generale, utilizzate il secondo e il quarto livello dal basso,
"forno ventilato", praticamente l'unica
8
Page 9
ponendo il cibo che necessita di maggior calore sul ripiano
2. Ad esempio: nel caso in cui v oleste cucinare un arrosto
con un altro tipo di alimento, ponete l'arrosto al secondo
livello e l'alimento più delicato sul quarto.
· Quando cucinate alimenti che richiedono tempi e temperature di cottura diversi, impostate la temperatura media tra le due consigliate e ponete gli alimenti più delicati
sul quarto ripiano. Rimuovete prima l'alimento che
necessita di un tempo di cottura più brev e.
· Ponete la leccarda sul ripiano più basso e la griglia su
quello più alto.
· Quando cucinate la pizza su più di un ripiano con la
temperatura impostata su 220°C, ricordatevi di
preriscaldare il forno per almeno 15 minuti. Generalmente
la cottura effettuata sul quarto ripiano ha una durata
maggiore; per questa ragione è consigliabile estr arre dal
forno prima la pizza sul ripiano inferiore, lasciando l'altra
ancora per qualche minuto.
Utilizzo del grill
Il forno consente di utilizzare due diversi metodi di grigliatura.
Utilizzate la funzione n.
consumo energetico per questa funzione è solo di 1200 W.
Risulta quindi ideale per grigliare piatti di ridotte dimensioni:
es. toast, hot-dogs ecc.
Posizionate il cibo al centro della griglia, dato che risulta
accesa solamente la parte centrale della resistenza
superiore. Il cibo negli angoli non viene cotto.
“Grill” per piccole porzioni. Il
La posizione 4
tutta la superficie della griglia. Utilizzate questa funzione
quando avete del cibo distribuito uniformemente e volete la
doratura uniforme.
Importante: Per ottenere risultati di cottura ottimali e per
risparmiare energia (il 10% circa), tenere sempre la porta
del forno chiusa quando si usa la funzione grill.
Quando si utilizzano le funzioni grill, si raccomanda di
impostare il termostato al massimo. Questo, però, non
significa che non si possano utilizzare temperature inferiori.
Nell'utilizzo delle funzioni grill, posizionare la griglia sul ripiano
più alto (vedere tabella cottura) e inserire sotto la griglia la
leccarda per raccogliere i grassi.
Posizione 5
grigliature veloci, si distribuisce il calore emesso dal grill
consentendo contemporaneamente alla doratura superficiale
anche una cottura nella parte inferiore. Consente di grigliare
grossi pezzi di carne o pollame senza l'uso del girarrosto.
Potete anche usarla nella parte finale della cottura dei cibi
che abbiano bisogno di doratura superficiale, ad esempio è
l'ideale per dorare la pasta al forno a fine cottura.
Nell'utilizzo di tale funzione disponete la griglia sul 2° o 3°
ripiano partendo dal basso (vedi tabella cottura) dopodiché,
per raccogliere i grassi ed evitare la for mazione di fumo,
disponente una leccarda nel 1° ripiano dal basso. Utilizzando
questa funzione insieme allo spiedo (previsto solo su alcuni
modelli) è possibile anche la cottura di pietanze sulla leccarda
posta al 1° ripiano, per esempio: patate, ecc....
"Doppio grill" consente di grigliare su
"Doppio Grill Ventilato" è utilissima per
Consigli pratici sull'uso delle piastre elettriche
Le manopole di comando delle piastre elettriche del
piano cottura (I)
Le cucine possono essere dotate di piastre elettriche di
serie, veloci e automatiche, in combinazioni varie (le piastre veloci si distinguono dalle altre per mezzo di un bollino rosso al centro e le piastre automatiche per mezzo di
un disco di alluminio al centro).
Per evitare dispersione di calore e danni alle piastre, si
consiglia di utilizzare recipienti per cucinare con fondi piatti
e con diametro non inferiore a quello della piastra stessa.
La tabella riporta la corrispondenza tra la posizione indicata sulle manopole e il tipo di utilizzo che si consiglia per
le piastre.
Pos. Piastra normale o rapida
0 Spento
1 Cot tura di ver dure, p esci
Cottura di patate (a vapore) minestre, ceci,
2
fagioli
Proseguimento di c ottura d i gra ndi quantit à di
3
cibi, minestroni
4
Arrostire (m edio)
5
Arrostire (forte)
6
Rosolare o raggiunger e bollitur a in p oco te mpo
Spia luminosa verde (H)
Questa spia si accende quando viene accesa una piastra
elettrica.
9
Page 10
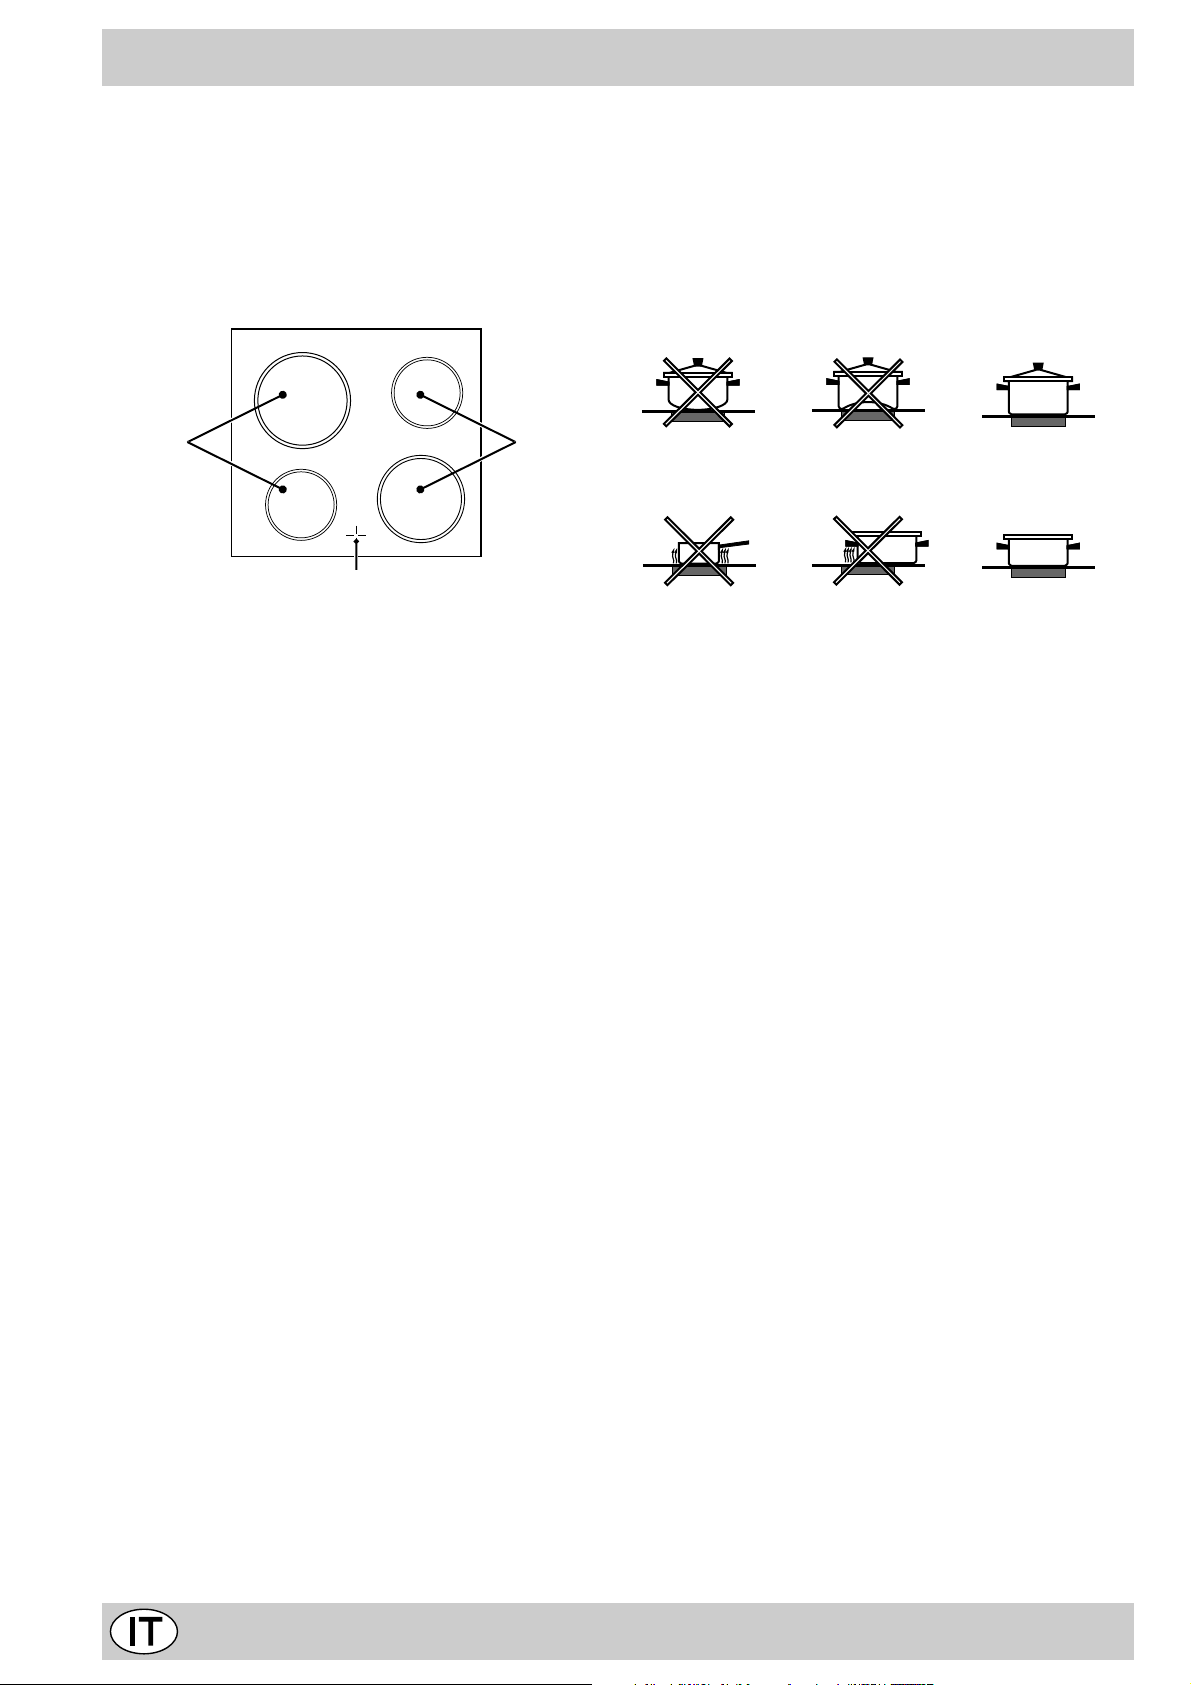
Istruzioni sull'uso del piano di cottura in ceramica
Descrizione
I piani di cottura sono dotati di riscaldatori elettrici radianti
incorporati al di sotto della superficie del piano di cottura
(zone che diventano rosse durante il funzionamento).
A. Zona di cottura (A).
B. Luci che indicano se la temperatura dei riscaldatori cor-
rispondenti supera i 60° C, anche se la zona del piano di
cottura è stata spenta.
AA
B
Descrizione degli elementi riscaldanti
Gli elementi riscaldanti radianti sono costituiti da elemen-
ti riscaldanti circolari, che diventano rossi soltanto dopo 1020 secondi dall'accensione.
Istruzioni per l'uso del piano di cottura in
vetroceramica
Per ottenere dal piano di cottura i migliori risultati possibili,
seguire alcune regole fondamentali al momento di preparare o cucinare i cibi.
· Sui piani di cottura in vetroceramica è possibile utilizzare tutti i tipi di pentole e padelle. Tuttavia, la superficie
inferiore deve essere perfettamente piana. Naturalmente, più spesso è il fondo della pentola o della padella, più
uniformemente viene distribuito il calore.
· Controllare che la base della padella copra completamente la corona: ciò permetterà di sfruttare appieno il
calore prodotto
· Controllare che la base della padella sia sempre asciutta e pulita: ciò garantisce non solo che il contatto sia
quello ottimale, ma anche che le padelle e i piani di cottura durino a lungo.
· Non utilizzare le stesse padelle che vengono utilizzate
per la cottura sui bruciatori a gas, perché la forza del
calore di questi ultimi potrebbe deformare la base della
padella e non darà gli stessi risultati se poi viene utilizzata su di un piano di cottura in vetroceramica.
10
Page 11
Consigli pratici per la cottura
Manopola di
selezione
1 Statico
2 Forno
ventilato
3 Grill
Cibo da cucinare Peso
(Kg)
Anatra
Roast beef
Arrosto di maiale
Biscotti
Crostate
(su 2 ripiani)
Pizza
Lasagne
Agnello
Pollo arrosto + pat ate
Sgombro
Sgombri
Plum cake
Bignè (su 2 ripiani)
Biscotti(su 2 ripian i)
Pan di spagna (su 1
ripiano)
Pan di spagna(su 2
ripiani)
Torte salate
Sogliole e seppie
Spiedini di calamari e
gamberi
Filetto di merluzzo
Verdure alla grigli a
1
1
1
-
1
1
1
1
1
1
1.5
1
0.5
0.5
0.5
1.0
1.5
1
1
1
1
Posizione di
cottura dal
basso
3
3
3
3
3
2-4
3
2
2-4
2
2
2
2-4
2-4
3
2-4
3
4
4
4
3/4
Tempo di
riscaldamento
(min.)
15
15
15
15
15
15
10
10
10
10
10
10
10
10
10
10
15
5
5
5
5
Manopola
del
termostato
200
200
200
180
180
220
200
180
180
180
180
170
190
180
165
165
200
Max
Max
Max
Max
Durata
della
cottura
(min.)
65-75
70-75
70-80
15-20
30-35
20-35
30-35
50-60
60-75
50-55
55-60
40-50
25-35
10-15
25-30
25-30
25-30
8
4
10
8-10
4 Doppio grill
5 Ventilato e
doppio grill
NB: i tempi di cottura sono indicativi e possono essere modi ficati in base ai propri gusti pers onali. Ne lle
cotture al grill o doppio grill o ventilato la leccarda va posta sempre al 1 ° ripiano a part ire dal basso.
Bistecca di vite llo
Cotolette
Hamburger
Sgombri
Toast
Pollo alla griglia
Seppie
1
1.5
1
1
n.° 4
1.5
1.5
4
4
3
4
4
2
2
5
5
5
5
5
5
5
Max
Max
Max
Max
Max
200
200
15-20
20
7
15-20
5
55-60
30-35
11
Page 12
Manutenzione ordinaria e pulizia del f orno
Scollegare il forno dalla fonte di elettricità prima di
effettuare qualsiasi operazione di manutenzione o
pulizia. Perché il f orno duri il più a lungo possibile, pulirlo
frequentemente e con cura, tenendo sempre a mente che:
· le parti smaltate e i pannelli autopulenti vanno lavati
con acqua calda, senza l'aggiunta di polveri abrasive
o sostanze corrosive , che potrebbero danneggiarne la
finitura;
· l'interno del forno va pulito, con una certa frequenza,
quando è ancora tiepido usando acqua calda e
detersivo, risciacquando ed asciugando poi
accuratamente;
· l'acciaio inox può rimanere macchiato se rimane a
contatto per lungo tempo con acqua fortemente
calcarea o con detergenti aggressivi (contenenti fosforo). Si consiglia di sciacquare abbondantemente ed
asciugare dopo la pulizia. È inoltre opportuno asciugare eventuali tr abocchi d'acqua;
· evitare che sul pannello di controllo si accumulino sporco e grasso, pulendolo frequentemente.
Utilizzare spugne non abrasive o panni morbidi per non
graffiare le parti smaltate o in acciaio lucido.
Pulizia della superficie del piano di cottura
Prima di cucinare, la superficie del piano di cottura dovrebbe essere sempre pulita con un panno umido al fine
di rimuovere la polvere o le particelle di cibo rimaste. La
superficie del piano di cottura dovrebbe essere pulita regolarmente con una soluzione tiepida d'acqua e detergente leggero. P eriodicamente potrebbe essere neces-
sario utilizzare un prodotto proprietario specifico per
la pulizia del piano in ceramica. Rimuovere innanzitutto
tutto il cibo e il grasso versati con un raschietto per vetri,
preferibilmente del tipo a lama di rasoio (non in
dotazione) oppure, in mancanza di ciò, del tipo a lama di
rasoio fissa.
Prodotti specifici per la
pulizia del vetroceramica
Raschietto a lametta e L amett e
di ricambi
Stahl-Fix
SWISSCLEANER
WK TOP
Altri prodotti per vetroc eram ica
Sostituzione della lampadina del forno
· Estrarre la spina (se accessibile) oppure scollegare il
forno dalla rete spegnendo l'interruttore multipolo utilizzato per connettere il forno alla fonte di elettricità;
· Svitare il coperchio in vetro del portalampada;
· Svitare la lampadina e sostituirla con una lampadina
resiste alle alte temperature (300°C) che abbia le caratteristiche seguenti:
- Tensione 230/240 V
- Potenza 25W
- Attacco E14
· Rimontare il coperchio in vetro e ridate alimentazione
al forno.
Dove acquistarli
Hobbistica e
Ferramenta
Casalinghi
Fai-Da-Te
Ferramenta
Supermercati
Quindi pulire il piano di cottura mentre è ancora caldo al
tatto con un panno di carta e un prodotto detergente adatto.
Poi risciacquare e asciugare con un panno pulito . Nel caso
in cui un pezzo di plastica o una lamina di alluminio si
siano accidentalmente fusi sulla superficie del piano, rimuoverli immediatamente dalla zona di cottura calda per
mezzo di un raschietto. al fine di e vitare di danneggiare la
superficie stessa. Eff ettuare le stesse operazioni nel caso
in cui vi sia stato un versamento di zucchero o cibi con un
alto contenuto di zucchero. Non utilizzare pagliette o spugne abrasive di nessun tipo. Anche prodotti per la pulizia
corrosivi quali spray per f orni o smacchiatori non dovrebbero essere utilizzati.
12
Page 13

Important
T o maintain the EFFICIENCY and SAFETY of this appliance, we recommend:
• call only the Service Centers authorized by the manufacturer
• always use original Spare Parts
1 This appliance is intended for non-professional use within the
home.
2 Before using the appliance, carefully read the instructions
contained in this manual, as they pr ovide important information
for ensuring safe installation, use and maintenance. Keep this
manual as a reference guide.
3 Remove the packing and make sure the appliance hasn’t been
damaged during transport. If you have any doubts, don’t use the
appliance. Call a qualified technician for assistance. F or safety , keep
packing materials (plastic bags, polystyrene foam, tac ks, etc.) away
from children.
4 The appliance must be installed by a qualified technician in
accordance with the manufacturer’ s instructions. No liability f or injury
or damage to persons, animals or property will be accepted by the
manufacturer arising from failure to f ollow these instructions.
5 The electrical safety of this appliance is ensured only if it is correctly
connected to an efficiently earthed system in accordance with
electrical safety regulations. Make sure this basic safety requirement
has been complied with. If in doubt, ha v e it check ed b y a qualified
technician. No liability for damage will be accepted by the
manufacturer because of def ective earthing.
6 Before connecting the appliance, make sure the specifications on
the rating plate correspond with those of your power supply.
7 Check that your supply and sockets are sufficient f or the total load
taken by your appliance which is stated on the rating plate. If you
have any doubts, contact a qualified technician f or service.
8 A multipole circuit breaker with a space between contacts of 3 mm
or more must be fitted for installation
9 If the socket and cooker plug are not compatible, have the socke t
replaced with a suitable model by a qualified technician who should
also check that the cross-section of the sock et cable is suited to the
power absorbed by the appliance. The use of adaptors, multiple
sockets and/or e xtensions, is not recommended. If their use can not
be avoided, remember to use only single or multiple adapters and
extensions which comply with current safety regulations. In these
cases, never exceed the maximum current capacity indicated on
the single adaptor or extension and the maximum pow er indicated
on the multiple adapter.
10 Do not leave the appliance plugged in if it is not necessary. Switch
off the main switch and gas cock when y ou are not using the cooker.
11 The openings and slots used for ventilation and dispersion of
heat must never be closed or plugged.
12 The user must not replace the supply cable of this appliance. Always
call an after-sales servicing centre authorised by the manufacturer
in the case of cable damage or replacement.
13 This appliance must be used for the purpose for which it was e xpressly
designed.
Any other use (e.g. heating rooms) is considered to be improper
and consequently dangerous.
The manufacturer declines all responsibility for damage resulting
from improper and irresponsible use.
14 A number of fundamental rules must be follow ed when using electrical
appliances. The f ollowing are of particular importance:
· do not touch the appliance when your hands or feet are wet
· do not use the appliance barefooted
· do not use extensions, but if these are necessary caution must
be exercised.
· never pull the power supply cab le or the appliance to unplug the
appliance plug from the mains.
· never leave the appliance exposed to atmospheric agents (rain,
sun etc.)
· do not allow children or persons who are not familiar with the
appliance to use it, without supervision.
15 Always unplug the hob from the mains or s witch off the main switch
before cleaning or carrying out maintenance operations.
16 If the surface of the glass breaks, disconnect the appliance
immediately . F or repairs call only an authorised after-sales servicing
centre and request the use of original spare parts only. Failure to
comply with the above may compromise the saf ety of the appliance.
17 If you are no longer using the appliance, remember to make it
unserviceable by unplugging the appliance from the mains and cutting
the supply cable. Also make all potentially dangerous parts of the
appliance, safe, above all for children who could play with the
appliance.
18 The vitreous china hob is resistant to temperature fluctuations and
shockproof. Remember howe ver that sharp kitchen tools or cutters
may break the surface of the hob . If this happens, unplug the cook er
immediately from the mains and call your local servicing centre.
19 Remember that the cooking surface remains hot f or at least half an
hour after you switch off the surface. Do not place containers or
other objects on the hot surface.
20 Av oid setting anything on the glass surface of the cooktop .
21 Do not turn on the cooking surfaces if there are sheets of aluminium
foil or plastic on the hob .
22 Keep a way from the hot surf aces.
23 When using small electrical household appliances close to the hob,
ensure that the power cable does not rest on the hot surf aces
24 Keep pot handles turned inwards to a void knoc king the pot off the
hob.
25 When you turn on the cooking surface always place a pot on the
surface immediately as it will otherwise ov erheat very quickly and
possibly damage the heating elements.
26 Preliminary instructions. The glass sealant utilised may lea ve traces
of grease on the glass. Remember to wipe these away with a normal
non abrasive detergent before y ou turn on the appliance. During the
first few hours of use there may be a smell of rubber which will
disappear very quickly .
27 When the appliance is in use, the heating elements and some parts
of the oven door become e xtremely hot. Make sure you don't touch
them and keep children well aw ay.
28 Make sure the knobs are in the “•”/”o” position when the appliance is
not in use.
29 Warning: never place hot containers or items and flammable
materials inside the dishwarmer drawer .
30 If the cooker is placed on a pedestal, take the necessary precautions
to prevent the same from sliding off the pedestal itself .
13
Page 14
Installation
1 2
3
4
5
12345
1
2
3
4
5
R
S
T
N
R
S
N
R
N
400 3N
H05RR-F 5x2.5 CEI-UNEL 35363
400V 2N
H05RR-F 4x2.5 CEI-UNEL 35363
230V 1N
H07RN-F 3x4 CEI-UNEL 35364
V
The following instructions should be read by a qualified
technician to ensure that the appliance is installed,
regulated and technically serviced correctly in compliance
with current regulations.
Important: disconnect the cooker from the electricity when
making any adjustement, maintenance operation, etc.
Positioning
The appliance can be installed next to furniture units which
are no taller than the top of the cooker hob. For proper
installation of the cooker, the following precautions must
be taken:
a) Kitchen cabinets installed next to the cooker that are
taller than the top of the hob must be situated at least
200 mm from the edge of the hob.
b) Hoods must be installed according to the requirements
in the installation manual for the hoods themselv es and
in any case at a minimum distance of 650 mm.
c) Place the wall cabinets adjacent to the hood at a
minimum height of 420 mm from the hob (see figure).
d) Should the cooker be installed beneath a wall cabinet,
the latter should be situated at least 700 mm
(millimetres) awa y from the hob , as sho wn in the figure.
e) the cut-out for the cooker cabinet should have the
dimensions indicated in the figure.
HOOD
Min. mm.
600
mm.
420
Min.
mm. with hood
420
650
Min. mm.
min.
mm. without hood
700
min.
Electrical connection
The power supply cable since its size depends on the
electric connection (see the following connection diagram).
Feeding cable installation
Terminal block opening:
· Unscrew screw “V”
· Pull and open the junction block lid
For the installation of the feeding cable carry out the
following operations:
· position the small connection A-B according to the type
of connection that has to be performed using the
scheme shown in the figure 3.
Note: the small connections are prepared by the Factory
for the 230V monophase connection (contacts 1-2-3 are
connected to one another). The br idge 4-5 is situated in
the lower part of the terminal block.
· introduce the cables (N and ) as shown in the figu-
re and tighten the relative screws.
· fix the remaining cables on the 1-2-3 clips.
· fix the feeding cable in the special cable stop and close
the cover fastening it with the screw “V”.
3
2
1
Levelling
In order to have a perf ect levelling of the cook er adjustable
feets are supplyed (see Fig.1). They can be screwed in
the seats positioned in the corners of the cooker base.
B
A
N
Connecting the supply cable to the mains
Fit a plug, normalised for the load indicated on the data
plate, on the cable; when making the connection directly
to the mains, an omnipoIar switch with a minimum opening
of 3 mm between the contacts, must be installed between
the appliance and the mains. This switch m ust be sufficient
for the load and must comply to regulations in force (the
earthing wire must not be interrupted by the switch). The
power supply cable must be positioned so that it does not
exceed 50°C more than room temperature at any point of
its length. Bef ore making the connection check that:
· the limiter valve and the home system can support the
appliance load (see data plate);
· the power supply system has an efficient earthing
connection which complies with the provisions of
current regulations;
· the socket or omnipoar circuit-breaker is easily
accessible once the cooker has been installed.
14
Page 15
Technical Specifications
104
60
50
85/90
Oven
Dimensions (WxDxH) 39x41x34 cm
V olume 54 lt
Oven absorption Max 2100 W
Ceramic Hob
Front Left 1200 W
Back Left 1700 W
Back Right 1200 W
Front Right 1700 W
Hob Ceramic absorption Max 5800 W
Voltage and frequency
230V / 400V 3N AC 50 Hz
Inner Dimensions of the Food Warmer:
Width: 42 cm
Depth: 44 cm
Height: 23 cm
This appliance conforms with the following Eur opean
Economic Community directives:
- 73/23/EEC of 19/02/73 (Low V oltage) and subsequent
modifications;
- 89/336/EEC of 03/05/89 (Electromagnetic
Compatibility) and subsequent modifications;
- 93/68/EEC of 22/07/93 and subsequent modifications.
The cooker with multifunction oven
D Dripping Pan or Baking Sheet
E Control Panel
F Adjustable Feet or Legs
G Selector Knob
H The green pilot lamp
K Oven Rack
I The control knobs for the electric plates
L Thermostat Light
M Timer Knob
N Thermostat Knob
Q Country Style Clock and Timer
L
H
K
E
D
F
L
H
M
GN
I
15
Q
GN
I
Page 16
How T o Use Y our Appliance
The various functions included in the cooker are selected
by operating the control devices located on the cooker
control panel.
Attention: bef ore using the oven and g rill for the first time,
turn the oven on for approximately one half hour. Make
sure that the oven is empty, the thermostat on high, the
door open, and the room properly ventilated. The odor
which can be detected at times is due to the evapor ation
off the substances used to protect the oven and the grill
during the period between the time of production and
installation of the appliance.
Attention: Only use the bottom shelf of the oven when
using the rotisserie to cook (where present). F or all other
types of cooking, never use the bottom shelf and never
place anything on the bottom of the oven when it is in
operation because this could damage the enamel. Always
place your cookware (dishes, aluminium f oil, etc. etc.) on
the grate provided with the appliance inserted especially
along the oven guides.
The Oven Control Knobs
The “5 Programms” o ven combines all the adv antages of
traditional “static” ovens with those of modern “ventilated”
ones.
The”5 Programms” oven is e xtremely versatile and off ers
5 different but sure and easy ways of cooking. Use the
knobs to select the different cooking functions available
on the “5 Programms” o v en:
G - selector knob;
N - thermostat knob.
When the selector knob is on any other setting than that
identified by the “o”, the oven light turns on. The setting
identified by the symbol makes it possible to turn the
oven light on without having any of the oven heating elements on. When the oven light is on, it means that the
oven is in use, and it will remain on f or the entire time the
oven is being used.
1.Convection Mode
- Position of the “ G” knob:
- Position of the “N” knob: between 50°C and Max
On this setting, the light comes on and the top and bottom
heating elements are activated. This is the classic, traditional type oven which has perf ected, with exceptional heat
distribution and reduced energy consumption. The convection ov en is still unequalled when it comes to cooking
dishes made up of sever al ingredients, e .g. cabbage with
ribs, stews, etc. Excellent results are achie v ed when preparing meat-based dishes as well (braised meats, stew,
goulash, wild game, ham etc.) which need to cook slowly
and require basting or the addition of liquid. It still remains
the best system for cooking pastries and fruit in general
and when using specific covered containers f or oven cooking. When cooking in conv ection mode, only use one dripping-pan or cooking rack at a time, otherwise the heat
distribution will be unev en. Select from among the v arious
rack heights based on whether the dish needs more or
less heat from the top or bottom.
2. V entilation Mode
- Position of the “G” knob:
- Position of the “N” knob: betw een 50°C and Max
Since the heat remains constant and uniform throughout
the oven due to the fan at the behind, the air cooks and
browns food uniformly over its entire surface. With this
mode, you can also cook various dishes at the same time,
as long as their respective cooking temperatures are the
same. A maximum of 2 rack levels can be used at the
same time, following the instructions in the section entitled, "Cooking On More Than One Rack". This cooking
mode is ideal for au gratin dishes or those which require
an extended cooking time like lasagne, macaroni bake,
chicken and roast potatoes, etc...
Moreover, the excellent heat distribution makes it possible to use lower temperatures when cooking roasts. This
results in less loss of juices, meat which is more tender
and a decrease in the loss of weight for the roast. The
ventilated mode is especially suited for cooking fish, which
can be prepared with the addition of a limited amount of
condiments, thus maintaining their flavour and appearance. Excellent results can also be attained when cooking vegetable like courgettes , aubergines, peppers, tomatoes, etc.
Desserts: leavened cakes are also perfect for the ventilated mode. Moreover , this mode can also be used to thaw
meat, fish and bread by setting the temperature to 80°100°C. To thaw more delicate foods, set the thermostat to
50°C or use only the cold air circulation feature by setting
the thermostat to 0°C.
3. Grill
- Position of the “G” knob:
- Position of the “N” knob: Max
The extremely high and direct temperature of the grill
makes it possible to brown the surf ace of meats and roasts
while locking in the juices to keep them tender . The grill is
also highly recommended for dishes that require high temperature on the surface: beef steaks, veal, entrecôte, filets, hamburger etc...
4. The "Double Grill"
- Position of the “G” knob:
- Position of the “N” knob: Max
This oversized grill has a completely new design, increas-
ing cooking efficiency by 50%. The doub le grill also eliminates pockets of unheated air in the corners of the oven.
Important: Always leave the oven door closed when
using the grill setting n order to achieve the best results
and save on energy (about 10%).
When using the grill, place the rack at the top rack heights
(see cooking table) and place the dripping-pan beneath
the oven rack to pre v ent grease from f alling onto the bottom of the oven.
5. V entilated Double Grill
- Position of the “G” knob:
- Position of the “N” knob: betw een 50 and 200°C
This combination of features increases the effectiveness
of the unidirectional thermal radiation of the heating elements through forced air circulation of the air throughout
16
Page 17

the oven. This helps prevents foods from burning on the
surface, allowing the heat to penetrate into the food. Excellent results are achieved with k ebabs made with meats
and vegetables, sausages, ribs, lamb chops, chicken,
quail, pork chops, etc. This mode is also ideal f or cooking
fish steaks, like sw ordfish, tuna, grouper etc.
In this function, the rotisserie motor will also turn on (where
present). Cooking with this function is especially recommended for meat dishes such as loins, poultry, etc….
Note: When using the grill (features 3, 4, 5), the oven
door must be closed.
The oven-operating pilot lamp (L)
Signals when the oven is heating. It s witches off when the
temperature inside the oven reached the temperature
selected by the knob. At this point the alternate turning on
and turning off of this light indicates that the thermostat is
operating correctly to keep the ov en temperature constant.
Country Style Clock and Timer
Attention
Av oid the children touch the ov en door because it is v ery
hot during the cooking.
Timer
To use the timer, it must be wound using the "M" knob.
T urn the knob almost one full turn in the clockwise direction
. Then, tur n the knob back , and set the time by
positioning the number (minutes) on the knob dial beneath
the mark on the control panel.
Timer Feature
The timer operates by counting down a given period of
time. This feature does not, howe ver, turn the ov en on or
off. It merely emits an acoustical alarm when the time has
run out.
How to Set the Current Time
The oven must be connected to the pow er supply
Pull and turn the knob in the counter-clockwise direction
to set the time.
N.B.: The clock is electric. Therefore, in the event of a
power outage, the clock will stop for the entire time the
oven remains without power . When the power comes back
on, the clock must be reset to the current time
How to Set the Timer
Turn the knob in the counter-clockwise direction until the
indicator is set on the length of time desired (using the
inside numbers). The time is clearly visible through the
transparent window on the indicator itself.
The timer will begin to count down immediately.
To turn off the buzzer, or to use only the clock, set the
indicator on the symbol.
17
Page 18

Practical Cooking Advice
The oven off ers a wide range of alternatives which allow you
to cook any type of food in the best possible w a y. With time
you will learn to make the best use of this versatile cooking
appliance and the following directions are only a guideline
which may be varied according to your own personal
experience.
Baking cakes
The oven should always be war m before putting in cakes
wait till the end of preheating (about 10-15 min.). Cake-baking
temperatures are normally around 160°C/200°C. Do not open
the oven door during the baking process as this could cause
the cake to sink.In general:
Pastry is too dry
Increase the temperature by 10°C and reduce the
cooking time.
Pastry dropped
Use less liquid or lower the temperature by 10°C.
Pastry is too da rk on t op
Place it on a lower rack, lower the temperature, and
increase the cooking t ime.
Cooked well on the inside but sticky on the outside
Use less liquid, l ower the temperature, and increas e the
cooking time.
The pastry sticks to the pan
Grease the pan well and sprinkl e it wit h a dusting of
flour or use greaseproof paper.
I used more than one leve l ( in t he funct i on
"ventilated oven") and they are not all at the same
cooking point
Use a lower temperature setting. It is not necessary to
remove the food from all the racks at the same time.
Cooking fish and meat
When cooking white meat, fowl and fish use lo w temperatures.
(150°C-175°C). When red meat must be superficially wellcooked but succulent inside, it is advisable to start with a
high temperature (200-220°C) for a short time, and then to
reduce it at a later point. Generally speaking, the more meat
there is, the lower the temperature and the longer the cooking
time should be.Place the meat in the centre of the grid and
put a spill-tray underneath to catch grease drips. Insert the
grid so that it is in the middle of the oven. If more heat from
below is required, use the 1° bottom shelf.
Cooking on More Than One Rack
Should you need to use two grids, use only function 2
“ventilated oven” which is the only solution f or this process.
· The oven has 5 different r ack heights. When cooking with
the ventilated mode, use only the two centre rac k heights:
the bottom and topmost rack heights directly receive hot
air and this could result in more delicate dishes being
burned.
· In general, use levels 2 and 4 from the bottom, placing
the food requiring more heat at level no . 2. For e xample,
when cooking a roast together with other food, place the
roast at level 2 and the more delicate dishes at le v el 4.
· When cooking foods requiring different cooking times and
temperatures, make sure that the temperature is set between the two recommended temperatures and put the
more delicate dishes at level no. 4. Finally, remove the
dish with the shorter cooking time first.
· Use the dripping pan at the bottommost rack height and
the grill at the top.
· When cooking pizza on more than one rack with the temperature set at 220°C. Remember to preheat the oven
for at least 15 minutes. In general the 4th rack height
cooks a little slower , so remov e the pizza on the second
rack height first and leave the other one in the o ven f or a
few minutes.
Using the Grill
The oven allows y ou to use two diff erent grilling methods.
Use the no. 3 setting “Grill” for small portions. Energy
consumption for this feature is only 1200 W; however, it is
ideal for grilling small dishes or portions, e.g. toast, frankfurters, etc.
Place the food in the centre of the grill, as onl y the centre of the heating element is turned on. Food in the corners of the oven will not be cooked.
The no. 4 setting “Double Grill” allows you to grill along
the entire surface area of the grill itself. Use this feature when
you have f ood distributed uniformly beneath the grill and you
want it to be browned ev enly.
Important: Always lea ve the oven door closed when using the grill setting n order to achieve the best results and
save on energy (about 10%).
When using the grill settings, it is recommended that the
thermostat be set to maximum, as this is the optimal setting
for the grill, which utilizes radiation produced by infrared r ays.
However, this does not mean that lower temperature settings cannot be used when necessary by simply turning the
control knob.
When using the grill, place the rack at the 4 rack heights
(see cooking table) and place the dripping-pan beneath the
oven rack to prevent grease from falling onto the bottom of
the oven.
Setting 5 “Ventilated Double Grill”, is e xtremely useful for grilling foods rapidly, as the distribution of heat makes
it possible not only to brown the surface , but also to cook the
bottom part. It can also be used to grill large pieces of meat
or fowl. Moreover, it can also be used for bro wning foods at
the end of the cooking process.
When using this function, place the grid on the 2nd or 3rd
oven rac k from the bottom (see cooking tab le) then, to prevent fat and grease from dripping onto the bottom of the
oven and thus smoke from f orming, place a dripping-pan on
the 1st rack from the bottom. When using this function together with the spit (only on some models), you can also
cook dishes on the dripping-pan situated on the 1st rack, for
example: potatoes, etc…….
18
Page 19

User's instructions the ceramic hob
Description
The hobs have been pro vided with radiant electric heaters.
These heaters are incorporated under the surface of the
hob as zones which redden while they are in use.
A. Cooking area (A).
B. A lights which indicate whether the corresponding
heaters are at a temperature in excess of 60° C; even
if the hob/zone has been switched off.
AA
B
Description of the heating elements
The radiant heating elements are composed of circular
heating elements. They only become red after being turned
on for 10-20 seconds.
Instructions for using the pyr oceram top
To obtain the best results from your hob, there are some
basic rules to follow when cooking or preparing food.
· All types of pots and pans may be used on the ceramic
glass cooktop. However, the bottom surface must be
perfectly flat. Naturally, the thicker the bottom of the
pot or pan, the more uniformly the heat is distributed.
· Make sure that the base of the pan completely covers
the cooking ring, so as to make full use of the heat
produced
· Always mak e sure that the pan base is always dry and
clean so as to guarantee proper contact as well as
longer-lasting pans and the long life-span of the hob.
· Do not use the same pans which are used for cooking
on gas burners. The heat strength of gas b urners may
deform the pan base and will not give the same results
if it is subsequently used on a glazed ceramic hob.
Pratical advice for using the electric plates
The cook-top electric plate control knobs (I)
The cookers may be equipped with standard, fast and
automatic electric plates in various combinations (the fast
plates distinguished from the others by a red dot in the
centre, the automatic ones by a round aluminium disk at
the centre.
To avoid heat dispersion and damage to the plates,
recommend using cooking vessels with flat bottoms in
diameters which are not smaller than the plate diameter.
Table shows the correspondence between the position
indicated on the knobs and the use for which the plates
advised.
Setting Normal or Fast Plate
0
1
2
3
4
5
6
The green pilot lamp (H)
This lights up when an electric plate is turned on.
Off
Cooking vegetables, fish
Cooking potatoes (using steam) soups,
chickpeas, beans.
Continuing the cooking of larg e quantiti es of
food, minestrone
For roasting (average)
For roasting (above average)
For browning and reaching a boil in a shor t
time.
19
Page 20

Practical Cooking Advice
Selection
knob
1 Static
2 Fan oven
cooking
3 Grill
Food to be cooked Wt.
(Kg)
Duck
Roast beef
Roast pork
Biscuits
Tarts
Pizza
(on 2 racks)
Lasagne
Lamb
Chicken + potatoes
Mackerel
Red porgy
Plum cake
Cream puffs (o n 2 r acks)
Biscuits (on 2 racks)
Sponge cake (on 1 rack)
Sponge cake (on 2
racks)
Savoury pies
Sole and cuttle fish
Squid and shrimp on
spits
Cod fillets
Grilled vegetables
1
1
1
1
1
1
1
1
1
1.5
1
0.5
0.5
0.5
1.0
1.5
1
1
1
1
Cooking
position f rom
bottom
3
3
3
3
3
2-4
3
2
2-4
2
2
2
2-4
2-4
3
2-4
3
4
4
4
3/4
Heating time
(min.)
15
15
15
15
15
15
10
10
10
10
10
10
10
10
10
10
15
5
5
5
5
Thermostat
knob
200
200
200
180
180
220
200
180
180
180
180
170
190
180
165
165
200
Max
Max
Max
Max
Cooking
time
(min.)
65-75
70-75
70-80
15-20
30-35
20-35
30-35
50-60
60-75
50-55
55-60
40-50
25-35
10-15
25-30
25-30
25-30
8
4
10
8-10
4 Double Grill
5 Ventilated
Double Grill
NB: cooking times are approximate and may vary according to personal taste.When cooking using the gr ill or double
grill or ventilated double grill, the dripping-pan must always be placed on the 1st oven rack from the bottom.
Veal steaks
Cutlet s
Hamburger s
Caballas
Toasted sandwiches
Grilled chicken
Cuttle fish
1
1.5
1
1
n.° 4
1.5
1.5
4
4
3
4
4
2
2
5
5
5
5
5
5
5
Max
Max
Max
Max
Max
200
200
15-20
20
7
15-20
5
55-60
30-35
20
Page 21

Routine maintenance and cleaning of the oven
Disconnect the oven from the source of electricity
before performing any maintenance or cleaning. To
ensure a long life for your oven, clean it frequently and
carefully, keeping in mind that:
· the enamelled parts and the self-cleaning panels
should be washed with warm water without the addition
of abrasive powders or corrosive substances which
could damage the finish;
· The inside of the oven should be cleaned fairly often
while it is still warm, using warm water and detergent
followed by careful rinsing and drying;
· stainless steel may become marked if it comes into
contact with very hard water or harsh detergents
(containing phosphorous) for long periods of time. After
cleaning, it is advisable to rinse thoroughly and dry. It
is also recommended to dry any water drops;
· avoid dirt and grease accumulating on the control panel
by cleaning it frequently . Use non-abrasiv e sponges or
soft cloths to avoid scr atching enamelled or shiny steel
parts.
Cleaning the hob surface
Prior to cooking, the hob surface should always be cleaned
using a damp cloth to remove any dust or stray food
particles. The hob surface should be regularly cleaned
with a lukewarm solution of water and a mild detergent.
Periodically it may be necessary to use a proprietary
ceramic hob cleaner. First remove all spilt food and fat
with a window scrape, preferably the razor blade type
(not supplied) or, failing that, the fixed blade
razor edge type.
Glass ceramic hob cleane rs Available from
Window scrape r R azor bl ad e
scrapers
Replacement blades DIY Stores,
COLLO luneta
HOB BRITE
Hob Clean
SWISSCLEANER
DIY Stores
supermar kets,
chemists
Boots, Co-op st ore s,
depar tment sto res, Regi ona l
Electri ci t y Compa ny sh ops,
supermar kets
Replacing the oven light bulb
· Either pull out the plug (if it is accessible) or disconnect
the oven from the mains by turning off the multipole
switch used for connecting the oven to the electricity
source;
· Remove the glass cover of the lamp holder;
· Unscrew the bulb and replace it with a high tempera-
ture resistant bulb (300°C) with the following
characteristics:
- Voltage 230/240 V
- Wattage 25W
- Type E14
· Replace the glass cover and reconnect the power
supply to the oven.
Then clean the hob while it is still warm to the touch with
a suitable cleaner and paper towel. Then rinse it and wipe
it dry with a clean cloth .If aluminium foil or plastic items
are accidentally allowed to melt on the hob surface they
should be immediately removed from the hot cooking area
with a scraper . This will a void any possib le damage to the
surface. This also applies to sugar or any f ood with a high
sugar content. Do not use abrasive sponges or scourers
of any type. Corrosiv e cleaners such as o v en spr a ys and
stain removers should also not be used.
21
Page 22

Important
Pour garantir l'EFFICACITE et la SECURITE de cet électroménager :
• adressez-vous exclusivement à des Centres d'assistance technique agréés
• exigez toujours l'utilisation de pièces détachées originales.
1 Cet appareil a été conçu pour un usage familial, de type
non professionnel.
2 Avant d'utiliser l'appareil, lisez attentivement cette notice
car elle contient des instructions très importantes concernant la sécurité d'installation, d'usage et d'entretien. Conservez-la pour la consulter en cas de besoin.
3 Déballez l'appareil et vérifiez s'il n'a pas été abîmé pendant le
transport. En cas de doutes, mieux v aut ne pas l'utiliser et faire
appel à un professionnel du secteur . Par souci de sécurité, ne
laissez pas les matériaux utilisés pour l'emballage (sachets plastique, polystyrène expansé, clous, etc.) à la portée des enfants .
4 L'installation doit être effectuée conformément aux instructions
du fabricant par un professionnel du secteur. Le fabricant décline toute responsabilité pour tous dommages causés à des
personnes, à des animaux ou à des choses du fait du non respect de ces instructions.
5 La sécurité électrique de cet appareil n'est assurée que si ce
dernier est correctement raccordé à l'installation de mise à la
terre conformément aux normes applicables en matière de sécurité électrique. Il est indispensable de vérifier si cette condition fondamentale de sécurité est bien remplie. En cas de doute,
adressez-vous à un technicien qualifié pour un contrôle minutieux. Le f abricant ne peut en aucun cas être considéré responsable des dommages pouvant survenir si l'installation de mise
à la terre fait déf aut.
6 Avant de connecter l'appareil, vérifiez si les caractéristiques
techniques de la plaquette signalétique correspondent bien aux
caractéristiques de votre installation électrique.
7 Vérifiez si la charge électrique de l'installation et des prises de
courant est apte à supporter la puissance maximum de l'appareil indiquée sur la plaquette. En cas de doute, faites appel à un
professionnel du secteur .
8 Lors de l'installation, il faut prévoir un interrupteur multipolaire
ayant au moins 3 mm d'ouv erture entre les contacts.
9 En cas d'incompatibilité entre la prise et la fiche de l'appareil,
faites remplacer cette prise par une autre appropriée par un
professionnel du secteur. Ce dernier devra aussi vérifier si la
section des câbles de la prise est apte à supporter la puissance
absorbée par l'appareil. En général, il vaut mieux n'utiliser ni
adaptateurs, ni prises multiples ni rallonges. Si leur emploi
s'avère indispensable, n'utilisez que des rallonges et des adaptateurs simples ou multiples aux normes, tout en veillant à ne
pas dépasser la limite de la charge électrique indiquée sur l'adaptateur simple ou sur les rallonges et la puissance maximum
indiquée sur l'adaptateur simple.
10 Ne laissez pas votre appareil branché inutilement. Eteignez l'in-
terrupteur général de l'appareil quand vous ne l'utilisez pas.
11 Les ouvertures et les fentes utilisées pour la ventilation et
la déperdition de la chaleur ne doivent en aucun cas être
fermées ou bouchées.
12 Le câble d'alimentation de cet appareil ne doit pas être rem-
placé par l'utilisateur. Si le câble est endommagé et doit être
remplacé, adressez-vous à l'un des centres de service aprèsvente agréés par le fabricant.
13 Cet appareil doit être destiné à l'usage pour lequel il a été conçu.
T oute autre utilisation (comme par e xemple le chauffage d'une
pièce) est impropre et donc dangereux.
Le fabricant décline toute responsabilité en cas de dommages
provoqués par un usage impropre ou erroné.
14 L'usage de tout appareil électrique implique le respect de cer-
taines règles fondamentales. A sa v oir:
· ne pas toucher l'appareil les pieds ou les mains mouillés ou
humides;
15 Avant toute opération de nettoyage ou d'entretien, déconnec-
16 En cas de cassure de la surface en verre, débranchez immé-
17 Si vous décidez de ne plus utiliser cet appareil, il est recom-
18 Le plan de cuisson vitrocéramique résiste aux sautes de tem-
19 N'oubliez pas que la surface de cuisson reste chaude pendant
20 Attention à ne pas poser d'objets sur la surface en verre du plan
21 N'allumez pas les foyers si des f euilles alu ou du plastique sont
22 Ne vous approchez pas trop des foy ers chauds.
23 Si vous utilisez de petits électroménagers près du plan de cuis-
24 Contrôlez que les manches des casseroles soient bien tournés
25 Quand vous allumez un foy er , posez immédiatement une cas-
26 Instructions préliminaires. La colle servant à sceller le verre
27 En cours de fonctionnement, les éléments chauffants et certai-
28 contrôlez toujours si les manettes sont bien sur "o"/"o" quand
29 Attention: ne placez jamais de récipients bouillants, de mets
30 Si la cuisinière est installée sur un socle, prenez les précau-
· ne jamais utiliser l'appareil pieds nus;
· ne jamais utiliser de rallonges ou bien le faire a vec un maxi-
mum de précautions;
· ne jamais tirer sur le cordon d'alimentation ou sur l'appareil
pour débrancher la fiche de la prise de courant;
· ne pas exposer l'appareil aux agents atmosphériques (pluie,
soleil, etc.);
· ne pas laisser utiliser l'appareil, sans surveillance, par des
enfants ou par des personnes incapables de le f aire.
tez l'appareil en débranchant la fiche ou en éteignant l'interrupteur de l'installation électrique.
diatement votre appareil. Pour son év entuelle réparation, faites
appel uniquement à un centre de service après-vente agréé et
exigez l'emploi de pièces détachées originales. Le non respect
de ces indications peut compromettre la sécurité de l'appareil.
mandé de le rendre inopérant en coupant le cordon d'alimentation, après l'avoir débranché de la prise de courant. Nous recommandons vivement de neutraliser les parties de l'appareil
susceptibles de représenter un danger quelconque, surtout pour
des enfants qui pourraient utiliser l'appareil pour jouer .
pérature et aux chocs. Souvenez-vous toutefois que lames et
ustensiles de cuisine pointus peuvent casser la surface du plan
de cuisson. En cas de cassure, débranchez immédiatement
l'appareil et faites appel au service après-vente le plus proche.
au moins une demi-heure encore après son extinction. Attention à ne pas poser des récipients ou des objets sur la surface
encore chaude.
de cuisson.
posés sur le plan de cuisson.
son, attention à ce que leur câble d'alimentation ne touche pas
aux surfaces chaudes.
vers l'intérieur de la table pour éviter de les heurter accidentellement ou de les faire tomber du plan de cuisson.
serole au-dessus pour éviter qu'il se réchauffe trop vite ce qui
pourrait endommager les éléments chauffants.
peut laisser des traces de graisse sur le verre lui-même. N'oubliez
pas de les éliminer avec un simple produit de nettoyage non
récurant avant toute utilisation de l'appareil. Une odeur de caoutchouc peut se dégager au cours des premières heures d'utilisation, elle disparaîtra très vite.
nes parties de la porte peuvent devenir très chauds . Attention
à ne pas les toucher et à garder les enfants à distance.
l'appareil n'est pas utilisé.
chauds ou du matériel inflammable à l'intérieur du tiroir chauffe-
plats.
tions qui s'imposent pour que l'appareil ne tombe pas de ce
socle.
22
Page 23

Installation
Les instructions suivantes sont destinées à l'installateur
qualifié pour lui permettre d'effectuer les opérations d'installation, de réglage et d'entretien technique de façon correcte et conformément aux normes en vigueur.
Important : coupez l'alimentation électrique de la cuisinière avant de procéder à toute opération de nettoyage,
de réglage, etc.
Positionnement
Possibilité d'installation côte à côte a vec des meubles dont
la hauteur ne dépasse pas celle du plan de travail. Il faut
observer les précautions suivantes pour une installation
correcte de la cuisinière:
a) Les meubles situés à côté, dont la hauteur est supé-
rieure à celle des plans de travail, doivent être situés à
au moins 200 mm du bord du plan même.
b) Les hottes doivent être installées selon les conditions
indiquées dans leurs livrets d'instructions et à au moins
650 mm de distance.
c) Les éléments près de la hotte doivent être placés à au
moins 420 mm de distance du plan de travail (voir figure).
d) Si la cuisinière est installée sous un élément suspendu,
il faut que ce dernier soit placé à au moins 700 mm
(millimètres) de distance du plan, comme illustré.
e) La niche du meuble doit av oir les dimensions indiquées
par la figure.
H05RR-F 5x2.5 CEI-UNEL 35363
400 3N
400V 2N
H05RR-F 4x2.5 CEI-UNEL 35363
230V 1N
H07RN-F 3x4 CEI-UNEL 35364
1 2
R
R
S
12345
R
1
2
3
T
S
3
N
4
N
4
5
N
5
Installation du câble d'alimentation
Ouverture du bornier :
· Dévissez la vis "V"
· Tirez sur le couvercle de la base de jonction pour
l'ouvrir
Pour le montage du câb le d'alimentation, procédez comme
suit:
· placez la petite connexion A-B selon le type de con-
nexion que vous souhaitez effectuer en suivant le
schéma de la figure 3.
Remarque : les petites connexions sont préparées en
usine pour raccordement monophasé à 230V (les contacts 1-2-3 sont connectés l'un à l'autre). Le pont 4-5 est
situé dans la partie inférieure du bornier..
· introduisez les câbles (N et ) comme illustré et ser-
rez les vis correspondantes.
· fixez les câbles restants aux bornes 1-2-3.
· fixez le câble d'alimentation dans le serre-câble corres-
pondant et fermez le couvercle à l'aide de la vis "V".
HOOD
Min. mm.
600
mm.
420
Min.
mm. with hood
420
650
Min. mm.
min.
mm. without hood
700
min.
Nivellement
Des pieds réglables (voir fig. 1), fournis avec l'appareil,
peuvent être vissés aux emplacements prévus sur les
angles à la base de la cuisinière pour obtenir une mise à
niveau parfaite.
Raccordement électrique
Le cordon doit être dimensionné en fonction du type de
raccordement électrique utilisé (voir schéma de connexion
sous indiqué).
3
2
1
V
B
A
N
Branchement du câble d'alimentation au réseau
électrique
Pour le câble, utilisez une fiche normalisée pour la charge
indiquée sur la plaquette signalétique. En cas de connexion
directe au réseau, installez entre l'appareil et le réseau un
interrupteur multipolaire ayant au moins 3 mm d'ouverture
entre les contacts. Cet interrupteur doit être dimensionné à
la charge et conforme aux normes applicables (l'interrupteur ne doit pas interrompre le fil de la terre). Le câble d'alimentation doit être monté de manière à ne jamais dépasser
de plus de 50°C la température ambiante sur toute sa longueur. Avant de procéder au branchement, vérifiez que:
· le plomb réducteur et l'installation de l'appartement
peuvent supporter la charge de l'appareil (voir plaquette
des caractéristiques);
· l'installation électrique est bien équipée d'une mise à
la terre efficace conformément aux normes applica-
bles en la matière;
· la prise ou l'interrupteur multipolaire est facilement ac-
cessible, une fois que la cuisinière est installée .
23
Page 24

Caractéristiques T echniques
Four
Dimensions (LxPxH) 39x41x34 cm
Volume 54 l
Absorption Max. four 2100 W
Plan de cuisson vitrocéramique
Av ant gauche 1200 W
Arrière gauche 1700 W
Arrière droit 1200 W
Av ant droit 1700 W
Absorption Max. plan de cuisson vitrocéramique 5800 W
Voltage et fréquence
230V / 400V 3N AC 50 Hz
Dimensions utiles du tiroir chauffe-plats:
Largeur : 42 cm
Profondeur : 44 cm
Hauteur : 23 cm
Cet appareil est conforme aux Directives
Communautaires suivantes:
- 73/23/CEE du 19/02/73 (Basse Tension) et
modifications successives;
- 89/336/CEE du 03/05/89 (Compatibilité
électromagnétique) et modifications successives;
- 93/68/CEE du 22/07/93 et modifications successives.
104
60
50
85/90
Cuisinière avec four multifonction
D Lèchefrite ou plaque de cuisson
E Tableau de bord
F Pieds réglables
G Bouton sélection
H Indicateur lumineux vert
K Grille du four
I Boutons plaques électriques
L V o yant thermostat
M Bouton Minuterie
N Bouton thermostat
Q Horloge avec minuterie Rustique
L
E
K
D
F
H
L
H
M
GN
I
24
Q
GN
I
Page 25

Mode d'emploi de la cuisinière
Pour sélectionner les différentes f onctions du four , servezvous des dispositifs de commande de son tableau de bord.
Attention : a vant d'utiliser le four et le gril pour la première
fois, allumez-les pendant 30 minutes environ. Le four doit
être vide, le thermostat réglé à son maximum, la porte
ouverte et la pièce dûment aérée. L'odeur qui se dégage
parfois pendant cette opération est due à l'évaporation
des produits utilisés pour protéger le four pendant le laps
de temps qui s'écoule entre la fabrication et l'installation
du produit.
Attention : N'utilisez le premier étage du bas que pour
vos cuissons au tournebroche (pour les modèles qui en
sont équipés). P our les autres modes de cuisson n'utilisez
jamais le gradin du bas et ne posez jamais d'objets à
même la sole du four, vous risqueriez d'abîmer l'émail.
Enfournez toujours vos plats de cuisson (plats Pyrex,
papier alu, etc. etc.) sur la grille f ournie av ec l'appareil et
montée dans les glissières du four .
Les boutons du four
Le four "5 cuochi" unit les avantages d'un f our traditionnel
"statique" à ceux d'un four moderne "ventilé".
C'est un four extrêmement performant qui vous permet
de choisir facilement et sans vous tromper parmi 5 modes
de cuisson. Servez-vous des boutons pour sélectionner
les fonctions de cuisson off ertes par le four "5 cuochi".
G - sélecteur de programmes
N - bouton thermostat.
Toute position du sélecteur autre que la position d'arrêt
identifiée par le symbole "o", déclenche l'éclairage du four .
Pour allumer la lampe du four sans qu'aucun élément
chauffant ne soit branché, tournez le bouton identifié par
le symbole . La position indiquée par le symbole
permet d'allumer l'éclairage du four sans qu'aucune
résistance de ce dernier soit activée. L'éclairage reste
allumé pendant toute la durée de la cuisson pour signaler
le fonctionnement du four .
1. Con vection Mode
- Position bouton "G":
- Position bouton "N": au choix entre 50°C et Max
En effectuant ce choix, vous obtiendrez: l'éclairage du four
et le branchement des deux résistances (sole et voûte)
C'est le four traditionnel de grand-mère re vu pour atteindre
un niveau exceptionnel de diffusion de la chaleur et
d'économie d'électricité. Rien n'égale le f our statique quand
il s'agit de cuisiner des plats garnis traditionnels tels que
: côtes de porc au chou, morue à l'espagnole, stockfisch
à la mode d'Ancône, veau au riz etc... Vous obtiendrez
des résultats tout aussi excellents pour vos plats de viande
de bœuf ou de veau tels que : bœuf braisé, ragoût,
goulasch, gibier, jambon et longe de porc etc... qui exigent une cuisson lente et de fréquents ajouts de liquides.
C'est aussi le mode de cuisson recommandé pour les
gâteaux, les fruits et les plats mijotés dans des cocottes
avec couvercle . Lorsque vous utilisez le four statique, ne
cuisez que sur un seul niveau pour avoir une meilleure
diffusion de la chaleur. N'hésitez pas à choisir le niveau
qui vous permettra de mieux balancer la quantité de
chaleur provenant de la voûte et de la sole. En enf ournant
sur le premier ou le deuxième gradin en partant du bas
vous obtiendrez plus de chaleur dans la partie inférieure.
2. Le f our "ventilé"
- Position bouton "G":
- Position bouton "N": au choix entre 50°C et Max
La chaleur, constante et bien distribué à l'intérieur du f our
grâce à la turbine située au fond du f our , permet de cuire
et de dorer les aliments de façon uniforme et en tous points.
Vous pouvez ainsi procéder à une cuisson groupée en
enfournant plusieurs plats ensemble à condition qu'ils
cuisent à la même température. Vous pouvez cuire sur
deux niveaux en suivant les conseils fournis dans le
paragraphe "Cuisson sur plusieurs niveaux". C'est la
fonction qui convient le mieux à des plats gratinés ou à la
cuisson prolongée tels que : lasagnes , gr atins de pâtes ,
poulet rôti et pommes de terre au four etc...
Une meilleure distribution de la température permettant
d'utiliser des températures plus basses offre des
avantages considérables lors de la cuisson de rôtis de
viande. Le choix de températures plus basses permet en
effet d'obtenir des rôtis de viande plus juteux et tendres à
souhait avec une moindre perte de poids. Cette fonction
qui permet de cuisiner avec peu de condiment, convient
aussi à merveille à la cuisson du poisson, dont l'aspect et
le goût demeurent inaltérés. Vous obtiendrez aussi
d'excellents résultats lors de la cuisson des légumes: courgettes, aubergines, poivrons, tomates etc.
Desserts : vous réussirez à coup sûr vos pâtes levées
pour vos génoises, brioches, croissants. La fonction
"ventilé", réglée à une température comprise entre 80° 100°C sert aussi à décongeler la viande, rouge ou
blanche, le poisson ou le pain. P our décongeler des mets
plus délicats, sélectionnez une température de 50°C ou
n'utilisez que la circulation d'air froid en plaçant la manette
du thermostat sur 0°C.
3. "Gril"
- Position bouton " G":
- Position bouton "N": Max
La température élevée et directe du gril permet de saisir
l'aliment en surface pour qu'il ne perde pas son jus et
reste tendre à souhait. La cuisson au gril est
particulièrement recommandée pour les plats qui exigent
une température élevée à leur surface : côtes de veau et
de bœuf, entrecôtes, filet, hamburgers , etc....
4. "Double Gril"
- Position bouton "G":
- Position bouton "N": Max
Un gril plus grand que d'habitude, au dessin novateur :
son rendement est augmenté de 50%. Avec ce double
gril, finies les zones d'angle où la chaleur n'arrive pas.
Important : P our obtenir d'excellents résultats et f aire des
économies d'énergie (10% environ), la porte du four doit
rester fermée lorsque vous utilisez le gril .
Lorsque vous cuisinez en fonction barbecue, placez la
grille sur le gradin le plus haut (voir tableau cuisson) et la
lèchefrite juste en-dessous pour recueillir la graisse qui
fond.
25
Page 26

5. "Double Gril Ventilé"
- Position bouton " G":
- Position bouton "N": au choix entre 50 et 200°C
L'irradiation thermique unidirectionnelle s'ajoute au
brassage de l'air pour une répartition uniforme de la
chaleur dans l'enceinte du four . Plus de risques de brûler
vos aliments en surface et plus grande pénétration de la
chaleur. C'est l'idéal pour cuire : brochettes de viande et
légumes (kebabs), saucisses, côtelettes, côtelettes
d'agneau, poulet, caille, côtes de porc, etc. Mais aussi
des tranches de poisson (espadon, thon, mérou, etc.).
Cette fonction déclenche aussi la mise en marche du
moteur du tournebroche (si votre appareil en est équipé).
Ce type de cuisson est notamment recommandé pour des
pièces de viande telles que longes, volaille, etc.
Remarque : cuisinez au gril (fonctions 3, 4,5), porte
fermée.
Horloge avec minuterie Rustique
Voyant de fonctionnement du four (L)
Il signale la montée en chaleur du four . Il s'éteint dès que
la température à l'intérieur du four a atteint la température
sélectionnée à l'aide du bouton. Le v oyant commence alors
à s'allumer et à s'éteindre à tour de rôle pour signaler le
fonctionnement du thermostat et maintenir une
température constante à l'intérieur du four.
Attention
Evitez que les enfants touchent la porte du four, elle se
réchauffe énormément durant la cuisson.
Minuterie
Pour remonter la minuterie, utilisez le bouton "M". Faites
faire un tour presque complet au bouton dans le sens des
aiguilles d'une montre . Puis, tournez-le dans le sens
inverse et sélectionnez la durée de cuisson en amenant
le chiffre (minutes) indiqué sur le bouton en face du repère
sur le tableau de bord.
Remise à l'heure
Le four doit être sous tension.
Poussez sur le bouton et tournez-le dans le sens inverse
des aiguilles d'une montre pour sélectionner l'heure
exacte.
N.B.: L'horloge fonctionne à l'électricité. Donc , en cas de
coupure de courant, elle cessera de fonctionner pendant
toute la durée de la panne. Dès retour du courant il faudra
par conséquent la remettre à l'heure.
Fonction minuterie
Le fonctionnement de la minuterie prévoit la sélection d'un
temps dont le décompte se fait au compte à rebours. Cette
fonction ne contrôle ni l'allumage ni l'arrêt du four mais
déclenche un signal sonore une fois le temps écoulé.
Programmation de la minuterie
T ournez le bouton dans le sens inverse des aiguilles d'une
montre pour amener le repère en face du temps souhaité
(échelle interne), visible à travers la fenêtre d'affichage.
Le décompte du temps démarre aussitôt.
Pour arrêter la sonnerie ou pour n'utiliser que la f onction
horloge, amenez le repère en face du symbole .
26
Page 27

Conseils utiles pour la cuisson
Le four vous offre de nombreuses possibilités de cuisson
appropriées à chaque type d'aliment. Les notes qui suiv ent ne
sont par conséquent qu'indicatives, v ous pourrez les enrichir au
gré de votre expérience personnelle.
Cuisson de la pâtisserie
Réchauffez toujours votre f our (pendant 10 - 15 minutes environ)
avant d'enf ourner vos gâteaux. La température de cuisson des
gâteaux varie entre 160°C et 200°C. N'ouvrez jamais la porte
en cours de cuisson d'un gâteau, il risquerait de s'affaisser .
Pâtisserie trop sèche
La prochaine fois progr amm ez une tem péra ture d e
10°C supérieure et réd uisez le t em ps de cuis son.
Le gâteau s'affaisse
Utilisez moins de liquid e ou bais sez la temp érat ure de
10°C.
Gâteau foncé sur le dessus
Enfournez-le à un nive au plus bas, cho isisse z une
température plus b asse et pr olongez la cui sson
Bonne cuisson extérieure, mais intérieur co llant
Utilisez moins de liquid e, abais sez la tem pérat ure,
augmentez le temps de cu isso n.
Le gâteau ne se démoule pas
Beurrez bien votre m oule et farinez -le un pe u ou bien
utilisez du pap ier su lfur isé.
"J'ai enfourné sur plusieurs niveaux (en fonction
"ventilé") mais je n'ai pas obtenu sur tous les
mêmes résultats de cuisson".
Sélectionnez une tem péra ture inf érieu re. Il n'e st pas
dit que des plats enfou rnés en mê me tem ps doive nt
obligatoirement être sortis ense mble.
Cuisson du poisson et de la viande
Pour les viandes b lanches, les volailles et le poisson utilisez des
températures plus basses. (150°C - 175°C). Pour rissoler les viandes
rouges à l'extérieur et les garder juteuses à l'intérieur, commencez
par régler une température élevée (200-220°C) pendant un bref
laps de temps puis diminuez-la par la suite. En général, plus vous
avez de viande à cuire, plus la tempér ature sera basse et la durée
de cuisson prolongée. Placez votre viande au milieu de la grille et
placez une lèchefrite en dessous pour recueillir la graisse qui fond.
Placez la grille au milieu du four . Si le type de cuisson exige plus de
chaleur par dessous, utilisez le premier gradin en partant du bas.
Cuisson simultanée sur plusieurs niveaux
La fonction 2 "four ventilé" est la seule qui vous permet de
cuire sur deux niveaux.
· Le four dispose de 5 niveaux. N'utilisez que les deux niveaux
du milieu en cas de cuisson au four ventilé : les niveaux,
extérieur, supérieur et inférieur sont en effet directement
frappés par l'air chaud qui pourrait brûler des mets délicats.
· Utilisez de préférence le deuxième et le quatrième niveau
en partant du bas en enfournant sur le deuxième les plats
qui exigent plus de chaleur . Exemple: si vous cuisinez un rôti
en même temps qu'un autre type de plat, enfournez le rôti
au deuxième niveau et vos plats plus délicats au quatrième.
· En cas de cuisson simultanée de plats dont les temps et les
températures de cuisson varient, choisissez une température
intermédiaire entre les deux conseillées et enfournez les plats
plus délicats au quatrième niveau. Sortez du four, avant les
autres, le plat exigeant un temps de cuisson moindre.
· Utilisez la lèchefrite sur le niveau du bas et la grille sur celui
du haut.
· Lors de la cuisson de pizzas sur plusieurs niveaux à une
température de 220°C, n'oub liez pas de préchauffer le f our
pendant au moins 15 minutes. D'habitude, la cuisson sur le
quatrième niveau exige davantage de temps; il est par
conséquent conseillé de sortir du four d'abord la pizza placé
au niveau inférieur et de laisser l'autre cuire quelques minutes de plus.
Utilisation du gril
Pour vos grillades, vous avez le choix entre deux modes de
cuisson.
Utilisez la fonction 3 "Gril" pour de petites pièces. La
consommation d'électricité n'est dans ce cas que de 1220 W,
c'est donc l'idéal pour griller de petites pièces telles que : croquemonsieur, saucisses de Strasbourg, etc.
Placez vos aliments au milieu de la grille car seule la partie
centrale de la résistance du haut est branchée. Les aliments
placés dans les coins ne sont pas cuits.
La position 4 "Double Gril" vous permet d'utiliser toute la
surface de la grille. Conseillée quand les aliments sont disposés
uniformément et quand vous désirez qu'ils soient tous bien dorés.
Important : Pour obtenir d'excellents résultats et faire des
économies d'énergie (10% environ), la porte du four doit rester
fermée lorsque vous utilisez le gril.
Quand vous utilisez cette fonction, n'oub liez pas de régler votre
thermostat sur le maximum. Cela ne vous empêche toutefois
pas d'utiliser des températures plus basses.
Lorsque vous cuisinez en fonction barbecue, placez la g rille sur
le gradin le plus haut (voir tableau cuisson) et la lèchefrite juste
en-dessous pour recueillir la graisse qui fond.
La position 5 "double gril ventilé" est extrêmement utile
pour des grillades rapides car la chaleur produite par le gril, bien
distribuée, permet non seulement de dorer en surface mais aussi
de cuire par dessous. Elle vous permet de griller de grosses
pièces de viande ou de volaille sans utiliser le tournebroche.
V ous pouvez v ous en servir pour parfaire la cuisson d'aliments
ayant besoin de dorer en surf ace, c'est l'idéal par ex emple pour
dorer vos gratins de pâtes en fin de cuisson.
Quand vous choisissez cette fonction, placez la g rille sur le 2e
ou 3e gradin en partant du bas (voir tableau de cuisson) et placez
une lèchefrite sur le premier gradin en partant du bas pour
recueillir les graisses et éviter la formation de fumée. Si vous
utilisez cette fonction en même temps que le tournebroche (prévu
uniquement sur certains modèles), vous pouvez cuisiner dans
la lèchefrite placée au premier gradin, comme par exemple :
des pommes de terre, etc…
27
Page 28

Mode d'emploi de la table vitrocéramique
Description
Les tables de cuisson sont équipées de fo yers électriques
radiants incorporés au-dessous de la surface du plan de
cuisson (zones qui deviennent rouges en cours de
fonctionnement).
A. Zone de cuisson (A).
B. Voyants lumineux qui indiquent si la température des
foyers correspondants dépasse 60° C, même après
extinction du plan de cuisson.
AA
B
Description des éléments de chauffe
Les éléments chauffants radiants sont formés par des
résistances circulaires qui deviennent rouges 10-20
secondes seulement après l'allumage.
Mode d'emploi de la table vitrocéramique
Pour obtenir des résultats de cuisson optimums, suivez
certaines règles fondamentales au moment de préparer
ou de cuire les aliments.
· Sur les plans de cuisson vitrocéramique vous pouvez
utiliser n'importe quel type de casseroles et de poêles.
Mais attention, leur fond doit être parfaitement plat.
Naturellement, plus le fond de la casserole ou de la
poêle est épais, plus la chaleur est uniformément
distribuée.
· Contrôlez que la base de la casserole recouvre
complètement la couronne : v ous profiterez à plein de
la chaleur produite.
· Veillez à ce que la base de la casserole soit toujours
sèche et propre : le contact sera ainsi optimal et vos
casseroles et vos plans de cuisson dureront plus
longtemps.
· Ne vous servez pas de casseroles déjà utilisées sur
des brûleurs à gaz car la force de la chaleur que ces
derniers produisent pourrait déformer la base de la
casserole qui ne donnera pas les mêmes résultats si
elle est ensuite utilisée sur un plan de cuisson
vitrocéramique.
Conseils pratiques pour l'utilisation des plaques électriques
Les manettes de commande des plaques électriques
du plan de cuisson (I)
Les cuisinières peuvent monter des plaques électriques
de série, rapides et automatiques combinées entre elles
(les plaques rapides se distinguent des autres à leur
pastille rouge, les plaques automatiques à la présence
d'un disque aluminium).
Pour éviter toute déperdition de chaleur et ne pas
endommager les plaques, il est conseillé d'utiliser des
casseroles à fond plat dont le diamètre n'est pas plus petit
que celui de la plaque.
Le tableau indique la correspondance entre la position
indiquée sur les manettes et le type d'utilisation conseillé
pour les plaques.
Position Plaque normale ou rapide
0 Eteint
1 Cuisson de légume s ver ts, po isso ns
2
3
4
5
6
Indicateur lumineux vert (H)
Ce voy ant s'allume quand une plaque électrique est allumée.
Cuisson de pommes de terr e (à la
vapeur) soupes , pois ch iche s, harico ts
Pour continuer la cuis son d e gra ndes
quantités d'aliments, minestrone
Rôtir (moyen)
Rôtir (fort)
Rissoler ou rejoindre l'ébull ition e n peu
de temps
28
Page 29

Practical Cooking Advice
Bouton
sélection
1 Traditionnel
2 Four ventilé
3 Gril
Aliments à cuire Poids
(Kg)
Canard
Roast-beef
Rôti de porc
Biscuits
Tartes
Pizza (sur 2 niveaux )
Lasagnes
Agneau
Poulet rôti + pomm es
de terre
Maquereaux
Plum-cake
Choux à la crème (su r
2 niveaux)
Biscuits (sur 2 niv eaux)
Génoise (sur 1 nivea u)
Génoise (sur 2 nivea ux)
Tartes salées
Soles et seiches
Brochettes de calmars
et de crevettes
Tranches de colin
Légumes grillés
1
1
1
-
1
1
1
1
1
1
1
0.5
0.5
0.5
1.0
1.5
1
1
1
1
Position
gradins en
partant du
bas
3
3
3
3
3
2-4
3
2
2-4
2
2
2-4
2-4
3
2-4
3
4
4
4
3/4
Préchauffage
(min.)
15
15
15
15
15
15
10
10
10
10
10
10
10
10
10
15
5
5
5
5
Bouton
thermostat
200
200
200
180
180
220
200
180
180
180
170
190
180
165
165
200
Max
Max
Max
Max
Durée
cuisson
(min.)
65-75
70-75
70-80
15-20
30-35
20-35
30-35
50-60
60-75
50-55
40-50
25-35
10-15
25-30
25-30
25-30
8
4
10
8-10
4 Double gril
5 Ventilé et
double gril
NB: les temps de cu isso n sont p urem ent indi catifs et peuven t être modifi és sel on les goûts d e chac un. Lor sque
vous utilisez le gril, le do uble gril ou le doub le gri l vent ilé, pla cez t oujour s la lè chefrit e sur le pre mier gr adin en
partant du bas.
Steaks de veau
Côtelettes
Hamburgers
Maquereaux
Toast
Poulet grillé
Seiches
1
1.5
1
1
n.° 4
1.5
1.5
4
4
3
4
4
2
2
5
5
5
5
5
5
5
Max
Max
Max
Max
Max
200
200
15-20
20
7
15-20
5
55-60
30-35
29
Page 30

Maintenance ordinaire et entretien du four
Avant toute opération de nettoyage ou d'entretien,
déconnectez le four. Pour prolonger la durée de vie de
votre four, nettoyez-le fréquemment et avec soin, en
n'oubliant pas que :
· les parties émaillées et les panneaux autonettoyants
doivent être lavés à l'eau chaude en évitant toute
utilisation de poudres abrasives ou de produits corrosifs
qui pourraient les abîmer;
· l'enceinte du four doit être nettoyée assez souvent,
quand elle est encore tiède à l'eau chaude avec un
peu de détergent. Rincez-la et essuyez-la ensuite
soigneusement;
· des taches peuvent se former sur l'acier inox si ce
dernier reste trop longtemps au contact d'une eau très
calcaire ou de détergents agressifs (contenant du
phosphore). Il est conseillé de rincer abondamment et
d'essuyer après le nettoyage . De plus , essuyez aussitôt
tout débordement d'eau;
· évitez toute accumulation de salissure ou de graisse
sur le bandeau, nettoyez-le fréquemment. Utilisez des
éponges non abrasives ou des chiff ons doux pour éviter
de rayer les parties émaillées ou en acier poli.
Nettoya ge du plan de cuisson
Avant de cuisiner, la surface du plan de cuisson doit
toujours être nettoyée à l'aide d'un chiff on humidifié pour
enlever les traces de poussière ou les restes d'aliments.
La surface du plan doit être nettoyée régulièrement à l'eau
tiède et avec un produit de nettoyage délicat. Il se peut
qu'il faille, de temps en temps, utiliser un netto yant spécial
pour tables en vitrocéramique. Enlevez d'abord tous les
restes d'aliments et les projections de graisse à l'aide d'un
racloir pour vitres, de préférence à lame de rasoir
(pas fourni avec l'appareil) ou bien, à déf aut, à
lame de rasoir fixe.
Produits de nettoyage
spéciaux pour
vitrocéramique
Raclette à lames et lames de
rechange
Stahl-Fix
SWISSCLEANER
WK TOP
Autres produits po ur
vitrocéramique
Remplacement de l'ampoule du four
· Débranchez la fiche (si elle est accessible) ou
déconnectez le four en éteignant l'interrupteur
multipolaire qui connecte le four au réseau électrique.
· Dévissez le couvercle en verre de la douille;
· Dévissez l'ampoule et remplacez-la par une ampoule
résistant à des températures élevées (300°C) ayant
les caractéristiques suivantes :
- Tension 230/240 V
- Puissance 25W
- Culot E14
· Remontez le couvercle en verre et connectez l'appareil.
Où les acheter
Bricolage et
quincaillerie
Articles ménagers
Bricolage
Quincaillerie
Supermarchés
Puis nettoyez le plan de cuisson alors qu'il est encore
chaud au toucher avec du papier essuie-tout et un produit
de nettoyage approprié. Rincez et séchez a vec un chiff on
propre. Un morceau de plastique ou d'aluminium qui aurait
accidentellement fondu à la surface de la table doit être
éliminé immédiatement du fo yer encore chaud à l'aide d'un
racloir pour ne pas endommager la surface. Procédez de
même en cas de débordement de sucre ou d'aliments à
teneur en sucre élevée. N'utilisez ni paille de fer ni éponges
récurantes. Des produits de nettoyage corrosifs tels que
bombes pour four ou détachants sont à éviter eux aussi.
30
Page 31

Безопасность хорошая привычка
1. Это оборудование разработано для использования
внутри помещений. Ни при каких обстоятельствах не
используйте оборудование на улице.
2. Плита должна использоваться в домашних условиях для
приготовления и разогрева пищи в соответствии с дан-
ной инструкцией. Использование оборудования не по
назначению, а также промышленное использование, ис-
пользование плиты в офисах, предприятиях сферы об-
служивания, здравоохранения, просвещения и т.п. не
предусмотрено. Производитель не несет ответствен-
ности за выход из строя оборудования при нарушении
данного пункта инструкции.
3. Снимите упаковку; элементы упаковки (пластиковые па-
кеты, пенопласт, металлические скрепки) могут быть по-
тенциально опасны для детей, поэтому выбросьте
упаковку сразу же или уберите в недоступное место.
4. Убедитесь, что Ваша плита не повреждена и полностью
укоплектована. Если у Вас есть сомнения, свяжитесь с
продавцом немедленно.
5. Запрещено использование удлинителей и переходников.
Длина кабеля не должна превышать 1,5 м. Производи-
тель не несет ответственности за возгорания, произо-
шедшие из-за использования тройников и удлинителей,
а также соединительного кабеля, сечение которого не
соответствует потребляемой оборудованием мощнос-
ти. При установке необходимо проверить соответствие
характеристик сети и плиты. Необходимые сведения со-
держатся в специальной таблице на задней стороне пли-
òû.
6. Розетка и вилка должны быть одного типа.
7. Плита должна устанавливаться только квалифициро-
ванным персоналом, в соответствии с рекомендация-
ми Производителя и стандартами, действующими на
территории стран СНГ. Неправильная установка может
принести вред людям, животным или Вашей собствен-
ности. В случае неправильной установки Производи-
тель снимает с себя всякую ответственность.
8. Электрическая безопасность гарантирована только при
наличии эффективного заземления, выполненного в со-
ответствии с правилами электрической безопасности.
Это требование обязательно должно соблюдаться. Если
возникли сомнения, свяжитесь со специалистом по ус-
тановке, который проверит Вашу систему заземления.
Производитель не несет ответственности за ущерб,
вызванный отсутствием заземления или его неисправ-
ностью.
9. Если плита подключается непосредственно к сети (без
вилки и розетки), необходимо установить многолиней-
ный выключатель с расстоянием между разведенными
контактами не менее 3 мм, линия заземления при этом
не должна разрываться. Выключатель должен устанав-
ливаться в легкодоступном месте.
10. Всегда вынимайте вилку из розетки или отключайте
электричество на Вашем щитке перед мойкой или дру-
гими операциями по профилактике плиты.
11. Не тяните провод, чтобы вынуть вилку из розетки: это
очень опасно. Не пережимайте и не натягивайте сете-
вой кабель. Для замены поврежденного кабеля вызы-
вайте специалиста из обслуживающей организации.
12. Следите за тем, чтобы вентиляционные отверстия и
щели в задней части плиты и под панелью управления
не были закрыты, в противном случае возникает опас-
ность превышения рабочей температуры элект-
рической изоляции и короткого замыкания.
13. Ваша плита должна использоваться только для того, для
чего она разработана. Если Вы решили испытать плиту
другой работой, (например, отапливать помещения) де-
лайте это на свой страх и риск.
Производитель не несет ответственности за поломки,
вызванные ненадлежащим или неразумным использо-
ванием.
14. Не касайтесь плиты, если Ваши руки или ноги мокрые
или сырые, не пользуйтесь оборудованием босиком.
15. В соответствии с общими требованиями Государствен-
ной Противопожарной службы не оставляйте плиту без
присмотра.
16. Не разрешайте детям и лицам, не знакомым с настоя-
щей инструкцией, пользоваться плитой в ваше отсутствие.
17. Запрещается изменение конструкции плиты и вмеша-
тельство лиц, не уполномоченных Производителем на
гарантийный ремонт.
18. При использовании малых кухонных электроприборов
рядом с плитой следите, чтобы их питающие кабели не
касались горячих частей оборудования.
19. Отключайте плиту от сети, когда уезжаете надолго.
20. Не используйте легковоспламеняющиеся жидкости (ал-
коголь, бензин и т.п.) рядом с работающим оборудова-
íèåì.
21. Стеклокерамическая поверхность термоустойчива и до-
статочно ударопрочна. Однако и ее можно расколоть
или поцарапать тяжелой посудой или острыми пред-
метами. Если это произошло, отсоедините немедлен-
но оборудование от сети. Для устранения дефектов
обратитесь в авторизованный сервисный центр.
22. Стеклокерамическая поверхность сохраняет тепло не
менее получаса после отключения. Будьте осторожны:
не прикасайтесь к ней, пока она еще горячая.
23. Не включайте зоны нагрева, если на поверхности нахо-
дится фольга или предметы из пластмассы.
24. Не ставьте на плиту посуду с неровным или деформи-
рованным дном. Старайтесь располагать посуду так,
чтобы ручки не перегревались и чтобы было невозмож-
но опрокинуть посуду, случайно задев за ручки.
25.
Предупреждение: никогда не помещайте горячую по-
суду и воспламеняющиеся материалы в отделение для
хранения и подогрева.
Никогда не оставляйте включенные зоны нагрева пус-
тыми или с неиспользуемой посудой, так как посуда
быстро нагревается, что может привести к поврежде-
нию нагревательных элементов.
Части плиты после выключения долгое время остаются
горячими. Будьте осторожны, не прикасайтесь к плите:
дождитесь, когда она полностью остынет.
26. Перед первым включением: удалите с поверхности
следы упаковочных материалов (клей, смазка) при по-
мощи неабразивного чистящего средства. При первом
включении Вы почувствуете неприятный запах: так уда-
ляются смазочные материалы. Не беспокойтесь: это
нормальное явление, запах быстро исчезнет.
27. Если плита не используется, проверьте, что рукоятки
на панели управления находятся в положении«»/ «о».
28. При установке плиты на опоры, соблюдайте меры пре-
досторожности, чтобы избежать соскальзывания пли-
òû ñ îïîð.
29. При возникновении нестандартной ситуации отключите
плиту от сети, позвоните в сервисный центр, телефон
которого указан в гарантийном документе (гарантий-
ном талоне, сервисной книжке, сервисном сертифика-
òå).
30. Если Вы решили, что плита больше не годится для эк-
сплуатации, сделайте ее непригодной для использо-
вания: отключите от сети, обрежьте питающий кабель,
снимите потенциально опасные части (это особенно
важно для безопасности детей, которые могут играть с
неиспользуемыми или выброшенными приборами).
Внимание! Для обеспечения эффективной и безопасной
работы оборудования настоятельно рекомендуем:
· не пользоваться услугами лиц, не уполномоченных Произ-
водителем;
· при ремонте требовать использования оригинальных за-
пасных частей.
31
Page 32

Установка
V
Этот раздел предназначен для квалифицированных техников
и содержит инструкции по установке и обслуживанию плиты
в соответствии с действующими нормами безопасности.
Важно: перед любыми работами по наладке, обслуживанию
и т.п. отключите плиту от электрической сети.
Установка плиты
Плита может устанавливаться рядом с кухонной мебелью,
которая, однако, не должна быть выше плиты.
При установке плиты необходимо соблюдать следующие
меры предосторожности:
a) Кухонная мебель, превышающая по высоте плиту, долж-
на находиться на расстоянии не менее 200 мм от края
рабочей поверхности плиты.
á) Вытяжки устанавливаются согласно их инструкциям по
по эксплуатации, и на расстоянии не менее 650 мм от
рабочей поверхности плиты.
â) Стенные шкафы, смежные с вытяжкой, навешиваются на
высоте не менее 420 мм от рабочей поверхности плиты
(ñì. ðèñ.).
ã) При установке плиты под стенными шкафами расстоя-
ние между шкафами и рабочей поверхностью плиты дол-
жно составлять не менее 700 мм, как показано на рисунке.
å) Размеры для встраивания плиты в модуль кухонной
мебели указаны на рисунке.
Параметры питающего кабеля зависят от типа электрическо-
го соединения (см. следующую таблицу, содержащую сведе-
ния о различных способах соединения проводов и перемычек
для адаптации электроплит к электрической сети, а также тре-
бования к типу кабеля).
H05RR-F 5x2.5 CEI-UNEL 35363
400 3N
400V 2N
H05RR-F 4x2.5 CEI-UNEL 35363
230V 1N
H07RN-F 3x4 CEI-UNEL 35364
В России: R=A, S=B, T=C.
1 2
R
R
S
12345
R
1
2
3
T
N
S
3
N
4
4
5
N
5
Установка питающего кабеля
Чтобы открыть коммутационную колодку:
l выверните винт V (ðèñ. Ñ);
l снимите крышку колодки, потянув ее на себя.
Подсоединение питающего кабеля производится следующим
образом :
l установите перемычки À-Â согласно требуемой схеме
соединения (рис. D).
Примечание: заводская предустановка выполнена для од-
нофазного соединения 230 В (контакты 1-2-3 соединены
между собой). Перемычка 4-5 находится в нижней части
коммутационной колодки.
l подсоедините провода (N è ) как показано на рис. D
и закрепите их винтами;
l зафиксируйте оставшиеся провода в зажимах 1-2-3;
l зафиксируйте питающий кабель в хомуте и закройте крыш-
ку коммутационной колодки, завернув винт V.
Выравнивание плиты (только для некоторых
моделей)
Ваша плита снабжена регулируемыми ножками, которые
служат для ее выравнивания. При необходимости, ножки вкру-
чиваются в отверстия по углам основания плиты
(ðèñ. A).
Установка опор (только для некоторых моделей)
Плита комплектуется надставными опорами, которые
устанавливаются нажатием под основанием плиты (рис.
B).
Ðèñ. A Ðèñ. B
ЭЛЕКТРИЧЕСКИЕ СОЕДИНЕНИЯ
Электрическая безопасность этого оборудования гаранти-
руется только при правильном его заземлении в соответ-
ствии со стандартами электрической безопасности.
Производитель снимает с себя всякую ответственность
за любой ущерб, причиной которого явилось неправильное
подключение оборудования.
3
2
1
B
A
N
Ðèñ. C Ðèñ. D
Подсоединение кабеля к сети
Оснастите питающий кабель соответствующей вилкой (см.
табличку характеристик) или непосредственно подключите
оборудование к сети (без вилки и розетки). В последнем слу-
чае должен быть установлен многолинейный выключатель,
соответствующий нагрузке оборудования, с расстоянием
между разведенными контактами не менее 3 мм, причем
линия заземления не должна разрываться. Питающий ка-
бель следует располагать так, чтобы по всей длине он никог-
да не нагревался до температуры, превышающей на 50°С
комнатную.
Перед подсоединением убедитесь в том, что:
l предохранители (пробки) или автоматические выключате-
ли и проводка выдерживают рабочую нагрузку оборудова-
ния (см. табличку характеристик);
l заземление соответствует правилам и требованиям,
предъявляемыми к заземлению бытовой техники;
l розетка или многолинейный выключатель находятся в
легкодоступном месте.
32
Page 33

Технические характеристики
104
60
50
85/90
ДУХОВКА
Размеры (Ширина x Глубина x Высота)
39x41x34 ñì
Объем
54 ë
Мощность духовки (max)
2100 Âò
СТЕКЛОКЕРАМИчЕСКА ПОВЕРХНОСТЬ
(зоны нагрева)
Передняя левая 1200 Âò
Задняя лева 1700 Âò
Задняя правая 1200 Âò
Передняя правая 1700 Âò
Максимальная мощность 5800 Âò
Напряжение и частота питания
230V / 400V 3N AC 50 Hz
Размеры отделения для хранения и подогрева:
Ширина: 42 см
Глубина: 44 см
Высота: 23 см
Продукция сертифицирована Код органа
на соответствие ГОСТам: по сертификации
27570.0-87
27570.14-88 ÌÅ 53
23511-79
Ð 50033-92
Ð 50696-94
Это оборудование соответствует следующим директи-
вам Европейского экономического сообщества:
- 73/23/EEC от 19/02/73 (Низкое напряжение) и последу-
ющие модификации;
- 89/336/EEC от 03/05/89 (Электромагнитная совмести-
мость) и последующие модификации;
- 93/68/EEC от 22/07/93 и последующие модификации.
Кухонная плита с многофункциональной духовкой (описание)
D Поддон для сбора жира или противень
E Панель управления
F Регулируемые ножки или опоры
G Рукоятка выбора функций духовки
H Зеленый индикатор электрических конфорок
K Решетчатая полка духовки
I Рукоятки управления электрическими
конфорками
L Индикатор термостата духовки
M Рукоятка таймера
N Рукоятка термостата
Q НЕОТДЕЛАННЫЕ ЧАСЫ CО СЧ¨ТЧИКОМ МИНУТ
L
H
K
E
D
F
L
H
M
GN
I
33
Q
GN
I
Page 34

Инструкции по эксплуатации
Для выбора различных функций плиты служат рукоятки и
кнопки на панели управления.
Внимание: перед первым использованием духовки мы ре-
комендуем прокалить пустую духовку, установив термостат
в максимальное положение. Затем откройте дверцу духовки
и проветрите комнату, чтобы удалить запах смазочных ве-
ществ, используемых для консервации оборудования во
время его хранения до установки.
Предупреждение: использование дна духовки допускает-
ся только при работе вертела (при наличии). Во всех других
случаях готовьте пищу только на решетке или противне,
вставляя их по направляющим. Ни в коем случае не распо-
лагайте посуду (блюда, алюминиевую фольгу и т.д.) на дне
духовки это может повредить эмалевое покрытие.
Рукоятки управления духовкой (G и N)
Многофункциональная духовка сочетает преимущества
традиционных статичных духовок и современных духовок
с принудительной вентиляцией. Это универсальное обо-
рудование предлагает 5 различных режимов
приготовления, выбор которых осуществляется с помощью
двух рукояток:
G рукоятки выбора функций духовки
N рукоятки термостата символ
(символьные обозначения рукояток нанесены на панель
управления).
Когда рукоятка выбора функций духовки G находится в лю-
бом положении, кроме «î» выключено, в духовке горит
свет. При установке рукоятки в позицию
ется без включения нагревательных элементов. Горящая
лампочка духовки показывает, что духовка используется.
Свет остается гореть в течение всего времени использо-
вания
духовки.
;
свет зажига-
1. СТАТИЧНАЯ ДУХОВКА
- Положение рукоятки G:
температура поддерживается автоматически.
Вентилируемая духовка особенно подходит для
приготовления блюд из двух и более ингридиентов. Режим
вентилируемой духовки позволяет готовить на 2-х уровнях
одновременно (см. раздел «Приготовление на нескольких
уровнях одновременно»).
Режим идеален для блюд, которые требуют длительного
приготовления. Также этот режим можно использовать для
приготовления жаркого при меньшей температуре. Режим
позволяет приготовить мясные продукты более сочными и
нежными.
Режим вентилируемой духовки хорошо подходит для при-
готовления рыбы с использованием меньшего количества
приправ, чем обычно, так как позволяет лучше сохранить
вкус и аромат блюда.
Режим вентилируемой духовки применяется и для приго-
товления изделий из слоенного теста, например, круаса-
нов, бриошей.
Использовать данный режим можно и для разморажива-
ния белого или красного мяса, рыбы и хлеба. При размо-
раживании в этом режиме требуется вдвое меньше времени
по сравнению с размораживанием при комнатной темпе-
ратуре. Рукоятка N устанавливается в положение от 80 до
100°С. Для размораживания продуктов, которые нельзя на-
гревать (тортов из мороженого, кремовых или фруктовых
тортов и пр.), термостат устанавливается в положение мень-
ше 50°С или положение «0» циркуляция воздуха при ком-
натной температуре.
3. ГРИЛЬ
- Положение рукоятки G:
- Положение рукоятки N: Max
В духовке горит свет, пища подвергается тепловому инф-
ракрасному излучению от раскаленного верхнего централь-
ноСильное направленное тепло гриля нагревает
поверхность мяса непосредственно (воздух нагревается
слабо). На мясе образуется румяная корочка, которая со-
храняет мясо сочным и мягким. Гриль идеален для приго-
товления блюд, требующих высокой температуры
поверхности, таких как: бифштекс, филе, гамбургеры,
ромштекс и т.д.
- Положение рукоятки N: любое между 50°C è Max
Горит лампа освещения, включены верхний и нижний
нагревательные элементы. Духовка нагревается до тем-
пературы, заданной рукояткой термостата; выбранная тем-
пература поддерживается автоматически. Поток горячего
воздуха направлен сверху вниз. Превосходное распреде-
ление температуры позволяет готовить в этом режиме
многие виды продуктов.
Статичная духовка особенно подходит для приготовления
мясных блюд, которые должны готовиться медленно и в
процессе приготовления требуют добавления жидкости,
или блюд, состоящих из двух (и более) компонентов (на-
пример, гуляш, мясные запеканки). Также режим подходит
для приготовления сухих бисквитов, печенья, галет,
запеченных фруктов.
Для равномерного распределения тепла используйте толь-
ко один противень (или решетку). Уровень расположения
противня выбирайте в зависимости от необходимости боль-
шего нагрева блюда сверху или снизу.
2. ВЕНТИЛИРУЕМАЯ ДУХОВКА
- Положение рукоятки G:
- Положение рукоятки N: любое между 50°C è Max
В духовке горит свет, работают оба нагревательных эле-
мента и вентилятор. Духовка нагревается до температу-
ры, заданной рукояткой термостата; выбранная
4. ДВОЙНОЙ ГРИЛЬ
- Положение рукоятки G:
- Положение рукоятки N: Max
В духовке горит свет и работает двойной нагревательный
элемент гриля, мотор вращает вертел. Этот гриль больше
обычного, его мощность на 50% превышает мощность про-
стого гриля. При работе двойного гриля воздействию теп-
ла подвергаются даже углы духовки.
Важно: при пользовании грилем всегда держите двер-
цу духовки закрытой. Это позволит вам получить превос-
ходные результы и сбережет электроэнергию (около 10%).
Помещайте решетку на верхние уровни (см. таблицу гл.
"Практические советы по приготовлению пищи в духовке").
Под решетку гриля поместите поддон для сбора жира.
5. ВЕНТИЛИРУЕМЫЙ ДВОЙНОЙ ГРИЛЬ
- Положение рукоятки G:
- Положение рукоятки N: любое между 50°C è 200°C
В духовке горит свет, работают нагревательные элементы
гриля и вентилятор. Направленное тепловое излучение
сочетается с принудительной циркуляцией воздуха внутри
духовки. Это предохраняет поверхность пищи от пригора-
ния и усиливает проникающую способность тепла.
Превосходные результаты достигаются при приготовлении
34
Page 35

шашлыков из мяса и овощей, колбасок, ребрышек, отбив-
ных из баранины и свинины, цыплят и т.д. Этот режим иде-
ален также для приготовления стейков из рыбы..
В этом режиме мотор также вращает вертел (при наличии),
на котором рекомендуется готовить мясное жаркое, домаш-
нюю птицу и т.д .
Внимание: при использовании гриля (режимы 3, 4, 5)
дверца духовки должна быть закрыта.
Индикатор термостата духовки (L)
Индикатор горит, когда духовка нагревается. Индикатор по-
гаснет, когда температура в духовке достигнет значения,
заданного рукояткой термостата. С этого момента индика-
тор начнет мигать, показывая, что термостат работает пра-
вильно, поддерживая в духовке постоянную температуру.
НЕОТДЕЛАННЫЕ ЧАСЫ CО СЧ¨ТЧИКОМ МИНУТ
Рукоятка таймера (M)
Чтобы завести таймер, поверните рукоятку M почти на один
полный оборот по часовой стрелке
щением рукоятки M установите желаемое время приго-
товления, совместив риску рукоятки с меткой, соответству-
ющей выбранному времени (в мин.).
Внимание: дверца духовки в процессе приготовления силь-
но нагревается, не позволяйте детям прикасаться к ней.
. Затем обратным вра-
Сч¸тчик минут
Для сч¸та минут устанавливается определ¸нное
время, от которого начинается отсч¸т наоборот.
Данная функция не позволяет следить за
включением и выключением духовки; она служит
только для оповещения с помощью звукового
сигнала об истечении времени.
Как правильно установить точное время
Духовка должна быть подключена к электрической
ñåòè.
Потяните рукоятку и поверните е¸ против часовой
стрелки до тех пор, пока не появится точное время.
Примечание: данные часы питаются от
электрической сети, поэтому в случае исчезновения
напряжения в сети часы остановятся и будут стоять
до тех пор, пока не появится напряжение.
Как установить сч¸тчик минут
Поверните рукоятку против часовой стрелки до тех
пор, пока указатель не будет установлен на
желаемое значение времени (внутренняя шкала);
данное значение Вы можете увидеть в окошке.
Отсч¸т времени начн¸тся незамедлительно.
Для того, чтобы прервать звуковой сигнал или для
того, чтобы использовать только часы, установите
указатель на символ .
35
Page 36

Практические советы
ó
Широкий диапазон функций духовки позволяет приготовить пищу
наилучшим способом. Со временем Вы приобретете собствен-
ный опыт, который позволит наиболее полно использовать
возможности оборудования. Кроме того, Вам помогут следую-
щие рекомендации:
Выпечка пирогов
Перед выпечкой пирогов всегда прогревайте духовку (около 10-
15 мин.). Обычно температура приготовления 160/200°C. Не
открывайте дверцу духовки во время выпекания, чтобы тесто не
осело. Тесто не должно быть слишком жидким, иначе время
приготовления может затянуться.
Общие замечания:
Если пирог слишком сухой:
в следующий раз повысьте температуру на 10°C
и сократите время приготовления.
Если пирог слишком сырой:
в следующий раз понизьте температуру на 10°C или
сократите количество жидкости при замешивании теста.
Если поверхность пирога слишком темная:
поместите форму на более низкий уровень, уменьшите
температуру и увеличьте время приготовления.
Если пирог хорошо пропечен снаружи, а внутри сырой:
сократите количество жидкости при замешивании теста,
уменьшите температуру и увеличьте время приготовления.
Если пирог пригорает к форме:
хорошо смажьте и посыпьте мукой форму.
Когда готовится сразу несколько блюд, блюда
доходят до готовности не одновременно:
меньшите температуру. Блюда, которые Вы готовите,
должны иметь одинаковое время приготовления.
Приготовление рыбы и мяса
Чтобы избежать пересушивания, готовьте мясо кусками не мень-
ше 1 килограмма. Когда готовите белое мясо, птицу или рыбу,
задавайте низкую температуру (150175°С). При приготовлении
красного мяса, которое должно быть хорошо пропеченным
снаружи и сочным внутри, на короткий промежуток времени по-
высьте температуру до 200220°С, а затем установите прежнее
значение. В основном чем больше жаркое, тем ниже температура
и дольше время приготовления. Положите мясо на середину ре-
шетки, а под нее поместите поддон для сбора жира. Поставьте
решетку на средний (центральный) уровень духовки. Если Вы
хотите увеличить количество тепла снизу, используйте нижний
уровень духовки. Для получения вкусной корочки поливайте мясо
растопленным жиром или обложите кусочками бекона, решетку
поместите в верхнюю часть духовки.
Приготовление на нескольких уровнях одновременно
Только режим 2 «Вентилируемая духовка» позволяет
готовить одновременно на двух решетках.
· В духовке имеется 5 уровней. При работе в режиме вентили-
руемой духовки используйте только два центральных уровня;
верхний и нижний уровни находятся в непосредственном кон-
такте с горячим воздухом, поэтому «деликатные» блюда на
них могут пригореть.
· Как правило используются 2-й и 4-й уровень (считая со дна),
причем 2-й уровень для блюд, требующих более высокой
температуры приготовления. Например, если Вы готовите
мясное жаркое одновременно с другими блюдами, поместите
жаркое на 2-й уровень, оставляя 4-й уровень для более
деликатных блюд.
· Если Вы одновременно готовите блюда с различными темпе-
ратурой и временем приготовления, установите среднюю
температуру, «деликатные» блюда разместите на 4-м уровне
и вынимайте первым блюдо с более коротким сроком приго-
товления.
· Поддон для сбора жира (глубокий противень) располагайте
снизу, а решетку сверху.
· Когда Вы готовите пиццу на двух уровнях, используйте
2-й и 4-й уровни при температуре 220°C. Перед помещением
пиццы в духовку, предварительно прогрейте ее (не менее 15
минут). Обычно на 4-м уровне приготовление идет медлен-
нее, поэтому сначала выньте пиццу со 2-го уровня, оставив
другую в духовке еще на несколько минут.
Использование гриля
Духовка имеет три различных режима работы гриля.
Для приготовления малых порций пищи используйте режим 3
«Гриль». При этом потребление энергии будет всего
1200 Ватт, но для малых порций пищи, таких как тосты, сэндвичи
и т.п., этого достаточно. Располагайте пищу в центре решетки,
т.к. работает только центральная часть верхнего нагреватель-
ного элемента. Пища, помещенная по углам решетки, останется
неприготовленной.
Режим 4 «Двойной гриль» позволяет жарить пищу на
всей поверхности решетки. Используйте этот режим для
равномерно распределенной пищи, которая должна быть одно-
родно прожарена.
Важно: для получения превосходных результатов и экономии
электроэнергии (около 10%) при пользовании грилем держи-
те дверцу духовки закрытой.
При использовании режимов гриля рекомендуется рукоятку
термостата устанавливать в максимальное положение это
наиболее эффективный способ применения гриля, использую-
щего инфракрасные лучи. Однако, при необходимости, термостат
можно установить на более низкую температуру простым
поворотом рукоятки к желаемой позиции.
При пользовании грилем помещайте решетку на верхние уровни
(4-й), на первый снизу уровень поместите поддон для сбора жира
Режим 5
быстрого приготовления, распределение температуры позволяет
не только запечь поверхность блюда, но и приготовить его
изнутри. Режим подходит для приготовления больших кусков
мяса или птицы. Кроме того, режим может использоваться для
подрумянивания поверхности блюда в конце приготовления.
Готовя в этом режиме, размещайте решетки на 2 или 3, считая
от дна уровнях духовки (см. табл. "Практические советы по
приготовлению пищи в духовке", а на 1-й уровень поместите
поддон для сбора жира.
При использовании данного режима с вертелом (только для
некоторых моделей) Вы также можете готовить некоторые блюда
на поддоне для сбора жира, помещенном на 1-й уровень,
например, картофель и пр.
Вентилируемый двойной гриль удобен для
36
Page 37

Использование стеклокерамической поверхности
Описание
Рабочая поверхность оборудована радиальными конфор-
ками, встроенными под поверхность как зоны нагрева, ко-
торые становятся красными во время использования.
A. Области для готовки (A).
Â. Индикаторы остаточного тепла показывают, что тем-
пература соответствующей зоны нагрева (конфорки)
выше 60°С, даже если нагревательный элемент уже вык-
лючен.
AA
B
Описание нагревательных элементов
Радиальные конфорки представляют собой круглые на-
гревательные элементы, которые нагреваются до красна
через 1020 секунд после включения.
Использование посуды на стеклокерамической
поверхности
Для достижения наилучших результатов при использовании
стеклокерамической рабочей поверхности соблюдайте сле-
дующие правила:
· Используйте кухонную посуду с горизонтальным и глад-
ким дном. Это обеспечит полный контакт дна посуды с
зоной нагрева. Использование кастрюль с деформиро-
ванным (выгнутым или вогнутым) дном недопустимо.
· Используйте кухонную посуду достаточного диаметра:
чтобы она полностью закрывала зону нагрева. Кроме
того, располагайте посуду точно над выбранной зоной
нагрева, что способствует наиболее эффективному ис-
пользованию тепла.
· Всегда проверяйте, чтобы дно кастрюль и сковород
было сухим и чистым. Это обеспечит хороший контакт
между рабочей поверхностью и кухонной посудой и
продлит срок их службы.
· Не пользуйтесь посудой, в которой готовили на газовой
плите. Концентрированное тепло от газовой горелки мо-
жет деформировать дно кухонной посуды, что не обес-
печит полный контакт посуды с рабочей поверхностью.
Рекомендации по использованию электрических конфорок
РУКОЯТКИ УПРАВЛЕНИЯ ЭЛЕКТРИЧЕСКИМИ
КОНФОРКАМИ (I)
Плиты могут быть оборудованы обычными, быстронагрева-
ющимися и автоматическими электрическими конфорками
в различных комбинациях (быстронагревающиеся конфор-
ки можно отличить по красному кружку в центре, автомати-
ческие по алюминиевому диску в центре).
Чтобы избежать потерь тепла и порчи посуды, рекомендуем
использовать посуду с плоским дном, диаметр которого не
превышает диаметр конфорки.
Таблица показывает соответствие между позицией рукоят-
ки и целью, для которой она используется.
Позиция Обычная или быстрая конфорка
0
1
2
3
4
5
6
Выключено
Приготовление овощей, рыбы
Варка картофеля, супов, гороха, фасоли
Тушение больших объемов пищи
Жаренье (средняя температура)
Жаренье (температура выше среднего)
Для быстрого поджаривания и кипячения
Зеленый индикатор электрических конфорок (H)
Индикатор горит, когда включена хотя бы одна электричес-
кая конфорка.
37
Page 38

Практические советы по приготовлению пищи в духовке
Позиция
рукоятки выбора
функций
духовки
1.
Статичная
духовка
2.
Вентилируемая
духовка
3.
Гриль
4.
Двойной гриль
5.
Вентилируемый
двойной гриль
Блюдо
Óòêà
Жаркое из говядины
Жаркое из свинины
Бисквиты
Торты
Пицца (на 2-х уровнях)
Лазанья
Баранина
Курица с картофелем
Скумбрия
Буженина
Сливовый пирог
Слойки с кремом (на 2-х уровнях)
Бисквиты (на 2-х уровнях)
Воздушный пирог (бисквит)
(на 1-м уровне)
—‘— (на 2-х уровнях)
Несладкие пироги
Рыба целая и кусками
Шашлык из кальмаров и креветок
Филе трески
Запеченные овощи
Бифштексы из телятины
Котлеты
Гамбургеры
Скумбрия
Блюда на вертеле
Телятина
Курица
Курица-гриль
Каракатица
Курица (на вертеле) +
картофель (на поддоне для
сбора жира)
Блюда на вертеле
Телятина
Курица
Баранина
Блюда на многошампурном
вертеле (только для некоторых
моделей)
Шашлыки из мяса
Шашлыки из овощей
Âåñ,
êã
1
1
1
1
1
1
1
1
1
1,5
1
0,5
0,5
0,5
1,0
1,5
1
1
1
1
1
1,5
1
1
1,0
2,0
1,5
1,5
1,5
-
1,5
1,5
1,5
1,0
0,8
Уровень
противня
снизу
3
3
3
3
3
2-4
3
2
2-4
2
2
2
2-4
2-4
3
2-4
3
4
4
4
3-4
4
4
3
4
-
2
2
-
2
-
-
-
-
-
Время
предварительного
разогрева духовки,
ìèí
15
15
15
15
15
15
10
10
10
10
10
10
10
10
10
10
15
5
5
5
5
5
5
5
5
5
5
5
5
5
5
5
5
5
5
5
Позиция
рукоятки
термостата,
Ñ°
200
200
200
180
180
220
200
180
180
180
180
170
190
180
165
165
200
Ìàõ
Ìàõ
Ìàõ
Ìàõ
Ìàõ
Ìàõ
Ìàõ
Ìàõ
Ìàõ
Ìàõ
200
200
200
200
200
200
200
Ìàõ
Ìàõ
Время
приготовления,
ìèí
65-75
70-75
70-80
15-20
30-35
20-35
30-35
50-60
60-75
50-55
55-60
40-50
25-35
10-15
25-30
25-30
25-30
8
4
10
8-10
15-20
20
7
20-25
70-870-80
55-60
30-35
70-75
70-75
70-80
70-80
70-80
40-45
25-30
NB: Время приготовления является приблизительным и может изменяться по Вашему усмотрению.
38
Page 39

Обслуживание и уход
Перед любой операцией по уходу и чистке отключайте
духовку и рабочую поверхность от электрической сети.
Духовка
Для продления срока службы оборудования необходимо
тщательно и регулярно его чистить, имея в виду, что:
· Эмалированные части и самоочищающиеся поверхно-
сти мойте теплой водой без применения абразивных и
разъедающих средств, которые могут испортить их.
· Изнутри духовку промывайте пока она еще не остыла
теплой водой с моющим средством, затем тщательно
ополосните и вытрите.
· Нержавеющая сталь может потерять свои свойства при
длительном контакте с жесткой водой или агрессивны-
ми чистящими средствами (содержащими фосфор). Ре-
комендуется компоненты из нержавеющей стали
промывать водой и вытирать насухо, не оставляя под-
теков.
· Регулярно очищайте панель управления от грязи и жира
неабразивной губкой или мягкой тканью, стараясь не по-
царапать эмалированные или блестящие металические
части.
Уход за рабочей поверхностью
Перед использованием рабочей поверхности ее необходи-
мо очистить влажной тряпочкой от грязи и остатков пищи.
Очищайте поверхность регулярно раствором теплой воды
и мягкого моющего средства. Периодически необходимо ис-
пользовать средства, предназначенные для чистки поверх-
ностей из керамического стекла. Сначала удалите все
остатки пищи и жира оконным скребком, предпочтительно
с бритвенным лезвием (не входит в комплект
поставки) или лезвием подобного типа .
Никогда не используйте жесткие губки (щетки) и абразив-
ные препараты. Кроме того, не должны применяться хими-
чески активные чистящие средства, предназначенные для
очистки духовок и удаления ржавчины.
Чистящие средства для
кер амической
поверхности
Скребки
Сменные лезвия
COLLO luneta
HOB BRITE
Hob Cle an
SWISSCLEANER
Где можно приобрести
Фирменные магазины,
универмаги, супермаркеты.
магазины электробытовой
техники, хозяйственные
магазины.
Замена лампы в духовке
(данная процедура не является гарантийным
ремонтом)
· Отключите духовку от сети, выключив многополярный
выключатель или (при наличии) выньте вилку из розетки.
· Снимите стеклянную крышку с держателя лампы.
· Выверните лампу (см. рис.) и замените ее лампой, вы-
держивающей нагрев до 300
ристиками:
- напряжение 230 Â,
- мощность 25 Âò,
- òèï Å14.
· Поместите стеклянную крышку держателя на место и
подключите духовку к сети.
î
С со следующими характе-
Очищайте поверхность пока она еще теплая, используя под-
ходящее чистящее средство и бумажные полотенца, затем
протрите ее влажной и сухой тканью.
Алюминиевая фольга, пластмасса или синтетические ма-
териалы, сахар или продовольственные продукты с высо-
ким его содержанием, плавятся на рабочей поверхности и
должны быть немедленно удалены скребком, пока поверх-
ность еще теплая.
Чистящие средства, особенно для стеклокерамики, остав-
ляют защитную пленку на поверхности, которая предотвра-
щает наращивание жира и пищевых остатков. Эта пленка
также служит для защиты поверхности от повреждений,
вызванных пищевыми продуктами с высоким содержанием
сахара.
39
Page 40

Merloni Elettrodomestici spa
Срок службы
10 ëåò
со дня изготовления
Производитель оставляет за собой право без предупреждения
вносить изменения в конструкцию, не ухудшающие
Некоторые параметры, приведенные в этой инструкции,
эффективность работы оборудования.
являются приблизительными.
Производитель не несет ответственности
за незначительные отклонения от указанных величин.
40
Page 41

K 3C0 M
Sporák
s multifunkèní troubou
Návod k instalaci a pouití
Váený zákazníku,
dìkujeme Vám, e jste si zakoupil výrobek spoleènosti MERLONI Elettro-
domestici, spa.
Pøi vybírání pøístroje peèlivì zvate, jaké èinnosti a funkce od pøístroje
poadujete. To, e výrobek nevyhovuje Vaim pozdìjím nárokùm,
nemùe být dùvodem k reklamaci. Pøed prvním pouitím si pozornì
pøeètìte pøiloený èeský návod, který dodává firma Merloni Elettrodomesti-
ci spa ke svým dováeným výrobkùm, a dùslednì se jím øiïte. Vekeré
výrobky slouí pro domácí pouití. Pro profesionální pouití jsou urèeny
výrobky specializovaných výrobcù. Vechny doklady o koupi a o
eventuálních opravách Vaeho výrobku peèlivì uschovejte pro poskytnutí
maximálnì kvalitního záruèního i pozáruèního servisu.
Dodrování tìchto zásad povede k Vaí spokojenosti. V pøípadì jejich
nerespektování vak nemùeme uznat pøípadnou reklamaci.
Doporuèujeme Vám po dobu záruèní lhùty uchovat pùvodní obaly k
výrobku.
Ne budete kontaktovat servisní støedisko, peèlivì prostudujte návod na
obsluhu a záruèní podmínky uvedené v záruèním listì. Pokud bude pøi
opravì zjitìno, e závada nespadá do záruky, uhradí vzniklé náklady
zákazník.
Upozornìní
Váený zákazníku, návod, který jste obdrel k naemu výrobku, vychází z
veobecného návodu pro celou výrobkovou øadu. Z tohoto dùvodu mùe
dojít k situaci, e nìkteré funkce, ovládací prvky a pøísluenství nejsou
urèeny pro vá výrobek. Dìkujeme za pochopení.
41
CZ
Page 42

Dùleité
Aby byla zajitìna øádná ÚÈINNOST a BEZPEÈNOST tohoto zaøízení, doporuèujeme Vám:
l Kontaktovat servisní støedisku, které je autorizováno výrobcem
l Vdy pouívat originální náhradní díly.
1 Tento spotøebiè je urèen k neprofesionálnímu pouití
14 Pøi pouívání el. spotøebièù je tøeba dodret nìkolik základních
v domácnostech.
2 Pøed pouitím spotøebièe si peèlivì pøeètìte pokyny
uvedené v tomto návodu k obsluze, protoe zde naleznete
vechny pokyny nezbytné pro zajitìní bezpeèné instalace,
pouití a údrby spotøebièe. Tento návod k obsluze mìjte
vdy po ruce.
3 Ihned po vybalení spotøebièe pøekontrolujte jeho stav. Pokud
máte nìjaké pochybnosti, spotøebiè nepouívejte a kontaktujte
nejblií servisní støedisko. Nikdy nenechávejte obaly od výrobku
(napø. plastové pytle, polystyrénové díly, høebíky atd.) v dosahu
dìtí, jeliko mohou být zdrojem nebezpeèí
4 Spotøebiè smí být nainstalován pouze kvalifikovaným technikem
15 Pøed èitìním nebo provádìním údrby vdy vytáhnìte síový
v souladu s poskytnutými instrukcemi. Výrobce se pøedem zøíká
odpovìdnosti za pøípadné kody na majetku nebo zranìní osob
16 Pokud povrch sklokeramické varné desky praskne, ihned
nebo zvíøat, které vzniknou nesprávným nainstalováním
spotøebièe.
5 Z elektrického hlediska je spotøebiè bezpeèný jen tehdy, je-li øádnì
uzemnìn a zapojen do zásuvky s funkèním ochranným vodièem
tak, jak to vyadují pøísluné pøedpisy. Vdy se ujistìte, e
17 Pokud zaøízení vyøazujete z provozu, zabezpeète jej tím,
uzemnìní je úèinné; máte-li nìjaké pochybnosti, obrate se na
kvalifikovaného elektrikáøe, který systém zkontroluje. Výrobce
nenese odpovìdnost za kodu zpùsobenou systémem, který
nebyl uzemnìn.
18 Sklokeramická varná deska je odolná proti teplotním výkyvùm a
6 Pøed zapojením spotøebièe do sítì se pøesvìdète, e specifikace
uvedená na typovém títku odpovídá specifikaci elektrorozvodné
nebo plynorozvodné sítì ve Vaí domácnosti.
7 Zkontrolujte, zda je elektrická pøípojka, vèetnì pojistky,
dostateènì dimenzována na zátì, kterou spotøebiè pøedstavuje
19 Berte na vìdomí, e varná deska je jetì minimálnì pùl hodiny
(uvedeno na typovém títku). Máte-li jakékoliv pochybnosti,
kontaktujte kvalifikovaného odborníka.
8 Do síového pøívodu je tøeba zaøadit vícepólový vypínaè, jeho
kontakty musí být ve vypnutém stavu alespoò 3 mm od sebe.
20 Na sklenìný povrch varné desky neumisujte ádné pøedmìty.
21 Varnou zónu nezapínejte, je-li ne jejím povrchu poloen arch
9 Nelze-li vidlici síového pøívodu zapojit do elektrické zásuvky,
nechejte zásuvku nahradit vhodnìjím modelem. Kvalifikovaný
technik by mìl zároveò zkontrolovat, zda je prùøez síového
22 Nedotýkejte se horkého povrchu desky.
23 Pouíváte-li v blízkosti varné desky malá elektrická zaøízení,
pøívodu vhodný pro napájení spotøebièe. Pouití adaptérù,
vícenásobných zásuvek a/nebo prodluovacích kabelù se
nedoporuèuje. Pokud se nelze jejich pouití vyhnout, pouijte
24 Dbejte na to, aby rukojeti pánví a hrncù byly vdy umístìny nad
vdy pouze jednoduché nebo vícenásobné adaptéry nebo
prodluovací kabely, které vyhovují poadavkùm platných
25 Nikdy nenechávejte varnou zónu zapnutou, ani by na ní stála
bezpeènostních norem. V tìchto pøípadech nikdy nepøekraèujte
maximální bìnou výkonnost uvedenou
na jednoduchém adaptéru nebo prodluovacím kabelu
26 Upozornìní pøed prvním pouitím: Tmel pouitý k lepení
a maximální výkon uvedený na vícenásobném adaptéru.
10 Nepouíváte-li spotøebiè, vytáhnìte jeho síový pøívod ze zásuv-
ky, vypnìte vypínaè napájení a zavøete kohout na plynové pøípojce.
11 Nikdy nezakrývejte ventilaèní tìrbiny a tìrbiny pro odvod
pøebyteèného tepla.
27 Bìhem doby, kdy je zaøízení vprovozu, jsou topná tìlesa
12 Nikdy nevymìòujte síový pøívod tohoto spotøebièe. V pøípadì
pokození nebo výmìny síového pøívodu se vdy obrate
na servisní støedisko autorizované výrobcem.
28 Jestlie spotøebiè nepouíváte, zkontrolujte, zda jsou regulaèní
13 Tento spotøebiè musí být pouíván k úèelùm, pro které je urèen.
Jakékoliv jiné pouití (napø. pro vytopení místnosti) je povaováno
29 Varování: horké nádoby nebo pøedmìty zhoølavého materiálu nik-dy
za nesprávné a tedy nebezpeèné.
Výrobce nenese odpovìdnost za kody zpùsobené nesprávným
30 Je-li sporák umístìn na soklu, proveïte vechna nezbytná
a nezodpovìdným pouitím spotøebièe.
pravidel. Ta následující jsou obzvlátì dùleitá:
l Nikdy se nedotýkejte spotøebièe, máte-li mokré ruce nebo nohy.
l Nikdy se spotøebièem nemanipulujte, jste-li naboso.
l Nepouívejte prodluovací kabely, je-li jejich pouití nezbytné,
manipulujte s nimi opatrnì.
l Neodpojujte spotøebiè ze zásuvky tahem za kabel síového
pøívodu nebo za vlastní spotøebiè.
l Spotøebiè nevystavujte pùsobení atmosférických vlivù (dé,
pøímé sluneèní záøení atd.).
l Zabraòte dìtem a nezpùsobilým osobám, aby se dostaly do
styku se spotøebièem bez dozoru.
pøívod spotøebièe ze zásuvky nebo vypnìte hlavní vypínaè.
vytáhnìte vidlici síového pøívodu ze zásuvky. Obrate se pouze
na servisní støedisko autorizované výrobcem a vyadujte pouití
originálních náhradních dílù, jinak by mohlo dojít ke sníení
bezpeènosti zaøízení
e odøíznete síový pøívod (nejprve jej odpojte ze sítì). Také
zabezpeète vechny potenciálnì nebezpeèné èásti zaøízení pøed
dìtmi, které by si svyøazeným zaøízením mohly hrát.
nárazùm. Pøesto mùe být pokozena nebo dokonce znièena
ostrými nástroji nebo noi. V takovém pøípadì vytáhnìte vidlici
síového pøívodu ze zásuvky a obrate se
na místní servisní støedisko.
po vypnutí teplá. Nepokládejte proto do její blízkosti ádné nádoby
nebo jiné pøedmìty.
aluminiové fólie nebo pøedmìt zplastu.
zabraòte tomu, aby se síový pøívod zaøízení dostal do styku se
zahøátým povrchem varné desky.
varnou deskou. Zabráníte tak jejich shození.
nìjaká nádoba. Varná zóna se bìhem okamiku zahøeje
na maximální teplotu, co mùe pokodit topný prvek.
sklenìné desky mùe na povrchu zanechat mastné skvrny.
Doporuèujeme je pøed pouitím zaøízení vyèistit obyèejným
(neabrasivním) èistícím prostøedkem. Zpoèátku ucítíte slabý
zápach pálené gumy, který se ale za chvíli pøestane íøit.
a nìkteré èásti dvíøek trouby zahøáté na vysokou teplotu.
Zabraòte tomu, aby se dìti dostaly do blízkosti dvíøek trouby.
knoflíky nastaveny do polohy l/o.
nevkládejte do prostoru pod troubou slouícího kohøívání pokrmù.
opatøení zabraòující tomu, aby sporák ze soklu sklouzl.
CZ
42
Page 43

Instalace
Následující pokyny jsou urèeny pro odborné pracovníky,
aby podle platných ustanovení mohli provádìt instalaci,
seøízení a technickou údrbu zaøízení.
Dùleité: Pøed provádìním jakýchkoli seøizovacích prací
nebo údrby odpojte zaøízení od sítì.
Umístìní
Zaøízení mùe být umístìno vedle kuchyòského nábytku,
který sporák nepøevyuje. Aby byla instalace sporáku
provedena správnì, je zapotøebí uèinit následující
opatøení:
a) Kuchyòské skøíòky umístìné vedle sporáku a pøevy-
ující sporák musí být umístìny alespoò 200 mm
od okraje sporáku.
b) Odsavaèe par musí být instalovány dle poadavkù
uvedených vnávodu kjejich obsluze. Vkadém pøípadì
musí být odsavaè umístìn alespoò 650 mm nad
sporákem.
c) Nástìnné kuchyòské skøíòky umístìné vedle odsavaèe
par je zapotøebí umístit do výky alespoò 420 mm nad
úrovní varné desky (viz obrázek).
d) Má-li být sporák umístìn pod nástìnnou kuchyòskou
skøíòkou, spodek skøíòky musí být umístìn ve výce
alespoò 700 mm nad sporákem, viz obrázek.
e) Výøez pro skøíòku sporáku by mìl mít rozmìry uvedené
na obrázku.
HOOD
H05RR-F 5x2.5 CEI-UNEL 35363
400 3N
400V 2N
H05RR-F 4x2.5 CEI-UNEL 35363
230V 1N
H07RN-F 3x4 CEI-UNEL 35364
1 2
R
R
S
12345
R
1
2
3
T
S
3
N
4
N
4
5
N
5
Feeding cable installation
Instalace napájecího kabelu
Otevøení svorkovnice:
l Vyroubujte roub V
l Tahem otevøete kryt svorkovnice
Pøi zapojování napájecího kabelu postupujte následovnì:
l Podle poadovaného zpùsobu zapojení nastavte malý
propojovací mùstek A-B (viz obr. 3).
Poznámka: Propojky jsou výrobcem nastaveny na jed-
nofázový rozvod 230 V (kontakty 1-2-3 jsou navzájem
propojeny). Mùstek 4-5 je umístìn ve spodní èásti
svorkovnice.
l Podle obrázku zapojte vodièe (N a ), utáhnìte
pøísluné rouby.
l Pøipojte zbývající vodièe na svorky 1-2-3.
l Kabel upevnìte do speciální kabelové svìrky, zavøete
kryt svorkovnice a zajistìte roubem V.
Min. mm.
600
mm.
420
Min.
mm. with hood
420
650
Min. mm.
min.
mm. without hood
700
min.
Vyrovnání
Zaøízení mùete dokonale vyrovnat pomocí dodávaných
nastavitelných noièek (viz obr. 1), které zaroubujete
do závitù vrozích podstavce sporáku.
Elektrické pøipojení
Napájecí kabel, nebo jeho rozmìr závisí na pøipojení
(viz následující diagram).
3
2
1
V
B
A
N
Pøipojení napájecího kabelu ksíti
Na síový pøívod pøipevnìte vhodnou síovou vidlici, která
odpovídá zátìi uvedené na typovém títku. Pokud
zaøízení musí být pøipojeno pøímo ksíti, je tøeba se mezi
pøístroj
a sí zapojit vícepólový vypínaè (jistiè) sminimální
vzdáleností kontaktù vrozpojeném stavu 3 mm, který je
dimenzován na pøísluné zatíení a odpovídá platným
normám (ochranný vodiè uzemnìní nesmí být vypínaèem
pøeruen). Síový pøívod musí být umístìn tak, aby
na ádném místì nebyl vystaven teplotì, která by byla
o 50° vyí, ne je teplota vpokoji.
Pøed provedením pøipojení se pøesvìdèete:
l zda je dostateènì dimenzována elektrická pøípojka
(pojistky, jistièe), zjitìné údaje porovnejte shodnotami
na typovém títku;
l zda je vbytovém (domovním) rozvodu zajitìno øádné
uzemnìní odpovídající platným pøedpisùm;
l zda je kzásuvce, popø. vícepólovému vypínaèi
nainstalovaného zaøízení snadný pøístup.
43
CZ
Page 44

Technické údaje
Trouba
Rozmìry 39 × 41 × 34 cm
Objem 54 litrù
Max. pohlcení tepla vtroubì 2100 W
Sklokeramická varná deska
Pøední levá varná zóna 1200 W
Zadní levá varná zóna 1700 W
Zadní pravá varná zóna 1200 W
Pøední pravá varná zóna 1700 W
Max. pohlcení tepla keramickou varnou deskou 5800
W
Napájecí napìtí a frekvence
230V/400V 3N AC 50 Hz
Vnitøní rozmìry prostoru pro ohøev pokrmu
íøka: 42 cm
Hloubka: 44 cm
Výka: 23 cm
Tento spotøebiè splòuje poadavky následujících
pøedpisù Evropského spoleèenství:
- 73/23/EEC z 19. 2. 1973 (Slaboproud) a následujících
úprav
- 89/336/EEC z 3. 5. 1989 (Elektromagnetická kompati-
bilita) a následujících úprav
- 93/68/EEC z 22. 7. 1993 a následujících úprav
104
60
50
85/90
Sporák smultifunkèní troubou
D Plech na odkapávání, popø. peèící plech
E Ovládací panel
F Nastavitelné nohy
G Knoflík volby peèících reimù
H Zelená kontrolka (Indikátor zahøívání)
K Peèící rot
I Regulaèní knoflíky elektrických plotýnek
L Indikátor zahøívání trouby
M Tlaèítko èasovaèe
N Knoflík pro nastavení teploty v troubì
Q Stylové hodiny a èasovaè
L
H
K
E
D
F
L
H
CZ
M
GN
I
44
Q
GN
I
Page 45

Návod k pouívání zaøízení
Rùzné peèící reimy, kterými je trouba vybavena, lze volit
pomocí regulaèních knoflíkù umístìných na ovládacím
panelu.
Pozor: Pøed prvním pouitím trouby a grilu troubu pøiblinì
na pùl hodiny zapnìte naprázdno. Pøesvìdète se, zda
uvnitø trouby nic není a termostat nastavte na nejvyí
teplotu. Otevøete dvíøka a v místnosti zajistìte øádné
vìtrání. Trouba se musí takto vypálit. Moná, e ucítíte
zápach, protoe se vypalují zbytky konzervaèních èinidel,
které troubu a gril chránily bìhem skladování.
Pozor: Spodní patro trouby pouívejte pouze tehdy,
pøipravujete-li pokrm vreimu grilování na roni (je-li jím
sporák vybaven). Pøi pøípravì pokrmù vjakémkoliv jiném
reimu peèení nikdy nepouívejte spodní patro a nikdy
nestavte nádoby s pokrmem pøímo na dno trouby. Dolo
by kpokození glazury na peèící nádobì. Peèící nádoby
(nádoby, alobal apod.) vdy umisujte na rot zasunutý
do dráek po stranách trouby. Rot je souèástí
dodávaného pøísluenství.
Knoflíky pro ovládání trouby
Trouba 5 programù v sobì spojuje výhody tradièní peèící
statické trouby s pøednostmi moderního horkovzduného
ohøevu s nuceným obìhem horkého vzduchu.
Vyuití trouby 5 programù je mnohostranné, mùete si
volit mezi 5 rùznými peèícími reimy. Vech 5 peèících
reimù trouby lze nastavit pomocí knoflíkù umístìných na
ovládacím panelu:
G - knoflík výbìru peèících reimù;
N - knoflík pro nastavení teploty vtroubì.
Pokud je knoflík výbìru peèícího reimu vjiné poloze ne
o, zapne se osvìtlení trouby. Pøi nastavení knoflíku
do polohy mùete osvìtlit prostor trouby bez zapínání
topných tìles. Bìhem doby, kdy je zapnuto osvìtlení
trouby, se má za to, e je trouba pouívána. Osvìtlení
trouby zùstává zapnuto po celou dobu, co je trouba
pouívána.
1. Statický reim
- Poloha knoflíku G:
- Poloha knoflíku N: mezi 50°C a Max
Pokud je vybrána tato poloha, zapne se osvìtlení trouby,
horní a spodní topná tìlesa zaènou høát. Vtomto reimu
pracuje trouba pøesnì tak, jako trouba Vaí babièky, i kdy
toto zaøízení samozøejmì dosahuje lepího rozloení tepla
a úspory energie. Trouba se statickým ohøevem toti dosud
nebyla pøekonána. Velmi vhod pøijde, pøipravujeteli jídla
o dvou nebo více slokách, napø. vepøové ebírko se zelím,
duené maso apod. Vynikajících výsledkù dosáhnete pøi
pøípravì pokrmù zmasa, napø. dueného èi vaøeného
masa, guláe, zvìøiny a vepøové peèenì, nebo se musí
pøipravovat pomalu a neustále podlévat. Je to také nejlepí
metoda peèení cukroví, èajového peèiva, jako i ovocných
dezertù. Je to také nejlepí metoda peèení, pokud
pouíváte nádoby svíkem speciálnì urèené pro peèení
vtroubì. Ve statickém reimu pøipravujte pokrm pouze
na jednom pekáèi, nebo více pekáèù poruí rovnomìrné
rozloení teploty uvnitø trouby. Zvolte optimální úroveò
vzávislosti na tom, zda je pro pøípravu pokrmu spíe
vyadováno teplo pùsobící odspodu nebo svrchu.
2. Horkovzduný reim
- Poloha knoflíku G:
- Poloha knoflíku N: mezi 50°C a Max
Vzhledem ktomu, e díky cirkulaci zajitìné vìtrákem
umístìným vzadu pùsobí horký vzduch ve vech èástech
trouby stejnì, je výsledný pokrm upeèený dozlatova,
stejnomìrnì a dokonale. Vtomto reimu lze souèasnì
pøipravovat více pokrmù (za pøedpokladu, e tyto vyadují
pøiblinì stejnou dobu peèení). Mùete péci maximálnì
na dvou rotech najednou viz odstavec Vaøení na
jednom nebo více rotech najednou. Tento reim je
vhodný pro pøípravu gratinovaných pokrmù nebo pokrmù,
které vyadují dlouhé peèení, napø. lasagne, tìstovinový
koláè, kuøe a peèené brambory apod.
Navíc Vám tento reim umoòuje sníit teplotu peèení,
nebo teplo pùsobí uvnitø trouby rovnomìrnì. Maso tak
bude mnohem avnatìjí, zùstane mìkké a neztratí na
objemu. Výbornì se tento reim hodí té kpøípravì ryb.
Vystaèíte svelmi malým mnostvím oleje, ryba zùstane
vzhledovì i chuovì takøka nezmìnìna. Výborných
výsledkù dosáhnete také sduenou zeleninou: kapustou,
èervenou øepou, mrkví, tykvemi, lilky, paprikami a rajèaty.
Zákusky: tento reim je ideální pro pøípravu kynutých
koláèù. Horkovzduný reim mùete té pouívat pro
rozmrazování masa, ryb a chleba. Staèí nastavit teplotu
mezi 80°C a 100°C. Pøi rozmrazování choulostivìjích
pokrmù nastavte teplotu na 50°C nebo vyuijte pouhé
cirkulace vzduchu o pokojové teplotì. Vtakovém pøípadì
nastavte termostat na 0°C.
3. Gril
- Poloha knoflíku G:
- Poloha knoflíku N: Max
Pøímým pùsobením vysoké teploty se maso pøi grilování
rychle opeèe dohnìda. Tak se zabrání ztrátì tekutin
zmasa, které je pak vláèné a avnaté. Grilování je
vhodnou úpravou pokrmù, je vyadují vysokou teplotu
na povrhu: telecí èi hovìzí steaky, ebírka, filé, hamburgery
atd.
4. Dvojitý gril
- Poloha knoflíku G:
- Poloha knoflíku N: Max
Tento gril je vìtí ne bìný a vyniká zcela novým
provedením: z hlediska monosti pøípravy pokrmù má
kapacitu o 50% vyí. Dvojitý gril nezná tzv. rohové zóny,
tj. místa, kde døíve teplo pùsobilo nerovnomìrnì.
Dùleité: Bìhem doby, kdy pouíváte gril, je tøeba
ponechat dvíøka trouby zavøená. Dosáhnete tak lepích
výsledkù a uetøíte energii (cca 10%).
Pokud pouíváte gril, umístìte peèící rot na horní patra
(viz tabulka pøípravy pokrmù). Pod peèící rot umístìte
plech zachycující odkapávající omastek. Zabráníte tak,
aby se tuk pøipaloval na dnì trouby.
5. Dvojitý gril sventilací
- Poloha knoflíku G:
- Poloha knoflíku N: mezi 50°C a 200°C
Tento reim spojuje výhody jednosmìrného sálavého tepla
a nuceného obìhu vzduchu vtroubì, který zabraòuje
spálení pøipravovaného pokrmu a zajiuje jeho optimální
prohøátí.
45
CZ
Page 46

Vynikajících výsledkù dosáhnete pøi pouití tohoto reimu
kpøípravì mletého masa, zeleniny, klobás, vepøových
ebírek, jehnìèích kotlet, kuøat, køepelek a vepøových
øízkù. Gril sventilací je velmi vhodný i pro úpravu rùzných
rybích specialit, napø. steakù zmeèouna, tuòáka nebo
plnìné chobotnice.
U této funkce se motor grilu (je-li jím trouba vybavena)
také otáèí. Pøípravu pokrmu vtomto reimu je obzvlátì
vhodné pouít pøi pøípravì pokrmù zmasa jako napø.
ledvin, drùbee apod.
Dùleité: Bìhem doby, kdy pouíváte gril (reim 3, 4, 5),
je tøeba ponechat dvíøka trouby zavøená.
Stylové hodiny a èasovaè
Indikátor zahøívání trouby (L)
Tato kontrolka svítí v prùbìhu ohøívání trouby a zhasne
tehdy, jakmile je v troubì dosaena poadovaná teplota.
Støídavé rozsvìcování a zhasínání kontrolky od tohoto
okamiku svìdèí o tom, e termostat pracuje správnì a
e teplota v troubì bude udrována v poadované výi.
Pozor
Zabraòte dìtem, aby se dotkly dvíøek trouby, protoe ta
jsou bìhem provozu trouby zahøátá na vysokou teplotu.
Knoflík èasovaèe
Abyste mohli tuto funkci pouít, je tøeba knoflík M otoèit
o jednu otáèku proti smìru hodinových ruèièek , poté
pohybem vopaèném smìru nastavte ukazatel na
panelu na znaèku, která odpovídá poadovanému poètu
minut na knoflíku.
Reim èasového spínaèe
Èasový spínaè pracuje na principu odpoèítávání
nastaveného èasu. Tento typ vak funguje pouze jako
hodiny, troubu nezapíná ani nevypíná. Pouze oznámí
uplynutí nastaveného èasu zvukovým signálem.
Jak nastavit aktuální èas
Trouba musí být zapojena do zásuvky.
Vytáhnìte knoflík a jeho otáèením proti smìru hodinových
ruèièek naøiïte èas.
Poznámka: Hodiny jsou elektrické. Proto se vpøípadì
výpadku sítì zastaví a spustí se a s obnovením napájení.
Proto je tøeba je v takovém pøípadì znovu naøídit.
Jak nastavit èasový spínaè
Knoflíkem otáèejte proti smìru hodinových ruèièek tak
dlouho, a ukazatel ukáe na poadovanou hodnotu (podle
vnitøní stupnice). Èas je jasnì vidìt prùhledným okénkem
na samotném ukazateli. Nastavený èas se zaène ihned
odpoèítávat. Bzuèák vypnete, resp. zvolíte reim, v nìm
budou fungovat pouze hodiny, nastavením ukazatele na
symbol .
CZ
46
Page 47

Praktické rady pøi peèení
Trouba Vám nabízí rùzné zpùsoby umoòující pøipravit jakýkoliv
druh pokrmu co nejlepím zpùsobem. Postupem èasu se jistì
nauèíte maximálnì vyuívat vech výhod tohoto vestranného
sporáku. Následující pokyny jsou pouze orientaèní, vpøípadì
potøeby je mùete obmìòovat.
Peèení koláèù
Sladké peèivo vdy vkládejte a do vyhøáté trouby (po 10 - 15ti
minutách pøedehøevu). Vdy poèkejte, a se trouba zahøeje.
Bìná teplota uvnitø vyhøáté trouby je 160°C/200°C. Bìhem
peèení neotevírejte dvíøka trouby, koláè by mohl klesnout.
Obecnì platí:
Hotové peèivo je pøíli suché
Zvyte teplotu o 10°C a zkrate dobu peèení.
Dort se slehl
Pouijte hustí tìsto nebo snite teplotu o 10°C.
Hotové peèivo je na povrchu pøíli tmavé
Pøi peèení peèivo umístìte do nií polohy, snite
teplotu a prodlute dobu peèení.
Tìsto je zvenèí dobøe upeèeno, ale uvnitø zùstává
lepivé.
Pouijte hustí tìsto, snite teplotu a prodlute dobu
peèení
Tìsto se pøilepilo ke stìnám formy (pekáèe)
Nádobu dobøe vymate a vysypte strouhankou nebo
moukou.
Pøi peèení na více rotech (v horkovzduném
reimu) nejsou vechny pokrmy hotové stejnì
rychle
Nastavte nií teplotu. Není nutné vyndávat z trouby
vechny pokrmy najednou.
Peèení ryb a masa
Pro úpravu bílého masa, drùbee a ryb pouívejte nií teploty
(150°C 175°C). Pøipravujeteli vtroubì èervené maso a
pøejeteli si, aby bylo na povrchu øádnì propeèené, ale uvnitø
zùstalo avnaté, zaènìte pøi vyí teplotì (200°C a 220°C) a
po krátké dobì ji snite. Obecnì platí, e èím je peèenì vìtí,
tím nií teplotu a delí dobu peèení je tøeba pouít. Maso ulote
doprostøed rotu a podlote odkapávacím tácem na stékající
omastek. Rot zasuòte do prostøedních dráek. Pøejeteli si,
aby více tepla pùsobilo zespod, pouijte první patro.
Pøíprava pokrmù na více rotech najednou
Potøebujete-li pøipravovat pokrm na dvou rotech najednou,
pouijte reim Horkovzduný (nastavení 2), nebo jde
o jediný reim, který tuto pøípravu umoní.
l Trouba má 5 rùzných úrovní peèení. Peèete-li pokrm
vhorkovzduném reimu, pouijte pouze dvì prostøední
patra: pokrm umístìný na horní nebo spodní úrovni by byl
pøímo vystaven pùsobení horkého vzduchu a mohlo by dojít
kjeho pøipálení.
l Veobecnì øeèeno pouívejte úrovnì 2 a 4 odspodu, pøièem
pokrm vyadující vyí teplotu umístìte na úroveò è. 2.
Napøíklad, pøipravujete-li souèasnì peèeni a nìjaký jiný
pokrm, umístìte peèeni na úroveò 2 a druhý pokrm vyadující
nií teplotu peèení na úroveò 4.
l Pokud peèete najednou dva rùzné pokrmy, které vyadují
rùznou dobu peèení a teplotu, nastavte prùmìrnou teplotu a
pokrm, který vyaduje nií teplotu peèení, umístìte na
úroveò è. 4. Pokrm vyadující kratí dobu peèení vyjmìte z
trouby døív.
l Pekáèe umísujte na nejnií úroveò a pokrmy, které mají
být grilovány, na úroveò nejvyí;
l Pokud peèete dvì pizzy najednou, nastavte teplotu 220° C.
Ne pizzy vloíte do trouby, troubu pøedehøejte (asi 15 minut).
Pizza umístìná na ètvrté úrovni vyaduje delí dobu peèení.
Proto nejprve ztrouby vyjmìte pizzu umístìnou na druhé
úrovni a pizzu umístìnou na ètvrté úrovni vyjmìte ztrouby
a po uplynutí nìkolika minut.
Pouití grilu
Trouba nabízí dva rùzné reimy grilování. Pro grilování meních
porcí postaèí reim Gril (nastavení 3). Pøi tomto nastavení
se topné tìleso zapne na výkon pouhých 1200 W, co pro mení
porce naprosto staèí. Napø. u sendvièù, toastù èi párkù jsou
výsledky vynikající.
Pokrm polote na grilovací rot doprostøed, protoe v tomto
reimu vyzaøuje jen prostøední úsek horního topného tìlesa
a pokrm umístìný v rohu by zùstal nedovaøený.
Nastavení 4 Dvojitý gril odpovídá reimu, v nìm
mùete pøi grilování vyuít celou plochu rotu. Pokrm musí být
rozloen na celé ploe rotu stejnomìrnì. Docílíte krásného
zabarvení dozlatova.
Dùleité: Pøipravujete-li pokrm vreimu grilování,
ponechejte dvíøka trouby zavøená. Nejene docílíte lepích
výsledkù, ale také uspoøíte cca 10% energie.
Pøi pouívání jednoho z grilovacích reimù se doporuèuje nastavit
na termostatu maximální teplotu, nebo gril vyuívá pøenosu
tepla sáláním a pøi maximální teplotì je i vyzaøování nejúèinnìjí.
Samozøejmì mùete na termostatu nastavit i nií teplotu, je-li
tøeba.
Pøi grilování umístìte rot na ètvrtou úroveò (viz tabulka) a
zásadnì pouívejte odkapávací plech umístìný pod rotem,
aby nedolo ke zneèitìní dna trouby odkapávajícím omastkem.
Reim Dvojitý gril s ventilací (nastavení 5) je velice
uiteèný pøi rychlém grilování pokrmu. Rozloení tepla umoòuje
nejen zabarvit pokrm krásnì dozlatova, ale také dolní èást
pokrmu uvaøit. Tento reim je vhodné pouít pøi grilování vìtích
porcí masa nebo drùbee bez grilu. Tento reim je dále vhodné
pouít k docílení krásného zabarvení pokrmu dozlatova po
uvaøení pokrmu
Pokud pouíváte tento reim, umístìte rot na druhou nebo
tøetí úroveò odspodu (viz tabulka). Na první úroveò odspodu
umístìte plech, který bude zachycovat odkapávající tuk a
zabraòovat tak jeho pøipalování na dnì trouby. Pokud pouíváte
tento reim ve spojení sotoèným rotem (pouze u nìkterých
modelù), mùete také pøipravovat pokrm na plechu urèeném
pro zachycení odkapávajícího tuku napø. peèené brambory
47
CZ
Page 48

Pokyny k pouívání keramické varné desky
Popis
Varná deska je vybavena varnými zónami pracujícími
na bázi sálavého tepla. Topná tìlesa jsou umístìna pod
povrchem keramické desky, vzapnutém stavu èervenì
svítí.
A. Varná zóna
B. Kontrolka udávající, zda je pøísluná varná zóna
vprovozu, svítí i po vypnutí plotýnky/varné zóny, dokud
její teplota pøesahuje 60°C.
AA
B
Popis topných prvkù
Varné zóny se sálavým teplem jsou tvoøeny kruhovým
topným prvkem. Èervené svìtlo se na nich rozsvítí a po
zhruba 10 20 sekundách po zapnutí.
Pouívání keramické varné desky
Chceteli svarnou deskou dosahovat optimálních
výsledkù, øiïte se pøi pøípravì pokrmù následujícími
pokyny:
l Pro vaøení na sklokeramické varné desce lze pouívat
vechny typy pánví a hrncù. Jejich dno ovem musí
být perfektnì rovné. Èím silnìjí je dno pánve nebo
hrnce, tím lépe je teplo rozloeno.
l Pouívejte nádoby s odpovídajícím prùmìrem. Nádoba
by mìla pokrýt celou plochu varné zóny, aby bylo
maximálnì vyuito uvolòované teplo.
l Ujistìte se, e dno nádoby je suché a èisté. Zajistíte
tak lepí kontakt a delí ivotnost varné desky i samot-
ného nádobí.
l Na keramické desce nevaøte nikdy v nádobí, které
pouíváte na plynovém sporáku. Intenzivní ár zply-
nového hoøáku mùe toti zdeformovat dno nádoby.
Ta pak pøi vaøení na keramické desce nebude
dosahovat poadovaných výsledkù.
Praktické rady pøi pouívání elektrických plotýnek
Regulaèní knoflíky elektrických plotýnek (I)
Sporáky mohou být vybaveny rùznými kombinacemi
standardních, rychlých a automatických plotýnek (ry-
chlé plotýnky mají ve støedu èervenou teèku, automatické
hliníkový kotouè).
Abyste zamezili úniku tepla nebo pøípadnému pokození
plotýnek, doporuèujeme pouívat nádoby srovným dnem
a prùmìrem, minimálnì stejnì velkým, jako je prùmìr
plotýnky.
Vtabulce jsou uvedeny pøíklady pouití plotýnek pøi
nastavení regulaèních knoflíkù na odpovídající stupeò.
Poloha Normální nebo rychlovarná plotýnka
0
1
2
3
4
5
6
Indikátor zahøívání elektrické plotýnky (H)
Tato kontrolka svítí v prùbìhu ohøívání elektrické plotýnky.
Vypnuto
Zelenina, ryby
Brambory (duené), polévky, cizrna,
fazole
Vaøení velkých mnoství jídla a eintopfù"
Peèení (støední)
Peèení (prudí)
Opékání dozlatova nebo rychlé zahøátí
na provozní teplotu
CZ
48
Page 49

Praktické rady pøi peèení
Poloha
knoflíku
volby reimu
1 Statický
reim
2 Horko-
vzduný
reim
Pøipravovaný pokrm Hmot
nost
(kg)
Kachna
Hovìzí peèenì
Vepøová peèenì
Snìhové peèivo
Suenky
Pizza (na 2 úrovních)
Lasagne
Jehnìèí
Kuøe + brambory
Makrela
Prama
vestkový koláè
Krémové lehké peèivo
(na 2 úrovních)
Cukroví (na 2 úrovních)
Pikotový øez
(na 1 úrovni)
Pikotový øez
(na 2 úrovních)
Pikantní plnìné koláèe
1
1
1
-
1
1
1
1
1
1
1,5
1
0,5
0,5
0,5
1,0
1,5
Poloha rotu
(odspodu)
3
3
3
3
3
2-4
3
2
2-4
2
2
2
2-4
2-4
3
2-4
3
Doba pøedehøevu
(min)
15
15
15
15
15
15
10
10
10
10
10
10
10
10
10
10
15
Nastavení
termostatu
(°C)
200
200
200
180
180
220
200
180
180
180
180
170
190
180
165
165
200
Doba
vaøení
(min.)
65-75
70-75
70-80
15-20
30-35
20-35
30-35
50-60
60-75
50-55
55-60
40-50
25-35
10-15
25-30
25-30
25-30
3 Gril
4 Dvojitý gril
5 Dvojitý gril
s ventilací
Poznámka: Doby peèení jsou pouze orientaèní a mohou se mìnit vzávislosti na Vaich osobních preferencích- Pokud
pouíváte reim grilu, dvojitého grilu nebo dvojitého grilu sventilací, vdy na první patro odspodu umístìte plech, který
bude zachycovat kapající tuk.
Platýz a sépie
Chobotnice a garnáty
Filé z tresky
Grilovaná zelenina
Telecí steaky
Kotlety
Hamburgery
Makrela
Sendviè
Grilované kuøe
Sépie
1
1
1
1
1
1,5
1
1
4 ks
1,5
1,5
4
4
4
3/4
4
4
3
4
4
2
2
5
5
5
5
5
5
5
5
5
5
5
Max
Max
Max
Max
Max
Max
Max
Max
Max
200
200
8
4
10
8-10
15-20
20
7
15-20
5
55-60
30-35
49
CZ
Page 50

Obvyklé èitìní a údrba
Pøed kadým èitìním vypnìte sporák ze sítì.
Pro dosaení dlouhé ivotnosti pøístroje je nezbytnì nutné
jej pravidelnì celý vyèistit. Dbejte vak na následující
pokyny:
l Smaltované èásti a samoèistící panely omývejte pouze
teplou vodou. Zásadnì nepouívejte ádný písek ani
jiné abrasivní prostøedky. Vyhnìte se také agresivním
chemickým èinidlùm, protoe vechny tyto látky tìmto
èástem kodí;
l Vnitøek trouby èistìte co nejèastìji a to bìhem doby,
kdy je jetì teplý. Pouívejte teplotu vodu spøídavkem
saponátu. Poté jej dùkladnì opláchnìte a vysute.
l Dlouhodobý styk s vodou o vysokém obsahu vápníku
nebo s èistícími prostøedky na bázi fosforu mùe na
nerezové oceli zanechat skvrny. Doporuèujeme proto
rám po èitìní dostateènì opláchnout a utøít do sucha.
Mìli byste té urychlenì odstranit vodu, která pøíp.
pøeteèe zhrncù;
l Zabraòte tomu, aby na ovládacím panelu zaschly
neèistoty nebo mastnota. Pouívejte jemné houby nebo
mìkké hadøíky, aby nedolo k pokrábání
smaltovaných èástí nebo ploch zlesklé oceli.
Èitìní povrchu varné desky
Pøed vaøením je vdy nutné keramickou desku otøít vlhkým
hadøíkem, abyste odstranili prach a zbytky jídla. Desku je
tøeba pravidelnì èistit vlanou vodou sjemným
saponátem. Obèas mùe být potøeba vyèistit povrch
speciálním èistícím prostøedkem na sklokeramické desky.
Nejprve odstraòte zbytky jídla a tuku pomocí stìrky typu
(není souèástí dodávaného pøísluenství) nebo
iletky.
Prostøedek na èitìní
keramické varné desky
Prodejna, kde jej mùete
zakoupit
Èistící stìrka, krabka Prodejny pro stavebníky
a kutily,
Náhradní ostøí do krabky Prodejny pro stavebníky
a kutily,
Drogerie,
Supermarkety
COLLO luneta
HOB BRITE
Prostøedek na èitìní
sklokeramických varných
desek
SWISSCLEANER
Drogerie, Obchody
s obuví, elezáøství,
Specializované prodejny
elektrospotøebièù,
Supermarkety a obchodní
domy
Výmìna árovky osvìtlení vnitøku trouby
l Buï vytáhnìte síový pøívod trouby ze zásuvky (je-li to
moné) nebo troubu odpojte od sítì vypnutím
vícepólového pøepínaèe pouívaného pro pøipojení
trouby ke zdroji el. energie.
l Odroubujte sklenìný kryt árovky;
l Vyroubujte árovku a nahraïte ji novou áruvzdornou
(300°C) árovkou snásledujícími parametry:
- Napìtí 230/240 V
- Pøíkon 25 W
- Závit E14
l Zaroubujte zpìt sklenìný kryt a troubu pøipojte ksíti.
Potom, dokud je deska jetì teplá, ji vyèistìte vhodným
èistícím prostøedkem a papírovým ruèníkem.
Varnou desku nakonec opláchnìte a vytøete do sucha
èistým hadøíkem. Pokud se na povrchu desky nataví
pøedmìty zumìlé hmoty nebo hliníkové fólie, odstraòte
je ihned, jetì zhorkého povrchu krabkou. Zabráníte
tak pøípadnému pokození povrchu sklokeramické varné
desky. Pokud se na povrchu varné desky nataví cukr nebo
pokrmy sobsahem cukru, také je ihned odstraòte. Na
èitìní nepouívejte drsné houby, drátìnky a korozívní
èistící prostøedky jako napø. spreje na èitìní trub nebo
odstraòovaèe skvrn.
CZ
50
Page 51

Seznam servisních støedisek je uveden na internetových
stránkách:
http://www.merloni.cz
http://www.indesit.cz
http://www.ariston.cz
Garantem servisu pro Èeskou republiku je firma
AP servis AR s.r.o., tel.: 02/71 74 20 67
Merloni Elettrodomestici s.r.o.
U nákladového nádraí 2, 130 00 Praha 3, Èeská republika
www.Merloni.com
viale Aristide Merloni, 47 - 60044 Fabriano
tel. 0732/6611 - telex 560196 - fax 0732/662954
Page 52

Merloni Elettrodomestici
Viale Aristide Merloni 47
60044 Fabriano
Italy
Tel +39 0732 6611
Fax +39 0732 662501
www .merloni.com
Cucina con forno multifunzione e piano VTC (Russia) *
11/01 - 195029205.03 Xerox Business Services - Docutech
 Loading...