

Page 1

FOLKLIG
GB
FR
DE
IT
Page 2

Page 3

ENGLISH 4
DEUTSCH 16
FRANÇAIS 32
ITALIANO 54
Page 4
ENGLISH 4
Table of contents
Safety information 4
Product description 5
Daily use 6
Maintenance and cleaning 9
What to do if 10
Technical Data 11
Electrical connection 12
Environmental concerns 13
IKEA GUARANTEE 14
Safety Information
Your safety and that of others is paramount.
This manual and the appliance itself provide
important safety warnings, to be read and
observed at all times.
This is the safety alert symbol,
pertaining to safety, which alerts users
to potential hazards to themselves and
others.
All safety messages are preceded by the
safety alert symbol and the following terms:
DANGER Indicates a hazardous
situation which, if not avoided, will
result in serious injury.
WARNING Indicates a hazardous
situation which, if not avoided, could
result in serious injury.
All safety warnings give specic details of
the potential risk present and indicate how
to reduce risk of injury, damage and electric
shock resulting from improper use of the
appliance. Please observe the following
instructions:
- The appliance must be disconnected
from the power supply before carrying
out any installation work.
- Installation and maintenance must be
carried out by a qualied technician,
in compliance with the manufacturer’s
instructions and local safety regulations.
Do not repair or replace any part of the
appliance unless specically stated in
the user manual.
- Regulations require that the appliance is
earthed.
- The power cable must be long enough
for connecting the appliance, once tted
in its housing, to the power supply.
- For installation to comply with current
safety regulations, an all-pole
disconnect switch with minimum contact
gap of 3 mm must be utilized.
- Do not use multiple plug adapters or
extension leads.
- Do not pull the power cable to
disconnect it from the electrical supply.
- The electrical components must not be
accessible to the user after installation.
- The appliance is designed solely for
household use for cooking food. No
other type of use is permitted (e.g.
heating rooms). The Manufacturer
declines all responsibility for
inappropriate use or incorrect setting of
the controls.
- The appliance and its accessible parts
become hot during use. Care should
be taken to avoid touching heating
elements. Children less than 8 years
of age shall be kept away unless
continuously supervised.
This appliance can be used by children
aged from 8 years and above and
persons with reduced physical, sensory
or mental capabilities or lack of
experience and knowledge if they have
been given supervision or instruction
concerning use of the appliance in a
safe way and understand the hazards
involved. They shall not play with
the appliance. Cleaning and user
maintenance shall not be made by
children supervision.
Page 5

ENGLISH 5
- The accessible parts of the appliance
may become very hot during use. Keep
children away from the appliance and
supervise them to ensure that they do
not play with it.
- During and after use, do not touch the
heating elements of the appliance. Do
not allow the appliance to come into
contact with cloths or other ammable
materials until all the components have
cooled sufciently.
- Do not place ammable material on or
near the appliance.
- Overheated oils and fats catch re
easily. Never leave the appliance
unattended when cooking with fat and
oil.
- Metallic objects such as knives, forks,
spoons and lids should not be placed on
the hob surface since they can get hot.
- A separator panel (not supplied) must
be installed in the space under the
appliance at a distance at least 20mm.
If an Ikea separator is used, follow the
instructions given in the panel reference
Product description
material.
No separator is needed if an oven is
installed underneath.
- If you don’t install the oven underneath,
you must use the separator and between
the separator and the cabinet you must
install the drawer.
- If the surface is cracked, switch off the
appliance to avoid the possibility of
electric shock.
- The appliance is not intended to be
operated by means of an external timer
or separate remote control system.
- Do not use steam cleaners.
- Unattended cooking on a hob with fat or
oil can be dangerous and may result in
re. NEVER try to extinguish a re with
water, but switch off the appliance and
then cover ame e.g. with a lid or a re
blanket.
Danger of re: do not store items on the
cooking surfaces.
- After use, switch off the hob element by
its control and do not rely on the pan
detector.
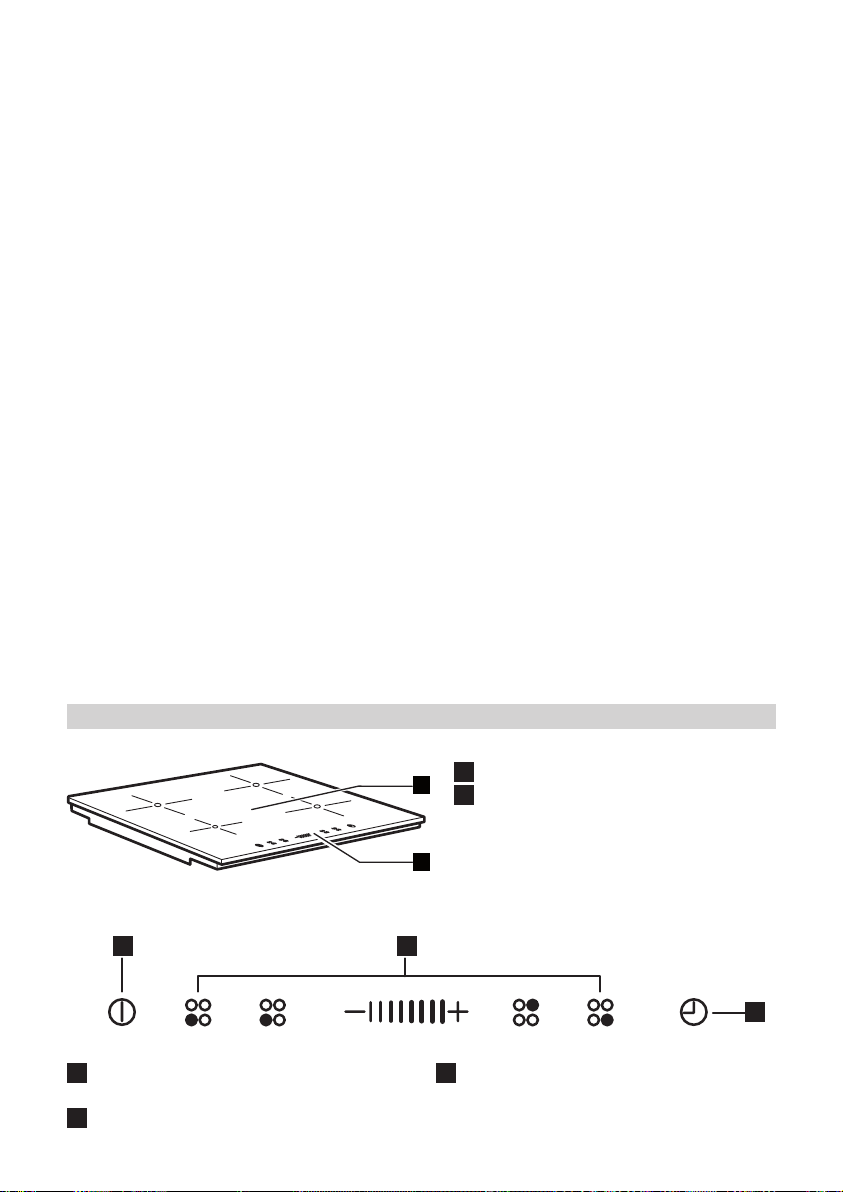
Control panel
B A
A
Cooking zone controls and
corresponding display
B
On/Off
1
Induction cooking zone
1
2
Control panel
2
C
Timer/Child lock/Power Management
C
Page 6
ENGLISH 6
Daily use
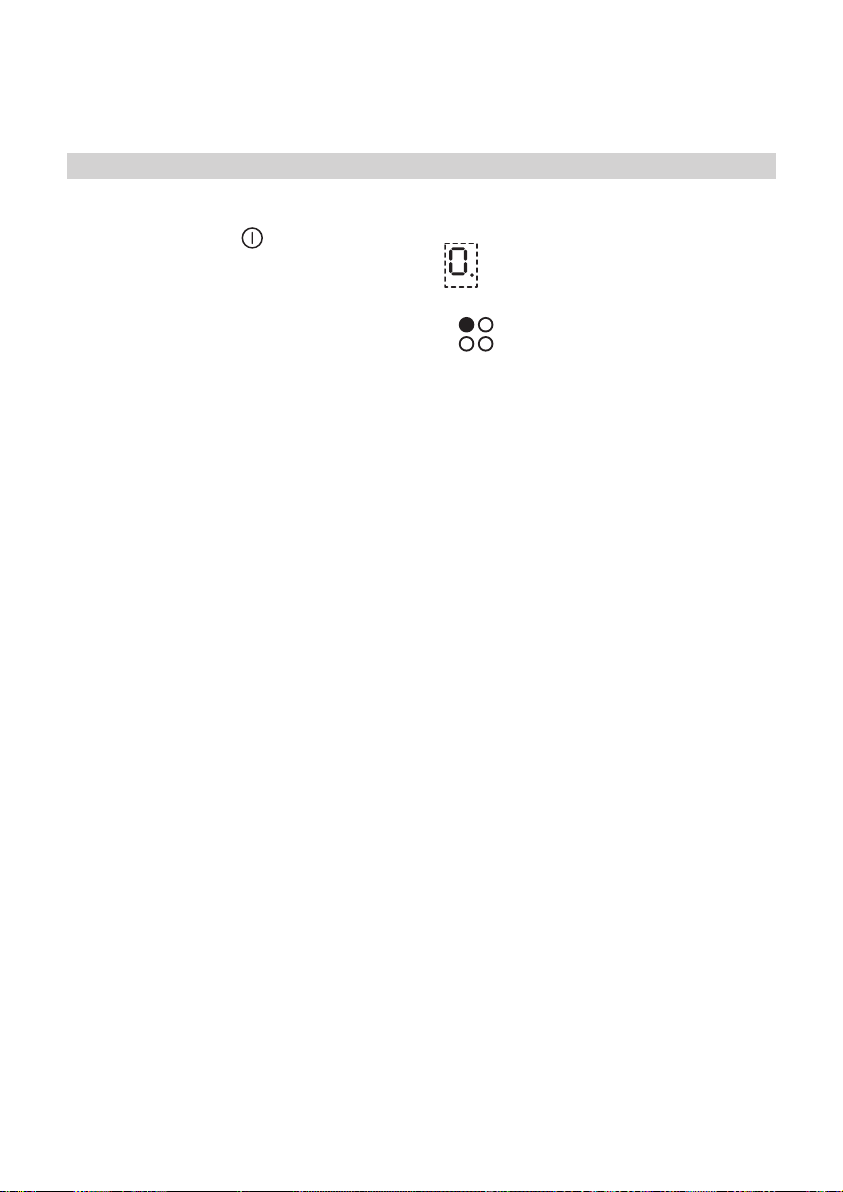
Switching the hob ON/OFF
To switch the hob on, press the
for approx. 2 seconds until the cooking zone
displays light up. To switch off, press the
same button until the displays switch off. All
the cooking zones are deactivated.
If the hob has been in use, the residual heat
indicator “H” remains lit until the cooking
zones have cooled down.
If within 10 seconds of switching on, no
function is selected, the hob switches off
automatically.
Before use
Important: The induction cooking zones will
not switch on if pots and pans are not of the
correct dimensions.
Only use pots bearing the symbol
“INDUCTION SYSTEM”.
Before switching the hob on, position the
pot on the desired cooking zone.
Existing pots and pans:
Use a magnet to check whether pots or
pans are suitable for use on the induction
hob: pots are unsuitable if they cannot be
magnetically detected.
1. Ensure pots have a smooth bottom,
otherwise they may scratch the hob’s
glass ceramic surface. Check dishes.
2. Do not use empty pots on the hob. This
could result in damage to both the glass
ceramic surface and the bottom of the
pots.
3. Never place hot pots or pans on the
hob’s control panel. This could result in
damage.
button
Switching on and adjusting cooking zones
Power indicator display
Selected cooking zone indication
Cooking zone positioning
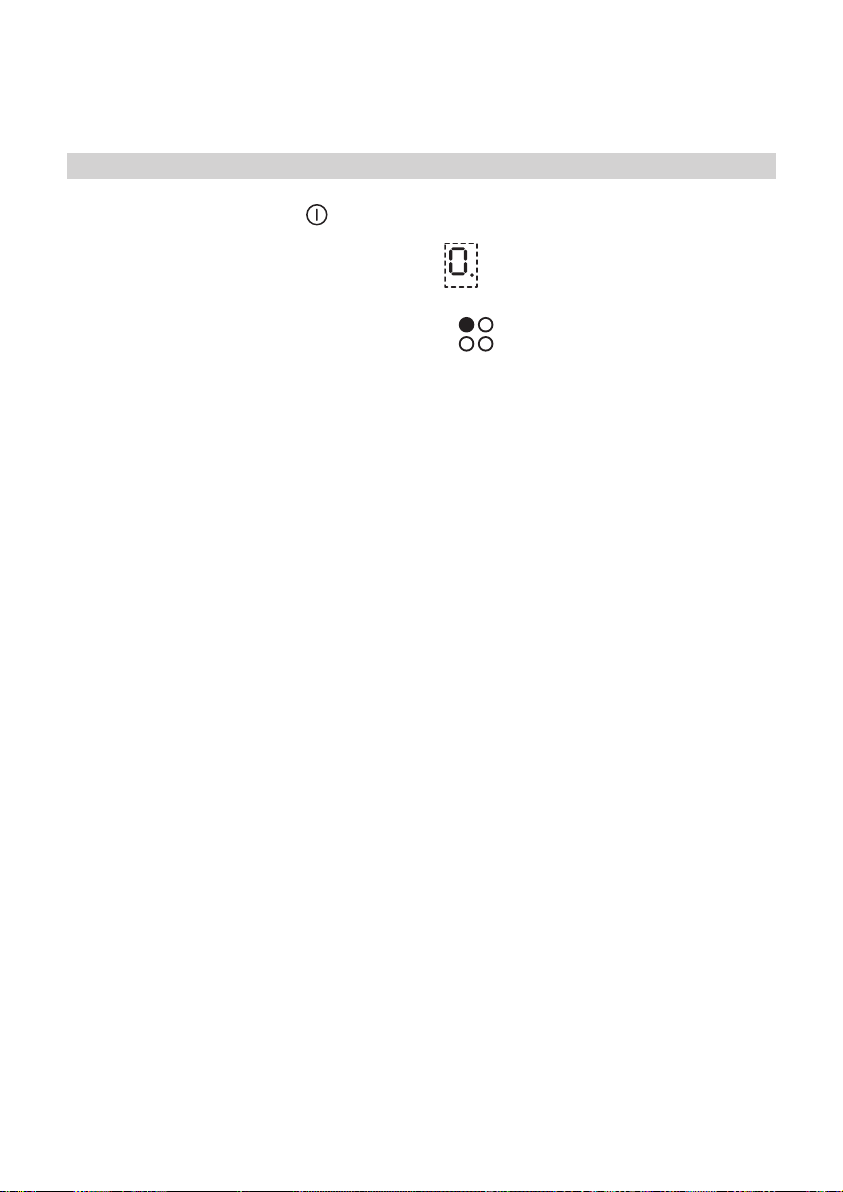
Once the hob is switched on and the pan
is positioned on the chosen cooking zone,
select the zone using the corresponding
button: the display shows level 0.
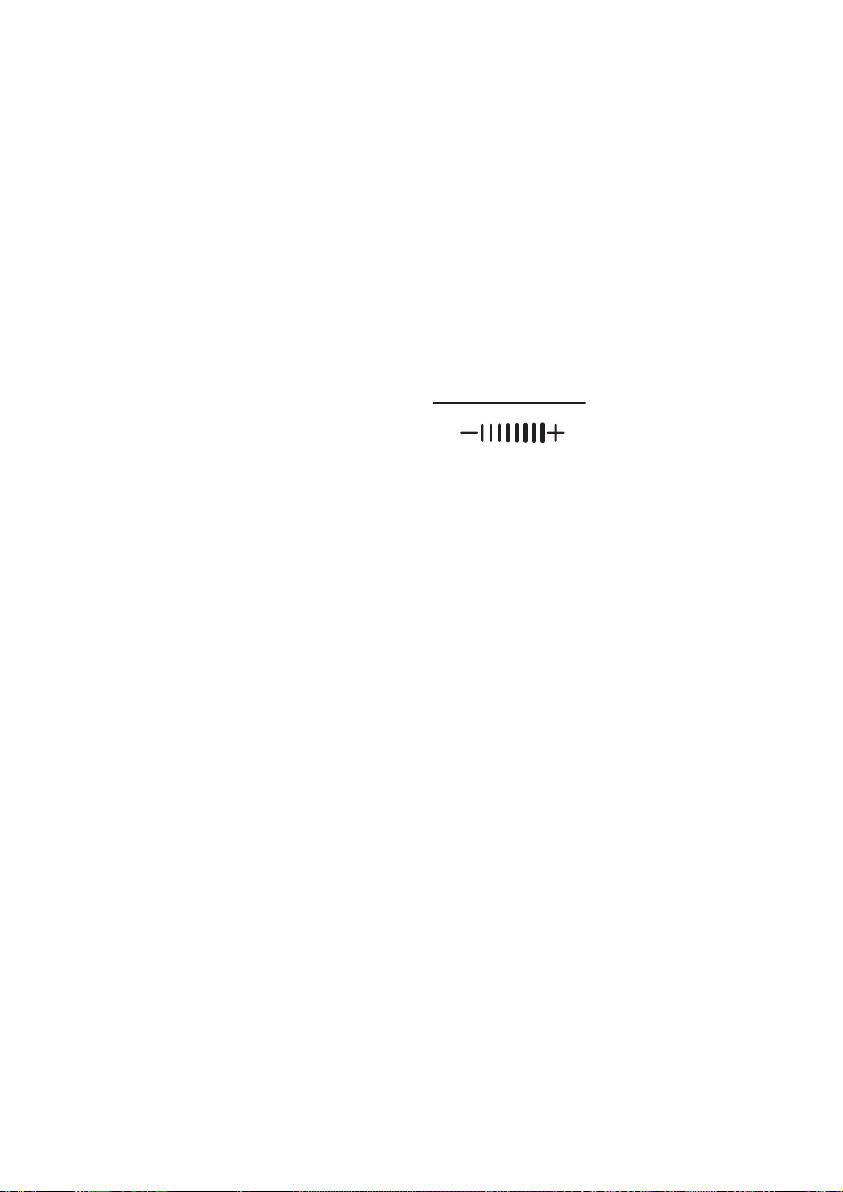
With the Slider it is possible to select the
required power level, from min. 0 to max. 9,
or booster “P”. To increase the power level,
slide your nger on the slider from left to
right several times; to decrease it, slide in
the opposite direction. Alternatively the “+”
and “-” quick access buttons can be used.
Each cooking zone has various power levels,
adjustable with the +/- buttons, going from
“1”: min. power, to “9”: max. power. Some
cooking zones have a fast boil function
(Booster), shown on the display with the
letter “P”.
Fast boil function (Booster)
This function, only present on some cooking
zones, makes it possible to exploit the hob’s
maximum power (for example to bring
water to the boil very quickly). To activate
the function, press the “+” button until “P”
appears on the display. After 5 minutes’
use of the booster function, the appliance
automatically sets the zone to level 9.
Demo Mode
This hob is equipped with a demo mode
which allows you to interact with the control
panel without activating the corresponding
cooking zones.
The activation and deactivation procedure
must be carried out within 60 seconds of the
appliance being connected to the power
Page 7

ENGLISH 7
supply in the home.
To activate the demo mode, hold the two
external cooking zone selection buttons at
the same time for at least 5 seconds: “dE”
appears on the central display. You can now
explore the control panel functions.
To deactivate Demo mode, repeat the
procedure, remembering rst of all to
disconnect the hob from the mains and then
reconnect it, carrying out the procedure
within 60 seconds of connection.
Activation/deactivation of the acoustic
signal
After switching on the hob, keep the “+”
button and outermost selection button on
the right (“control panel lock”) pressed at the
same time for at least 3 seconds
Deactivation of cooking zones
Select the cooking zone you wish to switch
off. Press the corresponding button (a dot
lights up at the bottom right of the power
level indicator).
Press the key “-” to set the level to “0”.
To switch off instantly, hold the zone
selection button for 3 seconds. The cooking
zone switches off and the residual heat
indicator “H” lights up.
Control panel lock
This function locks the controls to prevent
accidental switching on of the hob.
To activate the control panel lock function,
hold button C for 3 seconds.
The control panel is locked except for the
deactivation function. To deactivate the
control panel lock, repeat the activation
procedure.
The luminous dot goes off and the hob is
active again.
The presence of water, liquid spilled from
pots or any objects resting on the button
below the symbol can accidentally activate
or deactivate the control panel lock function.
Slider
The timer can be used to set cooking time
for a maximum of 99 minutes (1 hour and 39
minutes) for all cooking zones.
Select the cooking zone to be used with the
timer (an illuminated dot appears to the
bottom right hand side of the heat setting
indicator on the display), press the button
with the clock symbol then set the desired
cooking time using the buttons “+” and “-” of
the timer function (see gure).
After a few seconds, the timer begins the
countdown (an illuminated dot is visible next
to the zone for which the timer has been
activated).
Once the set time has elapsed, an acoustic
signal sounds and the cooking zone switches
off automatically.
To deactivate the timer, press the “-” button
until the display shows “0:0”.
To set the timer for another zone, repeat
the points above. The timer display always
shows the timer for the selected zone or the
shortest timer.
To change or switch off the timer, press
the zone selection button for the timer in
question.
Control panel warnings
Residual heat indicator.
The hob is tted with a residual heat
indicator for each cooking zone. These
indicators alert the user when cooking zones
are still hot.
If the display shows H, the cooking zone is
still hot. If the residual heat indicator of a
given cooking zone is lit, that zone can be
used, for example, to keep a dish warm or to
melt butter.
When the cooking zone cools down, the
display goes off.
Page 8
ENGLISH 8
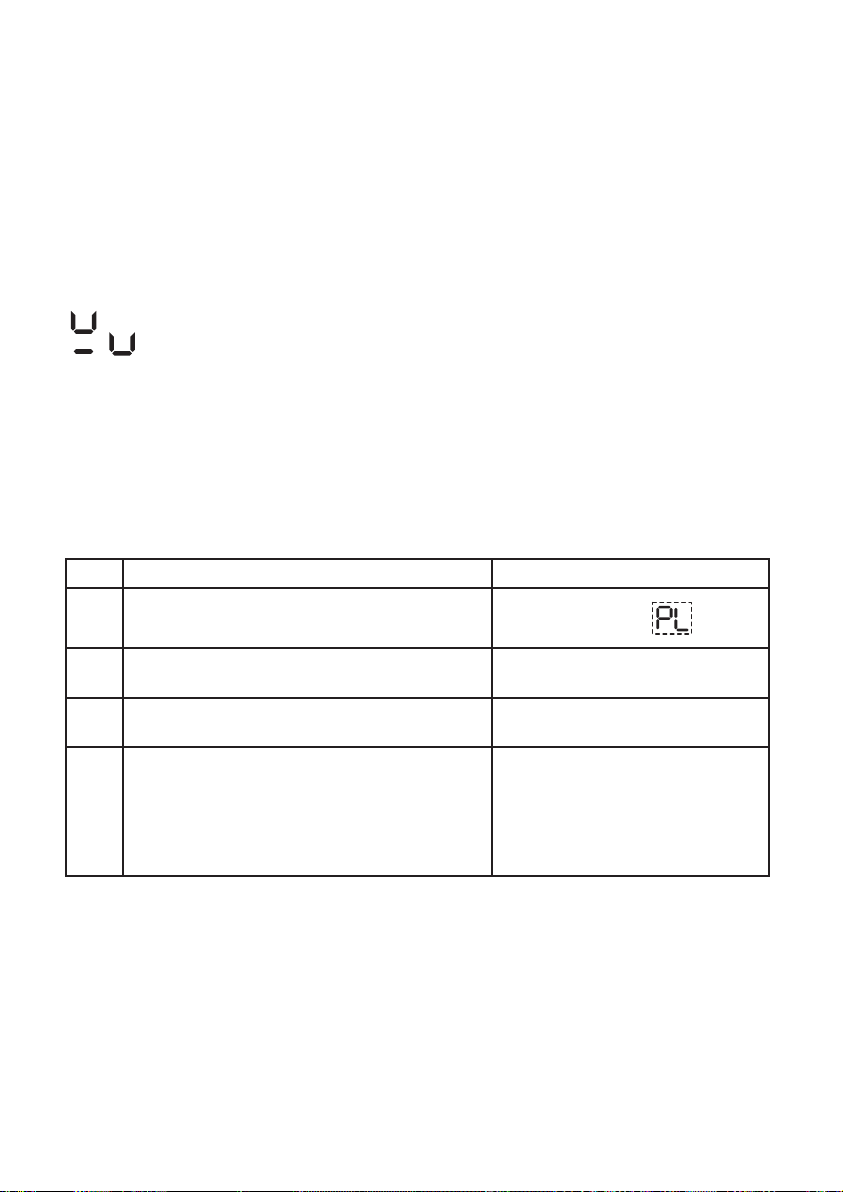
Incorrect or missing pot indicator.
If you are using a pot that is not suitable,
not correctly positioned or not of the correct
dimensions for your induction hob, the
message “no pot” will appear in the display
(see gure). If no pot is detected within 60
seconds, the hob switches off.
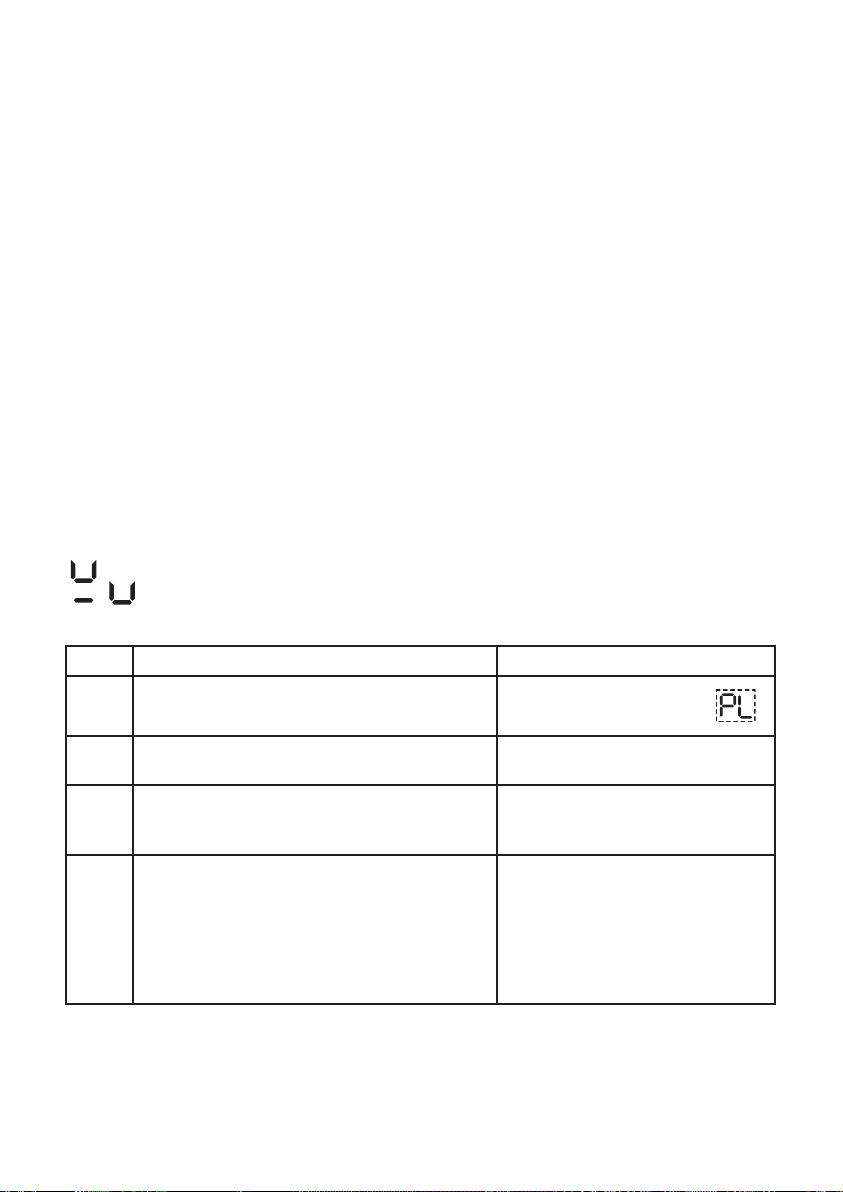
Power management
Thanks to the “Power management”
function, the user can set the maximum
power the hob can reach, as required.
This setting is possible at any time and is
maintained until the next change.
Step Control panel Display
1 Press for approximately 3 seconds + button
2 Press the Power Management (button C) to
conrm the previous step
3 Press - + button to set the chosen level
amongst the different options available
4 Press the Power Management (button C) to
conrm the previous step
By setting the required maximum power,
the hob automatically adjusts distribution in
the various cooking zones, ensuring that this
limit is never exceeded; with the advantage
of also being able to manage all the
zones simultaneously, but without overload
problems.
4 maximum power levels are available and
showed on display: 2.5 – 4.0 – 6.0 – 7.2
kW (7.2 kW is considered as max power of
cooktop) At the time of purchase, the hob
is set to maximum power After plugging
the appliance into the electrical socket,
in the rst 60 seconds it is possible to set
the required power level by running the
following points:
The display shows
The display shows last level set
previously
The display shows the set level.
The display shows the set level
which ashes for approximately
2 seconds; after which the hob
emits an acoustic signal and then
turns itself off; it is now ready for
use
Page 9
ENGLISH 9
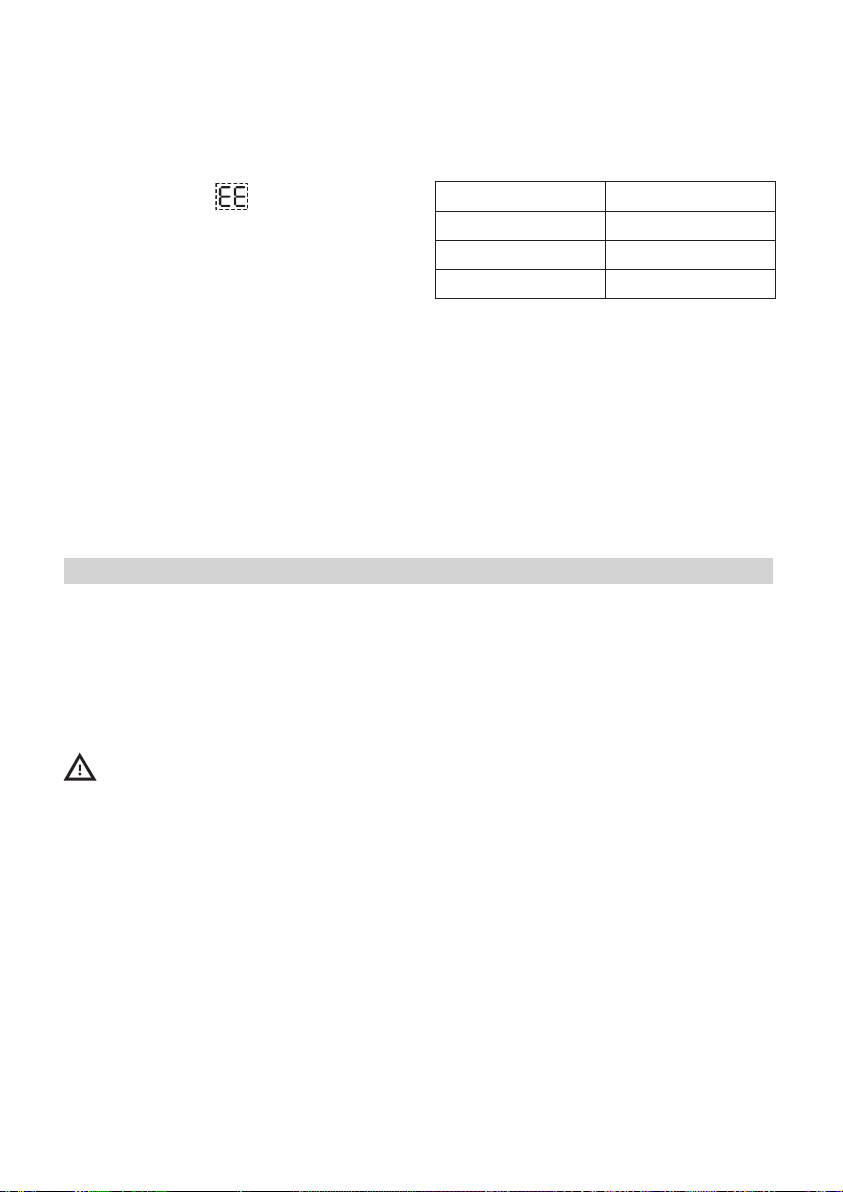
In case of an error when setting the
power, the symbol
middle and an acoustic signal sounds for
about 5 seconds. In this case repeat the
conguration procedure from the beginning.
If the error occurs again, contact the AfterSales Service.
During normal use, if the user tries to
increase the maximum available power
level when reached, the level of the zone
in use ashes twice and an acoustic signal
sounds.
To obtain a higher power in that zone, it is
necessary to manually decrease the power
level of one or more already active cooking
zones.
appears in the
Maintenance and cleaning
Clean the hob after each use in order to
avoid damaging the surface and to prevent
the formation of baked-on deposits which
are difcult to remove. Before cleaning,
make sure the cooking zones are switched
off and that the residual heat indicator (“H”)
is not displayed.
Steam cleaner is not to be used!
Periodically check for dust under the
appliance, near the cooling air inlet or the
outlet openings.
This could hinder the ventilation and cooling
of the electronic module and decrease the
effectiveness of the hob.
To clean the hob, proceed as follows:
1. use a soft clean cloth, absorbent kitchen
wipes or a proprietary cleaner for glass
Recommended pot bottom widths
Ø Zone Ø Pot
210 mm 150 - 210 mm
180 mm 120 - 180 mm
145 mm 100 - 145 mm
ceramic hobs. Do not use abrasive
sponges and/or metal scouring pads.
2. Food spills should be cleaned off before
they bake onto the glass ceramic
surface. Sugar and foods with a high
sugar content damage the glass ceramic
surface and must be immediately
removed using a scraper for glass.
Caution! Glass scrapers have a very
sharp blade and must be handled with
care.
3. Remove any stubborn food residues with
a scraper or proprietary detergents.
4. Salt, sugar and sand can scratch the
glass ceramic hob: clean up any such
spills on the hob immediately.
Page 10
ENGLISH 10
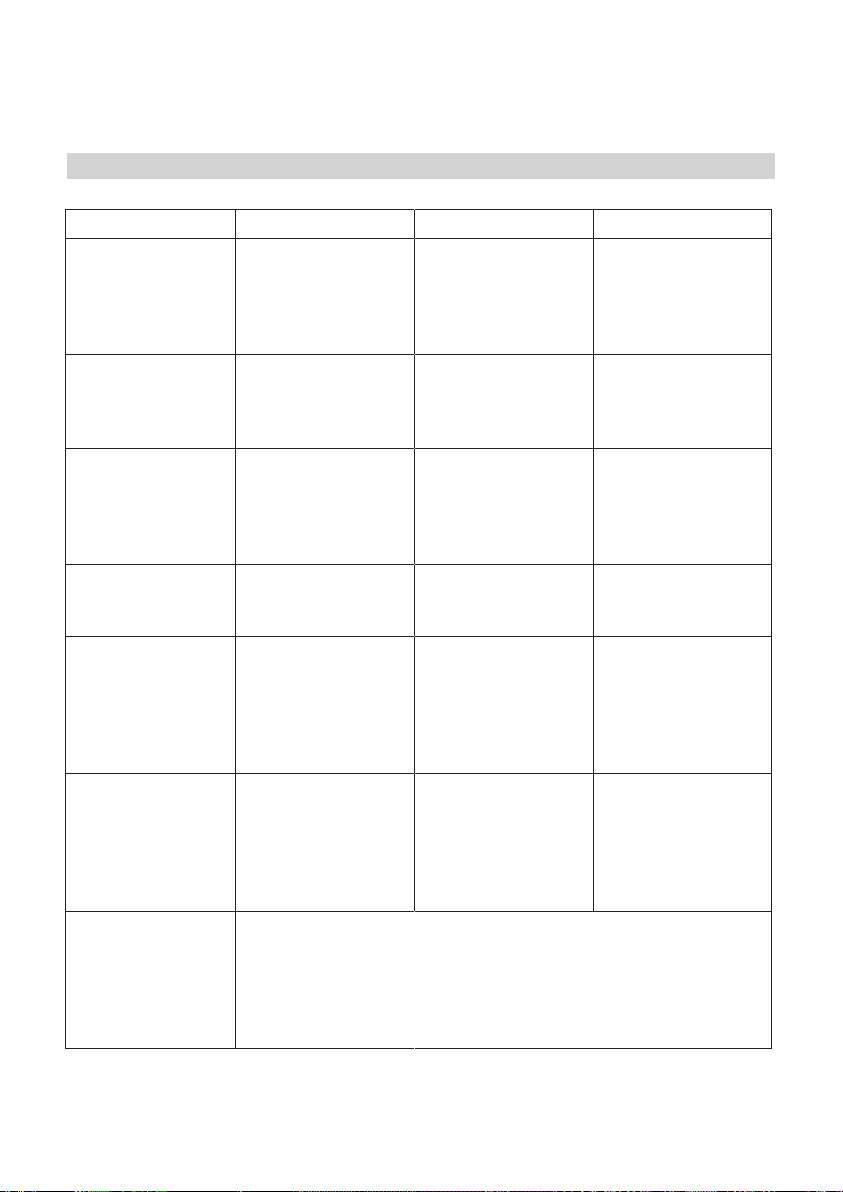
What to do if ...
Error code Problem Possible cause Solution
The hob switches
off and after 10
seconds emits an
acoustic signal
every 3 seconds
C81, C82 The control panel
C83 The control panel
C85 Hob is not able to
F02 or F04 or C84 The connection
F42 or F43 The connection
F01, F05, F06, F07,
F10, F12, F25, F33,
F34, F36, F37, F46,
F47, F48, F49, F58,
F61, F62, F63, F72,
F74, F77
Continuous pressure
on control panel
area
switches off because
of excessively high
temperatures
indicates the error
code hob off
because of an issue
on electronic circuit
give power to the
pot
voltage is wrong or
issue to the power
supply
voltage is wrong
Call the After-Sales Service and specify the error code
Water or utensils on
control panel
The internal
temperature of
electronic parts is
too high
Cooktop has been
supplied with over
voltage
Pot is not suitable to
the induction hob
The sensor detects
a discrepancy
between the
appliance voltage
and that of the mains
supply
The sensor detects
a discrepancy
between the
appliance voltage
and that of the mains
supply
Clean the control
panel
Wait for the hob to
cool down before
using it again
Cooktop may be
still used but call the
After-Sales Service
Use another
induction pot
Disconnect the hob
from the mains and
check the electrical
connection
Disconnect the hob
from the mains and
check the electrical
connection
Page 11
ENGLISH 11
Before calling the After-Sales Service:
1. Check “Troubleshooting guide” to see if
you can eliminate the problem yourself
2. Turn the hob on again to check if correct
operation has been restored.
3. If the problem persists, contact the Aftersales Service.
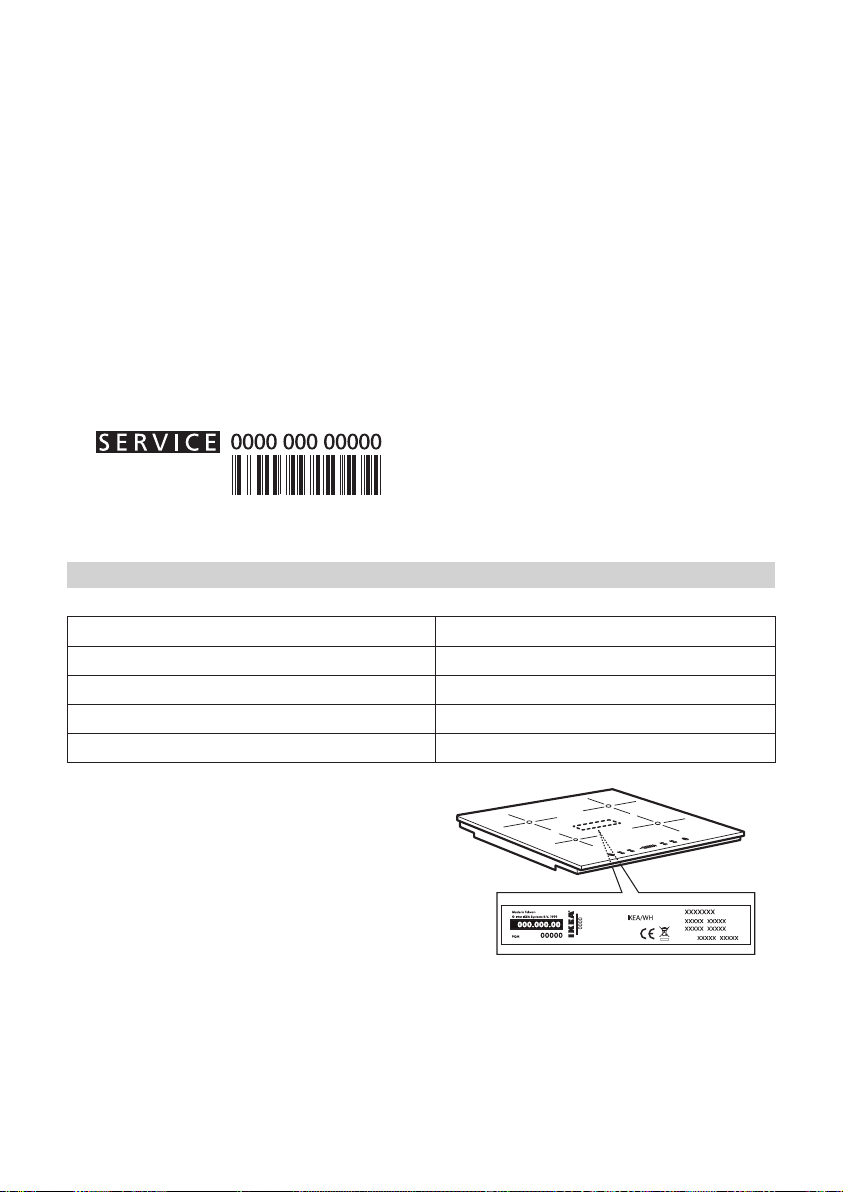
Give the following information:
• type of fault;
• hob model;
• service number (i.e. the number after the
word SERVICE on the dataplate under
the hob and on the warranty certicate);
• your full address;
• your telephone number.
If any repairs are required, contact an
authorised service centre, indicated in the
warranty.
In the unlikely event that an operation or
repair is carried out by an unauthorised
technician, always request certication
of the work carried out and insist on the use
of original spare parts.
Failure to comply with these instructions may
compromise the safety and quality of the
product.
Technical data
Dimensions
Width (mm) 580
Height (mm) 58
Depth (mm) 510
Voltage (V) See Installation and electrical connection
The technical information are situated in the
rating plate on the bottom side of the
appliance.
Page 12
ENGLISH 12
}
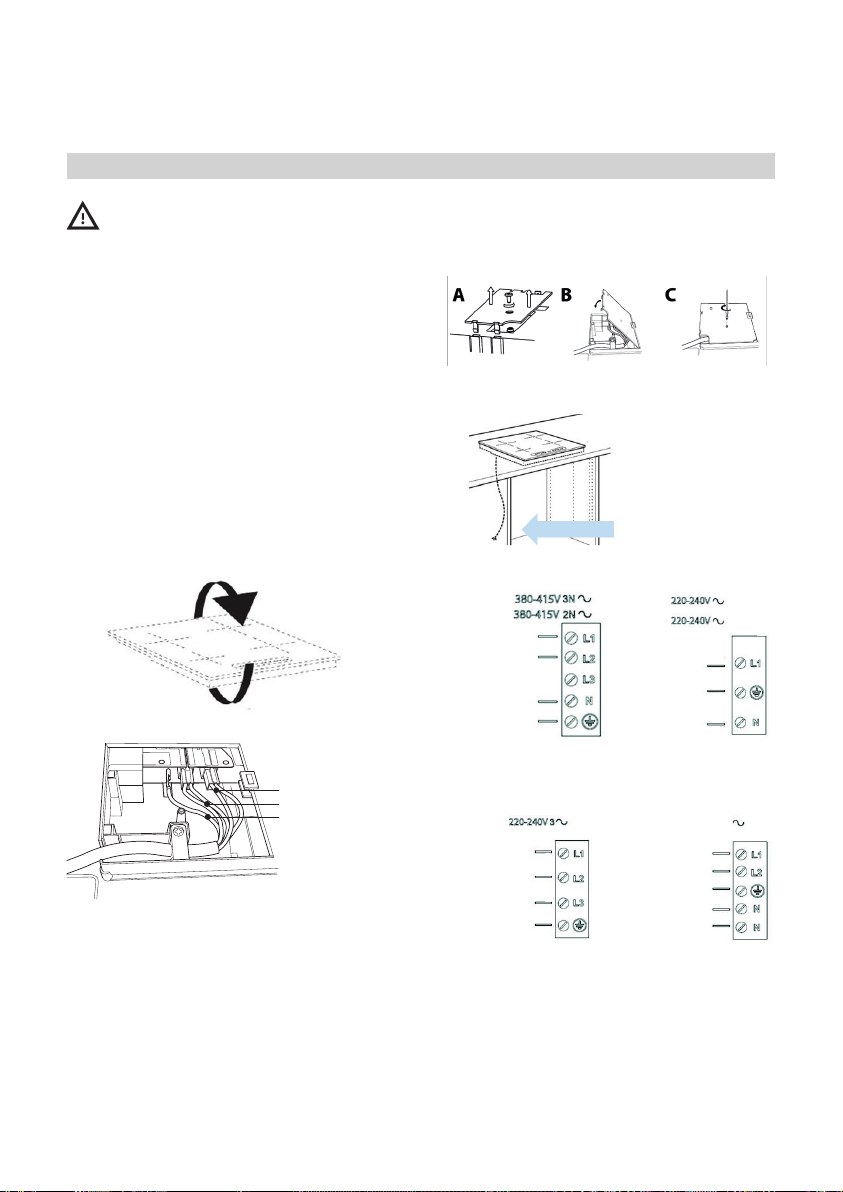
Electrical connection
WARNING. Disconnect the appliance
from the power supply.
- Installation must be carried out by
qualied personnel who know the current
safety and installation regulations.
- The manufacturer declines all liability
for injury to persons or animals and for
damage to property resulting from failure
to observe the regulations provided in this
chapter.
- The power cable must be long enough
to allow the hob to be removed from the
worktop.
- Make sure the voltage specied on the
dataplate located on the bottom of the
appliance is the same as that of the home.
For each connection to the network, the hob
automatically checks for a few seconds.
Connection to
main power
AU
blue
and UK
}
}
black
brown
blue
blue (grey)
yellow/green
black
brown
}
yellow/green
blue (grey)
blue/grey
black/brown
yellow/green
1. Remove the terminal cover (A) by
unscrewing the screw and insert the cover
into the hinge (B) of the terminal.
2. Plug the power cord into the clamp and
connect the wires to the terminal block as
shown in the wiring diagram located near
the terminal.
3. Secure the power cable with the cable
clamp.
4. Close the cover (C) and screw on the
terminal with the screw removed.
ONLY FOR BELGIUM
black
brown
blue
blue (grey)
yellow/green
230V 2 phase 2N
ONLY FOR NL
black
brown
}
yellow/green
blue
blue (grey)
Page 13
ENGLISH 13
Environmental concerns
Disposal of packaging materials
The packaging material is entirely
recyclable and marked with the recycling
symbol ( ). Do not dispose of the various
packaging materials carelessly, but do so
responsibly and in full compliance with
local authority regulations governing waste
disposal.
Scrapping
This appliance is marked in compliance with
European Directive 2002/96/EC on Waste
Electrical and Electronic Equipment (WEEE).
By ensuring that this appliance is
scrapped suitably, you can help prevent
potentially damaging consequences for the
environment and health.
The symbol
accompanying documentation indicates
that this product should not be disposed of
as unsorted municipal waste but must be
taken to a collection point for the treatment
of WEEE.
on the appliance or
Energy saving
For optimum results, observe the following
advice:
- Use pots and pans whose bottom
diameter is equal to that of the cooking
zone.
- Only use at-bottomed pots and pans.
- If possible, keep pot lids on when
cooking.
- Make sure you place the pot or pan in
the centre of the cooking zone outlined
on the hob.
Declaration of Conformity
- This appliance has been designed,
constructed and marketed in compliance
with the safety requirements of “Low
Voltage” Directive 2006/95/EC
(replacing 73/23/EEC as amended)
and protection requirements of “EMC”
Directive 2004/108/EC.
Page 14

ENGLISH 14
IKEA GUARANTEE
How long is the IKEA guarantee valid?
This guarantee is valid for ve (5) years from
the original date of purchase of your appliance
at IKEA, unless the appliance is named LAGAN
in which case two (2) years of guarantee
apply. The original sales receipt, is required
as proof of purchase. If service work is carried
out under guarantee, this will not extend the
guarantee period for the appliance.
Which appliances are not covered by the
IKEA ve (5) years guarantee?
The range of appliances named LAGAN and
all appliances purchased in IKEA before 1st of
August 2007.
Who will execute the service?
IKEA service provider will provide the
service through its own service operations or
authorized service partner network.
What does this guarantee cover?
The guarantee covers faults of the appliance,
which have been caused by faulty construction
or material faults from the date of purchase
from IKEA. This guarantee applies to domestic
use only. The exceptions are specied under
the headline “What is not covered under this
guarantee?” Within the guarantee period,
the costs to remedy the fault e.g. repairs,
parts, labour and travel will be covered,
provided that the appliance is accessible for
repair without special expenditure. On these
conditions the EU guidelines (Nr. 99/44/
EG) and the respective local regulations
are applicable. Replaced parts become the
property of IKEA.
What will IKEA do to correct the problem?
IKEA appointed Service Provider will examine
the product and decide, at its sole discretion,
if it is covered under this guarantee. If
considered covered, IKEA Service Provider
or its authorized service partner through its
own service operations, will then, at its sole
discretion, either repair the defective product
or replace it with the same or a comparable
product.
What is not covered under this guarantee?
• Normal wear and tear.
• Deliberate or negligent damage, damage
caused by failure to observe operating
instructions, incorrect installation or by
connection to the wrong voltage, damage
caused by chemical or electrochemical
reaction, rust, corrosion or water damage
including but not limited to damage
caused by excessive lime in the water
supply, damage caused by abnormal
environmental conditions.
• Consumable parts including batteries and
lamps.
• Non-functional and decorative parts which
do not affect normal use of the appliance,
including any scratches and possible color
differences.
• Accidental damage caused by foreign
objects or substances and cleaning or
unblocking of lters, drainage systems or
soap drawers.
• Damage to the following parts: ceramic
glass, accessories, crockery and cutlery
baskets, feed and drainage pipes, seals,
lamps and lamp covers, screens, knobs,
casings and parts of casings. Unless such
damages can be proved to have been
caused by production faults.
• Cases where no fault could be found
during a technician’s visit.
• Repairs not carried out by our appointed
service providers and/or an authorized
service contractual partner or where nonoriginal parts have been used.
• Repairs caused by installation which is
faulty or not according to specication.
• The use of the appliance in a non-domestic
environment i.e. professional use.
• Transportation damages. If a customer
transports the product to his home or
Page 15
ENGLISH 15
another address, IKEA is not liable for any
damage that may occur during transport.
However, if IKEA delivers the product
to the customer’s delivery address, then
damage to the product that occurs during
this delivery will be covered by IKEA.
• Cost for carrying out the initial installation
of the IKEA appliance.
However, if an IKEA appointed Service
Provider or its authorized service partner
repairs or replaces the appliance under
the terms of this guarantee, the appointed
Service Provider or its authorized
service partner will reinstall the repaired
appliance or install the replacement, if
necessary.
These restrictions do not apply to fault-free
work carried out by a qualied specialist
using our original parts in order to adapt the
appliance to the technical safety specications
of another EU country.
How country law applies
The IKEA guarantee gives you specic legal
rights, which cover or exceed all the local legal
demands. However these conditions do not
limit in any way consumer rights described in
the local legislation.
Area of validity
For appliances which are purchased in one EU
country and taken to another EU country, the
services will be provided in the framework of
the guarantee conditions normal in the new
country.
An obligation to carry out services in the
framework of the guarantee exists only if
the appliance complies and is installed in
accordance with:
- the technical specications of the country in
which the guarantee claim is made;
- the Assembly Instructions and User Manual
Safety Information.
The dedicated AFTER SALES for IKEA
appliances
Please don’t hesitate to contact IKEA
appointed After Sales Service Provider to:
• make a service request under this
guarantee;
• ask for clarications on installation of the
IKEA appliance in the dedicated IKEA
kitchen furniture;
• ask for clarication on functions of IKEA
appliances.
To ensure that we provide you with the best
assistance, please read carefully the Assembly
Instructions and/or the User Manual before
contacting us.
How to reach us if you need our service
Please refer to the last
page of this manual for the
full list of IKEA appointed
After Sales Service Provider
and relative national phone
numbers.
In order to provide you a quicker
service, we recommend to use the
specic phone numbers listed on this
manual. Always refer to the numbers
listed in the booklet of the specic
appliance you need an assistance for.
Please also always refer to the IKEA
article number (8 digit code) and 12
digit service number placed on the
rating plate of your appliance.
SAVE THE SALES RECEIPT!
It is your proof of purchase and required
for the guarantee to apply. The sales
receipt also reports the IKEA name and
article number (8 digit code) for each of
the appliances you have purchased.
Do you need extra help?
For any additional questions not related
to After Sales of your appliances please
contact your nearest IKEA store call centre.
We recommend you read the appliance
documentation carefully before contacting us.
Page 16
DEUTSCH 16
Inhalt
Sicherheitsinformationen 16
Produktbeschreibung 17
Täglicher Gebrauch 18
Pege und Wartung 21
Was tun, wenn... 22
Technische Daten 23
Anschluss an das Stromnetz 24
Umweltschutz 25
IKEA GARANTIE 26
IKEA GARANTIE (CH) 29
Sicherheitsinformationen
Ihre eigene Sicherheit und die anderer Personen ist
sehr wichtig.
Diese Anweisungen sowie das Gerät beinhalten
wichtige Sicherheitshinweise, die Sie durchlesen und
stets beachten sollten.
Dieses Symbol warnt vor möglichen Gefahren
für die Sicherheit des Benutzers und anderer
Personen.
Alle Sicherheitshinweise werden von dem
Gefahrensymbol und folgenden Begriffen begleitet:
GEFAHR Weist auf eine gefährliche Situation
hin, die bei mangelnder Vorsicht zu schweren
Verletzungen führen kann.
ACHTUNG Weist auf eine gefährliche Situation
hin, die bei mangelnder Vorsicht zu schweren
Verletzungen führt.
Alle Gefahrenhinweise bezeichnen das potenzielle
Risiko, auf das sie sich beziehen und geben an, wie
Verletzungsgefahren, Schäden und Stromschläge
vermieden werden können, die zurückzuführen sind
auf unsachgemäßen Gebrauch des
Gerätes. Halten Sie sich genau an folgende
Anweisungen:
- Vor und während der Durchführung von
Installationsarbeiten muss dieses Gerät von der
Stromversorgung getrennt sein.
- Die Installation und Wartung müssen von einer
Fachkraft gemäß den Herstellerangaben und
den gültigen örtlichen Sicherheitsbestimmungen
durchgeführt werden. Reparieren Sie das
Gerät nicht selbst und tauschen Sie keine Teile
aus, wenn dies im Bedienungshandbuch nicht
ausdrücklich angegeben ist.
- Die Erdung des Gerätes ist gesetzlich
vorgeschrieben.
- Das Netzkabel muss lang genug sein, um das
Gerät nach der Montage im Küchenmöbel an die
Stromversorgung anzuschließen.
- Damit die Installation den geltenden
Sicherheitsrichtlinien entspricht, muss ein allpoliger
Sicherheitsschalter mit einer Kontaktöffnungsweite
von mindestens 3 mm verwendet werden.
- Verwenden Sie keine Mehrfachstecker oder
Verlängerungskabel.
- Ziehen Sie nicht am Netzkabel des Gerätes, um
den Stecker aus der Steckdose zu ziehen.
- Nach der Installation dürfen Strom führende Teile
für den Benutzer nicht mehr zugänglich sein.
- Das Gerät ist ausschließlich zur Zubereitung von
Nahrungsmitteln für private Haushalte konzipiert.
Jeder hiervon abweichende Gebrauch (z. B.
das Heizen von Räumen) ist nicht gestattet. Der
Hersteller haftet nicht bei Schäden aufgrund
unsachgemäßen Gebrauchs oder fehlerhafter
Bedienung.
- Das Gerät und die zugänglichen Teile werden
bei der Benutzung heiß. Vermeiden Sie
unbedingt das Berühren der Heizelemente.
Kinder unter 8 Jahren dürfen das Gerät nur unter
ständiger Überwachung bedienen.
Das Gerät darf von Kindern unter und über
8 Jahren und von Personen, deren physische,
sensorische oder geistige Fähigkeiten und deren
Mangel an Erfahrung und Kenntnissen einen
sicheren Gebrauch des Gerätes ausschließen
nur unter Aufsicht oder nach ausreichender
Einweisung durch eine verantwortungsbewusste
Person benutzt werden, die sicherstellt, dass sie
sich der Gefahren des Gebrauchs bewusst sind.
Lassen Sie Kinder nicht mit dem Gerät spielen.
Reinigung und Instandhaltung darf nicht von
Kindern ohne Aufsicht erfolgen.
Page 17
DEUTSCH 17
- Die erreichbaren Teile des Gerätes können
während des Betriebs sehr heiß werden. Halten
Sie Kinder vom Gerät fern und achten Sie darauf,
dass sie das Gerät nicht als Spielzeug benutzen.
- Berühren Sie die Heizelemente während des
Betriebs und unmittelbar danach nicht. Vermeiden
Sie den Kontakt mit Tüchern oder anderen
entammbaren Materialien, bis das Gerät wieder
vollständig abgekühlt ist.
- Legen Sie keine brennbaren Gegenstände auf
oder in die Nähe des Geräts.
- Heißes Fett und Öl sind leicht entzündlich.
Beaufsichtigen Sie stets den Garvorgang, wenn
Sie Speisen mit Fett oder Öl zubereiten.
- Metallgegenstände wie Messer, Gabeln, Löffel
und Deckel sollten nicht auf die Oberäche des
Kochfelds gelegt werden, da sie heiß werden
können.
- In dem Raum unter dem Produkt ist eine
Trennplatte (nicht im Lieferumfang enthalten) mit
einem Mindestabstand von 20 mm einzubauen.
Wird eine IKEA Trennplatte verwendet, folgen Sie
bitte den Anweisungen im Referenzmaterial zu
dieser Platte.
Wird ein Backofen darunter installiert, ist keine
Produktbeschreibung
Trennplatte erforderlich.
- Wenn der Backofen nicht darunter installiert,
muss eine Trennplatte verwendet werden, und
zwischen Trennplatte und Küchenmöbel muss eine
Schublade installiert werden.
- Weist die Oberäche Risse auf, dann schalten Sie
das Gerät aus, um die Gefahr eines Stromschlags
zu vermeiden.
- Dieses Gerät ist nicht für den Betrieb mittels
externer Zeitschaltuhr oder getrenntem
Fernbedienungssystem vorgesehen.
- Verwenden Sie keine Dampfstrahlreiniger!
- Lassen Sie Speisen, die mit Öl oder Fett zubereitet
werden, niemals unbeaufsichtigt auf dem Herd
stehen, denn dies ist gefährlich und kann zu
einem Brand führen. Versuchen Sie NIEMALS,
einen Brand mit Wasser zu löschen, sondern
schalten Sie das Gerät aus und decken Sie die
Flamme mit einem Deckel oder einer speziellen
Brandschutzdecke ab.
Brandgefahr: stellen Sie keine Gegenstände auf
den Kochächen ab.
- Schalten Sie das Kochfeld nach der Benutzung mit
den Bedienelementen aus und verlassen Sie sich
nicht allein auf die Topferkennung.
Bedienfeld
B A
A
Kochzonen-Bedienelemente und
Anzeigen
B
Ein/Aus-Taste
1
Induktionskochzone
1
2
Bedienfeld
2
C
Timer/Kindersicherung/Leistungs-
Management
C
Page 18
DEUTSCH 18
Täglicher Gebrauch
Ein-/Ausschalten des Kochfeldes
Zum Einschalten des Kochfeldes etwa 2
Sekunden lang die Taste
Anzeigen der Kochzonen aueuchten. Zum
Ausschalten dieselbe Taste drücken, bis alle
Anzeigen erlöschen. Alle Kochzonen sind
abgeschaltet.
Falls das Kochfeld bereits benutzt wurde, bleibt
die Restwärmeanzeige “H” leuchten, bis alle
Kochzonen abgekühlt sind.
Wird innerhalb von 10 Sekunden nach dem
Einschalten des Kochfeldes keine Funktion
gewählt, dann schaltet sich das Kochfeld
automatisch wieder ab.
Vor der Benutzung
Wichtig: Die Induktionskochzonen arbeiten
nicht, wenn das Kochgeschirr nicht die korrekten
Abmessungen hat.
Verwenden Sie ausschließlich Töpfe und Pfannen
mit der Aufschrift "INDUKTIONSSYSTEM".
Stellen Sie vor dem Einschalten des Kochfelds
das Kochgeschirr auf die gewünschte Kochzone.
Bereits vorhandenes Kochgeschirr:
Mit einem Magneten lässt sich prüfen, ob das
Kochgeschirr für das Induktionskochfeld geeignet
ist: wenn die Töpfe und Pfannen nicht magnetisch
erfasst werden, sind sie ungeeignet.
1. Stellen Sie sicher, dass der Unterboden
des Kochgeschirrs nicht rau ist, da er die
Glaskeramikoberäche des Kochfelds
zerkratzen könnte. Überprüfen Sie das
Kochgeschirr.
2. Stellen Sie kein leeres Kochgeschirr auf der
Kochmulde ab. Der Boden des Kochgeschirrs
und die Glaskeramikoberäche des
Kochfelds könnten beschädigt werden.
3. Stellen Sie niemals heißes Kochgeschirr
auf das Bedienfeld der Kochmulde. Dieses
könnte Schaden nehmen.
drücken, bis die
Einschalten und Einstellen der Kochzonen
Leistungsstufenanzeige
Anzeige der ausgewählten
Kochzone
Position der Kochzone
Sobald das Kochfeld eingeschaltet und der Topf
auf die ausgewählte Kochzone gestellt wird,
wählen Sie die Zone mit der entsprechenden
Taste aus: das Display zeigt Stufe 0 an.
Mit dem Schieberegler können Sie die
gewünschte Leistungsstufe von der
Mindeststellung 0 bis zur Höchststellung 9
oder die Schnellkochstufe "P" wählen. Um die
Leistungsstufe zu erhöhen, fahren Sie mit dem
Finger auf dem Schieberegler mehrmals von
links nach rechts; um sie zu senken, fahren Sie mit
dem Finger in die andere Richtung. Alternativ
können Sie die Schnellzugrifftasten “+” und “-”
verwenden.
Jede Kochzone verfügt über verschiedene
Leistungsstufen, die mit den "+/-"-Taste von 1 bis
9, der maximalen Leistungsstufe, einstellbar sind.
Einige Kochzonen haben eine Boosterfunktion
zum Schnellkochen, die mit dem Buchstaben “P”
im Display angezeigt wird.
Schnellkochfunktion (Booster)
Diese Funktion ist nur bei bestimmten
Kochfeldern verfügbar und gestattet die
maximale Ausnutzung der Kochfeldleistung (z. B.
zum schnellen Sieden von Wasser). Drücken Sie
zum Aktivieren der Funktion die "+"-Taste, bis
"P" auf dem Display erscheint. Nach 5 Minuten
Benutzung der Schnellkochfunktion schaltet das
Gerät die Kochzone automatisch auf die Stufe 9
zurück.
Demo-Modus
Dieses Kochfeld ist mit einem Demo-Modus
ausgestattet, der Ihnen die Interaktion mit dem
Bedienfeld ermöglicht, ohne dass dabei die
Page 19
DEUTSCH 19
entsprechenden Kochzonen aktiviert werden.
Der Vorgang zum Aktivieren bzw. Deaktivieren
muss innerhalb von 60 Sekunden ausgeführt
werden, nachdem das Gerät an die
Netzversorgung in Ihrem Haus angeschlossen
wurde.
Um den Demo-Modus zu aktivieren, drücken
Sie bitte gleichzeitig die beiden äußeren
Kochzonenwahltasten und halten Sie diese für
mindestens 5 Sekunden lang gedrückt: "dE"
erscheint auf dem zentralen Display. Sie können
sich jetzt mit den Funktionen des Bedienfelds
vertraut machen.
Um den Demo-Modus zu deaktivieren,
wiederholen Sie den Vorgang. Zuerst
denken Sie bitte daran, das Kochfeld von der
Stromversorgung zu trennen und anschließend
wieder an die Stromversorgung anzuschließen,
und den Vorgang zur Deaktivierung des Demo-
Modus innerhalb von 60 Sekunden nach dem
Anschluss an das Netz auszuführen.
Aktivieren/Deaktivieren des Signaltons
Drücken Sie nach dem Einschalten der
Kochmulde gleichzeitig mindestens 3
Sekunden lang auf die Taste "+" und die
äußerste Auswahltaste auf der rechten Seite
("Bedienfeldsperre")
Deaktivierung der Kochzonen
Wählen Sie die Kochzone, die Sie ausschalten
möchten. Drücken Sie die entsprechende Taste
(ein Lichtpunkt erscheint unten rechts neben der
Leistungsstufenanzeige).
Die Taste “-” drücken, bis die Stufe “0” erscheint.
Um sofort auszuschalten, halten Sie die Taste
für die Kochzonenwahl 3 Sekunden lang
gedrückt. Die Kochzone schaltet ab und die
Restwärmeanzeige “H” erscheint.
Bedienfeldsperre
Diese Funktion sperrt das Bedienfeld, um ein
versehentliches Einschalten zu verhindern.
Zum Aktivieren der Sperrfunktion für das
Bedienfeld halten Sie Taste C 3 Sekunden lang.
Das Bedienfeld ist gesperrt mit Ausnahme der
Deaktivierungs-Funktion. Zum Ausschalten
der Bedienfeldsperre wiederholen Sie die
beschriebene Vorgehensweise.
Der Leuchtpunkt erlischt und das Kochfeld ist
wieder betriebsbereit.
Die Anwesenheit von Wasser, aus dem
Kochgeschirr übergetretene Flüssigkeiten
und Gegenstände aller Arten, die auf die
Taste unter dem Symbol geraten, können zum
unbeabsichtigten Auslösen oder Aufheben der
Funktion führen.
Schieberegler
Mit dem Timer kann für alle Kochzonen auf einen
Kochbetrieb vom maximal 99 Minuten (1 Stunde
und 39 Minuten) vorprogrammiert werden.
Wählen Sie die Kochzone, die mit dem
Timer vorprogrammiert werden soll (ein
Leuchtpunkt erscheint unten rechts neben der
Leistungsstufenanzeige am Display). Drücken Sie
dann die Taste mit dem Uhrensymbol und stellen
Sie dann die gewünschte Zeit mit den Tasten
“+” und “-” der Timer-Funktion ein (siehe die
Abbildung).
Nach einigen Sekunden beginnt der Timer mit
dem Countdown (ein Leuchtpunkt ist neben der
Zone sichtbar, für die der Timer programmiert
wurde).
Nach Ablaufen der Zeit ertönt ein Signalton und
die Kochzone schaltet automatisch ab.
Um den Timer auszuschalten, drücken Sie die
Taste “-”, bis auf der Anzeige “0:0” erscheint.
Um den Timer für eine andere Zone einzustellen,
wiederholen Sie die obigen Schritte. Das
Timer-Display zeigt immer den Timer für die
ausgewählte Zone oder den kürzesten Timer an.
Um den Timer zu ändern oder auszuschalten,
drücken Sie die Kochzonenwahltaste für den
betreffenden Timer.
Hinweise des Bedienfeldes
Restwärmeanzeige
Das Kochfeld ist mit einer Restwärmeanzeige für
jede Kochzone ausgestattet. Diese Anzeige weist
Page 20
DEUTSCH 20
auf noch heiße Kochzonen hin.
Wird auf dem Display “H” angezeigt, so ist
die Kochzone noch heiß. Solange die Anzeige
einer bestimmten Kochzone leuchtet, kann die
Restwärme dieser Kochzone zum Warmhalten
einer Speise oder zum Schmelzen von Butter
benutzt werden.
Erst nach Abkühlen der Kochzone erlischt die
Anzeige.
Anzeige falsch positioniertes oder fehlendes
Kochgeschirr.
Falls der Topf für Ihr Induktions-Kochfeld
ungeeignet ist, nicht genau auf der Kochzone
steht oder die falsche Größe hat, erscheint auf
dem Display der Hinweis "Topf fehlt" (siehe die
Abbildung). Wird innerhalb von 60 Sekunden
kein Topf erkannt, so schaltet sich die Kochmulde
automatisch wieder aus.
Schritt Bedienfeld
1 Circa 3 Sekunden lang + Taste drücken
Leistungsmanagement
Mit der Leistungsmanagement-Funktion kann der
Benutzer die maximale Leistung, die das Kochfeld
erreichen kann, nach Bedarf einstellen.
Diese Einstellung ist jederzeit möglich und wird bis
zur nächsten Änderung beibehalten.
Durch die Einstellung der erforderlichen
Maximalleistung verteilt das Kochfeld die Leistung
automatisch auf die verschiedenen Kochzonen
und stellt dabei sicher, dass der Höchstwert nicht
überschritten wird; dies hat den Vorteil, dass alle
Kochzonen gleichzeitig verwaltet werden können,
Probleme durch Überlast aber vermieden werden.
Es sind 4 maximale Leistungsstufen verfügbar, die
auf dem Display angezeigt werden: 2.5 – 4.0 –
6.0 – 7.2 kW (7.2 kW gilt als maximale Leistung
des Kochfelds). Das Kochfeld wurde werksseitig
auf die maximale Leistung eingestellt. Nach dem
ersten Anschluss des Produkts mit dem Netzstecker
in die Steckdose ist es in den ersten 60 Sekunden
möglich, die gewünschte Leistungsstufe anhand
folgender Punkte einzustellen:
Anzeige
Auf der Anzeige erscheint
2 Drücken Sie die Leistungsstufe (Taste C) zur
Bestätigung des vorherigen Schritts
3 Drücken Sie die -/+ Taste zur Einstellung der
ausgewählten Stufe aus den verschiedenen
verfügbaren Optionen
4 Drücken Sie die Leistungsstufe (Taste C) zur
Bestätigung des vorherigen Schritts
Auf der Anzeige erscheint die
zuletzt eingestellte Stufe
Auf der Anzeige erscheint die
eingestellte Stufe.
Auf der Anzeige erscheint die
eingestellte Stufe, die etwa 2
Sekunden lang blinkt; danach gibt
die Kochmulde einen Signalton ab
und schaltet sich dann selbständig
aus; jetzt ist die Kochmulde
betriebsbereit
Page 21

DEUTSCH 21
Bei einem Fehler während der Einstellung der
Leistung erscheint das Symbol
Mitte, und für etwa 5 Sekunden ertönt ein
Signalton. Wiederholen Sie in diesem Fall den
Einstellvorgang ganz von vorn. Sollte der Fehler
weiterhin auftreten, rufen Sie den Kundendienst.
Bei normaler Benutzung, wenn der Benutzer
versucht, die maximal verfügbare Leistungsstufe
bei Erreichen noch zu erhöhen, blinkt die
Leistungsstufe zwei Mal in der Kochzone, die in
Benutzung ist, und ein Signalton ertönt.
Um in dieser Kochzone eine höhere
Leistungsstufe zu erreichen, muss die
Leistungsstufe einer oder mehrerer anderer
aktiver Kochzonen manuell gesenkt werden.
in der
Pege und Wartung
Es wird empfohlen, das Kochfeld nach jedem
Gebrauch zu reinigen, um zu vermeiden, dass
die Glaskeramikoberäche beschädigt wird
und sich schwer zu entfernende Speisereste
ablagern. Vor dem Reinigen:
Schalten Sie vor dem Reinigen die
Kochzonen unbedingt aus und achten Sie
darauf, dass auch keine Restwärmeanzeige
(„H“) mehr leuchtet.
Keine Dampfstrahlreiniger verwenden!
Prüfen Sie die Kochmulde an den
Kühlöffnungen unter dem Gerät neben den
Luftein- und Auslassöffnungen regelmäßig
auf Staubablagerungen.
Staub verhindert die Luftzirkulation in
der Kochmulde, was zu Überhitzung der
Elektronik und Nachlassen der Kochleistung
führen kann.
Empfohlene Topfbodenbreiten
Ø Kochzone Ø Kochgeschirr
210 mm 150 - 210 mm
180 mm 120 - 180 mm
145 mm 100 - 145 mm
Tipps zum Reinigen:
1. Verwenden Sie Küchenpapier, saubere
Tücher oder spezielle Reinigungsmittel
für Glaskeramik-Kochfelder. Verwenden
Sie keine Scheuerschwämme und/oder
metallene Scheuer-Pads.
2. Lassen Sie Speisereste nicht antrocknen,
sondern entfernen Sie diese sofort.
Zucker oder stark zuckerhaltige Speisen
beschädigen das Kochfeld und müssen
sofort mit einem Schaber für Glas
entfernt werden. Achtung Solche Schaber
sind sehr scharf und mit Vorsicht zu
benutzen.
3. Entfernen Sie alle Rückstände mit dem
Schaber oder spezischen Produkten.
4. Salz, Zucker und Sand können das
Glaskeramikkochfeld verkratzen:
wischen Sie daher solche Partikel oder
Spritzer sofort vom Glaskeramikkochfeld
ab.
Page 22
DEUTSCH 22
Was tun, wenn...
Fehlercode Problem Mögliche Ursachen Lösung
Kochfeld schaltet
sich aus und gibt
nach 10 Sekunden
alle 3 Sekunden ein
akustisches Signal
aus.
C81, C82 Das Bedienfeld
C83 Das Bedienfeld zeigt
C85 Kochmulde kann
F02 oder F04 oder
C84
F42 oder F43 Der Anschluss-
F01, F05, F06, F07,
F10, F12, F25, F33,
F34, F36, F37, F46,
F47, F48, F49, F58,
F61, F62, F63, F72,
F74, F77
Dauerdruck auf dem
Bedienfeld
schaltet wegen
Überhitzung ab.
den Fehlercode
"Kochmulde aus" an,
weil eine Störung im
Stromkreis vorliegt
Topf nicht wärmen
Die
Anschlussspannung
falsch oder es gibt
ein Problem mit der
Stromversorgung
Spannungswert ist
falsch.
Rufen Sie den Kundendienst und geben Sie den Fehlercode an
Wasser oder
Küchenutensilien auf
dem Bedienfeld.
Interne Temperatur
der elektronischen
Komponenten zu
hoch.
Kochfeld hatte
Überspannung
Topf nicht geeignet
für das Induktionsfeld
Der Sensor erfasst
eine vom Anschluss
abweichende
Spannung.
Der Sensor erfasst
eine vom Anschluss
abweichende
Spannung.
Trocknen Sie das
Bedienfeld ab oder
räumen Sie es frei.
Warten Sie vor dem
Gebrauch ab, bis
sich das Kochfeld
abgekühlt hat.
Kochfeld kann
noch benutzt
werden, aber bitte
den Kundendienst
kontaktieren
Anderen
Induktionstopf
verwenden
Trennen Sie das
Kochfeld vom
Stromnetz und
prüfen Sie den
elektrischen
Anschluss.
Trennen Sie das
Kochfeld vom
Stromnetz und
prüfen Sie den
elektrischen
Anschluss.
Page 23

DEUTSCH 23
Bevor Sie den Kundendienst rufen:
1. Lesen Sie unter „Was tun, wenn...“ nach, um
zu sehen, ob Sie den Fehler selbst beheben
können.
2. Schalten Sie das Gerät aus und wieder ein
und prüfen Sie, ob die Störung dadurch
behoben ist.
3. Sollte die Störung weiterhin bestehen, rufen
Sie den Kundendienst.
Geben Sie folgende Informationen an:
• Art der Störung
• Modell des Kochfelds
• Servicenummer (d.h. die Zahl nach dem
Wort SERVICE auf dem Typenschild unter
dem Kochfeld und auf dem Garantieschein);
• Ihre vollständige Anschrift;
• Ihre Telefonnummer.
Sollte eine Reparatur erforderlich sein,
wenden Sie sich bitte an den Kundendienst
eines Vertragshändlers, wie in den
Garantiebestimmungen festgelegt.
Sollte eine Wartung oder Reparatur
ausnahmsweise einmal von einem NichtFachmann vorgenommen werden, verlangen Sie
auf jeden Fall eine Zertizierung
der ausgeführten Arbeiten und bestehen Sie
darauf, dass ausschließlich Original-Ersatzteile
verwendet werden.
Die Nichtbeachtung dieser Vorschriften kann
die Sicherheit und die Qualität des Produktes
beeinträchtigen.
Technische Daten
Abmessungen
Breite (mm) 580
Höhe (mm) 58
Tiefe (mm) 510
Spannung (V) Siehe hierzu "Installation und elektrischer
Anschluss"
Die technischen Daten sind auf dem Typenschild
an der Geräteunterseite angegeben.
Page 24

DEUTSCH 24
}
Anschluss an das Stromnetz
WARNUNG: Trennen Sie das Gerät von
der Stromversorgung.
- Die Installation muss von einem
qualizierten Techniker durchgeführt
werden, der die geltenden Sicherheits- und
Installationsrichtlinien genau kennt.
Der Hersteller haftet nicht für Verletzungen
von Personen oder Tieren und für
Sachschäden, die durch Missachten der
in diesem Kapitel genannten Richtlinien
entstehen.
- Das Stromkabel muss lang
genug sein, um die Kochmulde von der
Arbeitsplatte entfernen zu können.
- Die auf dem Typenschild unten
am Produkt angegebene Spannung muss
der Spannungsversorgung in Ihrem Haus
entsprechen.
blau/grün
schwarz/braun
gelb/grün
3. Befestigen Sie das Netzkabel mit der
Kabelklemme.
4. Schließen Sie den Deckel (C) und
schrauben Sie ihn mit der vorher entfernten
Schraube auf der Klemmenleiste fest.
Die Kochmulde prüft jeden Anschluss an das
Netz automatisch einige Sekunden lang.
Anschluss an die
Hauptstromversorgung
AU und
Vereinigtes
blau
Königreich
}
}
schwarz
braun
blau
blau (grau)
gelb/grün
schwarz
braun
}
gelb/grün
blau (grau)
1. Nehmen Sie den Klemmenleistendeckel (A)
nach Entfernen der Schraube ab und setzen
Sie ihn in das Scharnier (B) der Klemmenleiste
ein.
2. Setzen Sie das Netzkabel in die
Kabelklemme ein und schließen Sie die
Litzen an die Klemmenleiste an, wie
es auf dem Anschlussplan neben der
Klemmenleiste dargestellt ist.
schwarz
blau (grau)
gelb/grün
NUR FÜR BELGIEN
braun
blau
}
230V 2 Phase 2N
NUR FÜR NIEDERLANDE
schwarz
braun
gelb/grün
blau
blau (grau)
Page 25

DEUTSCH 25
Umweltschutz
Entsorgung von Verpackungsmaterialien
Das Verpackungsmaterial ist zu 100
% wiederverwertbar und trägt das
Recycling-Symbol ( ). Werfen Sie das
Verpackungsmaterial deshalb nicht einfach
fort, sondern entsorgen Sie es auf die von
den verantwortlichen Stellen festgelegte
Weise.
Entsorgung von Altgeräten
Dieses Gerät ist gemäß der Europäischen
Richtlinie 2002/96/EG für Elektro- und
Elektronik-Altgeräte gekennzeichnet.
Durch eine angemessene Entsorgung des
Geräts trägt der Nutzer dazu bei, potentiell
schädliche Auswirkungen für Umwelt und
Gesundheit zu vermeiden.
Das Symbol
dem beiliegenden Informationsmaterial
weist darauf hin, dass dieses Gerät kein
normaler Haushaltsabfall ist, sondern
in einer Sammelstelle für Elektro- und
Elektronik-Altgeräte entsorgt werden muss.
auf dem Gerät bzw. auf
Energiesparen
Für bestmögliche Leistungen empfehlen wir
Ihnen außerdem:
- Verwenden Sie nur Töpfe und Pfannen,
deren Bodendurchmesser dem der
Kochzone entspricht.
- Verwenden Sie nur Töpfe und Pfannen
mit achem Boden.
- Lassen Sie beim Kochen den Deckel
möglichst auf dem Topf.
- Stellen Sie das Kochgeschirr stets mittig
auf die gekennzeichneten Kochzonen
des Kochfeldes.
Konformitätserklärung
- Dieses Produkt wurde gemäß den
Sicherheitsanforderungen der
“Niederspannungsrichtlinie” 2006/95/EG
(ersetzt 73/23/EWG und nachfolgende
Zusätze) und den Schutzvorschriften der
“EMV”-Richtlinie 2004/108/EG entworfen,
hergestellt und in den Handel eingeführt.
IKEA GARANTIE
Page 26

DEUTSCH 26
IKEA GARANTIE
Wie lange ist die IKEA Garantie gültig?
Die Garantie gilt fünf (5) Jahre ab dem
Kaufdatum von bei IKEA gekauften
Geräten, es sei denn, es handelt sich um
Geräte der Marke “LAGAN”. Bei diesen
Geräten gilt eine Garantie von zwei (2)
Jahren. Als Kaufnachweis ist das Original
des Einkaufsbeleges erforderlich. Werden
im Rahmen der Garantie Arbeiten
ausgeführt, verlängert sich dadurch nicht die
Garantiezeit für das Gerät.
Welche Geräte sind nicht von der 5-(Fünf)Jahres-Garantie abgedeckt?
Die Geräte der Marke LAGAN und alle bei
IKEA vor dem 1. August 2007 gekauften
Geräte.
Wer übernimmt den Service?
IKEA führt die Serviceleistungen über sein
eigenes Kundendienstnetz oder einen
autorisierten Servicepartner aus.
Was deckt diese Garantie ab?
Die Garantie deckt Gerätefehler ab, die
aufgrund einer fehlerhaften Konstruktion
oder aufgrund von Materialfehlern nach dem
Datum des Einkaufs bei IKEA entstanden sind.
Die Garantie gilt nur für den Hausgebrauch
des betreffenden Gerätes. Ausnahmen
sind unter der Überschrift “Was deckt die
Garantie nicht ab?” erläutert. Innerhalb
der Garantiefrist werden die Kosten für
Reparatur, Ersatzteile sowie die Arbeits- und
Fahrtkosten übernommen, vorausgesetzt,
das Gerät ist ohne besonderen Aufwand
für eine Reparatur zugänglich. Die EURichtlinien (Nr. 99/44/EG) und die jeweiligen
örtlichen Bestimmungen gelten unter diesen
Bedingungen. Ersetzte Teile gehen in das
Eigentum von IKEA über.
Was unternimmt IKEA, um das Problem zu
lösen?
Der IKEA Kundendienst begutachtet das
Produkt und entscheidet nach eigenem
Ermessen, ob ein Garantieanspruch
besteht. Wenn die Garantie geltend
gemacht werden kann, wird IKEA durch
seinen eigenen Kundendienst oder einen
autorisierten Servicepartner nach eigenem
Ermessen das schadhafte Produkt entweder
reparieren oder durch ein gleiches oder
vergleichbares Produkt ersetzen.
Was deckt diese Garantie nicht ab?
• Normale Abnutzungen und
Beschädigungen.
• Vorsätzlich oder fahrlässig
herbeigeführte Schäden,
Beschädigungen infolge Missachtung
der Bedienungsanleitung,
unsachgemäßer Installation, falschen
Spannungsanschlusses, Beschädigung
durch chemische oder elektrochemische
Reaktionen, inklusive von Korrosionsoder Wasserschäden diese sind
nicht beschränkt auf Schäden durch
ungewöhnlich hohen Kalkgehalt
im Wasser, Beschädigungen
durch aussergewöhnliche
Umweltbedingungen.
• Verbrauchs- und Verschleißteile wie
Batterien und Glühlampen.
• Nichtfunktionelle und dekorative
Teile, die den normalen Gebrauch
nicht beeinussen, sowie Kratzer oder
mögliche Farbveränderungen.
• Zufallsschäden durch Fremdkörper,
Substanzen oder Reinigungsarbeiten
an Filtern, Abüssen oder Wasch-/
Spülmittelfächern.
• Schäden an folgenden Teilen:
Glaskeramik, Zubehör, Geschirr- und
Besteckkörbe, Zu- und Ablaufschläuche,
Dichtungen, Glühlampen und deren
Abdeckungen, Siebe, Knöpfe,
Gehäuse und Gehäuseteile. Soweit
nicht nachgewiesen wird, dass solche
Schäden auf Herstellungsmängel
zurückzuführen sind.
• Fälle, in welchen der gerufene
Servicetechniker keinen Fehler nden
konnte.
• Reparaturen, die nicht von unserem
eigenen Kundendienst oder -einem
Page 27

DEUTSCH 27
Servicevertragspartner ausgeführt oder
bei denen keine Originalteile verwendet
wurden.
• Durch fehlerhafte oder
unvorschriftsmäßige Installation
erforderliche Reparaturen.
• Die reparatur von Schäden, die durch
eine gewerbliche Nutzung des Gerätes
entstanden sind. gewerbliche Nutzung
des Gerätes.
• Transportschäden. Wenn der Kunde das
Produkt selbst nach Hause oder zu einer
anderen Adresse transportiert, ist IKEA
von der Haftung für Transportschäden
jeder Art freigestellt. Liefert IKEA das
Produkt direkt an die Kundenadresse,
werden eventuelle Transportschäden
durch IKEA gedeckt.
• Kosten für die Installation des IKEA-
Gerätes.
Wenn jedoch der IKEA-Kundendienst
oder ein Servicevertragspartner im
Rahmen der Garantie Reparaturen
ausführt oder das Gerät ersetzt,
installiert der Kundendienst oder
der Servicevertragspartner das
ausgebesserte Gerät oder das
Ersatzgerät, falls dies erforderlich sein
sollte.
Als Ausnahme gilt die fehlerfreie
Installation durch qualizierte Fachleute
unter Verwendung von Originalteilen,
um das Gerät den technischen
Sicherheitsvorschriften eines anderen
EU-Landes anzupassen.
Gültigkeit der länderspezischen
Bestimmungen
IKEA räumt Ihnen eine spezielle
Garantie ein, die die gesetzlichen
Gewährleistungsrechte, die von Land zu
Land jedoch unterschiedlich sein können,
mindestens abdeckt bzw. erweitert.
Allerdings schränken diese Bedingungen
in keiner Weise die landesweit geltenden
Verbraucherrechte ein.
Gültigkeitsbereich
Für Geräte, die einem EU-Land gekauft
und in ein anderes EU-Land mitgenommen
werden, wird der Kundendienst gemäß
den Garantierichtlinien im neuen Land
übernommen. Eine Verpichtung zur
Durchführung von Leistungen im Rahmen
der Garantie besteht nur dann, wenn das
Gerät gemäß der Montageanleitung und
gemäß:
- den technischen Spezikationen des
Landes, in dem der Garantieanspruch
erfolgt;
- den Montageinstruktionen und
Informationen im Benutzerhandbuch
entspricht.
Der engagierte Kundendienst für IKEA
Geräte
Der IKEA-Service steht Ihnen bei folgenden
Fragen / Anliegen gerne zur Verfügung:
• Wenn Sie einen Kundendienst im
Rahmen der Garantie benötigen
• Bei Fragen zur Installation Ihres
IKEA-Gerätes in den IKEA-Möbelkörper
• Wenn Sie Fragen zu den Funktionen
Ihres IKEA-Gerätes haben.
Um Ihnen möglichst schnell und kompetent
weiterhelfen zu können, bitten wir
Sie, sich vorher die Montage- und
Gebrauchsanweisung Ihres Gerätes
genauestens durchzulesen.
So erreichen Sie unseren Service
Gehen Sie dazu auf die letzte
Seite dieser Broschüre. Dort
nden Sie eine Übersicht mit den
entsprechenden Telefonnummern
und Kontaktdaten unserer
autorisierten Kundendienste.
Damit wir Ihnen im Falle einer
Störung jederzeit schnell helfen
können, bitten wir Sie, die in diesem
Handbuch aufgeführten Rufnummern
zu verwenden. Wenden Sie sich
jeweils an die für den betreffenden
Gerätetyp angegebene Rufnummer.
Halten Sie dazu bitte die (8-stellige)
IKEA Artikelnummer und die
Page 28

DEUTSCH 28
12-stellige Servicenummer (auf dem
Geräte-Typschild vermerkt) Ihres
IKEA Gerätes bereit.
BEWAHREN SIE DEN KAUFBELEG
GUT AUF!
Unser Service kann einen
Garantieanspruch nur unter Vorlage
dieses Beleges akzeptieren. Auf
dem Kaufbeleg ist auch die IKEA
Bezeichnung und Artikelnummer
(8-stelliger Code) für jedes der Geräte,
die Sie gekauft haben, vermerkt.
Benötigen Sie weiteren Rat und
Unterstützung?
Bei allen anderen, nicht
kundendienstspezischen Fragen, bitten
wir Sie, sich an Ihr nächstgelegenes IKEAEinrichtungshaus zu wenden. Wir empfehlen
Ihnen, sich vorher die dem Gerät beigefügten
Unterlagen genauestens durchzulesen.
Page 29

DEUTSCH 29
IKEA GARANTIE (CH)
Wie lange ist die IKEA Garantie gültig?
Die Garantie gilt 5 (fünf) Jahre ab dem
Kauf-/ Auslieferungsdatum für die bei IKEA
gekauften Geräte, es sei denn, es handelt
sich um Geräte der Marke “LAGAN”. Bei
diesen Geräten gilt eine Garantie von 2
(zwei) Jahren. Als Kaufnachweis ist das
Original des Einkaufsbeleges erforderlich.
Werden im Rahmen der Garantie Arbeiten
ausgeführt, verlängert sich dadurch nicht die
Garantiezeit für das Gerät.
Welche Geräte sind nicht durch die IKEA
Fünfjahresgarantie abgedeckt?
Die 5-jährige (fünf) Garantie gilt für alle
nach dem 1. August 2007 gekauften IKEA
Geräte. Hiervon ausgenommen sind die
IKEA Geräte der Marke LAGAN.
Wer übernimmt den Service?
IKEA führt die Serviceleistungen über
seinen eigenen Kundendienst oder einen
beauftragten Servicepartner aus.
Was deckt diese Garantie ab?
Die Garantie deckt Gerätefehler ab, die
aufgrund einer fehlerhaften Konstruktion
oder aufgrund von Materialfehlern nach
dem Datum bei/durch IKEA entstanden sind.
Die Garantie gilt nur für den Hausgebrauch
des betreffenden Gerätes. Ausnahmen
sind unter der Überschrift “Was deckt die
Garantie nicht ab?” erläutert. Innerhalb
der Garantiefrist werden die Kosten für
Reparatur, Ersatzteile sowie die Arbeits- und
Fahrtkosten übernommen, vorausgesetzt,
das Gerät ist ohne besonderen Aufwand für
eine Reparatur zugänglich. Die jeweiligen
örtlichen Bestimmungen oder die für die
Schweiz gültigen Rechtsvorschriften gelten
unter diesen Bedingungen. Ersetzte Teile
gehen in das Eigentum von IKEA über.
Was wird von IKEA unternommen, um das
Problem zu beheben?
Der Kundendienst begutachtet das Produkt
und entscheidet nach eigenem Ermessen,
ob ein Garantieanspruch besteht. Wenn
die Garantie geltend gemacht werden
kann, wird IKEA durch seinen eigenen
Kundendienst oder einen autorisierten
Servicepartner nach eigenem Ermessen das
schadhafte Produkt entweder reparieren
oder durch ein gleiches oder vergleichbares
Produkt ersetzen.
Was deckt diese Garantie nicht ab?
• Normale Abnutzungen und
Beschädigungen.
• Vorsätzlich oder fahrlässig herbeigeführte
Schäden, Beschädigungen infolge
Missachtung der Bedienungsanleitung,
unsachgemässer Installation, falschen
Spannungsanschlusses, Beschädigung
durch chemische oder elektrochemische
Reaktionen, Korrosions- oder
Wasserschäden, einschliesslich
Schäden durch ungewöhnlich hohen
Kalkgehalt im Wasser oder anormale
Umweltbedingungen.
• Verbrauchs- und Verschleissteile wie z.B.
Batterien und Glühlampen.
• Nichtfunktionelle und dekorative Teile,
die den normalen Gebrauch nicht
beeinussen, sowie Kratzer oder mögliche
Farbveränderungen.
• Schäden verursacht durch Fremdkörper,
Substanzen oder Reinigungsarbeiten/
Beseitigung von Verstopfungen an Filtern,
Abüssen oder Spülmittelfächern.
• Schäden an folgenden Teilen:
Glaskeramik, Zubehör, Geschirr- und
Besteckkörbe, Zu- und Ablaufschläuche,
Dichtungen, Glühlampen und deren
Abdeckungen, Siebe, Knöpfe, Gehäuse
und Gehäuseteile. Soweit nicht
nachgewiesen wird, dass solche Schäden
auf Herstellungsmängel zurückzuführen
sind.
• Bei Fällen, in welchen der Servicetechniker
keinen Fehler nden konnte.
• Reparaturen, die nicht von unserem
Page 30

DEUTSCH 30
eigenen Kundendienst oder einem
Servicevertragspartner ausgeführt oder
bei denen keine Originalteile verwendet
wurden.
• Durch fehlerhafte oder
unvorschriftsmässige Installation
erforderliche Reparaturen.
• Fehlbedienung und/oder Verwendung
des Gerätes in einer nicht privaten
sondern gewerblichen Umgebung.
• Transportschäden. Wenn der Kunde das
Produkt selbst nach Hause oder zu einer
anderen Adresse transportiert, ist IKEA
von der Haftung für Transportschäden
jeder Art freigestellt. Liefert IKEA das
Produkt direkt an die Kundenadresse,
werden eventuelle Transportschäden
durch IKEA gedeckt.
• Kosten für die Installation des IKEA
Gerätes.
Wenn jedoch der IKEA Kundendienst oder
ein Servicevertragspartner im Rahmen der
Garantie Reparaturen ausführt oder das
Gerät ersetzt, installiert der Kundendienst
oder der Servicevertragspartner
das ausgebesserte Gerät oder das
Ersatzgerät, falls dies erforderlich sein
sollte.
Als Ausnahme gilt die fehlerfreie
Installation durch qualizierte Fachleute
unter Verwendung von Originalteilen,
um das Gerät den technischen
Sicherheitsvorschriften eines anderen EULandes anzupassen.
Gültigkeit der länderspezischen
Bestimmungen
IKEA räumt Ihnen eine spezielle
Garantie ein, die die gesetzlichen
Gewährleistungsrechte, die von Land
zu Land unterschiedlich sein können,
mindestens abdeckt, evt. erweitert.
Allerdings schränken diese Bedingungen
in keiner Weise die landesweit geltenden
Verbraucherrechte ein.
Gültigkeitsbereich
Für Geräte, die in einem EU-Land gekauft
und in ein anderes Land mitgenommen
werden, wird der Kundendienst gemäss
den Garantierichtlinien im neuen Land
übernommen. Eine Verpichtung zur
Durchführung von Leistungen im Rahmen
der Garantie besteht nur dann, wenn
das Gerät gemäß der Montageanleitung
und gemäß der Sicherheitshinweise im
Benutzerhandbuch aufgestellt und installiert
wurde gemäß:
- den technischen Spezikationen des
Landes, in dem der Garantieanspruch
erfolgt;
- den Montageinstruktionen und
Informationen im Benutzerhandbuch.
Der engagierte Kundendienst für IKEA
Geräte
Der autorisierte Kundendienst für IKEA
Geräte steht Ihnen für Fragen oder
Probleme wie folgt zur Verfügung:
• Wenn Sie einen Kundendienst im Rahmen
der Garantie benötigen
• Bei Fragen zur Installation Ihres IKEAGerätes in den IKEA-Möbelkörpus
(Hinweis: Die Gasinstallation wird von
einem autorisierten Gasfachmann
durchgeführt).
• Wenn Sie Fragen zu den Funktionen Ihres
IKEA-Gerätes haben.
Um Ihnen möglichst schnell und
kompetent weiterhelfen zu können,
bitten wir Sie, vorher die Montage und
Gebrauchsanweisung Ihres Gerätes
genauestens durchzulesen.
So erreichen Sie unseren Service
Gehen Sie dazu auf die letzte
Seite dieser Broschüre. Dort
nden Sie eine Übersicht mit den
entsprechenden Telefonnummern
und Kontaktdaten unserer
autorisierten Kundendienste.
Page 31

DEUTSCH 31
Damit wir Ihnen im Falle einer
Störung jederzeit schnell und
kompetent helfen können, bitten wir
Sie, sich an die in diesem Handbuch
angegebene Service-Rufnummer zu
wenden. Halten Sie dazu bitte die
(8-stellige) IKEA Artikelnummer und
die 12-stellige Servicenummer (auf
dem Geräte-Typschild vermerkt)
Ihres IKEA Gerätes bereit.
KAUF-/AUSLIEFERUNGSBELEG AUF!
Unser Service kann einen
Garantieanspruch nur unter Vorlage
dieses Beleges akzeptieren. Auf dem
Beleg sind auch die Bezeichnung
und (8-stellige) IKEA Artikelnummer
des von Ihnen erworbenen Geräts
vermerkt.
Benötigen Sie weiteren Rat und
Unterstützung?
Bei allen anderen, nicht
kundendienstspezischen Fragen bitten
wir Sie, sich an den Kundenservice im
nächstgelegenen IKEA-Einrichtungshaus
zu wenden. Wir empfehlen Ihnen, vorher
die dem Gerät beigefügten Unterlagen
genauestens durchzulesen.
Page 32

FRANÇAIS 32
Table des matières
Instructions de sécurité 32
Description de l'appareil 33
Utilisation quotidienne 34
Nettoyage et entretien 37
Que faire si ... 38
Données techniques 39
Branchement électrique 40
Conseils pour la protection
de l'environnement 41
GARANTIE IKEA 42
GARANTIE IKEA (CH) 51
Instructions de sécurité
La sécurité est essentielle, pour vous et votre
entourage.
Le présent manuel contient d'importants messages
relatifs à la sécurité, qui gurent également sur
l'appareil. Nous vous invitons à les lire soigneusement
et à les respecter en toute circonstance.
Ceci est le symbole d'avertissement relatif à la
sécurité, qui rappelle l'attention des utilisateurs
sur les dangers potentiels qu'eux-mêmes ou d'autres
personnes peuvent encourir.
Tous les messages relatifs à la sécurité sont précédés
du symbole de danger et des termes suivants :
DANGER Indique une situation dangereuse qui,
si elle n'est pas évitée, occasionnera de graves
lésions.
AVERTISSEMENT Indique une situation
dangereuse qui, si elle n'est pas évitée, est
susceptible d'occasionner de graves lésions.
Tous les messages de sécurité mentionnent le risque
potentiel auquel ils se réfèrent et indiquent comment
réduire le risque de lésions, dommages et secousses
électriques dus à une utilisation incorrecte de
l'appareil. Veuillez observer scrupuleusement les
instructions suivantes :
- Débranchez l'appareil du secteur avant de
procéder aux opérations d'installation.
- L'installation et l'entretien sont réservés à
un technicien spécialisé, conformément aux
instructions du fabricant et à la réglementation
locale en vigueur en matière de sécurité. Pour
toute réparation ou tout remplacement de
pièces, procédez uniquement aux opérations
spéciées dans le manuel en utilisant les pièces
expressément indiquées.
- La mise à la terre de l'appareil est obligatoire.
- Le cordon d'alimentation doit être sufsamment
long pour permettre le branchement de l'appareil
une fois installé dans son logement.
- Pour que l'installation soit conforme aux normes
de sécurité en vigueur, utilisez un interrupteur
omnipolaire avec ouverture minimum de 3 mm
entre les contacts.
- N'utilisez en aucun cas de prises multiples ou de
rallonges.
- Ne tirez pas sur le cordon d'alimentation de
l'appareil pour le débrancher.
- Une fois l'installation terminée, l'utilisateur ne
devra plus pouvoir accéder aux composants
électriques.
- La table de cuisson est un appareil
électroménager conçu exclusivement pour la
cuisson d'aliments. Aucune autre utilisation n'est
autorisée (par exemple, pour chauffer une pièce).
Le fabricant décline toute responsabilité en cas
d'utilisation incorrecte ou de mauvais réglages
des commandes.
- L'appareil et ses parties accessibles deviennent
chauds pendant l'utilisation. Veillez à ne pas
toucher les résistances. Les enfants de moins
de 8 ans doivent être tenus à distance ou être
surveillés en permanence.
L'appareil n'est pas destiné à être utilisé par des
personnes (enfants de moins de 8 ans compris)
atteintes de déciences physiques, sensorielles
ou mentales, ayant une expérience et des
connaissances insufsantes, sauf si placées sous
la surveillance ou instruites sur l'utilisation de
l'appareil par une personne responsable de leur
sécurité. Empêchez-les de jouer avec l'appareil.
Le nettoyage et l'entretien quotidien de l'appareil
ne doivent pas être effectués par un enfant, à
moins qu'une personne adulte ne supervise ces
Page 33

FRANÇAIS 33
opérations.
- Les parties accessibles de la table deviennent très
chaudes pendant l'utilisation. Assurez-vous que
les enfants restent à l'écart et qu'ils ne jouent pas
avec l'appareil.
- Pendant et après l'utilisation, veillez à ne pas
toucher les résistances de l'appareil. Évitez
tout contact avec des chiffons ou autre matière
inammable tant que les composants de
l'appareil n'ont pas refroidi.
- Ne placez jamais de produits inammables sur
ou à proximité de l'appareil.
- L'huile et la graisse peuvent devenir très chaudes
et s'enammer facilement. Surveillez la cuisson si
vous utilisez de la graisse ou de l'huile.
- Ne posez pas de couteaux, fourchettes, cuillères,
couvercles et autres objets métalliques sur la table
de cuisson ; ils risquent de devenir brûlants.
- Un panneau de séparation (non fourni) doit être
installé dans l'espace présent au-dessous de
l'appareil, à une distance de 20 mm minimum.
Si vous utilisez un panneau de séparation
Ikea, suivez les instructions fournies dans la
documentation de référence du panneau.
La cloison de séparation est inutile si la table est
Description de l'appareil
installée au-dessus d'un four.
- Si la table de cuisson n'est pas installée au-dessus
d'un four, utilisez la cloison de séparation et
intercalez le tiroir entre la cloison de séparation et
le meuble.
- Si la surface est ssurée, mettez l'appareil hors
tension an de ne pas vous exposer à un risque
d'électrocution.
- Cet appareil n'a pas été conçu pour être mis en
marche par un minuteur ou un système de gestion
à distance.
- N'utilisez pas de nettoyeur vapeur.
- Si vous cuisinez avec de la graisse ou de l'huile,
surveillez constamment la cuisson, car ces
matières peuvent s'enammer et provoquer
un incendie. Ne tentez JAMAIS d'éteindre un
incendie avec de l'eau. En cas d'incendie, mettez
l'appareil hors tension puis couvrez la amme à
l'aide d'un couvercle ou d'une couverture anti-feu.
Risque d'incendie : ne stockez rien sur les surfaces
de cuisson.
- Après toute utilisation, mettez la résistance de la
plaque de cuisson hors tension à l'aide de son
dispositif de commande ; ne vous ez pas au
détecteur de casserole.
Bandeau de commande
B A
A
Réglage des foyers et afchages
correspondants
B
Marche/Arrêt
1
Foyer à induction
1
2
Bandeau de commande
2
C
Minuteur/Sécurité enfant/Gestion de la
puissance
C
Page 34
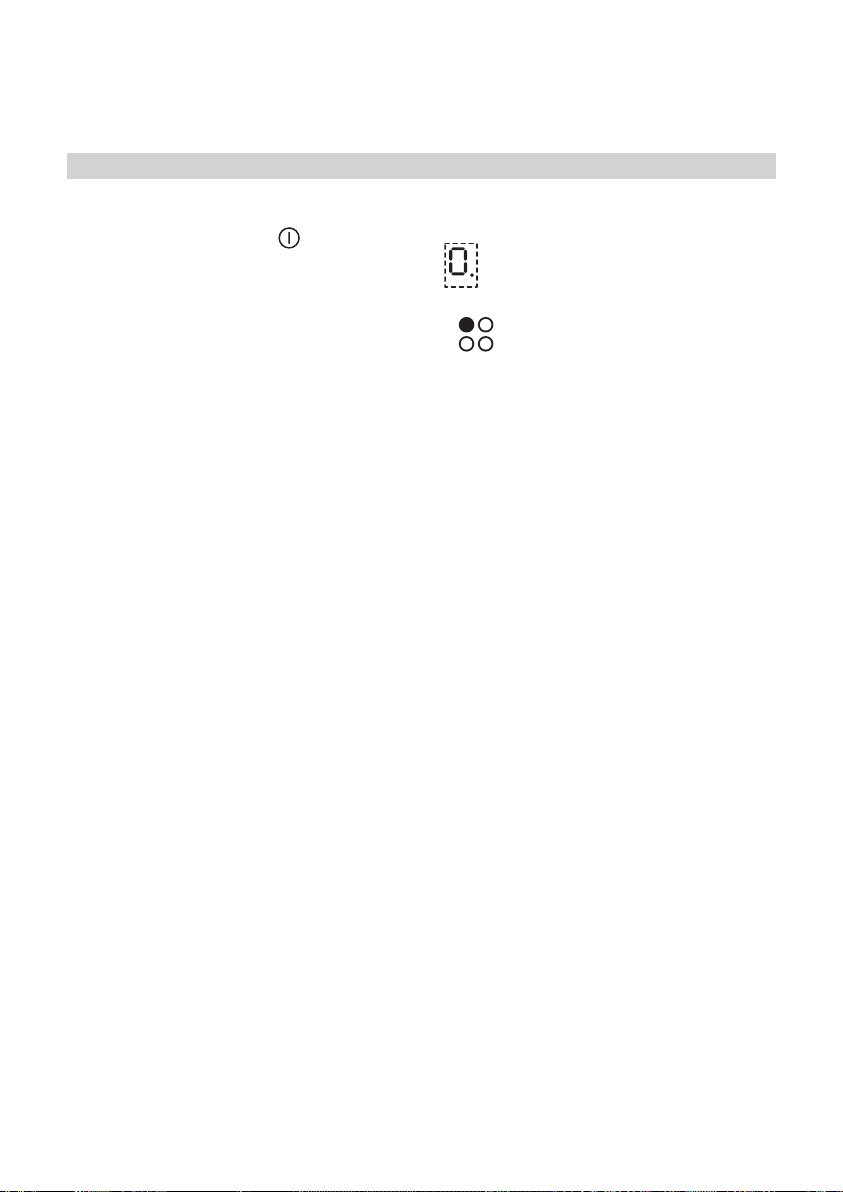
FRANÇAIS 34
Utilisation quotidienne
Marche/arrêt de la table de cuisson
Pour allumer la table, appuyez pendant 2
secondes environ sur la touche
l'allumage des afcheurs des foyers. Pour
éteindre, appuyez sur cette même touche jusqu'à
l'extinction des afcheurs. Tous les foyers sont
désactivés.
Au cas où la table aurait déjà été utilisée,
l'indicateur de la chaleur résiduelle “H” restera
actif jusqu'au refroidissement des foyers
Si aucune fonction n'est sélectionnée dans
les 10 secondes qui suivent l'allumage de la
table de cuisson, cette dernière se désactive
automatiquement.
Avant l'utilisation
Remarque importante : si la taille des casseroles
ne convient pas, les foyers ne s'allument pas.
Utilisez exclusivement des casseroles qui portent
le symbole “INDUCTION SYSTEM”.
Avant d'allumer la table de cuisson, posez la
casserole sur le foyer désiré.
Anciens récipients :
Pour vérier si une casserole est compatible
avec la table à induction, utilisez un aimant : s'il
l'aimant n'est pas attiré, la casserole ne convient
pas.
1. N'utilisez pas d'ustensiles de cuisson à fond
rugueux, car ils risqueraient de rayer la
surface de la table de cuisson. Contrôlez les
récipients.
2. N'utilisez pas de récipients vides sur la table
de cuisson. Le fond des récipients et la surface
du plan vitrocéramique pourraient subir des
dommages.
3. Ne posez jamais les casseroles et les poêles
chaudes sur le bandeau de commande, sous
peine de l'endommager.
jusqu'à
Activation et réglage des foyers
Afchage de l'indicateur de
puissance
Indication du foyer sélectionné
Position du foyer
Dès que vous avez mis la table de cuisson sous
tension et placé l'ustensile de cuisson sur le foyer
choisi, activez le foyer à l'aide de la touche
correspondante : l'afchage indique le niveau de
puissance 0.
La commande à glissement tactile permet de
régler le niveau de puissance de 0 (puissance de
chauffe mini.) à 9 (puissance de chauffe maxi.) ou
de sélectionner le Booster “P”. Pour augmenter
le niveau de puissance, faites glisser le doigt
de gauche à droite à plusieurs reprises et dans
l'autre sens pour le réduire. À défaut, utilisez les
touches d'accès rapide “+” et “-”.
Chaque foyer a différents niveaux de puissance
réglables à l'aide des touches +/-, qui
s'échelonnent de “1” (puissance minimale) à
“9” (puissance maximale). Certains foyers sont
équipés du Booster permettant une montée
en température ultra rapide. L'activation de
cette fonction est signalée par la lettre “P” sur
l'afcheur.
Fonction Booster (ébullition rapide)
Cette fonction, associée uniquement à certains
foyers, permet une montée en température ultra
rapide (par exemple, pour faire bouillir de l'eau
rapidement). Activez la fonction en appuyant sur
la touche “+” jusqu'à ce que “P” s'afche. Cinq
minutes après l'activation de la fonction Booster,
l'appareil règle automatiquement la puissance du
foyer au niveau 9.
Mode Démo
La table de cuisson est équipée du mode Démo,
qui vous permet d'interagir avec le bandeau de
commande sans activer les foyers correspondants.
Page 35
FRANÇAIS 35
La procédure d'activation et de désactivation doit
être effectuée dans les 60 secondes qui suivent
le branchement de l'appareil à l'alimentation
secteur.
Pour activer le mode Démo, appuyez
simultanément sur les touches de sélection des
deux foyers extérieurs pendant au moins 5
secondes. “dE” apparaît sur l'afchage central. À
présent, il vous est possible d'explorer les fonctions
du bandeau de commande.
Pour désactiver le mode Démo, répétez la
procédure ci-dessus en vous rappelant qu'il
est d'abord nécessaire de débrancher la table
de cuisson de l'alimentation secteur, puis de la
rebrancher et d'exécuter la procédure dans les 60
secondes qui suivent le branchement de l'appareil.
Activation/désactivation du signal sonore
Après avoir mis la table de cuisson sous tension,
appuyez simultanément sur la touche "+" et
sur la touche de sélection située le plus à droite
("verrouillage du bandeau de commande")
pendant au moins 3 secondes.
Désactivation des foyers
Sélectionnez le foyer que vous souhaitez
désactiver. Appuyez sur la touche correspondante
(un point s'allume dans le bas, à droite de
l'indicateur du niveau de puissance).
Appuyez sur la touche "-" pour régler la puissance
à "0".
Pour éteindre le foyer de manière instantanée,
appuyez sur la touche de sélection du foyer
pendant 3 secondes. Le foyer s'éteint et
l'indicateur de chaleur résiduelle “H” s'allume.
Verrouillage du bandeau de commande
Cette fonction bloque les commandes, an
d'empêcher toute mise en marche inopinée de la
table de cuisson.
Pour activer la fonction de verrouillage du
bandeau de commande, appuyez sur la touche C
pendant 3 secondes.
Toutes les fonctions du bandeau de commande
sont verrouillées, à l'exception de la fonction de
désactivation. Pour désactiver le verrouillage du
bandeau de commande, répétez la procédure
d'activation.
Le point lumineux s'éteint ; après quoi, la table de
cuisson est à nouveau active.
La présence d'eau, de liquide ayant débordé
des casseroles ou d'objets en général posés sur
la touche sous le symbole peuvent provoquer
l'activation ou la désactivation involontaire
de la fonction de verrouillage du bandeau de
commande.
Commande à glissière
Le minuteur permet de programmer une durée de
cuisson jusqu'à un temps maximum de 99 minutes
(1 heure et 39 minutes) à associer à tous les foyers.
Sélectionnez le foyer à associer au minuteur
(un point lumineux apparaît en bas à droite de
l'indicateur du niveau de puissance sur l'afcheur),
appuyez sur la touche avec le symbole de
l'horloge, puis réglez le temps désiré à l'aide des
touches “+” et “-” de la fonction minuteur (voir
gure).
Après quelques secondes, le minuteur démarre le
compte à rebours (un point lumineux apparaît à
côté du foyer pour lequel le minuteur a été activé).
À la n du temps imparti, un signal sonore retentit
et le foyer s'éteint automatiquement.
Pour désactiver le minuteur, appuyez sur la touche
“-” jusqu'à ce que “0:0” s'afche.
Si vous souhaitez régler le minuteur pour un
autre foyer, répétez les points décrits ci-dessus.
L'afchage du minuteur visualise toujours le
minuteur associé au foyer sélectionné ou le temps
le plus court.
Pour modier ou désactiver le minuteur, appuyez
sur la touche de sélection du foyer associé au
minuteur en question.
Avis du bandeau de commande
Indicateur de chaleur résiduelle
La table est équipée d'un indicateur de chaleur
résiduelle pour chaque foyer. Cet indicateur
signale les foyers encore à température élevée.
Si l'afcheur montre la lettre H, le foyer est encore
Page 36

FRANÇAIS 36
chaud. Si le foyer présente cette signalisation, il
est possible, par exemple, de maintenir un plat au
chaud ou de faire fondre du beurre.
Dès que le foyer est refroidi, l'afchage s'éteint.
Détection des casseroles
Si la casserole n'est pas compatible avec la table
à induction, si elle est mal posée ou que sa taille
est inappropriée, le message "casserole absente"
s'afche (voir l'illustration). Si la casserole n'est pas
détectée dans un délai de 60 secondes, la table
de cuisson s'éteint automatiquement.
Gestion de la puissance
Grâce à la fonction de “Gestion de la puissance”,
l'utilisateur peut régler la table de cuisson sur la
Étape
1
2
3
4
Bandeau de commande
Appuyez sur la touche + pendant 3 secondes
environ
Appuyez sur la touche de gestion de la
puissance (touche C) pour valider l'étape
précédente
Appuyez sur la touche - + pour régler le niveau
choisi parmi les différentes options disponibles
Appuyez sur la touche de gestion de la
puissance (touche C) pour valider l'étape
précédente
puissance de chauffe maximale, selon les besoins.
Ce réglage est possible à tout moment et est
maintenu jusqu'au prochain changement.
En programmant la puissance maximale, la table
de cuisson règle automatiquement la répartition
de la chaleur entre les différents foyers et garantit
que ce seuil n'est jamais dépassé, ce qui permet
de gérer tous les foyers en même temps sans
risque de surcharge.
4 niveaux de puissance maximale sont
disponibles et apparaissent sur l'afchage :
2,5 – 4,0 – 6,0 – 7,2 kW (7,2 kW est considérée
comme la puissance maxi. de la table de cuisson).
Au moment de l'achat, la table est réglée sur
la puissance maximale. Après avoir branché
l'appareil dans la prise électrique, il est possible
de régler la puissance requise pendant les 60
premières secondes en procédant comme suit :
Afcheur
L'afcheur indique
L'afcheur indique le dernier
niveau réglé
L'afcheur indique le niveau
sélectionné
L'afchage indique le niveau
réglé qui clignote pendant
environ 2 secondes ; la table
émet ensuite un signal sonore
puis s'éteint d'elle-même ; elle
est prête à l'utilisation.
Page 37

FRANÇAIS 37
Si une erreur survient pendant le réglage
de la puissance, le symbole
accompagné d'un signal sonore continu pendant
environ 5 secondes. Le cas échéant, recommencez
la conguration depuis le début. Si le problème
persiste, contactez le Service après-vente.
Quand la puissance maximale disponible est
atteinte dans des conditions d'utilisation normale,
le niveau du foyer concerné clignote deux fois et
émet un signal sonore si on tente de l'augmenter.
Pour obtenir une puissance supérieure sur ce
foyer, diminuez manuellement la puissance d'un
ou plusieurs foyers actifs.
s'afche,
Nettoyage et entretien
Il est conseillé d'effectuer le nettoyage de
la table après chaque utilisation pour éviter
d'endommager sa surface et la formation
d'incrustations de saleté difciles à éliminer.
Avant de procéder aux opérations de
nettoyage, vériez que les foyers sont
éteints et qu'aucun voyant de chaleur
résiduelle ("H") n'est allumé.
N'utilisez en aucun cas d'appareil de
nettoyage à la vapeur !
Vériez périodiquement qu'il n'y a pas de
poussière sous l'appareil, près des ouvertures
d'admission d'air de refroidissement ou
d'évacuation.
Ceci peut gêner la ventilation et le
refroidissement du module électronique et
diminuer l'efcacité de la table de cuisson.
Diamètres de casseroles conseillés
Ø foyer Ø casserole
210 mm 150 - 210 mm
180 mm 120 - 180 mm
145 mm 100 - 145 mm
Pour procéder au nettoyage, il est conseillé :
1. d'utiliser un chiffon doux propre, du
papier essuie-tout ou des produits
spéciaux pour tables de cuisson
vitrocéramiques. Évitez d'utiliser des
éponges à surface abrasive et/ou des
pailles de fer.
2. d'éliminer les résidus d'aliments en
évitant de les laisser durcir. Le sucre ou
les aliments à haute teneur en sucre
endommagent la table de cuisson et
doivent être éliminés immédiatement
avec un racloir pour verre. Attention Le
racloir pour verre doit être manipulé avec
soin.
3. d'enlever les éventuelles incrustations
avec un racloir ou des produits
spéciques.
4. Le sel, le sucre et le sable peuvent rayer
la table de cuisson vitrocéramique :
nettoyez immédiatement en cas de
déversement.
Page 38
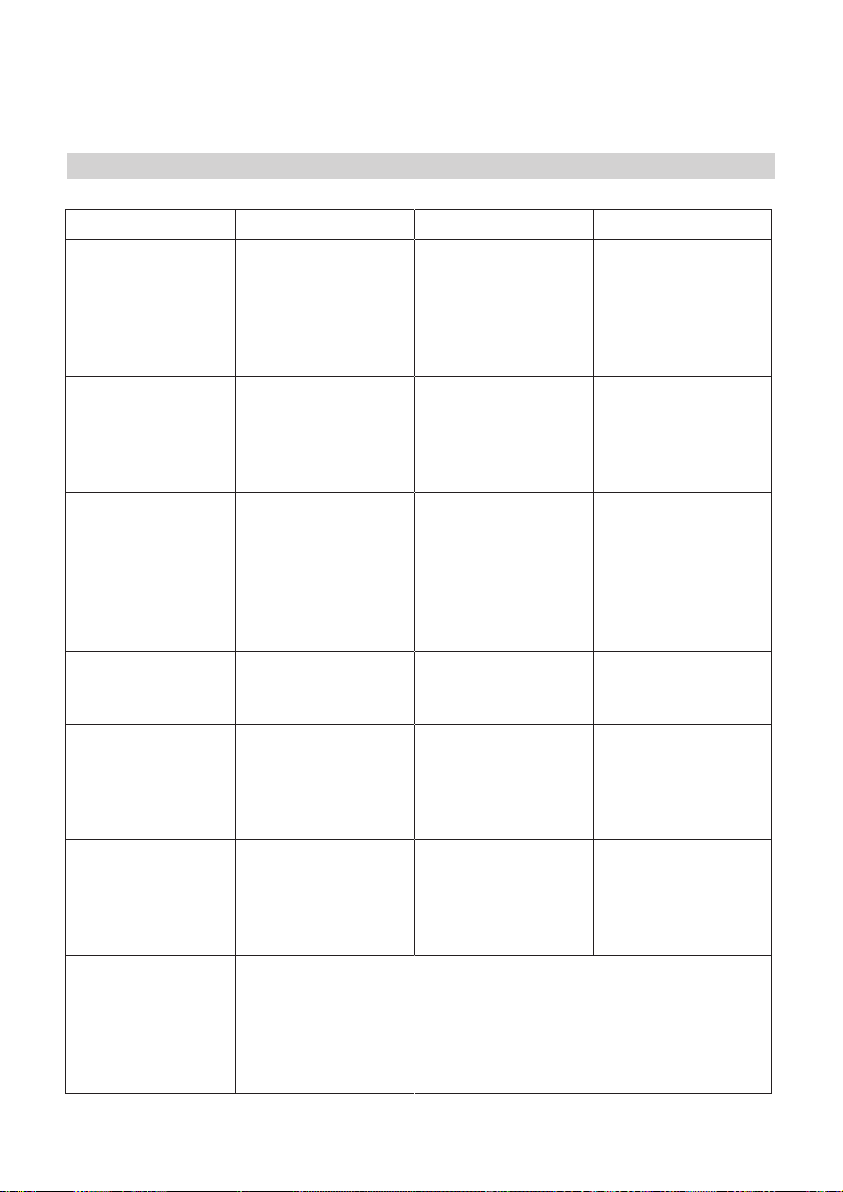
FRANÇAIS 38
Que faire si ...
Code d'erreur Problème Cause probable Solution
La table de cuisson
s'éteint et, au bout
de 10 secondes,
un signal sonore
retentit toutes les 3
secondes.
C81, C82 Le bandeau de
C83
C85 La table de cuisson
F02, F04 ou C84 La tension de
F42 ou F43 La tension
F01, F05, F06, F07,
F10, F12, F25, F33,
F34, F36, F37, F46,
F47, F48, F49, F58,
F61, F62, F63, F72,
F74, F77
Pression permanente
sur le bandeau de
commande
commande s'éteint
à cause d'une
température trop
élevée.
Le bandeau de
commande indique
le code d'erreur
de table éteinte en
raison d'un problème
dans le circuit
électronique
ne chauffe pas la
casserole
raccordement est
erronée ou il y a un
problème au niveau
de l'alimentation
d'alimentation de
la table n'est pas
correcte.
Contactez le Service Après-vente et communiquez le code d'erreur.
Eau ou ustensiles
de cuisine sur
le bandeau de
commande
La température
interne des
composants
électroniques est
trop élevée.
Problème de
surtension (réglage
initial sortie d'usine)
La casserole ne
convient pas à la
cuisson à induction
Le capteur
détecte une
tension différente
de la tension
d'alimentation.
Le capteur
détecte une
tension différente
de la tension
d'alimentation.
Nettoyez le bandeau
de commande.
Attendez que la table
refroidisse avant de
l'utiliser à nouveau.
La table de cuisson
peut toujours être
utilisée. Contactez
néanmoins le Service
après-vente.
Utilisez une casserole
spéciale induction
Débranchez la
table du secteur
et contrôlez le
branchement.
Débranchez la
table du secteur
et contrôlez le
branchement.
Page 39

FRANÇAIS 39
Avant de contacter le service après-vente :
1. Vériez si vous pouvez remédier par
vous-même au problème en consultant le
chapitre "Diagnostic des pannes".
2. Éteignez et rallumez l'appareil pour voir si
le problème persiste.
3. Si le problème persiste, contactez le
Service après-vente.
Veuillez spécier les informations suivantes :
• le type de panne ;
• le modèle de la table de cuisson ;
• le code service (numéro suivant le mot
SERVICE sur la plaque signalétique
située sous la table de cuisson
et sur le certicat de garantie) ;
• votre adresse complète ;
• votre numéro de téléphone.
Si une réparation est nécessaire, veuillez
contacter un Service Après-vente agréé,
comme indiqué dans la garantie.
Si la réparation devait être réalisée par un
technicien non agréé, exigez qu'il vous
remette une certication du
travail effectué et insistez pour qu'il soit fait
usage de pièces détachées d'origine.
Le non-respect des instructions
susmentionnées peut compromettre la
sécurité et la qualité de l’appareil.
Données techniques
Dimensions
Largeur (mm) 580
Hauteur (mm) 58
Profondeur (mm) 510
Tension (V) Voir le chapitre Installation et branchement
électrique.
Les données techniques gurent sur la plaque
signalétique située dans le fond de l'appareil.
Page 40

FRANÇAIS 40
}
Branchement électrique
MISE EN GARDE Débranchez l'appareil
du secteur.
- L'appareil doit être installé par un
professionnel qualié, connaissant
parfaitement les réglementations en vigueur
en matière de sécurité et d'installation.
- Le fabricant décline toute responsabilité en
cas de dommages aux personnes, animaux
ou choses résultant du non-respect des
consignes fournies dans ce chapitre.
- Le cordon d'alimentation doit être
sufsamment long pour permettre de retirer
la table de cuisson du plan de travail.
- Vériez que la tension indiquée sur la
plaque signalétique apposée sur le fond
de l’appareil correspond à la tension
d’alimentation de votre habitation.
bleu/gris
noir/brun
jaune/vert
1. Enlevez le couvre-borne (A) en dévissant la
vis et insérez le couvercle dans la charnière
(B) de la borne.
2. Insérez ensuite le cordon d’alimentation
dans le collier de serrage et connectez les
ls au bornier en suivant les indications du
schéma situé à côté dudit bornier.
3. Fixez le cordon d'alimentation avec le
serre-câble.
4. Fermez le couvercle (C) et vissez-le sur la
borne, vis retirée.
À chaque connexion au réseau électrique, la
table effectue un contrôle automatique de
quelques secondes.
Branchement sur
secteur
AU
noir
brun
bleu
}
bleu (gris)
jaune/vert
POUR LA BELGIQUE UNIQUEMENT
noir
brun
bleu
}
bleu (gris)
jaune/vert
noir
brun
jaune/vert
bleu
bleu (gris)
230 V biphasé 2N
POUR LES PAYS-BAS UNIQUEMENT
jaune/vert
bleu (gris)
et RU
}
}
noir
brun
bleu
Page 41
FRANÇAIS 41
Conseils pour la protection de l'environnement
Élimination des emballages
Les matériaux d'emballage sont entièrement
recyclables comme l'indique le symbole
de recyclage ( ). Par conséquent, ne les
jetez jamais dans la nature et respectez
les réglementations locales en vigueur en
matière d'élimination des déchets.
Mise au rebut de l'appareil
Cet appareil porte le symbole du recyclage
conformément à la Directive Européenne
2002/96/CE relative aux déchets
d'équipements électriques et électroniques
(DEEE).
En procédant correctement à la mise au
rebut de cet appareil, l'utilisateur contribue
à la prévention des impacts nocifs sur
l'environnement et la santé.
Le symbole
documentation qui l'accompagne indique
que cet appareil ne peut en aucun cas
être traité comme un déchet ménager et
qu'il doit être remis à un centre de collecte
agréé pour le recyclage des équipements
électriques et électroniques.
sur l'appareil ou la
Conseils pour économiser l'énergie
Pour obtenir les meilleurs résultats, nous
conseillons en outre :
- d'utiliser des ustensiles de cuisson et des
casseroles d'un diamètre identique à
celui du foyer ;
- d'utiliser exclusivement des ustensiles de
cuisson à fond plat ;
- dans la mesure du possible, de laisser
le couvercle sur la casserole pendant la
cuisson ;
- de placer la casserole au centre du foyer
tracé sur la table de cuisson.
Déclaration de conformité
- Cet appareil a été conçu, réalisé et mis sur
le marché conformément aux objectifs
de sécurité de la directive "Basse Tension"
2006/95/CE (qui remplace la 73/23/CEE et
modications), ainsi qu'aux objectifs de
protection de la directive CEM 2004/108/
CE.
GARANTIE IKEA
Page 42

FRANÇAIS 42
GARANTIE IKEA (FRANCE)
CONTRAT DE GARANTIE ET DE SERVICE
APRES-VENTE IKEA
Décret n° 87-1045 relatif à la présentation
des écrits constatant les contrats de garantie
et de service après-vente (J.O.R.F. du 29
décembre 1987).
Préalablement à la signature du bon
de commande, le vendeur indiquera à
l’acheteur les installations nécessaires pour
assurer le branchement de l’appareil selon
les règles de l’art.
Numéros de modèle et de série (Reporter
ici le numéro d’identication porté sur
l’étiquette code barre du produit)
Modèle :
N° de série :
Date d’achat (Reporter ici la date d’achat
portée sur votre ticket de caisse) :
Le vendeur est tenu de fournir une
marchandise conforme à la commande.
Livraison et mise en service
Livraison à domicile : oui, si demandée
par le client (selon modalités dénies et
mentionnées sur la facture d’achat ou le bon
de commande).
Gratuite : non (tarif et modalités disponibles
en magasin et fournis au client au moment
de la commande ou de l’achat).
Mise en service : non.
En cas de défauts apparents ou d’absence
de notice d’emploi et d’entretien, l’acheteur
a intérêt à les faire constater par écrit par le
vendeur ou le livreur lors de l’enlèvement de
la livraison ou de la mise en service.
Garantie Légale (sans supplément de
prix)
A la condition que l’acheteur fasse la preuve
du défaut caché, le vendeur doit légalement
en réparer toutes les conséquences (art.1641
et suivants du Code Civil). Si l’acheteur
s’adresse aux tribunaux, il doit le faire
dans un délai de deux ans à compter de la
découverte du défaut caché (art.1648 du
Code Civil).
Nota - En cas de recherche de solutions
amiables préalablement à toute action en
justice, il est rappelé qu’elles n’interrompent
pas le délai de prescription. La réparation
des conséquences du défaut caché,
lorsqu’il a été prouvé, comporte, selon la
jurisprudence:
• soit la réparation totalement gratuite de
l’appareil, y compris les frais de maind’oeuvre et de déplacement au lieu de la
mise en service ;
• soit son remplacement ou le
remboursement total ou partiel de son
prix au cas où l’appareil serait totalement
ou partiellement inutilisable ;
• et I’indemnisation du dommage
éventuellement causé aux personnes ou
aux biens par le défaut de l’appareil.
La garantie légale due par le vendeur
n’exclut en rien la garantie légale due par le
constructeur.
Litiges éventuels
En cas de difculté vous avez la possibilité,
avant toute action en justice, de rechercher
une solution amiable, notamment avec l’aide
:
d’une association de consommateurs ;
ou d’une organisation professionnelle de
la branche;
ou de tout autre conseil de votre choix.
Il est rappelé que la recherche d’une
solution amiable n’interrompt pas le délai
de deux ans de l’art.1648 du Code Civil.
Il est aussi rappelé qu’en règle générale
et sous réserve de l’appréciation des
tribunaux, le respect des dispositions de la
présente garantie contractuelle suppose :
• Que l’acheteur honore ses engagements
nanciers envers le vendeur;
• Que l’acheteur utilise l’appareil de façon
normale; (*)
• Que pour les opérations nécessitant une
haute technicité aucun tiers non agréé par
le vendeur ou le constructeur n’intervienne
Page 43

FRANÇAIS 43
pour réparation sur l’appareil (sauf cas de
force majeure ou carence prolongée du
vendeur).
(*) Voir la notice d’emploi et d’entretien et
les conditions d’application de la garantie
contractuelle
Garantie contractuelle IKEA
PRIX : rien à payer en sus.
DUREE : 5 (cinq) ans.
POINT DE DEPART : à compter de la date
d’achat chez IKEA.
RÉPARATION DE L’APPAREIL :
• remplacement des pièces, main-d’oeuvre,
déplacement, transport des pièces ou de
l’appareil : oui
• garantie des pièces remplacées : non
• délai d’intervention : fonction du type de
réparation et porté à la connaissance de
l’acheteur avant intervention.
REMPLACEMENT OU REMBOURSEMENT
DE L’APPAREIL (en cas d’impossibilité de
réparation reconnue par le vendeur et le
constructeur) : oui
Pour mettre en oeuvre le service aprèsvente en cas de panne couverte par la
garantie contractuelle, ou pour obtenir
des informations techniques pour la mise
en service ou le bon fonctionnement de
l’appareil, contacter IKEA au numéro de
téléphone respectif, suivant le pays, indiqué
à la n de cette notice et correspondant à
votre appareil.
Conservez votre preuve d’achat avec
le document de garantie, ils vous seront
nécessaires pour la mise en oeuvre de la
garantie.
CONDITIONS DE GARANTIE
CONTRACTUELLE IKEA
Quelle est la durée de validité de la
garantie ?
La présente garantie est valable cinq (5)
ans à compter de la date d’achat chez
IKEA d’un appareil électroménager de
l’assortiment cuisines, à l’exception des
appareils LAGAN qui sont garantis pour une
durée de deux (2) ans.
L’original du ticket de caisse, de la facture
ou du bon de livraison en cas de vente
à distance sera exigé comme preuve de
l’achat. Conservez-le dans un endroit sûr.
La réparation ou le remplacement
du produit défectueux n’a pas pour
conséquence de prolonger la durée initiale
de garantie. Toutefois, conformément à l’art.
L.211-16 du Code de la Consommation, toute
période d’immobilisation du produit, pour
une remise en état couverte par la garantie,
d’au moins sept jours vient s’ajouter à la
durée de la garantie qui restait à courir à
la date de la demande d’intervention du
consommateur ou de la mise à disposition
pour réparation du bien en cause, si cette
mise à disposition est postérieure à la
demande d’intervention.
Quels sont les appareils électroménagers
couverts par la garantie ?
La garantie IKEA de cinq (5) ans couvre
tous les appareils électroménagers de
l’assortiment cuisines, hors appareils de la
série LAGAN qui sont garantis pour une
durée de deux (2) ans, achetés chez IKEA à
compter du 1er août 2007.
Quels sont les appareils électroménagers
exclus de la présente garantie ?
Les appareils électroménagers portant
le nom de LAGAN, et tous les appareils
électroménagers de l’assortiment cuisines
IKEA achetés avant le 1er août 2007.
Qui est couvert par la garantie ?
La présente garantie concerne l’acheteur
agissant en qualité de consommateur à
compter de la date d’achat du produit.
Qui exécutera les prestations dans le
cadre de la garantie ?
Le prestataire de services désigné par
IKEA fournira l’assistance de son réseau de
réparateurs agréés pour vous servir dans
le cadre de cette garantie. Pour la mise en
oeuvre, veuillez vous reporter à la rubrique
«Comment nous joindre ».
Page 44

FRANÇAIS 44
Que couvre cette garantie ?
La présente garantie IKEA couvre les
défauts de construction et de fabrication
susceptibles de nuire à une utilisation
normale, à compter de la date d’achat chez
IKEA par le client. Elle ne s’applique que
dans le cadre d’un usage domestique.
Les exclusions sont reprises dans la section
“Qu’est-ce qui n’est pas couvert dans le
cadre de cette garantie ?”
Les présentes conditions de garantie
couvrent les frais de réparation, de pièces
de rechange, de main d’oeuvre et de
déplacement du personnel à domicile
pendant une période de cinq (5) ans,
ramenée à deux (2) ans sur la série LAGAN,
à compter de la date d’achat chez IKEA,
sous réserve que les défauts soient couverts
et à condition que l’appareil soit disponible
pour réparation sans occasionner de
dépenses spéciales. Voir aussi “Rappel des
dispositions légales”. Les pièces remplacées
deviennent la propriété de IKEA. Ces
dispositions ne s’appliquent pas aux
réparations effectuées sans autorisation du
prestataire de services IKEA.
Que ferons-nous pour remédier au
problème ?
Dans le cadre de cette garantie, le
prestataire de service désigné par
IKEA, examinera le produit. Si après
vérication, et hormis mise en oeuvre de
la garantie légale, il est reconnu que votre
réclamation est couverte par la présente
garantie contractuelle, il sera procédé à
la réparation du produit défectueux, ou
en cas d’impossibilité de réparation, à
son remplacement par le même article ou
par un article de qualité et de technicité
comparable. Compte tenu des évolutions
technologiques, l’article de remplacement
de qualité équivalente peut être d’un prix
inférieur au modèle acheté.
Si aucun article équivalent n’est disponible,
et en cas d’impossibilité totale ou partielle
de réparation reconnue par le prestataire
de IKEA ou son représentant agréé, sous
réserve que les conditions d’application de
la garantie soient remplies, IKEA procèdera
au remboursement total ou partiel de
l’appareil reconnu défectueux.
Le prestataire de service désigné par
IKEA s’engage à tout mettre en oeuvre
pour apporter une solution rapide et
satisfaisante dans le cadre de cette garantie
mais ni IKEA, ni le prestataire ne sauraient
être tenus pour responsables des cas de
forces majeurs, tels que dénis par la
jurisprudence, susceptibles d’empêcher
l’application correcte de la garantie.
Qu’est-ce qui n’est pas couvert dans le
cadre de la présente garantie ?
• L’usure normale et graduelle inhérente
aux appareils électroménagers,
compte tenu de la durée de vie et du
comportement communément admis pour
des produits semblables.
• Les dommages engageant la
responsabilité d’un tiers ou résultant d’une
faute intentionnelle ou dolosive.
• Les dommages résultant du non respect
des consignes d’utilisation, d’une
mauvaise installation non conforme
aux instructions du fabricant et/ou aux
règles de l’art, notamment en matière
de raccordement au réseau électrique,
ou aux arrivées d’eau ou de gaz qui
requièrent l’intervention d’un professionnel
qualié.
• Les dommages tels que, entre autres,
le vol, la chute ou le choc d’un objet,
l’incendie, la décoloration à la lumière,
les brûlures, l’humidité ou la chaleur
sèche excessive ou toute autre condition
environnementale anormale, les coupures,
les éraures, toute imprégnation par
un liquide, les réactions chimiques ou
électrochimiques, la rouille, la corrosion,
ou un dégât des eaux résultant entre
autres, d’un taux de calcaire trop élevé
dans l’eau d’approvisionnement.
Page 45

FRANÇAIS 45
• Les pièces d’usure normale dites pièces
consommables, comme par exemple les
piles, les ampoules, les ltres, les joints,
tuyaux de vidange, etc. qui nécessitent
un remplacement régulier pour le
fonctionnement normal de l’appareil.
• Les dommages aux éléments non
fonctionnels et décoratifs qui n’affectent
pas l’usage normal de l’appareil,
notamment les rayures, coupures,
éraures, décoloration.
• Les dommages accidentels causés par
des corps ou substances étrangers et par
le nettoyage et déblocage des ltres,
systèmes d’évacuation ou compartiments
pour détergent.
• Les dommages causés aux pièces
suivantes : verre céramique, accessoires,
paniers à vaisselle et à couverts, tuyaux
d’alimentation et d’évacuation, joints,
lampes et protections de lampes, écrans,
boutons et poignées, chassis et parties de
chassis.
• Les frais de transport de l’appareil,
de déplacement du réparateur et de
main-d’oeuvre relatif à un dommage non
garanti ou non constaté par le réparateur
agréé.
• Les réparations effectuées par un
prestataire de service et /ou un
partenaire non agréés, ou en cas
d’utilisation de pièces autres que des
pièces d’origine, toute réparation de
fortune ou provisoire restant à la charge
du client qui supporterait en outre, les
conséquences de l’aggravation éventuelle
du dommage en résultant.
• L’utilisation en environnement non
domestique, par exemple usage
professionnel ou collectif, ou dans un lieu
public.
• Les dommages liés au transport lorsque
l’appareil est emporté par le client lui-
même ou un prestataire de transport qu’il
a lui-même désigné. Lorsque l’appareil
est livré par IKEA, les dommages résultant
du transport seront pris en charge par
IKEA. Le client doit vérier ses colis et
porter IMPERATIVEMENT sur le bon
de livraison des RESERVES PRECISES :
indication du nombre de colis manquants
et/ou endommagés, et description
détaillée du dommage éventuel
(emballage ouvert ou déchiré, produit
détérioré ou manquant, etc.)
• Les coûts d’installation initiaux.
Toutefois, si le prestataire de service
ou son partenaire agréé procède à
une réparation ou un remplacement
d’appareil selon les termes de la présente
garantie, le prestataire de service ou son
partenaire agréé ré-installeront le cas
échéant l’appareil réparé ou remplacé.
La garantie reste toutefois applicable aux
appareils ayant fait l’objet d’une adaptation
dans le respect des rêgles de l’art par un
spécialiste qualié avec des pièces d’origine
du fabricant pour une mise en conformité de
l’appareil aux spécications techniques d’un
autre pays membre de l’Union Européenne.
Rappel des dispositions légales :
Le fabricant s’engage à garantir la
conformité des biens au contrat ainsi que
les éventuels vices cachés, conformément
aux dispositions légales gurant ci-après,
sans que cela ne fasse obstacle à la mise
en oeuvre de la garantie commerciale
ci-dessus consentie lorsque celle-ci est plus
étendue que la garantie légale.
« Garantie légale de conformité » (extrait
du code de la consommation)
• Art. L. 211-4. « Le vendeur est tenu de
livrer un bien conforme au contrat et
répond des défauts de conformité existant
lors de la délivrance. Il répond également
des défauts de conformité résultant de
l’emballage, des instructions de montage
ou de l’installation lorsque celle-ci a été
mise à sa charge par le contrat ou a été
réalisée sous sa responsabilité. »
• Art. L. 211-12. « L’action résultant du
défaut de conformité se prescrit par deux
ans à compter de la délivrance du bien. »
Page 46

FRANÇAIS 46
• Art. L. 211-5. « Pour être conforme au
contrat, le bien doit :
1° Etre propre à l’usage habituellement
attendu d’un bien semblable et, le cas
échéant :
- correspondre à la description donnée
par le vendeur et posséder les qualités
que celui-ci a présentées à l’acheteur
sous forme d’échantillon ou de modèle ;
- présenter les qualités qu’un acheteur
peut légitimement attendre eu égard
aux déclarations publiques faites par
le vendeur, par le producteur ou par
son représentant, notamment dans la
publicité ou l’étiquetage ;
- 2° Ou présenter les caractéristiques
dénies d’un commun accord par les
parties ou être propre à tout usage
spécial recherché par l’acheteur, porté
à la connaissance du vendeur et que ce
dernier a accepté. »
«De la garantie des défauts de la chose
vendue» (extrait du code civil)
• Art. 1641. « Le vendeur est tenu de la
garantie à raison des défauts cachés de
la chose vendue qui la rendent impropre
à l’usage auquel on la destine, ou qui
diminuent tellement cet usage, que
l’acheteur ne l’aurait pas acquise, ou n’en
aurait donné qu’un moindre prix, s’il les
avait connus. »
• Art. 1648 (1er alinéa). « L’action résultant
des vices rédhibitoires doit être intentée
par l’acquéreur dans un délai de deux
ans à compter de la découverte du vice. »
Où s’applique la présente garantie ?
Sous réserve de conformité aux
spécications techniques et réglementations
applicables et propres à chaque pays le
cas échéant, les garanties pourront être
exercées auprès de l’organisation IKEA
locale du pays où le produit est utilisé sur
tout le territoire de l’Union Européenne (hors
DOM et TOM). Les conditions de garantie,
étendues et limites, sont celles applicables
sur le marché local. Il est recommandé de se
les procurer auprès de l’organisation IKEA
locale.
Le Service Après-Vente applicable à vos
appareils électroménagers IKEA :
N’hésitez pas à contacter le prestataire de
Service Après-Vente désigné par IKEA pour :
1. requérir la mise en oeuvre du service
dans le cadre de cette garantie
contractuelle.
2. obtenir des conseils pour l’installation
de l’appareil IKEA dans un meuble de
cuisine IKEA prévu à cet effet.
3. obtenir des informations pour le bon
fonctionnement de l’appareil.
Pour pouvoir vous apporter la meilleure
assistance, assurez-vous d’avoir lu
attentivement les instructions de montage
et/ou le manuel de l’utilisateur avant de
nous contacter.
Comment nous joindre pour la mise en
oeuvre de la présente garantie ?
Dans le but de vous fournir un
service rapide, veuillez utiliser le
numéro de téléphone spécique à
votre pays indiqué dans le manuel.
Veuillez toujours vous reporter aux
numéros énoncés dans le livret fourni
spéciquement avec l’appareil
IKEA pour lequel vous avez besoin
d’assistance.
Avant de nous appeler, assurez
vous de disposer de la référence
IKEA (code à 8 chiffres) et du
numéro de service (code à 12
chiffres) que vous trouverez sur la
plaque d’identication apposée sur
l’appareil.
CONSERVEZ IMPERATIVEMENT
L’ORIGINAL DE VOTRE TICKET
Page 47

FRANÇAIS 47
DE CAISSE, FACTURE OU BON DE
LIVRAISON AVEC LE LIVRET DE
GARANTIE !
Ils vous seront nécessaires comme
preuve de l’achat pour vous permettre
de bénécier de la présente garantie.
Vous y retrouverez notamment la
désignation et la référence IKEA
(code à 8 chiffres) de chaque appareil
acheté.
Besoin d’aide supplémentaire?
Si vous avez des questions supplémentaires
sur les conditions d’application des garanties
IKEA (étendues et limites, produits couverts),
adressez-vous à votre magasin IKEA le
plus proche. Adresse et horaires sur le site
www.IKEA.fr, dans le catalogue IKEA ou par
téléphone au 0825 10 3000 (0,15 €/mn).
Page 48

FRANÇAIS 48
GARANTIE IKEA (BELGIQUE)
Quelle est la durée de validité de la
garantie IKEA?
Cette garantie est valable cinq (5) ans
à compter de la date d’achat de votre
appareil chez IKEA, à l’exception des
appareils LAGAN qui sont garantis pour une
durée de deux (2) ans. La preuve d’achat
originale est requise. Les réparations,
effectuées sous garantie ne prolongent pas
la période de garantie de l’appareil.
Quels appareils ne sont pas couverts par
cette garantie de cinq (5) ans ?
Les appareils portant le nom de LAGAN et
tous les appareils achetés chez IKEA avant
le 1er août 2007.
Qui effectuera la réparation ?
Le réparateur agréé IKEA se chargera de la
réparation par le biais de son propre réseau
ou du réseau de partenaires autorisés.
Que couvre la garantie ?
La garantie couvre les défauts de
l’appareil, dus à des vices de matière ou de
fabrication, à partir de la date d’achat chez
IKEA.
Cette garantie ne s’applique que dans le
cas d’un usage domestique. Les exceptions
sont spéciées à la rubrique “Qu’est-ce qui
n’est pas couvert par cette garantie ?”
Pendant la période de garantie, les coûts
engagés pour remédier au problème, par
exemple les réparations, les pièces, la
main-d’œuvre et les déplacements sont pris
en charge à condition que l’appareil soit
accessible à des ns de réparation sans
dépenses particulières. La directive UE (N°
99/44/CE) et les règlementations locales
respectives s’appliquent à ces conditions.
Les pièces remplacées deviendront
propriété d’IKEA.
Que fera IKEA pour régler le problème ?
Le réparateur désigné par IKEA examinera
le produit et décidera, à sa seule discrétion,
s’il est couvert par cette garantie. Si le
réparateur estime que le produit est
couvert, celui-ci, ou un partenaire autorisé,
soit réparera le produit défectueux, soit le
remplacera par un produit identique ou
comparable, à sa seule discrétion.
Qu’est-ce qui n’est pas couvert par cette
garantie?
• L’usure normale.
• Les dommages occasionnés sciemment
ou par négligence, les dommages
résultant du non-respect des instructions
d’utilisation, d’une installation
inadéquate ou d’une alimentation
électrique inadéquate, les dommages
causés par des réactions chimiques ou
électrochimiques, la rouille, la corrosion ou
un dégât des eaux, y compris, notamment,
les dommages causés par un excès de
calcaire dans l’eau, les dommages causés
par des conditions environnementales
anormales.
• Les consommables, y compris les
ampoules et les piles.
• Les éléments non fonctionnels et
décoratifs qui n’affectent pas l’usage
normal de l’appareil, y compris les griffes
et les éventuelles différences de couleur.
• Les dommages accidentels causés par
des corps étrangers ou des substances,
et le nettoyage et le débouchage des
ltres, les systèmes de vidange ou les
compartiments à savon.
• Les dommages occasionnés aux éléments
suivants : vitrocéramique, accessoires,
paniers à vaisselle et à couverts, tuyaux
d’alimentation et de vidange, joints,
ampoules et diffuseurs, écrans, boutons,
revêtements et parties de revêtements,
sauf s’il est prouvé que ces dommages
sont dus à des vices de fabrication.
• Les cas où aucun défaut n’est constaté
par le technicien.
Page 49

FRANÇAIS 49
• Les réparations qui ne sont pas effectuées
par nos réparateurs désignés et/ou un
partenaire contractuel autorisé ou lorsque
des pièces qui ne sont pas d’origine ont
été utilisées.
• Les réparations consécutives à une
installation inadéquate ou pas conforme
aux spécications.
• L’utilisation de l’appareil dans un
environnement non domestique, (p.ex.
professionnel).
• Les dommages occasionnés par ou
durant le transport. Si un client transporte
personnellement le produit jusqu’à son
domicile ou une autre adresse, IKEA
décline toute responsabilité en cas de
dommages pendant le transport. Si IKEA
livre le produit à l’adresse de livraison
indiquée par le client, tout éventuel
dommage se produisant en cours de
livraison sera couvert par IKEA.
• Les frais liés à l’installation initiale de
l’appareil IKEA.
Si un prestataire de service IKEA ou un
partenaire contractuel autorisé répare
ou remplace l’appareil conformément à
la présente garantie, le prestataire de
services ou le partenaire agréé autorisé
réinstallera l’appareil réparé ou installera
l’appareil de remplacement, le cas
échéant.
Ces restrictions ne s’appliquent pas aux
interventions correctes d’un spécialiste
qualié utilisant nos pièces d’origine an
d’adapter l’appareil aux spécications
techniques de sécurité d’un autre pays
européen.
Loi nationale applicable
La garantie IKEA vous donne des droits
légaux spéciques, qui couvrent ou
dépassent toutes les exigences légales
locales.
Cependant, ces conditions ne limitent en
aucun cas les droits des consommateurs
décrits dans la législation locale.
Zone de validité
Pour les appareils achetés dans un pays
européen et transportés dans un autre pays
européen, les interventions seront effectuées
dans le cadre des conditions de garantie
normales dans le nouveau pays.
L’obligation de réparation dans le cadre de
la garantie n’est effective que si l’appareil
est conforme et installé conformément aux :
- spécications techniques du pays dans
lequel la demande d’intervention sous
garantie est introduite ;
- instructions de montage et aux
informations relatives aux consignes
de sécurité gurant dans le manuel
d’utilisation.
Service Après-vente exclusif pour
appareils IKEA
N’hésitez pas à contacter un service Aprèsvente agréé IKEA pour :
• Faire une demande d’intervention sous
garantie.
• Demander des précisions au sujet de
l’installation des appareils IKEA dans les
meubles de cuisine IKEA.
• Demander des précisions au sujet des
fonctions des appareils IKEA.
An de vous garantir la meilleure
assistance possible, nous vous prions de lire
attentivement les instructions d’assemblage
et le mode d’emploi avant de nous
contacter.
Page 50
FRANÇAIS 50
Comment nous joindre en cas de besoin
CONSERVEZ VOTRE PREUVE
Consultez la dernière page
de ce manuel pour la liste
complète des services
Après-vente agréés IKEA
avec leur numéro de
téléphone respectifs.
An de mieux vous servir, nous vous
conseillons d’utiliser les numéros
de téléphone spéciques repris
dans le mode d’emploi. Sur base
des numéros repris dans le livret,
mentionnez toujours les références
de l’appareil pour lequel vous
demandez assistance. Ayez toujours
à disposition le numéro d’article IKEA
(il s’agit d’un numéro composé de
8 chiffres) ainsi que le code service
composé de 12 chiffres que vous
trouverez sur la plaque signalétique
de votre appareil.
D’ACHAT !
La preuve de votre achat est
nécessaire pour l’application de la
garantie.
Le nom et le numéro d’article (code à
8 chiffres) IKEA de chaque appareil
acheté gurent également sur la
preuve d’achat.
Besoin d’une assistance supplémentaire ?
Pour toute autre questions en dehors du
service après-vente de vos appareils,
contactez le call center de votre magasin
IKEA. Nous vous recommandons de lire
attentivement toute la documentation fournie
avec l’appareil avant de nous contacter.
Page 51

FRANÇAIS 51
GARANTIE IKEA (CH)
Quelle est la durée de validité de la
garantie IKEA ?
Cette garantie est valable 5 (cinq) ans à
compter de la date d’achat/de livraison
de votre appareil, sauf pour les appareils
de la marque LAGAN pour lesquels une
garantie de 2 (deux) ans est applicable. La
preuve d’achat originale est requise. Les
réparations, effectuées sous garantie ne
prolongent pas la période de garantie de
l’appareil.
Quels sont les appareils n’étant pas
couverts par la garantie de 5 (cinq) ans
IKEA ?
Les appareils portant le nom de LAGAN et
tous les appareils achetés chez IKEA avant
le 1er août 2007.
Qui effectuera la réparation ?
IKEA gère les prestations de service par le
biais de son propre service après-vente ou
par l’un de ses partenaires agréés.
Que couvre la garantie ?
La garantie couvre les défauts de l’appareil
dus à un vice de fabrication (défaut
fonctionnel), à compter de la date d’achat/
de livraison de l’appareil. Cette garantie
ne s’applique que dans le cas d’un usage
domestique.
Les exceptions sont spéciées sous la
rubrique “Qu’est-ce-qui n’est pas couvert
par cette garantie?” Pendant la période
de garantie, les coûts engagés pour
remédier au problème, par exemple les
réparations, les pièces, la main-d’oeuvre et
les déplacements sont couverts, pour autant
que l’appareil soit accessible à des ns de
réparation sans dépenses particulières.
Les dénitions locales actuelles ou les
instructions juridiques en vigueur pour le
pays correspondant sont valables sous
ces conditions. Les pièces remplacées
deviennent la propriété d’IKEA.
Que fera IKEA pour régler le problème?
Le réparateur désigné par IKEA examinera
le produit et décidera, à sa seule discrétion,
s’il est couvert par cette garantie. Si le
réparateur estime que le produit est
couvert, celui-ci, ou un partenaire autorisé,
soit réparera le produit défectueux, soit le
remplacera par un produit identique ou
comparable, à sa seule discrétion.
Qu’est-ce qui n’est pas couvert par cette
garantie?
• L’usure normale.
• Les dommages occasionnés sciemment
ou par négligence, les dommages
occasionnés à défaut de respecter
les instructions d’utilisation, par
une installation inadéquate ou une
alimentation électrique inadéquate, les
dommages causés par des réactions
chimiques ou électrochimiques, la rouille,
la corrosion ou les dégâts des eaux,
y compris, notamment, les dommages
causés par un excès de calcaire dans
l’eau, les dommages causés par des
conditions environnementales anormales.
• Les accessoires utilisés ou usés comme
par ex. les piles et ampoules.
• Les éléments non fonctionnels et
décoratifs qui n’affectent pas l’usage
normal de l’appareil, y compris les
rayures et les éventuelles différences de
couleur.
• Les dommages provoqués par des
corps étrangers, des substances, le
nettoyage ou le débouchage des ltres,
des systèmes d’écoulement ou des
compartiments pour détergents.
• Les dommages occasionnés aux éléments
suivants : vitrocéramique, accessoires,
paniers à vaisselle supérieur et inférieur
et à couverts, tuyaux d’alimentation et de
vidange, joints, ampoules et protections
des ampoules, écrans, boutons,
revêtements et parties de revêtements,
Page 52

FRANÇAIS 52
sauf s’il est prouvé que ces dommages
sont dus à des vices de fabrication.
• Les cas où aucun défaut n’est mis à jour
par le technicien.
• Les réparations qui ne sont pas effectuées
par nos réparateurs désignés et/ou un
partenaire contractuel autorisé ou lorsque
des pièces autres que d’origine ont été
utilisées.
• Les réparations consécutives à une
installation inadéquate ou non conforme
aux spécications.
• L’utilisation impropre de l’appareil et/
ou dans un environnement autre que
domestique, par exemple à des ns
professionnelles.
• Les dommages occasionnés par ou
durant le transport. Si un client transporte
personnellement le produit jusqu’à son
domicile ou une autre adresse, IKEA
décline toute responsabilité en cas de
dommages pendant le transport. Si IKEA
livre le produit à l’adresse de livraison
indiquée par le client, tout éventuel
dommage se produisant en cours de
livraison sera couvert par IKEA.
• Les frais reliés à l’installation initiale de
l’appareil IKEA.
Si un prestataire de service IKEA ou son
partenaire contractuel agréé répare
ou remplace l’appareil conformément
à la présente garantie, le prestataire
de services ou son partenaire agréé
installera l’appareil réparé ou l’appareil
de remplacement, le cas échéant.
Ces restrictions ne s’appliquent pas aux
interventions correctes d’un spécialiste
qualié utilisant nos pièces d’origine an
d’adapter l’appareil aux spécications
techniques de sécurité d’un autre pays UE.
Loi nationale applicable
La garantie IKEA vous octroie des droits
légaux spéciques, équivalents ou
supérieurs aux droits légaux locaux.
Cependant, ces conditions ne limitent en
aucun cas les droits des consommateurs
décrits dans la législation locale.
Couverture géographique
Pour les appareils achetés dans un pays
européen et emportés dans un autre pays
européen, les interventions seront effectuées
dans le cadre des conditions de garantie
normales dans le nouveau pays.
L’obligation de réparation dans le cadre de
la garantie n’est effective que si l’appareil
est conforme et installé conformément aux :
- spécications techniques du pays dans
lequel la demande d’intervention sous
garantie est introduite ;
- instructions de montage et aux
informations relatives à la sécurité
gurant dans le manuel d’utilisation.
Service Après vente exclusif pour
appareils IKEA
Le Service après-vente agréé pour les
appareils IKEA est à votre disposition pour
les questions/demandes suivantes :
• Faire une demande d’intervention sous
garantie
• Demander des clarications au sujet de
l’installation des appareils IKEA dans les
meubles de cuisine IKEA
(Remarque : L’installation de gaz doit être
réalisée par un installateur agréé)
• Demander des clarications au sujet du
fonctionnement des appareils IKEA
An de vous garantir la meilleure
assistance possible, nous vous prions de lire
attentivement les instructions d’assemblage
et/ou le mode d’emploi avant de nous
contacter.
Comment nous joindre en cas de besoin
Veuillez utiliser uniquement le
numéro de téléphone spécique
à votre pays, donné dans la liste
en dernière page de ce livret de
garantie.
Page 53

FRANÇAIS 53
Dans le but de vous fournir un service
après-vente plus rapide, utilisez les
numéros spéciques repris sur ce
livret de garantie et citez toujours
le numéro d’article IKEA (numéro
composé de 8 chiffres) de l’appareil
pour lequel vous avez besoin
d’assistance ainsi que le code service
à 12 chiffres, indiqués sur la plaque
signalétique de votre appareil.
CONSERVEZ VOTRE PREUVE
D’ACHAT !
La preuve de votre achat est
nécessaire pour l’application de la
garantie.Le nom et le numéro d’article
(code à 8 chiffres) IKEA de chaque
appareil acheté gurent également sur
la preuve d’achat.
Besoin d’une assistance supplémentaire ?
Pour toute question additionnelle en dehors
du service après-vente de vos appareils,
contactez le call center de votre magasin
IKEA. Nous vous recommandons de lire
attentivement toute la documentation
fournie avec l’appareil avant de nous
contacter.
Page 54

ITALIANO 54
Sommario
Informazioni di sicurezza 54
Descrizione del prodotto 55
Utilizzo quotidiano 56
Manutenzione e pulizia 59
Cosa fare se... 60
Dati tecnici 61
Connessione alla rete elettrica 62
Consigli per la salvaguardia
dell'ambiente 63
GARANZIA IKEA 64
GARANZIA IKEA (CH) 67
Informazioni di sicurezza
La sicurezza vostra e degli altri è molto
importante.
Il presente manuale e l’apparecchio stesso sono
corredati da importanti messaggi relativi alla
sicurezza, da leggere ed osservare sempre.
Questo è il simbolo di pericolo relativo alla
sicurezza, che avverte dei potenziali rischi
per l'utilizzatore e per le altre persone.
Tutti i messaggi relativi alla sicurezza saranno
preceduti dal simbolo di pericolo e dai seguenti
termini:
PERICOLO Indica una situazione pericolosa
che, se non evitata, provoca lesioni gravi.
AVVERTENZA Indica una situazione
pericolosa che, se non evitata, potrebbe
provocare lesioni gravi.
Tutti i messaggi relativi alla sicurezza specicano il
potenziale pericolo a cui si riferiscono ed indicano
come ridurre il rischio di lesioni, danni e scosse
elettriche conseguenti ad un uso non corretto
dell'apparecchio. Attenersi scrupolosamente alle
seguenti istruzioni:
- L'apparecchio deve essere scollegato dalla
rete elettrica prima di effettuare qualunque
intervento d'installazione.
- L'installazione o la manutenzione deve
essere eseguita da un tecnico specializzato, in
conformità alle istruzioni del fabbricante e nel
rispetto delle norme locali vigenti in materia
di sicurezza. Non riparare né sostituire alcuna
parte dell'apparecchio se non specicamente
richiesto nel manuale d'uso.
- La messa a terra dell'apparecchio è
obbligatoria.
- Il cavo di alimentazione deve essere
sufcientemente lungo da collegare
l'apparecchio, una volta posizionato
nell'ubicazione denitiva, alla presa di
corrente.
- Afnché l’installazione sia conforme alle
norme di sicurezza vigenti, occorre un
interruttore onnipolare avente una distanza
minima di 3 mm.
- Non utilizzare prese multiple o prolunghe.
- Non tirare il cavo di alimentazione
dell'apparecchio per staccarlo dalla presa di
corrente.
- Una volta terminata l'installazione, i
componenti elettrici non dovranno più essere
accessibili dall'utilizzatore.
- L'apparecchio è destinato esclusivamente ad
uso domestico per la cottura di alimenti. Non
sono consentiti altri usi (ad es. per riscaldare
la stanza). Il fabbricante declina ogni
responsabilità per usi non appropriati o per
errate impostazioni dei comandi.
- L'apparecchio e i suoi componenti accessibili
diventano caldi durante l'uso. Fare attenzione
a non toccare gli elementi riscaldanti. I
bambini di meno di 8 anni devono essere
tenuti lontani a meno che non siano sempre
sorvegliati.
Questo apparecchio può essere usato da
bambini di età superiore a 8 anni e da
persone con ridotte capacità siche, sensoriali
o mentali o con esperienza e conoscenza
inadeguate, solo se sono sorvegliati o se è
stato loro insegnato come usare l'apparecchio
in condizioni di sicurezza e se sono a
conoscenza dei pericoli che può comportare.
Non devono giocare con l'apparecchio. La
pulizia e la manutenzione non devono essere
Page 55

ITALIANO 55
effettuate da bambini, a meno che non siano
sorvegliati da adulti.
- Le parti accessibili possono diventare molto
calde durante l’uso. I bambini devono essere
mantenuti a distanza e sorvegliati afnché
non giochino con l'apparecchio.
- Durante e dopo l’uso non toccare gli elementi
riscaldanti dell’apparecchio. Evitare il contatto
con tessuti o altro materiale inammabile no
a che tutti i componenti dell’apparecchio non
si siano sufcientemente raffreddati.
- Non riporre materiale inammabile
sull’apparecchio o nelle sue vicinanze.
- I grassi e gli oli surriscaldati prendono
facilmente fuoco. Sorvegliare la cottura di
alimenti ricchi di grasso e di olio.
- Gli oggetti metallici come coltelli, forchette,
cucchiai e coperchi non devono essere
collocati sulla supercie del piano di cottura
perché possono diventare molto caldi.
- Nello spazio sotto l'apparecchio deve essere
installato un pannello separatore (non fornito
in dotazione), a una distanza di almeno 20
mm. Se si utilizza un separatore Ikea, seguire
le istruzioni fornite nel materiale di riferimento
Descrizione del prodotto
del pannello.
Non è necessario alcun separatore se sotto è
installato un forno.
- Se sotto all'apparecchio non si installa il forno,
utilizzare il separatore e installare il cassetto
fra il separatore e il mobile.
- Se la supercie presenta incrinature, spegnere
l'apparecchio per evitare scosse elettriche.
- L'apparecchio non è destinato ad essere
messo in funzione per mezzo di un
temporizzatore esterno oppure di un sistema
di comando a distanza separato.
- Non usare pulitrici a vapore.
- È pericoloso lasciare alimenti in cottura sul
piano senza sorveglianza, possono provocare
incendi. Non tentare MAI di spegnere le
amme con acqua. Al contrario, spegnere
l'apparecchio e soffocare le amme, ad
esempio con un coperchio o una coperta
antincendio.
Pericolo di incendio: non poggiare oggetti
sulle superci di cottura.
- Dopo l'uso, spegnere l'elemento del piano
di cottura mediante il suo comando, non fare
afdamento sul rilevatore di pentole.
Pannello comandi
B A
A
Comandi regolazione zone cottura e
relativo display
B
Accensione/Spegnimento
1
Zona di cottura ad induzione
1
2
Pannello comandi
2
C
Timer/Sicurezza bambini/Gestione
potenza
C
Page 56

ITALIANO 56
Utilizzo quotidiano
Accensione/Spegnimento piano cottura
Per accendere il piano premere per circa 2
secondi il tasto
display delle zone di cottura. Per spegnere
toccare lo stesso tasto no allo spegnimento
dei display. Tutte le zone di cottura vengono
disattivate.
Qualora il piano fosse già stato utilizzato
l’indicatore del calore residuo “H” resta attivo no
a raffreddamento delle zone di cottura.
Se entro 10 secondi dopo l’accensione del piano
cottura non si seleziona nessuna funzione, esso si
disattiva automaticamente.
Prima dell’utilizzo
Importante: Se le pentole non sono delle
dimensioni corrette le zone cottura non si
accendono.
Utilizzare solo pentole che riportano il simbolo
"SISTEMA A INDUZIONE".
Prima di accendere il piano di cottura,
posizionare la pentola sulla zona di cottura
desiderata.
Recipienti preesistenti:
Per vericare che il recipiente sia adatto al piano
cottura ad induzione servirsi di una calamita: le
pentole non sono adatte se non sono rilevabili
magneticamente.
1. Assicurarsi che il fondo delle pentole non sia
ruvido perché potrebbe grafare la supercie
del piano cottura. Controllare le stoviglie.
2. Non utilizzare pentole vuote sul piano cottura.
Il fondo delle pentole e la supercie del piano
vetroceramico, potrebbero danneggiarsi.
3. Non appoggiare mai le pentole e le padelle
calde sulla supercie del pannello di controllo
del piano. Potrebbero derivarne danni.
nché non si illuminano i
Attivazione e regolazione zone cottura
Display indicazione di potenza
Indicazione zona cottura
selezionata
Posizionamento zona cottura
Dopo aver acceso il piano di cottura e
posizionato la pentola sulla zona di cottura scelta,
selezionare la zona con il tasto corrispondente: il
display visualizza il livello 0.
Con il potenziometro a scorrimento è possibile
selezionare il livello di potenza desiderato, da
0 a 9 o Booster "P". Per aumentare il livello di
potenza, far scorrere il dito sul potenziometro
da sinistra a destra diverse volte; per diminuirlo,
far scorrere il dito nella direzione opposta. In
alternativa, possono essere utilizzati i tasti rapidi
"+" e "-".
Ogni zona di cottura ha vari livelli di potenza,
regolabili con i tasti +/-, da "1", potenza minima,
a "9", potenza massima. Alcune zone cottura
hanno la funzione ebollizione rapida (Booster),
visualizzata a display con la lettera "P".
Funzione ebollizione rapida (Booster)
Funzione presente solo su alcune zone cottura che
permette di sfruttare al massimo la potenza del
piano (ad esempio per portare ad ebollizione
rapidamente l’acqua). Per attivare la funzione,
premere il tasto "+" nché il display non visualizza
"P". Dopo 5 minuti di utilizzo della funzione
Booster, l’apparecchio imposta automaticamente
la zona al livello 9.
Modalità "Demo"
Questo piano di cottura è dotato della modalità
"Demo" che permette di interagire con il pannello
comandi attivando le corrispondenti zone di
cottura.
La procedura di attivazione e disattivazione
deve essere effettuata entro 60 secondi dopo il
collegamento dell'apparecchio all'alimentazione
Page 57

ITALIANO 57
elettrica.
Per attivare la modalità "Demo", tenere premuti
contemporaneamente i due tasti esterni di
selezione delle zone di cottura per almeno 5
secondi: sul display centrale compare il codice
"dE". Ora si possono esplorare le funzioni del
pannello comandi.
Per disattivare la modalità "Demo", ripetere
la procedura, ricordandosi prima di tutto di
scollegare il piano di cottura dall'alimentazione
elettrica, poi ricollegarlo ed eseguire la procedura
entro 60 secondi dopo il collegamento.
Attivazione/Disattivazione del segnale acustico
Dopo aver acceso il piano di cottura, tenere
premuti contemporaneamente per almeno 3
secondi il tasto "+" e il tasto di selezione più
esterno sulla destra ("Blocco pannello comandi").
Disattivazione delle zone di cottura
Selezionare la zona di cottura che si vuole
disattivare. Premere il tasto corrispondente (si
accende un puntino luminoso in basso a destra
dell'indicatore del livello di potenza).
Premere il tasto "-" no a portare il livello a "0".
Per disattivare immediatamente la zona di cottura,
tenere premuto per 3 secondi il tasto di selezione
della zona. La zona di cottura si disattiva e si
accende l'indicatore "H" di calore residuo.
Blocco pannello comandi
Questa funzione blocca i comandi per impedire
l'attivazione accidentale del piano di cottura.
Per attivare la funzione di blocco del pannello
comandi, tenere premuto il tasto C per 3 secondi.
Il pannello comandi è bloccato, eccetto la funzione
Disattivazione. Per disattivare il blocco comandi,
ripetere la procedura di attivazione.
Il puntino luminoso si spegne e il piano è
nuovamente attivo.
La presenza di acqua, liquido fuoriuscito dalle
pentole o oggetti di qualsiasi genere posati
sul tasto sotto il simbolo possono provocare
l'attivazione o la disattivazione involontaria della
funzione Blocco pannello comandi.
Potenziometro a scorrimento
Il timer è un interruttore orario che offre la
possibilità di impostare una durata di cottura per
un tempo massimo di 99 minuti (1 ora e 39 minuti)
associabile a tutte le zone di cottura.
Selezionare la zona di cottura a cui si intende
associare il timer (un puntino luminoso compare
in basso a destra dell’indicatore del livello di
potenza sul display), premere il tasto con il simbolo
dell'orologio e impostare il tempo desiderato
regolandosi con i tasti “+” e “-” della funzione
Timer (vedere gura).
Dopo alcuni secondi, il timer inizia il conto alla
rovescia (è visibile un puntino luminoso di anco
alla zona per la quale è stato attivato il timer).
Allo scadere del tempo si attiva un segnale
acustico e la zona di cottura si spegne
automaticamente.
Per disattivare il timer, premere il tasto "-" nché il
display non visualizza "0:0".
Per impostare il timer per un'altra zona, ripetere le
operazioni sopra indicate. L'indicazione del timer
è sempre relativa al timer per la zona selezionata
o al timer più breve.
Per modicare o disattivare il timer, premere
il tasto di selezione della zona per il timer in
questione.
Avvisi del pannello comandi
Spia di calore residuo.
Il piano è dotato di un indicatore di calore
residuo per ogni zona di cottura. Tale indicatore
segnala quali sono le zone di cottura ancora a
temperatura elevata.
Se il display visualizza “H”, la zona di cottura
è ancora calda. Se la zona presenta questa
segnalazione è possibile, per esempio, mantenere
calda una pietanza o far sciogliere il burro.
Con il raffreddamento della zona di cottura, il
display si spegne.
Indicatore di pentola non corretta o assente.
Qualora la pentola non fosse compatibile con il
Page 58

ITALIANO 58
vostro piano ad induzione, fosse mal posizionata
oppure non fosse delle dimensioni adatte,
nel display compare l'indicazione di "pentola
assente" (vedere gura). Se, entro 60 secondi, non
viene rilevata nessuna pentola, il piano cottura si
spegne.
Gestione potenza
Grazie alla funzione "Gestione potenza", l'utente
può impostare la potenza massima raggiungibile
dal piano di cottura, secondo necessità.
Questa impostazione può essere effettuata in
qualsiasi momento e viene mantenuta no alla
modica successiva.
Operazione Pannello comandi Display
1 Premere il tasto "+" per circa 3 secondi
2 Premere il tasto "Gestione potenza"
(tasto C) per confermare l'operazione
precedente
3 Premere il tasto "-"/"+" per impostare
il livello selezionando una delle diverse
opzioni disponibili
4 Premere il tasto "Gestione potenza"
(tasto C) per confermare l'operazione
precedente
Impostando la potenza massima richiesta, il piano
di cottura regola automaticamente la distribuzione
nelle varie zone di cottura, assicurando che questo
limite non sia mai superato; con il vantaggio di
poter anche gestire tutte le zone simultaneamente,
ma senza problemi di sovraccarico.
Sono disponibili 4 livelli di potenza massima
visualizzati nel display: 2,5 – 4,0 – 6,0 – 7,2 kW
(7,2 kW è considerata la potenza massima del
piano di cottura). Al momento dell'acquisto,
l'apparecchio è impostato alla potenza massima.
Dopo aver collegato l'apparecchio alla presa
elettrica, durante i primi 60 secondi è possibile
impostare il livello di potenza desiderato nel modo
seguente:
Il display visualizza
Il display visualizza l'ultimo
livello di potenza impostato
precedentemente
Il display visualizza il livello
impostato
Il display visualizza il livello
impostato che lampeggia per
circa 2 secondi; dopodiché
il piano di cottura emette un
segnale acustico e si disattiva;
ora è pronto per l'uso
Page 59
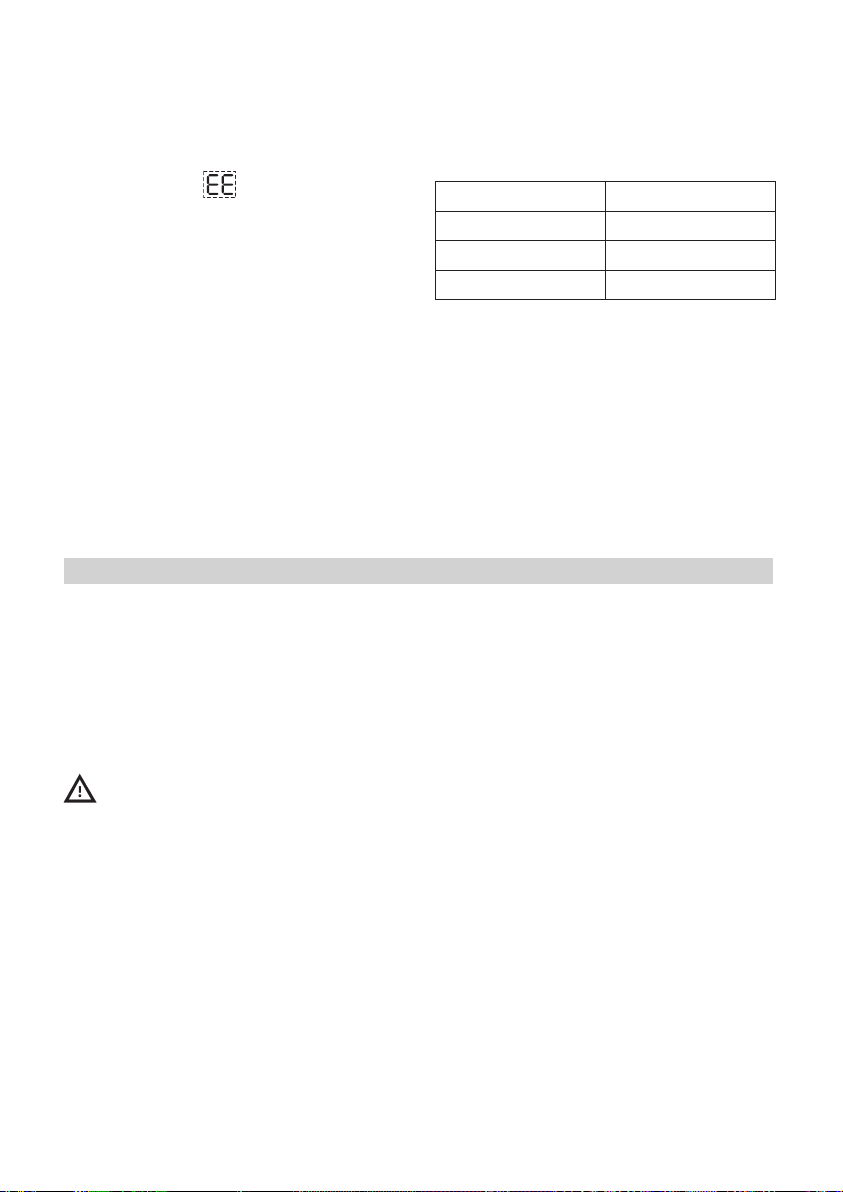
ITALIANO 59
In caso d'errore nell'impostazione della potenza,
compare il simbolo
emesso un segnale acustico per circa 5 secondi.
In questo caso, ripetere dall'inizio la procedura di
congurazione. Se l'errore si ripresenta, contattare
il Servizio Assistenza.
Durante il normale utilizzo, se l'utente cerca
di aumentare il livello di potenza massima
disponibile quando viene raggiunta la potenza
massima, il livello della zona in uso lampeggia
due volte e viene emesso un segnale acustico.
Per ottenere una maggiore potenza in quella
zona, è necessario diminuire manualmente il
livello di potenza di una o più zone di cottura già
attive.
al centro e viene
Manutenzione e pulizia
Si consiglia di effettuare la pulizia del
piano dopo ogni utilizzo per evitare di
danneggiarne la supercie ed il formarsi di
incrostazioni di sporco difcili da rimuovere.
Prima di procedere alle operazioni di pulizia,
assicurarsi che le zone di cottura siano spente
e che l’indicazione di calore residuo (“H”) sia
scomparsa.
Evitare l’uso di pulitrici a vapore!
Vericare periodicamente che non si
accumuli polvere sotto l’apparecchio, vicino
all’ingresso dell’aria di raffreddamento o alle
aperture di uscita.
Questo potrebbe ostacolare la ventilazione
ed il raffreddamento del sistema elettronico e
ridurre l’efcienza del piano di cottura.
Per procedere alla pulizia si consiglia di:
Larghezze del fondo delle pentole consigliate
Ø zona Ø pentola
210 mm 150 - 210 mm
180 mm 120 - 180 mm
145 mm 100 - 145 mm
1. Utilizzare un panno morbido pulito, carta
assorbente da cucina o prodotti specici
per la pulizia del piano vetroceramico.
Evitare l’uso di spugne con superci
abrasive e/o pagliette metalliche.
2. Pulire i residui di cibo, evitando di lasciarli
indurire. Zucchero o alimenti ad alto
contenuto zuccherino danneggiano
il piano di cottura e vanno rimossi
immediatamente con un raschietto
per vetro. Attenzione! Il raschietto per
vetro ha una lama aflata e deve essere
maneggiato con cautela.
3. Rimuovere eventuali incrostazioni con un
raschietto o con prodotti specici.
4. Sale, zucchero e sabbia potrebbero
grafare la supercie del vetro.
Page 60

ITALIANO 60
Cosa fare se...
Codice errore Problema Possibile causa Soluzione
Il piano cottura si
spegne e dopo 10
secondi emette un
segnale acustico
ogni 3 secondi.
C81, C82 La zona comandi
C83 Il pannello comandi
C85 L'apparecchio
F02 o F04 o C84 La tensione di
F42 o F43 Il collegamento del
F01, F05, F06, F07,
F10, F12, F25, F33,
F34, F36, F37, F46,
F47, F48, F49, F58,
F61, F62, F63, F72,
F74, F77
Pressione
permanente sulla
zona comandi.
si spegne per
temperatura troppo
elevata.
visualizza il codice
d'errore "Apparecchio
spento" perché
si è vericato un
problema nel circuito
elettronico.
non è in grado di
trasmettere calore
alla pentola.
alimentazione non è
corretta o problema
di alimentazione.
piano non è del
voltaggio giusto.
Chiamare il servizio di assistenza e comunicare il codice d’errore.
Acqua o utensili da
cucina sulla zona
comandi.
La temperatura
interna delle parti
elettroniche è troppo
alta.
Sovratensione nel
piano di cottura.
La pentola non è
adatta per il piano ad
induzione.
Il sensore rileva una
tensione differente
da quella di
collegamento.
Il sensore rileva una
tensione differente
da quella di
collegamento.
Ripulire la zona
comandi.
Attendere che il
piano si raffreddi
prima di riutilizzarlo.
Il piano di cottura
può ancora essere
utilizzato, è però
opportuno chiamare
il Servizio Assistenza.
Utilizzare un'altra
pentola adatta per i
piani ad induzione.
Scollegare il
piano dalla rete
e controllare il
collegamento.
Scollegare il
piano dalla rete
e controllare il
collegamento.
Page 61

ITALIANO 61
Prima di contattare il Servizio Assistenza:
1. Consultare la "Guida ricerca guasti” sopra
riportata per vericare se è possibile
eliminare il problema personalmente.
2. Riaccendere l'apparecchio per accertarsi
che l'inconveniente sia stato ovviato.
3. Se il problema persiste, contattare il
Servizio Assistenza.
Fornire le seguenti informazioni:
• tipo di guasto;
• modello del piano di cottura;
• il numero di assistenza (ossia, il
numero indicato dopo la parola
SERVICE sulla targhetta sotto il piano
di cottura e sul certicato di garanzia);
• il vostro indirizzo completo;
• il vostro numero di telefono.
Qualora si renda necessario un intervento
di riparazione, rivolgersi a un centro di
assistenza tecnica autorizzato tra quelli
indicati sulla garanzia.
Nel caso in cui un tecnico non autorizzato
effettui un intervento o una riparazione,
richiedere sempre la certicazione.
del lavoro eseguito e insistere afnché
vengano usati ricambi originali.
La mancata osservanza di queste istruzioni
può compromettere la sicurezza e la qualità
del prodotto.
Dati tecnici
Dimensioni
Larghezza (mm) 580
Altezza (mm) 58
Profondità (mm) 510
Tensione (V) Vedere Installazione e collegamento
elettrico
I dati tecnici sono riportati nella targhetta posta
sul fondo dell'apparecchio.
Page 62

ITALIANO 62
}
Connessione alla rete elettrica
ATTENZIONE: scollegare l'apparecchio
dalla rete elettrica.
- L'installazione deve essere effettuata da
personale qualicato a conoscenza delle
norme vigenti in materia d’installazione e
sicurezza.
- Il costruttore declina ogni responsabilità a
persone, animali o a cose in caso di mancata
osservanza delle direttive fornite nel presente
capitolo.
- Il cavo di alimentazione deve essere
sufcientemente lungo da permettere la
rimozione del piano cottura dal piano di
lavoro.
- Assicurarsi che la tensione indicata
sulla targhetta matricola posta sul fondo
dell'apparecchio corrisponda a quella
dell'abitazione in cui verrà installato.
blu/grigio
nero/marrone
giallo/verde
1. Rimuovere il coperchio morsettiera (A)
svitando la vite ed inserire il coperchio nella
cerniera (B) della morsettiera.
2. Inserire il cavo di alimentazione nel
morsetto e collegare i cavi alla morsettiera
come illustrato nello schema elettrico vicino
alla morsettiera.
3. Fissare il cavo di alimentazione con il
ssacavo.
4. Chiudere il coperchio (C) ed avvitarlo sulla
morsettiera con la vite rimossa.
Per ogni collegamento alla rete di
alimentazione, il piano di cottura effettua un
controllo automatico per alcuni secondi.
Collegamento
alla rete elettrica
AU
nero
marrone
blu
blu (grigio)
giallo/verde
SOLO PER IL BELGIO
nero
marrone
blu
}
blu (grigio)
giallo/verde
nero
marrone
}
giallo/verde
blu
blu (grigio)
230 V bifase 2N
SOLO PER L'OLANDA
marrone
giallo/verde
blu (grigio)
e UK
}
}
nero
blu
Page 63

ITALIANO 63
Consigli per la salvaguardia dell'ambiente
Smaltimento imballaggio
Il materiale di imballaggio è riciclabile al
100% ed è contrassegnato dal simbolo
di riciclaggio ( ). Le diverse parti
dell’imballaggio non devono essere disperse
nell’ambiente, ma smaltite in conformità alle
norme stabilite dalle autorità locali.
Smaltimento prodotto
Questo apparecchio è contrassegnato in
conformità alla Direttiva Europea 2002/96/
EC sui Riuti da apparecchiature elettriche
ed elettroniche (RAEE).
Assicurandosi che questo prodotto
sia smaltito in modo corretto, l’utente
contribuisce a prevenire le potenziali
conseguenze negative per l’ambiente e la
salute.
Il simbolo
documentazione di accompagnamento
indica che questo prodotto non deve essere
trattato come riuto domestico, ma deve
essere conferito al punto di raccolta per il
riciclaggio di apparecchiature elettriche ed
elettroniche.
sul prodotto o sulla
Risparmio energetico
Per ottenere migliori prestazioni, si
suggerisce inoltre di:
- Utilizzare tegami e pentole con diametro
del fondo uguale a quello della zona di
cottura.
- Utilizzare soltanto pentole e tegami con
fondo piatto.
- Dove possibile, tenere il coperchio sulle
pentole durante la cottura.
- Posizionare la pentola nel centro della
zona di cottura disegnata sul piano.
Dichiarazione di conformità
- Questo apparecchio è stato progettato,
costruito e immesso sul mercato in
conformità ai requisiti di sicurezza della
direttiva "Bassa Tensione" 2006/95/CE
(che sostituisce la 73/23/CEE e successivi
emendamenti) e ai requisiti di protezione
della direttiva "EMC" 2004/108/CE.
GARANZIA IKEA
Page 64

ITALIANO 64
GARANZIA IKEA
Quanto dura la garanzia IKEA?
Questa garanzia è valida per 5 (cinque)
anni a partire dalla data di acquisto/
consegna del tuo elettrodomestico
presso un negozio IKEA, salvo che
l’elettrodomestico appartenga alla gamma
LAGAN, nel qual caso la garanzia è di 2
(due) anni. È necessario esibire lo scontrino
originale come documento comprovante
l’acquisto. Eventuali interventi di assistenza
effettuati durante la garanzia non ne
estenderanno la validità.
Elettrodomestici non coperti dalla
garanzia IKEA di 5 (cinque) anni
La garanzia di 5 (cinque) anni è valida per
tutti gli elettrodomestici “IKEA” acquistati a
partire dal 1° Agosto 2007 eccetto che per
la gamma di prodotti LAGAN di “IKEA”.
Chi fornisce il servizio?
Il servizio assistenza selezionato ed
autorizzato da IKEA fornirà il servizio
attraverso la propria rete di Partner di
Assistenza autorizzati.
Cosa copre questa garanzia?
La garanzia copre i difetti
dell’elettrodomestico causati da vizi di
fabbricazione (difetto funzionale), a
partire dalla data di acquisto/consegna
dell’elettrodomestico. Questa garanzia
è applicabile solo all’uso domestico.
Le eccezioni sono descritte alla voce
“Cosa non è coperto dalla garanzia?”.
Nel periodo di validità della garanzia,
i costi di riparazione (pezzi di ricambio,
manodopera e viaggi del personale
tecnico) saranno sostenuti dal servizio
assistenza, fermo restando che l’accesso
all’apparecchiatura per l’intervento di
riparazione non comporti spese particolari.
Queste condizioni sono conformi alle
direttive EU (No. 99/44/CE) e alle norme
locali.
I componenti sostituiti diventano proprietà
di IKEA.
Come IKEA interverrà per risolvere il
problema?
Il servizio assistenza incaricato da IKEA
per l’esecuzione del servizio esaminerà il
prodotto e deciderà, a propria esclusiva
discrezione, se lo stesso rientra nella
copertura della garanzia. Il Servizio
Assistenza IKEA o il suo Partner di
Assistenza autorizzato tramite i rispettivi
Centri di Assistenza, a propria esclusiva
discrezione, riparerà il prodotto difettoso
o provvederà a sostituirlo con un prodotto
uguale o di pari valore.
Cosa non è coperto dalla garanzia?
• Normale usura
• Danni provocati deliberatamente, danni
provocati dalla mancata osservanza
delle istruzioni di funzionamento, da
un’installazione non corretta o in seguito
a collegamento a un voltaggio errato.
Danni provocati da reazioni chimiche o
elettrochimiche, ruggine, corrosione o
danni causati da acqua, inclusi i danni
causati dalla presenza di eccessivo
calcare nelle condutture idriche. Danni
causati da eventi atmosferici e naturali.
• Le parti soggette a consumo, incluse
batterie e lampadine.
• Danni a parti non funzionali e decorative
che non inuiscono sul normale uso
dell’elettrodomestico, inclusi graf e
differenze di colore.
• Danni accidentali causati da corpi o
sostanze estranee e danni causati da
pulizia o eliminazione di ostruzioni da
ltri, sistemi di scarico o cassetti del
detersivo.
• Danni ai seguenti componenti:
vetroceramica, accessori, cestelli per
posate e stoviglie, tubi di alimentazione
e drenaggio, guarnizioni, lampadine
e copri lampadine, griglie, manopole,
rivestimento e parti del rivestimento.
A meno che si possa provare che tali
danni siano stati causati da errori di
Page 65

ITALIANO 65
fabbricazione.
• Casi in cui non vengono rilevati difetti
funzionali durante la visita di un tecnico.
• Riparazioni non eseguite dal nostro
Servizio Assistenza autorizzato e/o da
un Partner di Assistenza contrattuale
autorizzato o in caso di uso di ricambi
non originali.
• Riparazioni causate da un’installazione
non corretta o non conforme alle
speciche.
• Casi di uso improprio e/o non
domestico dell’apparecchio, ad es. uso
professionale.
• Danni da trasporto. Qualora sia il cliente
a trasportare il prodotto alla propria
abitazione o ad altro indirizzo, IKEA
non è responsabile per eventuali danni
che potrebbero vericarsi durante il
trasporto. In compenso, qualora sia IKEA
ad effettuare il trasporto del prodotto
all’indirizzo del cliente, eventuali danni
occorsi al prodotto durante la consegna
saranno coperti da IKEA.
• Costi inerenti la prima installazione
dell’elettrodomestico IKEA.
Tuttavia, qualora un fornitore di servizi
IKEA o un suo partner autorizzato ripari o
sostituisca l’apparecchio nei termini della
presente garanzia, il fornitore o il partner
autorizzato reinstalleranno l’apparecchio
riparato o installeranno l’apparecchio in
sostituzione, se necessario.
Tali restrizioni non valgono per regolari
interventi svolti da personale tecnico
qualicato con ricambi originali per
adattare l’apparecchio alle disposizioni
tecniche di sicurezza di un altro paese UE.
Applicazione delle leggi nazionali
Il cliente è titolare dei diritti previsti
dal D. Lgs. n. 206/2005 e la presente
garanzia IKEA di 5 (cinque) anni lascia
impregiudicati tali diritti che rispondono
o estendono i diritti minimi legali di ogni
paese in termini di garanzia.
Tali condizioni non limitano tuttavia in alcun
modo i diritti del consumatore deniti dalle
leggi locali.
Area di validità
Per gli elettrodomestici acquistati in una
nazione EU e portati in un’altra nazione
EU, i servizi saranno forniti in base alle
condizioni di garanzia applicabili nel nuovo
paese. L’obbligo di fornire il servizio in
base alle condizioni della garanzia esiste
solo se l’elettrodomestico è conforme ed è
installato secondo:
- le speciche tecniche del paese in cui
viene richiesta l’applicazione della
garanzia;
- le informazioni sulla sicurezza contenute
nelle Istruzioni per il montaggio e nel
Manuale dell’utente.
Il servizio ASSISTENZA dedicato per gli
apparecchi IKEA
Non esitate a contattare il Servizio di
Assistenza Tecnica post-vendita incaricato
da IKEA per:
• richiedere assistenza tecnica nel periodo
di garanzia
• richiedere chiarimenti sull’installazione
degli elettrodomestici IKEA installati nelle
cucine IKEA
• richiedere informazioni sul funzionamento
degli elettrodomestici IKEA.
Per assicurarvi la migliore assistenza vi
preghiamo di leggere attentamente le
istruzioni di assemblaggio e/o il manuale di
istruzioni del prodotto prima di contattarci.
Come contattarci se avete bisogno di
assistenza
Siete pregati di contattare
il numero del Servizio di
Assistenza Tecnica post vendita
incaricato da IKEA riportato
sull’ultima pagina di questo
manuale.
Page 66

ITALIANO 66
Al ne di garantirvi un servizio più
veloce, vi suggeriamo di utilizzare
i numeri di telefono riportati in
questo manuale. Fate sempre
riferimento ai numeri indicati nel
manuale dell’apparecchiatura per la
quale avete bisogno di assistenza.
Vi suggeriamo di avere sempre
a disposizione il codice IKEA (8
cifre) e il codice a 12 cifre riportati
nell’etichetta del vostro prodotto.
CONSERVATE IL DOCUMENTO DI
ACQUISTO/CONSEGNA!
È la prova del vostro acquisto ed
è necessario esibirlo afnché la
garanzia sia valida. Sullo scontrino
sono riportati anche il nome e il
codice articolo IKEA (8 cifre) per ogni
apparecchiatura acquistata.
Avete bisogno di ulteriore aiuto?
Per qualunque informazione non relativa
all’assistenza vi preghiamo di far
riferimento al Servizio Cliente del punto
vendita IKEA di riferimento. Vi preghiamo
di leggere attentamente la documentazione
tecnica relativa all’elettrodomestico prima
di contattarci.
Page 67

ITALIANO 67
GARANZIA IKEA (CH)
Quanto dura la garanzia IKEA?
Questa garanzia è valida per 5 (cinque)
anni a partire dalla data di acquisto/
consegna del vostro elettrodomestico
presso un negozio IKEA, salvo che
l’elettrodomestico appartenga alla gamma
LAGAN, nel qual caso la garanzia è di 2
(due) anni. È necessario esibire lo scontrino
originale come documento comprovante
l’acquisto. Eventuali interventi di assistenza
effettuati durante la garanzia non ne
estenderanno la validità.
Elettrodomestici non coperti dalla
garanzia IKEA di 5 (cinque) anni
La garanzia di 5 (cinque) anni è valida per
tutti gli elettrodomestici “IKEA” acquistati a
partire dal 1° Agosto 2007 eccetto che per
la gamma di prodotti LAGAN di “IKEA”.
Chi fornisce il servizio?
Il servizio assistenza selezionato ed
autorizzato da IKEA fornirà il servizio
attraverso la propria rete di Partner di
Assistenza autorizzati.
Cosa copre questa garanzia?
La garanzia copre i difetti
dell’elettrodomestico causati da vizi di
fabbricazione (difetto funzionale), a
partire dalla data di acquisto/consegna
dell’elettrodomestico. Questa garanzia
è applicabile solo all’uso domestico. Le
eccezioni sono descritte alla voce “Cosa
non è coperto dalla garanzia?”.
Nel periodo di validità della garanzia,
i costi di riparazione (pezzi di ricambio,
manodopera e viaggi del personale
tecnico) saranno sostenuti dal servizio
assistenza, fermo restando che l’accesso
all’apparecchiatura per l’intervento di
riparazione non comporti spese particolari.
Queste condizioni sono conformi alle norme
locali ed alle norme in vigore in Svizzera.
I componenti sostituiti diventano proprietà
di IKEA.
Come IKEA interverra’ per risolvere il
problema?
Il servizio assistenza incaricato per
l’esecuzione del servizio, esaminerà il
prodotto e deciderà, a propria esclusiva
discrezione, se lo stesso rientra nella
copertura della garanzia. Il Servizio
Assistenza IKEA o il suo Partner di
Assistenza autorizzato tramite i rispettivi
Centri di Assistenza, a propria esclusiva
discrezione, riparerà il prodotto difettoso
o provvederà a sostituirlo con un prodotto
uguale o di pari valore.
Cosa non è coperto dalla garanzia?
• Normale usura
• Danni provocati deliberatamente, danni
provocati dalla mancata osservanza
delle istruzioni di funzionamento, da
un’installazione non corretta o in seguito
a collegamento a un voltaggio errato.
Danni provocati da reazioni chimiche o
elettrochimiche, ruggine, corrosione o
danni causati da acqua, inclusi i danni
causati dalla presenza di eccessivo
calcare nelle condutture idriche. Danni
causati da eventi atmosferici e naturali.
• Le parti soggette a consumo, incluse
batterie e lampadine.
• Danni a parti non funzionali e decorative
che non inuiscono sul normale uso
dell’elettrodomestico, inclusi graf e
differenze di colore.
• Danni accidentali causati da sostanze o
corpi estranei e danni causati da pulizia
o eliminazione di ostruzioni da ltri,
sistemi di scarico o cassetti del detersivo.
• Danni ai seguenti componenti:
vetroceramica, accessori, cestelli per
posate e stoviglie, tubi di alimentazione
e drenaggio, guarnizioni, lampadine
e copri lampadine, griglie, manopole,
rivestimento e parti del rivestimento.
A meno che si possa provare che tali
danni siano stati causati da errori di
fabbricazione.
Page 68

ITALIANO 68
• Casi in cui non vengono rilevati difetti
funzionali durante la visita di un tecnico.
• Riparazioni non eseguite dal nostro
Servizio Assistenza autorizzato e/o da
un Partner di Assistenza contrattuale
autorizzato o in caso di uso di ricambi
non originali.
• Riparazioni causate da un’installazione
non corretta o non conforme alle
speciche.
• Casi di uso improprio e/o non
domestico dell’apparecchio, ad es. uso
professionale.
• Danni da trasporto. Qualora sia il cliente
a trasportare il prodotto alla propria
abitazione o ad altro indirizzo, IKEA
non è responsabile per eventuali danni
che potrebbero vericarsi durante il
trasporto. In compenso, qualora sia IKEA
ad effettuare il trasporto del prodotto
all’indirizzo del cliente, eventuali danni
occorsi al prodotto durante la consegna
saranno coperti da IKEA.
• Costi inerenti la prima installazione
dell’elettrodomestico IKEA.
Tuttavia, qualora un fornitore di servizi
IKEA o un suo partner autorizzato ripari
o sostituisca l’apparecchio nei termini
della presente garanzia, il fornitore o
il partner autorizzato reinstalleranno
l’apparecchio riparato o installeranno
l’apparecchio in sostituzione, se
necessario.
Tali restrizioni non valgono per regolari
interventi svolti da personale tecnico
qualicato con ricambi originali per
adattare l’apparecchio alle disposizioni
tecniche di sicurezza di un altro paese UE.
Applicazione delle leggi nazionali
La garanzia IKEA Le conferisce diritti legali
specici che coprono o superano tutti i
requisiti delle leggi locali.
Tali condizioni non limitano tuttavia in alcun
modo i diritti del consumatore deniti dalle
leggi locali.
Area di validità
Per gli elettrodomestici acquistati in una
nazione EU e portati in un’altra nazione,
i servizi saranno forniti in base alle
condizioni di garanzia applicabili nel nuovo
paese. L’obbligo di fornire il servizio in
base alle condizioni della garanzia esiste
solo se l’elettrodomestico è conforme ed è
installato secondo:
- le speciche tecniche del paese in cui
viene richiesta l’applicazione della
garanzia;
- le informazioni sulla sicurezza contenute
nelle Istruzioni per il montaggio e nel
Manuale dell’utente.
Il servizio ASSISTENZA dedicato per gli
apparecchi IKEA
Non esitate a contattare il Servizio di
Assistenza Tecnica post-vendita incaricato
da IKEA per:
• richiedere assistenza tecnica nel periodo
di garanzia
• richiedere chiarimenti sull’installazione
degli elettrodomestici IKEA installati nelle
cucine IKEA
(Nota: L’installazione del gas deve
essere effettuata da un installatore
qualicato autorizzato).
• richiedere informazioni sul
funzionamento degli elettrodomestici
IKEA
Per assicurarvi la migliore assistenza vi
preghiamo di leggere attentamente le
istruzioni di assemblaggio e/o il manuale di
istruzioni del prodotto prima di contattarci.
Come contattarci se avete bisogno di
assistenza
Siete pregati di contattare
il numero del Servizio di
Assistenza Tecnica post vendita
incaricato da IKEA riportato
sull’ultima pagina di questo
manuale.
Page 69

ITALIANO 69
Al ne di garantirvi un servizio più
veloce, vi suggeriamo di utilizzare
i numeri di telefono riportati in
questo manuale. Fate sempre
riferimento ai numeri indicati nel
manuale dell’apparecchiatura per la
quale avete bisogno di assistenza.
Vi suggeriamo di avere sempre
a disposizione il codice IKEA (8
cifre) e il codice a 12 cifre riportati
nell’etichetta del vostro prodotto.
CONSERVATE IL DOCUMENTO DI
ACQUISTO/CONSEGNA!
È la prova del vostro acquisto ed
è necessario esibirlo afnché la
garanzia sia valida. Sullo scontrino
sono riportati anche il nome e il
codice articolo IKEA (8 cifre) per ogni
apparecchiatura acquistata.
Avete bisogno di ulteriore aiuto?
Per qualunque informazione non relativa
all’assistenza vi preghiamo di far
riferimento al Servizio Cliente del punto
vendita IKEA di riferimento.
Vi preghiamo di leggere attentamente
la documentazione tecnica relativa
all’elettrodomestico prima di contattarci.
Page 70
70
BELGIË - BELGIQUE - BELGIEN
Telefoon/Numéro de téléphone/Telefon-Nummer:
Tarief/Tarif/Tarif: Lokaal tarief/Prix d’un appel local/Ortstarif
Openingstijd: Maandag - Vrijdag 8.00 - 20.00
Heures d’ouverture: Lundi - Vendredi 8.00 - 20.00
Öffnungszeiten: Montag - Freitag 8.00 - 20.00
БЪЛГАРИЯ
Телефонен номер:
Тарифа: Локална тарифа
Работно време: понеделник - петък 8.00 - 20.00
ČESKÁ REPUBLIKA
Telefonní číslo:
Sazba: Místní sazba
Pracovní doba: Pondělí - Pátek 8.00 - 20.00
DANMARK
Telefonnummer:
Takst: Lokal takst
Åbningstid: Mandag - fredag 9.00 - 21.00
Lørdag 9.00 - 18.00
(Åbent udvalgte søndage, se IKEA.dk)
DEUTSCHLAND
Telefon-Nummer:
Tarif: Ortstarif
Öffnungszeiten: Montag - Freitag 8.00 - 20.00
ΕΛΛΑΔΑ
Τηλεφωνικός αριθμός:
Χρέωση: Τοπική χρέωση
Ώρες λειτουργίας: Δευτέρα - Παρασκευή 8.00 - 20.00
ESPAÑA
Teléfono:
Tarifa: Tarifa local
Horario: Lunes - Viernes 8.00 - 20.00
(España Continental)
FRANCE
Numéro de téléphone:
Tarif: Prix d’un appel local
Heures d’ouverture: Lundi - Vendredi 9.00 - 21.00
HRVATSKA
http://www.ikea.com
ÍSLAND
Símanúmer:
Kostnaður við símtal: Almennt mínútuverð
Opnunartími: Mánudaga - Föstudaga 9.00 - 17.00
ITALIA
Telefono:
Tariffa: Tariffa locale
Orari d’apertura: Lunedì - Venerdì 8.00 - 20.00
LIETUVIŲ
Telefono numeris: (0) 520 511 35
Skambučio kaina: Vietos mokestis
Darbo laikas: Nuo pirmadienio iki
penktadienio 8.00 - 20.00
MAGYARORSZÁG
Telefon szám:
Tarifa: Helyi tarifa
Nyitvatartási idő: Hétfőtől Péntekig 8.00 - 20.00
02 4003536
225376400
70150909
06929993602
2109696497
913754126
0170480513
5852409
0238591334
(06-1)-3285308
026200311
NEDERLAND
Telefoon:
Tarief: 15 cent/min., starttarief 4.54 cent
en gebruikelijke belkosten
Openingstijd: Maandag t/m - Vrijdag 8.00 - 20.00
Zaterdag 9.00 - 20.00
Zondag gesloten
NORGE
Telefon nummer:
Takst: Lokal takst
Åpningstider: Mandag - fredag 8.00 - 20.00
ÖSTERREICH
Telefon-Nummer:
Tarif: Ortstarif
Öffnungszeiten: Montag - Freitag 8.00 - 20.00
POLSKA
Numer telefonu:
Stawka:
Godziny otwarcia: Poniedziałek - Piątek 8.00-20.00
PORTUGAL
Telefone:
Tarifa: Tarifa local
Horário: Segunda - Sexta 9.00 - 21.00
REPUBLIC OF IRELAND
Phone number:
Rate: Local rate
Opening hours: Monday - Friday 8.00 - 20.00
ROMÂNIA
Număr de telefon:
Tarif: Tarif local
Orar: Luni - Vineri 8.00 - 20.00
РОССИЯ
Телефонный номер:
Стоимость звонка: Местная стоимость звонка
Время работы: Понедельник - Пятница 9.00 - 21.00
(Московское время)
SCHWEIZ - SUISSE - SVIZZERA
Telefon-Nummer/Numéro de téléphone/Telefono:
Tarif/Tarif/Tariffa: Ortstarif/Prix d’un appel local/Tariffa locale
Öffnungszeiten: Montag - Freitag 8.00 - 20.00
Heures d’ouverture: Lundi - Vendredi 8.00 - 20.00
Orario d’apertura: Lunedì - Venerdì 8.00 - 20.00
SLOVENSKO
Telefónne číslo:
Cena za hovor: Cena za miestny hovor
Pracovná doba: Pondelok až piatok 8.00 - 20.00
SRBIJA
http://www.ikea.com
SUOMI
Puhelinnumero:
Hinta: Yksikköhinta
Aukioloaika: Maanantaista perjantaihin 8.00 - 20.00
SVERIGE
Telefon nummer:
Taxa: Lokal samtal
Öppet tider: Måndag - Fredag 8.30 - 20.00
Lördag - Söndag 9.30 - 18.00
UNITED KINGDOM
Phone number:
Rate: Local rate
Opening hours: Monday - Friday 9.00 - 21.00
09002354532
23500112
013602771461
225844203
Koszt połączenia według taryfy operatora
213164011
016590276
021 2044888
84957059426
(02) 50102658
0981710374
0775-700 500
02076601517
en/of 0900 BEL IKEA
0225675345
Page 71

Page 72

5019 600 00919
© Inter IKEA Systems B.V. 2014 AA-1158382-1
18535
 Loading...