

Page 1

Please check out our eBay auctions for more great
deals on Factory Service Manuals:
Page 2

Contents
Where to Find Information ...................... viii
Chapter 1. Using Your Computer Outside Your Home
Country . . . . . . . . . . . . . . . . . . . . . . . . . . . . . . . . 1
Changing the Date and Time ..................... 2
Power Cord Requirements ...................... 2
Selecting the Country for the Internal ThinkPad Modem ..... 3
International Hardware Service Information ............. 4
Chapter 2. Using Audio and Modem Features ......... 5
Using the Audio Features ....................... 6
Using the 3D Sound Retrieval System (SRS) Function .... 7
Using the Modem Features ...................... 9
Using the 56-Kbps Modem .................... 11
Telephony Features . . . . . . . . . . . . . . . . . . . . . . . . 12
Chapter 3. Protecting Your Computer ............. 15
Using Passwords . . . . . . . . . . . . . . . . . . . . . . . . . . . 16
Using the Personalization Editor .................. 16
Using Mechanical Locks ....................... 16
Chapter 4. Using Your Computer with a Battery Pack ... 19
Using the Battery Pack ....................... 20
Charging the Battery Pack .................... 20
Monitoring the Battery Status .................. 20
Saving Battery Power ........................ 24
Using the Power Management Modes ............. 24
Customizing Power Management ................ 28
Considerations When Using a Power Management Mode .. 30
Using Other Battery-Saving Methods .............. 35
Chapter 5. Using Your Computer with a PC Card ...... 37
Using a PC Card ........................... 39
PC Card Types .......................... 39
PC Card Interface ......................... 41
PC Card Support Software ..................... 42
Using a PC Card in Windows 95 (with CardWorks) ....... 45
Self-Check . . . . . . . . . . . . . . . . . . . . . . . . . . . . . 46
PC Card Information ....................... 47
Stopping the PC Card ...................... 50
Copyright IBM Corp. 1998 iii
Page 3

Help . . . . . . . . . . . . . . . . . . . . . . . . . . . . . . . . . 50
Using a PC Card in Windows NT (with CardWizard) ...... 51
Self-Check . . . . . . . . . . . . . . . . . . . . . . . . . . . . . 52
PC Card Information ....................... 52
Stopping the PC Card ...................... 53
Help . . . . . . . . . . . . . . . . . . . . . . . . . . . . . . . . . 54
Using ATA PC Cards ....................... 54
Power Management Support .................. 54
Using a PC Card in Windows 3.11 (with CardWizard) ...... 56
Self-Check . . . . . . . . . . . . . . . . . . . . . . . . . . . . . 57
Help . . . . . . . . . . . . . . . . . . . . . . . . . . . . . . . . . 57
Formatting PC Cards ....................... 58
Using a PC Card in OS/2 (with PC Card Director) ........ 61
Stopping the PC Card ...................... 62
Using the Auto Configurator Utility ............... 63
Updating the CONFIG.SYS File ................. 66
PCMCIA Storage Card Device Driver ............. 69
Checking the Allocated Resources for the PC Card ..... 72
Avoiding PC Card Resource Conflicts ............. 73
Using a PC Card in DOS (with CardSoft) ............. 75
CARDINFO . . . . . . . . . . . . . . . . . . . . . . . . . . . . . 75
Using the Configuration Utility .................. 77
Using Storage PC Cards ..................... 79
Chapter 6. Resolving System Resource Conflicts ...... 83
Sharing an IRQ between ThinkPad Modem Devices ...... 83
Default IRQ Assignments ...................... 86
System Resources and IRQs .................... 86
Chapter 7. Solving Computer Problems ............ 91
Frequently Asked Questions .................... 92
Hints, Tips, and Limitations ..................... 99
Troubleshooting Guide . . . . . . . . . . . . . . . . . . . . . . . . 101
Troubleshooting Charts . . . . . . . . . . . . . . . . . . . . . . . 102
Error Codes or Messages .................... 103
No Error Codes or Messages .................. 107
Input Problems . . . . . . . . . . . . . . . . . . . . . . . . . . 108
Suspend or Hibernation Problems ............... 109
LCD Problems . . . . . . . . . . . . . . . . . . . . . . . . . . . 113
An Indicator Problem ....................... 114
iv IBM ThinkPad 600 Online Book
Page 4

Battery Problems . . . . . . . . . . . . . . . . . . . . . . . . . 114
CD-ROM Drive Problems .................... 114
Infrared Communication Problems ............... 116
Audio or Telephony Problems .................. 117
A Universal Serial Bus (USB) Problem ............. 117
Modem Problems . . . . . . . . . . . . . . . . . . . . . . . . . 118
PC Card Problems ........................ 120
Docking Station Problems .................... 122
A Printer Problem ......................... 124
External Monitor Problems .................... 124
A Port Replicator Problem .................... 126
Other Option Problems ...................... 126
Software Problems . . . . . . . . . . . . . . . . . . . . . . . . 128
Other Problems . . . . . . . . . . . . . . . . . . . . . . . . . . 128
Testing Your Computer ....................... 130
Recovering Lost or Damaged Software .............. 132
Using the Diskette Factory .................... 133
Using the ThinkPad Customization CD ............. 134
Using the Recovery CD ..................... 134
Chapter 8. Installing Software . . . . . . . . . . . . . . . . . . 135
Installing a New Operating System and Its Device Drivers ... 137
Installing Software for Windows 95 ................ 138
Installing Microsoft Windows 95 ................. 140
Installing the ThinkPad Configuration Program for Windows
95 . . . . . . . . . . . . . . . . . . . . . . . . . . . . . . . . . 143
Installing the ThinkPad Display Driver for Windows 95 ... 144
Installing PC Card Support Software for Windows 95 .... 145
Installing the Audio Device Driver for Windows 95 ...... 146
Installing the ThinkPad Modem Software for Windows 95 .. 147
Installing the IBM TrackPoint Driver for Windows 95 ..... 148
Installing the CD-ROM Device Driver for Windows 95 .... 149
Installing Software for Windows NT ................ 151
Installing Microsoft Windows NT ................ 151
Installing the ThinkPad Configuration Program for Windows
NT . . . . . . . . . . . . . . . . . . . . . . . . . . . . . . . . . 152
Installing the Display Driver for Windows NT ......... 153
Installing PC Card Support Software for Windows NT .... 155
Installing the Audio Device Driver for Windows NT ...... 155
Installing the ThinkPad Modem Software for Windows NT . 156
Contents v
Page 5

Installing the Infrared Device Driver for Windows NT ..... 158
Installing the IBM TrackPoint Driver for Windows NT .... 160
Installing the IDE Driver for Windows NT ........... 161
Installing Software for Windows Version 3.11 .......... 162
Installing Microsoft Windows Version 3.11 ........... 162
Installing the ThinkPad Configuration Program for Windows
3.11 . . . . . . . . . . . . . . . . . . . . . . . . . . . . . . . . 165
Installing the ThinkPad Display Driver for Windows 3.11 .. 165
Installing PC Card Support Software for Windows 3.11 ... 166
Installing the Audio Device Driver for Windows 3.11 ..... 166
Installing the ThinkPad Modem Software for Windows 3.11 . 167
Installing Software for OS/2 Warp 4 ................ 169
Installing IBM OS/2 ........................ 169
Installing the ThinkPad Configuration Program for OS/2 ... 171
Installing the Display Device Driver for OS/2 ......... 171
Installing the PC Card Support Software for OS/2 ...... 172
Installing the Audio Device Driver for OS/2 .......... 173
Installing the ThinkPad Modem Software for OS/2 ...... 173
Installing the IBM TrackPoint Driver for OS/2 ......... 174
Installing the CD-ROM Device Driver for OS/2 ........ 175
Installing Software for DOS ..................... 177
Installing IBM PC DOS Version 7.0 ............... 177
Installing the ThinkPad Configuration Program for DOS ... 177
Installing PC Card Support Software for DOS ......... 178
Installing the Audio Device Driver for DOS .......... 178
Installing the CD-ROM Device Driver for DOS ........ 178
Appendix A. Using System Management ........... 181
System-Management Features . . . . . . . . . . . . . . . . . . . 182
Desktop Management Interface (DMI) ............. 183
Remote Program Load (RPL) .................. 184
Dynamic Host Configuration Protocol (DHCP) ........ 184
Wake on LAN ........................... 185
Waking Up from Suspend Mode ................ 185
System-Management Features Software ............ 186
Setting Up System-Management Features ............ 189
Enabling or Disabling Wake on LAN .............. 190
Automatic Power-On Startup Sequence ............ 192
Enabling or Disabling a Flash (POST/BIOS) Update from the
Network . . . . . . . . . . . . . . . . . . . . . . . . . . . . . . 193
vi IBM ThinkPad 600 Online Book
Page 6

Appendix B. Using PS2 Commands .............. 197
Appendix C. Version Notice . . . . . . . . . . . . . . . . . . . 207
Appendix D. Trademarks . . . . . . . . . . . . . . . . . . . . . 209
Index . . . . . . . . . . . . . . . . . . . . . . . . . . . . . . . . . . 211
Contents vii
Page 7
Where to Find Information
This online book supplements the
following topics are covered. Click on the topic you want to read:
ThinkPad 600 User's Guide
. The
To use your computer in foreign countries
To use audio and modem features
To protect your computer
To use your computer witha battery pack
To get PC Card information
To allocate the system resources manually
To install operating systems and the ThinkPad device drivers
Chapter 8
To solve computer problems
Chapter 3
Chapter 5
Chapter 2
Chapter 7
Chapter 4
Chapter 1
Chapter 6
viii IBM ThinkPad 600 Online Book
Page 8

Chapter 1. Using Your Computer Outside Your Home Count
This chapter provides necessary information if you are using the
computer outside the country where you purchased it.
Changing the Date and Time ..................... 2
Power Cord Requirements ...................... 2
Selecting the Country for the Internal ThinkPad Modem ..... 3
International Hardware Service Information ............. 4
Copyright IBM Corp. 1998 1
Page 9

Changing the Date and Time
You need to change the date and time settings if you go to a
different time zone.
1
In the Windows 95 desktop, click on Start and move the cursor
to Settings and Control Panel. Then double-click on Control
Panel and Date/Time.
2
Set the current date and time.
3
Click on the Time Zone tab.
Click on
the list. Press Enter.
Note:
, and select the region closest to your location from
If you do
saving time, remove the check from the check box ( ).
4
Click on OK.
Power Cord Requirements
To use the AC Adapter outside the country where you purchased the
computer, you need an ac power cord that is certified for the country
you are visiting. You can purchase one through an IBM authorized
reseller or IBM marketing representative in that country.
Attention
The use of an improper power cord might cause severe
damage to your computer.
The following tables show the part numbers for power cords.
For 2-pin power cords:
IBM Power
Cord
Part Number
13H5273 Japan
not
want to automatically adjust the clock for daylight
Used in These Countries
2 IBM ThinkPad 600 Online Book
Page 10

For 3-pin power cords:
Note
The grounded adapter is required for full MPRII compliance.
IBM Power
Cord
Part Number
76H3514 Australia, New Zealand
75H3516 Canada, Thailand, U.S.
76H3518 Europe
76H3520 Denmark
76H3522 India, South Africa
76H3524 United Kingdom
76H3526 Japan
76H3528 Switzerland
76H3530 Italy
76H3532 Israel
76H3535 Korea
Used in These Countries
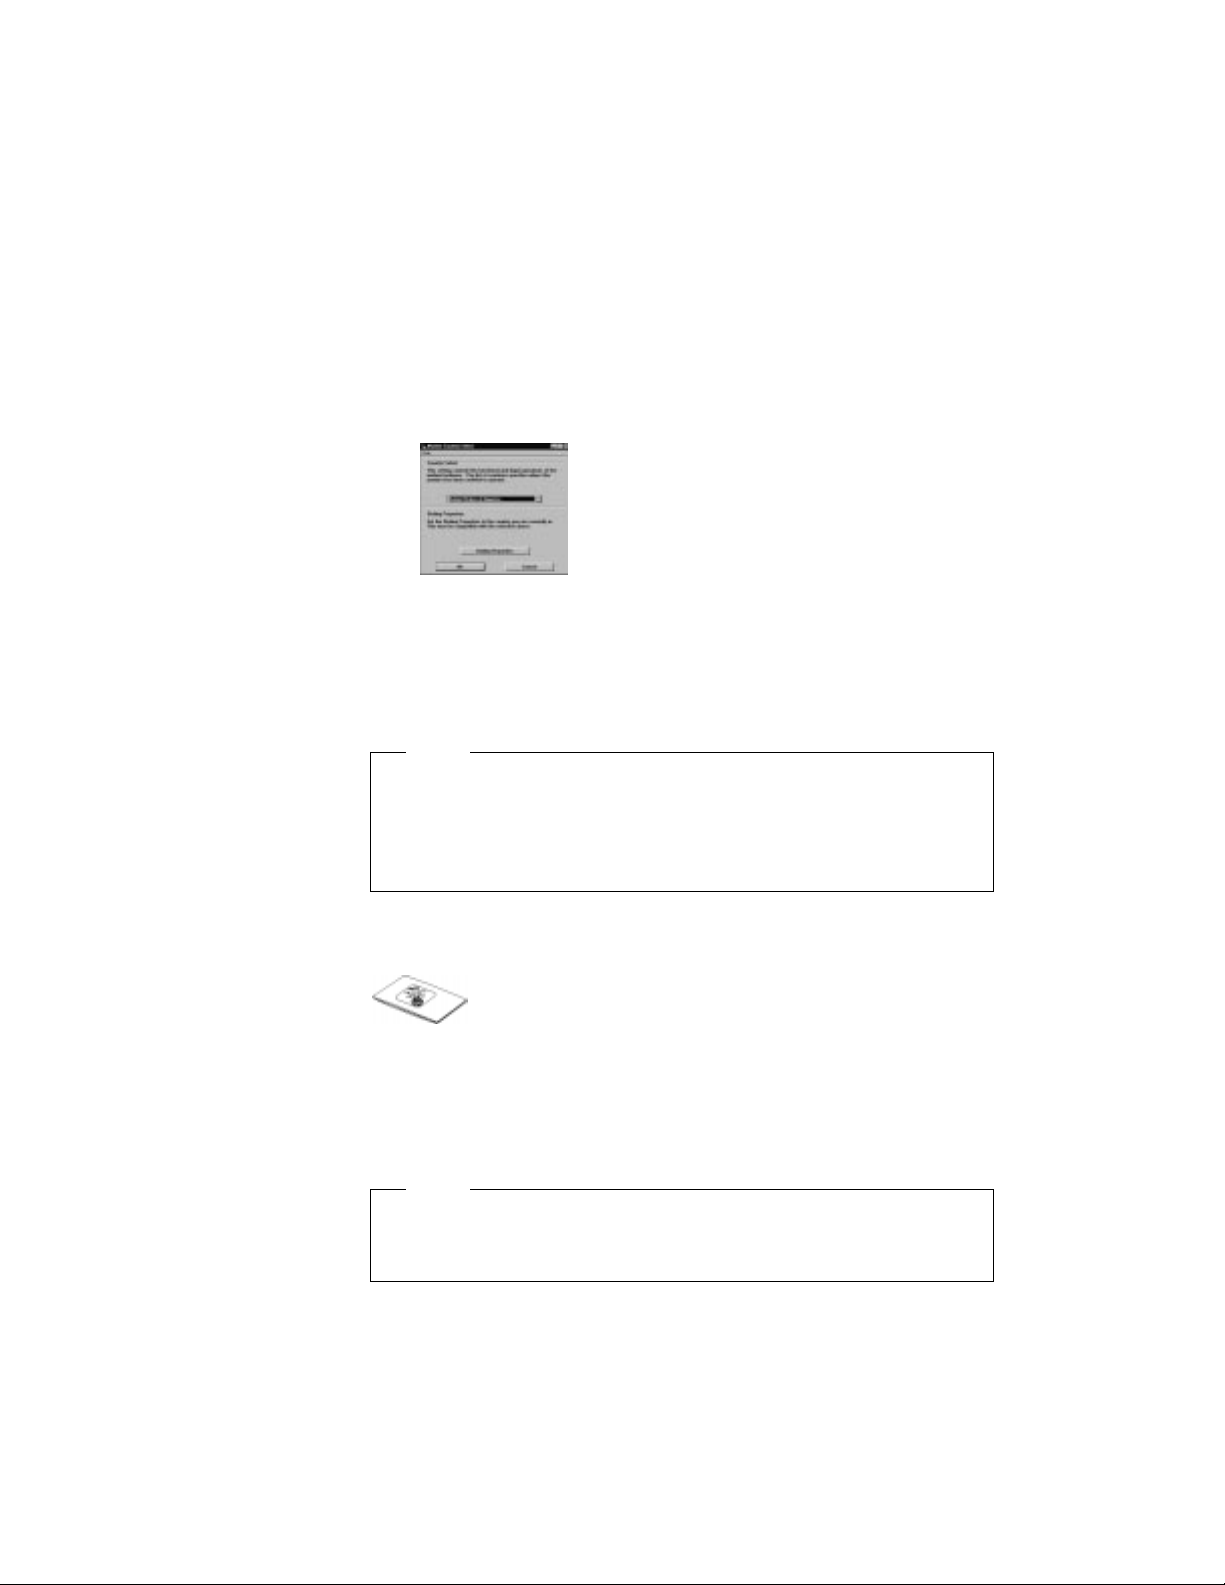
Selecting the Country for the Internal ThinkPad Modem
To use the internal ThinkPad modem outside the country where you
purchased the computer, you must change the country name.
1
In the Windows 95 desktop, click on Start, Programs,
ThinkPad Modem, and then Country Selection.
The following two windows appear:
Chapter 1. Using Your Computer Outside Your Home Country 3
Page 11
2
In the Dialing Properties window, select the country where
you are using the modem and click on OK.
3
In the Modem Country Select window, select the country
where you are using the modem and click on OK.
Note
| Check the IBM Web site for the latest information. When
| updates become available, they will posted on:
| http://www.pc.ibm.com/thinkpad
International Hardware Service Information
The ThinkPad computer comes with an International Warranty
Service (IWS). The booklet
Information
numbers for obtaining international technical support.
Note
(which comes with the computer) contains telephone
International Hardware Service
The kind of support you can get differs according to the country
you are visiting.
4 IBM ThinkPad 600 Online Book
Page 12

Chapter 2. Using Audio and Modem Features
Using the Audio Features ....................... 6
Using the 3D Sound Retrieval System (SRS) Function .... 7
Using the Modem Features ...................... 9
Using the 56-Kbps Modem .................... 11
Telephony Features . . . . . . . . . . . . . . . . . . . . . . . . 12
| Setting the RingCentral Application for New Zealand ... 13
| Caller ID Support ........................ 13
Copyright IBM Corp. 1998 5
Page 13

Using the Audio Features
Your computer is equipped with the following:
A -inch (3.5-mm) diameter external stereo line-in or monaural
microphone/line-in jack.
To use the input jack for an external stereo line-in device,
you need to disable the microphone function with software on
your operating system. For example in Windows 95, you can
disable the function by putting a check mark in the check box
of Mute for MIC in the “Master Out” window. To use the jack
for a manual microphone, disable the line-in function with
software.
A -inch (3.5-mm) diameter stereo headphone or an
external-powered speaker jack.
A MIDI/joystick port on the docking station. To use a MIDI
device, you should first connect your computer to the &dosk.;
then connect an external MIDI device to the docking station.
After docking your computer in the docking station, you should
enable this port using the ThinkPad Configuration program.
Note
Your computer also has an audio chip that enables you to enjoy
various multimedia audio features. This audio chip provides the
following features:
Recording and playing back of PCM and WAV files in 8-bit or
16-bit format.
Sampling of various rates from 8 KHz to 44 KHz for the WAV
file.
Playback of MIDI files through an FM synthesizer.
Recording from various sound sources, such as an integrated
microphone, an external microphone, or an audio device
attached to a line-in jack or an integrated CD-ROM drive.
DOS game compatibility. You should select Sound Blaster Pro**
for the audio adapter in the sound setup of the game.
6
IBM ThinkPad 600 Online Book
Page 14
The 3D Sound Retrieval System (SRS) function compensates for
flat, two-dimensional sound image limitations by reestablishing
the necessary information that allows the human ear to hear in
three dimensions.
Attention
Do not enter suspend or hibernation mode when you are using
audio features. You need to turn off any automatic timers that
put the computer into suspend or hibernation mode. If the
computer enters suspend or hibernation mode, data from a
running audio program will be lost.
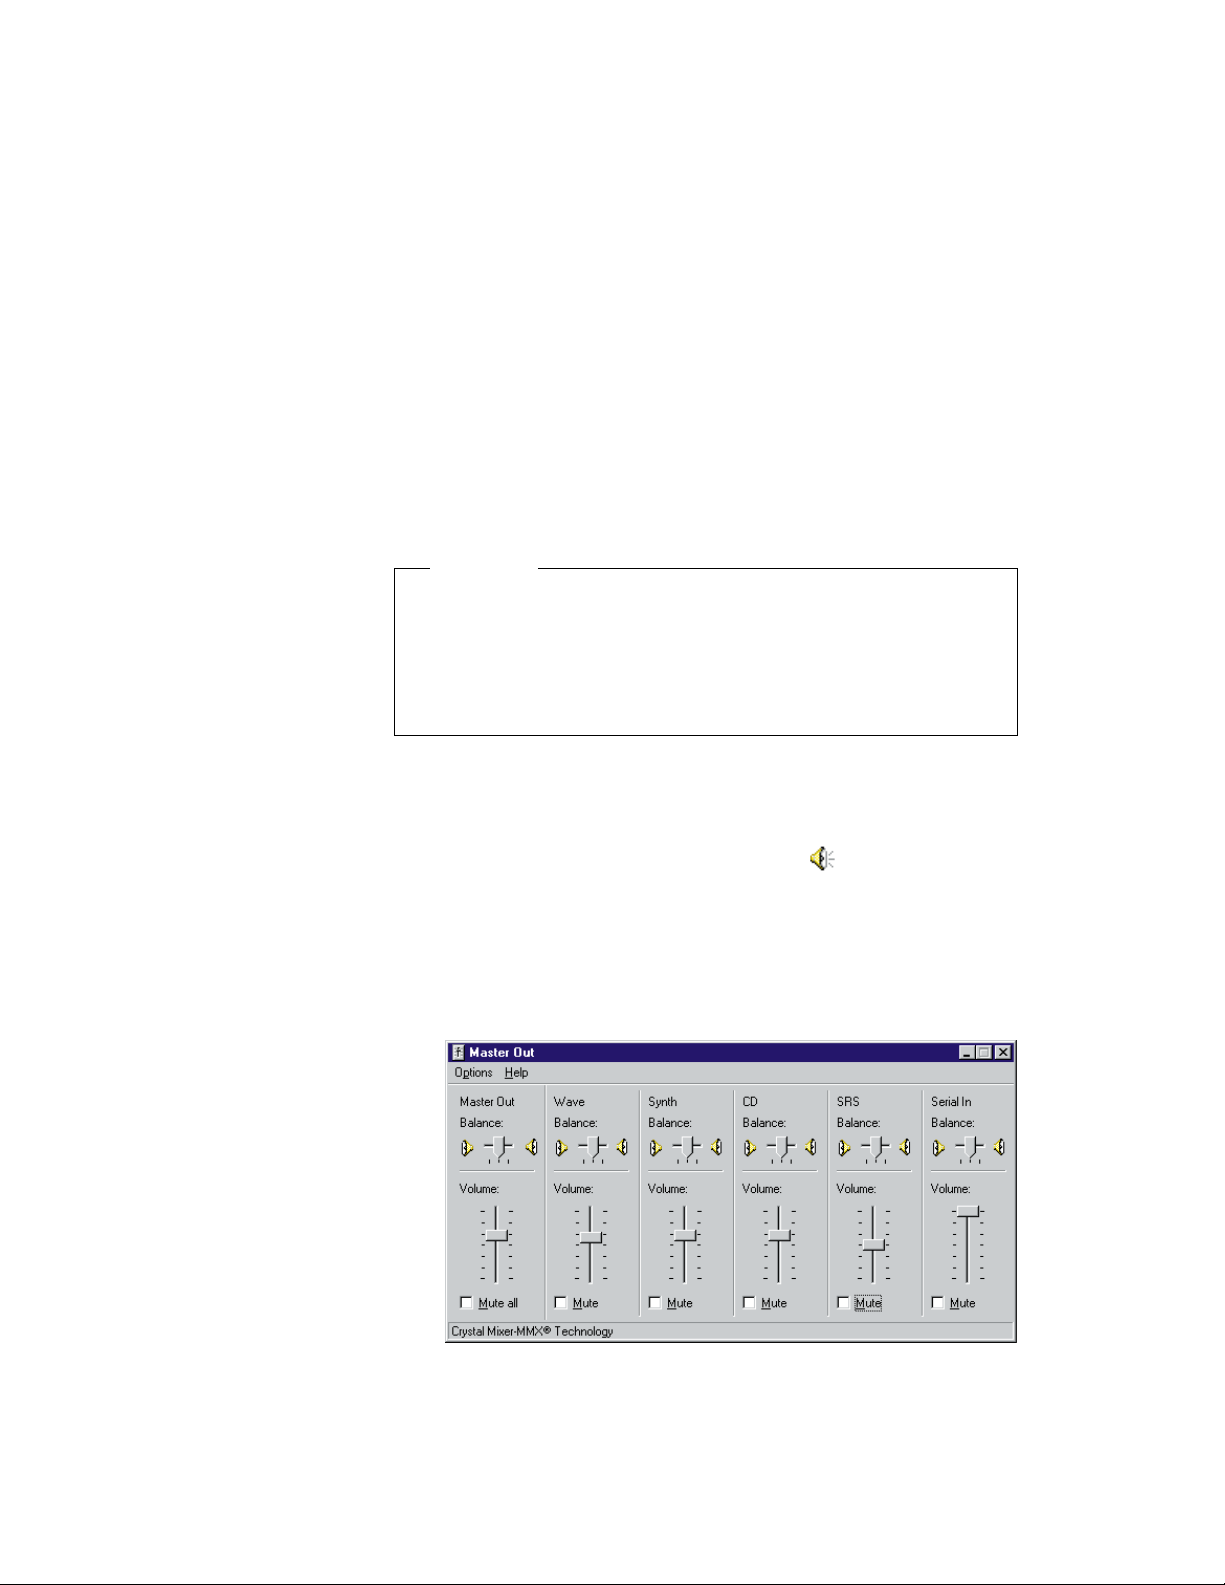
Using the 3D Sound Retrieval System (SRS) Function
To use the SRS function, do the following:
1
Double-click on the small speaker icon ( ) at the bottom right
of the Windows desktop.
or
Click on the Start button, and then select Programs,
Accessories, Multimedia, and Volume Control.
The “Master Out” window appears:
2
Make sure that the SRS Balance column is displayed and the
Mute check box is unchecked.
Chapter 2. Using Audio and Modem Features 7
Page 15

If the column is displayed and the check box is not checked,
exit the window. You can use the SRS function; skip the
remaining steps.
If the column is not displayed, go to the next step.
3
Select Options on the upper left corner of the window.
4
Select Properties.
The “Properties” window appears:
5
Put a check mark on SRS and press OK.
You return to the “Master Out” window.
6
Make sure that there is no check mark in the Mute check box
in the SRS Balance column.
7
Exit the “Master Out” window.
Now you can use the SRS function.
8 IBM ThinkPad 600 Online Book
Page 16

Using the Modem Features
You can use the following functions with the ThinkPad Modem:
Data modem functions
– Asynchronous communications port interface (NS16550A
UART compatible) operation
– ITU-T V.34 up to 33.6 Kbps data modem
– ITU-T V.32bis protocols with data rates of 4800, 7200, 9600,
12000, and 14000 bps
– ITU-T V.32 protocols with data rates of 4800, 9600 uncoded,
and 9600 bps Trellis coded
– ITU-T V.21/V.22, V.22bis protocols with data rates from 300
bps to 2400 bps
– Hayes** AT command set compatibility
– Asynchronous error recovery protocol
– Microcom Network Protocol (MNP**) protocols
– VoiceView (Windows 95 only)
–X2
Windows NT only)
Facsimile (fax) modem functions
– Class 1 fax modem
– Class 2 fax modem
– G3 transfers
– ITU-T T.4 & T.30 operations
– ITU-T V.27ter-2400/4800 bps send/receive
– ITU-T V.29-7200/9600 bps send/receive
– ITU-T V.17-14400 bps send/receive
- Error correction via MNP classes 1–4
- Data compression via MNP class 5 and V.42bis
- MNP class 5 for up to 2x data compression
** protocol with data rates of 56 kbps (Windows 95 and
You can use this ThinkPad modem only on a public-switched
telephone network (PSTN). You cannot use a private branch
exchange (PBX) or some other type of digital telephone extension
line. If you connect the modem to a line other than PSTN, an error
message appears, preventing you from using the line. If you are not
sure which kind of phone line you are using, contact your telephone
company.
Chapter 2. Using Audio and Modem Features 9
Page 17
Attention for Use Overseas
In many countries, you cannot use the ThinkPad modem
function before obtaining approval from the proper authorities.
Your ThinkPad modem is a worldwide modem and can be
used in any country where Postal Telegraph and Telephone
(PTT) type approval has been obtained. If the country you
want is not on the Country Selection listing, see
http://www.pc.ibm.com/thinkpad on the Internet, and
download the newest Country Selection list.
If you are a non-U.S. user, run the Country Selection
program in the ThinkPad Modem folder after you complete
the ThinkPad Modem installation. The “Country Selection”
window enables you to change the country name to the
country in which you are actually going to use the ThinkPad
Modem telephony function in. Click on ThinkPad Modem in
your operating system; then click on Country Selection.
Confirm whether the selection matches the country name in
the Dialing Properties listing (for Windows 95).
For more information on the use of the internal modem in a
specific country, contact the IBM customer support center in that
country. You can look up the phone number by referring to the
International Service Information booklet that came with your
computer.
DANGER
To avoid shock hazard, do not connect the cable to or
disconnect the cable from the telephone outlet on the wall during
electrical storms.
To use the ThinkPad modem, connect one end of the telephone
cable to the modem port; then connect the other end to the
telephone outlet on the wall.
For Windows 95 and Windows NT:
IBM ThinkPad 600 Online Book
10
Page 18

When you start Windows, the ThinkPad Modem automatically starts
and is ready for use.
For OS/2:
To start the ThinkPad modem from OS/2, do the following:
1
Open the Communications for OS/2 folder.
2
Double-click on the Modem icon.
3
Start your communication program.
Using the 56-Kbps Modem
To take advantage of your modem's 56-Kbps x2** technology, you
must first make sure that your Internet service provider (ISP)
supports a 56-Kbps modem protocol.
1
Contact your ISP and determine which 56-Kbps modem
protocol they use.
2
Determine which 56-Kbps modem protocol your modem
supports. To view your modem's supported protocol, do the
following:
a) Click on the Start button, and select Programs and
Modem (or Modem & Audio).
b) Click on Modem.
c) Choose Options from the “Modem Status” window; then
choose Settings.
The available transfer speeds are displayed. The 56-Kbps
protocol your modem supports is listed in parentheses
following the 56-Kbps transfer setting.
If no 56-Kbps transfer setting is listed, your modem's
56-Kbps technology is not currently enabled.
Your modem and your ISP must support the same 56-Kbps protocol,
or your maximum connection speed will be limited to V.34
technology.
Chapter 2. Using Audio and Modem Features 11
Page 19

Significantly higher Internet modem connection speeds up to 56
Kbps require all-digital transmission connections from your ISP to the
line card in the central office to which your phone line is connected.
The actual rate of reception is limited by the quality of your telephone
line, which may vary from location to location.
In the U.S., current FCC regulations limit the maximum speed for
downstream communication to 53 Kbps. Even though your modem
contains 56-Kbps technology, connect rate in the receive direction
might be significantly less than 56 Kbps.
Currently, 56-Kbps capability is in the receive direction only (from the
ISP to your local modem). The transmit or send direction (from your
local modem to the ISP) uses V.34 technology.
Note: 56-Kbps transfer rates are not available in all locations or
Telephony Features
The ThinkPad modem, with the associated software, provides the
following telephony features:
Other
countries. You must check with your ISP to determine if your
area is capable of 56-Kbps transfer rates.
Industry standard modem support up to 33.6 Kbps
Industry standard fax support up to 14.4 Kbps
Computer telephony function support
– DTMF and pulse dialing
– Detecting DTMF digits received from the phone line
– Call progress monitoring
– Auto-dialing feature
– Telephony API (TAPI) support through Windows 95
Unimodem V (Windows 95 only)
Telephone answering machine support (Windows 95 only)
– Recording and playback of messages and greetings
– Answering device with caller ID
– Modem class 8 AT commands for TAPI calls
Full-duplex speaker phone support (Windows 95 only)
– Acoustic echo cancellation
– DOS box operation for 33.6-Kbps data and 14.4-Kbps fax
– System level and device level power management
12
IBM ThinkPad 600 Online Book
Page 20

|
| The RingCentral** program allows you to set the number of rings for
| incoming messages before it answers the call.
| You can set the value by selecting:
| Options - Answering - Ring Options
| from the RingCentral menu.
| The values x and y in the following fields must be between 2 and 5:
| Answer after x rings if there are new messages.
| Answer after y rings if there are no new messages.
Setting the RingCentral Application for New Zealand
|
| The “Answering devices with caller ID support” can be used only
| where the caller ID services is available, currently only in the U.S.
| and Canada.
Caller ID Support
Chapter 2. Using Audio and Modem Features 13
Page 21

14 IBM ThinkPad 600 Online Book
Page 22

Chapter 3. Protecting Your Computer
This chapter provides overall information about how to protect your
computer from theft or unauthorized use. To protect your computer,
you can use
Passwords
The Personalization Editor
A mechanical Lock
For more details, see the
User's Reference
.
Copyright IBM Corp. 1998 15
Page 23

Using Passwords
The password-setting feature prevents your computer from being
used by others. Once you set a password, a prompt appears on the
screen each time you turn on the computer. You must enter your
password at the prompt. You will not be able to use the computer
unless you type the correct password. You can set the following
passwords on your computer:
The power-on password protects your computer from being
used by unauthorized persons.
The hard disk password protects the data on your hard disk
from being accessed by unauthorized persons.
The supervisor password protects the system information
stored in Easy-Setup so that without knowing the password,
nobody can change the configuration of the computer.
To use the password, refer to the
Using the Personalization Editor
With the Personalization Editor, you can display such personal
information as your name and address on the screen each time you
power on your computer. This feature helps you to identify your
computer when identical computers are being used in your location,
or to deter theft.
To set the Personalization Editor, refer to the
Using Mechanical Locks
You can attach a mechanical lock to your computer, to prevent it
from being removed without your permission.
To attach a lock, do the following:
Attach a mechanical lock to the keyhole 1 on the left side of the
computer; then secure the chain on the lock to a secure stationary
object.
User's Reference
User's Reference
.
.
IBM ThinkPad 600 Online Book
16
Page 24
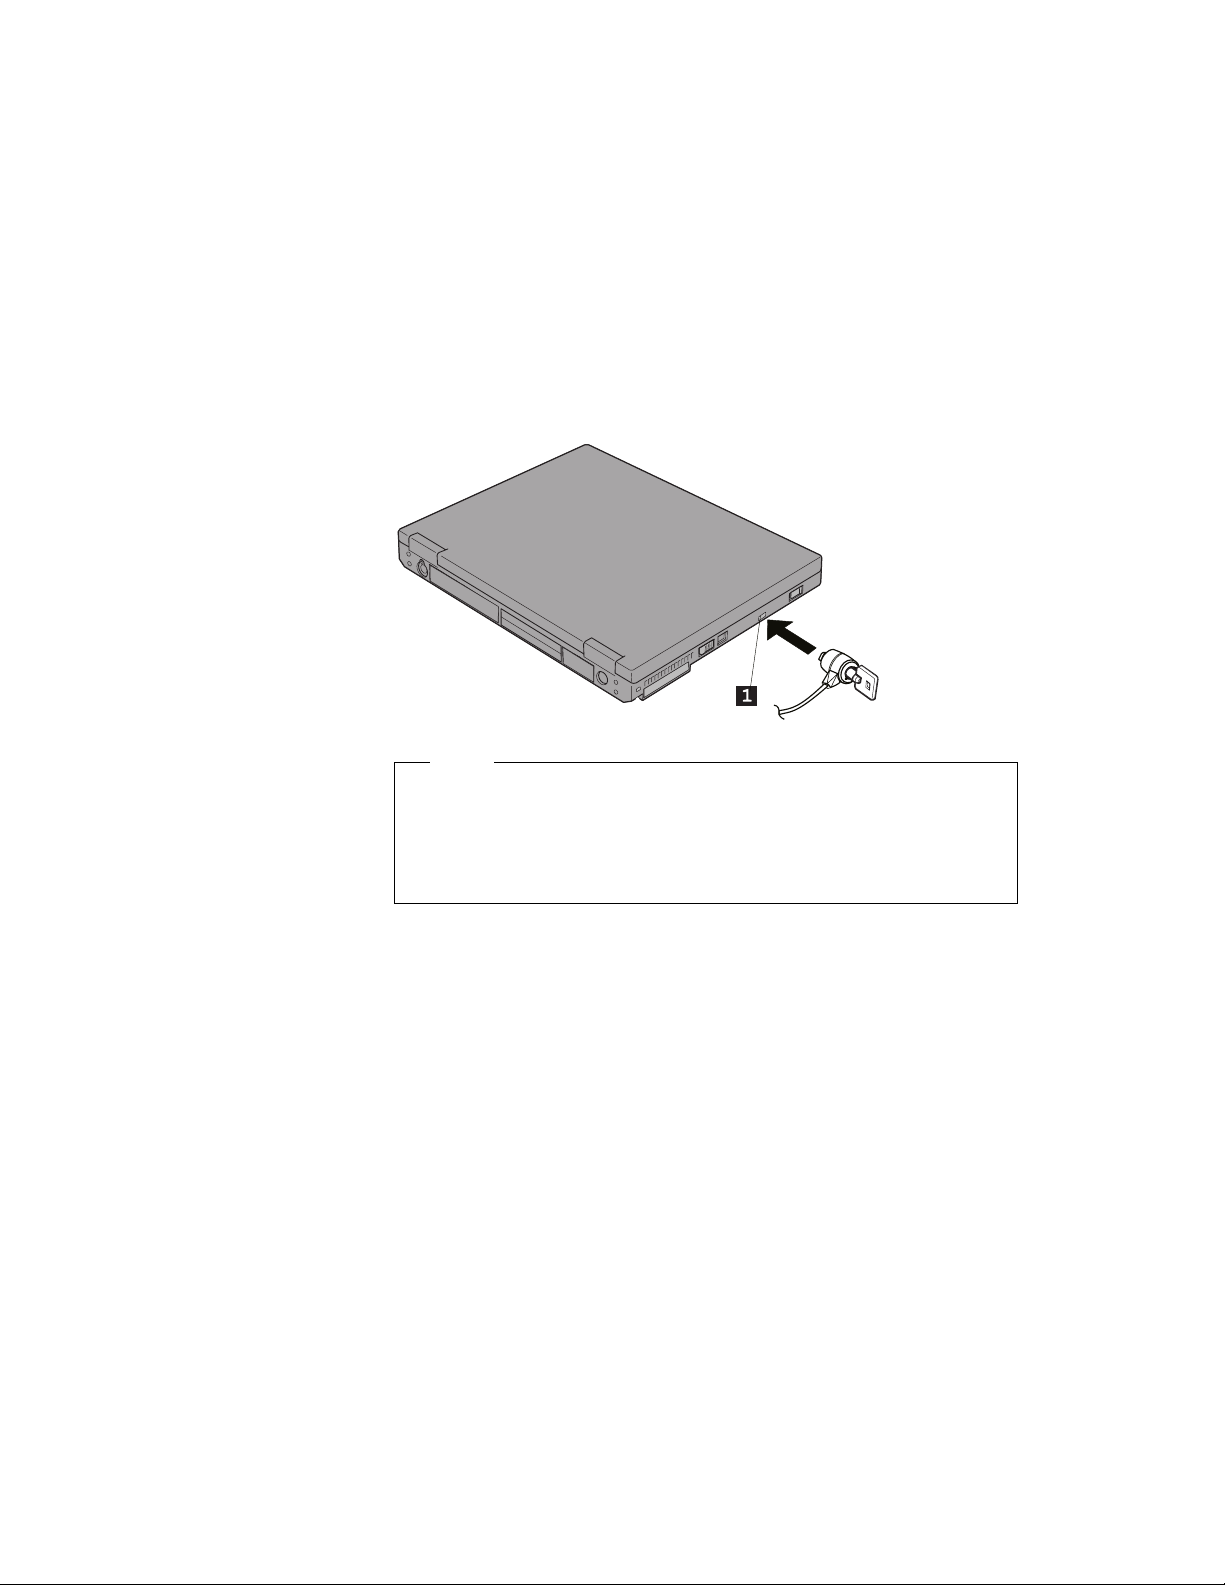
Note
You are responsible for evaluating, selecting, and implementing
the locking devices and security features. IBM makes no
comments, judgments, or warranties about the function, quality,
or performance of locking devices and security features.
Chapter 3. Protecting Your Computer 17
Page 25

18 IBM ThinkPad 600 Online Book
Page 26

Chapter 4. Using Your Computer with a Battery Pack
If you use your ThinkPad computer with the battery pack, you need
to conserve the power for long operation. The ThinkPad computer is
provided with power management for saving battery power, and it
always indicates the battery status. This chapter describes these
function for battery operation.
Using the Battery Pack ....................... 20
Charging the Battery Pack .................... 20
Monitoring the Battery Status .................. 20
Using the Battery Status Indicator .............. 21
Using the Fuel-Gauge Program ............... 23
Saving Battery Power ........................ 24
Using the Power Management Modes ............. 24
Customizing Power Management ................ 28
Setting the Suspend Timer .................. 28
Enabling Hibernation Mode .................. 29
Considerations When Using a Power Management Mode .. 30
Considerations for Suspend Mode .............. 30
Considerations for Hibernation Mode ............ 32
Notes for Reinstalling or Installing the Operating System 33
Using Other Battery-Saving Methods .............. 35
Copyright IBM Corp. 1998 19
Page 27

Using the Battery Pack
This section describes how to charge your battery pack and display
its status.
Charging the Battery Pack
You can charge the battery pack when the AC Adapter is connected
to the computer and the battery pack is installed. You need to
charge the battery pack in any of the following conditions:
Monitoring the Battery Status
You can monitor the battery status through the battery status
indicator and the Fuel-Gauge program.
When you purchase a new battery pack
If the battery status indicator starts blinking
If the battery pack has not been used for a long time
Notes
Before you charge the battery pack, ensure that its
temperature is at least 10°C (50°F).
If the battery pack has not been used for a long time, it will
not be fully charged with only a single charging. You will
have to completely discharge it; then recharge it three to six
times to maximize battery operating time.
20 IBM ThinkPad 600 Online Book
Page 28
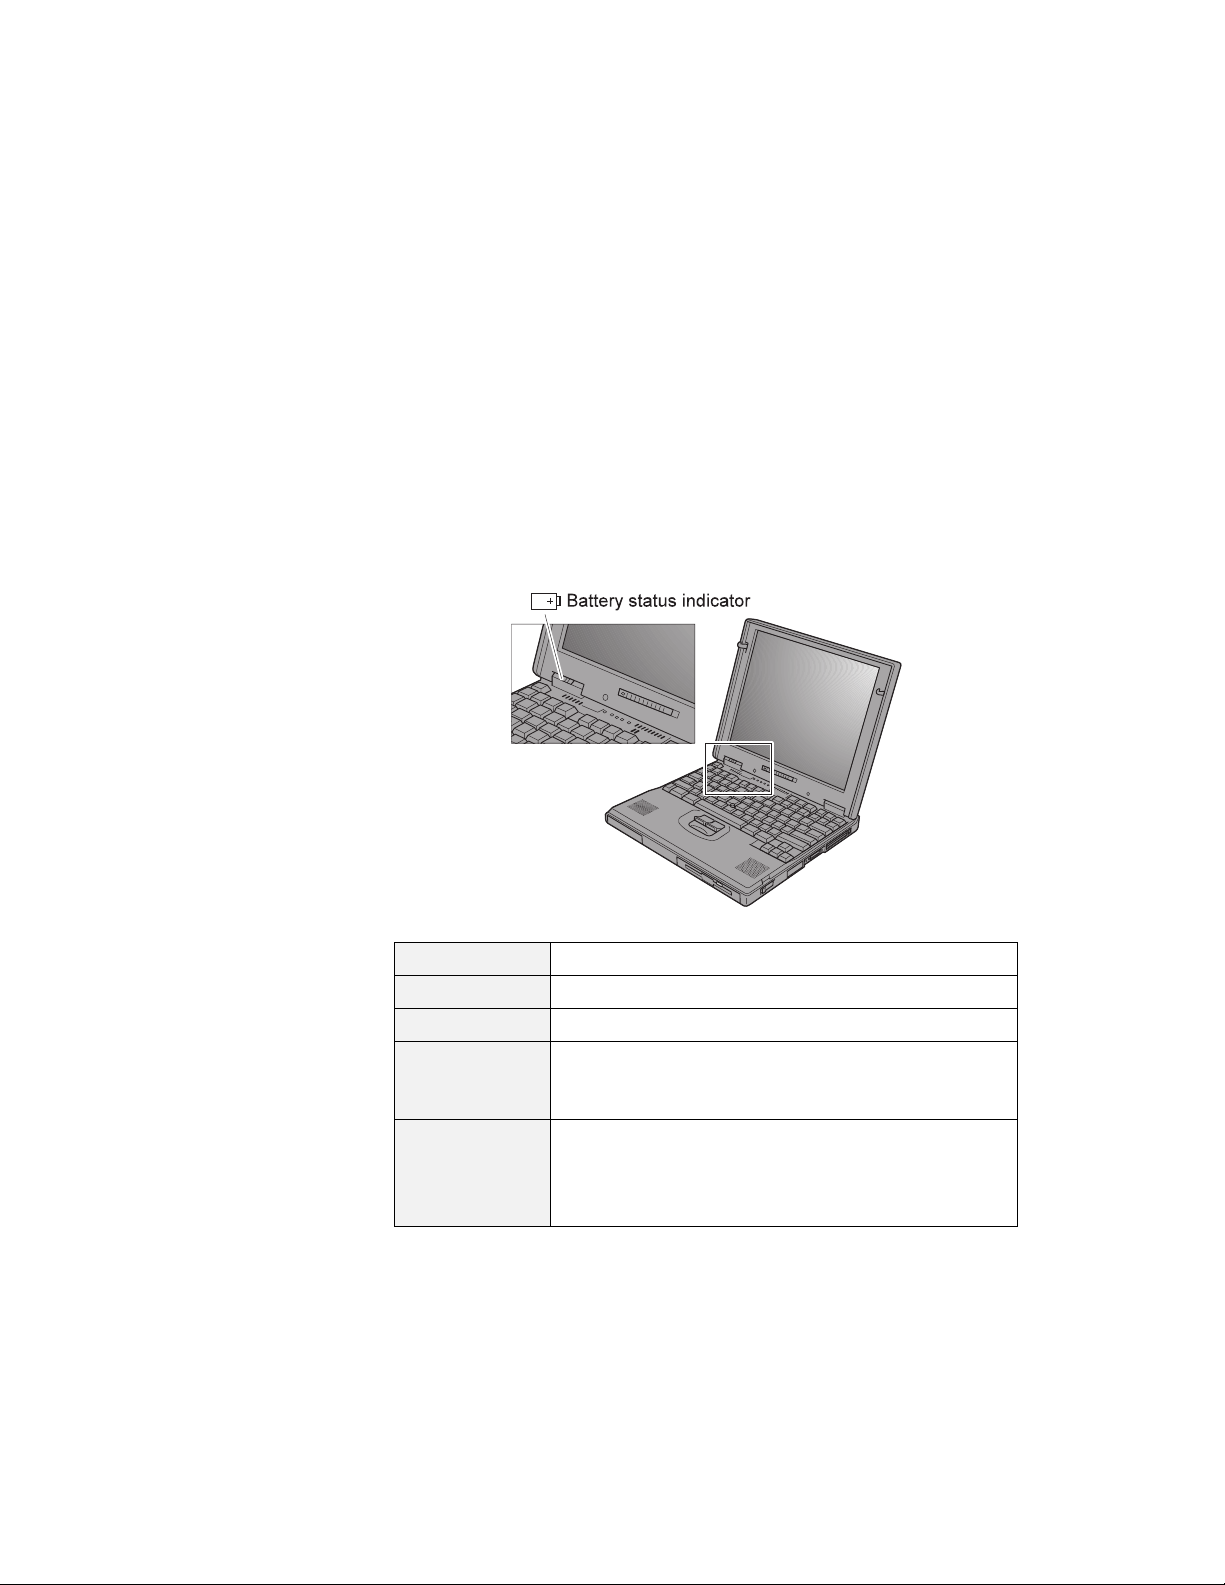
Using the Battery Status Indicator
The battery status indicator shows the current status of the battery
pack (only when the battery is installed).
Compare the battery status indicator with the following table to
determine the condition of your battery.
Status Condition
Green Enough power remains for operation.
Orange The battery pack is being charged.
Blinking
orange
Off The battery pack is not installed.
The battery pack needs charging. If the indicator
starts blinking orange, the computer beeps three
times.
The computer is turned off or is in suspend mode
when the AC Adapter is not connected.
Chapter 4. Using Your Computer with a Battery Pack 21
Page 29

Attention
You should take corrective actions when the battery status
indicator is
consecutive beeps. (If your computer enters suspend mode
because of a low-battery condition, data in memory might be
lost.)
blinking orange
, and your computer sounds three
Immediately connect the AC Adapter to the computer
Then take either of the following actions:
To continue your work with AC Adapter, press the Fn key.
.
or:
To continue your work with a fully charged battery pack, do
the following:
1.
Replace the battery pack with a fully charged one. (See
the
User's Reference
2.
Press the Fn key.
3.
Disconnect the AC Adapter from the computer.
If you do not take corrective actions within about 30 seconds, the
computer will enter suspend mode.
Do not leave the computer in this condition for an extended
time. Data in memory will be lost.
.)
22 IBM ThinkPad 600 Online Book
Page 30

Using the Fuel-Gauge Program
Using the Fuel-Gauge program, you can display the battery status
and power mode (High Performance, Automatic, or Customized).
You also can select suspend or hibernation mode.
To start the Fuel-Gauge program, click on the Fuel-Gauge icon in
the ThinkPad Configuration window. The following window appears:
Notes
The “Current Power Mode” icon depends on the power mode.
The “Power Source” icon depends on the power source.
( is for the AC Adapter and is for battery pack.)
The “Duration of Remaining Power” does not appear when
the AC Adapter is connected.
You can minimize the window to an icon by clicking on the icon at
the top of the window. You can toggle between the Fuel-Gauge
window and the icon by pressing the Fn+F2 key combination.
Chapter 4. Using Your Computer with a Battery Pack 23
Page 31

Saving Battery Power
Using the Power Management Modes
Your battery pack should be useful for approximately 3 years, or 300
charge-discharge cycles. The number of years or charge-discharge
cycles might vary depending on how efficiently you use your
computer. This section describes the following:
How to use the power management modes
How to use other battery saving methods
Your ThinkPad computer has three power management modes to
save the battery power. You can use your computer under battery
power for a considerable length of time by using these power
management modes:
Attention
Do not enter suspend or hibernation mode when your computer
is doing any of the following:
Playing or recording audio
Playing a movie
Playing a game
Running any other multimedia application
Stop these applications before entering suspend or hibernation
mode.
Standby Mode
In standby mode, the LCD turns off. Also, if a power-saving
monitor (Energy Star Monitor) is in use when the computer
enters standby mode, the computer activates the monitor's
low-power mode.
You can also enter this mode by pressing the Fn+F3 keys.
To return to normal operation, press any key or move the
TrackPoint.
Suspend Mode
In this mode, your computer stops all tasks and stores all data in
memory. You can enter suspend mode by:
24
IBM ThinkPad 600 Online Book
Page 32

– Pressing the Fn+F4 keys
– Closing the cover
– Selecting the Suspend button (
program
RediSafe*
To prevent loss of data during suspend mode when the
battery is critically low, your ThinkPad computer has a
RediSafe function. Once you set this function, the
hibernation file is activated each time the computer enters
suspend mode, and is ready to enter hibernation mode from
suspend mode whenever the battery is low.
Set RediSafe as following:
Windows 95:
1.
Start the ThinkPad Configuration program.
2.
Click on the Power Management button ( ).
3.
Select the Hibernation tab.
4.
Enable hibernation mode if it is disabled.
a)
Click on the Enable Hibernation.. button.
b)
Click on Create Now; then Close.
5.
Select RediSafe.
6.
Click on OK.
) in the Fuel-Gauge
Windows NT, Windows 3.11, or OS/2:
1.
Start the ThinkPad Configuration program.
2.
Click on the Power Management button ( ).
3.
Select the Suspend/Hibernation/Resume Options
button (
4.
Enable hibernation mode if it is disabled.
a)
Click on the Enable Hibernation.. button.
b)
Click on OK.
5.
Select RediSafe.
6.
Click on OK.
Hibernation Mode
Chapter 4. Using Your Computer with a Battery Pack 25
).
Page 33

In this mode, your computer stops all tasks and stores all data in
the hard disk; then it powers off. You should set your computer
to this mode when you want to maintain the present operating
condition until the next day, for instance.
To use this mode, you have to create a hibernation file with the
ThinkPad Configuration program. (See Enabling Hibernation
Mode.)
For Windows NT Users
You cannot create a hibernation file in a Windows NT system
that uses the NTFS file format, the Windows NT default. If
you want to use hibernation mode, you should reinstall
Windows NT with the FAT file format.
You can set hibernation mode by doing any of the following:
– Pressing the Fn+F12 keys.
– Selecting the Hibernation button (
) in the Fuel-Gauge
program.
Notes
You cannot enter hibernation mode when you are using
the communication network.
Hibernation mode might be terminated if you connect
your computer to a docking station or if you use a
particular PC Card.
The following table shows how the indicator behaves in each power
management mode:
IBM ThinkPad 600 Online Book
26
Page 34

Current Status
Suspend Mode
Indicator
Power-On
Normal operation
or standby mode
Suspend mode Green Off
Entering or resuming from
suspend mode
Power off or
hibernation mode
Off Green
Blinking green On
Off Off
The following figure shows the relationship between different power
management modes, how to switch between them, and battery
power consumption:
Chapter 4. Using Your Computer with a Battery Pack 27
Page 35

Customizing Power Management
This section describes how to customize power management. Use
the power management mode appropriate to your operation.
Setting the Suspend Timer
To set the suspend timer, do the following:
For Windows 95:
1
Start the ThinkPad Configuration program.
2
Click on the Power Management ( ) button.
The “Power Properties” window appears.
3
Select the Power Mode tab.
The “Power Mode” window appears.
4
Select Customized.
The bottom gray portion is displayed in black, and you can
specify the timeout value in minutes in the Suspend Timer
box.
5
Click on OK.
For Windows NT, Windows 3.11, or OS/2:
1
Start the ThinkPad Configuration program.
2
Click on the Power Management ( ) button.
Three buttons appear on the right.
3
Click on the Power Mode Settings ( ) button.
The “Power Mode Settings” window appears.
4
Specify the timeout value in minutes in the Suspend Timer
box.
5
Click on OK.
28
IBM ThinkPad 600 Online Book
Page 36

Enabling Hibernation Mode
To enable hibernation mode, do the following:
For Windows 95:
1
Start the ThinkPad Configuration program.
2
Click on the Power Management ( ) button.
The “Power Properties” window appears.
3
Select the Hibernation tab.
The “Hibernation” subwindow appears.
4
Click on Enable Hibernation. (If you have already created a
hibernation file, this button appears in gray and you cannot
click on it.)
The “Enable Hibernation” subwindow appears.
5
Click on Create Now.
6
Click on Close; then OK.
For Windows NT, Windows 3.11, or OS/2:
1
Start the ThinkPad Configuration program.
2
Click on the Power Management ( ) button.
3
Click on the Suspend/Resume Options ( ) button.
The “Suspend/Resume Options” window appears.
4
Click on the Enable Hibernation.. button.
5
Click on OK.
Chapter 4. Using Your Computer with a Battery Pack 29
Page 37

Considerations When Using a Power Management Mode
When you use a power management mode, you need to consider a
few points, especially if you are using the network.
Considerations for Suspend Mode
Consider the following before using suspend mode:
The computer can enter suspend mode when used with the
following operating systems:
– DOS Version 7.0
– OS/2 Warp Version 4
– Microsoft Windows Version 3.11 with DOS Version 7.0
– Microsoft Windows 95
– Microsoft Windows NT 4.0
Important
If you use Windows Version 3.11, ensure that Advanced
Power Management (APM) is installed according to the
instructions in page 34.
Attached devices, such as a printer or serial device, stop running
when the computer enters suspend mode. When you resume
normal operation, the output might differ from what you expect,
because the device might be reset or lose its configuration
settings.
Sometimes you might want to use the computer with the LCD
closed—for example, when an external monitor and keyboard are
used. In such a case, turn on the computer with the LCD closed
or use the ThinkPad Configuration program to set the computer
not to enter suspend mode when the LCD is closed.
If the computer resumes normal operation by reaching the
ThinkPad Configuration timer setting or because of an incoming
call, only a blank screen is displayed. To display a power-on
password prompt, press any key or move your pointing device.
If the computer is powered with ac power and is using one of the
following IBM PC Cards, it enters
– IBM 3270 Emulation Credit Card Adapter
– IBM Token-Ring 16/4 Credit Card Adapter
30
IBM ThinkPad 600 Online Book
standby mode
:
Page 38

– IBM Credit Card Adapter for Ethernet
– IBM 5250 Emulation Credit Card Adapter
If other PC Cards are used and the computer enters suspend
mode, all application programs stop. Communication also stops
for communication PC Cards not in the preceding list. For some
PC Cards, power to the PC Cards might also turn off.
If the computer is powered with battery power, the computer
turns power off to the PC Card, and communication stops for
communication PC Cards, so the duration of suspend mode is
longer.
If communication for a PC Card is not reestablished after
resuming normal operation, remove and then reinstall the PC
Card before restarting the system or application program. For
other kinds of PC Cards, if the PC Card or computer does not
operate, restart the application or computer.
If the computer is using one of the following IBM modem cards
and detects an incoming call while in suspend mode, the
computer automatically resumes normal operation:
– IBM 28.8/14.4 Data/FAX Modem
– IBM PCMCIA Data/FAX Modem
– IBM High Speed PCMCIA Data/FAX Modem
– IBM Microelectronics 2.4/9.6 Data/FAX Modem
– IBM Microelectronics 14.4/14.4 Data/FAX Modem
– IBM Wireless Modem for ARDIS
– IBM Wireless Modem for Mobitex
– IBM Wireless Modem for Cellular/CDPD
While a communication link is active, the computer does not
enter suspend mode.
Note:
You must set the Resume on incoming call option in the ThinkPad
Configuration program so the computer automatically resumes
normal operation.
For Windows 95:
1.
Click on the Battery ( ) button.
2.
Click on the Suspend/Resume options tab.
3.
Select the Resume on incoming call option.
Chapter 4. Using Your Computer with a Battery Pack 31
Page 39

For Windows NT, Windows 3.11, or OS/2:
1.
Click on the Battery ( ) button.
2.
Click on the Suspend/Hibernation/Resume options ( )
button; then select the Resume on incoming call option.
For DOS: Enter PS2 RI E
Considerations for Hibernation Mode
Consider the following before using hibernation mode:
Do not run any tasks while the hibernation file is being created.
The computer uses battery power to enter hibernation mode.
Therefore, it reserves some battery power when it is set to enter
hibernation mode when a low-battery condition occurs. This can
cause the battery operating time to be shorter than the time
publicly stated.
Do not add or remove memory during hibernation mode. If you
do, the computer resumes from hibernation mode without
recognizing the changed memory size. To ensure that the
computer recognizes the correct memory size, shut down; then
restart your operating system.
If the computer is powered with battery power, the computer
turns power off to the PC Card when entering hibernation mode.
When resuming normal operation, if the PC Card or computer
does not operate, restart the application or computer.
32
IBM ThinkPad 600 Online Book
Page 40

If the computer is powered with ac power, it does not enter
hibernation mode if it is using one of the following IBM PC
Cards:
– IBM 28.8/14.4 Data/FAX Modem
– IBM PCMCIA Data/FAX Modem
– IBM High Speed PCMCIA Data/FAX Modem
– IBM 3270 Emulation Credit Card Adapter
– IBM Token-Ring 16/4 Credit Card Adapter
– IBM Credit Card Adapter for Ethernet
– IBM 5250 Emulation Credit Card Adapter
– IBM Microelectronics 2.4/9.6 Data/FAX Modem
– IBM Microelectronics 14.4/14.4 Data/FAX Modem
– IBM Wireless Modem for ARDIS
– IBM Wireless Modem for Mobitex
– IBM Wireless Modem for Cellular/CDPD
This prevents possible problems from occurring with
communication application programs after the computer returns
to normal operation.
Note:
If the communication links are still not reestablished, remove and
then reinstall the PC Card before restarting the system or
application program.
Notes for Reinstalling or Installing the Operating System
When you install an operating system, install it with Advanced Power
Management (APM). Also install the ThinkPad Configuration
program with the Utility Diskette to use power management mode.
Note
To install the software
If you are using Windows 95 or OS/2,
in your computer.
If you are using DOS,
APM is automatically installed in your
computer. To verify that the computer has installed APM correctly,
Chapter 4. Using Your Computer with a Battery Pack 33
Chapter 8, Installing Software
APM is automatically installed
Page 41

type power at the command prompt and press Enter. If a screen
similar to the following appears, APM is successfully installed.
Power Management Status
---------------------- Setting = ADV: REG
CPU: idle 32% of time.
AC Line Status : OFFLINE
Battery status : High
If not, add the following line to your CONFIG.SYS file, using a text
editor such as the DOS Editor:
DEVICE=C:\DOS\POWER.EXE
If you are using Windows 3.11
, follow these instructions to check and
install APM for Windows:
1
Start the computer.
Make sure that the current directory is Windows (usually
C:\WINDOWS>).
2
Type SETUP at the command prompt and press Enter.
The following appears:
Windows Setup
===============
If your computer or network appears on the Hardware Compatibility List
with an asterisk next to it, press F1 before continuing.
System Information
Computer: MS-DOS System
Display: MagicGraph128XD 8 ×6 256 small font
Mouse: Microsoft, or IBM PS/2
If MS-DOS System with APM appears for the item Computer:,
APM is already installed. Press F3 to exit the setup.
3
Using the Arrow keys (↑ , ↓ ), position the highlighted cursor
over MS-DOS System and press Enter.
4
Position the highlighted cursor over MS-DOS System with
APM and press Enter.
34
IBM ThinkPad 600 Online Book
Page 42

5
Verify that the item Computer has changed to
MS-DOS System with APM on the screen. If not, return to
step 3.
Windows Setup
===============
If your computer or network appears on the Hardware Compatibility List
with an asterisk next to it, press F1 before continuing.
System Information
Computer: MS-DOS System with APM
Display: MagicGraph128XD 8 ×6 256 small font
Mouse: Microsoft, or IBM PS/2
6
Press Enter to install APM.
7
Restart the system to make APM effective.
Using Other Battery-Saving Methods
Another battery-saving method is to decrease the LCD brightness.
You can use the ThinkPad Configuration program to decrease the
brightness of the LCD by clicking on the LCD (
) button and
selecting Normal for Brightness (battery operation) in the window
that appears.
Chapter 4. Using Your Computer with a Battery Pack 35
Page 43

36 IBM ThinkPad 600 Online Book
Page 44

Chapter 5. Using Your Computer with a PC Card
This chapter provides necessary information if you are using the
computer with a PC Card.
Using a PC Card ........................... 39
PC Card Types .......................... 39
Storage Cards . . . . . . . . . . . . . . . . . . . . . . . . . 39
Modem Cards . . . . . . . . . . . . . . . . . . . . . . . . . 40
Network Cards . . . . . . . . . . . . . . . . . . . . . . . . . 40
SCSI Cards . . . . . . . . . . . . . . . . . . . . . . . . . . . 40
Other PC Cards ........................ 40
PC Card Interface ......................... 41
16-Bit PC Cards ........................ 41
CardBus Cards . . . . . . . . . . . . . . . . . . . . . . . . . 41
Custom Interface Cards .................... 41
PC Card Support Software ..................... 42
Power Management . . . . . . . . . . . . . . . . . . . . . . 44
Using a PC Card in Windows 95 (with CardWorks) ....... 45
Self-Check . . . . . . . . . . . . . . . . . . . . . . . . . . . . . 46
PC Card Information ....................... 47
Attributes . . . . . . . . . . . . . . . . . . . . . . . . . . . . 48
Resources . . . . . . . . . . . . . . . . . . . . . . . . . . . . 48
Drivers . . . . . . . . . . . . . . . . . . . . . . . . . . . . . . 49
Stopping the PC Card ...................... 50
Help . . . . . . . . . . . . . . . . . . . . . . . . . . . . . . . . . 50
Using a PC Card in Windows NT (with CardWizard) ...... 51
Self-Check . . . . . . . . . . . . . . . . . . . . . . . . . . . . . 52
PC Card Information ....................... 52
Attributes . . . . . . . . . . . . . . . . . . . . . . . . . . . . 53
Name . . . . . . . . . . . . . . . . . . . . . . . . . . . . . . 53
Stopping the PC Card ...................... 53
Help . . . . . . . . . . . . . . . . . . . . . . . . . . . . . . . . . 54
Using ATA PC Cards ....................... 54
Power Management Support .................. 54
Suspend Mode Support .................... 55
Using a PC Card in Windows 3.11 (with CardWizard) ...... 56
Self-Check . . . . . . . . . . . . . . . . . . . . . . . . . . . . . 57
Help . . . . . . . . . . . . . . . . . . . . . . . . . . . . . . . . . 57
Formatting PC Cards ....................... 58
Formatting the ATA Card ................... 58
Copyright IBM Corp. 1998 37
Page 45

Formatting a Flash Disk Card (MCFORMAT) ....... 58
Formatting an SRAM Card .................. 59
Memory Card Partitions and Drive Letters ......... 59
Using a PC Card in OS/2 (with PC Card Director) ........ 61
Stopping the PC Card ...................... 62
Using the Auto Configurator Utility ............... 63
Registering a PC Card in Auto Configurator ........ 63
Deleting a Registered Card .................. 64
Changing the Registered Order for PC Cards ....... 64
Changing the Resource Information for the PC Card ... 65
Updating the CONFIG.SYS File ................. 66
Registered Drivers and Standard Rules ........... 66
Parameters for the OS/2 PCMCIA ATA Card Device Driver 68
PCMCIA Storage Card Device Driver ............. 69
PCMCIA Storage Card Device Driver for OS/2 ...... 69
Formatting PCMCIA Storage Cards before Use ...... 70
Using PCMCIA ATA Cards with Multiple Partitions .... 70
PCMCIA Storage Card Device Manager .......... 70
OS/2 PCMCIA Storage API Device Driver ......... 71
Flash Card Memory Technology Driver ........... 71
Checking the Allocated Resources for the PC Card ..... 72
Avoiding PC Card Resource Conflicts ............. 73
Using a PC Card in DOS (with CardSoft) ............. 75
CARDINFO . . . . . . . . . . . . . . . . . . . . . . . . . . . . . 75
Running CARDINFO . . . . . . . . . . . . . . . . . . . . . . 76
Using the Configuration Utility .................. 77
Running the Configuration Utility ............... 78
Using Storage PC Cards ..................... 79
Using the ATA Hard Disk or ATA Flash Disk Cards .... 79
Using Memory Cards ..................... 80
38 IBM ThinkPad 600 Online Book
Page 46

Using a PC Card
A PC Card enables you to send and receive faxes, communicate
through a network, store data, and use other functions. PC Cards
can be distinguished by their functions:
Storage cards
Modem cards
Network cards
SCSI cards
Other PC Cards
A PC Card is also distinguished by the interface that supports it.
Before you use a PC Card, you need to make sure that your
computer supports it.
PC Card Types
Storage Cards
16-bit PC Card
CardBus Card
1
Custom Interface Card
This chapter explains PC Card functions and interfaces. It describes
PC Card support software and explains how to use your PC Card in
the operating system that you have installed.
An Advanced Technology Attach (ATA) card functions as a
hard disk with the Integrated Drive Electronics (IDE**) interface**.
You can transfer data between devices by inserting a card in a
PC Card slot just as you would with a diskette in a diskette drive.
There are two types of ATA card:
– The ATA hard disk card has a large capacity; you can use
the card as you would an external hard disk.
– The ATA Flash disk card acts as a memory card; you can
use the card to back up your data.
1
CardBus allows PC Cards and your computer to use 32-bit busmastering and to operate at speeds up to 33 MHz.
Chapter 5. Using Your Computer with a PC Card 39
Page 47

Modem Cards
A fax modem card is used for communication through a telephone
line; ac power is not needed. You can use this card to access the
PC network or the Internet, or to send a fax.
Network Cards
A memory card is used to read or write moderate amounts of
data. There are three types of memory card:
–A static-random-access-memory (SRAM) card backs up
computer memory. The card has its own battery.
–A read-only-memory (ROM) card is used for reading data
only.
–A Flash memory card is a writeable and readable card. No
battery is needed.
A LAN/Network card physically connects PCs in a LAN or
Network. The following LAN-or-Network cards are available:
– An Ethernet card is for constructing a small area network.
–A TokenRing card is for constructing a global area network.
– An IBM 3270 card and an IBM 5250 card are also available.
An integrated services digital network (ISDN) card is used to
connect your computer to the ISDN network.
SCSI Cards
A small computer system interface (SCSI) card connects your
computer to a SCSI device. For example, it enables you to use a
SCSI disk drive that cannot fit in a small notebook PC.
Other PC Cards
A sound card enables your computer to play music and other
sounds. It typically has an audio and a MIDI in/out connector.
A video capture card captures signals from video devices,
enabling you to use the data in your computer.
There are also multi-function PC Cards, such as the Combo Card
and the Multi Function Card.
40
IBM ThinkPad 600 Online Book
Page 48

PC Card Interface
16-Bit PC Cards
CardBus Cards
Custom Interface Cards
Most PC Cards are 16-bit PC Cards (PCMCIA 2.0 or 2.1), providing
ISA device performance.
The CardBus Card is connected as a PCI device and provides higher
performance than the 16-bit PC Card.
The Zoomed Video Card2 (ZV Card) is currently the only custom
interface card available.
The Zoomed Video port interface provides the connection for the ZV
Card. The ZV Card enables you to write video data directly to an
input port of the graphics controller. Some video-related cards are
considered ZV Cards.
Video capture card
MPEG card
The ZV Card cannot be used without a PC Card device driver and a
display device driver.
2
Zoomed Video (ZV) is a connection between a PC Card and your computer that allows the card to write video data directly to the video
controller. The data is transferred with no buffering requirements, because it is transferred over ZV port rather than the system bus.
Chapter 5. Using Your Computer with a PC Card 41
Page 49

Attention
When you use PC Cards, be aware of the following restrictions:
Although you can insert or remove some PC Cards without
turning off the computer (refer to the instructions that came
with the PC Card), you
during suspend or hibernation mode.
Before removing storage PC Cards from the PC Card slot,
you must power off
PC Card might be corrupted or lost.
Note: According to the operating system, you can stop the
PC Card Support Software
ThinkPad PC Card support software enables you to use a PC Card
as soon as you insert it into the ThinkPad computer.
Each operating system has its own ThinkPad PC Card support
software, as follows:
cannot
the computer. Otherwise, data in the
PC Card with the PC Card support software and
remove it without powering off the computer. (See the
PC Card support software section of the each
operating system to see how to stop the PC Card.)
remove or install PC Cards
Windows 95 (OSR2): CardWorks
Windows NT 4.0: CardWizard for Windows NT
Windows 3.11: CardWizard
OS/2: PC Card Director
DOS: CardSoft
To use PC Cards with your computer, you need to install the PC
Card support software appropriate for the operating system installed
in your computer.
To install the PC Card software
42
IBM ThinkPad 600 Online Book
** for DOS
** for Windows 95
** for Windows 3.11
Chapter 8, Installing Software
Page 50

The following table shows the PC Card supported by the different PC
Card support software:
CardWorks
(Windows
95 )
16-bit PC
Card
CardBus Card Supported N/A N/A N/A N/A
ZV Card Supported N/A Supported N/A N/A
Note: Windows 95 OSR2 (OEM Service Release Version 2)
Supported Supported Supported Supported Supported
CardWizard
(Windows NT
4.0)
CardWizard
(Windows
3.11)
PC Card
Director
(OS/2)
CardSoft
(DOS)
When you insert the PC Card into your ThinkPad computer:
The PC Card support software detects the card and reads the
information about it.
The PC Card support software searches for the corresponding
card service device driver.
The device driver requests the PC Card support software to
allocate such system resources as memory space, I/O port, and
IRQ. If these resources are available, the support software
recognizes the PC Card and you can use it.
If there is a resource conflict, you need to change either the
resources or the system configuration:
Either:
– Change the requested resources of the PC Card: You can
allocate the available resources by using each operating
system or PC Card support software function.
Or:
– Change the system configuration: You can change the
system configuration with your operating system or with the
ThinkPad Configuration program.
Chapter 5. Using Your Computer with a PC Card 43
Page 51

Note
If the PC Card device driver is the PC Card point enabler,
you cannot use the PC Card with ThinkPad PC Card support
software. Check with the card vendor whether the device
driver is a client device driver or a point enabler.
Power Management
Depending on the function of the PC Card, changing from one power
management mode to another might cause your ThinkPad computer
to hang. PC Card support software prevents this occurrence through
special handling during power state transition:
Card Type
Modem or
Network
Other Supported Supported Supported Supported
Note: Standby mode is always accepted.
Suspend Request (Fn+F4) Hibernation Request (Fn+F12)
AC Power Battery Power AC Power Battery Power
Supported Supported N/A Supported
For more information about the PC Card support software, go to the
appropriate section according to the following table:
CardWorks for Windows 95 OSR2
Using a PC Card in
Windows 95 (with CardWorks)
CardWizard for Windows NT
Using a PC Card in
Windows NT (with CardWizard)
CardWizard for Windows 3.11
Using a PC Card in
Windows 3.11 (with CardWizard)
PC Card Director for OS/2
Using a PC Card in OS/2
(with PC Card Director)
CardSoft for DOS
Using a PC Card in DOS (with
CardSoft)
44 IBM ThinkPad 600 Online Book
Page 52

Using a PC Card in Windows 95 (with CardWorks)
You can make your PC Card easy to use with the PC Card support
software called CardWorks. It is supported only by the Windows 95
OEM Service Release Version 2 (OSR2).
CardWorks minimizes user intervention in configuring many PC
Cards. CardWorks with CardWizard provides the following:
Capability to check
If you have a problem, refer to this section.
PC Card information
CardWorks provides various information about your PC Card.
Capability to stop
If you remove the PC Card from your computer, sometimes you
need to stop the PC Card.
Help
You can get help for most of the windows.
CardWorks provides two modes for using a PC Card:
Plug and Play mode:
CardSoft mode:
To start CardWizard, do as follows:
Help
You can use the PC Card in this mode when the device
driver of the card is supported by Windows 95.
You can use the PC Card in this mode when the device
driver of the PC Card is for Windows 3.11.
Self-Check
PC Card Information
Stopping the PC Card
1
Click on Start.
2
Move the cursor to Programs and CardWorks. Then click on
CardWizard.
The CardWizard window appears:
Chapter 5. Using Your Computer with a PC Card 45
Page 53

Self-Check
The information panel displays up-to-date information about the PC
Cards and PC Card slots being used in your computer.
It also displays up to three lines of card information, which it reads
directly from the card:
The first line shows the card name.
The second line shows the manufacturer.
The third line shows the card's function or type.
CardWorks has a self-check function that solves such problems as
incorrect or missing PC Card device drivers, system resource
conflicts (IRQ, memory, or I/O ports), and unconfigured PC Cards, as
well as memory conflicts.
If there are any problems, click on Wizard. Each time you click on
the Wizard button, a series of self-checks is run to assure that all
necessary components are installed and working properly.
CardWizard then analyzes the computer to verify that there are
resources available for PC Card configuration.
IBM ThinkPad 600 Online Book
46
Page 54

Even if CardWizard cannot automatically solve a problem, it can
pinpoint the problem exactly so that you or a technical support
engineer can fix the problem more easily.
PC Card Information
You can see the attributes, resources, drivers, and memory card
utilities that are loaded for PC Card support in the “PC Card
Properties” window.
To open the “PC Card Properties” window of the PC Card that you
are using, do the following:
1
2
3
Select the PC Card in the CardWizard window by clicking on it.
Click on View in the menu bar of the window.
Click on Properties.. in the pop-up menu.
The “PC Card Properties” window appears:
The window provides the following information:
Attributes
Chapter 5. Using Your Computer with a PC Card 47
Page 55

Attributes
Resources
Drivers
Note
The following information appears depending on the type of PC
Card:
Slot: The slot number and assigned name for the slot.
(You can change the slot name by selecting slot
management from the options menu.)
Card: The type of this PC Card.
Manufacturer: The manufacturer of the PC Card.
Size: The storage capacity of the PC Card.
Drive: The drive letter.
Battery status: The charge status of the SRAM Card battery.
Write protect: The write protect status—either enabled or disabled.
File system: The file system used by the PC storage or hard disk
card.
Port: The communication port used by this PC modem
card.
Resources
Note
Some resource information is not relevant to all types of PC
Cards. These nonrelevant resources are displayed as “Not
Applicable.”
IRQ: The interrupt request being used.
I/O: The starting and ending addresses of the
input/output range for the PC Card.
DMA: The DMA channel used.
Memory range: The range of physical memory.
48
IBM ThinkPad 600 Online Book
Page 56

Drivers
Note
CardWizard determines the type of device driver being used. It
also displays whether the card is configured by Windows 95 or by
CardWorks.
Card driver: Indicates whether Plug-and-Play mode or CardSoft
mode is used in configuring the PC Card. This field
is enabled only if the Change card driver box is
checked. You should
card has been identified and configured
successfully.
Change card driver:
If this item is enabled (checked), you can select
either Plug and Play (if available) or the CardWorks
device drivers.
Remove from the Plug-and-Play hardware list:
If this item is enabled (checked), you can delete the
Plug-and-Play device driver assigned to a card.
This applies only if the card is handled by Windows
95 (Plug-and-Play mode). Later, when you reinsert
the same PC Card, CardWorks configures the card
as if it were the first insertion.
not
change drivers if your
Memory Card Utility:
This item appears only if you insert an SRAM card
or a Flash memory card. You can format the SRAM
card or Flash memory card as follows:
Note
You can also format these card from the file
system with the DOS FORMAT command.
1.
Open the “PC Card Properties” window.
2.
Select the Memory Card Utility tab.
3.
Enter a Volume Label (if desired).
4.
Click on Format Drive/Partition.
Chapter 5. Using Your Computer with a PC Card 49
Page 57

Stopping the PC Card
If you are removing a PC Card, you must first stop it. The system
might freeze or data might be lost if a PC Card is removed before it
is stopped.
Note
You can stop only one card at a time. After invoking stop, you
cannot stop another card until the first stop has either completed
or failed.
You can stop a card as follows:
1
Click on the right button on the CardWizard window.
A pop-up menu appears.
Note
5.
Click on Start.
This procedure enables you to completely erase an
SRAM/Flash memory card, especially a brand-new
card. Make sure to save the data on the card
before erasing it.
The stop option appears in gray if you are in CardSoft mode
or if the card is already stopped.
2
Click on Stop. The following message appears:
The card has been stopped. You can safely remove the
card.
If the stop fails, no message appears.
Help
If you press F1 or select the Help button, a glossary of terms and an
index of Help items are made available.
50
IBM ThinkPad 600 Online Book
Page 58

Using a PC Card in Windows NT (with CardWizard)
You can make your PC Card easy to use with the PC Card support
software called CardWizard.
CardWizard minimizes user intervention in configuring many PC
Cards. CardWizard provides the following:
Capability to check
If you have a problem, refer to this section.
PC Card information
CardWorks provides various information about your PC Card.
Capability to stop
If you remove the PC Card from your computer, sometimes you
need to stop the PC Card.
Help
You can get help for most of the windows.
Multifunction PC Cards are not supported in CardWizard for
Windows NT.
To start the CardWizard for Windows NT, do as follows:
1
Start Windows NT 4.0.
2
Click on Start.
Help
Note
Self-Check
PC Card Information
Stopping the PC Card
3
Select Programs.
4
Click on CardWizard for Windows NT.
The menu bar for the CardWizard window includes File, View,
Actions, Options, and Help options. Each option provides
CardWizard functions to perform actions with cards, modify
user-selected options, and obtain help.
Chapter 5. Using Your Computer with a PC Card 51
Page 59

Self-Check
Quick Launch
Once you have installed CardWizard for Windows NT, you can
start it by clicking on the CardWizard icon. The CardWizard
menu appears on the taskbar, left of the CardWizard icon. Click
on the menu once with the left mouse button to start the Wizard
application.
Another way to start CardWizard for Windows NT is to
double-click on the system tray icon with the left mouse button.
If you have a problem configuring your PC Card, select the Wizard
button in the “CardWizard for Windows NT” window.
Each time you click on the Wizard button, a series of self-checks is
run to assure that all necessary components are installed and
working properly. CardWizard then analyzes the computer to verify
that there are resources available for PC Card configuration.
Click on this button to fix most PC Card problems. Even if
CardWizard cannot automatically solve a problem, it can pinpoint the
problem exactly so that you or a technical support engineer can fix
the problem more easily.
PC Card Information
You can see the attributes, resources, drivers, and memory card
utilities that are loaded for PC Card support in the “PC Card
Properties” window.
To open the “PC Card Properties” window, do the following:
1
Select Properties from the “Actions” menu.
2
From the “Card Information” panel:
a
Press the right mouse button while the cursor is on an
inserted card icon.
b
Click on Properties.
IBM ThinkPad 600 Online Book
52
Page 60

The “Properties” windows provide information about the attributes
and drivers associated with the selected PC Card.
Attributes
Slot: The slot number and assigned name for the slot.
Card: The type of this PC Card.
Manufacturer: The manufacturer of the PC Card.
IRQ: The interrupt request being used (if relevant).
Port: The I/O address associated with a communication
DOS Device: The communication port used by this device (if
Name
When you select device drivers, the following information is
displayed:
Driver: The full path to the driver for this PC Card.
Version: The version for the current driver.
Stopping the PC Card
If you are removing a PC Card, you must first stop it. The system
might freeze or data might be lost if a PC Card is removed before it
is stopped.
port (if relevant).
relevant).
Note
You can stop only one card at a time. After invoking stop, you
cannot stop another card until the first stop is either completed or
fails.
To stop a card, click on the traffic light icon ( ) on the taskbar, or
select Stop from the “Actions” menu.
Power to the slot is turned off when a card is “stopped.” You can
remove ATA cards. To prevent loss of data and other unpredictable
machine behavior, make sure the stop operation is complete before
you remove the cards.
Chapter 5. Using Your Computer with a PC Card 53
Page 61

Help
If you press F1 or select the Help button, you can get help for most
of the windows. A glossary of terms and an index of Help items are
also available.
Using ATA PC Cards
This section describes how to initialize and use removable storage
cards, such as ATA hard disk and ATA Flash disk cards.
An ATA PC Card can be used like most storage devices. Your new
ATA card needs to be formatted just as any hard disk does.
Format the ATA Card as follows:
1
2
3
4
5
6
Start Windows NT 4.0.
Click on Start.
Click on Programs.
Click on Administrator Tools (Common).
Click on Disk Administrator.
Select a drive that you want to format.
7
Click on Tool.
8
Click on Format.
Power Management Support
CardWizard for Windows NT provides support for power
management. Power management is a function to conserve the
battery life of your computer. Battery power is conserved when your
computer enters suspend mode. Then, many devices are powered
off and others run at lower power consumption levels. When
operation is resumed (when the computer exits from suspend mode),
the computer returns to the state it was before it entered suspend
mode. Programs and data that were in use before suspend mode
began are restored.
IBM ThinkPad 600 Online Book
54
Page 62

Suspend Mode Support
Your computer enters suspend mode if you:
Leave the computer idle for a specified amount of time
Press the hardware suspend button (for example, Fn+F4)
Press a software suspend button within a power management
application (for example, the suspend and hibernation button in
the Fuel window)
With CardWizard, you can use PC Card devices over a
suspend-resume cycle. The PC Card Controller and the cards are
powered off when your computer enters suspend mode. However,
each card type is handled differently to prevent data loss or machine
crash through the suspend-resume event. For example, all files
must be closed on an ATA disk. LAN cards cannot avoid the risk of
crashing the system when resuming. CardWizard identifies each
card type and might present a dialog of instructions to avoid these
potential problems. In some cases CardWizard might stop the
suspend event altogether. You are expected to follow the
instructions given before entering suspend mode.
There is also a
automatically suspended by the system when the battery life is about
to expire. In this case, your computer might not be able to fully
restore the state it was in before it entered suspend mode. When
resuming from critical suspend, CardWizard analyzes the cards that
were being used before the critical suspend and instructs you to
save data or prevent problems such as a system crash. The
instructions might recommend that you reboot your system.
Suspend Notifications:
attempt to suspend your computer with the following cards:
Network or SCSI cards. You tried to suspend while there is a
network or SCSI card in use. Shut down your system instead of
suspending it.
ATA cards. You tried to suspend before you closed all files and
folders on the ATA card. Close all files and folders, and then try
the suspend.
Chapter 5. Using Your Computer with a PC Card 55
critical suspend,
You might receive messages when you
where your computer is
Page 63

Using a PC Card in Windows 3.11 (with CardWizard)
This section describes the PC Card support software for Windows
3.11 and how to format the PC Card.
CardWizard is the PC Card support software for Windows 3.11. It
increases the usability of PC Cards.
CardWizard has following features:
Capability to check
If you have a problem, refer to this section.
Help
You can get help for most of the windows.
To start CardWizard, do as follows:
1
Start Windows 3.1.
2
Double-click on SystemSoft Tools on the “Program Manager”
panel.
3
Double-click on CardWizard.
The CardWizard window appears.
You can see up-to-date information about the PC Card slots in your
computer in the window.
The first line shows the card name.
The second line shows the manufacturer.
The third line shows the card's function or type.
If you have a multifunction card installed, you will see up to two
functions at a time. You can scroll to see available functions if more
than one function are activated on your card. Functions are labeled
by slot number followed by function number. For example:
Help
Self-Check
1-2 means slot 1, function number 2
2-1 means slot 2, function number 1
56
IBM ThinkPad 600 Online Book
Page 64

Self-Check
CardWorks has a self-check function that solves such problems as
incorrect or missing PC Card device drivers, system resource
conflicts (IRQ, memory, or I/O ports), and unconfigured PC Cards, as
well as memory conflicts.
If there are any problems, click on the Wizard button, which is in the
bottom right-hand corner of the window. Each time you click on the
Wizard button, a series of self-checks is run to assure that all
necessary components are installed and working properly.
CardWizard then analyzes the computer to verify that there are
resources available for PC Card configuration. There are four
possibilities:
Card Configured: On the left, CardWizard displays a graphical
representation of the card and any available card manufacturer
information. On the right, CardWizard displays all system
resources that the card is using.
Card Not Configured: On the left, CardWizard shows a question
mark and any available card manufacturer information. On the
right, CardWizard displays a message suggesting that you click
on the Wizard button to correct the problem.
Card Not Recognized: On the left, CardWizard shows a
question mark and any available card manufacturer information.
On the right, CardWizard displays a message asking you to click
on the Wizard button to select the type of card you have
inserted.
No Card Inserted: CardWizard displays a picture of an empty
slot.
Even if CardWizard cannot automatically solve a problem, it can
pinpoint the problem exactly so that you or a technical support
engineer can fix the problem more easily.
Help
CardWizard provides extensive online help. Help is available for
almost all windows (when you press F1 or the Help button).
Chapter 5. Using Your Computer with a PC Card 57
Page 65

For most menu items (when you press F1 while the menu item is
selected), you can get an extensive list of CardWizard topics.
Formatting PC Cards
This section describes how to initialize and use removable storage
cards, such as ATA hard disk drive, ATA Flash disk, Flash memory
(non-ATA type), and SRAM cards. It summarizes the formatting
requirements and options for removable storage cards.
Note
Before initializing removable storage cards for use, you must exit
Windows 3.11 and enter DOS.
Formatting the ATA Card
You need to format ATA cards before you can use them. To format
the card, you need to run the ATAINIT command from the DOS
prompt. Then you need to use the standard DOS FORMAT
command.
See Using the ATA Hard Disk or ATA Flash Disk Cards.
Formatting a Flash Disk Card (MCFORMAT)
You can configure and manage a (non-ATA) Flash memory card with
the MCFORMAT command. MCFORMAT enables you to perform
the following actions easily:
Create and format a new partition
Format an existing partition
Erase a partition
Display partition information
MCFORMAT is a DOS command, so you must exit Windows 3.11
before using it.
MCFORMAT can be used to create and format FTL partitions on a
Flash memory card or PC DOS partitions on an SRAM card.
To create and format a new partition on a Flash memory card or an
SRAM card:
1
Go to the CardWizard directory and type:
58
IBM ThinkPad 600 Online Book
Page 66

MCFORMAT
2
Press Enter.
3
Follow the instructions on the screen.
Formatting an SRAM Card
Before using an SRAM card, you have to format it using the DOS
FORMAT command. Do the following:
1
Type the following:
FORMAT drive_letter:
(drive_letter is the actual drive letter.)
2
Press Enter.
For more instructions on using FORMAT, see your DOS user's
guide.
Memory Card Partitions and Drive Letters
MTDDRV assigns drive letters to each partition on a memory card to
allow each partition to be accessed as if it were another hard disk
drive.
You can display the drive letters it reserves at system boot or by
entering the following at the DOS prompt from within the directory
containing the CardWizard files:
MTDDRV /?
If the first available letter is F, MTDDRV reserves drive letter F for
your first PC Card slot and letter G for your second PC Card slot.
These drive letters are reserved whether you are actually using them
for memory card partitions or not.
Chapter 5. Using Your Computer with a PC Card 59
Page 67

Note
The situation described in this example could create a problem if
you are connected to a network, especially if you are mapped to
numerous network drives. The system might run out of drive
letters to assign before all your network drives have been
properly mapped. The drive letters that MTDDRV reserves might
cause all other drive letters to be reassigned (excluding drive
letters for local hard disks or ATA cards).
For example, if you have a network drive that is normally drive F
and you install MTDDRV, the network drive will no longer be
assigned drive letter F on your system. As a result, you might
have to modify the drive letters in any network batch files that
you use. For example, if you have a network batch file that loads
your network login files from drive F and MTDDRV has reserved
drive letters F and G for memory card partitions, you must
change the drive letter in your network batch file to H (the next
available letter).
60 IBM ThinkPad 600 Online Book
Page 68

Using a PC Card in OS/2 (with PC Card Director)
This section describes how to use the PC Card in OS/2.
The PC Card slots of the computer and the port replicator do not
support the following PC Cards:
Integral Peripherals Model 1841PA (40 MB)
IBM 105-MB PCMCIA hard disk drive (P/N 74G8694)
8-bit or 16-bit slave DMA PC Cards
Ask IBM or an IBM authorized dealer for more information about the
different types of PC Cards.
3
You can use a DOS object
Card Services provides a Card Services interface and enables you to
use the DOS PC Card device driver for the DOS object.
Note
Even when a PC Card is enabled with a DOS object, the device
driver or the application program might not work, or their
performance might not be what you expect.
To use Virtual Card Services with a DOS object, do the following:
in the OS/2 environment. OS/2 Virtual
1
Move the mouse pointer to the DOS object icon; then click the
right mouse button.
2
Click on Properties.
3
Click on the Session tab.
4
Click on DOS (WIN-OS/2) Properties.
5
Click on All DOS (DOS and WIN-OS/2) Settings.
6
Set PCMCIA_CARD_SERVICES as On.
7
Set PCMCIA_RELEASE_LEVEL as 2.1.
3
A
DOS object
Chapter 5. Using Your Computer with a PC Card 61
might be a DOS program, Windows 3.11 program, DOS full-screen, DOS window, WIN-OS/2 full-screen, or a WIN-OS/2 window.
Page 69

8
Set MEM_EXCLUDE_REGIONS as CC –D3FFF.
9
Specify the PC Card device driver name at the DOS_DEVICE
prompt.
PC Card Director is the PC Card support software for OS/2. It
makes using PC Cards with your computer easier in the following
ways:
You can use the PC Card when you insert it in a PC Card slot.
You can display what type of PC Card is in your computer.
You can register an application program for a particular PC Card
and start the program automatically when the card is inserted.
Notes
If your PC Card is not supported by PC Card Director, you
must install the driver that came with your card. To see the
supported PC Cards by PC Card Director, click on the
Supported PC Cards icon in the “PC Card Director” window.
Even if your PC Card is not listed, try using it with PC Card
Director.
The card driver must be compatible with the PCMCIA Card
Services PC Card Standard (1995) or the PCMCIA Card
Services Standard Release 2.1. Follow the instructions in
your PC Card manual to install the driver.
To start PC Card Director, double-click on the PC Card Director
folder; then double-click on the PC Card Director icon.
Stopping the PC Card
PC Card Director has a stop function for removing the PC Card
safely. Stop the PC Card as follows:
1
Open PC Card Director.
2
Click on the Control Power icon.
3
Select from the card list the storage PC Card you want to
remove.
62
IBM ThinkPad 600 Online Book
Page 70

4
Click on Off.
5
Make sure the card status is off; then remove the storage PC
Card.
Using the Auto Configurator Utility
You can delete or change a registered PC Card with the Auto
Configurator Utility. You can find the Auto Configurator Utility
icon in the “PC Card Director” window.
This section describes this utility.
Note
PC Card Director provides the
some PC Cards, so that you do not have to install the device
driver supplied with it. When you install PC Card Director, a
BASEDEV= statement such as the following is added to the
CONFIG.SYS file.
BASEDEV=AUTODRV2.SYS
Auto Configurator
Registering a PC Card in Auto Configurator
1
Double-click on the Auto Configurator Utility ( ) icon from
the “PC Card Director” window.
2
Select a card from the Available Cards list in the “Auto
Configurator Utility” window.
, a program for
Select the card for which you want to assign the resources first.
For example, if you want to assign COM3 (rather than COM2)
to a modem card, select the setting for COM3 first.
Chapter 5. Using Your Computer with a PC Card 63
Page 71

The names in the left list box (Available Cards) can be
registered. The names in the right list box (Selected Cards)
are already registered in Auto Configurator.
3
Click on the Add>> button.
4
Click on the Save button.
When a PC Card is installed, Auto Configurator starts from the
top of the list to assign the resources to the card.
Deleting a Registered Card
1
Double-click on the Auto Configurator Utility icon in the “PC
Card Director” window.
2
Select the PC Card you want to delete from Selected Cards in
the “Auto Configurator Utility” window.
3
Click on the Delete button.
4
Click on the Save button.
Changing the Registered Order for PC Cards
To change the order of the registered PC Cards, do the following:
1
Double-click on the Auto Configurator Utility icon from the
“PC Card Director” window.
2
Click on the Order... button in the “Auto Configurator Utility”
window. The following window appears:
3
Do as follows to change the order of the PC Cards in the list:
When moving a card toward the bottom:
64 IBM ThinkPad 600 Online Book
Page 72

a
Select the PC Card you want to move.
b
Click on the Down button.
Every time you click on the Down button, the PC Card
is moved toward the bottom of the list.
When moving a card toward the top:
a
Select the PC Card you want to move.
b
Click on the Up button.
Every time you click on the Up button, the PC Card is
moved toward the top of the list.
4
Click on the OK button to save the changes.
The changes are saved. To cancel the changes, click on the
Cancel button.
Changing the Resource Information for the PC Card
1
Double-click on the Auto Configurator Utility icon in the “PC
Card Director” window.
2
Select the PC Card you want to change from the left list box in
the “Auto Configurator Utility” window.
3
Click on the Edit... button.
The following window appears:
Auto Configurator Utility - Edit
Title
Card ID
I/O port 1
I/O Port 2
IRQ level
COM No.
Memory window 1
Base address
Size
Card offset
Memory window 2
Base address
Size
Card offset
Chapter 5. Using Your Computer with a PC Card 65
Modem Card [2F8]
MODEM,MD24XC,116E2,118C2,FC2400,2460MC
Description:
Interrupt [IRQ] Level
Ok Cancel Help
Page 73

Note
The current resource information is set as the default and
appears in the input field of each item. The number that
can be set is displayed in the pull-down list box.
4
You can change the following registered information for the PC
Card. The items that can be changed differ depending on the
PC Card.
Card ID
I/O port address
IRQ level
COM number of the serial port
Memory window address
Memory window size
Card offset address
5
Click on the OK button, and save the changes.
To cancel the changes, click on the Cancel button.
Updating the CONFIG.SYS File
For PC Card Director to work correctly, the PC Card device drivers
must be registered in the CONFIG.SYS file. These drivers are
automatically registered in the CONFIG.SYS file when you install PC
Card Director following the instructions in Chapter 8, Installing
Software.
The following section describes the standard rules for each driver
registered in the CONFIG.SYS file for your reference.
Registered Drivers and Standard Rules
The following is a sample of a CONFIG.SYS file:
IBM ThinkPad 600 Online Book
66
Page 74

:
BASEDEV=PCMCIA.SYS --→ Card Services
BASEDEV=IBM2SS14.SYS --→ Socket Services
BASEDEV=AUTODRV2.SYS --→ Auto Configurator
DEVICE=C:\THINKPAD\VPCMCIA.SYS --→ Virtual Card Services
:
DEVICE=C:\THINKPAD\xxxxxxx.SYS --→ Storage card device driver
:
REM PC_Card_Client_Device_Driver
:
DEVICE=C:\THINKPAD\$ICPMOS2.SYS --→ Power Management Support driver
Rule 1 Card Services and Socket Services must be listed before any
other PCMCIA drivers.
Rule 2 The PCMCIA Power Management Support driver must be listed
after all drivers, at the end of the CONFIG.SYS file.
Rule 3 When using storage cards, the device drivers must be installed
according to the card type.
Example of using only an ATA card:
:
BASEDEV=PCM2ATA.ADD /!DM --→ ATA card device driver
DEVICE=C:\THINKPAD\PCMSSDIF.SYS --→ Storage API device driver
:
BASEDEV=OS2PCARD.DMD --→ Storage Card Device Manager
Example of using an ATA card and an SRAM card:
:
BASEDEV=PCM2ATA.ADD /!DM --→ ATA card device driver
DEVICE=C:\THINKPAD\PCMSSDIF.SYS --→ Storage API device driver
DEVICE=C:\THINKPAD\PCM2SRAM.SYS → SRAM card device driver
BASEDEV=OS2PCARD.DMD --→ Storage Card Device Manager
Example of using an ATA card and a Flash card:
:
BASEDEV=PCM2ATA.ADD /!DM --→ ATA card device driver
DEVICE=C:\THINKPAD\FLSH2MTD.SYS --→ Flash Card Memory Technology driver
DEVICE=C:\THINKPAD\PCMSSDIF.SYS --→ Storage API device driver
DEVICE=C:\THINKPAD\PCM2FLSH.SYS --→ Flash card device driver
:
BASEDEV=OS2PCARD.DMD --→ Storage Card Device Manager
Example of using an ATA card, an SRAM card, and a Flash
card:
:
Chapter 5. Using Your Computer with a PC Card 67
Page 75

BASEDEV=PCM2ATA.ADD /!DM --→ ATA card device driver
DEVICE=C:\THINKPAD\FLSH2MTD.SYS --→ Flash Card Memory Technology driver
DEVICE=C:\THINKPAD\PCMSSDIF.SYS --→ Storage API device driver
DEVICE=C:\THINKPAD\PCM2SRAM.SYS --→ SRAM card device driver
DEVICE=C:\THINKPAD\PCM2FLSH.SYS --→ Flash card device driver
:
BASEDEV=OS2PCARD.DMD --→ Storage Card Device Manager
Rule 4 The Storage Card Device Manager (OS2PCARD.DMD) must be
added after the Power Management Support driver
($ICPMOS2.SYS) in the CONFIG.SYS file. If you do not have
the Power Management Support driver, the Storage Card
Device Manager must be added at the end of the CONFIG.SYS
file.
Parameters for the OS/2 PCMCIA ATA Card Device Driver
The following are the parameters and their explanations of the OS/2
PCMCIA ATA card device driver statement in the CONFIG.SYS file:
BASEDEV=PCM2ATA.ADD [/S:n] [/P:hhhh] [/EXIRQ:n]
[/NOBEEP] [/B] [/STBTIME:n] [/MDRV:n] [/!DM]
IBM ThinkPad 600 Online Book
68
Page 76

/S:
n
/P:
hhhh
/EXIRQ:
/NOBEEP Specifies not to beep when a storage card is installed. If this
/B Specifies that OS/2 has started from an ATA card. If this
/STBTIME:
/MDRV:
/!DM Specifies not to use OS2DASD.DMD as the device manager. If
n
n
Specifies the number of PC Card slots. /S:1 shows that there
is only one PC Card slot. If this parameter is not set, the
number of PC Card slots is set to 2.
Specifies the lower limit for the I/O address of the ATA card.
The device driver assigns the next usable I/O address from this
lower limit to the card. If this parameter is not set, the device
driver looks for a usable address and assigns it to the card.
Specifies the IRQ level that
can set more than one IRQ level.
parameter is not set, you will hear a beep every time a storage
card is installed into the PC Card slot.
parameter is set, there will be no redundancy in assigning the
logical drive to the slot where OS/2 was booted. It depends on
the ATA card whether you can start OS/2 from it.
n
Specifies the time (from 1 to 21 minutes) until entering standby
mode. If the ATA card is not accessed for the time specified by
this parameter, the ATA card enters standby mode (only when
your ATA card supports standby mode). If this parameter is not
specified, standby mode for the ATA card is disabled.
Specifies the number of extra drives that can be used in addition
to the number of PC Card slots available for the PCMCIA
storage devices. If this parameter is not specified, no extra
drive is given to the device driver. The extra drives can be
activated by the PCMCIA ATA Card Mount utility.
this parameter is set, OS2PCARD.DMD is used instead.
is not
assigned to the card. You
PCMCIA Storage Card Device Driver
ATA cards, SRAM cards, and Flash cards are PCMCIA storage
cards. This section describes the device drivers for these storage
cards, available in PC Card Director.
PCMCIA Storage Card Device Driver for OS/2
The device drivers for each type of storage cards are:
PCM2ATA.ADD for ATA cards
PCM2SRAM.SYS for SRAM cards
PCM2FLSH.SYS for Flash cards
Chapter 5. Using Your Computer with a PC Card 69
Page 77

Any PC Card installed in the slot is recognized by its device driver,
so regardless of its type, you can access the card by the drive name
assigned to the slot.
Notes
Install PCM2ATA.ADD for all storage cards, even if you are
using SRAM or Flash cards.
If using the PCMCIA ATA Card Mount Utility, install the
PCMCIA Storage API device driver (PCMSSDIF.SYS) for
OS/2.
Formatting PCMCIA Storage Cards before Use
You need to format new PCMCIA storage cards before using them.
For Flash cards, run the Flash Format Utility (FFORMAT2.EXE); then
format the Flash card. For ATA cards and SRAM cards, there is no
need to run any programs before formatting the card.
To format the card, use the FORMAT.COM program by choosing the
drive icon.
Using PCMCIA ATA Cards with Multiple Partitions
The device driver assigns a drive letter only to the active (bootable)
partition of the ATA card if it holds multiple partitions. For other
primary partitions or logical drives in an extended partition, use the
PCMCIA ATA Card Mount utility to assign a drive letter to it.
PCMCIA Storage Card Device Manager
OS2PCARD.DMD is the device manager for the PCMCIA storage
card. Specify the /!DM parameter in the PCM2ATA.ADD line, so that
OS2PCARD.DMD is used instead of OS2DASD.DMD. If you do not
specify /!DM, PCM2ATA.ADD uses the OS/2 standard Storage Card
Device Manager (OS2DASD.DMD); however, under some conditions
the format is not correct when you use OS2DASD.DMD.
The following is a line from the CONFIG.SYS file that describes the
Storage Card Device Manager:
BASEDEV=OS2PCARD.DMD
IBM ThinkPad 600 Online Book
70
Page 78

OS/2 PCMCIA Storage API Device Driver
This device driver provides a communication function between PC
Card Director or the mount utility and the OS/2 PCMCIA ATA card
device driver. As a result, a utility in the upper layer can get the
drive letter or partition information for the PCMCIA storage card.
The following is a line from the CONFIG.SYS file that describes the
Storage API device driver:
DEVICE=[drive:][directory]PCMSSDIF.SYS
Flash Card Memory Technology Driver
This driver is used to read and write to a Flash card. It is used by
the OS2 Flash card driver (PCM2FLSH.SYS).
The following is a line from the CONFIG.SYS file that describes the
Flash Card Memory Technology driver:
DEVICE =[drive:] [directory] FLSH2MTD.SYS
--→ Memory Technology driver
DEVICE =[drive:] [directory] PCM2FLSH.SYS
--→ Storage card device driver
Chapter 5. Using Your Computer with a PC Card 71
Page 79

Checking the Allocated Resources for the PC Card
If the resources for the PC Cards are not correctly allocated, you will
see error messages. You can check which resources for the PC
Card were not correctly allocated by using PC Card Director. To
check the resources that could not be allocated, click on the Status
button in the PC Card Director program.
The following are some reasons why the resources could not be
correctly allocated, and corresponding actions you should take to
solve the problem.
Problems
The resource was already reserved by another device.
Configuration files were not set up correctly.
Actions
To change the resource settings for the PC Card or other devices,
you can do one of the following:
Refer to the system manual or utility program and check which
device is using the resources that you want to use for the PC
Card. Then change the settings for the device by using, for
example, the setup programs. For more information, refer to the
manuals supplied with your computer.
If your PC Card is enabled by a PC Card enabler, you can
change the resources assigned to the PC Card by changing the
parameters in the PC Card enabler, or you can change the
settings in the configuration file of the PC Card. For more
information, refer to the manuals supplied with your PC Card.
If you are using Auto Configurator to enable your PC Card, you
can change the resources assigned to the PC Card by using the
Auto Configurator. Make sure the resource is not used by other
devices and can be used by the PC Card and its application
program. For more information, see Using the Auto Configurator
Utility.
If you are using modem cards, you should know that some
modem cards use serial port COM1 or COM2 and do not have
the setup information for COM3 and COM4. These modem
72 IBM ThinkPad 600 Online Book
Page 80

cards cannot be enabled when other devices are using COM1
and COM2. (For example, as a default, COM1 is used by the
infrared device and COM2 is used by the ThinkPad Modem.)
Error messages are displayed to tell you that the I/O port
address 3F8 or 2F8, or IRQ level 3 or 4, were not allocated.
If this is the case, use the ThinkPad Setup Utility in the ThinkPad
Configuration program to disable the devices using COM1 or
COM2; then restart the system.
Avoiding PC Card Resource Conflicts
PC Card Director checks the resources for most devices used by the
system to avoid resource conflicts, but it does not recognize all
option devices used. Especially if you are using the docking station,
there is a possibility that the I/O port address or IRQ level might
conflict with the PC Card.
Check the status of the PC Card by using PC Card Director. When
the PC Card is set to “Ready,” the resources used for that PC Card
are displayed. Refer to the manuals supplied with the system or
option adapters to check that the resources for the devices in the
system or for the option adapters do not conflict with the resources
for the IRQ level, I/O port address, or memory window of the PC
Card. If you are using OS/2 Warp, you can check the assigned
system resources using RMVIEW.EXE.
If there is a conflict:
If you are using OS/2 Warp, use RESERVE.SYS to register
those resources in OS/2.
To set RESERVE.SYS, refer to the manuals or online help for
OS/2 Warp, or refer to the README file of PC Card Director.
If you are using Auto Configurator, change the enabling order or
resource information using the Auto Configurator Utility.
Using the Auto Configurator Utility
Change the parameter for the PC Card enabler. Refer to the
manuals supplied with the PC Card.
If you are using network cards, change the resource information
for the PC Card stated in the PROTOCOL.INI or NET.CFG file.
Chapter 5. Using Your Computer with a PC Card 73
Page 81

To change the configuration file for the network cards, refer to
the manuals or README files of the PC Cards or network
drivers.
74 IBM ThinkPad 600 Online Book
Page 82

Using a PC Card in DOS (with CardSoft)
This section describes CardSoft for DOS and how to use it.
CardSoft enables you to use your PC Cards in the DOS
environment. It increases the usability of PC Cards by simplifying
their installation and configuration.
CardSoft provides some DOS commands. You can see the following
information on the PC Card with these commands:
PC Card type
The resources assigned to the current PC Card
Any resource conflict with the current PC Card
The drive letter of the storage or memory card
Whether the PC Cart is turned on or off
CardSoft information
This section describes how to use the CardSoft commands as well
as the Configuration utility to help you configure and manage PC
Cards on your system.
Note
These commands are active in the directory where CardSoft
resides.
CARDINFO
CARDINFO scans the PC Card slots on your computer and shows
information about them. It also shows any warnings or error
messages that might have occurred when CardSoft configured these
cards.
You use CARDINFO command when:
You need to know the types of cards that are currently inserted
in your PC Card slots.
You need to know the I/O ports, IRQs, and memory areas that
are being used by your PC Card. This information might be
needed if you are installing other components on your system.
Chapter 5. Using Your Computer with a PC Card 75
Page 83

You need to know if there is a conflict between the new
component and a PC Card is use—that is, if the new component
and a PC Card are trying to use the same resource, such as an
IRQ interrupt. If this happens, either the PC Card or the new
component must be reconfigured for other resources to be used.
You want to turn off (or turn on) power to a PC Card slot that
contains the PC Card.
You want to display manufacturer and product information about
your PC Cards.
You need to know the drive letter for your ATA hard disk or ATA
Flash disk card.
You need to know the latest error that occurred for an inserted
card.
Running CARDINFO
To run CARDINFO, type the commands with one of the following
commands and press Enter:
CARDINFO Displays the card information. The information
similar to the following is displayed:
Slot 1 Function :
Manufacturer = TDK
Product Name = DF2814 DATA/FAX MODEM
Device Type = Modem (COM 3)
Slot 2 Function
Manufacturer = IBM
Product Name = IBM17JSSFP
Device Type = ATA Disk
Device Type = F:
Slot 3 Function
Slot 3 is empty
Slot 4 Function
Slot 4 is empty
CARDINFO /V Displays more extensive information about the
PC Card slots in your computer.
76
IBM ThinkPad 600 Online Book
Page 84

CARDINFO /C Provides the following additional Card Services
information:
Card Service release number
Vendor revision number
Number of slots
Number of functions per slot
Vendor copyright information
CARDINFO /OFF[:S,F] Turns off power to all PC Card slots.
Note
S is the parameter that specifies the slot.
You can turn off the power to only the
specified slot with this parameter.
F is the parameter that specifies the
function. You can turn off the power to
only the specified function with this
parameter.
CARDINFO /ON[:S,F] Turns on power to all PC Card slots.
Note
S is the parameter that specifies the slot.
You can turn on power to only the
specified slot with this parameter.
F is the parameter that specifies the
function. You can turn on power to only
the specified function with this parameter.
CARDINFO /? Displays information about CARDINFO
switches.
Using the Configuration Utility
The Configuration utility (CONFIG.EXE) modifies the CARDID.INI
and CSALLOC.INI files. You need to run this utility if you are having
difficulty using the PC Card, or if you are customizing your system.
Whenever you finish using this utility, restart your system so that
your changes take effect.
The Configuration utility can be used for the following purposes:
Chapter 5. Using Your Computer with a PC Card 77
Page 85

Setting or changing the IRQs and COM port assignment order for
your fax/modem cards.
Setting or changing the I/O port address, IRQ, and memory
areas that your network cards will use.
Selecting the address (primary, secondary, or any) that your ATA
cards will be using to communicate with the system.
Selecting the type of video display (color, monochrome, or LCD).
Online Help
Online help is available for many of the Configuration utility fields.
To access online help for a particular field, position the cursor in
the field (or highlight the field) and then press F1 (or click on the
Help button, if it is available).
Running the Configuration Utility
From the DOS prompt (C:\), type CONFIG and press Enter.
The following menus are available from this window:
File
Edit Configuration
Save Configuration
Exit
Utility
Resource Allocation
Display
Color
Monochrome
LCD
To access a pull-down menu, click the left mouse button on the
menu name, or press Alt+the highlighted letter in the menu name.
For example, to access the “File” menu, click on the word File or
press Alt+F. When the pull-down menu appears, select a menu item
by:
Clicking on it.
78
IBM ThinkPad 600 Online Book
Page 86

Pressing the Down arrow key to highlight the item and then
press Enter.
Pressing a key that corresponds to the highlighted letter.
Using Storage PC Cards
This section describes how to use the storage cards.
Using the ATA Hard Disk or ATA Flash Disk Cards
For you to use ATA hard disk or ATA Flash disk cards on your
system, your CONFIG.SYS file must contain the following line. The
standard device drivers are always required:
DEVICEHIGH=C:\CARDSOFT\ATADRV.EXE
DEVICEHIGH=C:\CARDSOFT\MTDDRV.EXE
Formatting or Intializing a Card
Attention
Make sure you are using the correct drive letter when formatting
or initializing your ATA card, because any information on the
specified drive is erased.
Formatting an ATA Card
To format an ATA card:
1
Type the following command
FORMAT drive_letter /U
Note
drive_letter is the drive letter assigned to the card. For
example, if the card has been assigned to drive D, type
format D: /U
2
Press Enter.
Initializing an ATA Card
Chapter 5. Using Your Computer with a PC Card 79
Page 87

To initialize an ATA card, run the ATAINIT command from the DOS
prompt, and then use the standard DOS format command to format
the ATA card.
Note
ATAINIT works only with ATA cards that are supported by the
ATADRV driver. If you cannot use your ATA card, it might be an
unsupported card. Check with the manuals that came with the
card.
ATAINIT.EXE is a disk-partitioning utility that must be used to
initialize any ATA cards supported by ATADRV. When a new ATA
card is inserted into a PC Card slot, you need to initialize the card by
using ATAINT. ATAINIT finds the physical parameters (number of
sectors, cylinders, and so on) to use, and then initializes the card.
To initialize the card, do as follows:
1
Type the following command:
ATAINT drive_letter:
Note
drive_letter is the actual drive letter. For example, if your
ATA card has been assigned drive letter D, you should
type: ATAINIT D:
2
Press Enter to accept the displayed information. If you want to
specify a drive parameter, type P and press Enter. Then follow
the instructions in the window.
Using Memory Cards
For you to use memory cards on your system, your CONFIG.SYS file
must contain the following lines (in addition to the standard drivers
that are always required):
DEVICEHIGH=C:\CARDSOFt\MTSRAM.EXE
DEVICEHIGH=C:\CARDSOFT\MTDDRV.EXE
Drive Letters
IBM ThinkPad 600 Online Book
80
Page 88

You need to know which drive letter to use to access the memory
card.
Note
Drive letters are shared by memory and Flash memory cards. If
you insert a memory card in slot 1, it will be assigned drive E; if
you insert a Flash memory card in slot 2, it will use drive F.
If you remove the memory card from slot 1, and insert a second
Flash memory card in slot 1, it will be assigned drive E, because
that is the drive letter assigned to slot 1 for memory and Flash
memory cards.
Type the following and press Enter:
MTDDRV /?
Information similar to the following is displayed:
Drive E is partition number for slot number 1.
Drive F is partition number for slot number 2.
Drive G is partition number for slot number 3.
Drive H is partition number for slot number 4.
This example shows a system with four PC Card slots, configured for
one partition per card. You can use the memory card in your first
PC Card slot (slot 1 in this example) as drive letter E.
The number of drive letters listed depends on the number of PC
Card slots in your computer, and whether MTDDRV is configured for
multiple partitions.
Formatting Memory Cards
Attention
Make sure you are using the correct drive letter when formatting
a memory card, because any information on the specified drive is
erased. Refer to the previous section if you need to know which
drive letter to use.
Chapter 5. Using Your Computer with a PC Card 81
Page 89

To format your memory card, type the following and press Enter:
FORMAT drive_letter:
(drive_letter is the actual drive letter.)
For more instructions on using FORMAT, see your DOS user's
guide.
82 IBM ThinkPad 600 Online Book
Page 90

Chapter 6. Resolving System Resource Conflicts
This chapter describes the default system resources and how to
share an IRQ between two devices.
Note: This chapter is only for Windows 95.
Sharing an IRQ between ThinkPad Modem Devices
Default IRQ Assignments ...................... 86
System Resources and IRQs .................... 86
In most cases, your computer automatically assigns the system
resources when you install a new device. For example, your
computer assigns such resources as the
and the
Other devices might need such system resources as
access (DMA)
have a value of 0 to 15. That is, there are 16 values that can be
assigned for IRQs.
Sometimes Windows 95 does not allocate the resources correctly,
because the resource might already be allocated to another device.
This is called a system resource
case, you can free one IRQ by sharing an IRQ between two devices.
When doing this, you need to know about the system resources
available and their IRQs.
This chapter describes how to solve resource conflicts by sharing an
IRQ.
input/output (I/O)
and
memory
ports when you install a PC Card modem.
. The IRQ for each system resource can
conflict
interrupt request
, or
contention
...... 83
(IRQ) level
direct memory
. In this
Sharing an IRQ between ThinkPad Modem Devices
The ThinkPad Modem function is supported by a digital signal
processor (DSP) called IBM Advanced Communications Processor.
The ThinkPad Modem usually uses two IRQs to handle the DSP
interrupt and the modem interrupt. However, by sharing an IRQ
between these two devices, you can free one IRQ so that you can
use it for another device.
Copyright IBM Corp. 1998 83
Page 91

Notes:
1. Do not have your computer set in an IRQ-shared status when
installing the ThinkPad Modem. If your computer is already in a
sharing status, disable the status before you start the installation.
2. An IRQ can be shared only in Windows 95. You must disable
the status before you start rebooting another operating system.
The default resources are as follows:
I/O 13 -13F
I/O 2F8-2FF
IRQ 3
IRQ 1
DMA 7
Attention
An IRQ can be shared only in Windows 95. If you have a
multipartitioned hard disk drive or have multiple hard disk drives,
and reboot another operating system or install another operating
system, the CMOS status and the hardware settings might not
remain consistent and the devices sharing an IRQ might become
unusable. It is recommended that you use the system in its
default IRQ status, unless you must have the IRQ shared—for
example, because you are using multiple PC Cards and the
docking station simultaneously.
To share an IRQ, do the following:
1
Click on Start, Programs, and ThinkPad Configuration.
2
Click on the Internal Modem icon.
3
Click on the Device Manager button.
4
Double-click on IBM Digital Signal Processor.
5
Double-click on ThinkPad Digital Signal Processor.
6
|
| check box by clicking on it; then click on OK.
|
84
IBM ThinkPad 600 Online Book
Put a check mark in the Disable in this hardware profile
7
Double-click on ThinkPad Digital Signal Processor.
Page 92

|
|
| Settings check box.
|
| Make sure the list is as follows:
| I/O 13 -13F
| I/O 2F8-2FF
| IRQ 3
| DMA 7
|
8
Click on the Resources tab.
9
Make sure the check mark is removed in the Automatic
10
Select Basic Configuration 0005.
11
Click on the General tab.
|
| profile check box by clicking on it; then click on OK.
12
Remove the check mark in the Disable in this hardware
13
Restart your computer.
To disable sharing an IRQ, do the following:
1
Click on Start, Programs, ThinkPad, and ThinkPad
Configuration.
2
Click on the Internal Modem icon.
3
Click on the Device manager button.
4
Double-click on IBM Digital Signal Processor.
5
Double-click on ThinkPad Digital Signal Processor.
6
Click on the Resources tab.
7
Click on the Automatic Settings and remove the check mark.
8
Select Basic Configuration 0001.
9
Scroll the Resource Settings list box. Locate and double-click
on the second IRQ 3 resource in the “Resource Type” column.
10
Specify 10 for Value and click on OK.
Chapter 6. Resolving System Resource Conflicts 85
Page 93

11
Make sure that there are no conflicting devices indicated in the
Conflicting Device list.
Default IRQ Assignments
The following table shows the default system resource assigned for
each IRQ:
IRQ Value Assignment
0 Timer
1 Keyboard
2 Cascade
3 ThinkPad Modem
4 Infrared
5 Crystal audio
6 Diskette
7 Parallel port
8 Real-time clock
9 Not used
10 ThinkPad Modem
11 PCI
12 Auxiliary device
13 Math co-processor
14 Primary IDE
15 Secondary IDE
System Resources and IRQs
The following table shows the available system resources for your
computer and the docking stations. The values in parentheses are
alternate values that are selectable from the ThinkPad Configuration
program or from an application program. The default values are
highlighted.
86
IBM ThinkPad 600 Online Book
Page 94

System Resources
Audio Control base None 0538–053F,
CD-ROM and DVD
drive in UltraslimBay
Diskette controller 6 03F0–03F7 None 2
Hard disk drive 14 01F0–01F7 and
IDE hard disk drive or
the IDE CD-ROM drive
in the docking station
Infrared port 4, 3, or disabled 03F8–03FF,
ISA adapter card
(option card) in the
docking station
Joystick port None 0201 None None
Keyboard 1 0060 and 0064 None None
Math co-processor
exception
MIDI 5, 7, 10, 11, or
IRQ
15, 14 0170–0177,
0170–0177 and
0376–0377,
01E0–01E7 and
03E6–03E7,
01E8–01EF and
03EE–03EF, or
0168–016F and
036E–036F,
(Refer to the manual shipped with the adapter card.)
13 None None None
disabled
I/O Address (Hex)
0D38–0D3F,
0E88–0E8F, or
0FF0–0FF7
0376–0377,
01F0–01F7, or
03F6–03F8
03F6–03F7
None None None
02F8–02FF,
02E8–02EF, or
03E8–03EF
0330–0333,
0310–0313,
0320–0323, or
0330–0332
Memory Address
(Hex)
None None
None None
None None
None 0 and 3 or
None None
DMA
Channel
disabled
Chapter 6. Resolving System Resource Conflicts 87
Page 95

System Resources
Modem (Refer to
“Sharing an IRQ
between ThinkPad
Modem Devices” on
page 83.)
Parallel port 7 03BC–03BE (and
PC Card (Dependent on the PC
PCI adapter card
(option card) in the
docking station
PCMCIA controller 11 03E0–03E1 CC000–CCFFF and
Real-time clock 8 0070–0071 None None
SCSI controller in the
docking station
Serial port Disabled Disabled None None
Sound Blaster None 0220–0233,
Timer 0 0040–0043 None None
TrackPoint or mouse 12 0060 and 0064 None None
IRQ
10, 3, 4, 5, 7, 11, 15,
disabled
–or–
3, 4,
7 0378–037F (and
5 0278–027F (and
Disabled Disabled
Card type)
(Refer to the manual shipped with the adapter card.)
(Automatically set by
the system)
4 03F8–03FF
3 02F8–02FF
4 03E8–03EF
3 02E8–02EF
I/O Address (Hex)
0130–013F,
0350–035F,
0770–077F, or
0DB0–0DBF
–or–
02F8–02FF,
03F8–03FF,
03E8–03EF, or
02E8–02EF
07BC–07BE )
0778–077A )
0678–067A )
(Dependent on the PC
Card type)
None None None
0240–0253,
0260–0273, or
0280–0293
Memory Address
(Hex)
None 7, 0, 1, or 6
None 0, 1, 3, or
(Dependent on the PC
Card type)
CD000–CEFFF
None 1, 0, 6, or 7
DMA
Channel
disabled
None
None
88 IBM ThinkPad 600 Online Book
Page 96

System Resources
Video controller None 03BA, 03B4–03B5,
WSS codec base 5, 7, 9, 10, 11, 15 0530–0537,
IRQ
I/O Address (Hex)
03C0–03CF,
03D4–03D5, 03DA,
0604–060B,
0E80–0E87, or
0F40–0F47
Memory Address
(Hex)
A0000–BFFFF
C0000–C9FFF
None 0, 1, 3
Note:
The I/O addresses in parentheses are used also when ECP is enabled as the printer operating mode from the
ThinkPad Configuration program.
When you enable ECP as the printer operating mode from the ThinkPad Configuration program, you must select one
value from the four selections (including “disabled”).
When you use Windows 95 OSR2, do not assign this I/O addresses.
DMA
Channel
None
Chapter 6. Resolving System Resource Conflicts 89
Page 97

90 IBM ThinkPad 600 Online Book
Page 98

Chapter 7. Solving Computer Problems
Note
You should print the information in this chapter, so that in case
you have a problem with your computer, you will have access to
the information.
Frequently Asked Questions .................... 92
Hints, Tips, and Limitations ..................... 99
Troubleshooting Guide . . . . . . . . . . . . . . . . . . . . . . . . 101
Troubleshooting Charts . . . . . . . . . . . . . . . . . . . . . . . 102
Error Codes or Messages .................... 103
No Error Codes or Messages .................. 107
Input Problems . . . . . . . . . . . . . . . . . . . . . . . . . . 108
Suspend or Hibernation Problems ............... 109
LCD Problems . . . . . . . . . . . . . . . . . . . . . . . . . . . 113
An Indicator Problem ....................... 114
Battery Problems . . . . . . . . . . . . . . . . . . . . . . . . . 114
CD-ROM Drive Problems .................... 114
Infrared Communication Problems ............... 116
Audio or Telephony Problems .................. 117
A Universal Serial Bus (USB) Problem ............. 117
Modem Problems . . . . . . . . . . . . . . . . . . . . . . . . . 118
PC Card Problems ........................ 120
Docking Station Problems .................... 122
A Printer Problem ......................... 124
External Monitor Problems .................... 124
A Port Replicator Problem .................... 126
Other Option Problems ...................... 126
Software Problems . . . . . . . . . . . . . . . . . . . . . . . . 128
Other Problems . . . . . . . . . . . . . . . . . . . . . . . . . . 128
Testing Your Computer ....................... 130
Recovering Lost or Damaged Software .............. 132
Using the Diskette Factory .................... 133
Using the ThinkPad Customization CD ............. 134
Using the Recovery CD ..................... 134
Copyright IBM Corp. 1998 91
Page 99

Frequently Asked Questions
This section addresses frequently asked questions.
Questions Page
How to stop the screen from blanking 93
How to set the infrared port 94
How to set the serial port 94
How to switch the TrackPoint and mouse 95
How to set the display resolution 96
How to set the external monitor 96
How to maximize the battery life 97
How to install the operation system 98
How to use the Recovery CD 98
92 IBM ThinkPad 600 Online Book
Page 100

To solve the problems discussed in this section, you need to use the
ThinkPad Configuration program. To start the ThinkPad
Configuration program, find the ThinkPad icon on the taskbar; then
double-click on the icon.
The ThinkPad Configuration program window appears:
TrackPoint
Display Device Presentation
Serial Infrared
Note: You can also open the ThinkPad Configuration program as
follows:
1.
Click on Start.
2.
Move the cursor on Programs, ThinkPad; then click on
ThinkPad Configuration.
My screen keeps blanking when I do not want it to. How do I
stop this?
You can disable any system timers, such as the LCD turnoff
timer or the power management mode timers with the
ThinkPad Configuration program.
1
Start the ThinkPad Configuration program.
2
Click on the Disable Screen Blanking button.
Chapter 7. Solving Computer Problems 93
 Loading...