

Page 1

Contents
Finding information in this Online User's Guide .......... v
Chapter 1. Using your computer outside your home country 1
Changing the date and time ...................... 1
Power cord requirements ....................... 2
Chapter 2. Using the features of your computer ....... 5
Using the Norton Mobile Essentials ................. 6
Using Before You Go ........................ 7
Using Location Controller ..................... 8
Using the audio features ....................... 9
Setting the volume ......................... 9
Using the built-in modem features ................. 11
Setting the modem ........................ 12
Using the 56-Kbps modem .................... 14
Telephony features . . . . . . . . . . . . . . . . . . . . . . . . 14
Using the Auto Answer feature ................. 16
Viewing a DVD movie ........................ 18
Chapter 3. Protecting your computer ............. 21
Protecting your computer ...................... 22
Using passwords . . . . . . . . . . . . . . . . . . . . . . . . . . . 22
Using mechanical locks ....................... 22
Chapter 4. Using your computer with a battery pack .... 25
Using the battery pack ........................ 26
Charging the battery pack .................... 26
Monitoring the battery status ................... 26
Saving battery power ........................ 30
Using the power management modes ............. 30
Customizing power management ................ 37
Considerations when using a power management mode .. 40
Using other battery-saving methods .............. 43
Chapter 5. Using your computer with a PC Card ...... 45
Using a PC Card ........................... 46
PC Card types ........................... 46
PC Card interface ......................... 48
PC Card support software ...................... 49
Power management . . . . . . . . . . . . . . . . . . . . . . . . 50
Copyright IBM Corp. 1999 i
Page 2

Using a PC Card in Windows 95 (with CardWorks) ....... 52
Self-check . . . . . . . . . . . . . . . . . . . . . . . . . . . . . 53
PC Card properties ........................ 54
Stopping the PC Card ...................... 56
Help . . . . . . . . . . . . . . . . . . . . . . . . . . . . . . . . . 57
Using a PC Card in Windows NT (with CardWizard) ...... 58
Self-check . . . . . . . . . . . . . . . . . . . . . . . . . . . . . 60
PC Card properties ........................ 60
Hot swapping the PC Card .................... 61
PC Card Activator ......................... 62
Enhanced power management ................. 62
Stopping the PC Card ...................... 63
Help . . . . . . . . . . . . . . . . . . . . . . . . . . . . . . . . . 64
Chapter 6. Resolving system resource conflicts ...... 65
Resource conflict . . . . . . . . . . . . . . . . . . . . . . . . . . . 65
Resolving a resource conflict .................. 65
Default resource assignments ................... 70
Default IRQ assignments ..................... 71
System resources and IRQs ................... 71
Chapter 7. Frequently asked questions ............ 75
Frequently asked questions ..................... 75
Chapter 8. Installing software . . . . . . . . . . . . . . . . . . 83
Installing a new operating system and its device drivers .... 84
Installing software for Windows 98 ................. 85
Overall procedure . . . . . . . . . . . . . . . . . . . . . . . . . 85
Installing Microsoft Windows 98 ................. 86
Installing software for Windows 95 ................. 88
Overall procedure . . . . . . . . . . . . . . . . . . . . . . . . . 89
Installing Microsoft Windows 95 ................. 90
Installing software for Windows NT Version 4.0 ......... 95
Overall procedure . . . . . . . . . . . . . . . . . . . . . . . . . 95
Installing Microsoft Windows NT ................ 96
Chapter 9. Using system management ............ 99
Using system management ..................... 100
System-management features . . . . . . . . . . . . . . . . . . . 100
Intel WfM full support ....................... 101
ii IBM ThinkPad 570 Online Book
Page 3

Desktop Management Interface (DMI) ............. 101
Remote program load (RPL) ................... 102
Preboot eXecution Environment (PXE) ............. 102
Wake on LAN ........................... 103
Waking up from suspend mode by an incoming call ..... 103
Universal Management Agent .................. 104
Asset ID EEPROM ........................ 105
Setting up system-management features ............. 105
Enabling or disabling Wake on LAN .............. 105
Automatic power-on startup sequence ............. 107
Enabling or disabling a Flash (POST/BIOS) update from the
network . . . . . . . . . . . . . . . . . . . . . . . . . . . . . . 107
Appendix A. Using PS2 commands .............. 111
Using PS2 Command ........................ 111
Syntax rules . . . . . . . . . . . . . . . . . . . . . . . . . . . . 111
PS2 commands . . . . . . . . . . . . . . . . . . . . . . . . . . 112
Appendix B. Using modem commands ............ 119
Modem commands . . . . . . . . . . . . . . . . . . . . . . . . . . 119
Running commands . . . . . . . . . . . . . . . . . . . . . . . . 119
Command format . . . . . . . . . . . . . . . . . . . . . . . . . 119
AT commands . . . . . . . . . . . . . . . . . . . . . . . . . . . 119
Extended AT commands ..................... 122
V.42bis commands . . . . . . . . . . . . . . . . . . . . . . . . 123
Modem response codes ....................... 124
S registers . . . . . . . . . . . . . . . . . . . . . . . . . . . . . . . 127
Appendix C. Handling the ThinkPad .............. 131
Handling tips . . . . . . . . . . . . . . . . . . . . . . . . . . . . . 131
ThinkPad don'ts . . . . . . . . . . . . . . . . . . . . . . . . . . 131
ThinkPad do's . . . . . . . . . . . . . . . . . . . . . . . . . . . 133
Cleaning your computer ..................... 133
Carrying your computer ..................... 133
Extending your computer's battery life ............. 134
Ruggedized mobile computers ................. 135
Ergonomics information . . . . . . . . . . . . . . . . . . . . . . . 135
Appendix D. Getting service . . . . . . . . . . . . . . . . . . . 139
Getting service . . . . . . . . . . . . . . . . . . . . . . . . . . . . 139
Contents iii
Page 4

Customer support and service ................... 139
Help at the ThinkPad Web site ................. 139
Help by telephone ......................... 140
ThinkPad EasyServ . . . . . . . . . . . . . . . . . . . . . . . . 141
Getting help around the world .................. 141
Fax information . . . . . . . . . . . . . . . . . . . . . . . . . . 142
Electronic support services .................... 142
Purchasing additional services ................. 144
Enhanced PC Support Line ................... 144
900-number operating system and hardware support line .. 145
Network and Server Support Line ................ 145
Ordering support line services .................. 145
Warranty and repair services .................. 146
Obtaining IBM operating system updates ........... 147
Getting update diskettes ..................... 147
Ordering publications . . . . . . . . . . . . . . . . . . . . . . . 147
Appendix E. Notices . . . . . . . . . . . . . . . . . . . . . . . . 149
Edition notice . . . . . . . . . . . . . . . . . . . . . . . . . . . . . 149
Appendix F. Trademarks . . . . . . . . . . . . . . . . . . . . . 151
Trademarks . . . . . . . . . . . . . . . . . . . . . . . . . . . . . . 151
Glossary . . . . . . . . . . . . . . . . . . . . . . . . . . . . . . . 153
Index . . . . . . . . . . . . . . . . . . . . . . . . . . . . . . . . . . 157
iv IBM ThinkPad 570 Online Book
Page 5

Finding information in this Online User's Guide
The following topics are covered in this
the topic you want to read:
Changing the date and time
Ergonomics information
Frequently asked questions
Getting service
Handling tips
Installing a new operating system and its device drivers
Power cord requirements
Setting the modem
Using the audio features
Using the battery pack
Online User's Guide
. Click
Using passwords
Using a PC Card
Using system management
Viewing a DVD movie
Contents v
Page 6

vi IBM ThinkPad 570 Online Book
Page 7

Chapter 1. Using your computer outside your home country
This section provides necessary information if you are using the
computer outside the region where you purchased it.
Changing the date and time ...................... 1
Power cord requirements ....................... 2
Changing the date and time
Note
If you are a U.S. user, you should use the Norton Mobile
Essentials for the location settings. For details
Norton Mobile Essentials.
You need to change the date and time settings if you go to a
different time zone.
1
In the Windows 98 desktop, click Start, move the cursor to
Settings, and then click Control Panel.
Using the
2
Double-click Date/Time.
3
Set the current date and time.
4
Click the Time Zone tab.
Click , and select the region closest to your location from the
list. Press Enter.
Note: If you do
for daylight saving time, clear the check box.
5
Click OK.
Copyright IBM Corp. 1999 1
not
want the clock to be automatically adjusted
Page 8

Power cord requirements
To use the AC Adapter outside the region where you purchased your
computer, you need an ac power cord that is certified for the region
you are visiting. You can purchase one through an IBM authorized
reseller or IBM marketing representative in that region.
Attention
The use of an improper power cord might cause severe
damage to your computer.
For 2-pin power cords:
Part number Country or region
13H5264
13H5267
13H5270
13H5273 Japan
13H5276
13H5279 Bangladesh, Pakistan, South Africa, Sri Lanka
Bahamas, Barbados, Bermuda, Bolivia, Canada,
Cayman Islands, Colombia, Costa Rica, Dominican
Republic, Ecuador, El Salvador, Guatemala, Guyana,
Haiti, Honduras, Jamaica, Korea (South), Mexico,
Netherlands Antilles, Nicaragua, Panama, Peru,
Philippines, Saudi Arabia, Suriname, Taiwan,
Thailand, Trinidad (West Indies), United States of
America, Venezuela
Abu Dhabi, Albania, Antigua, Bahrain, Brunei, Dubai,
Fiji, India, Ireland, Kenya, Kuwait, Macao, Malaysia,
Nigeria, Oman, People's Republic of China (including
Hong Kong), Qatar, Singapore, United Kingdom
Austria, Bosnia-Herzogovina, Belgium, Bulgaria,
Chile, Croatia, Czech Republic, Denmark, Egypt,
Finland, France, Germany, Greece, Hungary, Iceland,
Indonesia, Israel, Italy, Macedonia, Netherlands,
Norway, Poland, Portugal, Romania, Slovakia,
Slovenia, Spain, Sweden, Switzerland, Turkey,
Yugoslavia
Argentina, Australia, New Zealand, Papua New
Guinea, Paraguay, Uruguay
For 3-pin power cords:
2 IBM ThinkPad 570 Online Book
Page 9

Part number Country or region
02K0539 People's Republic of China (other than Hong Kong)
76H3514
Argentina, Australia, New Zealand, Papua New
Guinea, Paraguay, Uruguay
Aruba, Bahamas, Barbados, Bermuda, Bolivia, Brazil,
Canada, Cayman Islands, Colombia, Costa Rica,
Curacao, Dominican Republic, Ecuador, El Salvador,
76H3516
Guatemala, Guyana, Haiti, Honduras, Jamaica, Korea
(South), Liberia, Mexico, Netherlands Antilles,
Nicaragua, Panama, Peru, Philippines, Saudi Arabia,
Suriname, Taiwan, Thailand, Trinidad (West Indies),
United States of America, Venezuela
Austria, Belgium, Bosnia-Herzogovina, Bulgaria,
Croatia, Czech Republic, Egypt, Finland, France,
76H3518
Germany, Greece, Hungary, Iceland, Indonesia,
Macao, Macedonia, Netherlands, Norway, Poland,
Portugal, Romania, Slovakia, Slovenia, Spain,
Sweden, Turkey, Yugoslavia
76H3520 Denmark
76H3522
Bangladesh, Myanmar, Pakistan, South Africa, Sri
Lanka
Abu Dhabi, Albania, Antigua, Bahrain, Brunei, Dubai,
76H3524
Fiji, Hong Kong, India, Ireland, Kenya, Kuwait,
Malaysia, Nigeria, Oman, Qatar, Singapore, United
Kingdom
76H3528 Switzerland, Liechtenstein
76H3530 Chile, Ethiopia, Italy, Libya
76H3532 Israel
76H3535 Korea
Chapter 1. Using your computer outside your home country 3
Page 10

4 IBM ThinkPad 570 Online Book
Page 11

Chapter 2. Using the features of your computer
This section provides necessary information if you are using the
various features of your ThinkPad computer.
Using the Norton Mobile Essentials ................. 6
Using Before You Go ........................ 7
Using Location Controller ..................... 8
Using the audio features ....................... 9
Setting the volume ......................... 9
Setting the volumes with device drivers ........... 10
Using the built-in modem features ................. 11
Setting the modem ........................ 12
Using the 56-Kbps modem .................... 14
Telephony features . . . . . . . . . . . . . . . . . . . . . . . . 14
Using the Auto Answer feature ................. 16
Viewing a DVD movie ........................ 18
Copyright IBM Corp. 1999 5
Page 12

Using the Norton Mobile Essentials
Your ThinkPad computer provides the Norton Mobile Essentials,
which enable you to manage your ThinkPad location settings easily.
When you travel with your ThinkPad computer, the Norton Mobile
Essentials can help you with ThinkPad location settings.
The Norton Mobile Essentials include the following features:
Before You Go is for learning about the power cord and modem
requirements of your destination country or region. Use
Checklists to plan for your trip effectively. Before You Go also
contains many international phone numbers for travel services
and links to Web sites with additional information about your
destination.
Location Controller is for setting up all of the location-sensitive
settings, such as modem properties, time and date, time zone,
printer, and so forth. Once you set up a location, you don't have
to set it up again.
Connection Doctor is for resolving any problem you might have
with your modem connection at your destination.
To use the Norton Mobile Essentials, do the following:
1
Click Start.
2
Move the cursor to Programs and Norton Mobile Essentials;
then click Norton Mobile Essentials.
The main window appears:
6 IBM ThinkPad 570 Online Book
Page 13
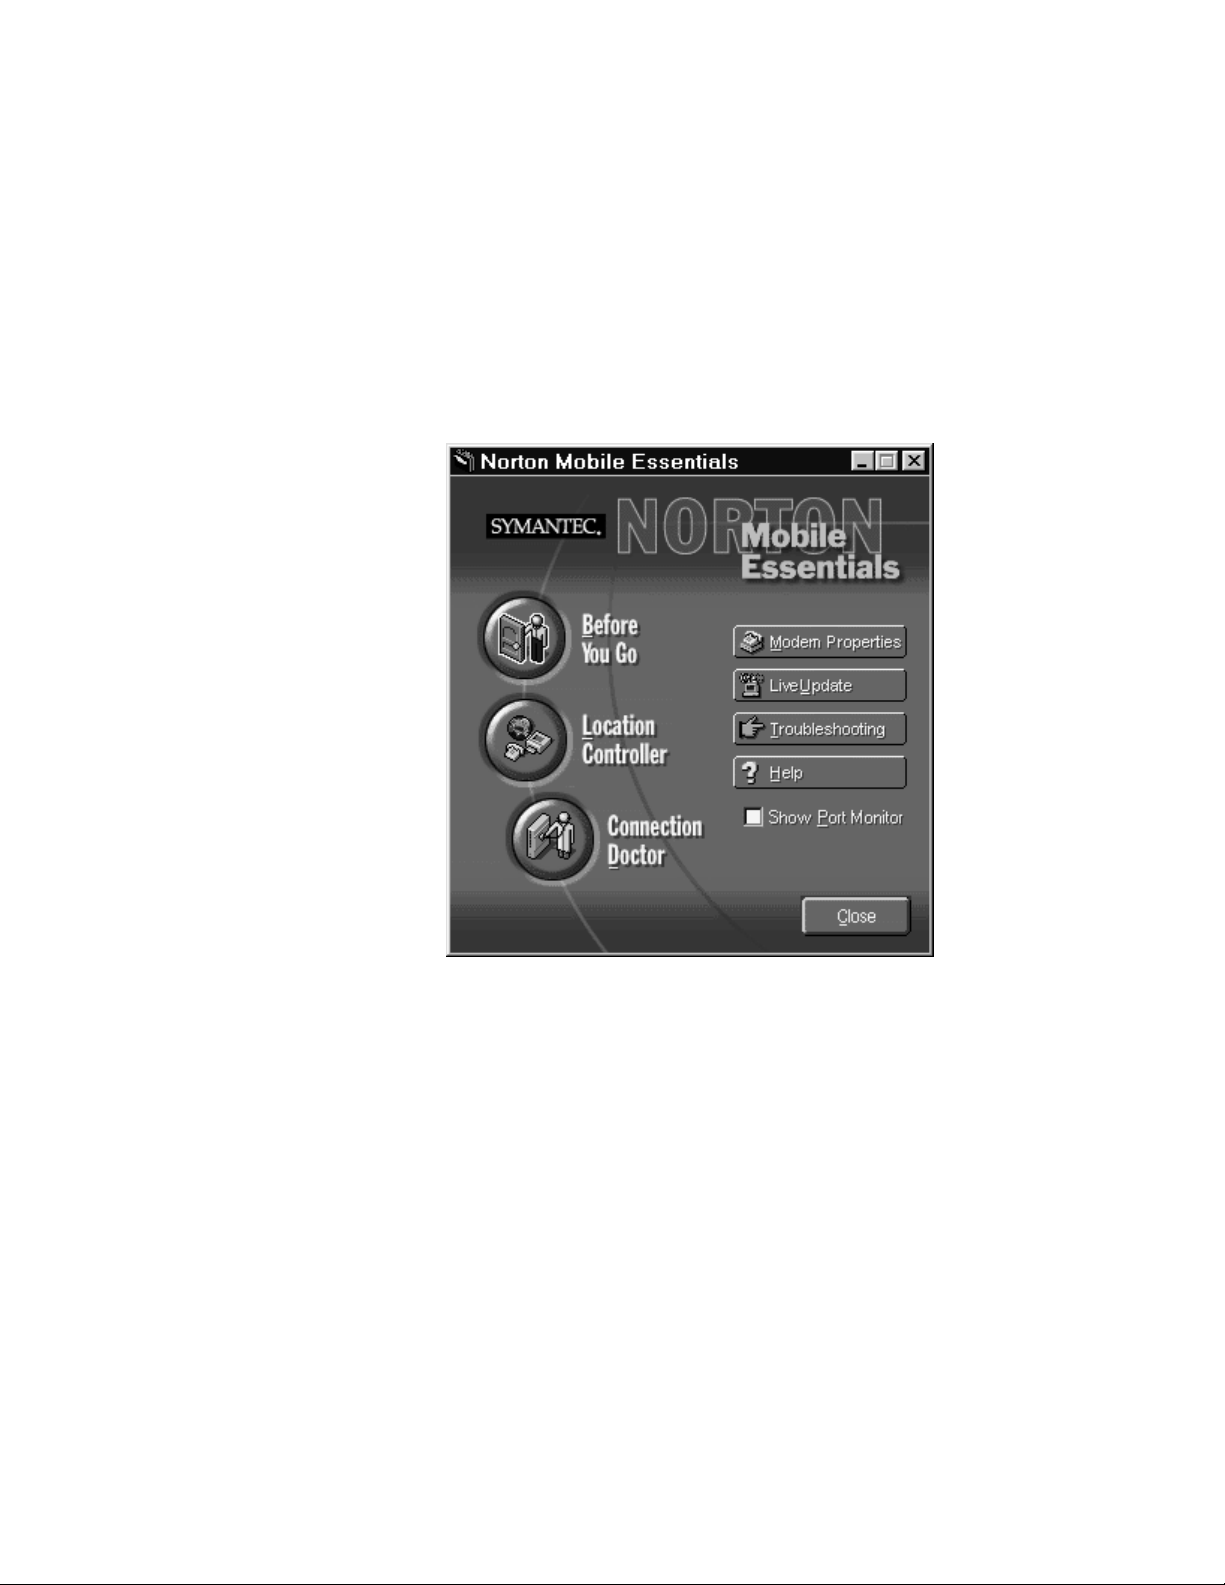
You can activate all the features from this window, or you can
launch each feature individually from the Norton Mobile
Essentials program group. For more detail on the Norton
Mobile Essentials, click Help.
Note: You might need to install the Norton Mobile Essentials from
the hard disk drive or the Software Selections CD before you use it
for the first time.
Using Before You Go
To start Before You Go, do the following:
1
Click Start.
2
Move the cursor to Programs and Norton Mobile Essentials.
3
Click Norton Mobile Essentials Before You Go.
To check the power cord and modem requirements for your
destination:
Chapter 2. Using the features of your computer 7
Page 14

a) Click Destination.
b) Select your location from the list.
To use the various checklists to plan your trip or to obtain
travel services:
a) Click Checklist.
b) Select Guides. View the guides in the window.
Using Location Controller
To start the Location Controller, do the following:
1
Click Start.
2
Move the cursor to Programs and Norton Mobile Essentials.
3
Click Norton Mobile Essentials Location Controller.
4
To create a new location, click New and follow the instructions
on the window.
Note: See the following IBM Web site for the latest
information about your modem's status for
international use:
http://www.ibm.com/thinkpad
Notes:
1. Make sure that you set up the location for your
so that you can switch back to those settings easily when you
return from your trip.
2. For the best location settings, always use the Location
Controller when you set up a new location. If your Internet
dialer application also has location settings, it will adjust its
settings based on the Location Controller settings in most
cases. You need to choose additional location settings in your
Internet dialer application, such as a local phone number.
3. If you are using a Personal Digital Assistant (PDA) such as IBM
WorkPad, do not allow the Location Controller to adjust the
windows clock automatically. This might lead to unwanted
changes in your PDA calendar.
8 IBM ThinkPad 570 Online Book
home
or
office
,
Page 15

Using the audio features
Your computer is equipped with the following:
A -inch (3.5-mm) diameter external monaural microphone jack.
A -inch (3.5-mm) diameter stereo headphone or an
external-powered speaker jack.
Your computer also has an audio chip that enables you to enjoy
various multimedia audio features. This audio chip provides the
following features:
Recording and playing back of PCM and WAV files in 8-bit or
16-bit format.
Sampling of various rates from 8 KHz to 48 KHz for the WAV
file.
Playback of MIDI files through an FM synthesizer.
Recording from various sound sources, such as an integrated
microphone, an external microphone, or an audio device
attached to a line-in jack.
Game compatibility. You might select Sound Blaster Pro for the
audio adapter in the sound setup for a game.
Setting the volume
You can customize the volume in a volume control window, which
appears when you click the small speaker icon ( ) on the task bar.
Your computer might provide volume control as part of its
hardware—for example, with a volume control knob. If your
Chapter 2. Using the features of your computer 9
Page 16
computer does not have a volume control knob, however, you can
control volume by pressing the PgUp ( ) or PgDn ( ) key.
For more information about your computer
Note: The value you set with the volume control knob or the Fn +
PgUp or PgDn key combination is the maximum or minimum
value of the volume.
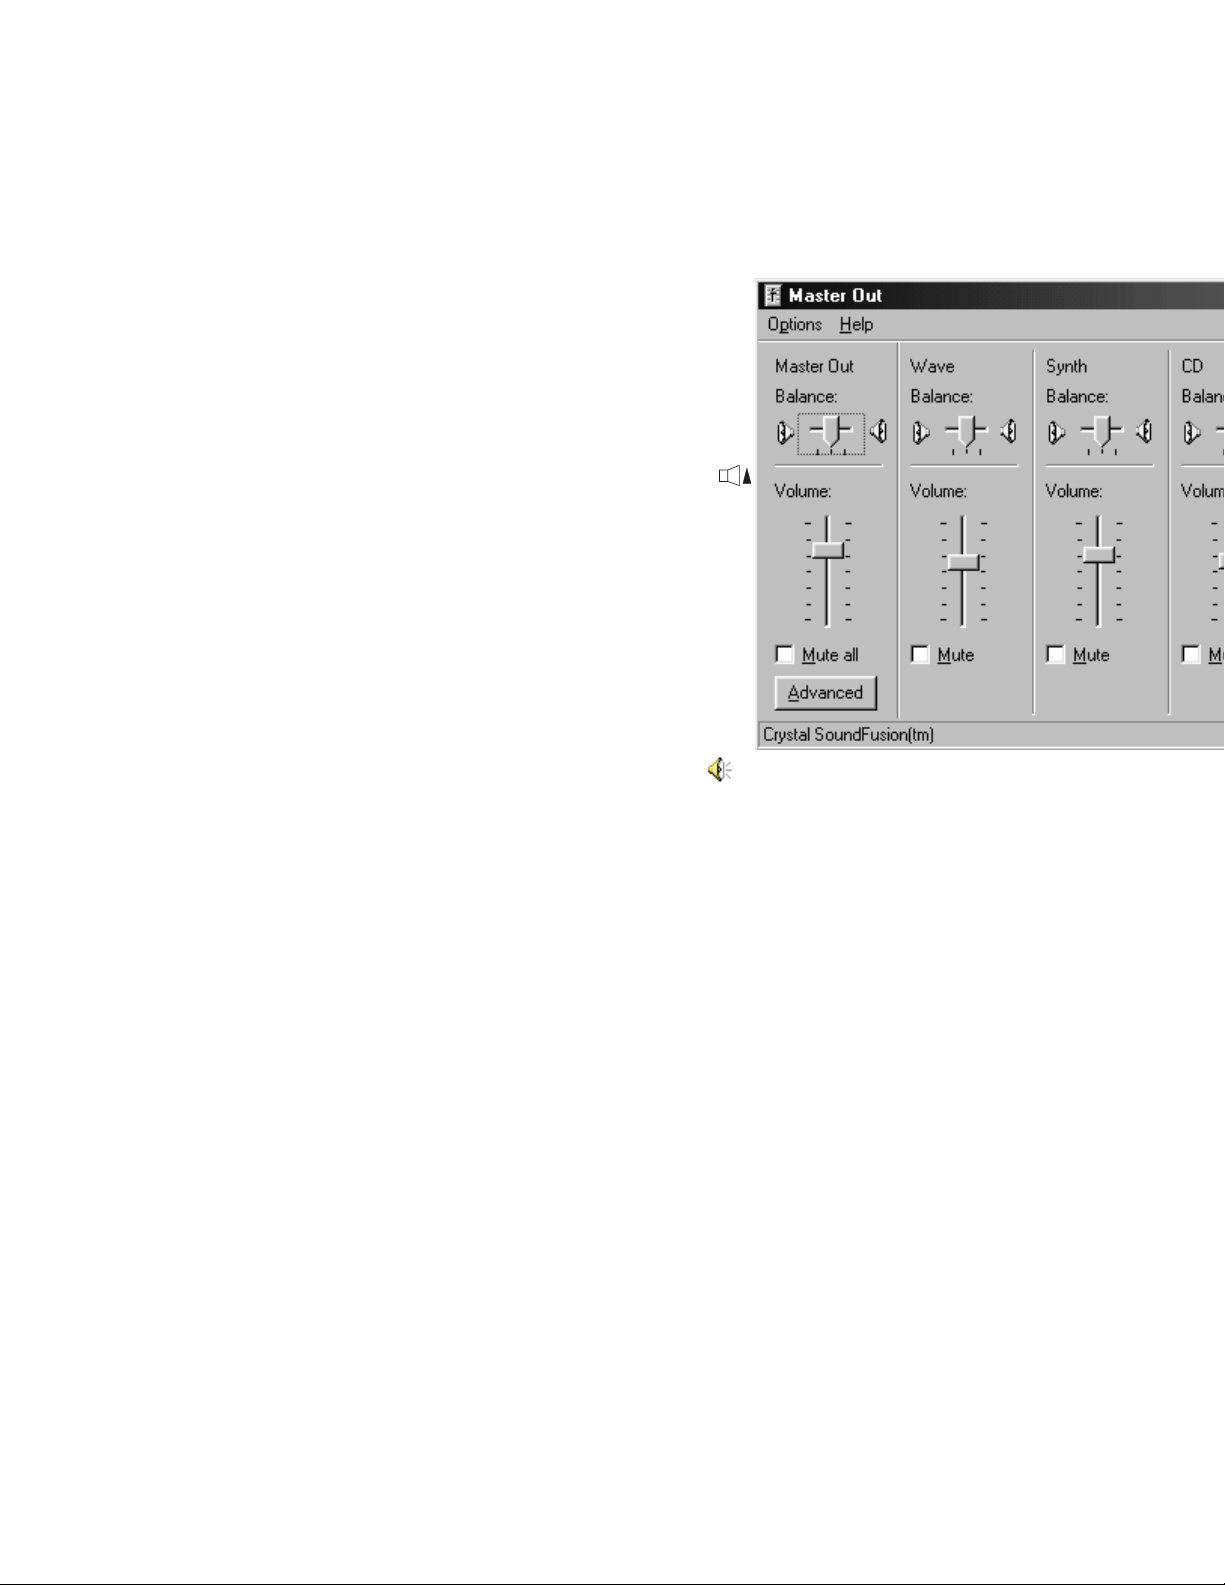
Setting the volumes with device drivers
The volume is also controlled by each device, and you can set it for
each device.
Double-click the small speaker icon ( ) at the bottom right of the
Windows desktop.
or
Click Start; move the cursor to Program, Accessories,
Entertainment; and click Volume Control.
A “Master” window similar to the following appears:
User's Reference
.
After you make any changes, exit the “Master” window.
Note: Dock In and ZV Port are set to mute by default. To use these
functions, clear check boxes.
10 IBM ThinkPad 570 Online Book
Page 17

Using the built-in modem features
The built-in modem enables you to send or receive data, faxes, and
voice over the telephone line. This modem uses a digital signal
processor (DSP), and its software can be upgraded, allowing great
flexibility. It supports ITU-T V.90 protocols with data rates of 56
Kbps, and K56flex protocol with data rates of 56 Kbps.
You can use the built-in modem only on a public-switched telephone
network (PSTN). You cannot use a private branch exchange (PBX)
or some other type of digital telephone extension line. If you connect
the built-in modem to a line other than PSTN, an error message
appears, preventing you from using the line. If you are not sure
which kind of phone line you are using, contact your telephone
company.
Attention for use overseas
In many regions, you cannot use the built-in modem function
until IBM has received approval from the proper authorities.
Your built-in modem is a worldwide modem and can be used
in any region where Postal Telegraph and Telephone (PTT)
type approval has been obtained. You can change the
modem setting according to the region where you use the
modem. If the region you want is not on the Region
Selection listing, see http://www.ibm.com/thinkpad on the
Internet, and download the newest Region Selection list.
If you are a non-U.S. user, the parameter for using the
modem is set automatically during the modem installation.
The “Modem Region Selection” window enables you to
change the region name to that of the region in which you
are actually going to use the built-in modem telephony
function. Confirm whether the selection matches the region
name in the Dialing Properties listing.
For more information on the use of the built-in modem in a
specific region, contact the IBM customer support center in that
region.
Chapter 2. Using the features of your computer 11
Page 18

Setting the modem
To use the built-in modem, connect one end of the telephone cable
to the modem connector; then connect the other end to the
telephone outlet on the wall.
Note: To use a DOS modem application in the Windows 95 or
Windows 98 DOS box, disable the infrared port.
When you start Windows, the modem automatically starts and is
ready for use.
To use the built-in modem outside the region where you purchased
the computer, you must change the region name.
DANGER
To avoid shock hazard, do not connect the cable to or
disconnect the cable from the telephone outlet on the wall during
electrical storms.
1
In the Windows 98 desktop, click Start.
2
Move the cursor to Settings and click Control Panel.
3
Double-click Modems.
4
Click the Dialing Properties button.
12 IBM ThinkPad 570 Online Book
Page 19
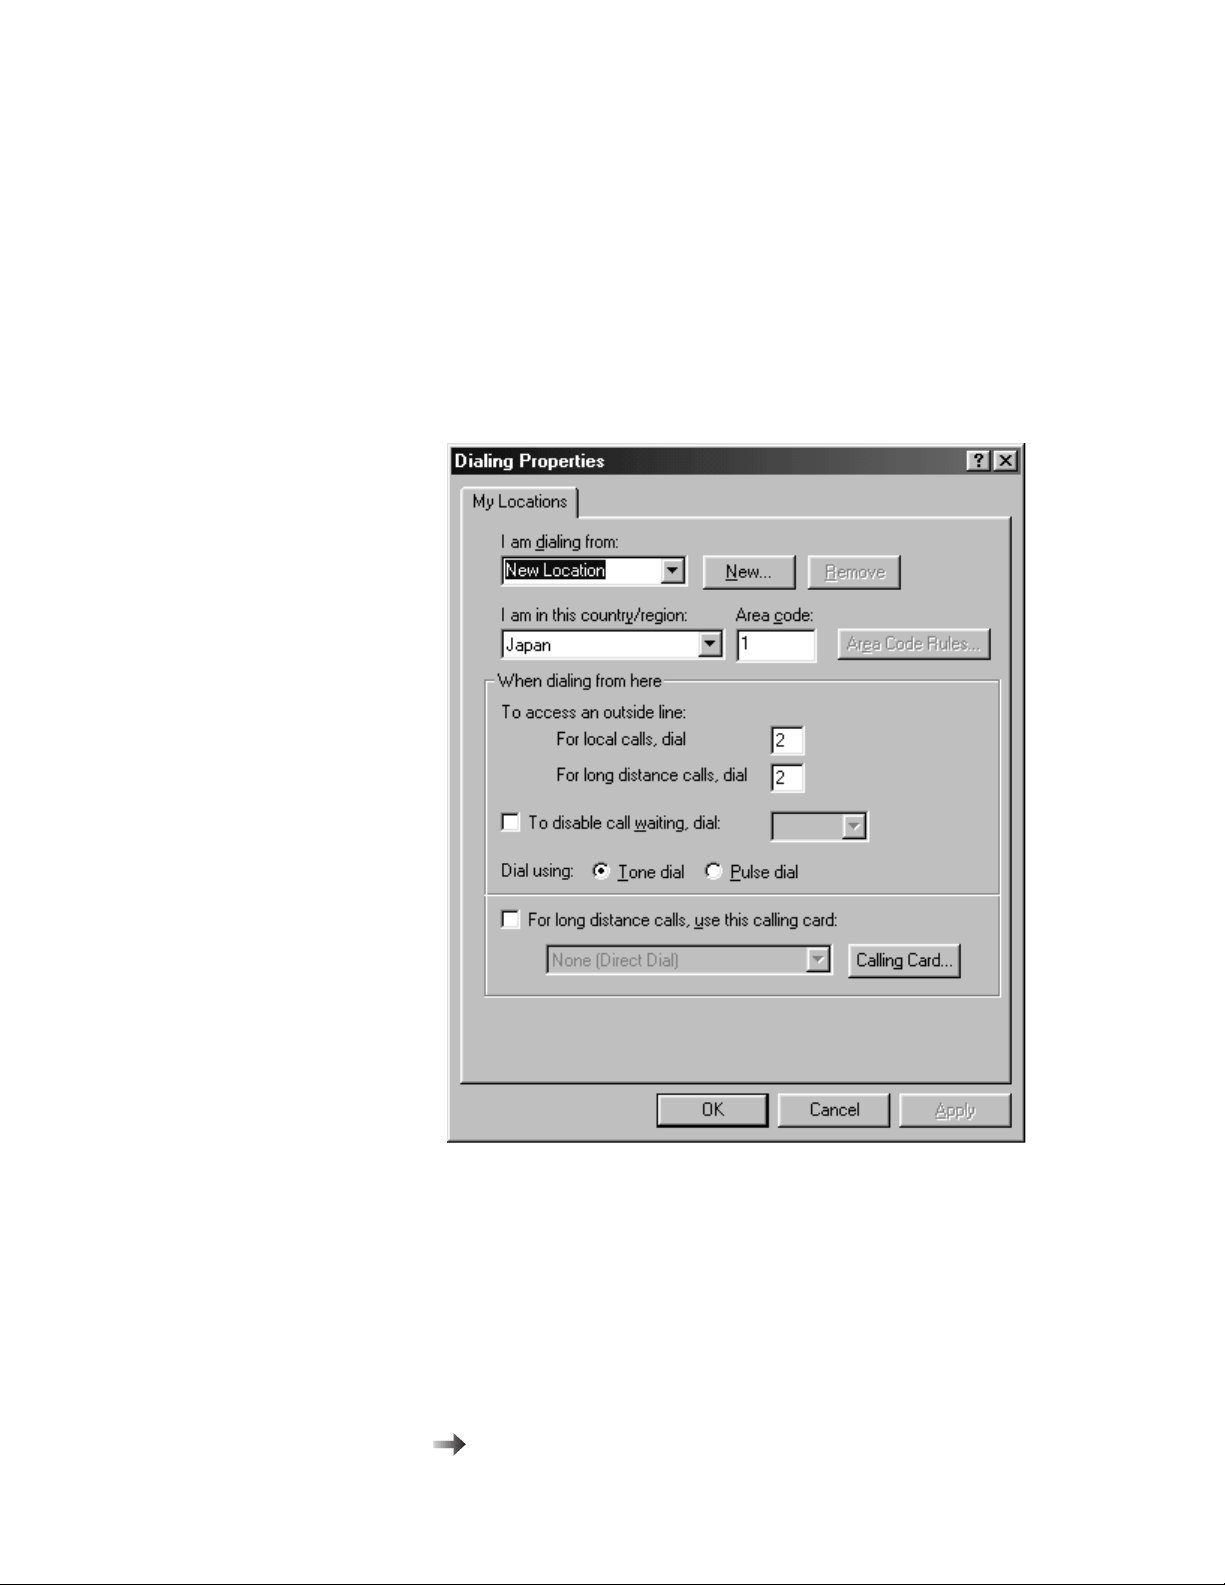
5
Select the region that you are using your modem, and set other
dialing options; then click OK.
Notes:
1. Check the IBM Web site for the latest information. When
updates become available, they are posted on:
http://www.ibm.com/thinkpad
2. You can also perform the basic modem functions by using the
AT commands from the DOS prompt.
AT commands.
Chapter 2. Using the features of your computer 13
Page 20

Using the 56-Kbps modem
To take advantage of your modem's 56-Kbps standard protocol
(ITU-T V.90), you must first make sure that your Internet service
provider (ISP) supports the protocol.
Contact your ISP and determine which 56-Kbps modem protocol it
uses.
If your ISP supports the 56-Kbps standard protocol (ITU-T V.90) or
K56flex technology, your modem uses the same 56-Kbps protocol.
Your modem and your ISP must support the same 56-Kbps protocol,
or your maximum connection speed will be limited to V.34
technology.
Significantly higher Internet modem connection speeds up to 56
Kbps require all-digital transmission connections from your ISP to the
line card in the central office to which your phone line is connected.
The higher speeds at which this modem is capable of operating on a
specific network implementation is only one of many ways to deliver
high-quality voice telephony to customers. Failure of the modem to
operate at high speed should not be reported as a fault, unless
ordinary voice telephone calls are substandard.
In the U.S., current FCC regulations limit the maximum speed for
downstream communication to 56 Kbps. Even though your modem
contains 56-Kbps technology, the connect rate in the receive
direction might be significantly less than 56 Kbps.
Currently, the 56-Kbps capability is in the receive direction only (from
the ISP to your local modem). The transmit or send direction (from
your local modem to the ISP) uses V.34 technology.
Note: 56-Kbps transfer rates are not available in all locations. You
must check with your ISP to determine if your area is capable
of 56-Kbps transfer rates.
Telephony features
The built-in modem provides the following telephony features:
Industry standard modem support up to 56 Kbps
14 IBM ThinkPad 570 Online Book
Page 21

Data
protocols
Bell 103 (300 bps)
Bell 212A (1200 bps)
V.21 (300 bps)
V22bis (2400 bps)
V.22 (1200 bps)
V.34bis (33600, 31200 bps)
V.34
(28800, 26400, 24000, 21600, 19200,
16800, 14400, 12000, 9600, 7200, 4800
bps)
K56flex
(downstream only, up to 56000 bps)
V.90 (downstream only, up to 56000 bps)
Error
correction
protocols
MNP2-4 (Microcom error correction)
V.42 (error-correcting procedures for DCEs
using asynchronous automatic dialing and
control)
Data
compression
V.42bis (DCE data compression)
MNP5 (Microcom data compression)
protocols
Miscellaneous
protocols
V.8 (startup sequence)
V.80 (video phone)
Industry standard fax support up to 14.4 Kbps
Fax protocols V.21 Ch 2 (300 bps fax)
V.17 (up to 14.4 kbps fax)
V.29 (9600 bps fax)
V.27ter (4800 bps fax)
Computer telephony function support
– DTMF and pulse dialing
– Detecting DTMF digits received from the phone line
– Call progress monitoring
– An auto-dialing feature
– Telephony API (TAPI) support through Windows 98 or
Windows 95
Chapter 2. Using the features of your computer 15
Page 22

Telephone answering machine support (Windows 98 and
Windows 95)
– Recording and playback of message and greetings
– Answering device with caller ID (North America only)
– Modem class-8 AT commands for TAPI calls
Full-duplex speaker phone support (Windows 98 and Windows
95 only)
– Acoustic echo cancellation
Using the Auto Answer feature
If you use a modem communication software program, your modem
might need to be set for
your computer answer calls from another computer automatically.
Your modem communication software determines how the modem
operates with Auto Answer. Some fax programs do not require you
to type an AT command to turn Auto Answer on or off. For specific
instructions, see the user's guide that came with the communication
software.
To start the Auto Answer feature from your communication software,
use the command ATS=n. This command tells the modem to
answer a call after a certain number of rings. To set the number of
rings, replace n with any number from 1 to 255.
Auto Answer
1
. The Auto Answer feature lets
If you do not have a voice modem, turn Auto Answer off when you
are not using your modem. Otherwise, callers will be greeted with
the modem tone. To turn Auto Answer off, use the
command ATS = .
In some communication software programs, you might need to select
the “Auto Answer On” or “Auto Answer Off” option to turn off the
Auto Answer feature.
Note: If you are using Auto Answer with a fax software program,
setting a high number of rings enables you to answer the
telephone before the fax modem answers.
1
This function can be used only where the caller ID services is available. Currently, this service is available only in the U.S. and Canada.
16 IBM ThinkPad 570 Online Book
Page 23

If your computer came with fax software already installed, use the
fax software documentation included in the box your computer came
in or the fax software online help for additional information.
Chapter 2. Using the features of your computer 17
Page 24

Viewing a DVD movie
Note
You need a DVD-ROM drive and the ThinkPad 570 UltraBase,
available as an option, to view a DVD movie.
If you want to view a DVD movie on your computer, you need to set
the DVD region code. You can set the region code when you start
DVD Express for the first time.
Notes:
1. The DVD movie player program is supported by Windows 98 and
Windows 95 OSR2.0 or later version.
2. Some DVD movies might not play in your computer. If it is
possible to play another DVD movie in your computer, the
problem is not with your computer. Check with the DVD vendor
whether there is a problem with the DVD content.
3. You need to disable system timers when viewing a DVD movie
to avoid screen blanking.
DVD regional codes
Regional coding is part of the protection strategy for DVD content.
The world is divided into six regions. Specific content can be viewed
only in a specific region. For example, Region 1 (U.S. and Canada)
content should be viewed only in Region 1. The DVD Movie Player
Program application is also region-specific.
You must select a region to play DVD content. After you select the
region, you can play content only for that region. Be sure to select
your correct region.
An incorrect region code setting causes
your computer to hang; you can recover your computer only
with the Recovery CD.
18 IBM ThinkPad 570 Online Book
Page 25

Attention
Make sure the first DVD content you play is from the
appropriate region. You can verify the region code of the
content by looking at the region code symbol on the back of
the content packaging. If the first DVD you play is from a
region other than the region you selected, your system will
no longer play DVD content. Recover your system using the
Recovery CD.
To set the region code, do as follows:
1
Click Start, move the cursor to Programs and Mediamatics
DVD Express, and then click Mediamatics DVD Player.
The “Select DVD Region” window appears.
2
Select the region code and click OK.
Region Code Region
1 U.S, Canada
2 Europe, Middle East, South Africa, Japan
3 Southeast Asia, Taiwan, Korea, Hong Kong
4 Latin America, Australia, New Zealand
5 Former Soviet Union, the rest of Africa, India
6 People's Republic of China (except Hong Kong)
Your computer has been configured to provide the highest quality
audio and video playback based on the available system resources.
You can alter the default settings, however, by changing the video
resolution setting within the Control Panel of Windows 95 or
Windows 98.
Note: Some systems do not have enough resources to provide full
quality audio and video playback at all resolution settings. If
you experience poor playback performance, adjust the
resolution setting to a lower setting.
To view a DVD movie, do the following:
Chapter 2. Using the features of your computer 19
Page 26

1
Insert the DVD title into the DVD drive.
2
Click Start, move the cursor to Programs and Mediamatics
DVD Express, and then click Mediamatics DVD Player.
The DVD express operation window appears.
3
Click the Play button. The playback window appears.
4
Follow the instructions on the screen.
For more information, click the Help button on the operating
window.
20 IBM ThinkPad 570 Online Book
Page 27

Chapter 3. Protecting your computer
Protecting your computer ...................... 22
Using passwords . . . . . . . . . . . . . . . . . . . . . . . . . . . 22
Using mechanical locks ....................... 22
Copyright IBM Corp. 1999 21
Page 28

Protecting your computer
This section provides overall information about how to protect your
ThinkPad computer. To protect your computer from theft or
unauthorized use, you can use:
Passwords
A mechanical lock
For information on mechanical locks and for more details about
passwords
Using passwords
The password-setting feature prevents your computer from being
used by others. Once you set a password, a prompt appears on the
screen each time you power on the computer. You must enter your
password at the prompt. You cannnot use the computer unless you
type the correct password. You can set the following passwords on
your computer:
The power-on password protects your computer from being
used by unauthorized persons.
The hard disk password protects the data on your hard disk
from being accessed by unauthorized persons.
User's Reference
.
The supervisor password protects the system information
stored in BIOS Setup Utility so that without knowing the
password, nobody can change the configuration of the computer.
To use the different passwords, refer to the
User's Reference
.
Using mechanical locks
You can attach a mechanical lock to your computer, to help prevent
it from being removed without your permission.
Attach a mechanical lock to the keyhole of the computer; then secure
the chain on the lock to a stationary object. Refer to the instructions
shipped with the mechanical lock.
22 IBM ThinkPad 570 Online Book
Page 29

Note
You are responsible for evaluating, selecting, and implementing
the locking devices and security features. IBM makes no
comments, judgments, or warranties about the function, quality,
or performance of locking devices and security features.
If you attach an option, such as ThinkPad 570 UltraBase or port
replicator, to your computer, refer to the
User's Reference
for how
you can protect your system by using the mechanical lock.
Chapter 3. Protecting your computer 23
Page 30

24 IBM ThinkPad 570 Online Book
Page 31

Chapter 4. Using your computer with a battery pack
This section provides necessary information if you are using a
battery pack.
Using the battery pack ........................ 26
Charging the battery pack .................... 26
Monitoring the battery status ................... 26
Using the battery status indicator .............. 26
Using the Fuel-Gauge program ............... 29
Saving battery power ........................ 30
Using the power management modes ............. 30
Customizing power management ................ 37
Setting the suspend timer ................... 37
Enabling hibernation mode .................. 39
Considerations when using a power management mode .. 40
Considerations for suspend mode .............. 40
Considerations for hibernation mode ............ 41
Notes for reinstalling or installing the operating system .. 42
Using other battery-saving methods .............. 43
Copyright IBM Corp. 1999 25
Page 32

Using the battery pack
If you use your ThinkPad computer with the battery pack, you need
to conserve the power for long operation. Your computer is provided
with power management for saving battery power, and it always
indicates the battery status. This section describes the functions for
battery operation.
Charging the battery pack
You can charge the battery pack when the AC Adapter is connected
to the computer and the battery pack is installed. You need to
charge the battery pack in any of the following conditions:
Notes:
When you purchase a new battery pack
If the battery status indicator starts blinking
If the battery pack has not been used for a long time
1. Before you charge the battery pack, ensure that its temperature
is at least 10°C (50°F).
2. If the battery pack has not been used for a long time, it will not
be fully charged with only a single charging. You will have to
completely discharge it; then recharge it three to six times to
maximize battery operating time.
Monitoring the battery status
You can monitor the battery status by using the battery status
indicator or the Fuel-Gauge program.
Using the battery status indicator
The battery status indicator shows the current status of the battery
pack (only when the battery is installed).
Compare the battery status indicator with the following table to
determine the condition of your battery:
26 IBM ThinkPad 570 Online Book
Page 33

Status Condition
Green Enough power remains for operation.
Orange The battery pack is being charged.
Blinking
orange
The battery pack needs charging. If the indicator
starts blinking orange, the computer beeps three
times.
Off The battery pack is not installed.
The computer is turned off or is in suspend mode
when the AC Adapter is not connected.
Chapter 4. Using your computer with a battery pack 27
Page 34

Attention
You should take corrective actions when the battery status
indicator is
consecutive beeps. (If your computer enters suspend mode
because of a low-battery condition, data in memory might be
lost.)
blinking orange
, and your computer sounds three
Immediately connect the AC Adapter to the computer
Then take either of the following actions:
To continue your work with the AC Adapter, press the Fn
key.
.
or:
To continue your work with a fully charged battery pack, do
the following:
1.
Replace the battery pack with a fully charged one. (See
the
User's Reference
2.
Press the Fn key.
3.
Disconnect the AC Adapter from the computer.
If you do not take corrective actions within about 30 seconds, the
computer will enter suspend mode.
Do not leave the computer in this condition for an extended
time. Data in memory will be lost.
.)
28 IBM ThinkPad 570 Online Book
Page 35

Using the Fuel-Gauge program
You can display the battery status and power mode (High
Performance, Automatic, or Customized) by using the Fuel-Gauge
program.
If you are using the secondary battery, you can see the secondary
battery status by the Fuel-Gauge program. In the Fuel-Gauge
program window are with two gauges: 1 is for main battery status
and 2 is for secondary battery. The computer uses the secondary
battery first. When you are charging batteries, the computer charges
the main battery first.
You also can select suspend or hibernation mode.
To start the Fuel-Gauge program, click Start, move the cursor to
Program and ThinkPad, and then click Fuel-Gauge. The following
window appears:
Notes:
1. The “Current Power Mode” icon depends on the power mode.
2. The “Power Source” icon depends on the power source. ( is
for the AC Adapter and is for battery pack.)
3. The “Duration of Remaining Power” indicator does not appear
when the AC Adapter is connected.
You can minimize the window to an icon by clicking the icon ( ) at
the top of the window. You can toggle between the Fuel-Gauge
window and its icon by pressing the Fn+F2 key combination.
Chapter 4. Using your computer with a battery pack 29
Page 36

Saving battery power
Using the power management modes
Your battery pack should be useful for approximately 3 years, or 300
charge-discharge cycles. The number of years or charge-discharge
cycles might vary depending on how efficiently you use your
computer. This section describes the following:
Using the power management modes
Using the other battery-saving methods
You can run your computer on battery power for a considerable time
by using the power management modes (standby mode, suspend
mode, and hibernation mode).
Note: Even if you don't set the low-battery alarm, the charge
indicator will let you know when the battery is low, and then
your computer will automatically enter the power-saving mode.
This default low-battery behavior is independent of the
operating system, so the computer might behave differently
from your setting if you set the low-battery alarm. The
computer chooses appropriately between your setting and the
default setting.
Attention
Do not enter suspend or hibernation mode when your computer
is doing any of the following:
Playing or recording audio
Playing a movie
Playing a game
Running any other multimedia application
Stop these applications before entering suspend or hibernation
mode.
Standby mode
30 IBM ThinkPad 570 Online Book
Page 37

For Windows 98 users:
The LCD and external monitor turn off. Also the audio is muted.
If no application program is running in the background, the hard
disk stops turning.
For Windows 95 users:
The LCD turns off. Also, if a power-saving monitor (Energy Star
Monitor) is in use when the computer enters standby mode, the
computer activates the monitor's low-power mode.
You can enter standby mode by:
– Pressing the Fn+F3 keys.
You can return to normal operation by:
– Pressing any key or moving the TrackPoint.
Suspend mode
Your computer stops all tasks and stores all data in memory.
You can enter suspend mode by:
– Pressing the Fn+F4 keys.
– Closing the cover.
If you select the Will not suspend even if LCD is closed
check box in the “Power Management Properties” window,
the computer does not enter suspend mode when the LCD is
closed. Only the LCD turns off.
– Selecting the Suspend button ( ) in the Fuel-Gauge
program.
–
For Windows 98 users:
Click Start and Shut Down.., and then select Stand by by
clicking the radio button.
Note: The term Stand by on the Windows 98 screen has a
different meaning from the term standby in the user's
manuals.
Your computer automatically enters suspend mode when:
Chapter 4. Using your computer with a battery pack 31
Page 38

– The preset timeout is reached.
For Windows 98 users:
You can set the System standby timer in the “Power
Management Properties” window.
For Windows 95 users:
You can set the Suspend Timer in the “Power Properties”
window.
– The battery is low.
For Windows 98 users:
You can set the alarm action by specifying Standby for the
prompt When the alarm goes off, the computer will:
For Windows 95 users:
If you select the Hibernate when battery becomes low check
box in the “Power Management Properties” window, the
computer enters hibernation mode when the battery is low.
You can return to normal operation by:
– Pressing the Fn key.
– Opening the LCD.
– Turning the power switch on.
Your computer automatically returns to normal operation when:
– The preset timeout for the resume timer is reached.
For Windows 98 users:
You can set the timer in Scheduled Tasks.
For Windows 95 users:
You can set the timeout with the resume on timer specification
in the “Power Properties” window.
32 IBM ThinkPad 570 Online Book
Page 39

RediSafe:
To prevent loss of data during suspend mode when the battery is
critically low, your ThinkPad computer has a RediSafe function.
Once you set this function, the hibernation file is activated each
time the computer enters suspend mode, and is ready to enter
hibernation mode from suspend mode whenever the battery is
low.
Set RediSafe as follows:
From Windows 95 or Windows 98:
1.
Start the ThinkPad Configuration program.
2.
Click the Power Management button ( ).
3.
Click the Hibernation tab.
4.
Enable hibernation mode if it is disabled:
a)
Click the Enable Hibernation.. button.
b)
Click Create Now; then Close.
5.
Select the RediSafe check box.
6.
Click OK.
From Windows NT:
1.
Start the ThinkPad Configuration program.
2.
Click the Power Management button ( ).
3.
Click the Suspend/Hibernation/Resume Options button
( ).
4.
Enable hibernation mode if it is disabled:
a)
Click the Enable Hibernation.. button.
b)
Click OK.
5.
Select the RediSafe check box.
6.
Click OK.
Hibernation mode
Your computer stops all tasks and stores all data in the hard
disk; then it powers off. Set your computer to this mode if you
want to maintain the present operating condition until the next
day, for instance.
Chapter 4. Using your computer with a battery pack 33
Page 40

To use this mode, you have to create a hibernation file with the
ThinkPad Configuration program. (See Enabling hibernation
mode.)
You can enter hibernation mode by:
– Pressing the Fn+F12 keys.
– Clicking the Hibernation button ( ) in the Fuel-Gauge
program.
– Turning the power switch off.
You can enable this option by selecting the Hibernate by
power switch check box in the “Hibernation” subwindow of
the “Power Management Properties” window.
Your computer automatically enters hibernation mode when:
– The preset timeout is reached. (Windows 95 user only)
If you select the Hibernate by timer check box in the
“Hibernation” subwindow and set Suspend timer in the
“Power Mode” subwindow, your computer enters hibernation
mode when it reaches timeout.
– The battery is low.
For Windows 98 users:
You can set the alarm action by specifying Hibernate for the
prompt When the alarm goes off, the computer will:
For Windows 95 users:
If you select the Hibernate when battery becomes low check
box, your computer enters hibernation mode when the battery is
low.
You can return to normal operation by turning the power on.
For Windows NT users:
You cannot create a hibernation file in a Windows NT system
that uses the NTFS file format, the Windows NT default. If you
want to use hibernation mode, you should reinstall Windows NT
with the FAT file format.
34 IBM ThinkPad 570 Online Book
Page 41

Notes:
1. Windows 95 users cannot enter hibernation mode when you
are using the communication network.
2. Hibernation mode might end if you connect your computer to
a port replicator or if you use a particular PC Card.
The following table shows how the indicator behaves in each power
management mode:
Indicator
Current status
Suspend mode
Power-on
Normal operation
or standby mode
Suspend mode Green Off
Entering or resuming from
suspend mode
Power off or
hibernation mode
Off Green
Blinking green Green
Off Off
The following figure shows the relationship between different power
management modes, how to switch between them, and battery
power consumption:
Chapter 4. Using your computer with a battery pack 35
Page 42

36 IBM ThinkPad 570 Online Book
Page 43

Customizing power management
This section describes how to customize power management so that
you are using the power management mode appropriate to your
operation.
Setting the suspend timer
To set the suspend timer, do the following:
For Windows 98:
1
Start the ThinkPad Configuration program.
2
Click the Power Management ( ) button.
The “Power Management Properties” window appears.
3
Click the Power Schemes tab.
The “Power Schemes” window appears.
4
Set the length of time for the suspend timer at System
standby timers under Settings for Portable/Laptop power
scheme.
Note: You can also set the LCD off timers and Hard disk off
timers.
5
Click OK.
For Windows 95:
1
Start the ThinkPad Configuration program.
2
Click the Power Management ( ) button.
The “Power Properties” window appears.
3
Click the Power Mode tab.
The “Power Mode” window appears.
4
Select Customized.
Chapter 4. Using your computer with a battery pack 37
Page 44

The bottom gray portion is displayed in black, and you can
specify the timeout value in minutes in the Suspend Timer
box.
5
Click OK.
For Windows NT:
1
Start the ThinkPad Configuration program.
2
Click the Power Management ( ) button.
Three buttons appear on the right.
3
Click the Power Mode Settings ( ) button.
The “Power Mode Settings” window appears.
4
Specify the timeout value in minutes in the Suspend Timer
box.
5
Click OK.
38 IBM ThinkPad 570 Online Book
Page 45

Enabling hibernation mode
To enable hibernation mode, do the following:
For Windows 98 and Windows 95:
1
Start the ThinkPad Configuration program.
2
Click the Power Management ( ) button.
The “Power Properties” window appears.
3
Click the Hibernation tab.
The “Hibernation” subwindow appears.
4
Click Enable Hibernation. (If you have already created a
hibernation file, this button appears in gray and you cannot
click it.)
The “Enable Hibernation” subwindow appears.
5
Click Create Now.
6
Click Close; then OK.
For Windows NT:
1
Start the ThinkPad Configuration program.
2
Click the Power Management ( ) button.
3
Click the Suspend/Resume Options ( ) button.
The “Suspend/Resume Options” window appears.
4
Click the Enable Hibernation... button.
5
Click OK.
Chapter 4. Using your computer with a battery pack 39
Page 46

Considerations when using a power management mode
When you use a power management mode, you need to consider a
few points, especially if you are using the network.
Considerations for suspend mode
Consider the following before using suspend mode:
Before playing audio, it is better to turn off any automatic timers
that put the computer into suspend or hibernation mode. In
addition, it is better to stop playing audio before entering
suspend or hibernation mode. If the computer enters suspend or
hibernation mode, data from a running audio program might be
lost.
Attached devices, such as a printer or serial device, stop running
when the computer enters suspend mode. When you resume
normal operation, the output might differ from what you expect,
because the device might be reset or lose its configuration
settings.
Sometimes you might want to use the computer with the LCD
closed—for example, when an external monitor and keyboard are
used. In such a case, power on the computer with the LCD
closed, or use the ThinkPad Configuration program to set the
computer not to enter suspend mode when the LCD is closed.
If the computer resumes normal operation by reaching the
ThinkPad Configuration timer setting or because of an incoming
call, only a blank screen is displayed. To display a power-on
password prompt, press any key or move your pointing device.
If you are using some communication cards and the computer is
powered with ac power, your computer enters standby mode
rather than suspend mode.
If you are using other PC Cards and the computer enters
suspend mode, all application programs stop. For some PC
Cards, power to the PC Cards might also turn off.
If the computer is powered with battery power, the computer
turns power off to the PC Card, and communication stops for
communication PC Cards, so the duration of suspend mode is
longer.
40 IBM ThinkPad 570 Online Book
Page 47

If communication for a PC Card is not reestablished after normal
operation resumes, remove and then reinstall the PC Card
before restarting the system or application program. For other
kinds of PC Cards, if the PC Card or computer does not operate,
restart the application or computer.
Even if you are using a communication card with a ring-resume
function, some cards cannot detect an incoming call.
While a communication link is active, the computer does not
enter suspend mode.
If you select the Disable in the hardware profile check box
under the Device usage of the General tab in the Advanced
Power Management Support area of the “System Properties”
window, your computer does not enter suspend mode.
Note:
You must set the Resume on incoming call option in the ThinkPad
Configuration program so the computer automatically resumes
normal operation.
For Windows 95 and Windows 98:
1.
Click the Power Management ( ) button.
2.
Click the Suspend/Resume options tab.
3.
Select the Resume on incoming call check box.
For Windows NT:
1.
Click the Battery ( ) button.
2.
Click the Suspend/Hibernation/Resume options ( )
button; then select the Resume on incoming call check
box.
For DOS:
Enter PS2 RI E
Considerations for hibernation mode
Consider the following before using hibernation mode:
Do not run any other tasks while the hibernation file is being
created.
Chapter 4. Using your computer with a battery pack 41
Page 48

The computer uses battery power to enter hibernation mode.
Therefore, it reserves some battery power if it is set to enter
hibernation mode when a low-battery condition occurs. This can
cause the battery operating time to be shorter than the time
publicly stated.
Do not add or remove memory during hibernation mode. If you
do, the computer resumes from hibernation mode without
recognizing the changed memory size. To ensure that the
computer recognizes the correct memory size, shut down; then
restart your operating system.
If the computer is powered with battery power, it turns power off
to the PC Card when entering hibernation mode. When normal
operation resumes, if the PC Card or computer does not operate,
restart the application or computer.
If you are using some communication cards and your computer
is powered with ac power, the computer does not enter
hibernation mode. This prevents possible problems from
occurring with communication application programs after the
computer returns to normal operation.
Note: If the communication links are still not reestablished,
remove and then reinstall the PC Card before restarting
the system or application program.
Notes for reinstalling or installing the operating system
Install your operating system with Advanced Power Management
(APM), and install the ThinkPad Configuration program with the
Utility Diskette to use power management mode.
Note: To install the software
and its device drivers.
If you are using Windows 98 or Windows 95,
automatically installed in your computer.
If you are using DOS,
computer. To verify that the computer has installed APM correctly,
type POwer at the command prompt and press Enter. If a screen
similar to the following appears, APM is successfully installed.
42 IBM ThinkPad 570 Online Book
APM is automatically installed in your
Installing a new operating system
APM is
Page 49

Power Management Status
---------------------- Setting = ADV: REG
CPU: idle 32% of time.
AC Line Status : OFFLINE
Battery status : High
If not, add the following line to your CONFIG.SYS file, using a text
editor such as the DOS Editor:
DEVICE=C:\DOS\POWER.EXE
Using other battery-saving methods
Another battery-saving method is to decrease the LCD brightness.
You can use the ThinkPad Configuration program to decrease the
brightness of the LCD by clicking the LCD ( ) button and
selecting Normal for Brightness (battery operation) in the window
that appears.
Chapter 4. Using your computer with a battery pack 43
Page 50

44 IBM ThinkPad 570 Online Book
Page 51

Chapter 5. Using your computer with a PC Card
This section provides necessary information if you are using the
computer with a PC Card.
Using a PC Card ........................... 46
PC Card types ........................... 46
Storage cards . . . . . . . . . . . . . . . . . . . . . . . . . . 46
Modem cards . . . . . . . . . . . . . . . . . . . . . . . . . . 47
Network cards . . . . . . . . . . . . . . . . . . . . . . . . . 47
SCSI cards . . . . . . . . . . . . . . . . . . . . . . . . . . . 47
Other PC Cards ........................ 47
PC Card interface ......................... 48
16-bit PC Cards ........................ 48
CardBus Cards . . . . . . . . . . . . . . . . . . . . . . . . . 48
ZV Cards . . . . . . . . . . . . . . . . . . . . . . . . . . . . 48
PC Card support software ...................... 49
Power management . . . . . . . . . . . . . . . . . . . . . . . . 50
Using a PC Card in Windows 95 (with CardWorks) ....... 52
Self-check . . . . . . . . . . . . . . . . . . . . . . . . . . . . . 53
PC Card properties ........................ 54
Attributes . . . . . . . . . . . . . . . . . . . . . . . . . . . . 55
Resources . . . . . . . . . . . . . . . . . . . . . . . . . . . . 55
Drivers . . . . . . . . . . . . . . . . . . . . . . . . . . . . . . 55
Stopping the PC Card ...................... 56
Help . . . . . . . . . . . . . . . . . . . . . . . . . . . . . . . . . 57
Using a PC Card in Windows NT (with CardWizard) ...... 58
Self-check . . . . . . . . . . . . . . . . . . . . . . . . . . . . . 60
PC Card properties ........................ 60
Attributes . . . . . . . . . . . . . . . . . . . . . . . . . . . . 60
Name . . . . . . . . . . . . . . . . . . . . . . . . . . . . . . 61
Hot swapping the PC Card .................... 61
PC Card Activator ......................... 62
Enhanced power management ................. 62
Stopping the PC Card ...................... 63
Help . . . . . . . . . . . . . . . . . . . . . . . . . . . . . . . . . 64
Copyright IBM Corp. 1999 45
Page 52

Using a PC Card
This section explains PC Card functions and interfaces. It describes
PC Card support software and explains how to use your PC Card in
the operating system that you have installed.
A PC Card enables you to send and receive faxes, communicate
through a network, store data, and use other functions. PC Cards
can be distinguished by their functions:
Storage cards
Modem cards
Network cards
SCSI cards
Other PC Cards
A PC Card is also distinguished by the interface that supports it.
Before you use a PC Card, you need to make sure that your
computer supports it.
16-bit PC Card
CardBus Card
2
Zoomed Video Card3 (ZV Card)
PC Card types
Storage cards
An Advanced Technology Attach (ATA) card functions as a
hard disk with the Integrated Drive Electronics (IDE) interface.
You can transfer data between devices by inserting a card in a
PC Card slot just as you would with a diskette in a diskette drive.
There are two types of ATA card:
– The ATA hard disk card has a large capacity; you can use
the card as you would an external hard disk.
– The ATA Flash disk card acts as a memory card; you can
use the card to back up your data.
2
CardBus allows PC Cards and your computer to use 32-bit busmastering and to operate at speeds up to 33 MHz.
3
Zoomed Video (ZV) is a connection between a PC Card and your computer that allows the card to write video data directly to the graphics
controller. The data is transferred with no buffering requirements, because it is transferred over a ZV port rather than the system bus.
46 IBM ThinkPad 570 Online Book
Page 53

Modem cards
A fax modem card is used for communication through a telephone
line; ac power is not needed. You can use this card to access the
PC network or the Internet, or to send a fax.
Network cards
A memory card is used to read or write moderate amounts of
data. There are three types of memory card:
–A static-random-access-memory (SRAM) card backs up
computer memory. The card has its own battery.
–A read-only-memory (ROM) card is used for reading data
only.
–A Flash memory card is a writeable and readable card. No
battery is needed.
A LAN/Network card physically connects PCs in a LAN or
Network. The following LAN-or-Network cards are available:
– An Ethernet card is for constructing a small area network.
–A TokenRing card is for constructing a global area network.
– An IBM 3270 card and an IBM 5250 card are also available.
An integrated services digital network (ISDN) card is used to
connect your computer to the ISDN network.
SCSI cards
A small computer system interface (SCSI) card connects a SCSI
device to your computer. For example, it enables you to use a SCSI
disk drive that cannot fit in a small notebook PC.
Other PC Cards
A sound card enables your computer to play music and other
sounds. It typically has an audio and a MIDI in/out connector.
A video capture card captures signals from video devices,
enabling you to use the data in your computer.
There are also multi-function PC Cards, such as the Combo Card
and the Multi Function Card.
Chapter 5. Using your computer with a PC Card 47
Page 54

PC Card interface
16-bit PC Cards
CardBus Cards
ZV Cards
Most PC Cards are 16-bit PC Cards (PCMCIA 2.0 or 2.1), providing
ISA device performance.
The CardBus Card is connected as a PCI device and provides higher
performance than the 16-bit PC Card.
The Zoomed Video port interface provides the connection for the ZV
Card. The ZV Card enables you to write video data directly to an
input port of the graphics controller. The following video-related
cards are considered ZV Cards:
Video capture card
MPEG card
The ZV Card cannot be used without a PC Card device driver and a
display device driver.
Attention
When you use PC Cards, be aware of the following restrictions:
Although you can insert or remove some PC Cards without
powering off the computer (refer to the instructions that came
with the PC Card), you
during suspend or hibernation mode.
Before removing storage PC Cards from the PC Card slot,
you must power off
PC Card might be corrupted or lost.
Note: According to the operating system, you can stop the
PC Card with the PC Card support software and
remove it without powering off the computer. (See the
PC Card support software section of each operating
system to see how to stop the PC Card.)
48 IBM ThinkPad 570 Online Book
cannot
the computer. Otherwise, data in the
remove or install PC Cards
Page 55

PC Card support software
ThinkPad PC Card support software enables you to use a PC Card
as soon as you insert it into the ThinkPad computer.
Each operating system needs its own ThinkPad PC Card support
software, as follows:
Windows 98
: You can use the PC Card without the PC Card
support software; the PC Card support function is included within
the operating system.
Windows 95 (OSR2.1)
Windows NT 4.0
To install the PC Card software
: CardWorks for Windows 95.
: CardWizard for Windows NT.
Installing a new operating
system and its device drivers.
The following table shows the PC Cards supported by Windows 98
and the different PC Cards support software:
Windows 98 CardWorks (Windows
952)
16-bit PC Card Supported Supported Supported
CardBus Card Supported Supported Supported
ZV Card Note 1 Supported Not supported
Notes:
1
Check the Web site of the card vendor.
2
The PC Card support software is supported by OEM Service Release Version 2 (OSR2) or a later version.
3
See the SystemSoft Web site for the card list that the CardWizard supports:
http://www.systemsoft.com/catalog/support3.htm
CardWizard (Windows
NT 4.0)
3
3
When you insert the PC Card into your ThinkPad computer:
The PC Card support software detects the card and reads the
information about it.
The PC Card support software searches for the corresponding
card service device driver.
The device driver requests the PC Card support software to
allocate such system resources as memory space, I/O port, and
Chapter 5. Using your computer with a PC Card 49
Page 56

IRQ. If these resources are available, the support software
recognizes the PC Card and you can use it.
If there is a resource conflict, you need to change either the
resources or the system configuration:
Either:
– Change the requested resources of the PC Card: You can
allocate the available resources by using each operating
system or PC Card support software function.
Or:
– Change the system configuration: You can change the
system configuration with your operating system or with the
ThinkPad Configuration program.
Note: If the PC Card device driver is the PC Card point enabler,
you cannot use the PC Card with ThinkPad PC Card
support software. If you cannot set up the PC Card with
PC Card support software, check with the card vendor
whether the device driver is a client device driver or a
point enabler.
For Windows NT, you can select the PC Card support
software or other software. For details “Using a PC
Card in Windows NT (with CardWizard).”
Power management
Depending on the function of the PC Card, changing the power state
might cause your ThinkPad computer to hang. PC Card support
software prevents this occurrence through special handling during
power state transition.
The following table approximately indicates the supported power
management function depending on the type of PC Card. If you
need a power management function, make sure that your PC Card
supports the function.
Note: This table shows the power management functions that are
supported by the PC Card support software. Since Windows
98 does not support the PC Card support software, this table
does not apply to Windows 98.
50 IBM ThinkPad 570 Online Book
Page 57

Card type
Modem or
network
Other Accepted Accepted Accepted Accepted
Note:
Standby mode is always accepted.
Windows 98 might change the capability of the power state transition.
CardWizard for Windows NT enhances the capability of the power state transition.
Suspend request (Fn+F4) Hibernation request (Fn+F12)
ac power Battery power ac power Battery power
Accepted Accepted Not accepted Accepted
For more information about the PC Card support software, go to the
appropriate section.
Chapter 5. Using your computer with a PC Card 51
Page 58

Using a PC Card in Windows 95 (with CardWorks)
You can make your PC Card easy to use with the PC Card support
software called CardWorks. It is supported only by the Windows 95
OEM Service Release Version 2.1 (OSR2.1).
CardWorks minimizes user intervention in configuring many PC
Cards. CardWorks with CardWizard provides the following:
Self-check
If you have a problem, refer to this section.
PC Card properties
CardWorks provides various information about your PC Card.
Stopping the PC Card
If you remove the PC Card from your computer, sometimes you
need to stop the PC Card.
Help
You can get help for most of the windows.
CardWorks provides Plug and Play mode for using a PC Card. You
can use the PC Card in this mode if the device driver of the card is
supported by Windows 95.
To start CardWizard, do as follows:
1
Click Start.
2
Move the cursor to Programs and CardWorks. Then click
CardWizard.
The CardWizard window appears:
52 IBM ThinkPad 570 Online Book
Page 59

Self-check
This information panel displays up-to-date information about the PC
Cards and PC Card slots being used in your computer.
It also displays up to three lines of card information, which it reads
directly from the card:
The first line shows the card name.
The second line shows the manufacturer.
The third line shows the card's function or type.
CardWorks has a self-check function that solves such problems as
incorrect or missing PC Card device drivers, system resource
conflicts (IRQ, memory, or I/O ports), and unconfigured PC Cards, as
well as memory conflicts.
If there are any problems, click Wizard. Each time you click the
Wizard button, a series of self-checks is run to assure that all
necessary components are installed and working properly.
CardWizard then analyzes the computer to verify that there are
resources available for PC Card configuration.
Chapter 5. Using your computer with a PC Card 53
Page 60

Even if CardWizard cannot automatically solve a problem, it can
pinpoint the problem exactly so that you or a technical support
engineer can fix the problem more easily.
PC Card properties
You can see the attributes, resources, drivers, and memory card
utilities that are loaded for PC Card support in the “PC Card
Properties” window.
To open the “PC Card Properties” window of the PC Card that you
are using, do the following:
1
Select the PC Card in the CardWizard window by clicking it.
2
Click View in the menu bar of the window.
3
Click Properties... in the pop-up menu.
The “PC Card Properties” window appears:
The window provides the following information:
Attributes
54 IBM ThinkPad 570 Online Book
Page 61

Attributes
Resources
Drivers
The following information appears depending on the type of PC
Card:
Slot The slot number and assigned name for the slot.
(You can change the slot name by selecting slot
management from the options menu.)
Card The type of this PC Card.
Manufacturer The manufacturer of the PC Card.
Size The storage capacity of the PC Card.
Drive The drive letter.
Battery status The charge status of the SRAM Card battery.
Write protect The write protect status—either enabled or
disabled.
File system The file system used by the PC storage.
Port The communication port used by this PC modem
card. If this is not shown, click the Wizard button
and Auto Correct.
Resources
Some resource information is not relevant to all types of PC Cards.
These nonrelevant resources are displayed as “Not Applicable.”
IRQ The interrupt request being used.
I/O The starting and ending addresses of the
input/output range for the PC Card.
DMA The DMA channel used.
Memory range The range of physical memory.
Drivers
CardWizard determines the type of device driver being used. It also
displays whether the card is configured by Windows 95 or by
CardWorks.
Chapter 5. Using your computer with a PC Card 55
Page 62

Card driver Indicates that Plug-and-Play mode is used in
configuring the PC Card. This field is enabled
only if the Change card driver box is selected.
Change card
driver
Remove from the
Plug-and-Play
hardware list
Memory card
utility
You should
been identified and configured successfully.
If this item is enabled (checked), you can select
either Plug and Play (if available) or the
CardWorks device drivers.
If this item is enabled (checked), you can delete
the Plug-and-Play device driver assigned to a
card. This applies only if the card is handled by
Windows 95 (Plug-and-Play mode). Later, when
you reinsert the same PC Card, CardWorks
configures the card as if it were the first insertion.
This item appears only if you insert an SRAM card
or a Flash memory card. You can format the
SRAM card or Flash memory card as follows:
Note: You can also format these cards from the
1.
Open the “PC Card Properties” window.
2.
Click the Memory Card Utility tab.
3.
Enter a Volume Label (if desired).
4.
Click Format Drive/Partition.
5.
Click Start.
This procedure enables you to completely erase
an SRAM or a Flash memory card, especially a
brand-new card. Make sure to save the data on
the card before erasing it.
not
change drivers if your card has
file system with the DOS FORMAT
command.
Stopping the PC Card
If you are removing a PC Card, you must first stop it. The system
might freeze or data might be lost if a PC Card is removed before it
is stopped.
Note: You can stop only one card at a time. After invoking stop,
you cannot stop another card until the first stop has either
completed or failed.
56 IBM ThinkPad 570 Online Book
Page 63

Help
You can stop a card as follows:
1
Click the right button on the CardWizard window.
A pop-up menu appears.
Note: The stop option appears in gray if the card is already
stopped.
2
Click Stop. The following message appears:
The card has been stopped. You can safely remove the
card.
If you press F1 or click the Help button, a glossary of terms and an
index of Help items are made available.
Chapter 5. Using your computer with a PC Card 57
Page 64

Using a PC Card in Windows NT (with CardWizard)
You can make your PC Card easy to use with the PC Card support
software called CardWizard.
CardWizard minimizes user intervention in configuring many PC
Cards. CardWizard provides the following:
Self-check
If you have a problem, refer to this section.
PC Card properties
CardWizard provides various information about your PC Card.
Hot swapping the PC Card
You can use a mass-storage, modem, or network PC Card as
soon as you insert it into your computer; you do not need to
reboot.
PC Card Activator
You can select the PC Card support function of Windows NT
rather than CardWizard without uninstalling CardWizard.
Enhanced power management
Depending on the state of your computer, the PC Card type, and
the capability of the drivers, CardWizard enhances the transition
between power states.
Stopping the PC Card
If you remove the PC Card from your computer, sometimes you
need to stop the PC Card.
Help
You can get help for most of the windows.
58 IBM ThinkPad 570 Online Book
Page 65

Using mass-storage PC Cards
To use a removable mass-storage PC Card such as an ATA, an
SRAM, or a Flash memory card for the first time, you need to
format the card as follows:
1. Start CardWizard.
2. Select the PC Card that you want to format in the
CardWizard window.
3. Click Actions.
4. Click Format...
5. Click Start.
To start CardWizard for Windows NT, do as follows:
1
Start Windows NT 4.0.
2
Click Start.
3
Move the cursor to Programs and CardWizard for Windows
NT.
4
Click CardWizard for Windows NT.
The menu bar for the CardWizard window includes File, View,
Actions, Options, and Help options. Each option provides
CardWizard functions to perform actions with cards, modify
user-selected options, and obtain help.
Quick launch
Once you have installed CardWizard for Windows NT, you can
start it by clicking the CardWizard icon. The CardWizard menu
appears on the taskbar, to the left of the CardWizard icon. Click
the menu once with the left mouse button to start the wizard
application.
Another way to start CardWizard for Windows NT is to
double-click the system tray icon with the left mouse button.
Chapter 5. Using your computer with a PC Card 59
Page 66

Self-check
If you have a problem configuring your PC Card, click the Wizard
button in the “CardWizard for Windows NT” window.
Each time you click the Wizard button, a series of self-checks is run
to ensure that all necessary components are installed and working
properly. CardWizard then analyzes the computer to verify that there
are resources available for PC Card configuration.
Click this button to fix most PC Card problems. Even if CardWizard
cannot automatically solve a problem, it can pinpoint the problem
exactly so that you or a technical support engineer can fix the
problem more easily.
Note: If the PC Card device driver is the PC Card point enabler, you
PC Card properties
You can see the attributes, resources, drivers, and memory card
utilities that are loaded for PC Card support in the “PC Card
Properties” window.
cannot use the PC Card with CardWizard. To use such a PC
Card, use the PC card support function of Windows NT rather
than CardWizard. For details, see PC Card Activator.
To open the “PC Card Properties” window, do the following:
1
Start the CardWizard.
2
Select Properties from the “Actions” menu.
3
From the “Card Information” panel:
a
Click the right mouse button while the cursor is on an
inserted card icon.
b
Click Properties.
The “Properties” window provides information about the attributes
and drivers associated with the selected PC Card.
Attributes
Slot The slot number and assigned name for the slot
60 IBM ThinkPad 570 Online Book
Page 67

Name
Card The type of this PC Card
Manufacturer The manufacturer of the PC Card
Function The function of the PC Card
Hot-swappable The capability for hot swapping the PC Card
IRQ The interrupt request being used (if relevant)
Port The I/O address associated with a communication
port (if relevant)
Capacity The memory or disk capacity of the mass-storage
PC Card (if relevant)
File system The file system of the mass-storage PC Card (if
relevant)
Volume label The volume label of the storage drive in the
mass-storage PC Card (if relevant)
DOS Device The communication port (for example, COM 1) or
drive letter used by this device (if relevant)
When you select device drivers, the following information is
displayed:
Driver The full path to the driver for this PC Card
Version The version for the current driver
Hot swapping the PC Card
You can use any one of the following PC Cards as soon as you
insert it into your computer:
Mass-storage PC Card (ATA, SRAM, or Flash memory)
PC Card modem
Hot-swappable network PC Card
You determine whether the PC Card is hot-swappable in the
“Attribute” subwindow in PC Card Properties.
Chapter 5. Using your computer with a PC Card 61
Page 68

PC Card Activator
PC Card Activator is an easy interface for switching between
CardWizard and the PC Card support function of Windows NT. To
switch to the PC Card support function of Windows NT, do as
follows:
1
Start Windows NT.
2
Click Start.
3
Move the cursor to Program and CardWizard for Windows
NT.
4
Click PC Card Activator.
5
Follow the instructions on the screen.
Note: With the PC Card support function of Windows NT, you can
use a PC Card that is not supported by CardWizard.
However, you cannot use some PC Cards, such as a
CardBus Card, and some PC Card functions, such as network
PC Card hot swapping.
Enhanced power management
The principal feature of power management is to save the life of your
computer's battery. CardWizard for Windows NT provides enhanced
power management in the following ways:
CardWizard maintains system integrity, ensuring the stability of
your computer.
Depending on the state of your computer, the card type, and the
capability of the drivers, CardWizard enhances the transition
between power states.
See the following table for details:
62 IBM ThinkPad 570 Online Book
Page 69

ATA, SRAM,
and Flash
memory
card
Modem card LAN card SCSI card
Hot-swappable Non-hot-
swappable
Cold
insertion
1
OK OK OK OK OK
Stop Note 2 Note 2 OK Not OK Not OK
Standby
OK OK OK OK OK
mode
Suspend
Note 2 Note 2 OK Note 3 Note 3
mode
Hibernation
Note 2 Note 2 OK Note 3 Note 3
mode
Note:
1
Insertion while the computer is powered off.
2
If the card is in use, you cannot stop it. A warning message appears.
3
The computer enters standby mode instead of entering suspend or hibernation mode.
Stopping the PC Card
If you are removing a PC Card, you must first stop it. The system
might freeze or data might be lost if a PC Card is removed before it
is stopped.
Note: You can stop only one card at a time. After invoking stop,
you cannot stop another card until the first stop has either
completed or failed.
To stop a card, select Stop from the “Actions” menu.
The stop function powers off the PC Card. If data on the card is lost,
this function is disabled or rejected. This function is related to the
power management support of the PC Card; for details, see
Enhanced power management.
Chapter 5. Using your computer with a PC Card 63
Page 70

Help
If you press F1 or select the Help button, you can get help for most
of the windows. A glossary of terms and an index of Help items are
also available.
64 IBM ThinkPad 570 Online Book
Page 71

Chapter 6. Resolving system resource conflicts
Resource conflict
This section describes the default system resources and how to
share an IRQ between two devices.
Resource conflict . . . . . . . . . . . . . . . . . . . . . . . . . . . 65
Resolving a resource conflict .................. 65
Using the Device Manager .................. 66
Using the BIOS Setup Utility ................. 66
Default resource assignments ................... 70
Default IRQ assignments ..................... 71
System resources and IRQs ................... 71
To use devices, the following system resources are required:
Interrupt request (IRQ):
A signal from the devices to the processor. The system
has 16 levels of IRQs.
Direct memory access (DMA):
A mechanism to help the overall system performance
by transferring data between memory and devices
without processor intervention. The system has eight
DMA channels.
The IRQ levels, DMA channels, and I/O addresses must be
configured without introducing conflict among devices. When you
add new devices to your ThinkPad computer, you might exceed the
number of IRQs or DMAs allowed in the operating system.
This section explains how to resolve such a resource conflict.
Note: For details of the default resource mapping, refer to Default
resource assignments.
Resolving a resource conflict
You can resolve a resource conflict easily with the ThinkPad
Configuration program, which notifies you if there is a resource
conflict and enables you to disable devices that are in conflict. The
ThinkPad Configuration program tries to maintain the hardware
Copyright IBM Corp. 1999 65
Page 72

configuration by managing the system resources automatically. In
some cases, you might have to disable one device in order to use
the another device.
To resolve the resource conflict, you can also use the Device
Manager or the BIOS Setup Utility.
Using the Device Manager
To open the Device Manager:
1.
Click Start.
2.
Move the cursor to Programs and Settings, and then click
Control panel.
3.
Double-click System.
4.
Click the Device Manager tab.
You can also access the Device Manager from the ThinkPad
Configuration program. There is a Device Manager button in each
ThinkPad Configuration submenu window.
For details about the device, select the device and click Properties.
General information as well as information on drivers and resources
is displayed. For example, from the “Driver” window, you can see
the device driver version, and you can update the driver.
If there is an X on the left side of the device, the device is disabled.
To enable the device, select it and click Properties. You can see
whether the device can be enabled. To change the default
configuration setting, click Resources.
If ! is on the left side of the device, the device has a problem. To
resolve the problem, select the device and click Properties.
Using the BIOS Setup Utility
This section describes the items in the Advanced submenu of the
Config menu of the BIOS Setup Utility.
Only the PCI configuration is a unique function of the BIOS Setup
Utility. You can set up the other functions with the ThinkPad
66 IBM ThinkPad 570 Online Book
Page 73

Configuration program. The settings in the ThinkPad Configuration
program take precedence over those in the BIOS Setup Utility.
Notes:
1. Here are the meaning of
Enabled
and
Enabled: The function is configured
Disabled: The function is not configured
2. Default values are in boldface.
Function Selection Comments
Serial port
Serial port
Enabled
Disabled
Infrared
Infrared
Enabled
Disabled
Parallel port
Parallel port
Enabled
Disabled
I/O address and IRQ:
3F8 IRQ4
2F8 IRQ3
3E8 IRQ4
2E8 IRQ3
I/O address and IRQ:
3F8 IRQ4
2F8 IRQ3
3E8 IRQ4
2E8 IRQ3
(Enabled)
Mode:
– Output only
– Bi-directional
– ECP
I/O address and IRQ:
– 378/IRQ7
– 378/IRQ5
– 278/IRQ7
– 278/IRQ5
– 3BC/IRQ7
– 3BC/IRQ5
(Disabled)
Mode:
– Output only
– Bi-directional
– ECP
You can select the base I/O address if you
enable this function.
You can select the base I/O address if you
enable this function.
You can select the base I/O address if you
enable this function.
Disabled
:
Chapter 6. Resolving system resource conflicts 67
Page 74

Function Selection Comments
PCI
1st PCI IRQ
2nd PCI IRQ
3rd PCI IRQ
4th PCI IRQ
Keyboard/mouse
Fn key lock Disabled
Typematic rate Normal
TrackPoint Disabled
Power
Power mode for ac Customized
Power mode for battery Customized
Processor speed Fixed Max
Suspend timer
LCD-off timer
Disabled
3
4
5
7
9
10
11
15
Enabled
Fast
Enabled
AutoDisable
Maximum Battery Life
Maximum Performance
Maximum Battery Life
Maximum Performance
Fixed Medium
Fixed Slow
Auto Medium
Auto Slow
Disabled
1 Minute
2 Minutes
3 Minutes
5 Minutes
10 Minutes
15 Minutes
20 Minutes
25 Minutes
30 Minutes
45 Minutes
60 Minutes
You can set up the PCI IRQ.
You can enable or disable the Fn key lock.
You can set up the typematic rate of the
keyboard.
You can set up the TrackPoint.
You can set the power mode when you are
using ac power.
You can set the power mode when you are
using the battery pack.
Auto medium and auto slow change the
processor speed automatically between ac
power and battery power.
You can set this function if you select
Customized for the power mode for the
battery.
You can set the LCD-off timer and suspend
timer.
You can set this function if you select
Customized for the power mode for the
battery.
68 IBM ThinkPad 570 Online Book
Page 75

Function Selection Comments
HDD-off timer Disabled
3 Minutes
5 Minutes
10 Minutes
20 Minutes
Hibernating by timer Disabled
Enabled
Low-battery action Suspend
Hibernation
Suspending when LCD is
closed
Suspending or Hibernating
while docked
RediSafe Disabled
Resume on time
Disabled
Enabled
Resume on modem ring Disabled
Screen blanking Disabled
Power switch mode On/Off
Suspend-to-hibernation
timeout
CD-ROM speed High
CPU power management Disable
No suspend
Suspend
Disabled
Enabled
Enabled
Resume Timer [00:00:00]
Resume Date [00:00:0000]
Enabled
Enabled
Hibernation
Disabled
30 Minutes
60 Minutes
90 Minutes
Normal
Silent
Automatic
You can set the HDD-off timer.
You can set this function if you select
Customized for the power mode for the
battery.
You can set the hibernation timer.
You can set the low-battery action.
If you select No suspend, the computer
doesn't enter suspend mode when you
close the LCD.
If you select Enabled, the computer enters
suspend or hibernation mode automatically
when you dock your computer to the
docking station.
If you want to enable RediSafe, you need
to create the hibernation file with the
ThinkPad Configuration program.
You can set the resume time.
If you enable this function, your computer
resumes when an incoming call occurs.
If you use your computer to make a
presentation, disable this function to avoid
the LCD blanking.
If you select hibernation, you can switch
between hibernation mode and operational
mode with the power switch.
You can set the timer to specify when the
computer enters hibernation mode from
suspend mode.
You can set the CD-ROM speed.
You can enable or disable this
power-saving feature, witch stops the
processor clock automatically when there is
no system activity. You usually don't need
to change the function.
Chapter 6. Resolving system resource conflicts 69
Page 76

Function Selection Comments
PCI Bus Power
Management
Alarm
Power control beep Disabled
Low-battery alarm Disabled
Volume beep Disabled
Other
Resetting configuration data No
Booting the display device LCD
HV expansion Off
Brightness High
Startup screen Enabled
RPL token ring speed 4
Disable
Automatic
Enabled
Enabled
Enabled
Yes
CRT
Both
On
Normal
Disabled
16
You can enable or disable this
power-saving feature, which stops the PCI
bus clock automatically when there is no
system activity. You usually don't need to
change the function.
If you enable this function, a beep sounds
when the computer enters a power
management mode and when it resumes
operational mode. There is also a beep
when the AC Adapter is connected or
disconnected.
You can enable or disable the low-battery
alarm.
If you enable this function, a beep sounds
when you change the volume by pressing
Fn+PgUp or PgDn.
Select Yes if you want to reset your
configuration data.
You can select the boot video device.
You can control the LCD horizontal and
vertical expansion state.
If you select High, the brightness of the
LCD is always the same under either ac
power or battery power. High diminishes
the battery power.
If you enable this function, the IBM logo
always appears on the LCD when the
computer boots.
If you user the remote program loading
(RTP) system through the token ring card,
you can set its speed.
Default resource assignments
To see the default resource assignment, go to the appropriate
section:
70 IBM ThinkPad 570 Online Book
Page 77

Default IRQ assignments
System resources and IRQs
Default IRQ assignments
The following table shows the default system resource assigned for
each IRQ:
IRQ value Assignment
0 Timer
1 Keyboard
2 Cascade
3 Not used
4 Not used
5 Audio (set by device driver)
6 Diskette
7 Parallel port
8 Real-time clock
9 Not used
10 Not used
11 PCI
12 Auxiliary device
13 Math co-processor
14 Primary IDE
15 Secondary IDE (in the ThinkPad 570 UltraBase)
System resources and IRQs
The following table shows the available system resources for your
computer and the port replicators. The values in parentheses are
alternate values that are selectable from the ThinkPad Configuration
program or from an application program. The default values are
highlighted in boldface.
Chapter 6. Resolving system resource conflicts 71
Page 78

System resources IRQ I/O address (hex) Memory address
(hex)
Audio accelerator PCI IRQ (3, 4, 5, 7, 9,
10, 11, or 15)
CD-ROM and DVD
drive in UltraBay II
Diskette controller 6 03F0–03F5, and 03F7 None 2
Game device (set by
device driver)
Hard disk drive 14 01F0–01F7 and 03F6 None None
Infrared port
OS other than
Windows NT 4.0
Joystick port (set by
device driver)
Keyboard 1 0060 and 0064 None None
Math co-processor
exception
Modem PCI IRQ (3, 4, 5, 7, 9,
Parallel port 7 03BC–03BE and
15 0170–0177, and 0376, None None
5 0220–022F,
5, 7, 9, or 10 0220–022F,
4
3
4
3
3, 4, 5, or 7
Disabled
200–207 None None None
13 None None None
10, 11, 15)
7 0378–037F and
5 0278–027F and
Disabled Disabled
PCI memory None
None 1, 2, or 3
0240–024F
and 0388–038B,
None 1
0240–024F 0260, or
026F
and
0388–038B,
0390–0393, 0398, or
039B
03F8–03FF
02F8–02FF
03E8–03EF
02E8–02EF
03F8–03FF,
02F8–02FF
03E8–03EF, or
02E8–02EF
Disabled
PCI I/O PCI memory None
07BC–07BE
0778–077A
0678–067A
DMA
channel
0, 1, or 3
0, 1, or 3
0, 1, or 3
72 IBM ThinkPad 570 Online Book
Page 79

System resources IRQ I/O address (hex) Memory address
(hex)
PC Card (Dependent on the PC
Card type)
PC Card controller
(CardBus)
Real-time clock 8 0070–0071 None None
Serial port 4
Timer 0 0040–0043
TrackPoint or mouse 12 0060 and 0064
Video PCI IRQ (3, 4, 5, 7, 9,
PCI IRQ (3, 4, 5, 7, 9,
10, 11, 15)
3
4
3
Disabled
10, 11, 15)
(Dependent on the PC
Card type)
03E0–03E1 (the PC
Card slot in the
docking station:
03E2–03E3) or none
03F8–03FF
02F8–02FF
03E8–03EF
02E8–02EF
Disabled
03B0–03BB or
03C0–03DF
(Dependent on the PC
Card type)
(PCI memory)
A0000–BFFFF,
C0000–CBFFF, or PCI
memory
DMA
channel
None
None
Notes:
1. PCI I/O and PCI memory are automatically set by the system.
2. IRQ 5 and 7 cannot be set for infrared by Windows NT 4.0.
3. Joystick and game device resources are set by the device driver.
4. For Windows 95 OSR2 or Windows 98, memory-mapped I/O is used instead of the I/O address.
Chapter 6. Resolving system resource conflicts 73
Page 80

74 IBM ThinkPad 570 Online Book
Page 81

Chapter 7. Frequently asked questions
Frequently asked questions
This section addresses frequently asked questions. Click the button
in the following chart and do the specified action.
Questions Page
How can I stop the screen from blanking? 76
How can I set the infrared port? 76
How can I set the serial connector? 77
How can I switch the TrackPoint and mouse? 78
How can I set the display resolution? 78
How can I set the external monitor? 79
How can I maximize battery life? 80
How can I install the operation system? 81
How can I use the Recovery CD? 81
Copyright IBM Corp. 1999 75
Page 82

To solve the problems discussed in this section, you need to use the
ThinkPad Configuration program. To start the ThinkPad
Configuration program, find the ThinkPad icon on the taskbar; then
double-click the icon.
Note: You can also open the ThinkPad Configuration program as
follows:
1.
Click Start.
2.
Move the cursor to Programs and ThinkPad; then click
ThinkPad Configuration.
For more information on how to start the ThinkPad Configuration
program
My screen keeps blanking when I do not want it to. How can I
stop this?
User's Reference
You can disable any system timers, such as the LCD turnoff
timer or the system standby timer, with the ThinkPad
Configuration program.
1
Start the ThinkPad Configuration program.
2
Click the Power Management button; then click the
Power Schemes tab.
.
You can disable the system timers by selecting never
rather than a specific time.
How can I use my infrared port as a communication port?
If the infrared port is disabled, you must enable it before you
can use it again. To enable your infrared port, do as
follows:
1
Save your work and quit any program you are using.
2
Start the ThinkPad Configuration program.
3
Click the Infrared button.
4
Select Enable from the Infrared list box.
A “Warning” might appear that the hardware resource
is being used by another communication device.
76 IBM ThinkPad 570 Online Book
Page 83

5
Click Disable Device.
Another “Warning” window prompts you to restart your
computer.
6
Click OK. The computer restarts.
Notes:
1. If you check your infrared port and it is already enabled,
you can use it immediately without changing any
settings.
2. You can disable your computer's serial connector to free
resources for another communication device, such as
the infrared port.
After your infrared port is enabled, you can use it as a
communication port. If it does not work properly, you might
have a problem with your communication software or the
device that you are trying to communicate with. Check the
online help for your communication software if the other
device appears to be working properly.
How can I use my serial connector as a communication port?
If the serial connector is disabled, you must enable it before
you can use it again. To enable your serial connector, do
as follows:
1
Save your work and any program you are using.
2
Start the ThinkPad Configuration program.
3
Click the Serial Port button.
4
Select Enable from the Serial port list box.
A “Warning” might appear that the hardware resource
is being used by another communication device.
5
Click Disable Device.
Another “Warning” window prompts you to restart your
computer.
6
Click OK. The computer restarts.
Chapter 7. Frequently asked questions 77
Page 84

Notes:
1. If you check your serial connector and it is already
enabled, you can use it immediately without changing
any settings.
2. You can disable your computer's infrared port to free
resources for another communication device, such as
the serial connector.
After your serial connector is enabled, you can use it as a
communication port. If it does not work properly, you might
have a problem with the communication software application
or the cable or device attached to the serial connector.
Check the online help system for your communication
software if the cable and attached device appear to be
working properly.
How can I use an external mouse when I am at my desk, but
then use the TrackPoint when I am away from my desk?
The TrackPoint has an “auto disable” setting that disables it
when you power on or restart the computer with an external
mouse attached. When you want to enable the TrackPoint,
remove the external mouse; then restart the computer.
Note: You can set up the TrackPoint manually with the
ThinkPad Configuration program as follows:
1
Start the ThinkPad Configuration program.
2
Click the TrackPoint button.
3
Select enable, disable, or auto disable from
the TrackPoint list box.
4
Click OK.
Why do I not get the highest possible resolution out of my
external monitor when I am using the LCD and external monitor
at the same time?
You can set any resolution for either the ThinkPad LCD or
the external monitor. When you use both at the same time,
the resolution of both is the same. If you set a higher
resolution for the ThinkPad LCD, you can see only part of
78 IBM ThinkPad 570 Online Book
Page 85

the screen at a time. You can see other parts by moving
the image with the TrackPoint or another pointing device.
You can change the display output type to the LCD,
external monitor (CRT), or both with the Display Device
buttons of the ThinkPad Configuration program or with
Fn+F7.
You can set up the external monitor as follows:
1
Double-click My Computer, Control Panel, and then
Display.
The “Display Properties” window appears.
2
Click the Settings tab.
3
Click the Advanced... button.
4
Click the Monitor tab.
5
Click the Change... button.
The “Update Device Driver Wizard” window appears.
6
Click the Next button, and follow the instructions on
the screen by selecting Display a list of all the
drivers in a specific location, so you can select the
driver you want; and then Show all hardware.
7
Select Manufacturers and Models for your monitor,
and follow the instructions on the screen.
8
Click OK to close the “Properties” window after
updating the driver.
9
Set Colors and Screen area in the “Display
Properties” window.
10
Click the OK button.
How can I set up the external monitor if the Windows
plug-and-play feature does not detect it?
Do as follows:
1
Make sure that the external monitor is a DDC or
plug-and-play monitor (see the manual for the external
monitor).
Chapter 7. Frequently asked questions 79
Page 86

2
Make sure you are using a D-Sub (Subminiature-D)
connector cable.
3
Double-click My Computer, Control Panel, and then
Display.
The “Display Properties” window appears.
4
Click the Settings tab.
5
Click the Advanced... button.
6
Click the Monitor tab.
7
Make sure the Automatically detect Plug & Play
monitors check box is selected.
If not, select the check box, and click OK to close the
window. Restart the computer; then make sure the
plug-and-play feature detects the monitor.
8
If your monitor is still not recognized, click the
Change... button. The “Update Device Driver Wizard”
window appears.
9
Check if the display driver information in the window is
correct. If necessary, install the display driver by
following the instructions on the screen.
10
Click the OK button.
How can I maximize battery life?
To maximize battery life, do the following:
Use the battery until the charge is completely depleted
(until the battery and power LEDs flash in unison).
Recharge the battery completely before using (the
battery is fully charged when the AC Adapter is
plugged in and the battery LED is green).
For a new battery or a battery that you have not used
recently:
1. Recharge completely before using (the battery is
fully charged when the AC Adapter is plugged in
and the battery LED is green).
80 IBM ThinkPad 570 Online Book
Page 87

2. Use the battery until the charge is completely
depleted (until the battery and power LEDs flash
in unison).
Always use power management features such as
power modes, standby, suspend, and hibernation.
For more detailed information about power
management features
“Using the battery pack”
on page 26.
How can I load a different operating system on my computer?
–Or–
Where can I get ThinkPad device drivers for this operating
system?
See Installing a new operating system and its device drivers
for information on installing a new operating system and
device drivers.
You can get the ThinkPad device drivers by using the
Diskette Factory. Before installing a new operating system,
do the following:
1. Print Installing a new operating system and its device
drivers.
2. Make backup diskettes of the device drivers and
applications for your new operating system with the
Diskette Factory. For more information
Reference
.
User's
3. Make a DOS system diskette that has the DOS
FDISK.COM and FORMAT.COM utilities and the
CD-ROM device driver for DOS.
How can I use the Recovery CD to reload my factory-installed
ThinkPad operating system and applications?
User's Reference
Chapter 7. Frequently asked questions 81
.
Page 88

82 IBM ThinkPad 570 Online Book
Page 89

Chapter 8. Installing software
This section provides procedures for installing an operating system
and the necessary software.
Installing a new operating system and its device drivers .... 84
Installing software for Windows 98 ................. 85
Overall procedure . . . . . . . . . . . . . . . . . . . . . . . . . 85
Installing Microsoft Windows 98 ................. 86
Installing software for Windows 95 ................. 88
Overall procedure . . . . . . . . . . . . . . . . . . . . . . . . . 89
Installing Microsoft Windows 95 ................. 90
Installing Windows 95 OSR1 ................. 90
Installing Windows 95 OSR2.1 or OSR2.5 ......... 91
Installing software for Windows NT Version 4.0 ......... 95
Overall procedure . . . . . . . . . . . . . . . . . . . . . . . . . 95
Installing Microsoft Windows NT ................ 96
Copyright IBM Corp. 1999 83
Page 90

Installing a new operating system and its device drivers
Note
You need a CD-ROM Drive and the ThinkPad 570 UltraBase,
available as an option, to use the Software Selections CD.
If you want to install a new operating system in your computer, you
need to install the ThinkPad device drivers for it at the same time.
The Software Selections CD includes the preloaded software and
ThinkPad device drivers for Windows 98, Windows 95, and Windows
NT.
This section describes how to install a supported operating system
and corresponding device drivers using the Software Selections CD.
You should print the sections you will be using before you reinstall
the operating system. Go to appropriate section depending on the
operating system you are using.
The following table shows the country code that you will need in the
instructions:
Country Code Country Code
Denmark DK Netherlands NL
Finland FI Norway NO
France FR Spain SP
Germany GR Sweden SW
Italy IT United States US
Japan JP
Installing software for Windows 98
Installing software for Windows 95
Installing software for Windows NT Version 4.0
84 IBM ThinkPad 570 Online Book
Page 91

Installing software for Windows 98
This section describes the installation procedures for Windows 98
and its software for your computer using the Software Selections CD.
Note: You can install Windows 98 by restoring the original preloaded
image from the Recovery CD. Refer to the
for how to use the Recovery CD.
Overall procedure
1
Have the Windows 98 installation package in hand.
2
Back up your software and personal data files on the hard disk.
3
Install Windows 98.
4
Insert the Software Selections CD into the CD-ROM drive.
The Software Selections main window appears.
5
Click Install Software.
6
Click the View All radio button above the “Program Name” list
window.
All the device drivers and other programs in the Software
Selections CD are listed.
User's Reference
7
Select the check box of the device drivers and programs that
you want to install.
You can select multiple device drivers and programs.
8
Click the Install button at the bottom right of the window, and
follow the instructions on the screen.
You need to install at least the following device drivers if you
are restoring your ThinkPad computer to its original state at the
time of purchase:
ThinkPad Configuration program
Display driver
Audio device driver
TrackPoint driver
ThinkPad modem driver
Chapter 8. Installing software 85
Page 92

ThinkPad UltraBase hot/warm swap driver
For details on how to use the Software Selections CD, refer to its
help.
Installing Microsoft Windows 98
Notes:
1. If you are installing Windows 98 on a drive other than the C
drive, more than 25 MB is required on the C drive.
2. To use the CD-ROM drive to install Windows 98, create the
Startup Disk for Windows 98, which enables you to use the
CD-ROM drive. Then boot the system with the diskette.
To create the Startup Disk for Windows 98, do as follows:
a) Insert a blank diskette into the diskette drive.
b) Open the Control Panel window.
c) Double-click Add/Remove Programs.
d) Click the Startup Disk tab.
e) Click Create Disk...
f) Follow the instructions on the screen.
1
Insert the Windows 98 CD-ROM into the CD-ROM drive.
2
Search for SETUP.EXE in the CD-ROM, and run the
SETUP.EXE. Type the following:
src_cd:\tgt_dir\SETUP.EXE
where src_cd is the drive letter of the CD-ROM drive and
tgt_dir is the directory that SETUP.EXE is in.
For more information, refer to the SETUP.TXT in the Windows
98 CD-ROM.
3
Press Enter.
4
After Windows 98 is installed, replace the Windows 98
CD-ROM with the Software Selections CD.
5
Click Start.
6
Click Run...
86 IBM ThinkPad 570 Online Book
Page 93

7
Type the following:
src_cd:\DATA\WIN98\cc\WIN98SUPP\PIXX4\APM2APM\APM2APM.REG
where src_cd is the drive letter of the CD-ROM drive and cc is
the respective country code.
8
Click OK.
9
Follow the instructions on the screen.
10
To support 1280 x 1024 resolution, do as follows:
a) Click Start.
b) Move the cursor to Program and click MS-DOS Prompts.
c) Change the directory to C:\WINDOWS\INF
d) Type the following:
COPY src_cd:\DATA\WIN98\cc\WIN98SUPP\RTMINF\MONITOR.INF C:
where src_cd is the drive letter of the CD-ROM drive and
cc is the respective country code.
e) Press Enter. MONITOR.INF in the WIN98SUPP directory is
copied to drive C.
f) Enter EXIT to close the DOS prompts.
11
After the installation has finished, remove the Software
Selections CD from the CD-ROM drive and restart the
computer.
Note: Depending on the optional applications you install with
Windows 98, your required disk space varies. The following
information applies to installing only Windows 98 in your
computer:
Full installation on a FAT 16 drive:
About 225 MB disk space is required. Depending on your
system configuration and the options you select, the
required space ranges from 165 MB to 355 MB.
Full installation on a FAT 32 drive:
About 175 MB disk space is required. Depending on your
system configuration and the options you select, the
required space ranges from 140 MB to 225 MB.
Chapter 8. Installing software 87
Page 94

Installing software for Windows 95
This section describes the installation procedures for Windows 95
and its software for your ThinkPad computer.
The following versions of Windows 95 are available for your
computer:
Service Pack Version 1 (OSR1)
OEM Service Release Version 2.1 (OSR2.1)
OEM Service Release Version 2.5 (OSR2.5)
The SP1 can be downloaded from the Microsoft Web site
http://www.microsoft.com/windows/downloards/contents/updates
Your version of Windows 95:
You can check which version of Windows 95 you are using by
clicking Start and moving the cursor to Settings and Control
Panel, and then double-clicking Control Panel and System.
The following window appears:
You can check the version in this window. Read the numbers
under “System.”
4.00.950a means that it is Windows 95 OSR1
4.00.950B means that it is Windows 95 OSR2.1
4.00.950C means that it is Windows 95 OSR2.5
88 IBM ThinkPad 570 Online Book
Page 95

Overall procedure
1
Have the Windows 95 installation package in hand.
2
Back up your software and personal data files on the hard disk.
3
Install Windows 95.
4
Insert the Software Selections CD into the CD-ROM drive.
The Software Selections main window appears.
5
Click Install Software.
6
Click the View All radio button above the “Program Name” list
window.
All the device drivers and other programs in the Software
Selections CD are listed.
7
Select the check box of the device drivers and programs that
you want to install.
You can select multiple device drivers and programs.
8
Click the Install button at the bottom right of the window, and
follow the instructions on the screen.
You need to install at least the following device drivers if you
are restoring your ThinkPad computer to its original state at the
time of purchase:
ThinkPad Configuration program
Notes:
a) The ThinkPad Configuration program is supported by
Windows 95 OSR2.0 and later.
b) You need to install Internet Explorer Version 4.0 or
later.
Display driver
PC Card support software
Audio device driver
TrackPoint driver
ThinkPad modem driver
ThinkPad UltraBay hot/warm swap driver
Chapter 8. Installing software 89
Page 96

For details on how to use the Software Selections CD, refer to its
help.
Installing Microsoft Windows 95
Some new files must be incorporated at the time of installation.
Note: To use the CD-ROM drive to install Windows 95, create the
Startup Disk for Windows 95, which enables you to use the
CD-ROM drive. Then boot the system with the diskette.
To create the Startup Disk for Windows 95, do as follows:
1. Insert a blank diskette into the diskette drive.
2. Open the Control Panel window.
3. Double-click Add/Remove Programs.
4. Click the Startup Disk tab.
5. Click Create Disk...
6. Follow the instructions on the screen.
Installing Windows 95 OSR1
1
Make sure there is enough space in the hard disk to store the
cabinet files and the installation programs (the required space
might vary depending on the national language supported by
your version of Windows 95).
2
Make a temporary directory.
For example, at the DOS prompt, type the following:
MD c:\win95
and press Enter.
3
Insert the Windows 95 CD-ROM into the CD-ROM drive.
4
Copy all the cabinet (.CAB) files and the installation programs
from the \WIN95 directory of the Windows 95 CD-ROM to the
temporary directory.
At the DOS prompt, type the following:
COPY src_cd:\WIN95\ . c:\win95
90 IBM ThinkPad 570 Online Book
Page 97

where src_cd is the drive letter of the CD-ROM drive, c is the
drive letter of your hard disk drive, and win95 is the temporary
directory that you made in step 2.
5
Press Enter.
6
Replace the Windows 95 CD-ROM with the Software
Selections CD.
7
Copy the Windows 95 supplementary files from the Software
Selections CD to the temporary directory.
At the DOS prompts, type the following:
COPY src_cd:\DATA\WIN95\cc\OSR INF\ . c:\win95
where src_cd is the drive letter of the CD-ROM drive, cc is the
respective country code, c is the drive letter, and win95 is the
temporary directory that you made in step 2.
8
Press Enter.
9
Install the operating system by entering SETUP.EXE at the
temporary directory prompt.
10
Refer to the Windows 95 documentation and the instructions
that appear on the screen to complete the installation.
11
To activate the PC Card slot, double-click the PC Card icon in
the Control Panel. The PC Card Wizard window launches.
Click No twice, and reboot the computer.
12
If required, install the Service Pack Version 1, available from
the Microsoft Web site.
13
Remove all the files in the temporary directory and then remove
the directory itself after you complete the installation, to free the
space on the hard disk.
Installing Windows 95 OSR2.1 or OSR2.5
If you have a CD-ROM version of Windows 95 OSR2.1, do the
following:
1
Make sure there is enough space in the hard disk to store the
cabinet files and the installation programs (the required space
Chapter 8. Installing software 91
Page 98

might vary depending on the language supported by your
version of Windows 95).
2
Make a temporary directory.
For example, at the DOS prompt, type the following:
MD c:\win95
and press Enter.
3
Insert the Windows 95 CD-ROM into the CD-ROM drive.
4
Copy all the cabinet (.CAB) files and the installation programs
from the \WIN95 directory of the Windows 95 CD-ROM disk to
the temporary directory.
At the DOS prompt, type the following:
COPY src_cd:\WIN95\ . c:\win95
where src_cd is the drive letter of the CD-ROM drive, c is the
drive letter of your hard disk drive, and win95 is the temporary
directory that you made in step 2.
5
Press Enter.
6
Replace the Windows 95 CD-ROM with the Software
Selections CD.
7
Copy the Windows 95 supplementary files from the Software
Selections to the temporary directory.
At the DOS prompt, type the following:
COPY src_cd:\DATA\WIN95\cc\OSR2INF\ . c:\win95
where src_cd is the drive letter of the CD-ROM drive, cc is the
respective country code, c is the drive letter, and win95 is the
temporary directory that you made in step 2.
8
Press Enter.
9
Type the following:
COPY src_cd:\DATA\WIN95\cc\CARDBUS\ . c:\win95
10
Press Enter.
92 IBM ThinkPad 570 Online Book
Page 99

11
Install the operating system by entering SETUP.EXE at the
temporary directory prompt.
12
Refer to the Windows 95 documentation and the instructions
that appear on the screen to complete the installation.
Disregard the instruction to install the USBD.SYS and UHCD.SYS
files.
13
Replace the Software Selections CD with the Windows 95
CD-ROM.
14
Change the current drive letter to the CD-ROM drive letter, and
run USBSUPP.EXE and USBUPD2.EXE in the \OTHERS\UPDATES\USB
directory of the CD-ROM.
15
Replace the Windows 95 CD-ROM with the Software
Selections CD.
16
At the DOS prompt, type the following:
src_cd:\DATA\WIN95\cc\QFE444\PCCARDUP.EXE
where src_cd is the drive letter of the CD-ROM drive and cc is
the respective country code.
17
Press Enter.
18
Reboot the system.
19
To replace the Unimodem drivers to support the Intel Video
Phone application, from the DOS prompt, go to
C:\WINDOWS\SYSTEM (or the SYSTEM subdirectory where Windows
95 is installed).
20
Rename the UNIMODEM.VXD and UNIMDM.TSP files by entering:
REN UNIMODEM.VXD UNIMODEM.BAK
REN UNIMDM.TSP UNIMDM.BAK
21
Copy the new files by typing the following:
COPY src_cd:\DATA\WIN95\cc\UNIMODEM\ .
where src_cd is the drive letter of the CD-ROM drive and cc is
the respective country code.
Chapter 8. Installing software 93
Page 100

22
Press Enter.
23
Refer to the documentation shipped with this version to finish
the installation.
24
To activate the PC Card slot, double-click the PC Card icon in
the Control Panel. The PC Card Wizard window launches.
Click No twice, and reboot the computer.
94 IBM ThinkPad 570 Online Book
 Loading...