

Page 1
ibiMaster 250 / ibiMaster 250e
CZ
H
RUS
Instruction Manual
Manuel d’utilisation
Bedienungsanleitung
Manuale d’istruzioni
Gebruiksaanwijzing
Manual de instrucciones
Manual de instruçöes
Bruksanvisning
Instrukcja obsługi
Návod k obsluze
Használati útmutató
Руководство по
ксплуaтaции
EDNord - Istedgade 37A - 9000 Aalborg - telefon 96333500
Page 2
1a
4
2a
1b 2b
5
6
3
D1
A
D
B
C
A
A1
D
B
C
D1
EDNord - Istedgade 37A - 9000 Aalborg - telefon 96333500
Page 3
ibiMaster 250 / ibiMaster 250e
250e only - Electrical safeguards
250e only - Safety instructions
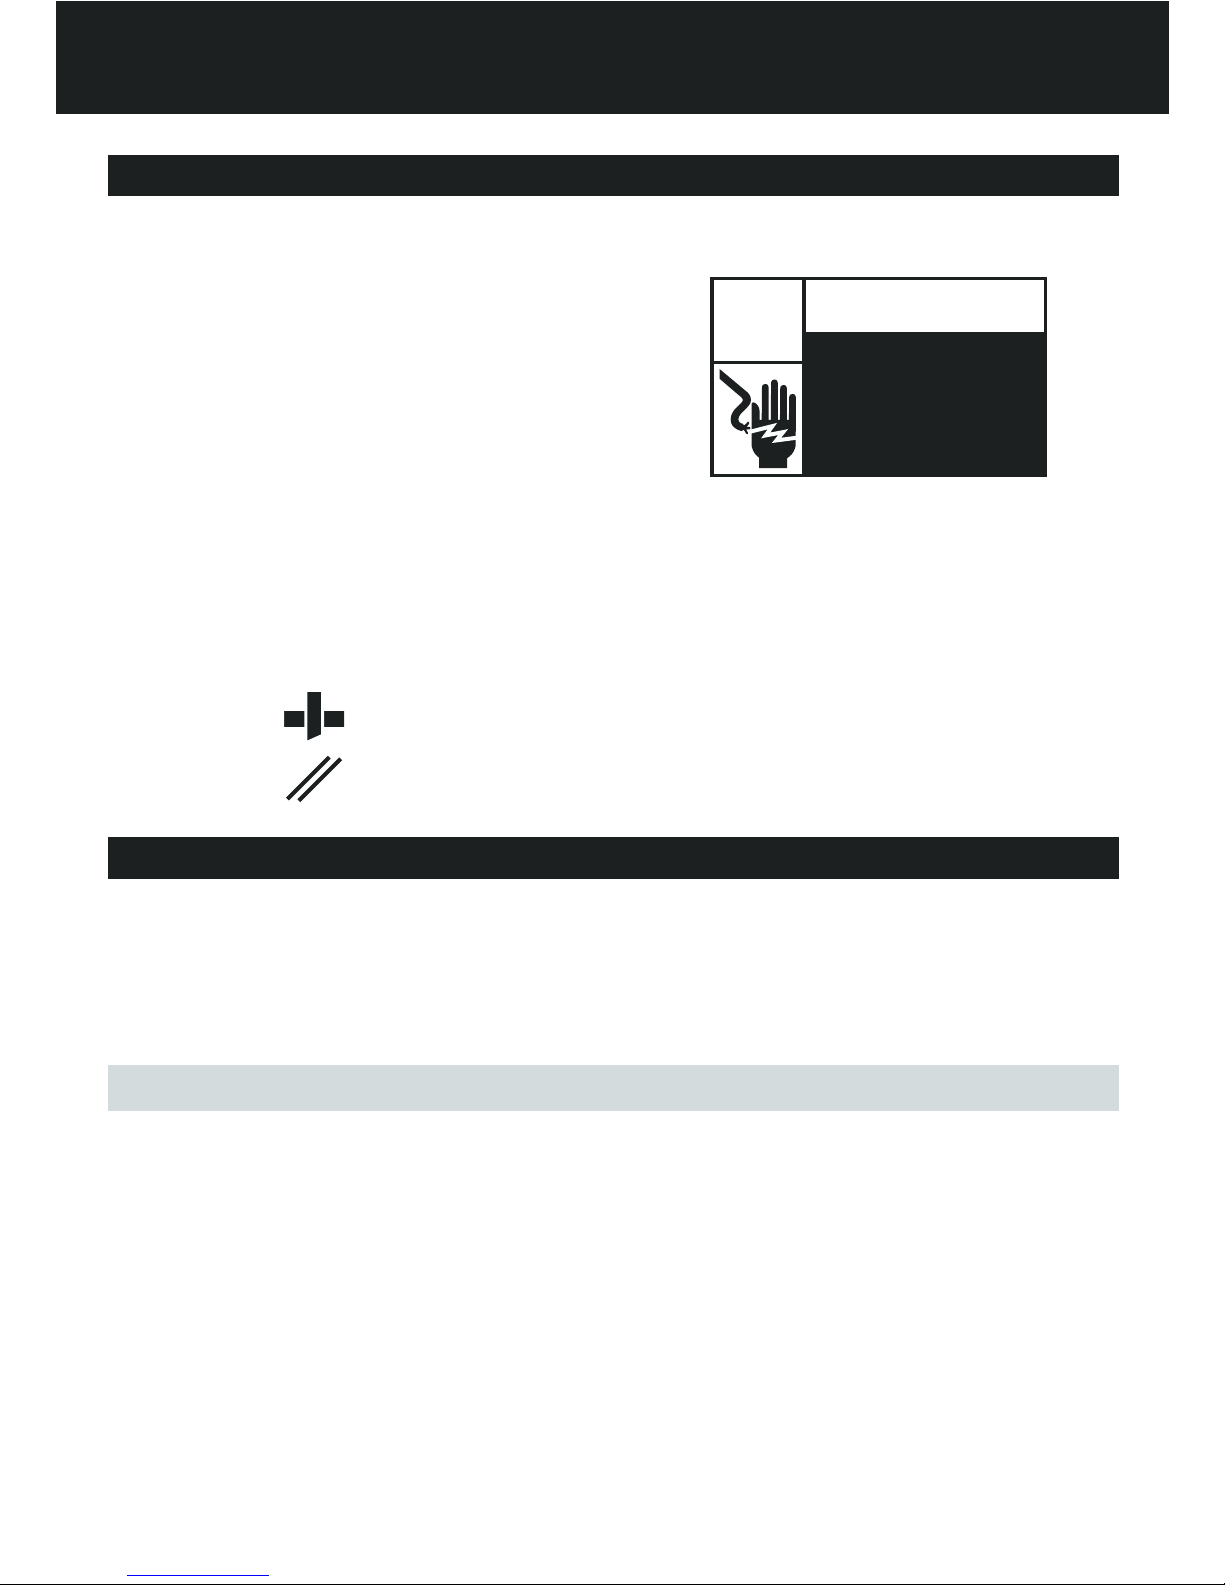
YOUR SAFETY AS WELL AS THE SAFETY OF OTHERS IS
IMPORTANT TO IBICO. IN THIS INSTRUCTION MANUAL
AND ON THE PRODUCT ARE IMPORTANT SAFETY
MESSAGES. READ THESE MESSAGES CAREFULLY.
THE FOLLOWING WARNING IS FOUND ON THE BOTTOM
OF THE PRODUCT.
This safety message means that you could be seriously
hurt or killed if you open the product and expose yourself
to hazardous voltage.
Electrical shock hazard.
Do not open. No user
servicable parts inside.
Refer servicing to qualified
service personnel.
WARNING
THE SAFETY ALERT SYMBOL PRECEDES
EACH SAFETY MESSAGE IN THIS
INSTRUCTION MANUAL. THIS SYMBOL
INDICATES A POTENTIAL PERSONAL SAFETY
HAZARD THAT COULD HURT YOU OR OTHERS,
AS WELL AS CAUSE PRODUCT DAMAGE OR
PROPERTY DAMAGE.
250e only - Important safeguards
The following ISO and IEC symbols appear on this
product, and their meaning is as follows:
Punch
Reset
The ibiMaster 250e must be connected to a supply
voltage corresponding to the electrical rating of the
machine as indicated on the serial/rating plate or in
this manual.
CAUTION: THE POWER RECEPTACLE MUST BE
LOCATED NEAR THE EQUIPMENT AND
BE EASILY ACCESSIBLE.
CAUTION: IN CASE OF EMERGENCY, USE THE
POWER CORD AS A MAIN DISCONNECT
DEVICE!
• Unplug the unit before moving it, or when it is not in use
for an extended period of time.
• Do not operate with a damaged supply cord or plug, if it
is damaged, or malfunctions.
• Do not overload electrical outlets beyond their capacity;
fire or electrical shock could result.
• Do not alter attachment plug. Plug is configured for the
appropriate electrical supply.
• The unit is intended for indoor use only.
• Never push objects into this product through cabinet
slots. Do not spill liquid of any kind on this product.
• Do not operate if the product has been exposed to rain
or water.
WARNING: FOR YOUR PROTECTION DO NOT CONNECT THE IBIMASTER 250e TO ELECTRICAL POWER
UNTIL YOU READ THESE INSTRUCTIONS COMPLETELY. KEEP THESE INSTRUCTIONS IN A CONVENIENT
LOCATION FOR FUTURE REFERENCE. TO GUARD AGAINST INJURY, THE FOLLOWING BASIC SAFETY
PRECAUTIONS MUST BE OBSERVED IN THE SET-UP AND USE OF THIS PRODUCT.
EDNord - Istedgade 37A - 9000 Aalborg - telefon 96333500
Page 4

ibiMaster 250 / ibiMaster 250e
Getting started
250 only: Push the handle (A) (fig. 1a) onto the
punching shaft located on the right side of the
machine. Align the flat spot of the handle with the flat
of the shaft.
Secure handle with screwdriver.
250e only: Firmly push the female end of the power
cord into the power cord receptacle located at the
back of the machine.
CAUTION: Make sure this step is complete prior to
plugging the male end of the power cord
into a power receptacle.
Plug the male end of the power cord into an
appropriate power receptacle.
1
2
3
4
Determine sheet width
Set Edge Guide (B) to paper size you wish to bind
(11”, 8-1/2” letter size, 11-1/4” oversized cover,
A4 ring, A5, Japan A4) (see figure 1a/1b).
1
250e only - Cleaning
CAUTION: Unplug this product before cleaning.
• Wipe exterior only with a damp cloth.
Do not use detergents or solvents.
The following notes apply only to the units
rated 230 V 50Hz.
MAIN CORDSET SELECTION
(FOR 230 AV MACHINES ONLY)
When choosing a detachable line cord for use with the
ibiMaster 250e, always observe the following:
The cordset consists of three components; the attachment
plug, cordage and appliance inlet. Each of these
components must meet European regulatory approvals
for safety.
The following
minimum electrical ratings for the specific
cordset are published for safety purposes.
DO NOT USE CORDSETS THAT DO NOT MEET THE
FOLLOWING MINIMUM ELECTRICAL REQUIREMENTS.
PLUG: 3 A, 250 Volts, 50/60 Hz, Class 1,3 conductor,
European safety agency approved.
CORDAGE: Type H05W-F3G0.75, Harmonized ( HAR ).
The “ ” symbols indicate cordage approved to
appropriate European standard (NOTE: "HAR" may be
substituted by the approval mark of the European safety
agency which approved the cordage. An example would
be “ VDE ”.
APPLIANCE CONNECTOR: 3 A, 250 Volts, 50/60 Hz,
European safety approved, Type IEC 320. Cordset shall not
exceed 3 meters in length. Cordset with component
electrical ratings greater than the minimum specified
electrical ratings may be substituted.
General safeguards
• Use the unit only for its intended purposes.
• Do not place anything in the punch opening of the
machine other than paper and cover stock.
• Place unit on a secure, stable work area to prevent the
unit from falling and possibly causing personal injury
and damage to the unit.
• Follow all warnings and instructions marked on the unit.
• Lift the machine from the bottom, not the cover.
• Do not lift the machine by the cover or paper holder
wire.
EDNord - Istedgade 37A - 9000 Aalborg - telefon 96333500
Page 5

ibiMaster 250 / ibiMaster 250e
Determine plastic comb size
Slide the Binder Sizer open (c) (see figure 1a/1b).
Place document including covers behind Binder Sizer.
Release the Binder Sizer and select the comb binding
element that corresponds with the size shown by
guide. Only comb sizes up to 25 mm are shown.
Your ibiMaster can bind documents up to 425 sheets,
or 50 mm comb size. For best results, always use ibico
brand covers with ibico colour-coordinating binding
combs.
1 3
2
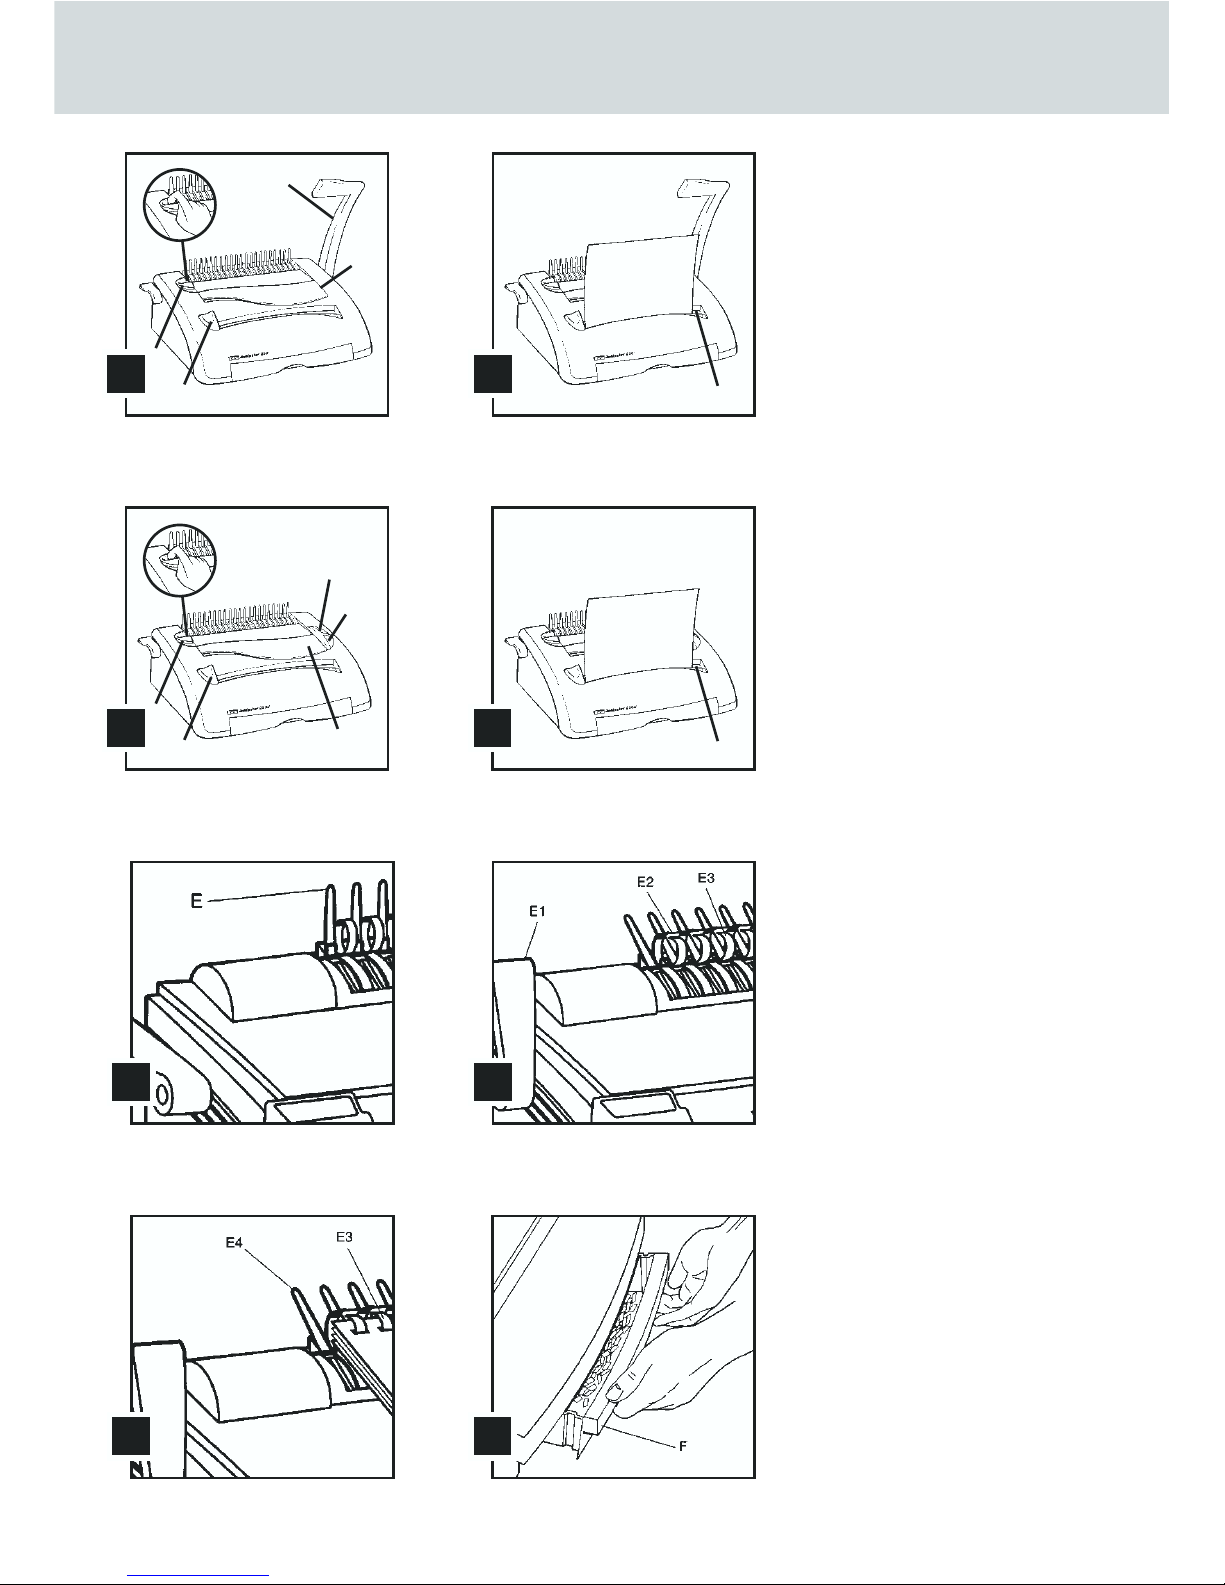
Punching paper (see figure 2)
Align sheets or covers and insert edge to be bound into
punch throat (D1) (see figure 2a/2b).
Jog the sheets until they are flush against the edge
guide and the bottom of the punch throat.
250 only: To punch, pull the Punch Handle (A) (fig.
1a) toward you. Pull all the way down to punch
completely through the paper. Punches up to 25 sheets
of 80gram paper at once. Punch only TWO clear
covers at a time to prevent jams and excessive wear.
250e only: To punch, press the punch button (A) (fig.
1b). The ibiMaster 250e punches up to 20 sheets of
80gsm at once. Punch only TWO clear covers at a time
to prevent jams and excessive wear.
250e only: If the punch jams, depress the reset
button (A1) (fig. 1b) then press the punch button (A)
(fig. 1b) again and remove the paper or covers from
the punch throat (it may be necessary to punch several
times in order to remove the paper). Repeat steps 1 to
3 with slightly less paper to avoid punch jams on
additional lifts.
Disengageable punching dies: If you require to punch
A5, a die can be disengaged from the punch by pulling
up the selector pin situated under the lid on top of the
machine (D) (see figure 1a/1b), when selector is down
the punching die is engaged, once again.
Margin Adjustment: The width of the margin between
the punched holes and the paper edge, can be
adjustered, depending on the thickness of the
document. Adjust the lever, situated on the left side of
the ibiMaster, by pulling it out or pushing it in,
according to the required margin thickness.
1
5
6
7
2
3
4
Binding
Place the Plastic Comb Binding Element behind the
Vertical Comb (E) with open portion of element facing
you (see figure 3).
Rotate the Bind lever up (E1) toward you until the
Comb Binding Element (E2) opens sufficiently to insert
your document (see figure 4).
Thread front cover finished side facing down (see
figure 5), onto open Binding Element Fingers (E3).
Thread pages, front facing down, onto element. Repeat
for large documents as required. Place the back cover,
finished side facing upwards on open Binding Element
Fingers last.
Push the Bind Lever away from you back to its original
position to close the Binding Element.
Remove book by lifting upward. Your presentation is
now complete!
Once you become familiar with your ibiMaster, you will
find that you can bind as you punch, increasing your
productivity.
1 4
5
6
2
3
EDNord - Istedgade 37A - 9000 Aalborg - telefon 96333500
Page 6

ibiMaster 250 / ibiMaster 250e
Guarantee
Operation of this machine is guaranteed for one year from
date of purchase, subject to normal use. Within the
guarantee period, GBC will at its own discretion either
repair or replace the defective machine free of charge.
Defects due to misuse or use for inappropriate purposes
are not covered under the guarantee. Proof of date of
purchase will be required. Repairs or alterations made by
persons not authorised by GBC will invalidate the
guarantee. It is our aim to ensure that our products
perform to the specifications stated. This guarantee does
not affect the legal rights which consumers have under
applicable national legislation governing the sale of goods.
Visit
www.gbceurope.com for more on binding with Ibico and GBC.
Specifications
Dimensions
Weight
Punch Capacity
Bind Capacity
Maximum Sheet Width
Dis-engagable Pins
ibico ibiMaster 250
457 mm x 216 mm x 406 mm
11.8 kg
25 sheets of 80 gm
2
paper
425 sheets (50 mm)
11.7" (297 mm A4)
11
ibico ibiMaster 250e
457 mm x 216 mm x 406 mm
15.2 kg
20 sheets of 80 gm
2
paper
425 sheets (50 mm)
11.7" (297 mm A4)
11
Service
• Do not attempt to service or repair the pouch laminator
yourself. Unplug the unit and contact an authorized ibico
service representative for any required repairs.
Empty chip drawer
Empty Chip Drawer (F) (see figure 6) after repeated
use. Pull drawer gently toward you to open. When
putting back in, the drawer will snap into place.
1
EDNord - Istedgade 37A - 9000 Aalborg - telefon 96333500
Page 7
ibiMaster 250 / ibiMaster 250e
250e - Mises en garde électriques
250e - Messages de sécurité
VOTRE SÉCURITÉ ET CELLE DES AUTRES A BEAUCOUP
D’IMPORTANCE POUR IBICO. CE MANUEL ET CE PRODUIT
COMPORTENT DES MESSAGES DE SECURITE IMPORTANTS.
VEUILLEZ LIRE CES MESSAGES ATTENTIVEMENT.
L’AVERTISSEMENT SUIVANT SE TROUVE SUR LE PRODUIT.
Ce message de sécurité signifie que vous pourriez être
gravement blessé ou tué si vous ouvrez ce produit et vous
exposez à une tension dangereuse.
Risque de choc électrique. Ne pas
ouvrir. Aucune pièce à l’intérieur ne
peut être entretenue par l’utilisateur.
Faire effectuer l’entretien par le
personnel d’entretien qualifié.
AVERTISSEMENT
LE SYMBOLE D’ALERTE DE SÉCURITÉ PRÉCÈDE
CHAQUE MESSAGE DE SECURITE DANS CE
MANUEL. CE SYMBOLE INDIQUE UN DANGER
POTENTIEL POUR VOTRE SÉCURITÉ
PERSONNELLE QUI POURRAIT VOUS BLESSER
OU BLESSER D’AUTRES PERSONNES AINSI
QU’ENDOMMAGER LE PRODUIT OU VOTRE
PROPRIETE.
AVERTISSEMENT : POUR VOTRE PROTECTION NE BRANCHEZ PAS LE IBIMASTER 250e AVANT DE LIRE
ENTIÈREMENT LES INSTRUCTIONS. CONSERVEZ CE MANUEL EN LIEU SÛR AFIN DE POUVOIR LE CONSULTER
ULTÉRIEUREMENT. POUR VOUS PROTÉGER CONTRE TOUTE BLESSURE, RESPECTEZ LES PRECAUTIONS DE
SÉCURITÉ DE BASE SUIVANTES DURANT L’INSTALLATION ET L’UTILISATION DE CE PRODUIT.
250e - Conseils de sécurité importants
Les symbole suivant apparaît sur ce produit et signifie :
Poinçonner
Reset
Le ibiMaster 250e doit être branché à une tension
d'alimentation correspondant source d’alimentation électrique
correspondant à celle indiquée sur l’étiquette placée sur
l’appareil.
ATTENTION : LA PRISE D'ALIMENTATION ÉLECTRIQUE
DOIT ÉTRE PLACÉ PRÈS DE
L'ÉQUIPMENT ET D'ACCÈS FACILE.
ATTENTION : EN CAS D'URGENCE, UTILISEZ LE
CORDON ÉLECTRIQUE COMME
SECTIONNEUR PRINCIPAL
• Débranchez le ibiMaster 250e avant de le déplacer ou
lorsqu’il n’est pas utilisé pendant de longues périodes.
• N’utilisez pas l’appareil avec un cordon ou une prise
endommagé, après un problème de fonctionnement ou
après que l’appareil ait été endommagé d’une façon ou
d’une autre.
• Ne surchargez pas les prises électriques au-delà de leur
capacité car cela pourrait provoquer des incendies ou des
chocs électriques.
• Ne modifiez pas la prise de branchement qui est configurée
pour l'alimentation électrique appropriée.
• Cet appareil est prévu pour une utilisation en intérieur
seulement.
• N’essayez pas d’introduire d’objets dans la fente de
perforation. Ne déversez aucun liquide sur ce produit.
• Ne faites pas fonctionner ce produit s'il a été exposé à la
pluie ou àl'eau.
EDNord - Istedgade 37A - 9000 Aalborg - telefon 96333500
Page 8

250 : Emboîtez la poignée (A) (fig. 1) dans l'axe de
perforation situé à droite de l'appareil.
Vérifiez le positionement de la poignée. Elle ne doit pas
heurter la table lorsque vous la tirez en avant pour perforer.
Fixez la poignée à l'aide du tournevis.
250e : Poussez fermement l'extrémité femelle du cordon
dans la prise de courant située à l'arrière de l'appareil.
ATTENTION : Assurez-vous de terminer cette étape avant
de brancher l'extrémité mâle du cordon
dans la prise de courant.
Branchez l'extrémité mâle du cordon dans la prise appropriée.
ibiMaster 250 / ibiMaster 250e
250e - Nettoyage
Precaution : Débranchez ce produit avant le nettoyage.
• Essuyez l’extérieur uniquement avec un chiffon humide.
N’utilisez pas de détergents ou de dissolvants.
Les notes suivantes s’appliquent seulement aux
appareils de tension 230 V 50Hz.
CHOIX DU CORDON AMOVIBLE PRINCIPAL
(POUR LES APPAREILS 230 V c.a. SEULEMENT)
En choisissant un cordon amovible pour le ibiMaster 250e,
respectez toujours les directives suivantes:
Le cordon amovible comprend trois composantes: la fiche
de branchement, le cordon et le connecteur. Chacun de ces
composants doit répondre aux réglementaires de sécurité
européennes.
Les tensions électriques
minimum suivantes pour le cordon
amovible spécifique sont publiées pour des raisons de sécurité.
N’UTILISEZ PAS LES CORDONS AMOVIBLES QUI NE RÉPONDENT
PAS AUX EXIGENCES ÉLECTRIQUES MINIMALES SUIVANTES.
FICHE : 3 A, 250 volts, 50/60 Hz, conducteur de classe 1,3 ;
approuvée par une agence européenne de sécurité.
CORDON : Type H05VV-F3G0.75 harmonisé ( HAR ). Les
symboles « » indiquent que le cordage a été approuvé selon
la norme européenne appropriée. (REMARQUE: « HAR » peut être
substitué par la marque d'approbation de l'agence de sécurité
européenne qui a approuvé le cordon. Un exemple serait
« VDE ».
CONNECTEUR D'APPAREIL MÉNAGER : 3 A, 250 volts,
50/60 Hz, conforme à une norme de sécurité européenne,
de type IEC 320. L’ensemble fiche/cordon/connecteur ne doit
pas dépasser 3 mètres de longueur. Un ensemble avec des
composants électriques ayant des capacités plus élevées que
le minimum requis.
Mise en fonctionnement
1
2
3
4
5
Determinez le format papier
Ajustez le guide latéral au format du papier à perforer (11"
pour du 19 anneaux, 11-1/4" pour les couvertures d'un
format supérieur à 19 anneaux, et A4 pour du 21 anneaux)
(fig. 1a/1b).
1
Mises en garde générales
• N’utilisez l’appareil qu’à ces fins et ne perforez aucun autre
matériau.
• Installez l’appareil sur une surface de travail stable et fixe pour
éviter qu’il ne tombe provoquant ainsi peut-être des blessures
personnelles ou des dommages.
• Une mauvaise installation et/ou une utilisation erronée ou non
conforme aux instructions exposées dans ce manuel peuvent
compromettre les caractéristiques de cet appareil.
• Soulever l'appareil du déplacez l’appareil en le soulevant par
dessous.
• Ne pas soulever l'appareil par le couvercle ou par le support
papier.
EDNord - Istedgade 37A - 9000 Aalborg - telefon 96333500
Page 9

ibiMaster 250 / ibiMaster 250e
Determinez le diametre de la reliure
Faites glisser le sélecteur de diamètre pour l'ouvrir
(fig. 1a/1b).
Placez le document, avec les couvertures, derriére le
sélecteur.
Relâchez le sélecteur et sélectionnez la reliure à anneaux
plastiques correspondant au diamètre déterminé par le
guide. Ne sont indiqués que les diamètres allant jusqu'à
25 mm mais votre ibiMaster peut relier des documents
jusqu'à 425 feuilles d'éspaisseur, soit 50 mm. Pour
obtenir de meilleurs résultats, sélectionnez des reliures
à anneaux plastiques ibico et des couvertures ibico aux
couleurs assorties.
1 3
2
Perforation
Alignez les feuilles et les couvertures et introduisez le côté
à perforer dans la fente de perforation (fig. 2a/2b).
Taquez les feuilles de façon à ce qu'elles soient bien
alignées contre le guide latéral et au fond de la fente de
perforation.
250 : Pour perforer, tirez la poignée vers vous (A) (fig.
1a). Tirez-la bien à fond pour perforer la totalité du papier.
L'appareil perfore jusqu'à 25 feuilles de papier 80g/m
2
par cycle de perforation. Ne perforez pas plus de DEUX
couvertures à la fois pour éviter les bourrages et une
usure prématurée de l'appareil.
250e : Pour perforer, appuyez sur le bouton PUNCH
(PERFORATION) (A) (fig. 1b). Le ibiMaster 250e perfore
jusq’à 20 feuilles de papier 80g/m
2
par cycle de
perforation. Ne perforez pas plus DEUX couvertures à la
fois pour éviter les bourrages et une usure prématurée de
l’appareil.
250e : En cas de bourrage, appuyez sur le bouton RESET
(REINITIALISATION) (A1) (fig. 1b). Puis appuyez sur le
bouton PUNCH (A) (fig. 1b) et retirez le papier ou lesw
couvertures de la fente de perforation (il peut être
nécessaire d’actionner plusieurs fois ce bouton pour
retirer les feuilles). En cas de nouveau bourrage, répétez
les étapes 1 à 3 en diminuant légèrement le nombre de
feuilles pour éviter toute surcharge de l’appareil.
Poinçons débrayables : Pour perforer un format A5, un
poinçon doit être désengagé en tirant vers le haut le
sélecteur se trouvant sur le dessus de la machine (D) (fig.
1a/1b), sous le couvercle. Pour réengager le poinçon,
appuyez à nouveau sur le sélecteur.
Profondeur de marge : La marge, entre le bord de la
feuille et les perforations, peut être ajustée selon
l’épaisseur du document. Réglez à l’aide de la manette,
située sur le côté gauche du perforelieur, selon la
profondeur de marge souhaitée.
1 5
6
2
3
7
4
Reliure
Positionnez la reliure à annwaux plastiques derrière son
support (E), partie ouverte face à vous (fig. 3).
Relevez le levier de reliure vers vous jusqu'à ce que les
anneaux de la reliure soit suffisamment ouverts pour
recevoir le document.
Insérez la couverture de dessus, recto dessous, dans les
anneaux de la reliure. Insérez ensuite les pages, toujours
recto dessous, dans les anneaux de la reliure. Pour les
documents éspais, répétez l'opération autant de fois que
nécessaire. Pour terminer, insérez enfin la couverture de
dessous, recto dessus.
Repoussez le levier de reliure pour refermer les anneaux
de la reliure plastique.
Soulevez votre document pour le dégager de la machine.
Votre document relié est prêt!
Une fois que vous serez habitué au fonctionnement de
votre appareil, vous verrez que sa conception permet de
perforer et de relier simultanément pour une plus grande
productivité.
1 4
5
6
2
3
EDNord - Istedgade 37A - 9000 Aalborg - telefon 96333500
Page 10

ibiMaster 250 / ibiMaster 250e
Dessin entretien
• Contactez le service technique agréé par ibico pour toute
réparation nécessaire.
Videz le tiroir a confettis
Videz régulièrment le tiroir à confettis (F) (fig. 6). Pour
l'ouvrir, tirez le document vers vous. Pour le remettre en
place, repoussez-le bein à fond.
1
Garantie
Le fonctionnement de cette machine est garanti pendant un
an à compter de la date d’achat, sous réserve de conditions
normales d’utilisation. Durant la période de garantie, GBC
choisira de réparer ou remplacer gratuitement la machine.
Les défauts dus à une mauvaise utilisation ou une utilisation
non appropriée ne sont pas couverts par cette garantie. La
preuve de la date d’achat sera demandée. Les réparations ou
modifications effectuées par des personnes non autorisées
par GBC invalideront la garantie. Notre objectif est de nous
assurer que nos produits réalisent les performances
déclarées. Cette garantie n’affecte pas les droits légaux des
consommateurs au titre de la législation nationale en vigueur
régissant la vente des biens de consommation.
Spécifications
Dimensions
Poids
Capacité de perforation
Capacité de reliure
Largeur maxi papier
Marge de perforation
ibico ibiMaster 250
457 mm (L) x 216 mm (H) x 406 mm (P)
11,8 kg.
25 feuilles papier 80 g/m
2
425 feuilles ou 50 mm
297 mm A4 (11.7")
11
ibico ibiMaster 250e
457 mm (L) x 216 mm (H) x 406 mm (P)
15,2 kg.
20 feuilles papier 80 g/m
2
425 feuilles ou 50mm
297 mm A4 (11.7")
11
EDNord - Istedgade 37A - 9000 Aalborg - telefon 96333500
Page 11
ibiMaster 250 / ibiMaster 250e
250e - Sicherheitshinweise für elektrische Geräte
250e - Sicherheitshinweise
IBICO MÖCHTE IHRE UND DIE SICHERHEIT ANDERER
SICHERSTELLEN. IN DIESEM BEDIENUNGSHANDBUCH UND AM
PRODUKT BEFINDEN SICH WICHTIGE SICHERHEITSHINWEISE.
BITTE LESEN SIE DIESE HINWEISE SORGFÄLTIG DURCH.
DER FOLGENDE WARNHINWEIS BEFINDET SICH AN DER
UNTERSEITE DES PRODUKTS.
Diese Sicherheitsmeldung bedeutet, dass Sie schwer verletzt
oder getötet werden können, wenn Sie das Produkt öffnen
und sich einer gefährlichen Spannung aussetzen.
Elektroschock Gefahr. Nicht öffnen.
Enthaltene Teile können nicht vom
Benutzer überholt werden. Bitte
überlassen Sie Wartungsmaßnahmen
qualifiziertem Fachpersonal.
WARNUNG
DAS SYMBOL FÜR DEN SICHERHEITSALARM
STEHT VOR JEDER SICHERHEITSMELDUNG IN
DEM ANWEISUNGSHANDBUCH. DIESES
SYMBOL WEIST AUF EIN MÖGLICHES
SICHERHEITSRISIKO HIN, DURCH DAS SIE
ODER ANDERE PERSONEN VERLETZT WERDEN
KÖNNTEN UND DURCH DAS ES ZU EINER
BESCHÄDIGUNG DES PRODUKTS ODER
SACHSCHÄDEN KOMMEN KANN.
250e - Wichtige Sicherheitshinweise
Die folgenden Symbole befinden sich auf dem Produkt.
Sie haben de folgende Bedeutung:
Locher
Reset
Die ibiMaster 250e muß an eine Netzspannung angeschlossen
werden, die den elektrischen Nennwerten der Maschine
entsprechen und die auf dem Serien- bzw. Leistungsschild
oder in diesem Handbuch angegeben sind.
VORSICHT: DIE STECKDOSE MUSS SICH IN DER NÄHE
DES GERÄTS BEFINDEN UND LEICHT
ZUGÄNGLICH SEIN.
VORSICHT: IM NOTFALL DIE ELEKTROSCHNUR ALS
HAUPTTRENNEINRICHTUNG EINSETZEN!
• Vor dem Transport des ibiMaster 250e oder bei längerem
Nichteinsatz das Gerät von der Steckdose abziehen.
• Das Gerät nicht mit einer beschädigten Elektroschnur oder
einem schadhaften Stecker, nach Betriebsstörungen oder
nach Beschädigungen gleich welcher Art betreiben.
• Steckdosen nicht überlasten, da diese Brände oder einen
elektrischen Schlag nach sich ziehen könnte.
• Den Stecker nicht verändern, da dieser für die
entsprechende Stromversorgung ausgelegt ist.
• Das Gerät ist nur für den Gebrauch in Innenräumen gedacht.
• Niemals Gegenstände durch die Gehäuseschlitze in diesem
Produkt schieben. Keine Flüssigkeiten gleich weicher Art
über das Gerät gießen.
• Das Produkt nicht betreiben, wenn es Regen oder Wasser
ausgesetzt wurde.
VORSICHT: ZU IHRER EIGENEN SICHERHEIT SCHLIEßEN SIE DEN IBIMASTER 250e NUR DANN AN DAS
STROMNETZ AN, NACHDEM SIE DIE ANWEISUNGEN VOLLSTÄNDIG GELESEN HABEN. BEWAHREN SIE DIESE
ANWEISUNGEN AN EINEM LEICHT ZUGÄNGLICHEN ORT AUF, UM SIE IN ZUKUNFT EINSEHEN ZU KÖNNEN.
BEFOLGEN SIE DIE GRUNDSÄTZLICHEN VORSICHTSMAßNAHMEN, DIE BEIM EINRICHTEN UND GEBRAUCH
DES PRODUKTS ZU BEACHTEN SIND.
EDNord - Istedgade 37A - 9000 Aalborg - telefon 96333500
Page 12

ibiMaster 250 / ibiMaster 250e
Vorbereitung
250: Den Innenstecker des Anschlußkabels (fig. 1) fest mit der
Geräteanschlußbuchse an der Rückseite der Maschine verbinden.
Anschließend den Netzstecker des Geräteanschlußkabels mit der
entsprechenden Netzstromquelle verbinden.
250e: Das Buchsenende der Elektroschnur fest die
Elektroschnurbuchse hinten an der Maschine stecken.
VORSICHT: Stellen Sie sicher, daß dieser Schritt durchgeführt
wird bevor der Stecker in eine Steckdose gesteckt wird.
Das Steckerende der Elektroschnur in eine geeignete Steckdose
stecken.
1
3
2
4
Einstellung der bogenbreite
Die Kantenführung auf die gewünschte Papiergröße einstellen
(11-1/4" - 19-Ring Briefformat. 11-1/4" Deckblatt - 19-Ring
Deckblatt-Übergrößen, A4 21-Ring) (fig. 1a/1b).
1
250e - Reinigung
VORSICHT: Vor dem Reinigen den Stecker dieses Gerätes aus der Steckdose ziehen.
• Wischen Sie es nur mit einem feuchten Tuch ab. Es dürfen keine
Reinigungs- oder Lösungsmittel verwendet werden.
Die folgenden Hinweise gelten nur für Geräte mit 230 V,
50 Hz.
AUSWAHL DER KONFEKTIONIERTEN HAUPTLEITUNGSSCHNUR
(NUR FÜR 230 V AC MASCHINEN)
Folgendes muß stets beachtet werden, falls eine abnehmbare
Leitungsschnur für den Gebrauch mit dem ibiMaster 250e
ausgewählt wird:
Die konfektionierte Leitungsschnur besteht aus drei Teilen: dem
Stecker, der Schnur und dem Anschlußstecker zum Gerät. Jede
dieser Komponenten muß den Sicherheitsvorschriften europäischer
Prüfstellen entsprechen.
Aus Sicherheitgründen werden die folgenden Mindestnennwerte für
Elektroschnüre angegeben. VERWENDEN SIE AUF KEINEN FALL EINE
KONFEKTIONIERTE LEITUNGSSCHNUR, DIE NICHT DEN FOLGENDEN
MINDE-STANFORDERUNGEN FÜR ELEKTROKABEL ENTSPRICHT.
STECKER: 3 A, 250 V, 50/60 Hz. Leiter Klasse 1,3, genehmigt von
einer europäischen Sicherheitsprüfstelle für elektrische Geräte und
Einrichtungen.
LEITUNGSSCHNUR: Typ H05W-F3G0.75, harmonisiert ( HAR ).
„”Symbole bedeuten, daß es sich um Leitungsschnüre
handelt, die der entsprechenden euopäischen Norm genügen
(HINWEIS: „HAR” kann durch ein genehmigtes Symbol der
europäischen Sicherheitsprüfstelle für elektrische Gerät und
Einrichtungen ersetzt werden, die die Leitungsschnur genehmigt
hat, wie zum Beispiel dem VDE - Kabelkennzeichen „ VDE ”.
ANSCHLUSSTECKER ZUM GERÄT: 3 A, 250 V, 50/60 Hz,
genehmigt von einer europäischen Sicherheitsprüfstelle für
elektrische Geräte und Einrichtungen, Typ IEC 320. Die
konfektionierte Leitungsschnur darf nicht länger als 3 Meter sein.
Eine konfektionierte Leitungsschnur mit Komponenten, deren
Nennwerte die Mindestnennwerte für Elektrogeräte und - kabel
übersteigen, sind als Ersatz zulässig.
Allgemeine Sicherheitshinweise
• Die ibiMaster darf nur in dem vorgesehenen Einsatzbereich, d.h. für
das Lochen und Binden von Papier und Einbanddeckeln, im
Rahmen der angegebenen technischen Daten eingesetzt werden.
• In die Locheröffnung der Maschine dürfen nur Papierblätter oder
Einbanddeckel gesteckt werden.
• Das Gerät auf eine sichere und stabile Arbeitsoberfläche stellen,
damit das nicht herunterfallen kann, was zu Schäden an Personen
und Gerät führen könnte.
• Alle auf dem Produkt angegeben Warnungen und Anweisungen
sind zu befolgen.
• Die Maschine nur an der Unterseite und nicht an der Abdeckung
anheben.
• Die Maschine nicht an der Abdeckung oder am Papierhalterdraht
anheben.
EDNord - Istedgade 37A - 9000 Aalborg - telefon 96333500
Page 13

ibiMaster 250 / ibiMaster 250e
1
Bestimmung der binderückengrösse
Den Binderückenselektor aufschieben (fig. 1a/1b).
Das Dokument einschl. Deckblätter hinter dem
Binderückenselektor einlegen.
Den Binderückenselektor schließen und eine
Binderückengröße wählen, die der auf der Führung
angezeigten Größe entspricht. Es werden nur
Rückengrößen bis zu 25 mm angezeigt. Ihr ibiMaster
kann Dokumente mit bis zu 425 Seiten, oder einer
Rückengröße von 50 mm binden. Für beste Resultate
stets Original ibico-Deckblätter und farblich koordinierte
Binderücken verwenden.
1 3
2
Stanzung
Die Bögen oder Deckblätter ausrichten, und mit der zu
bindenden Seite in den Stanzschacht einführen (fig. 2a/2b).
Die Bögen hin-und-her bewegen, bis sie bündig gegen die
Kantenführung und die untere Seite des Stanzschachtes
anliegen.
250: Zur Stanzung den Hebel in Bedienerrichtung ziehen
und vollständig nach unten drücken, um das Papier
durchgehend zu lochen (A) (fig. 1a). Es können bis zu 25
Bögen von 80 g/m
2
gleichzeitig gestanzt werden. Nur ZWEI
Abdeckfoliengleichzeitig stanzen, um Blockierungen und
übermäfligen Verschleifl zu vermeiden.
250e: Zur Stanzung die Taste punch (icon) betätigen (A)
(fig. 1b). Der ibiMaster 250e stanzt bis zu 20 Blatt
gleichzeitig (80g/m
2
). Nur ZWEI Abdeckfolien gleichzeitig
stanzen, um Blockierungen und übermäfligen Verschleifl zu
vermeiden.
250e: Bei einer Blockierung des Lochers die Taste RESET
(A1) (fig. 1b) betätigen. Anschlißend die Taste PUNCH (A)
(fig. 1b) drücken und das papier oder die Deckblätter aus
dem Stanzschacht entfernen (es kann dabei erforderlich
sein, die Taste punch mehrmals zu betätigen um das
Papier entfernen zu können). Sollte erneut eine Blockierung
erfolgen. Schritte 1 bis 3 mit etwas weniger Papier
wiederholen, um eine Überlastung des Lochers durch
zusätzliche hubbewegungen zu vermeiden.
Herausnehmbare Locherstifte: Zum Lochen von A5 den
Deckel an der Abdeckung (D) (fig. 1a/1b) anheben und die
ensprechenden Auswahlvorrichtungsstifte hochziehen, um
die Locherstifte ausser Function zu setzen, die unter
Umstaenden die Kante Ihres Blatts knicken koennen.
Margin Anpassung|: Die Breite des Abstandes zwischen
gestanzten Loechern und Papierkante kann veraendert
werden, um dem Umfang des Dokuments zu ensprechen.
Der Heben befinded sich an der linken Seite des ibiMaster.
Die Breite kann veraendert werden, indem man den Hebel
herauszieht oder hereindrueckt.
5
Bindung
Den Binderücken mit der offenen Seite in Richtung des
Bedieners zeigend hinter dem Binderückenhalter einlegen
(fig. 3).
Den Bindehebel soweit heranziehen, bis der Binderücken
ausreichend weit geöffnet wird, um das Dokument
einschieben zu können.
Das Deckblatt mit der Vorderseite nach unten in den
offenen Binderücken einfädeln. Die zu bindenden Seiten
mit der beschrifteten Seite nach unten auf dem
Binderücken einfädeln. Für stärkere Dokumente diesen
Vorgang wie gewünscht wiederholen. Zuletzt das
Deckblatt auf den offenen Binderücken einfädeln.
Den Bindehebel nacj hinten drücken, um dadurch den
Binderücken zu schlieflen.
Das Buch nach oben herausheben - Ihre gebundene
Unterlage ist jetzt komplett!
Wenn Sie mit Ihrem ibiMaster erst einmal besser vertraut
sind, werden Sie feststellen, daß die Auslegung des
Gerätes Lochung und Bindung in einem Arbeitsgang
ermöglicht - und somit Ihre Produktivät erhöht.
1 4
5
6
2
3
2
3
4
6
7
EDNord - Istedgade 37A - 9000 Aalborg - telefon 96333500
Page 14

ibiMaster 250 / ibiMaster 250e
Wartung
• Setzen Sie sich mit einem zugelassenen Wartungsvertreter
von ibico in Verbindung, wenn Ihr Gerät repariert werden
muss.
Entleerung des Abfallbehälters
Nach wiederholter Benutzung des Gerätes den
Abfallbehälter entleeren (F) (fig. 6). Dazu den Einschub
zum Öffnen vorsichtig in Bedienerrichtung ziehen. Beim
Wiedereinsetzen schnappt der Einschub wieder in die
normale Position.
1
Garantie
Wir übernehmen die Garantie für die Funktionsfähigkeit dieser
Maschine bei normaler Nutzung für ein Jahr ab Kaufdatum.
Innerhalb des Garantiezeitraums repariert oder ersetzt GBC
die schadhafte Maschine kostenlos und nach eigenem
Ermessen. Mängel aufgrund von Mißbrauch oder
Zweckentfremdung fallen nicht unter die Garantie. Das
Kaufdatum ist nachzuweisen. Reparaturen oder
Veränderungen, die durch nicht von GBC autorisierte
Personen durchgeführt werden, heben die Garantie auf. Wir
wollen sicherstellen, dass unsere Produkte die in den
Spezifikationen angegebene Leistung erbringen. Diese
Garantie beeinträchtigt keine gesetzlichen Rechte, die
Verbraucher gemäß der jeweils geltenden nationalen
Rechtsprechung bezüglich des Verkaufs von Waren haben.
Technische Daten
Abmessungen
Gewicht
Stanzleistung
Bindekapazität
Max. Bogenbreite
Stanztiefe
ibico ibiMaster 250
457 mm (B) x 216 mm (H) x 406 mm (T)
11,8 kg.
25 Blatt 80 g/m
2
425 Blatt
297 mm A4 (11,7")
11
ibico ibiMaster 250e
457 mm (B) x 216 mm (H) x 406 mm (T)
15,2 kg.
20 Blatt 80 g/m
2
425 Blatt
297 mm A4 (11,7")
11
EDNord - Istedgade 37A - 9000 Aalborg - telefon 96333500
Page 15
ibiMaster 250 / ibiMaster 250e
250e - Precauzioni elettriche
250e - Misure di sicurezza
ALLA IBICO STA A CUORE LA SICUREZZA DEGLI UTENTI
E DEI TERZI. IN QUESTO MANUALE OPERATIVO E SUL
PRODOTTO SONO RIPORTATI IMPORTANTI MESSAGGI
DI SICUREZZA, CHE VANNO LETTI ATTENTAMENTE.
I SEGUENTI MESSAGGI SI TROVANO SUL RETRO DELLA
MACCHINA.
Questo messaggio significa che potreste rimanere feriti
gravemente o uccisi se aprite la macchina con
conseguente esposizione accidentale ad alto voltaggio.
Pericolo di scarica elettrica.
Non aprire. Per operazioni
di manutenzione o
riparazione rivolgersi a
personale qualificato.
ATTENZIONE
QUESTO SIMBOLO PRECEDE OGNI
MESSAGGIO RELATIVO ALLA SALVAGUARDIA
DELLA VOSTRA INCOLUMITA’. ESSO INDICA
UN RISCHIO POTENZIALE PER L’OPERATORE
O PER TERZI, O UN DANNO POTENZIALE
ALLA MACCHINA.
AVVERTENZA! PER ASSICURARE L'INCOLUMITÀ DELL'UTENTE, NON COLLEGARE LA IBIMASTER 250e IN
RETE A MENO DI AVER LETTO COMPLETAMENTE QUESTE ISTRUZIONI. CONSERVARE LE ISTRUZIONI IN
UNA COMODA UBICAZIONE A TITOLO DI FUTURO RIFERIMENTO. DURATE L’APPRONTAMENTO E L’USO DI
QUESTO PRODOTTO, OSSERVARE LE PRECAUZIONI FONDAMENTALI DI SICUREZZA ELENCATE SOTTO, IN
MODO DA EVITARE POSSIBILI LESIONI.
250e - Importanti precauzioni
i seguenti simboli appaiono sul prodotto ed hanno il
seguente significato:
Punzonatura
Reset
La ibiMaster 250e deve essere collagata ad una fonte
elettrica avente una tensione corrispondente a quella
nominale della macchina, indicata sulla targhetta del
numero di serie/specifiche o in questo manuale.
ATTENZIONE! LA PRESA DI CORRENTE DEVE
ESSERE SITUATA IN PROSSIMITA'
DELL'ATTREZZATURA ED ESSERE
FACILMENTE ACCESSIBILE.
ATTENZIONE! IN CASO DI EMERGENZA, USARE IL
CAVO DI ALIMENTAZIONE QUALE
PRINCIPALE DISPOSITIVO DI
SCOLLEGAMENTO.
• Estrarre la spina del cavo di alimentazione della
ibiMaster 250e dalla presa a muro prima di spostarla o
quando non si usa la macchina per periodi prolungati.
• Non mettere in funzione la rilegatrice se la spina o il
cavo di alimentazione sono danneggiati, se la macchina
non funziona bene o se è stata danneggiata in qualsiasi
modo.
• Non sovraccaricare la presa elettrica, visto che ciò può
causare incendi o folgorazioni.
• Non modificare la spina di alimentazione. Tale spina è
stata configurata in funzione dell'appropriata rete di
alimentazione.
• L’unità è destinata ad essere usata solamente al coperto.
• Non inserire mai alcun oggetto attraverso le
sfinestrature della cassa. Non versare mai liquidi di
alcun tipo su questo prodotto.
• Non mettere in funzione la macchina se è stata esposta
alla pioggia o all'acqua.
EDNord - Istedgade 37A - 9000 Aalborg - telefon 96333500
Page 16

ibiMaster 250 / ibiMaster 250e
Operazioni preliminari
Determinare la larghezza dei fogli
Impostare la guida margini laterale sul formato di carta che si
desidera rilegare (11" - 19 anelli formato lettera, 11 - 1/4"
copertina - 19 anelli copertina fuori misura, A4 - 21 anelli)
(fig. 1a/1b).
1
250: Inserire la maniglia (A) (fig.1) sull'asta di foratura posta
sul lato destro della macchina. Allineare i fogli o le copertine
ed inserire il lato da rilegare nel vano di foratura.
Pareggiare i fogli fin quando non siano a filo con la guida
laterale e poggino bene sul fondo del vano di foratura.
Lasciare che la carta poggi sul SUPPORTO IN METALLO (non
di serie) o, se si preferisce, mantenere i fogli in posizione con
la mano libera.
250e: Inserire la spina femmina del cavo di alimentazione
nella presa posta sul retro della macchina.
ATTENZIONE! Verificare il completamento di questo
passo prima di inserire la spina maschio del cavo
di alimentazione in una presa di rete.
Inserire la spina maschio del cavo di alimentazione in una
appropriata presa di rete.
250e - Pulizia
PERICOLO: Staccare sempre la presa della corrente prima di procedere con la pulizia.
• Pulire la superficie esterna solo con un panno umido.
Non utilizzare detergenti o solventi.
Le seguenti note sono riferite solamente alle unità da
230 V, 50 Hz.
SELEZIONE DEL CAVO DI ALIMENTAZIONE
(PER LE SOLE MACCHINE DA 230 V CA)
Quando si sceglie un cavo scollegabile di alimentazione per la
ibiMaster 250e, attenersi alle direttive sottoindicate.
Il cavo scollegabile è composto da tre componenti: una spina
femmina di alimentazione dell'unità, uno spezzone di cavo
elettrico ed una spina maschio di collegamento in rete. Ciascuno
di tali componenti deve essere conforme ai requisiti europei di
sicurezza.
I seguenti requisiti elettrici
minimi del cavo di alimentazione
sono riportati ai fini della sicurezza.
NON USARE CAVI DI ALIMENTAZIONE CHE NON SODDISFINO I
REQUISITI ELETTRICI MINIMI INDICATI SOTTO.
SPINA DI COLLEGAMENTO IN RETE: 3 A, 250 V, 50/60 Hz,
classe 1, a 3 conduttori, omologata dall'ente di sicurezza
europeo.
CAVO ELETTRICO: tipo H05W-F3G0.75, armonizzato
( HAR ). I simboli “ ” indicano l'omologazione del cavo ai
sensi dell'appropriato standard europe. (NOTA: la dictura “HAR”
può essere sostituita dall'appropriato marchio di omologazione
dell'ente di sicurezza europe preposto, ad esempio: “ VDE ”)
SPINA DI ALIMENTAZIONE DELL'UNITA: 3 A, 250 V,
50/60Hz, omologazione europea di sicurezza, tipo IEC 320. Il
cavo di alimentazione non deve superare i 3 metri di lunghezza.
E'possibile sostituire il cavo di alimentazione conforme ai requisiti
nominali minimi con un altro avente caratteristiche di sicurezza
superiori.
Precauzioni generali
• Usare la ibiMaster solamente per lo scopo previsto di forare e
rilegare fogli di carta e copertine, in conformità alle specifiche
indicate.
• Inserire nell'apertura di punzonatura della macchina solamente
fogli di carta e cartoncino per copertine.
• Collocare l’unità su una superficie di lavoro stabile e sicura,
in modo da evitare la caduta della macchina, il suo
danneggiamento ed eventuali lesioni personali.
• Attenersi a tutte le avvertenze ed instruzioni riportate sul
prodotto.
• Sollevare la macchina afferrandone il fondo e non il coperchio.
• Non sollevare la macchina afferrandola per il coperchio né per
il filo portacarta.
1
2
3
4
EDNord - Istedgade 37A - 9000 Aalborg - telefon 96333500
Page 17

ibiMaster 250 / ibiMaster 250e
Determinare il formato del dorsa ad anelli
Far scorrere la guida di profondità della rilegatrice per
aprirlo (fig. 1a/1b).
Posizionare il documento, completo di copertine, dietro
alla guida di profondità.
Rilasciare la guida di profondità e scegliere il dorso ad
anelli che corrisponde alla dimensione indicata sulla
guida. Sulla macchina sono indicate solamente
dimensioni fino a 25 mm. Il Vostro ibiMaster può
rilegare documenti fino a 425 fogli ed accetta dorsi
fino a 50 mm. Per risultati ottimali, utilizzare sempre
copertine ibico con dorsi di rilegatura coordinati.
1
3
2
Foratura
Sollevare il supporto metallico per la carta e portarlo in
posizione (non di serie) (fig. 2a/2b).
Allin eare i fogli o le copertine ed inserire il lato da
rilegare nel vano di foratura.
250: Pareggiare i fogli fin quando non siano a filo con
la guida laterale e poggino bene sul fondo del vano di
foratura
(A) (fig. 1a)
. Lasciare che la carta poggi sul
SUPPORTO METALLICO (non di serie) o, se si
preferisce, mantenere i fogli in posizione con la mano
libera.
250e: Per forare, premere il pulsante punch
(A) (fig. 1b)
ibiMaster 250e può forare fino a 20 fogli da 80gr per
volta. Forare solamente DUE copertine trasparenti alla
volta per ridurre al minimo il rischio di inceppamentie di
usura eccessiva.
250e: In caso die inceppamento durante líoperazione
di foratura, premere il pulsante reset
(A1) (fig. 1b)
e
quindi il pulsante punch
(A) (fig. 1b)
ed estrarre la carta
o le copertine dal vano di foratura potrebbe essere
necessario forare più volte per poter estrarre la carta.
Se si verifica di nuovo un altro inceppamento, ripetere
le operazionidal punto 1 al punto 3. Utilizzando questa
volta una quantità die carta inferiore per evitare
sovraccarichi.
Punzoni di perforazione sganciabili: In caso di
perforazione di un documento in formato A5, e’
possibile sganciare un gruppo di perforazione,
sollevando il selettore dei punzoni, posto sotto la calotta
della macchina (D) (fig. 1a/1b); quando il selettore e’
abbassato, il gruppo di perforazione e’ riagganciato.
Regolazione del margine: Lo spessore del margine tra
i fori e il margine del foglio puo’ essere modificato in
base allo spessore del documento. Regolate la leva,
posta sulla sinistra della macchina, in base allo
spessore del margine richiesto.
1 5
2
3
6
4
7
Rilegatura
Posizionare i dorsi ad anelli dietro al supporto dorsi
mantenendo la parte del dorso aperta verso se stessi
(fig. 3).
Portare la leva di rilegatura in alto verso se stessi fin
quando il dorso non si sia aperto sufficientemente da
consentire l'inserimento dei fogli.
Inserire la copertina frontale negli anelli aperti con la
parte rifinita verso il basso. Inserire le altre pagine,
sempre con la parte frontale verson il basso, negli
anelli. Per ultimo, inserire la copertina di fondo con la
parte rifinita verso l'esterno.
Per richiudere il dorso ad anelli, riportare la leva
lontano da sé.
Estrarre il documento sollevandolo verso l'alto. Il
documento è pronto!
Una volta familiarizzato con il funzionamento della
ibiMaster, potrete rilegare in fase de foratura,
ottenendo così una maggiore produttività.
1 4
5
6
2
3
EDNord - Istedgade 37A - 9000 Aalborg - telefon 96333500
Page 18

ibiMaster 250 / ibiMaster 250e
Assistenza
• Rivolgersi per le riparazioni a un rivenditore o
distributore ibico.
Svuotare il vassoio per gli scarti
Svuotare il vassoio per gli scarti dopo un ripetuto
utilizzo della macchina (F) (fig. 6). Per aprire, tirare
delicatamente il vassoio verso di sé. Quando si
reinserisce, il vassoio scatta in posizione.
1
Garanzia
Il funzionamento di questa macchina è garantito per un
anno dalla data di acquisto, soggetto ad un uso normale.
Durante il periodo di garanzia GBC, a proprio giudizio,
potrà riparare o sostituire gratuitamente la macchina
difettosa. Difetti provocati da un uso errato o un uso
improprio non sono coperti dalla garanzia. Sarà richiesta la
prova della data di acquisto. Riparazioni o modifiche
effettuate da persone non autorizzate da GBC rendono
nulla la garanzia. È nostro obiettivo assicurare il
funzionamento dei nostri prodotti nelle specifiche
dichiarate. Questa garanzia non ha effetto sui diritti legali
garantiti ai consumatori come effetto di leggi nazionali
applicabili che regolano la vendita di beni.
Caratteristiche tecniche
Dimensioni
Peso
Capacità foratura
Capacità rilegatura
Larghezza massima foglio
Margine foratura
ibico ibiMaster 250
457 mm (L) x 216 mm (A) x 406 mm (P)
11,8 kg.
25 fogli da 80 gr
425 fogli (50 mm)
297 mm A4 (11,7")
11
ibico ibiMaster 250e
457 mm (L) x 216 mm (A) x 406 mm (P)
15,2 kg.
20 fogli da 80 gr
425 fogli (50 mm)
297 mm A4 (11,7")
11
EDNord - Istedgade 37A - 9000 Aalborg - telefon 96333500
Page 19

ibiMaster 250 / ibiMaster 250e
250e - Veiligheidsmaatregelen inzake elektriciteit
250e - Veiligheidsvoorschriften
UW VEILIGHEID EN DIE VAN ANDEREN HEEFT VOOR IBICO
HOOGSTE PRIORITEIT. IN DEZE HANDLEIDING EN OP DE
MACHINE ZELF TREFT U VERSCHILLENDE BELANGRIJKE
VEILIGHEIDSVOORSCHRIFTEN AAN. LEES DEZE ZORGVULDIG.
DE VOLGENDE WAARSCHUWING IS TE VINDEN AAN DE
ONDERKANT VAN DE MACHINE.
Deze waarschuwing houdt in dat u ernstig gewond kunt raken
indien u het product openmaakt en u zo blootstelt aan
elektrische spanning.
Risico van elektrische schok. Niet
openen. Geen door gebruiker te
onderhouden delen binnenin. Voor
het onderhoud verwijzen wij u naar
bevoegd onderhoudspersoneel.
WAARSCHUWING
HET ALARMSYMBOOL STAAT VÓÓR IEDERE
VEILIGHEIDSWAARSCHUWING IN DEZE
GEBRUIKERSHANDLEIDING. DIT SYMBOOL
DUIDT OP EEN POTENTIEEL GEVAARLIJKE
SITUATIE VOOR UZELF OF ANDEREN, OOK ZOU
DE MACHINE OF DE OMGEVING SCHADE
BEROKKEND KUNNEN WORDEN.
VOOR UW EIGEN VEILIGHEID: SLUIT DE IBIMASTER 250e NIET OP HET ELEKTRICITEITSNETWERK AAN VÓÓRDAT U
DEZE HANDLEIDING VOLLEDIG DOORGELEZEN HEEFT. BEWAAR DEZE VERVOLGENS OP EEN MAKKELIJKE PLAATS
BIJ DE MACHINE, ZODAT U DEZE, INDIEN NODIG, NOG EENS KUNT RAADPLEGEN. TER VOORKOMING VAN LETSEL
MOETEN DE VOLGENDE ELEMENTAIRE VEILIGHEIDSVOORSCHRIFTEN OPGEVOLGD WORDEN TIJDENS DE
INSTALLATIE ÉN HET GEBRUIK VAN DIT APPARAAT.
250e - Belangrijke veiligheidsmaatregelen
Het volgende symbool is op de machine afgebeeld en betekent:
Ponsen
Reset
De ibiMaster 250e moet worden aangesloten op een netvoeding
in overeenstemming met de waarde die vermeld staat op de
serie-/ken plaat van de machine of in deze gebruiksaanwijzing.
VOORZICHTIG: DE CONTACTDOOS MOET ZICH IN DE
ONMIDDELLIJKE NABIJHEID VAN DE MACHINE BEVINDEN
EN TE ALLEN TIJDE MAKKELIJK BEREIKBAAR ZIJN
VOORZICHTIG: GEBRUIK IN NOODGEVALLEN DIT SNOER
OM DE STROOMTOEVOER VOLLEDIG AF TE SLUITEN
• Trek de stekker uit het stopcontact als u de ibiMaster 250e wilt
verplaatsen of als het systeem gedurende langere tijd niet in
gebruik is.
• Stel het apparaat niet in werking als het snoer of de stekker
beschadigd is, of als het apparaat zelf defect of beschadigd is.
• Zorg ervoor dat stopcontacten en wandcontactdozen niet
overbelast worden, dit kan leiden tot brand of het oplopen van
een elektrische schok.
• Wijzig de bevestigingsstekker niet. De stekker is
geconfigureerd voor de daartoe bestemde netvoeding.
• Het apparaat is uitsluitend bestemd voor gebruik binnenshuis.
• Steek geen objecten/dingen door de gleuven in de behuizing
van de machine. Zorg er voor dat er geen vloeistof gemorst
wordt op de machine.
• Stel het apparaat niet in werking als het is blootgesteld aan
water of andersoortige vochtigheid.
EDNord - Istedgade 37A - 9000 Aalborg - telefon 96333500
Page 20

ibiMaster 250 / ibiMaster 250e
Aanvang
250: Duw de greep (A) (fig. 1) op de ponsschacht die te
vinden is op de rechterkant van de machine. Controleer dat
de greep in de juiste positie geplaatst is. Ze mag de tafel niet
raken wanner naar voren getrokken om te perforeren.
Schroef de greep vast met een schroevendraaier.
250e: Steek het vrouwelijke uiteinde van het
elektriciteitssnoer stevig in de daartoe bestemde
stekkeropening aan de achterzijde van de machine.
WAARSCHUWING: Zorg ervoor dat u deze stap voltooid
heeft voordat u de stekker (het mannelijke
uiteinde van het snoer) in het stopcontact steekt.
Steek de stekker in een daartoe geschikt stopcontact.
1
3
2
4
Stel breedte van het blad vast
Stel de randgeleider in op het papierformaat dat u wenst the
binden (11" - 19 ring letterformaat, 11-1/4" Schutblad - 19
ring bovenmaatse schutblad. A4 - 21ring) (fig. 1a/1b).
1
250e - Reinigen
WAARSCHUWING: Haal vóór het reinigen de stekker uit het stopcontact.
• De buitenkant schoonwrijven met een vochtige doek, gebruik
geen reinigings- of oplosmiddelen.
De volgende opmerkingen gelden alleen voor de
machines van 230V/50Hz.
SELECTIE VAN DE SNOERSET
(UITSLUITEND VOOR APPARATEN VAN 230V AC)
Als u opteert om een verwijderbaar snoer te gebruiken in
combinatie met de ibiMaster 250e, let dan op de volgende
zaken:
De snoerset bestaat uit drie onderdelen: de stekker, de kabel en
de vrouwelijke stekker. Uit veiligheidsoverweging moeten ze
alledrie voldoen aan de Europese voorschriften inzake.
Vanuit veiligheidsoogpunt worden de voldende
minimum
voedingswaarden vermeld voor de specifieke snoerset.
GEBRUIK GEEN SNOERSETS DIE NIET VOLDOEN AAN DE
VOLGENDE MINIMUMVEREISTEN INZAKE ELEKTRICITEIT.
STEKKER: 3 A, 250 V, 50/60 Hz, klasse 1,3 stroomgeleider,
goedgekeurd door Europese veiligheidsinstelling.
KABEL: type H05VV-F3G0.75, geharmonieerd ( HAR ). De
symbolen “ ” kunnen ook door het goedkeuringskenteken
van de Europese veiligheidsinstelling die de kabel goedkeurde
vervangen worden.
APPARAATCONNECTOR: 3 A, 250 V, 50/60 Hz, goedgekeurd
door Europese veiligheidsinstelling, type IEC 320. De snoerset
mag niet langer zijn dan 3 m. Er mag ook gebruik worden
gemaakt van verschillende stukken, zolang ze alle voldoen aan
bovenstaande minimum voedingswaarden.
Algemene veiligheidsmaatregelen
• Gebruik de ibiMaster uitsluitend waarvoor het systeem bedoeld
is, namelijk het ponsen en inbinden met metalen
draadkammen volgens de opgegeven specificaties.
• Plaats alléén vellen papier en schutbladen in de ponsopening
van de machine en niets anders.
• Zet de machine op een stevige vlakke ondergrond om te
voorkomen dat de machine valt, wat persoonlijk letsel of
schade aan de machine tot gevolg kan hebben.
• Volg alle waarschuwingen en richtlijnen die op het apparaat
vermeld staan op.
• Wanneer u de machine verplaatst, til de machine dan bij de
bodem op.
• Til de machine
nooit aan de ponshendel op.
EDNord - Istedgade 37A - 9000 Aalborg - telefon 96333500
Page 21

ibiMaster 250 / ibiMaster 250e
Stel kamformaat vast
Schuif de Maatnemer van de binder uit (fig. 1a/1b).
Plaats het document met schutbladen achter de Maatnemer.
Zet de Maatnemer van de binder vrij en kies het
kambindelement dat correspondeert met de door de geleider
getoonde afmeting. Alleen kamformaten tot een maximum
van 25 mm worden getoond. Uw ibiMaster kan documenten
binden tot een maximum van 425 vellen, of 50 mm
kamformaat. Gebruik voor de beste resultaten altijd
schutbladen met het ibico merknaamlabel met ibico kleurgeco-ordineerde bindkammen.
1 3
2
Perforeren
Breng vellen of schutbladen in lijn en voeg de te binden kant
in hals van ponsmachine (fig. 2a/2b).
Duw de vellen tegen de kantgeleider en de onderkant van de
hals van de ponsmachine.
250: Om te perforeren trekt u de ponsgreep
(A) (fig. 1a)
naar u toe. Trek helemaal naar beneden om volledig door het
papier te perforeren. Perforeert een maximum van 25 vel/80
gram papier tegelijk. Perforeer slechts TWEE transparante
schutbladen tegelijk om vastlopen en teveel slijtage te
minimaliseren.
250e: Om te perforeren drukt u op de ponsmachine
(A) (fig.
1b)
knop. De ibiMaster 250e perforeert een maximum van 20
vellen van 80g/m
2
papier tegelijk. Perforeer slechts TWEE
transparante schutbladen tegelijk om vastlopen en teveel
slijtage te minimaliseren.
250e: Als de ponsmachine vastloopt, drukt u op de RESET
(A1) (fig. 1b)
knop. Druk daarna op de PERFOREER
(A) (fig.
1b)
knop en verwijder papier of schutbladen van de hals van
de ponsmachine (het kan nodig blijken verschillende malen te
drukken om het papier te verwijderen). Als de ponsmachine
nogmaals vastloopt, herhaalt u stappen 1 tot 3 met iets
minder papier om overlading van de ponsmachine te
voorkomen bij volgend gebruik.
Uitschakelbaar ponsmes: Indien u documenten op A5 formaat
wilt ponsen, is het mogelijk om een ponsmes uit te schakelen
door de selector-pin onder het deksel van de machine uit te
trekken. (D) (fig. 1a/1b) Wanneer de selector-pin ingedrukt
staat, dan is het ponsmens weer gewoon ingeschakeld.
Marge instelling. De breedte van de marge tussen de
geponste gaten en de papierrand kan aangepast worden.
Handig als het document wat dikker is. Aan de linkerkant van
de ibiMaster treft u hiervoor een hendel aan, waarmee u,
door deze in te duwen of uit te trekken, naar gelieve de
marge kunt instellen.
1 5
6
2
3
7
4
Binden
Plaats kambindelement achter kamhouder met open gedeelte
van element naar u toe (fig. 3).
Draai de Bindgreep omhoog naar u toe totdat het
kambindelement voldoende opent om uw document in te
voegen.
Rijg voorschutblad met de afgewerkte kant naar beneden, op
de open vingervormige onderdelen van het bindelement. Rijg
pagina's, met de voorkant naar beneden, op het element.
Herhaal voor grote documenten als benodogd. Plaats het
achterschutblad met de afgewerkte kant naar boven het
laatst op de open vingeronderdelen van het bindelement.
Duw de Bindgreep van u af om het bindelement te sluiten.
Verwijder boek door het omhoog te tillen. Uw presentatie is
nu voltooid!
Als u eenmaal gewend bent aan uw ibiMaster, zult u vinden
dat het ontwerp het u mogelijk maakt om te binden terwijl u
perforeert, en dit zal uw productiviteit opvoeren.
1 4
5
6
2
3
EDNord - Istedgade 37A - 9000 Aalborg - telefon 96333500
Page 22

ibiMaster 250 / ibiMaster 250e
Service
• Onderhoudsbeurt te geven of te repareren. Haal de stekker uit
het stopcontact en neem contact op met uw ibico leverancier.
Legen van spaanbak
Leeg spaanbak (F)
(fig. 6)
na herhaald gebruik. Trek de lade
voorzichtig naar u toe om te openen. Wanneer u deze weer
terugduwt, zal de lade in positie snappen.
1
Garantie
De werking van deze machine is gegarandeerd voor een jaar
vanaf de datum van aankoop, afhankelijk van normaal gebruik.
Binnen de garantieperiode zal GBC ter eigen beoordeling de
defectieve machine gratis repareren of vervangen. Defecten als
een gevolg van verkeerd gebruik of gebruik voor ongeschikte
doeleinden zijn niet gedekt onder de garantie. Bewijs van datum
van aankoop zal vereist worden. Reparaties of veranderingen
uitgevoerd door niet door GBC geautoriseerde personen zullen
de garantie ongeldig maken. Wij streven ernaar te verzekeren
dat onze producten voldoen aan de vastgelegde specificaties.
Deze garantie heeft geen invloed op de wettelijke rechten van
consumenten onder de toepasbare nationale wetgeving die
de verkoop van goederen regelt.
Specificaties
Afmetingen
Gewicht
Ponscapaciteit
Bindcapaciteit
Max. velbreedte
Perforeermarge
ibico ibiMaster 250
457 mm (Br) x 216 mm (H) x 406 mm (D)
11,8 kg.
25 vellen, 80 gr papier
425 vellen
297 mm A4 (11.7")
11
ibico ibiMaster 250e
457 mm (Br) x 216 mm (H) x 406 mm (D)
15,2 kg.
20 vellen, 80 gr papier
425 vellen
297 mm A4 (11.7")
11
EDNord - Istedgade 37A - 9000 Aalborg - telefon 96333500
Page 23

ibiMaster 250 / ibiMaster 250e
250e - Precauciones de seguridad para las conexiones eléctricas
250e - Mensajes de seguridad
SU SEGURIDAD ASÍ COMO LA SEGURIDAD DE LOS DEMÁS ES
IMPORTANTE PARA IBICO. EN ESTE MANUAL DEL OPERADOR Y
EN EL PROPIO PRODUCTO HALLARÁ IMPORTANTES MENSAJES
DE SEGURIDAD. LEA ATENTAMENTE ESTOS MENSAJES.
EN EL FONDO DEL PRODUCTO SE ENCUENTRA ESTA
ADVERTENCIA.
Este mensaje de seguridad significa que usted podría resultar
gravemente herido o incluso encontrar la muerte si abriera
este producto y se expusiera a un voltaje peligroso.
Riesgo de descarga eléctrica.
No abrir. Las piezas internas
no deben ser manipuladas por
el usuario. Acudir a un centro
de servicio especializado.
ADVERTENCIA
EL SIMBOLO DE ALERTA DE SEGURIDAD PRECEDE
A CADA MENSAJE DE SEGURIDAD EN ESTE
MANUAL DE INSTRUCCIONES. ESTE SIMBOLO
INDICA UN RIESGO PARA LA SEGURIDAD
PERSONAL QUE PODRIA AFECTARLE A USTED O
A LOS DEMAS, PROVOCAR DAÑOS A LOS
PRODUCTOS O A LA PROPIEDAD.
ADVERTENCIA: PARA SU PROTECCIÓN, NO CONECTE EL IBIMASTER 250e A LA FUENTE DE ALIMENTACIÓN
ELÉCTRICA HASTA QUE HAYA LEIDO COMPLETAMENTE ESTAS INSTRUCCIONES. CONSERVE ESTAS INSTRUCCIONES
EN UN LUGAR PRÁCTICO PARA PODER CONSULTARLAS EN EL FUTURO. PARA PREVENIR LESIONES, SE DEBEN
RESPECTAR LAS SIGUIENTES PRECAUCCIONES BÁSICAS DE SEGURIDAD AL MONTAR Y USAR ESTE PRODUCTO.
250e - Importantes precauciones de seguridad
Los siguientes simbolos aparecen en este producto y su
significado es el siguiente:
Perforar
Reset
El sistema ibiMaster 250e debe conectarse a una fuente de
alimentación eléctrica que tenga una tensión que se corresponda
con la capacidad eléctrica nominal de la máquina como se indica
en la placa de serie o placa de capacidad nominal del fabricante
o este manual.
CUIDADO: LA TOMA DE CORRIENTE DEBE ESTAR
SITUADA CERCA DEL EQUIPO Y ESTAR
FÁCILMENTE ACCESIBLE.
CUIDADO: EN CASE DE EMERGENCIA, ¡USE EL CORDÓN
DE ALIMENTACIÓN ELÉCTRICA COMO UN
DISPOSITIVO DE DESCONEXIÓN PRINCIPAL!
• Desenchufe el ibiMaster 250e antes de moverlo o cambiarlo de
lugar o cuando no vaya a usarlo durante un extenso período de
tiempo.
• No ponga esta unidad a funcionar si tiene el cordón de
alimentación eléctrica o el enchufe dañado, después que haya
sufrido algún desperfecto o después que se haya dañado de
cualquier manera.
• No sobrecargue las tomas de corriente más allá de su
capacidad, puesto que esto puede causar incendios o
descargas eléctricas.
• No altere la clavija de conexión. Esta clavija está configurada
para el suministro eléctico apropiado.
• La unidad está diseñada para usarse únicamente bajo techo en
ambientes interiores.
• Nunca empuje objetos dentro de este producto insertándolos a
través de las ranuras del gabinete. No derrame liquidos de
ninguna clase sobre este producto.
• No ponga la unidad en funcionamiento si ha estado expuesta a
la lluvia o al agua.
EDNord - Istedgade 37A - 9000 Aalborg - telefon 96333500
Page 24

ibiMaster 250 / ibiMaster 250e
Para empezar
250: Empuje la palanca (A) (fig. 1) hacia el eje de perforación
situado en el lado derecho de la máquina. Compruebe que la
palanca esté colocada en la posición del papel. No debe golpear
la mesa cuando se adelanta hacia el perforador.
Sujete la palanca con un destornillador.
250e: Empuje firmemente el extremo hembra del cordón de
alimentación eléctrica insertándolo en la toma de conexión
situada en la parte posterior de la máquina.
¡CUIDADO! Asegúrese de completar este paso antes de
conectar el extremo macho del cordón de alimentación
eléctrica dentro de una toma de corriente.
Enchufe el extremo macho del cordón de alimentación eléctrica
en una toma de corriente adecuada.
1
2
3
4
Determine la anchura de hoja
Ajuste la guía de margen al papel de tamaño que desea
encuadernar (11 pulgadas - 19 anillas - tamaño de carta, 111/4 pulgadas Cubierta - 19 anillas cubierta de tamaño superior
A4-21 anillas) (fig. 1a/1b).
1
250e - Limpieza
PRECAUCION: Desenchufe este producto antes de proceder a su limpieza.
• Limpie el exterior únicamente con un paño humedecido.
No utilice detergentes ni disolventes.
Las sigulentes notas se aplican únicamente a las unidades
que tengan una capacidad nominal de 230 V 50 Hz.
SELECCIÓN DEL CORDÓN PRINCIPAL DE ALIMENTACIÓN
ELÉCTRICA (ÚNICAMENTE PARA MÁQUINAS DE 230 VCA)
Cuando seleccione un cordón desconectable de circuito eléctrico
para usarlo con el ibiMaster 250e, tenga siempre en cuenta lo
siguiente:
El juego de cordón consiste en tres componentes; la clavija de
conexión, el cordón propiamente dicho y el conector hembra del
aparato. Cada uno de estos componentes debe cumplir las normas
europeas de seguridad.
Con fines de seguridad se publican las siguientes capacidades
eléctricas
minimas para el juego de cordón especifico.
NO USE JUEGOS DE CORDÓN QUE NO CUMPLAN LOS SIGUIENTES
REQUISITOS ELÉCTRICOS MÍNIMOS.
CLAVIJA DE CONEXIÓN: 3 A, 250 voltios, 50/60 Hz, conductor
de clase 1,3, con la aprobación de una agencia europea reguladora
de seguridad.
CORDÓN: tipo H05VV-F3G0.75, Armonizado ( HAR ). Los
simbolos “ ” indican que el cordón está aprobado según la
norma europea apropiada (NOTA: las letras "HAR" pueden ser
sustituidas por la marca de aprobación de la agencia de seguridad
europea que aprobó el cordón. Un ejemplo de estas marcas sería
“ VDE ”.
CONECTOR DEL APARATO: 3 A, 250 voltios, 50/60 Hz, con
aprobación de una agencia europea de seguridad. Tipo IEC 320. El
juego de cordón no deberá tener más de tres metros de longitud. Se
puede utilizar un juego de cordón que tenga una capacidad eléctrica
en sus componentes superior a la capacidad eléctrica mínima
especificada.
Precauciones generales de seguridad
• Use el sistema ibiMaster únicamente para su finalidad prevista de
perforar y encuadernar papel y tapas según las especificaciones
indicadas.
• No coloque nada en la abertura de perforación de la máquina que
no sea el papel y el material de las tapas.
• Coloque la unidad en un área segura y estable de trabajo para
impedir que la máquina se caiga dañándose y causando
posiblemente lesiones personales y daños materiales.
• Siga todas las advertencia e instrucciones de seguridad marcadas
en el producto.
• Levante la máquina asiéndola por su parte inferior. Nunca la agarre
por la cubierta para levantaria.
• No levante la máquina agarrándola por la cubierta ni por el
alambre del portapapel.
EDNord - Istedgade 37A - 9000 Aalborg - telefon 96333500
Page 25

ibiMaster 250 / ibiMaster 250e
Determine el tamaño del peine de encuadernacion
Deslice el Adaptador de Encuadernadora abriéndolo (fig.
1a/1b).
Coloque el documento incluyendo las cubiertas detrás del
Adaptador de Encuadernadora.
Suelte el Adaptador de Encuadernadora y seleccione el
elemento de encuadernación de peine que corresponde al
tamaño indicado por la guía. Unicamente se muestran los
tamaños de peine de hasta 25 mm. Su ibiMaster puede
encuadernar documentos de hasta 425 hojas, o tamaño de
peine de 50 mm. Para conseguir los mejores resultados, use
siempre cubiertas de marca ibico con peines de
encuadernación de color combinado ibico.
1 3
2
Perforador
Alinee las hojas o cubiertas e inserte el margen que ha de
encuadernarse dentro de la abertura del perforador
(fig.2a/2b).
Agite las hojas hasta que estén al ras contra la guía de
margen y el fondo de la abertura del perforador.
250: Para perforar, tire de la palanca de Perforación
(A)
(fig. 1a)
hacia usted. Tire totalmente abajo para perforar
completamente a través del papel. Perfora hasta 25 hojas
de papel de 80 gramos de una vez. Perfore únicamente DOS
cubiertas separadas a la vez para minimizar atascos y
excesivo desgaste.
250e: Para perforar, pulse el pulsador PUNCH
(A) (fig. 1b)
(perforador). El ibiMaster 250e perfora hasta 20 hojas de 80
gramos de papel de una sola vez. Perfore únicamente DOS
cubiertas separadas a la vez para minimizar atascos y
excesivo desgaste.
250e: Si se atasca el perforador apriete el pulsador RESET
(A1) (fig. 1b)
(reajuste). Luego pulse el pulsador PUNCH
(A)
(fig. 1b)
y quite el papel o las cubiertas de la abertura del
perforador (puede ser necesario perforar varias veces para
quitar el papel). Si se atasca otra vez el perforador. repita las
operaciones 1 a 3 con un poco menos de papel para evitar
sobrecarga del perforadoren los levantamientos adicionales.
Taladros anulables: Si necesita taladrar el formato A5, uno de
los taladros puede anularse apretando el selector de taladros
situado en la parte superior de la máquina bajo el protector
(D) (fig. 1a/1b), cuando el selector está en la posición más
baja el taladro está operativo otra vez.
Ajustes de margen: El margen entre los agujeros del taladro y
el margen del papel pueden ser ajustados dependiendo del
grosor del documento. Ajuste el selector situado en la parte
izquierda de la ibiMaster, hacia dentro o hacia fuera, de
acuerdo con el margen necesario para cada documento.
1 5
6
7
2
3
4
Encuadernacion
Coloque el elemento de encuadernación de peine detrás del
portapeine con la parte abierta del elemento cara a usted (fig.
3).
Gire la palanca de encuadernación hacia su usted hasta que
el elemento de encuadernación de peine se abra
suficientemente para insertar su documento.
Pase la cubierta delantera, con el lado acabado cara abajo,
a los dedos del elemento de encuadernación abierto. Pase
las páginas, con la parte delantera cara abajo, al elemento.
Repita esto para documentos grandes según se requiera.
Coloque la cubierta trasera, con el lado acabado cara arriba
y en los dedos del elemento abierto finalmente.
Empuje la Palanca de Encuadernación separándola de usted
para cerrar el elemento de encuadernación.
Quite el libro levantándolo hacia arriba. ¡Su presentación está
ahora completa!
Cuando se haya familiarizado con su ibiMaster, notará que su
diseño le permite encuadernar al mismo tiempo que
aumentando su productividad.
1 4
5
6
2
3
EDNord - Istedgade 37A - 9000 Aalborg - telefon 96333500
Page 26

ibiMaster 250 / ibiMaster 250e
Servicio
• Acuda a un centro de servicio autorizado ibico para realizar
cualquier reparación.
Vacie la bandeja de residuos de papel
Vacíe el cajón de residuos de papel después del uso repetido
del equipo
(F) (fig. 6)
.Tire suavemente del cajón hacia usted
para abrirlo. Cuando vuelva a cerrar, el cajón se pondrá se
pondrá instantáneamente en su posición.
1
Garantía
El funcionamiento de esta máquina está garantizado durante
1 año desde la fecha de compra bajo una utilización normal.
Durante el período de garantía, GBC reparará o sustituirá a su
criterio la máquina defectuosa sin coste alguno. Los defectos
debidos a una mala utilización o a un uso con otra finalidad no
quedan cubiertos bajo esta garantía. Se requerirá prueba de la
fecha de compra. Las reparaciones o modificaciones realizadas
por personas no autorizadas por GBC invalidarán la garantía.
Nuestro objetivo es que nuestros productos funcionen según
las especificaciones indicadas. Esta garantía no afecta a los
derechos legales que los consumidores tengan bajo la legislación
nacional vigente sobre la venta de artículos.
Especificationes
Dimensiones
Peso
Capacidad de perforación
Capacidad de Encuadernación
Anchura máx. de hoja
Margen de Perforación
ibico ibiMaster 250
457 mm (A) x 216 mm (A) x 406 mm (D)
11,8 kg.
25 hojas, 80 gramos de papel
425 hojas
297 mm A4 (11.7")
11
ibico ibiMaster 250e
457 mm (A) x 216 mm (A) x 406 mm (D)
15,2 kg.
20 hojas, 80 gramos de papel
425 hojas
297 mm A4 (11.7")
11
EDNord - Istedgade 37A - 9000 Aalborg - telefon 96333500
Page 27

ibiMaster 250 / ibiMaster 250e
250e - Medidas preventivas eléctricas
250e - Mensagens de segurança
A SUA SEGURANÇA, BEM COMO A SEGURANÇA DOS OUTROS,
É IMPORTANTE PARA A IBICO. MENSAGENS IMPORTANTES
SOBRE SEGURANÇA ESTÃO PRESENTES NO SEU MANUAL
DE INSTRUÇÕES E NO PRÓPRIO PRODUTO. LEIA ESSAS
MENSAGENS CUIDADOSAMENTE.
A SEGUINTE ADVERTÊNCIA ENCONTRA-SE NA PARTE DE BAIXO
DO APARELHO.
Esta mensagem de segurança significa que poderá sofrer
grandes danos pessoais ou mesmo morrer, se abrir o aparelho e
expor-se a tensão perigosa.
Risco de choque eléctrico. Não
abra. Não há dentro peças que
possam ser reparadas pelo
utilizador. Contacte com o pessoal
de assistência qualificado.
ADVERTÊNCIA
HÁ UM SÍMBOLO DE ALERTA ANTES DE CADA
MENSAGEM DE SEGURANÇA NESTE MANUAL DE
INSTRUÇÕES. ESTE SÍMBOLO INDICA UM RISCO
POTENCIAL PARA A SEGURANÇA PESSOAL, COM
DANOS PESSOAIS PARA SI OU PARA OUTRAS
PESSOAS, ALÉM DE DANOS MATERIAIS NO
APARELHO E/OU DEMAIS EQUIPAMENTO.
ADVERTÊNCIA: PARA SUA PROTECÇÃO, NÃO LIGUE O IBIMASTER 250e À TENSÃO ELÉCTRICA ENQUANTO NÃO
TIVER LIDO ESTAS INSTRUÇÕES NA ÍNTEGRA. GUARDE ESTAS INSTRUÇÕES NUM LOCAL CONVENIENTE PARA
FUTURA CONSULTA. PARA EVITAR FERIMENTOS, AS PRECAUÇÕES BÁSICAS DE SEGURANÇA A SEGUIR PRECISAM
DE SER OBSERVADAS NA INSTALAÇÃO DESTE PRODUTO.
250e - Medidas preventivas importantes
Os símbolos seguintes ISO e IEC abaixo aparecem neste
produto, e o seu significado é o seguinte:
Perfurar
Reset
O ibiMaster 250e precisa ser ligado numa fonte de
alimentação que corresponda ao consumo eléctrico nominal
da máquina como indicado na etiqueta de série/consumo ou
neste manual.
PERIGO: A TOMADA TEM QUE ESTAR LOCALIZADA
PERTO DO EQUIPMENTO E SER FACILMENTE
ACESSÍVEL.
PERIGO: EM CASO DE EMERGÊNCIA, USE O CABO DA
TOMADA COMO DISPOSITIVO PRINCIPAL
PARA DESLIGAR.
• Desligue o ibiMaster 250e da tomada antes de movê-lo, ou
quando ele não estiver a ser usado durante um período
prolongado.
• Não opere o aparelho se o cabo de alimentação ou a
tomada estiverem danificados, depois de um defeito ou
depois de ter sido danificado de alguma maneira.
• Não sobrecarregue as tomadas eléctricas além das suas
capacidades, pois isso pode causar incêndio ou choque
eléctrico.
• Não altere o capacidade da tomada. Ela é configurada para
a fonte de alimentação eléctrica apropriada.
• A unidade é projectada somente para uso interno.
• Nunca empurre objectos para dentro deste produto através
das ranhuras existentes no aparelho. Não derrame líquidos
de qualquer tipo sobre este produto.
• Não opere o produto caso ele tenha sido exposto à chuva
ou água.
EDNord - Istedgade 37A - 9000 Aalborg - telefon 96333500
Page 28

ibiMaster 250 / ibiMaster 250e
Para começar
250: Coloque a pega (A) (fig. 1), carregando, sobre o eixo de
perfuração situado do lado direito da máquina. Verifique que a
pega está montada na posição adequada. Esta não deve bater
na mesa quando for puxada para fora ao efectuar a perfuração.
Fixe a pega com uma chave de parafusos.
250e: Empurre com firmeza a extremidade fêmea do cabo de
alimentação na tomada localizada na parte de trás da máquina.
PERIGO: Certifique-se de que esta fase está concluída antes
de introduzir a extremidade macho do cabo de
alimentação numa tomada eléctrica.
Introduza a extremidade macho do cabo de alimentação na
tomada eléctrica apropriada.
1
2
3
4
Determinação da largura da folha
Coloque o guia da borda sobre o tamanho do papel que pretende
encadernar (dimensão de carta de 279 mm - 19 argolas, capa
que excede o tamanho normal, A4 - 21 argolas) (fig. 1a/1b).
1
250e - Limpeza
CUIDADO: Desligue a ficha do aparelho antes de limpá-lo.
• Passe um pano húmido somente por fora. Não utilize detergentes
nem solventes.
As notas a seguir aplicam-se somente às unidades de
230 V, 50 Hz.
SELECÇÃO DO SISTEMA PRINCIPAL DO CABO DE
ALIMENTAÇÃO (SOMENTE PARA MÁQUINAS DE 230 VAC)
Ao escolher um cabo de alimentação destacável para uso com o
ibiMaster 250e, observe sempre o seguinte:
O sistema do cabo de alimentação consiste em três componentes: a
ficha de ligação, o fio e a tomada de entrada. Cada um desses
componentes precisa de estar aprovado pelas normas Europeias de
segurança.
As especificações eléctricas
mínimas a seguir para um sistema de
cabo de alimentação específico são publicadas tendo em vista a
segurança.
NÃO USE SISTEMAS DE CABOS DE ALIMENTAÇÃO QUE NÃO
CUMPRAM OS REQUISITOS MÍNIMOS.
FICHA: 3 A, 250 Volts, 50/60 Hz, Classe 1, condutor 3, aprovação
por órgão de segurança Europeia.
FIO: Tipo H05W-F3G0.75, Harmonizado ( HAR ). Os símbolos
“”indicam fios aprovados conforme os padrões Europeus
(NOTA: "HAR" pode ser substituído pela marca de aprovação do
órgão de segurança Europeu que aprovou o fio. Um exemplo seria
“ VDE ”.
TOMADA DE ENTRADA: 3 A, 250 Volts, 50/60 Hz, aprovada pelos
padrões Europeus de segurança, Tipo IEC 320. O sistema do cabo de
alimentação não deve exceder 3 metros de comprimento. Todos
aqueles que contendo componentes com especificações eléctricas
maiores que os valores mínimos exigidos podem e devem de ser
substituídos.
Medidas preventivas em geral
• Utilize o ibiMaster somente para a função para que foi projectado,
furar e encadernar papel e capas de acordo com as especificações
indicadas.
• Não coloque nada na abertura de perfuração da máquina a não ser
o papel e as capas.
• Coloque a unidade numa área de trabalho segura e estável a fim
de evitar que a máquina caia e provoque acidentes com ferimentos
pessoais ou danifique a unidade.
• Obedeça a todas as advertências e instruções indicadas no
produto.
• Levante a máquina por baixo, nunca pela tampa.
• Não levante a máquina pela tampa ou pelo retentor de papel.
EDNord - Istedgade 37A - 9000 Aalborg - telefon 96333500
Page 29

ibiMaster 250 / ibiMaster 250e
Determinação do tamanho do pente
Deslize o calibrador do Encadernador para ficar aberto (fig.
1a/1b).
Coloque o documento, inclusive as capas, por trás do
Calibrador do Encadernador.
Solte o Calibrador do Encadernador e seleccione o elemento
de encadernação em pente que corresponde ao tamanho
indicado pelo guia. Só vêm indicados os tamanhos dos
pentes até 25 mm. O seu ibiMaster pode encadernar
documentos até 425 folhas, ou com um tamanho de pente
de 50 mm. Para obter os melhores resultados possíveis,
utilize sempre as capas da marca ibico com os pentes de
encadernar com cores a condizer.
1 3
2
Perfuração
Alinhe as folhas ou as capas e insira a borda a ser
encadernada na abertura de perfuração (fig. 2a/2b).
Sacuda levemente as folhas até ficarem rente ao guia da
borda e à parte inferior da abertura de perfuração.
250: Para perfurar, puxe pela Pega de Perfuração
(A) (fig.
1a)
na sua direcção. Puxe totalmente para baixo, de maneira
a perfurar completamente o papel. Perfura até 25 folhas de
80 g de uma só vez. Perfure apenas DUAS capas
transparentes de uma só vez para minimizar obstruções
e um desgaste excessivo.
250e: Para perfurar, pressione o botão de PUNCH
(A) (fig.
1b)
(PERFURAÇÃO). O ibiMaster 250e perfura até 20 folhas
de papel de 80 gramas de uma só vez. Perfure apenas DUAS
capas transparentes ao mesmo tempo para minimizar
obstruções e um desgaste excessivo.
250e: No caso de o perfurador ficar obstruído pressione o
botão de RESET (RESTABELECIMENTO)
(A1) (fig. 1b)
.Em
seguida pressione o botão de PUNCH
(A) (fig. 1b)
e retire o
papel ou as capas da abertura de perfuração (talvez seja
necessário perfurar diversas vezes para se poder retirar o
papel). No caso do perfurador ficar de novo obstruído, repita
as fases de 1 a 3, com um pouco menos de papel para evitar
a sobrecarga do perfurador nas recolhas adicionais.
Anular Furos: Se necessita de perfurar o formato A5, um dos
furos pode ser anulado, puxando o selector de furos, que está
situado na parte superior da máquina, por baixo do protector
(D) (fig. 1a/1b). Quando o selector está na posição mais
baixa, o furo está operativo de novo.
Ajuste da Margem: A margem entre os furos da perfuração
e a margem do papel, pode ser ajustada dependendo do
espessura do documento. Ajuste o selector situado no lado
esquerdo da ibiMaster, para dentro ou para fora, de acordo
com a margem necessária para cada documento.
1 5
6
2
3
7
4
Encadernação
Coloque o elemento de encadernação em pente por trás
do suporte do pente com a parte aberta do elemento virada
para si (fig. 3).
Gire a Alavanca de Encadernação para cima na sua direcção
até o elemento de encadernação em pente ficar
suficientemente aberto para poder inserir o seu documento.
Enfie a capa com o lado acabado virado para baixo nos
dedos do elemento de encadernação. Enfie as páginas, com
a parte da frente virada para baixo, no elemento. Repita
conforme necessário para os documentos grandes. Coloque
por último a contracapa, com o lado acabado virado para
cima nos dedos do elemento aberto.
Empurre a Alavanca de Encadernação para longe de si para
fechar o elemento de encadernação.
Retire o livro, puxando-o para cima. A sua apresentação está
agora concluída!
Uma vez que se tenha habituado ao seu ibiMaster, verá que
o desenho lhe permite realizar a encadernação à medida que
vai efectuando a perfuração, aumentando assim a sua
produtividade.
1 4
5
6
2
3
EDNord - Istedgade 37A - 9000 Aalborg - telefon 96333500
Page 30

ibiMaster 250 / ibiMaster 250e
Serviço
• Contacte um representante de assistência autorizado da ibico
para quaisquer necessidades de reparações.
Esvaziamento da gaveta dos desperdícios
Esvazie a gaveta dos desperdícios (F)
(fig. 6)
após repetidas
utilizações. Puxe a gaveta suavemente na sua direcção para
a abrir. Quando voltar a colocá-la na máquina, um estalo
indicar-lhe-á que já se encontra no seu lugar.
1
Garantia
O funcionamento desta máquina é garantido por um ano, a partir
da data de compra, em condições normais de utilização. Durante
o prazo de garantia, a GBC poderá, ao seu critério, reparar
gratuitamente ou substituir a máquina defeituosa. Defeitos
causados por uma utilização incorrecta ou inapropriada não
estão cobertos pela garantia. Será exigida a prova da data de
compra. Reparações ou alterações realizadas por pessoal não
autorizado pela GBC anulam a garantia. É nosso objectivo
assegurar que os nossos produtos funcionem em conformidade
com as especificações indicadas. Esta garantia não afecta os
direitos dos consumidores estabelecidos pela legislação nacional
referente à venda de bens.
Especificações
Dimensões
Peso
Capacidade de Perfuração
Capacidade de Encadernação
Largura Máx. de folha
Margem de Perfuração
ibico ibiMaster 250
457 mm (L) x 216 mm (A) x 406 mm (C)
11,8 kg.
25 folhas, papel 80 g
425 folhas
297 mm A4 (11.7")
11
ibico ibiMaster 250e
457 mm (L) x 216 mm (A) x 406 mm (C)
15,2 kg.
20 folhas, papel 80 g
425 folhas
297 mm A4 (11.7")
11
EDNord - Istedgade 37A - 9000 Aalborg - telefon 96333500
Page 31

ibiMaster 250 / ibiMaster 250e
250e - Elektriska säkerhetsåtgärder
250e - Föreskrifter om säkerhet
DIN SÄKERHET LIKAVÄL SOM ANDRAS ÄR EN
BETYDELSEFULL ANGELÄGENHET FÖR IBICO. I DENNA
ANVÄNDARHANDBOK OCH PÅ SJÄLVA ENHETEN FINNS
VIKTIGA SÄKERHETSFÖRESKRIFTER. LÄS NOGGRANT
IGENOM DESSA FÖRESKRIFTER.
FÖLJANDE VARNING FINNS PÅ PRODUKTENS
UNDERSIDA.
Det här säkerhetsmeddelandet informerar dig om risk för
allvarliga personskador eller dödsfall om du öppnar
produkten och utsätter dig själv för farliga lspänningar.
Risk för elchock. Öppna inte.
Du kan inte göra service på
några interna komponenter.
Låt kvalificerad
servicepersonal utföra service.
VARNING
VARNINGSSYMBOLEN SITTER FÖRE ALLA
SÄKERHETSMEDDELANDEN I DEN HÄR
BRUKSANVISNINGEN. SYMBOLEN
INDIKERAR EN POTENTIELL SÄKERHETSRISK
SOM KAN INNEBÄRA PERSONSKADOR PÅ
DIG SJÄLV ELLER ANDRA, OCH SOM ÄVEN
KAN INNEBÄRA SKADOR PÅ PRODUKTEN
ELLER ANNAN EGENDOM.
VARNING: FÖR DIN EGEN SÄKERHET, KOPPLA INTE IBIMASTER 250e TILL DET ELEKTRISKA FÖRRÄN
DU FULLSTÄNDIGT HAR LÄST IGENOM DESSA ANVISNINGAR. SE TILL ATT DESSA ANVISNINGAR
FÖRVARAS PÅ LÄMPLIGT STÄLLE FÖR FRAMTIDA ANVÄNDNING. FÖR ATT SKYDDA SIG MOT
PERSONSKADA MÅSTA FÖLJANDE GRUNDLÄGGANDE SÄKERHETS-BESTÄMMELSER IAKTTAS UNDER
INSTALLATION OCH ANVÄNDNING AV DENNA ENHET.
250e - Viktiga säkerhetsåtgärder
På enheten finns följande symboler. Deras innebörd är
den följande:
Punch (Hålslagning)
Reset
ibiMaster 250e måste anslutas till en matarspänning som
svarar mot maskinens elektriska märkdata, som finns
angivet på serienr. -/märkningsplåten eller i denna
handbok.
VAR FÖRSIKTIG: STRÖMUTTAGET MÅSTE
BEFINNA SIG NÄRA
UTRUSTNINGEN OCH VARA
LÄTTÅTKOMLIGT.
VAR FÖRSIKTIG: I EN NÖDFALLSSITUATION,
ANVÄND ELSLADDEN SOM
FÖRSTA URKOPPLANDE DON!
• Koppla ur ibiMaster 250e innan du flyttar denna enhet,
eller när den inte används under längre tid.
• Utför inte körning med en skadad sladd eller dess
stickkontakt, efter att den inte fungerat eller efter att
den på något sätt utsatts för skada.
• Överbelasta inte de elektriska uttagen utöver kapaciteit.
Det kan leda till brand eller elektrisk chock.
• Utför inte ändring av sladdkontakten. Den är utformad
för avsedd matarspänning.
• Enheten är endast avsedd för användning inomhus.
• Tryck aldrig in föremål i denna enhet genom slitsar i
huskroppen. Spill inte vätska av något slag på denna
enhet.
• Utför inte körning av enheten om den har utsatts för
regn eller vatten.
EDNord - Istedgade 37A - 9000 Aalborg - telefon 96333500
Page 32

ibiMaster 250 / ibiMaster 250e
Förberedande installation
250: För handtaget mot stansningsaxeln som återfinnes
på maskinens högra sida (fig. 1). Kontrollera att handtaget
är korrekt monterat. Handtaget ska inte ta i bordet när det
förs framåt vid stansning.
Skruva fast handtaget med skruvmejsel så att det sitter
säkert.
250e: Skjut ordentligt in elsladdens honände i det
mottagande uttag som finns på maskinens baksida.
OBS: Se till att detta steg är utfört innan elsladdens
hanände insätts i eluttaget.
Insätt elsladdens hanände i lämpligt eluttag.
1
2
3
4
Inställning av pappersmått
Ställ in kantguiden att passa måttet på de papper som
skall bindas (A4 - 21 ringar, 11" (amerikanskt
brevpapper) - 19 ringar, 11 1/4 " (omslag till amerikanskt
brevpapper) - 19 ringar) (fig. 1a/1b).
1
250e - Rengöring
SE UPP: Dra ur kontakten till produkten innan du utför någon rengöring.
• Torka av maskinens utsida (endast utsidan) med en fuktig
trasa. Använd inga rengöringsmedel eller lösningsmedel.
Följande anmärkningar gäller enbart för de enheter
som är märkta 230 V, 50 Hz.
VAL AV HUVUDSLADD-SET
(ENBART FÖR VÄXELSTRÖMS 230 V MASKINER)
Vid val av en lösgörbar ledningssladd för användning med
ibiMaster 250e, iakttag alltid det följande:
Sladdsetet består av tre komponenter; anslutnings/stickkontakt, sladd och apparatingång. Var och en av dessa
komponenter måste uppfylla de europeiska bestämmelserna
för godkänd säkerhet.
Följande elektriska mini-märkdata för det specifika sladdsetet
har offentliggiorts för säkerhetsändamål.
ANVÄND EJ SLADDSET SOM INTE UPPFYLLER FÖLJANDE
ELEKTRISKA MINIMIKRAV.
KONTAKT: 3 A, 250 V, 50/60 Hz, Klass 1,3 ledare, godkänd
av europeisk säkerhetsmyndighet.
SLADDSET: Typ H05W-F3G0.75. Harmoniserad ( HAR ).
Symbolerna “ ” indikerar ett sladdset som är godkänt
enligt rätt europeisk standard (OBS: I stället för “HAR” kan det
godkännandemärke vara påsatt som representeras av den
europeiska säkerhetsmyndighet som godkände sladdsetet. Ett
exempel pådetta är: “ VDE ”.
APPARATENS KONTAKTDON: 3 A, 250 volt, 50/60 Hz,
godkänd europeisk säkerhet. Typ IEC 320. Sladdsetet får inte
vara längre än 3 meter. Det får användas ett sladdset som
uppvisar komponent med elektriska märkdata större än
specificerade elektriska minimärkdata.
Allmänna säkerhetsåtgärder
• Använd ibiMaster endast för dess avsedda ändamål: att
hålslå och binda papper och omslag i enlighet med de
angivna specifikationerna.
• Placera inte någonting i maskinens hålslagningsöpping med
undantag för pappers - och omslagsmaterial.
• Placera enheten på en säker och stabil arbetsyta så att
maskinen inte kan falla och eventuellt åsamka personskada
eller skada på enheten.
• Följ alla varningsmeddelanden och anvisningar som finns
utmärkta på enheten.
• Lyft upp maskinen underifrån, inte med ovandelen.
• Lyft inte maskinen med ovandelen eller med
pappershållartråden.
EDNord - Istedgade 37A - 9000 Aalborg - telefon 96333500
Page 33

ibiMaster 250 / ibiMaster 250e
Val av spiralstorlek
Öppna inbindningsguiden (fig. 1a/1b).
Placera dokument samt omslag på inbindningsguiden.
Lösgör inbindningsguiden och välj en lämplig spiral
enligt guiden. Endast spiralstorlekar upp till 25 mm är
beskrivna. ibiMaster kan binda upp till 425 sidor, eller
50 mm spiralstorlek. För bästa resultat använd alltid
ibico's omslag tillsammans med ibico's färgmatchande
spiraler.
1 3
2
Stansning
Bunta noggrannt ihop och för in arken samt omslagen
som skall stansas längst in i maskinen öppning (fig.
2a/2b).
Se till att dokumentet ligger dikt mot kantguiden i
maskinens öppning.
250: För att stansa hål, dra handtaget mot dig
(A) (fig.
1a)
. För ned hela vägen, genom alla papper. Upp till 25
st 80 grams A4 papper kan stansas samtidig. För att
undvika att mekanismen hänger upp sig och förslits i
onödan stansa endast TVÅ plastomslag/transparenter i
taget.
250e: För att stansa hål, tryck på PUNCH
(A) (fig. 1b)
knappen. Upp till 20 st 80 grams A4 papper kan
stansas samtidig. För att undvika att mekanismen
hänger upp sig och förslits I onödan stansa endast
TVÅ plastomslag/transparenter I taget.
250e: On stansningsmekanismen fastnar/hakar upp
sig, tryck på RESET
(A1) (fig. 1b)
knappen. Tryck därefter
på PUNCH
(A) (fig. 1b)
knappen och ta bort dokumentet
ur maskinens öppning (det kan ibland vara nödvändigt
att repetera denna procedur flera gånger). För att
fortsätta stansningen, upprepa steg 1 till 3 med en
mindre mängd papper/omslag fr att undvika att
mekanismen hakar upp sig igen.
Utdragbara stans knivar: Om du önskar att stansa A5,
så kan en stanskniv frigöras från stansning genom att
man drar upp avdelarspärren som finns under locket
på toppen av maskinen (D) (fig. 1a/1b), när avdelaren
är nere stansar den kniven åter igen.
Marginal inställning: Marginalen mellan de stansade
hålen och papperskanten, kan justeras, beroende på
dokumentets tjocklek. Justera handtaget, lokaliseras på
den vänstra sidan på ibiMaster, antingen genom att dra
ut den eller genom att trycka in den, enligt det önskade
marginal avståndet.
1 5
6
2
3
7
4
Inbindning
Placera spiralen bakom de vertikala stöden med den
öppnsbara sida mot dig (fig. 3).
Rotera inbindningshandtaget uppåt mot dig tills att
spiralen har öppnat sig tillräckligt för att du skall kunna
infoga dokumentet.
Trä på omslaget, framsidan nedåt, över spiralens
pinnar. Trä därefter på dokumentsidorna med
framsidan nedåt. Om du har ett stort antal sidor i ditt
dokument kan proceduren behöva upprepas ett antal
gånger. Avsluta med att sätta på baksidans omslag.
För handtaget från dig för att stänga spiralen.
Lyft upp och du har nu ett komplett inbundet
dokument!
Så snart du blivit familjär med att använda ibiMaster
kommer du att upptäcka många nya och spännande
sätt att designa dina inbunda dokument.
1 4
5
6
2
3
EDNord - Istedgade 37A - 9000 Aalborg - telefon 96333500
Page 34

ibiMaster 250 / ibiMaster 250e
Service
• Dra ur kontakten till enheten, och låt en auktoriserad
ibico-servicerepresentant utföra de reparationer som
behövs.
Tömning av pappersavfallsbehållaren
Avfallsbehållaren bör tömmas regelbundet
(F) (fig. 6)
.
För att öppna, dra försiktigt ut lådan mot dig. Lådan
åker automatiskt på plats då den sätts tillbaka.
1
Garanti
Apparaten garanteras fungera i ett år från inköpsdatumet
om den används normalt. GBC reparerar eller ersätter
felaktiga apparater, efter egen bedömning, utan kostnad
inom garantiperioden. Garantin utesluter fel som uppstått
till följd av felaktig användning eller användning i andra
syften än det som beskrivits. Bevis för inköpsdatum krävs.
Garantin gäller inte om apparaten har reparerats eller
modifierats av personer som inte är auktoriserade av GBC.
Det är vårt mål att garantera att våra produkter fungerar
enligt de specifikationer som angivits. Denna garanti
påverkar inte dina lagstadgade rättigheter.
Specifikation
Dimensioner
Vikt
Stansningskapacitet
Inbindningskapacitet
Max pappersvidd
Borttagbar sprint
ibico ibiMaster 250
457 mm x 216 mm x 406 mm
11,8 kg
25 st 80 gm
2
papper
425 st (50 mm)
11,7" (297 mm A4)
11
ibico ibiMaster 250e
457 mm x 216 mm x 406 mm
15,2 kg
20 st 80 gm
2
papper
425 st (50 mm)
11,7" (297 mm A4)
11
EDNord - Istedgade 37A - 9000 Aalborg - telefon 96333500
Page 35

ibiMaster 250 / ibiMaster 250e
250e - Środki ostrożności związane z elektrycznością
250e - Uwagi dotyczące bezpieczeństwa
BEZPIECZEŃSTWO, ZARÓWNO TWOJE JAK I INNYCH OSÓB,
JEST DLA FIRMY IBICO BARDZO ISTOTNĄ. W NINIEJSZEJ
INSTRUKCJI OBSłUGI, JAK I NA SAMYM URZĄDZENIU,
UMIESZCZONE SĄ WAżNE INFORMACJE DOTYCZĄCE
BEZPIECZEŃSTWA. PROSIMY O ICH UWAżNE PRZECZYTANIE.
NA DOLNEJ CZĘŚCI PRODUKTU ZNAJDUJE SIĘ NASTĘPUJĄCE
OSTRZEŻENIE.
Niniejsza informacja o zachowaniu bezpieczeństwa oznacza, że
użytkownik może doznać poważnych obrażen a nawet zginąć, jeśli
otworzy urządenie i wystawi się na dzialanie niebezpiecznego
napięcia.
Ryzko porażenia prądem elektrycznym.
Nie otwierać. Wewnątrz urządzenia nie ma
części obsługiwanych przez użytkownika.
Czynności serwisowe powinni wykonywać
wykwalifikowani pracownicy serwisu.
OSTRZEŻENIE
PRZED KAŻDĄ INFORMACJĄ DOTYCZĄCĄ
BEZPIECZEŃSTWA ZNAJDUJE SIĘ SYMBOL
BEZPIECZEŃSTWA. SYMBOLTEN WSKAZUJE
WYSTĘPOWANIE RYZYKA POTENCJALNEGO
ZAGROŻENIA DLA LUDZI, KTÓRE MOŻE
SPOWODOWAĆ ZAGROŻENIE UŻYTKOWNIKA, INNYCH
OSÓB, USKODZENIA PRODUKTU LUB MIENIA.
UWAGA: DLA WŁASNEGO BEZPIECZEŃSTWA PROSIMY NIE PODŁĄCZAĆ BINDOWNICY IBIMASTER 250e DO SIECI PRZED
DOKŁADNYM ZAPOZNANIEM SIĘ Z TREŚCIĄ NINIEJSZEJ INSTRUKCJI OBSŁUGI. INSTRUKCJA POWINNA BYĆ
PRZECHOWYWANA W ŁATWO DOSTĘPNYM MIEJSCU, ABY W RAZIE POTRZEBY MOGŁA SŁUŻYĆ POMOCĄ. ABY ZAPOBIEC
EWENTUALNYM OBRAŻENIOM, NALEŻY PRZEDSIĘWZIĄĆ NASTĘPUJĄCE PODSTAWOWE ŚRODKI OSTROŻNOŚCI PRZY
PODŁĄCZANIU I UŻYWANIU URZĄDZENIA.
250e - Istotne środki ostrożności
Poniższe symbole znajdula się na urządzeniu, a ich znaczenie jest
następujące:
Dziurkowanie
Reset
Bindownica ibiMaster 250e musi zostać podłączona do prądu
elektrycznego o parametrach zgodnych z danymi znamionowymi
podanymi na tabilczce znamionowej oraz w niniejszej instrukcji
obsługl.
UWAGA: GNIAZDKO SIECIOWE MUSI ZNAJDOWAĆ SIĘ
BLISKO URZĄDZENIA I BYĆ ŁATWO DOSTĘPNE.
UWAGA: W RAZIE NIEBEZPIECZEŃSTWA DO
ODŁĄCZENIA URZĄDZENIA OD ŹRÓDŁA
NAPIĘCIA W PIERWSZEJ KOLEJNOŚCI NALEŻY
UŻYĆ PRZEWODU SIECIOWEGO!
• Przed przestawieniem urządzenia w inne miejsce lub w przypadku,
gdy urządzenie nie jest używane przez dłuższy czas, należy
odłączyć bindownicę ibiMaster 250e od sieci.
• Nie używać urządzenia w przypadku, gdy przewód sieciowy bądź
wtyczka są uszkodzone, urządzenie zadziałało nieprawidłowo, lub
gdy urządzenie zostało w jakikolwiek sposób uszkodzone.
• Nie przekraczać mocy znamionowej gniazdek elektrycznych, gdyż
może to spowodować pożar lub porażenie prądem elektrycznym.
• Nie dokonywać jakichkolwiek zmian przy wtyczce; wtyczka jest
dostosowana do parametrów elektrycznych urządzenia.
• Urządzenie jest przeznaczone wyłącznie do użytku w
pomieszczeniach zamkniętych.
• Nie wtykać jakichkolwiek przedmiotów przez otwory w urządzeniu,
ani rozlewać jakichkolwiek cieczy na urządzenie.
• Nie używać urządzenia w przypadku, gdy było one wystawione na
działanie deszczu lub wody.
EDNord - Istedgade 37A - 9000 Aalborg - telefon 96333500
Page 36

ibiMaster 250 / ibiMaster 250e
Uruchomienie
250: Założyć rączkę na wałek dziurkarki ulokowany z prawej strony
maszyny (fig. 1). Upewnić się, że rączka znajduje się we właściwej
pozycji. Przy pociąganiu rączki w celu dziurkowania, nie powinna ona
uderzać o stół.
Zamocować rączkę za pomocą śrubokręta.
250e: Mocno wcisnąć żeńską końcówkę przewodu sieciowego w
gnlazdko dla przewodu sieciowego znajdujące się na tylnej ściance
urządzenia.
UWAGA: Przed wetknięciem męskiej końcówki przewodu
sieciowego do sieci należy się upewnić, że czynność
opisana w punkcie 3. została zakończona.
Wetknąć męską końcówkę przewodu sieciowego do gniazdka
sieciowego o odpowiednich parametrach elektrycznych.
1
2
3
4
Wybór szerokości arkusza
Nastawić przymiar prowadzący na odpowiedni wymiar oprawianego
papieru (11" - 19 pierścieni, rozmiar listu; 11 1/4" Okładka - 19
pierścieni, rozmiar okładki; A4 - 21 pierścieni) (fig. 1a/1b).
1
250e - Czyszczenie urządzenia
UWAGA: Przed czyszczeniem odłączyć produkt od zasilania.
• Wolno czyścić tylko elementy zewnętrzne, przecierając je wilgotną
ściereczką. Nie wolno używać detergentów lub rozpuszczalników.
Poniższe uwagi dotyczą urządzeń zasilanych napięciem
230 V ~, 50 Hz.
DOBOR GŁÓWNEGO PRZEWODU POŁĄCZENIOWEGO
(DOTYCZY WYŁĄCZNIE URZĄDZEŃ NA 230 V~)
Przy doborze odłączalnego przewodu połączeniowego dla bindownicy
ibiMaster 250e należy wziąć pod uwagę następujące czynniki:
Przewód polączeniowy składa się z następujących trzech części: wtyczki
sieciowej, kabla oraz wtyczki urządzeniowej. Każda z tych części musi
spełniać europejskie wymogi bezpieczeństwa.
Następujące minimalne elektryczne dane znamionowe dla konkretnych
przewodów połączenlowych zostały opublikowane dla zapewnienia
bezpieczeństwa użytkowników.
NIE UŻYWAĆ PRZEWODÓW POŁĄCZENIOWYCH, KTÓRE NIE
SPEŁNIAJĄ PONIZSZYCH MINIMALNYCH WYMOGÓW
ELEKTRYCZNYCH.
WTYCZKA SIECIOWA: 3 A, 250 V, 50/60 Hz, przewodnik klasy 1,3,
zatwierdzona przez europejskle instytucje normalizacyjne.
KABEL: Typ H05W-F3G0.75, normy spójne ( HAR ). Symbole
„” oznaczają kabel zatwierdzony odośną europejską normą
(UWAGA: zamiast „ HAR ” może się pojawić symbol danej europejskiej
instytucji normalizacyjnej, która przewód zatwierdziła, np. „ VDE ”.
WTYCZKA URZĄDZENIOWA: 3 A, 250 V, 50/60 Hz, zatwierdzona przez
europejskie instytucje normalizacyjne, typ IEC 320. Długość przewódu
połączeniowego nie może przekraczać 3 m. Zastępczo może zostać użyty
przewód połączeniowy o elektrycznych danych znamionowych większych
od podanych powyżej minimalnych parametrów elektrycznych.
Ogólne środki ostrożności
• Bindownicy ibiMaster należy użwać jedynie zgodnie z jej
przeznaczeniem, tj. do dziurkowania i oprawiania papieru i okładek, z
uwzględnienem podanych parametrów technicznych.
• W szczelinie perforacyjnej urządzenia nie należy umieszczać niczego
poza papierem i okładkami.
• Urządzenie należy ustawić w bezpiecznym, stabilnym miejscu, tak, aby
nie mogło spaść i spowodować obrażeń u personelu bądż uszkodzenia
bindownicy.
• Przy obsłudze urządzenia należy działać zgodnie ze wszelkimi
ostrzeżeniami i instrukcjami umieszczonymi na urządzeniu.
• Przy podnoszeniu urządzenie należy trzymać od spodu, nie za pokrywę.
• Urządzenia nie należy podnosić trzymając za pokrywę czy wspornik
papieru.
EDNord - Istedgade 37A - 9000 Aalborg - telefon 96333500
Page 37

ibiMaster 250 / ibiMaster 250e
Wybór rozmiaru grzbietu
Otworzyć część wyznaczającą rozmiar oprawy (fig. 1a/1b).
Dokument włącznie z okładką umieścić z tyłu części.
Zwolnić część i wybrać grzbiet odpowiadający rozmiarowi
wskazanemu przez przymiar. Ukazane są tylko rozmiary do
25 mm. ibiMaster ma maksymalną zdolność oprawiania 425
arkuszy, tj. do rozmiaru grzbietów 50 mm. Dla uzyskania
najlepszych rezultatów należy zawsze używać okładek i
grzbietów wiążących marki ibico o dopasowanych kolorach.
1 3
2
Dziurkowanie
Wyrównać arkusze lub okładki i umieścić brzeg do zszycia w
szczelinie dziurkującej (fig. 2a/2b).
Popychać arkusze krótkimi ruchami aż będą ściśle przylegały do
prowadnicy i szczeliny dziurkującej.
250: W celu rozpoczęcia dziurkowania należy pociągnąć
rączkę do siebie (A) (fig. 1a). Należy ciągnąć maksymalnie do
dołu, aby przedziurkować wszystkie arkusze. Maszyna przebija
jednorazowo do 25 arkuszy papieru 80 gram. Celem uniknięcia
zacięć i nadmiernego zużycia, należy dziurkować jednorazowo
tylko DWIE plastikowe okładki.
250e: W celu rozpoczęcia dziurkowania należy nacisnąć
przycisk PUNCH (A) (fig. 1b). Maszyna ibiMaster przebija
jednorazowo 20 arkuszy papieru 20 lb./80 gram. Celem
uniknięcia zaclęć nadmiernego zużycia, należy dziurkować
jednorazowo tylko DWIE plastikowe okladki.
250e: W przypadku zacięcia się papieru należy nacisnąć
przycisk RESET (A1) (fig. 1b). Następnie nacisnąć przycisk
PUNCH (A) (fig. 1b) I usunąć papier lub okladki ze szczeliny
dziurkującej (może być konieczne kilkakrotne naciskanie
przycisku PUNCH celem osiągnięcia pożądanego efektu). W
razie kolejnego zacięcia należy powtórzyć kroki od 1 do 3,
umieszczając nieco mniej papieru, aby zapobiec przeciążeniu.
Odłączane wycinaki: Jeśli chcesz przedziurkować kartkę formatu
A5, od dziurkacza możesz oddzielić wycinaki podnosząc szpilkę
nastawczą znajdującą się pod pokrywą w górnej części
urządzenia (D) (fig. 1a/1b); jeśli szpilka jest opuszczona,
wycinaki będą ponownie zamocowane.
Dostosowanie marginesu: Szerokość marginesu między
dziurkami a krawędzią papieru można dostosować, zależnie od
grubości dokumentu. Zmień położenie dźwigni znajdującej się z
lewej strony urządzenia ibiMaster, wysuwając ją lub wsuwając,
odpowiednio do wymaganej szerokości marginesu.
1 4
5
2
3
5
3
Oprawa
Umieścic grzbiet wiążący z tyłu obsady na pionowy grzebień w
taki sposób, aby otwarta część elementu była widoczna (fig. 3).
Obracać dźwignią oprawy ku sobie, aż grzbiet wiążący otworzy
się na tyle, aby można było wsunąć do niego dokument.
Przystąpić do nawlekania przedniej okładki (skierowanej "twarzą
w dół") na zęby otwartego grzbietu. Następnie nawlekać kolejne
strony, "twarzą w dół", w podobny sposób. Powtórzyć czynność,
aż wszystkie strony zostaną nawleczone na grzbiet. Przy
nawlekaniu tylnej okładki należy zwrócić ją "twarzą do góry".
Pchnąć dźwignię oprawy od siebie, aby zamknąć grzbiet
wiążący.
Książkę należy wyjąć poprzez uniesienie jej w górę. Twoja
oprawa jest już gotowa!
Po bliższym zapoznaniu się z urządzeniem ibiMaster można
zauważyć, że jego konstrukcja umożliwia jednoczesne
dziurkowanie i oprawianie, w ten sposób zwiększając wydajność
pracy.
1 4
5
6
2
3
EDNord - Istedgade 37A - 9000 Aalborg - telefon 96333500
Page 38

ibiMaster 250 / ibiMaster 250e
Serwis
• Skontaktować się z autoryzowanym przedstawicielem serwisu
ibico w celu dokonania koniecznych napraw.
Opróżnianie tacki na skrawki
Po kilkakrotnym użyciu należy opróżnić szufladkę na skrawki (F)
(fig. 6). Otworzyć szufladkę pociągajac ją łagodnym ruchem do
siebie. Przy ponownym instalowaniu, szufladka powinna
"zaskoczyć" w swoje miejsce.
1
Gwarancje
Udzielamy gwarancji na jeden rok pracy urzàdzania od daty
zakupu pod warunkiem, ˝e urzàdzenie b´dzie eksploatowane w
sposób okreÊlony w instrukcji. W okresie obj´tym gwarancjà GBC
naprawi lub wymieni wadliwe urzàdzenie wed∏ug swojego uznania,
nie pobierajàc za to ˝adnej op∏aty. Niniejsza gwarancja nie
obejmuje uszkodzeƒ wynikajàcych z niew∏aÊciwej eksploatacji
urzàdzenia lub jego u˝ycia niezgodnie z przeznaczeniem. Przy
sk∏adaniu reklamacji nale˝y przedstawiç dowód zakupu. Naprawy
lub zmiany konstrukcyjne dokonane przez osoby nieupowa˝nione
przez GBC powodujà utrat´ gwarancji. Dà˝ymy do tego, by nasze
produkty spe∏nia∏y podane specyfikacje. Niniejsza gwarancja nie
narusza w niczym praw przys∏ugujàcym konsumentom na mocy
odpowiedniego prawa krajowego okreÊlajàcego zasady sprzeda˝y
towarów.
Specyfikacja
Wymiary
Ciężar
Wydajność dziurkarki
Wydajność oprawy
Maksymalna szerokość arkusza
Rozłączalność
ibico ibiMaster 250
457 mm x 216 mm x 406 mm
11,8 kg
25 arkuszy, papier 80 g/m
2
425 arkuszy (50 mm)
11,7" (297 mm A4)
11
ibico ibiMaster 250e
457 mm x 216 mm x 406 mm
15,2 kg
20 arkuszy, papier 80 g/m
2
425 arkuszy (50 mm)
11,7" (297 mm A4)
11
EDNord - Istedgade 37A - 9000 Aalborg - telefon 96333500
Page 39

ibiMaster 250 / ibiMaster 250e
CZ
250e - Bezpečnost elektrického zapojenĺ
250e - Důležité bezpečnostní pokyny
VAŠE BEZPEČNOST I BEZPEČNOST OSTATNÍCH
OSOB JE PRO IBICO DŮLEŽITÁ. V TÉTO PŘÍRUČCE A
NA PŘÍSTROJÍCH JSOU DŮLEŽITÉ BEZPEČNOSTNÍ
POKYNY. ČTĚTE TYTO POKYNY POZORNĚ.
TATO VÝSTRAHA JE NA SPODNÍ ČÁSTI PŘÍSTROJE.
Toto bezpečnostní upozorněnostní znamená, že by mohlo
dojít k vážnému zranění nebo usmrceni, pokud přístoj
otevřete a budete zasaženi nebezpečným elektrickým
napětím.
Nebezpečí úrazu elektrickým proudem.
Neotvírat. Uvnitř nejsou žádné
součástky pro vlastní údržbu
uživatelem. Přenechte údržbu
kvalifikovanému servisnímu personálu.
VÝSTRAHA
VÝSTRAŽNÝ BEZPEČNOSTNÍ SYMBOL JE
PŘED KAŽDÝM POKYNEM V TÉTO PŘÍRUČCE,
KTERÝ SE TÝKÁ BEZPEČNOSTI. TENTO
SYMBOL OZNAČUJE POTENCIÁLNÍ PORUŠENÍ
BEZPEČNOSTI, KDY MŮŽETE ZRANIT SEBE
NEBO NĚKOHO JINÉHO, NEBO MŮŽETE
ZPŮSOBIT POŮKOZENÍ PŘÍSTROJE NEBO
ŠKODU NA MAJETKU.
VAROVÁNĺ: PRO VLASTNÍ BEZPEČNOST NAZAPOJUJTE IBIMASTER 250e DO ZDROJE ELEKTRICKÉHO
PROUDU PŘED SEZNÁMENÍM SE SE VŠEMI INSTRUKCEMI. INSTRUKCE USCHOVEJTE TAK, ABY VÁM BYLI
STÁLE K DISPOZICI. PŘI ZAHÁJENÍ ČINNOSTI A PŘI PRÁCI S VÝROBKEM JE NUTNO DODRŽOVAT
NÁSLEDUJÍCÍ BEZPEČNOSTNÍ OPATŘENÍ, ABY BYLO ZABRÁNĚNO MOŽNÉMU PORANĚNÍ.
250e - Důležitá bezpečnostní opatření
Na zařízení jsou vyznačeny následující symboly s těmito
významy:
Děrovat
Reset
ibiMaster 250e musí být zapojen do zdroje napěti, které
odpovídá elektrickému rozsahu zařízení vyznačenému na
specifikačnim štitku zařízení a v této přiručce.
POZOR: ELEKTRICKÁ ZÁSUVKA MUSĺ BÝT V
BLĺZKOSTI ZAŘĺZENĺ A MUSĺ BÝT
SNADNO PŘĺSTUPNÁ.
POZOR: V NALÉHAVÉM PŘÉPADĚ POUŽIJTE PRO
RYCHLÉ ODPOJENĺ ELEKTRICKOU
ŠŇŮRU.
• Odpojte ibiMaster 250e vždy před jeho přenášením nebo
nebude-li používán po delší dobu.
• Nepoužívejte zařízení, pokud je poškozena elektrická
šňúra nebo zástrčka, v případě jeho nesprávné funkce
nebo je-li jakkoli poškozeno.
• Nezatěžujte elektrický výstup nad povolenou mez, nebo
to může způsobit požár či elektrický šok.
• Nezaměňujte připojovací zástrčku. Zástrčka je upravena
pro příslušný zdroj proudu.
• Zařízení je určeno pouze pro použití v místnosti.
• Nikdy nevkládejte žádné předměty do otvorů v krytu.
Nesmí dojít k rozlití žádné kapaliny na zařízení.
• Nepouživejte zařízení, dostalo li-se do styku s vodou
nebo bylo-li vystaveno dešti.
EDNord - Istedgade 37A - 9000 Aalborg - telefon 96333500
Page 40

ibiMaster 250 / ibiMaster 250e
CZ
Začínáme pracovat
250: Nasad'te ruční páku k prosekávání na hřídel
prosekávacího zařízení a to na pravé straně stroje (fig. 1).
Zkontrolujte, zda ruční páka k prosekávání je nasazena ve
správné poloze. Při stlačení do nejnižší spodní polohy
nesmí se dotýkat stolu na kterém je přístroj umístěn.
Zajistěte ruční páku k prosekávání šroubem.
250e: Pevně zasuňte zásuvku elektrického kabelu do
zásuvky pro elektrický kabel umístěné na zadní části
zařízení.
POZOR: Tento krok je nutno učinit před zasunutím
zástrčky elektrického kabelu do elwktrické zásuvky.
Zasuňte zástrčku elektrického kabelu do příslušné
elektrické zásuvky.
1
2
2
2
Určenĺ šíře prosekávané strany papíru
Nastavte postranní vodítko podle velikosti šíře prosekávané
strany listů papíru, který chcete vázat (11" - pro velikost
listu s 19 kroužky, 11 1/4" pro větší velikost prezentační
obálky s 19 kroužky, A4 - pro velikost s 21 kroužky) (fig.
1a/1b).
1
250e - Čištění
POZOR: Před čištěním odpojte přístroj od zdroje napětí.
• Otřete vnější části přístroje pouze vlhkým hadrem.
Nepoužívejte čisticí prostředky ani ředidla.
Následující poznámky se týkají pouze typu na 230 V a 50Hz.
VÝBĚR SESTAVY HLAVNĺHO KABELU
(POUZE ZAŘĺZENĺ NA 230V AC)
Při výběru odpojovatelné sestavy kabelu pro ibiMaster 250e se
řite následujícím:
Hlavní kabel se sestává ze tří složek: připojovacl zástrčka,
materiál kabelu a vstup pro zařízení. Každá složka musí
splňovat bezpečnostní požadavky stanovené pro Evropu.
Následující minimální elektrické parametry pro specifickou
sestavu kabelu jsou uvedeny z bezpečnostních důvodů.
NEPOUŽĺVEJTE SESTAVU KABELU, KTERÁ NESPLŇUJE
TYTO MINIMÁLNĺ ELEKTRICKÉ PARAMETRY.
ZÁSTRČKA: 3 A, 250 V, 50/60 Hz, vodič třidy 1,3, schváleno
Evropskou bezpečnostní agenturou.
MATERIÁL KABELU: Typ H05VV-F3G0,75, harmonizovaný
( HAR ). Symboly „ ” označují materiál kabelu splňující
požadavky příslušné evropské normy (POZN. „ HAR ” Ize
nahradit schvalovací značkou Evropské bexpečnostni agentury,
která schválila materiál kabelu. Jako přiklad Ize uvést
„ VDE ”.
KONEKTOR ZAŘĺZENĺ: 3 A, 250 V, 50/60 Hz, schváleno podle
evropské normy. Typ IEC 320. Délka kabel nemá přesáhnout 3
metry. Lze nahradit kabelem, jehož elektrické parametry
jednotlivých složek přesahuji minimálni uvedené hodnoty.
Obecná bezpečnostní opatření
• ibiMaster používejte pouze pro jeho určený účel, to znamená
pouze pro děrování a vázání papíru podle uvedených pokynů.
• Do děrovacího otvoru zařizeni nevkládejte nic jiného než
papír nebo svazek papírů.
• Umístěte zařízení na bezpečné a pevné pracovní místo, aby
bylo zabráněno jeho pádu, který může způsobit poranění a
poškození zařízení.
• Dodržujte všechna upozornění a všechny instrukce uvedené
na zařízení.
• Při zdvihání zařizeni je uchopte za spodni část, nikoli za jeho
kryt.
• Při zdvihání, zařízení nedržte za jeho kryt ani za drátový
držák papíru.
EDNord - Istedgade 37A - 9000 Aalborg - telefon 96333500
Page 41

ibiMaster 250 / ibiMaster 250e
CZ
Určení velikosti plastického kroužkového hřbetu
Použijte zařízení k měření tloušt'ky vázaného dokumentu
(fig. 1a/1b).
Vložte kompletní dokument včetně prezentačních obálek.
Uvolněte toto zařízení a odečtěte potřebnou velikost
průměru plastického kroužkového hřbetu na stupnici
měřidla. Lze tak odměřit velikost průměru plastického
kroužkového hřbetu do 25 mm včetně. Vaším přístrojem
ibiMaster můžete vázat dokumenty až do díly 425 listů s
velikostí plastického kroužkového hřbetu 50 mm. K
dosažení vysoké úrovně prezentovaných dokumentů
používejte vždy kvalitní prezentační obálky ibico barevně
sladěné s barvou plastických kroužkových hřbetů ibico.
1 3
2
Prosekávání
Vyrovnejte listy papíru neb prezentační obálky a stranou,
kde má být dokument svázán, vložte přiměřený počet listů
pro prosekávání štěrbiny (fig. 2a/2b).
Vložené listy znovu srovnejte tak, aby doléhaly na postranní
vodítko a současně dosedly na dno prosekávací štěrbiny.
250: Vlastní prosekávání aktivujete stlačením ruční páky k
prosekávání směrem k sobě
(A) (fig. 1a)
. Stlačte ji zcela dolů
tak, aby všechny listy papíru byly proseknuty. ibiMaster
prosekává naráz až 25 listů papíru 80 g/m
2
. Prosekávajte
vždy jen DVĚ transparentní presentační obálky (PVC) a to k
zamezení ucpávky prosekávacího zařízení.
250e: Vlastní prosekávání aktivujete stlačením tlačitka
prosekávání “PUNCH”
(A) (fig. 1b)
. ibiMaster prosekává
naráz až 20 listů papiru 80 g/m
2
. Prosekávejte vždy jen DVĚ
transparentni presentační obálky (PVC) a to k zamezení
ucpávky prosekávacího zařizení.
250e: Pokud přece jen k ucpávce došlo, stiskněte tlačítko
“RESET”
(A1) (fig. 1b)
. Poté stiskněte tlačítko prosekávání
“PUNCH”
(A) (fig. 1b)
a vyjměte listy papíru nebo
presentační obálky z prosekávací štěrbiny. (Je možné,
že k vyjmutí listů papíru budete muset stisknout tlačítko
prosekávání několikrát.) Pokud by v zápětí došlo opět k
ucpávce, musite předcházejíci kroky opakovat s menším
počtem listů papíru.
Výsuvné děrovací raznice: Pokud chcete děrovat A5, je
možné vysunout raznici z děrovače tak, že vytáhnete
směrem nahoru kolík voliče umístěný pod víkem nahoře na
stroji (D) (fig. 1a/1b); když je volič dole, zapadne děrovací
raznice znovu na místo.
Seřízení okraje: Šířku okraje mezi proraženými otvory a
hranou papíru je možné seřídit v závislosti na tloušce
dokumentu. Nastavte páku umístěnou na levém boku
ibiMaster tak, že ji vytáhnete ven nebo zatlačíte dovnitř
podle požadované šířky okraje.
1 5
6
2
3
7
4
Vázání
Plastický kroužkový hřbet položte za vázací kolík a to tak,
aby jeho otevírací strana směřovala k Vám (fig. 3).
Pomalým pohybem vázací páky směrem k sobě otevřete
plastický kroužkový hřbet tak, abyste mohli svazovaný
materiál pohodlně navléct do kroužků plastického
kroužkového hřbetu.
Nyní navlečte přední prezentační obálku, a totitulní stranou
směřující dolů, na otevřené kroužky. Následuje navlečení
oostatních stránek dokumentu, opět přední stranou dolů.
Nakonec umístěte i zadní prezentační obálku titulní stranou
nahoru.
Pohybem vázací páky směrem od Vás uzavřete plastický
kroužkový hřbet.
Vyjměte svázaný dokument z vázacích kolíků směrem
nahoru. Váš presentační dokument je hotov.
Jakmile se seznámíte s obluhou Vašeho přístroje ibiMaster,
poznáte, že design přístroje umožňuje provádět
prosekávání i vázání současně. To podstatně zvýší celkový
výkon vázání.
1 4
5
6
2
3
EDNord - Istedgade 37A - 9000 Aalborg - telefon 96333500
Page 42

ibiMaster 250 / ibiMaster 250e
CZ
Údržba
• Kontaktujte autorizovaný servis ibico.
Odstranění odpadu po prosekávání
Vyprázdněte po určité době prosekávání nádobku na
vznikající odpad (F) (fig. 6). Nádobku vytáhněte mírným
tahem k sobě. Když ji po vyprázdnění zatlačĺte zpět,
dostane se do své původní polohy.
1
Záruka
Provoz tohoto stroje je, za pfiedpokladu obvyklého zpÛsobu
pouÏívání, zaruãen po dobu jednoho roku od data zakoupení.
V prÛbûhu záruãní doby bude spoleãnost GBC bezplatnû
provádût opravy stroje nebo podle vlastního uváÏení rozhodne
o v˘mûnû vadného stroje. Tato záruka se nevztahuje na
závady zpÛsobené nesprávn˘m zacházením nebo pouÏíváním
knevhodn˘m úãelÛm. Bude poÏadováno pfiedloÏení doklad o
datu zakoupení. Opravy nebo úpravy provedené osobami,
které k tomu nebyly GBC oprávnûny, budou mít za následek
ztrátu platnosti záruky. Na‰ím cílem je, aby byla zaji‰tûna
funkce na‰ich v˘robkÛ v souladu s uveden˘mi specifikacemi.
Tato záruka neovlivÀuje zákonná práva, která pro spotfiebitele
vypl˘vají z pfiíslu‰né národní legislativy upravující podmínky
prodeje zboÏí.
Specifikace
Rozměry
Hmotnost
Kapacita prosekávání
Kapacita vázání
Max. šířka listu papíru
Rozpojitelné kolíky
ibico ibiMaster 250
457 mm x 216 mm x 406 mm
11,8 kg
25 listů papíru 80 g/m
2
425 listů (50 mm)
11,7" (297 mm A4)
11
ibico ibiMaster 250e
457 mm x 216 mm x 406 mm
15,2 kg
20 listů papíru 80 g/m
2
425 listů (50 mm)
11,7" (297 mm A4)
11
EDNord - Istedgade 37A - 9000 Aalborg - telefon 96333500
Page 43

ibiMaster 250 / ibiMaster 250e
250e - Villamossági óvintézkedések
250e - Munkavédelmi tudnivalók
AZ ÖN ÉS MÁSOK BIZTONSÁGA FONTOS A IBICO-NEK.
FONTOS MUNKAVÉDELMI TUDNIVALÓKAT TALÁLHAT
EBBEN A HASZNÁLATI KÉZIKÖNYVBEN ÉS MAGÁN A
TERMÉKEN. FIGYELMESEN OLVASSA EL EZEKET A
TUDNIVALÓKAT.
A TERMÉK ALSÓ RÉSZÉN A KÖVETKEZŐ
FIGYELMEZTETŐ FELIRAT OLVASHATÓ.
A fenti biztonsági figyelmeztetés azt jelenti, hogy a bererdezés
felnyitásával olyan nagy elektromos feszültségnek teheti ki
magát, amely komoly, vagy akár halálos sérüléshez is
vezethet.
Áramütés-veszély! Ne nyissa fel!
A berendezésben nincsenek
olyan alkatrészek, amelyeket
sajátmaga javíthat. A berendezés
javítását bízza szakemberre!
FIGYELEM
EBBEN A KEZELÉ SI ÚTMUTATÓBAN, MINDEN
BIZTONSÁGGAL KAPCSOLATOS MEGJEGYZÉST, A
BIZTONSÁGI FIGYELMEZTETŐ JELZÉS ÁBRÁJA
ELŐZI MEG. EZ A JELZÉS AZ ESETLEGES OLYAN
VESZÉLYHELYZETEKRE HÍVJA FEL A FIGYELMET,
AMELYEK SORÁN SÉRÜLÉS ÉRHETI ÖNT VAGY
MÁSOKAT, ILLETVE MEGSÉRÜLHET A TERMEK
VAGY MÁS TÁRGYAK.
FIGYELMEZTETÉS: MUNKAVÉDELMI OKOKBÓL NE CSATLAKOZTASSA A IBIMASTER 250e BERENDEZÉST AZ
ELEKTROMOS HÁLÓZATBA MINDADDIG, AMIG EL NEM OLVASTA A HASZNÁLATI UTASÍTÁST. A HASZNÁLATI
UTASÍTÁST TARTSA KÖNNYEN HOZZÁFÉRHETŐ HELYEN. A BALESETEK MEGELÖZÉSE ÉRDEKÉBEN A TERMÉK
ÜZEMBE HELYEZÉSE ÉS HASNÁLATA SORÁN AZ ALÁBBI ÓVINTÉZKEDÉSEKET KELL BETARTANI.
250e - Fontos óvintézkedések
A berendezésen található további jelek és jelentésük:
Lyukaszt
Reset
A ibiMaster 250e iratkötö készüléket a sorozatszámot és
minősítést feltüntető lapon vagy ebben a használati utasításban
jelzett villamossági minősitésnek megfelelő tápfeszültséghez
szabad csak csatlakoztatni.
FIGYELMEZTETÉS: A TÁPFESZÜLTSÉG
KONNEKTORA LEGYEN A BERENDEZÉS
KÖZELEBEN ES LEGYEN KÖNNYEN
MEGKÖZELITHETÖI
FIGYELMEZTETÉS: VÉSZHELYZETBEN HASZNALJA
A HALOZATI TAPKÁBELT A CSATLAKOZÁS
MEGSZÜNTETÉSÉHEZI
• Húzza ki a ibiMaster 250e tápkábelét, mielőtt a berendezést
elmozdítja vagy ha hosszabb ideig nem használja.
• Ne használjon sérült, rosszul működő, vagy bármilyen más
módon károsodott tápkábelt és csatlakozót.
• Ne terhelje túl a hálózati konnektorokat a kapacitásukat
meghaladó mértékben, ez tűzveszélyes és áramütést
okozhat.
• Ne módosítja a hosszabbító dugót. A dugót a megfelelő
tápfeszültségre állitották be.
• A berendezés kizárólag beltéri használatra tervezték.
• Ne tegyen semmilyen tárgyat a berendezés nyílásaiba. ne
öntsön rá semmilyen folyadékot.
• Ne használja a berendezést, ha azt eső vagy víz érte.
EDNord - Istedgade 37A - 9000 Aalborg - telefon 96333500
Page 44

ibiMaster 250 / ibiMaster 250e
Indítás
250: Nyomja a kart a gép jobboldalán található lyukasztó
tengelyre (fig. 1). Ellenőrizze, hogy a kar megfelelő
pozíicióban lett felszerelve. Amikor Ön lyukasztáskor előre
húzza, nem szabad az asztalhoz érnie.
Rögzítse a kart egy csavarhúzóval.
250e: Határozott mozdulattal nyomja be a hálózati kábel
csatlakozóját a készaülék hátoldalán található aljzatba.
VIGYÁZAT! Ügyeilen arra, hogy először ezt alépést
végezze el, csak azután dugja be a hálózati
kábelt a fali konnektorba.
Dugja be a hálózati kábel csatlakozóját a fali konnektorba.
1
2
3
4
A lap szélességének meghatározása
Állítsa be a szélmeghatározót a bekötendő papír méretére
(11" - 19 lyukas levélpapír méret, 11 1/4" borító - 19 lyukas
túlméretezett borító, A4 - 21 lyuk) (fig. 1a/1b).
1
250e - Tisztítás
VIGYÁZAT: Tisztítás előtt húzza ki a berendezés hálózati csatlakozóját!
• Csak a berendezés külső részét törölje át nedves ruhával!
Ne használjon mosószert vagy oldószereket!
Az alábbi megjegyzések csak a 230 V 50Hz minősitésü
egységekre vonatkoznak.
FÖ KÁBELKESZLET KIVÁLASZTÁSA
(CSAK 230 VAC GĖPEKRE)
Ha leszerelhető kábeit választ a ibiMaster 250e - hez, mindig
vegye figyelembe az alábbiakat.
A kábelkészlet három elemből áll: csatlakozókábelből, kábelből
és csatlakozó aljzatból. Mindegyik elemnek meg kell felelnie az
európai biztonsági előirásoknak.
Az alábbi, az adott kábelkészletre vonatkozó minimális
villamossági biztonsági minősítéseket csak munkavédelmi
okokbol közöljük.
NE HASZNÁLJON OLYAN KÁBEL KÉSZLETET, AMELYIK
NEM FELEL MEG A MINIMÁLIS VILLAMOSSÁGI
ELÖĺRÁSOKNAK.
CSATLAKOZÓ: 3 A, 250 V, 50/60 Hz, 1,3 kategóriájú vezetö,
európai biztonsági hivatal által jóváhagyott.
KÁBEL: H05VV-F3G0.75, harmonizált (HAR). A jel mutatja,
hogy a kábel megfelel az adott európai szabványnak.
(Megjegyzés: Előfordulhat, hogy a HAR jelzés helyett annak az
európai biztonsági hivatalnak a jelzése van feltüntetve, amelyik
jóváhagyta a kábelt. PI. VDE.
KÉSZÜLÉK CSATLAKOZÓ: 3 A, 250 V, 50/60 Hz, európai
hivatal által jóváhagyott, IEO 320 típusú. A Kábel hosszúsága
ne haladja meg a 3 métert. A kábelkészlet helyettesíthető a
feltütetett minimális villamossági minősítésnél jobb
kábelkészlettel.
Általános óvintézkedések
• A ibiMaster kötörendszert rendeltetésszerüen, csak papir- és
borítólapok átlyukasztására és összefüzésére használja a
mellékelt utasítások alapján.
• A lyukasztótorokba ne tegyen papír-és borítólapon kivül
semmit.
• A készüléket helyezze biztonságos, stabil munkafelületre.
Ügyeljen rá, hogy a berendezés ne eshessen le, személyi
sérüléseket vagy a gép megrongálódását okozva.
• Vegye figyelembe a terméken feltüntetett összes
figyelmeztetést és utasítást.
• A készüléket ne a fedelénél, hanem az aljánál fogva emelje
meg.
• Soha ne emelje fel a készüléket a fedelénél vagy a papírtartó
huzalnál fogva.
EDNord - Istedgade 37A - 9000 Aalborg - telefon 96333500
Page 45

ibiMaster 250 / ibiMaster 250e
A spirálgyűrűk méretének meghatározása
Tolja a fűzőméretezőt nyitott helyzetbe (fig. 1a/1b).
Helyezze a dokumentumot a borítóval a fűzőméretező
mögé.
Engedje vissza a fűzőméretezőt és válassza ki azt a
spirálgyűrűt, amelynek mérete megegyezik az útmutatón
jelölt mérettel. Csak 25 mm-ig tüntettük fel a spirálgyűrűk
méretét. A ibiMaster készülék 425 lapig terjedő
dokumentumok bekötésére alkalmas, egészen 50 mm
gyűrű méretig. A legjobb eredmény elérésének érdekében
használjon mindig ibico márkás borítót ibico színkódos
fűzőkkel!
1 3
2
Lyukasztás
Helyezze a sorba szedett lapok és borítók szélét a
lyukasztó nyílásba (fig. 2a/2b).
Ütögesse a papírokat, amíg egy szintre rendeződnek a
szélmeghatározó és lyukasztó nyílás alja között.
250: Lyukasztáshoz húzza maga felé a lyukasztó kart
(A)
(fig. 1a)
. Nyomja le teljesen, hogy minden lapot
átlyukasszon. A készülék egyszerre 25, 80 grammos lapot
lyukaszt. Egyszerre csak KÉT borítót lyukasszon, hogy
elkerülje a túlzott igénybevételt és a papírelakadást!
250e: A lyukasztáshoz nyomja meg a PUNCH (lyukaszt)
gombot
(A) (fig. 1b)
. A ibiMaster egyszerre kilyukaszt akár
20 db 80 grammos lapot. Egyszerre viszont csak KÉT
boritót lyukasszon, hogy elkerülje a túlzott igénybevételt és
a papirelakadást!
250e: Ha a papír elakad, nyomja meg a RESET
(A1) (fig.
1b)
gombot. Aztán nyomja meg a PUNCH
(A) (fig. 1b)
gombot és távolitsa el a boritót vagy a lapokat a lyukasztó
nyílásából (elöfordulhat, hogy többször is kell lyukasztani,
hogy a lapokat kivehesse). Ha a papír újra elakad, ismételje
meg az 1-3 lépéseket kevesebb papirral, hogy a
továbbiakban elkerülje a lyukasztásnál a túlterhelést!
Szétkapcsolható lyukasztók: Amennyiben A5-ös formátum
lyukasztására van szükség, az eszköz (D) (fig. 1a/1b)
fedele alatti választókar felhúzása által a lyukasztóalátét
(matrica) kiakasztható a tüskéből; a választókar alsó
pozícióba állításával a lyukasztó ismételten
összekapcsolódik.
Szegélybeállítás: A lyukak és a papír pereme közötti
szegély szélessége szabályozható, a dokumentum
vastagságától függően. A ibiMaster-as bal oldalán található
kar kihúzása vagy benyomása által a kívánt
szegélyszélesség beállítható.
1 5
6
2
3
7
4
Fűzés
Helyezze a fűző element a fűző tartó mögé úgy, hogy a
fűző elem nyitott része legyen Ön felé (fig. 3).
Fordítsa a fűző kart fölfelé, maga felé egészen addig, míg a
fűző elem ki nem nyílik annyira, hogy belehelyezhesse a
dokumentumot.
Fűzze be a felső borítólapot arccal lefelé a nyitott fűző
elem fogaira. Fűzze be a lapokat arccal lefelé. Nagyobb
dokumentumok esetében ismételje meg műveletet. Végül
pedig helyezze a hátsó borítót arccal felfelé a fűző elem
fogaira.
Tolja el magától a fűző kart, hogy lezárja a fűző elemet.
Emelje ki a kész dokumentumot. A dokumentum bekötése
elkészült!
Ahogy megszokja a ibiMaster használatát, látni fogja, hogy
a rendszer lehetővé teszi a lyukasztással egy időben
végzett fűzést. ĺgy Ön gyorsabban elvégezheti a munkáját.
1 4
5
6
2
3
EDNord - Istedgade 37A - 9000 Aalborg - telefon 96333500
Page 46

ibiMaster 250 / ibiMaster 250e
Javíttatás
• Javítás érdekében vegye fel a kapcsolatot a ibico
szervizképviseletével!
A papírhulladék eltávolĺtása
Ismételt használat után ürítse ki a hulladékot a fiókból (F)
(fig. 6). Húzza finoman maga delé a fiókot, hogy kinyissa.
Visszahelyezéskor a fiók a helyére fog kattanni.
1
Jótállás
Ezen berendezésre rendeltetésszerı használat mellett egy
év jótállást vállalunk. A jótállási idŒszak alatt a GBC a saját
mérlegelése után díjtalanul megjavítja vagy kicseréli a
meghibásodott berendezést. A jótállás nem terjed ki a nem
rendeltetésszerı használat során bekövetkezett hibákra.
A jótállás érvényesítéséhez szükség van a vásárlást igazoló
számlára. A berendezésen végzett olyan javítások vagy
változtatások, amelyeket a GBC által nem jóváhagyott személy
végzett, érvénytelenítik a jótállást. Célunk, hogy a termékeink
a megadott körülmények között megfelelŒen mıködjenek.
Ez a jótállás nem befolyásolja a vásárlók jogi lehetŒségeit
a kereskedelmi forgalomba kerülŒ termékekre vonatkozó
érvényes törvények alapján.
Műszaki leírás
Méret
Súly
Lyukasztási kapacitás
Fűzési kapacitás
Maximális lapszélesség
Kikapcsolható tűk
ibico ibiMaster 250
457 mm x 216 mm x 406 mm
11,8 kg
25 lap, 80 g/m
2
papír
425 lap (50 mm)
11,7" (297mm A4)
11
ibico ibiMaster 250e
457 mm x 216 mm x 406 mm
15,2 kg
20 lap, 80 g/m
2
papír
425 lap (50 mm)
11,7" (297mm A4)
11
EDNord - Istedgade 37A - 9000 Aalborg - telefon 96333500
Page 47

ibiMaster 250 / ibiMaster 250e
RUS
250e - Mер лектрической безопасности
250e - Указания по безопасности
ВАША БЕЗОПАСНОСТ И БЕЗОПАСНОСТ ДРУГИХ ВАЖНА
КОМПАНИИ IBICO. В НАСТОЯЩЕМ РУКОВОДСТВЕ ПО
ЗКСППУАТАЦИИ, А ТАКЖЕ НА САМОМ ИЗДЕЛИИ
РАСПОЛОЖЕН УКАЗАНИЯ ПО БЕЗОПАСНОСТИ.
ВНИМАТЕЛНО ПРОЧТИТЕ ЗТИ УКАЗАНИЯ.
CЛEДУЮЩEE ПРEДУПРEЖДЕНИE НAXОДИТСЯ СНИЗУ
ИЗДЕЛИЯ.
Данное сообщение о безопасности означает, что B можете
получит серезную травму или погибнут, если откроете
машину и подвергнете себя воздействию опасного напряжения.
Опасност поражения лектрическим
током. Не открват. Bнутри нет
деталей, обслуживаемх
ползователем. За техобслуживанием
обращайтес к квалифицированному
обслуживающему персоналу.
ПРEДУПРEЖДEHИE
B НACTOЯЩEЙ ИНСТРУКЦИИ ПО 4КСПЛУАТАЦИИ
ПЕРЕД КАЖД9М COOБЩЕНИEМ О БЕЗOПАCНОCTИ
СТОИТ ЗНAК ПРEДУПРEЖДEHИЯ OБ ОПACHОCTИ.
TAКОЙ ЗНAК ГОBОPИТ О ПОТEНЦИAЛ=НОЙ
ОПACHОCTИ ДЛЯ ЛИЧНОЙ БЕЗОПACНОСTИ,
КПТОРAЯ МОЖEТ ПРИBECТИ К НAНECEНИЮ
ТРABМ9 BAМ ИЛИ ДРУГИМ ЛЮДЯМ, A ТAКЖE К
ПОBРEЖДЕНИЮ ИЗДEЛИЯ ИЛИ ПОРЧE ИМУЩECТBA.
ПРЕДУПРЕЖДЕНИЕ: ДЛЯ ВАШЕЙ БЕЗОПАСНОСТИ, НЕ ПОДКПЮЧАЙТЕ IBIMASTER 250e В ЗЛЕКТРОСЕТ= ДО ТОГО,
КАК В9 ПОЛНОСТ=Ю ПРОЧЛИ НАСТОЯЩУЮ ИНСТРУКЦИЮ. ХРАНИТЕ ЗТУ ИНСТРУКЦИЮ В УДОБНОМ МЕСТЕ ДЛЯ
БУДУЩИХ СПРАВОК. ДЛЯ ПРЕДУИРЕЖДЕНИЯ НЕСЧАСТН9Х СЛУЧАЕВ, ОБЯЗАТЕЛ=НО СОБЛЮДАТ= СЛЕДУЮЩИЕ
ОСНОВН9Е МЕР9 ПРЕДОСТОРОЖНОСТИ ПРИ УСТАНОВКЕ И 4КСПЛУАТАЦИИ 4ТОГО ИЗДЕЛИЯ.
250e - Важне мер безопасности
На изделии расположен следующие знаки, со следующим
значением:
ПРОБИВКА
RESET
Машину ibiMaster 250e следует подключат в источник
напряжения, соответствующий расчетнм лектрическим
характеристикам машин, указаннм на паспортной табличке
либо в настоящем руководстве.
ПРЕДУПРЕЖДЕНИЕ: СЕТЕВАЯ РОЗЕТКА ДОЛЖНА
НАХОДИТСЯ НЕДАЛЕКО ОТ ОБОРУДОВАНИЯ И
БТ ЛЕГКО ДОСТУПНОЙ.
ПРЕДУПРЕЖДЕНИЕ: В СЛУЧАЕ АВАРИИ,
ИСПОЛЗОВАТ СЕТЕВОЙ ШНУР В КАЧЕСТВЕ
ГЛАВНОГО СРЕДСТВА ОТКЛЮЧЕНИЯ!
• Отключит машину ibiMaster 250e от сети перед тем, как
передвигат ee, или когда она не зксплуатируется в течение
длителного срока времени.
• Не ксплуатироват с поврежденнм сетевм шнуром либо
штепселем, после случая неисправной работ или после
какого-либо повреждения машин.
• Не перегружат сетеве розетки за предел их емкости, так
как зто может привести к пожару либо злектрическому шоку.
• Не видоизменят штепселную вилку. Вилка построена для
соответствующего источника пектронергии.
• Машина предназначена толко для зксплуатации внутри
помещения.
• Никогда не вталкиват вещи в то изделие через паз в
корпусе. Не проливат какие-либо жидкости на то изделие.
• Не зксплуатироват, если изделие подверглос воздействию
дождя или вод.
EDNord - Istedgade 37A - 9000 Aalborg - telefon 96333500
Page 48

ibiMaster 250 / ibiMaster 250e
RUS
BKЛЮЧЕНИЕ МАШИН9
250: Передвинте рукоятку по направлению (fig. 1) к валу
перфорации, расположенному с правой сторон машин.
Проверте, чтоб рукоятка стояла в правилном положении.
Она не должна ударятся о стол в тот момент, когда ее
передвигают вперед для пробивания отверстий.
Закрепите рукоятку с помощю отвертки.
250e: Прочно затолкнут гнездовой конец сетевого шнура в
штепселную колодку на задней части машин.
ПРЕДУПРЕЖДЕНИЕ: Обязателно завершит то
действие перед тем, как вставлят штрковй
конец сетевого шнура в сетевую розетку.
Вставит штрковй конец сетевого шнура в подходящую
сетевую розетку.
1
2
3
4
5
ОПРЕДЕЛИТЕ ШИРИНУ ЛИСТА
Установите приспособление, контролирующее положение
кромки листа, на размер листа бумаги, которй в
собираетес брошюроват (11 дюймов - 19 колец формата
25,4 x 40,6 cm, 11 1/4 дюйма обложка - 19 колец обложки
болшего формата, A4 - 21 колцо) (fig. 1a/1b).
1
250e - Чистка
ПРEДОСТEРEЖEНИE: Bтащите вилку машин из розетки перед тем, как приступат к чистке.
• Протирайте наружне поверхности толко влажной тряпкой.
Не ползуйтес моющими средствами или растворителями.
Нижеследующие указания относятся толко к машинам с
расчетнми лектрическими характеристиками 230 В 50 Гц.
В9БОР КОМПЛЕКТА ГЛАВНОГО ШНУРА
(ТОЛ=КО ДЛЯ МАШИН 230В ПЕРЕМЕННОГО НАПРЯЖЕНИЯ)
При вборе съемного сетевого шнура для применения в
машине ibiMaster 250e, всегда соблюдат следующие указания:
Комплект шнура состоит из трех лементов: штепселной
вилки, шнура и вставки подключения к аппарату. Каждй из
тих лементов должен соответствоват европейским
нормативнм стандартам по безопасности.
Нижеследующие минималне расчетне лектрические
характеристики определенного комплекта шнура публикуются с
целю обеспечения безопасности.
НЕ ПОЛЗУЙТЕС КОМПЛЕКТАМИ ШНУРА, НЕ
СООТВЕТСТВУЮЩИМИ НИЖЕСЛЕДУЮЩИМ
МИНИМАЛНМ ЛЕКТРИЧЕСКИМ ТРЕБОВАНИЯМ.
ВИЛКА: 3 А, 250 волт, 50/60 Гц, проводник класса 1,3,
утверждена европейским ведомством по безопасности.
ШНУР: Типа Н05W-F3G0.75, Гармонизированнй ( HAR ).
Символ “ ” означают шнур. утвержденнй по
соответствующему европейскому стандарту (ПРИМЕЧАНИЕ:
букв “ НАR ” могут бт заменен знаком утверждения
европейского ведомства по безопасности, утвердившего шнур.
Возможнй пример - “ VDE ”.)
ВСТАВКА ПОДСОЕДИНЕНИЯ К АППАРАТУ: 3 А, 250 волт,
50/60 Гц, утверждена по европейским стандартам
безопасности, типа МК 320. Длина комплекта шнура должна
бт не болше З метров. Можно также исползоват комплект
шнура с расчетнми лектрическими характеристиками
лементов, превшающими указанне минималне значения.
Общие мер безопасности
• Применят систему ibiMaster толко для намеченной цели
пробивки отверстий в бумаге и обложках и скрепления
последних в соответствии с указаннми техническими
условиями.
• Не вставлят ничего в щел для пробивки отверстий машин,
кроме бумаги и обложек.
• Устанавливат машину на безопасном, устойчивом рабочем
месте, чтоб предотвратит падение машин и возможное
телесное повреждение и ввод из строя машин.
• Соблюдат все предупреждения и указания, помеченне на
изделии.
• Поднимат машину за дно, а не за покршку.
• Не поднимат машину за покршку либо за проволоку
держателя бумаги.
EDNord - Istedgade 37A - 9000 Aalborg - telefon 96333500
Page 49

ibiMaster 250 / ibiMaster 250e
RUS
OПРЕДЕЛИТЕ РАЗМЕР9 Д9РОКОЛА
1 3
2
Вровняйте лист или обложки и вставте край, в котором
следует пробит отверстия, в щел дрокола (fig. 2a/2b).
Проталкивайте лист до тех пор, пока они не будут заподлицо с
приспособлением, контролирующим положение кромки листа, и
дном щели дрокола.
250: Для пробивания отверстий потяните рукоятку перфрации на
себя (A) (fig. 1a). Тяните вниз до конца для того, чтоб пробит
отверстия по всей длине листа. Перфорирует до 25 листов
плотностю 80 г на лист за один раз. Для того, чтоб свести до
минимума заклинивание и чрезмернй износ, за один раз следует
перфорироват толко ДВЕ прозрачне обложки.
250e: Для того, чтоб пробит отверстия, нажмите на кнопку
“PUNCH” (ПЕРФОРАЦИЯ) (A) (fig. 1b). “ibiMaster” за один раз
перфорирует до 20 пистов плотностю 80 грамм на лист. Для того,
чтоб свести до минимума заклинивание и чрезмернй износ, за
один раз следует перфорироват толко ДВЕ прозрачне
обложки.
250e: Eсли при пробивании отверстий происходит заклинивание,
нажмите на кнопку “RESET” (СБРОС) (A1) (fig. 1b). Затем нажмите
на кнопку “PUNCH” (ПЕРФОРАЦИЯ) (A) (fig. 1b) и втащите лист
бумаги или обложки из щели дрокола (возможно, потребуется
несколко раз пробит бумагу для того, чтоб втащит ее). Если
дрокол снова заклинивает, повторите пункт 1-3 с нескопко
меншим количеством листов бумаги для того, чтоб не допустит
перегрузки дрокола при дополнителнх подемах.
Оmключаеме врубне шmамп: Eрли требуется пробит лист
формата A5, штамп можно отключит от перфоратора, втянув
стержен селектора, расположеннй под кршкой устройства (D)
(fig. 1a/1b). Когда селектор находится в нижнем положении,
врубной штамп снова подключен.
Реулuровка оmсmупа: Отступ между перфорируемми
отверстиями и краем листа можно отрегулироват в зависимости
от толщин документа. Отрегулируйте положение рчага,
расположенного на левой стороне устройства ibiMaster, в
соответствии с необходимм отступом, втягивая или вдавливая
рчаг.
1 5
2
3
6
4
Раскройте классификатор машин (fig. 1a/1b).
Положите документ, включая обложки, под классификатор
машин для брошюровки.
Освободите классификатор машин для брошюровки и вберите
тот дрокол-сшивател, которй соответствует размеру,
указанному на приспособлении, контролирующем положение
кромки листа. На нем стоят размер дрокола толко до 25 mm.
"ibiMaster" может переплетат документ толщиной до 425
листов, что соответствует paзмеру дрокола-сшивателя в 50 mm.
Для получения наилучших резултатов при применении
дрокола-сшивателя с цветовой координацией для брошюровки
блоков фирм ibico всегда исползуйте фирменне обложки
ibico.
ПЕРФОРАЦИЯ
БРОШЮРОВКА
Поставте дрокол-сшивател позади держателя дрокола так,
чтоб откртая част лемента смотрела в вашу сторону (fig. 3).
Поворачивайте рукоятку брошюровки по направлению к себе до
тех пор, пока дрокол-сшвател не откроется достаточно для
того, чтоб можно бло вставит ваш документ.
Наденте переднюю обложку лицом вниз на открте палц
сшивателя. Наденте страниц лицом вниз на лемент. Все то
повторите в отношении более крупнх документов, если
требуется. И, последнее, наденте заднюю обложку лицом вверх
на открте палц сшивателя.
Поверните рчаг брошюровки от себя для того, чтоб закрт
сшивател.
Снимите книгу, подняв вверх. Тепер в готов к презентации!
После того, как в освоите "ibiMaster", в найдете, что его
конструкция дает вам возможност брошюроват по мере
пробивания отверстий, за счет чего повшается
производителност вашего труда.
1 4
5
6
2
3
7
EDNord - Istedgade 37A - 9000 Aalborg - telefon 96333500
Page 50

ibiMaster 250 / ibiMaster 250e
RUS
ТЕХНИЧЕСКИЕ ХАРАКТЕРИСТИКИ
Размер
Bec
Макс. число пробиваемх листов
Макс. число скрепляемх листов
Макс. Ширина листа
Съемне палц
ibico ibiMaster 250
457 mm x 216 mm x 406 mm
11,8 кг
25 листов, 80 г/лист
425 листов (50 mm)
11,7" (297mm A4)
11
ibico ibiMaster 250e
457 mm x 216 mm x 406 mm
15,2 кг
20 листов, 80 г/лист
425 листов (50 mm)
11,7" (297mm A4)
11
TEXOБCЛYЖИВАHИE
• Oбратитес к официалному представителю ibico по сервису в
отношении любого требуемого ремонта.
ОСВОБОЖДЕНИЕ СБОРНИКА ОБРЕЗКОВ
Освободите от обрезков вдвижной ящик после того, как
несколко раз исползуете машину (F) (fig. 6). Для того,
чтоб открт ящик, несилно потяните его на себя. При
задвижении ящик становится на место со щелчком.
1
ГAPAHTИЯ
Pабота настоящей машин гарантируется в течение одного года
с дат покупки при условии нормалного исползования. B
течение гарантийного срока GBC по своему собственному
усмотрению бесплатно отремонтирует или заменит
неисправную машину. Неисправности, возникшие в резултате
неправилного применения или исползования для
ненадлежащих целей, не покрваются гарантией. Потребуется
представит доказателство дат покупки. Ремонт или
изменения, произведенне лицами, не уполномоченнми на то
GBC, сделают гарантию недействителной. М стремимся
обеспечит, чтоб наши изделия работали в соответствии с
указаннми техническими требованиями. Настоящая гарантия
не влияет на законне права, которе потребители имеют
согласно применимому националному законодателству,
регулирующему продажу товаров.
EDNord - Istedgade 37A - 9000 Aalborg - telefon 96333500
Page 51

EDNord - Istedgade 37A - 9000 Aalborg - telefon 96333500
Page 52

GBC Office Products
5700 Old Orchard Road
Skokie, IL 60077
USA
www.gbc.com
EDNord - Istedgade 37A - 9000 Aalborg - telefon 96333500
 Loading...